ccoyle
-
Posts
10,520 -
Joined
-
Last visited
Content Type
Profiles
Forums
Gallery
Events
Everything posted by ccoyle
-
Great story! I'm a California native, so I enjoyed all of the geographical references. I grew up in Humboldt County and lived in Mariposa for 12 years before I moved to South Carolina -- I tell folks around here that I'm from "the other California." I also tell them that they have "cute little mountains" here. 😄
-
 Some of JSC's designs date all the way back to the 1960s, which is old for a card model, though perhaps not for a card modeler.
- 331 replies
-
- 12
-

-

-
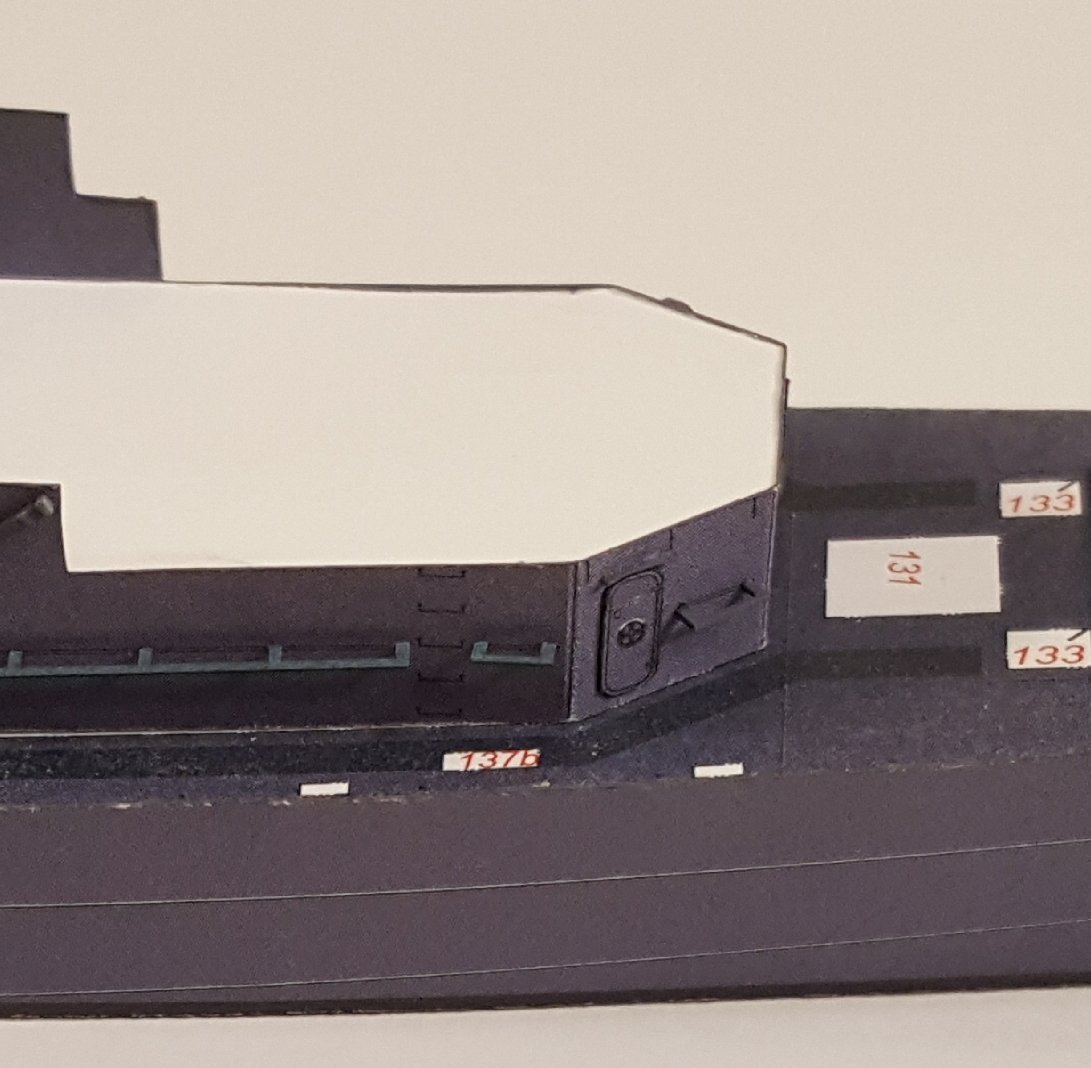
5,6: Superstructure Details I added all of the flat elements to the superstructure first, then moved on to the grab rails -- still a work in progress at this point. I ran into a teensy issue. See if you can spot it: Yeah, the color of those laser-cut details doesn't match the color of the printed hull parts. I'm going to have to paint them, as I did with the far right grab rail in the photo. Oh, well!
- 331 replies
-
- 12
-
-
Yep, that was kind of my point. 😄 On the flip side, I find these older ships much more visually interesting than, say, a Zumwalt-class destroyer.
-
That does look too large. Did you double-check to make sure you're using the correct block and line diameter?
-
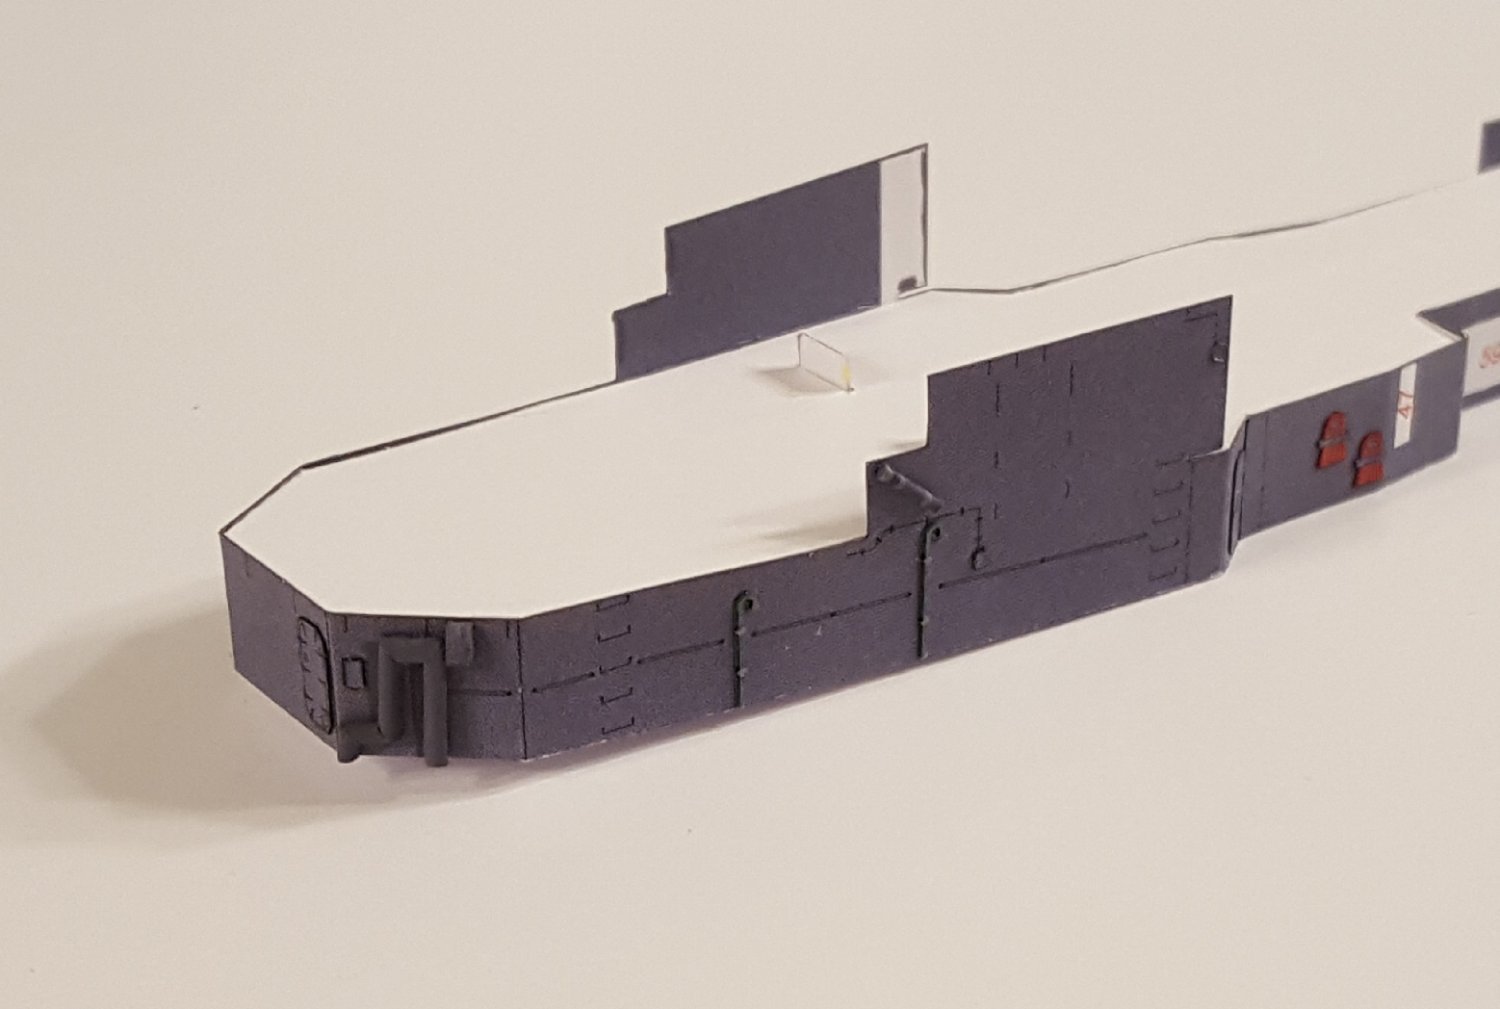
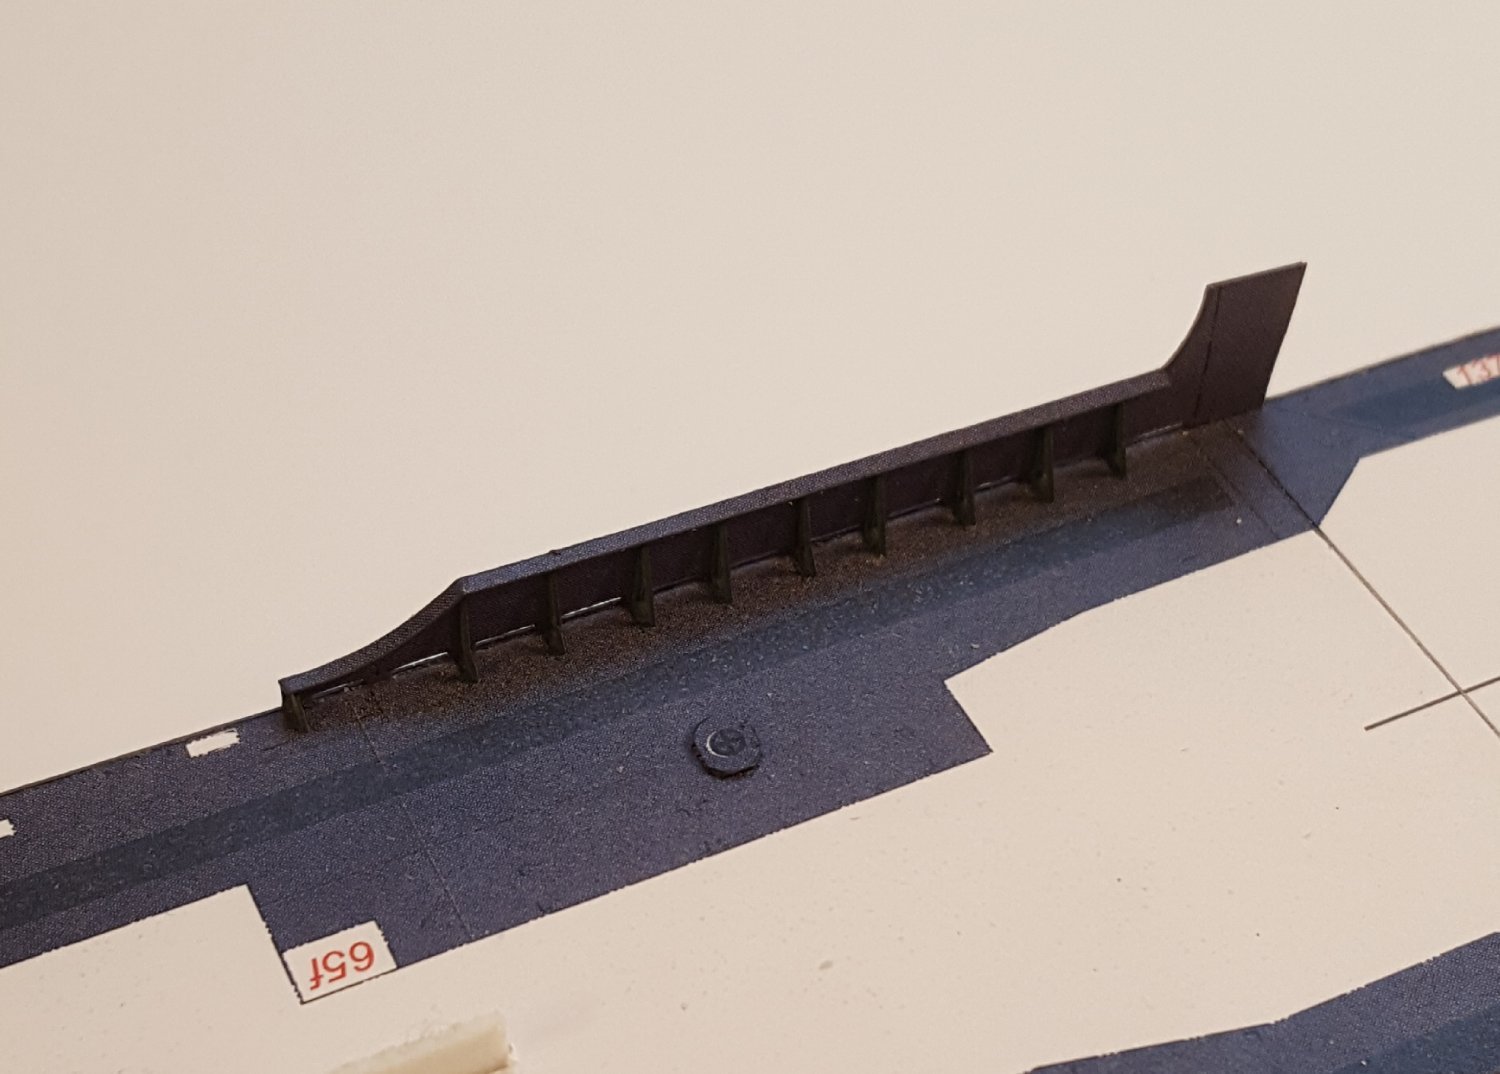
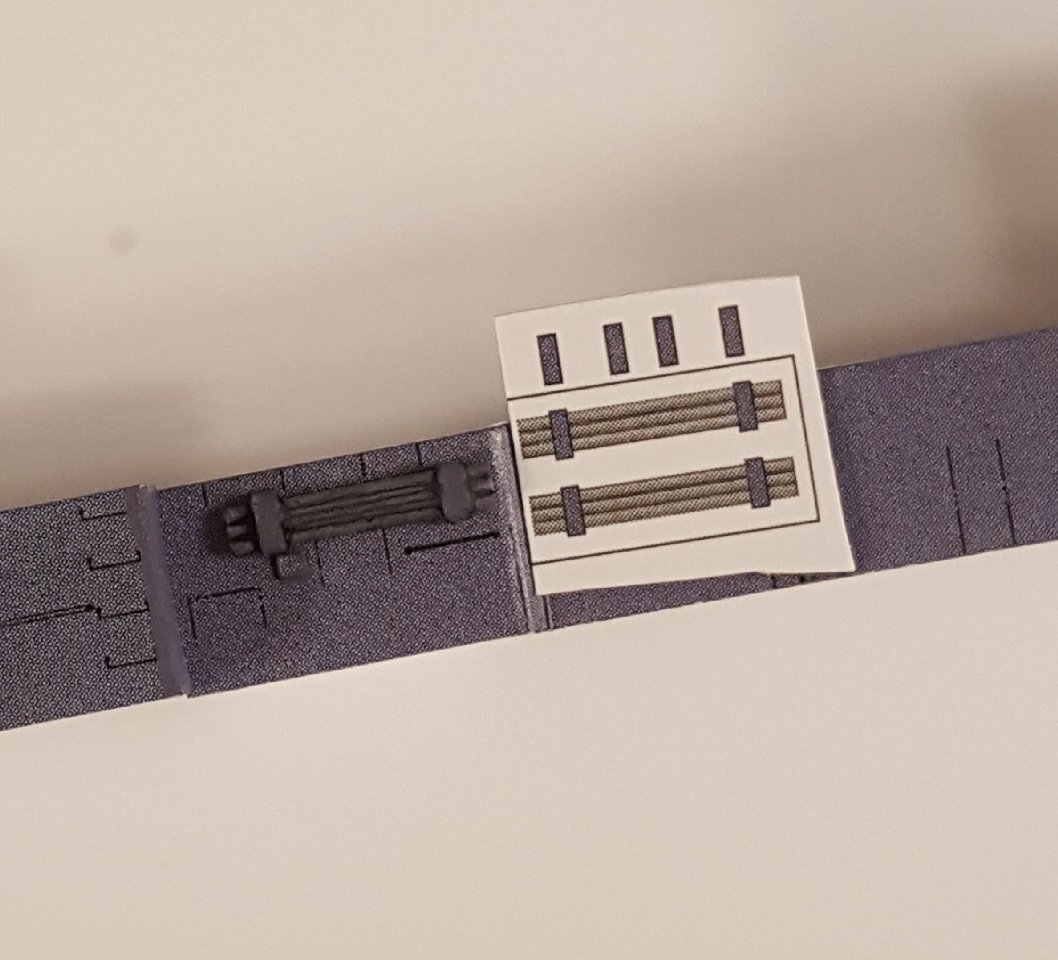
5: Superstructure Sides The superstructure sides have been added, but since then construction has proceeded very slowly. Part of that is due to the sheer number of elements that must be added to the sides -- WWII sailors in the Southwest Pacific were obviously unconcerned about how much electromagnetic radiation from enemy radars bounced off of their ships. Even the tiny gongs and electrical boxes are included as doubled parts. The second reason for the slow progress is that options are provided for replacing some of the flat paper parts with more 3-dimensional upgrades; these add a bit more detail but take more time to construct. In this first image, showing the still incomplete forward port-side wall, there are already thirteen elements in place. Two of them are optional replacements, including the steam pipe in the foreground, which is made of five individual segments (the piping around the funnel will eventually consist of far more). In this shot is a scratch-built rack of pipes shown with the original flat paper parts being replaced. The pipes are 11 mm long. I played around with some washes to bring out the details. As usual, they look way better in real life than in this sad cell phone image. Note the electrical box beneath the left-hand bracket. That's it for now!
- 331 replies
-
- 20
-
-

-
Yep. So the buyer is paying for five kits, two of which he could get for free from the publisher. It is. It's also not particularly well built, and it's the second HMV kit I saw the seller trying to pawn off as a scratch build.
- 27 replies
-
- 5
-
-
-
- eBay
- kit piracy
- (and 1 more)
-
Here's another loser trying to find a sucker on eBay. After all, he only needs one.

- 27 replies
-
- 1
-
-
- eBay
- kit piracy
- (and 1 more)
-
Here's another one. The seller is legitimate, but why would this offer not be a good deal?
- 27 replies
-
- 2
-
-
- eBay
- kit piracy
- (and 1 more)
-
See how long it takes you to spot why this eBay seller is not your friend!
- 27 replies
-
- 1
-
-
- eBay
- kit piracy
- (and 1 more)
-
New Member Introduction and Need Some Advice
ccoyle replied to Artisan's topic in New member Introductions
Welcome! Unfortunately, there are several difficulties regarding your request. The first is the scale. The nature of wooden ship hulls necessarily limited their length, which happily for us modelers keeps wooden ship subjects in the size range that can produce reasonably-sized models in scales between 1/48 and 1/96. Steel hulls allowed larger ships to be built, which ultimately meant that models of them needed to be built in smaller scales to keep them at manageable sizes. For example, I'm currently building a WWII destroyer escort -- a small warship by the standards of the day. But even at 1/250 scale, the finished model will be roughly 14 inches in length. The second issue is the requirement for wooden kits. Once upon a time, wooden kits were the norm, but after WWII plastic kits quickly became the medium of choice, and the crude wooden kits that preceded them have become collectors' items. Civil War, WWI, and WWII warships are almost entirely available these days as either plastic, resin, or card models with the most popular scales being 1/100, 1/200, 1/250, and 1/400 for card, and 1/250 or 1/350 for plastic and resin. Only a handful of Civil War steam frigates are available as wooden kits, but none in 1/60. If you are adamant about finding a kit in a larger scale, the only practical solution I know of is to resort to RC kits. These typically include fiberglass or GRP hulls. To get a feel for what is available, you can check out the selection at Fleetscale. Hope that helps! -
Welcome aboard, and lovely result on your first effort!
- 4 replies
-
- 1
-
-
- Modellers Shipyard
- Finished
- (and 2 more)
-
I actually asked for a Swann-Morton handle and blades for Christmas, and even provided a link to the exact Swann-Morton products. But, instead, I received two (!) Chinese-made knock-offs. And since it's bad form to whine about Christmas gifts, I gave the knock-offs a tryout. I have the same issue with the blade tips flexing. But it's not all bad news -- I find the scalpel a better tool for chopping tasks, since the blades have a narrower kerf and therefore produce a less-beveled cut.
- 331 replies
-
- 11
-
-
Looking good! The Mastini book has been around quite a while now -- it was a big source of encouragement for me when I got started.
-
Beautiful!
-
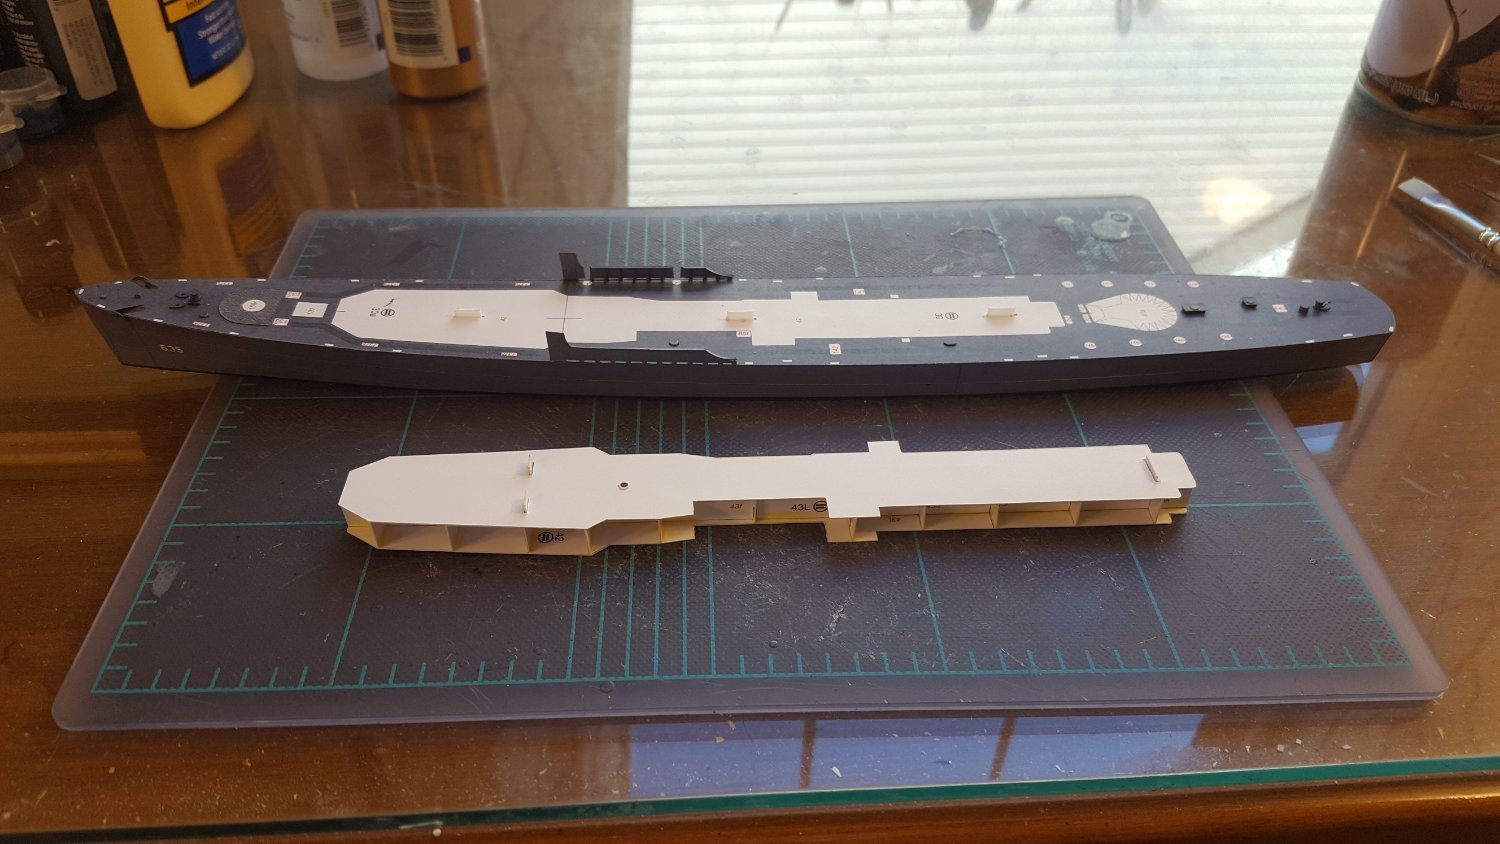
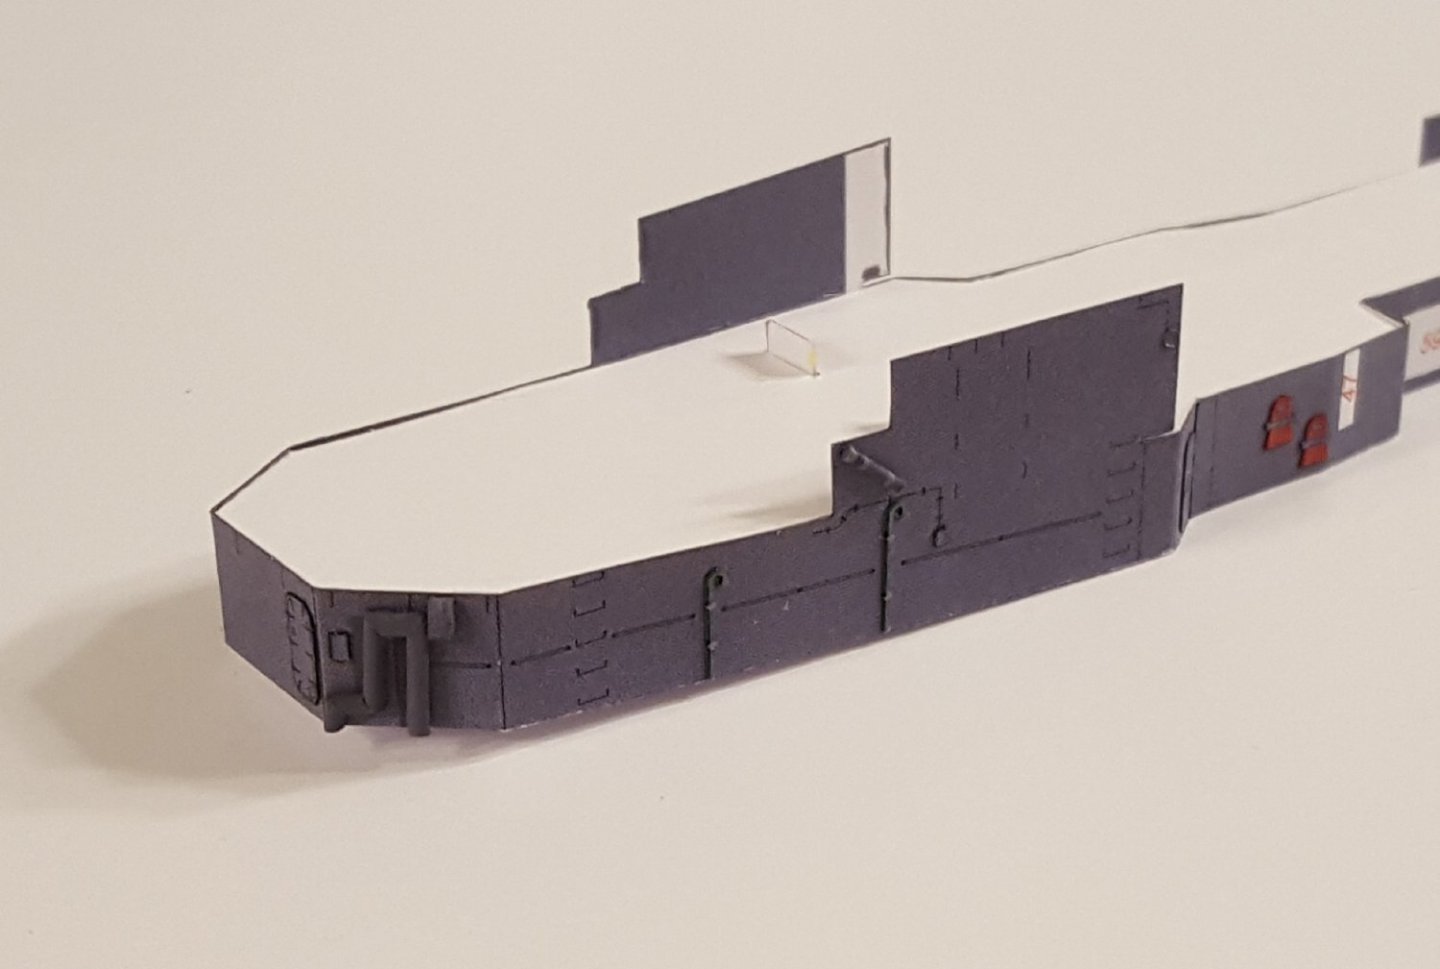
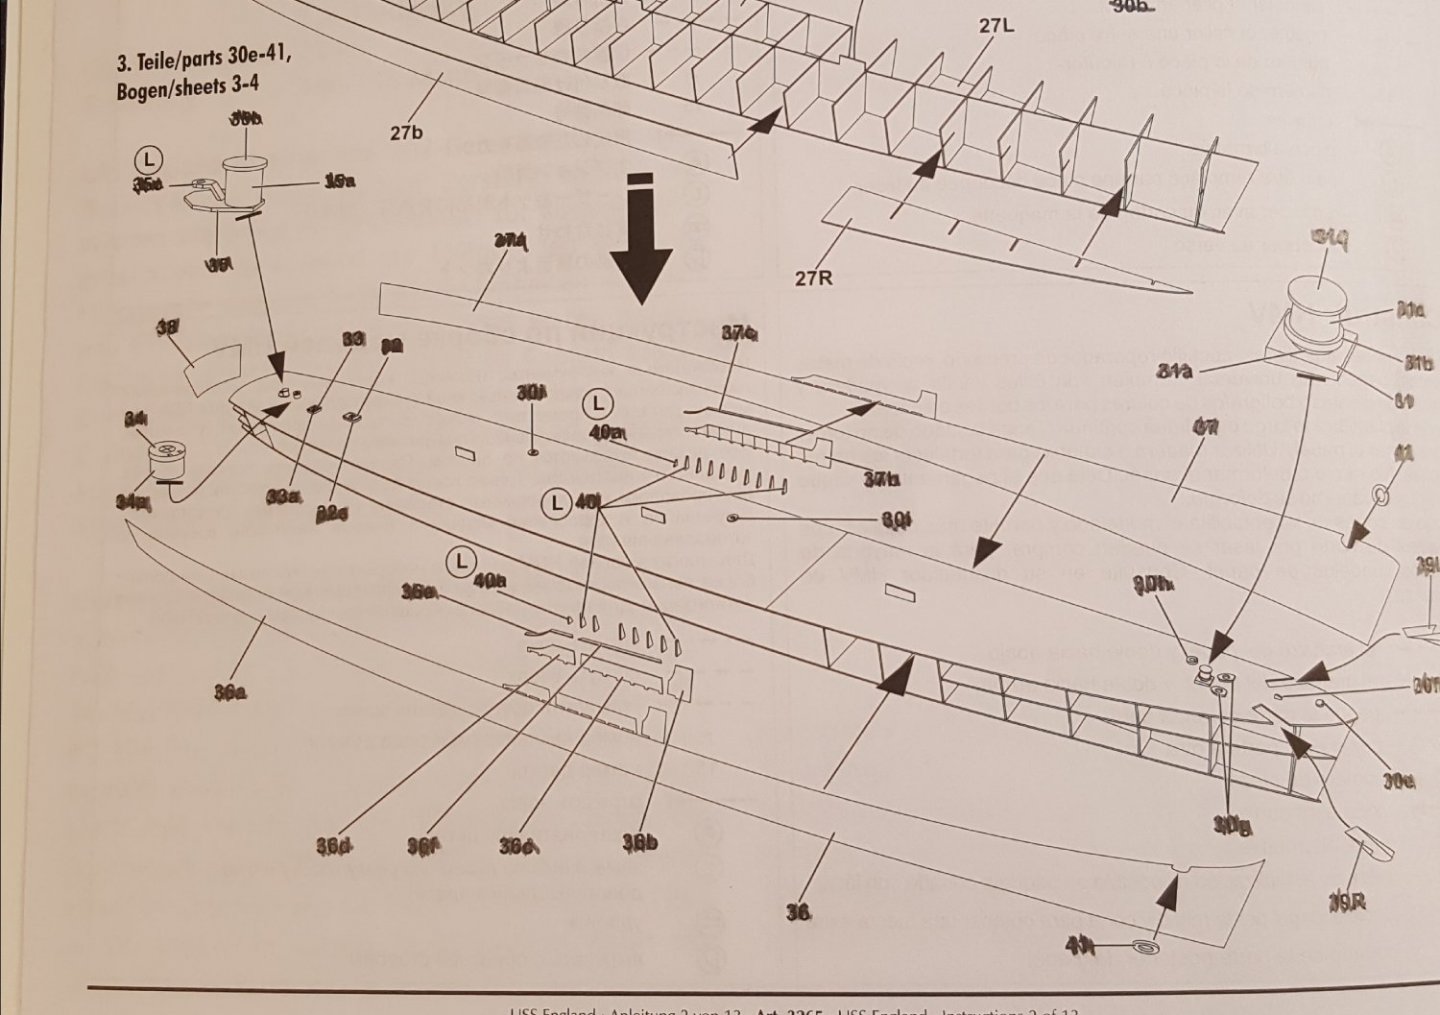
4: Superstructure Framing Short update today, but this takes care of diagram #4. All of the superstructure profile former and bulkhead parts are doubled. This is a departure from the usual HMV practice, but I hope it will become a standard for them -- the resulting parts are of course much more rigid than single-layer card. The framing is built in the usual egg-crate style, but it must be done atop the hull, because the superstructure is not perfectly flat lengthwise but slightly curved. Once the frames were set, a small box for the lower mast was added, then the top was glued on. There are tabs to help situate both the superstructure top to its framing and the superstructure itself atop the hull. You can see that the actual superstructure surface will be added later. Next, the superstructure sides will be constructed, and they have quite a few bits and pieces that must be added to them, e.g. doors, grab rails, hose reels, etc., etc. Total sidetrack issue for the day: I came across a batch of old X-acto Z blades in my tool supplies and then subsequently rediscovered why I never used all of them up. Although they are advertised as sharper and more durable than ordinary blades, they have one very bad attribute for card modelers: their tips are too flexible. When downward pressure is applied to a Z blade, the tip bends slightly, causing the blade to want to wander away from the line being cut. This is obviously an undesirable trait in a card modeling tool. I quickly switched back to my el cheapo Excel blades.

- 331 replies
-
- 19
-
-
Pretty much my exact thought as I read through your description of the process. Congratulations on surviving this task!
- 238 replies
-
- 2
-
-
- Robert E Lee
- steamboat
- (and 3 more)
-
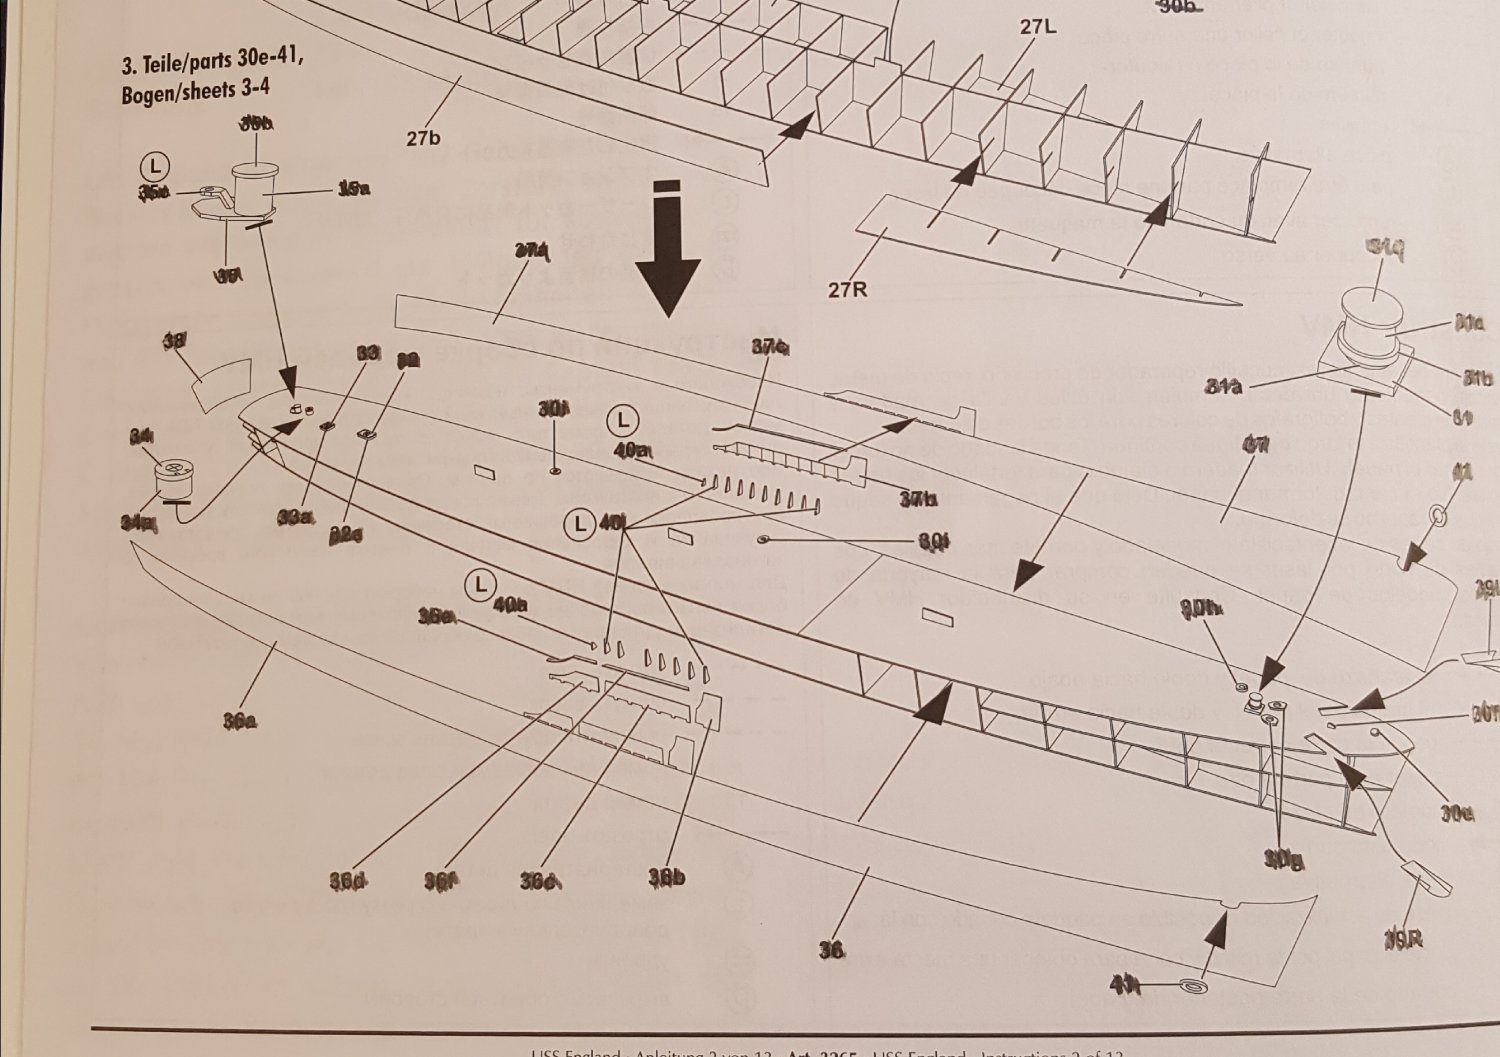
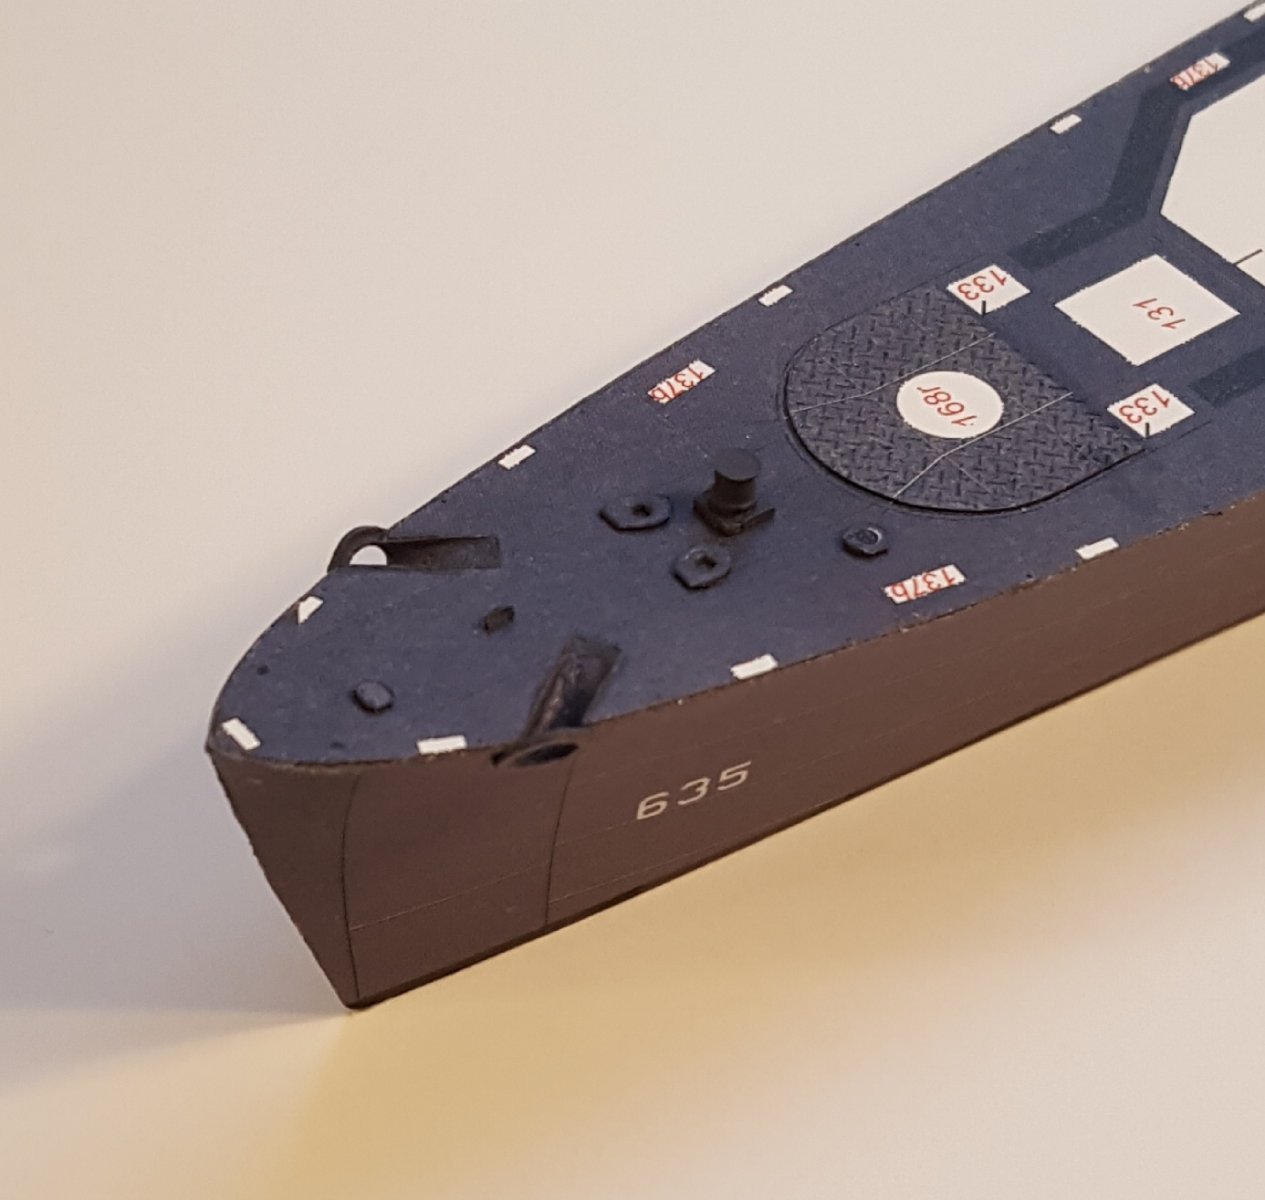
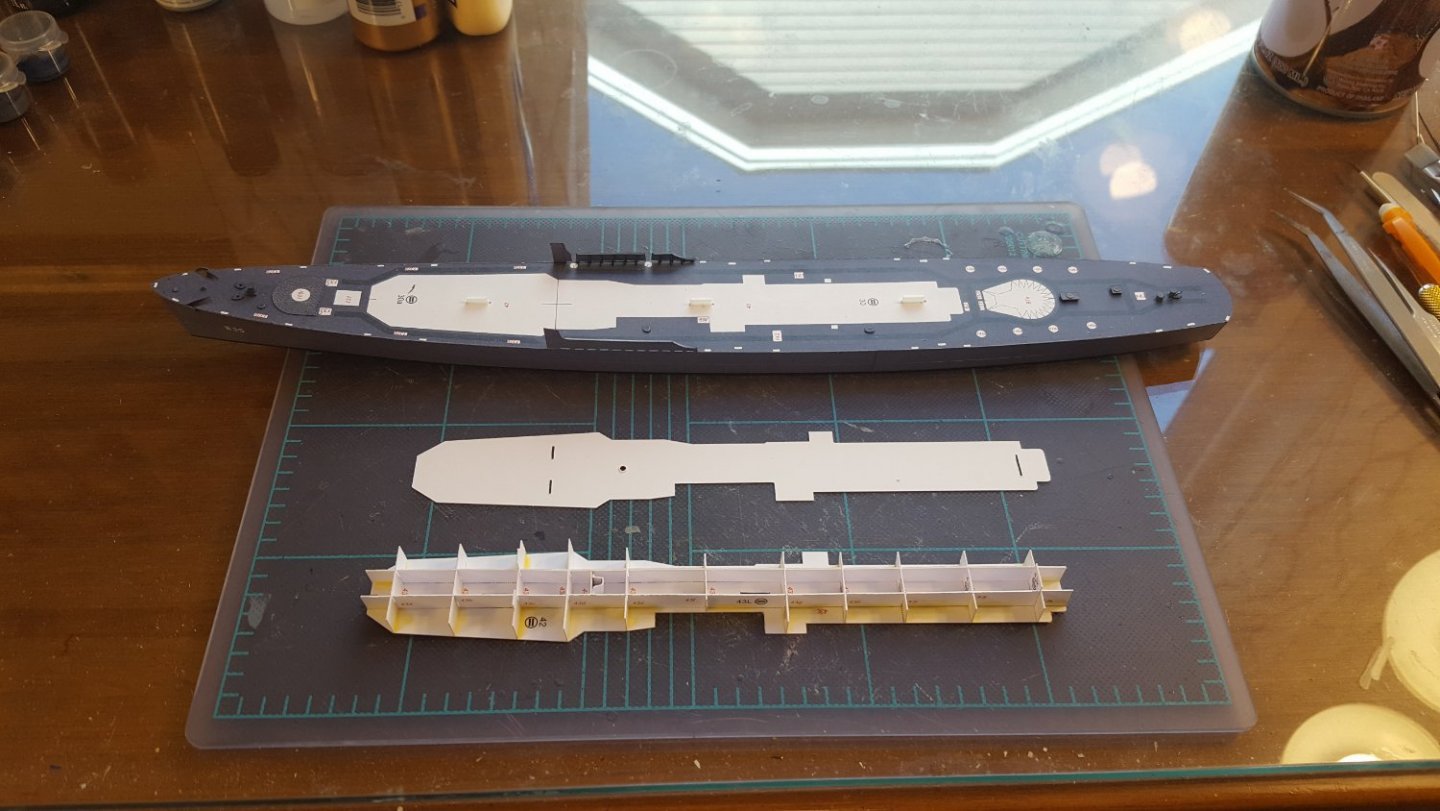
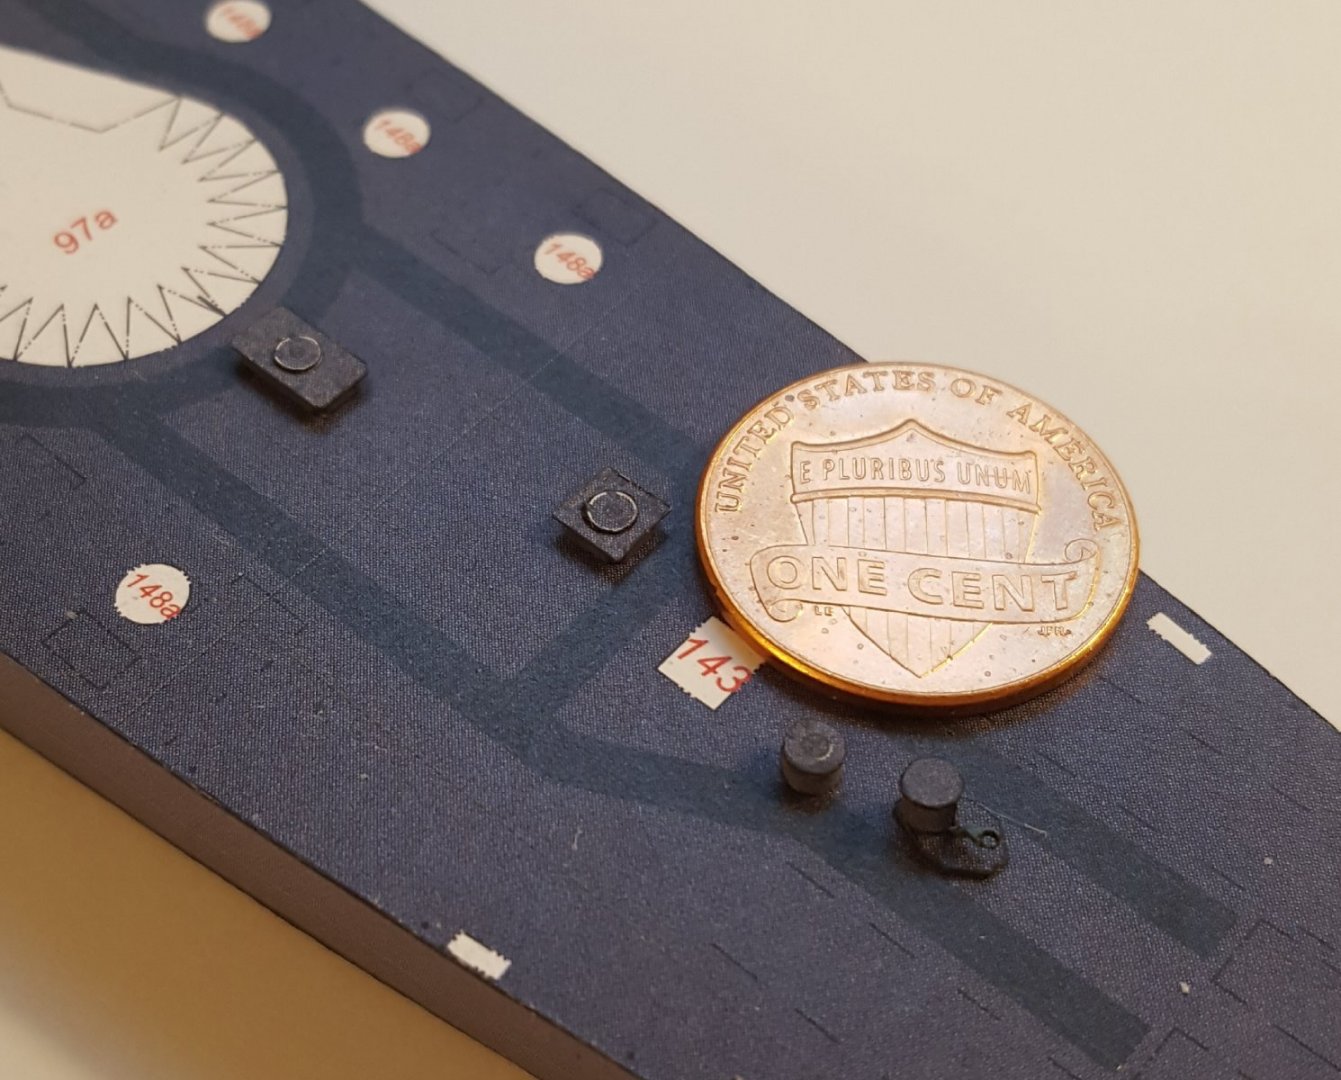
3: Hull It dawned on me that a good way to track these updates would be by linking them to the numbered construction diagrams, of which there are 27, plus an optional 28th. The printed hull allowed me to skip diagrams 1 and 2. With this update, I am now done through diagram 3. Forward we have the hawse pipes, hawse pipe lips, capstan, and platform for the forward 3"/50. Amidships are the solid bulwarks and their stanchions, which I assume are frame extensions. These are the laser-cut replacement parts. And aft we have various hatches. For parts that are only one card sheet thick, I'm using an ordinary gray felt-tip marker for edge coloring; at pretty much any viewing distance, it's indistinguishable from the mixed paint color. For our foreign friends, an American penny is 19 mm wide. This photo shows assemblies 32-35 in place on deck. Note the spot marked "143." 😮 Cheers!


- 331 replies
-
- 17
-
-
Eric, that's a good list, and yes I have discovered many of the things you listed through trial and error. The best way to minimize touch-ups for card models is to likewise minimize visible seams and boo-boos. The first comes down to a combination of kit design and skillful cutting out of parts, the latter is simply a matter of practice and paying attention during construction.
-
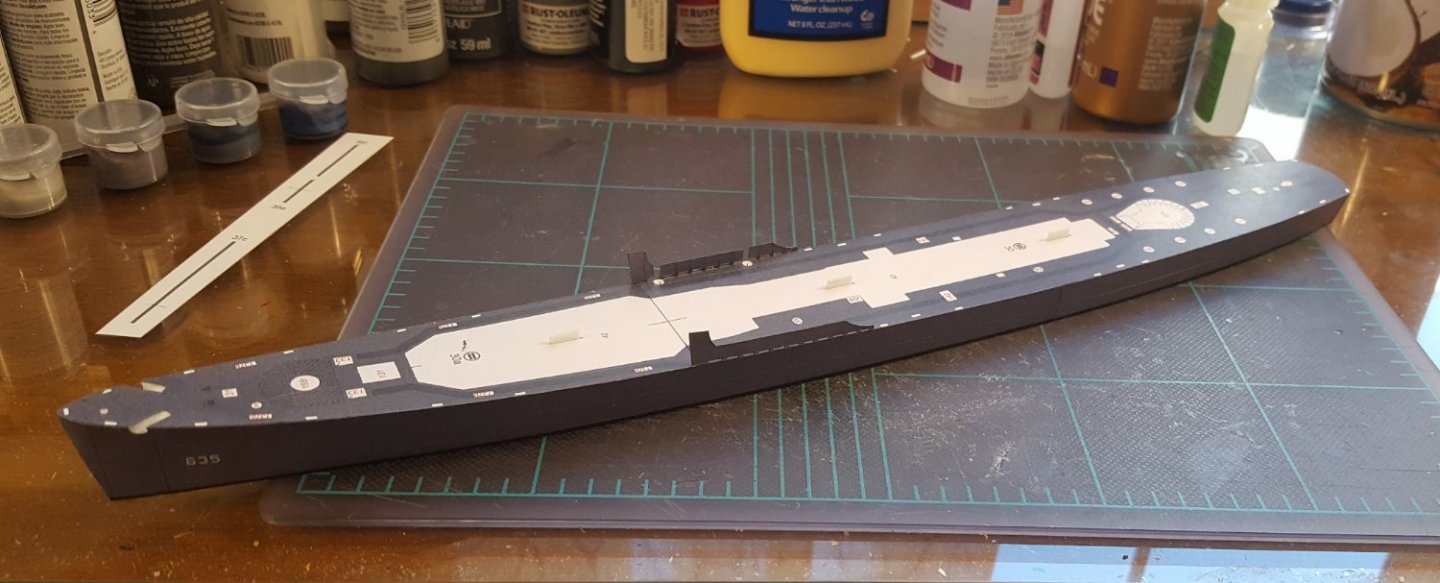
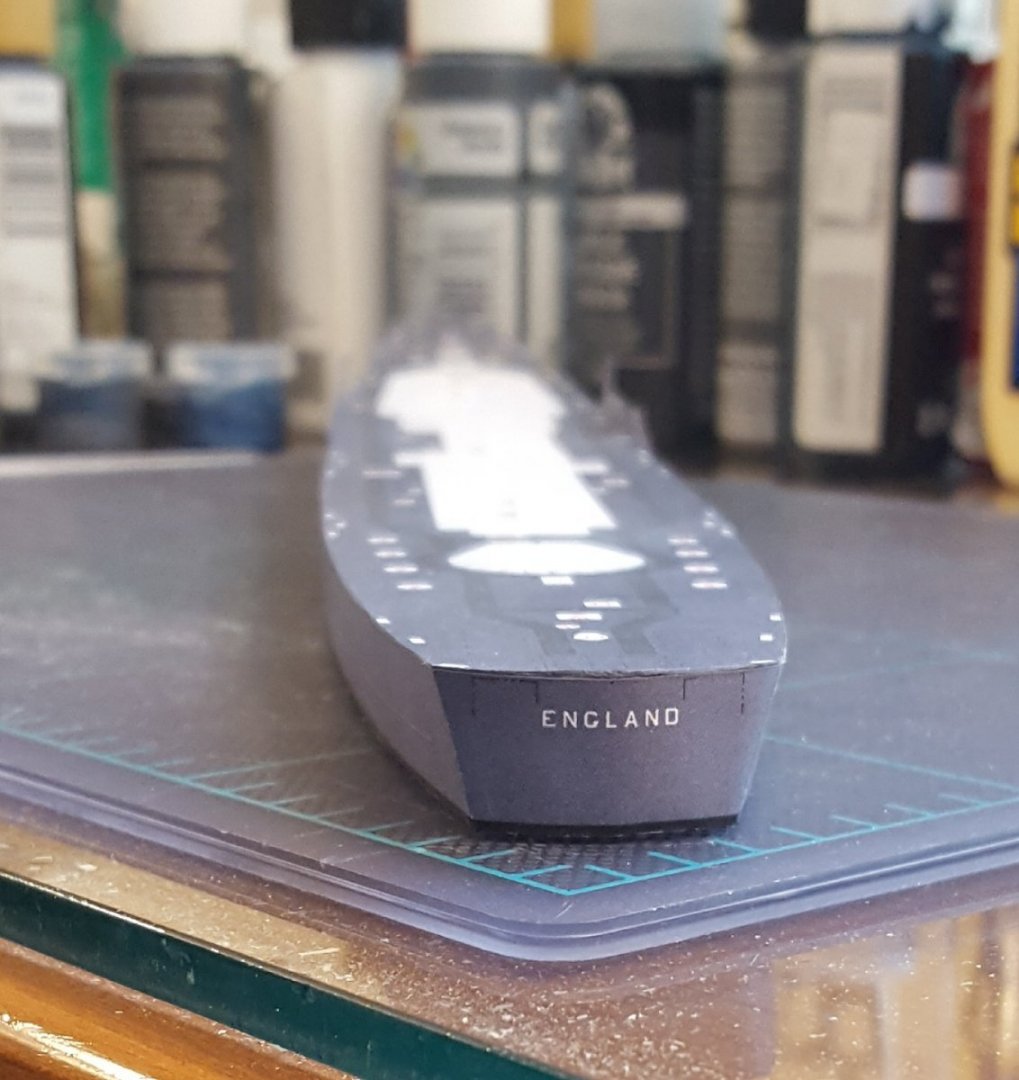
Hull Siding The hull siding is now complete. Took a while because the solid amidships bulwarks have inner skins, the starboard inner bulwark piece is in three parts (to leave room for boat davits later), and the bulwarks originally had printed scuppers, which I decided to cut out. I'm about 95% satisfied with the job -- I have some iffy seam work at both ends, I wound up with a mystery glue spot on one side, and I also got a tiny drip of water on one side. These have all been touched up as best I could. Port-side hull: And the stern, which I did build up a bit with scrap card before adding the printed part: Next up is adding the frame extensions needed to toughen up the easily-bent bulwarks.
- 331 replies
-
- 23
-
-