ccoyle
-
Posts
10,590 -
Joined
-
Last visited
Content Type
Profiles
Forums
Gallery
Events
Everything posted by ccoyle
-
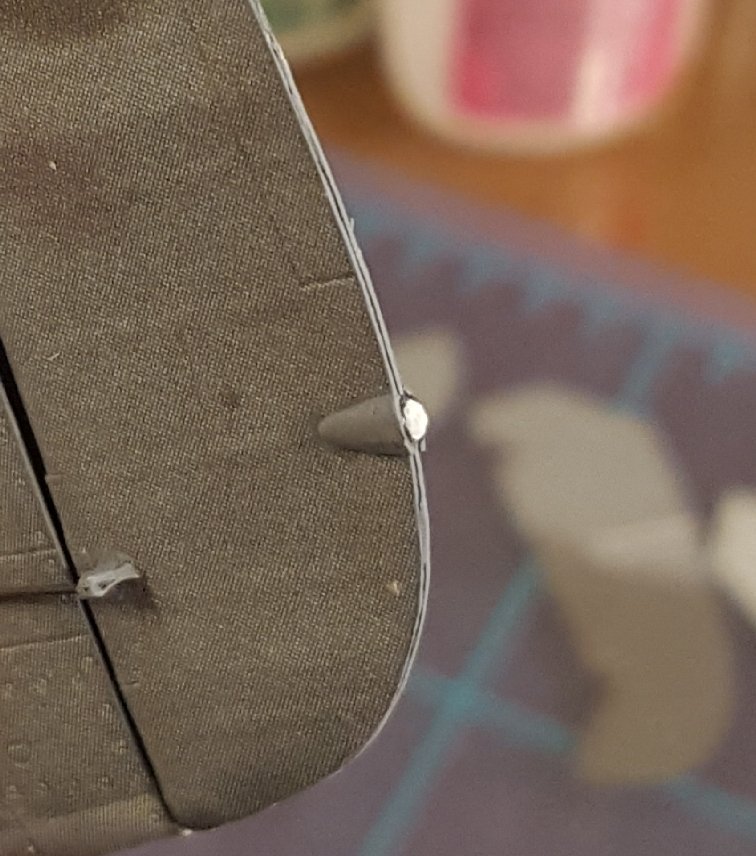
 Determining where to cut wasn't too difficult. Only the framing that contained the aileron cut-out needed to be shifted, and the spot I selected required cutting the least amount of material. The frames were rejoined as a butt joint between the new stringer and the existing stringer. I took another picture, just for you. 🙂 BTW, the misalignment was likely just some sloppy workmanship.
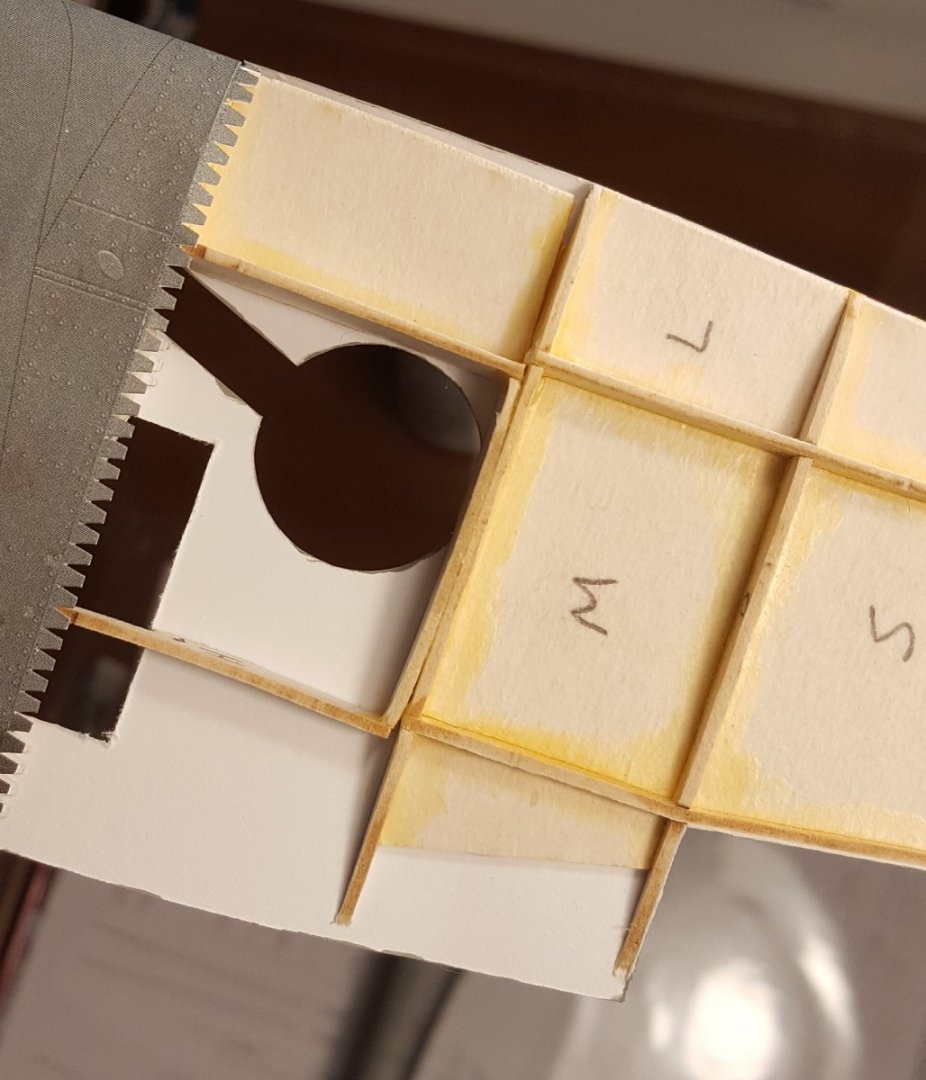
- 130 replies
-
- 13
-

-
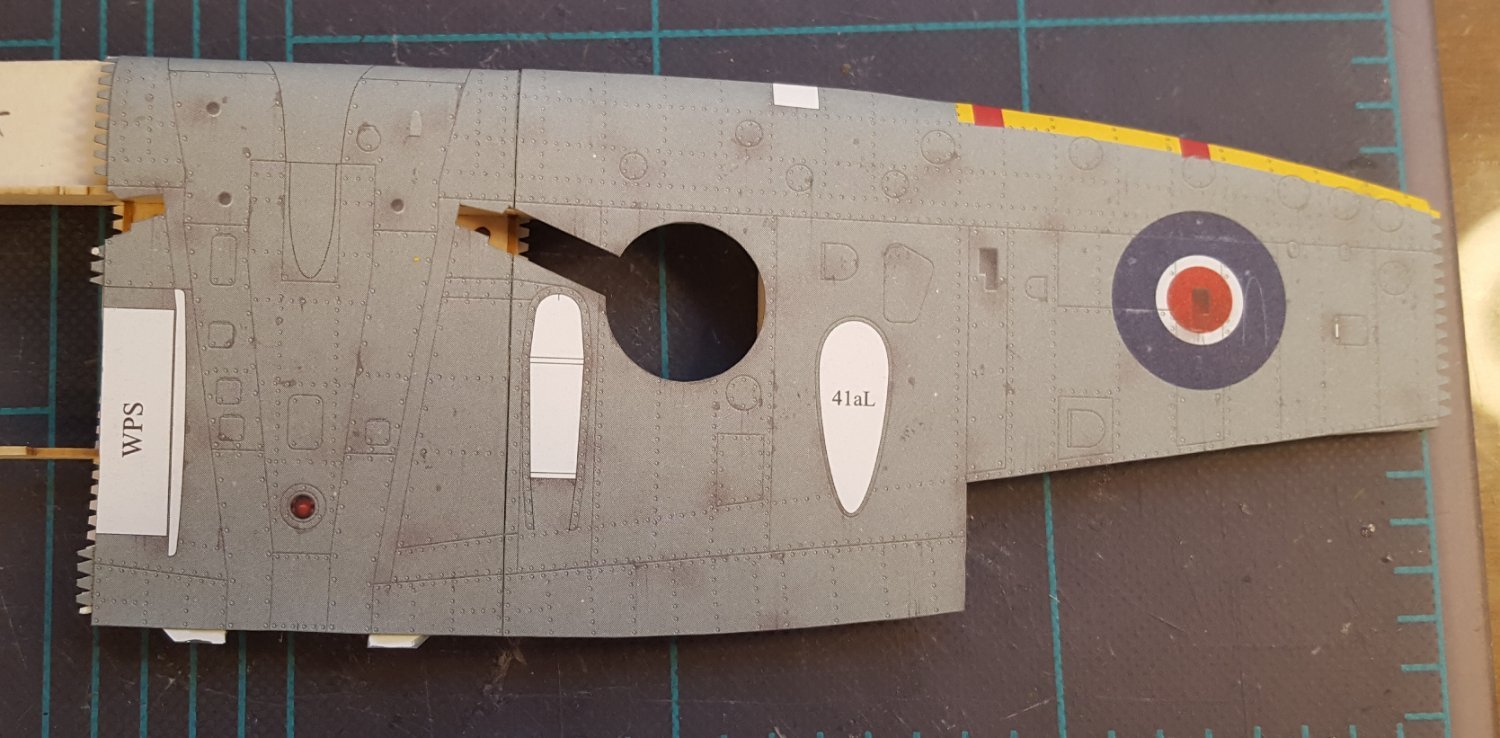
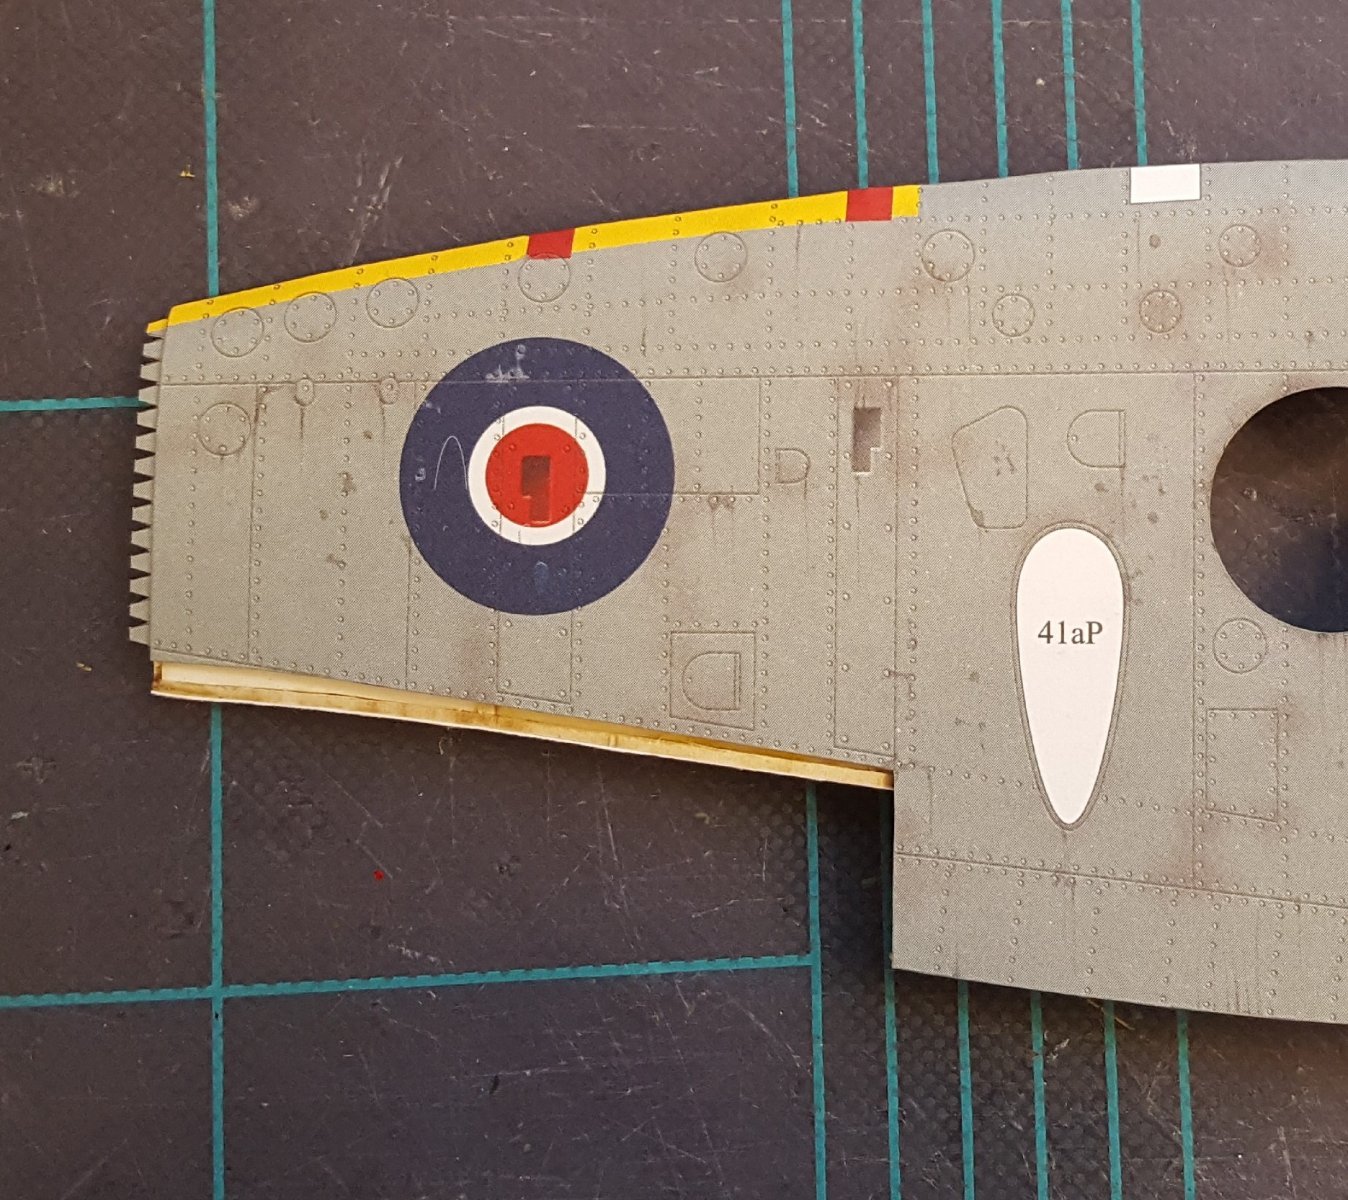
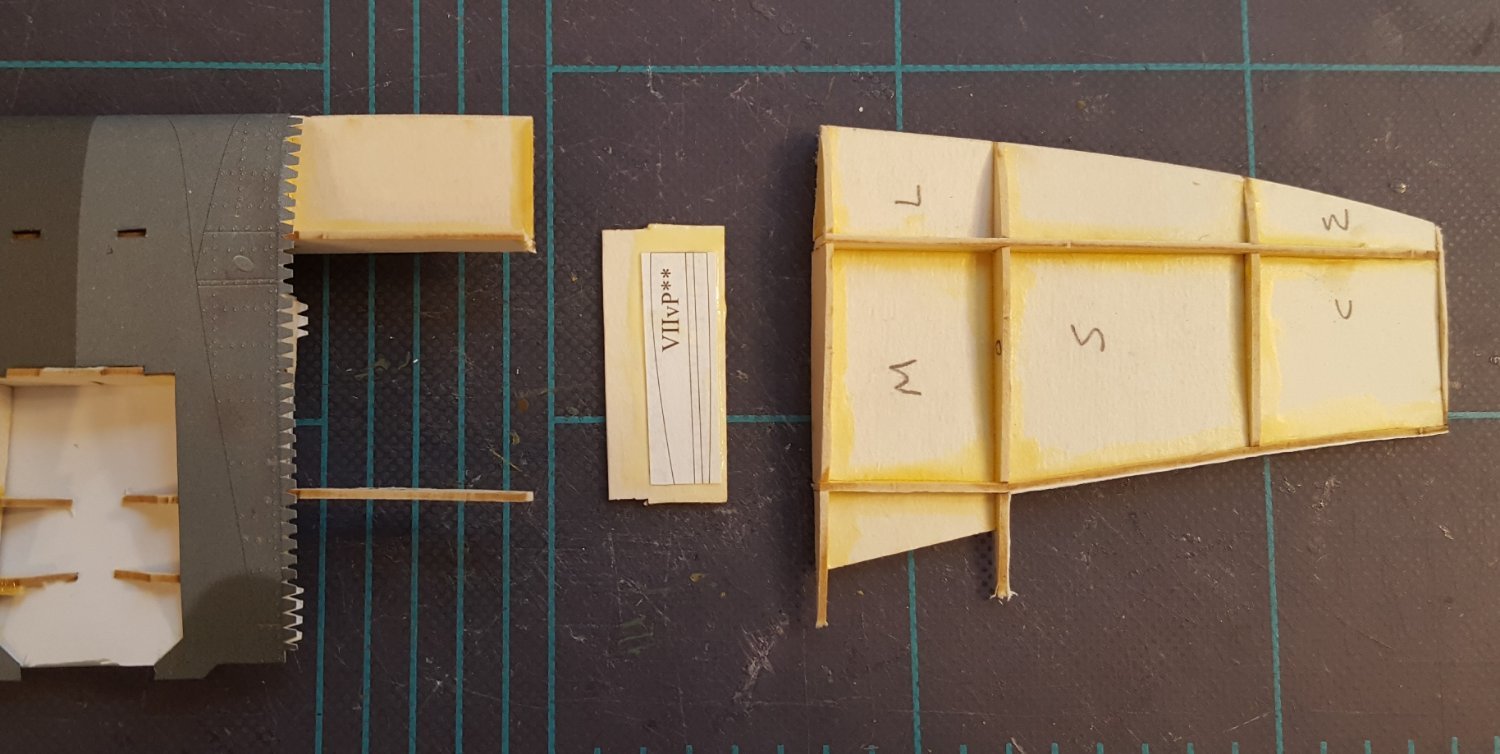
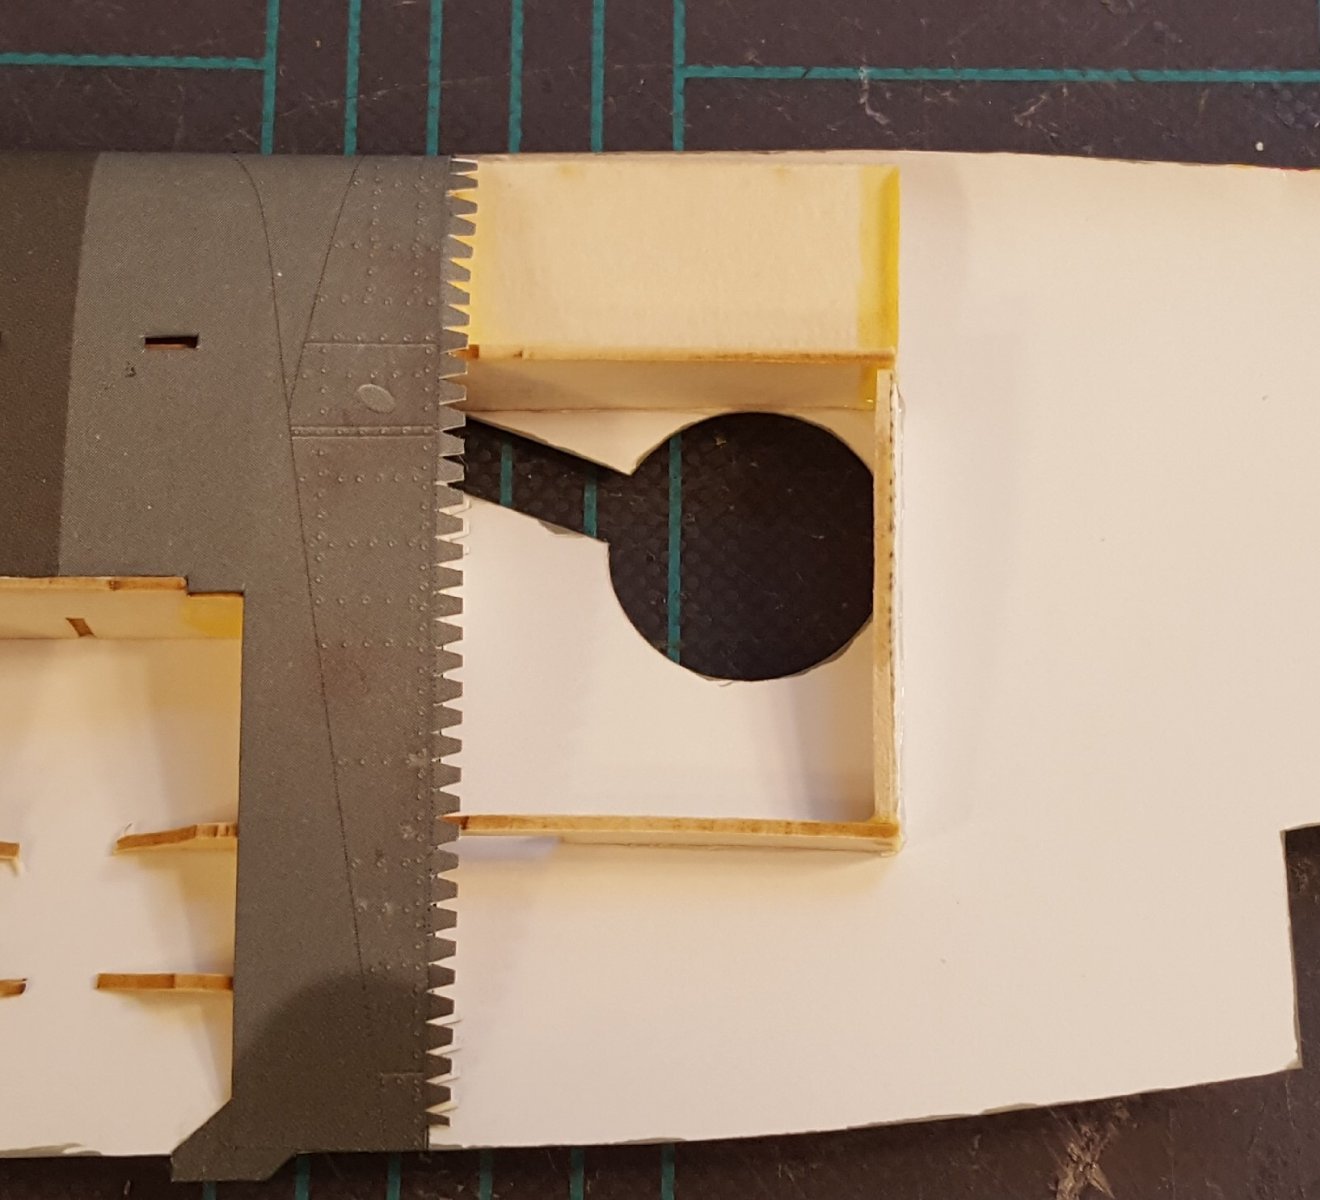
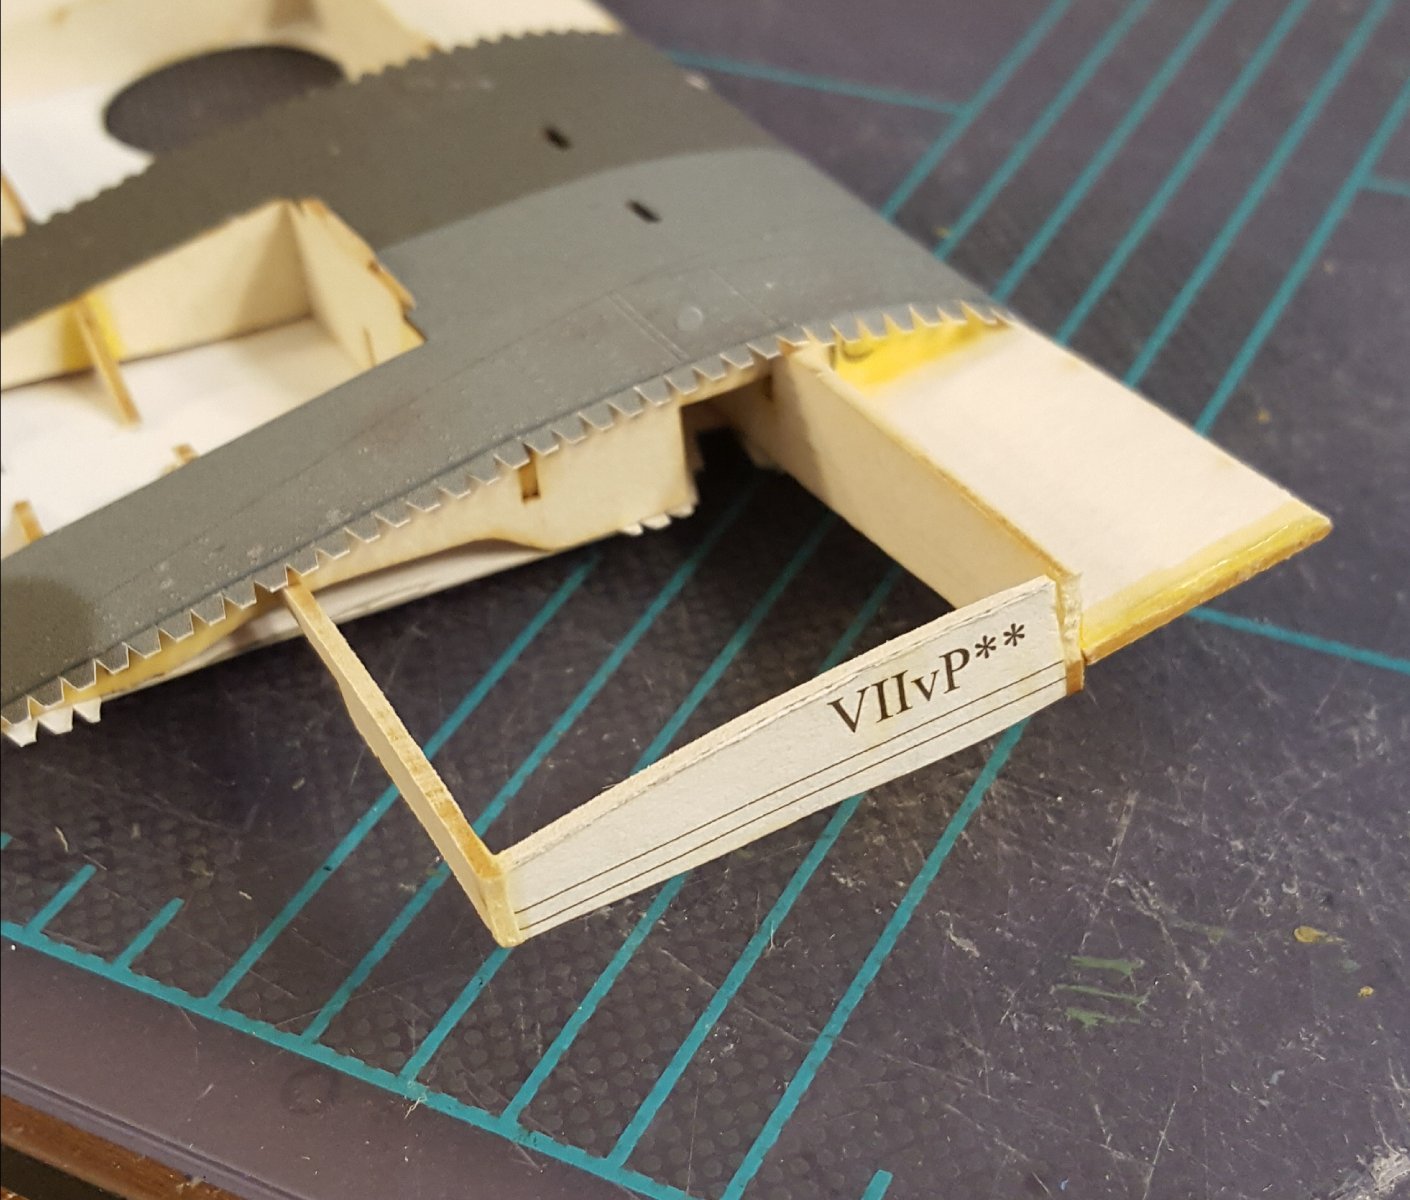
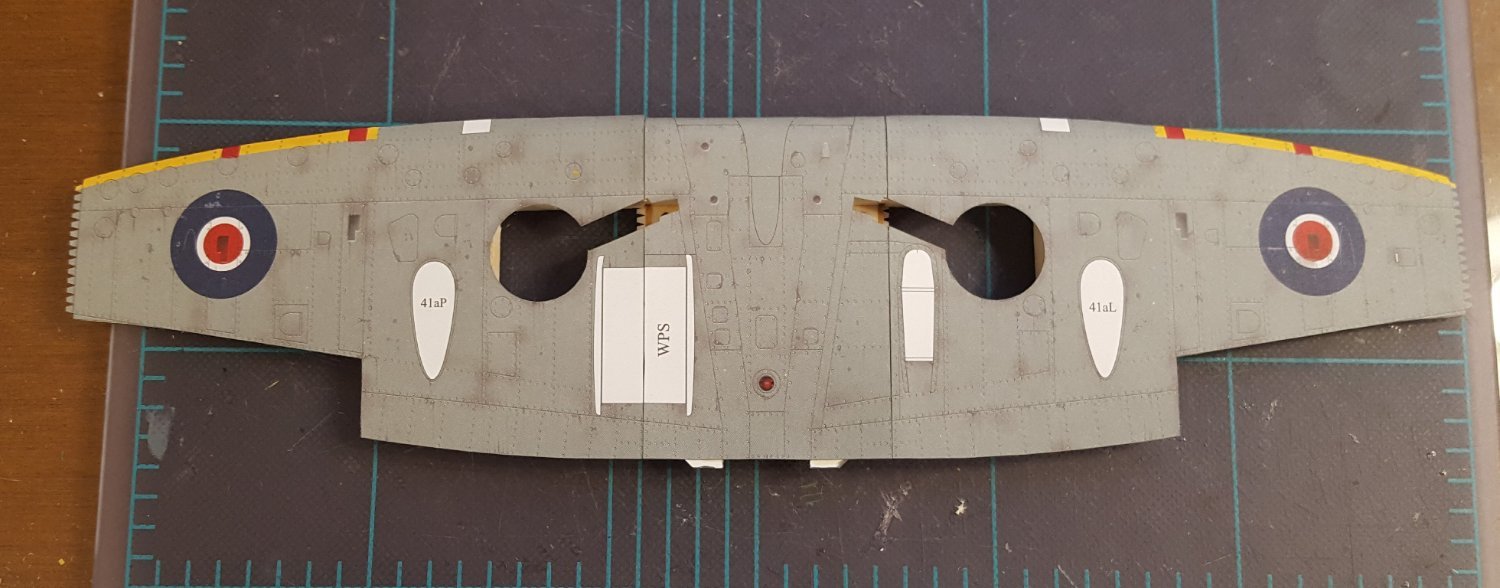
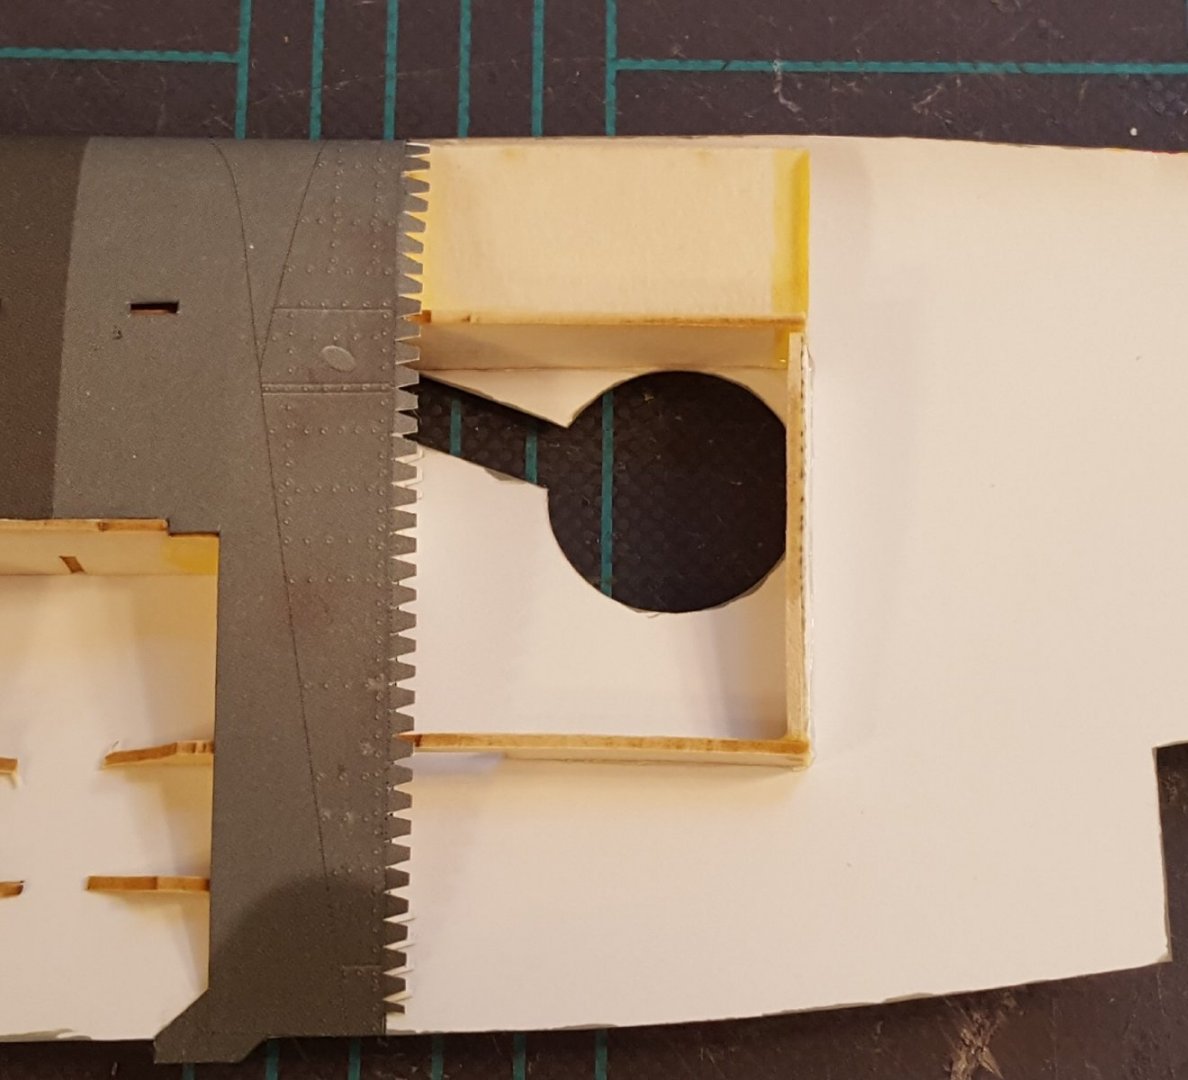
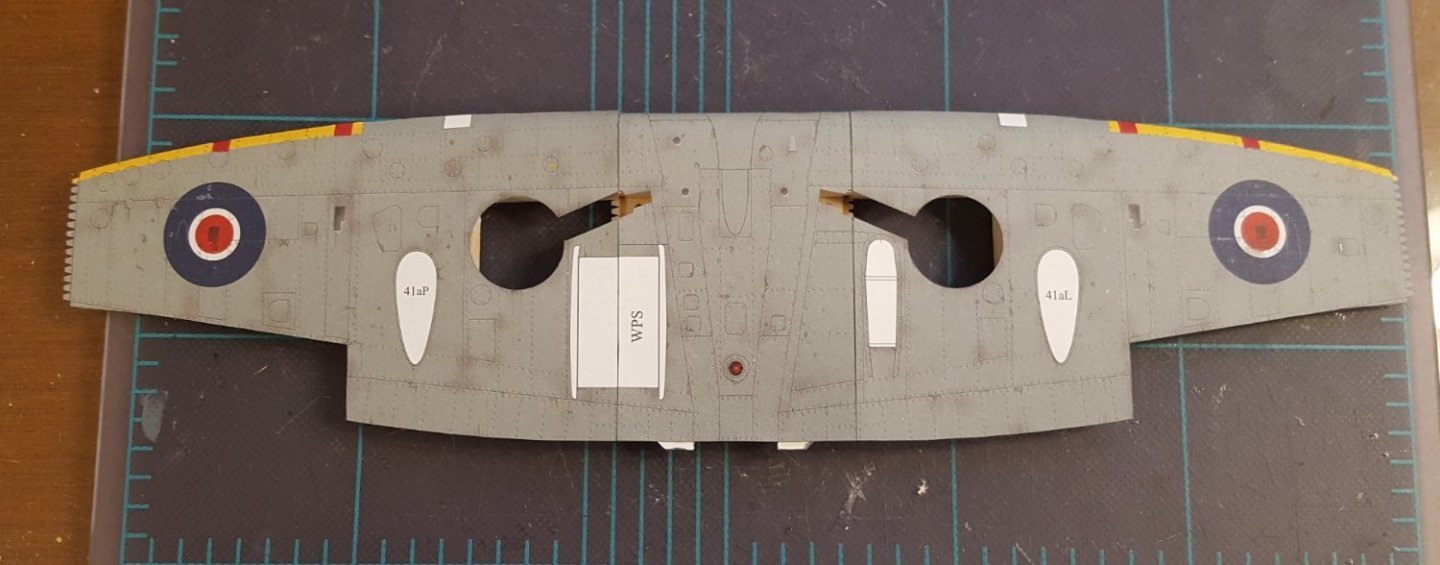
Ch. 18 Wing, Pt. II -- Drama! Sort of. So, skinning the wing begins with the center section -- no difficulties there. Neither were there any problems with the port-side skin (on the right in the photo, cuz we're looking at the bottom). Note the cut-out for the aileron -- all is in order. Now on to the starboard skin. First, a dry fit -- again, look at the aileron cut-out. Wow. That's off -- by a lot. What can be done about this? In this instance, what's required is . . . SURGERY! We start by slicing the wing in half. 😵 Don't worry -- this will be fixed. One nice thing about using laser-cut frames is that the printed templates for frames don't get used. That means we can use the printed template and a scrap piece of 1 mm beer mat to make a new piece to perfectly fit the gap created when the wing was cut. After gluing that piece in and allowing it to dry, we attach the skin. With the skin in place, we can determine the new position for the remaining frames and glue them in. And here's the result. A small amount of material will need to be removed from the extra piece in order for the wheel well to fit, but other than that the repair has been a success. Onward!


- 130 replies
-
- 15
-
-
In instances like these, it is helpful to think of something called "scale viewing distance." When a model is viewed from a few feet away, it is like looking at the original from a great distance. From such distances, rigging always appears very fine -- more like a spider's web than a macrame pot hanger. So, if your only options are either a bit larger or a bit smaller, I'd go smaller.
-
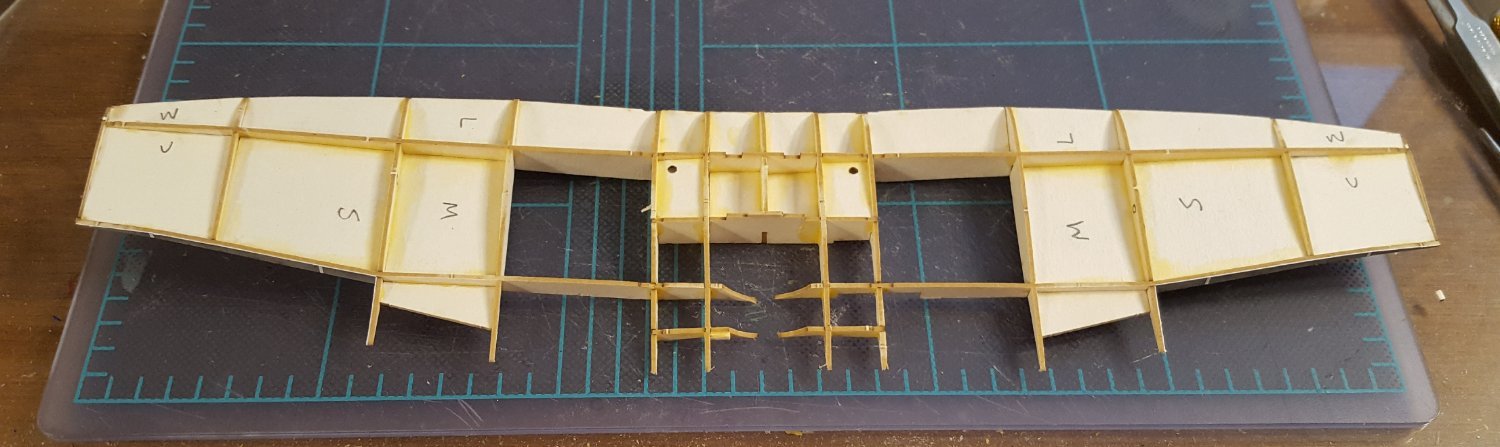
Ch. 17 Wing, Pt. I Whew -- 26 pieces in the framing! Actually, there are 30 pieces, because two of the pieces had their interlocking slots cut out from the bottom when they were designed to be cut out from the top. 😮 So I had to cut each into three separate pieces to glue them in correctly. The framework is pretty solid now, though early on in the construction sequence it was pretty flimsy, such that I accidentally broke two pieces. 🙄 But PVA glue works wonders in such instances.

- 130 replies
-
- 14
-
-
Welcome! There is no one format for build logs. If you have enough photos for a 'condensed' log, then post away. If you think it better to just post pictures of the finished model, then you can add it to the gallery. Cheers!
-
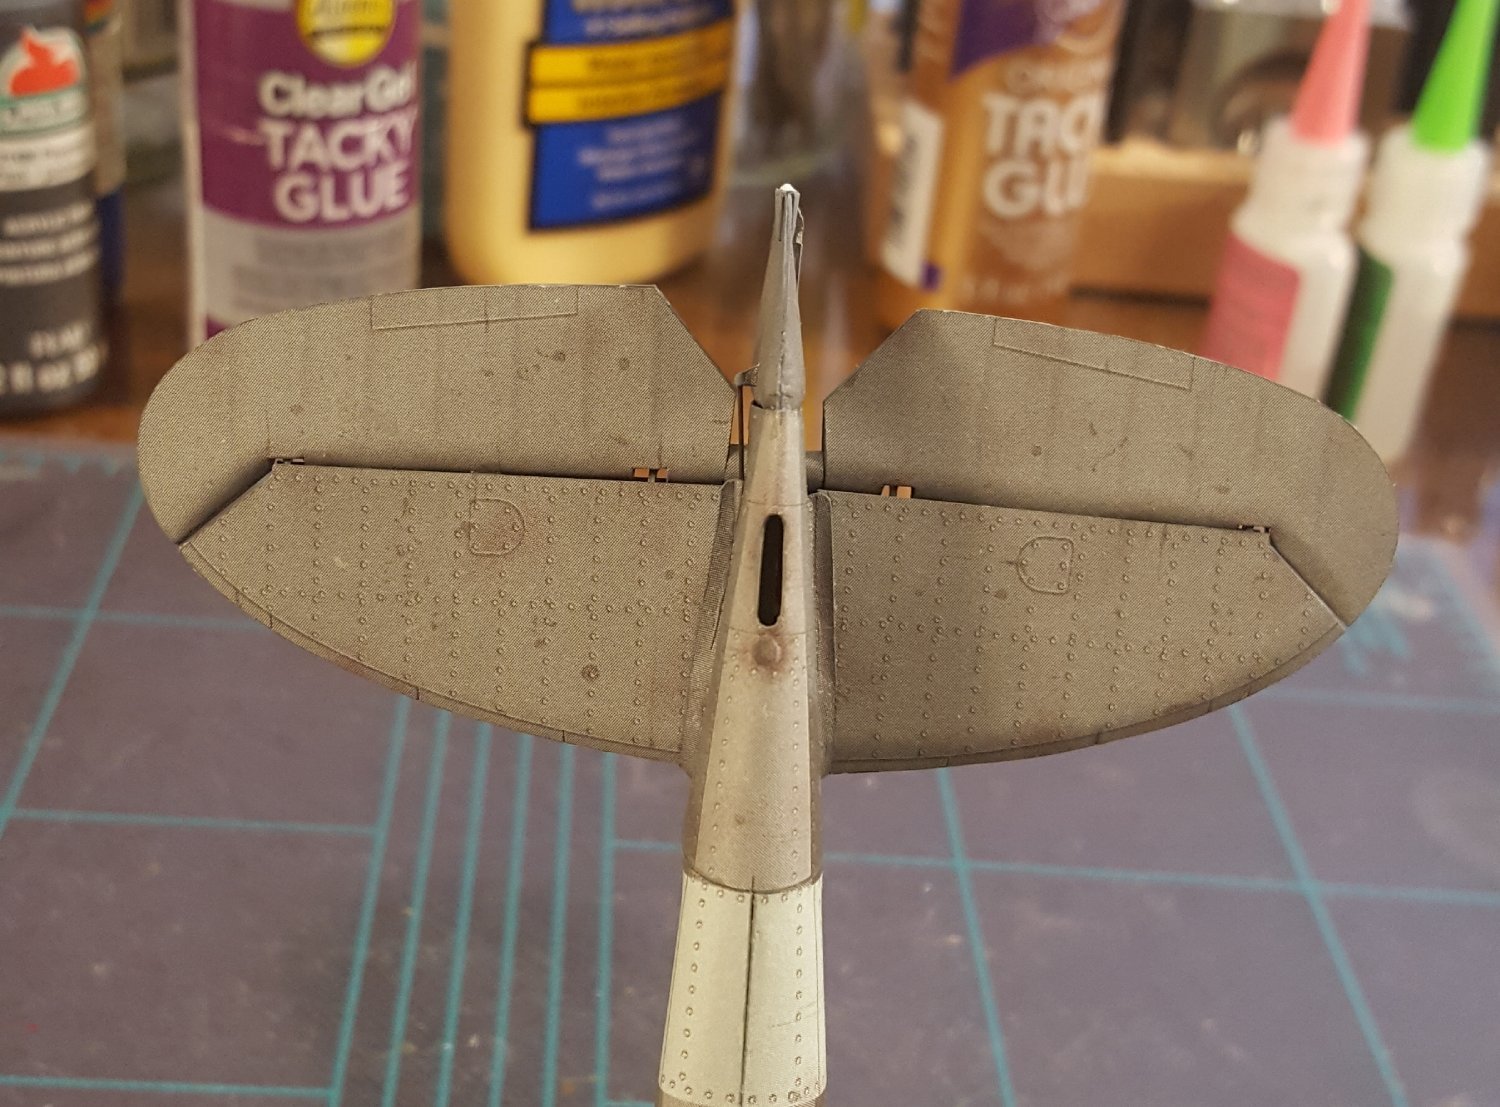
For comparison, I checked Halinski's F4F-3 Wildcat kit published in 1998. The horizontal stabilizers + elevators in that kit consist of only eight parts total.
-
Ch. 16 Empennage Whew! The empennage is now complete. Quite a bit of work went into the horizontal stabilizers and elevators; together, they consist of 60 parts, which is substantially more than is found in most kits.


- 130 replies
-
- 17
-

-
-
Good luck on your project, Andrew. I noticed you are from Moira -- some of my ancestors were from up the road in Ballymena, though we have been comfortably ensconced on the this side of the pond for seven generations now.
- 32 replies
-
- 1
-

-
- Nisha
- Vanguard Models
- (and 1 more)
-
Since I started collecting (hoarding?) Halinski kits, I have been completely turned off to kits with very basic graphics. I still have some of the latter, but I don't get excited about the prospect of building them. BTW, there were still some Halinski kits leftover at the sale going on over at papermodelers.com, so I picked up a Douglas SBD-3 Dauntless (with laser-cut frames), a Hawker Hurricane Mk. I with canopy, and a Macchi C.205 Veltro. The addiction is real. 😵 P.S. The Dauntless is a beast of a model -- just imagine Halinski's insane level of interior detail doubled for a two-seater aircraft. It can also be built with its split dive flaps deployed.
- 130 replies
-
- 10
-
-
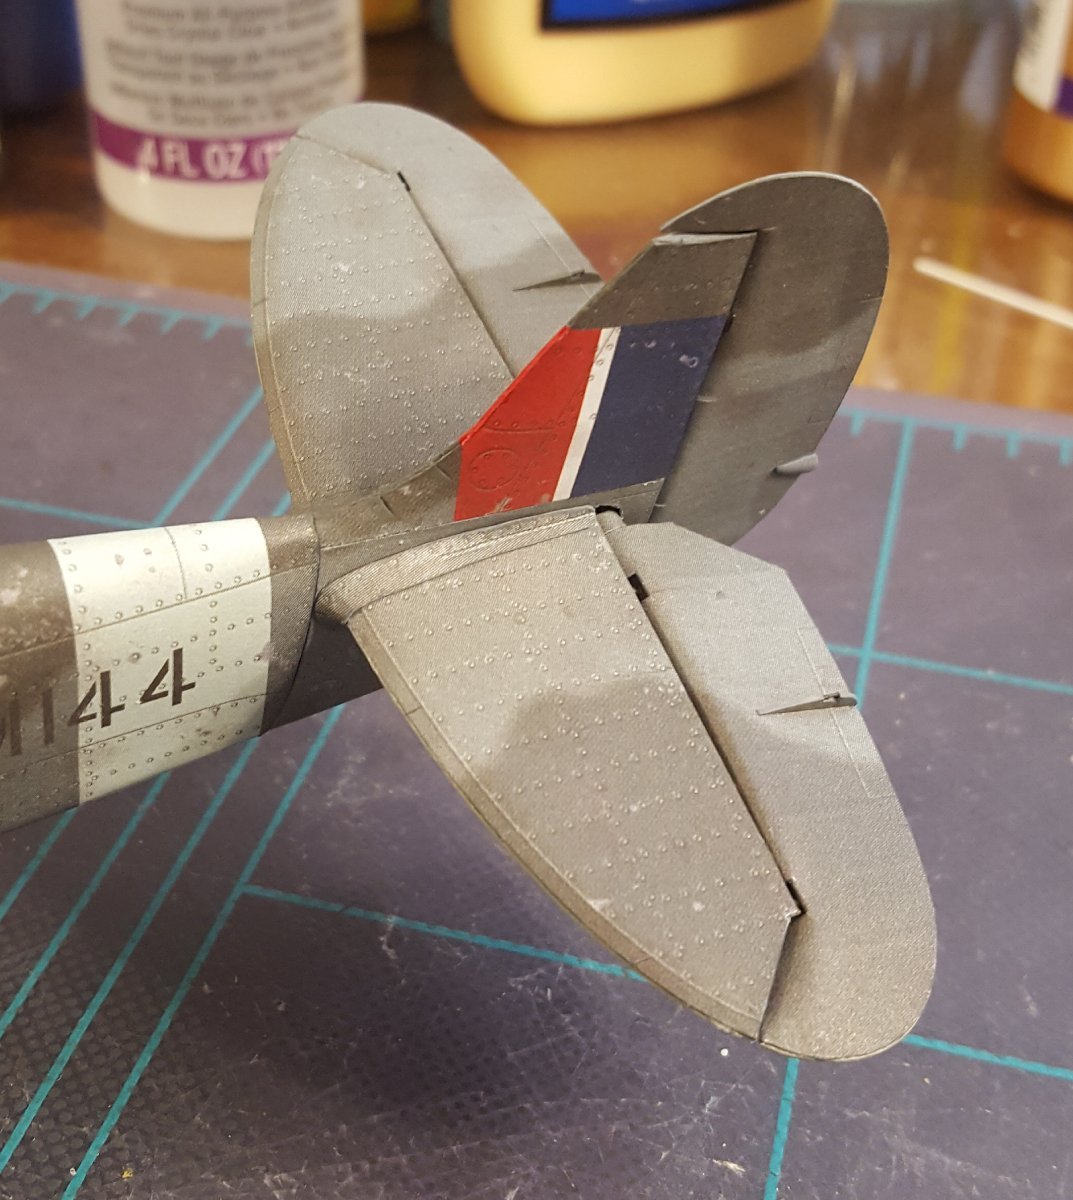
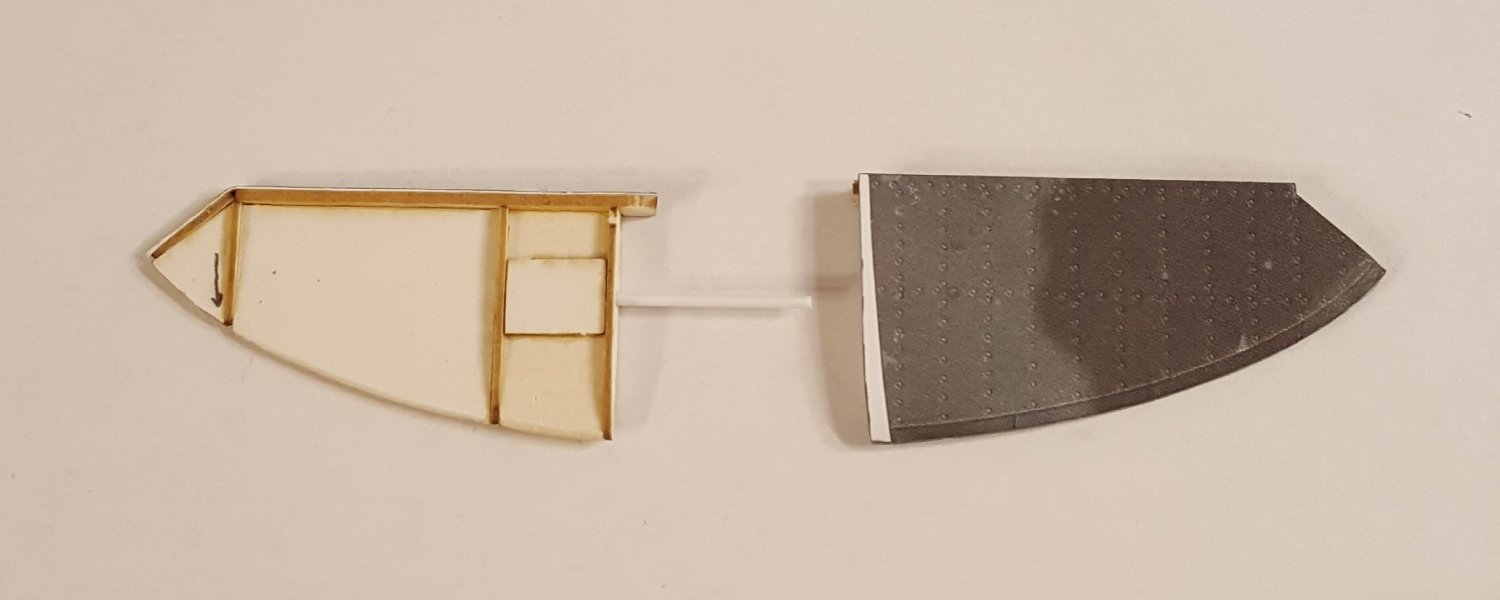
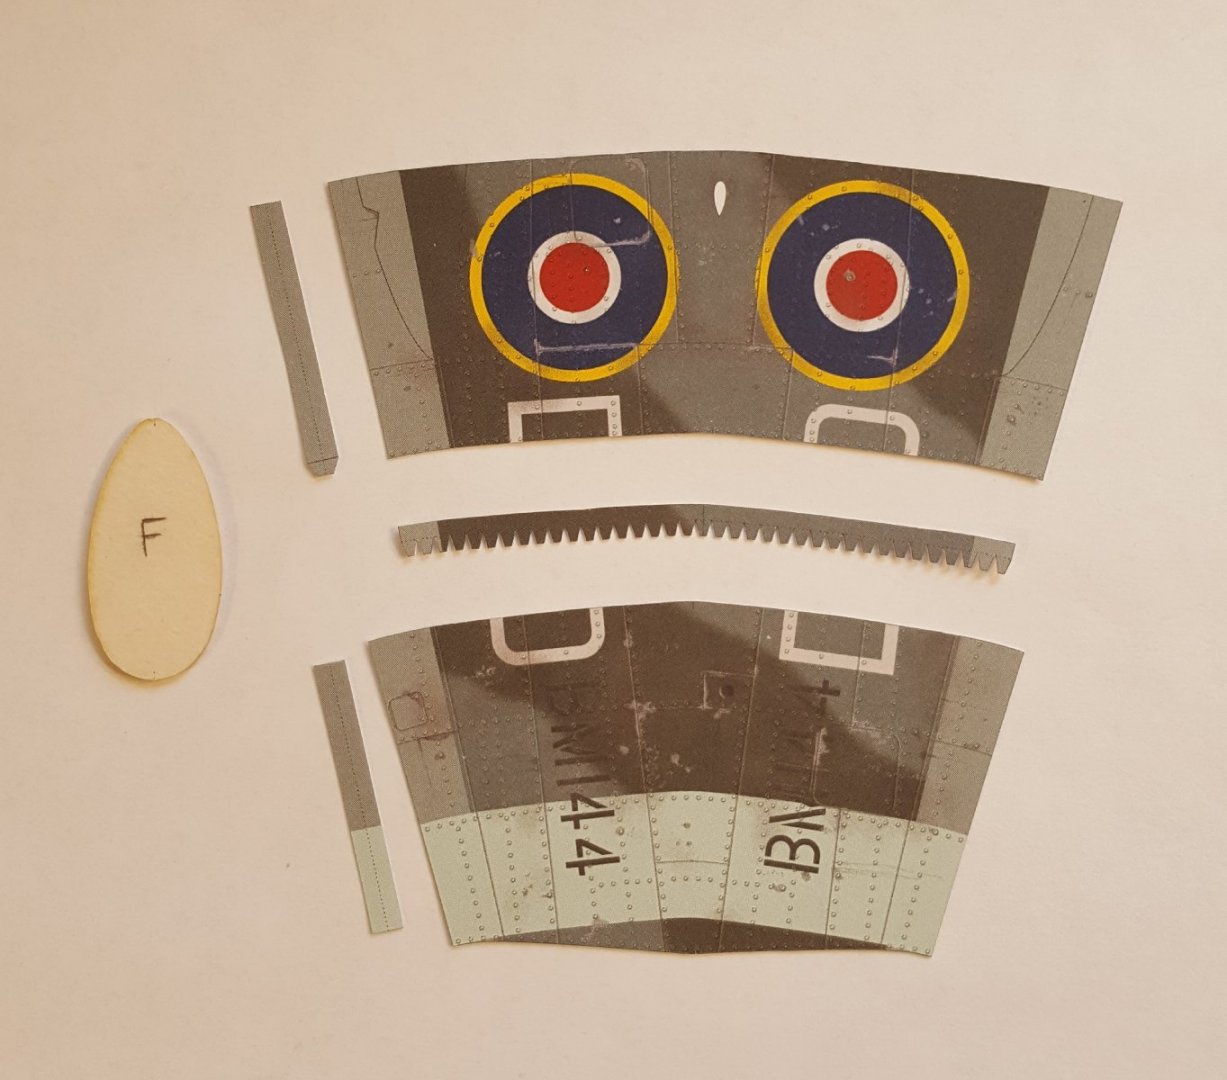
Ch. 15 Small Triumphs You know us modelers -- we take pride in even the smallest of achievements, whether it's pulling off a difficult task or adding an extra little touch to our models. Remember the missing navigation light I mentioned earlier? Here's it's scratch-built replacement: Skills-wise, I wasn't particularly pleased with my work on the rudder. I got a little hasty and careless, and the rudder shows this (if you know where to look -- which I do). So, for the horizontal stabilizers, I told myself to slow down, work carefully, double-check all fits before gluing, and -- most importantly, don't use fingers to clamp flat surfaces glued over internal frames! 😬 And this is the result on the port-side horizontal stabilizer, shown with it's un-skinned starboard-side partner -- not a starving cow in sight. As my Hispano-Teutonic friends might say, "mucho besser!"

- 130 replies
-
- 15
-
-
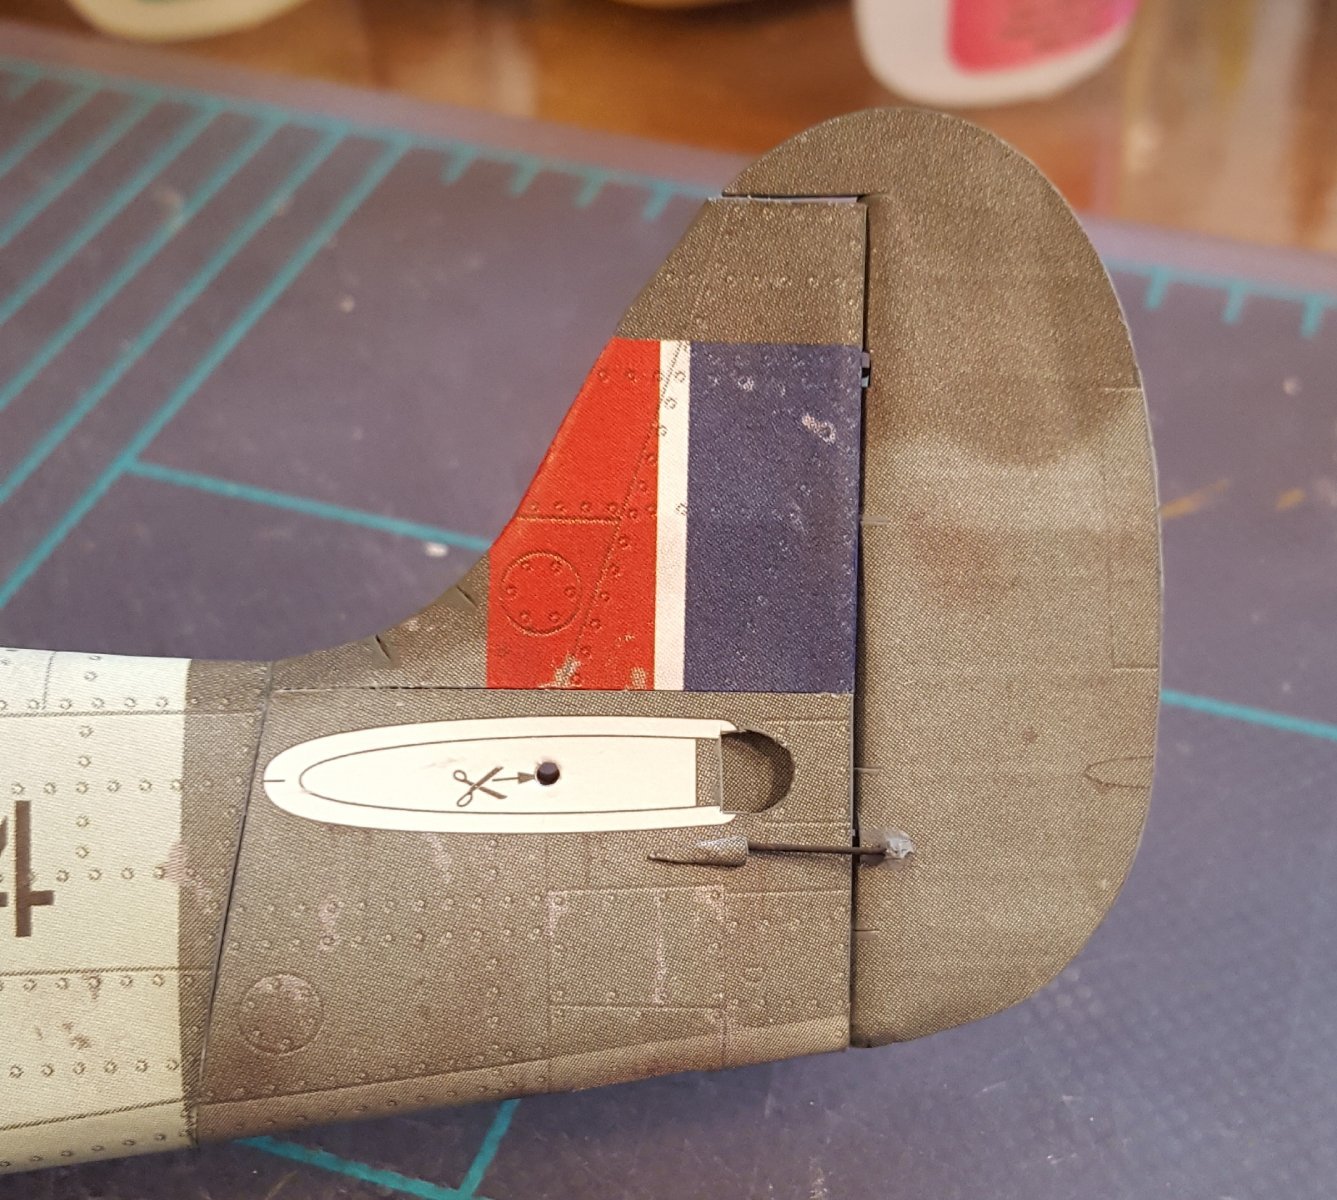
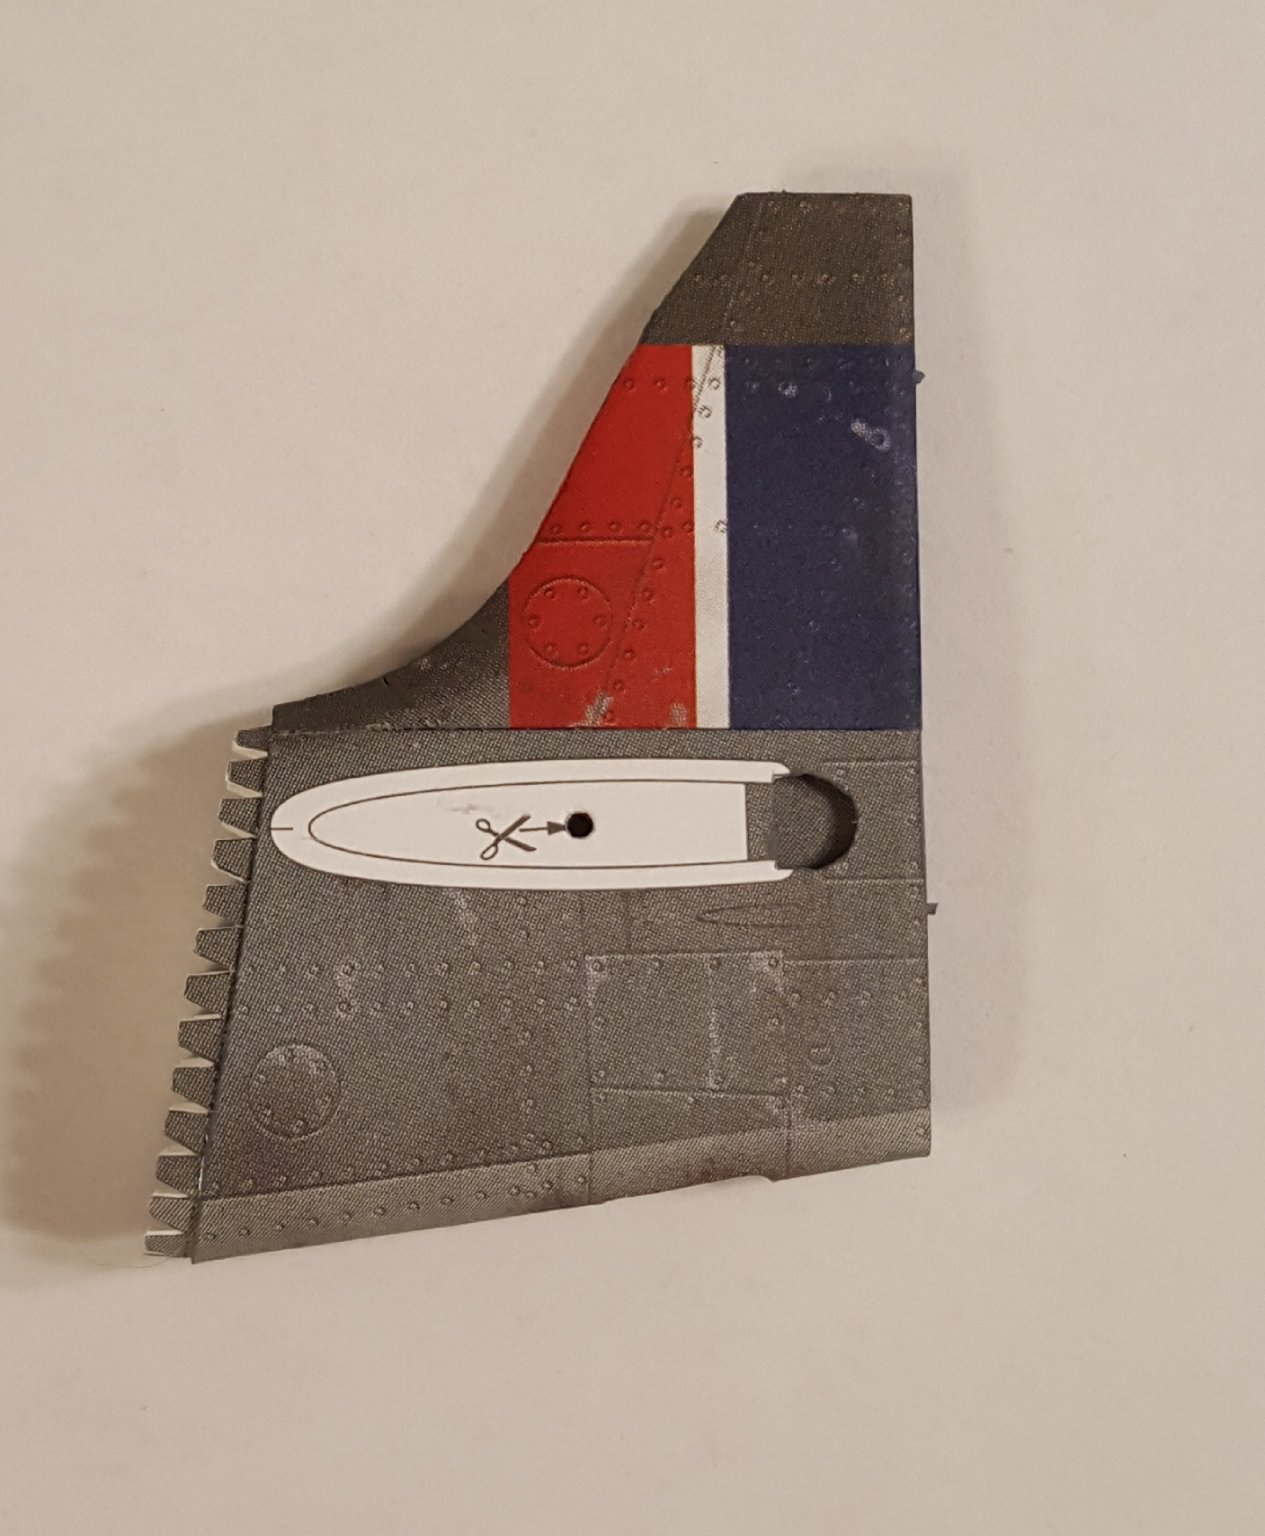
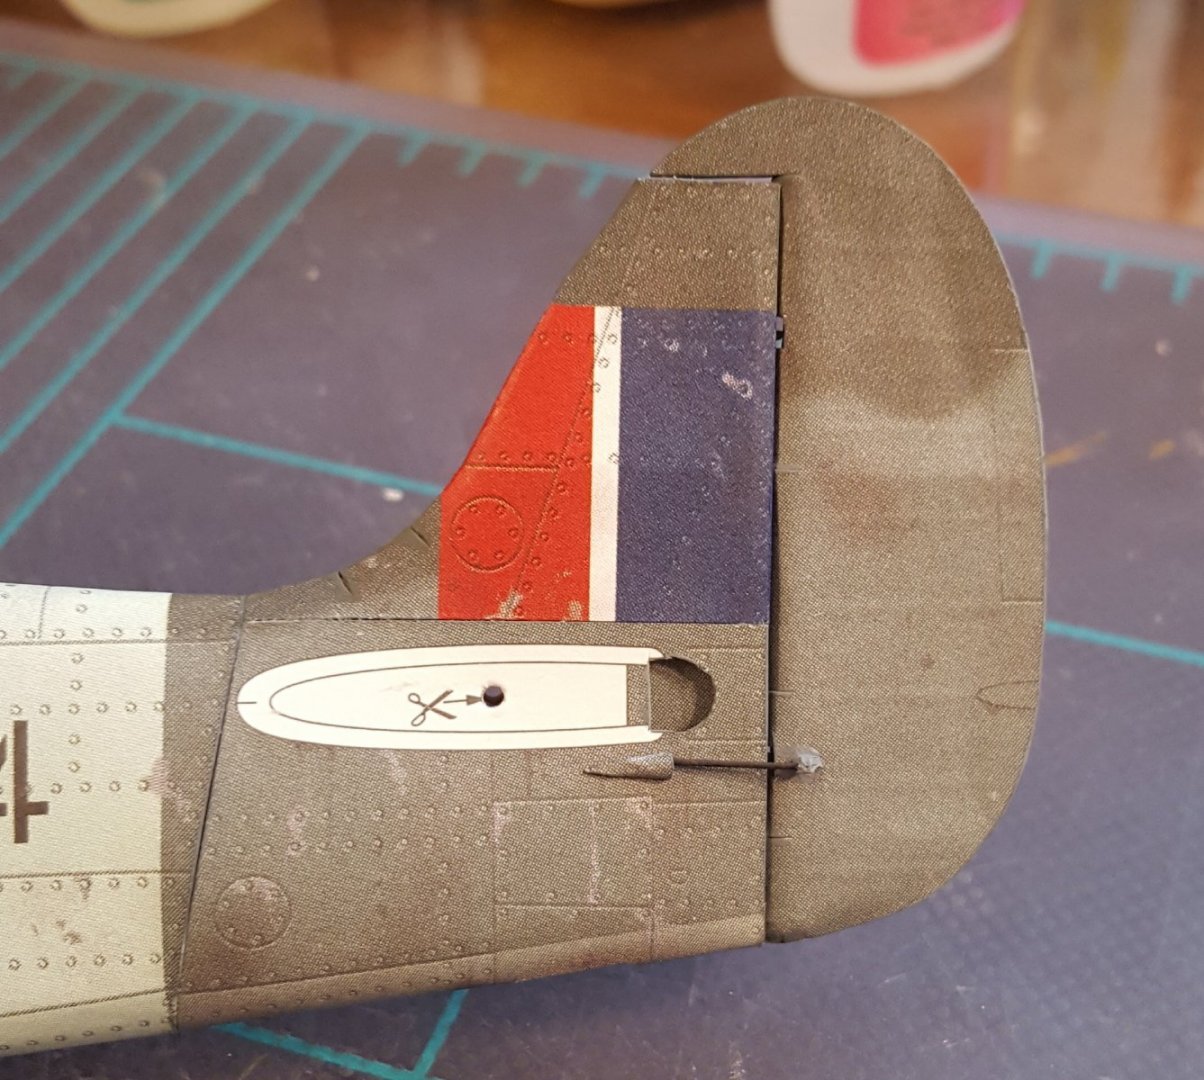
Ch. 14 Rudder The rudder has been added. The Spitfire had only a single actuator for its rudder, mounted on the port side. On the starboard side is an actuator for the rudder trim tab. Also, the rudder should have a small navigation light; the kit has locator marks for it printed on the rudder, but provides no part for it. It is also shown on the diagrams, but without any part number. Next up will be the horizontal stabilizers and elevators -- parts galore! For anyone who is curious, the early marks of Spitfire differed primarily in their power plants, with newer marks of the Merlin providing increased horsepower resulting in greater aircraft performance. The three main variants of the Mk V were in turn based in the differences in their armament. The Mk Va kept the eight .303 Brownings of the earlier marks, the Mk Vb replaced four of the Brownings with a pair of 20 mm cannon whose size and ammunition drums necessitated some changes to the wing, and the Mk Vc introduced what was called the "universal wing", which could carry either combination of weapons. Both the Mk Vb and Mk Vc were produced in tropicalized versions, each characterized by having a prominent chin-mounted duct for the necessary dust filtration system. Cheers!

- 130 replies
-
- 17
-
-
Very convincing paint chipping!
-
Hi, Arthur. For recommendations on tools, check out this link. Also, take a moment to introduce yourself in the new members section -- we'd enjoy learning something about you. Cheers!
-
In California, where 99% of US walnuts are produced, English walnut scions are grafted onto black walnut root stock. My grandparents lived in San Joaquin county -- there were walnut orchards everywhere.
-
Although the Spitfire was produced in about five bazillion different marks, this kit depicts a particular aircraft at a particular point in time, so no optional parts. Other kits do sometimes have such options. I have a Fokker E.V kit that has optional parts for four different liveries, and I also have a Sopwith Pup kit that has two different liveries, each with different armament.
-
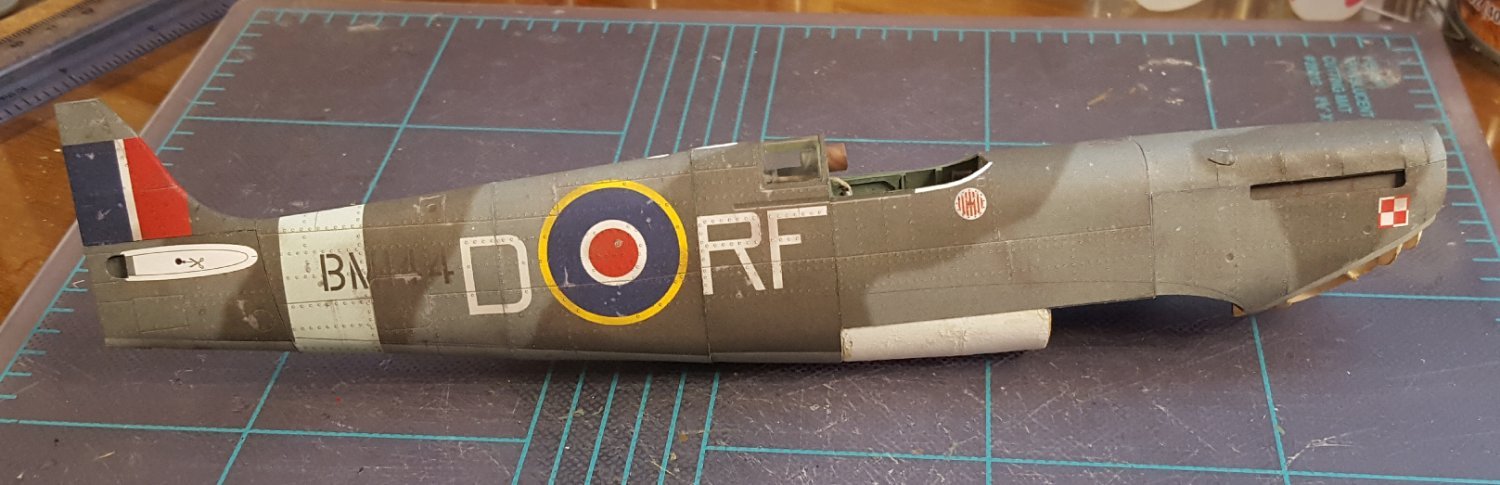
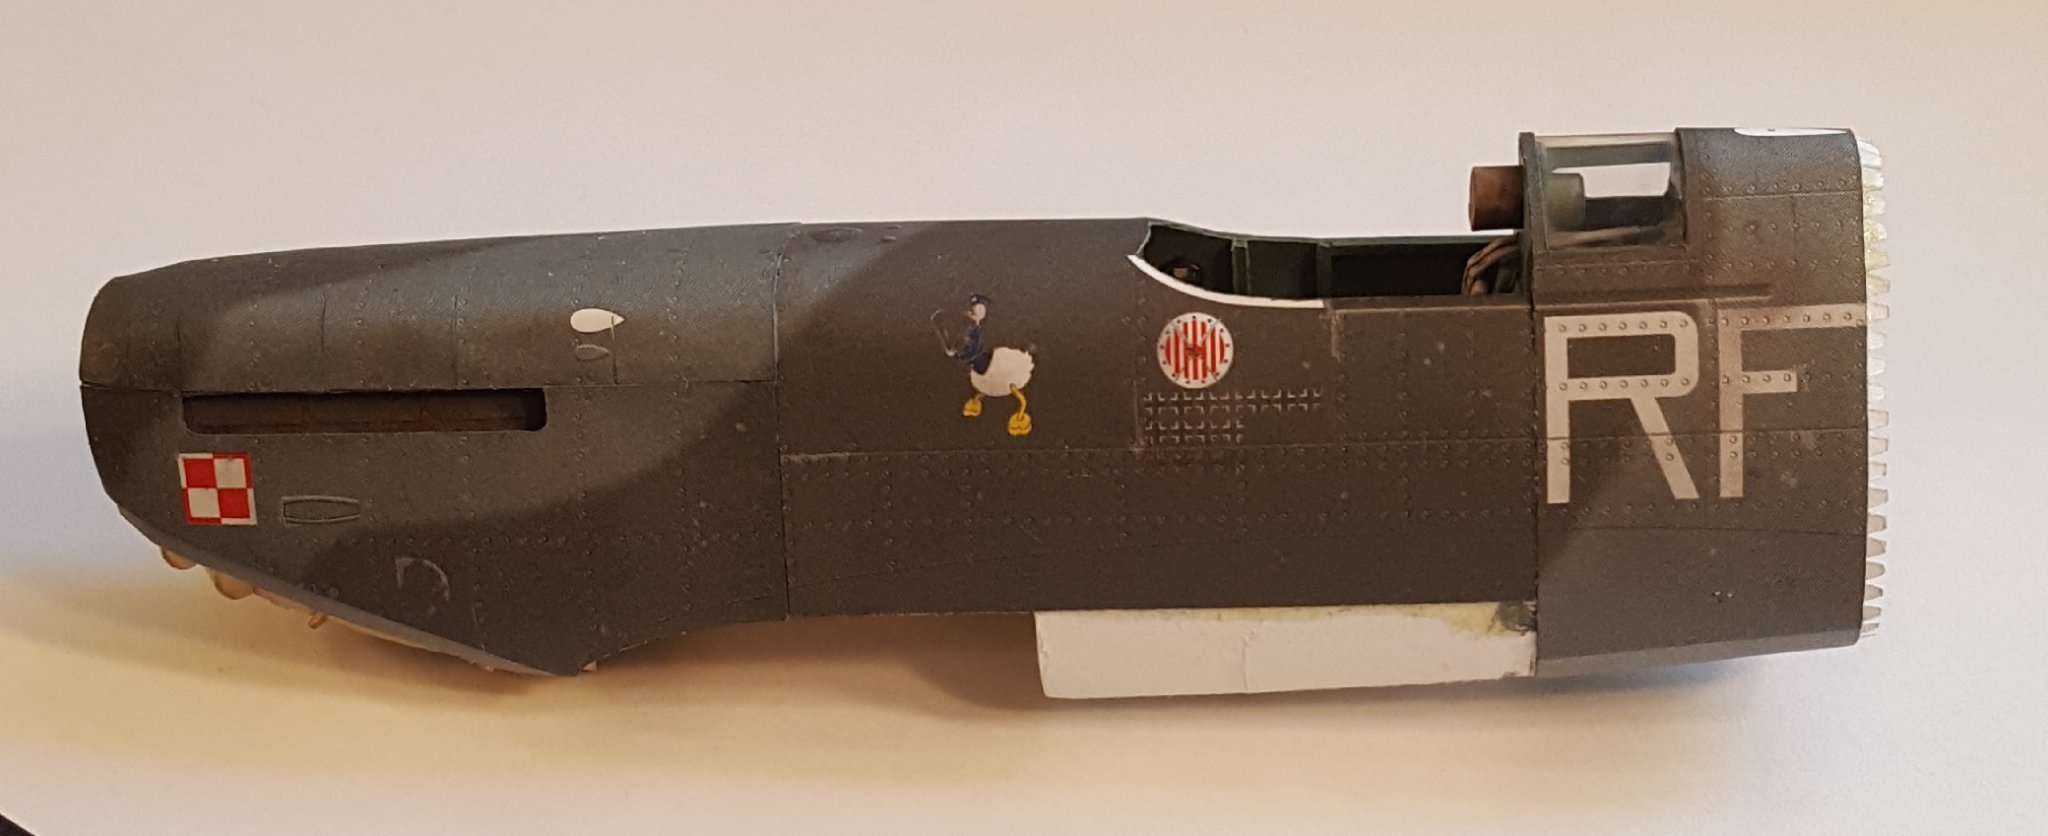
Ch. 13 Fuselage Meh. That was my feeling after completing this step. I got a bit too much of the starving cow effect for my liking, and my seams let me down a bit. It doesn't look too bad in the photo below, because I purposely showed only the better of the two sides. You may notice that the worst of the seam work appears near the bottom, and that's deliberate, for two reasons. First, the bottom -- obviously -- is the least-seen part of the aircraft. Second, some of the more unsightly parts will eventually disappear beneath the wing fairings. So, if any of the seams appeared to be a bit loose, I made the upper parts tight and let the lower sides be the victims. BTW, if we think of the British roundel as the letter 'O', then the identification letters spell out the word 'DORF', which is German for 'village'. I have no idea if that has any cosmic significance. 🤔

- 130 replies
-
- 19
-
-
That I can take no credit for -- it is entirely due to the skill of the graphic artist who colored the model. These nicely weathered models can ruin one's appetite for kits that aren't thusly rendered. Ask me how I know. 😬
- 130 replies
-
- 11
-
-

-
Greetings to MSW/NRG Members and All Ships at Sea
ccoyle replied to Michael Scarborough's topic in New member Introductions
Amazing craftsmanship, Michael! Love the Pup -- I have one in my stash. -
Ch. 12 Vertical Stabilizer Perhaps somewhat counterintuitively, following the construction sequence given in the instructions takes us next to the opposite end of the model. Unlike some other kits, this one has the aft-most fuselage section and vertical stabilizer as a single assembly rather than having a separate stabilizer. Parts . . . . . . and done.
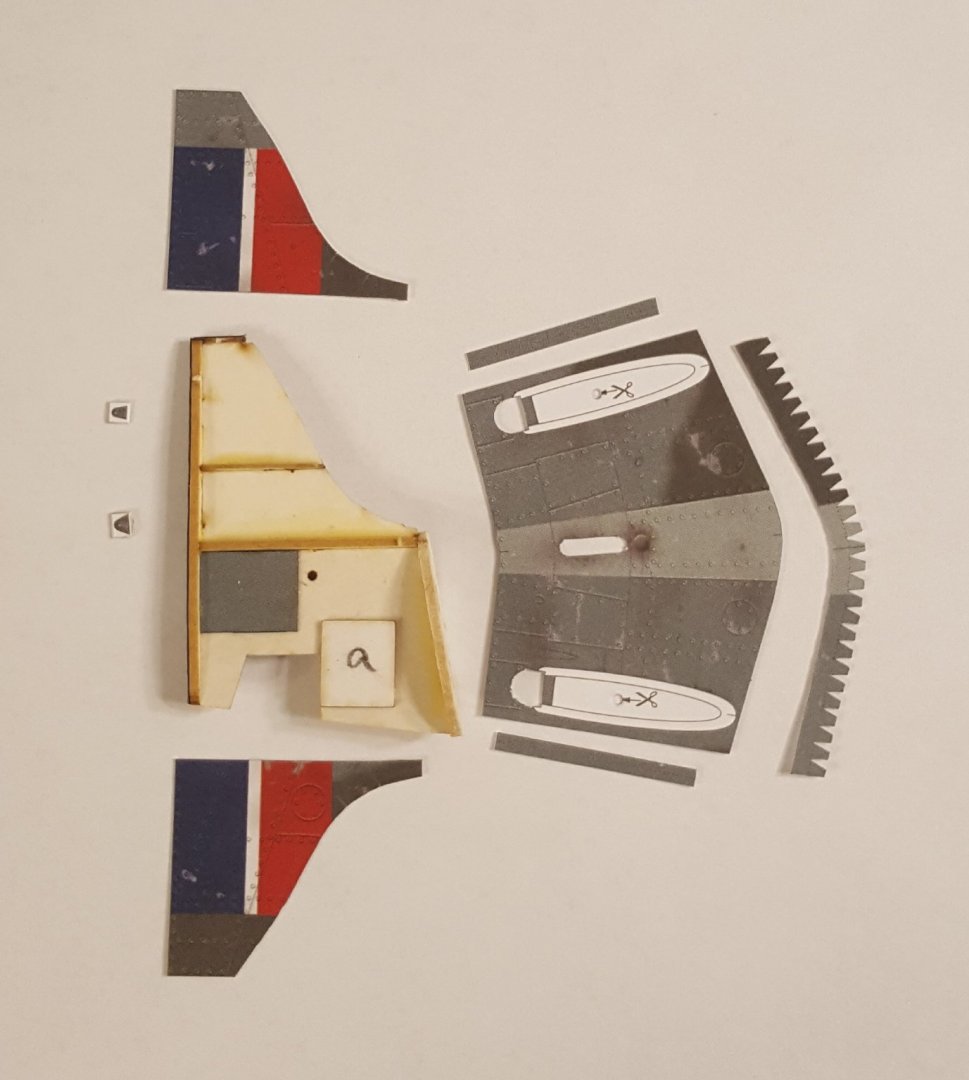

- 130 replies
-
- 17
-
-
I should add that confidence is high at the moment. My last Halinski effort, the Brewster B-239, never got past the cockpit stage, so this is already a big improvement.
- 130 replies
-
- 10
-
-
Ch. 11 Forward Fuselage This next shot doesn't convey how much work went in to getting this section done. The upper forward fuselage is wrapped in three separate sections, two sides and a top. Before adding these, the sub-structure needed to be sanded, and although the frames did have laser-etched fairing marks on them, there was still some guesswork involved in getting the shape correct (and I won't know if I got everything truly correct until the lower skins are added). The real problem, though, is that the very first frame, the round one to which the propeller will eventually be fitted, was revealed during dry-fitting to stick out about 1 mm too far. I double-checked the diagrams and part numbers to make sure I hadn't gotten something wrong (I hadn't), then removed the offending frame. After removing most of its material, I glued it into the topside skin, then glued that down to the frames, followed by the two sides. I had to do some very slight trimming and filling, but overall I think the finished structure is okay.

- 130 replies
-
- 19
-