ccoyle
-
Posts
10,579 -
Joined
-
Last visited
Content Type
Profiles
Forums
Gallery
Events
Everything posted by ccoyle
-
Since it's a Mantua product, I'd also be extremely leery of the part that says "comes with an extensive description that explains step by step how the model should be built." 🤨
-
 You can fix this, if you'd like. When you add your picture in the reply window, simply double-click on it to bring up our on-board resizing tool. Just make sure to check that the box for maintaining current proportions is marked -- I often forget that bit.
- 8 replies
-
- 1
-

-
- Plastic
- Constitution
- (and 2 more)
-
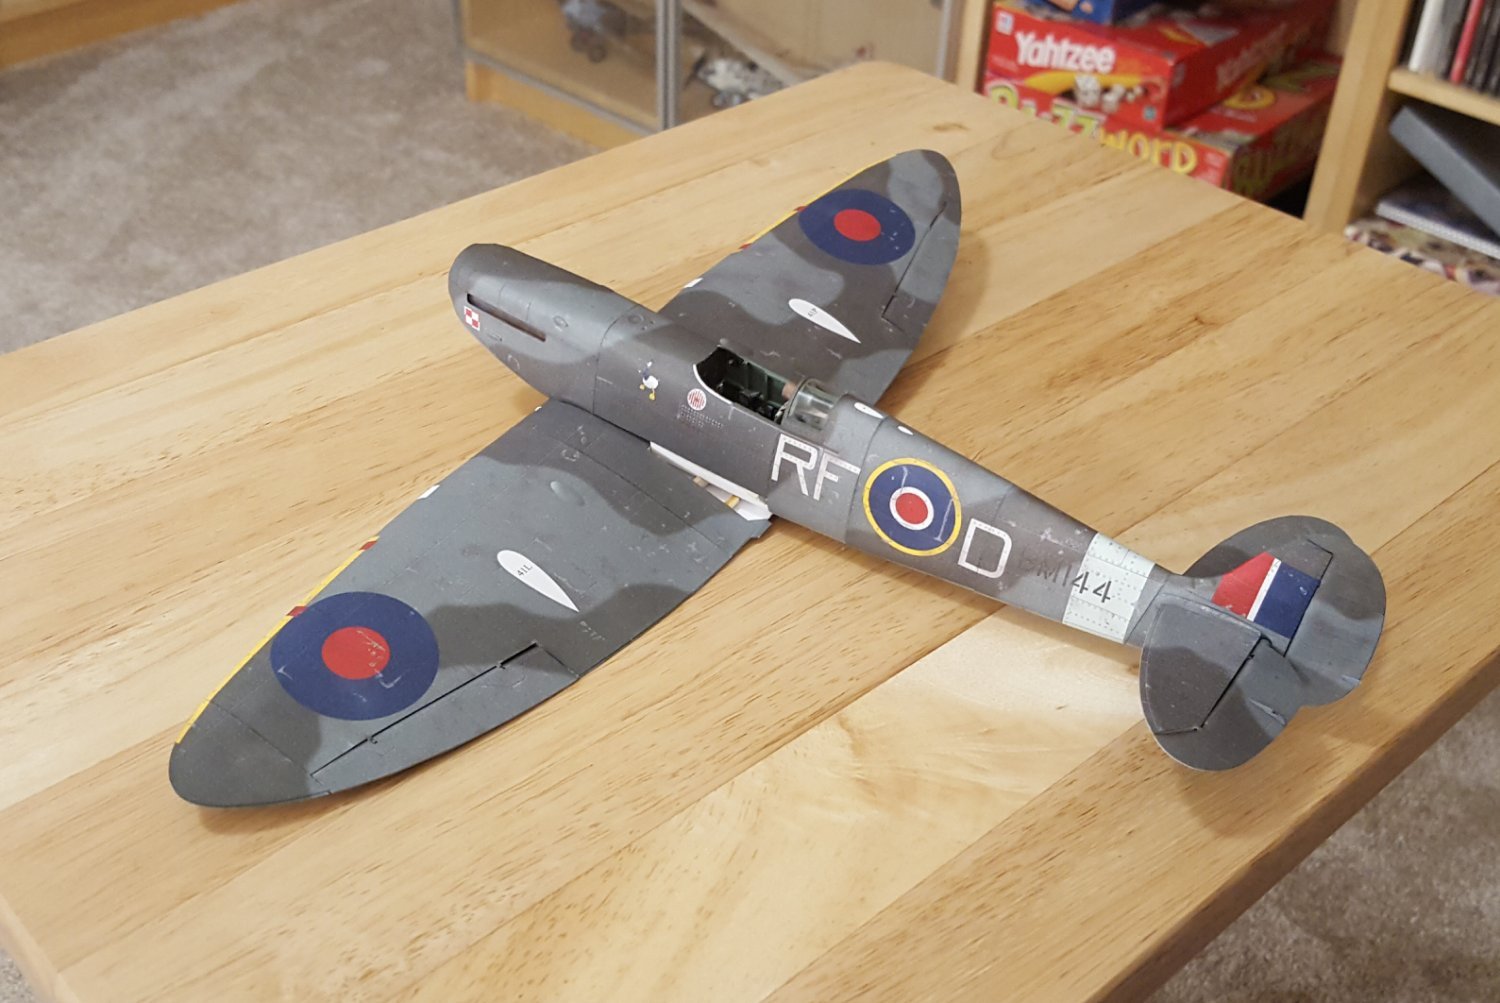
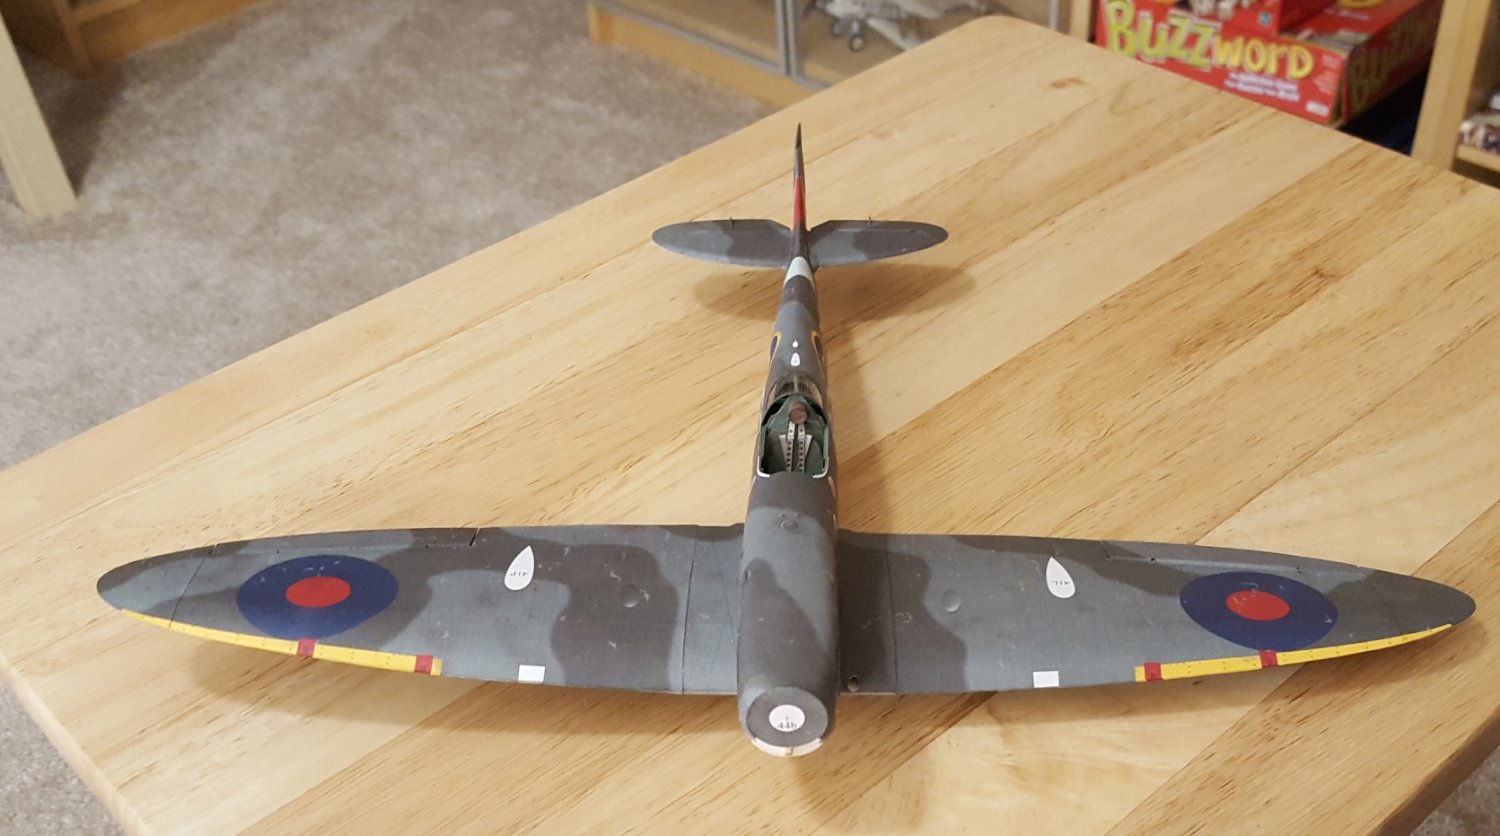
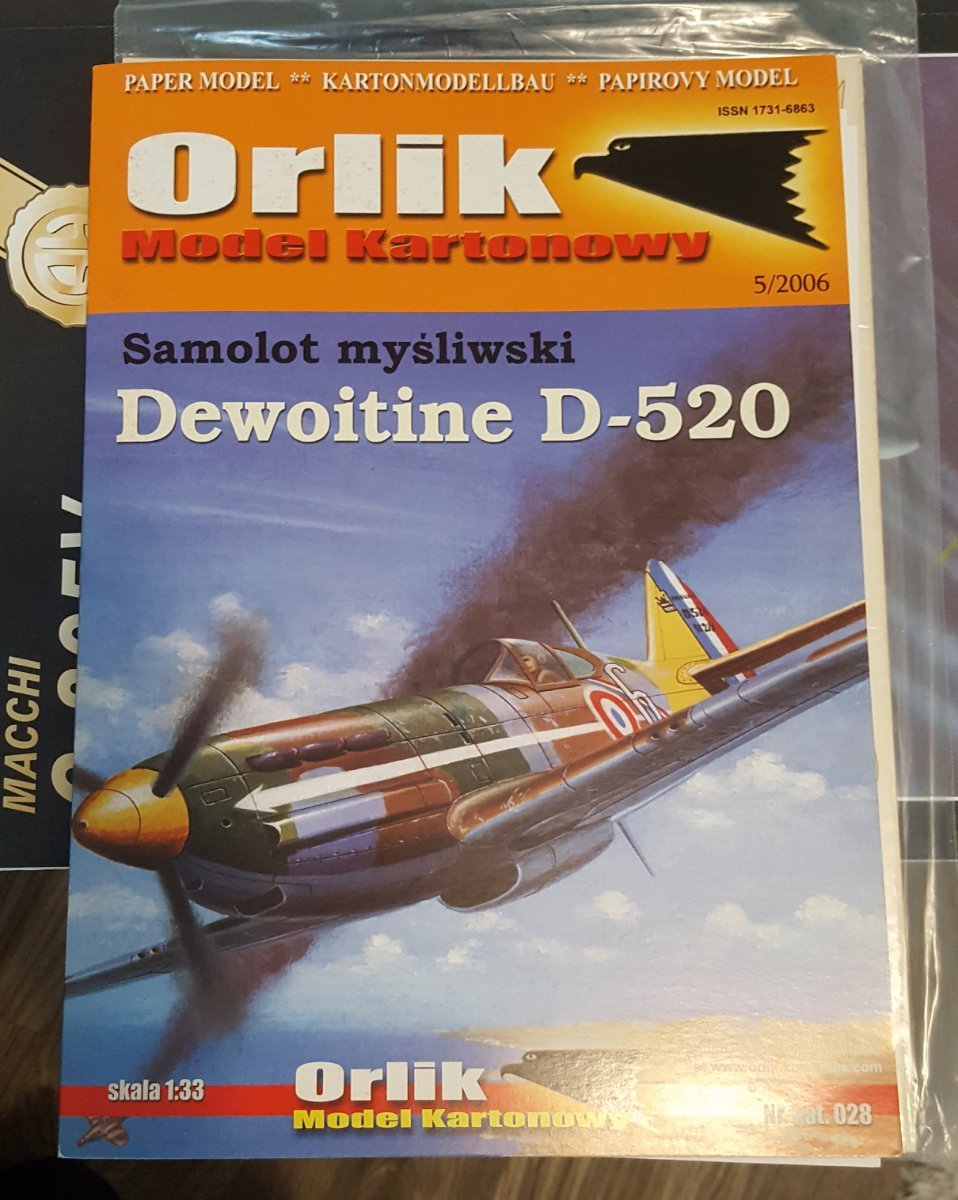
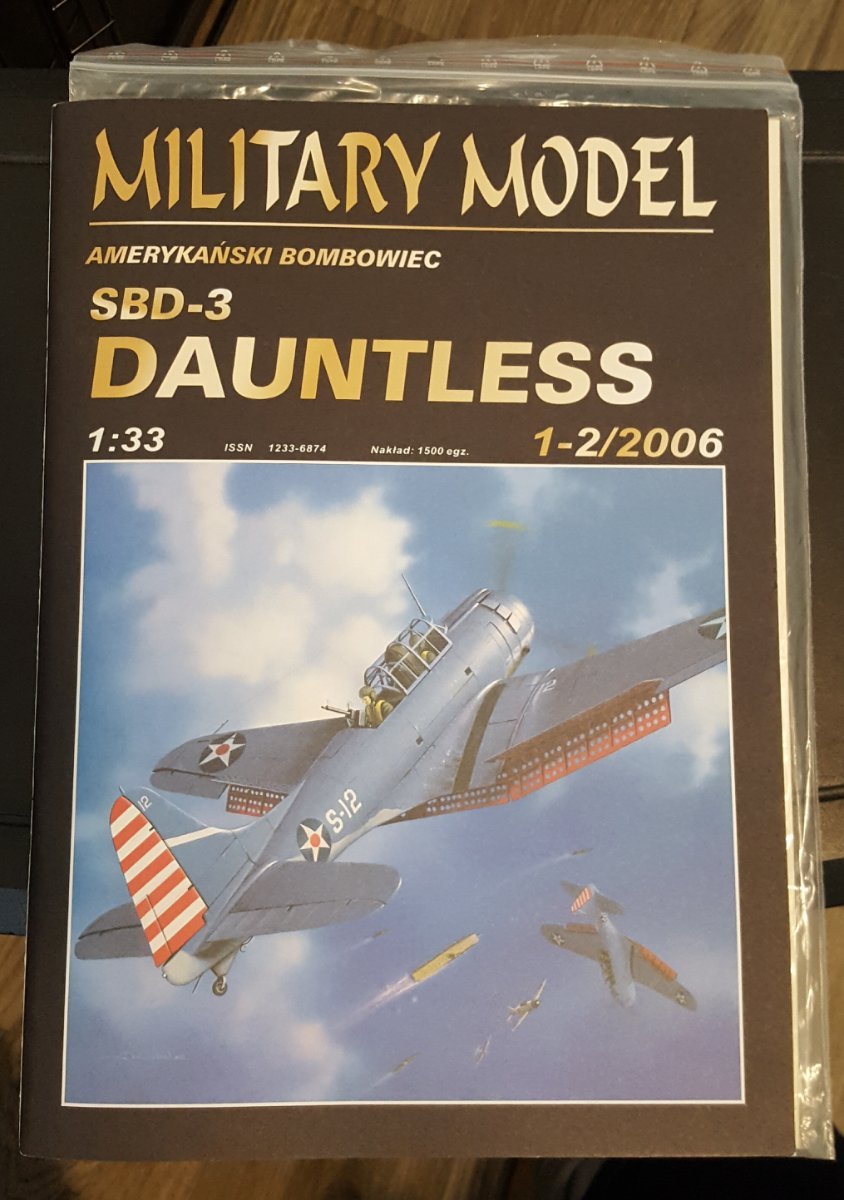
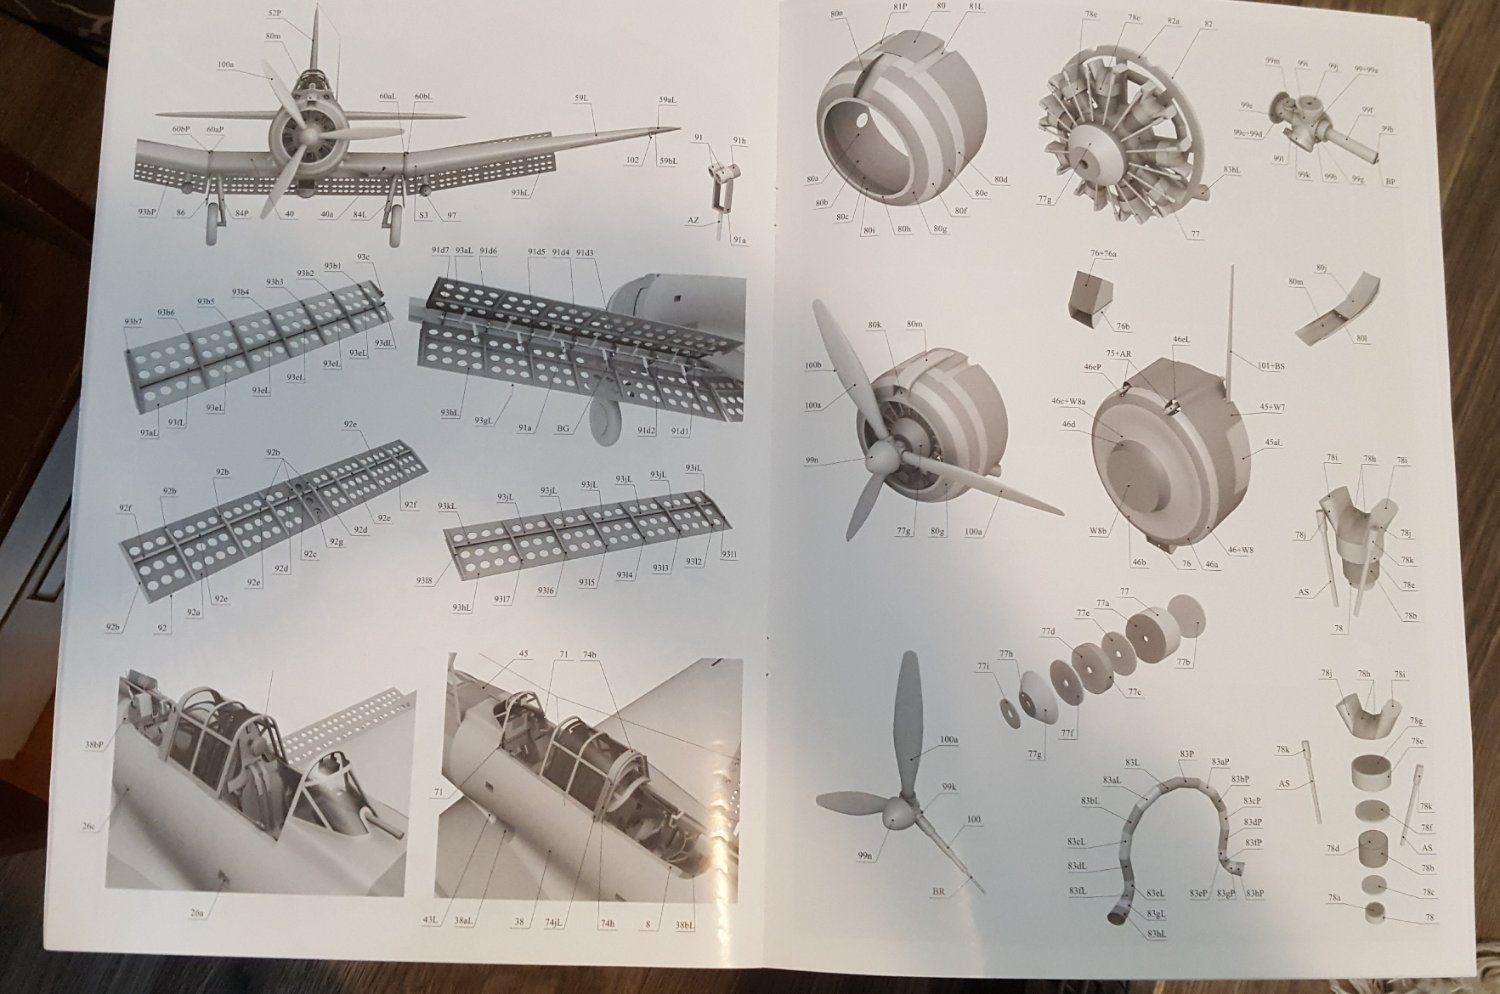
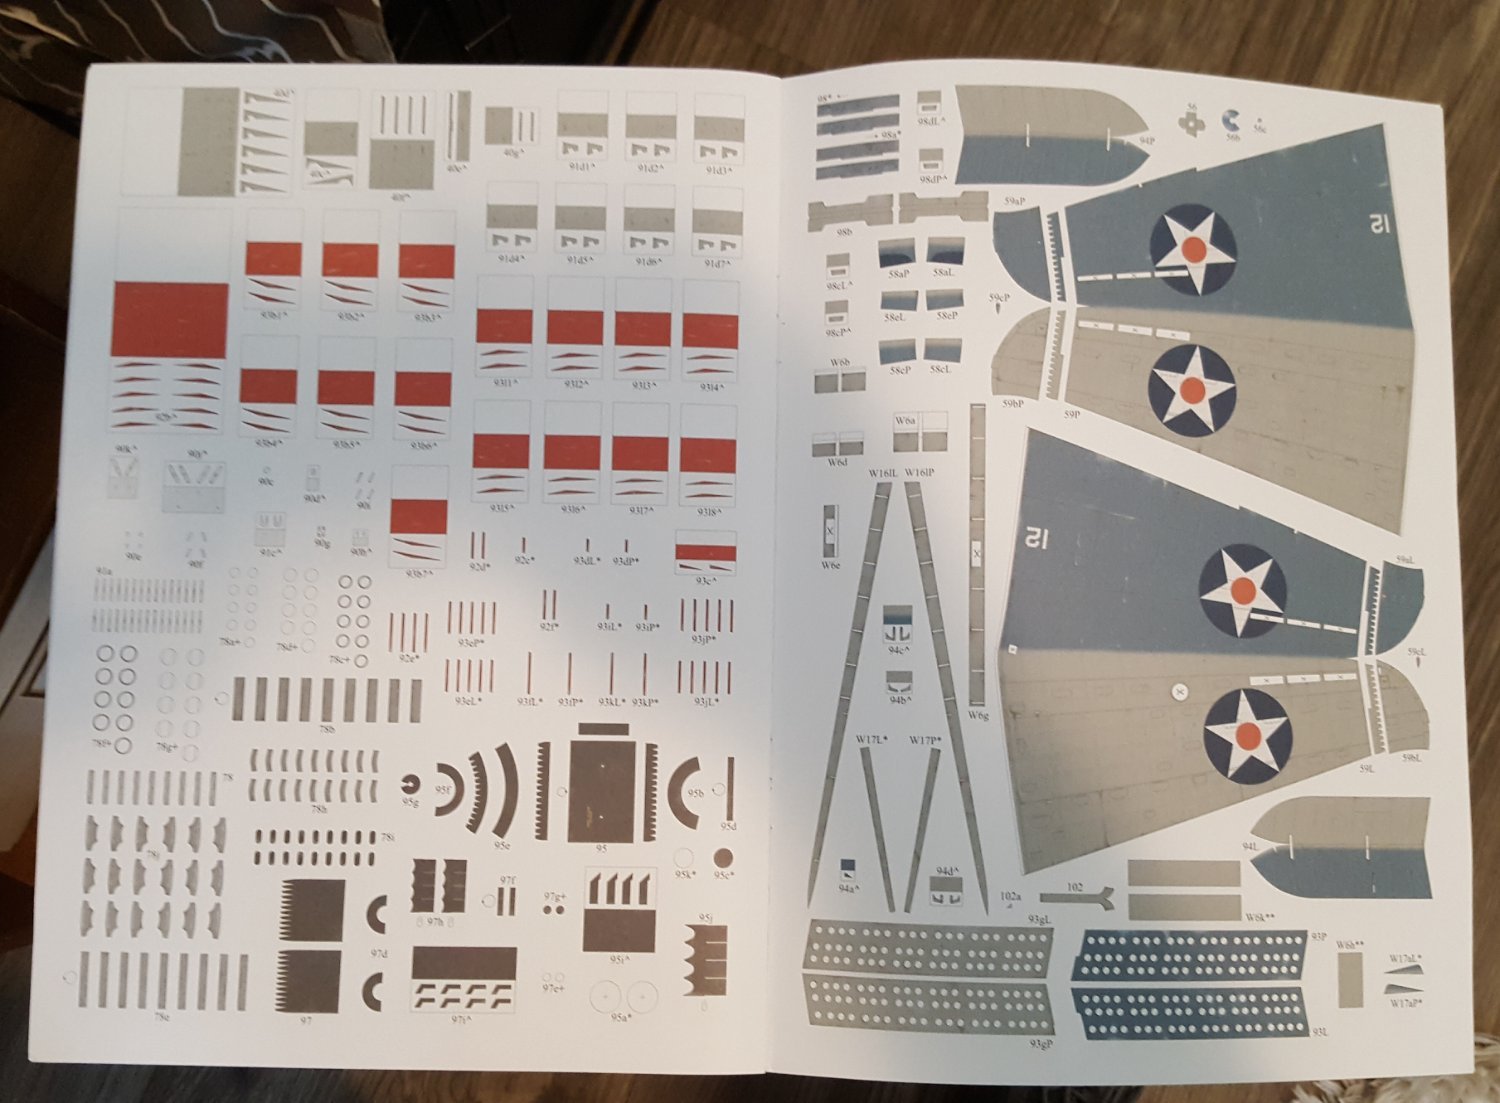
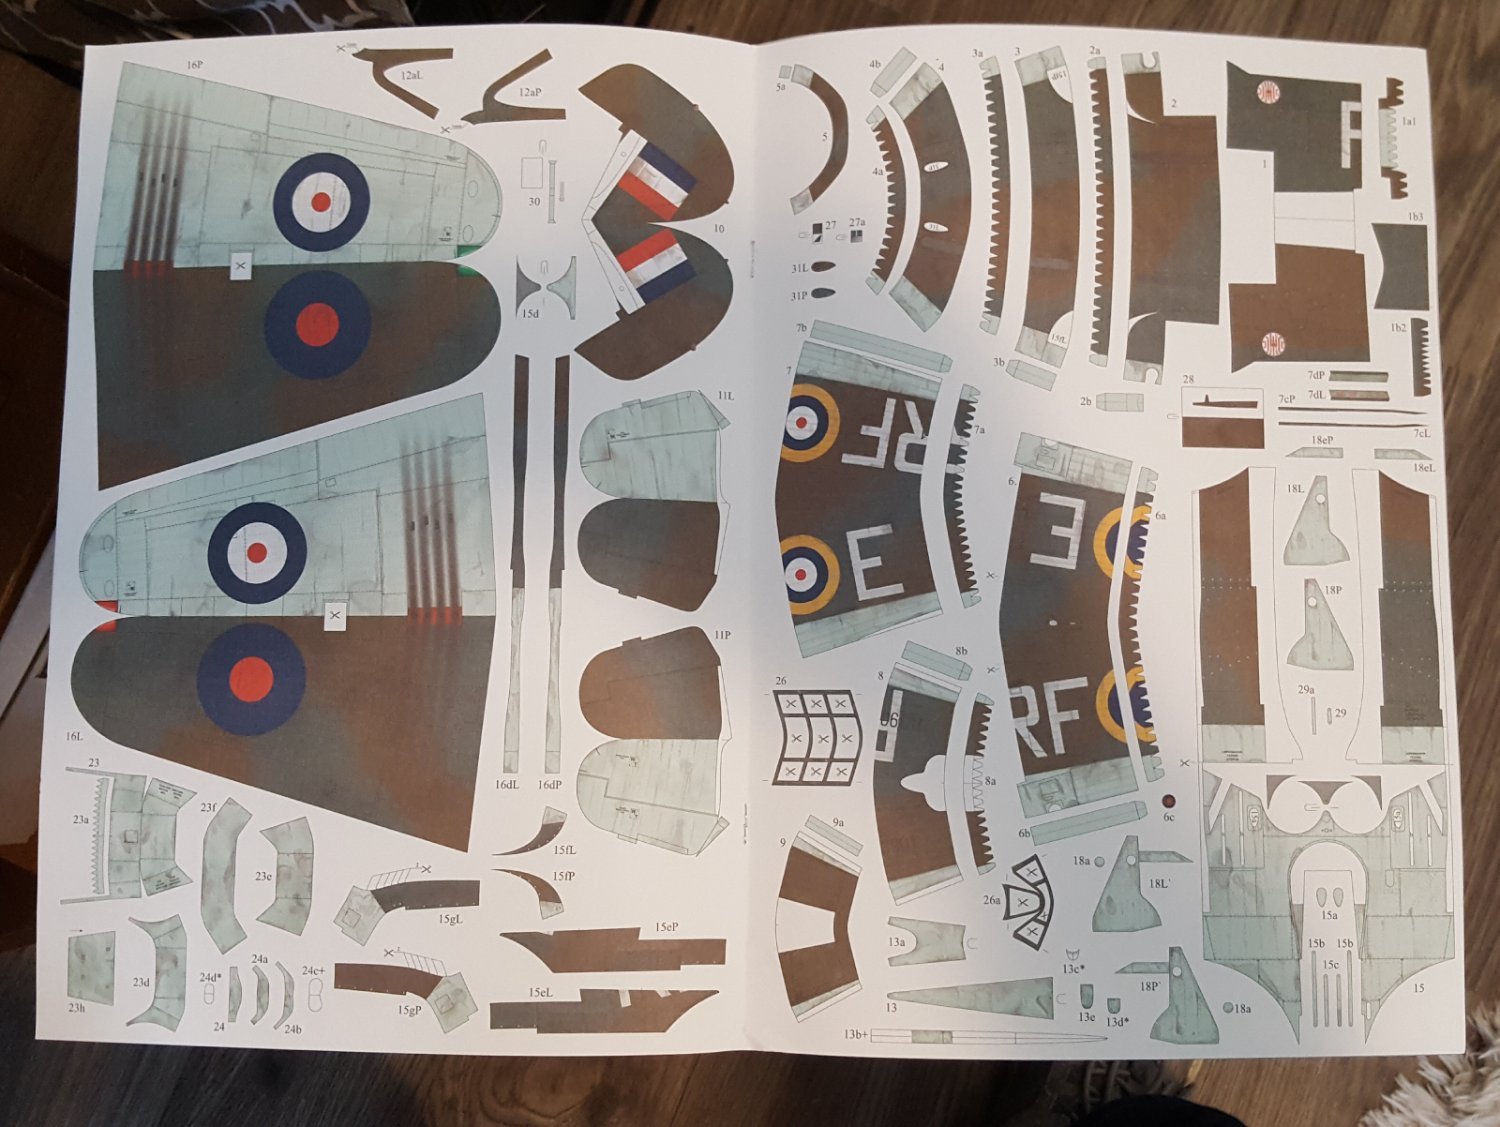
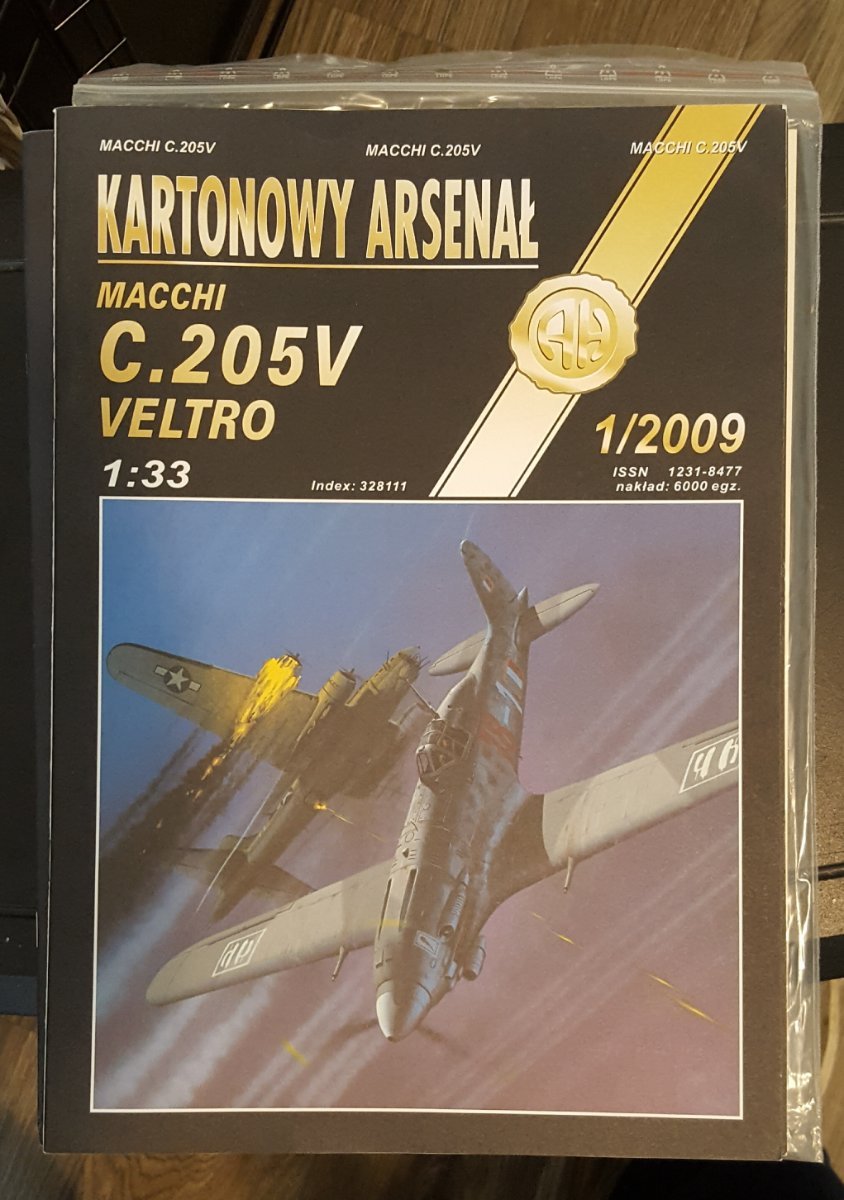
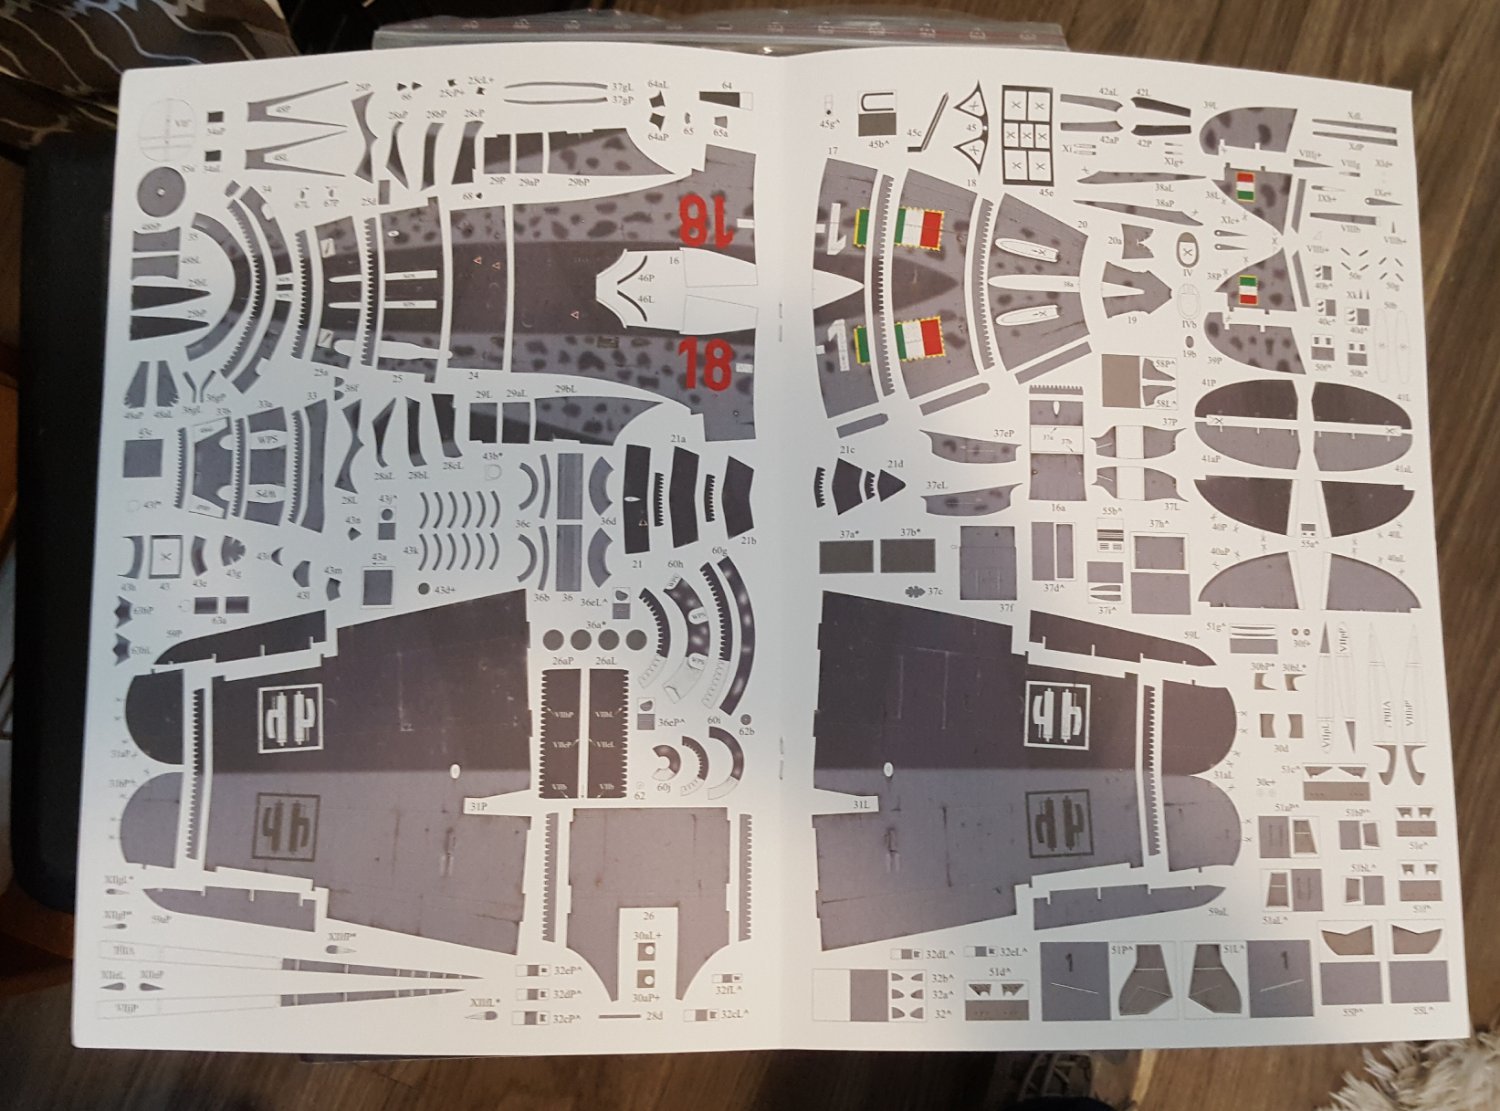
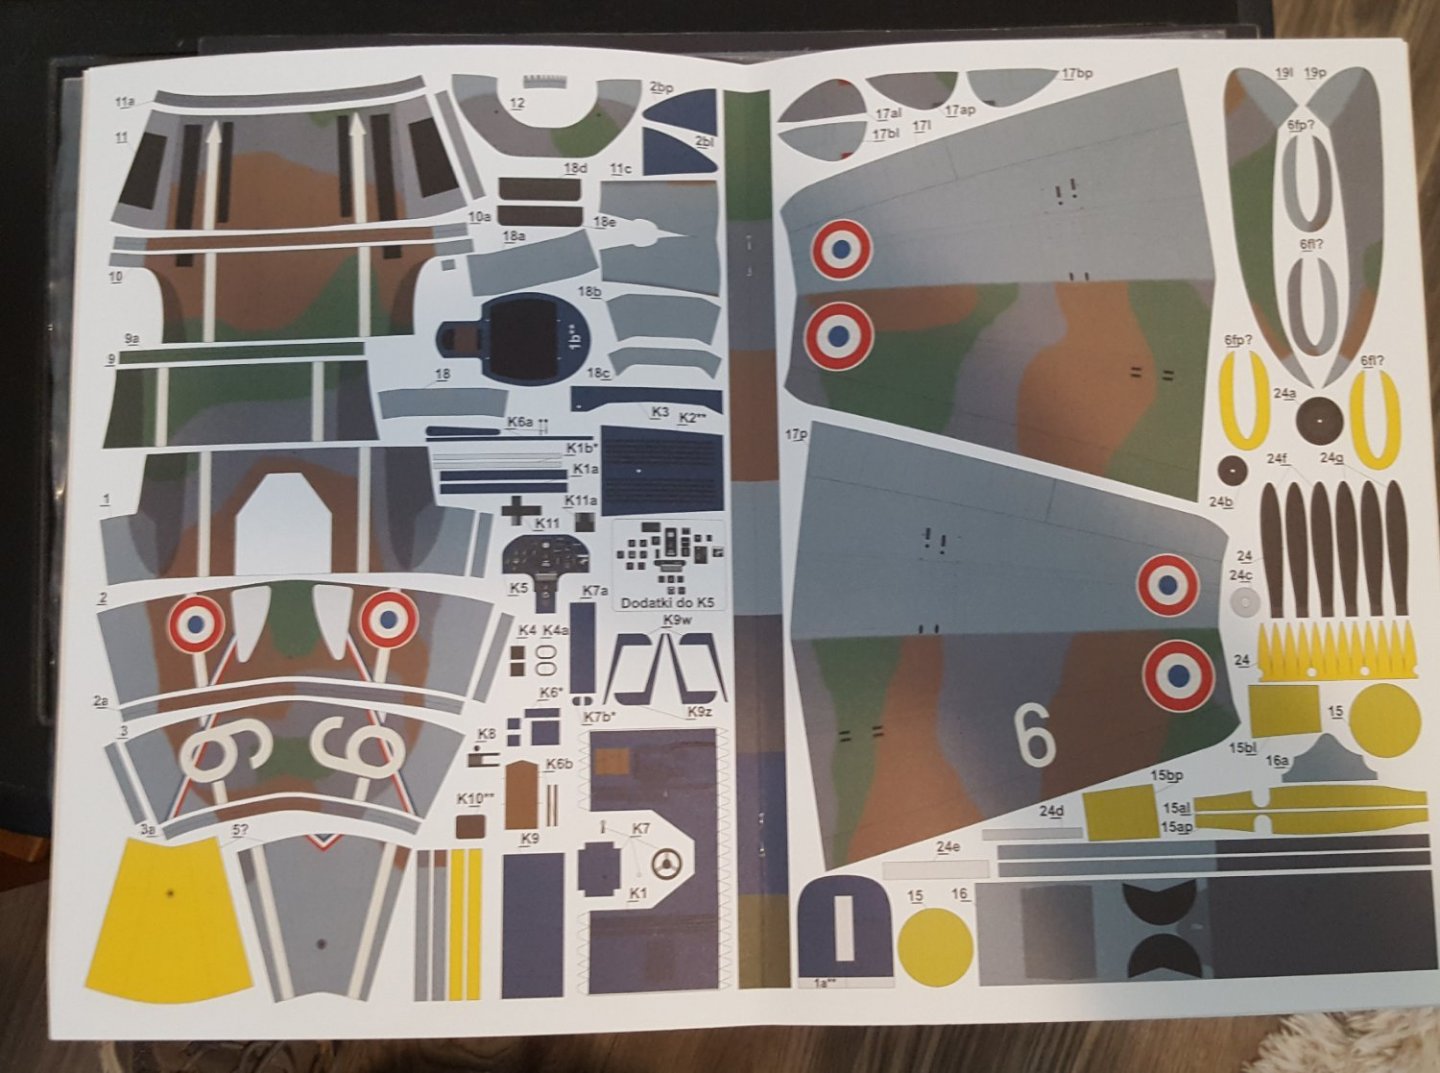
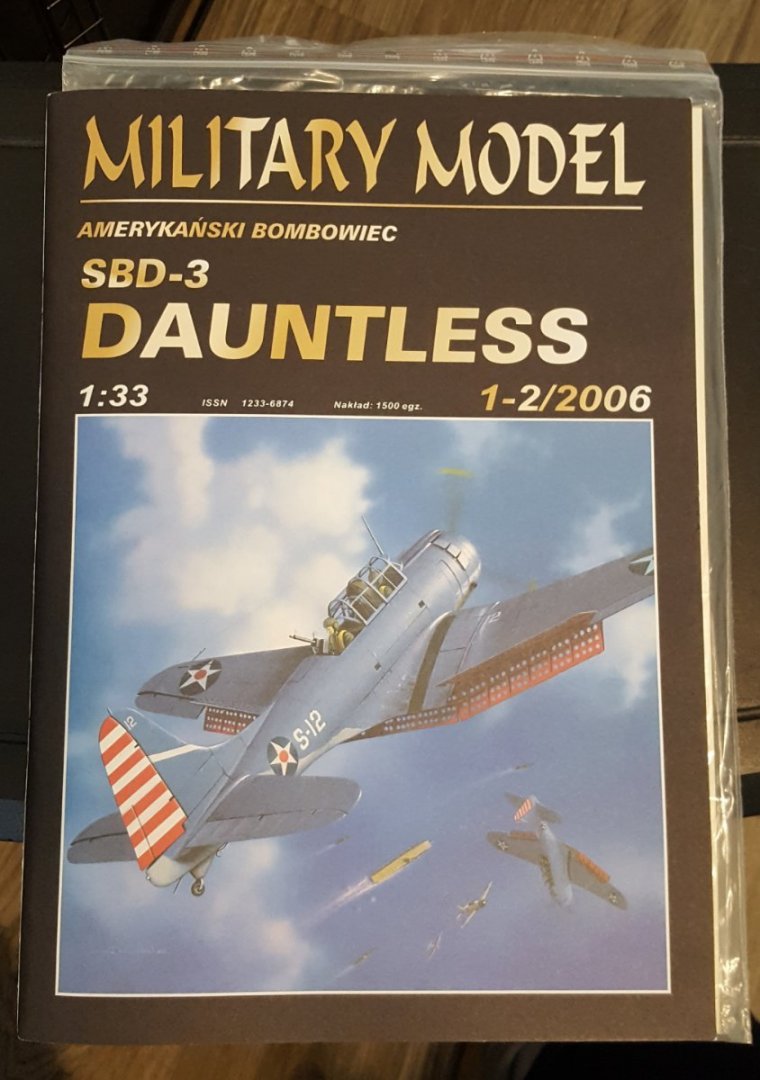
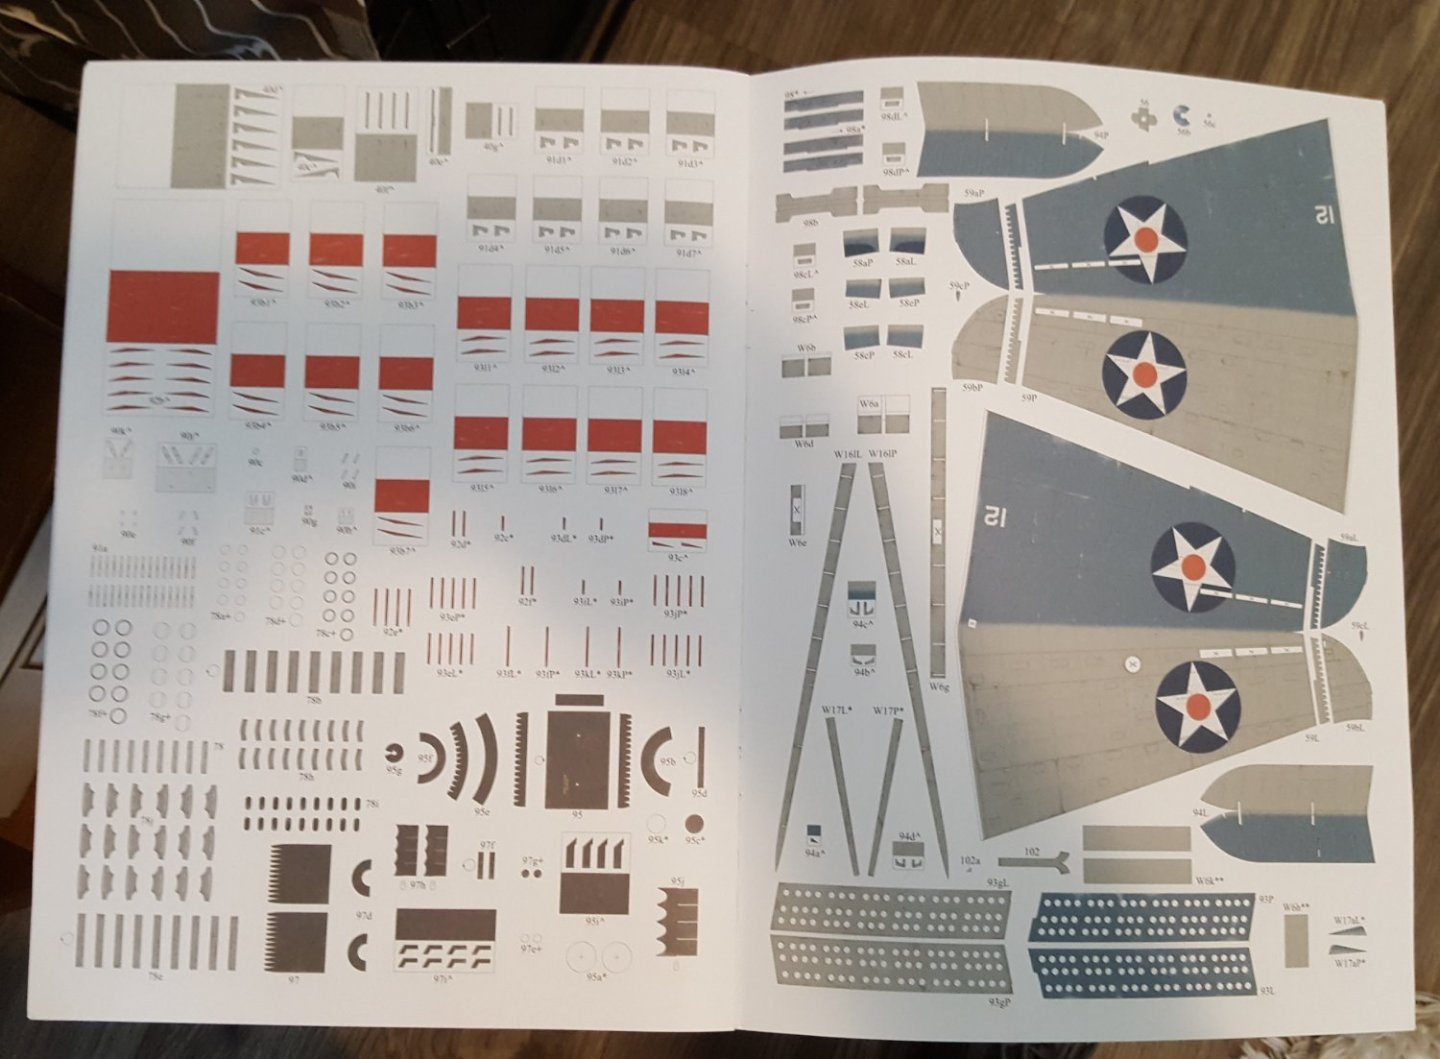
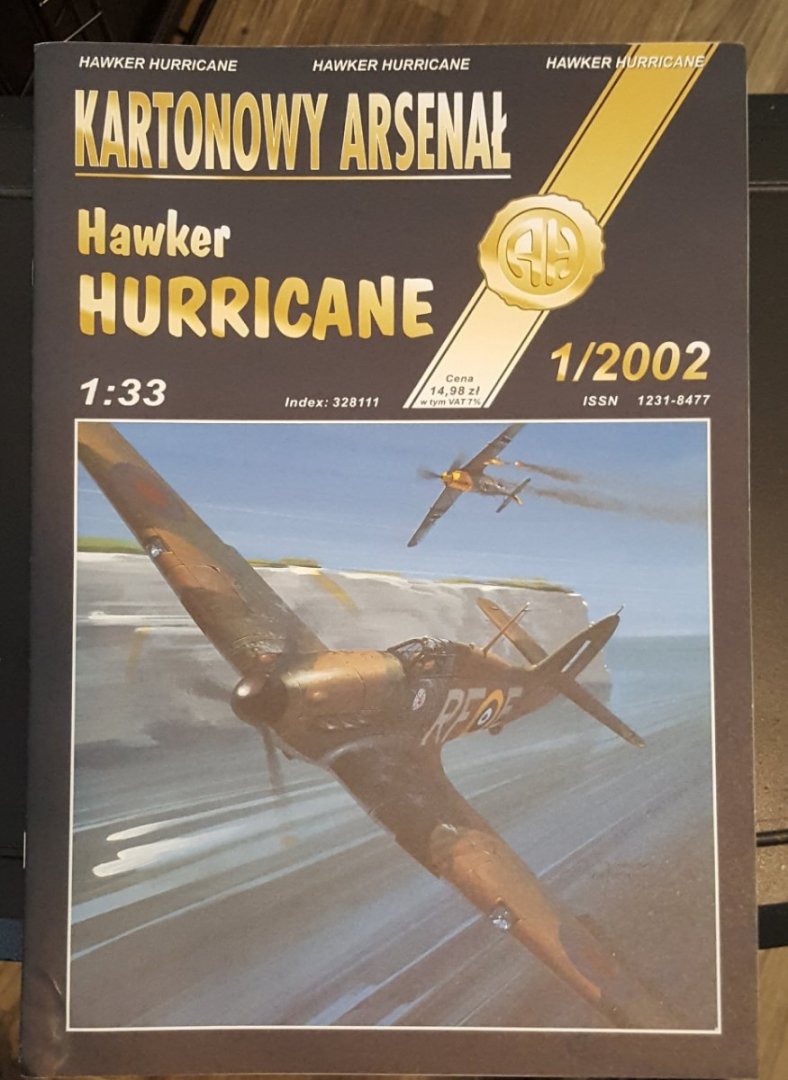
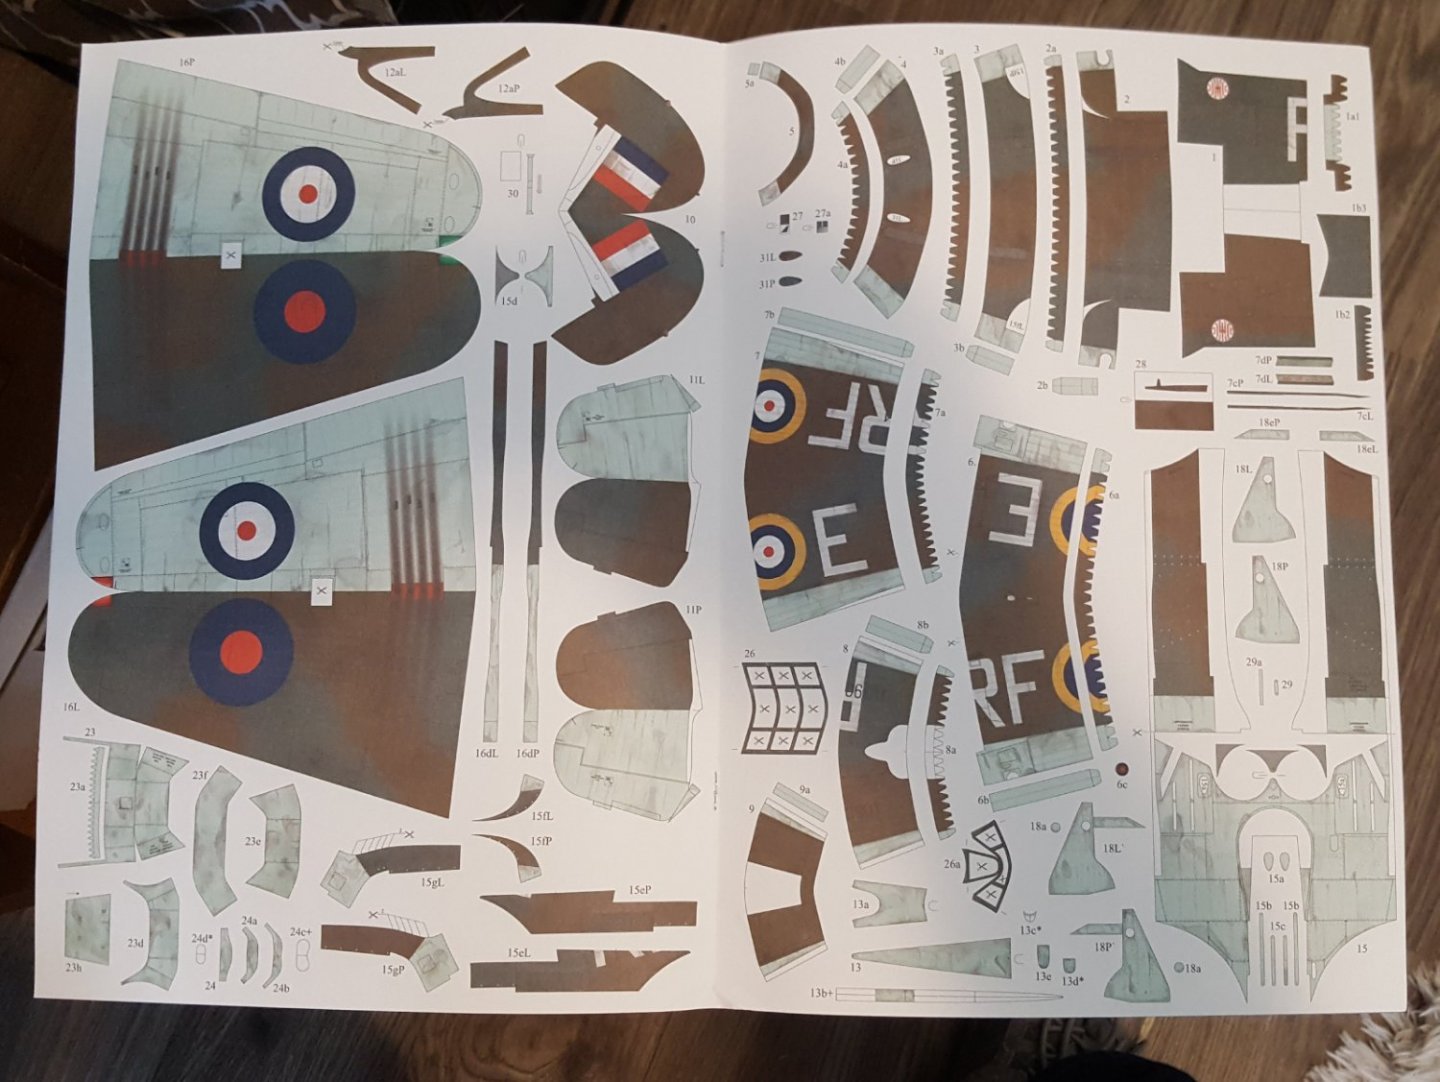
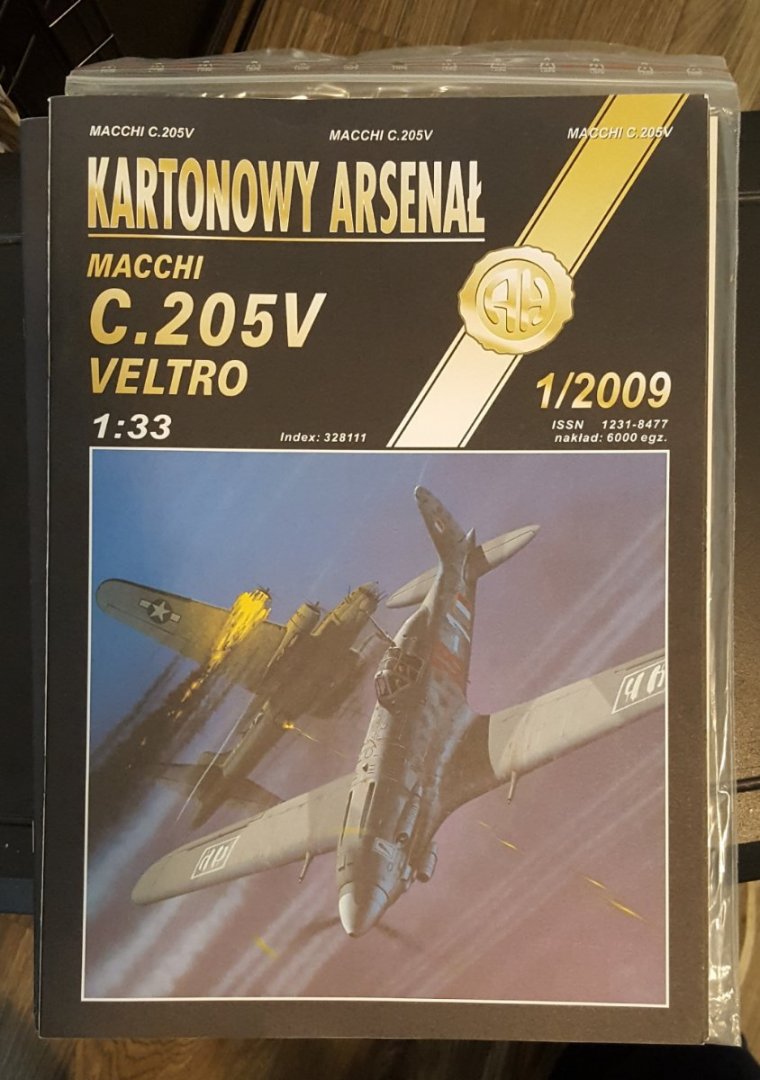
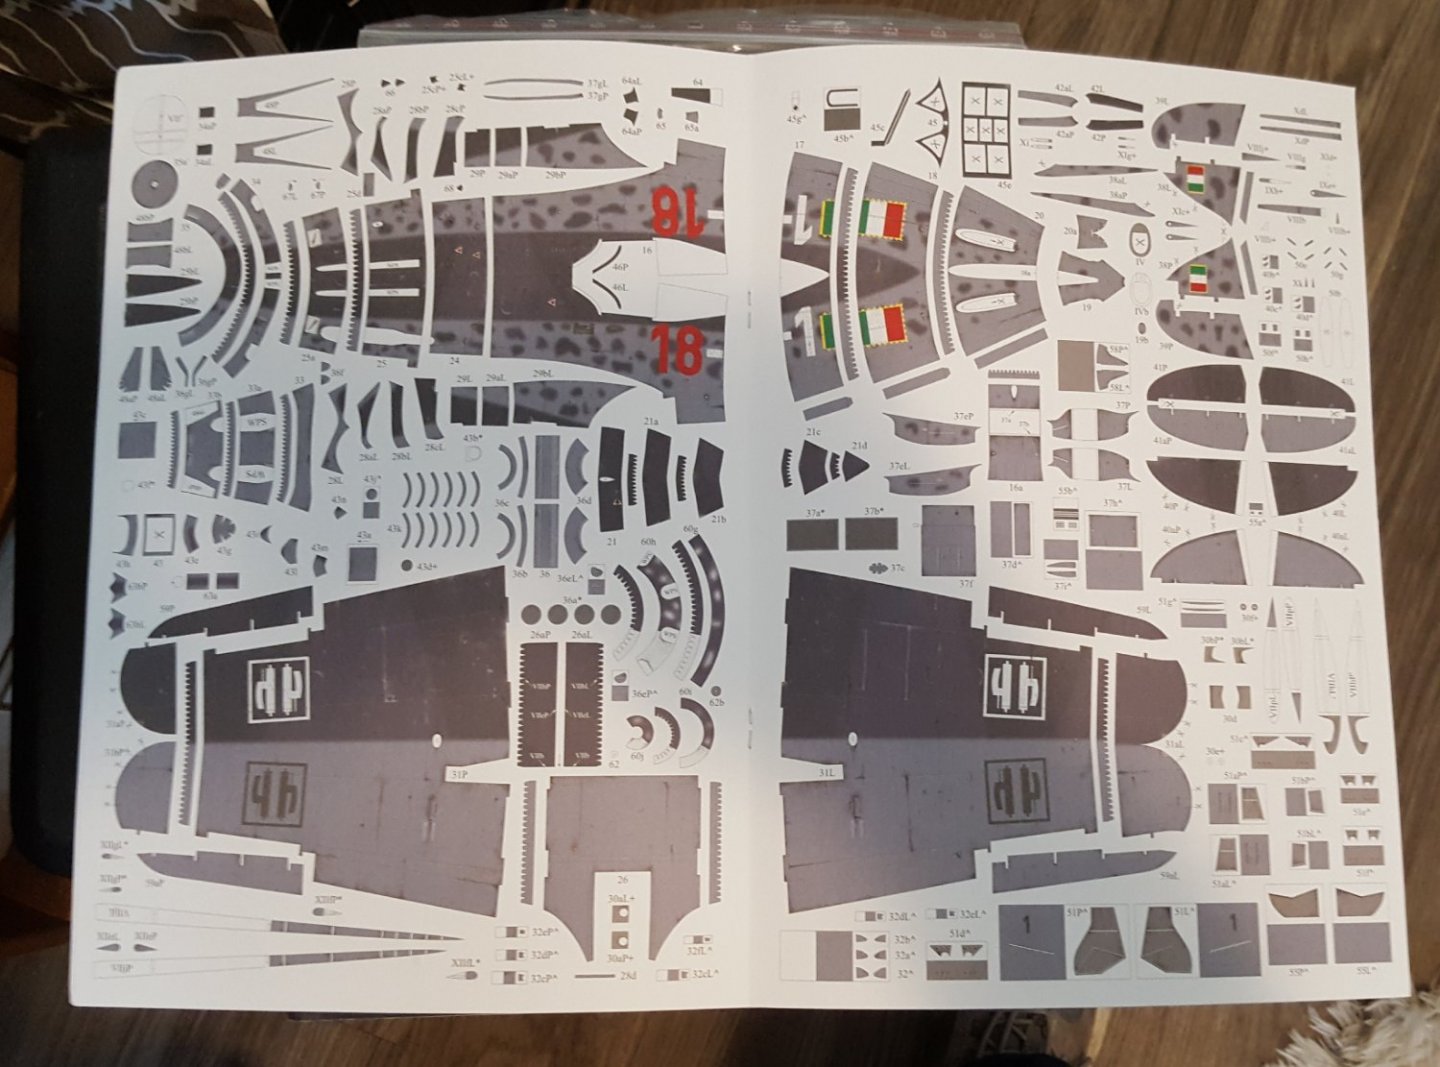
Interlude Well, since I have returned to work, the pace of this build has slowed waaaaay down. Last night, I got an aileron done, as in one, singular. Hopefully I will get the other one done tonight. They are not easy, as they are triangular in cross-section and tapered along their length. In the meantime, my anxiously awaited package arrived today, containing four more issues of card modeling goodness from the estate sale at Paper Modelers. Let's see what came! First, there are three kits from Halinski, whoo-hoo! The first is a 2002 kit of a Hawker Hurricane Mk I. This kit is one that was published during Halinski's transitional phase, before they had fully morphed into the Tamiya of card models. It's a great kit, just not as complex as later models, e.g. it doesn't have separate control surfaces. I would consider it to be similar in many regards to kits published by Kartonowa Kolekcja. I also received the molded canopy for this kit. Then we have the Halinski Macchi C.205 Veltro, a plane with great lines. This kit is similar in complexity to the Spit. No frames for this kit -- in the photo, it just happens to be sitting atop another kit that has them. And last from Halinski, the Douglas SBD-3 Dauntless. As I said, this kit is a beast. It has nine pages of printed parts and a whopping eleven pages of diagrams -- not for the faint of heart! Happily, I got the laser-cut frames with this kit as well. And finally, one kit from Orlik, a Dewoitine D.520 in Vichy markings, along with the kit's laser-cut frames. This is the same publisher that produced my recently completed Ki-43 Oscar, so it is similar in complexity, though not weathered. Curiously, the kit has optional separate control surfaces, but one of them has a handwritten note next to it that says "corrected part in MS406"; since I don't have the Orlik Morane-Saulnier MS.406 kit, it looks like I'll be building this one without the optional parts. Even without them, this is still a much nicer kit than the recently aborted Bloch MB.152. That's it for now, but I still have a little bit of Christmas on the way. I'll make an announcement about that when it arrives. Cheers!


- 130 replies
-
- 16
-
-
Aw, thanks -- it's nice to feel needed! In the meantime, I have added the wings upper surfaces, along with its single box radiator (that particular structure required some staring at diagrams, help from images online, and meditation). I will upload a picture once I get the wing's various other bits added.
- 130 replies
-
- 11
-
-
I'd like to see one of our accomplished weathering artists, such as @FriedClams, get hold of this kit and a set of its deck gear and then really grunge it up. I'm sure these boats were worked very hard.
-
15' Dinghy by Bedford - FINISHED - 1:1 scale
ccoyle replied to Bedford's topic in Non-ship/categorised builds
Argh, John, you are correct! My bad!! But look at all those faux roaches! -
I fixed it for you.
-
15' Dinghy by Bedford - FINISHED - 1:1 scale
ccoyle replied to Bedford's topic in Non-ship/categorised builds
Ha! I have a story about Australian cedar -- the flooring in our last house was made entirely from it. It's beautiful wood, but it had a lot of knots in it -- like a lot of knots! Unfortunately for those of us of a certain age, with the degraded eyesight that comes with it, and who happen to live in the American South, many of those knots were just the right size, shape, and color to imitate nice, plump cockroaches. I never quite got used to it -- especially since real cockroaches would occasionally turn up to reinforce the similarity. -
Hi, Paul. I gave your title a massage to make its intended meaning more evident. When I first saw the original, my thoughts went immediately to my Estes days long, long ago.
-
Congratulations upon the completion of your project -- she looks great!
- 109 replies
-
- 1
-
-
- Finished
- Artesania Latina
- (and 1 more)
-
Great job, Richard! I recommend sites like Fiddlers Green and free downloaded models for first projects -- at least there is no pain to one's wallet if the model gets boogered. I built plenty of simple, free kits before I ventured into more complex kits. In fact, one of my first airplanes was a Fiddlers Green Piper Cub. Cheers! P.S. I removed the tags from your post, because tagging is not allowed in the non-ship area. Otherwise, hits from this area will show up in searches for ship-related topics.
-
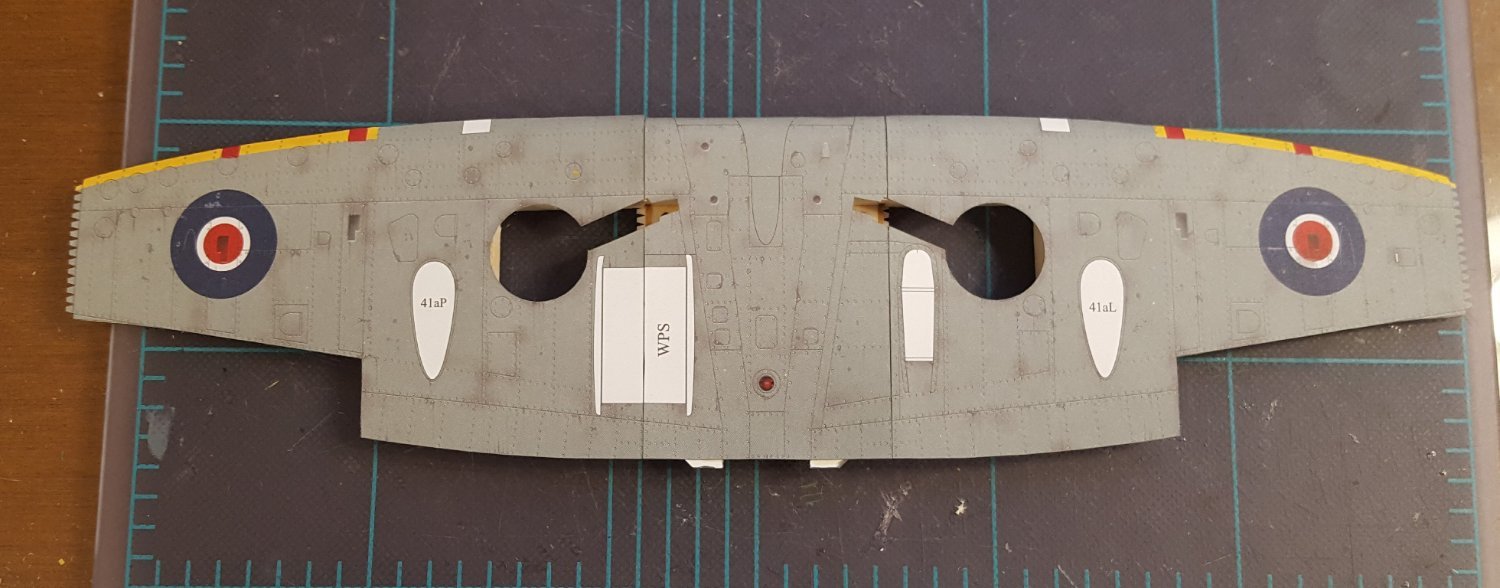
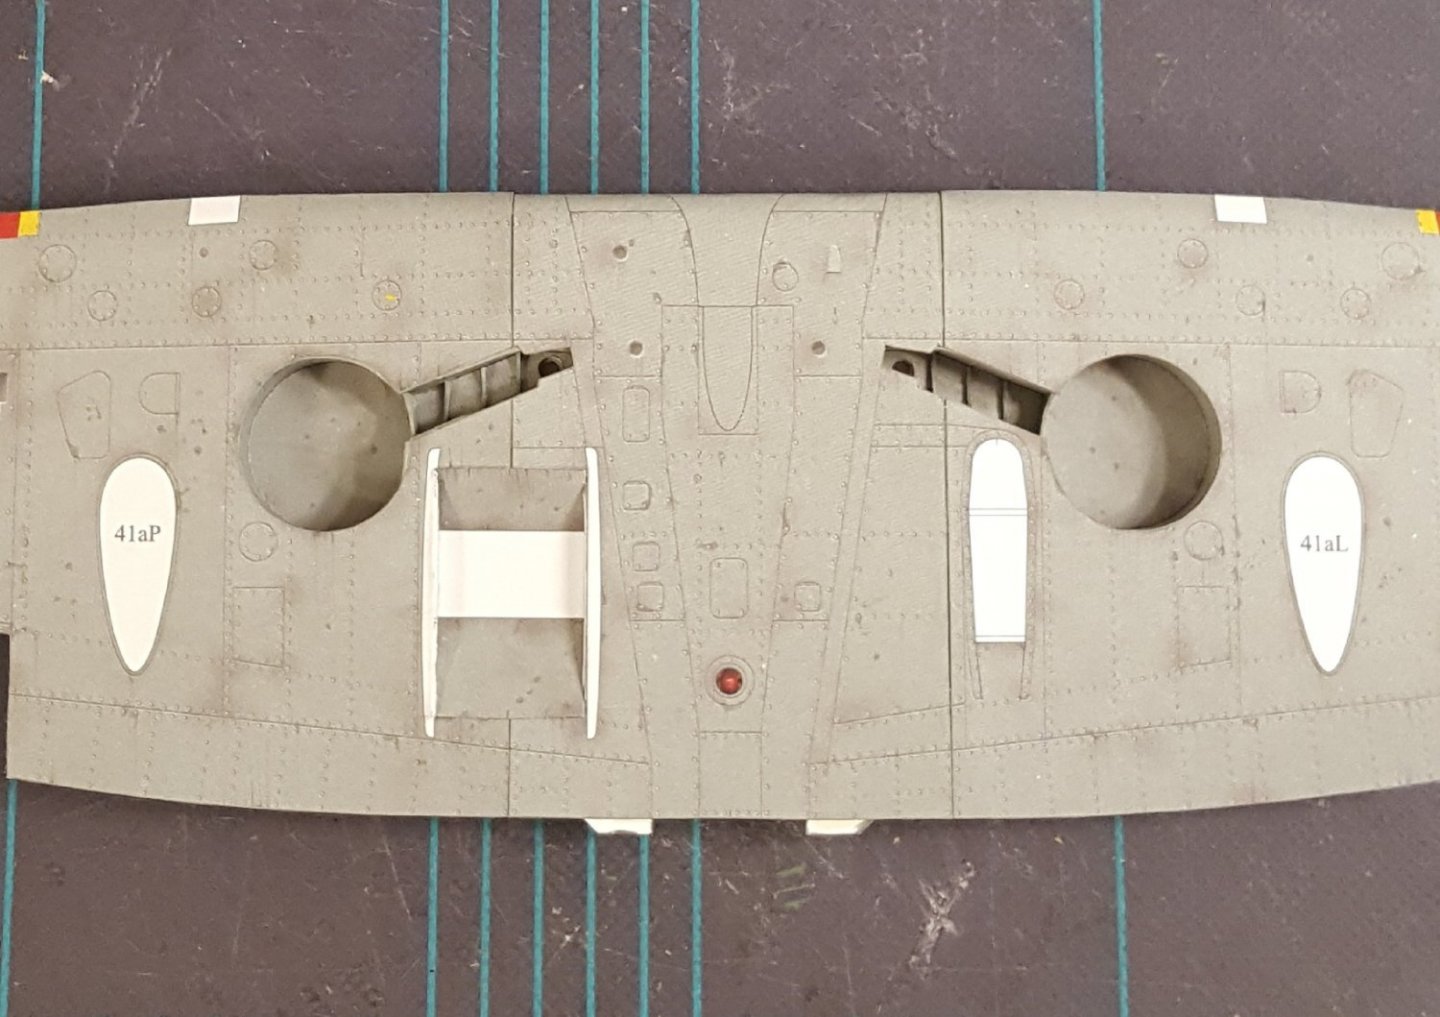
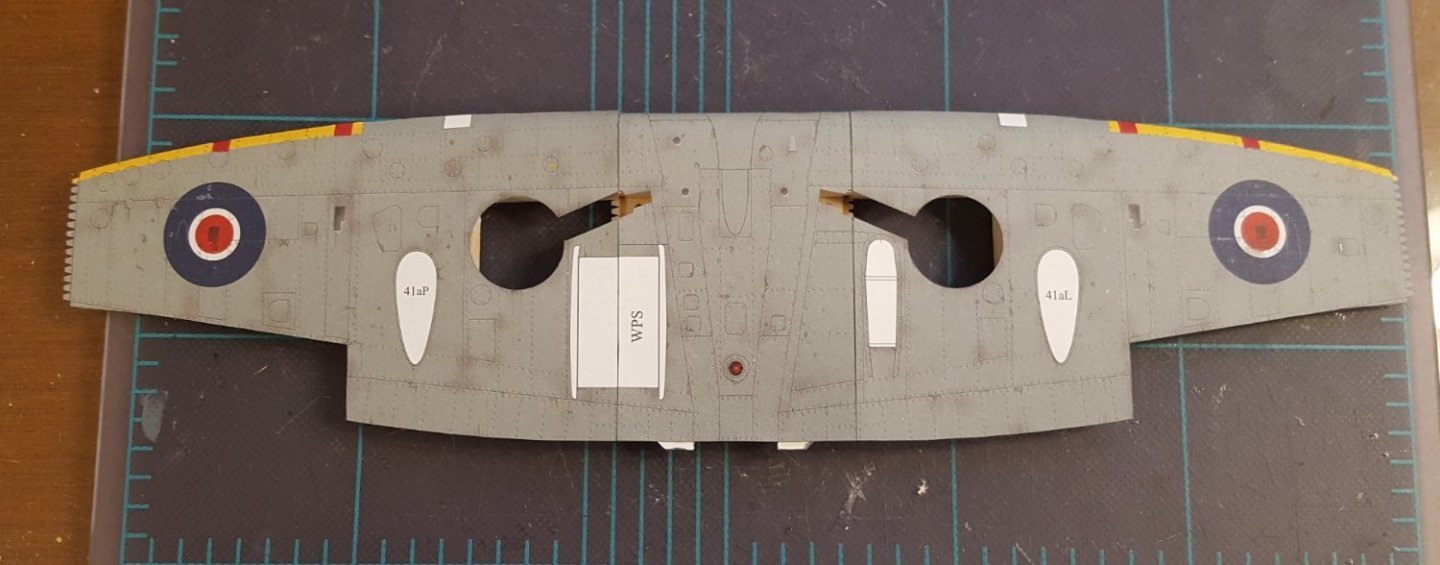
Ch. 19 Wing, Pt. III Wheel wells have been added, along with part of the wing radiator. Next up will be the wing's dorsal surfaces -- but I have to go back to work tomorrow after two weeks off for Christmas, so construction will not proceed as quickly. 😟
- 130 replies
-
- 16
-
-
I saw a dapping tool set on your bench. I just got a set for Christmas and use it for card modeling. It is quite handy for a number of tasks.
-
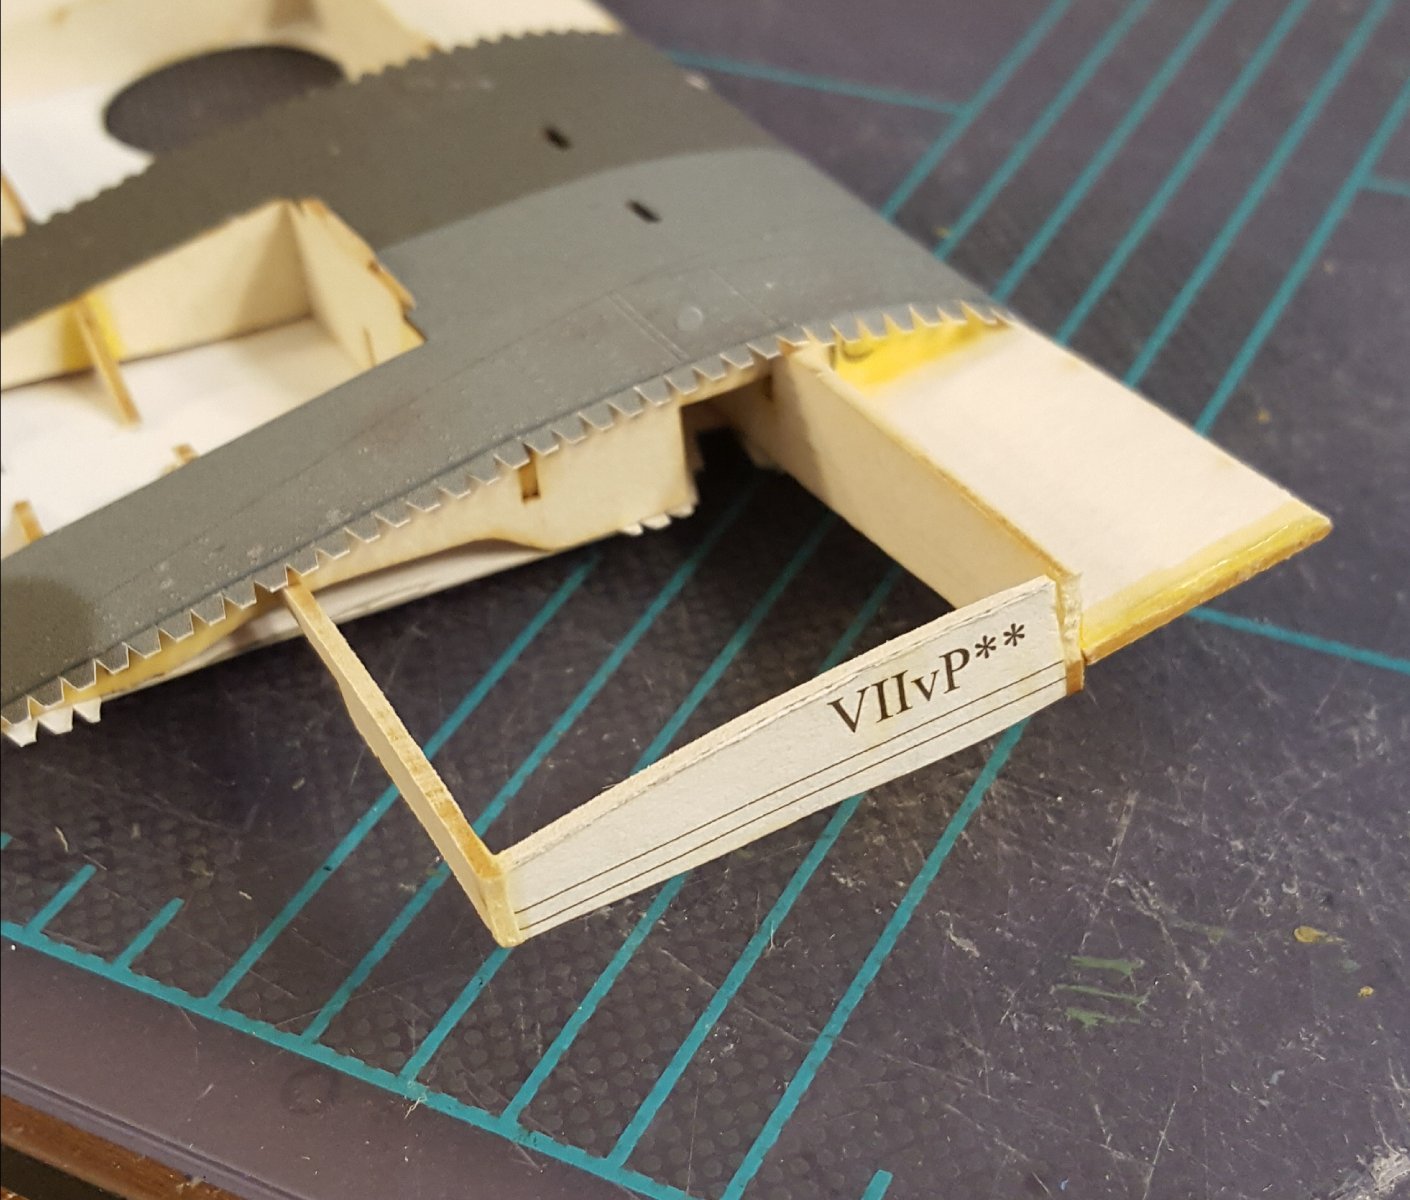
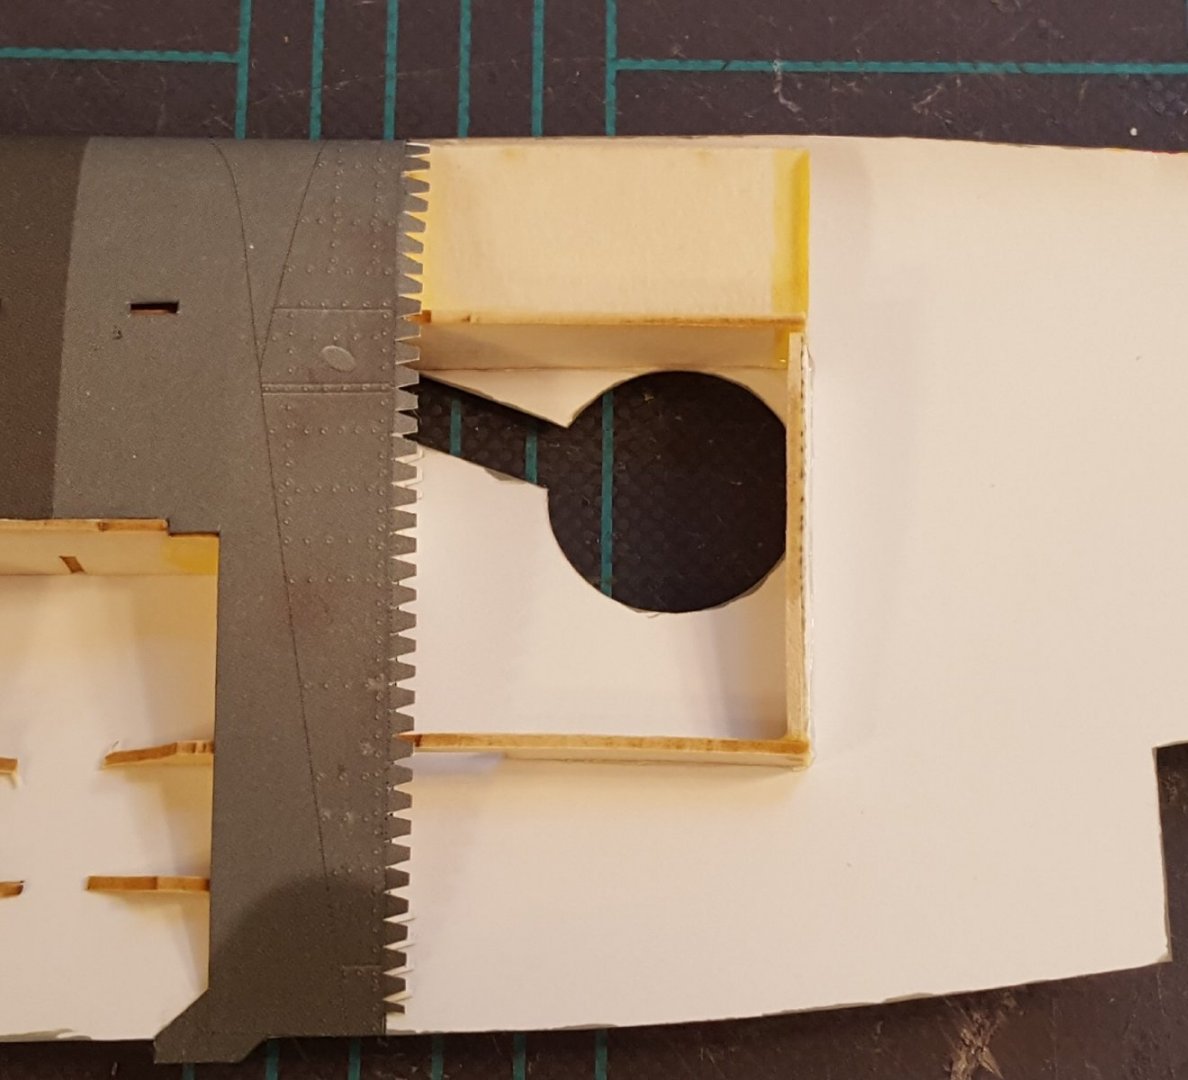
Determining where to cut wasn't too difficult. Only the framing that contained the aileron cut-out needed to be shifted, and the spot I selected required cutting the least amount of material. The frames were rejoined as a butt joint between the new stringer and the existing stringer. I took another picture, just for you. 🙂 BTW, the misalignment was likely just some sloppy workmanship.
- 130 replies
-
- 13
-
-
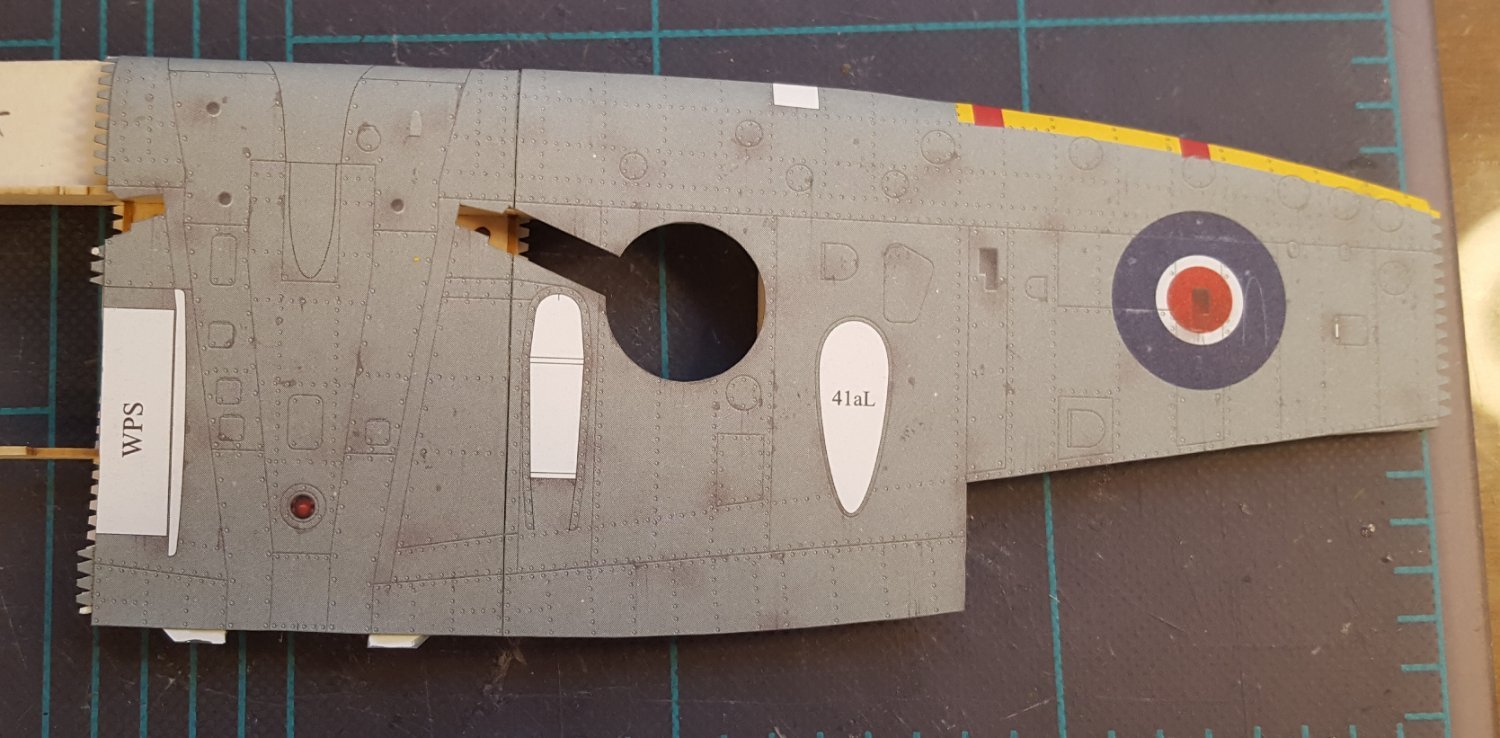
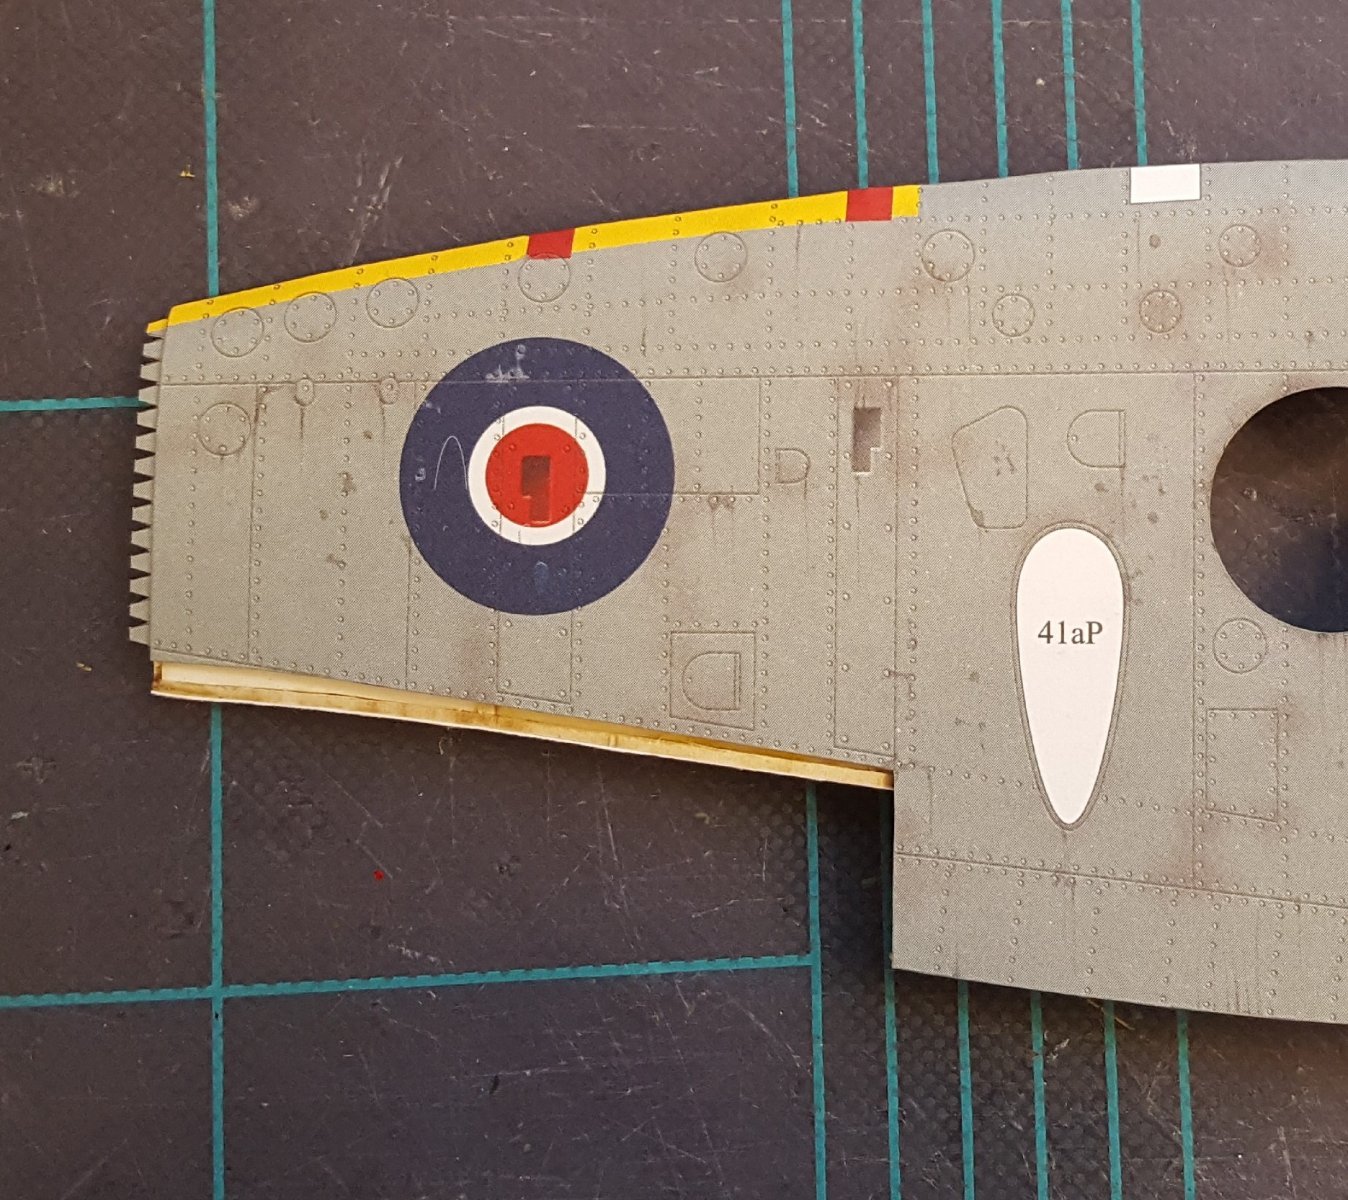
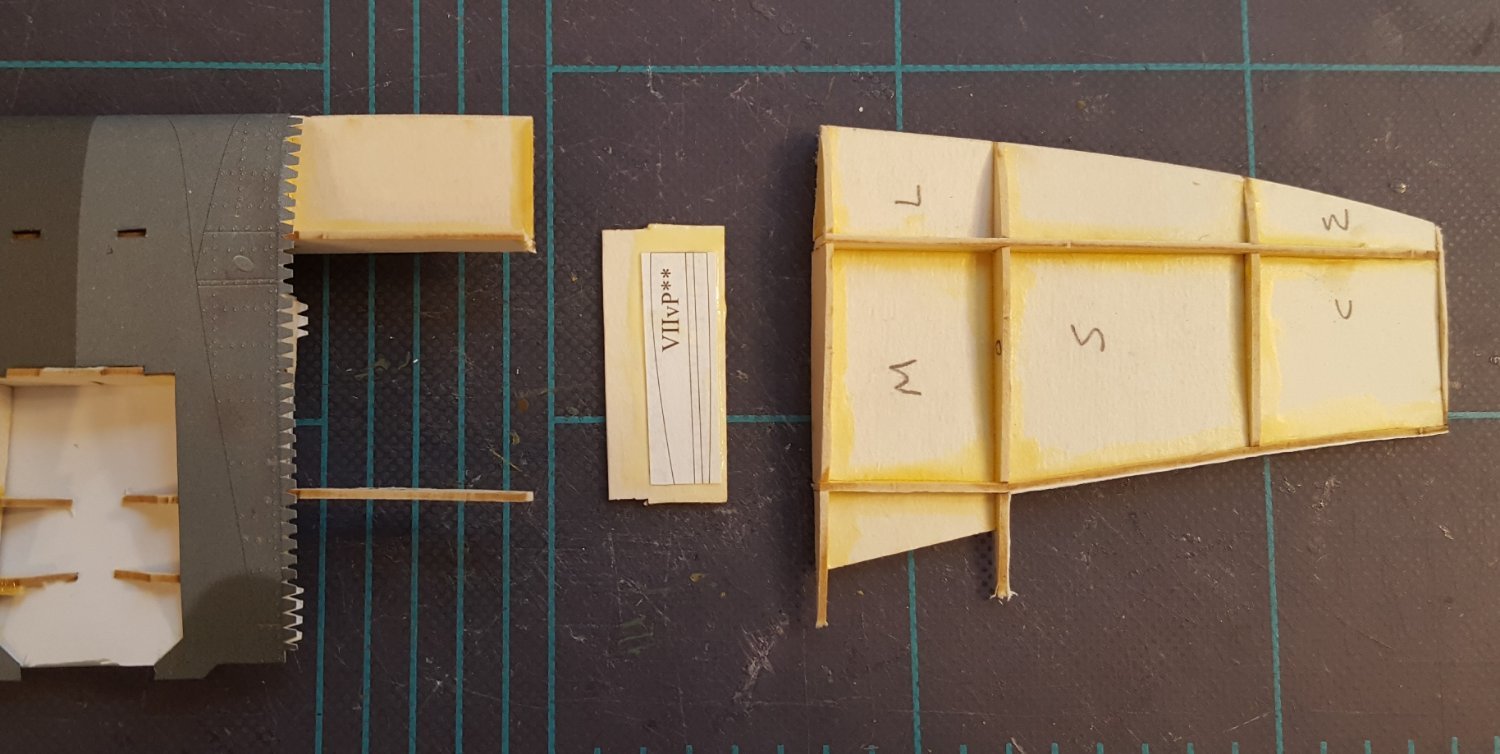
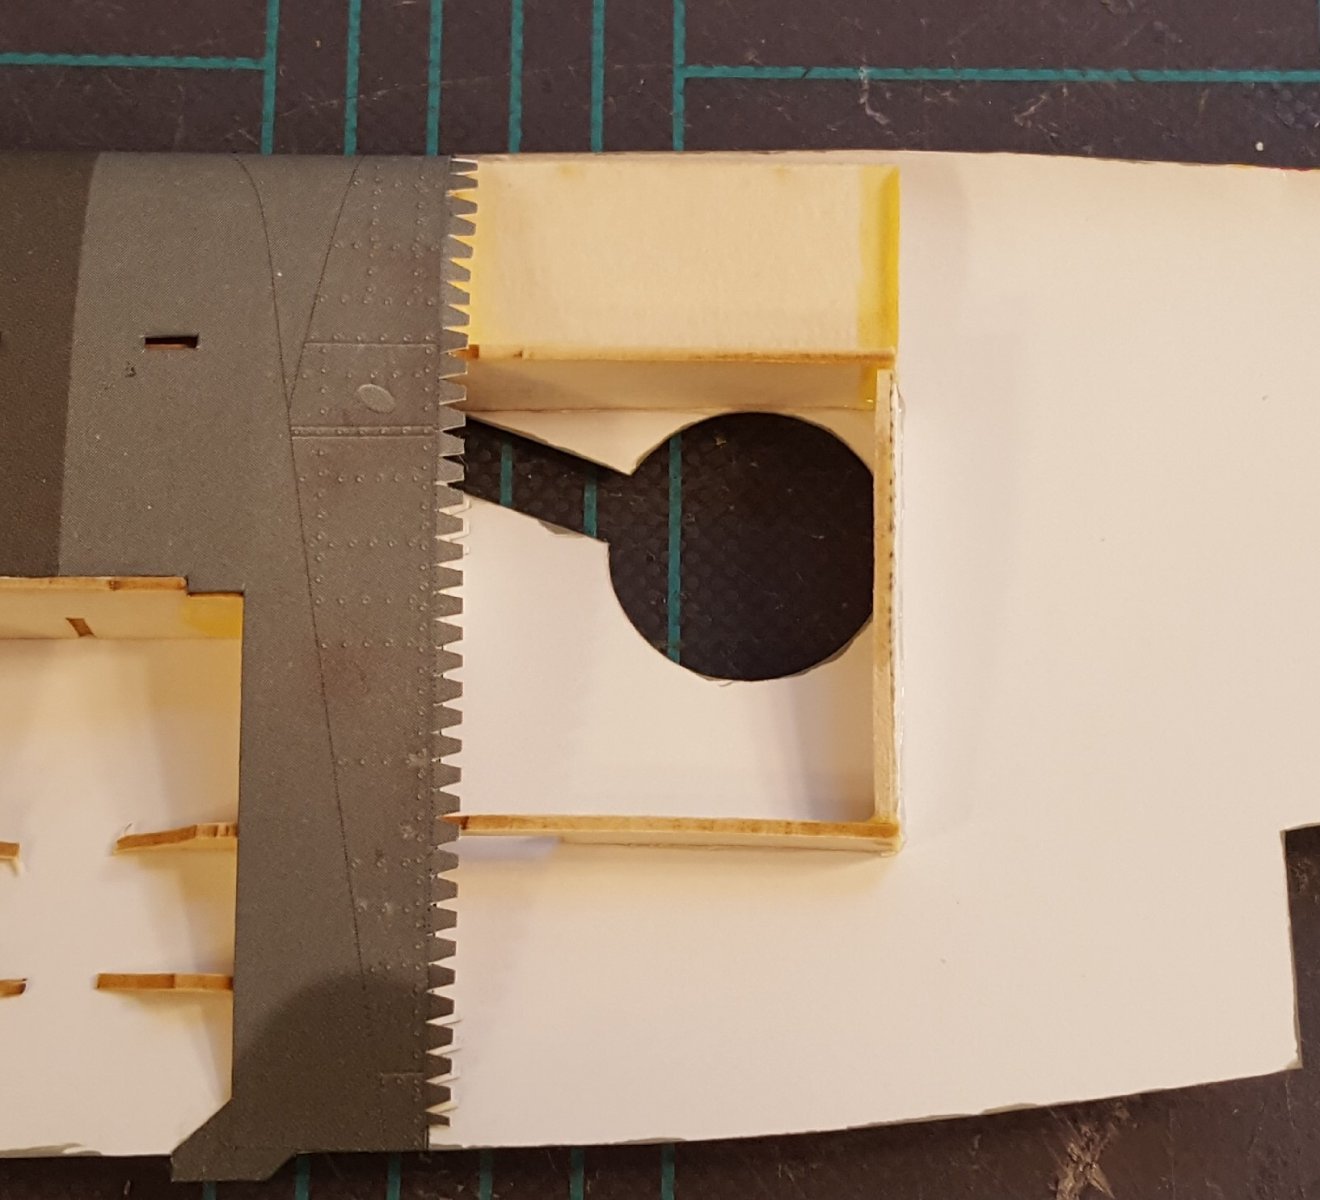
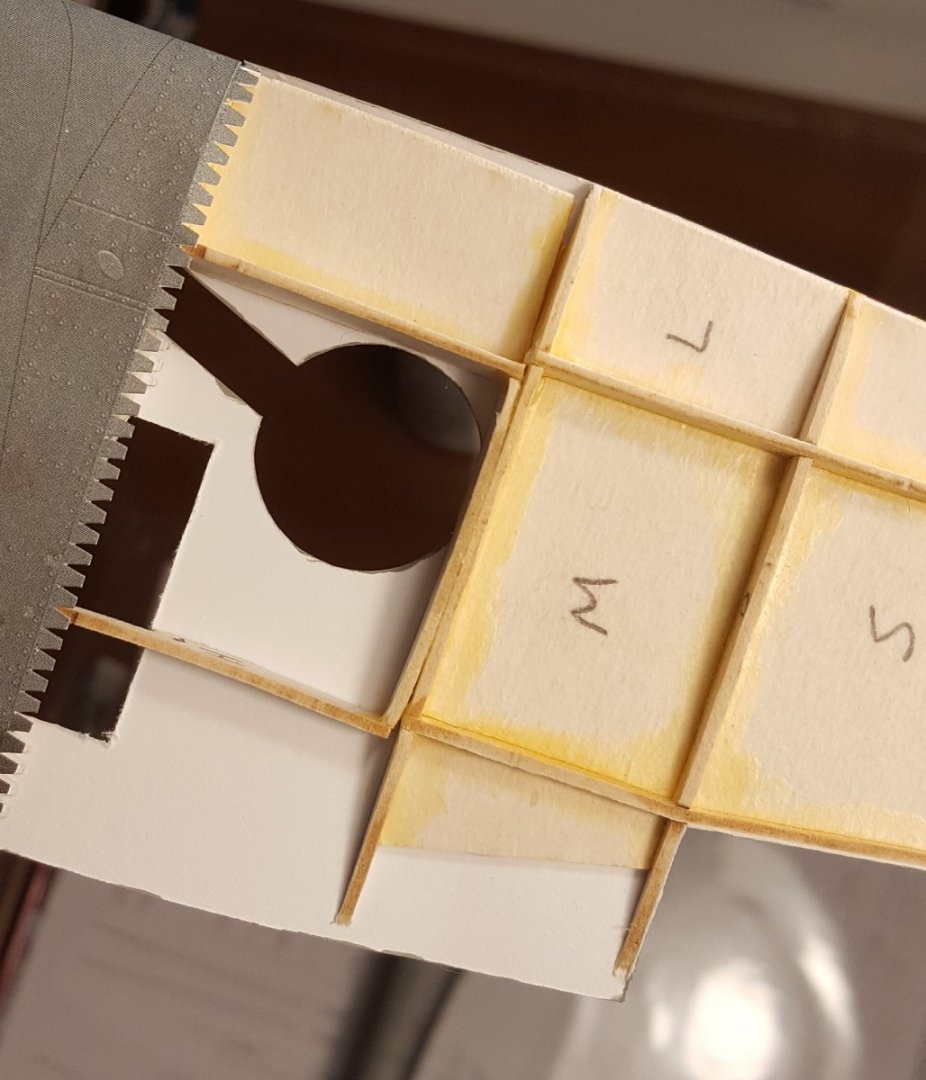
Ch. 18 Wing, Pt. II -- Drama! Sort of. So, skinning the wing begins with the center section -- no difficulties there. Neither were there any problems with the port-side skin (on the right in the photo, cuz we're looking at the bottom). Note the cut-out for the aileron -- all is in order. Now on to the starboard skin. First, a dry fit -- again, look at the aileron cut-out. Wow. That's off -- by a lot. What can be done about this? In this instance, what's required is . . . SURGERY! We start by slicing the wing in half. 😵 Don't worry -- this will be fixed. One nice thing about using laser-cut frames is that the printed templates for frames don't get used. That means we can use the printed template and a scrap piece of 1 mm beer mat to make a new piece to perfectly fit the gap created when the wing was cut. After gluing that piece in and allowing it to dry, we attach the skin. With the skin in place, we can determine the new position for the remaining frames and glue them in. And here's the result. A small amount of material will need to be removed from the extra piece in order for the wheel well to fit, but other than that the repair has been a success. Onward!


- 130 replies
-
- 15
-
-
In instances like these, it is helpful to think of something called "scale viewing distance." When a model is viewed from a few feet away, it is like looking at the original from a great distance. From such distances, rigging always appears very fine -- more like a spider's web than a macrame pot hanger. So, if your only options are either a bit larger or a bit smaller, I'd go smaller.
-
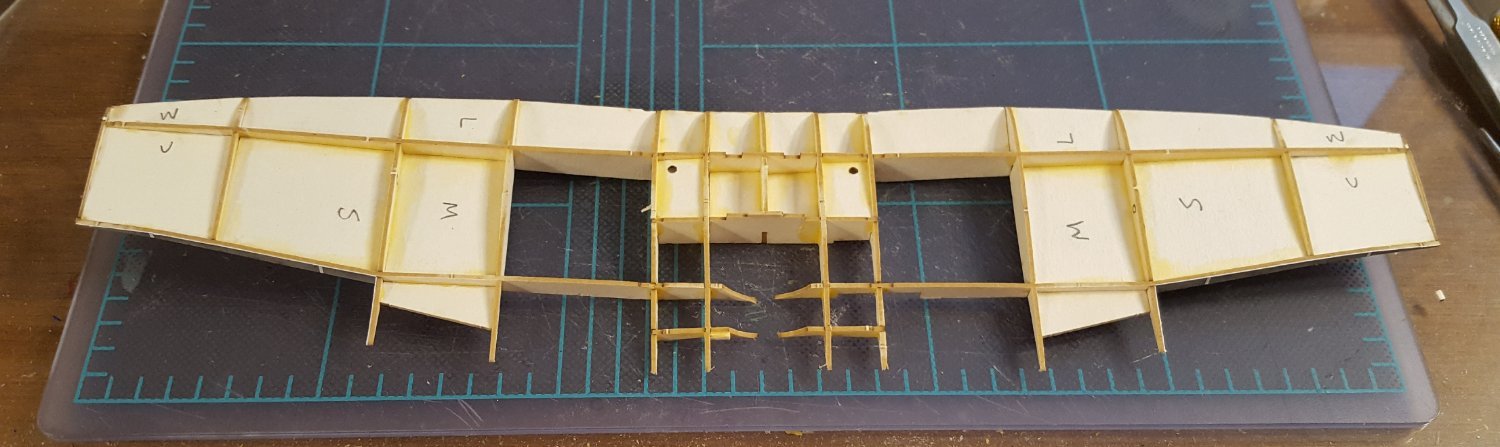
Ch. 17 Wing, Pt. I Whew -- 26 pieces in the framing! Actually, there are 30 pieces, because two of the pieces had their interlocking slots cut out from the bottom when they were designed to be cut out from the top. 😮 So I had to cut each into three separate pieces to glue them in correctly. The framework is pretty solid now, though early on in the construction sequence it was pretty flimsy, such that I accidentally broke two pieces. 🙄 But PVA glue works wonders in such instances.

- 130 replies
-
- 14
-
-
Welcome! There is no one format for build logs. If you have enough photos for a 'condensed' log, then post away. If you think it better to just post pictures of the finished model, then you can add it to the gallery. Cheers!
-
For comparison, I checked Halinski's F4F-3 Wildcat kit published in 1998. The horizontal stabilizers + elevators in that kit consist of only eight parts total.