ccoyle
-
Posts
10,546 -
Joined
-
Last visited
Content Type
Profiles
Forums
Gallery
Events
Everything posted by ccoyle
-
 I quit now. But seriously, that is amazing work!
 -
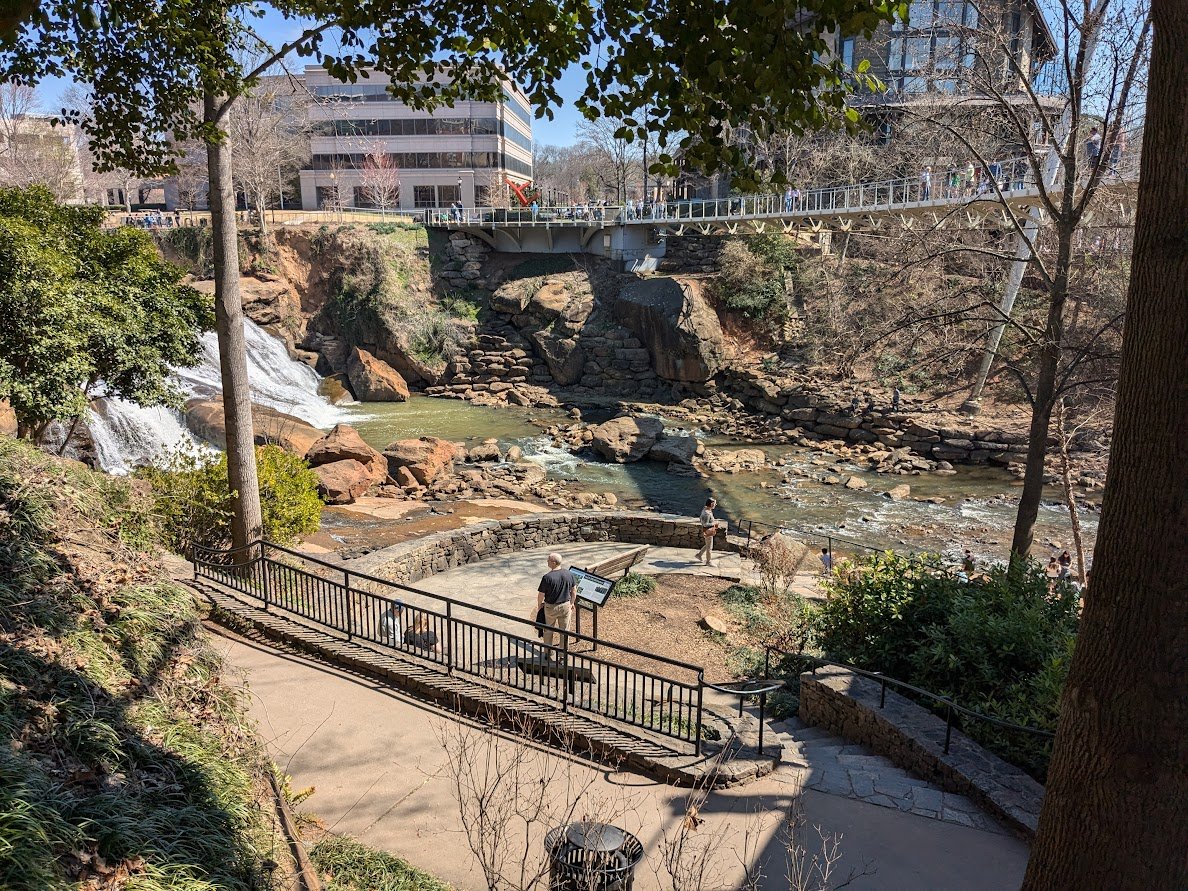
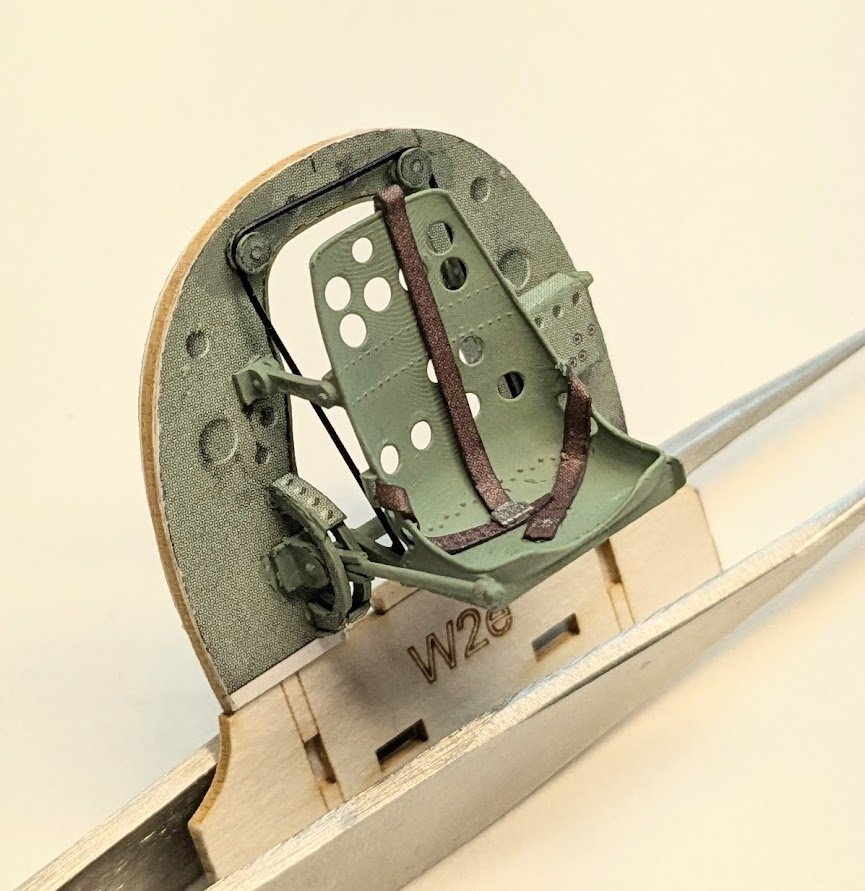
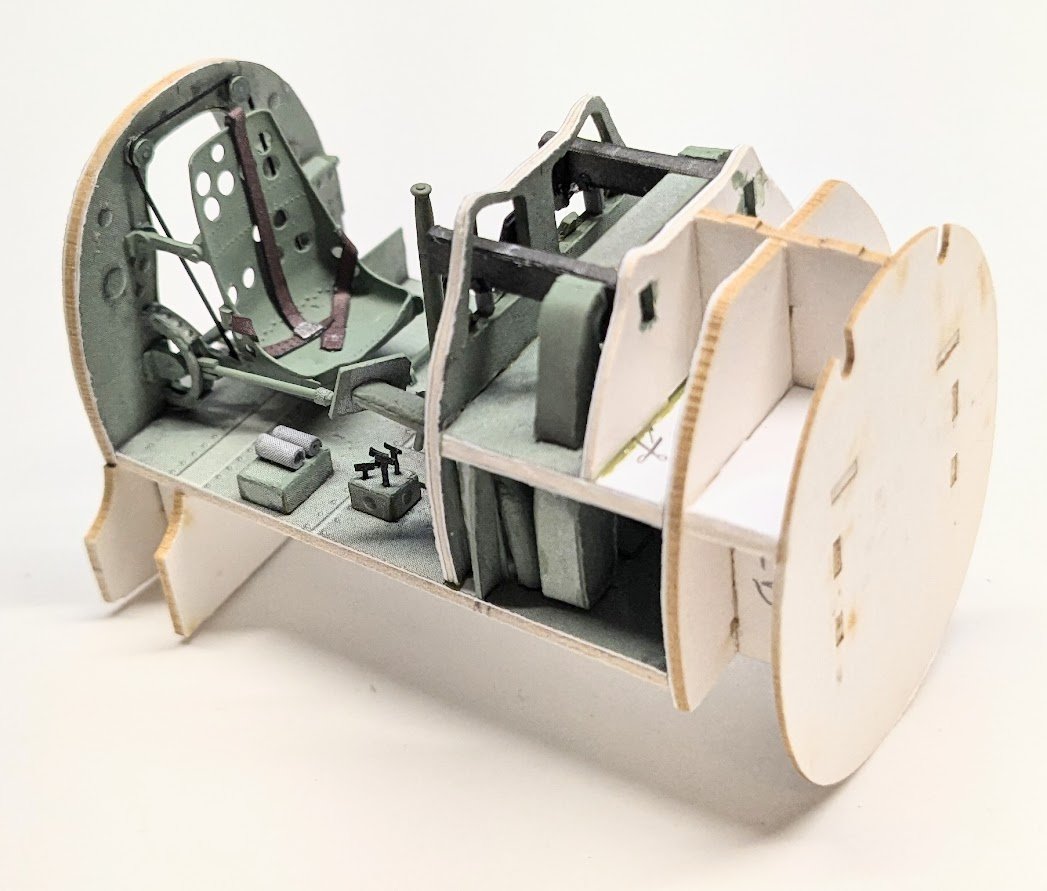
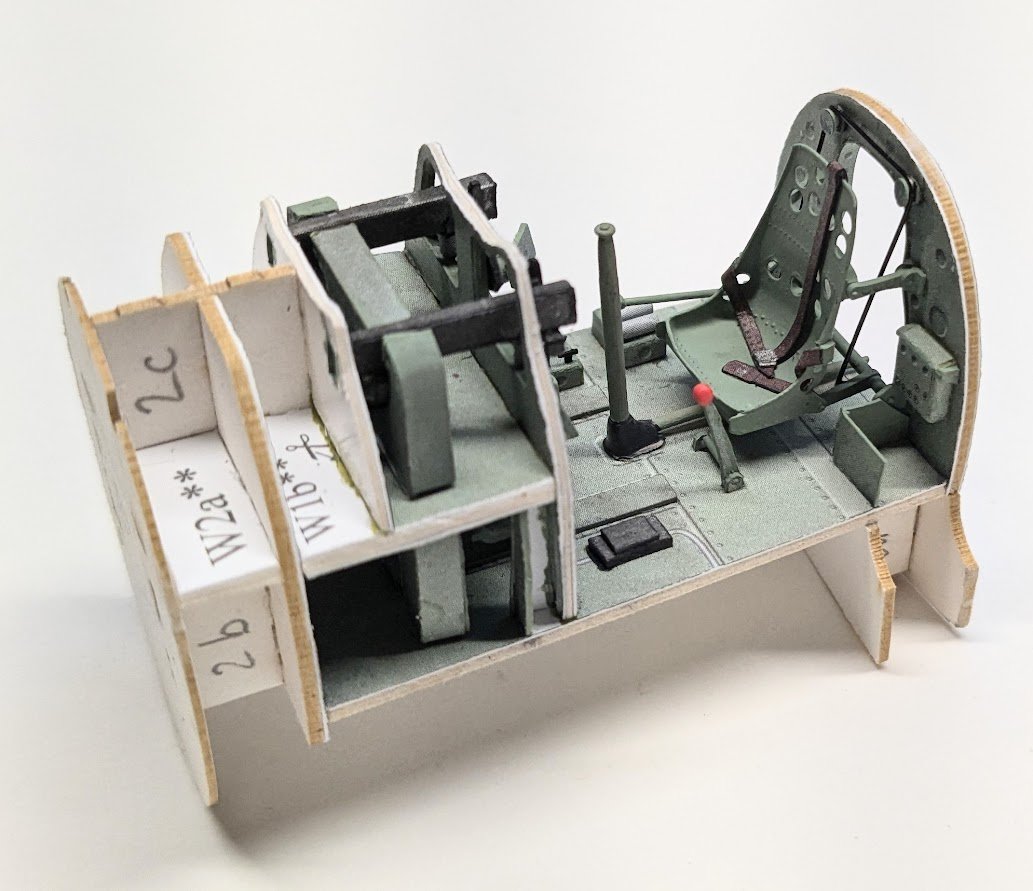
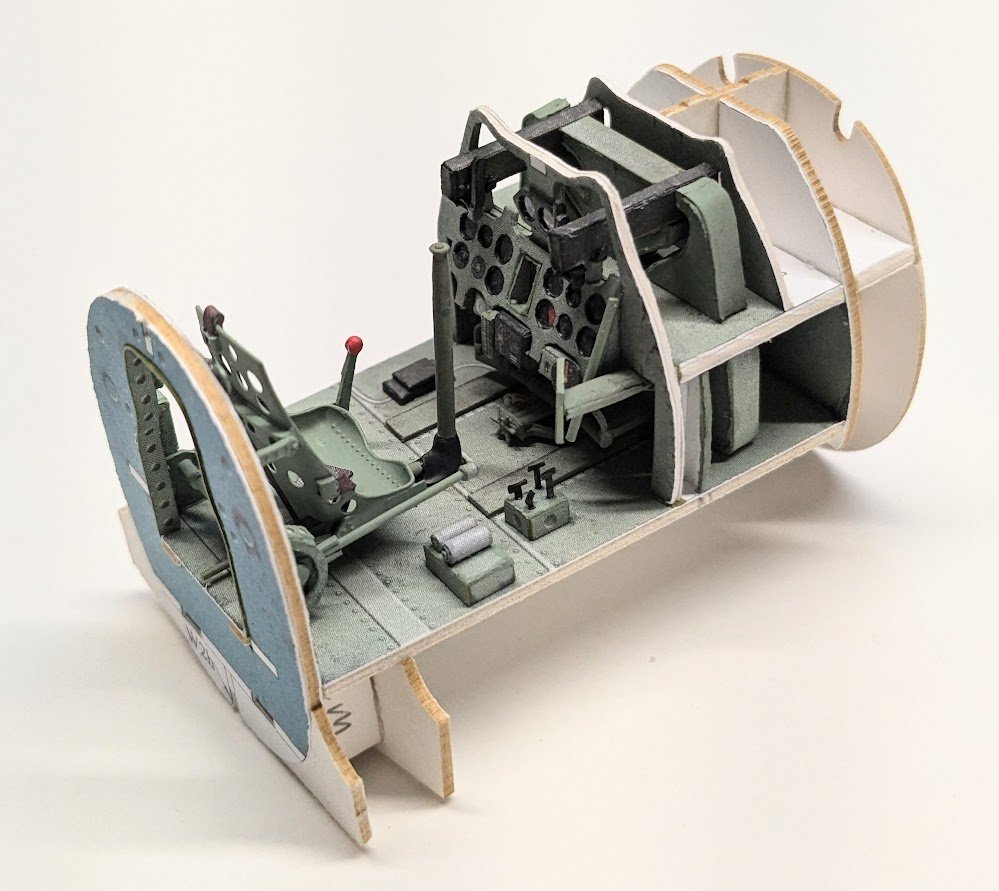
Okay, we reached a milestone today. But first, here's a picture for all of you who might still be firmly in the grasp of Old Man Winter. It was sunny and 72 here in Greenville this morning -- perfect weather for taking the dog out for a stroll through Falls Park. I have to enjoy this while I can, because in July it won't be perfect weather anymore. 😬 Back to airplanes! First, we finished off the aft bulkhead bits. A few bits remained to be added to the cockpit floor, and then we were able to glue the aft bulkhead to the cockpit structure. Now we can move on to the cockpit walls, which means we only have this many cockpit parts left! 😵💫😢😒 That's it for today!


- 112 replies
-
- 18
-

-

-
Sorry to hear about your decision, Rob, but I can completely understand why you made it. I have a couple of similarly unfinished models sitting on a shelf in my man cave. Hopefully you will not completely give up on the hobby and maybe try something that is more commensurate with your skills? P.S. I have marked your log as 'terminated' rather than 'finished' -- the latter label is reserved for projects that reach completion. There is no shame in the former label, since I suspect that most of us have terminated a build for one reason or another, and even a partially-completed log can be helpful for other modelers. Cheers!
-
You might try your hand at making sails. It is really not so difficult, and the results usually look much better than kit-supplied sails.
-
Welcome aboard! I can't answer your question, because the last plastic ship I worked on was over forty years ago. But we have a couple of of plastic gurus among our members -- look for the word "plastic" in the build log titles and you'll find them. Cheers!
-
Received partially-built Corel Victory -- worth salvaging?
ccoyle replied to SaltyScot's topic in Wood ship model kits
Whoa, how'd that happen? Fixed now! -
Received partially-built Corel Victory -- worth salvaging?
ccoyle replied to SaltyScot's topic in Wood ship model kits
It would probably take as much time to and effort to repair that model as to start over with a fresh kit. P.S. Since you put up a question for discussion, I have moved your post to the kit discussions area. -
Best Marine Salvage Airbags for Lifting Sunken Vessels?
ccoyle replied to wildtmpckjzg's topic in Nautical/Naval History
This is quite possibly one of the most unusual inquiries we've ever fielded here. -
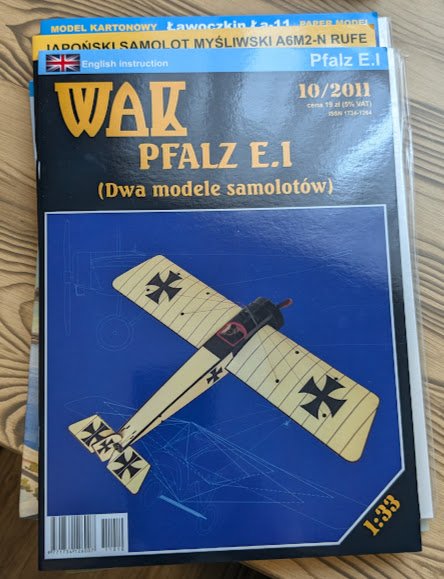
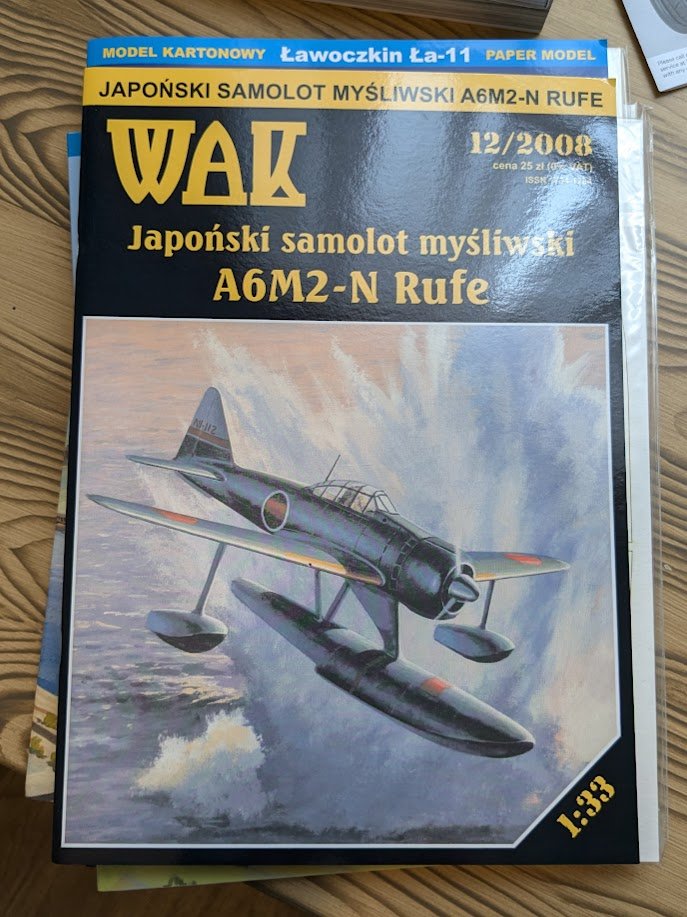
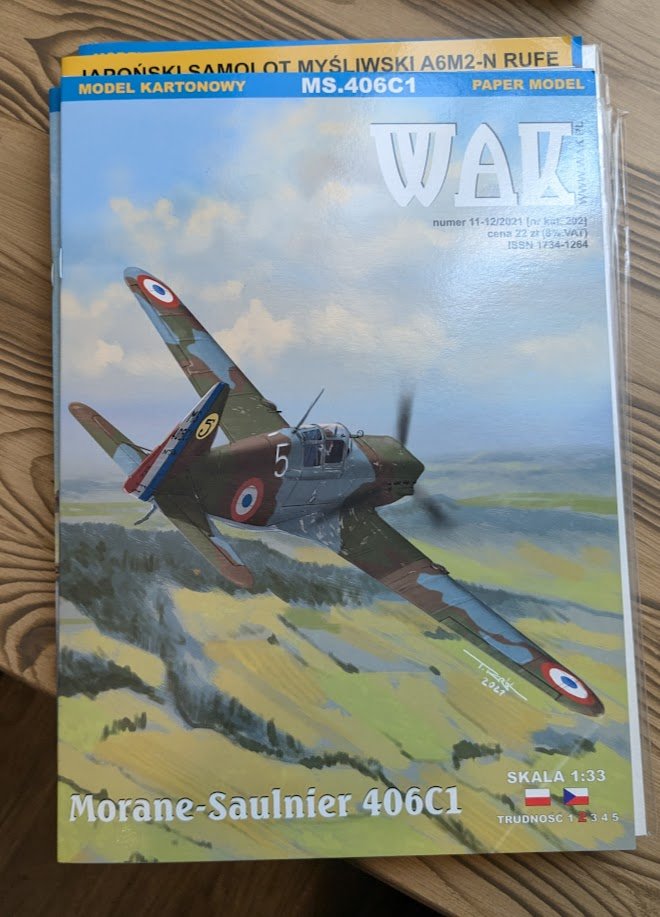
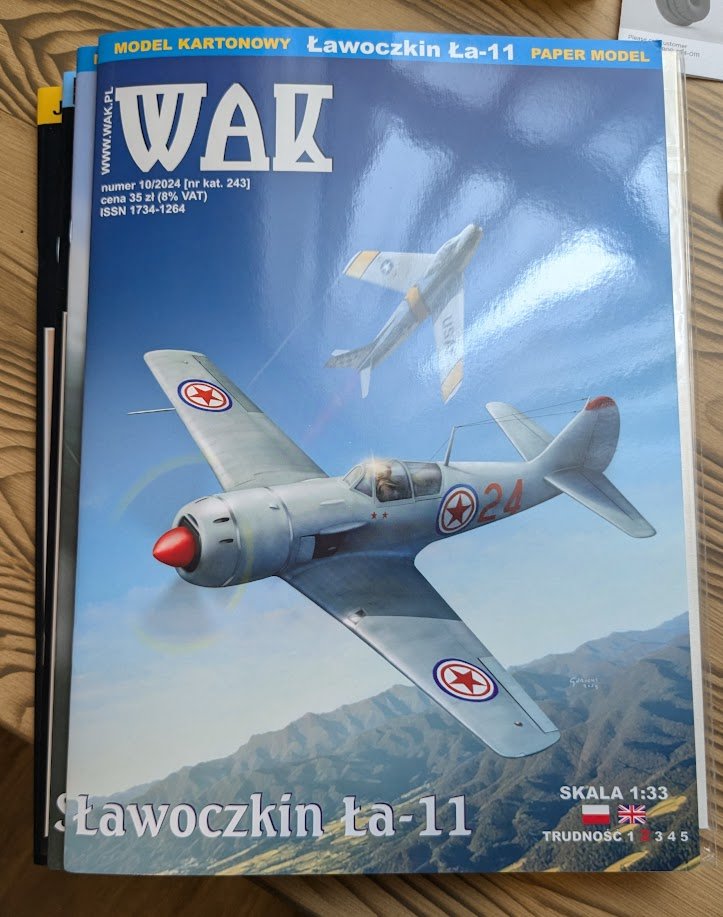
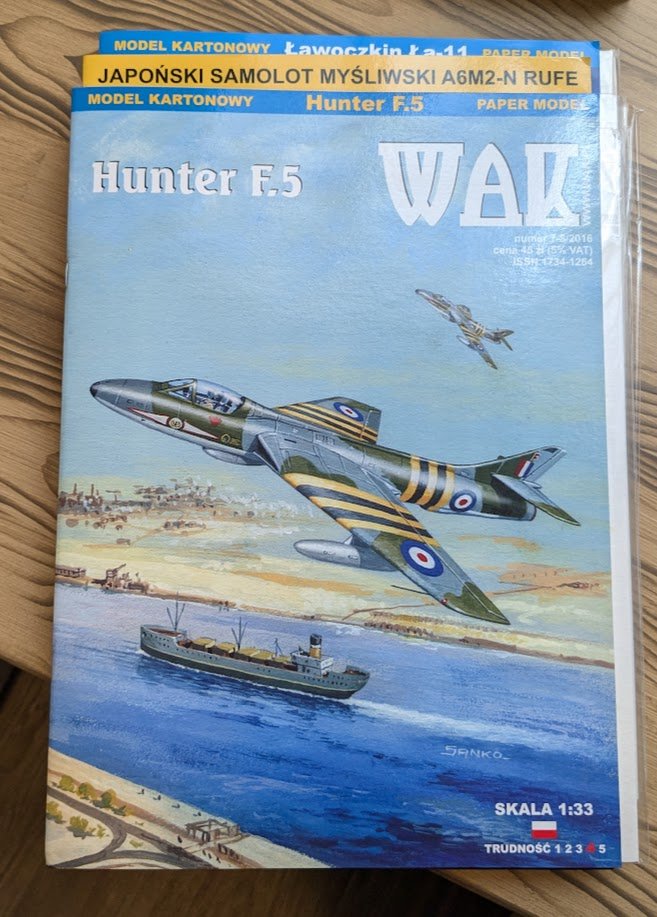
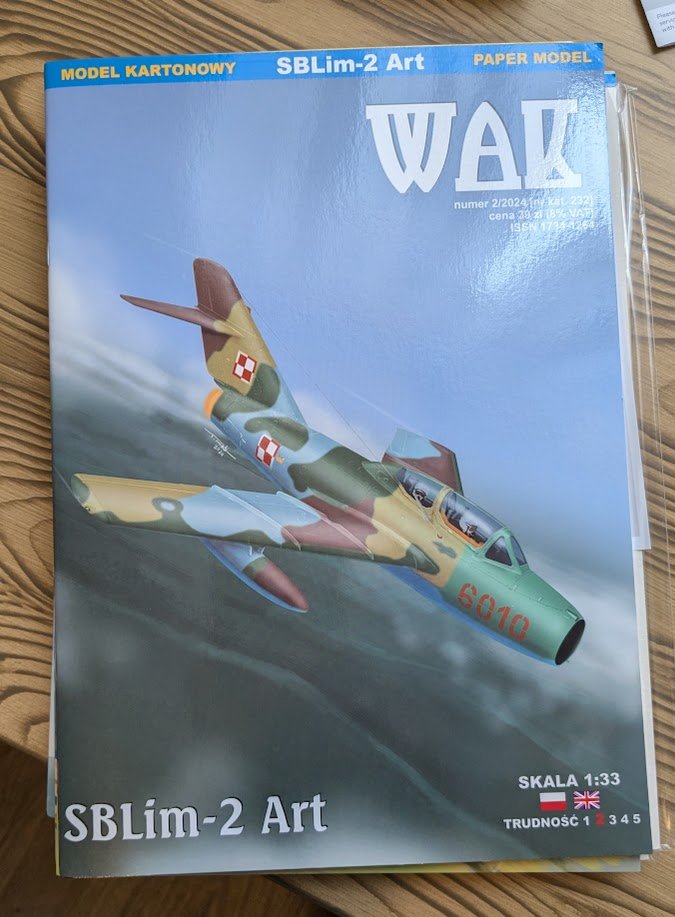
I subscribe to multiple FB groups operated by card model publishers, and that is often how I find out about the latest sales. WAK recently ran a 20% off promotion, so I picked up the following goodies: Pfalz's version of an Eindecker. This kit is the work of a designer I've not run into before, but the kit bears many striking similarities to the work of Kartonowa Kolekcja's Pawel Mistewicz. I wonder if he collaborated? The first floatplane fighter in my collection. A beautiful kit by Lukasz Fuczek. The ugliest front-line fighter fielded in large numbers by any of WW2's major combatants. The M.S. 406 is so ugly that I long resisted purchasing one, but I figured I should go ahead and complete the set since I already have an MB.152, a D.520, and a Hawk 75 in the stash. This kit is part of a series of intermediate-level kits designed by Lech Kolodziejski of CardPlane, who designed the PWS-10 kits I built a few years back. Features fabulous artwork by Marcin Dworzecki. A Lavochkin La-11 in North Korean livery -- for the sheer novelty of having something in KPAAF colors. This is another of Lech's and Marcin's offerings. And finally (drum roll) -- the first two jets in my collection. If I'm going to do a jet, it should at least be visually striking, and I think these two pass muster. The Hunter is by Lukasz, and the SBLim (Polish license-built MiG-15 reconnaissance variant) is from Lech & Marcin. So many models, so little time!
- 112 replies
-
- 15
-
-
-
Just catching up on your log, Dan. I have to say that you do exceptional finish work!
- 87 replies
-
- 3
-
-

-
- Lady Nelson
- Amati
- (and 1 more)
-
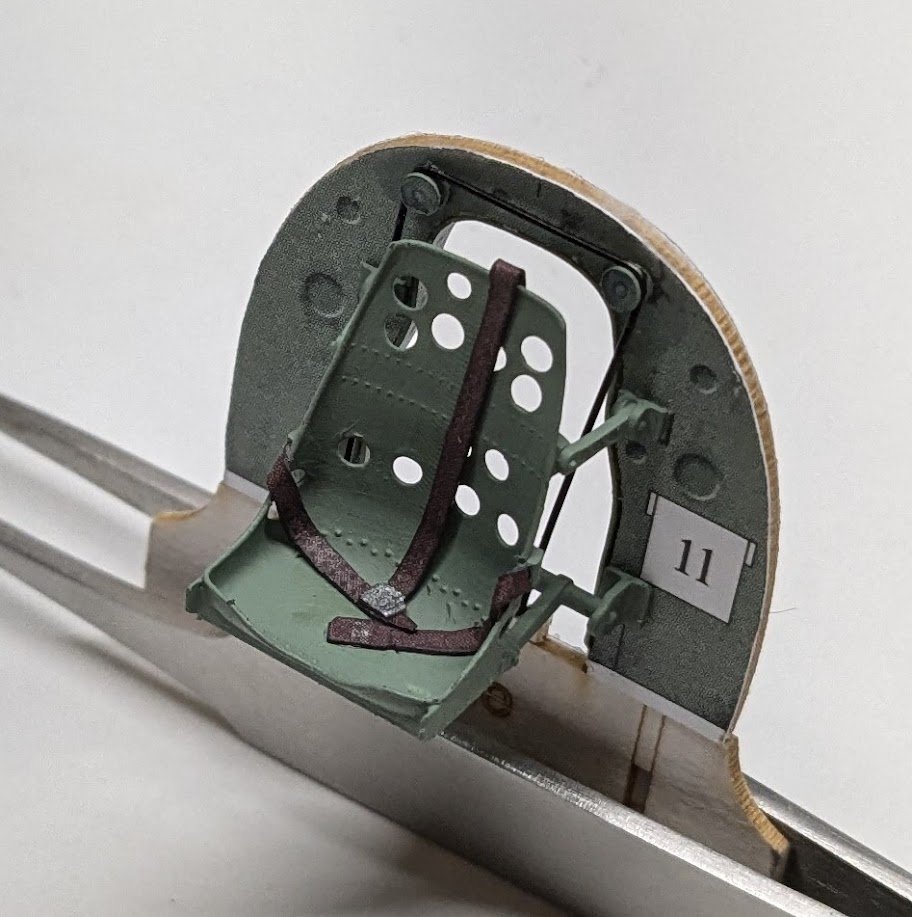
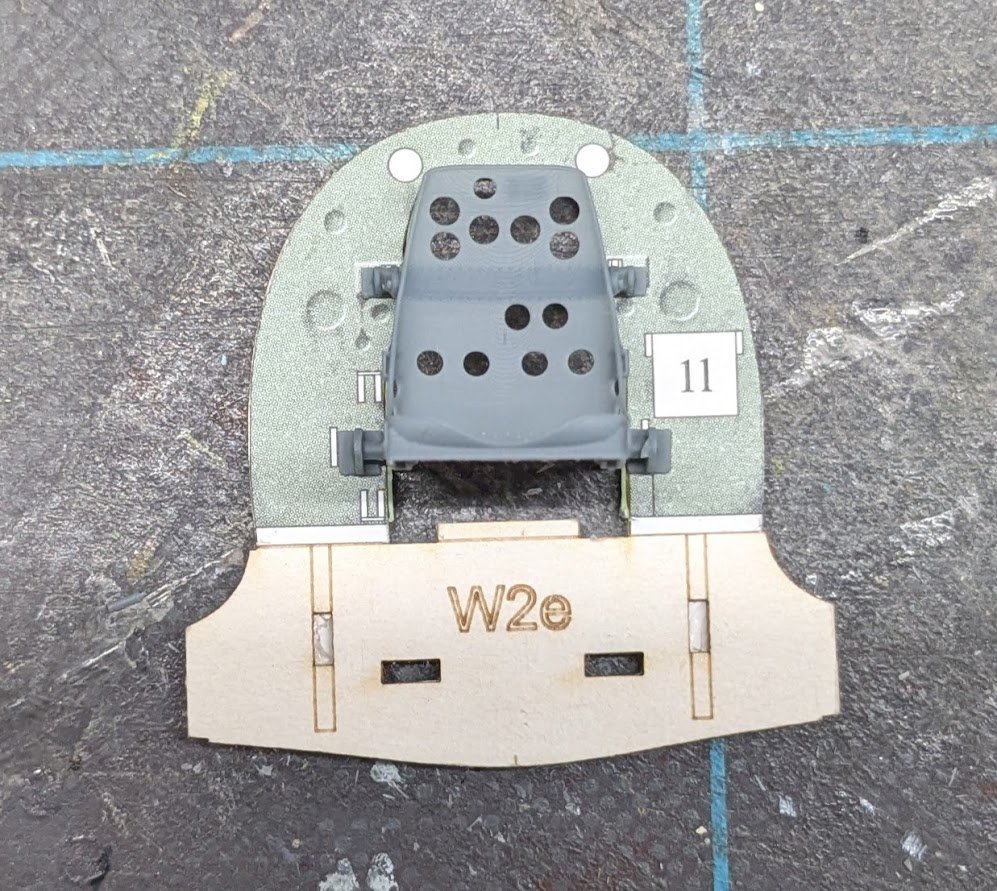
Working on the aft cockpit bulkhead. I got roped into binge-watching a new series on Apple+, so my modeling time has been curtailed. I have carefully removed the 3D-printed seat from its supports, which took about a half-hour to do -- managed not to damage anything in the process this time. The seat fits the locator marks on the bulkhead perfectly.
- 112 replies
-
- 14
-
-
-
Welcome aboard, Mark!
-
Just add your replies in the reply box at the bottom of the list of posts.
-
WZ-X by ccoyle - CardPlane - 1/33 - CARD
ccoyle replied to ccoyle's topic in Completed non-ship models
Thanks, Mike. I found these photos over at kartonbau.de. I'd completely forgotten I had shared them there. A couple of the models had build logs posted on the old paper modeling forum that was taken over by Zealot years ago (you probably remember those sad events) -- I was so irked by Zealot's heavy-handed tactics that I took down all my content there. Some of the photos I have posted today are stored on CDs that I can no longer access easily, seeing as I don't own any CD drives. Cheers! -
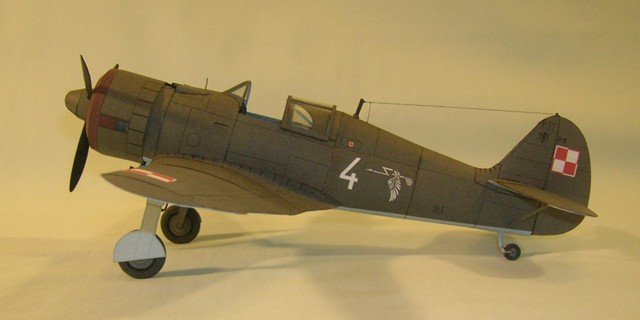
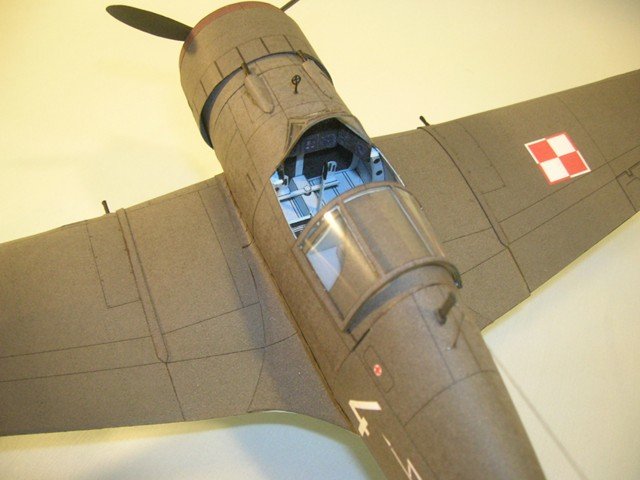
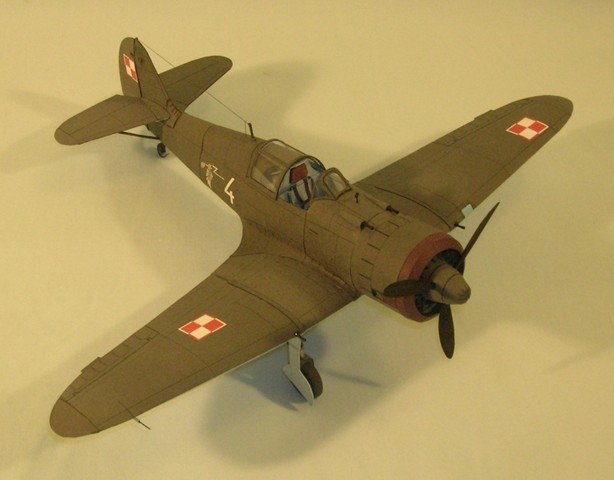
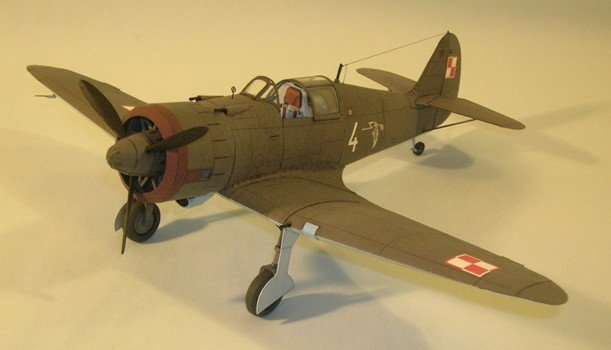
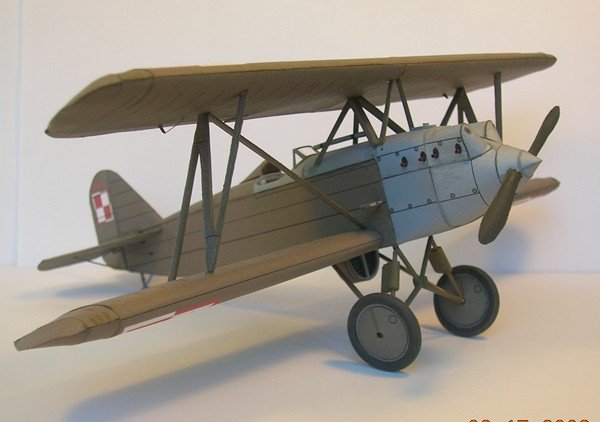
I came across some old photos of some of my early card models. This one is a Polish PZL-50 Jastrzab (Hawk) from a digital download offered through eCardmodels. As the title suggests, the model is designed by Marek Paczynski. Only two PZL-50 prototypes were completed before the onset of WW2. Apologies for the poor photo quality -- these were made with our first digital camera, and the technology wasn't what it is today. Enjoy!

-
- 8
-
-
-
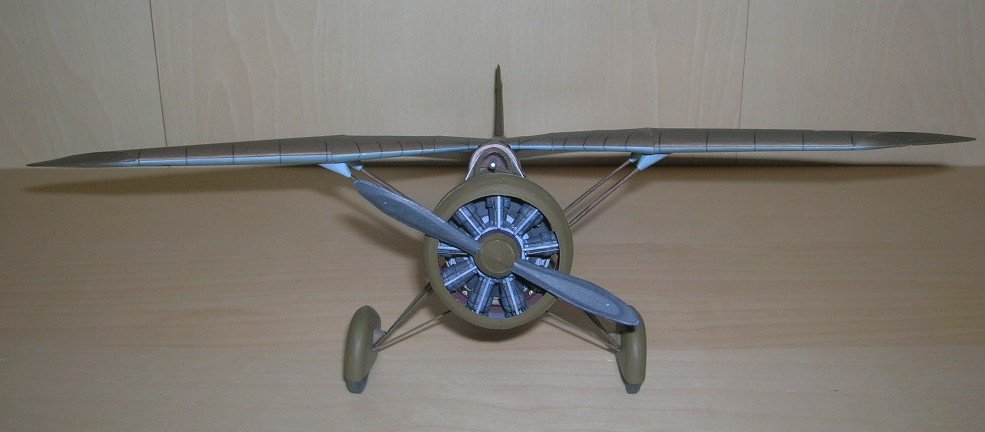
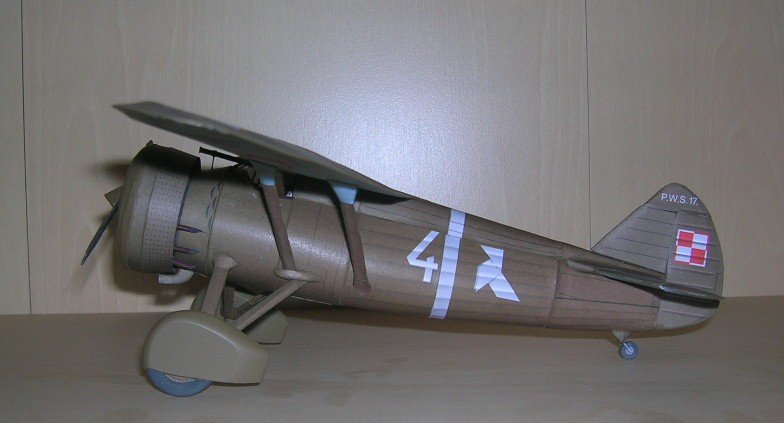
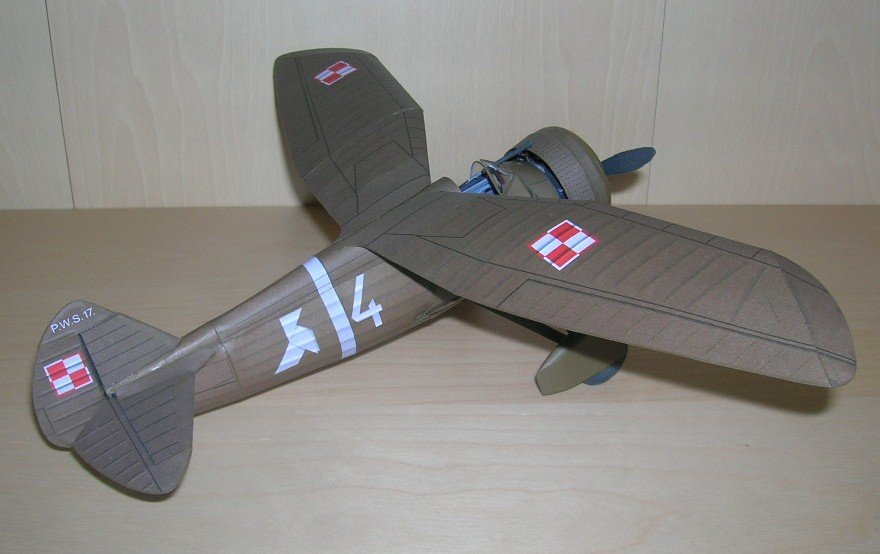
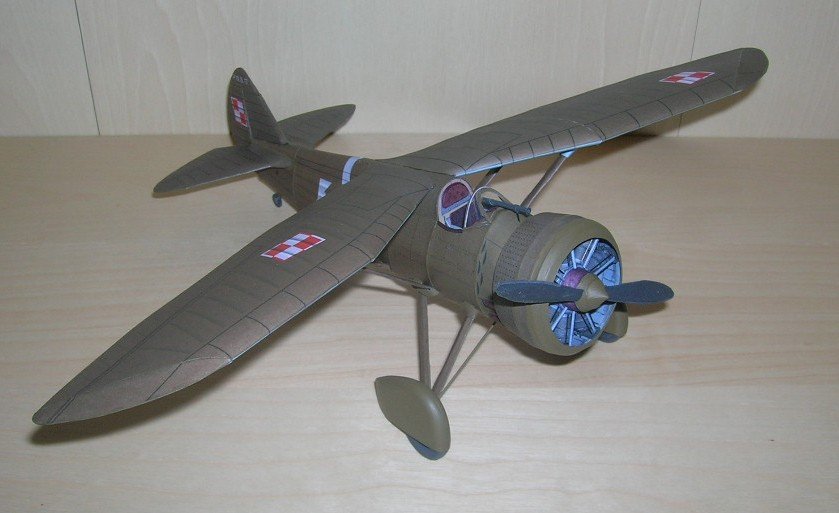
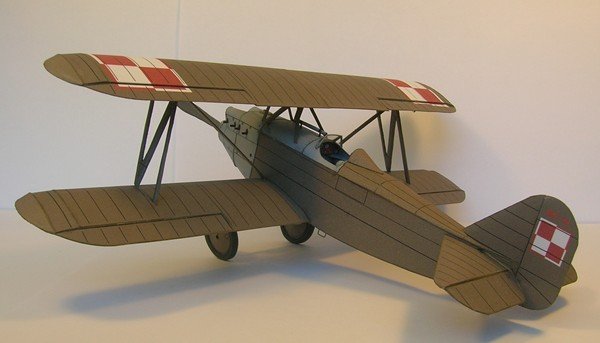
I came across some old photos of some of my early card models. This one is a Polish PWS Z-17 published by Cardplane. The PWS-17 was a project designed to replace the PZL-7 fighter then in service. The PWS-17 was unusual in having a swept-forward wing design. With the high-mounted wings and wing roots behind the cockpit, the pilot would have had exceptional forward visibility. Apologies for the poor photo quality -- these were made with our first digital camera, and the technology wasn't what it is today. Enjoy!

-
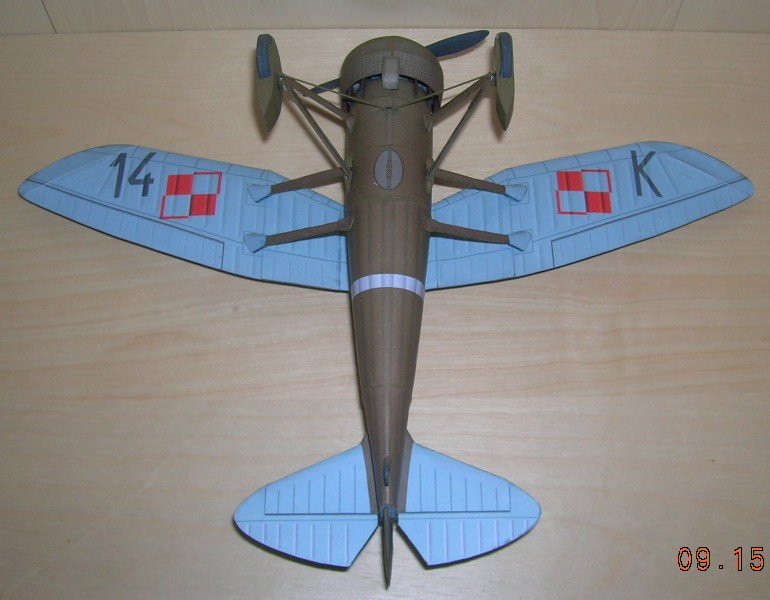
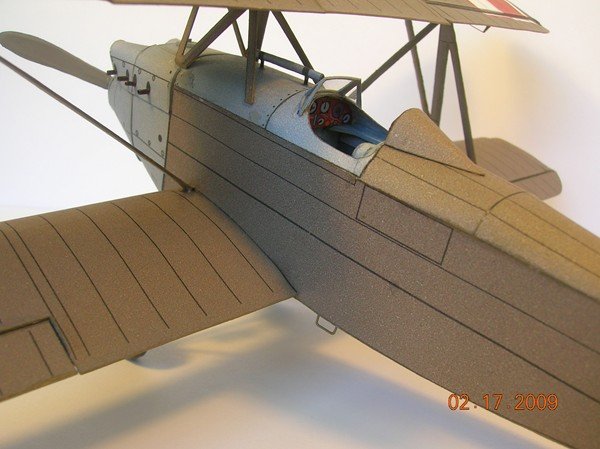
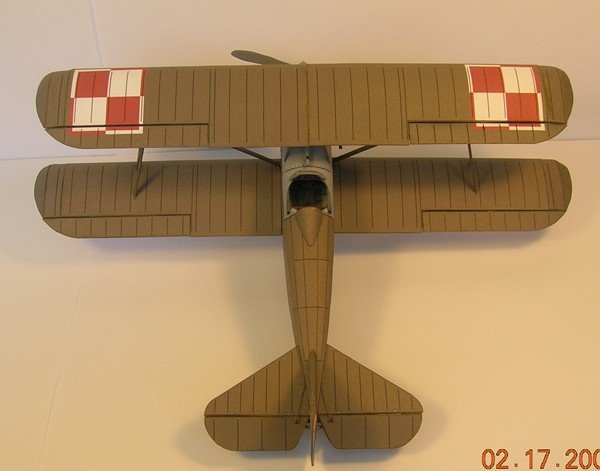
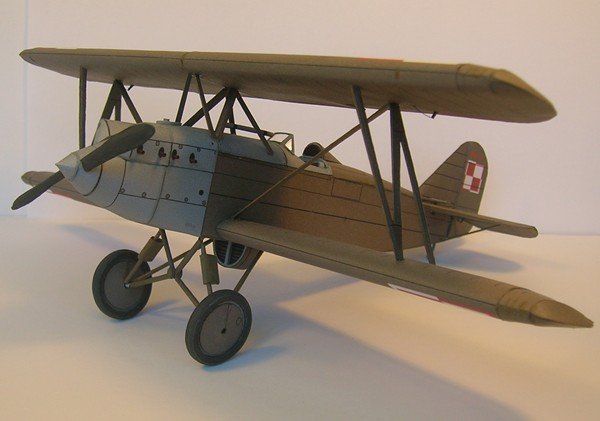
I came across some old photos of some of my early card models. This one is a Polish Bartel BM-6a published by Cardplane. The BM-6a was a sesquiplane trainer. The unusual wing configuration was due to the upper and lower wings being interchangeable while keeping the wingspan the same. Apologies for the poor photo quality -- these were made with our first digital camera, and the technology wasn't what it is today. Enjoy!
-
- 5
-
-
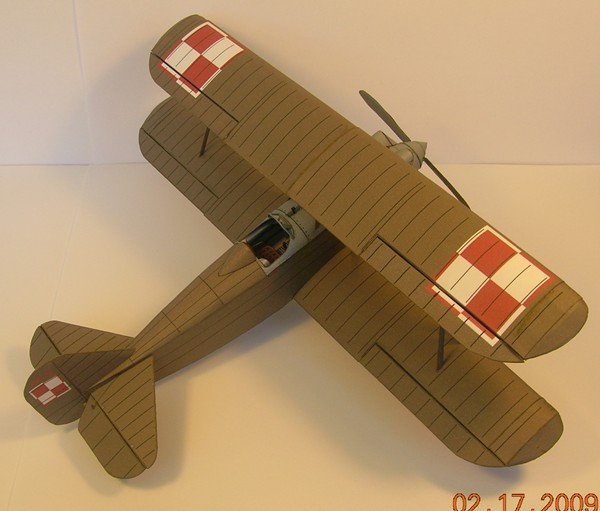
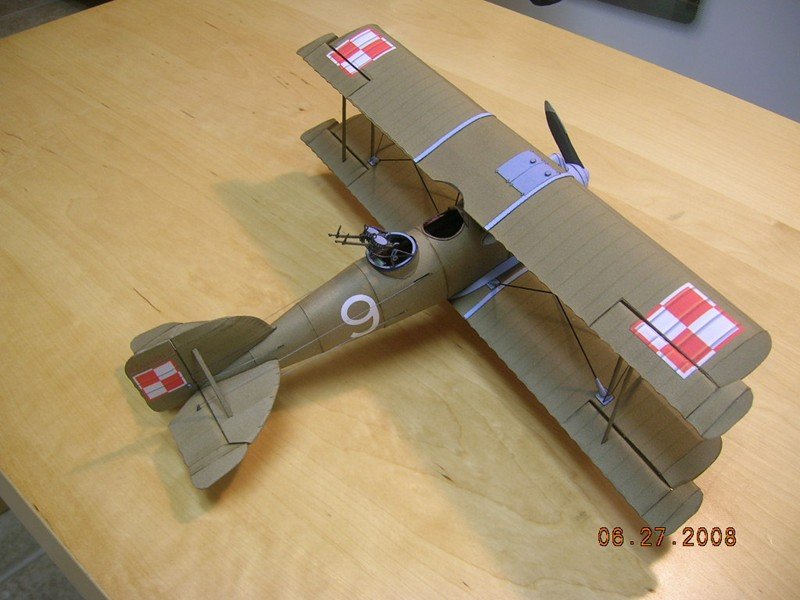
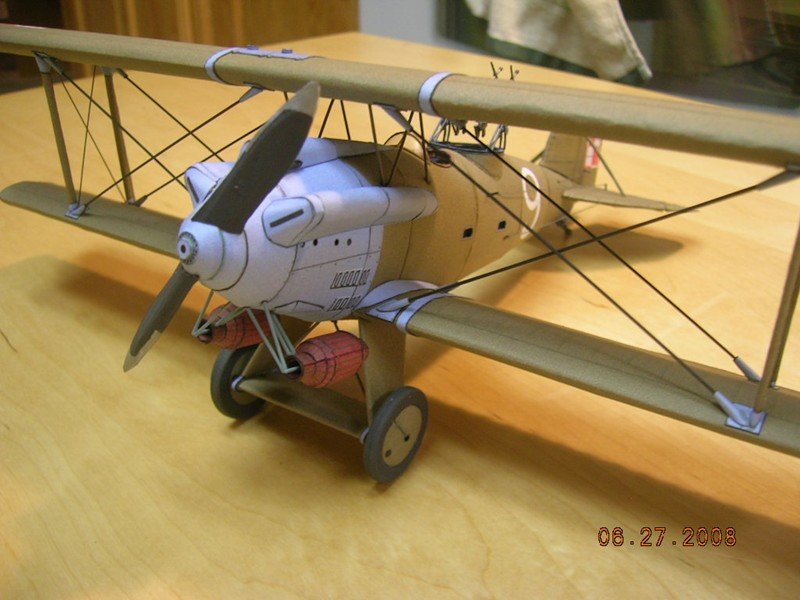
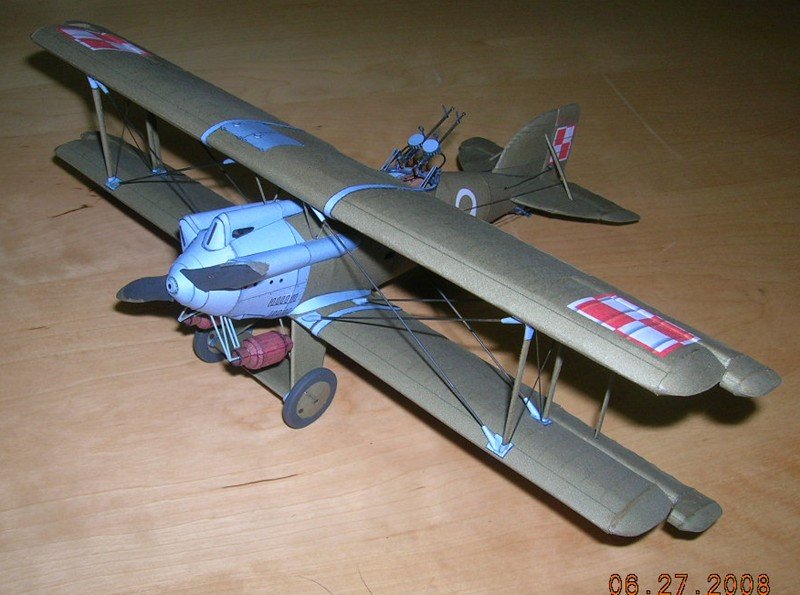
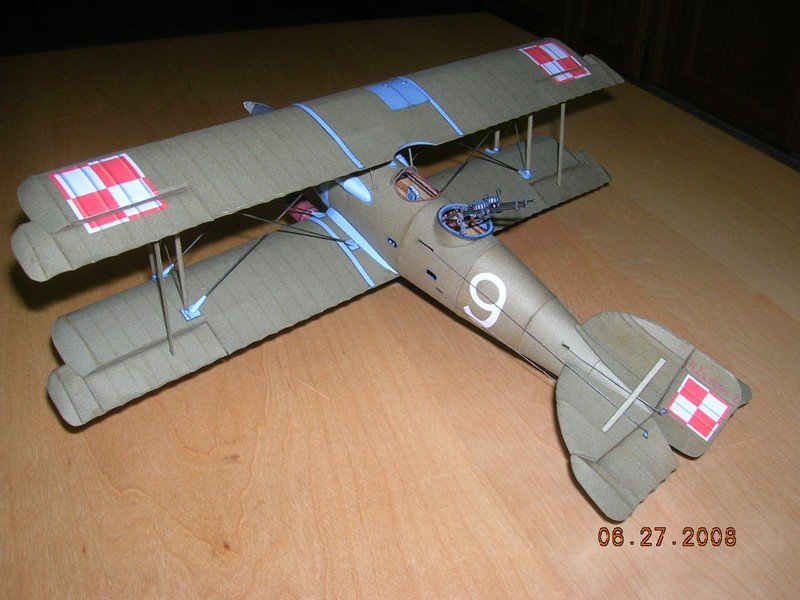
I came across some old photos of some of my early card models. This one is a Polish WZ-X (as in 'WZ Ten') published by Cardplane. This was the first 'real' card airplane I ever built, as opposed to some earlier efforts that were simpler free models in assorted scales. Apologies for the poor photo quality -- these were made with our first digital camera, and the technology wasn't what it is today. Enjoy!

-
Hi, Bruce. I have merged your topics here. It is not necessary to post updates as new topics -- just add them to this one. Cheers!
-
Welcome aboard, Doug! If you are big into research, then the Sergal SoS kit should keep you very busy. Don Dressel, a well-known member of the Ship Modelers Association ( a club in Southern California) spent ten years researching and building his own SoS build, beginning with the Sergal kit, of which he kept the false keel and transverse bulkheads and not much else. Over the course of his research he discovered that the kit departed significantly from the original in terms of armament, rigging, and hull ornamentation. I don't know whether he chronicled his findings in any publicly available medium. Best of luck!