ccoyle
-
Posts
10,546 -
Joined
-
Last visited
Content Type
Profiles
Forums
Gallery
Events
Everything posted by ccoyle
-
 Hi, friends! Phoenix will be taking another break while I work on a different project. I feel I made good progress in this recent burst of modeling activity, and I'm sure I'll return to her in the not-too-distant future with renewed enthusiasm. In the meantime, if you're interested, you can follow along on my latest not-a-ship adventure! Cheers!
 -
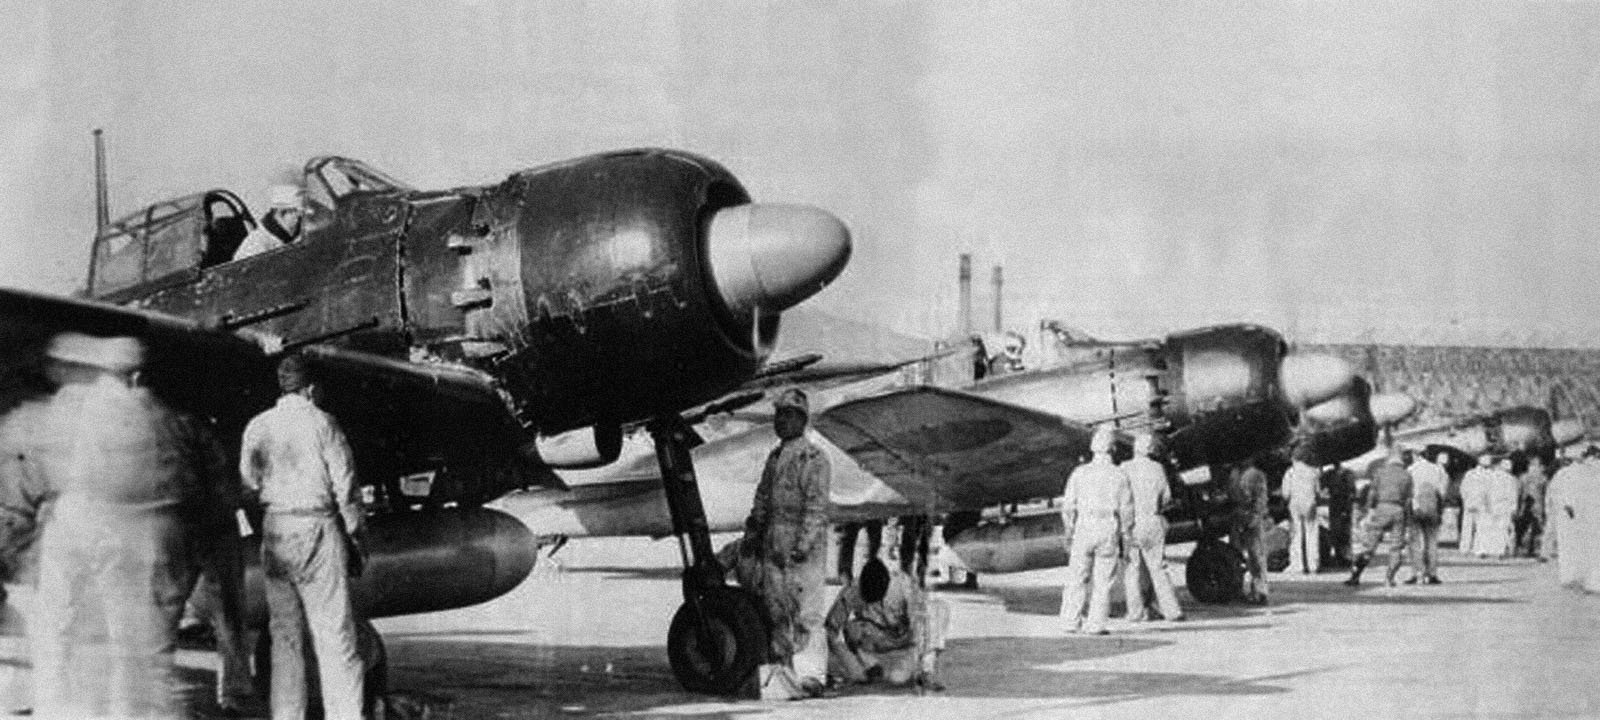
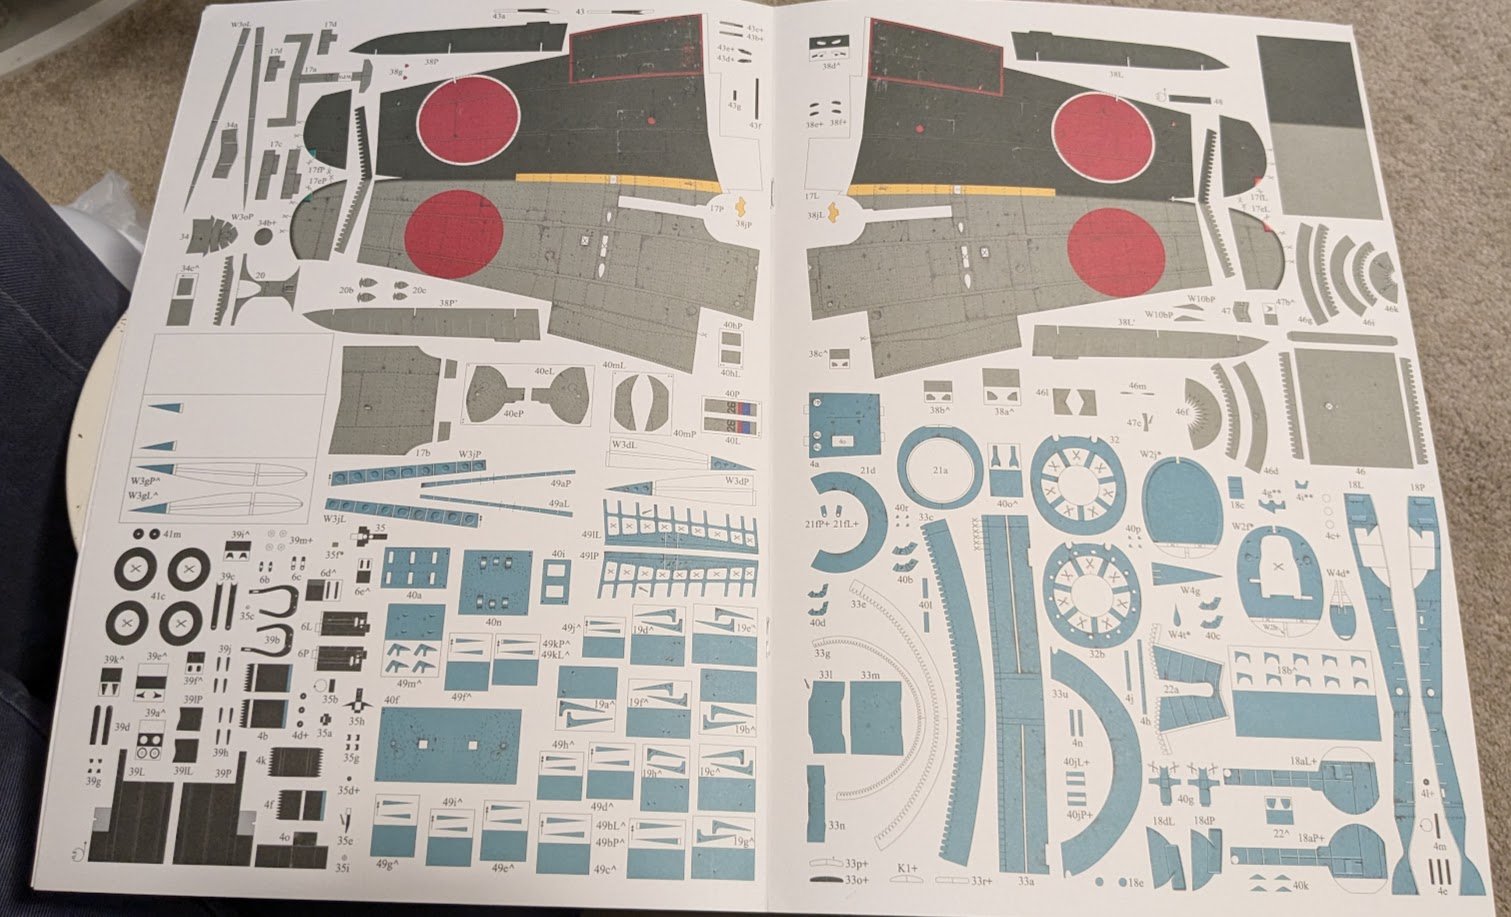
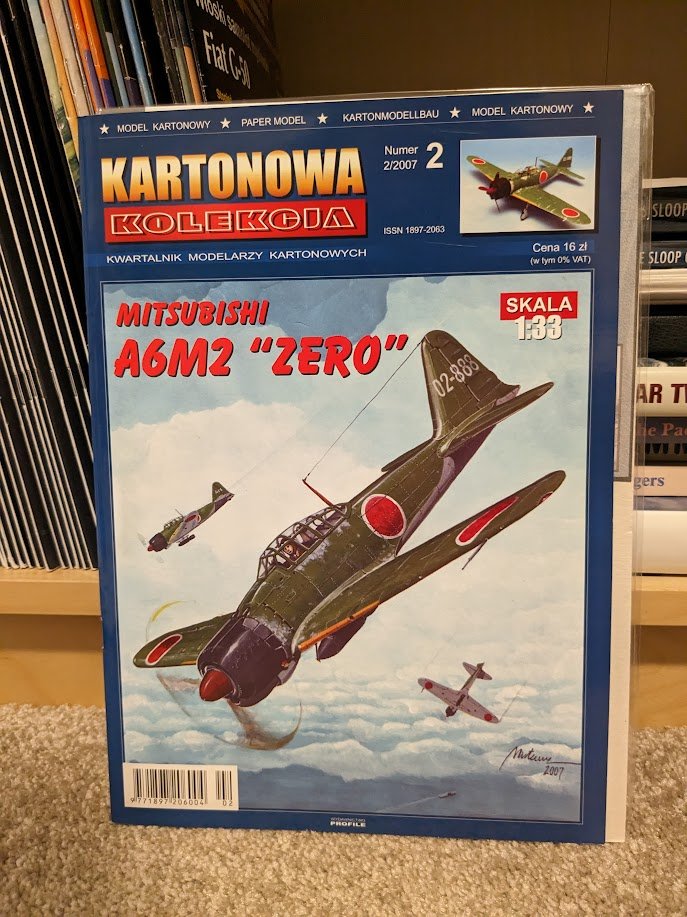
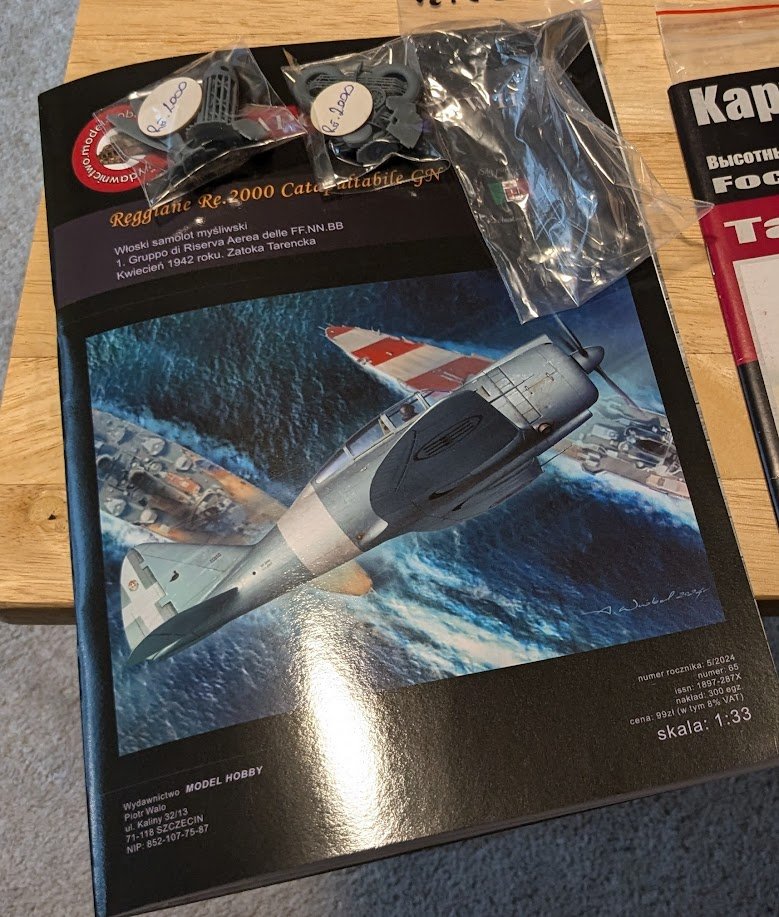
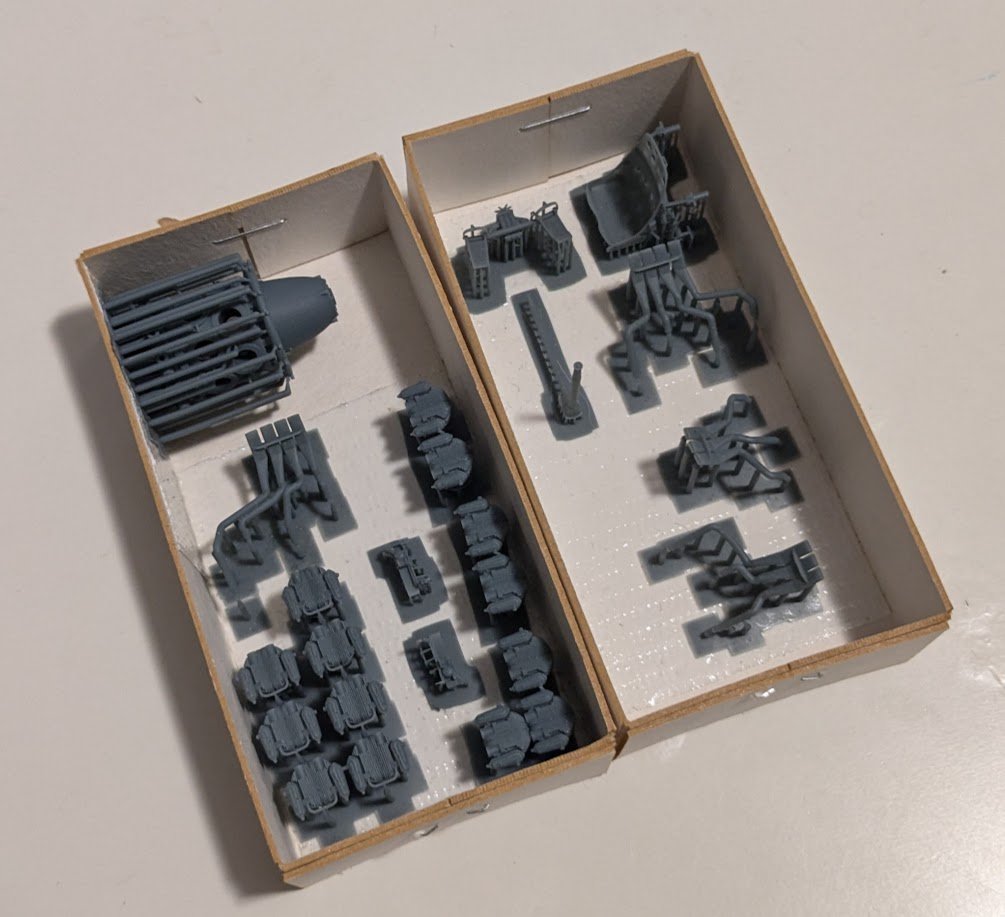
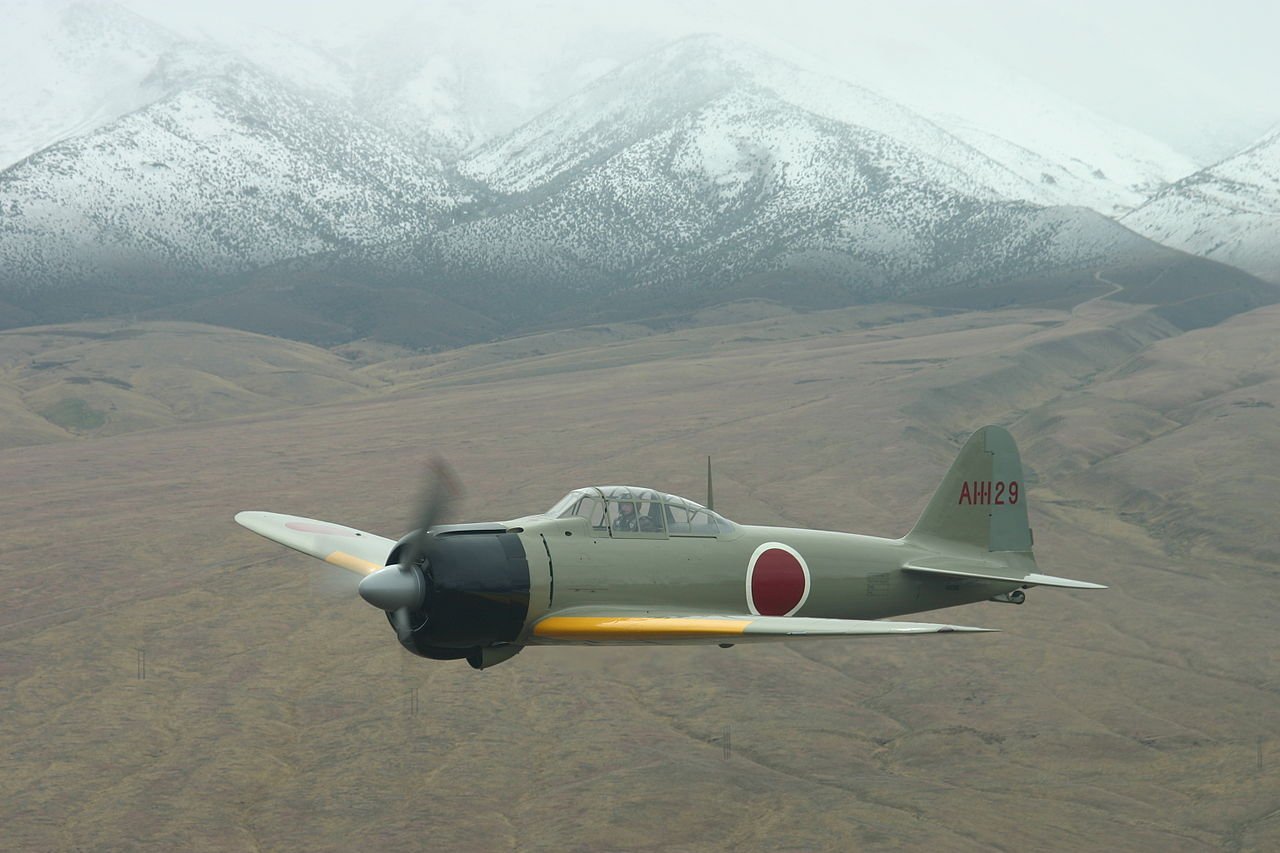
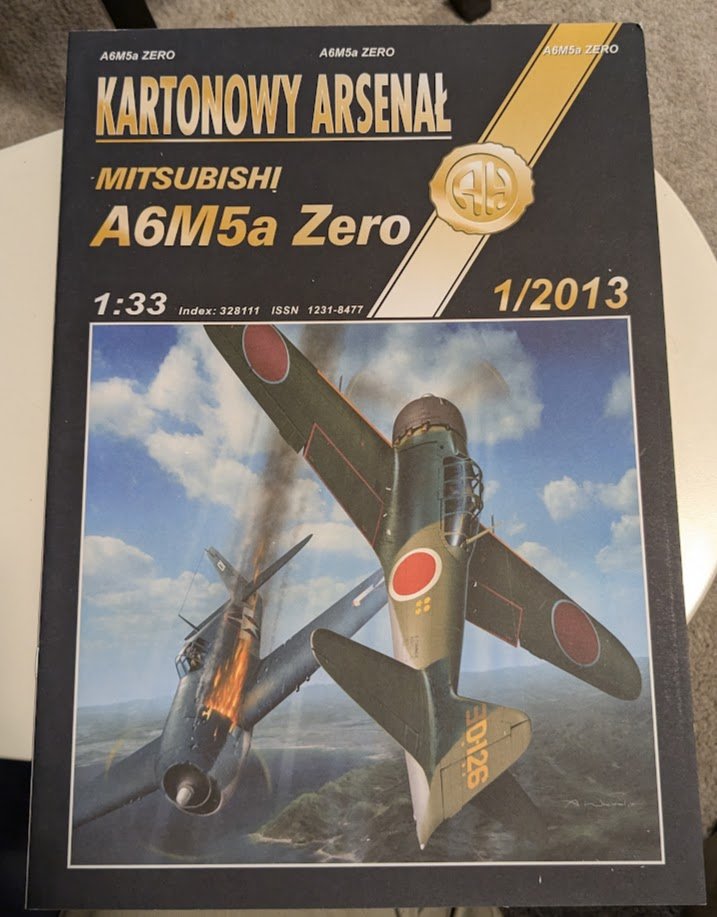
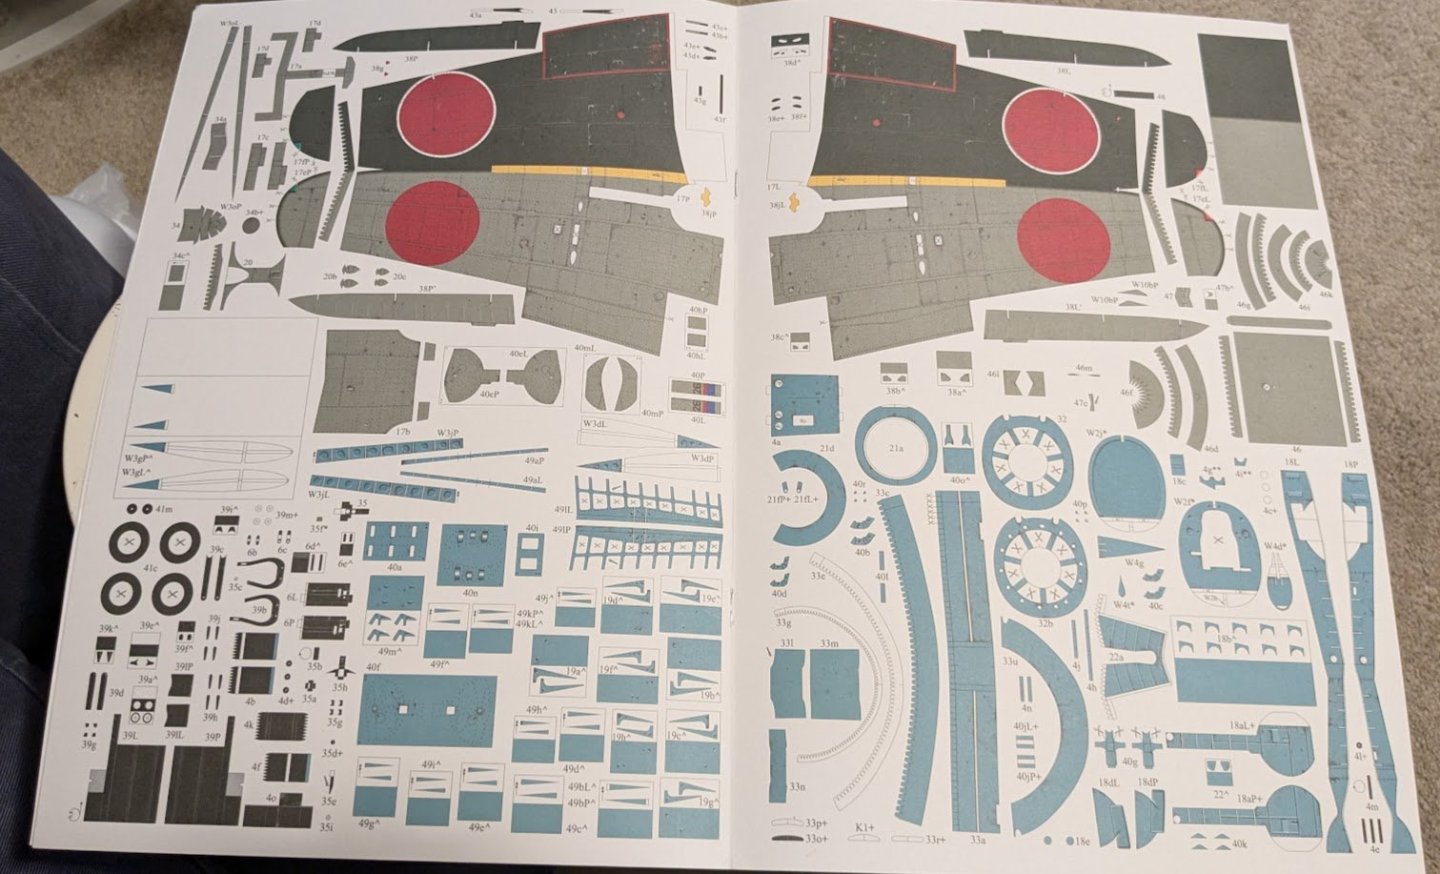
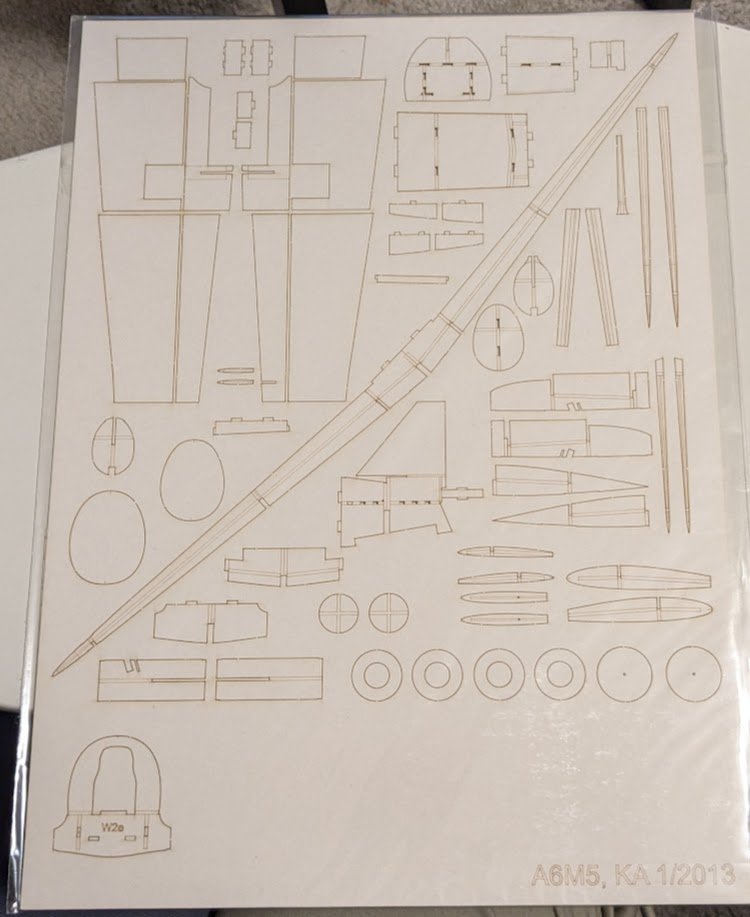
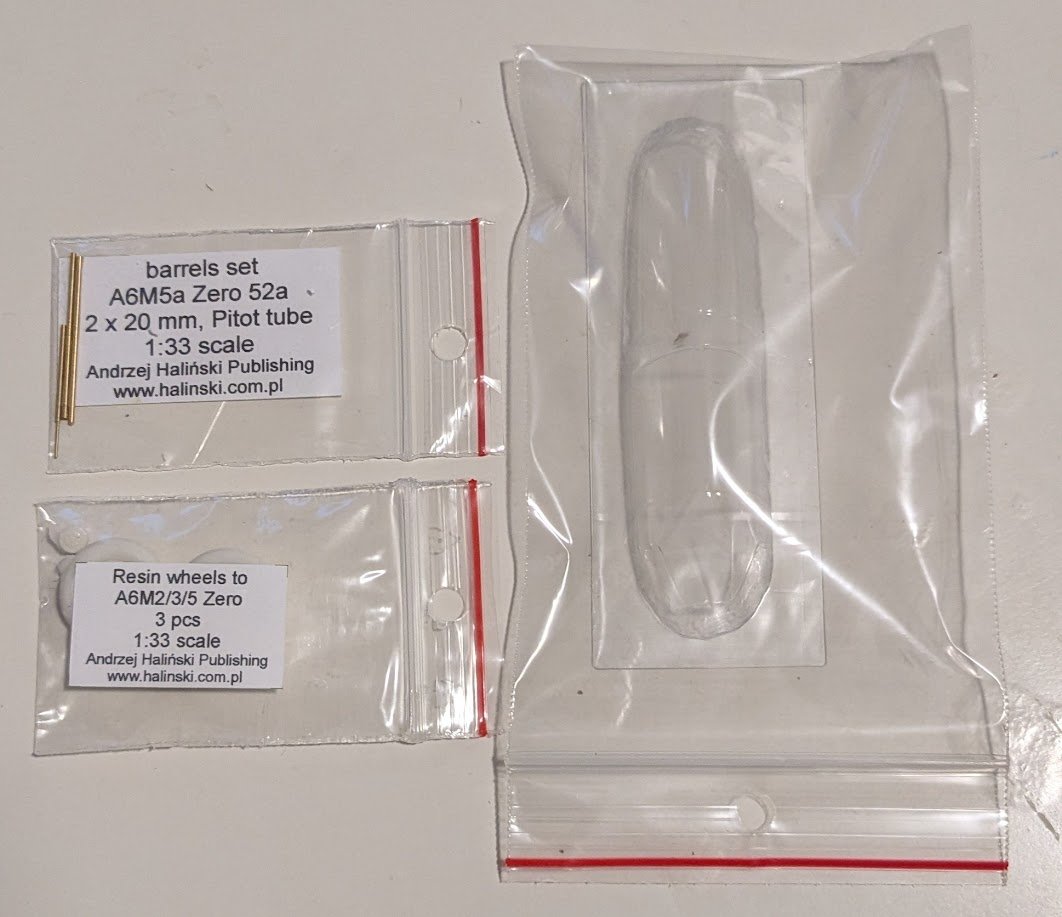
A Tale of Two Zeros (and a Falco) Welcome to my next not-a-ship build! I'll introduce the subject of this log by way of a story. I had long been considering building one of Pawel Mistewicz's WW2 subjects published by Kartonowa Kolekcja. I have built many of Pawel's WW1 and interwar subjects, but only one WW2 subject (Brewster F2A Buffalo). His A6M2 Zero (kit #2, published in 2007) is the oldest such subject in my stash, so I was leaning toward building that kit. That is, until I learned last year that Model Hobby was publishing a brand-new kit of the Reggiane Re.2000 Falco. I leapt at the opportunity to purchase the new kit and be among the first builders to complete one. But it was not to be. It took four months for the Re.2000 kit to arrive. 😑 By then I had already seen a finished example online, so the possibility of being the first to finish one had vanished. Oh, well! So it was back to building the Zero. Back when I ordered the Reggiane, I decided to also acquire some 3D-printed after-market parts for the Zero build, namely a Sakae radial engine and a cockpit details set. Included among the parts were fourteen individual exhaust pipes, which I did not know came with the engine when I ordered it. While looking through the KK kit instructions to see where the various parts would be used, something hit me: the A6M2 did not have individual, separated exhaust pipes. Instead, the A6M2 vented its exhaust downward through a pair of pipes on either side of the fuselage. The separated pipes were introduced on the A6M5 for the purpose of giving the aircraft a little extra forward thrust by venting the exhaust gases rearward (it only marginally improved performance). The individual pipes passed through cutouts in the cowling flaps. This distinctive feature is an easy way to distinguish the A6M5 from earlier variants. A6M2 (no cutouts) A6M5 (cutouts) (Left: By Marc Grossman - Own work, CC BY-SA 3.0, https://commons.wikimedia.org/w/index.php?curid=15575787 ; Right: By unlisted - 1. Historic Wings [1], Public Domain, https://commons.wikimedia.org/w/index.php?curid=1631577) Well, it seemed a shame to have such nice after-market parts and not use them, so I did the only sensible thing: I bit the bullet and ordered an A6M5a kit from Halinski (from their Cardboard Arsenal series), along with its after-market frames, canopy, wheels, and brass gun barrels. So that's how I ended up at this particular build subject, and it's a bit of an ambitious one. The finished model will depict the mount of Lt. (j.g.) Sadaaki Akamatsu. I'm excited to see how this one comes together, and I hope you will enjoy following along. Look for first cuts soon!

- 112 replies
-
- 19
-

-

-
I gave a lesson on the names of various rigging wires not too long ago. Maybe you should draft a quiz. 😉
-
I just tried it out and got the same result. I guess it's a thing now. James H would know more about it.
-
Wow! She looks great -- a fine testament to what can be accomplished with this fantastic kit!
-
new kit alert! New kit on the horizon - Winchelsea Nef
ccoyle replied to James H's topic in Wood ship model kits
I went to school with a guy whose last name was Neff, but I don't think he was from Winchelsea.- 15 replies
-
- 6
-

-
-
- winchelsea
- medieval
- (and 1 more)
-
Kit review 1:25 Drakkar ‘Oseberg’ V3 - Ships of Pavel Nikitin
ccoyle replied to James H's topic in REVIEWS: Model kits
Good review, and the prototype is very striking! I'm sure you will do the kit justice.- 14 replies
-
- 2
-
-
- Pavel Nikitin
- viking
- (and 2 more)
-
Ironically, the kit does include these pieces -- it's just that the bulwark patterns are supposed to overlap them neatly. If the overlap isn't done just so (as on my model), then the effect of some 'recessed' linings is created. I fear that adding additional linings, as you suggest, may make the gun ports too small. I'll have to fiddle around a bit and find what works best. Cheers!
-
Only a moderator can do that.
-
I had to take the Praxis exam in two subject areas. 😵💫😵💫
-
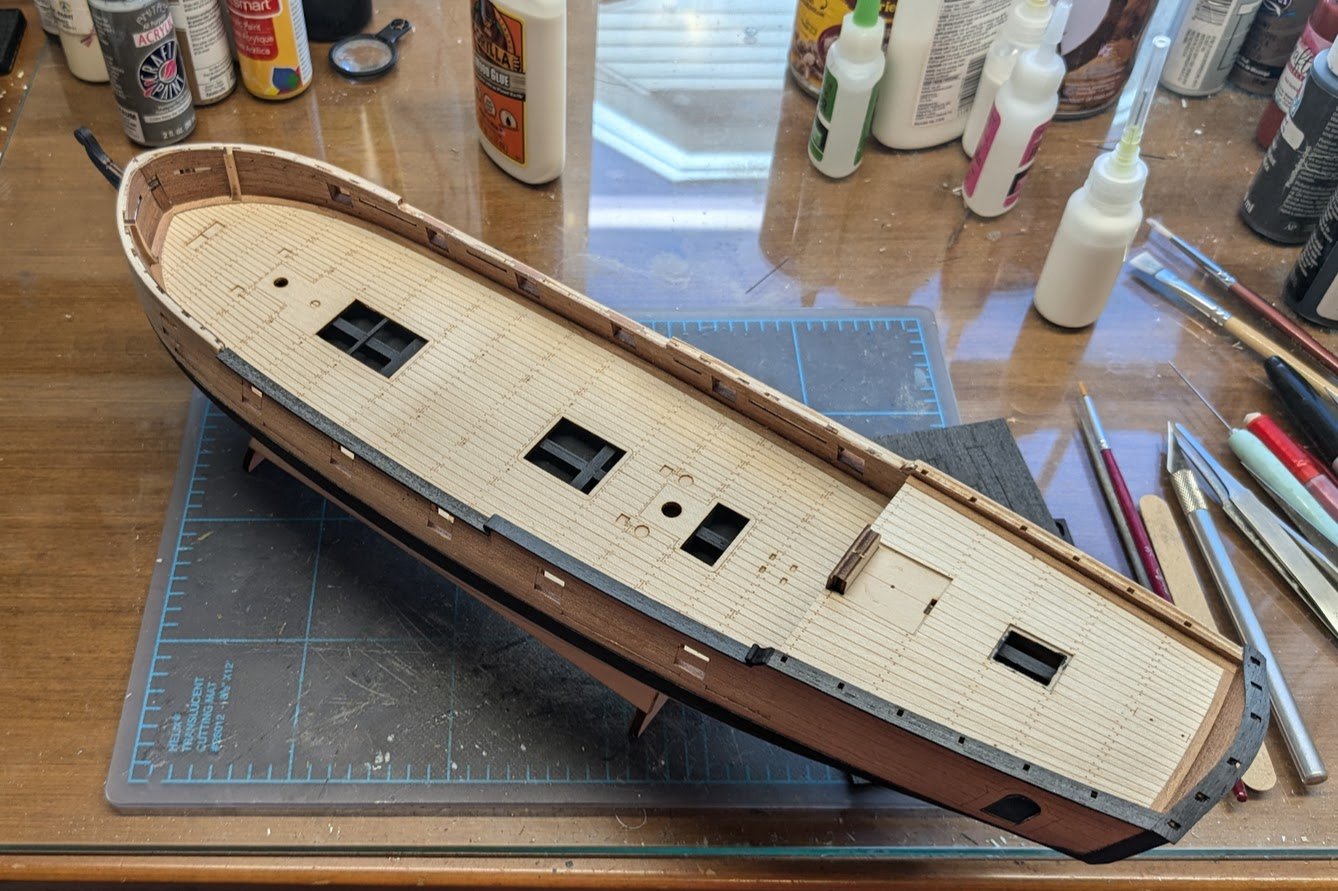
As I was working on the cap rails, I noticed that the temporary gun port support strips (part of the outboard veneer) had disappeared from the photos. I don't remember reading about this in the written instruction, but I decided that now was as good a time as any to go ahead and remove them, so I did. Now, this leads to a rather unpleasant task: cleaning up the gun ports. The ports are laser cut into both the inboard and outboard veneers, and I suppose that if one manages to line up everything neatly then nice, square gun ports should be the result. Apparently I didn't do the job neatly enough, because I don't have nice, square gun ports. The ports don't everywhere line up properly inboard-to-ouboard, and the linings are here and there off kilter. There are limited options to fix this. One would be to simply file away the overlapping planking until it is flush with the port linings, but that would ruin the square shape of the ports. I only see one other option, and that is to add material to the linings until the new material sits flush with the inboard and outboard strips. That material could be putty, but then that would need to be painted and would thus ruin the all-wood look of the bulwarks. So the material will have to be wood, which will of course require more effort to fit and shape correctly. But who doesn't like a challenge, right? My package from Poland made it to Georgia today, so I'm hoping it will be here on Monday. 😮

-
I've seen at least two sources that state that the German East Asia Squadron were all painted gray as of 1910.
-
Welcome back, Elia! I have wondered from time to time what became of you -- I still remember your wonderful Smuggler build. At least, I think I remember it -- I ain't getting any younger, either!
-
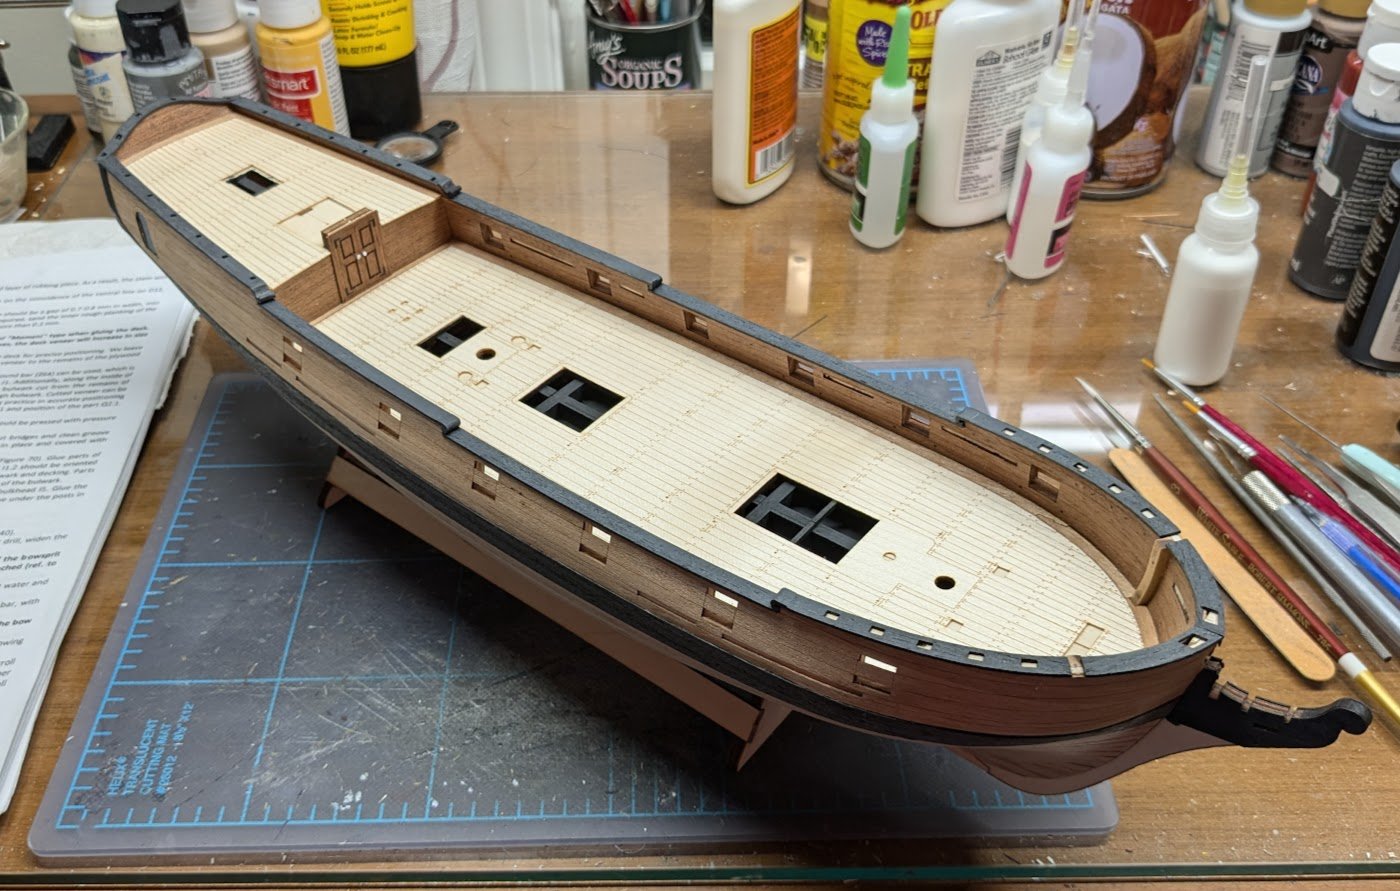
Cap rails all done.
-
Hi, Jim. Nice model, but I had to delete the watermarked image from Getty, as they are a commercial site.
-
Me neither, mostly because many years ago eBay sellers lost their collective minds and lost all sense of what used merchandise was worth.
-
Well, we couldn't get them until Keith found an eBay seller I've never heard of. I'm curious about the seller's ID -- his or her profile tells us nothing about them, and they've only been a seller since November of 2022.
-
They do! There's a few pieces of veneer left to do on the keel and stem post, but the rough underlying structure is quickly disappearing from view.
-
I have started in on the cap rails.
-
Congratulations, Kevin, on finishing this striking model. I can't believe it only took you six months!! 😮
- 62 replies
-
- 4
-
-
- belle poule
- OcCre
- (and 1 more)
-
I believe they have, only as you pointed out we can no longer purchase their kits here due to the present geopolitical situation. I'm sure we all hope that things will be resolved soon for the sake of everyone involved. We have modeling friends on both sides. As for rigging, I am not planning to add sails. As I outlined earlier, I plan to replace ALL the rigging line in the kit, since the supplied rigging line is the kit's biggest weakness. Doing so won't be cheap, so I plan to economize a bit by adding only the standing rigging and minimal amount of running rigging, e.g. lifts. P.S. I should add that this build will be taking another brief hiatus soon, as I currently have another project on its way here from Poland (which should provide a hint on the nature of the new project), but I won't disclose what the subject is until I get the build started. 😉
-
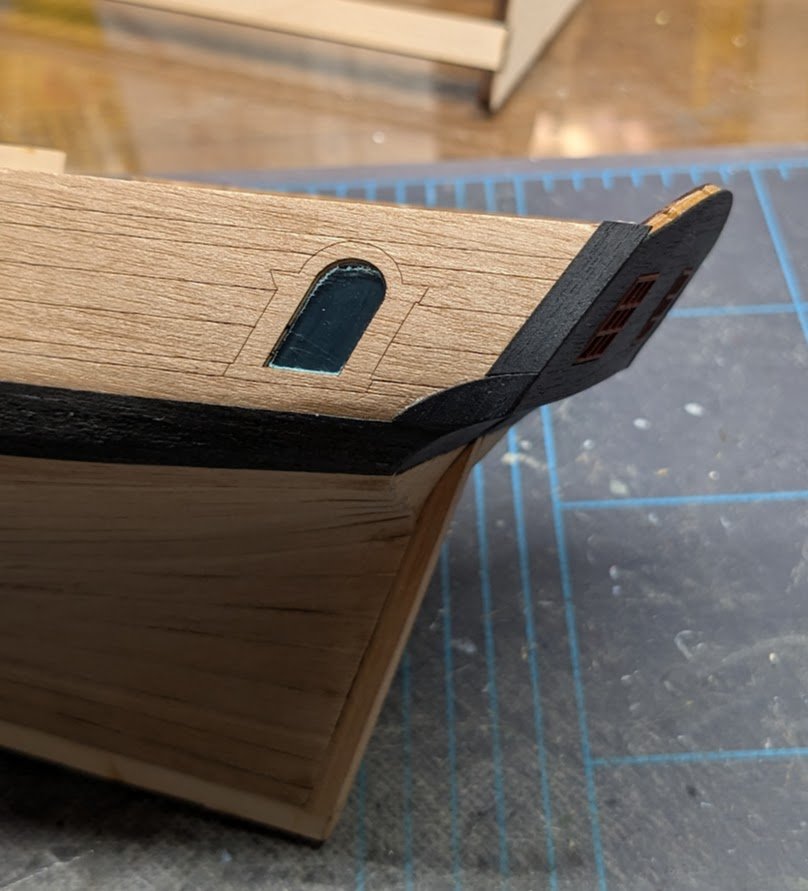
The fashion pieces have been added. Like other parts, these were pre-cut (BTW, I found out that these pieces are cut from 'black hornbeam' -- since hornbeam isn't black, these pieces must have been dyed, as I previously supposed), but they did not fit in the allowable space. I needed to cut them into two parts, trim a little off of the curved section, and then glue the separate parts to the hull.