


ccoyle
-
Posts
10,551 -
Joined
-
Last visited
Content Type
Profiles
Forums
Gallery
Events
Everything posted by ccoyle
-
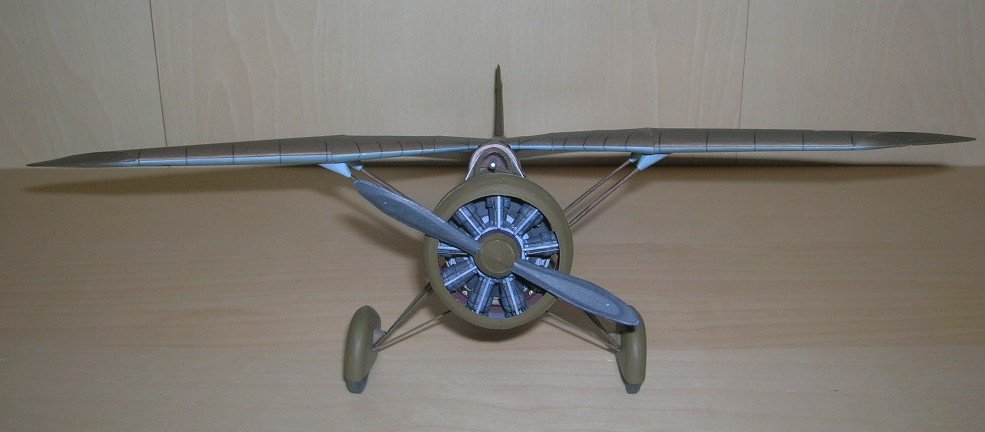
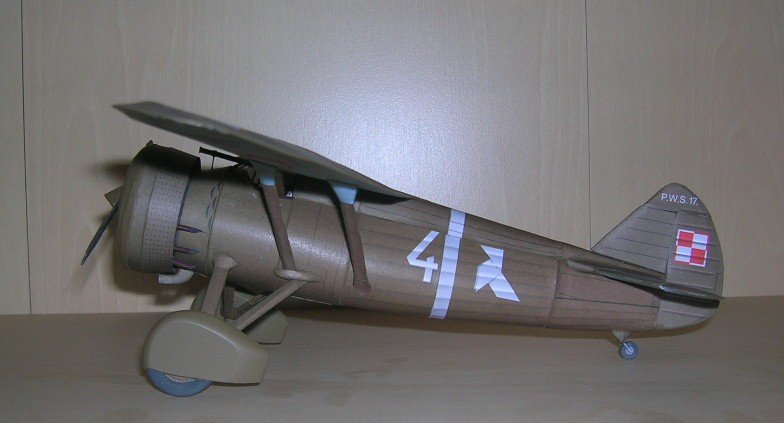
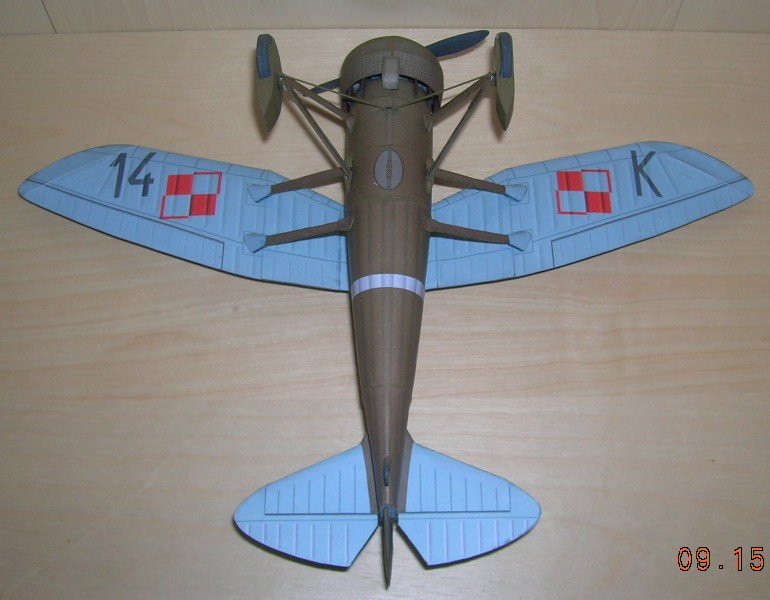
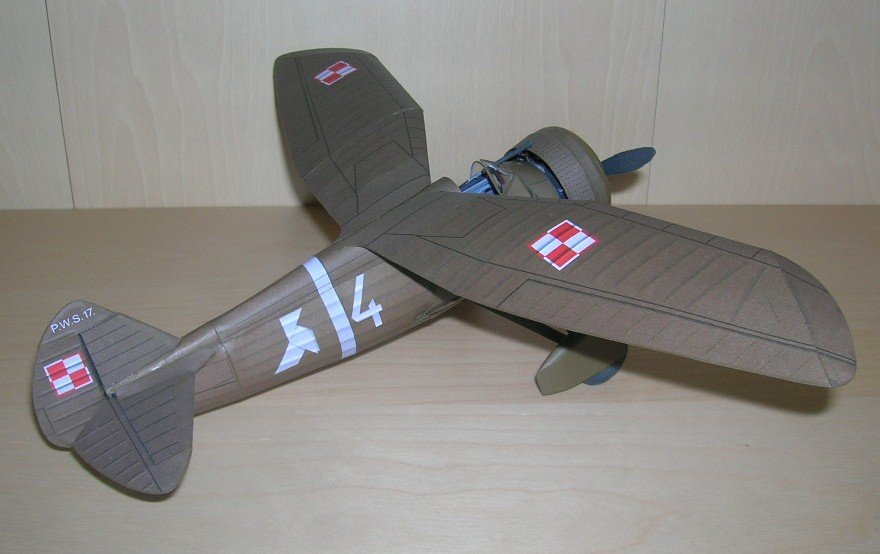
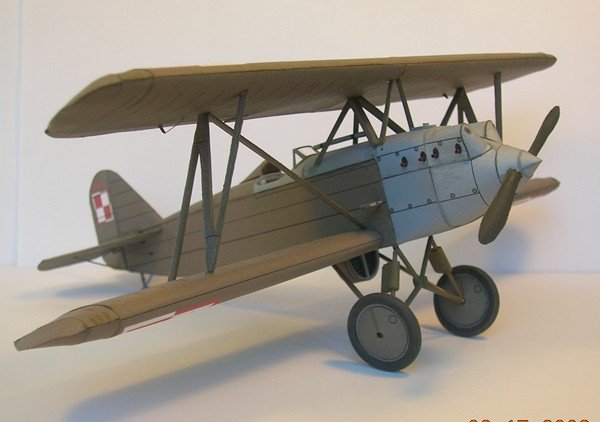
I came across some old photos of some of my early card models. This one is a Polish PWS Z-17 published by Cardplane. The PWS-17 was a project designed to replace the PZL-7 fighter then in service. The PWS-17 was unusual in having a swept-forward wing design. With the high-mounted wings and wing roots behind the cockpit, the pilot would have had exceptional forward visibility. Apologies for the poor photo quality -- these were made with our first digital camera, and the technology wasn't what it is today. Enjoy!

-
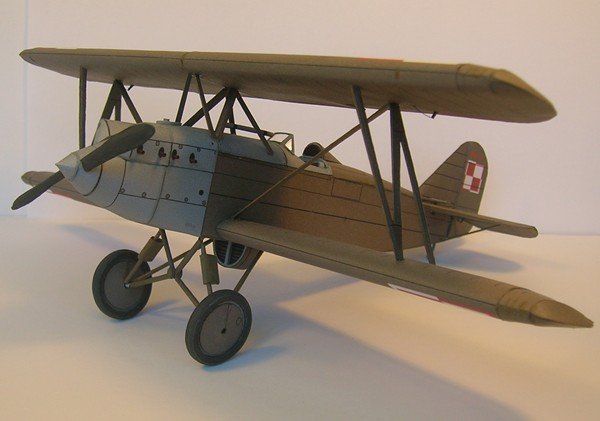
I came across some old photos of some of my early card models. This one is a Polish Bartel BM-6a published by Cardplane. The BM-6a was a sesquiplane trainer. The unusual wing configuration was due to the upper and lower wings being interchangeable while keeping the wingspan the same. Apologies for the poor photo quality -- these were made with our first digital camera, and the technology wasn't what it is today. Enjoy!
-
- 5
-

-
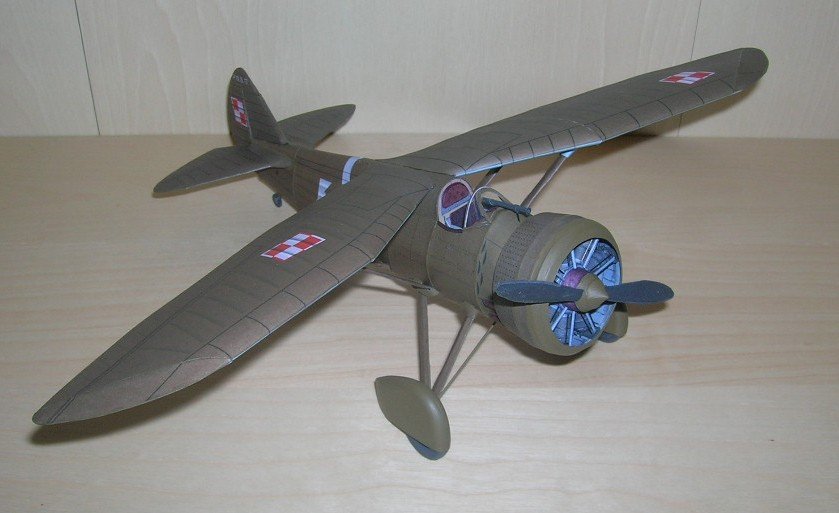
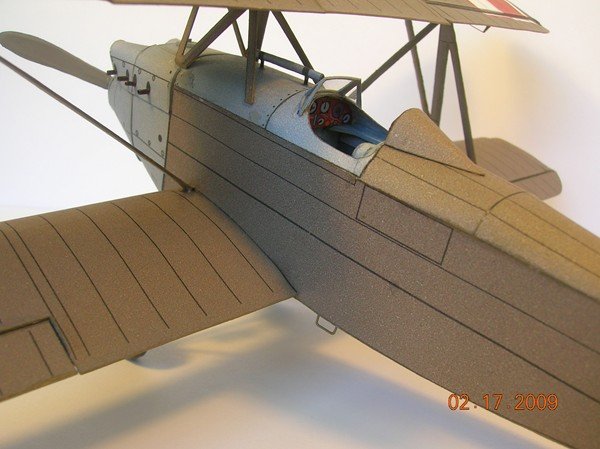
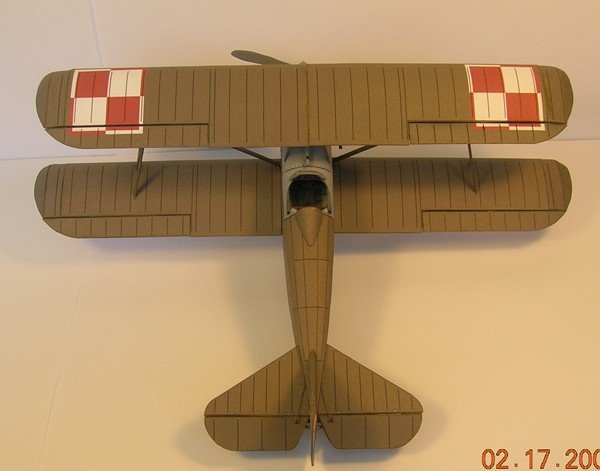
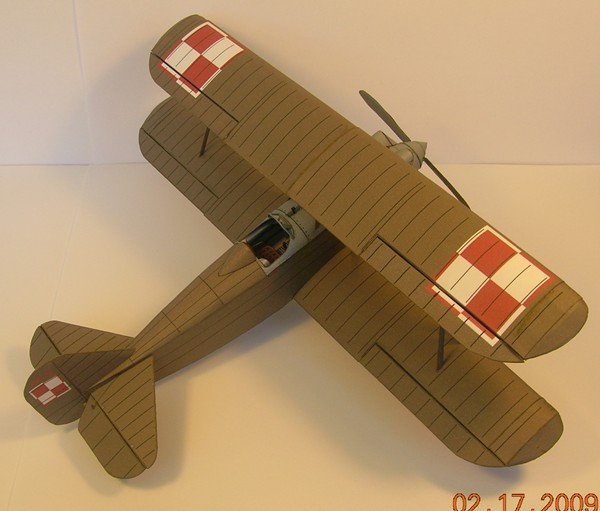
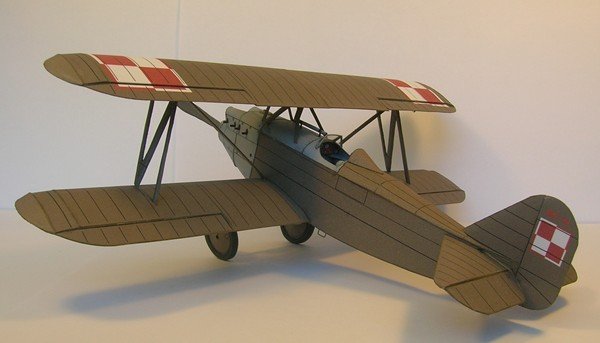
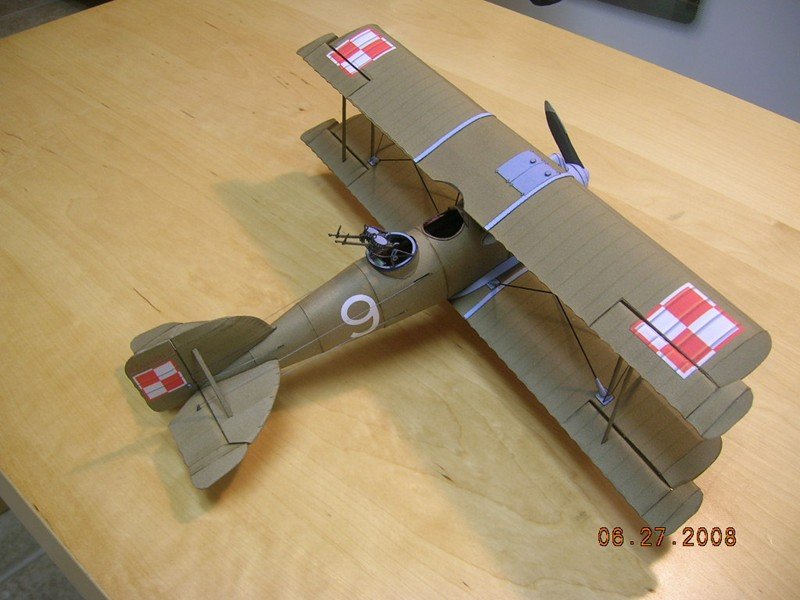
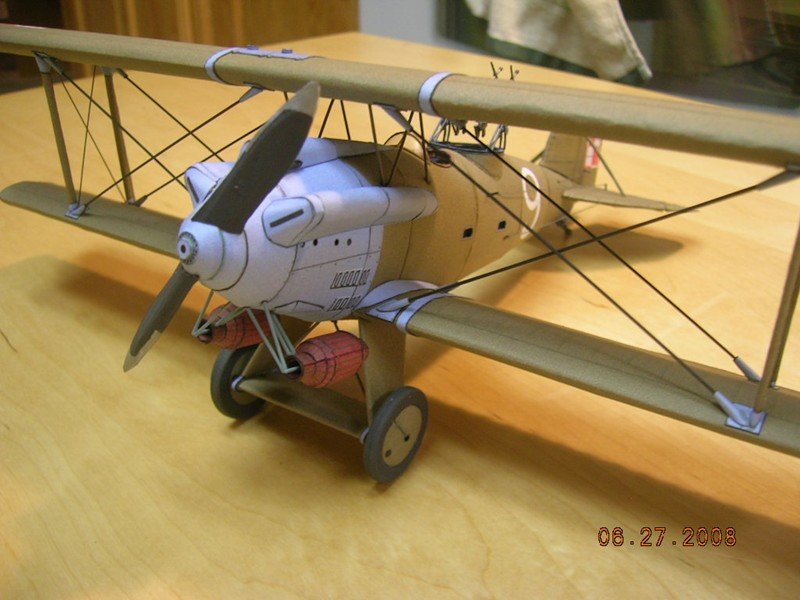
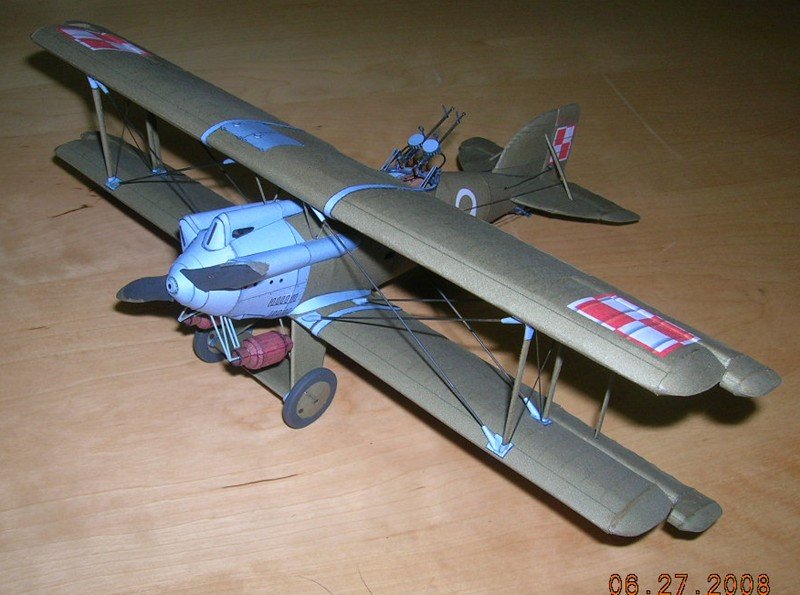
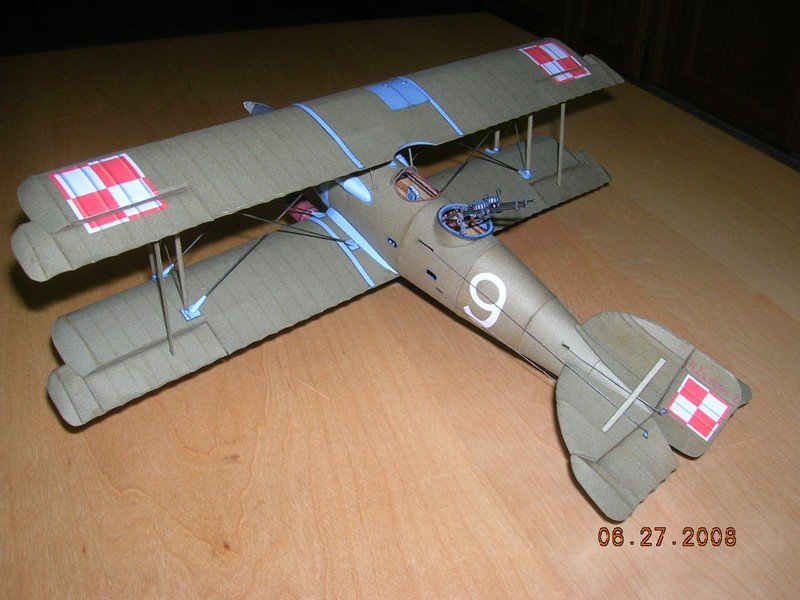
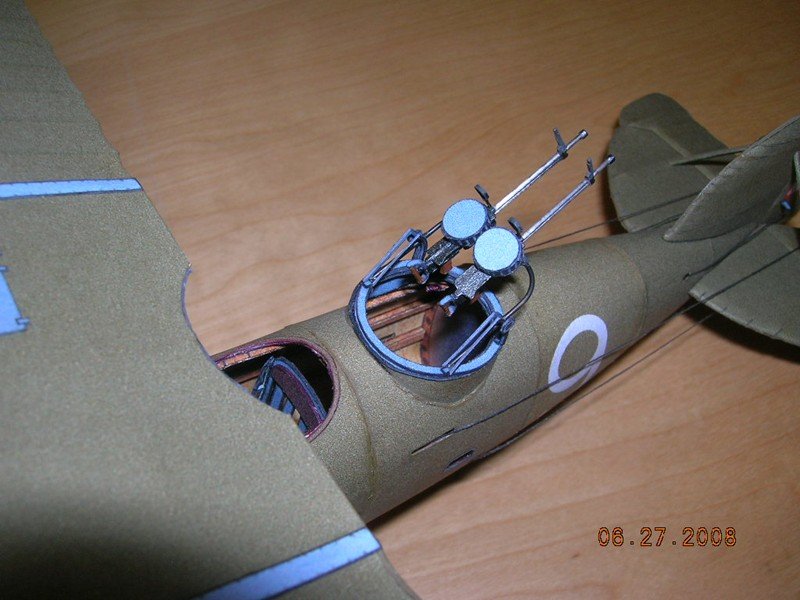
I came across some old photos of some of my early card models. This one is a Polish WZ-X (as in 'WZ Ten') published by Cardplane. This was the first 'real' card airplane I ever built, as opposed to some earlier efforts that were simpler free models in assorted scales. Apologies for the poor photo quality -- these were made with our first digital camera, and the technology wasn't what it is today. Enjoy!

-
 Hi, Bruce. I have merged your topics here. It is not necessary to post updates as new topics -- just add them to this one. Cheers!
 -
Welcome aboard, Doug! If you are big into research, then the Sergal SoS kit should keep you very busy. Don Dressel, a well-known member of the Ship Modelers Association ( a club in Southern California) spent ten years researching and building his own SoS build, beginning with the Sergal kit, of which he kept the false keel and transverse bulkheads and not much else. Over the course of his research he discovered that the kit departed significantly from the original in terms of armament, rigging, and hull ornamentation. I don't know whether he chronicled his findings in any publicly available medium. Best of luck!
-
Got the machine guns in, along with their ammo chutes. This took most of the afternoon. 😑
- 112 replies
-
- 17
-
-
There's actually a lot more to add! I think it will look pretty cramped in the end. And then of course it will all end up hidden. 🙄
- 112 replies
-
- 10
-

-
-
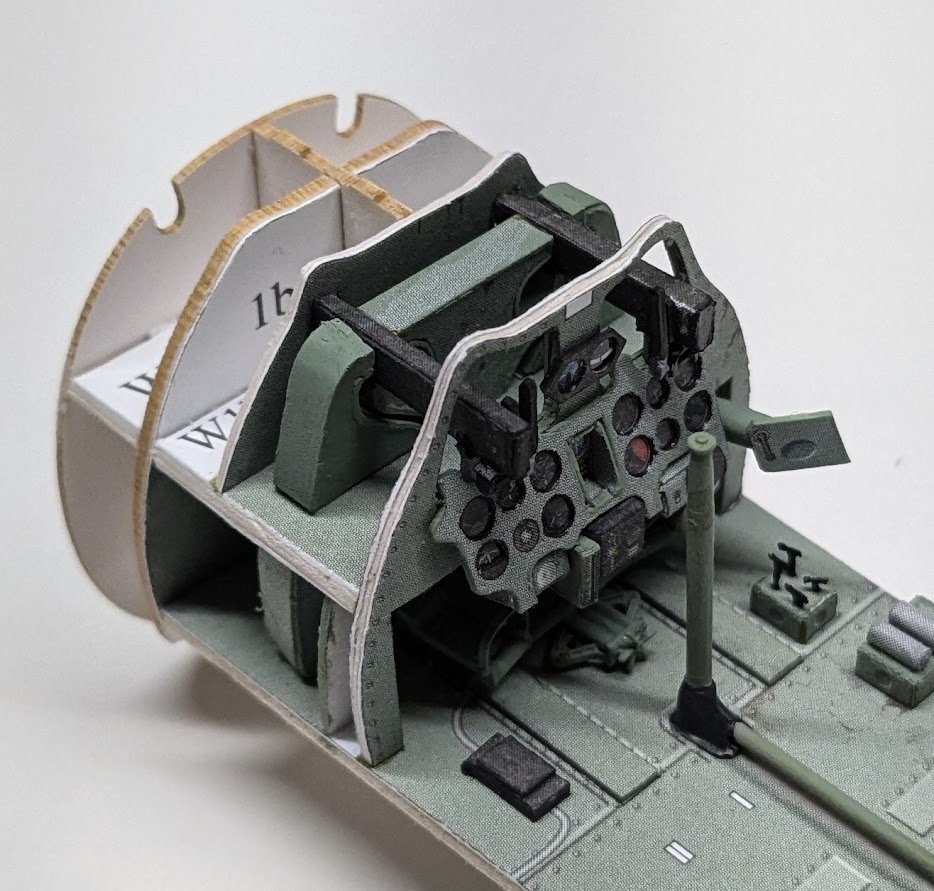
Many "special words" may have been used in completing this next phase. I had to scratch-build a new rudder pedal strap twice because the Carpet Monster ate the first one -- stupid Carpet Monster!! The tiny T-handles on the box on the right side of the cockpit were supposed to be made from styrene rod or wire (snort!!) -- I chose to cut them from paper. Onward!
- 112 replies
-
- 21
-
-
-
Don't get your hopes too high. I have many, many options in my stash now -- a downside of collecting!
-
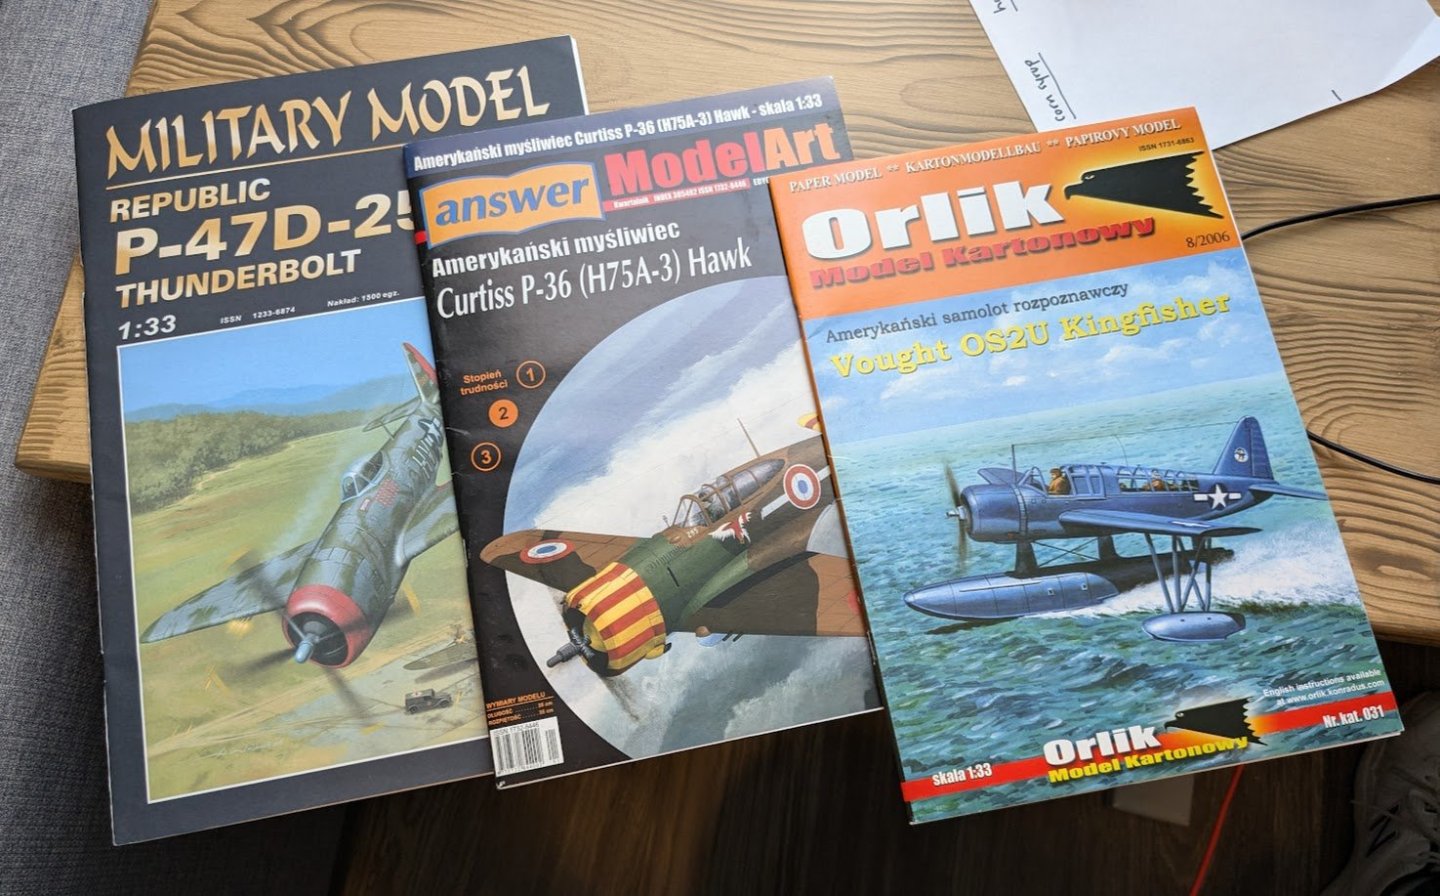
I have hit a small snag while working on the 3D-printed rudder pedals. They are quite delicate, which means of course that a couple of bits have broken off and disappeared into the Carpet Monster, despite my best efforts to be careful in freeing the part from its forest of sprues. In the meantime, look what arrived in the mail today! You may dimly recall my disastrous attempt at building a Curtiss H75 (Hawk) in RAF colors a while back. The kit shown here is designed by the same gentleman who designed that kit. I have since found a great two-for-one build log by a Polish builder who built both models and did a fantastic job on both (as the Poles always seem to do); should I ever get around to building this kit I will definitely be looking in on that build log again. The P-47D-25 is a Halinski kit, so it is absurdly detailed, as is typical with their kits. The Kingfisher is by a designer I am not familiar with, but the kit looks very good. Something I learned about the OS2U -- when I first looked at the kit, I thought perhaps it was not actually in 1/33 scale because I expected the wings to be much larger on a two-seat aircraft. Turns out the Kingfisher's wingspan was slightly less than 36 feet, so it was indeed on the smallish side -- less than that of an F4F Wildcat.
- 112 replies
-
- 16
-
-
Welcome aboard! The importance of this cannot be overstated. Congratulations on persevering!
-
Moin, Wolle! I had a chance to visit Hamburg back in 1979 and drink an Alsterwasser or two. Your restoration of Oceanic turned out very nice! And I'm sure our members would enjoy watching your progress with Britannia. Cheers!
-
Folks, we already have a recently updated thread here on the SS United States. If you wish to join in on the conversation, please do so there. Thanks!
-
https://syrenshipmodelcompany.com/
-
Great choice for a new project!
-
Neverland Hobby - is this a legit model manufacturer?
ccoyle replied to bruce d's topic in Plastic model kits
Nope. Looks like they manufacture plastic kits. I found links to their products at Scalemates and Fine Scale Modeler. -
I do, too! She's a real credit to your skills, Peter.
-
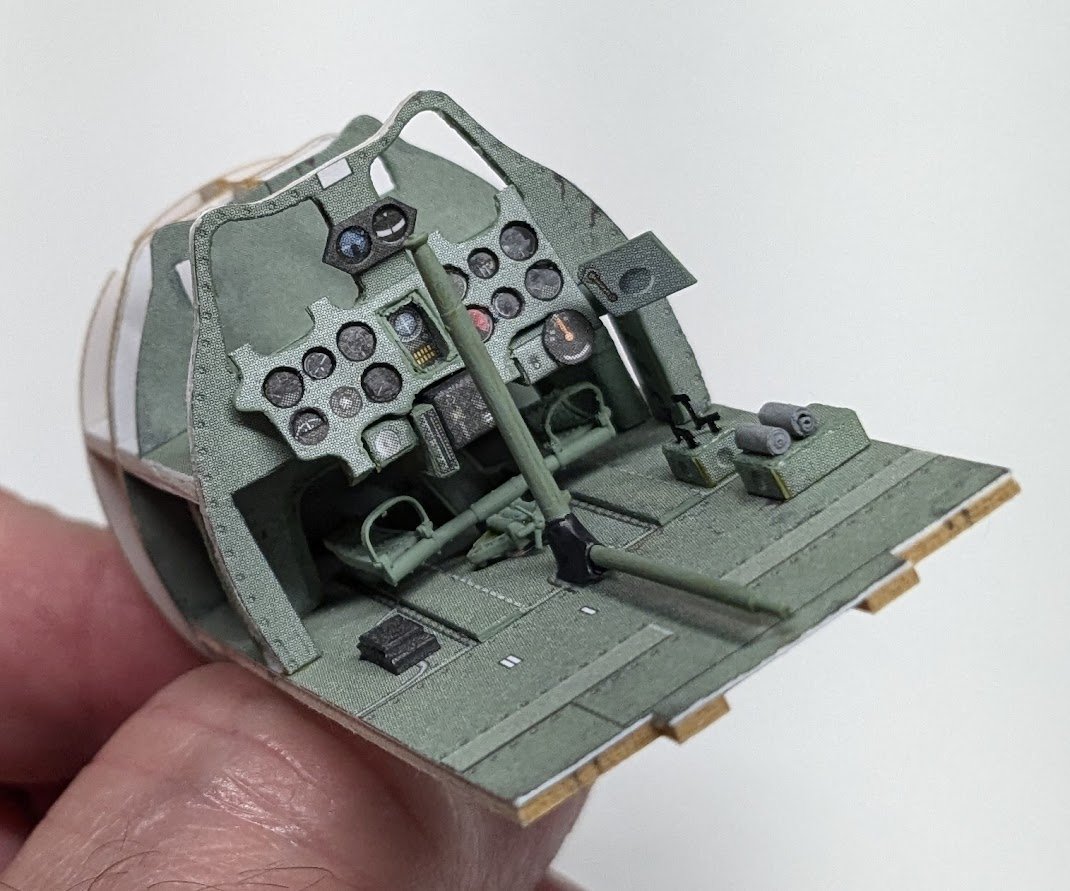
Work on the cockpit continues slowly. Sometimes it is a "three steps forward, two steps back" kind of process. Here we have the instrument panel, which is 'glazed' with clear tape (the kit includes an unglazed option). There is a recessed instrument in the center of the panel that I had to do twice because the first time it didn't allow the panel to sit properly. There is also a series of electronic doohickies that sit below the panel, one of which you can see before its installation. The instrument is a tiny box that unfortunately does not fit into the space allowed for it, so I will need to do some surgery on that piece before proceeding.
- 112 replies
-
- 21
-
-
Congratulations! I noticed that you didn't include your name and date on the nameplate. You know we get a lot of inquiries here about mystery models with no provenance -- you should include that information somewhere, perhaps on the bottom of the stand?
- 142 replies
-
- 3
-
-
- alfred
- solid hull
- (and 2 more)
-
Uh-oh -- need to develop some sales resistance! But don't ask me how to do that, cuz I don't know!
- 133 replies
-
- 3
-
-

-
- Ranger
- vanguard models
- (and 1 more)
-
If you have a smartphone you can try Google Lens -- it has a built-in translation function. You point your camera at the text and the translation shows up on the screen.
-
Slowly adding structure to the cockpit area. There's a lot of parts that need to be laminated onto various thicknesses of card, even if one uses the laser-cut frames set. The laminated parts often need to be trimmed slightly here and there to get them to fit properly, and with Halinski kits there is no margin for error -- get the frames wrong and fitting the skins afterward will be a booger. And here we hit a little snag. This bulkhead location is off because there are tabs on the piece in front of it that fit into slots on the back of the bulkhead -- except if one accidentally installs the forward part upside-down, then fitting the tabs into their slots causes the bulkhead to be off by several millimeters. It's not a huge problem, since all I need to do is trim off the tabs and fit the bulkhead without them. That's all for now!
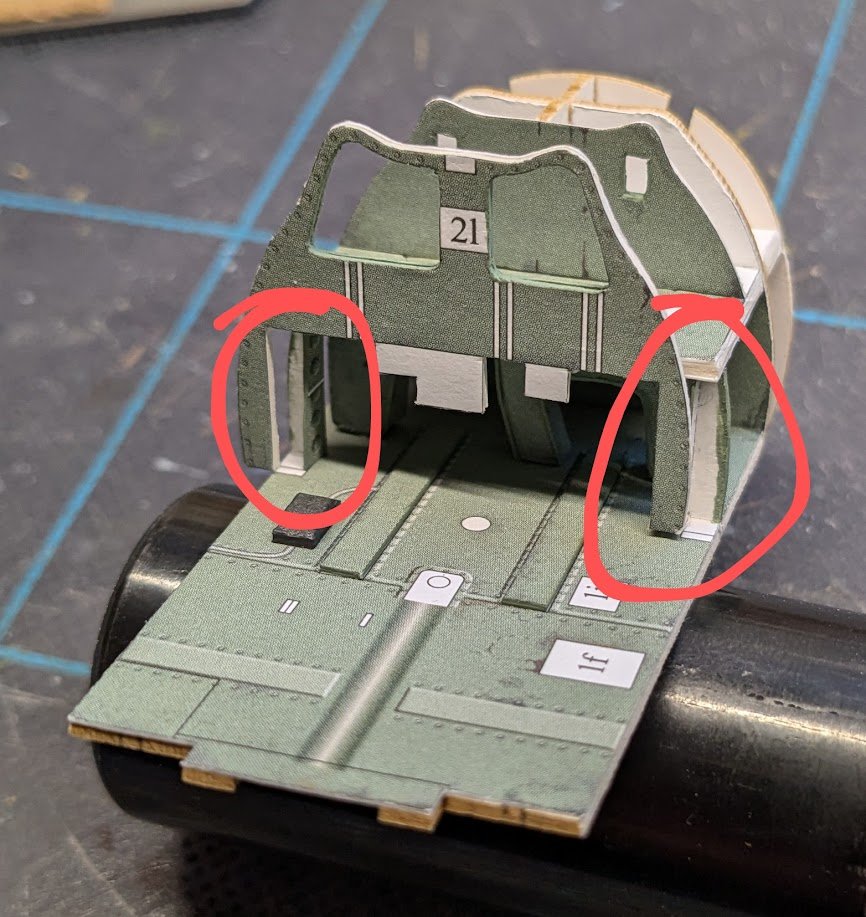
- 112 replies
-
- 18
-
-
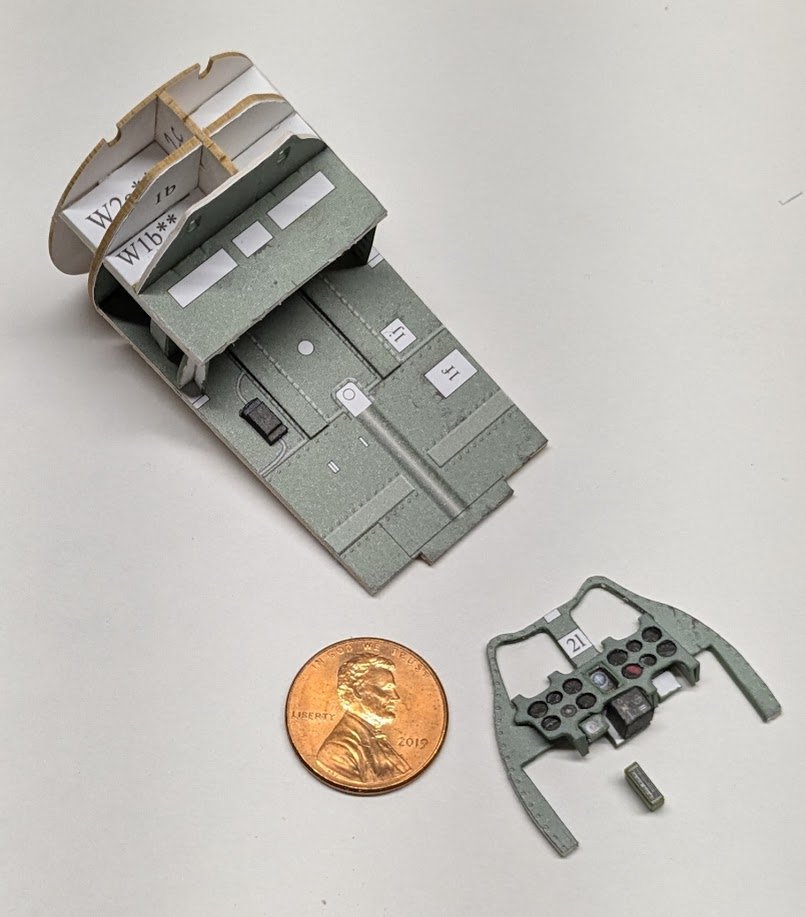
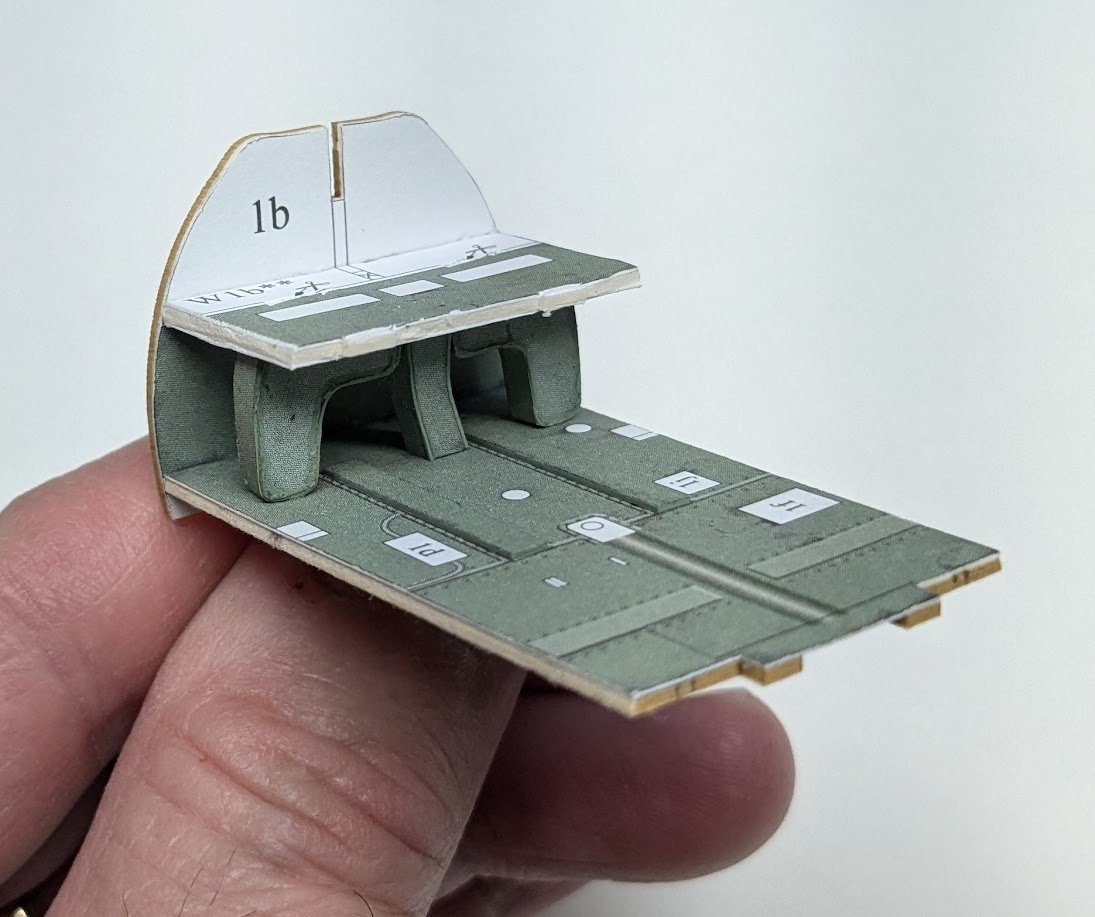
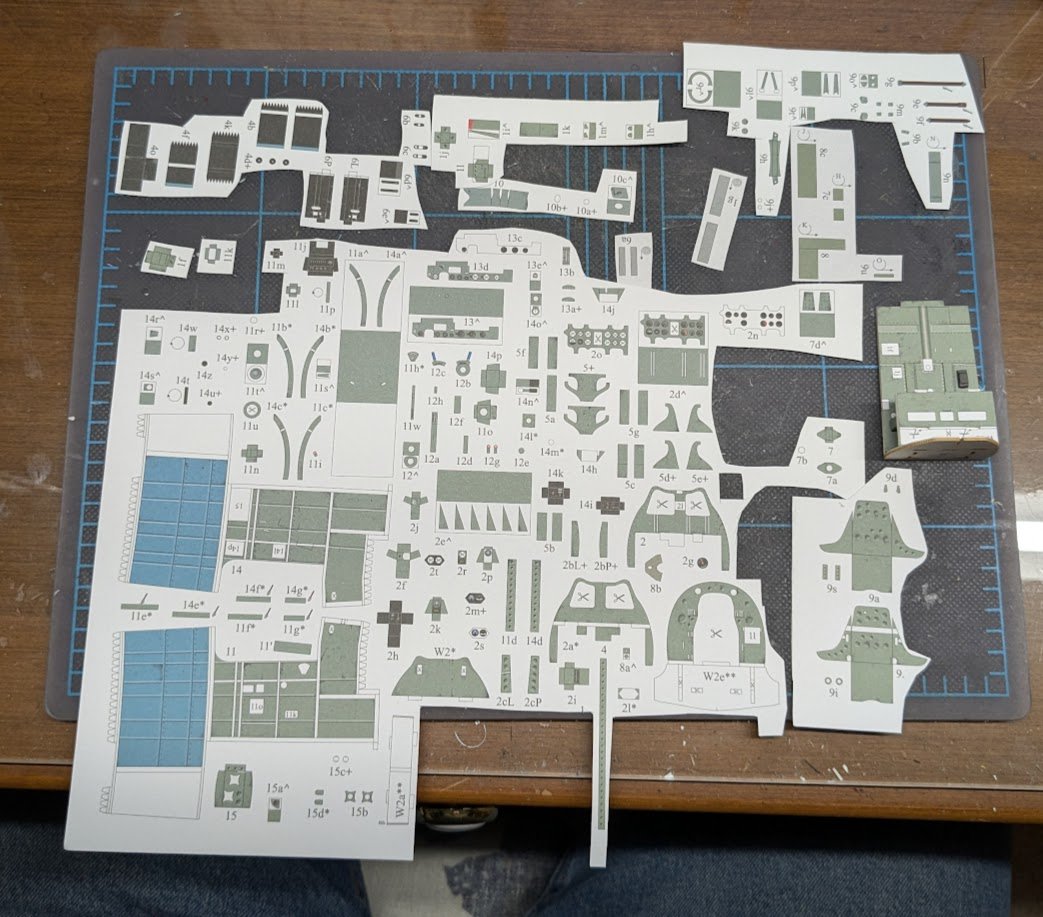
I know it's been three days since I created this build log, but despite the apparent inactivity, I did in fact start building. And here's the progress so far: Exciting, right? If you're not familiar with Halinski kits, I'll let you in on a not-so-secret secret in the card modeling world: Halinski kits are very highly detailed -- even to the point of being described as "over-engineered" by some modelers. This one, small, partially-built assembly has eighteen parts in it. To give you a good idea of how detailed Halinski kits can be, here's a birds-eye view of all the cockpit parts: That doesn't include all of the laser-cut frames that are part of the cockpit, nor does it include the wire and/or styrene rod bits that must be made using supplied templates. Some of these parts will be replaced by 3D-printed parts, but by no means all of them. It can make for some slow progress. Cheers!
- 112 replies
-
- 20
-
-

