russ
-
Posts
3,086 -
Joined
-
Last visited
Content Type
Profiles
Forums
Gallery
Events
Everything posted by russ
-
Alfons: Thanks. I will post a pic of the deck when I get the planking completed. Right now it is just one small plank after another. Russ
-
Gary: You will need to actually go through the process to see if it will work. I have never planked a hull with strips like this. I have always worked from much wider stock, cutting my planks from that. Your plan might work. I am not sure if you can do that much edge bending, but if it is not too extreme, it might be okay. Russ
-
John: Thanks. As cold as it has been, it was a challenge getting them on before the glue dried. Russ
-
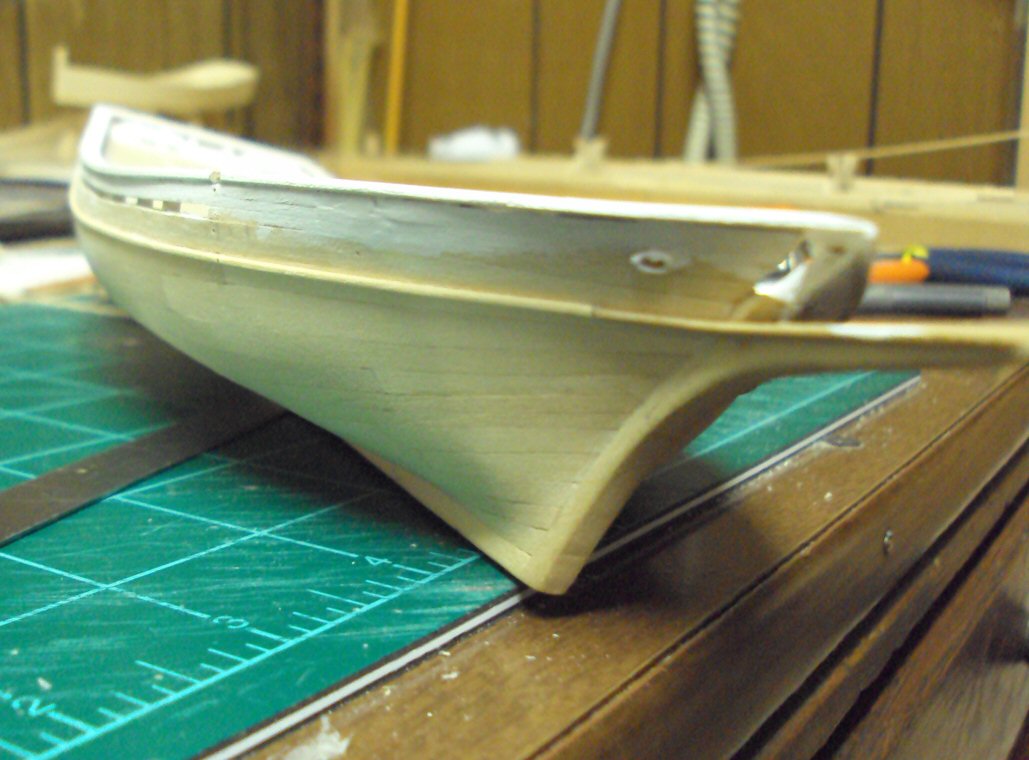
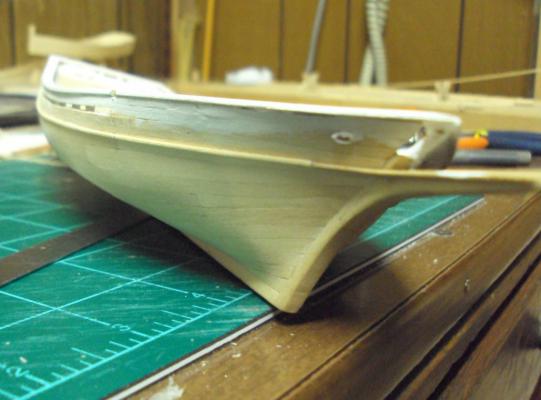
This past week, I got a little more decking done and I also added the rubrail along the sides of the hull. This is a 1/32" square piece that follows the line of the planking. Questions and comments welcomed. Russ
-
Cross-section by russ - FINISHED - 1/48 scale
russ replied to russ's topic in - Build logs for subjects built 1751 - 1800
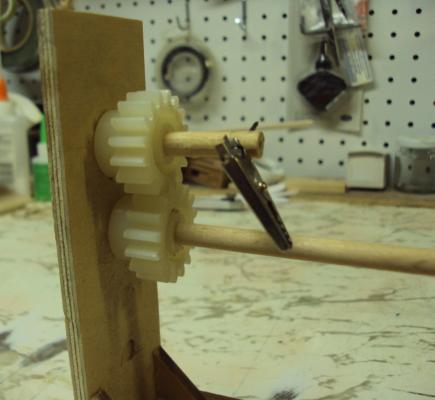
Here are photos of the two sets of gears on my serving machine. On one end we have the gears with the crank handle and on the other end we have the gears at the other end. The lower gears are connected with an axel so that when the crank is turned, the gears on both ends turn. On the crank end, the upper gear is fitted with a hook and its counterpart on the other end has an alligator clip. These hold the line to be served. The serving line is tied and glued onto to the line to be served and then the crank is turned to spin that line and the serving line is rotated onto it. The serving line is kept under tension during the process and that is very important. If the serving line goes slack, then you have a big mess. So long as the serving line is taut, it will be kept very neat as it rotates onto the line to be served. Hope that helps. Russ
- 69 replies
-
- 2
-

-
- frigate
- cross-section
- (and 1 more)
-
Cross-section by russ - FINISHED - 1/48 scale
russ replied to russ's topic in - Build logs for subjects built 1751 - 1800
I will take some better pics of the serving machine this evening and explain how it works. Russ -
Check the scale on the plan and see if the bars measure 3/16". The plan may be off. They might have printed the plans to fit on the paper and that would throw them off from the laser cut parts. So long as the parts fit, I would not worry about it. However, if there is a problem with the fit of the laser cut parts, then that would be an issue. Russ
-
Ken: Once you measure the distance along each frame, then divide that distance by the same number of planks to get the width of each plank at each frame. Russ
-
I agree about the shackle pins. I have done it with both hard soldering and just CA. CA will usually provide enough hold in such a confined space. I just glued the pin in place and then trimmed and filed the ends. Russ
-
That looks really good so far. Great work. Russ
-
It looks very good so far. Russ
-
The length of the main mast is keyed to the ship's breadth. I am not sure what Chapman is saying, but In James Lees' Masting and Rigging of English Ships of War 1625-1860, he says that that the main mast length from the 1719 was 2.4 times the ship's breadth for frigates of 30 guns. The max diameter for the main mast from 1670-1773 was 15/16" per 3 ft of length. Russ
-
Gary: The 1/16" basswood will be a better choice for the bottom planking. If you are single planking, you will appreciate the extra thickness. This will allow for some sanding. Russ
-
The rigging looks very good. The seizings appear very neatly done. Good work. Russ
-
They look like cradles to hold the hull once it is on the building or display board. Russ
-
Gary: Quick work is the short bulwarks planks between the gun ports. The bulwarks plank is the plank above and below the gun ports. The topsides planks are the outer planks below the rail and above the wales and black strakes. The transom plank is the outer plank of the stern and the counter plank is probably the area where the name is located. Russ
- 206 replies
-
- 1
-
-
- fair american
- model shipways
- (and 1 more)
-
Ken: I have had good results by using tape at each frame to measure out the complete length of the surface to be covered with planks. I then take the tape off the frame and lay it out flat. Now I have a mark at the each end of the tape and I divide the space between those marks equally. Then I put the tape back on the frame with the end marks in the same place on the frame and transfer the rest of the marks onto the frame. Now I have, on the frame, the width of each plank that crosses that frame, I do the same for each frame and along the bow and stern post. On your hull, I can see the possible need for stealers aft as you approach the sternpost, but I doubt you really need any drop strakes going into the bow. One key to running your planks into the bow is to makes sure the garboard and broad strakes do not climb up the bow too far. If they do, this will crowd the rest of the planks at the bow rabbet and then you will find you will not have enough room for all of them, leading to the drop strakes to fix that problem. Properly spiled and tapered, the general shape of the planks at the bow should look like a downward sloping "S". The ends of the planks will appear to sweep upward slightly at the bow, but in reality, they will not. Russ
- 455 replies
-
- 2
-
-
- fair american
- model shipways
- (and 1 more)
-
Alfons: The deck details look terrific. That is really wonderful work. The paint work is really very good. Russ
-
Drilling Sheave Holes For Masts
russ replied to Stuntflyer's topic in Modeling tools and Workshop Equipment
I have not done it with a drill press. I have always done it with a hand held pin vise. I would use a knife point to to mark the where you want to the drill to bite. Go slow and check several times to make sure you are drilling in the proper direction. Russ -
That looks good so far. So long as you do not let any of the planks get too wide at the bow, it should be fine. Nice work. Russ
-
14' Banks dory by martinmack - 1/12 scale
russ replied to martinmack's topic in - Build logs for subjects built 1851 - 1900
They look wonderful. Congratulations all round. The details are impressive. Russ -
Pat: The flattie looks great so far. The primer coat looks very nice. Great work. Russ
-
Wes: Check out this thread. http://modelshipworld.com/index.php?/topic/53-before-you-post-your-build-log-please-read-this-starting-and-naming-your-build-log/ Russ
-
Andy: Yes that is what I meant. Russ
-
Andy: The top edge of that paper template probably needs to spiled to get the correct curve. Once you have that curve correct, then measure the width of the plank at that point. I suspect that although the top edge of the template looks okay, it is actually causing the problem on the bottom edge, thus the need for some spiling on that upper edge. . I would definitely use scale length planks on your hull planking. Russ