russ
-
Posts
3,086 -
Joined
-
Last visited
Content Type
Profiles
Forums
Gallery
Events
Everything posted by russ
-
Mike: Excellent work. The decks look great. Looking forward to the stern ornaments. Russ
-
Nice work on those cleats. Everything has a great finish to it. Nice ambience. Russ
-
Sam: Thanks for the kind words. The soldering job here was actually only competently done. There are others around this site who are far neater and more expert than I. I painted the waterways, inner bulwarks, and railings before I began the deck planking to avoid having to mask that area. I want a natural deck and crisp line along the curve of the deck against the painted surface. So far, it is working out well. This reminds me that now the weather is a bit better, I can paint the port side railing and the stern railing bfore I lay any more deck plank. Russ
-
Mark: It is too bad that it came to this, but I get where you are coming from. We have all been there at some point. I look forward to the next build. Russ
-
Henry: Thanks for clarifying. That was really what I meant to say, but my terminology was flawed. Druxey had it right from the start. The cut splice would be the way to go. In any case, the idea is to have that resting against the shoulder near the end of the jib boom and have the shrouds come off that going on either side. Russ
-
Ah, I got it. Thanks for clearing that up. Russ
-
The strings look good. That creates a good looking run of the planking. My question is the marking of the widths of the planks. They look a bit wide for the scale. At 5mm, that is just over 3/16" wide. If the first photo shows the width of each plank, that looks awfully wide. I may have misunderstood. If so I apologize. Russ
-
Greg: Seize a loop in the middle of the line just as you would a mast shroud. Slip it over the end of the jib boom and you have two lines, one on either side, to be led back the catheads port and starboard. The loop will rest against the shoulder formed near the end of the jib boom as depicted in your drawing. Russ
-
Very good work on the sanding and the bulwarks. So far so good. Russ
-
Alfons: Yep, there was a little tear out in the rail. That will require a little filler, but when the cap is on and everything is painted, it will be invisible. Russ
-
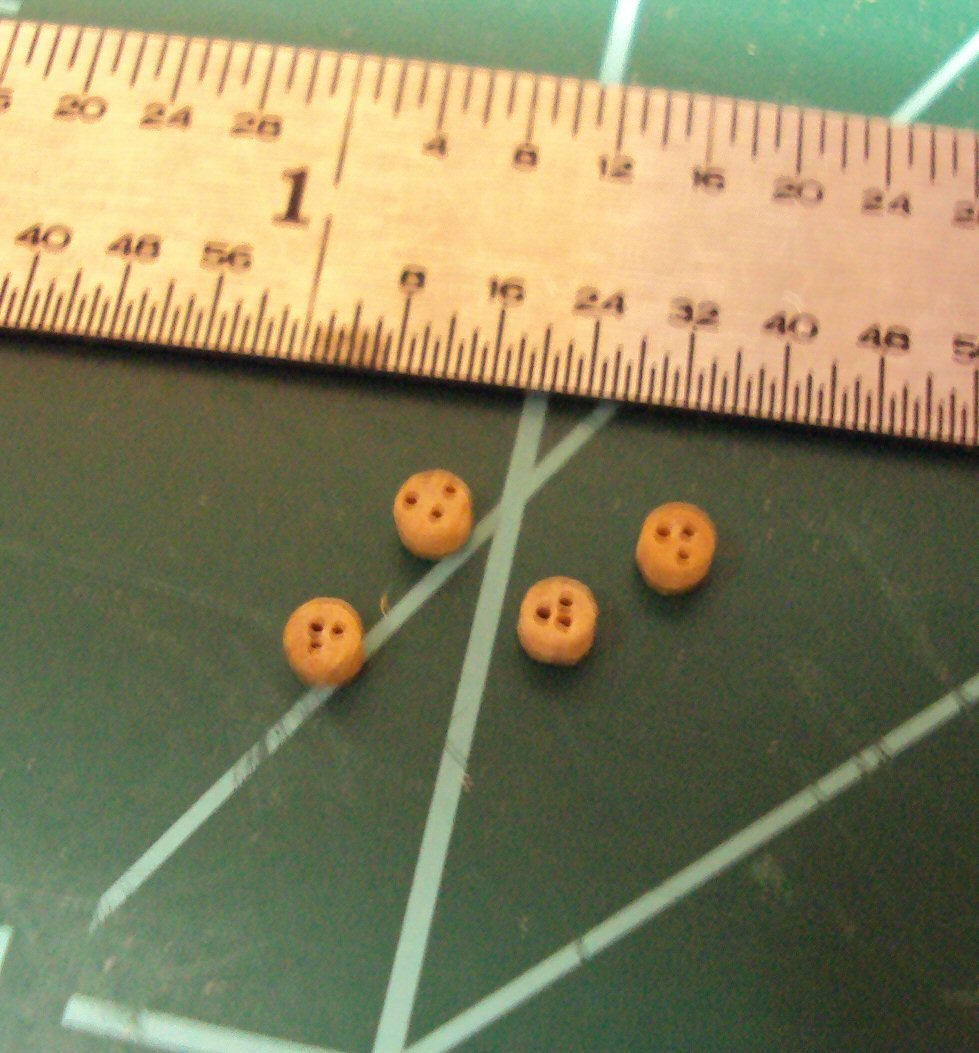
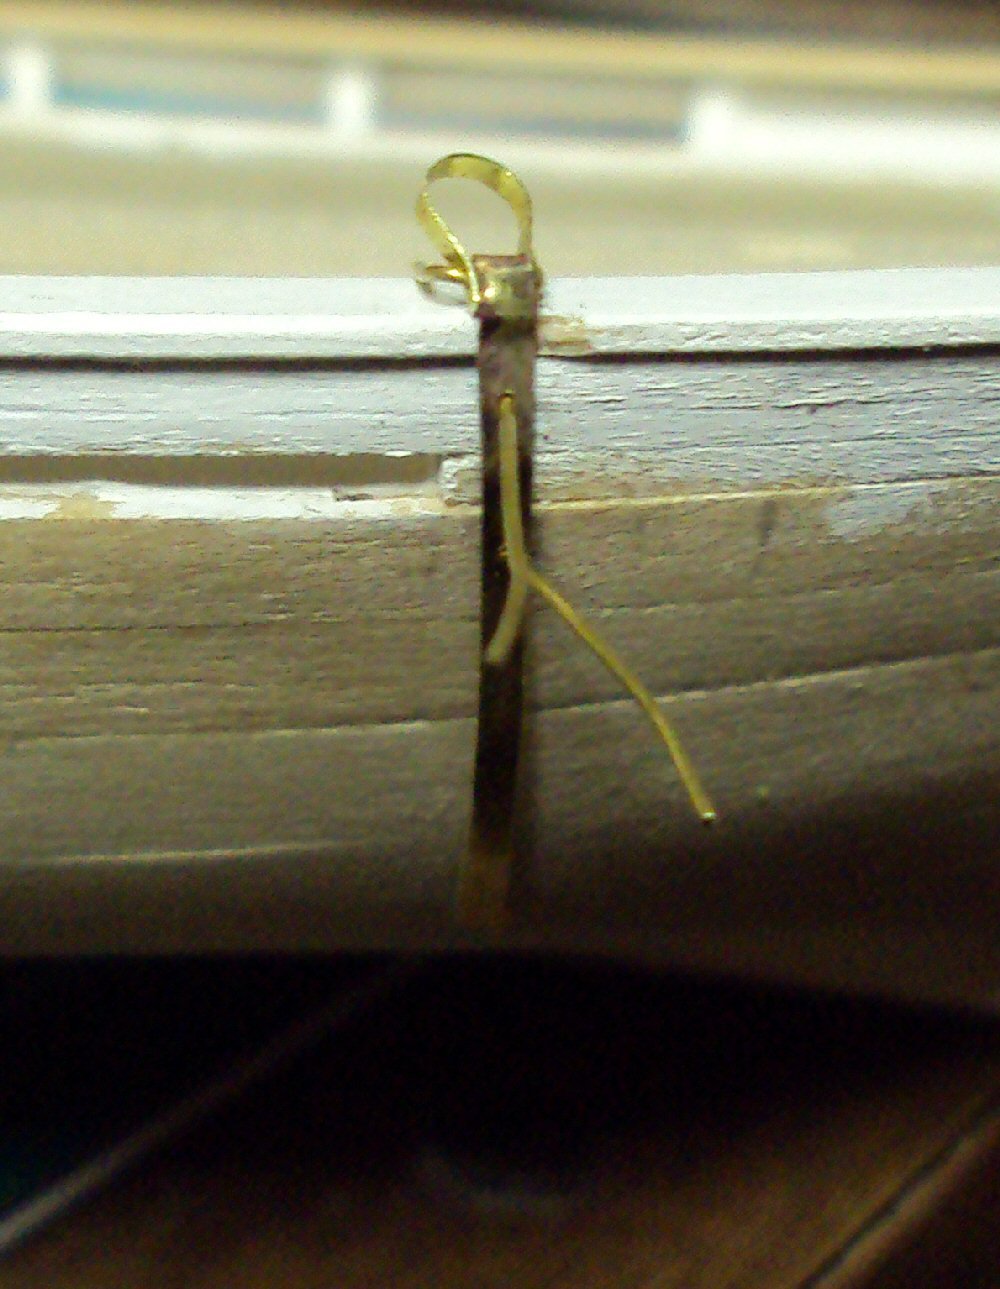
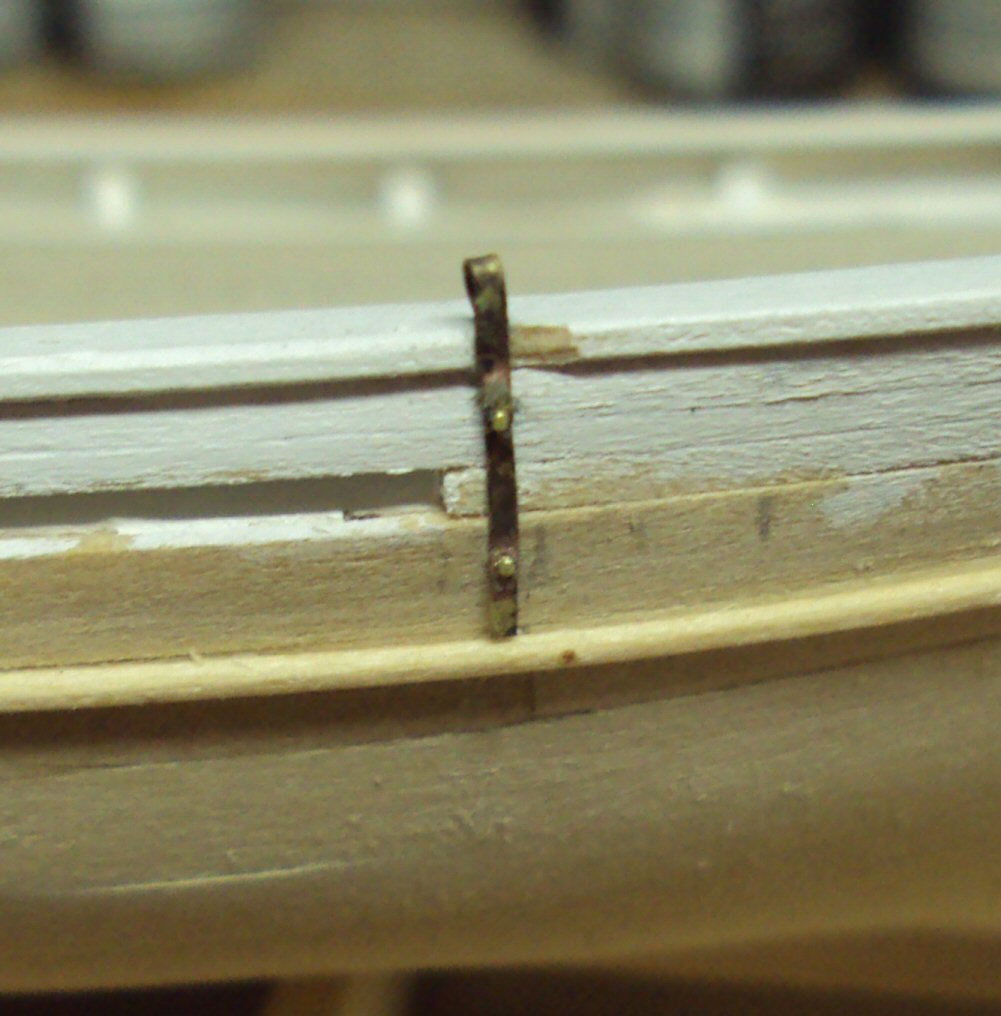
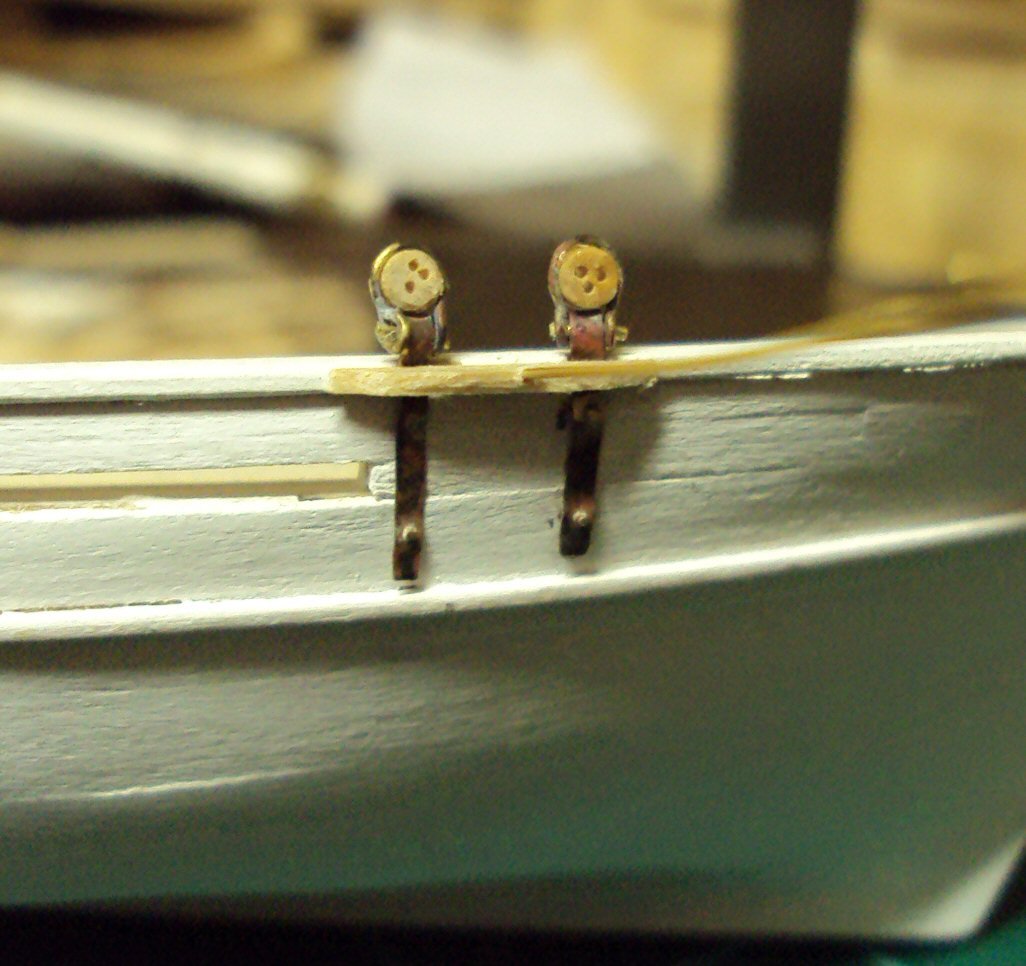
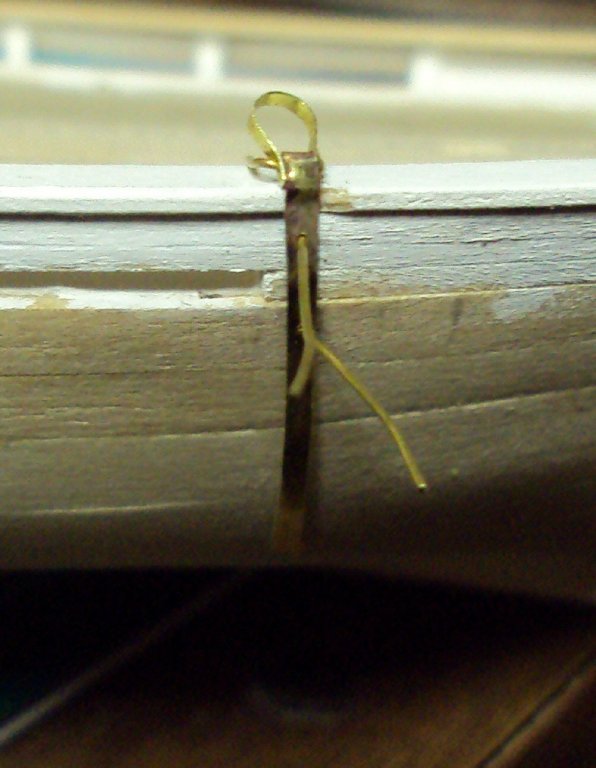
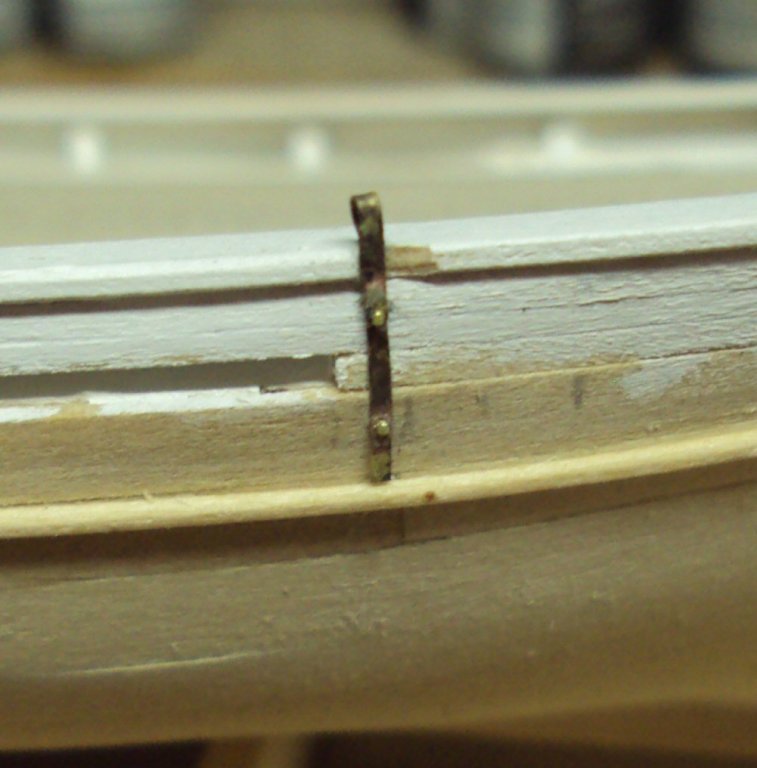
Here is another small update. I had some time to solder up the chainplates tonight. There are ten total. Each has an eye soldered in its upper end and is drilled for two wires that will fasten it to the hull. Here is a photo of a dry fit. Never mind the wires, they will eventually be glued in and cut off. Also, the chainplate will be cut shorter, just below the bottom wire. That will happen only just before final installation. The rail is notched for the chainplate to lay flat against the hull and there will be a wooden cap fixed along the outer edge of the rail to help secure the chainplates upper part. Questions and comments welcomed. Russ

-
Frank: Thanks for the kind words. I have sent you a PM with my email contact. Shoot me an email and let's talk. I have all of the history of the American Girl and I will be happy to share the paperwork. I also have some photos of her, but I am always looking for more. As for how much time it takes, I am notoriously slow about my model building. I am sure others would have the time to spend on this and would crank it out in a few months. Not my style really and even if it were, I just do not seem to the time to spare on some days. Russ
-
Martin: Thanks. I wish I could find more time, but sometimes it is not there. I am hoping to lay a little more deck this evening. Alfons: Thanks for those kind words. I hope mine can at least come close to matching your fine schooner. Russ
-
Craig: Your hull is coming together nicely. I agree about the clamps. Very smart. Russ
-
The stern looks good. Very clean. Nice work. Russ
-
Elia: Thanks for the kind words. Russ
-
Sherry: Thanks. I agree, so long as we do not look too closely.
-
Joe: Thanks. Will do. Russ
-
Pat: Thanks. It was nice to get a few minutes in the shop. Hopefully I will get a bit more later today. John: Thanks for looking in. Russ
-
Thanks. Yes, all the railing and outboard will be white and the hull bottom red. Russ
-
Mike: The wheel box and the cabin trunk look great. Nice work. Russ
-
Pat: That could have been much worse. Other than making a new bowsprit, you appear to be in good shape. Russ
- 517 replies
-
- 1
-

-
- Endeavour
- Artesania Latina
- (and 1 more)
-
Have a look at the articles on planking. http://modelshipworldforum.com/ship-model-framing-and-planking-articles.php Russ
-
Gabe: That is really quite normal. Kit instructions generally do not tell you the details as much as they tell you where things go. A little research on seizing and kots is quite common. Russ
-
Gabe: Do not fret. You have shown that you can work around the problems you encounter. That is one of the most important aspects of model building. Is there anything particular in the rigging that is giving you fits? Russ