


newbuilder101
-
Posts
870 -
Joined
-
Last visited
Content Type
Profiles
Forums
Gallery
Events
Posts posted by newbuilder101
-
-
-
-
-
Thank-you Mark! You've listed me with some pretty amazing carvers - not sure that I'm quite up to their level but I am flattered.
-
Thank-you Patrick! I use Testors metallic gold paint.
-
Thank-you Piet!Thank-you Pete! Yes, this really is my first scratch build, but not my first experience with carving or artistic things though.Dan: Not a problem. You have your notepad ready...no pressure there.
 Thank-you as well for the Mother's Day wishes which does apply to both Canada and myself.Thank-you Remco! I'm sure with your skill level, your carvings will be spectacular and you won't need mine,
 but thanks for the thought!
  Thank-you Sjors! I'll have to think about the online courses.
-
Thank-you for your generous comments Robbyn and Brian!
-
-
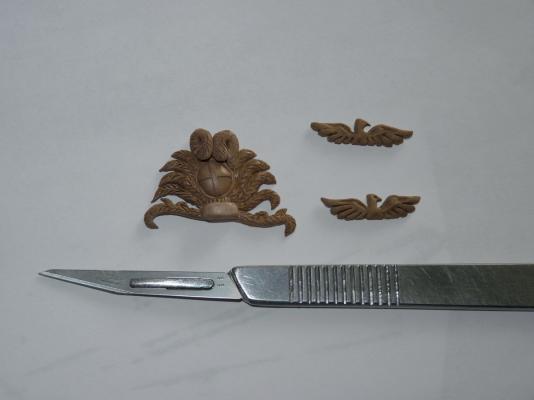
Thank-you Wayne! I will be disappointed when all the ornamentation is finished - I love making these bits.Thank-you Mark! I use mostly basswood for the carvings such as the figurehead and I have a scrap bin from our workshop and it has bits of cherry, mahogany and other scraps that I can't identify. I use a scalpel, small files and sandpaper. The latest bits are from a piece of the unidentified wood. I coated it with wood conditioner in preparation for stain and then I decided to paint them gold to match the other bits....now I wish I had left them natural since the conditioner darkened the wood so nicely.Thank-you Henry!Thank-you as well Dee_Dee!Thank-you Augie! Whatever you do - DON'T give up!Thank-you Dan! I do not have the kit, just the plans and everything is from scratch. I may buy some rope, blocks and deadeyes later, but not sure yet. See my response to Mark above for the wood info. I have a lot more carvings to do, and I will try to include more photos of the work in progress next time.
-
Another small update.....
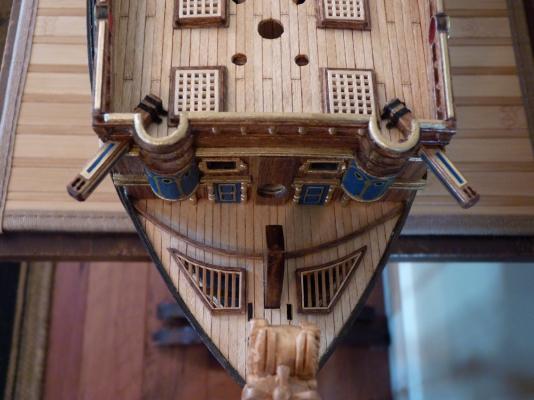
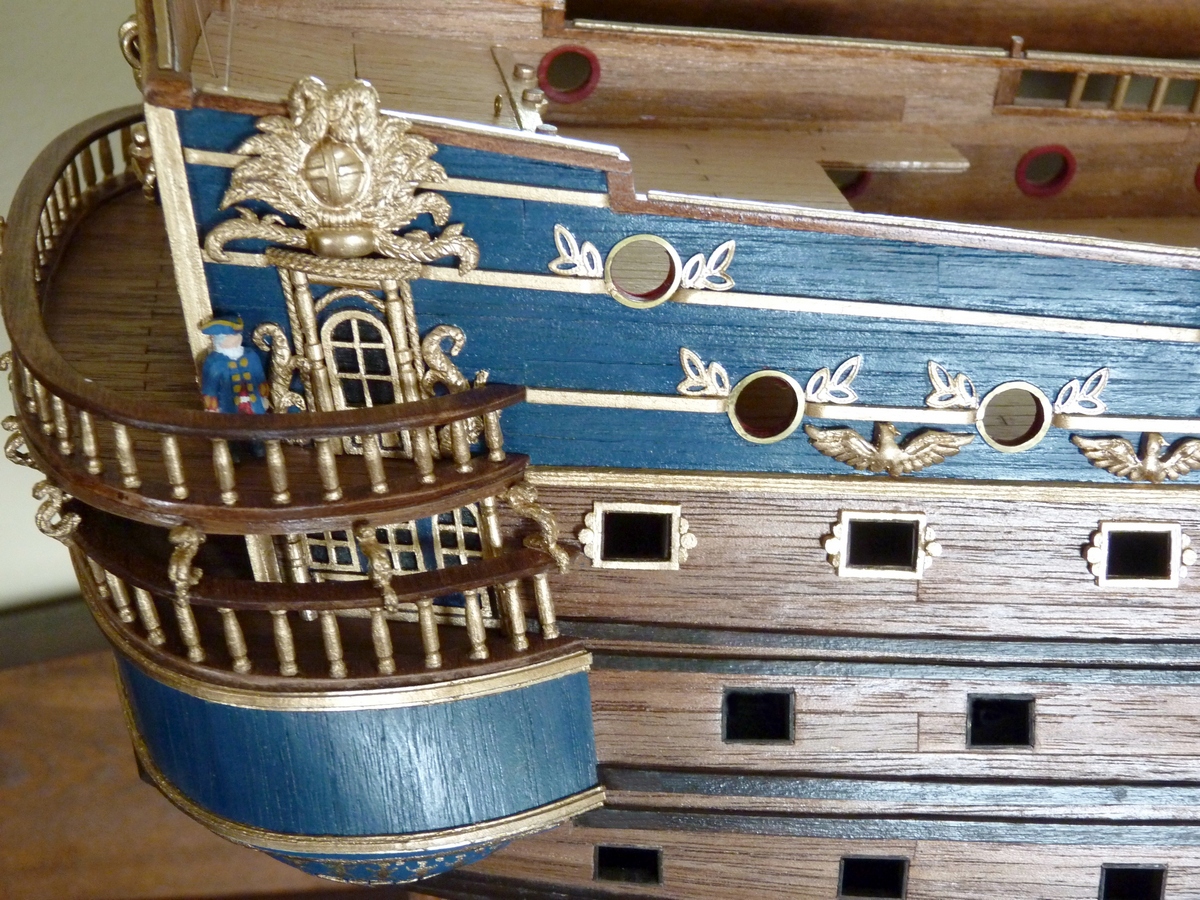
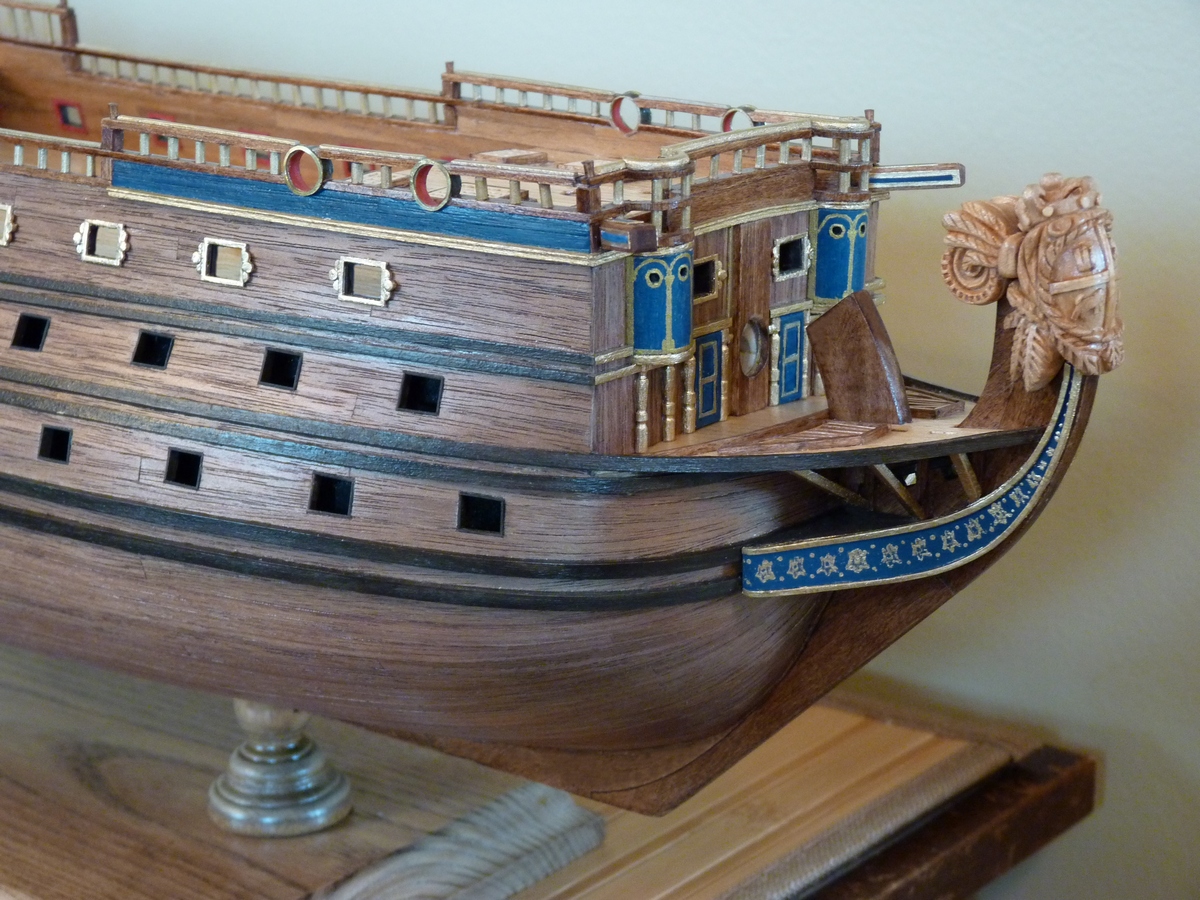
New additions include the vertical strips of wood on the hull mid-ship. I'm not sure of the name or function of these timbers, but I'm wondering if they could be for protection of the hull when the lowering of the ship's boats?
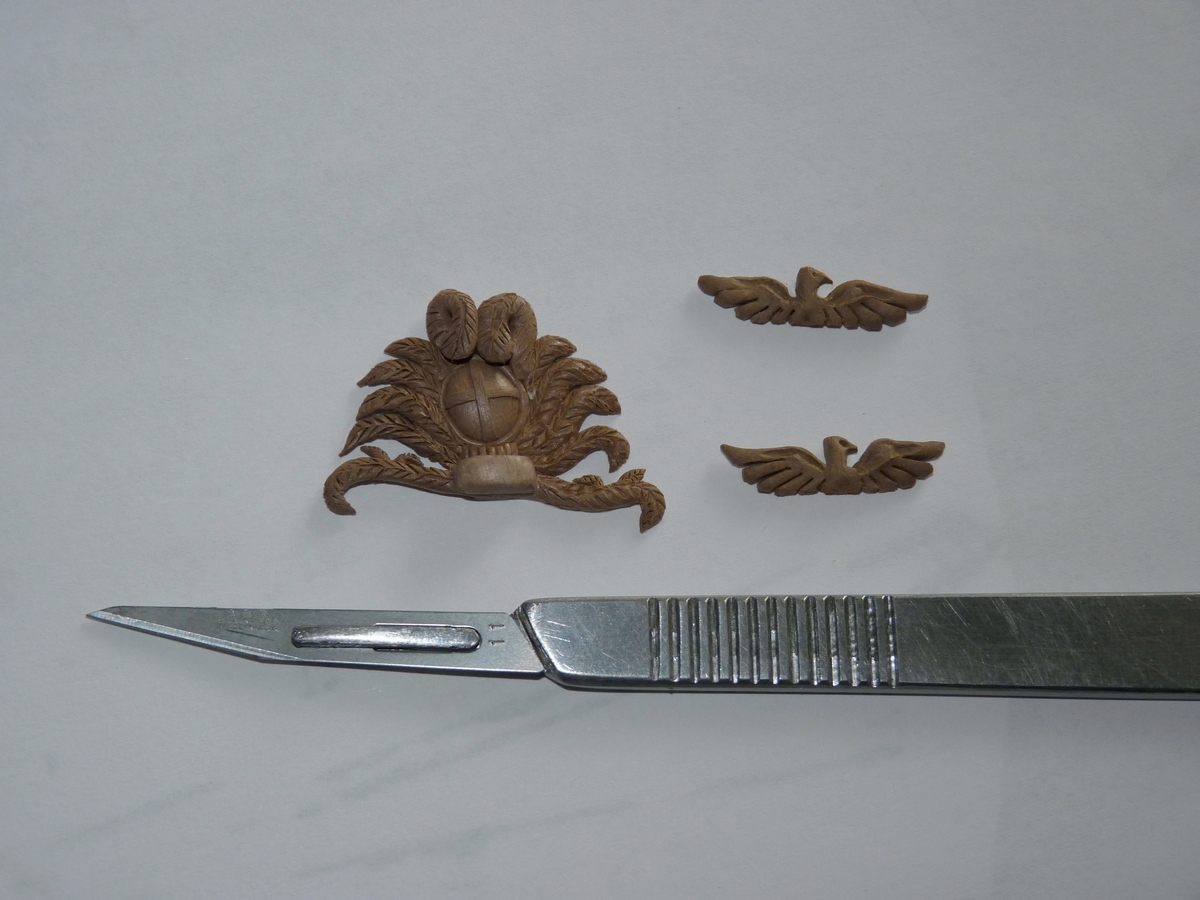
Also added are more ornamentation pieces, such as the eagles and the piece at the top of the gallery door.
Now to make these same pieces for the port side.

- firdajan, egkb, CaptainSteve and 38 others
-
 41
41
-
-
-
-
-
-
Thank-you Patrick and Ed for the generous comments!
Ed: I have learned the LOS technique and SO much more on your build logs - beautiful ships and educational logs!!
-
-
Thank-you so much Chris, Jack, Piet, Augie, Michael, Sjors, Joe and Grant for the kind comments and support! Each and every one is truly appreciated!
-
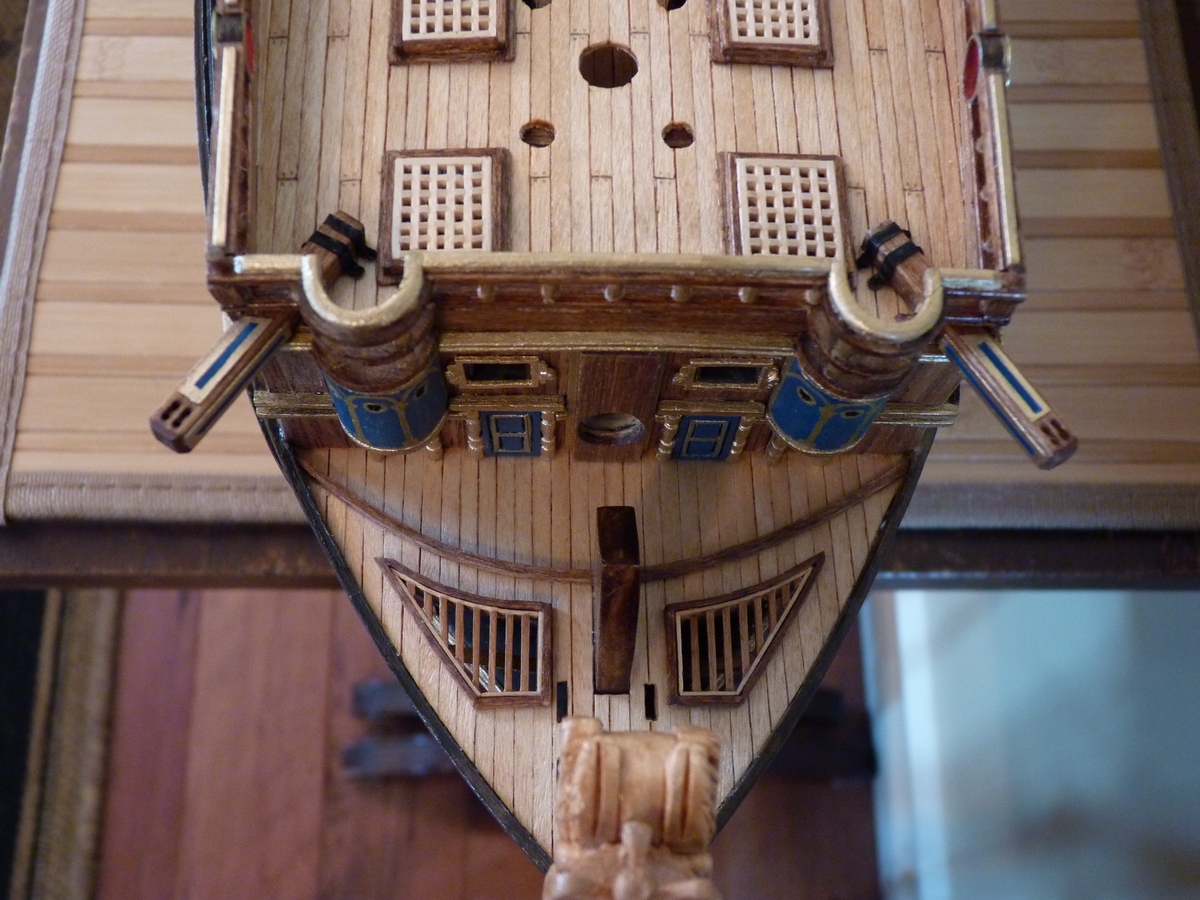
Finally a bit of an update!
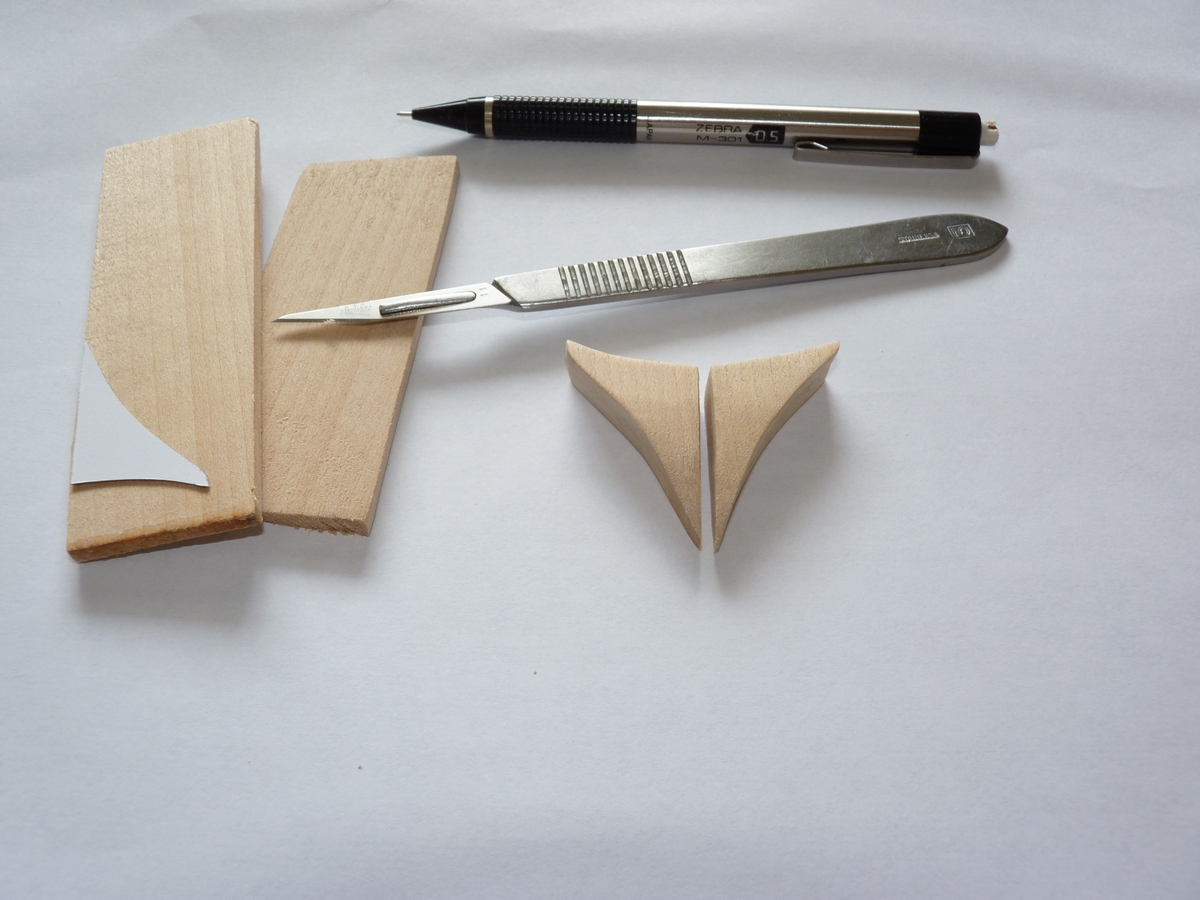
First photo shows some shaped pieces at the bow. In my eagerness to finish and install these and the fancy trim overlay, I forgot to take pictures and these pieces are virtually hidden now!

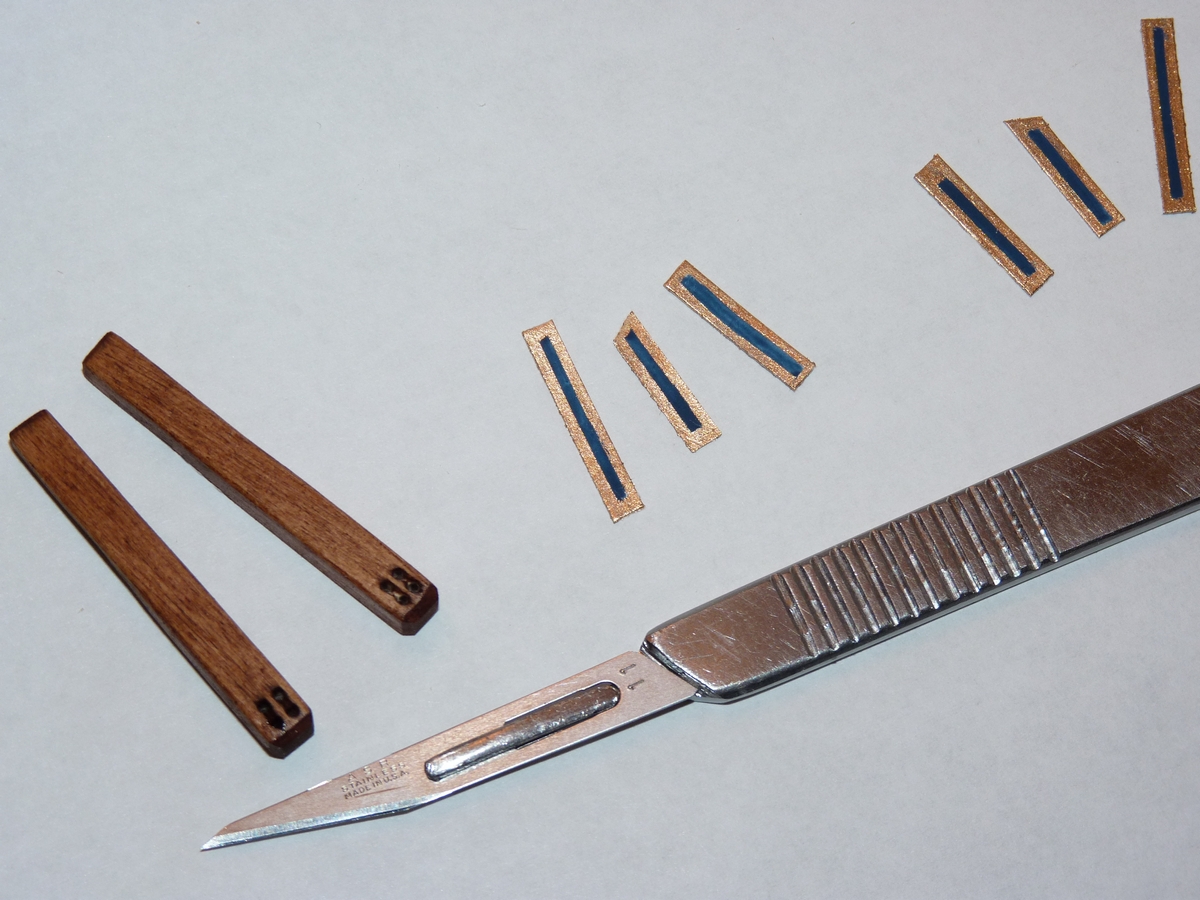
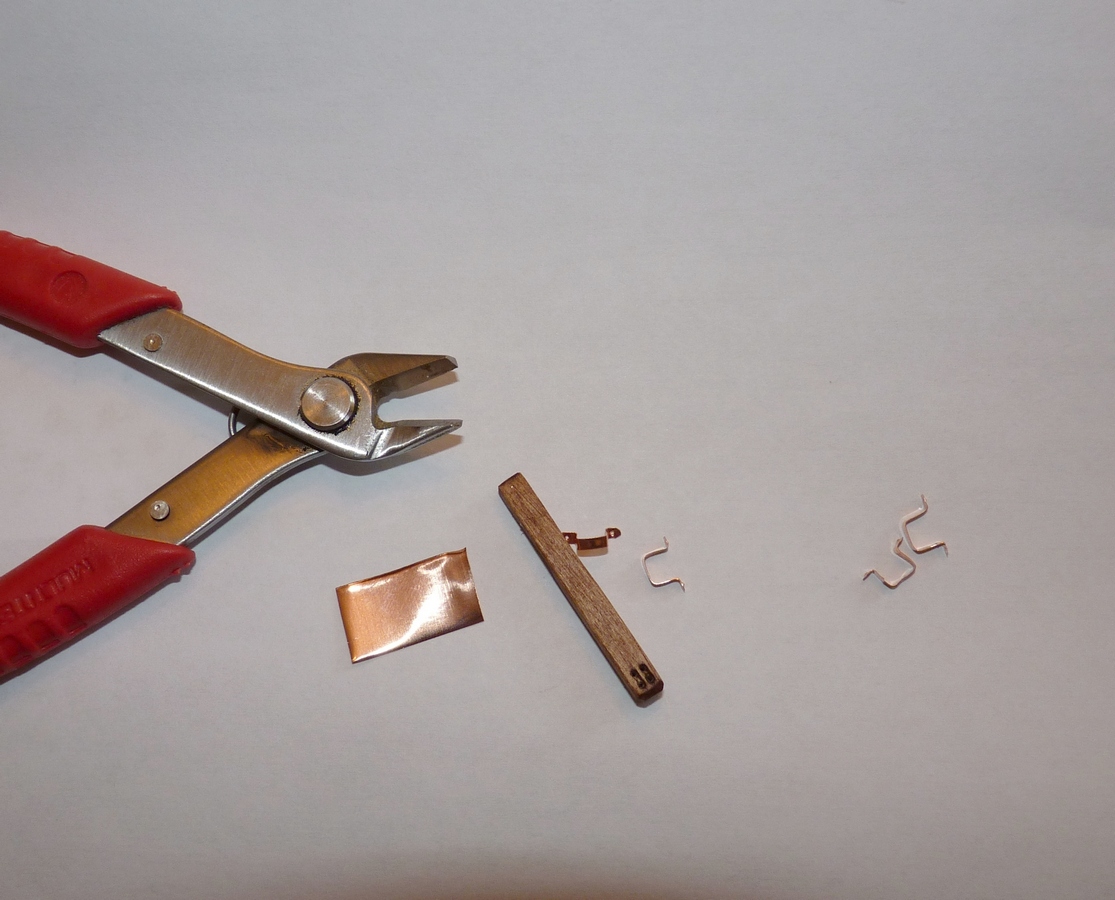
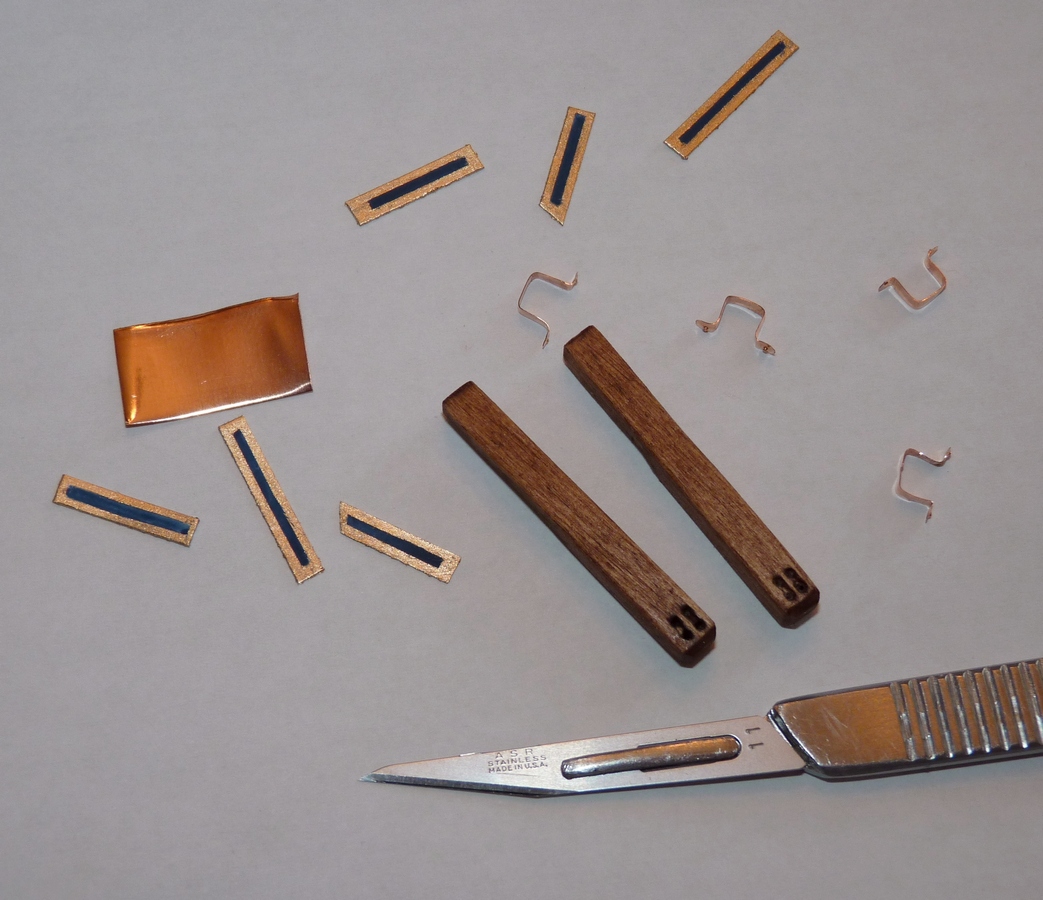
Next up were the catheads and trim, made from basswood square stock.

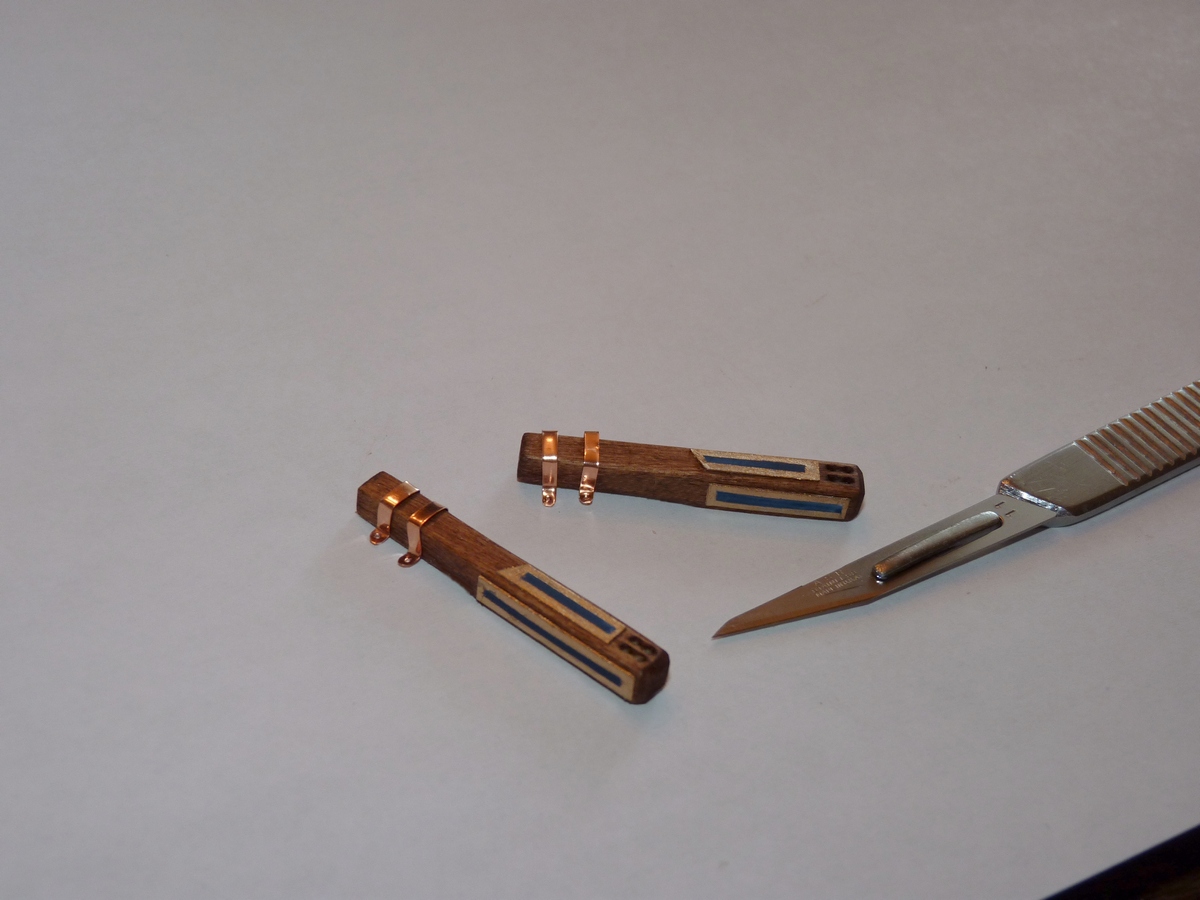
I used copper sheet to cut strips and fashion the brackets that hold the catheads down.
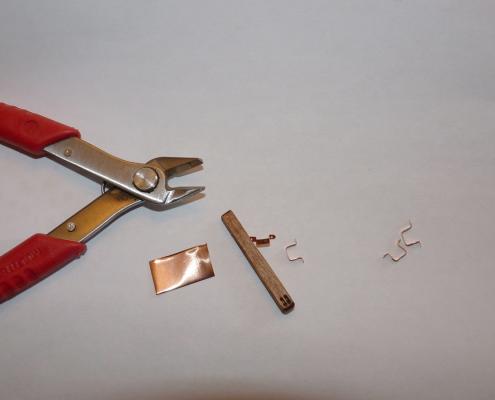

Everything is assembled.
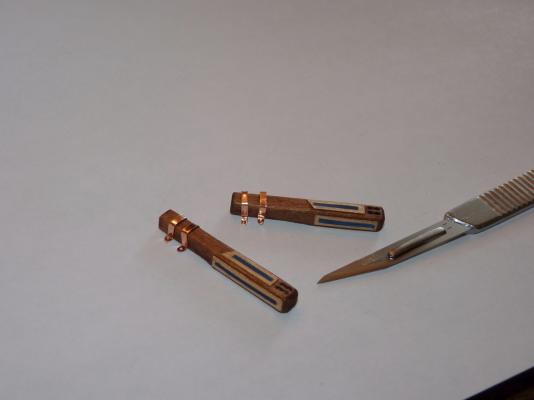
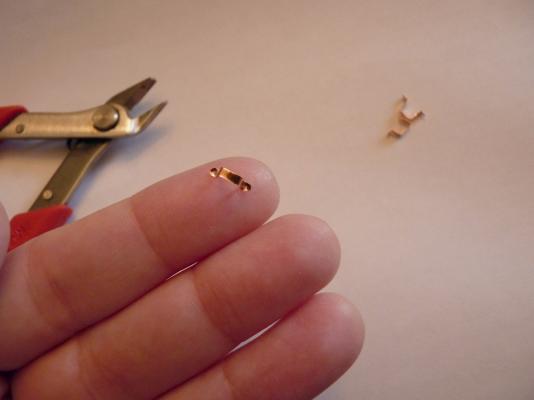
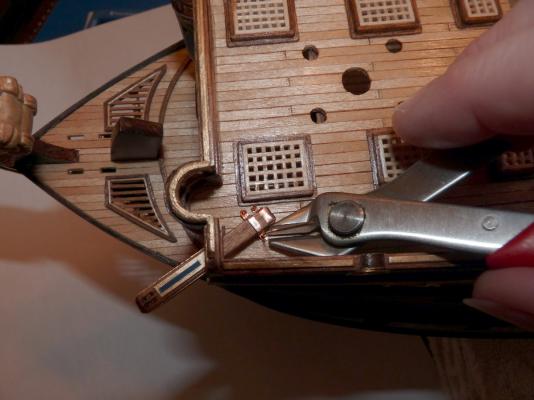
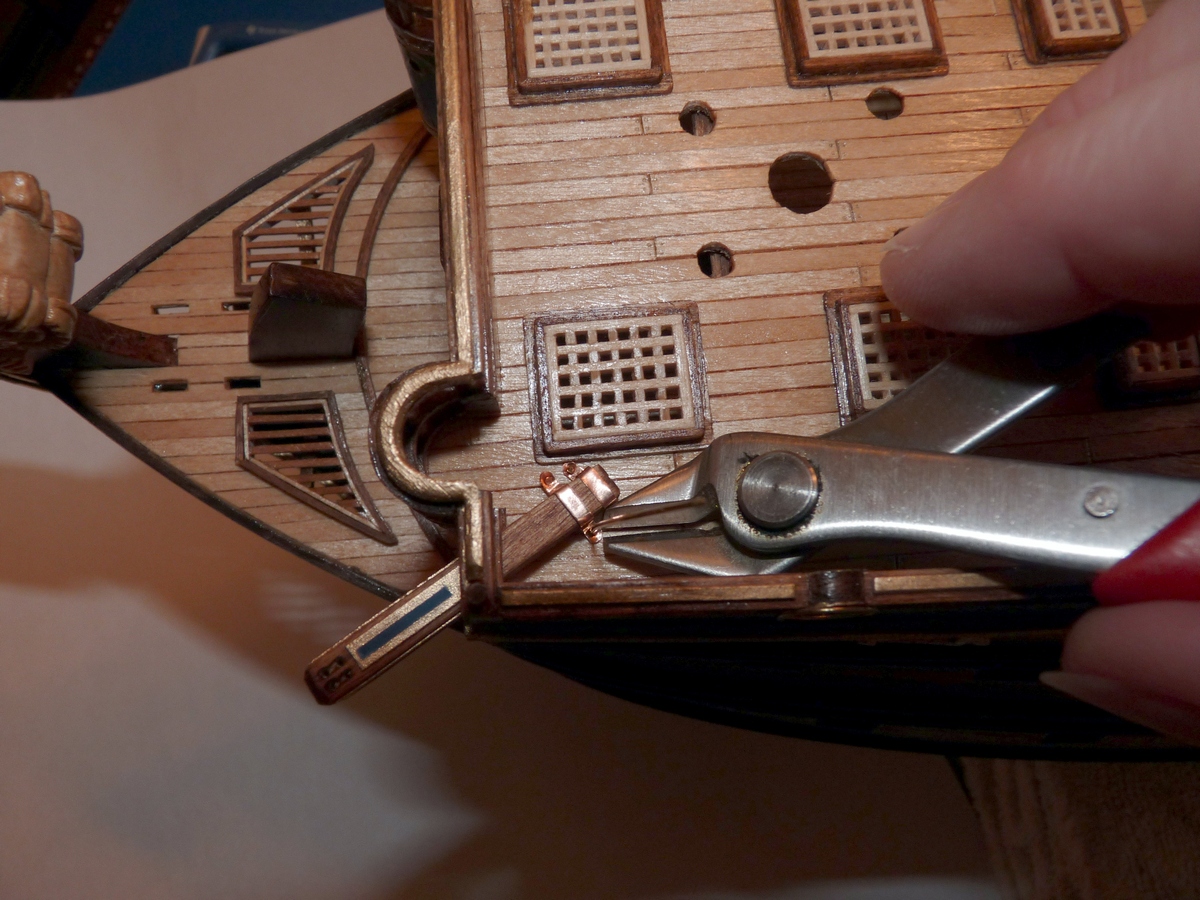
Then installed on the model. I used copper wire to simulate bolts.
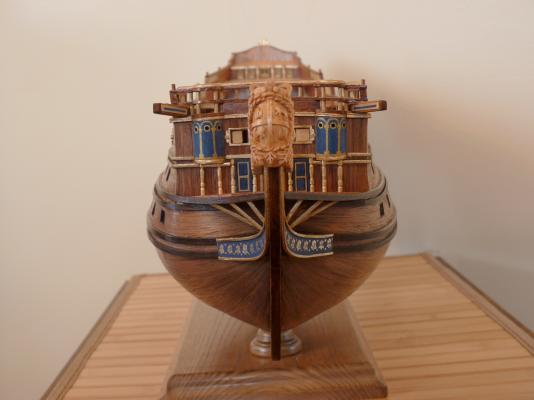
Here's a bow shot with catheads installed and bow braces and trim pieces.
This picture shows the copper brackets blackened with liver of sulphur. I used EdT's method of soaking them in acetone first, to clean and remove any coating that may have been present. Then I dipped a small paint brush in dilute liver of sulphur and applied to the brackets in situ, followed by a water rinse - it worked like a charm!
Just a slightly different angle.

That's it for now.
-
-
-
-
-


HMS Victory by gjdale - FINISHED - Mamoli - Scale 1:90
in - Kit build logs for subjects built from 1751 - 1800
Posted
Spectacular little boat! I need a couple for my San Felipe, can I place an order with you now?
