


newbuilder101
-
Posts
870 -
Joined
-
Last visited
Content Type
Profiles
Forums
Gallery
Events
Posts posted by newbuilder101
-
-
-
Thanks for the idea Piet, and thank-you Mark, Karl, Sjors and Nenad!
Bob: I couldn't resist.
- trippwj, captainbob and Piet
-
 3
3
-
-
-
-
Thank-you Wayne, Michael and Ed!Michael: Yes, I am a bit of a pack rat. We have a working floor model gramophone, and unless you buy tungsten tipped or fibre needles, then you can only use the needle once or twice at most. The steel tip dulls and rounds, thus making the groove in the record wider if used multiple times.Ed: I would love to be able to say that I spent hours researching and sourcing the best of papers, but I confess to using what I had on hand. Please see the next reply for the answer...Wayne:
 Close......paper from a HP copier. I'm tempted to buy a Canon copier just so I can use your line!!!Also have to add that I wish it was a canon copier because I'm getting quite weary of making them individually.
-
Thank-you Piet, Augie and Edwin!Piet: I think the "impossible to tell" is a lovely compliment, but a more accurate description might be: "not too noticeably different at a quick glance" and I'm happy with that.
 Augie: I think we all do what we have to do and use what we can. I've always re-purposed things as often as possible.Edwin: And those used "scratchy" needles are now cannon trunnions.
-
-
Thanks Crackers! Glad to be back.
Thank-you as well Popeye.
-
I've been asked 'Paper or Plastic' but, until now, never 'Paper or Brass? I can't tell the difference !!!!!
Could you mention how you made the trunnions?
I knew I had forgotten something. The trunnions are made from something very unusual. I just happened to have a selection of gramophone needles which are the perfect scale for my cannons.
-
Thank-you everyone for the well wishes! My eye is healing quite nicely.
I've put together a very basic mini tutorial and hope it may be of help to someone.
I bought a brass turned cannon, of the correct scale for my ship, to use as a reference model.
I had a piece of round plastic dowel on hand, which I carved and sanded until it was the same size as the reference model.
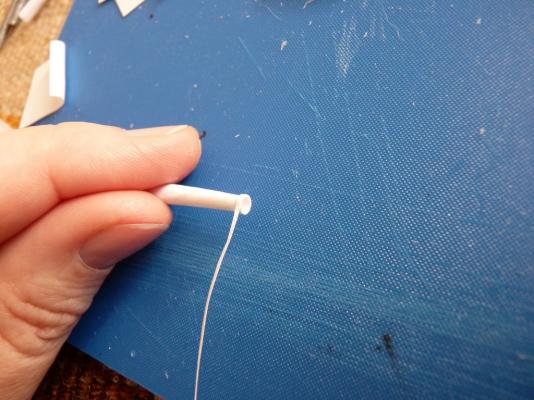
Next, I cut paper trapezoids and rolled them around the plastic dowel, and sealed with some white glue. The dowel ensured that all my cannons would be the same.


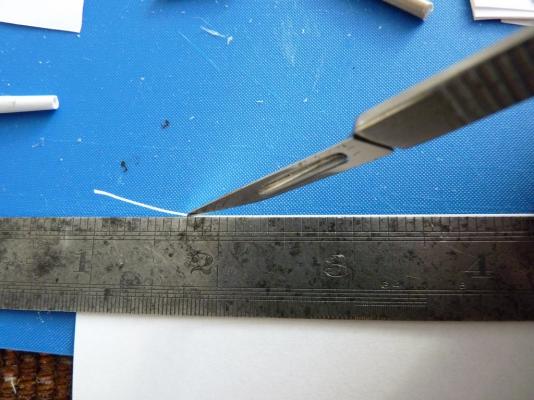
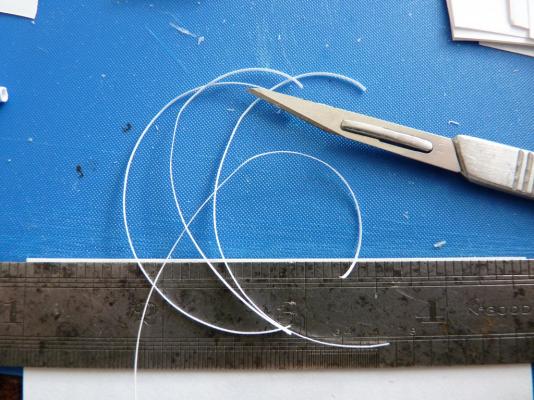
Next up, I marked the location for each ring, by comparing to the reference model and cut very thin strips of paper and glued them in place. This can be tricky since the paper tube is narrow at one end and the strip naturally wants to spiral up the tube.
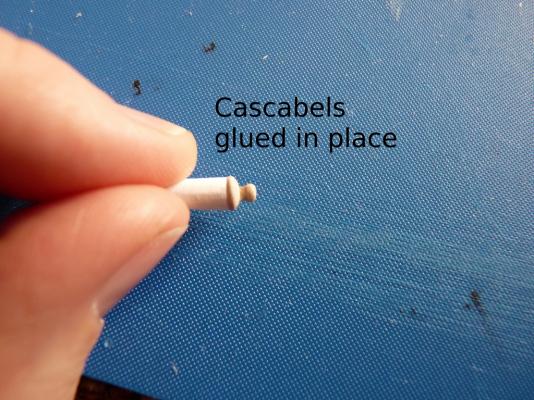
The cascabels/miniature mushrooms

 , were fashioned from polymer clay, then baked and glued in place. I had tried carving them from a wood dowel, but decided that clay would be a faster option.
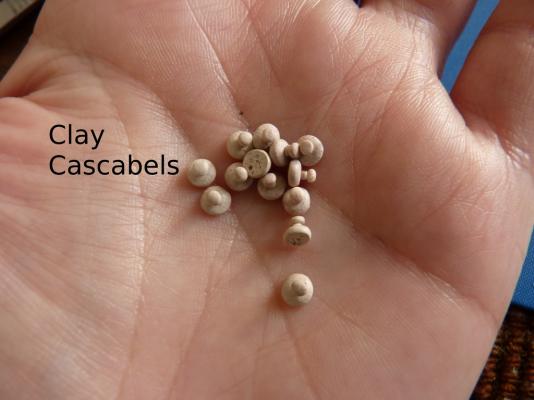
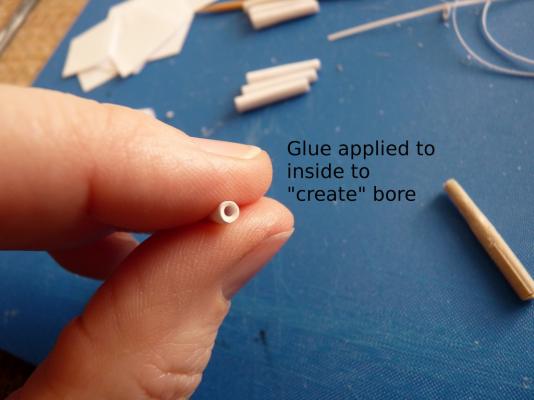
At this point the "bore" was added. I dipped a toothpick in white glue and applied a thin film around the inside of the end of the cannon. Once dry I repeated once or twice more as needed.
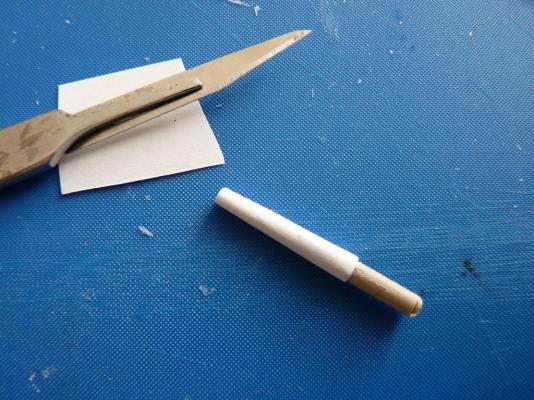
This picture is a repeat from my last update, but it gives a good idea of the different stages.

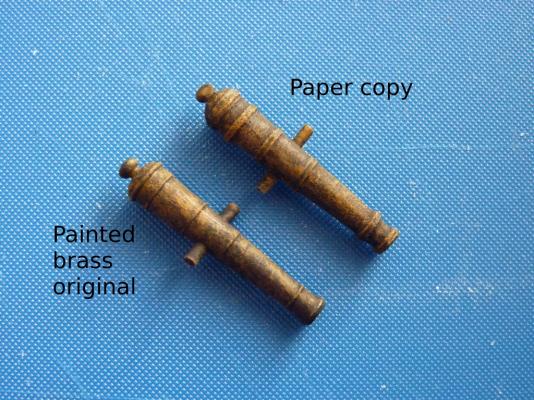
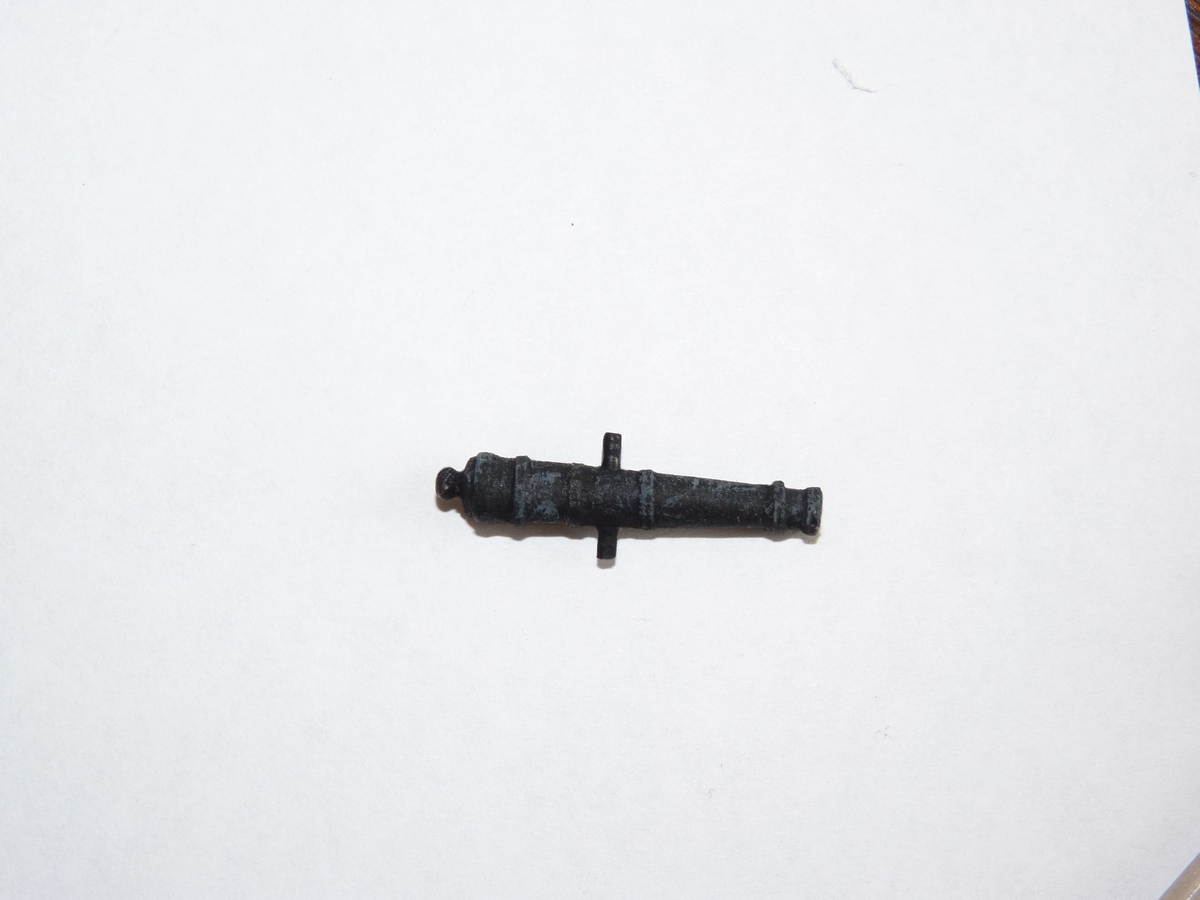
Finally, a couple of thin layers of flat black acrylic were added and allowed to dry, followed by dry-brushing with yellow-ochre that was tamed down with a little brown.

This last picture shows the finished paper cannon beside the original brass cannon, which I also painted.
If you have any questions, please feel free to ask.
-
-
Okay Robbyn and Bob, I'll see what I can do. It will have to wait for a day or two since I need just a little time to recover from eye surgery. If I do it now with one good eye, the tutorial may be a bit "wonky".
- edmay, popeye the sailor, augie and 1 other
-
4
-
wyzwyk: Thank-you! I can't take credit for the idea though - I owe that to a very talented builder on this forum named Doris, who does amazing things with paper and card.
Adrieke: Thank-you very, very much!
- NenadM, popeye the sailor and edmay
-
3
-
Your build log leaves us pretty much speechless - so we'll just say thanks for posting it!!!
- EdT, SawdustDave, CaptainSteve and 1 other
-
4
-
-
Edwin: Thank-you! All the best to you as well in 2015!
Frank: Thank-you! I'm glad I was able to camouflage the paper.
Mark: Good luck with the resin. I'm sure you'll be able to make it work.
-
-
Mark/SJSoane: I think my main problem is the small scale at which I am working. It can be done apparently, but it was more trouble than it was worth to me.After a few tries I got a decent rubber mold, but I struggled with the polyester resin sticking to the mold. I tried the dilute vaseline, corn starch, and talc as release agents - none of which worked for me. Apparently there is a release agent for purchase, but I didn't want to commit any more money to this one project. I did get a few cannons that were okay, but I like my paper ones better. The biggest problem was the resin fumes, which left me with huge headaches and sinus problems every time I used it. When I finally made the connection, I stopped using resin and no more symptoms.Popeye: Thank-you! I am happy with the results.Grant: Thank-you! It's great to be back. Hopefully I can find more time to finish these guns soon.Elia: Thank-you! I know what you mean about finding alternative processes, and this one seems to work for me.Patrick: Thank-you as well!Bob: Thank-you on both counts!Sjors: Thank-you! Paper is a LOT cheaper too, than buying more than 100 brass cannons.Mark: Thank-you! The casabels are made from polymer clay.
-
-
Thank-you Nenad, Ed, Wayne and Patrick! Thank-you for all the "likes" as well! It's good to be back in the shipyard.
-
Thank-you everyone for all the comments!
Well, an update is long overdue - I almost feel I should introduce myself again!
I struggled in the summer with which route to take for my cannons. I tried making molds and casting with resin with only limited success. The summer flew by and winter appeared and casting became a problem due to mess and allergies, or at least some reaction to the fumes. Ideally working outside is the best option, but at -20 degrees Celsius, it's not an option!
I had seen some paper cannons that Doris made and I thought I would give that a try. It would be easier if my scale was larger, but I don't find it too difficult. I know they are not perfect, but I am relatively pleased with the outcome and will continue with this process.
I am currently experimenting with weathering the cannons, so the painted one is not necessarily what the finished product will look like.

-
-


ROYAL CAROLINE 1749 by Doris - 1:40 - CARD
in - Build logs for subjects built 1501 - 1750
Posted
Doris, I can't find words that accurately describe or praise your work, other than to say absolutely stunningly beautiful model! You have certainly outdone yourself on this one and can be very proud of your accomplishments! I look forward to your nest build!