ca.shipwright
-
Posts
483 -
Joined
-
Last visited
Content Type
Profiles
Forums
Gallery
Events
Everything posted by ca.shipwright
-
An hour of rigging is better than an hour of therapy. Model ship building requires many skills. Many we learn as we go. Unfortunately, with skills it's "use it or loose it." Rigging is highly suseptable to this phenomenon. It's literally two years before the mast (no pun intended). This is my strongest positive for working on more than one model at a time which are in different stages of construction. Regards
-
 Hi Jesse, I built a home made mini lathe using a electric hand drill. I am having trouble getting decent cuts with the miniature cutting tools that I have. Did you make some custom cutters to get those fine lines? If so, care to share? Regards
- 1,306 replies
-
- 4
-

-
- syren
- model shipways
- (and 1 more)
-
Outstanding!!!! Looking for your next project. Regards
-
Hi Dave and EJ, Thanks for the kind words, your models really do stimulate me to do better. I only wish that when I started, I paid more attention to the AOS. This would have let me build without trying to accommodate the Corel plans into the AOS- can't be done. So now I am using scaled top and side views from AOS. This has presented several conflicts which are being handled in the most expeditious manner. Right now I am attempting to learn how to silver solder with a torch, flux and silver chips. My father was a jeweler and this is what he did for over 50 years. I wish he were still around to teach me. Working on the rudder cudgeons and pintles. More to follow soon. Anyone have a Vandelay trunnel maker they want to loan out? It appears that Vandelay Industries no longer makes this item. Using a drawer plate is a really big pain in...... Regards to all
-
Hi Ron, An outstanding model. I have never a fan of sails on a static model. But your model has made me rethink this,and,I may have to give sails a try on my Endeavour when the time comes Regards
-
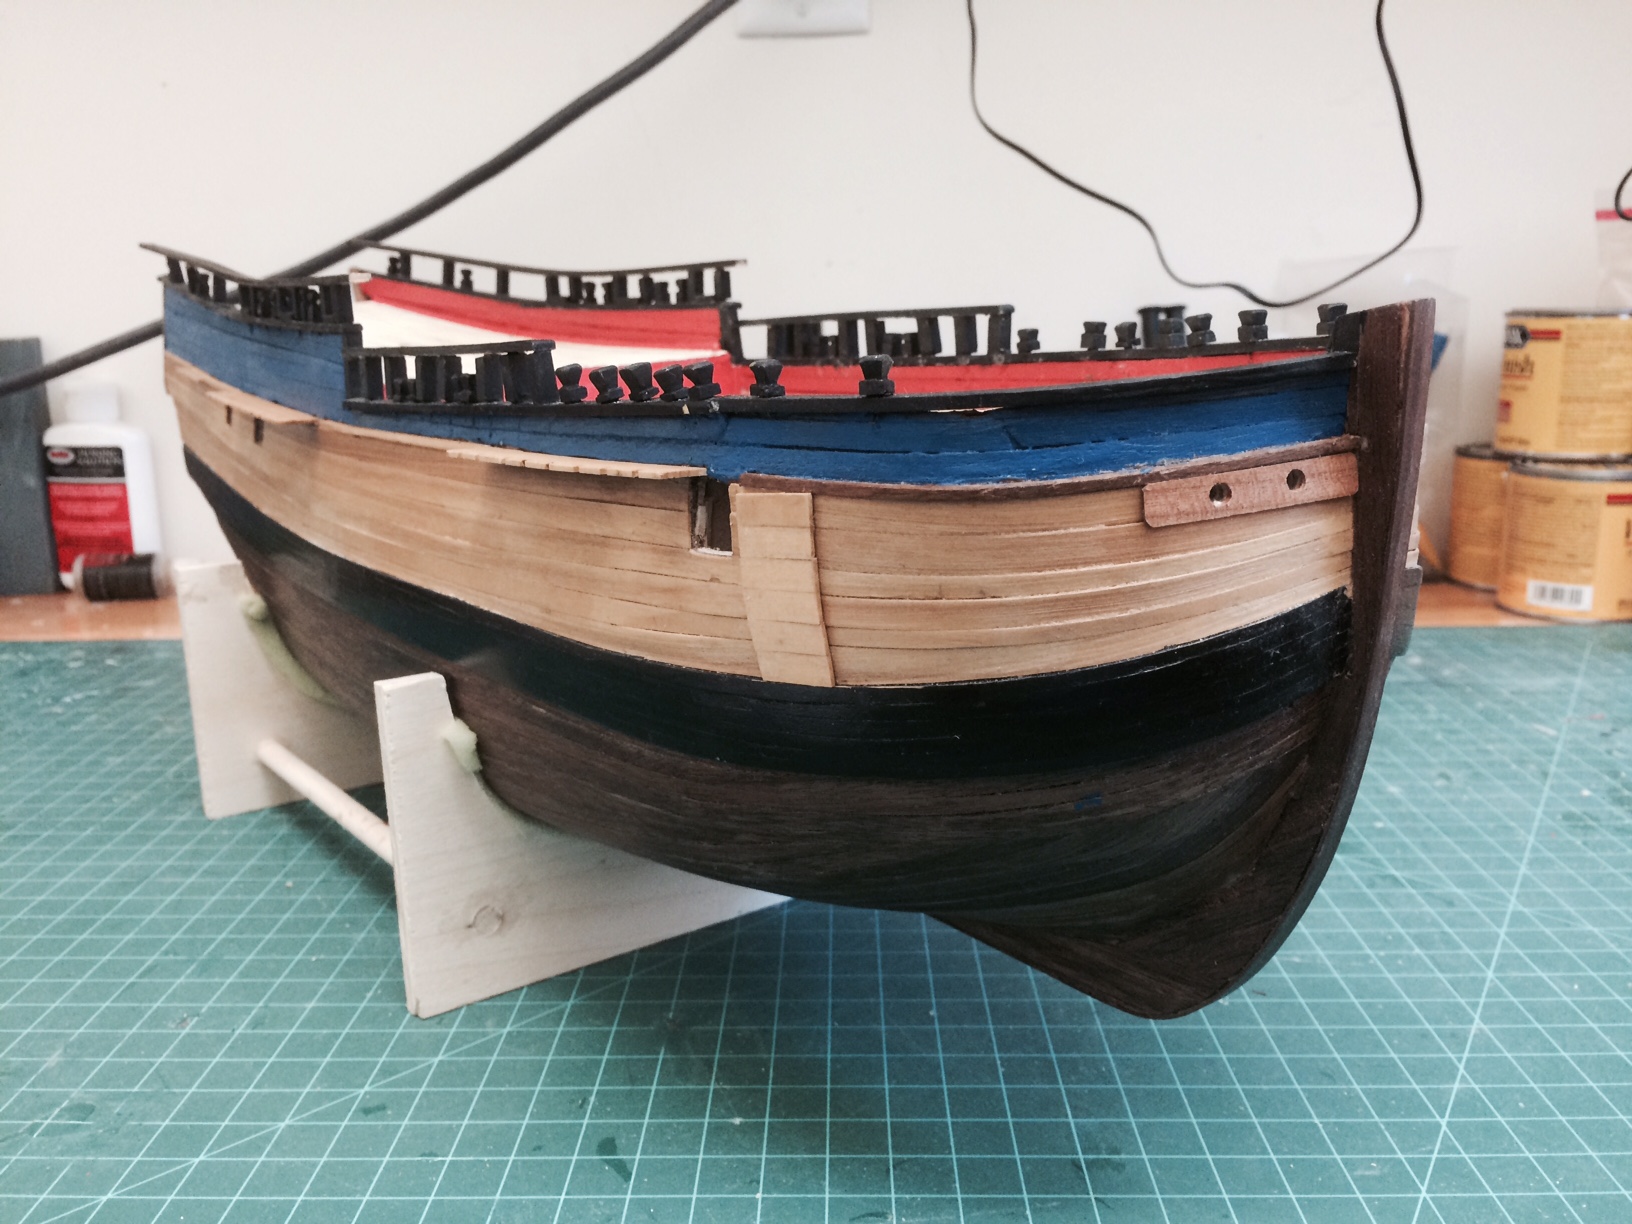
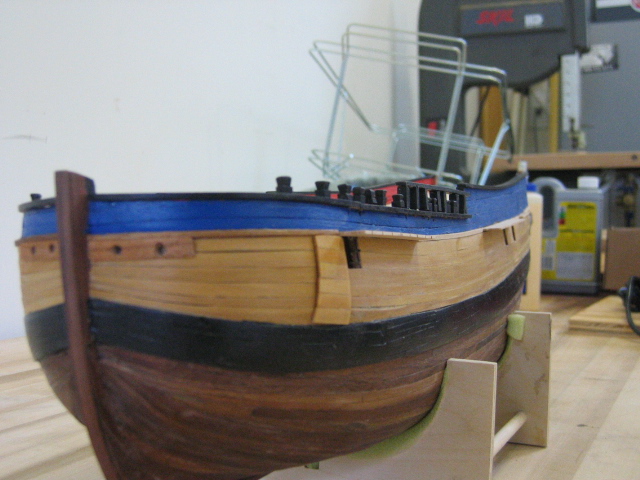
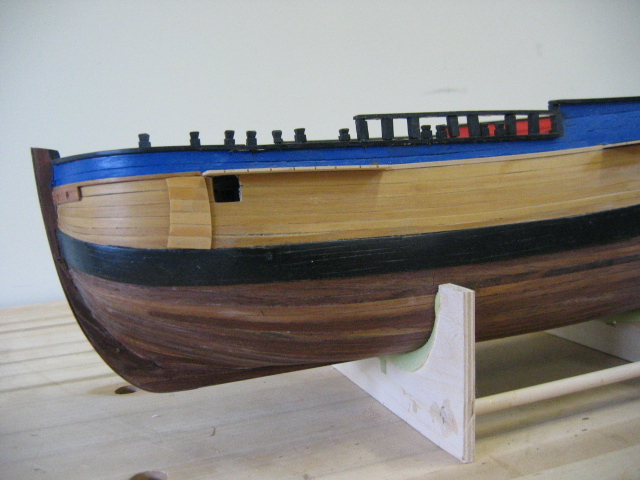
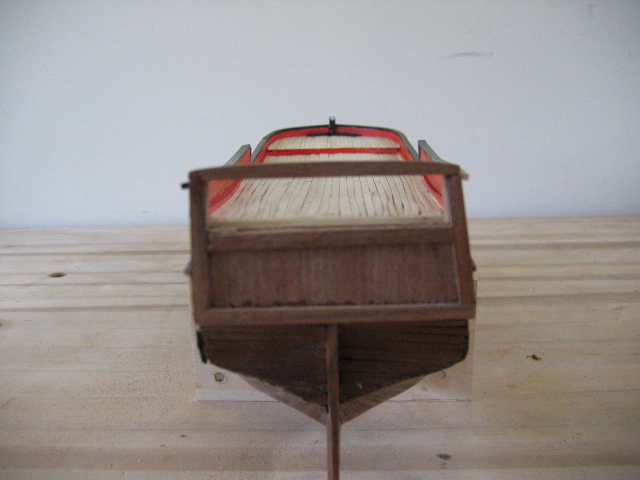
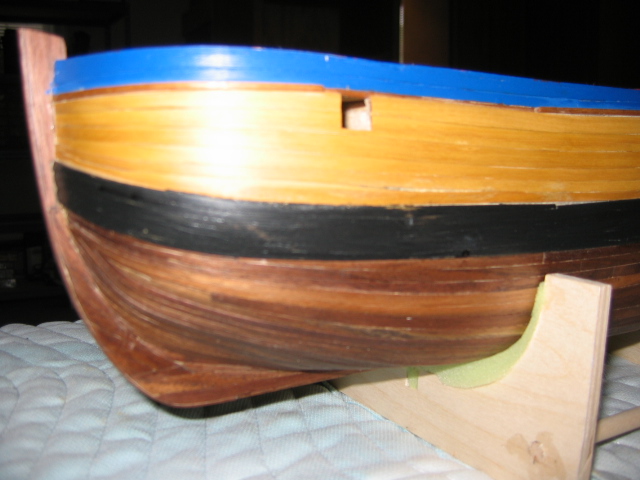
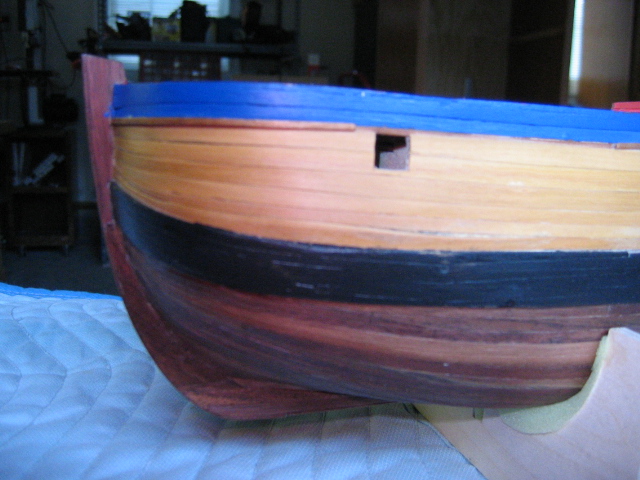
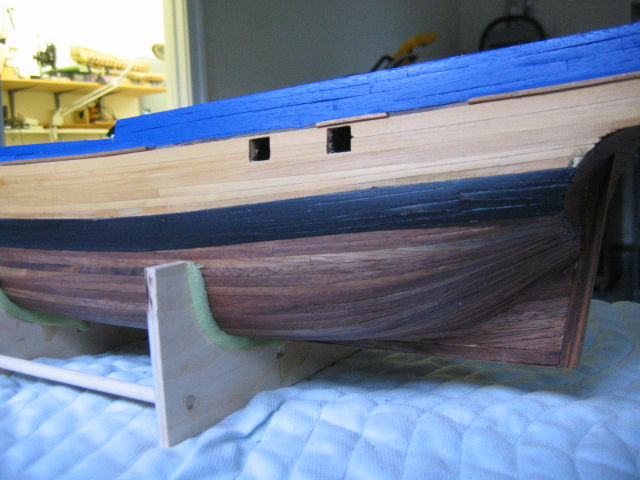
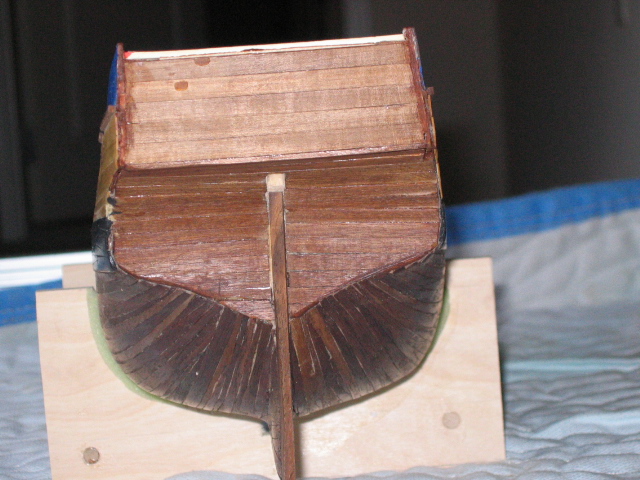
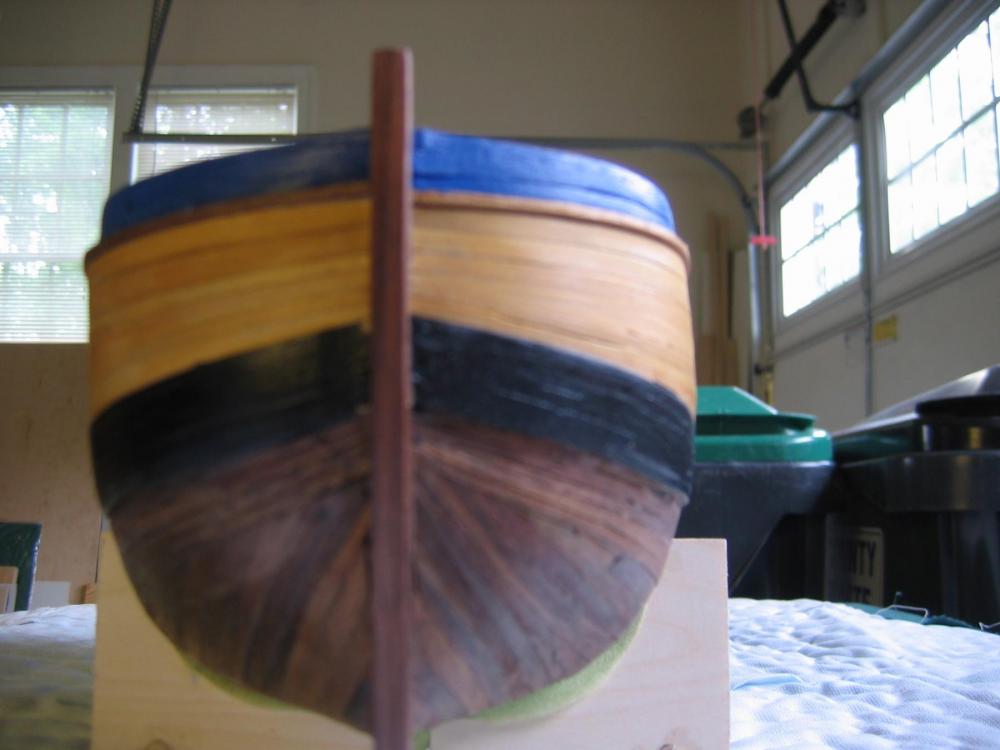
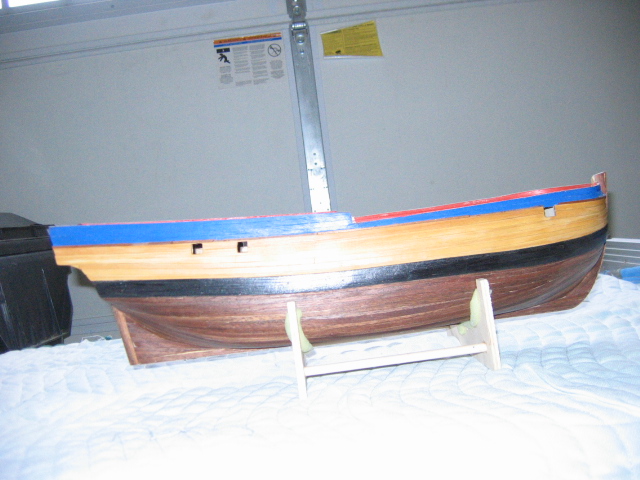
Hi everyone, Finally the rails, timberheads, gun ports and channels are all in place. Next up the stern. Photo attached. Looks like my iPhone takes better pictures than my Canon camera. Regards

-
Another mistake! I just noticed that the forward channels are too far forward. You can see this in the forward portside photo in the previous post. You can't put the chain plate over a port. Ahhhhhhhhhhhh
-
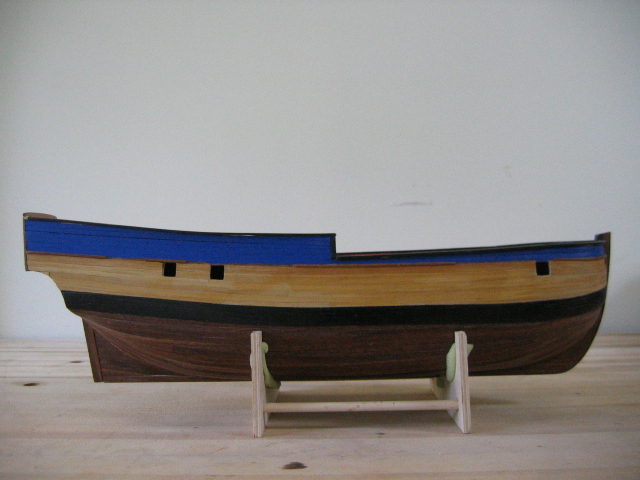
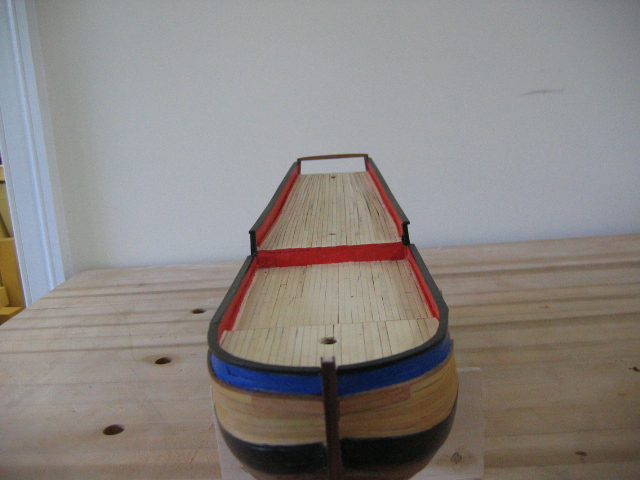
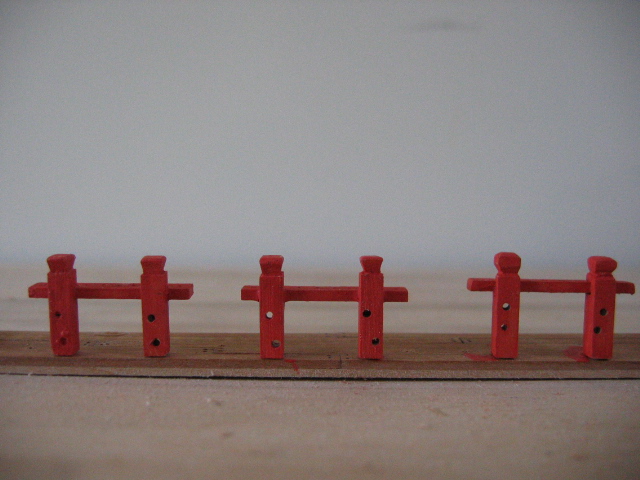
Hello everyone, Some more progress to report. I seem to be taking two steps forward and one or two steps back trying to reconcile the Corel Endeavour with the AOS plans. I don't seem to have the vision needed yet to see when something is inconsistant. Hence, it is build, rip out and rebuild. I am totally in awe of the skills displayed by DAVEROW, DASHI, BANYAN, KIWIRON and others. I have had to reassess by expectations as my skills are nowhere near what you fellows display. It looks like I will have to be satisfied with a nicely built "representation" of HMB Endeavour. Meanwhile, the work progresses, albeit slowly. Rails and timberheads are in on the forward part of the ship, anchor linings mounted, channels are installed in a rebate for added strength and painting continuously touched up. Also fabricated some more of the deck furnishings. Built the rudder and now have to add the cudgeons and pintles to the rudder and hull. Some more pictures enclsoed Regards to all.

-
Another tip. Get a small box and save the pieces of cutoff that you have from cutting down the stock. You can always piece together strips if you run short.
-
There is probably less than 5% on the various strips. The color variation between lots makes it difficult to substitute if you are using a natural finish. Not an issue with painting. The dowels for the masts, and yards allow for no mistakes. Measure 3 times cut once is the old wood workers adage. Regards
-
Outstanding Jesse. Looking at your work, I am drooling at the thought of starting my Syren. Your work is truly inspiring. Regards
- 1,306 replies
-
- 6
-
-
- syren
- model shipways
- (and 1 more)
-
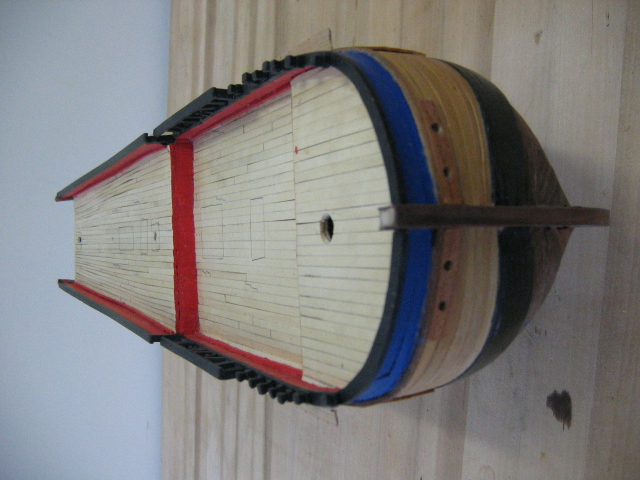
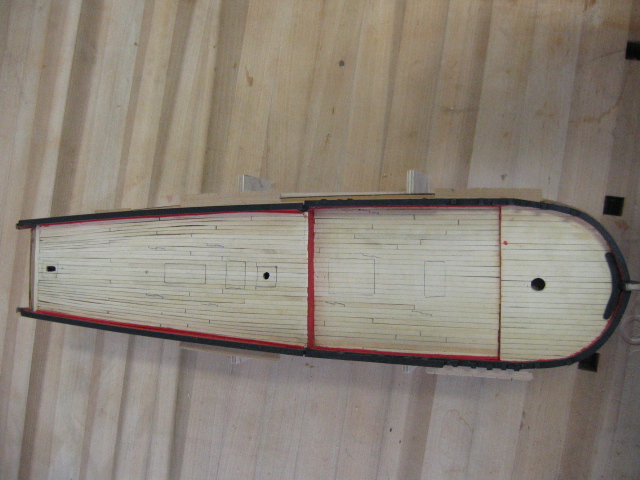
Hello everyone, Back in the shipyard, after a minor remodeling. The shipyard works better now. Now for an update of HMB. I have completed the deck planking using natural stained holly which I milled using my Jim Byrnes' saw and thickness sander. I really do enjoy making timbers and one day I hope to scratch build a ship. I opted not to trennel the deck or the or the planking. But I did put in the butt and scarf joints in the decking. I uses a fine chisel to put a dent (takes 5) in the wood and blackened it with a pencil. Of course, I cut one backwards. Loose your concentration for 1 second and a mistake will occur. They came our fairly well for a first effort. As you can see, I ripped out the stern and redid it. I raised the bulworks the width of a plank and a half. Completed the bottom rails all around. A lot of painting going on. Everything got two coats of wipe on poly satin to try to protect what is done. Still looks like a continuous touch-up operation will be the norm. Took a break from the long timbers and made some of the riding bits and pin rails. Again out of boxwood as it keeps a very sharp edge It looks like the next investment is going to be an inexpensive X-Y table for the drill press so my holes come out evenly spaced and aligned. Regards to all, Pictures are attached

-
Charlene, very nice indeed. You and Jerry should be very proud of this build. I hope you enjoy looking at it as much as you enjoyed the build Regards
-
Can i live without a BYRNES TABLE SAW
ca.shipwright replied to shihawk's topic in Modeling tools and Workshop Equipment
I want one of Jim's rope walks to complete my Byrnes' ensemble. Ahhhhhhhhhhhhhhhhhh -
Can i live without a BYRNES TABLE SAW
ca.shipwright replied to shihawk's topic in Modeling tools and Workshop Equipment
With regards to the safety of using a 10" standard table saw previously asked in this thread. A full sized table saw is safe when used in the appropriate manner for the appropriate task. Some "rules" to follow: - always use the anti-kickback pawl and splitter - never stand behind the blade and fence - use the right blade for the task at hand, rip, crosscut, plywood - never cross cut freehand, always x-cut using the miter gauge with or without an extension piece and move the table saw fence out of the way - always get a tail person or build an out-feed table when cutting long sheets - never, never, never have a conversation while operating any power saw Regards PS I have a Jim Byrnes saw for 10 years. By milling my own lumber from stock (to include logs), this machine has paid for itself many times over; as has Jim's thickness planer. -
Greetings, Well, we're back in the shipyard after a longer then planned break too busy doing honey chores. To progress: the hull is fully planked as is the deck. The wales have been anchor-stocked with boxwood and painted The deck was planked with holly, stained natural. The lower hull is walnut again stained natural. The hull above the wales is box wood stained natural. The bull works are painted. Next is to paint and install the water way planks. Then on to the deck furniture which will be boxwood.


-
Jesse, Thanks for showing me how you did this. It's on the list of to do's. My other question is did you use this as a cutter or just a profile checker? And if a profile cutter did you use any special cutting tools or just small lathe cutters? Thanks
- 1,306 replies
-
- 5
-
-
- syren
- model shipways
- (and 1 more)
-
There has always been issues with the "count" of the pieces in a kit. I can't imagine working a job where I would have to spend 8 hours a day counting split rings, nails, and 20 different sizes of wood strips with 100% accuracy. Possibly our expectations exceed reality Model Shipways has always replaced broken parts, missing parts, or lost parts promptly and without charge for the parts or postage. Corel, Mantua-Sergal, and Artesenia Latina have all replaced parts for me as well. The problem is (and I am guilty of this as well), is we don't find out the part is missing until we need to use it. This definitely raises the stress level. The solution is to inventory the kit upon opening and then contact the manufacturer with the entire list of shortages. This will prevent a lot of heartburn. It's also worth noting that there is always something to do like building deck furniture or assembling masts while we wait for the missing plank to show up. As for using 3rd party parts like blocks, rope, and other fixtures. This is up to the modeler. I know my skills are not at that level where these parts will make a difference in how the completed model looks. Maybe one day. But as they say, this is a hobby to be enjoyed not one to agonize over. Regards
- 608 replies
-
- 4
-
-
- la couronne
- corel
- (and 1 more)
-
Ron, Your Endeavor is beautiful. I have completed the starboard side through the planking and painting. I liked your color scheme so much, with the light wood above the wales, that I planked mine using boxwood and a natural finish. Several years ago I sold a Royal Caroline by Panart to one of your countrymen. The postage was half the price of the kit. The buyer was tickled to death to be able to get it. Regards
-
Jesse, Yes, the template for the cannon profiles. The only thing I am not happy with on my drill press is the tool rest. I have always been under the impression that the tool rest should be very close to the work piece to prevent chatter. Is this correct? I will take some photos of the lathe and post them. I know a little about Lyme's Disease. It is a very insidious condition. I wish you and Keith all the best and hope you do well. Regards
- 1,306 replies
-
- 9
-
-
- syren
- model shipways
- (and 1 more)
-
Jesse, I also made one of the youtube homemade electric drill lathes. I am very interested in how you made the cutter for the carronades. Could you share how you made this and what it was made of. I never did any metal shop classes, only wood and plastics. Tjhanks Michael
- 1,306 replies
-
- 4
-
-
- syren
- model shipways
- (and 1 more)
-
Sorry, link won't work. Search Utube for homemade lathe. There are several.
- 1,306 replies
-
- 5
-
-
- syren
- model shipways
- (and 1 more)