KeithAug
-
Posts
3,980 -
Joined
-
Last visited
Content Type
Profiles
Forums
Gallery
Events
Everything posted by KeithAug
-
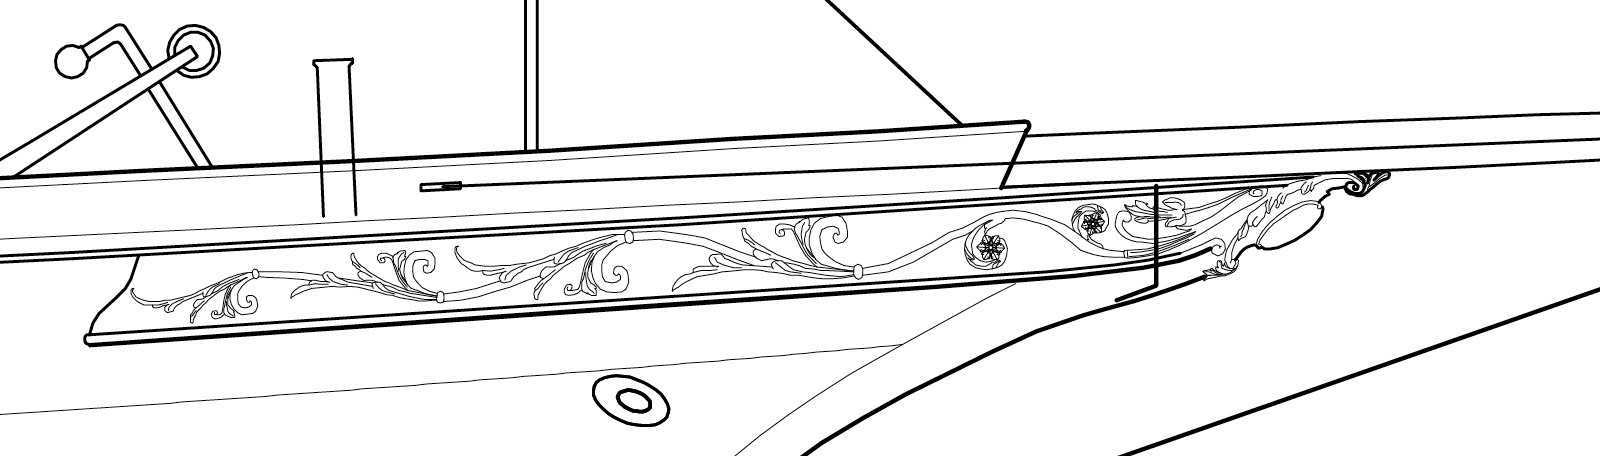
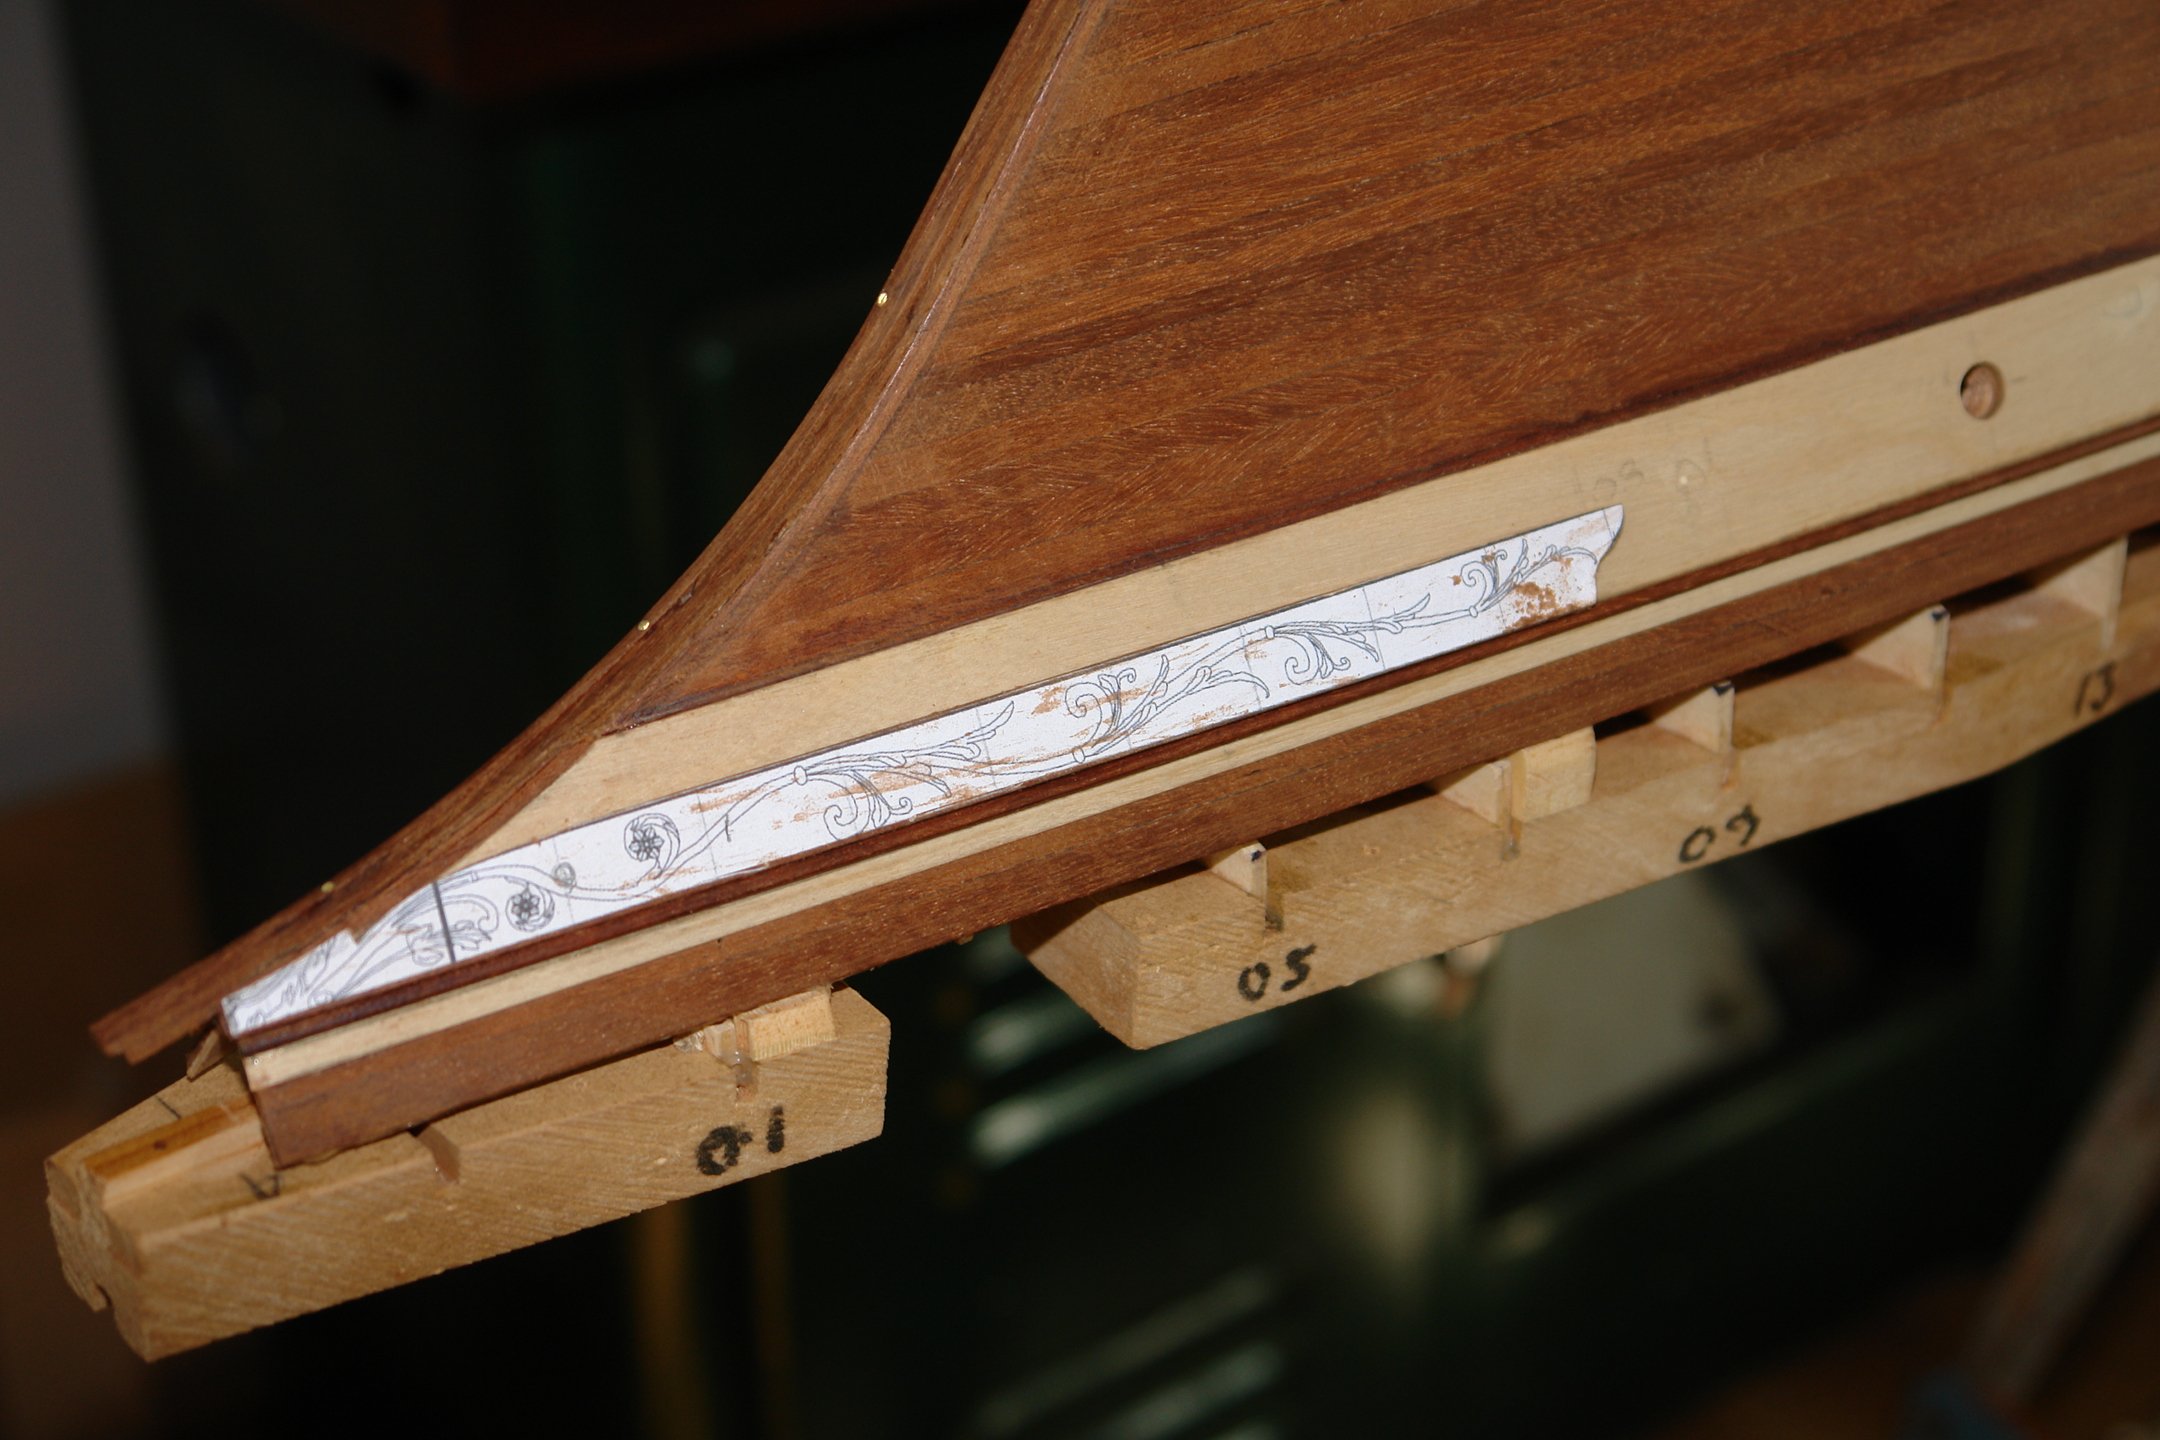
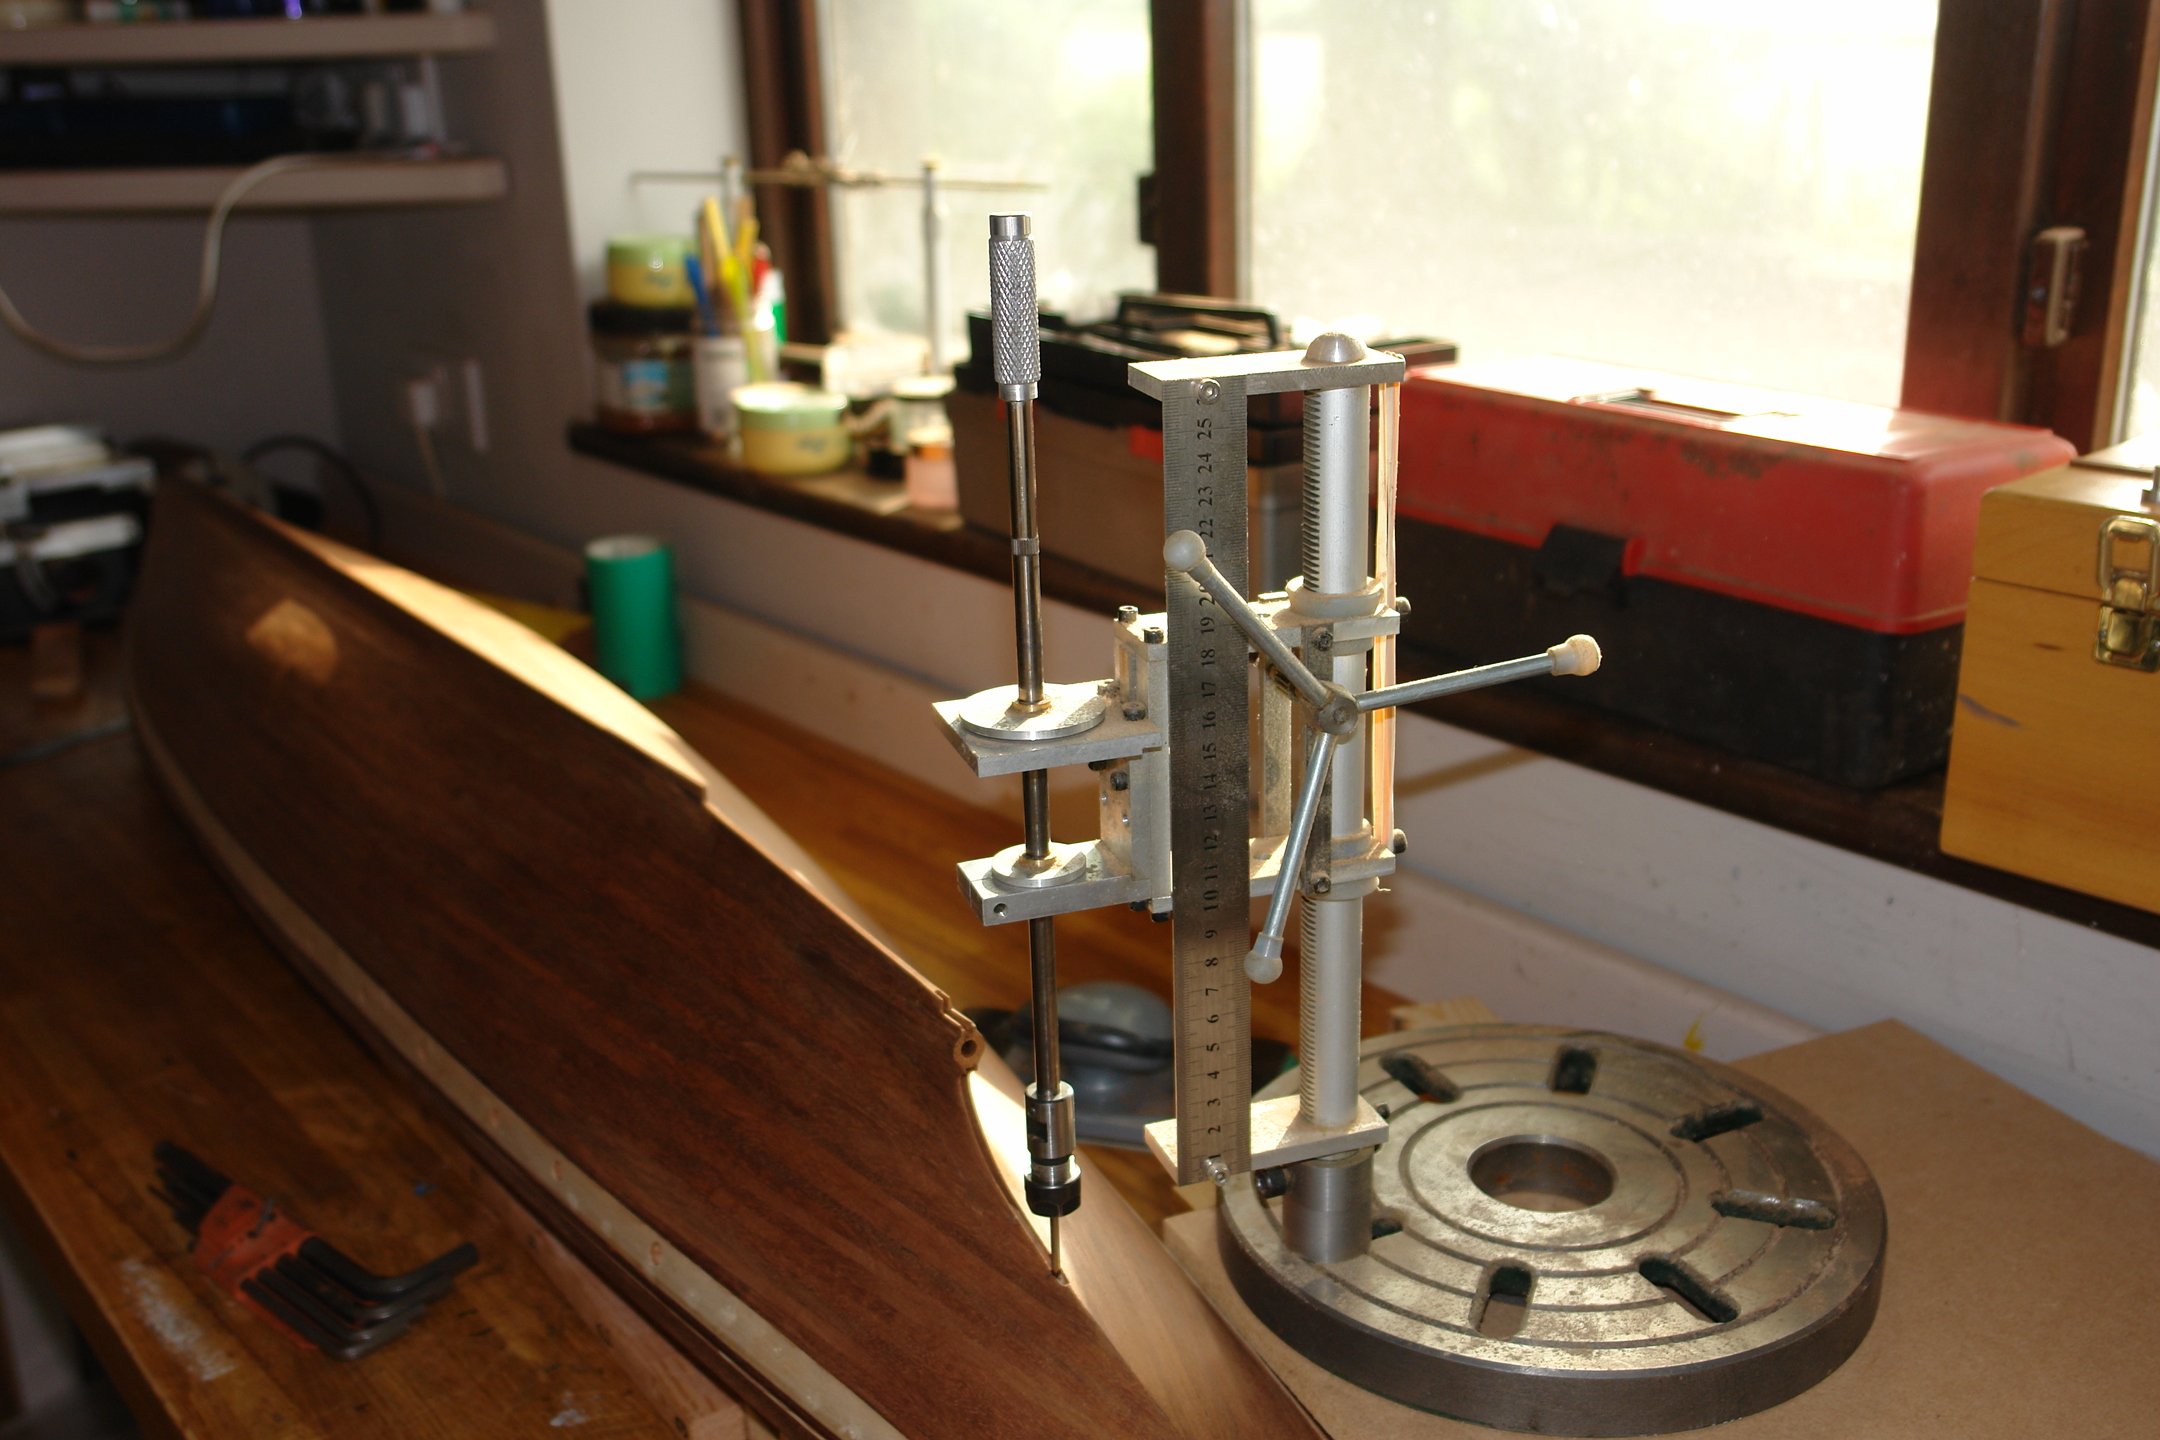
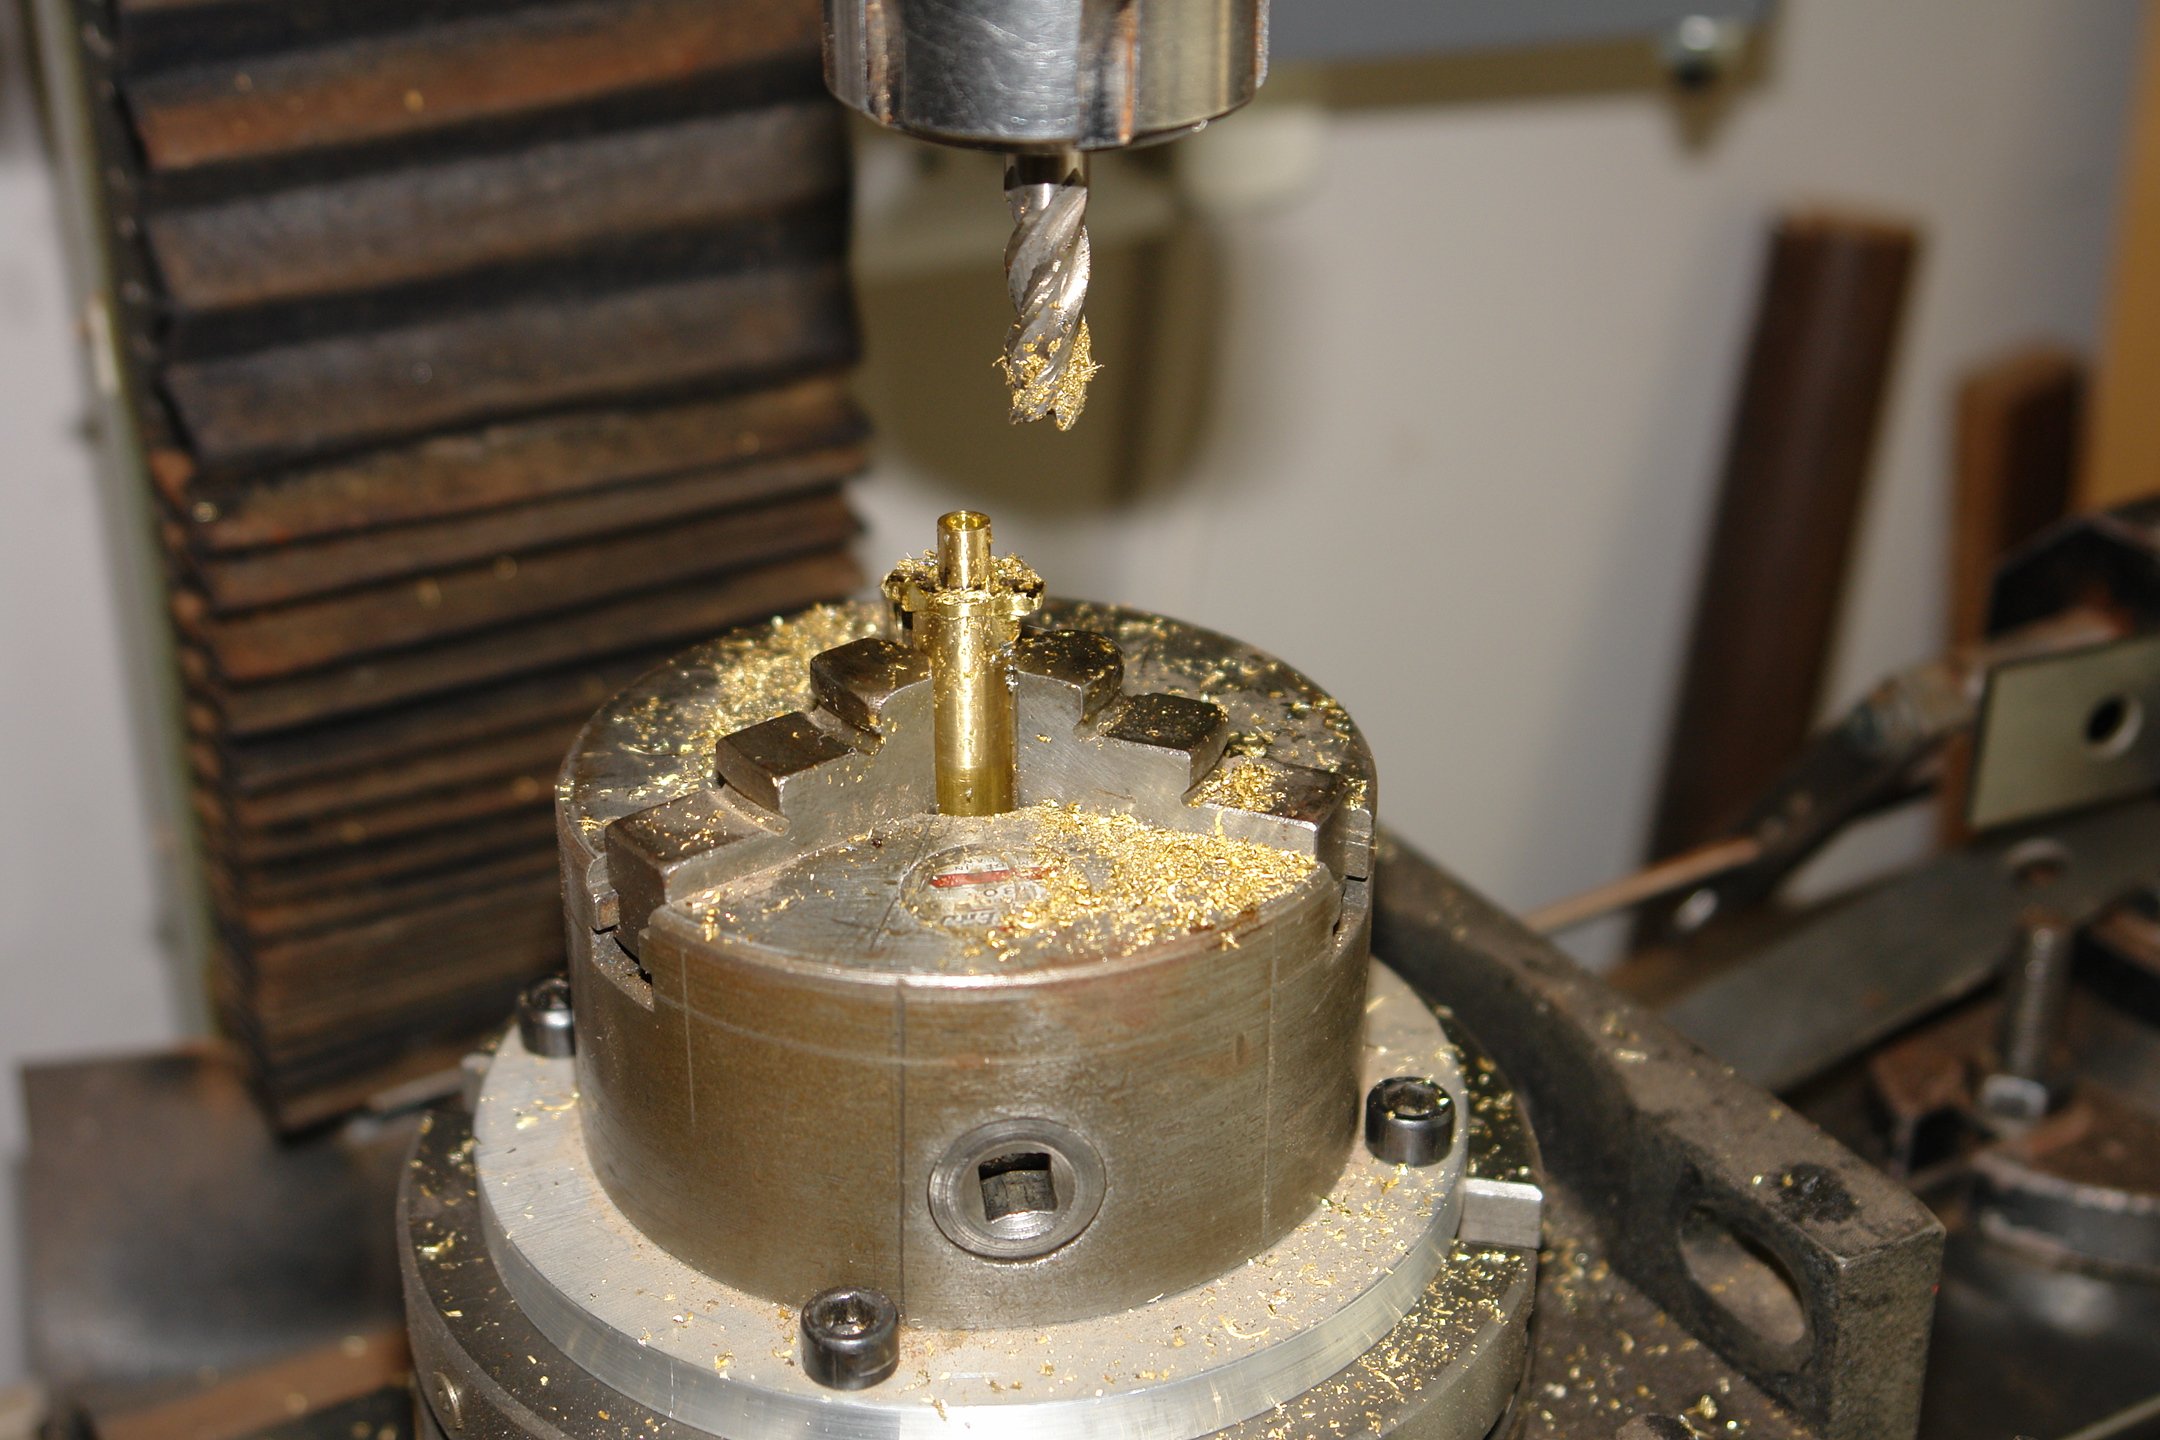
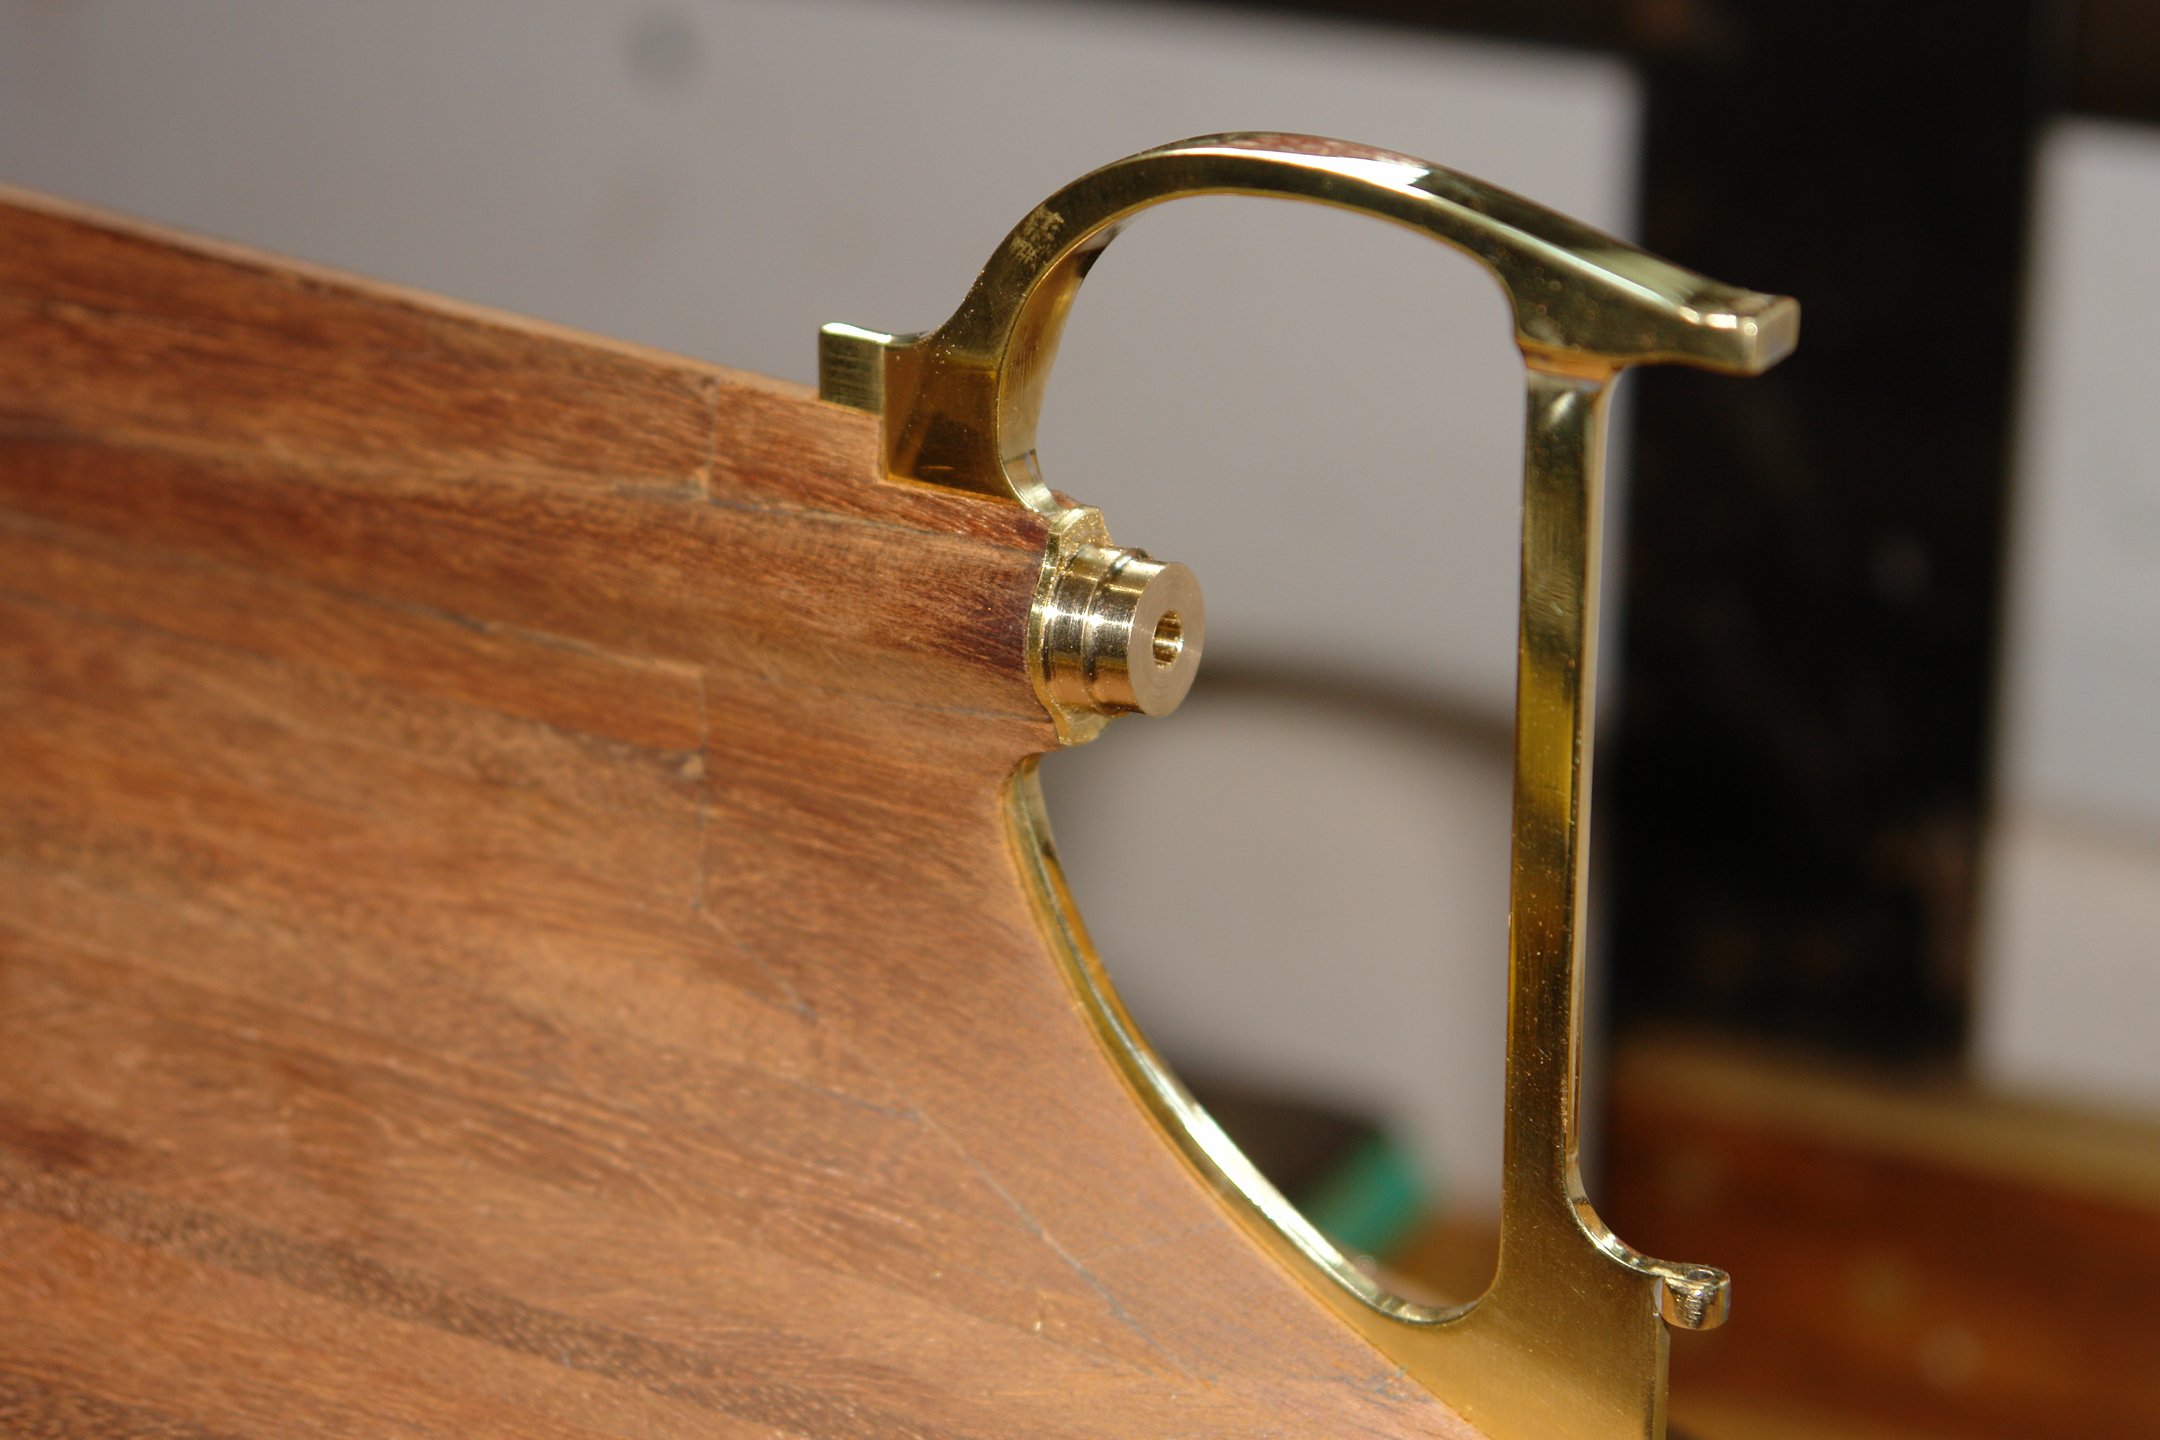
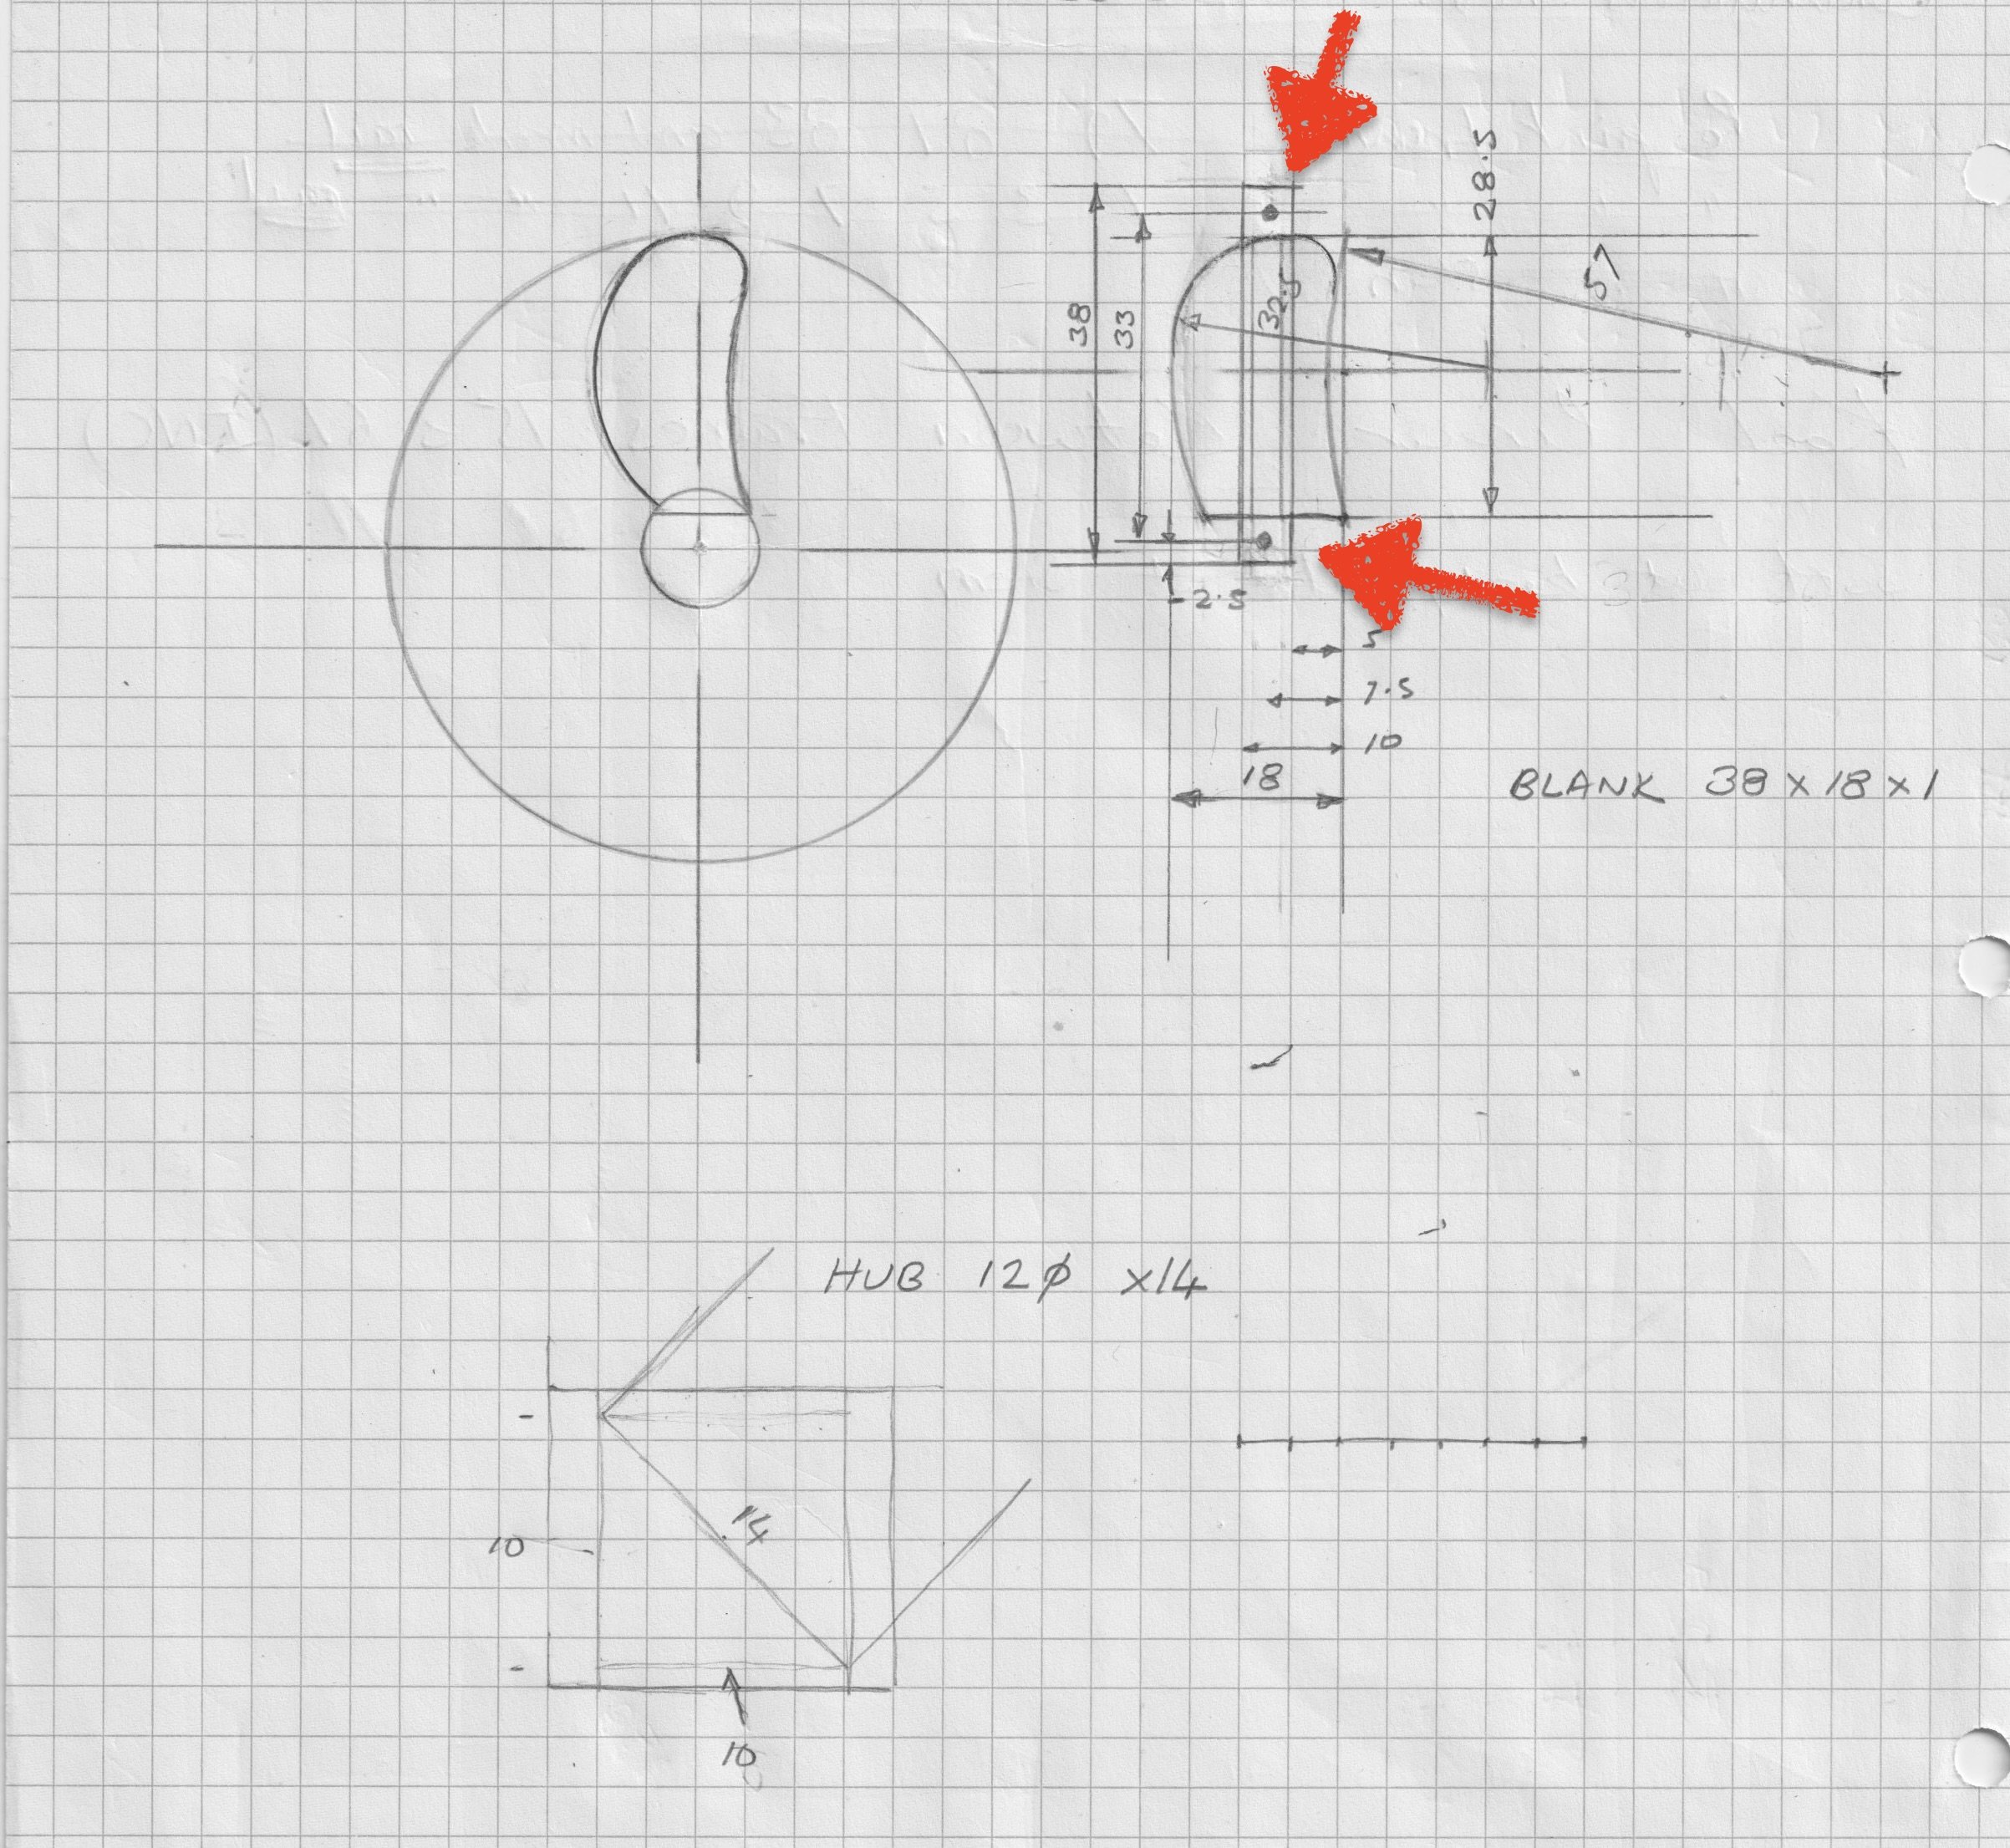
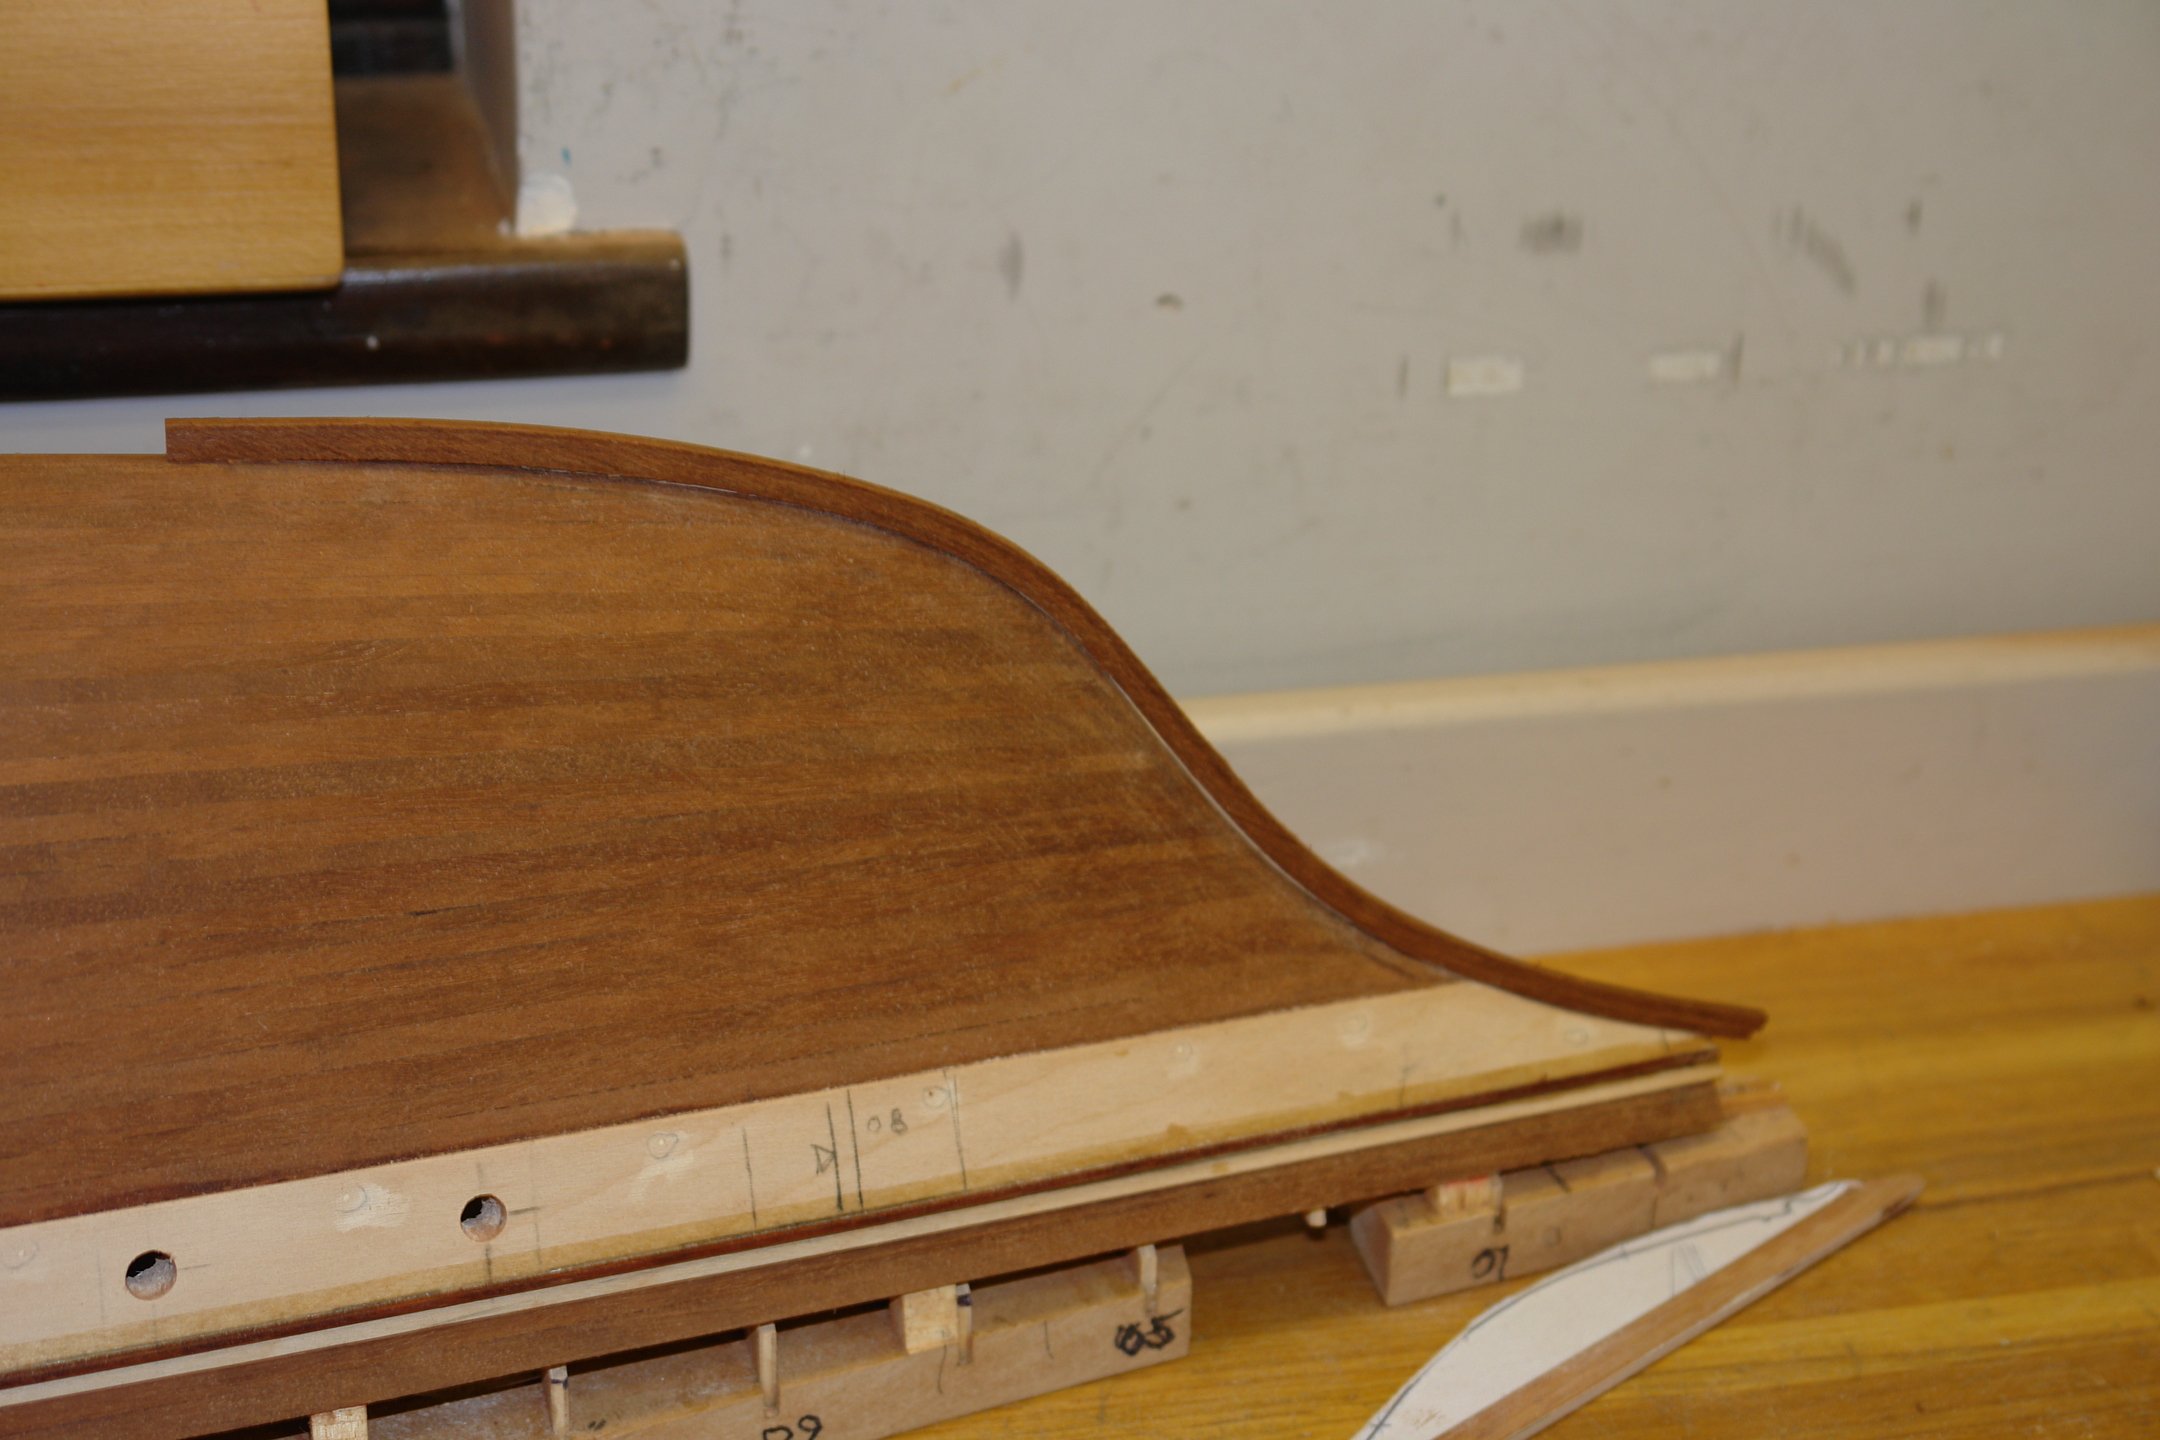
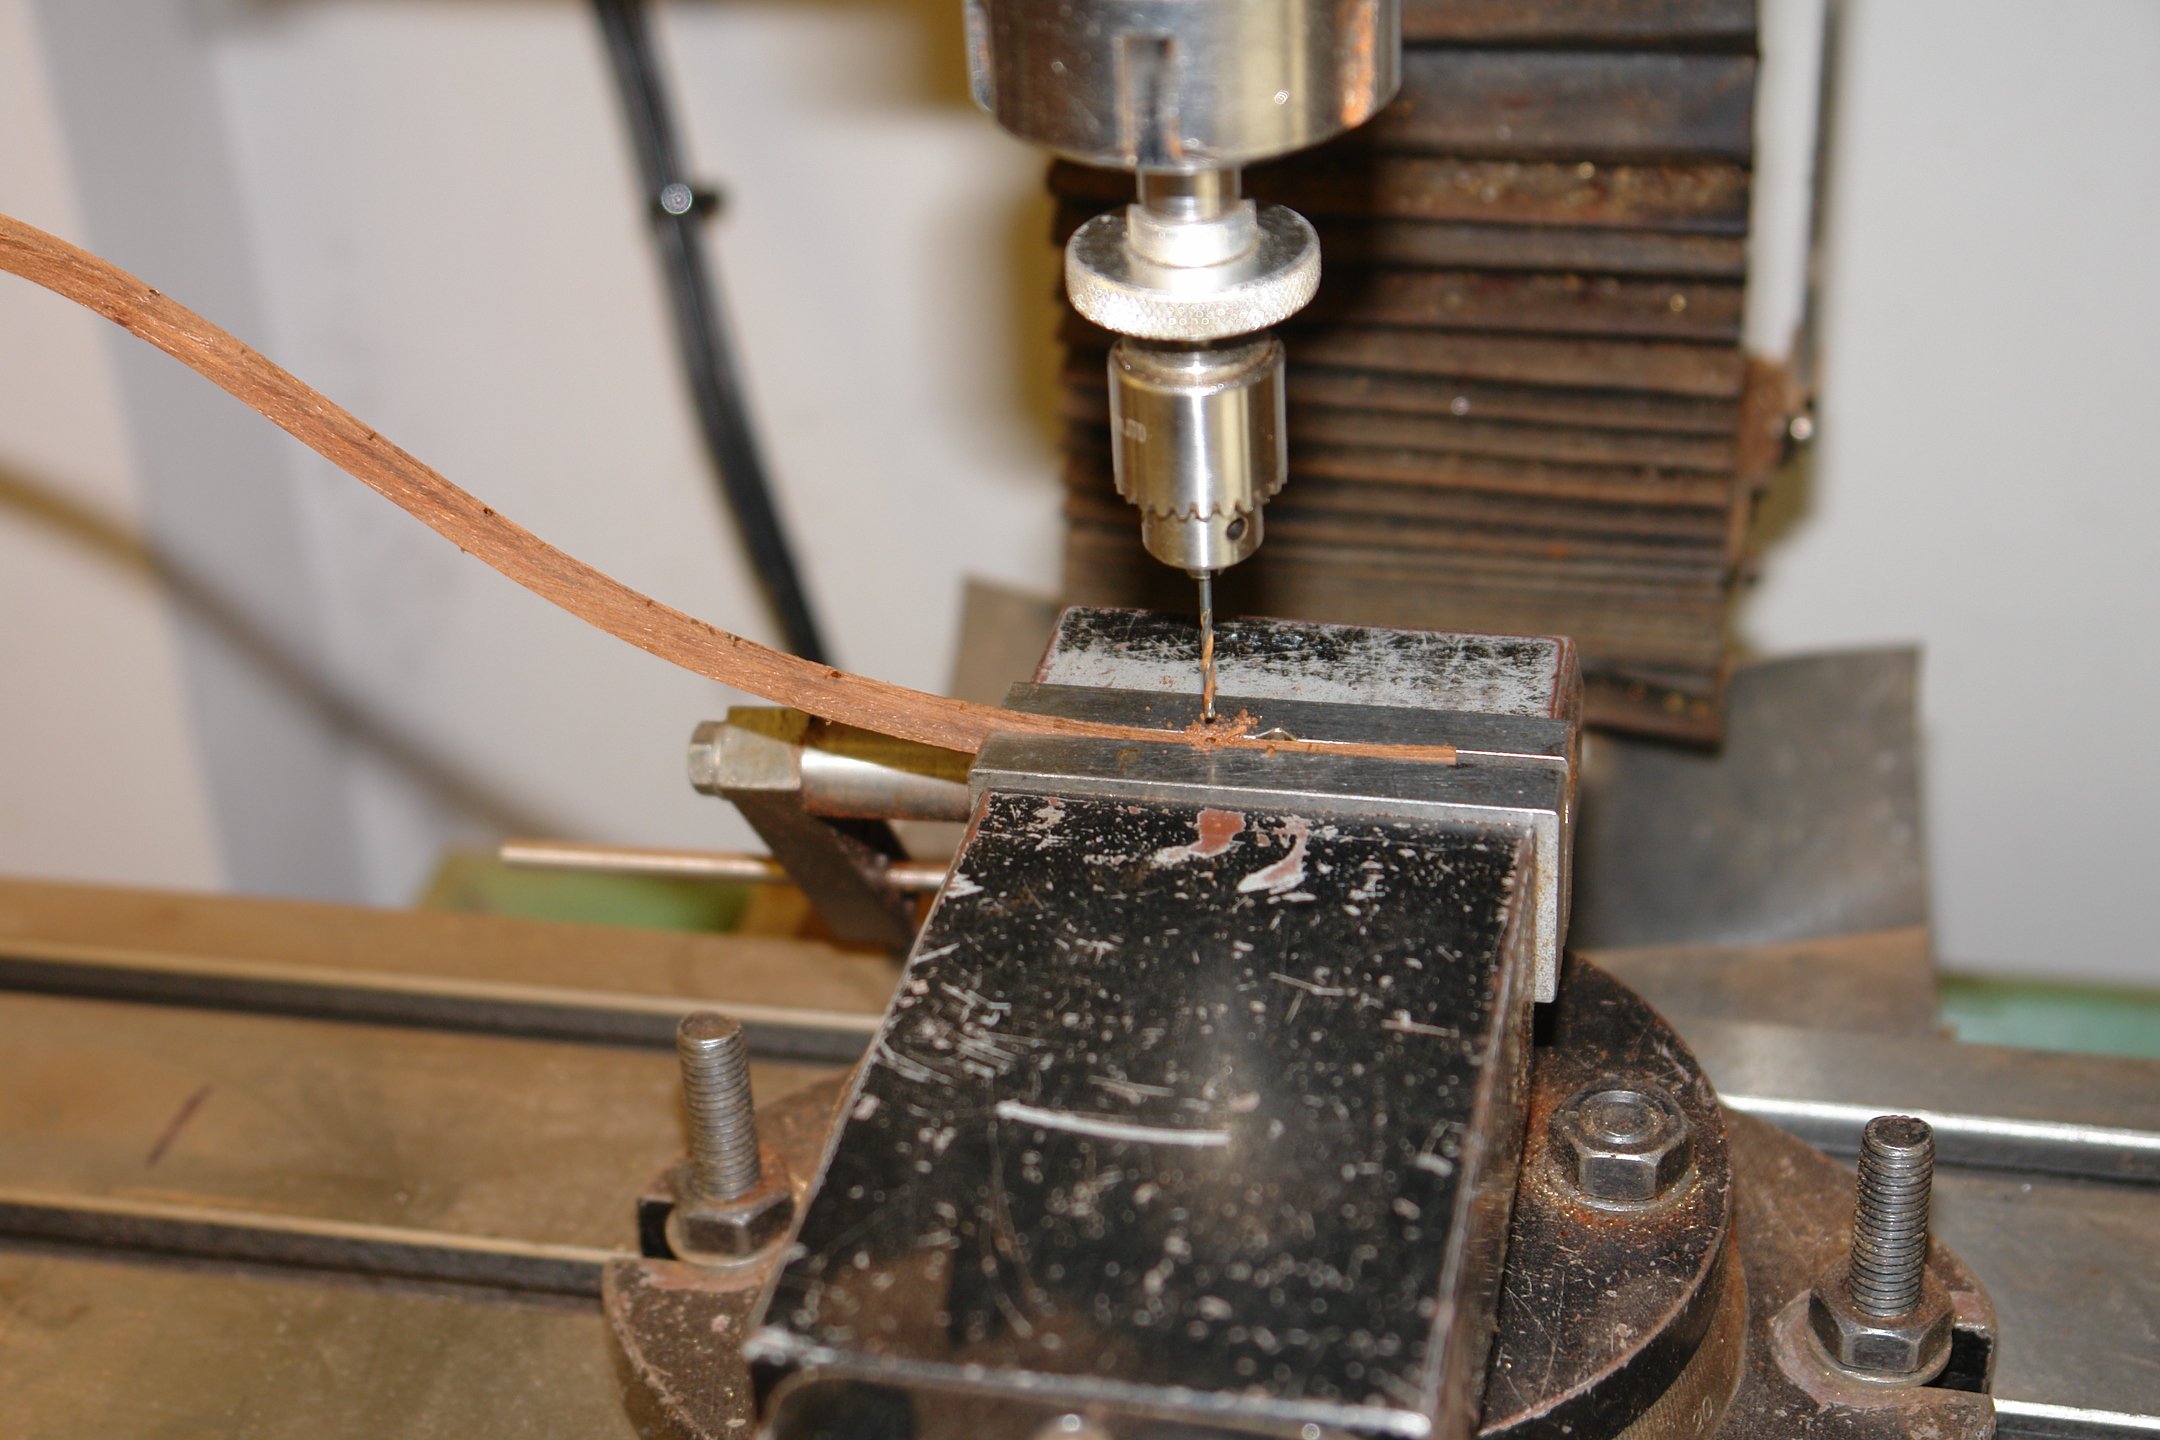
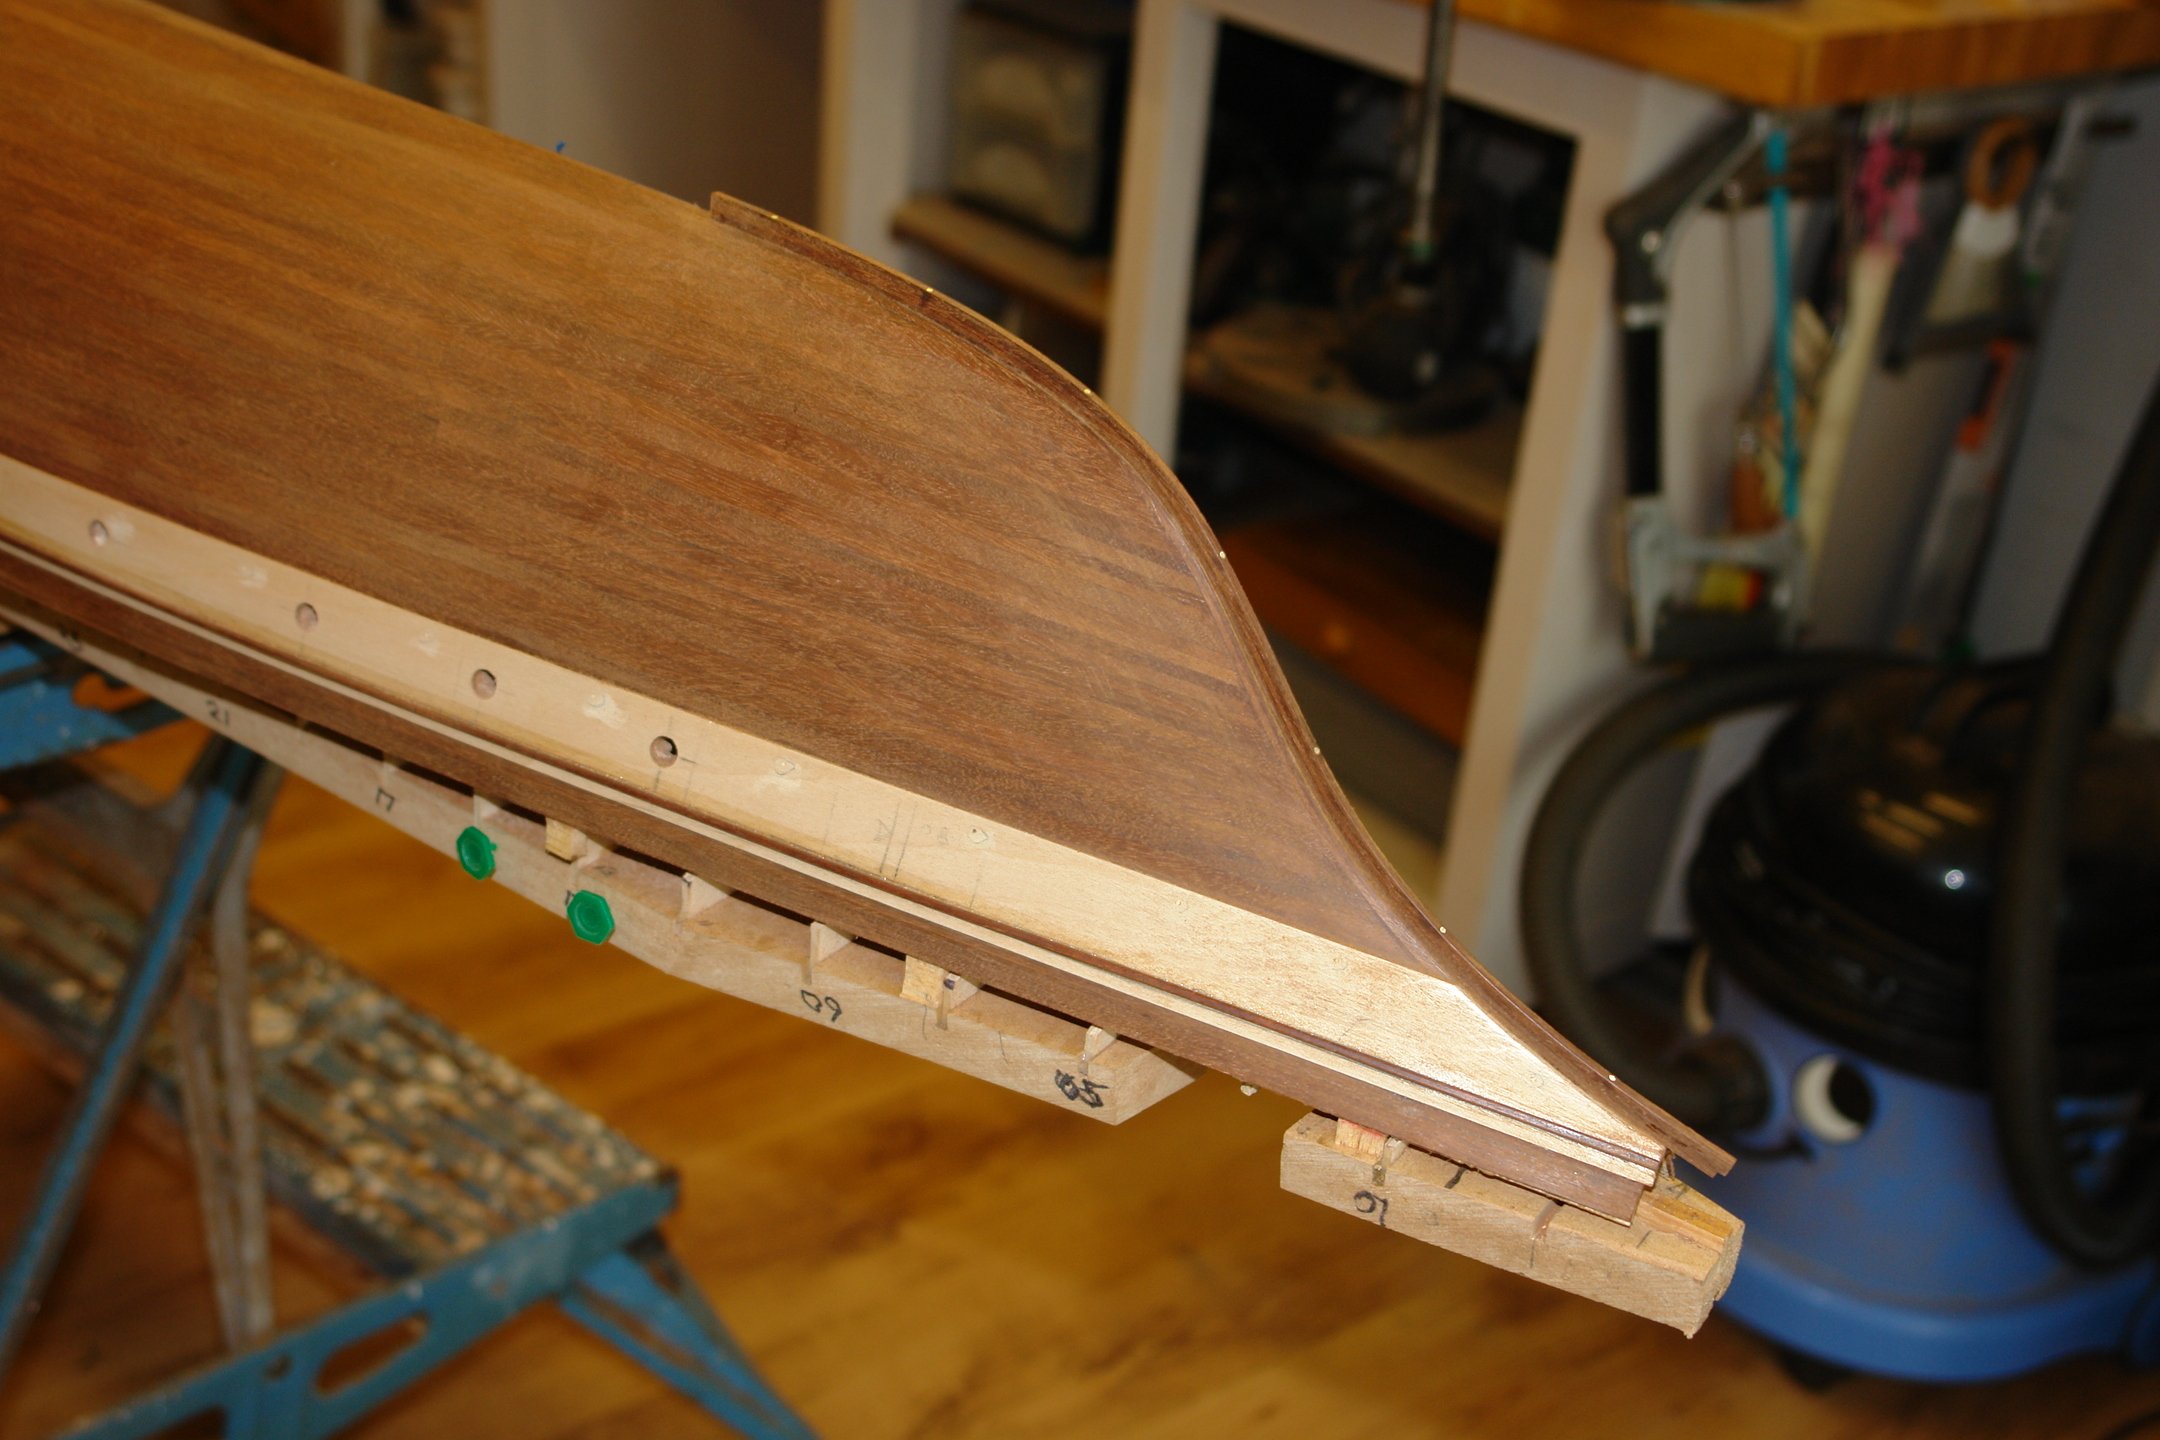
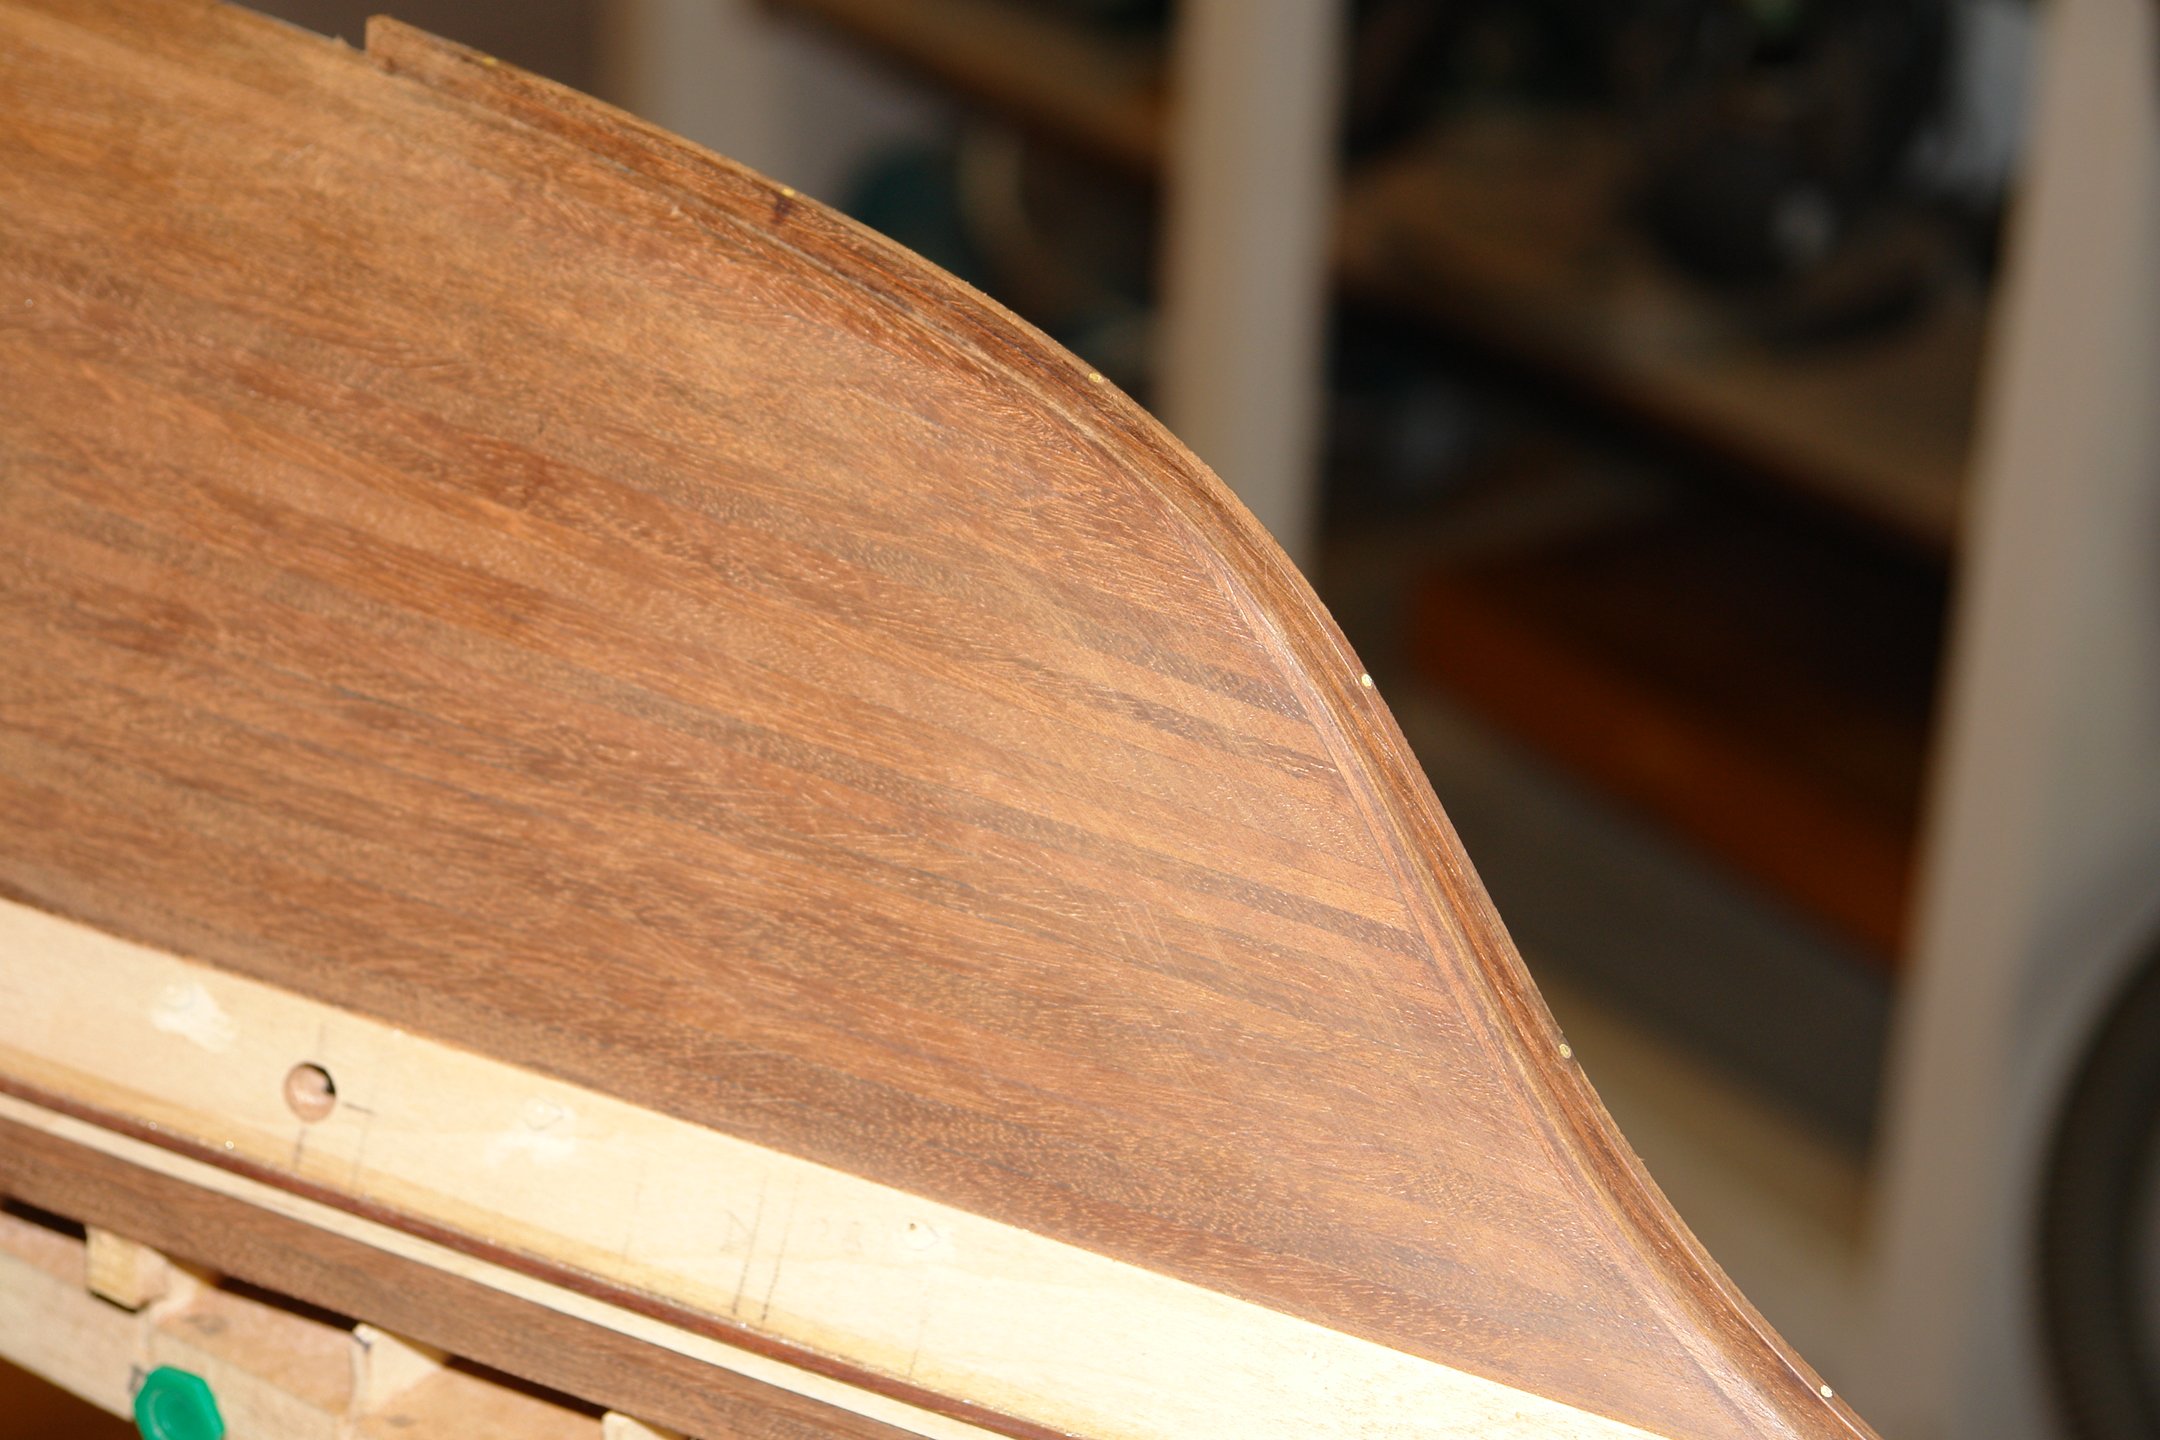
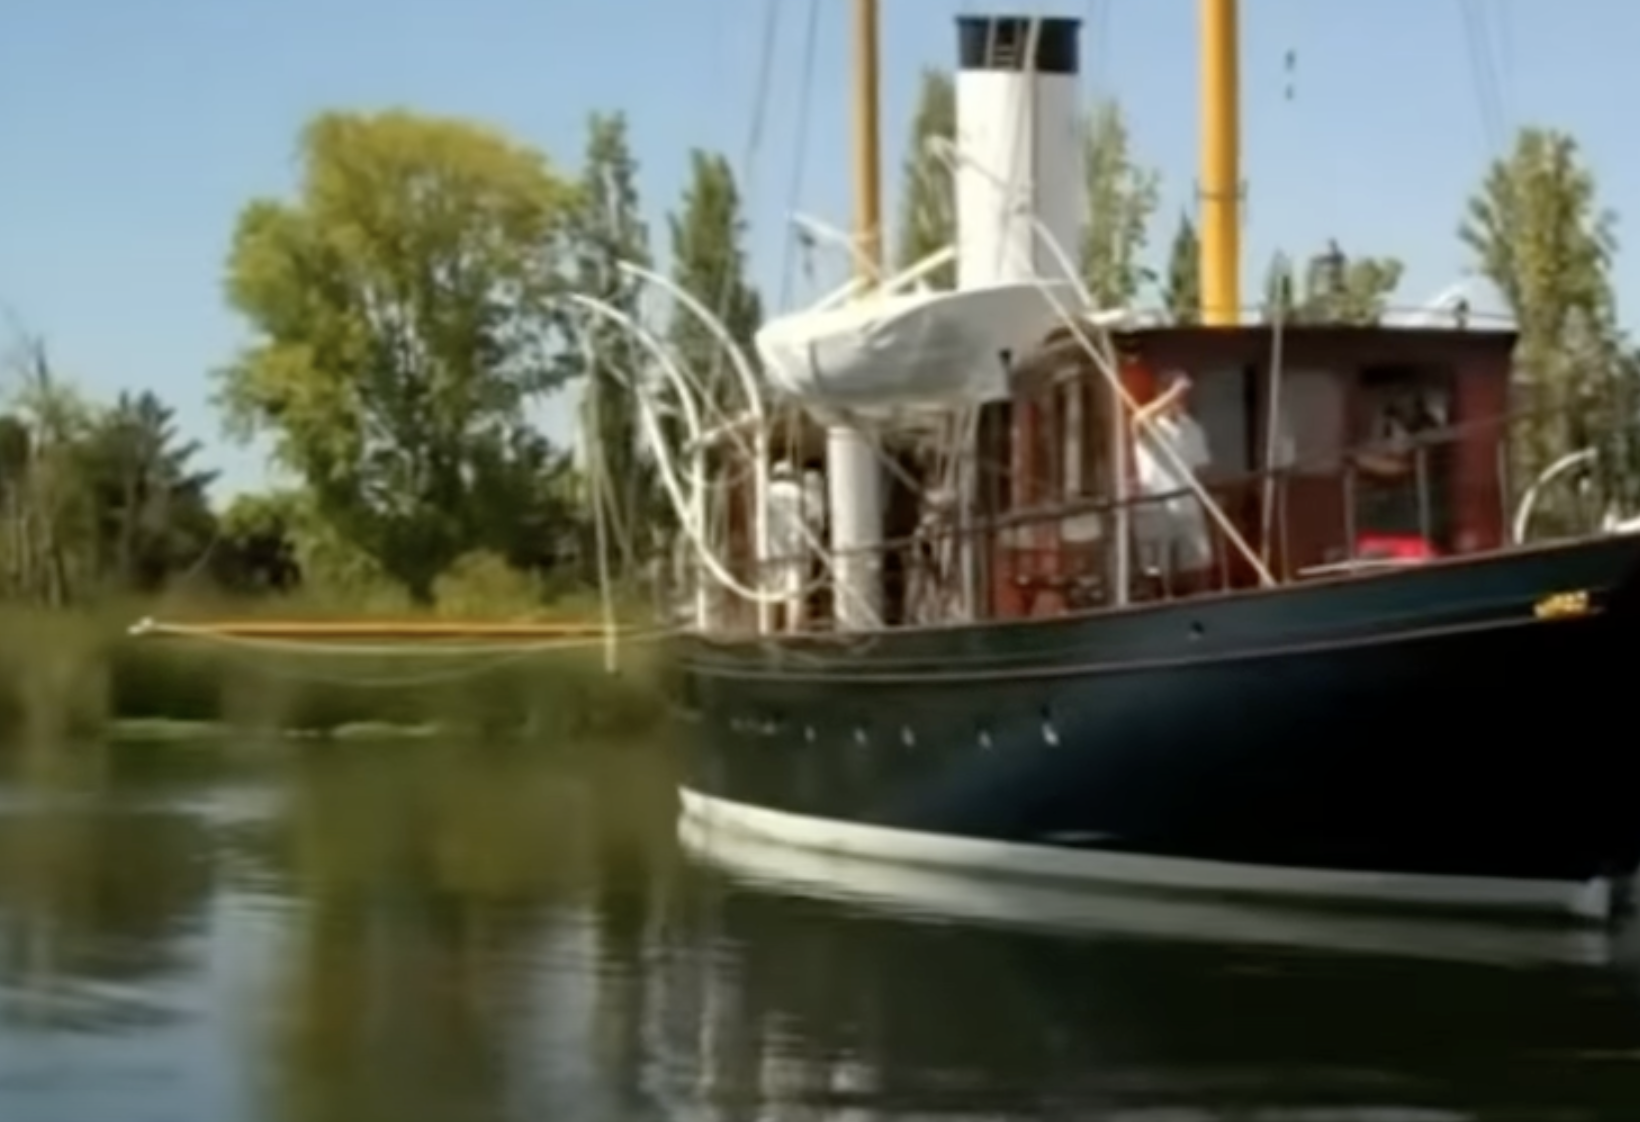
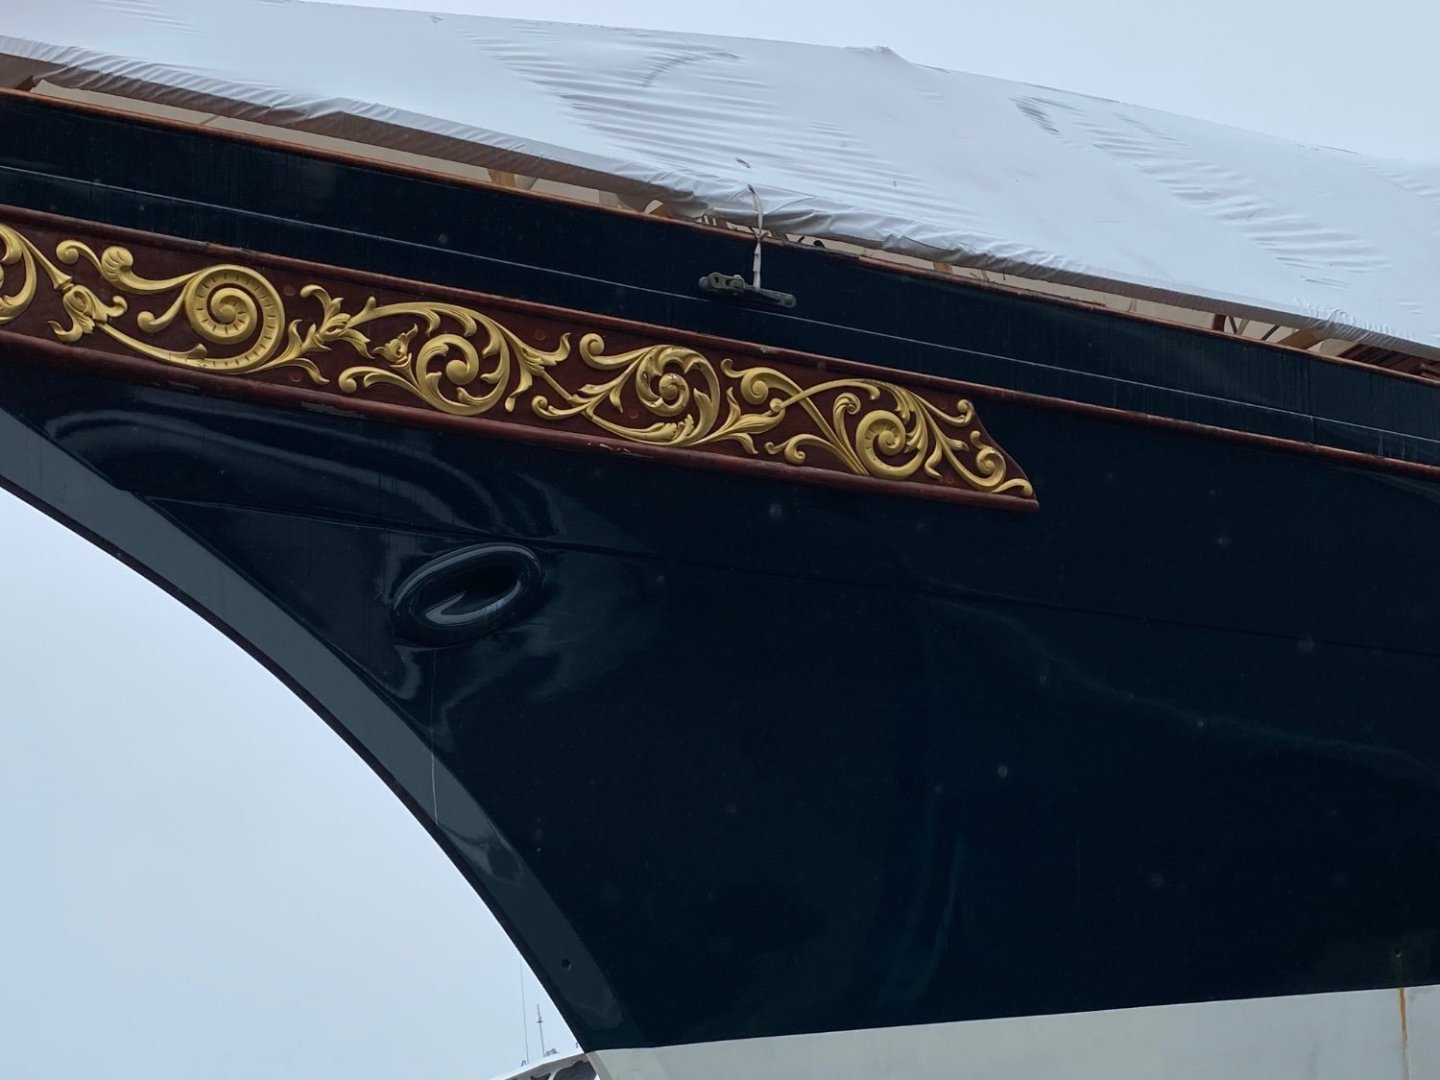
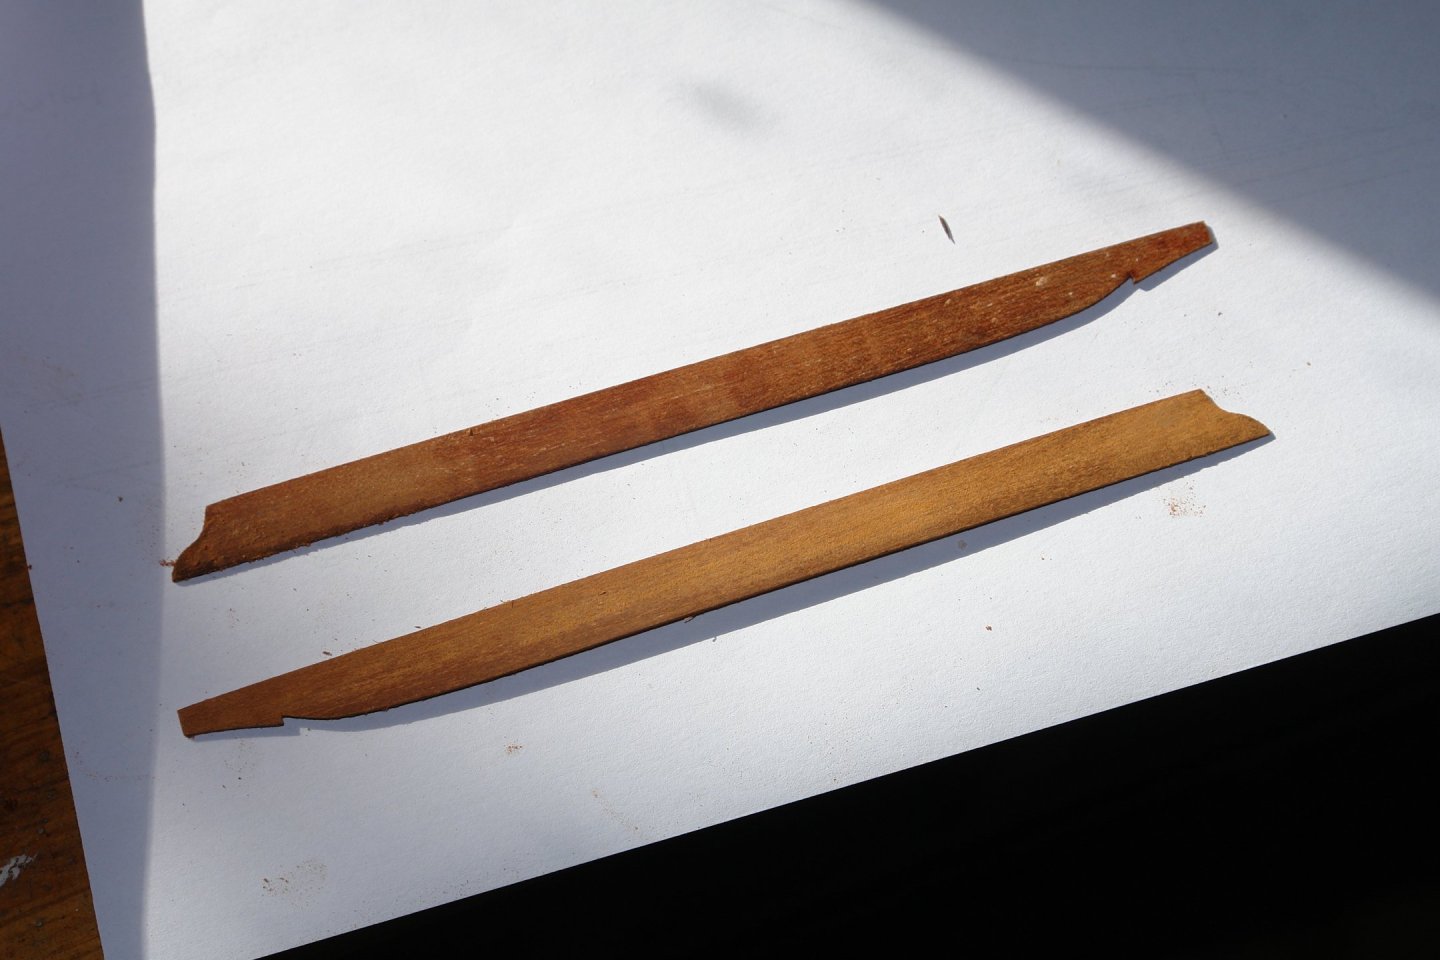
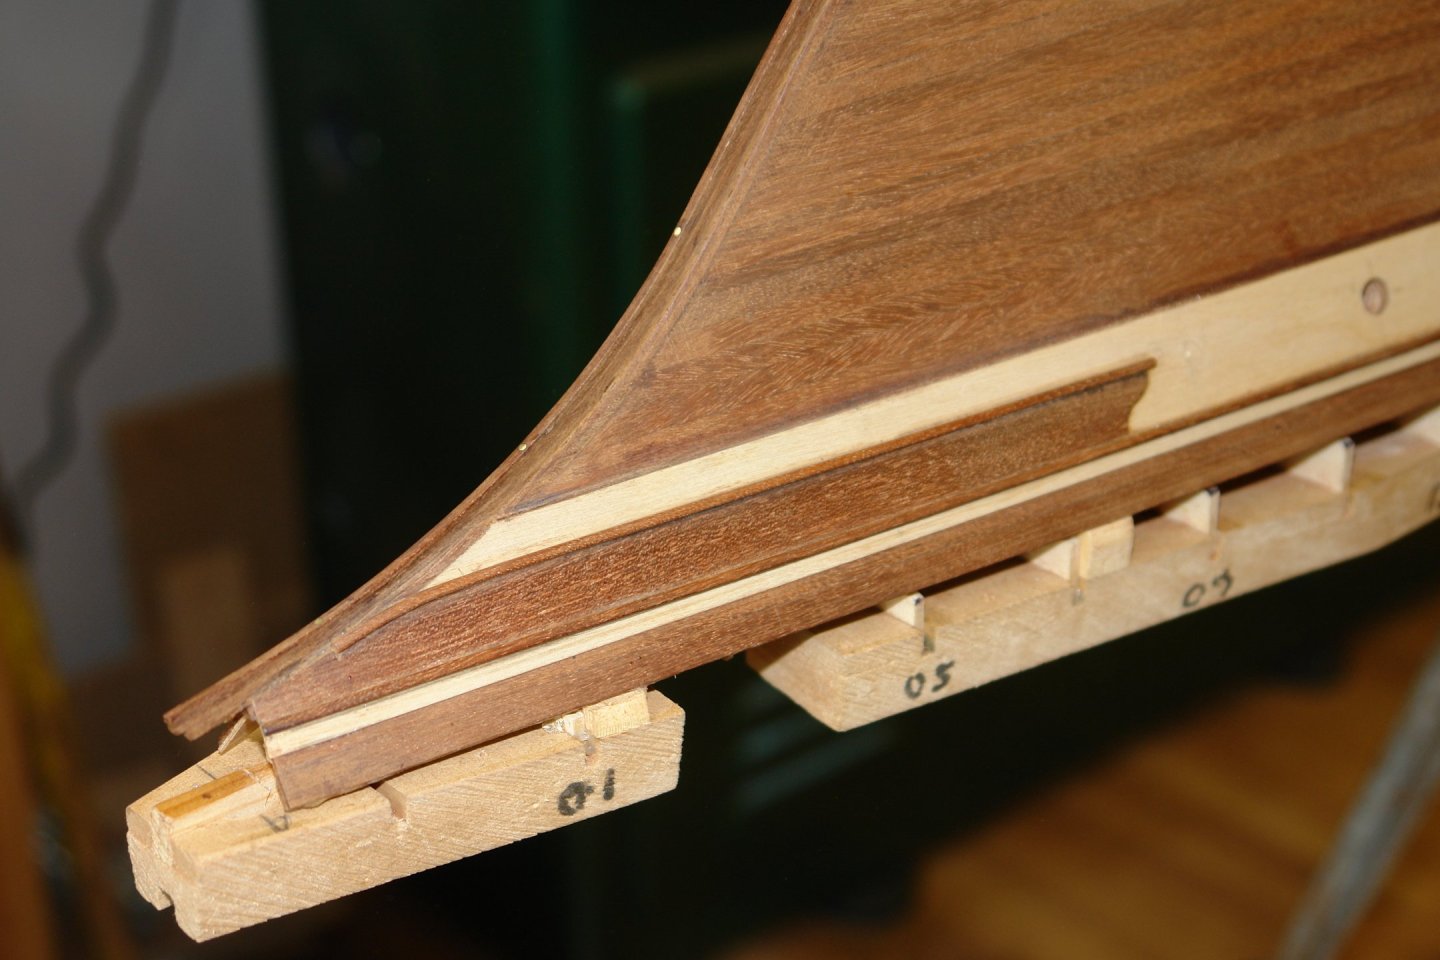
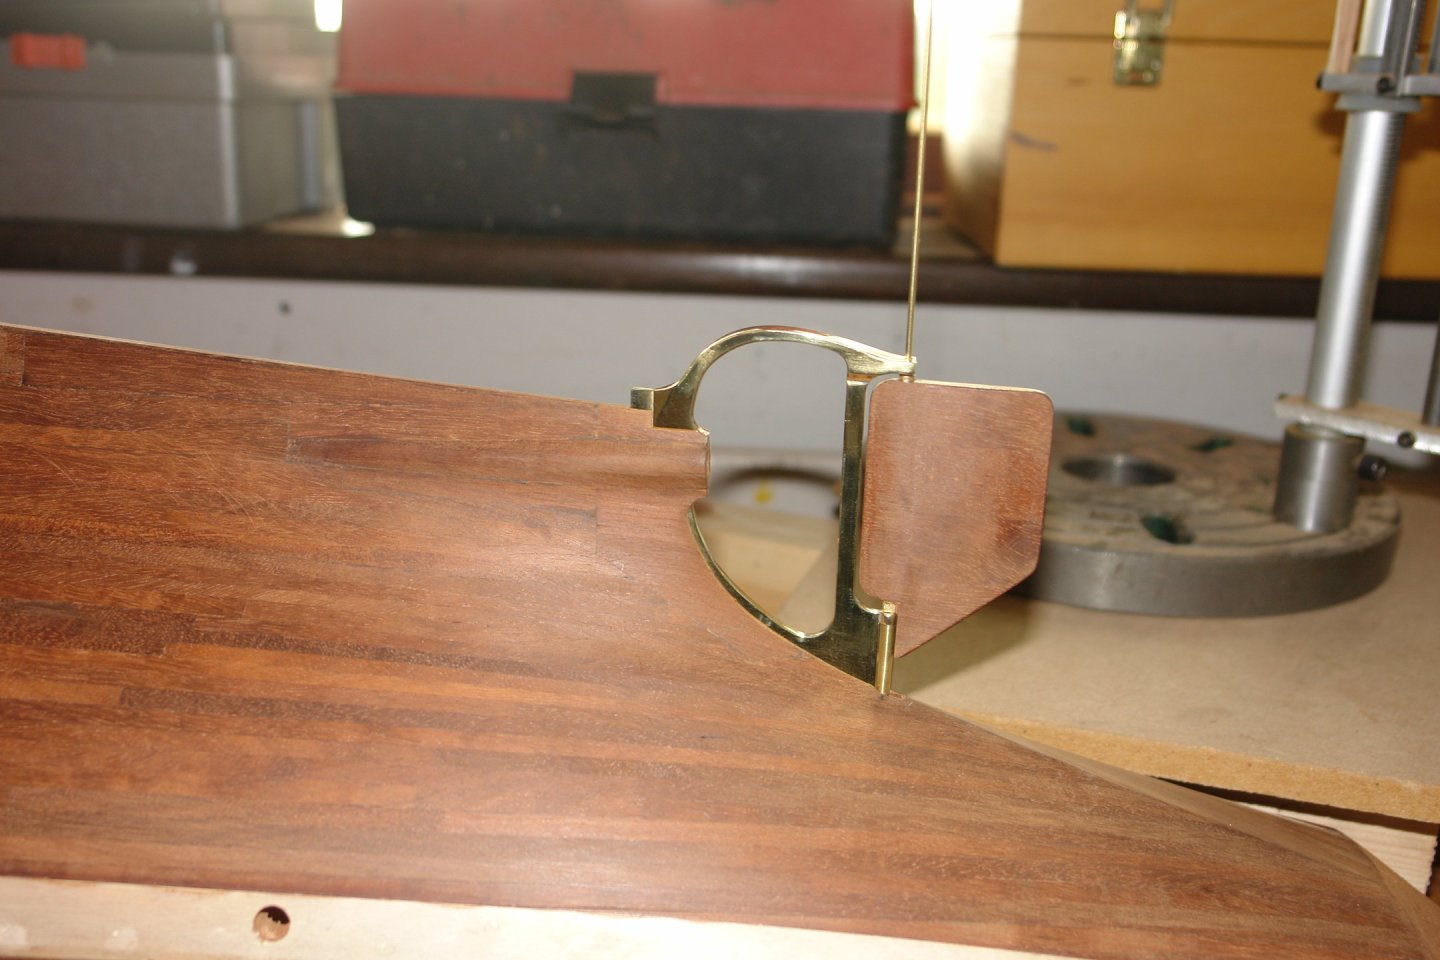
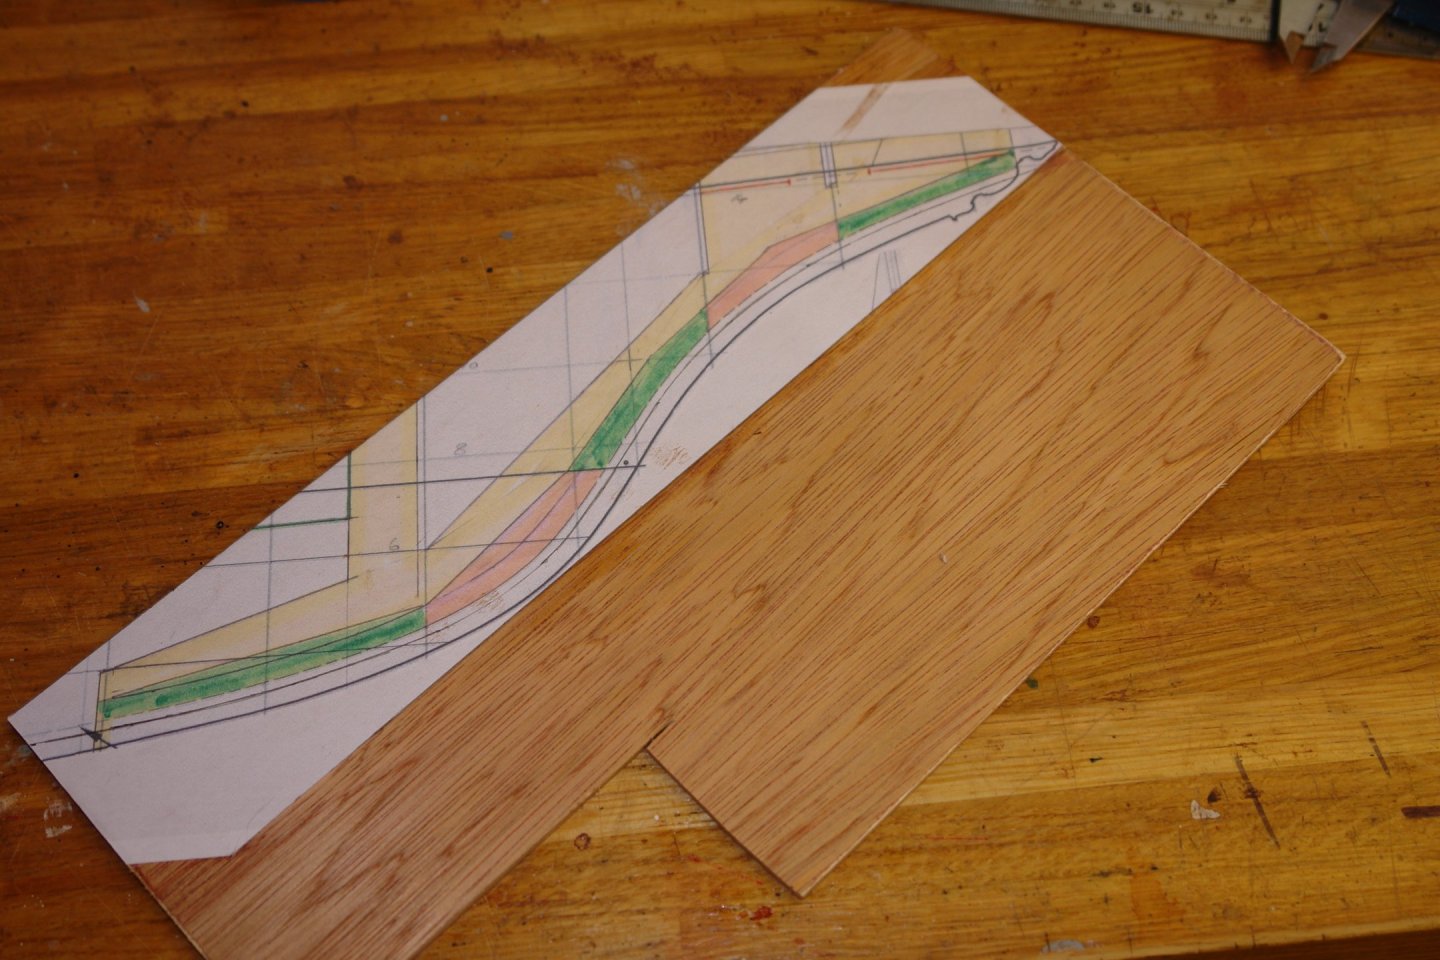
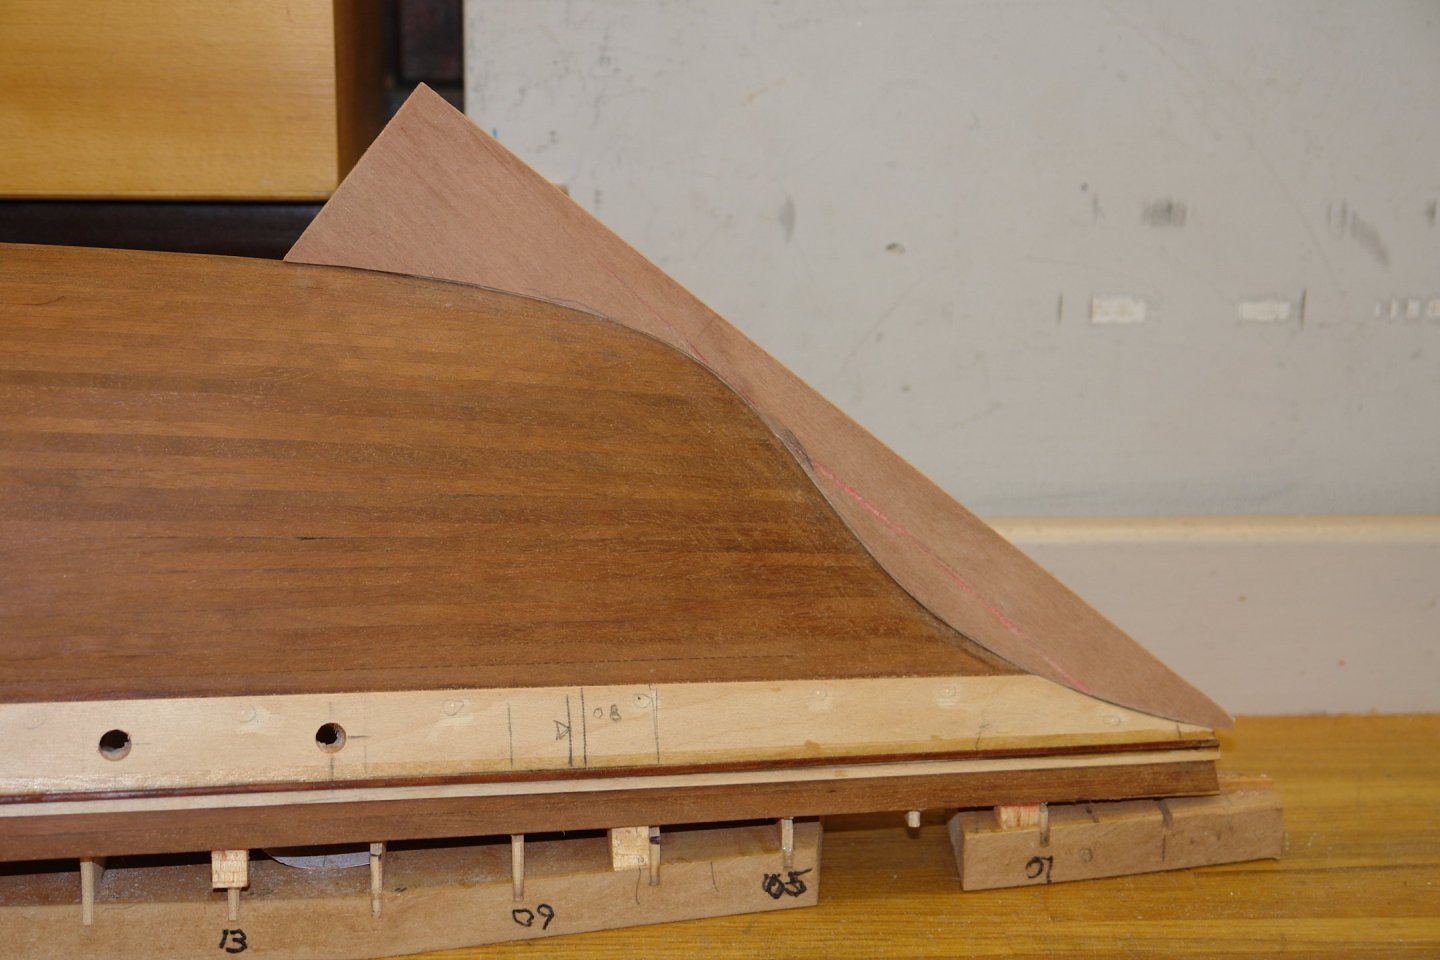
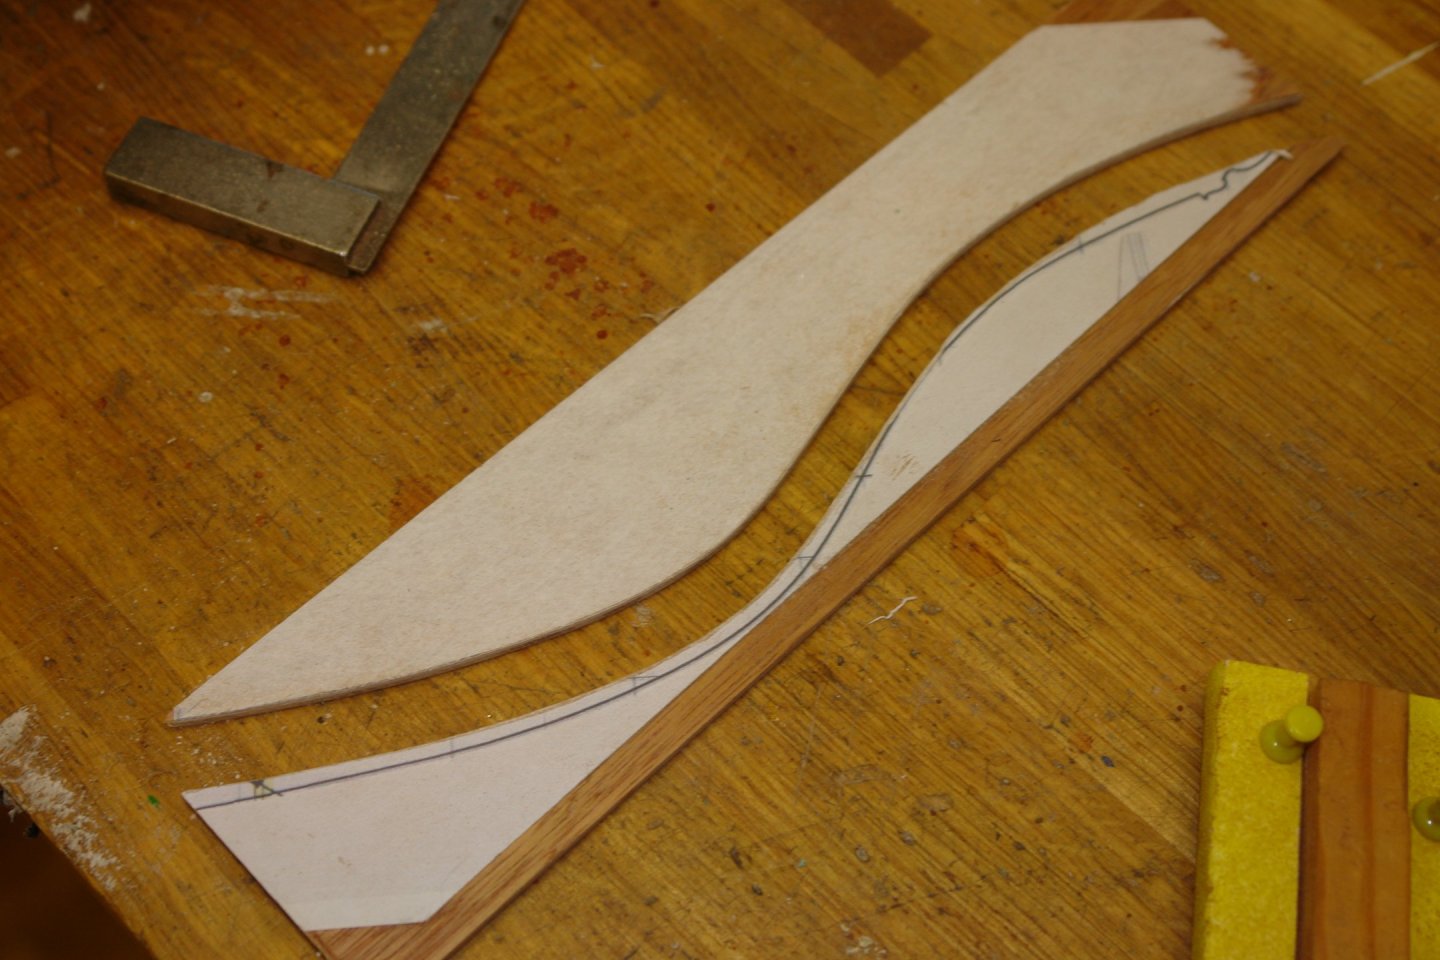
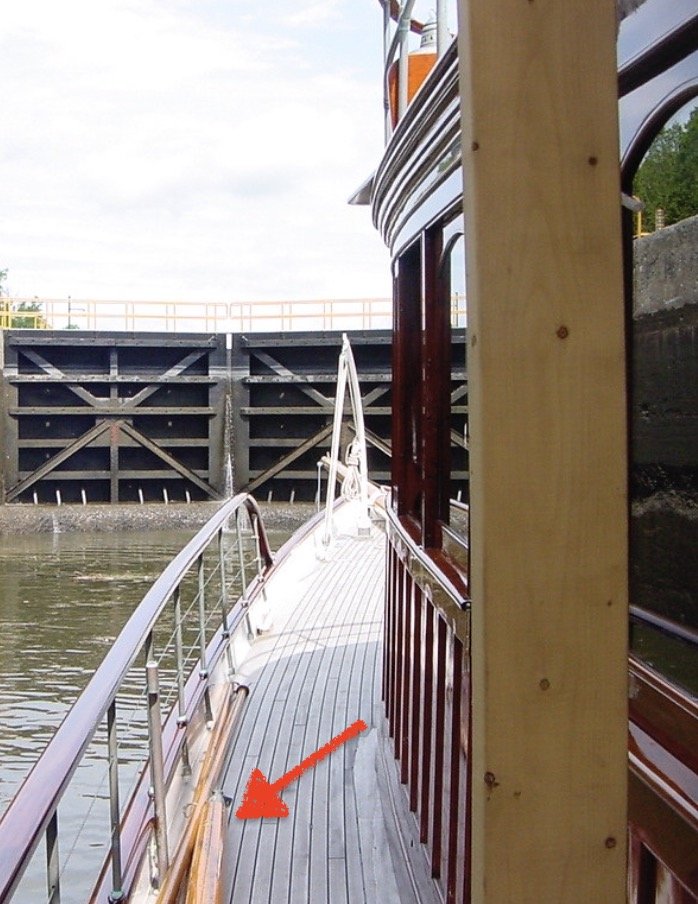
 Another week gone by and I plod along. I feel like I need a bit of change of direction after all a change is a good as a rest! Firstly here is that dreaded scroll work that has been exercising my thoughts. On the hull drawings the draughtsman took a bit of artistic license when representing the decorations. It would have been a deal easier to follow this fanciful representation. The drawing did however accurately define the mahogany backing board on which the scroll work sits. By this stage I had rejected the notion of carving the decoration in relief because I couldn't see how I was going to neatly paint the scroll without spreading the gold paint everywhere. I printed out a template and offered this up to the hull. I then cut 2 pieces of mahogany .020" thick and taped these together with double sided tape. I glued on the template and cut the planks to shape with a jewelers saw. I then glued these on to the hull and attached a piece of strip to the lower edge. I broke several pieces of strip before I got the curve sorted. Nerves then got the better of me so I parked the scroll and diverted to the other end. I hadn't drilled the hull for the rudder stock so I adapted my tapping jig and bored the hole. With that done I did a test assembly of the rudder. I then went on to make the boss that fits at the end of the prop fairing. Interestingly the skeg (including the boss) is the only hull feature from the original yacht that seems to have made it into the reconstruction. The boss was made from a piece of 1/2" brass bar - as per the very rough sketch below. Because the flange needs to be 3/4" diameter I formed a stub and soldered on a brass washer (white arrow). The flange was then machined away using the side of an end mill with the bar mounted on a rotary table. The boss was finished on the lathe. The finished part was then test fitted with the skeg. I am nearly at the stage of gluing all these parts on to the hull but I am reluctant to do so as it isn't entirely obvious how I am going to fit the prop with the skeg glued in place. It is also obvious that I can't permanently fit the prop before the skeg. I do have a devious plan but I really need to make the prop and try out the plan before final committing to permanently attaching the skeg. So the next step is to make the prop. I have given some thought to prop manufacture. I did consider buying one but getting the right size and shape wasn't exactly easy and anyway it felt like cheating. The design sketch is attached below. The hub will be made from 12mm bar with the blade root angle being 45 deg to the axis. The tip angle will be about 70 deg to the axis. The blade shape is estimated from the various photographs that I have. The lugs (red arrows) are an early thought on an assembly aid and may not feature once I have thought it through. And so on to working out how to machine and assemble the prop. The next post should be somewhat more interesting.


-
The hull is looking mighty fine George.
-
Keith Your wonky donkey is looking just the job. I fear it may starve without teeth. I recommend a set of dentures and a cart load of carrots. Working to 3am isn't conducive to maintaining your youthful good looks. I admire your stamina but you need your beauty sleep.😀
-
Keith - I am still working on my plan for extending your modelling career. 😀
-
Richard I have seen some examples where a base of photo etch has been built up using solder to create the required depth. I won't even pretend to be in the same class as Doris with modelling clay.
-
Very skilful John - I may need a few years of practice. I was in York the other day looking at the Minster. I spent some time watching / talking to the stone masons carving replacement gargoyles, They seem to have a very long apprenticeship. The girl mason had very impressive biceps.😬
-
I agree with Daniel - your pictures show both Keith.
-
Halò from the Highlands of Scotland.
KeithAug replied to Highlander's topic in New member Introductions
It’s good to have an immortal on board.🙂 My wife taught mathematics in Edinburgh for many years. St George’s. -
Ras, was the original red or is that detail. Lost in the mists of time?
- 128 replies
-
- 2
-

-
- zulu
- sternwheeler
- (and 1 more)
-
What wood were you carving John? Did you carve the scrolls and apply them to a backing board or did you start with a thick board and carve away the excess?
-
The use of the wooden cloths pegs made me smile. The build is coming along rather well.
- 201 replies
-
- 5
-

-
-
- Oyster Sharpie
- first scratch build
- (and 1 more)
-
USS Cairo by Zetec - FINISHED - 1/50 scale
KeithAug replied to Zetec's topic in - Build logs for subjects built 1851 - 1900
Very impressive build. -
Pat - I am probably going to do a bit of experimenting before I reach a decision. I have a couple criteria of choice. Avoids expensive new machinery and skills - e.g. prnters Accuracy of duplication - identical mirror image on both sides. I have been reading up on photo etch but at the moment it looks a bit messy for my liking.
-
Keith, the engine is elegantly simple. Presumably not very fuel efficient but I bet maintenance and fault finding was a dream.
-
Wonderful to see this build back after a long absence. Good to see your skills have not suffered as a result of the layoff.
-
Richard - Not an option Im afraid. I come from a long line of luddites.
-
Not a great plan for a national treasure, but better than rotting away in the boat yard I suppose.
-
I love the realism of the construction Andy. Flipping between the model and the full size build it is easy to lose track of which is which.
- 174 replies
-
- 4
-
-
- Vigilance
- Sailing Trawler
- (and 1 more)
-
Great progress John - everything looking very smart.
-
Thank you Glen, Rick and John. And thanks to everyone for the likes. Richard - I don't know yet. I keep looking at it, worrying and putting it to the back of my mind. I guess I'll do a trawl of techniques from other build logs and then decide what my skill set will accommodate.
-
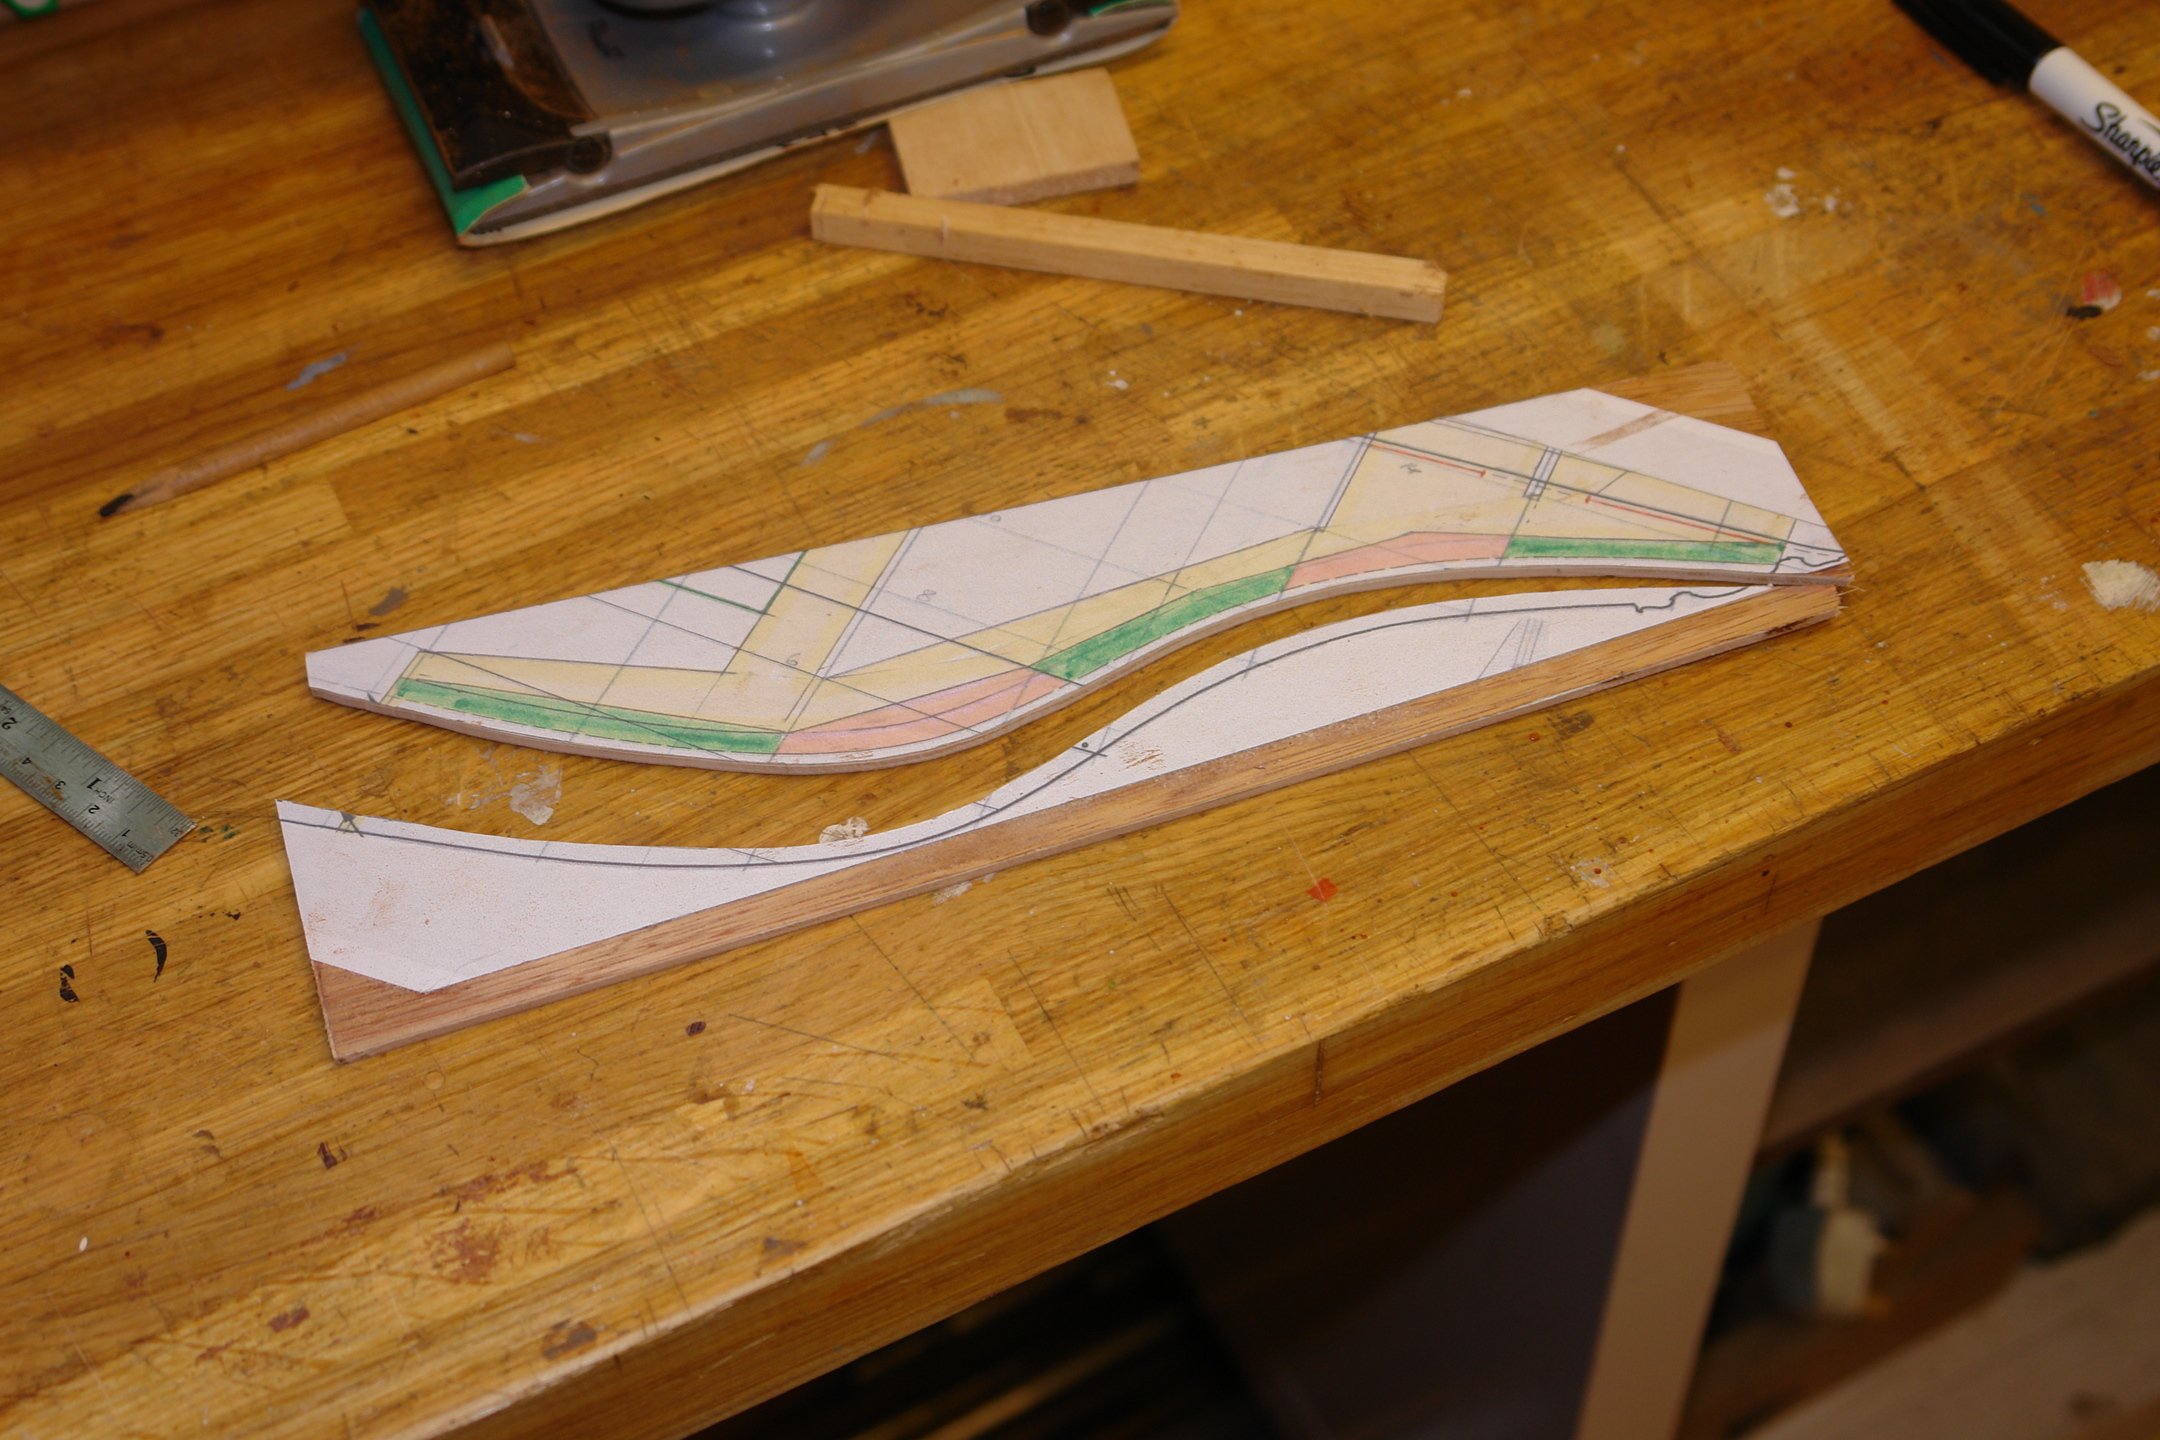
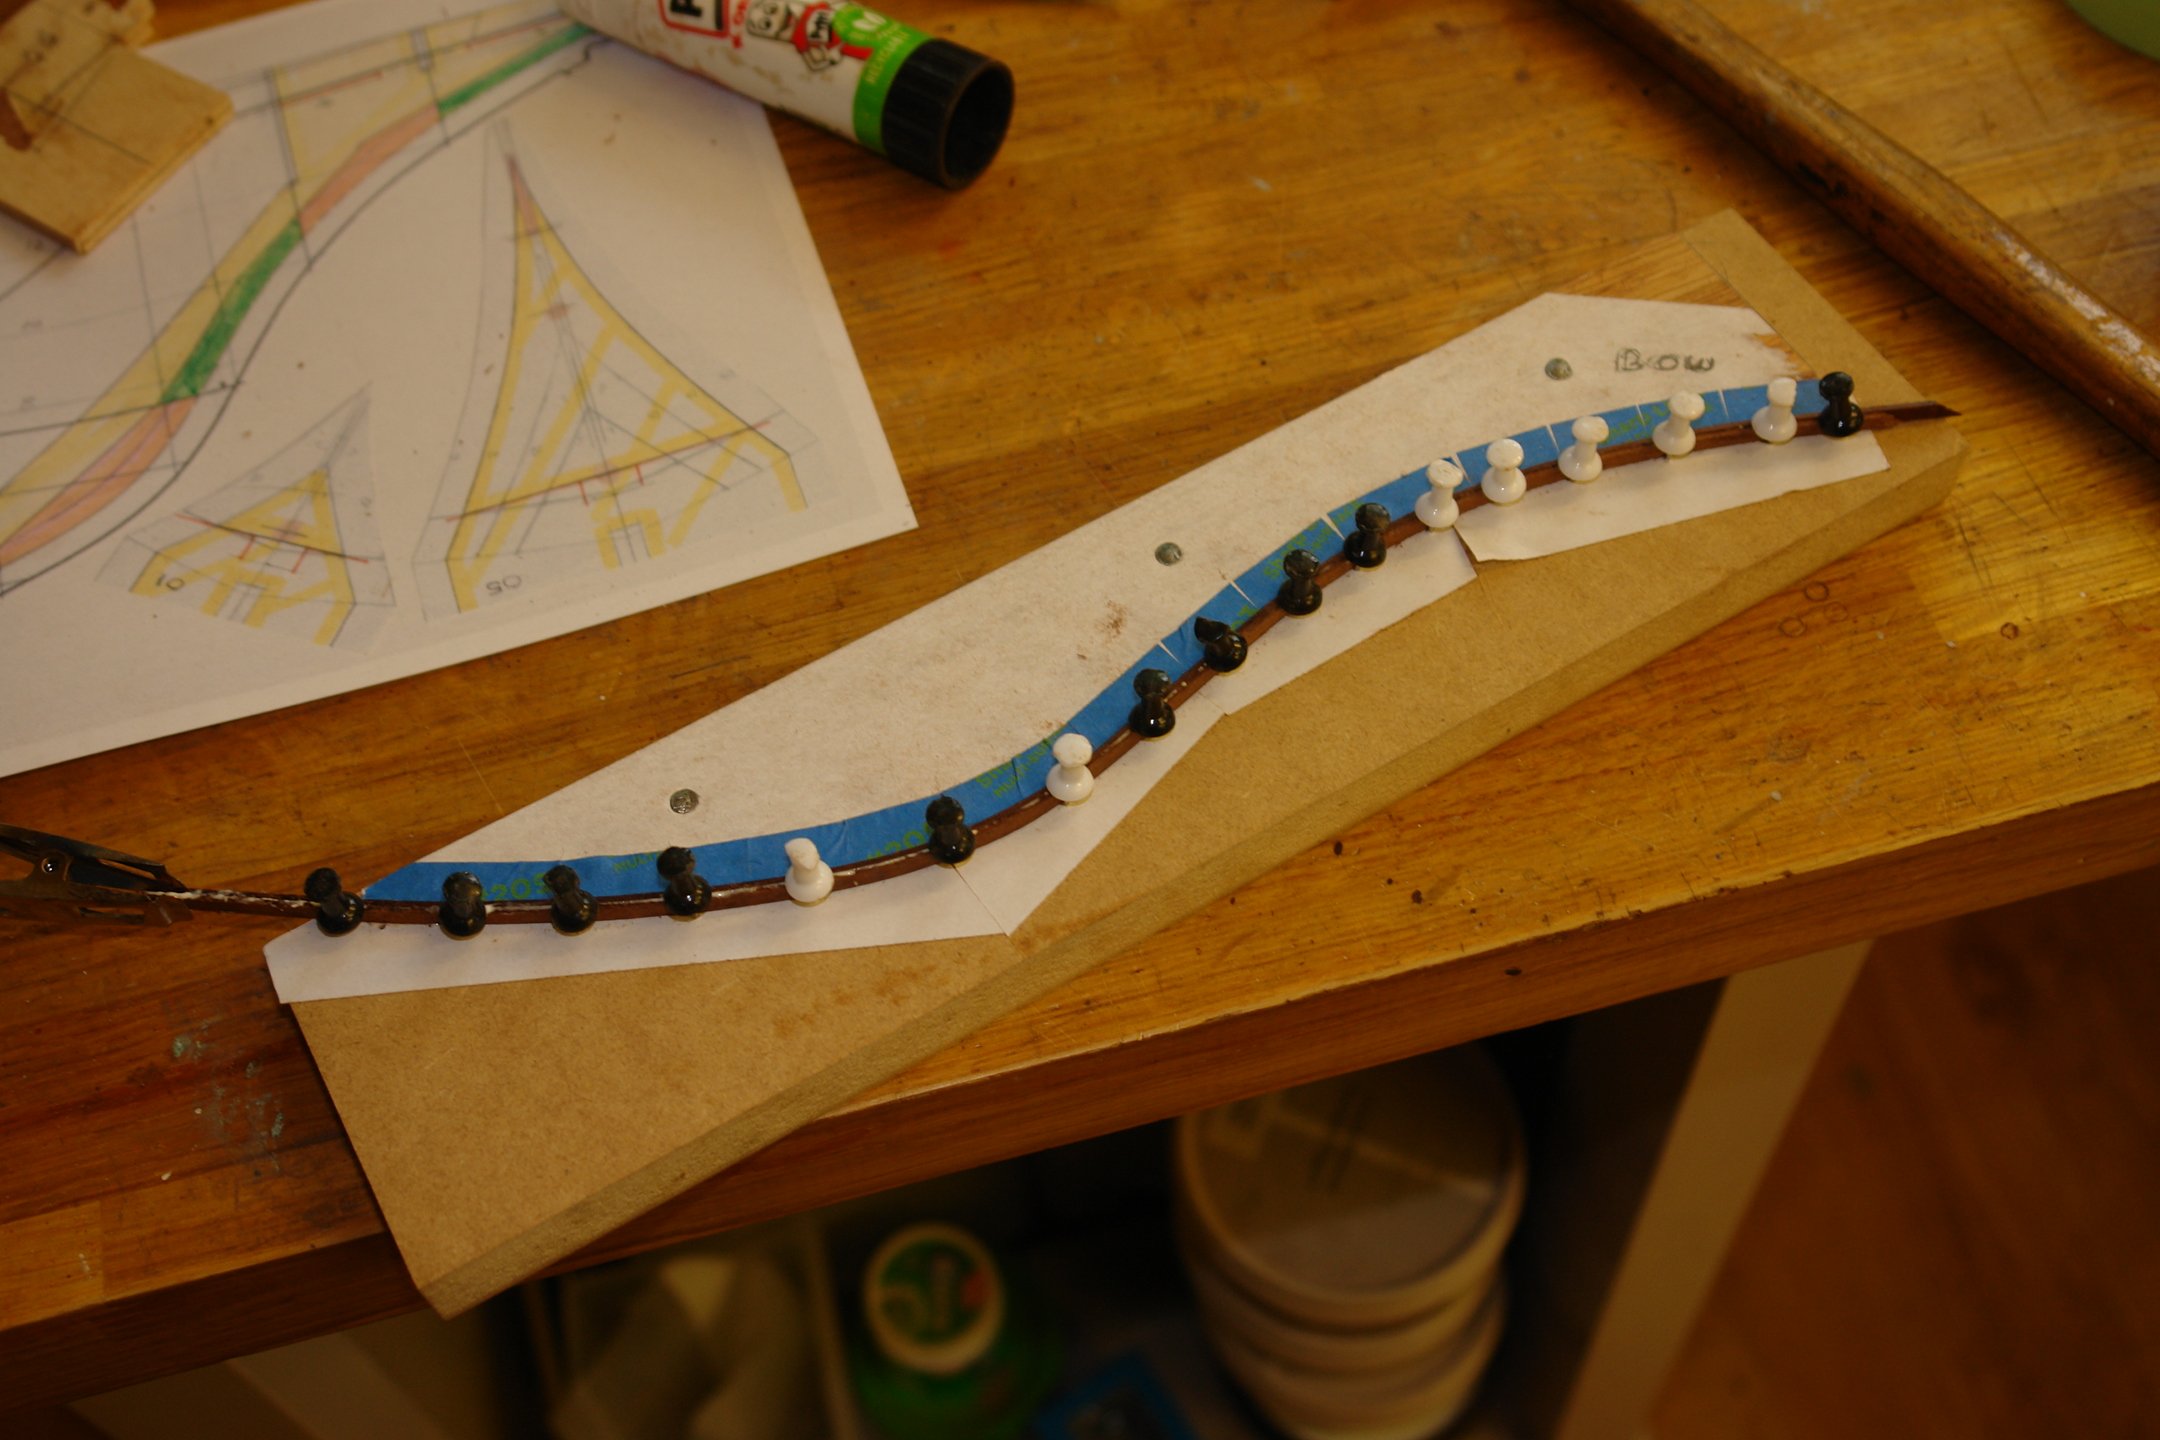
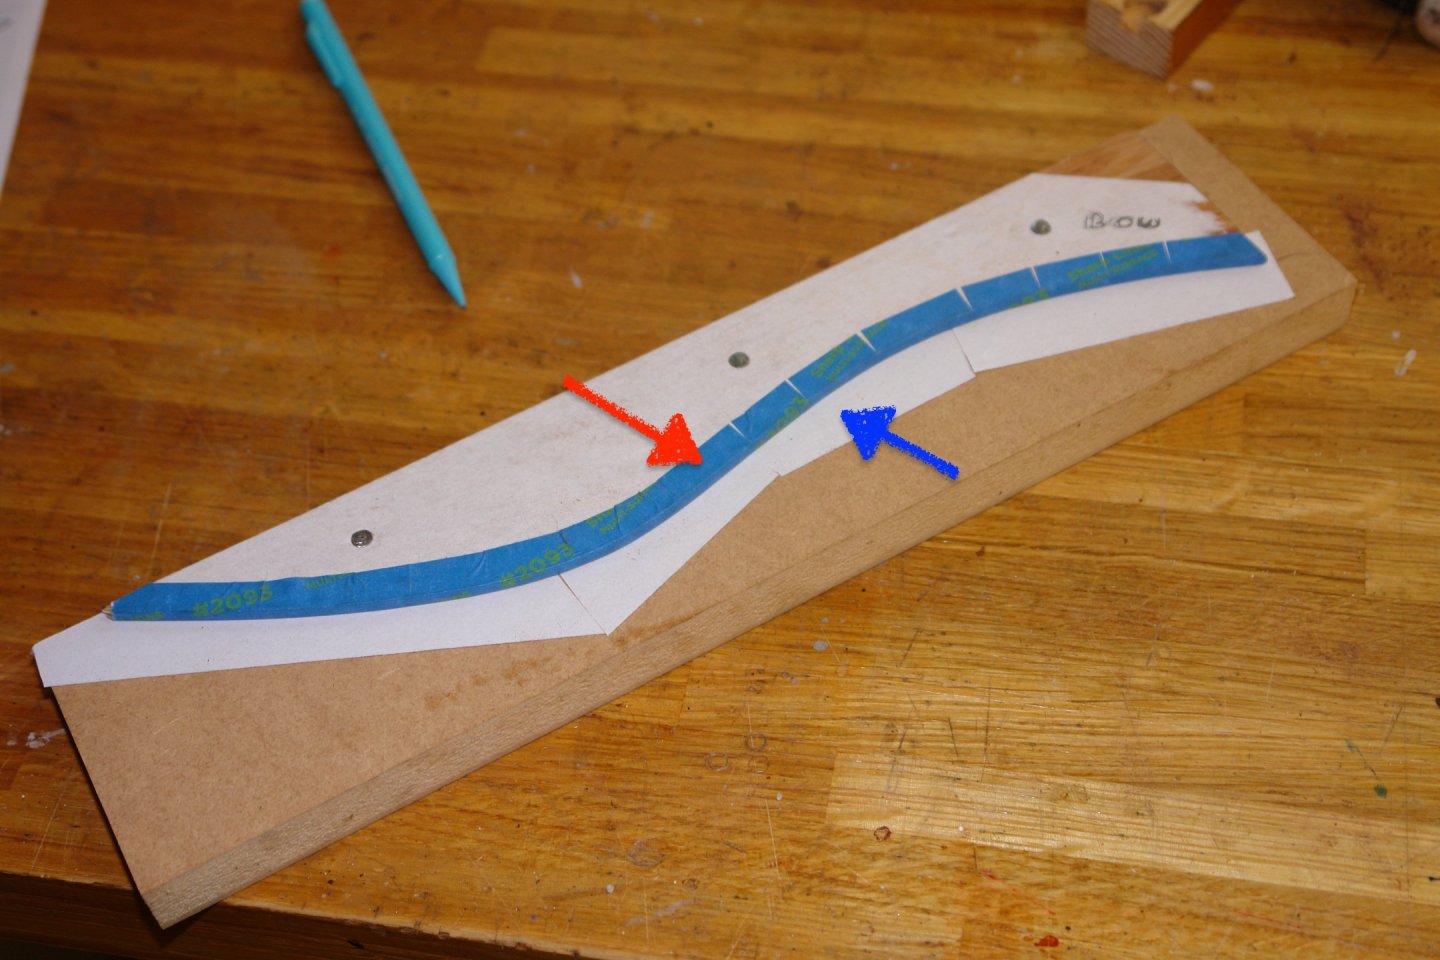
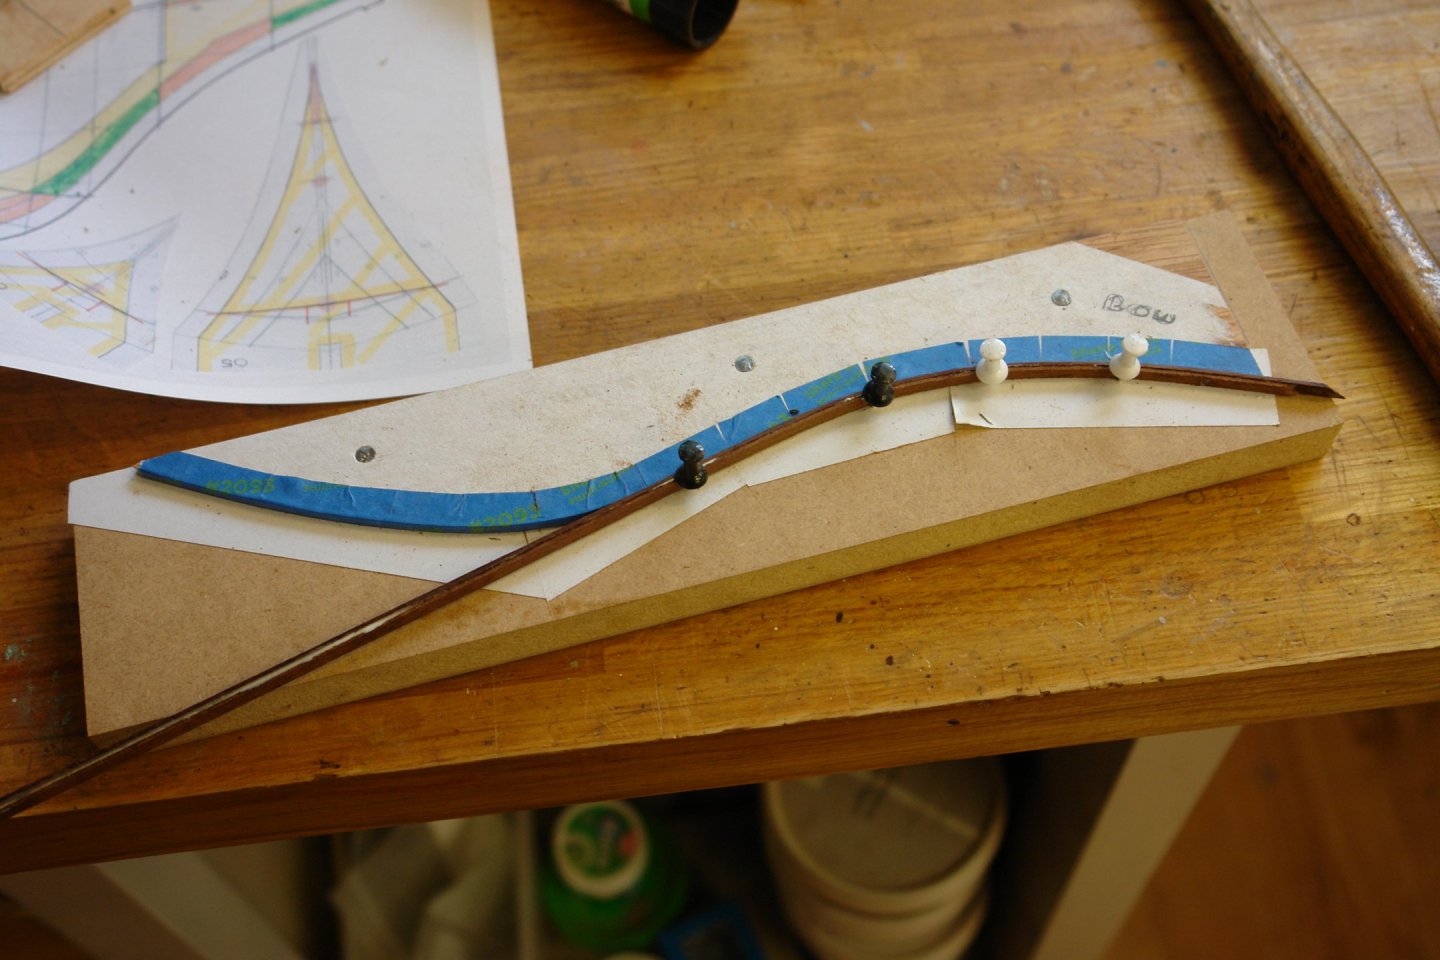
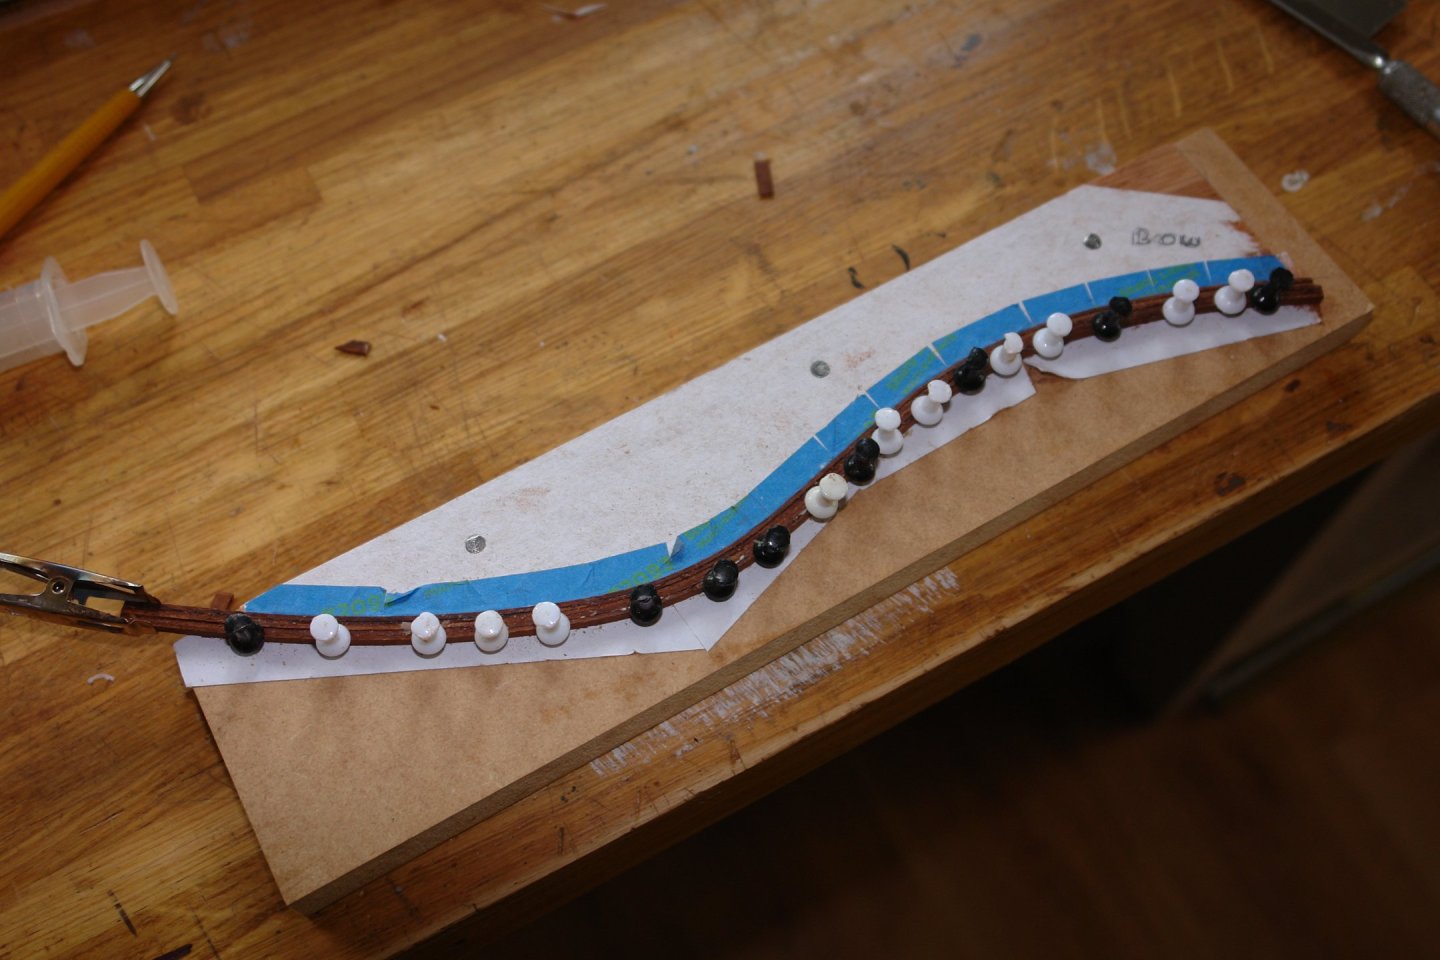
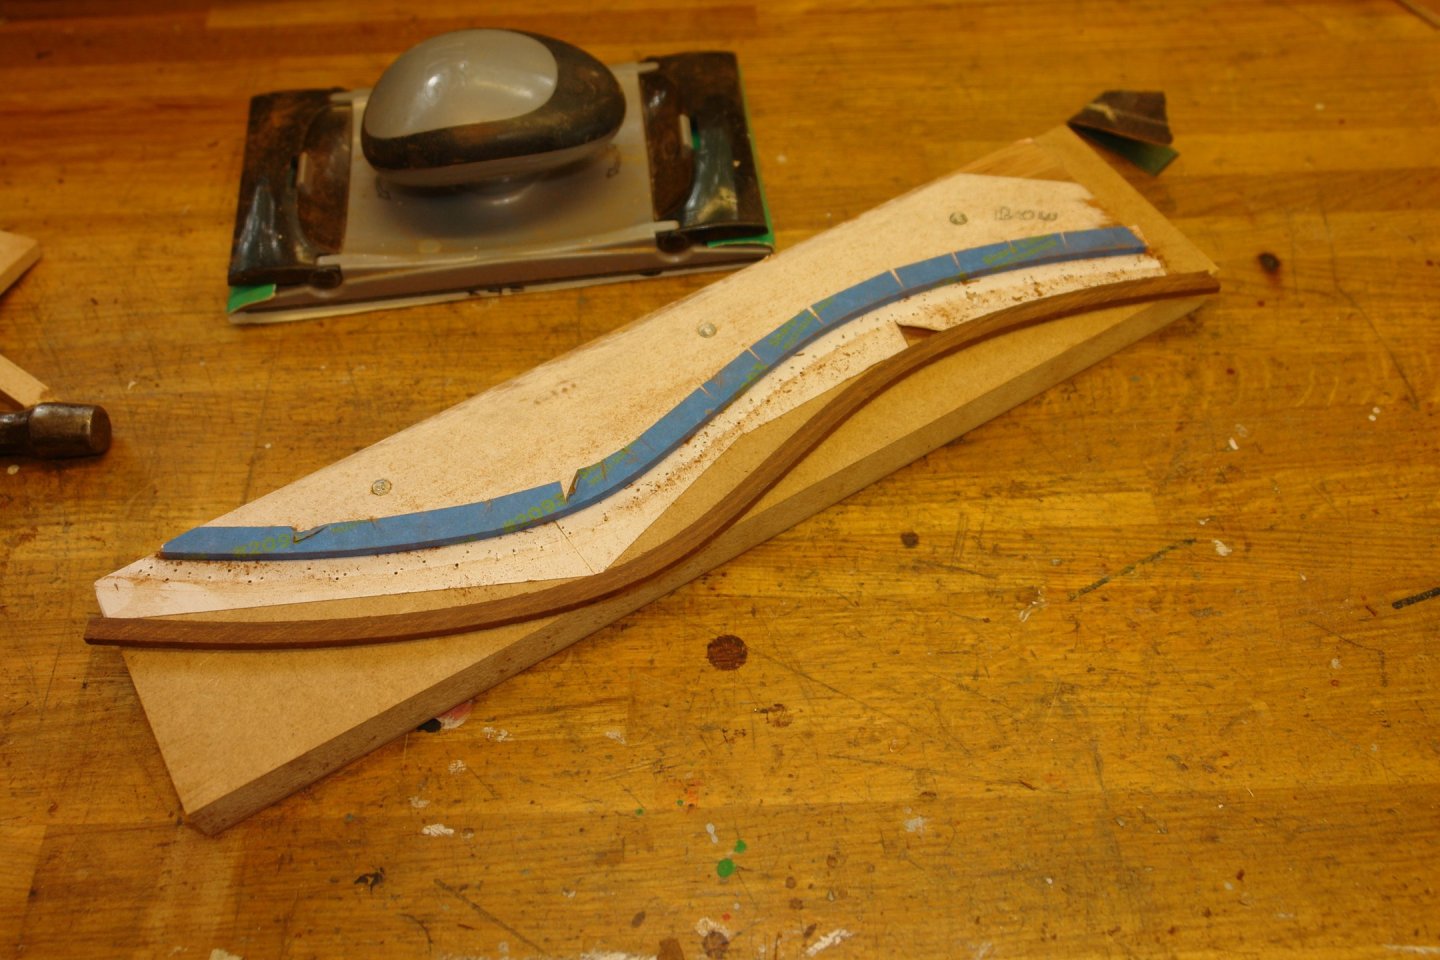
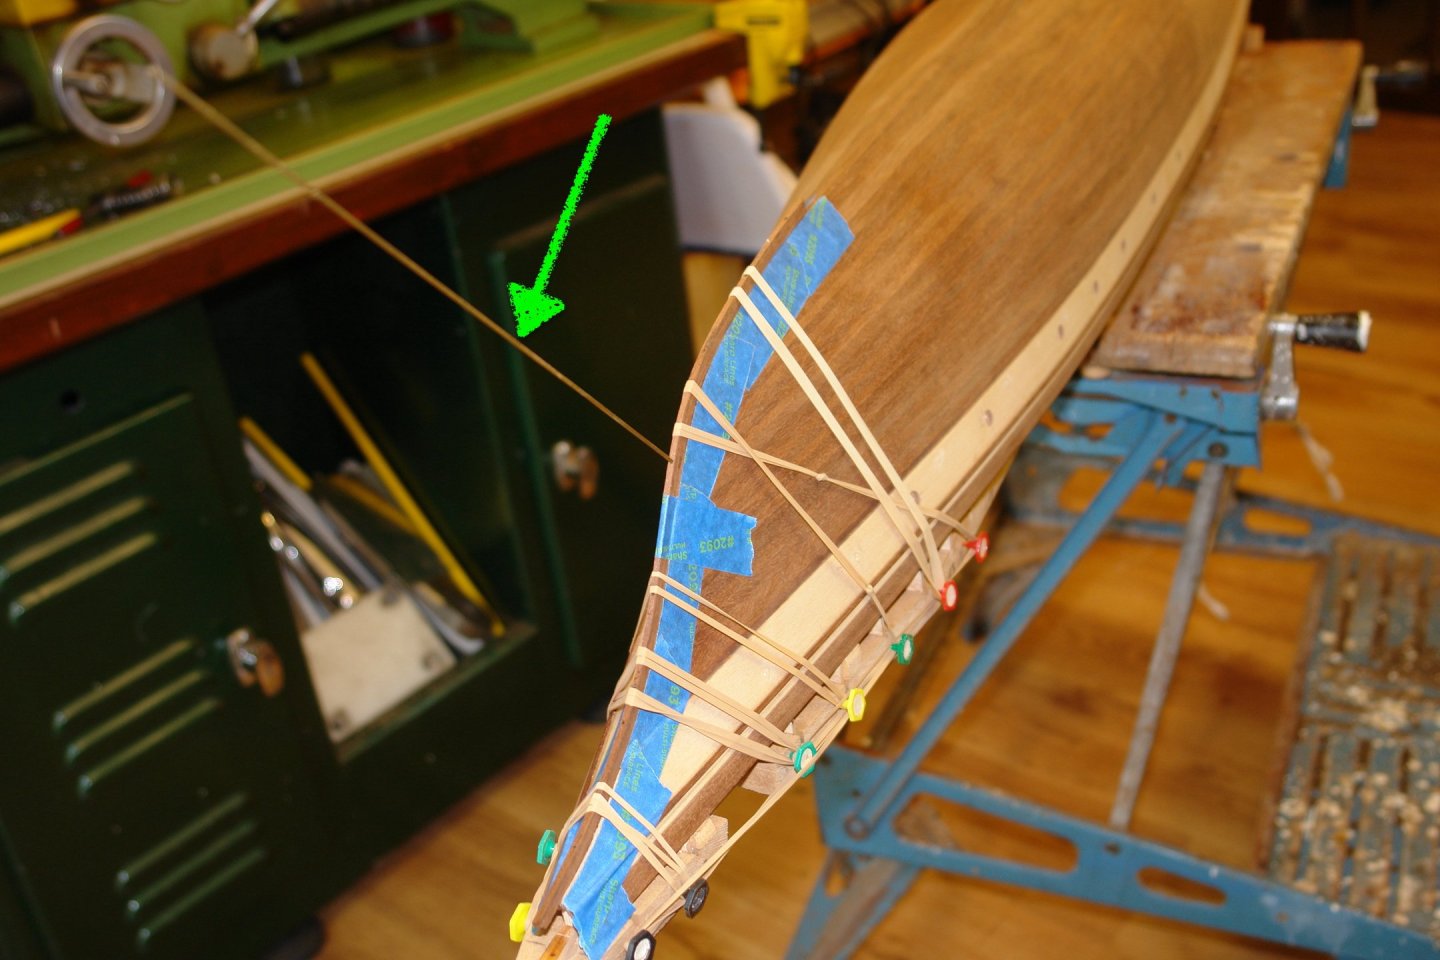
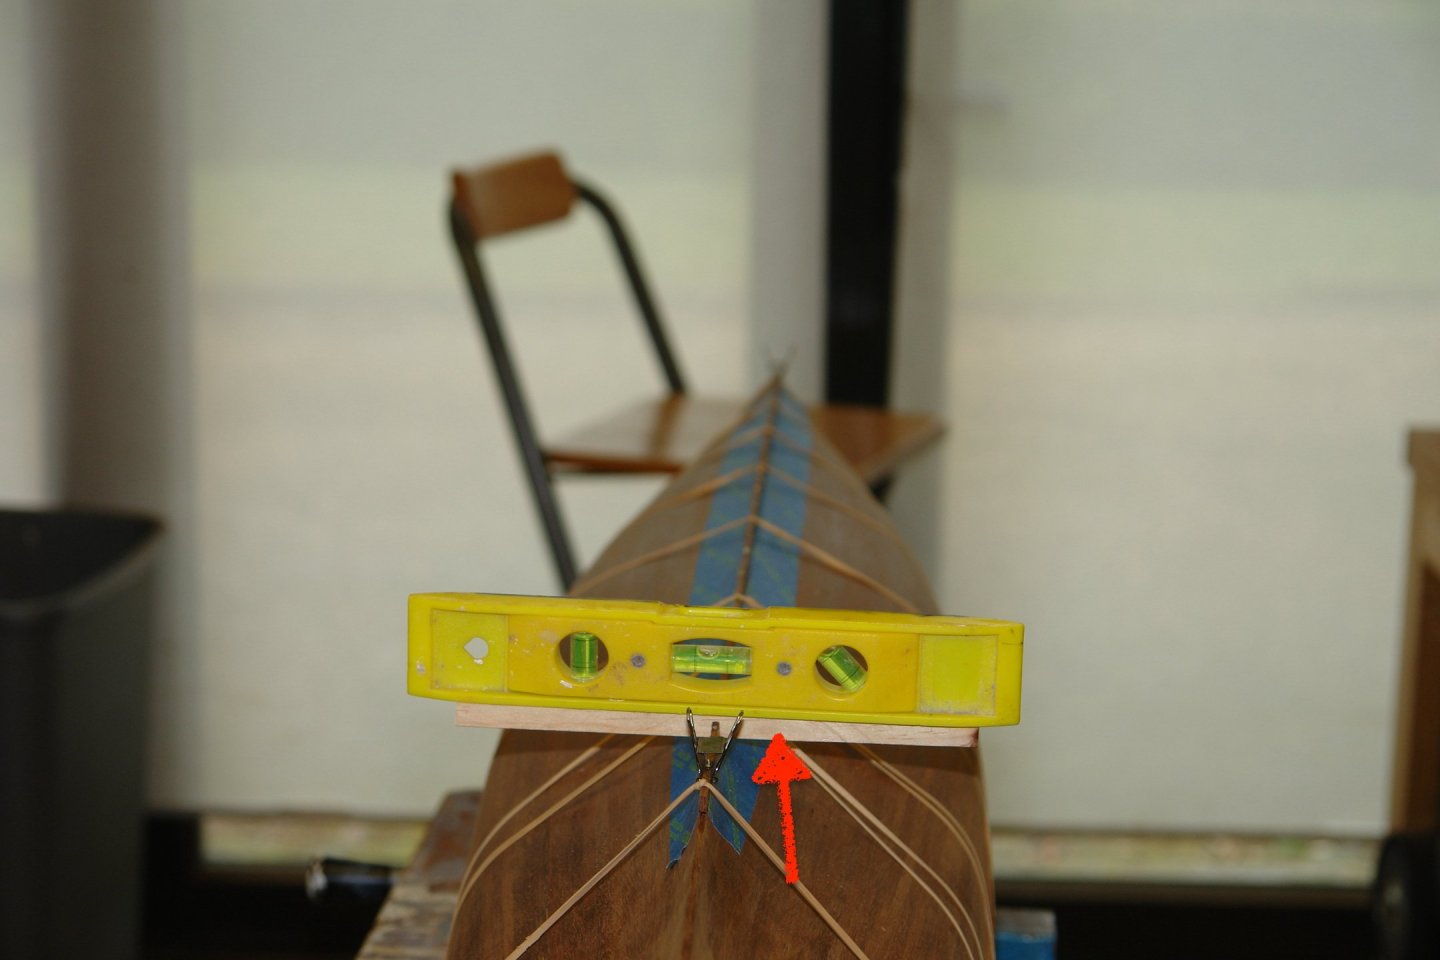
So here goes with an update of the weekends work prior to a journey round the country visiting friends and family. In pursuit of my strange plan (to do everything in reverse order) I move on to the keel. I started at the bow where the keel wraps around to become the stem. I considered making this section as a series of shaped and end jointed planks but in the end decided to lay it up from layered strips. To start I printed off the bow profile and glued it to a piece of .160" thick ply. I then cut out the shape of the bow to create a template. This was offering up to the hull to check for accuracy of fit. The profile of the hull and of the template was then adjusted to eliminate any gaps. This wasn't the end of the process because what I needed was a template of the shape of the hull. To complete the exercise what I needed to do was manufacture the matching template of the shape of the stem. Once this was produced I taped the edge of the template with masking tape (red arrow) before nailing it down to a piece of MDF covered with glue resistant tape (blue arrow). I then cut 5 mahogany strips .05" thick by .140" wide. The final width was 0.1" and the .140" allowed plenty of room for final sizing. I then glued the first 2 planks and held them against the template with notice board pins, before allowing the glue to dry. I proceeded to add the remaining 3 planks. Once the glue was dry I removed the pins and slipped the stem off the template. The stem was then sanded both sided down to a thickness of .100" There was a bit of flex back in the finished stem so the fit was marginally off. I decided that there was enough flexibility in the stem piece to spring and hold it place for attachment. To give the stem (and keel) additional strength I decided to pin it in place with .062" brass dowel pins. The stem (and keel) pieces were drilled at 2" centres to take the pins. The stem was then glued in place with PVA glue while being held tightly in place with elastic bands and pins. The blue masking tape is to prevent the PVA spreading on to the finish sanded hull. The green arrow is pointing at one of the pins left excessively long to act as a sighting guide to aligned the stem central to the keel. Once dry the pins were filed back to their finished length. The keel was then attached. The red arrow is pointing at a piece of wood with a slot cut to fit tight over the keel piece. This together with a spirit level allowed the keel to be attached / pinned truly vertical. That is the whole keel attached with the exception of a short length immediately in front of the skeg. This will be fitted once the skeg is glued in place. And so off on our travels we go.


-
Thank you so much Rick. Every little bit of detail just adds another layer of interest. Is she actually sold?
-
I also found a video so here are some fairly poor images of the "parking" pole.


-
Roel - yes it is all becoming clear. The step is on the starboard side amidships ( somewhat further aft than the feature in question ). Also the step brackets have two horizontal pivot lugs whereas the feature I was looking at only has one vertical pivot lug. The bonus from this investigation is that I now know where the step (and the gate in the guard rail) is. Finally here is a picture of what may be the boom laid on the deck adjacent to the feature in question. It seems to have an end fitting that would fit nicely into the vertical lug on the bulwark feature. The evidence does seem to be stacking up doesn't it Steve. Yes Phil, and if you imagine very hard you can see a line led forward from the outboard end of the pole, presumably to swing it out and then hold it in place. Thanks to everyone for the suggestions.
-
Keith - thank you for the clarification. This is the first time I had understood that ..........................................................................................................I thought the bow was the other end!😲