KeithAug
-
Posts
3,986 -
Joined
-
Last visited
Content Type
Profiles
Forums
Gallery
Events
Everything posted by KeithAug
-
 Thank you Andrew, Ian and Druxey. Andrew - I come from Thurnscoe, Near Barnsley. I grew up climbing and sledging down the slag heaps but that was in the good old days before the mines closed. It went rapidly downhill after that which is quite a trick noting its lowly starting point. We always thought Knaresborough was very posh, only visited on rare charabanc trips that always seemed manage a return route via Harry Ramsdens. I escaped aged 16 when I left home and haven't lived in Yorkshire since. My ambition was to retire to Harrogate, sadly not to be.
 -
They breed us thick skinned, tough (and stupid) in Yorkshire.
-
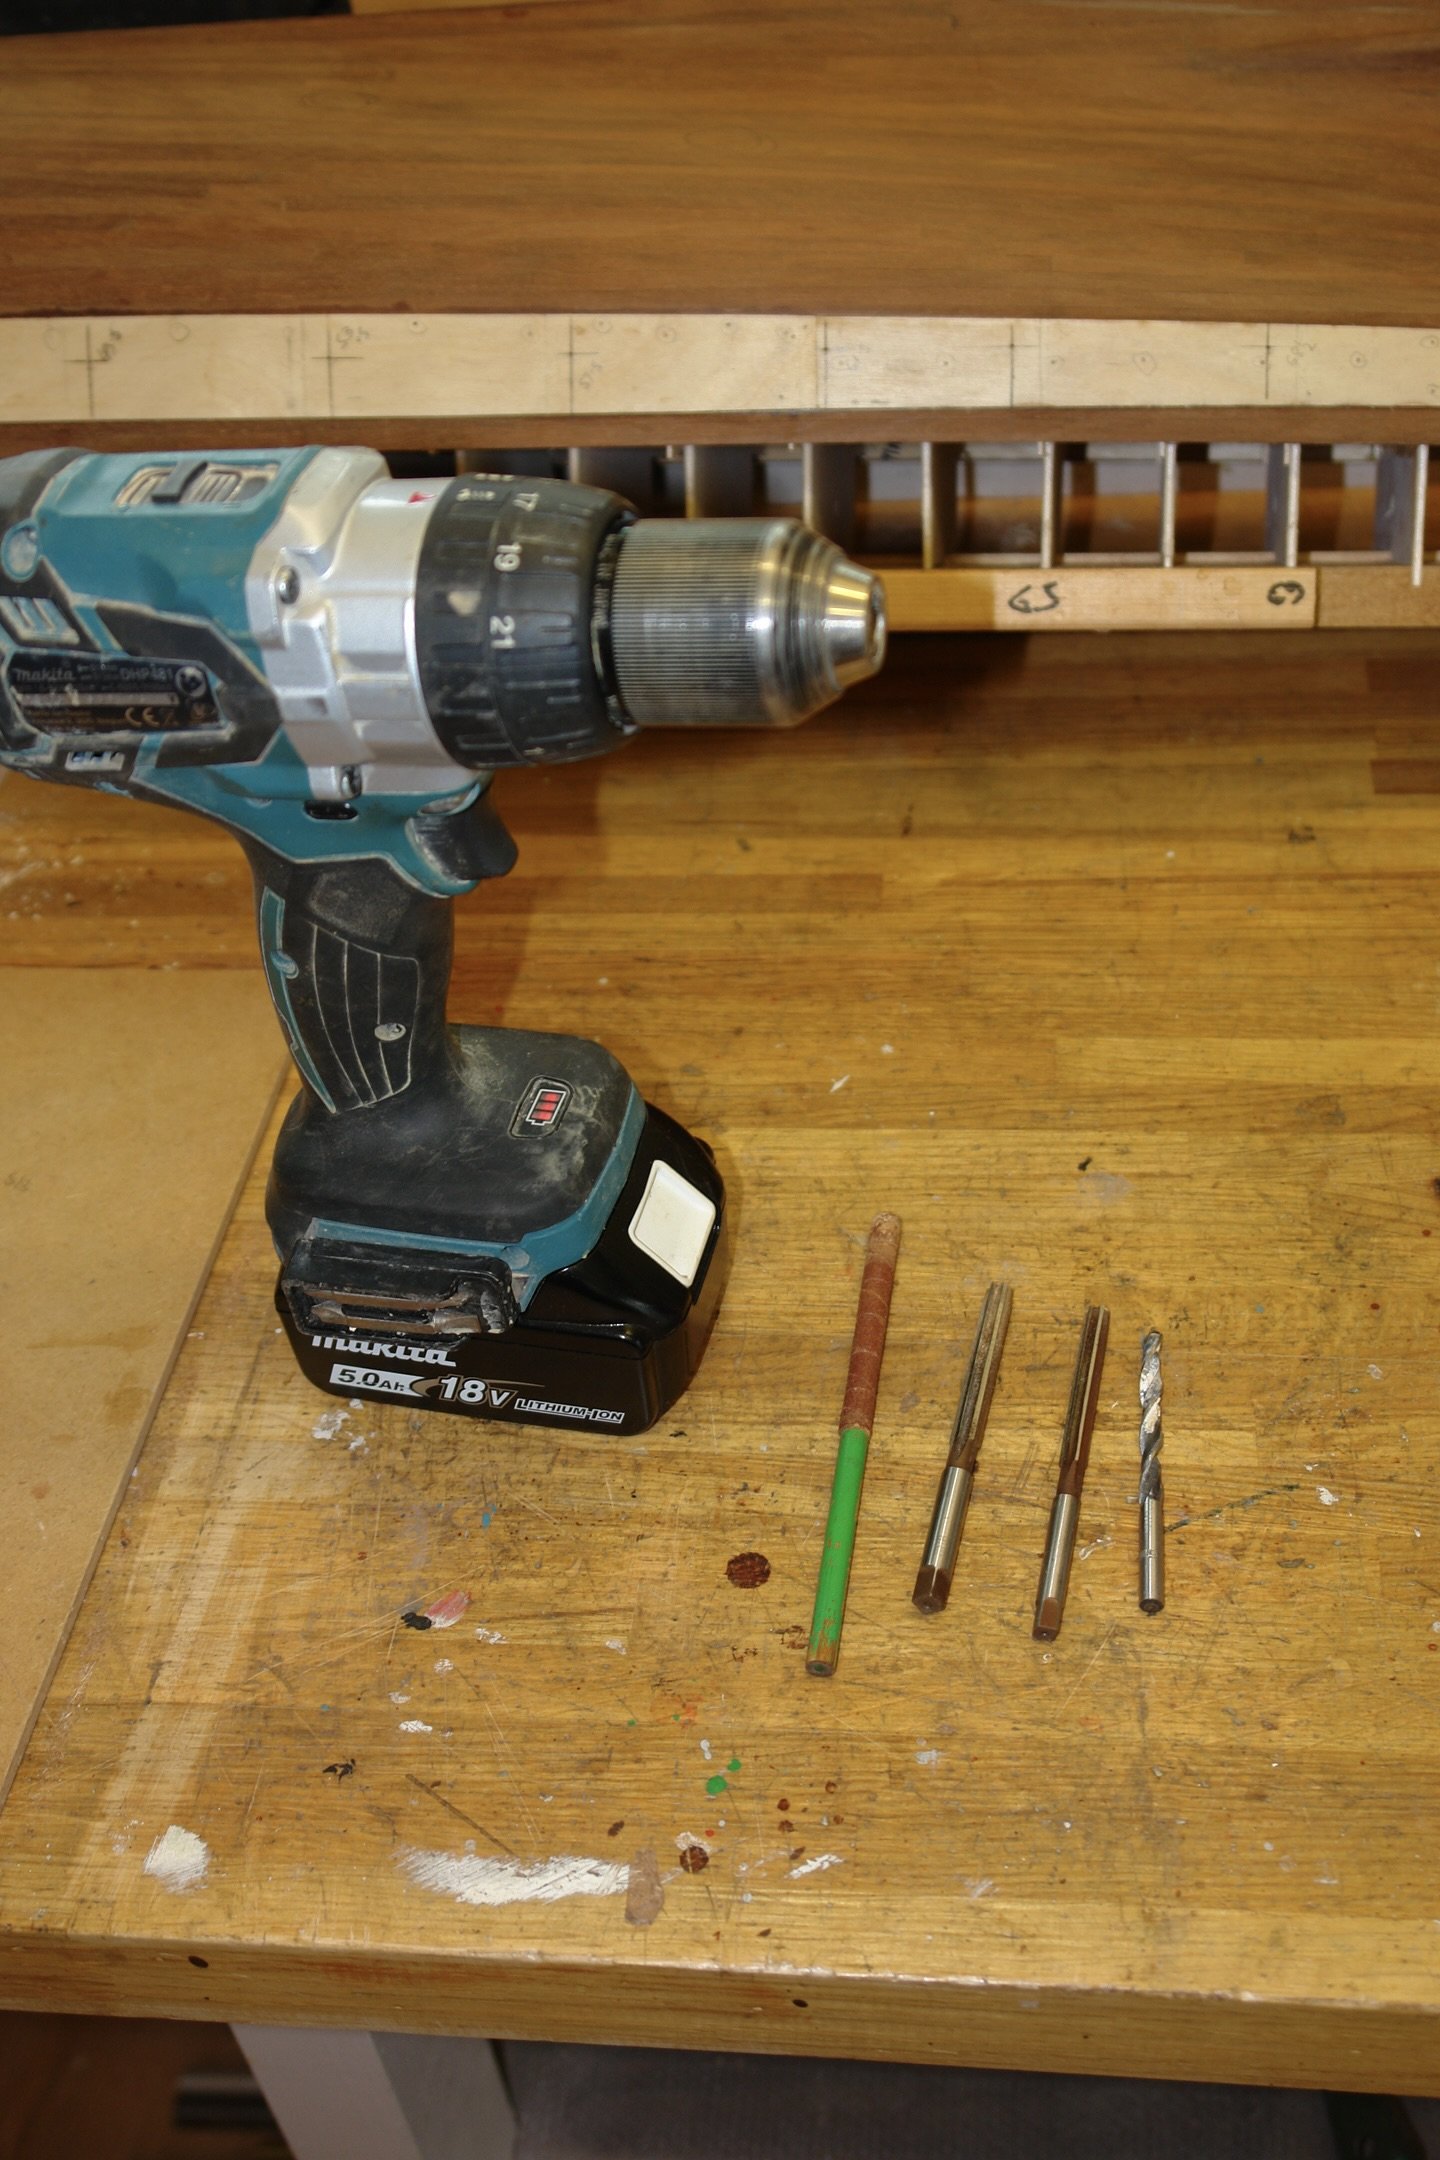
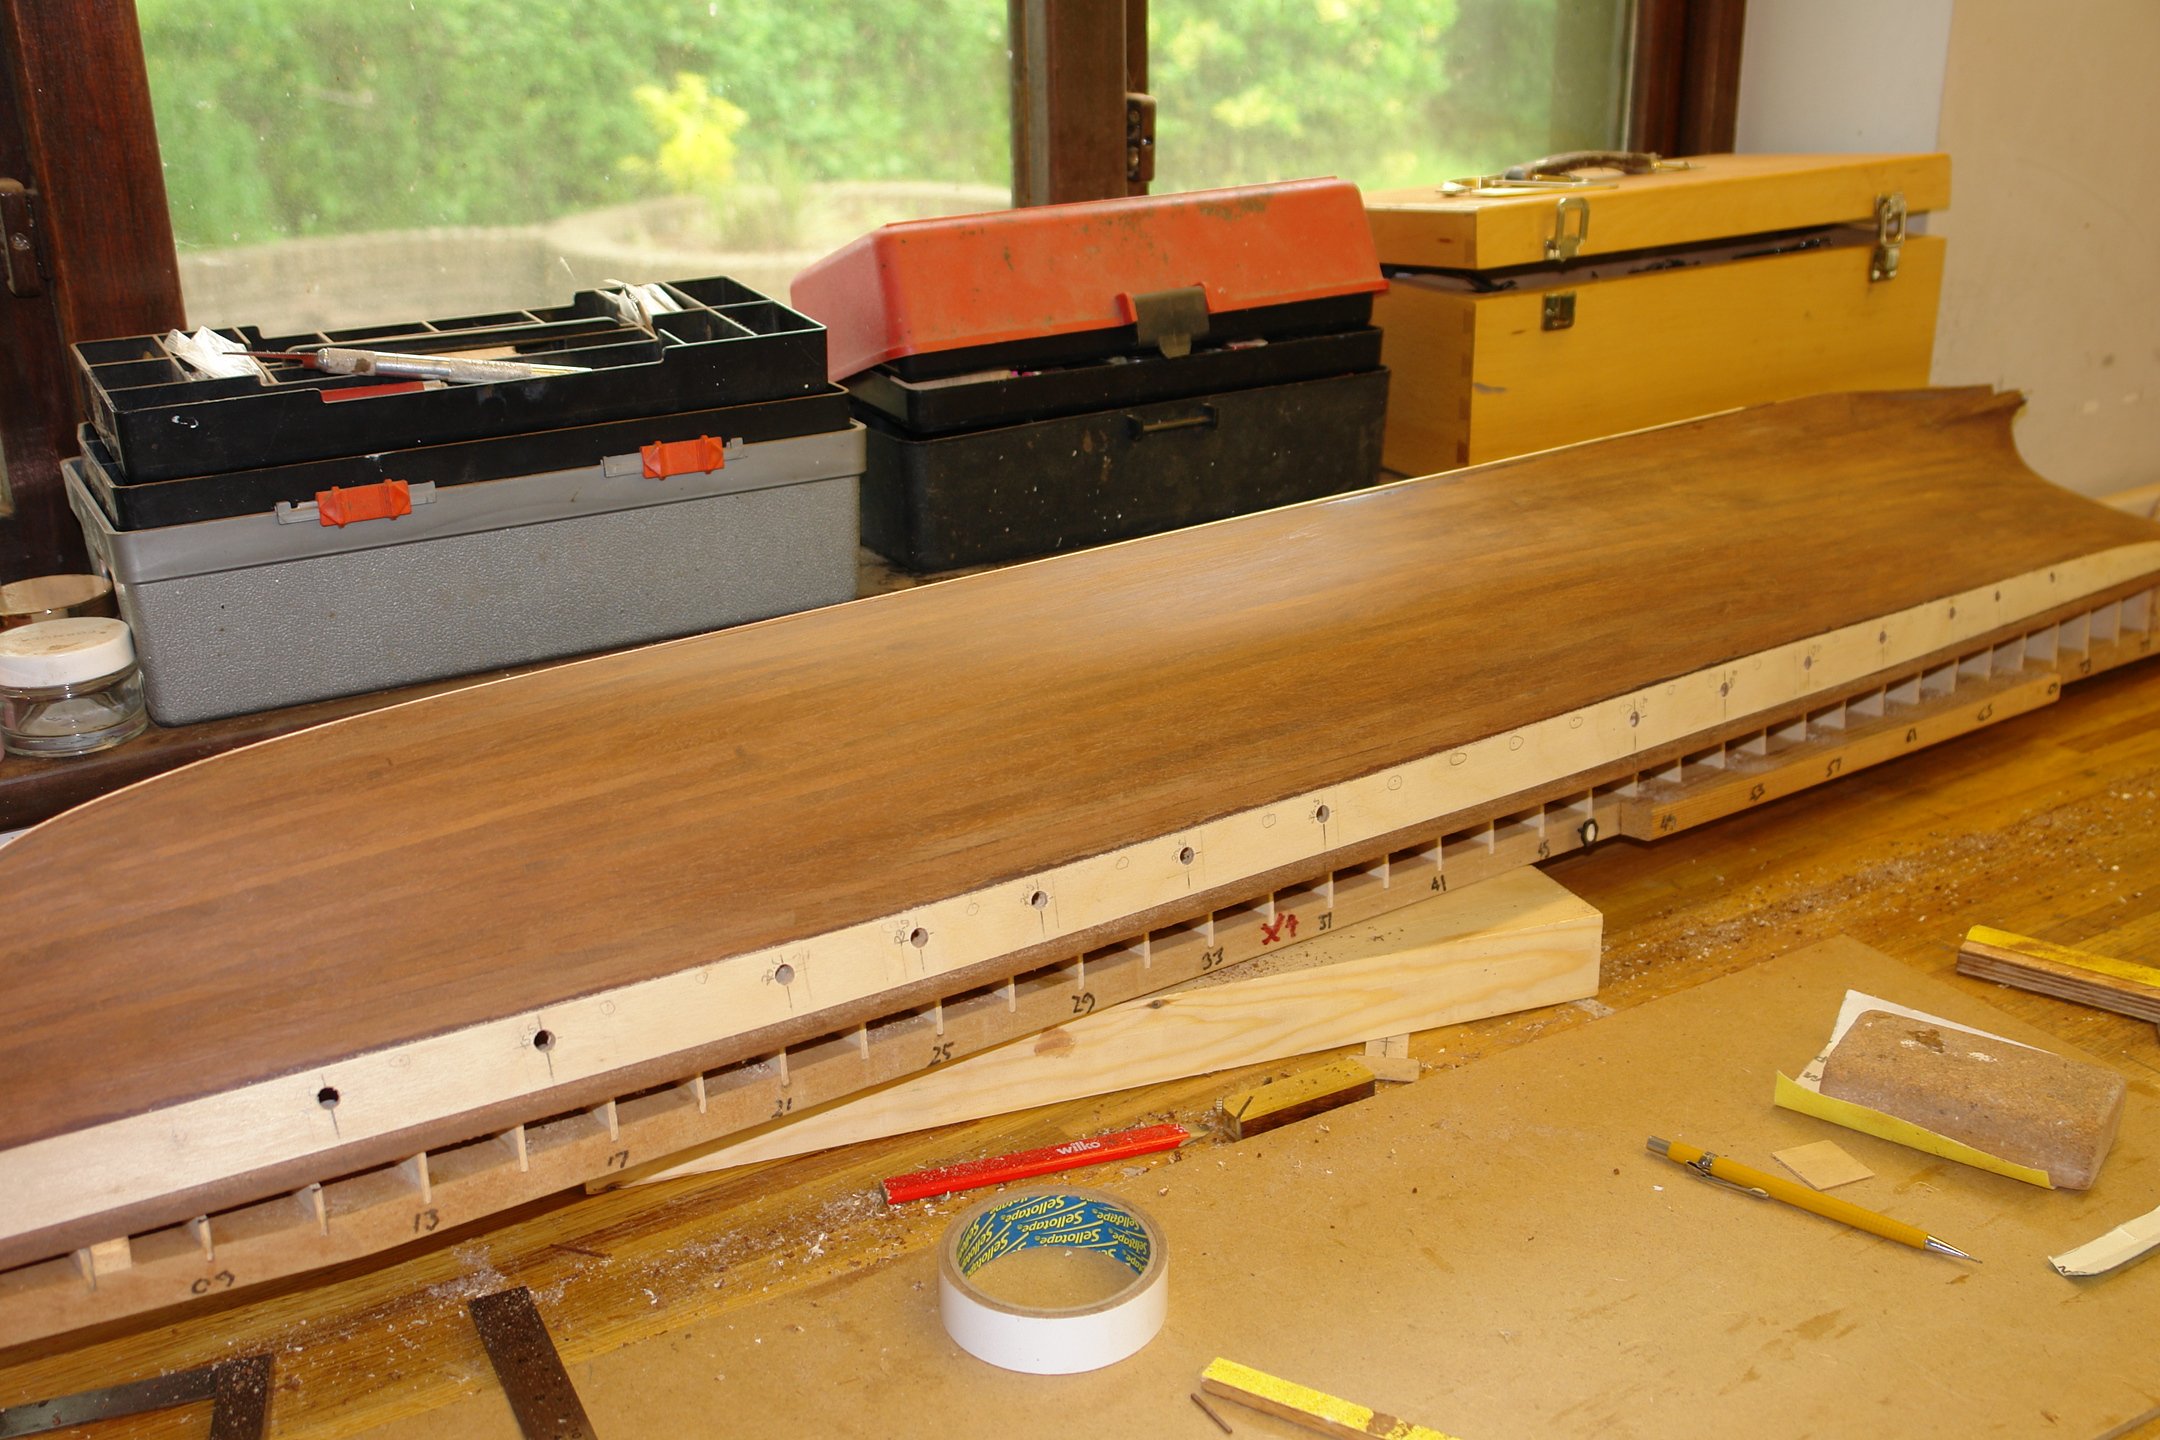
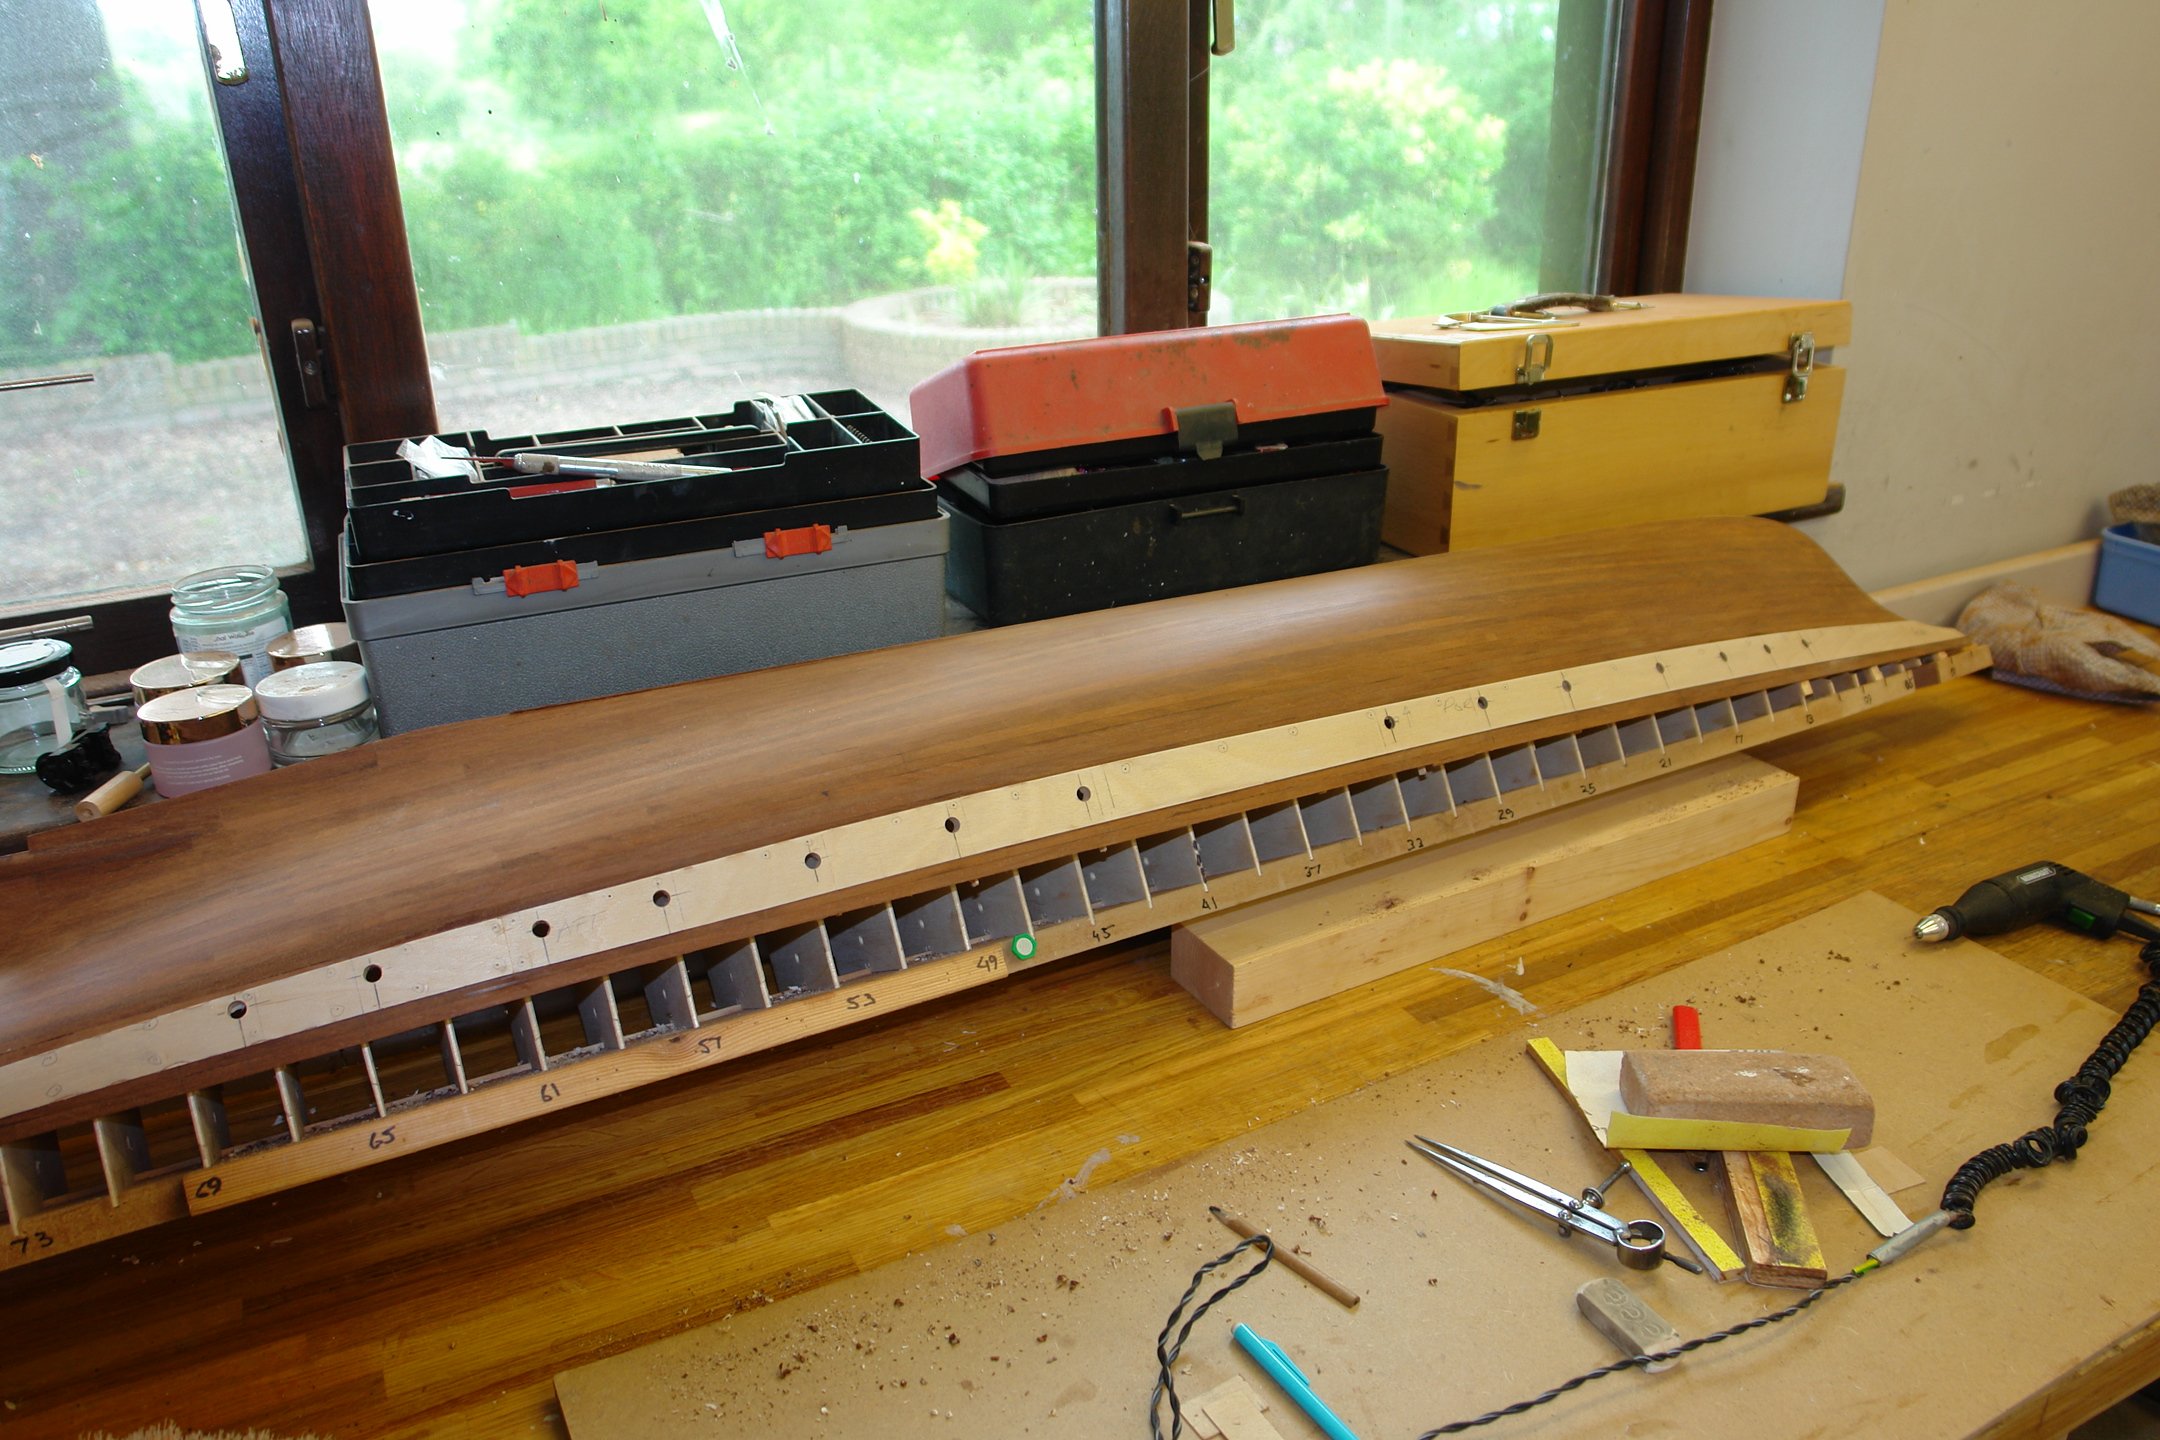
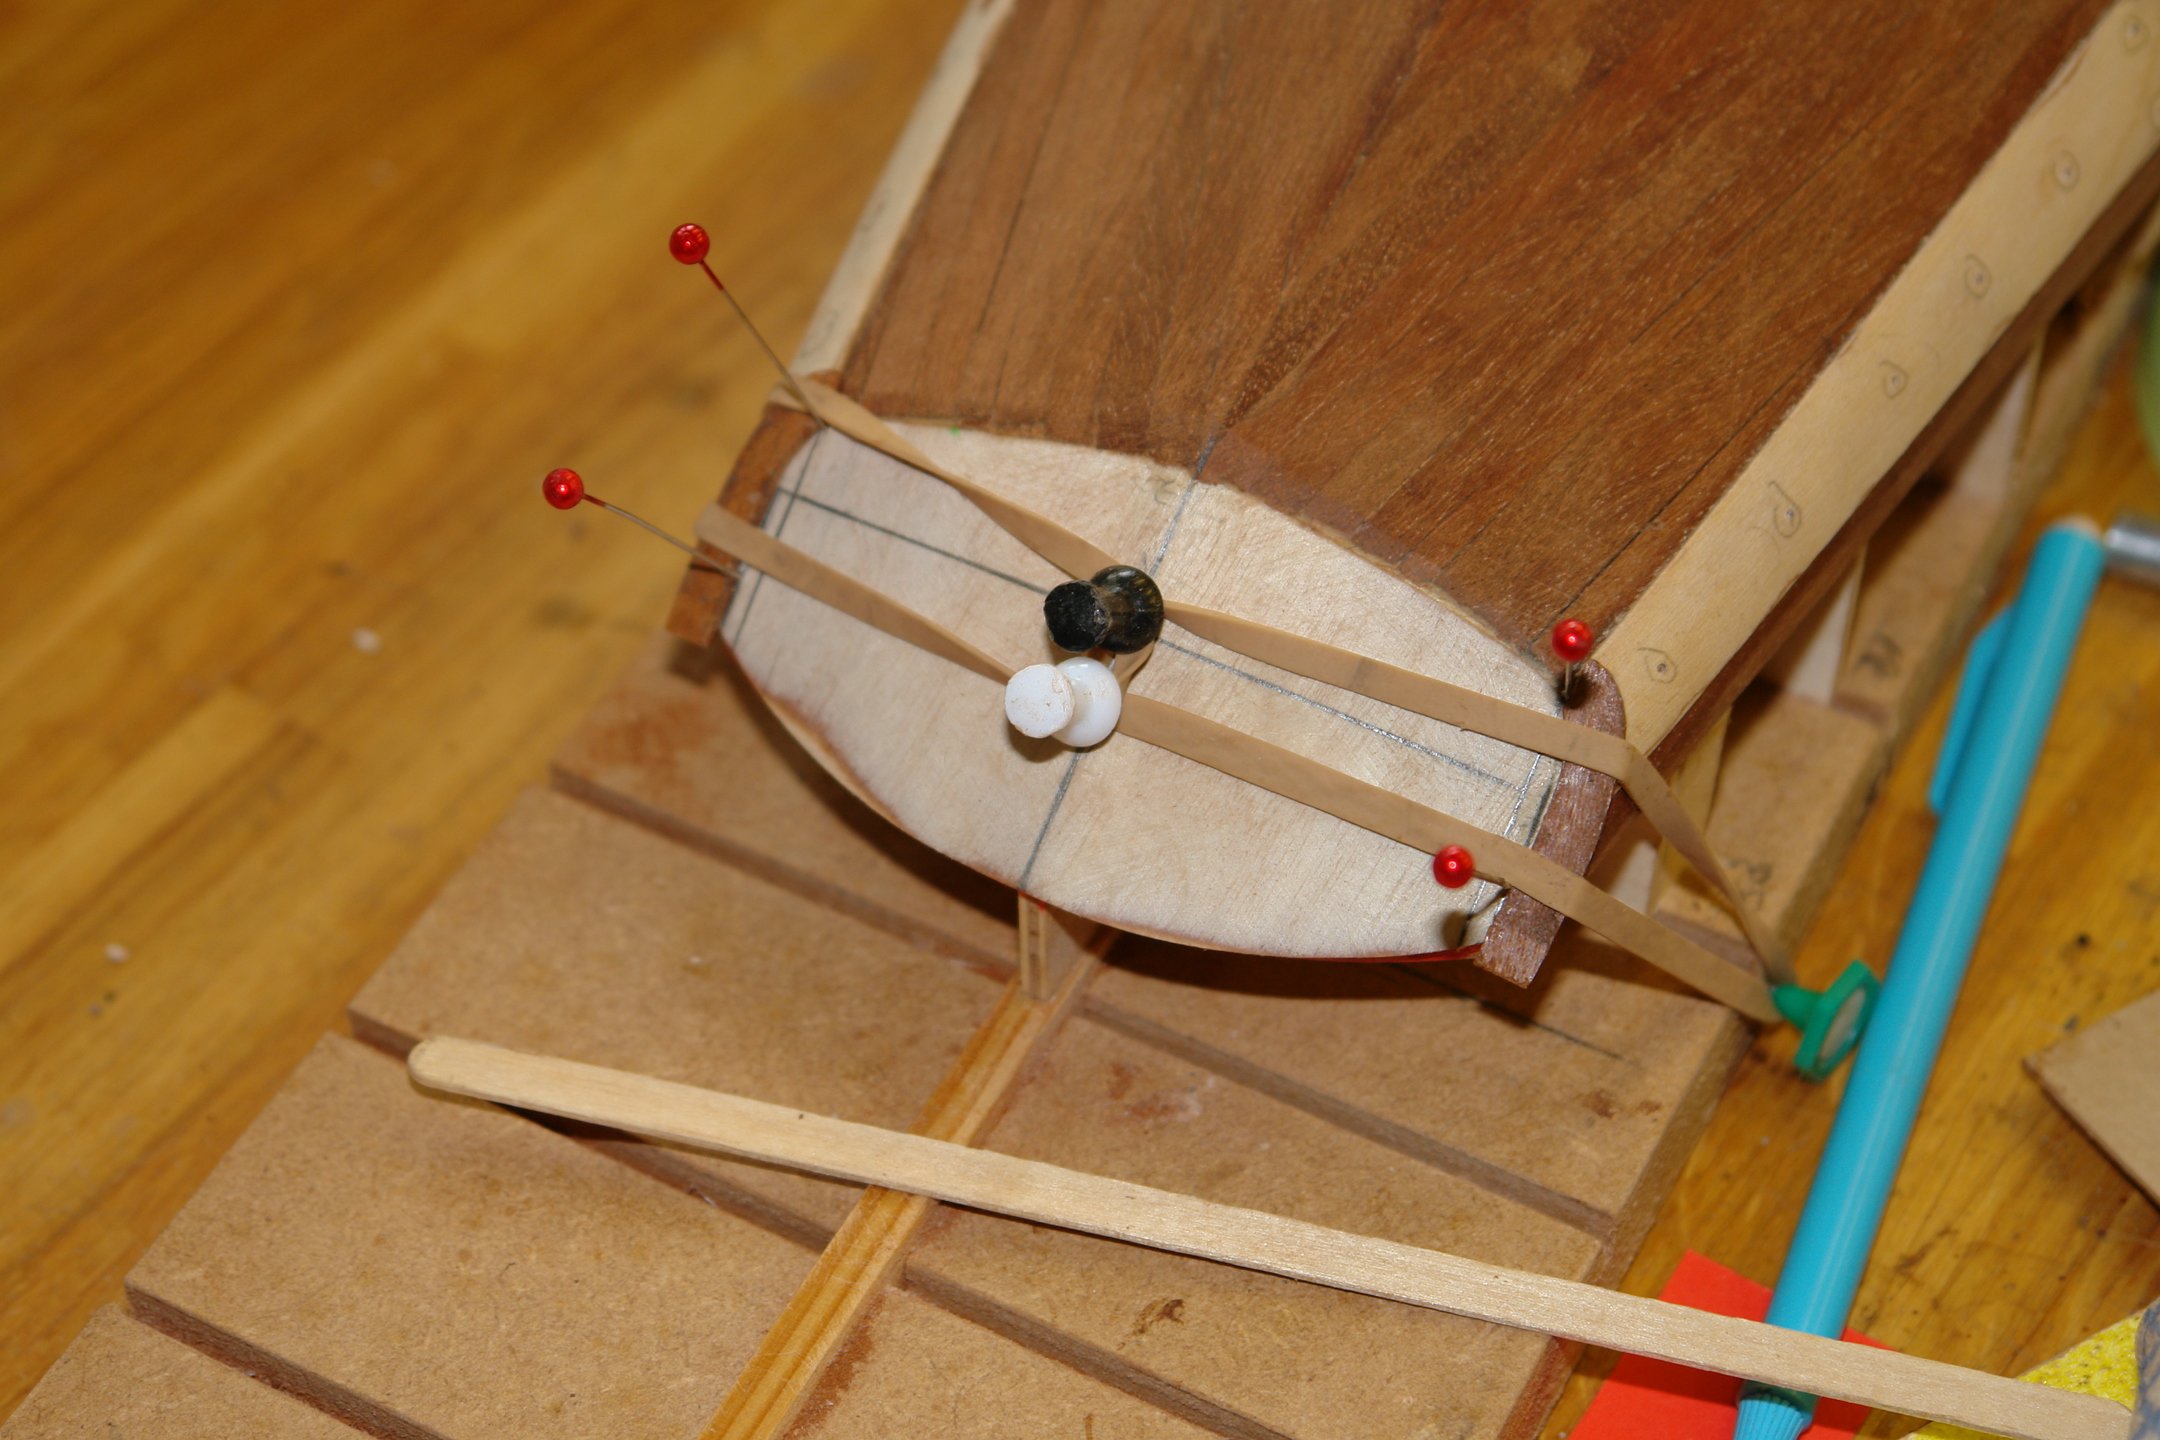
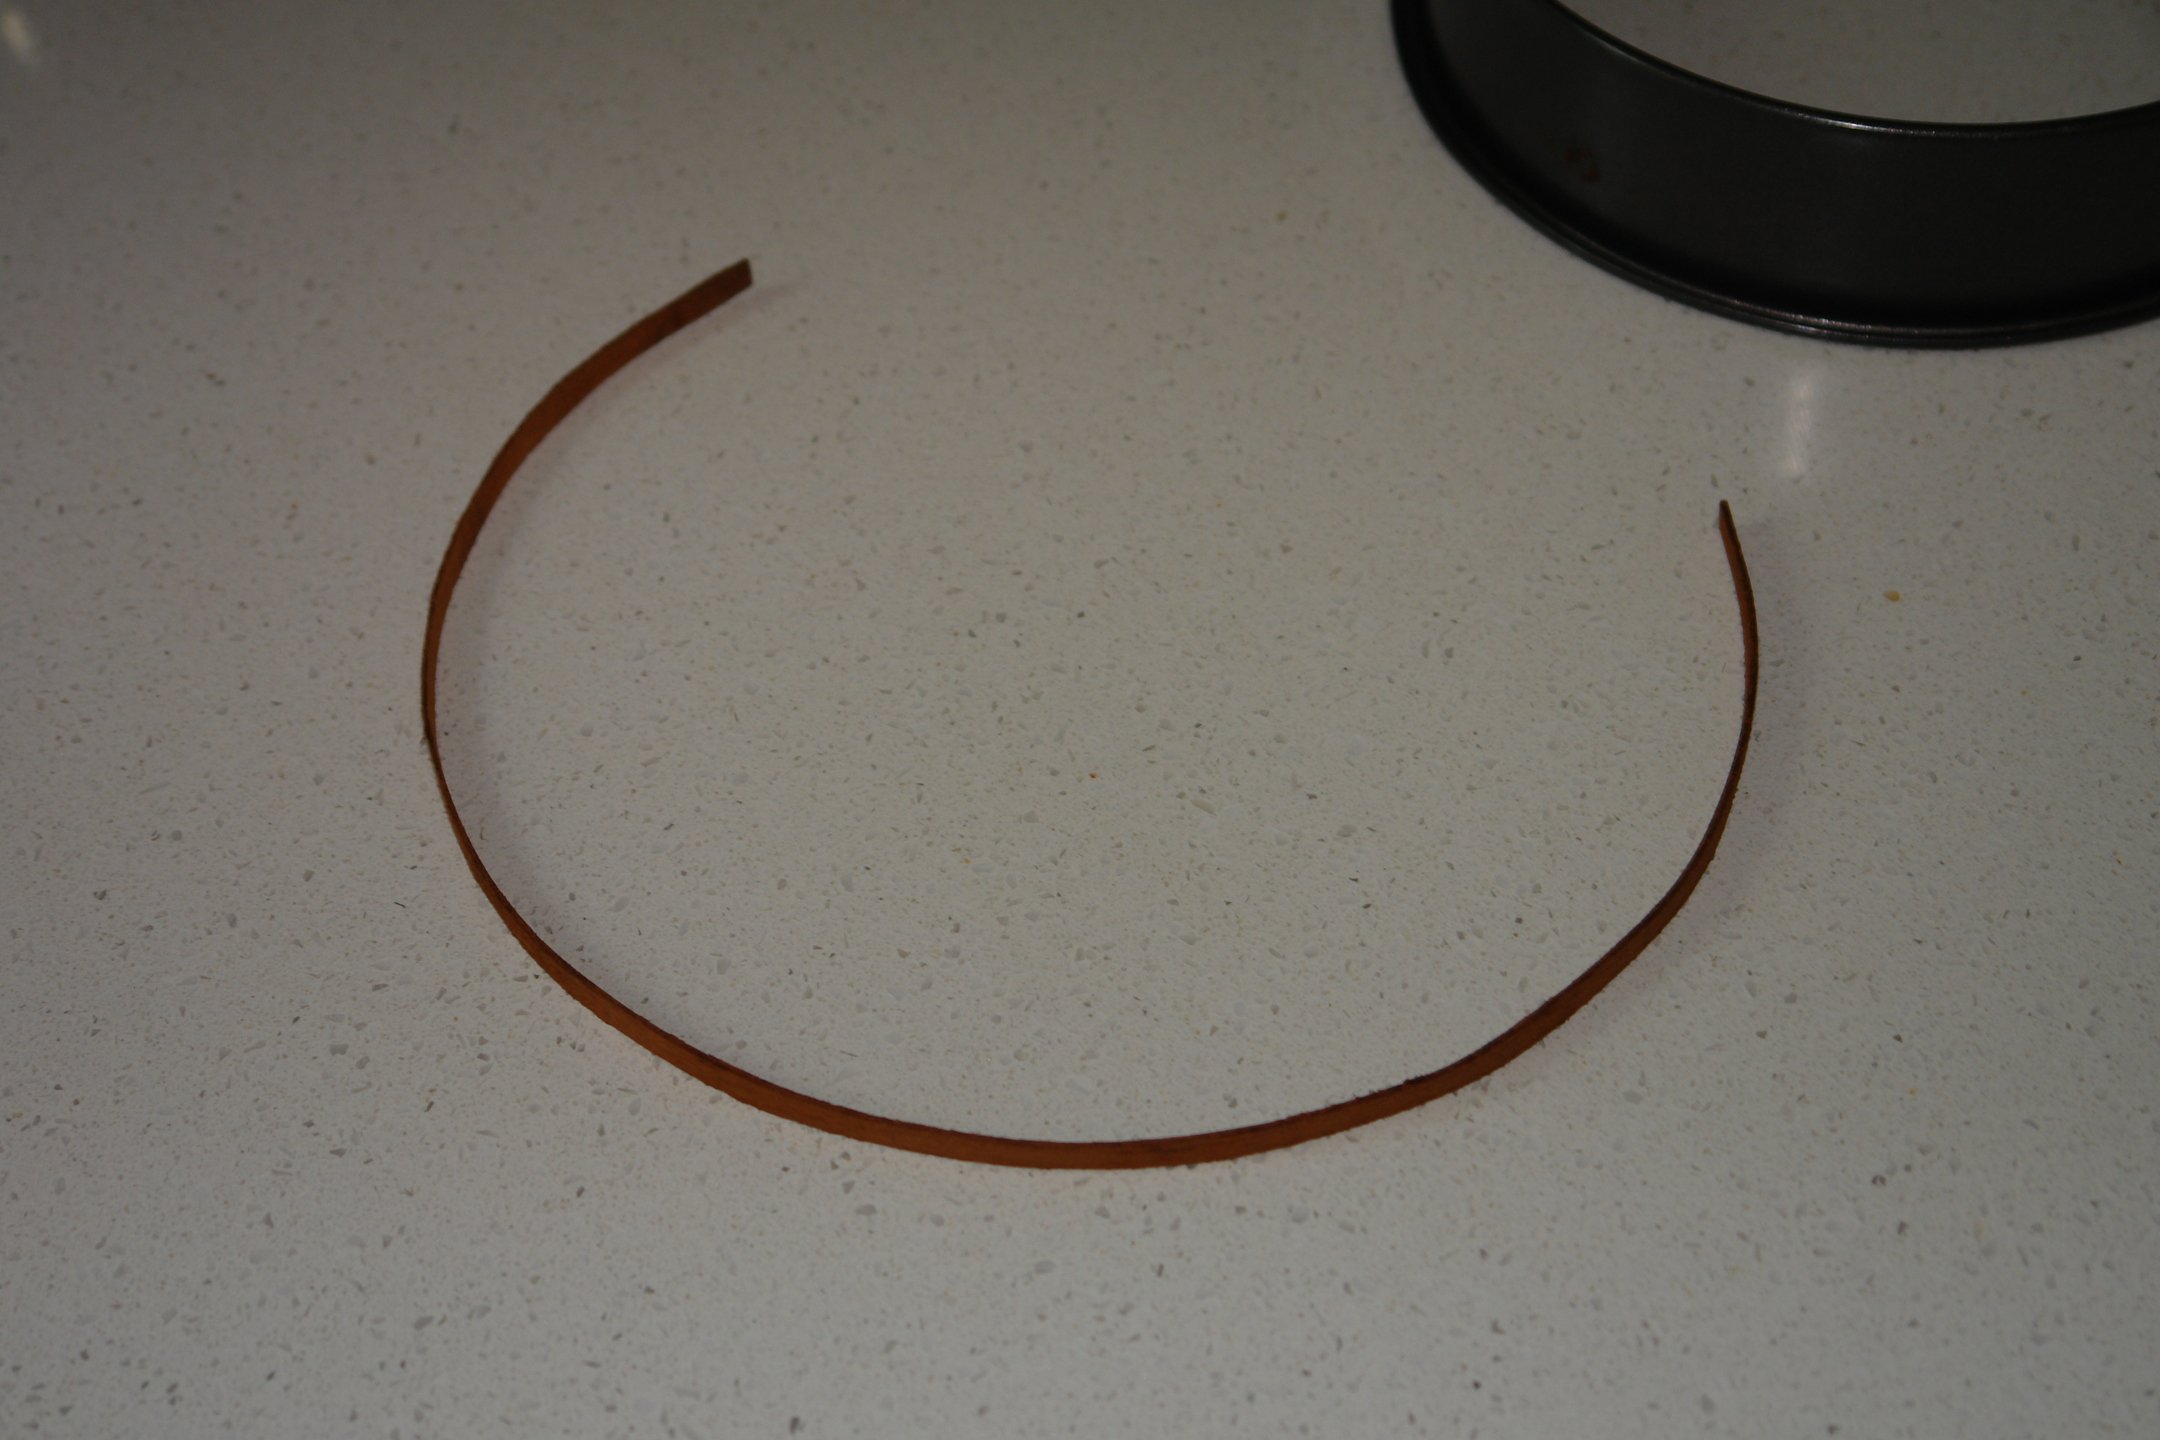
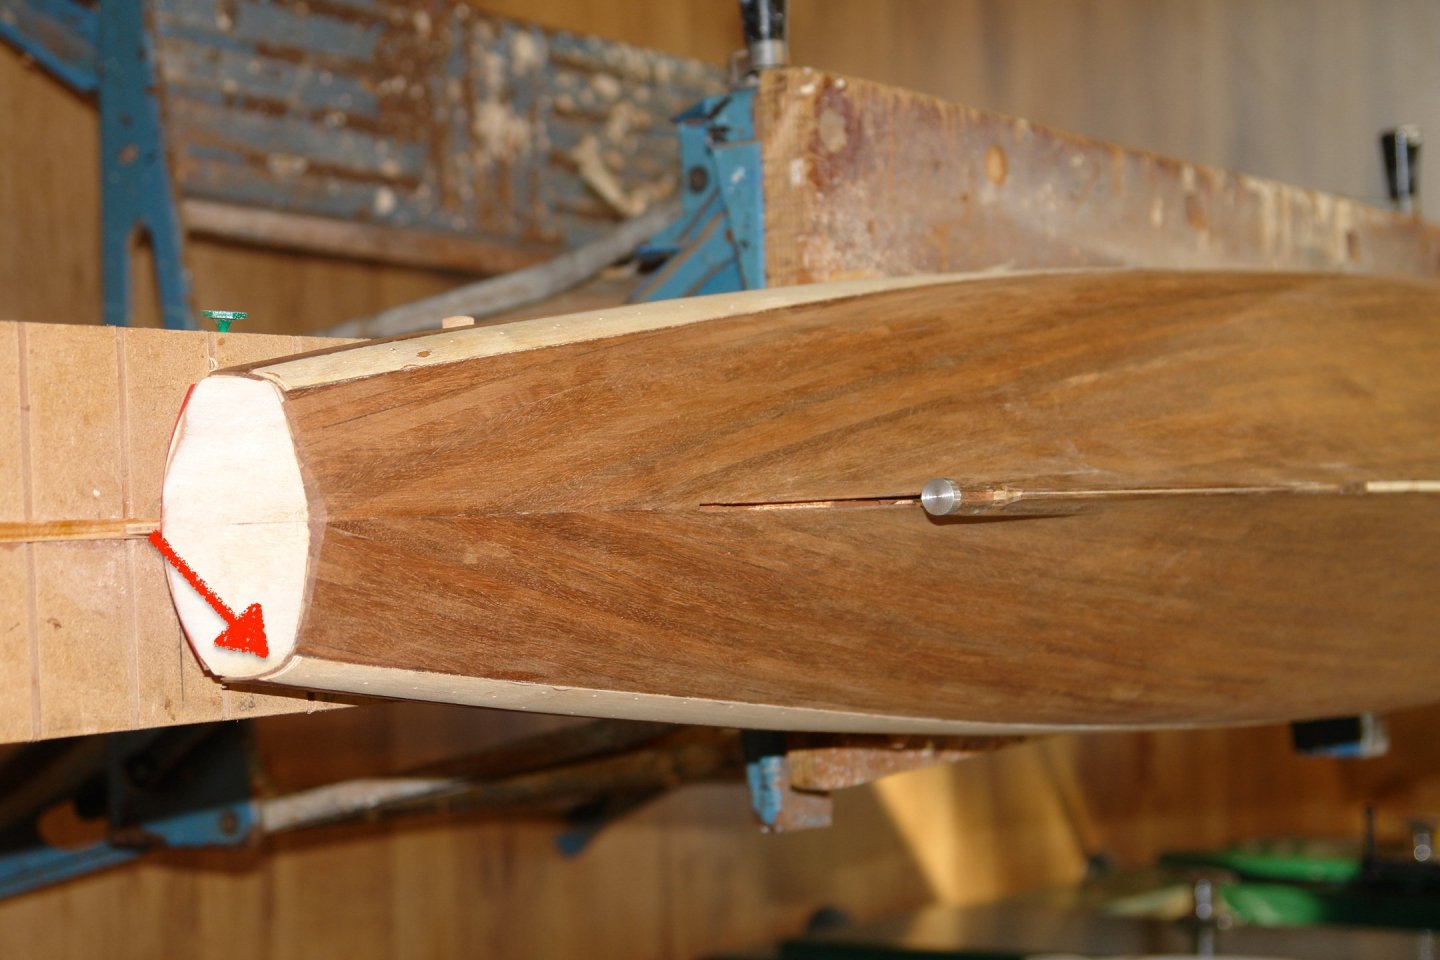
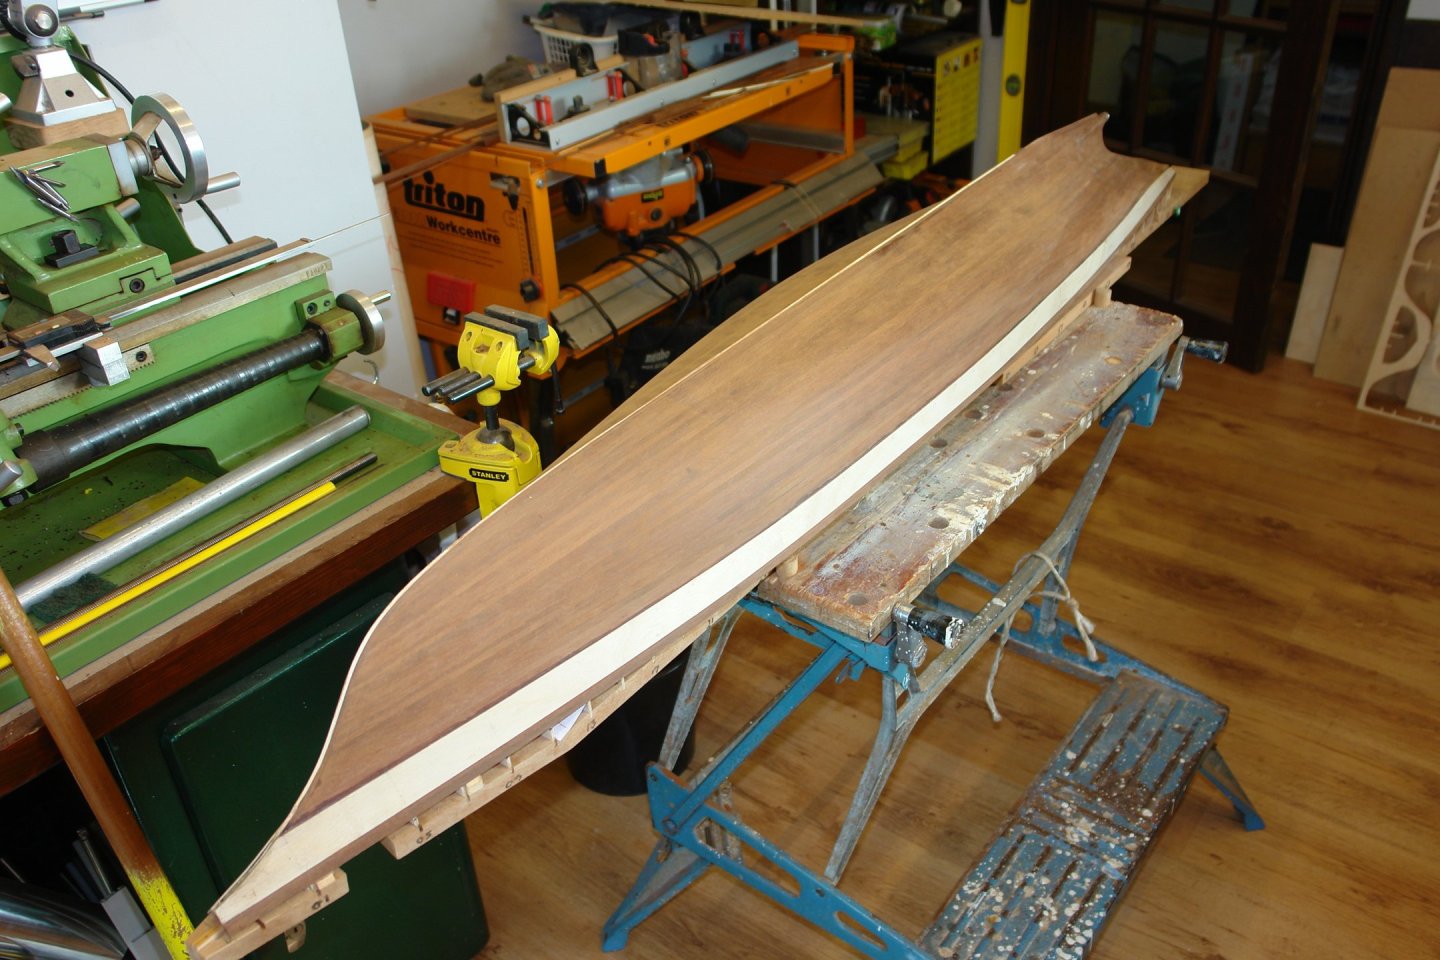
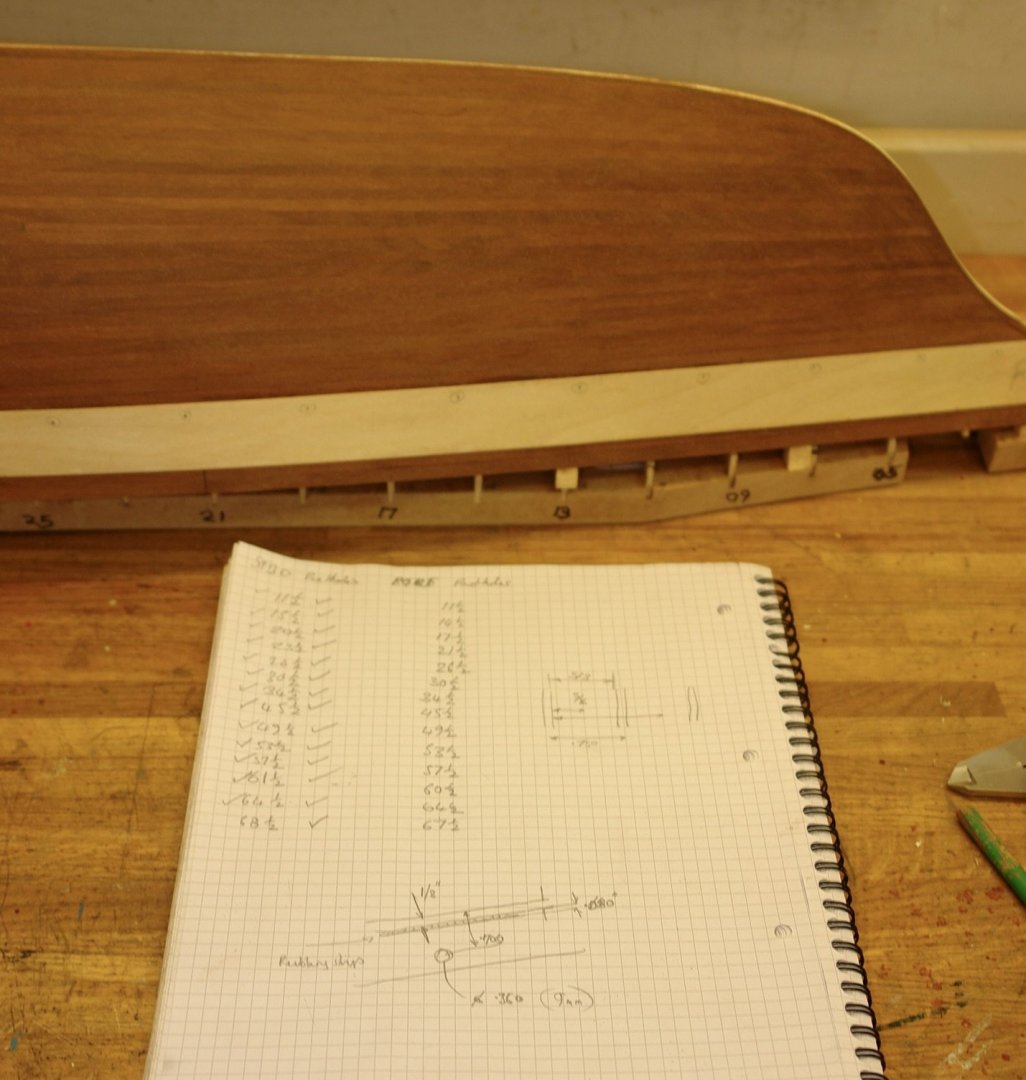
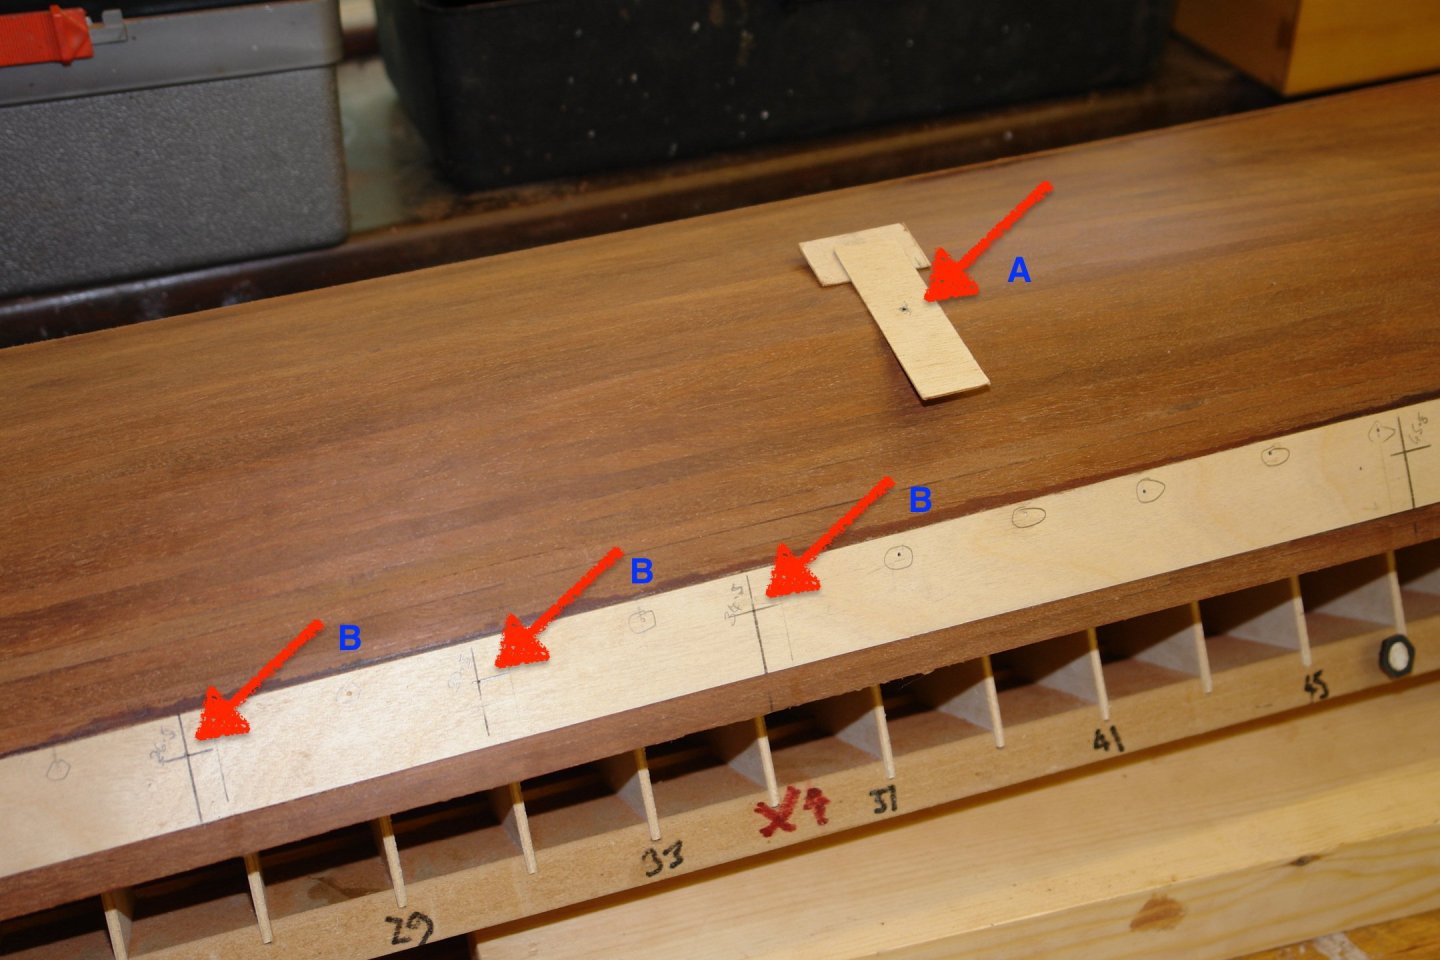
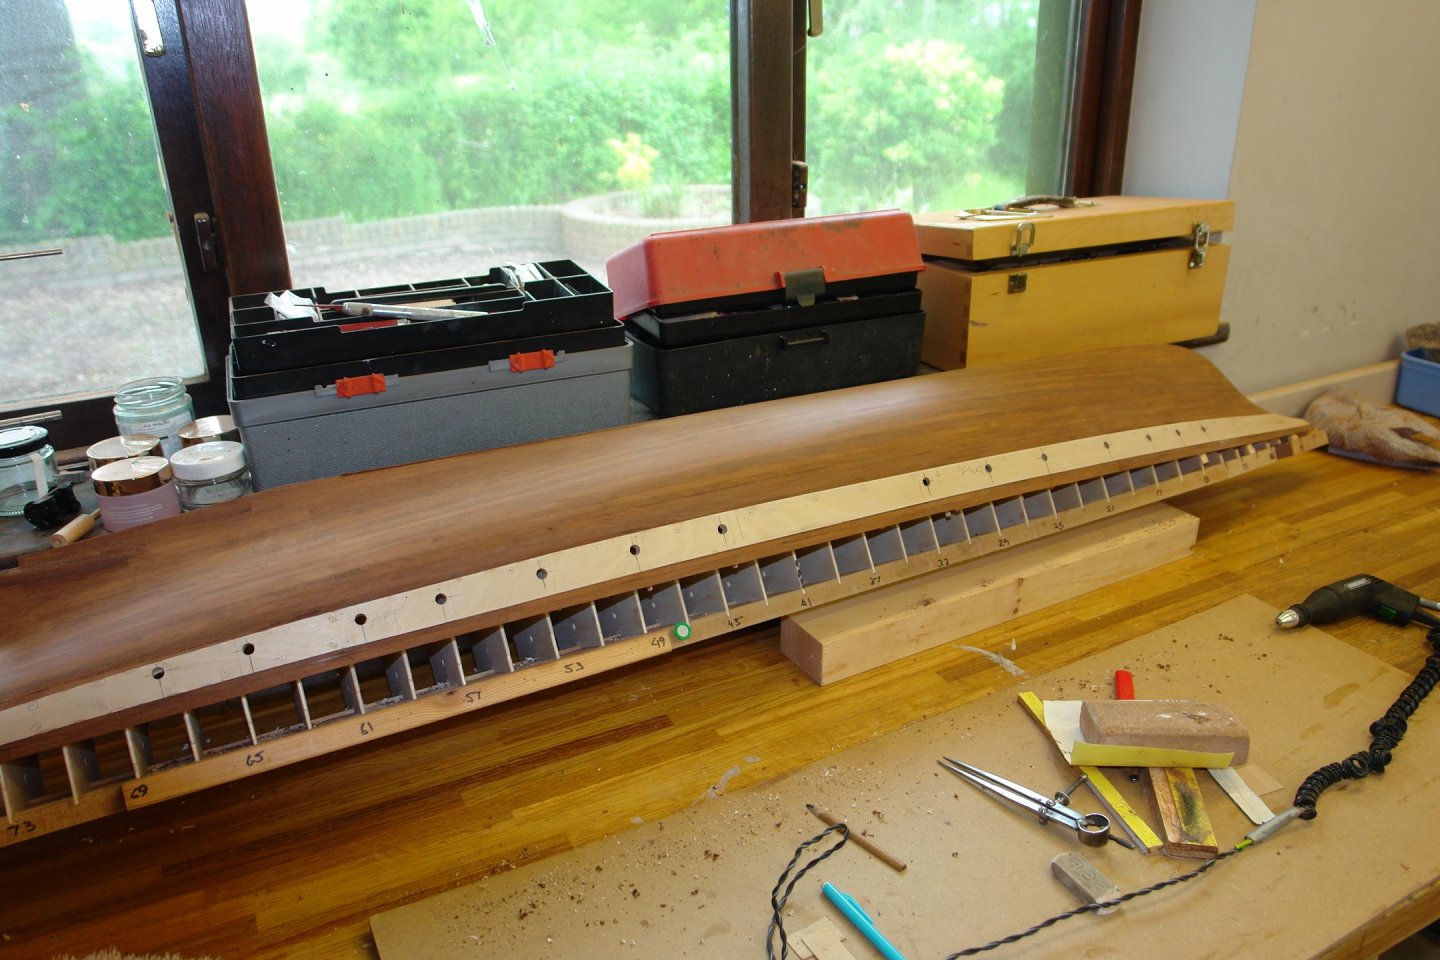
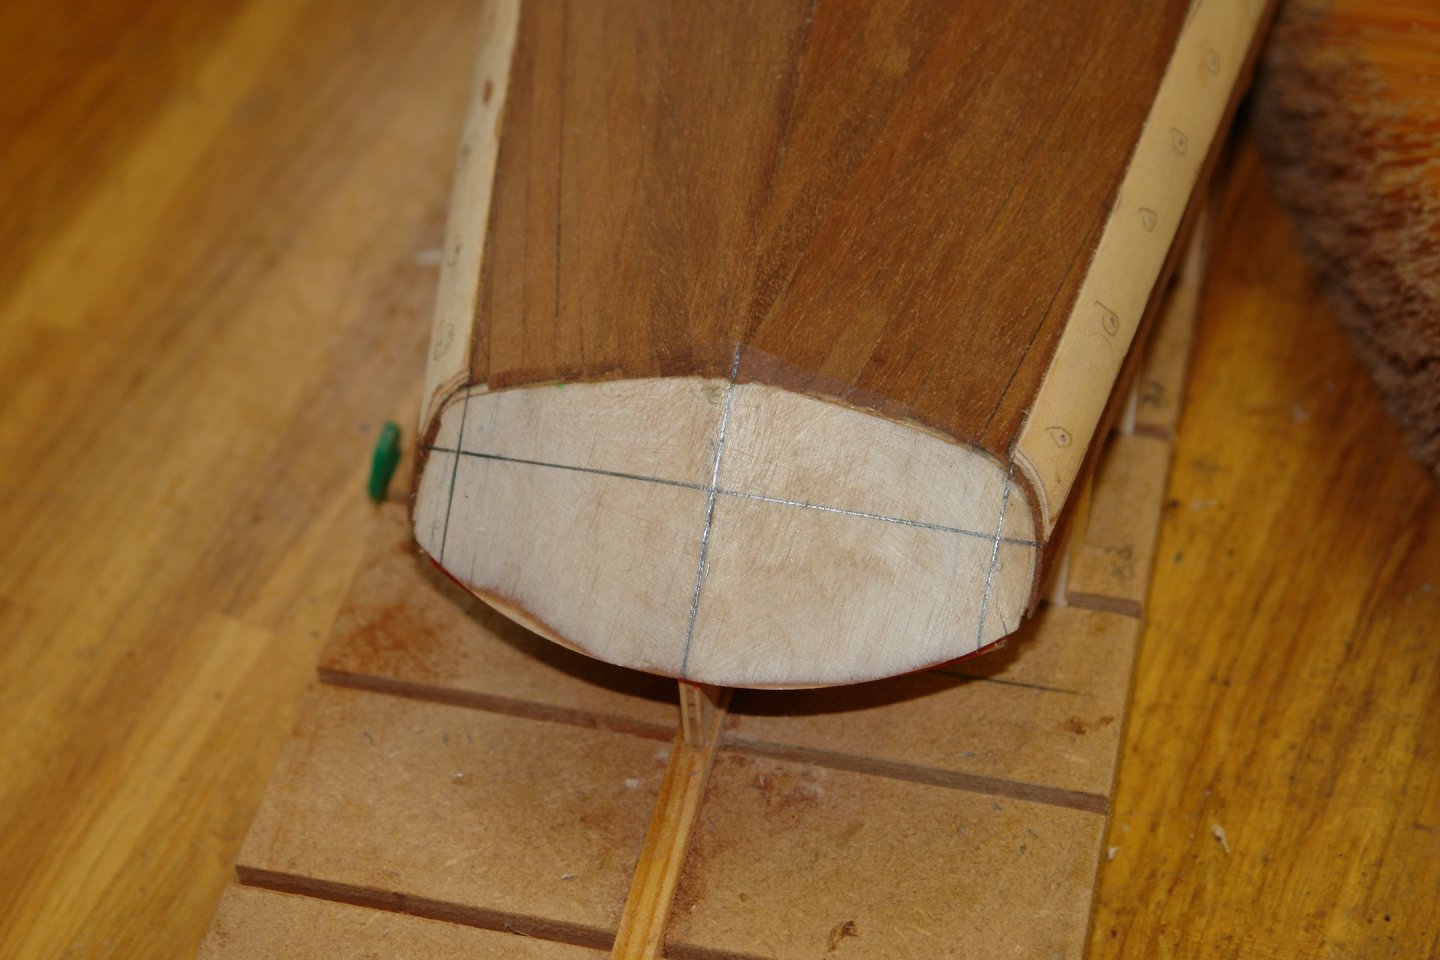
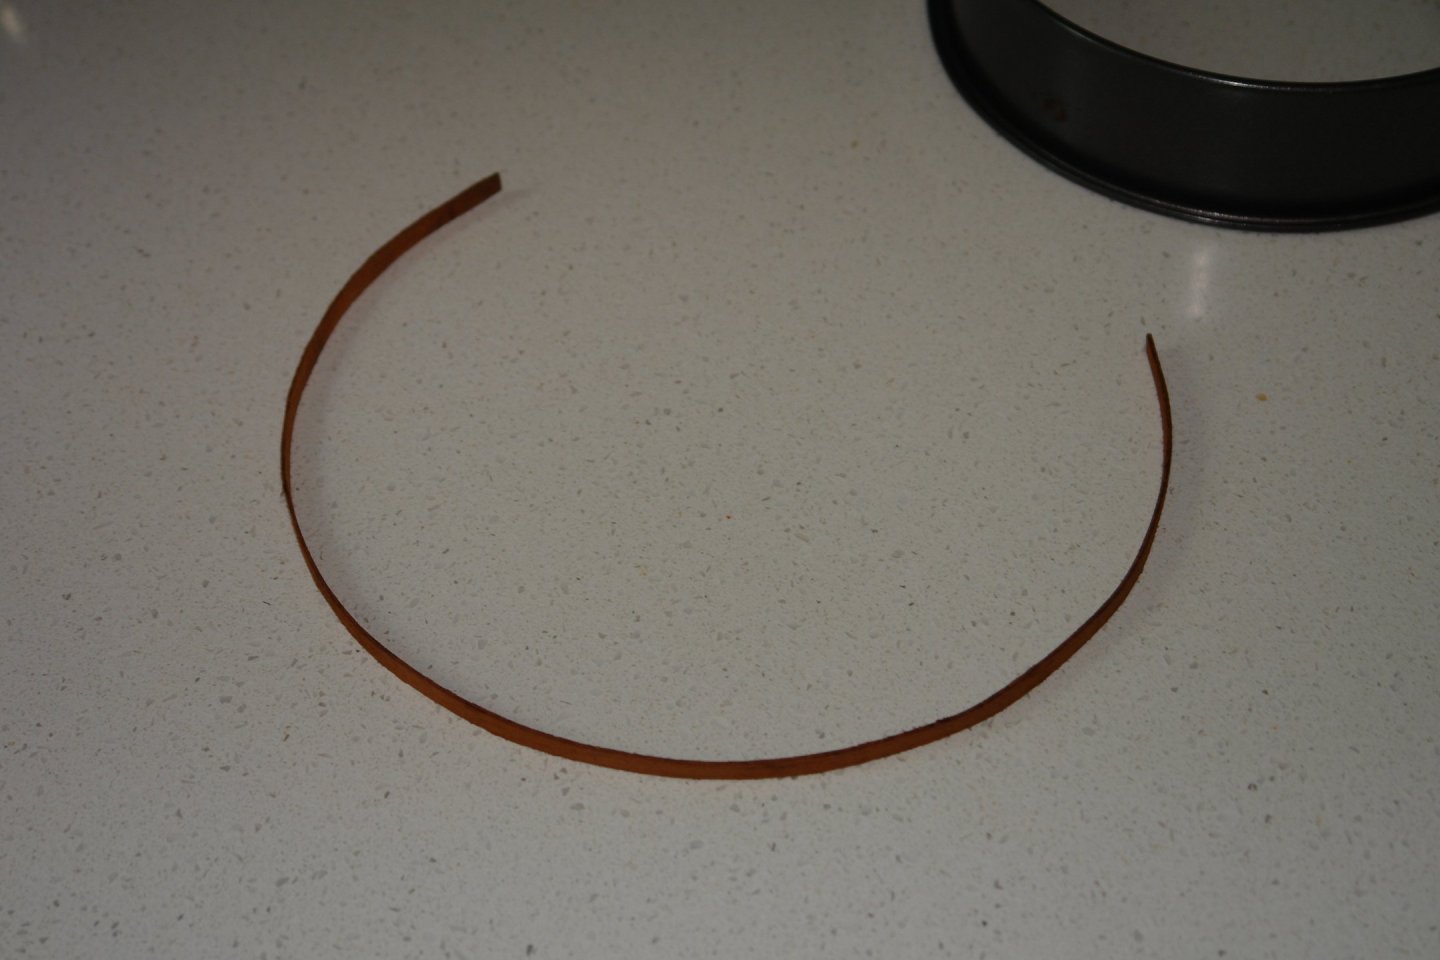
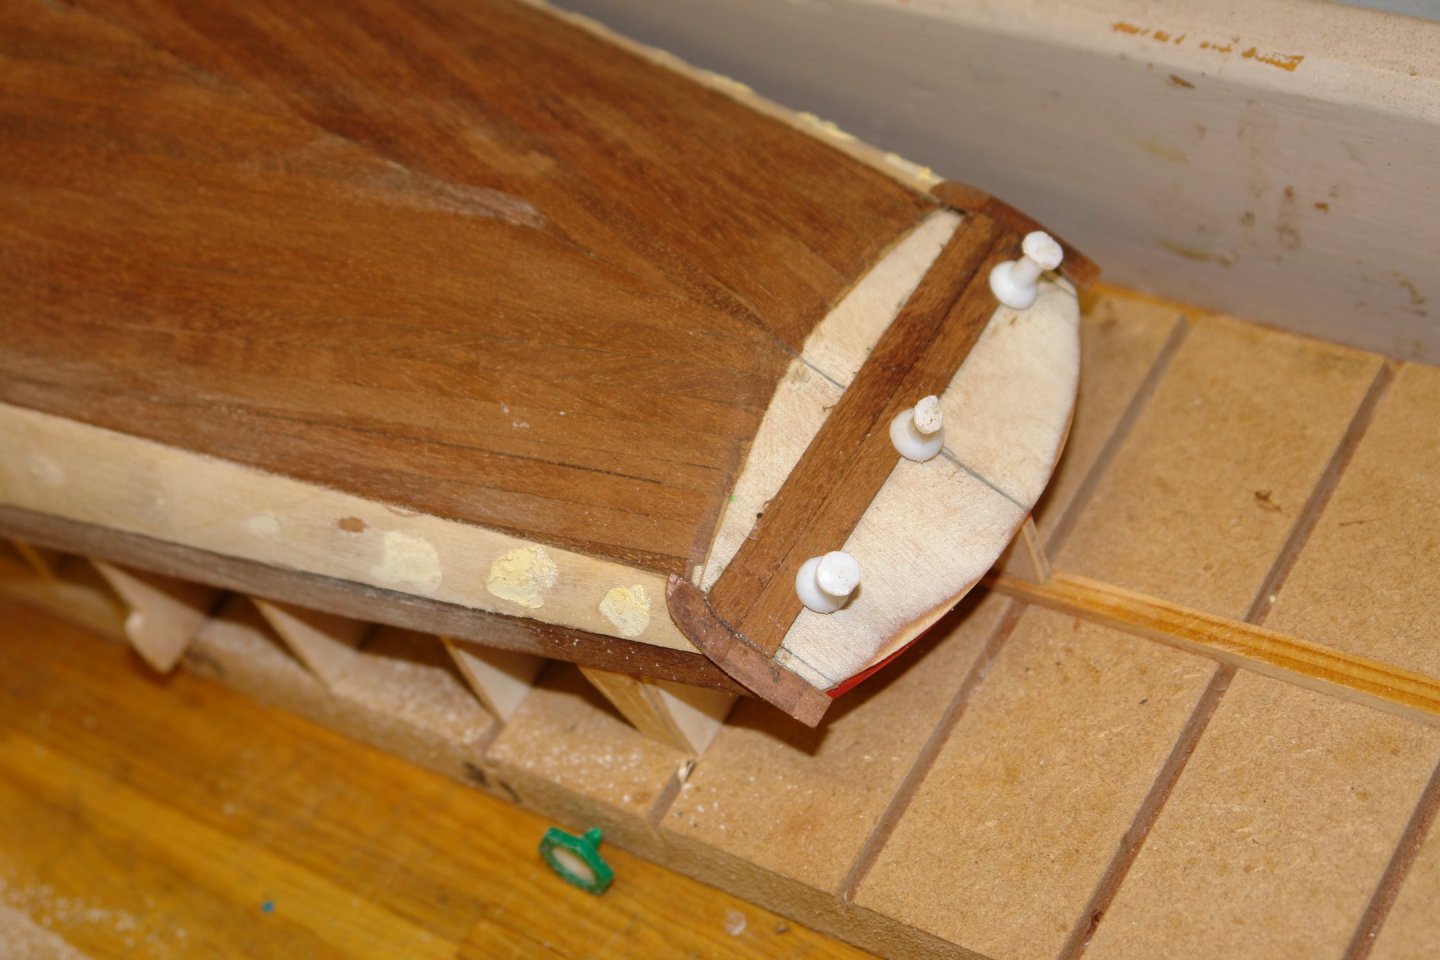
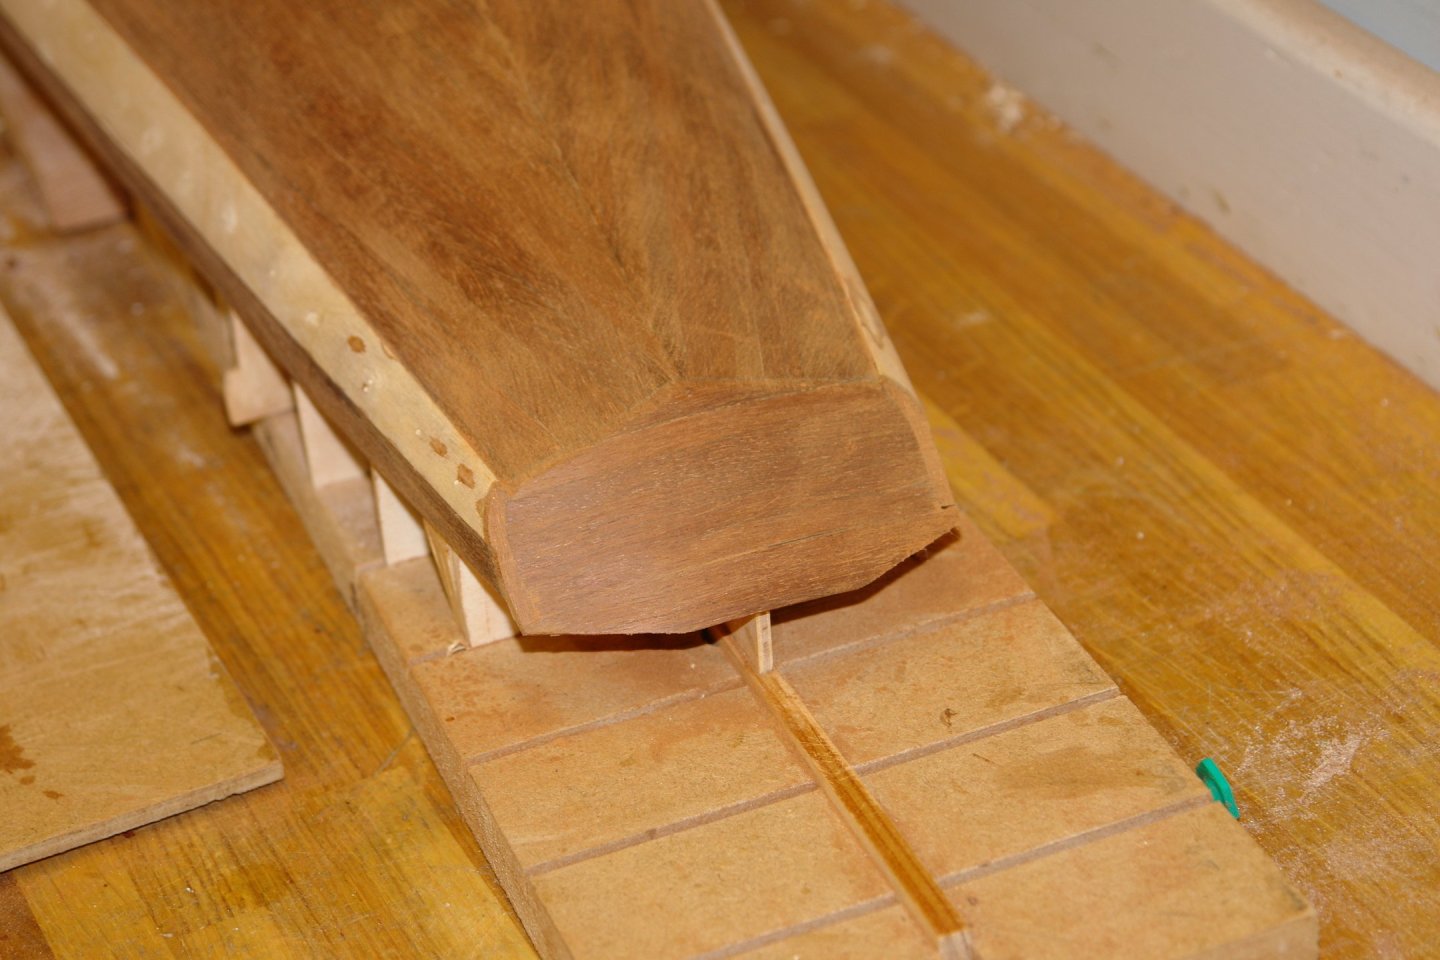
Almost another week gone and here is another update. Firstly a couple of pictures of the hull with the compensation plates in position. And a picture of the plywood wrapped around the stern. The next job was drilling out the portholes. These are positioned mid way between the frames and as the frames are to scale the lontitudinal positioning of the holes should have been easy. The problem occurred because one of the holes on the plan view was in a different position to the hole on the side elevation. There followed a long process of investigating photos to try and decide which was right. I think I got it right but then again who knows. The next photo is my list of the porthole positions measured in "frames". Port and starboard are different so this introduced a further degree of uncertainty, prompting checking and re-checking and re-checking. I hate the anxiety accompanying drilling holes in hulls. Fortunately (as near as makes no difference) all the portholes are equidistant from the bulwark edge of the compensation plate. I made my self a little marking out jig (arrow A) to get the positioning consistent. The half frame positions were transferred from the hull up-stands using the laser level. Arrows B are the centre lines for drilling. I took the drilling steadily, fearful of splintering the plywood. The next photo is my drilling equipment consisting of an alarmingly powerful drill plus a 6mm brad point wood drill, a 7mm reamer, a 8m reamer and a set of 9mm sanding drums glued to a pencil. The reamers occasionally went into threepenny bit mode but the sanding drums always brought the holes back to round. Some time later all 28 holes were drilled. I then transferred my attention to planking the stern. You can see from previous posts that the stern is the only part of the hull with a mahogany finish. The stern has vertical edge planks with horizontal planking between. The edge planks were cut as matched pair and glued in place with PVA. I decided it would be easier to pre-bend the horizontal planks. Fortunately my wife was out and I discovered that one of her baking tins was just what I needed for the former. With the plank attached to the former I dunked the whole thing in boiling water (utilising a Lecruset pan that just happened to be lying about). I really have been living on the edge this week. Then the last bit of the hull planking was done. That's all for now folks.


-
I thought Whitby class frigates had twin shafts. I guess it's simpler to give her a single shaft. Presumably the printer programme was already adapted for the building of a single shaft model?
-
Now you mention it I remember reading that post. Maybe dementia is catching.
-
Praise the lord for trousers. It could have been much worse!😬
-
I see she has a feathering prop Mark - that should be a test. Beautiful shaping around the stern, prop cut out and rudder.
-
You must have Yorkshire ancestry. When words were used differently my Grandfathers favourite saying was, "everybody's queer excep me an thee, an am not sure about thee". His other favourite saying was "thas nowt meks wimin sa mad as havin a sicret nobdy wants to ere". He wasn't very PC.
-
Isn't the internet clever:- Toughened glass was invented in 1874 by Francois Barthelemy Alfred Royer de la Bastie. Wire mesh glass was invented in 1892 by Frank Shuman
- 201 replies
-
- 5
-

-
- Oyster Sharpie
- first scratch build
- (and 1 more)
-
Yes that's it Gary. The further picture highlights it perfectly. Someone is bound to follow up with a method of removing unwanted CA. Sadly I don't have a clue but if anyone does it will save me endless hours of chewing it off my fingers.😬
-
Excellent reasoning Paul. It now all makes complete sense. I don't know if they had toughened glass readily available in North Carolina in that era but if they didn't that would also support a wood solution.
- 201 replies
-
- 5
-
-
- Oyster Sharpie
- first scratch build
- (and 1 more)
-
Brass wire: it bends, it breaks!
KeithAug replied to Mollusc's topic in Metal Work, Soldering and Metal Fittings
Mollusc - it would be good to know the diameter of the wire. The above video might not be all that helpful as the process is for bending bar at high temperature. It should be possible to bend brass cold for smaller brass diameters. If brass is hard it can be softened by heating it to cherry red and then allowing it to cool. It will then be soft but will harden as you work it. Repeat the process to soften it again. Be careful not to melt the brass. This is very easily done with small diameters. -
It looks nice Paul but did you have a reason why (apart from the cash strapped fisherman tall story).
- 201 replies
-
- 5
-
-
- Oyster Sharpie
- first scratch build
- (and 1 more)
-
Nicely done Keith. After I have finished a part I sometimes amuse myself by counting up the number of parts that have gone into it. Often it reminds me why it took so long to make. Most normal people would look at MSW and ask why we bother.
-
The grey looks a deal better than the lurid blue. Remarkable what a bit of paint will do. I think I can even see the positions of the portholes or is that where the printing supports attached - or is it both?
-
Yes that would work Phil. I am using clear polyurethane for the lower hull but I don't think that would affect the suggestion. In some ways I think your method is better than mine.
-
Gary, the last couple of shots show her off to perfection, beautifully done. Being super critical just to bring you back to earth, are 2 of the planks at the port bow a little recessed or am I looking at a bit of filler?
-
All looking very neat Jon. Yes it is a pity that most of us are unwilling to lower our standards to match reality.
-
That sounds a bit annoying. Maybe I'll stick to the traditional method for a bit longer.
-
Glen - it only works with CA glue if you plan to leave a varnished wood finish. If you try to use PVA it leaves a blemish. PVA is ok if you are going to paint.
-
Keith - I just took it as an innocent and sensible question. No need for any apology my friend.
-
Keith - Ann is fairly ok with Cangarda. We have a large playroom that was vacated by the children many years ago and finished models generally go in there. It's when we inevitably downsize that the problem is going to occur and some difficult choices will have to be made.
-
Thank you Andy - i wasn't aware of such devices. I do a bit of internet searching.
-
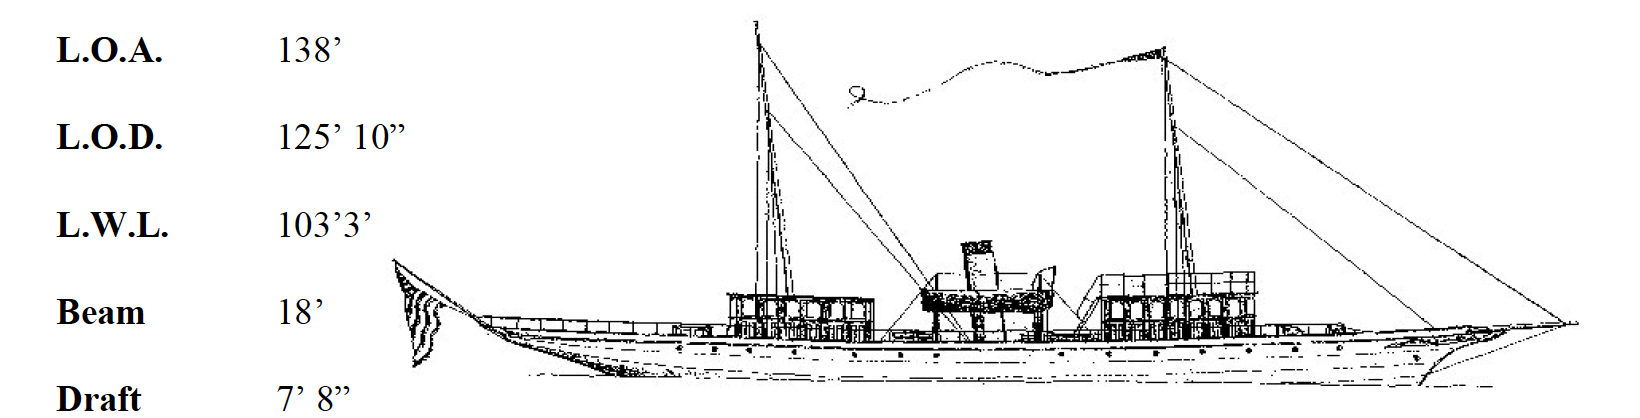
Keith - I can't remember if anyone has asked. I am building at a scale of 1:24 so from the above:- LOA = 5'9" LOD = 5'3" LWL = 4'3" Beam = 9" Draft = 3.8" I hope you are both keeping well. Best wishes.