KeithAug
-
Posts
3,980 -
Joined
-
Last visited
Content Type
Profiles
Forums
Gallery
Events
Everything posted by KeithAug
-
 I think you both may be showing your age.😁
 -
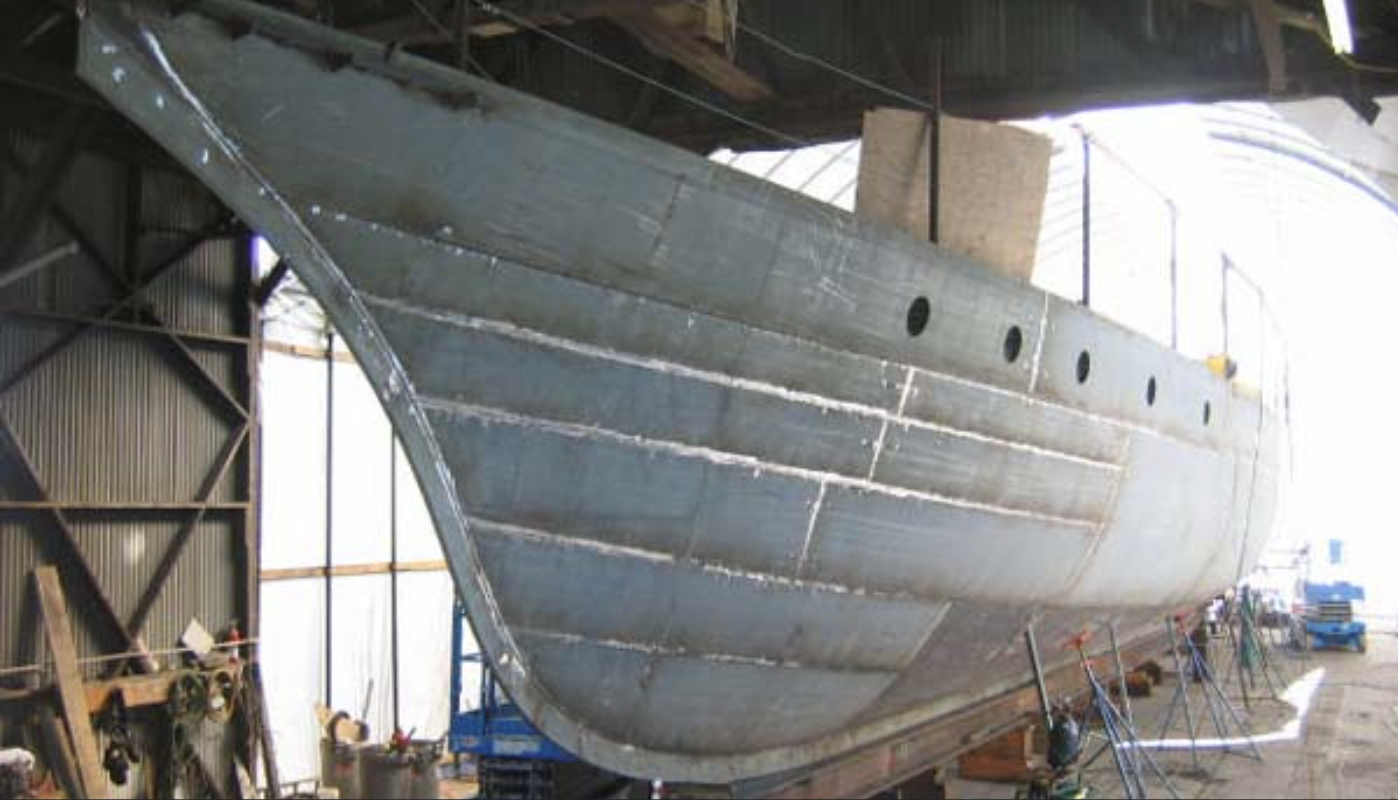
Rather a messy picture, but is that a pole attached to it? It might be a false memory but haven't I seen something like this arrangement in another build log, with ships boats being tied to a pole and trailed out to one side (or am I just going mad?).
.jpeg.c27c77b833c50fa843c59d515bb0f658.jpeg)
-
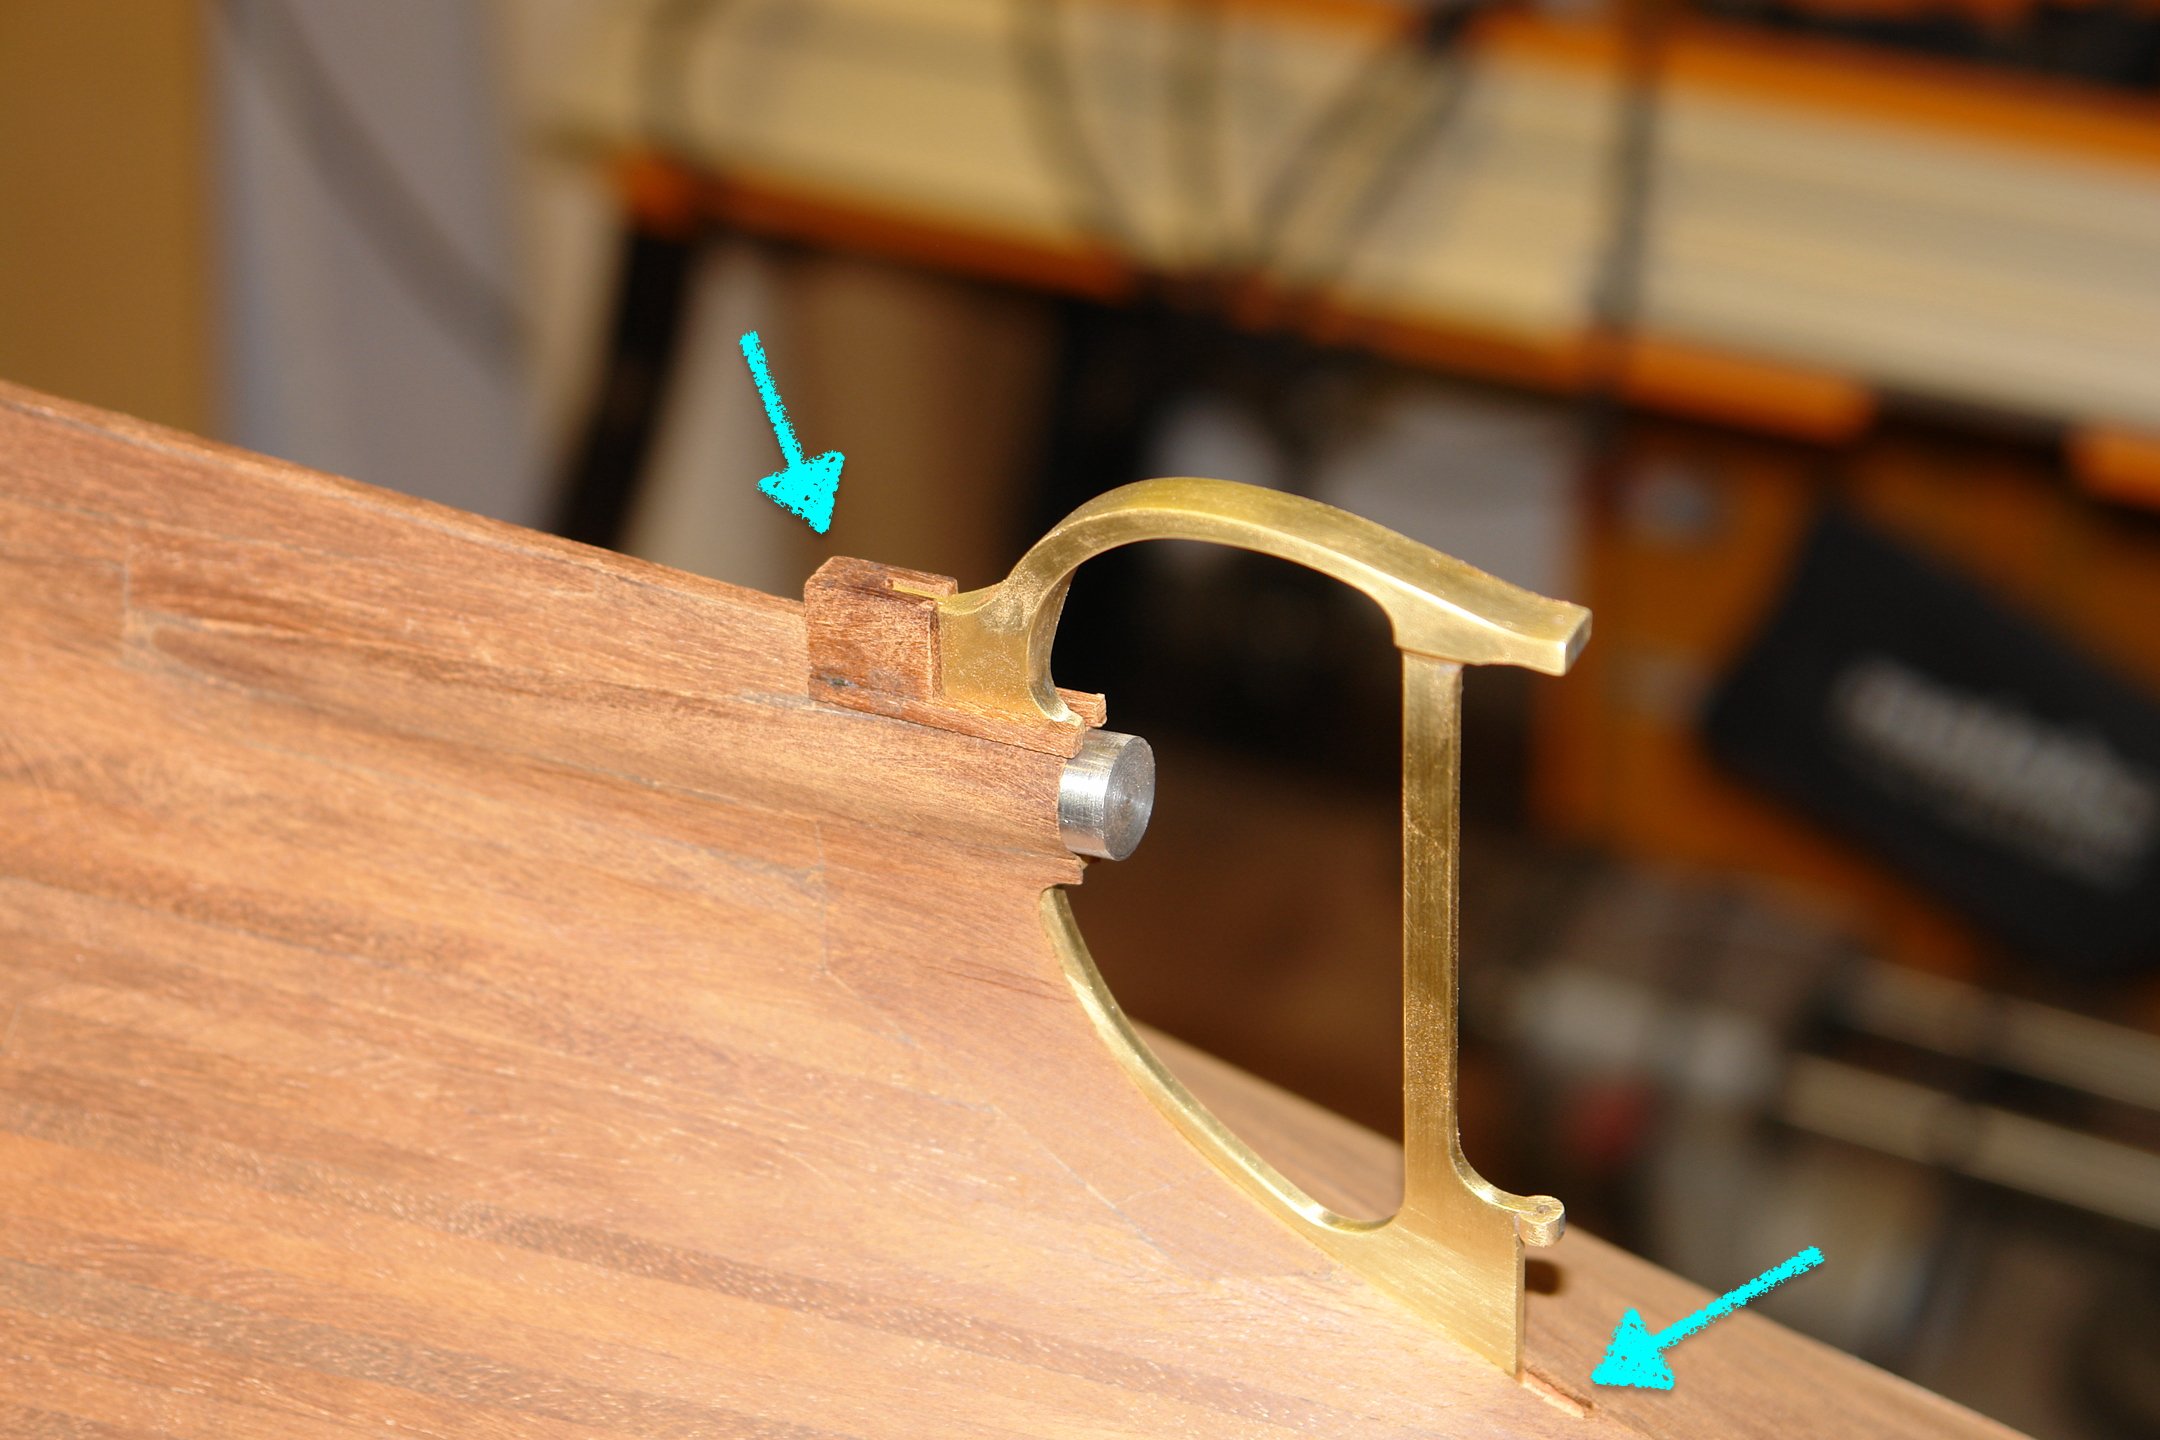
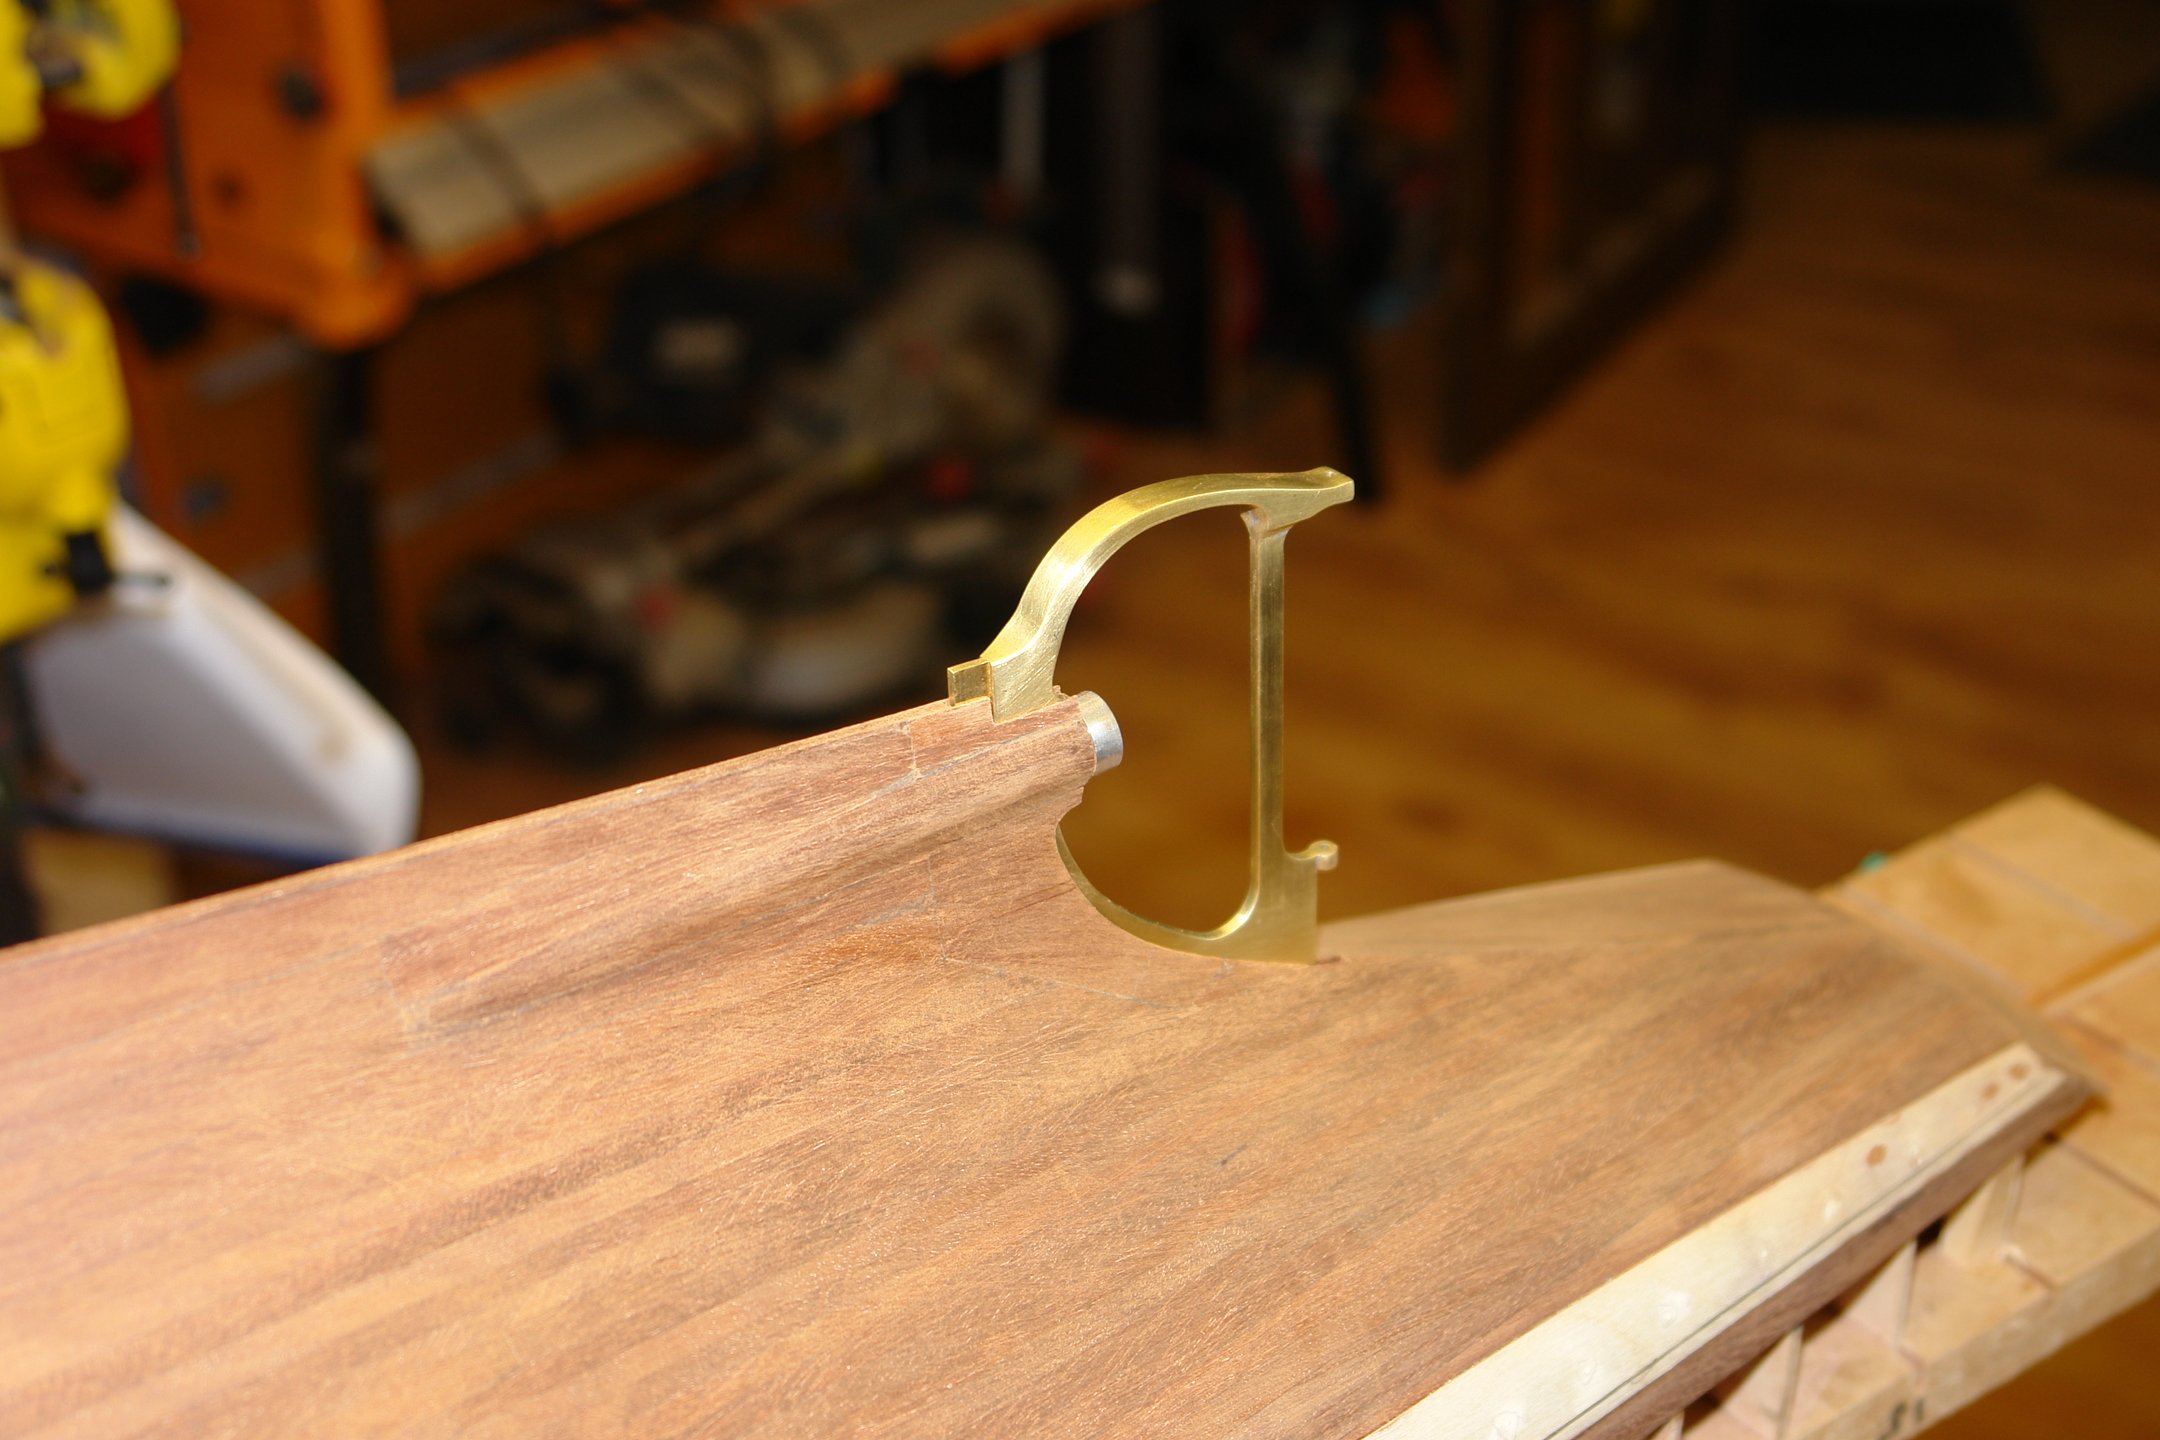
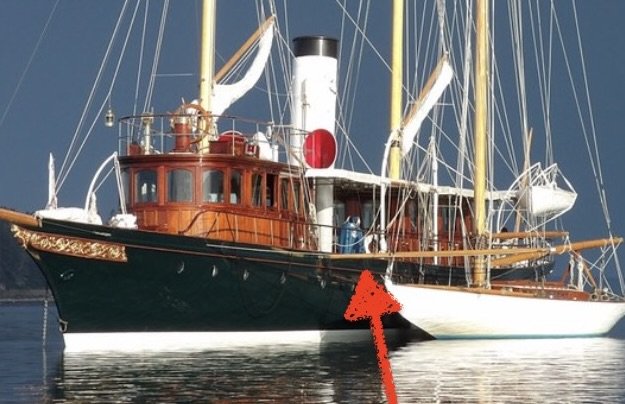
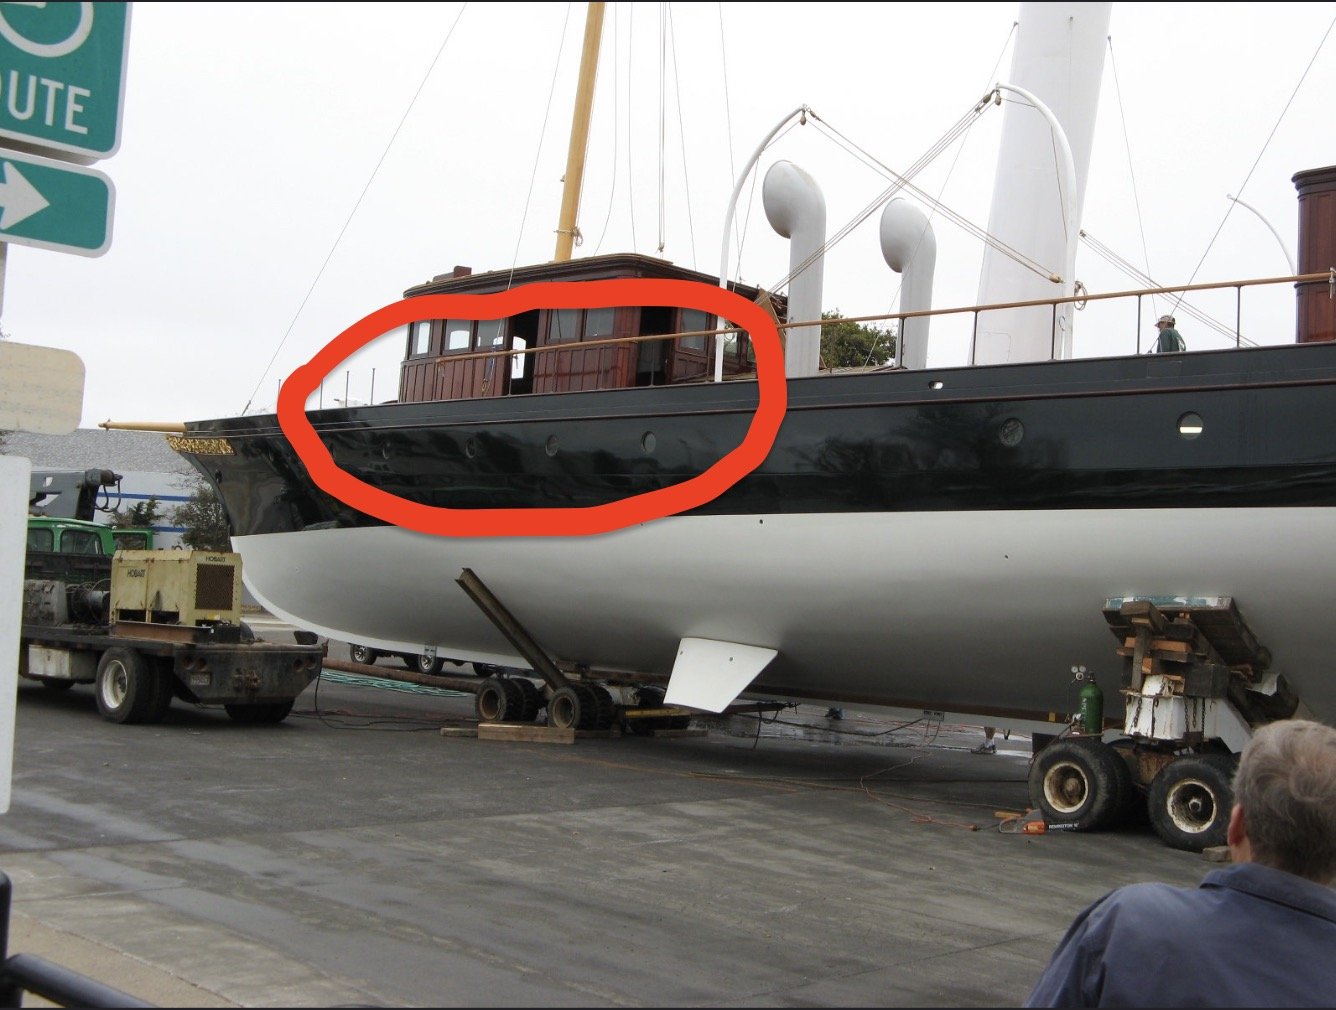
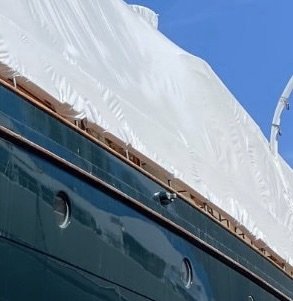
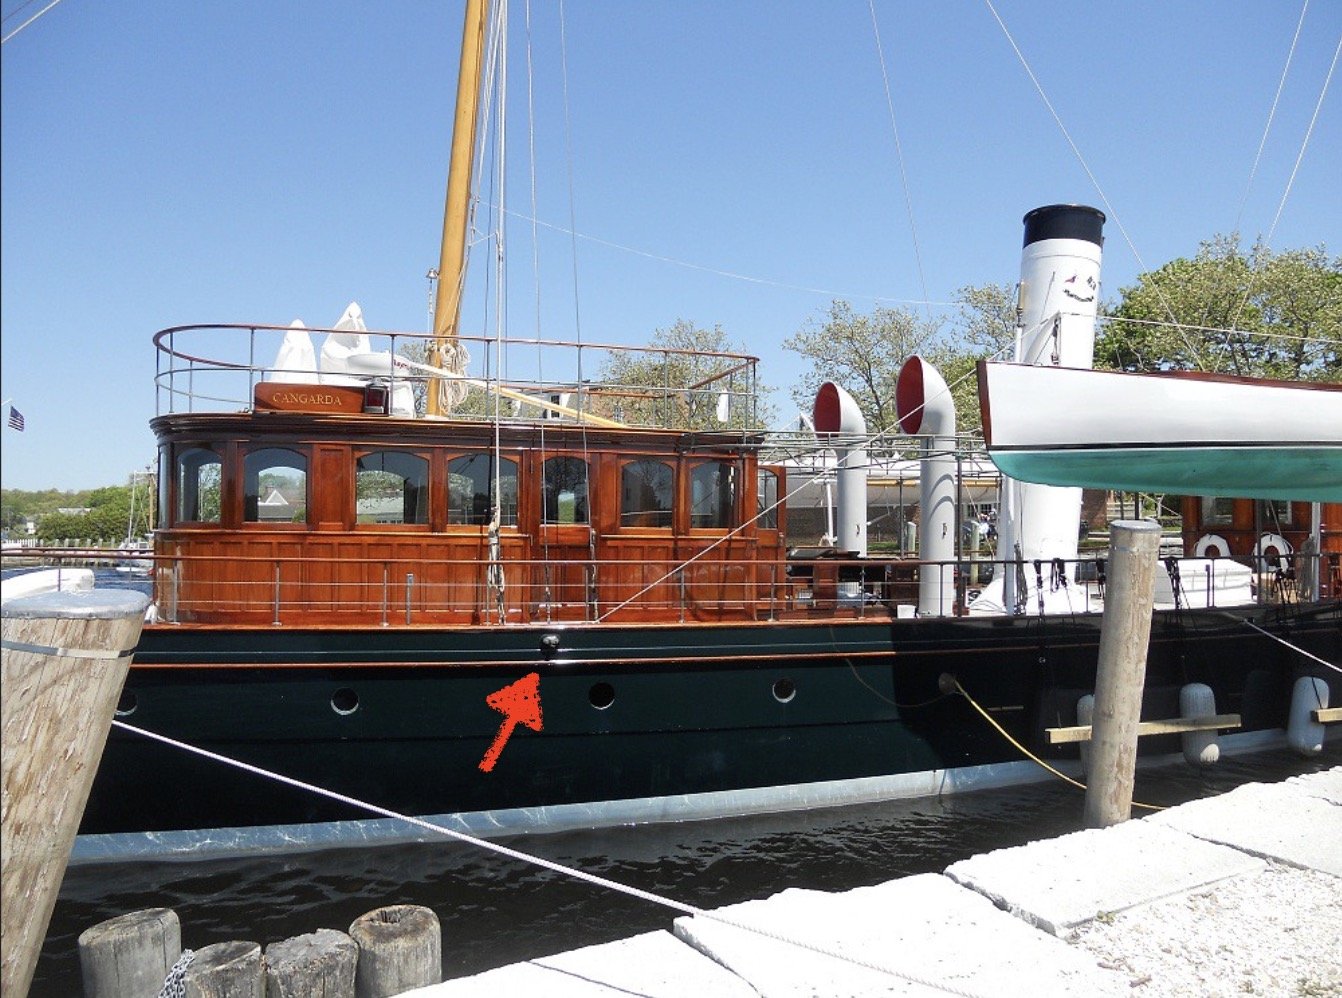
Sorry Tom I should have been clearer. I'm referring to the oval feature above the rubbing strip. John - there are other views but all are less distinct than this one. Michael - it seems to stick out, but other than that I can't see much detail. Roel - I agree it does look like one of those but they are usually attached to the grating itself and not the hull. Also as you say there is only one and it doesn't seem to be positioned adjacent to a gate in the guard rail. Not sure about that glen. A captain clever enough to ensure that he touched the dock at that particular point would probably be clever enough to avoid the collision. Seems a bit vulnerable Pat. As you say it would probably be better to have it on deck. Interesting Keith - but why only on one side? Yves, they are usually on deck, but anything is possible. It is on the port side but it would be tricky if Cangarda moored on her starboard side. It doesn't seem to have been present when she was rolled out of the builders yard:- Its a mystery! It does seem to be some sort of bracket in this picture:-
-
I wonder if any of you have any ideas about what this might be. As best as I can tell it only exists on the port side.
-
It must have been a major messing about - 9 months. Hull looking very good.
-
The dog on floor training seems to be going badly! Poor doggy on right seems to have had surgery🙁.
-
It was maybe 4 or 5 in reality.
-
Kevin - I lived near Dundee 20 years ago, but now live in West Sussex (Wisborough Green) . Are you stalking me? 🙂
-
That should inspire someone to have a go George. Thank you for posting.
-
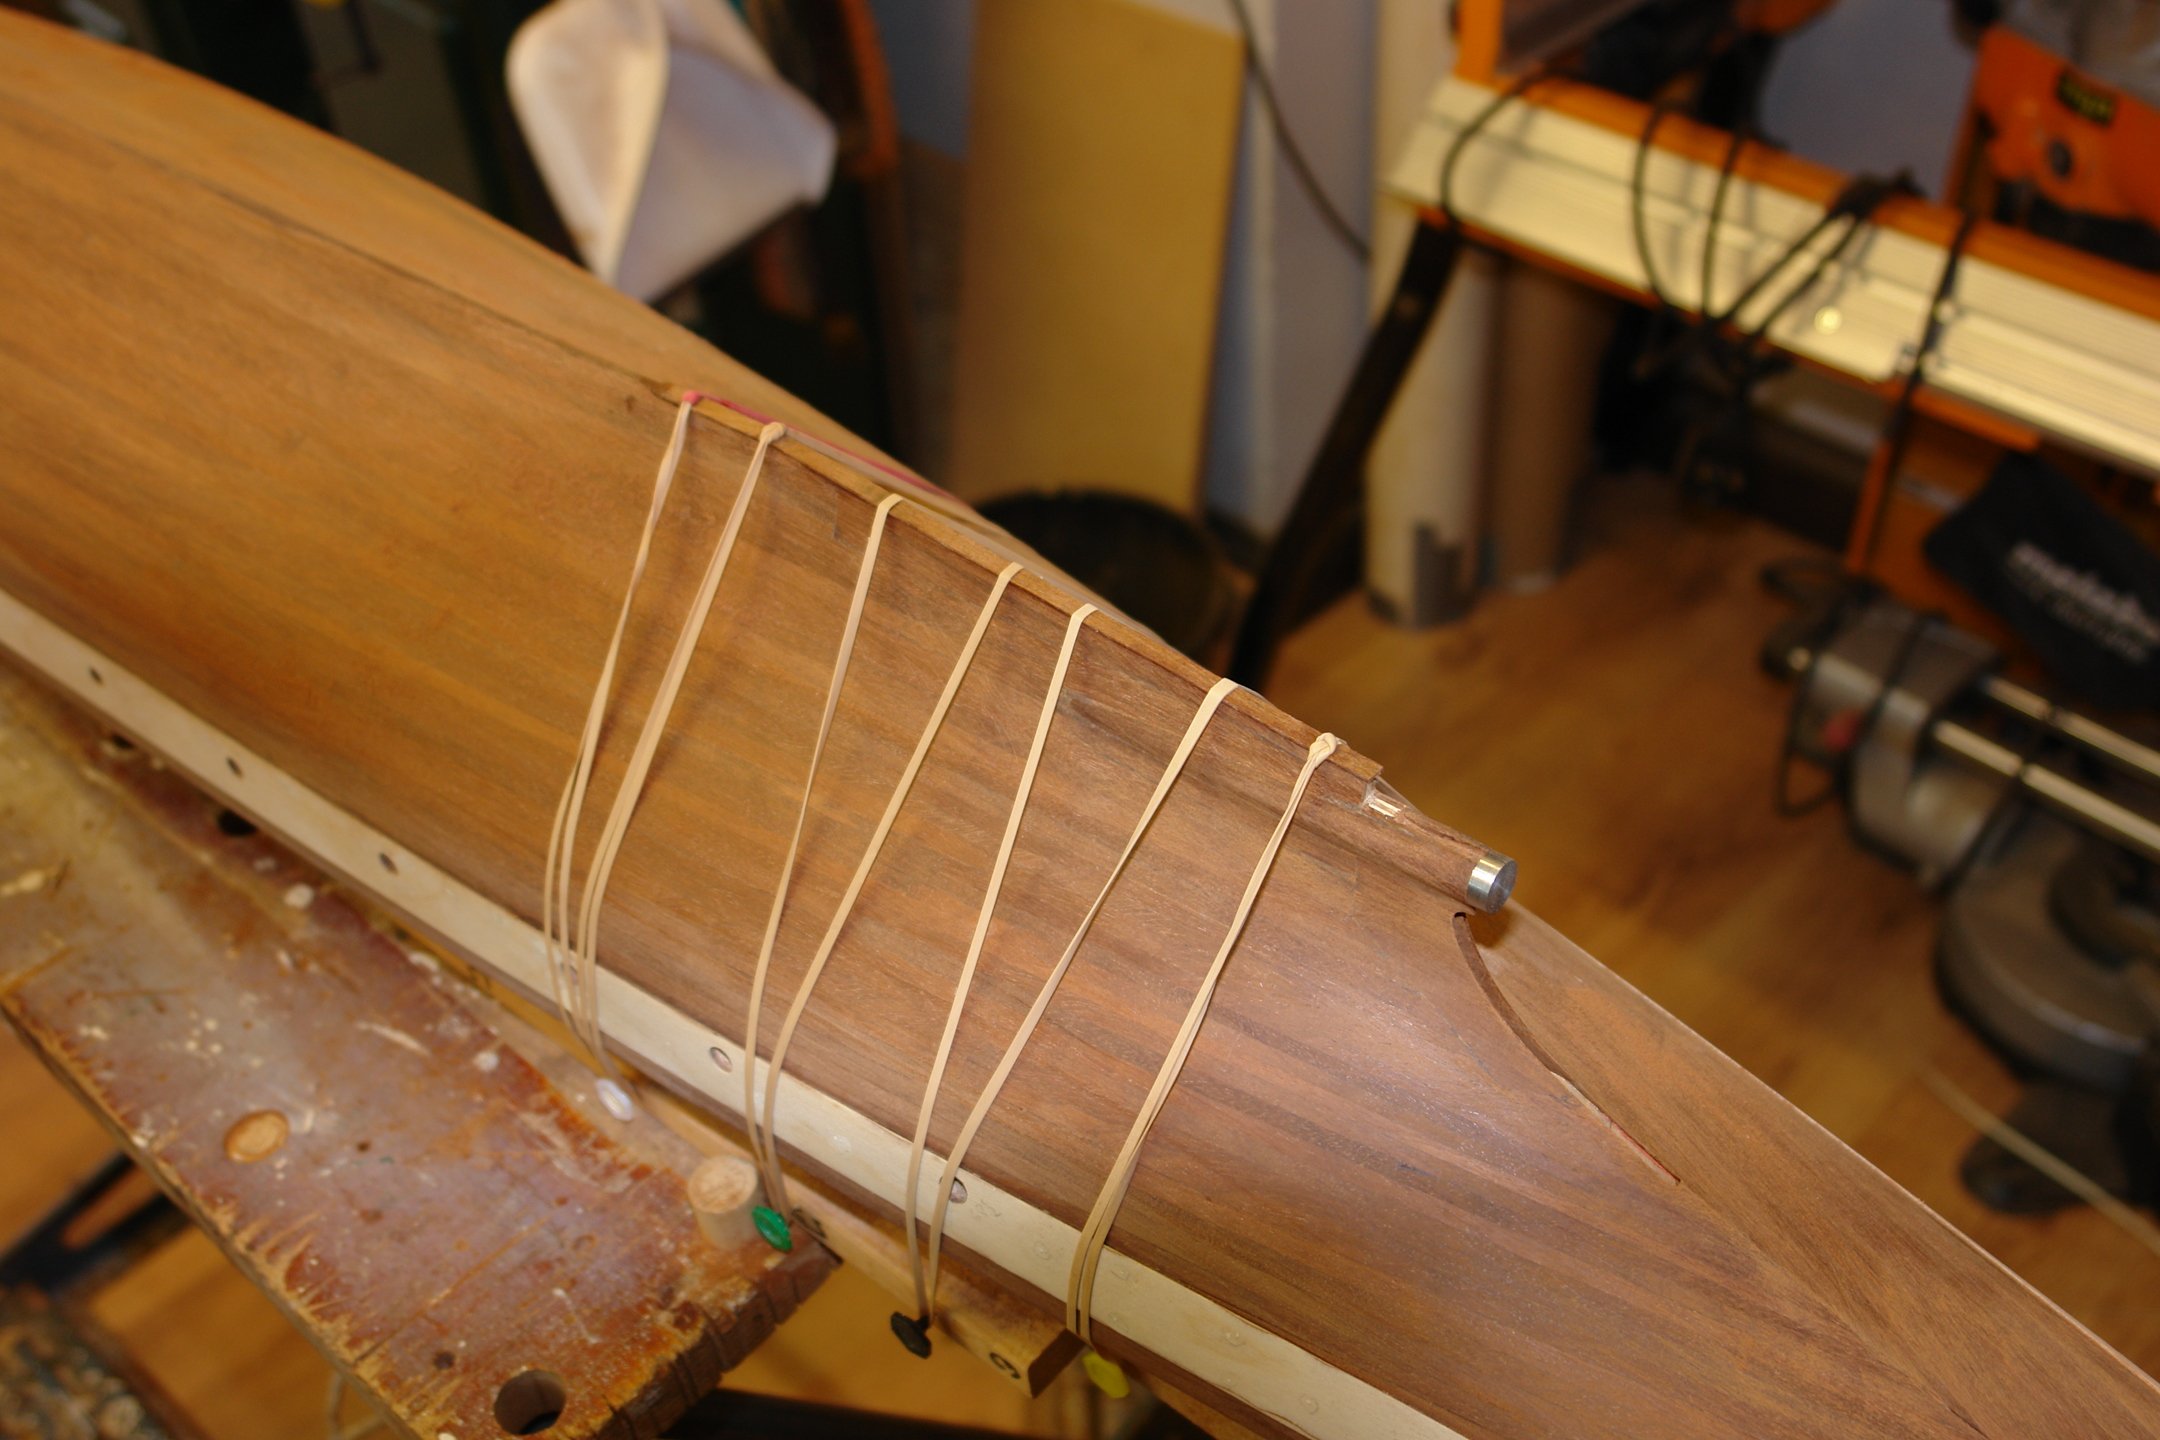
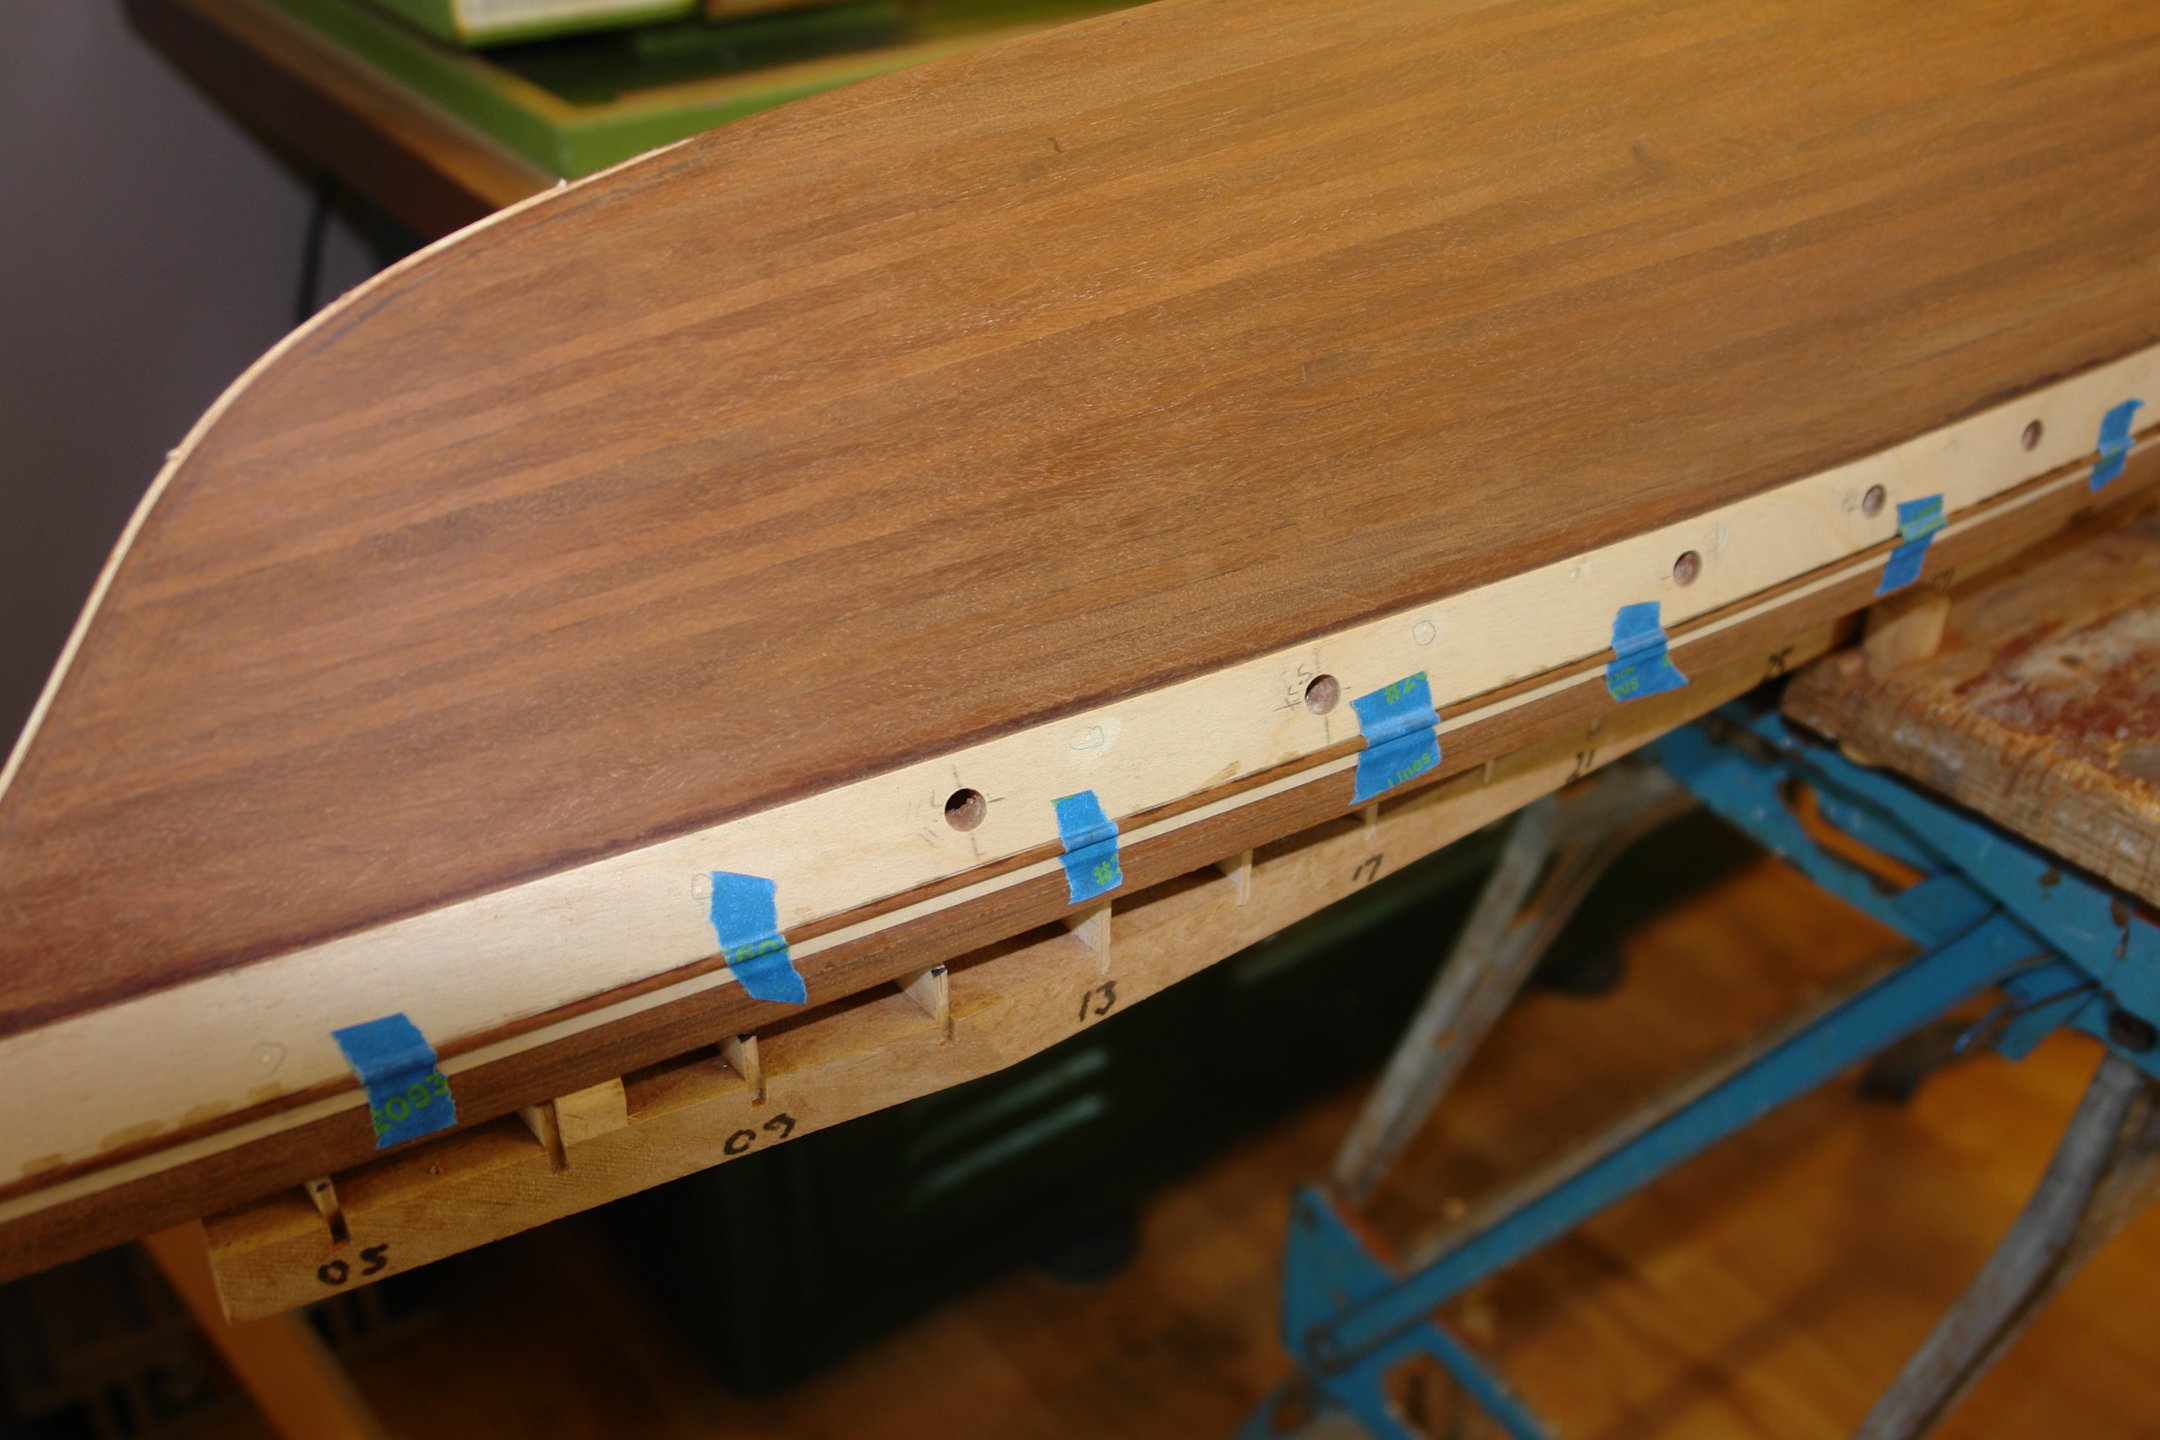
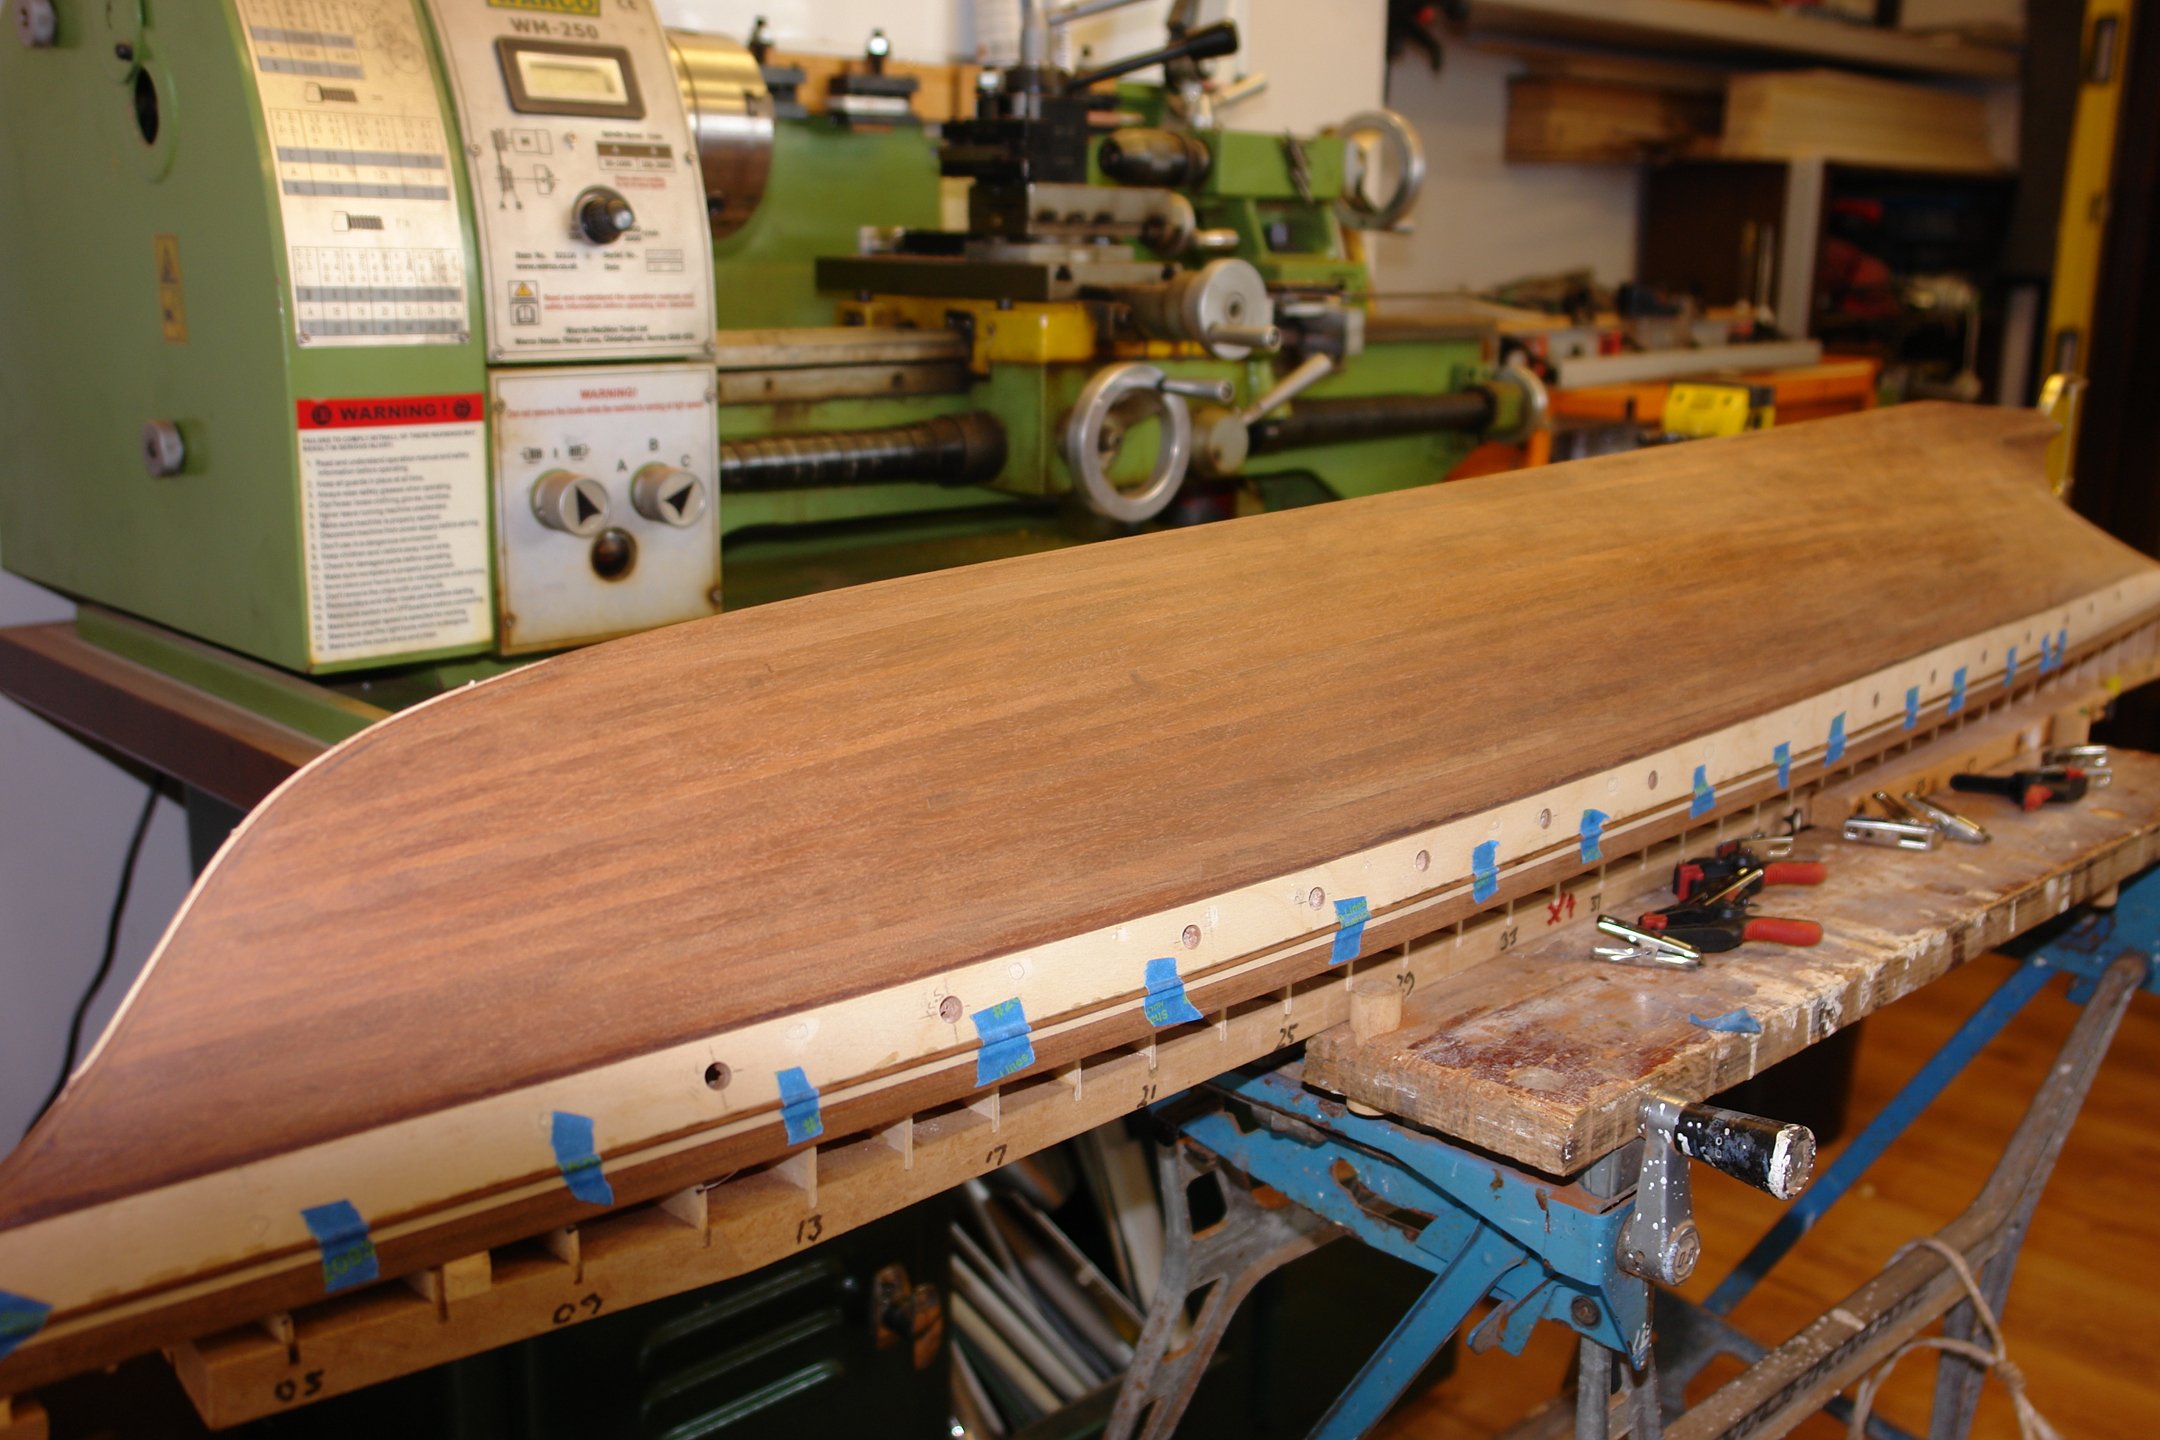
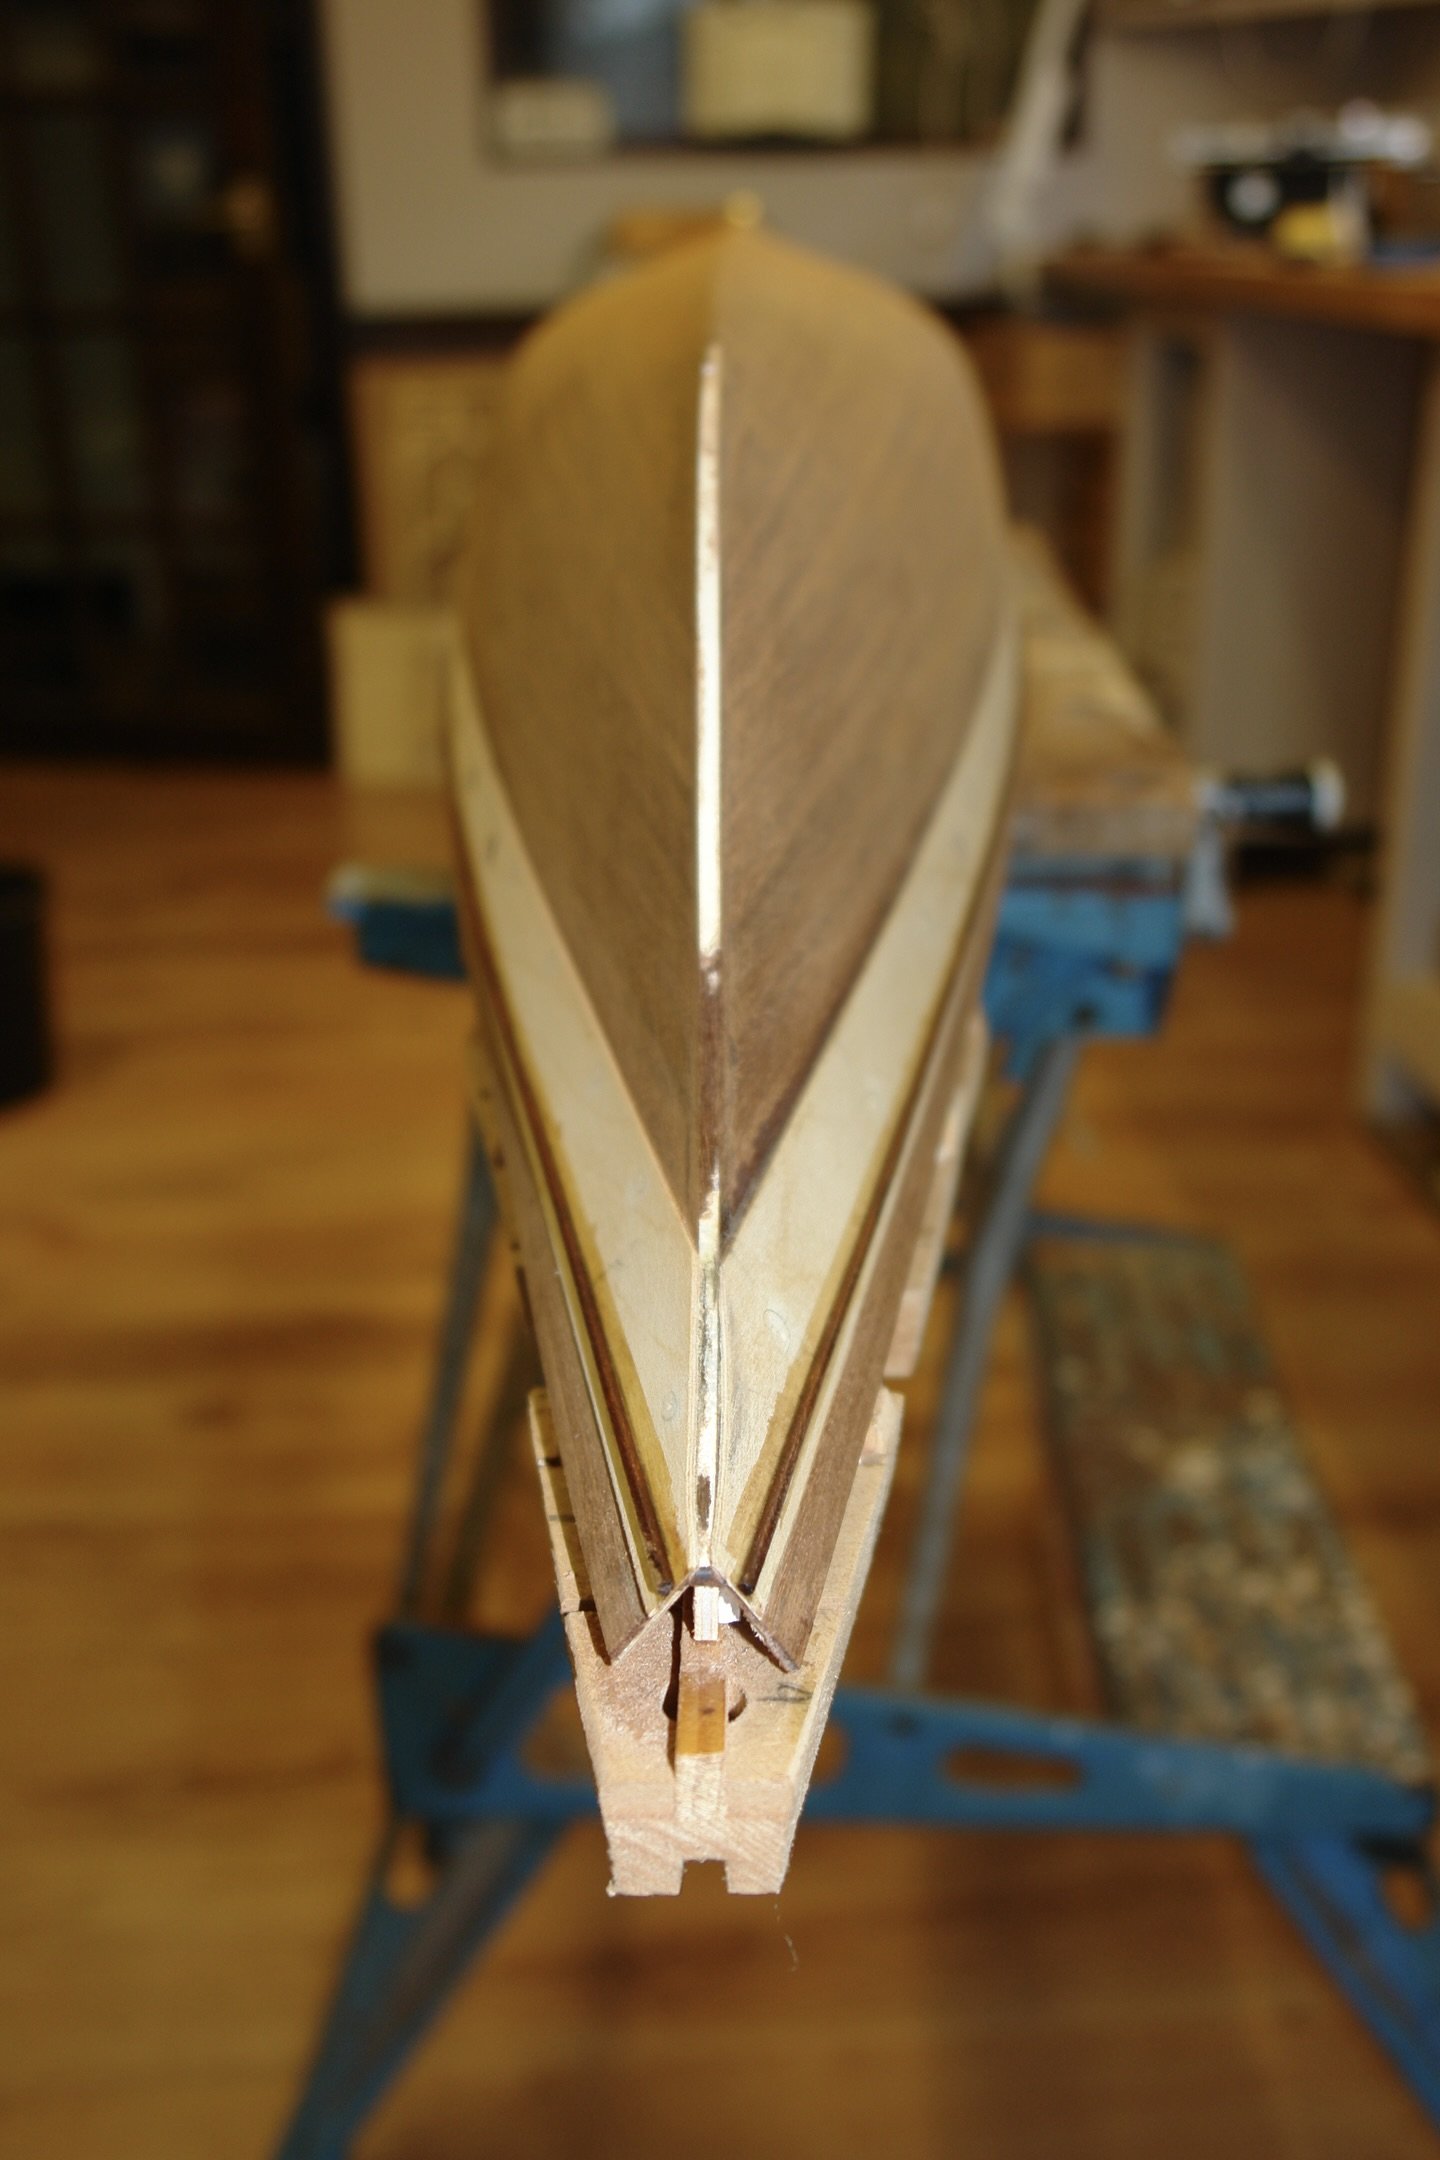
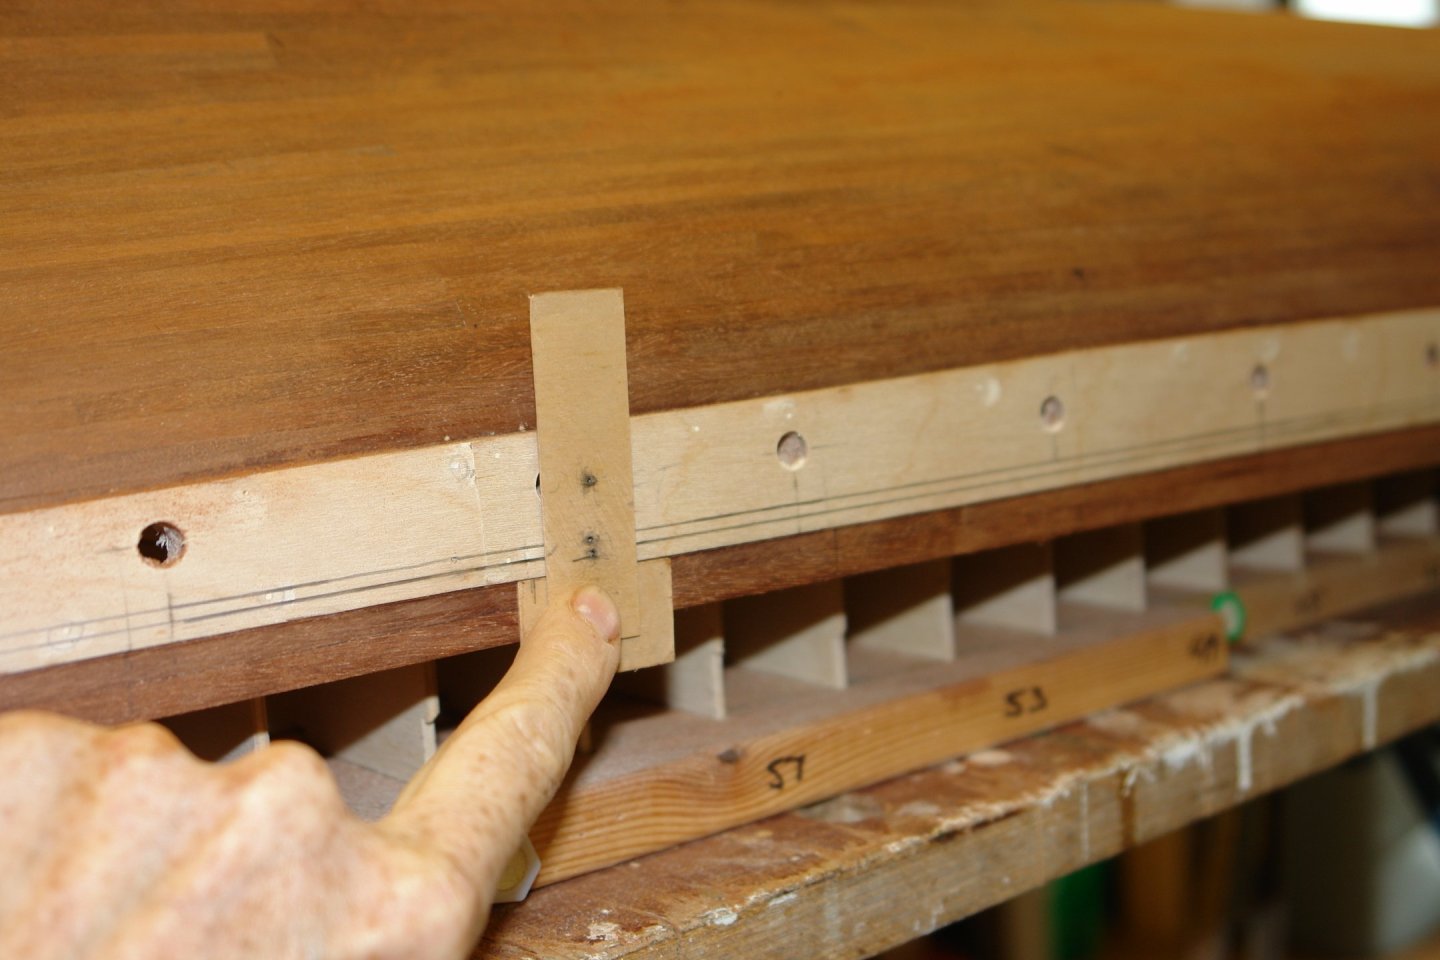
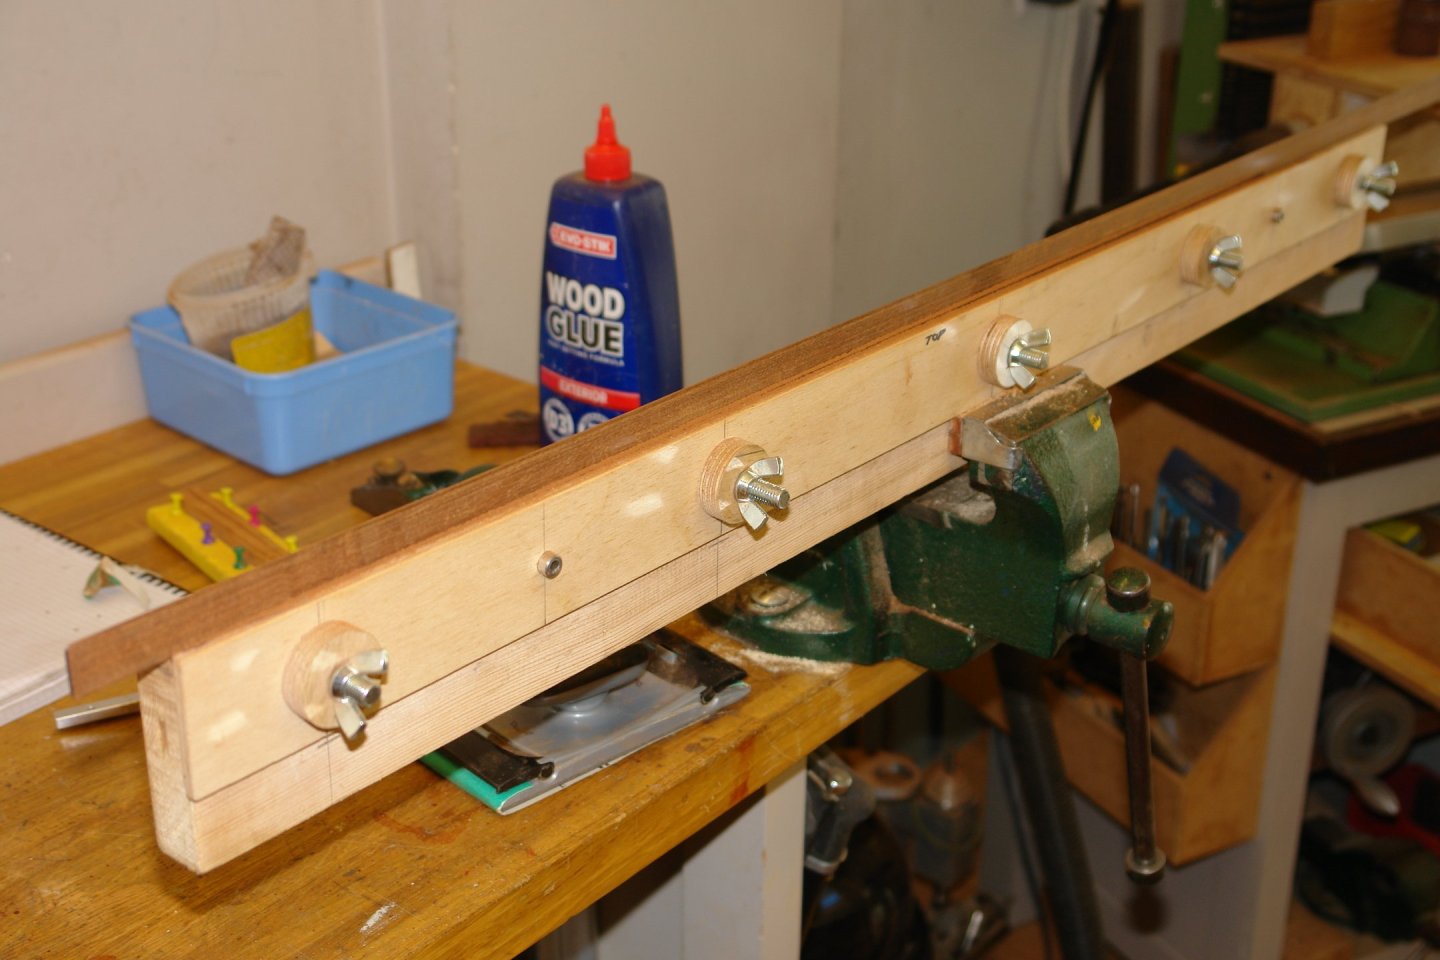
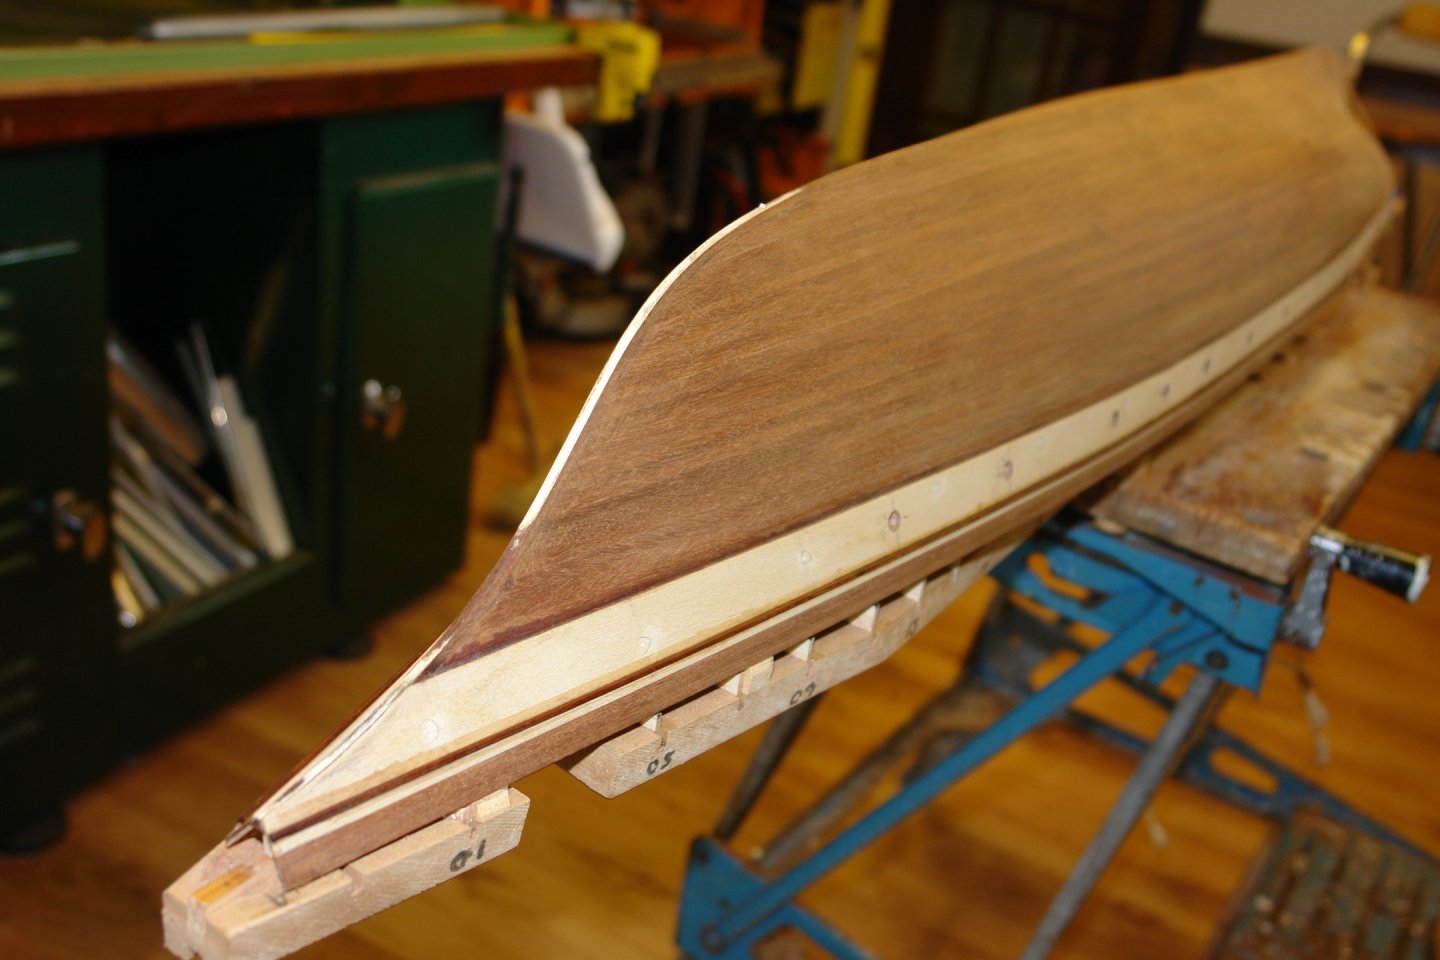
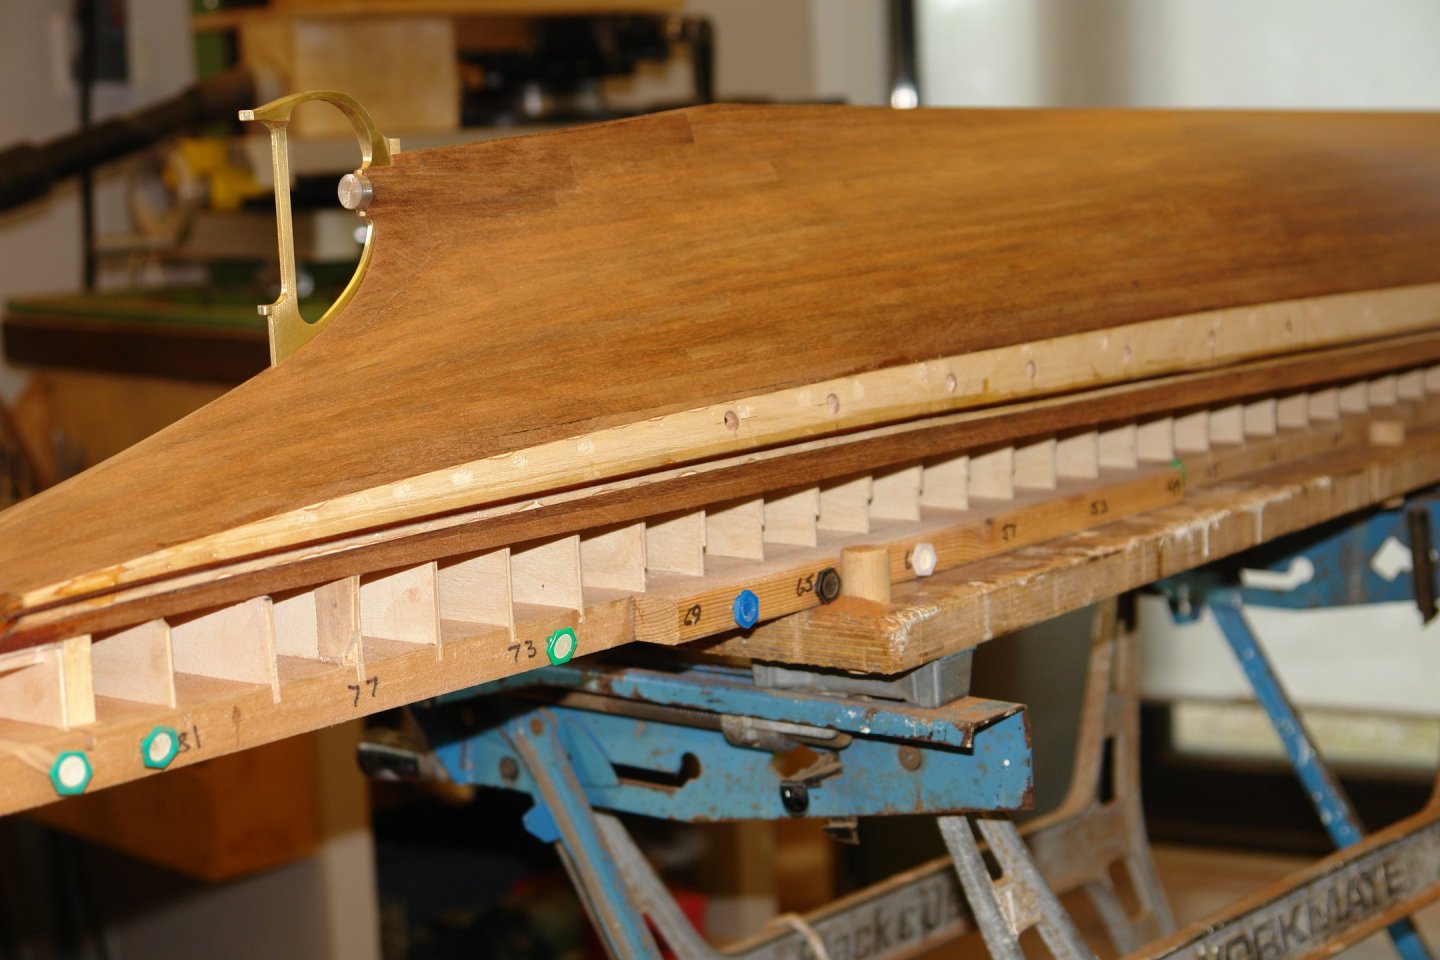
Another week flashes by with the garden and my wife's birthday taking priority. However I did manage to sneak into the workshop for the odd hour or two. I continued working on the hull. The final piece of the "rabbet plank" was glued in place. Then it was time to sort out the end of the keel where it meets the skeg. The piece, made a couple of posts ago, was glued in place. The slot (bottom right above) isn't an error. The slot had to be over long to allow the skeg to side in place horizontally over the prop shaft. The slot will be sorted out once the skeg is glued in place. The piece at the end of the keel was sanded to shape and is now quite fragile. You may recall I broke the previous piece. I was jumping about a bit so the next job was to make and attach the rubbing strips. These have a "D" cross section and are 0.1" wide by 0.07" high. Fortunately the rubbing strips are parallel to the upper edge of the compensation plate so I was able to recycle my "port hole marker" to draw the parallel lines where the rubbing strips are mounted. I cut a plank 0.1" wide and rounded off the 2 edges with sandpaper to form the "D" The edges were slit off .070 thick on the table saw. I then attached the rubbing strips to the hull with masking tape. I then ran a bead of CA glue along the edge of the rubbing strip and the capillary action drew it between the touching surfaces. Next I think I will sort out the keel. At the scale size the keel is circa 0.1" wide by .25" deep and runs the full length of the hull from prow to skeg.


-
Good to see that she is back in build.
- 454 replies
-
- 1
-

-
- Union Steamship Company
- Stepcraft 840
- (and 3 more)
-
The model in the background looks forlorn. I really haven't got my head round why the pile driver doesn't turn turtle. That tower would make a very good keel.🙂
-
This looks like an interesting challenge Eberhard. The rig looks to be reasonably well defined but I am not sure how you are going to get a lot of the deck detail. I will enjoy watching how you progress.
-
The build quality continues to impress Paul. All looking very smart.
- 201 replies
-
- 5
-
-

-
- Oyster Sharpie
- first scratch build
- (and 1 more)
-
That sounds wonderful JD. Remember you can never take too many pictures.
-
Andy - it's basically one of these. Many brands are available which look basically the same. All manufactured in the same factory in China no doubt.

-
Dear Wonky, Yep, I agree tha shunt stick ont top o paint. (That really won't work for anyone reading this through a translator😬).
-
Andy - you can probably find his address in the Doomsday Book.
-
I agree with Eric - before I got to his comment I was thinking it looked quite a lot like some of our very old furniture. Very nice but not grunge.
-
They look nice and uniform.👍