KeithAug
-
Posts
3,980 -
Joined
-
Last visited
Content Type
Profiles
Forums
Gallery
Events
Everything posted by KeithAug
-
 lovely job on the navigation lights and buckets Valeriy. I had to magnify the buckets to see how you had done the handle connection. A cunning piece of visual deception. Very effective.
 -
They are quite common Keith. A granddaughter favourite.

-
A youngster then Ras. Many more modelling years left to add to your fleet.🙂
- 128 replies
-
- 2
-

-

-
- zulu
- sternwheeler
- (and 1 more)
-
Beautifully done. Does fido have a name?
-
A short but sweet build log. She turned out rather fine.
- 68 replies
-
- 5
-
-
- Coates
- Rudderow-class
- (and 1 more)
-
R Ras - thank you for your kind offer. If I am not mistaken Zulu has the simpler non feathering type of paddle wheel. The ones that Eberhard posted were feathering paddle wheels. You probably know the difference but this video explains it well - I was thinking about making the feathering type so unfortunately Zulu's plans don't help a lot, but thank you anyway.
- 128 replies
-
- 1
-
-
- zulu
- sternwheeler
- (and 1 more)
-
I have always thought it would be fun to make a large working model of a paddle wheel. I have often seen Waverley on my sailing trips around the Hebrides and watched her paddles with interest. Maybe after Cangarda is finished I will have a go.
- 128 replies
-
- 2
-
-
- zulu
- sternwheeler
- (and 1 more)
-
You are underselling her Steven. I think she looks rater cute.
- 110 replies
-
- 3
-
-

-
- Paddlewheeler
- Ballarat
- (and 3 more)
-
Another good idea for the fallback position Michael. I will probably try the bending option tomorrow and see how I go. I think I have a lot of you guys waiting in anticipation.
-
Thank you Steve, Mark, druxey, Gary. As I have already cut the pieces I am going to have a go at bending them first using boiling water. There is a danger that they won't bend enough or that they might split but as they already exist it is a no loss situation. I agree that the double 1/64" ply solution might be better so I will keep that in reserve. I should have used a scarf joint as Steve suggests so if the bending fails I will incorporate that mod into the replacement bits.
-
Raz - yes that works. I tend to be a bit frugal with my use of wood so I use an MDF block with the pre cut side planks held on it (at the correct angle) with double sided tape. Once the step slots are cut I remove the side planks by brushing a bit of white spirit on to the MDF to break the bond. Because the side planks are already the correct size I don't have to cut the shallow angles and therefore no need for a taper jig. We all have senior moments, in fact mine are the dominant type of moment.
- 128 replies
-
- 2
-
-
- zulu
- sternwheeler
- (and 1 more)
-
Handsome little fleet Andy. Let's hope they sell well. Presumably the buyer gets an authentication certificate?
- 174 replies
-
- 2
-
-
- Vigilance
- Sailing Trawler
- (and 1 more)
-
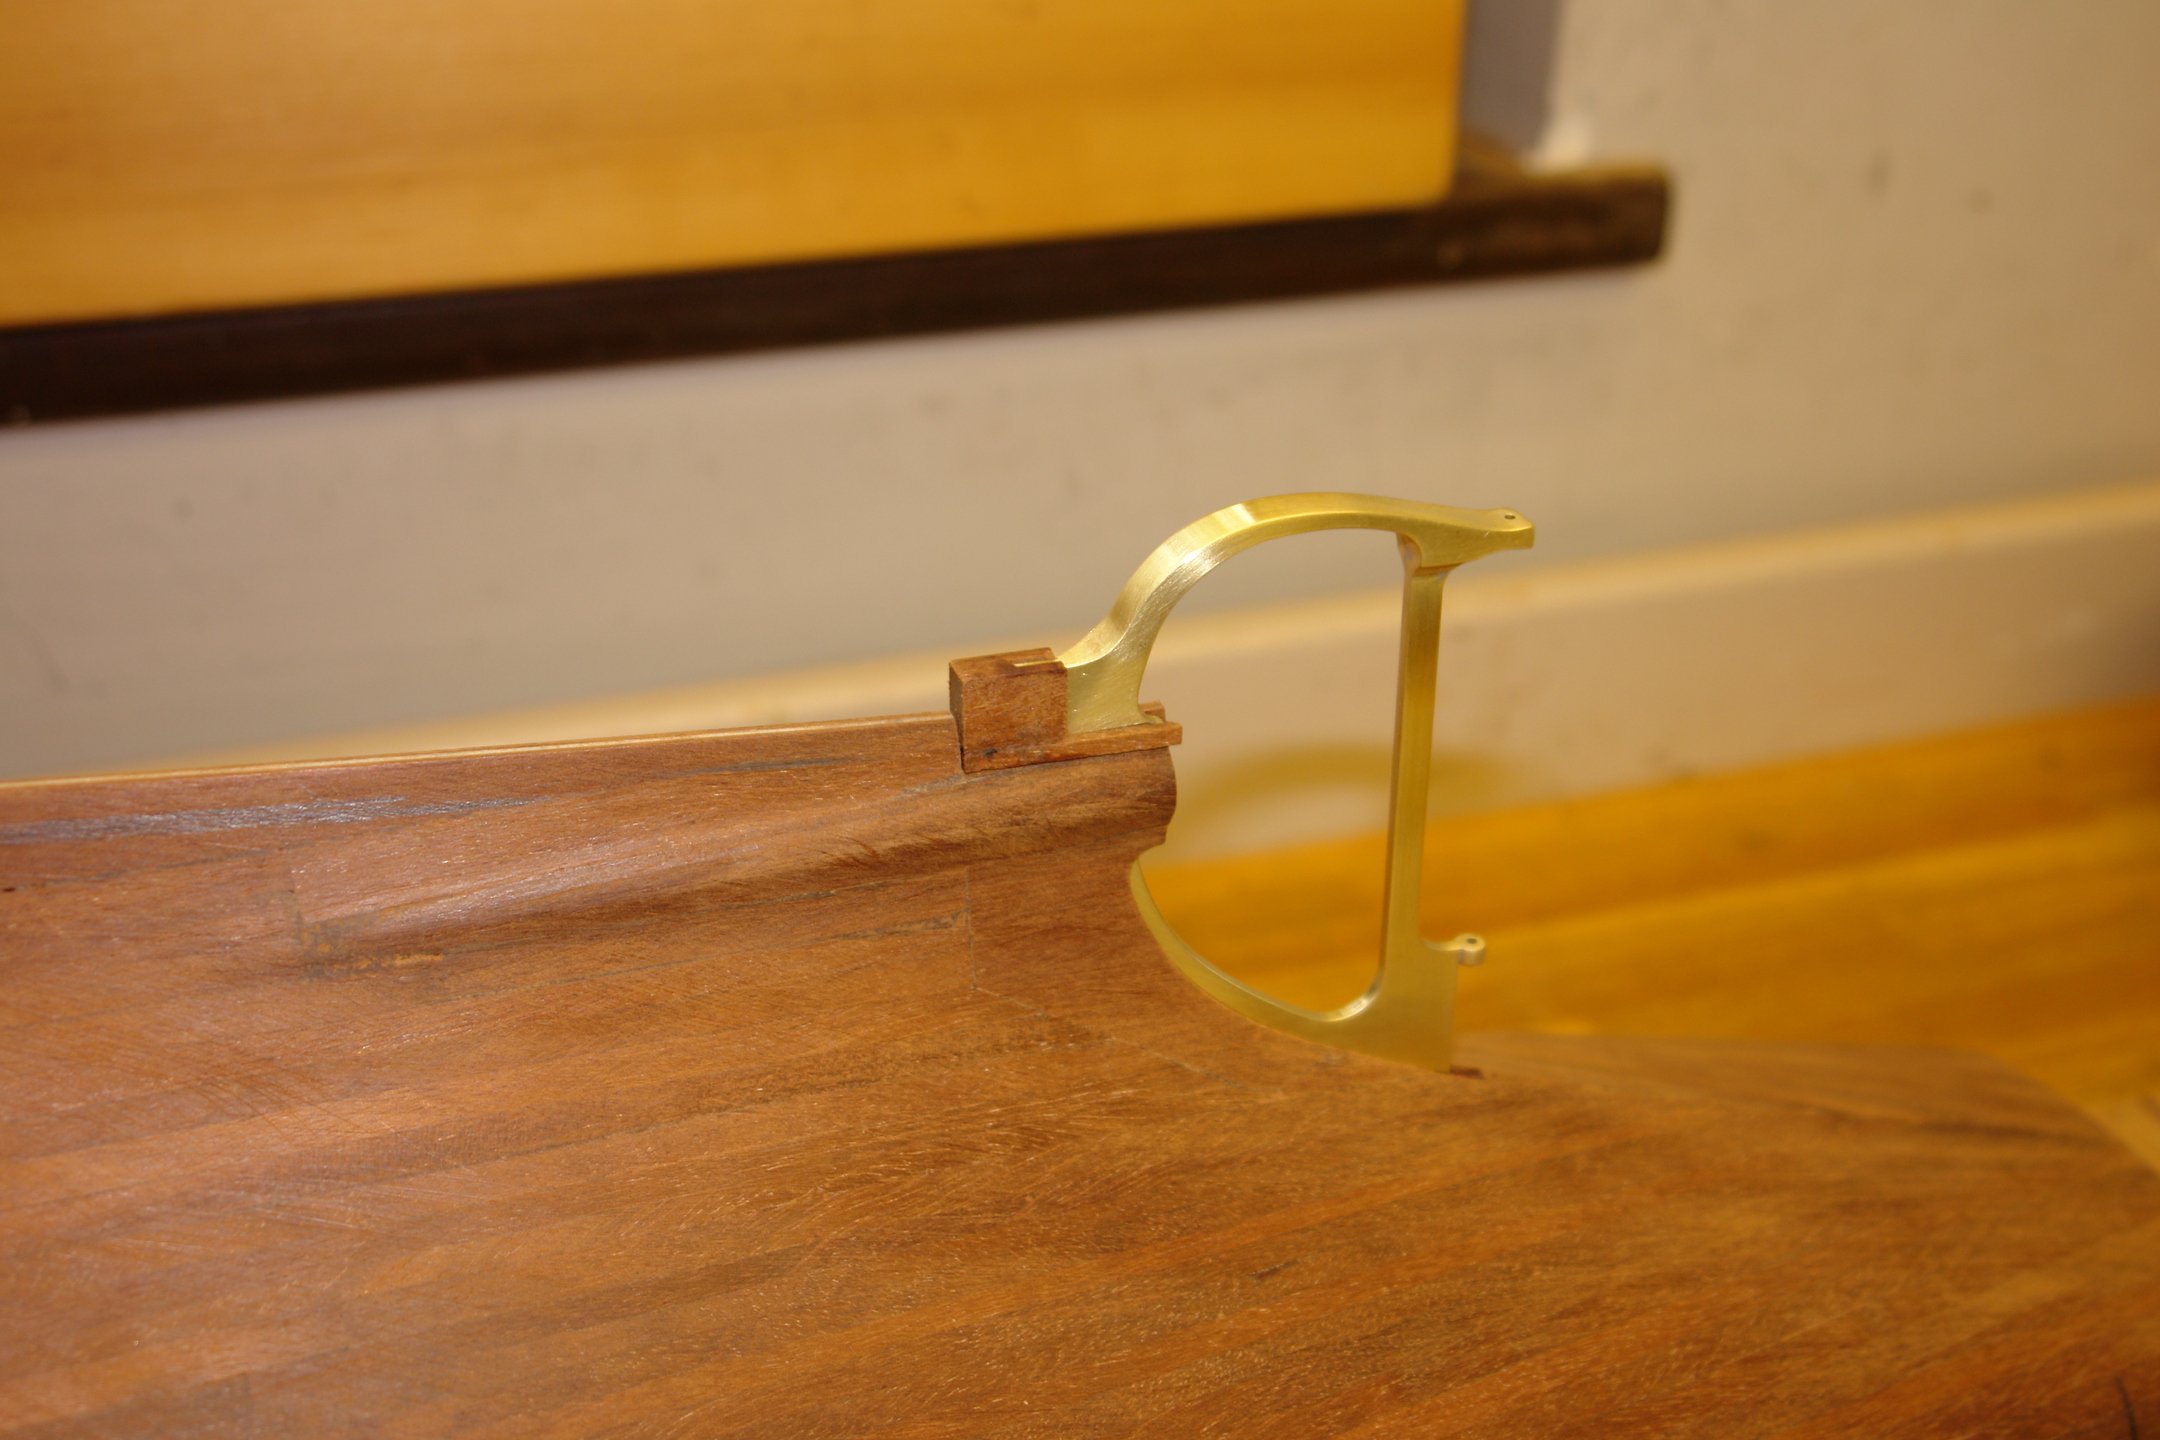
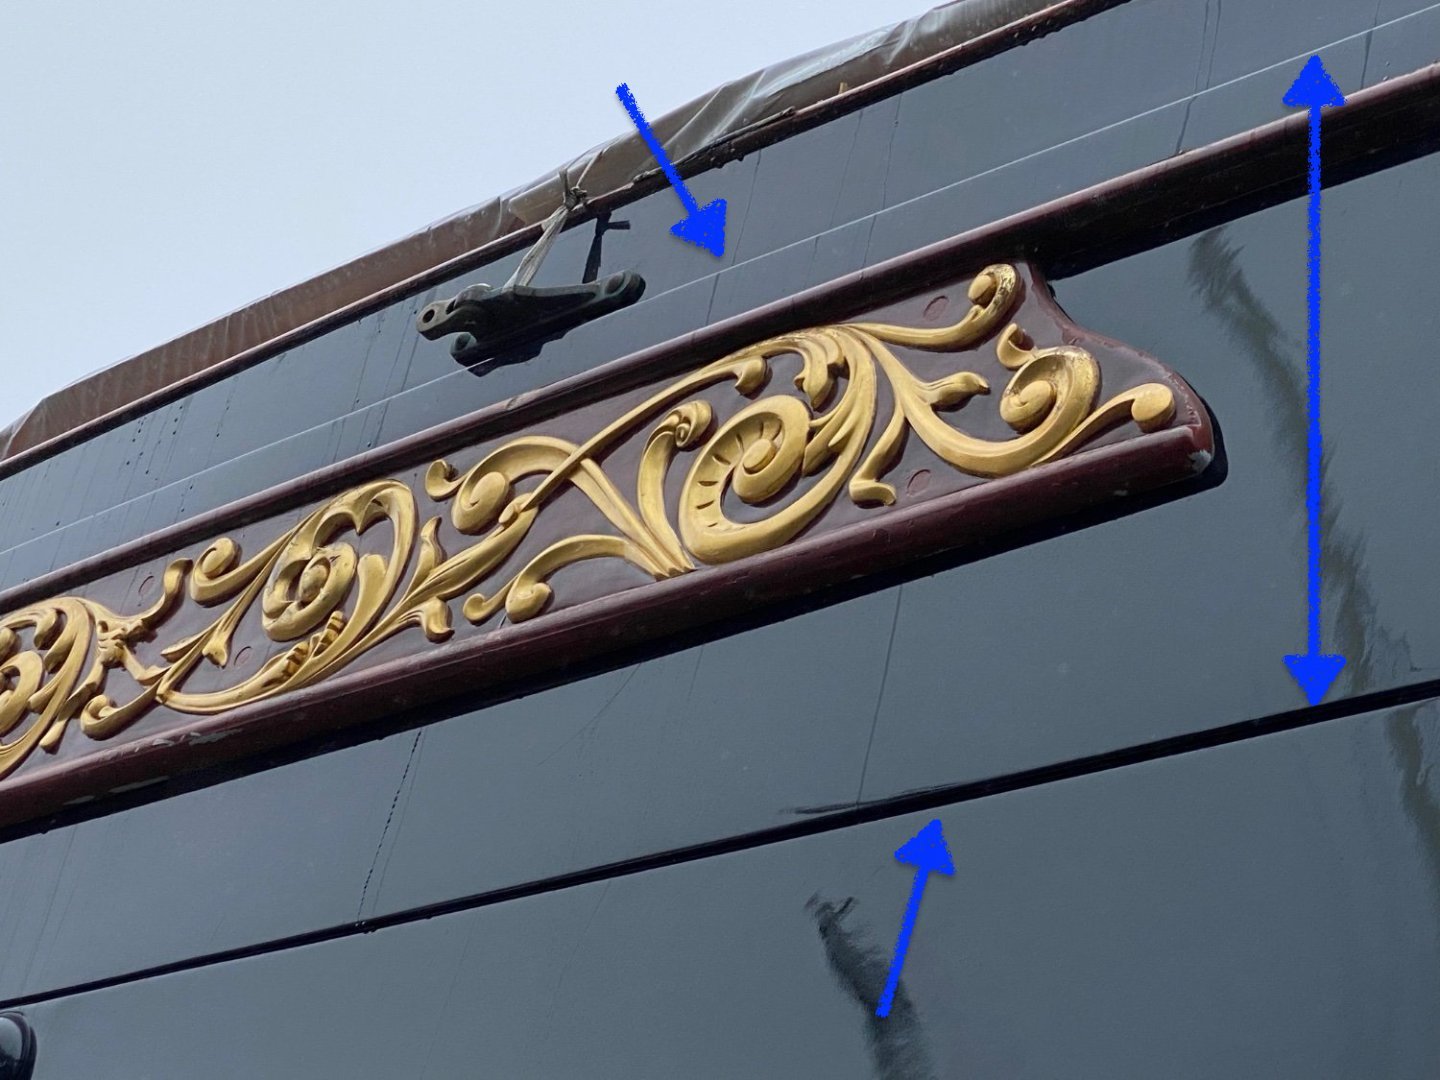
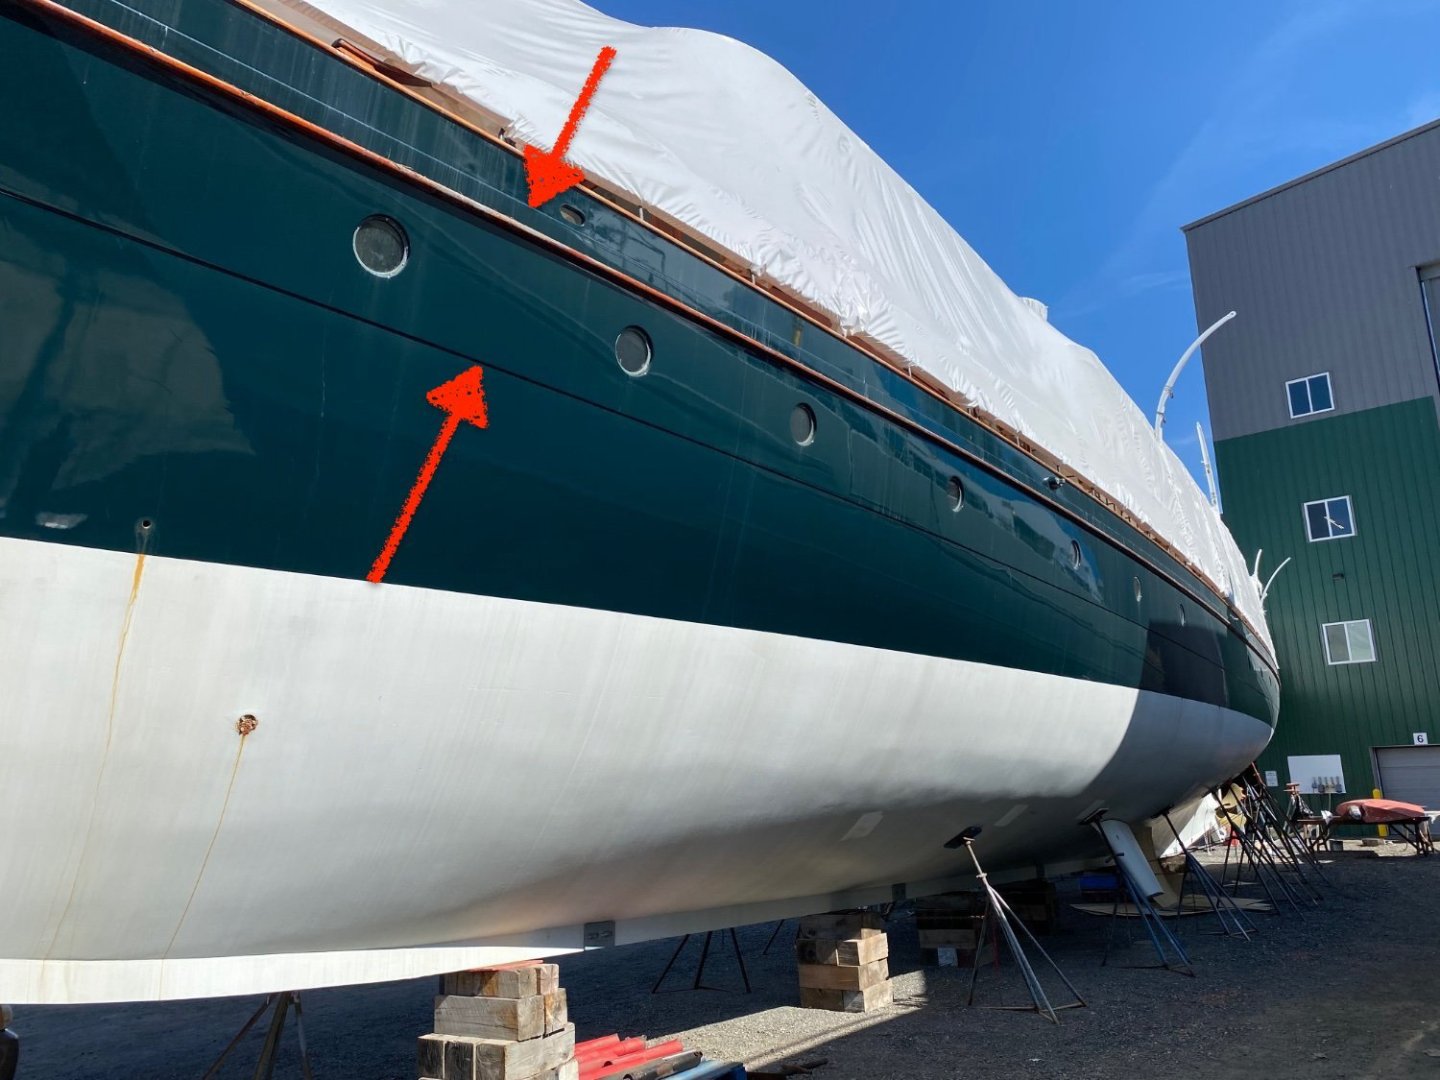
Eberhard - As you say one reason was that it was available. I had (have) many options. 1. Over plank with 1/32 mahogany strips. 2. Clad in metal - brass / copper or similar .020 thick 4. Build it up using filler (against edge strip guides). 5. Make it out of .020" card. 6. Use .020" aluminium foil sticky tape. 7. Use 1/32 birch ply. Im sure more options are available and guess I will have a lot more options within a few hours of posting this. My guess is that the plate protrusion is circa 0.5" and with a bit of sanding both the "wood" options would come back to about this thickness. The mahogany planks option just seem a bit tedious (i have had enough of planking for a while). I don't want to adopt the metal option because it's expensive for a model of this size and it would involve a lot of pieces that would have to be seamlessly matched together. The maximum size of .020" sheet readily available is 300mm. Also the complex bending to match the hull is probably beyond my patience. I thought it would be quite difficult to get a consistent thickness of filler. I'm never sure about card. My worry is it won't look anything like steel once painted. I was surprised to find .020" (0.5mm) tape. It isn't cheap but this might be my fallback option. I think birch ply is the best and cheapest option (particularly if I ignore the bending problem). I am not too worried about getting it to bend. Famous last words 😬. I will find out within a few days.
-
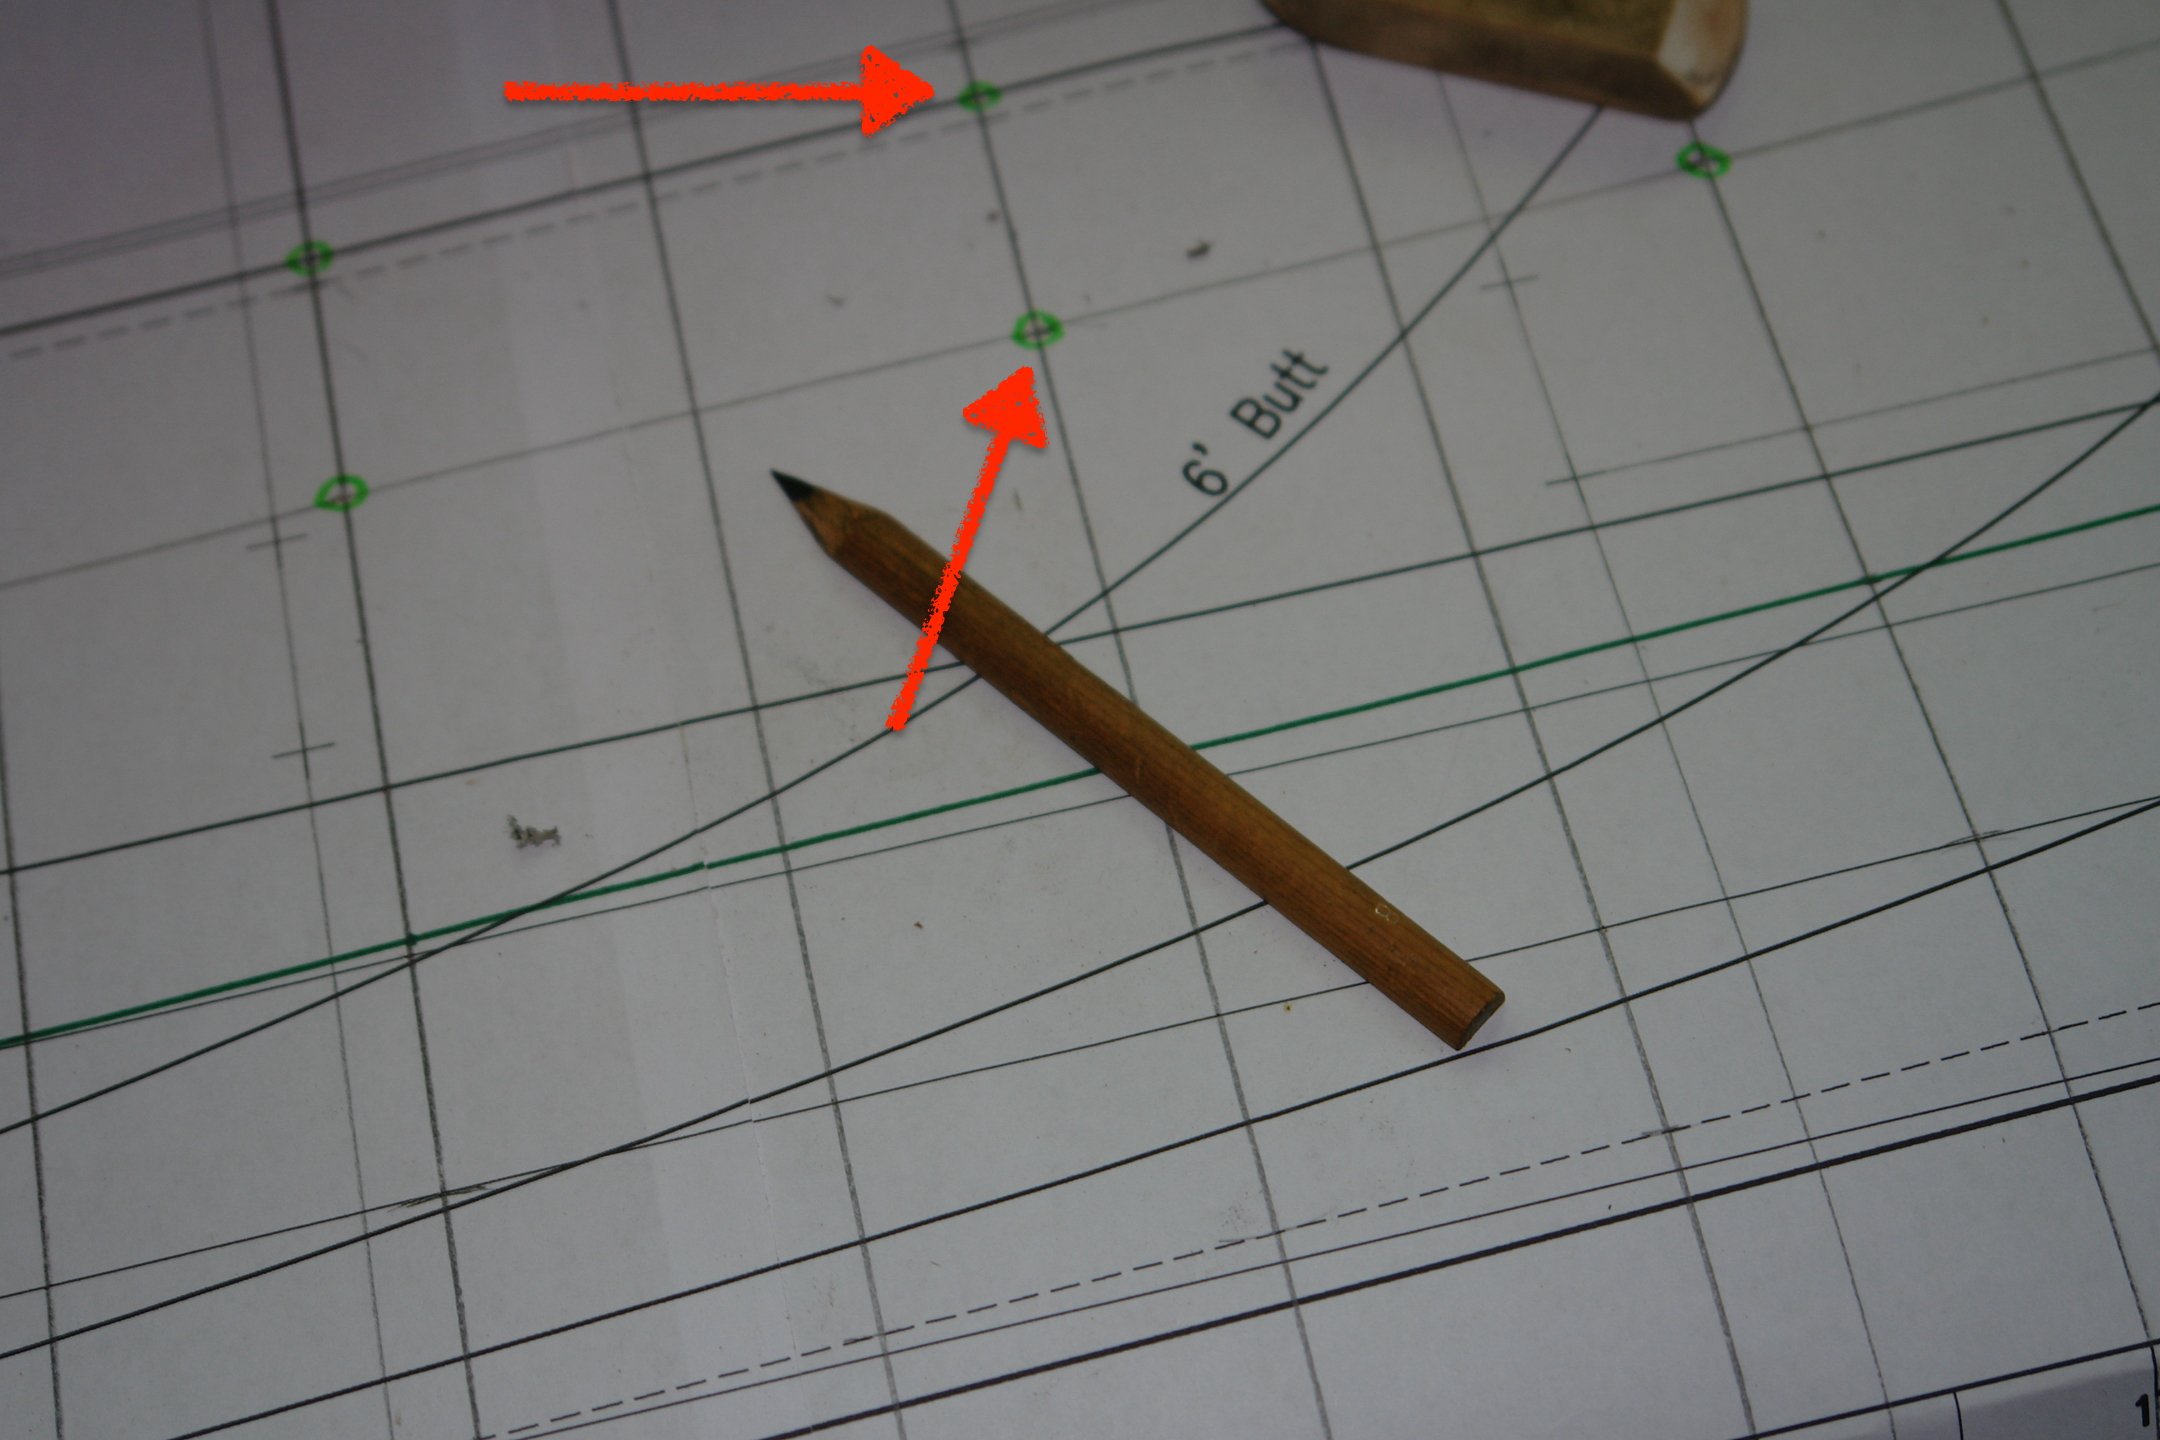
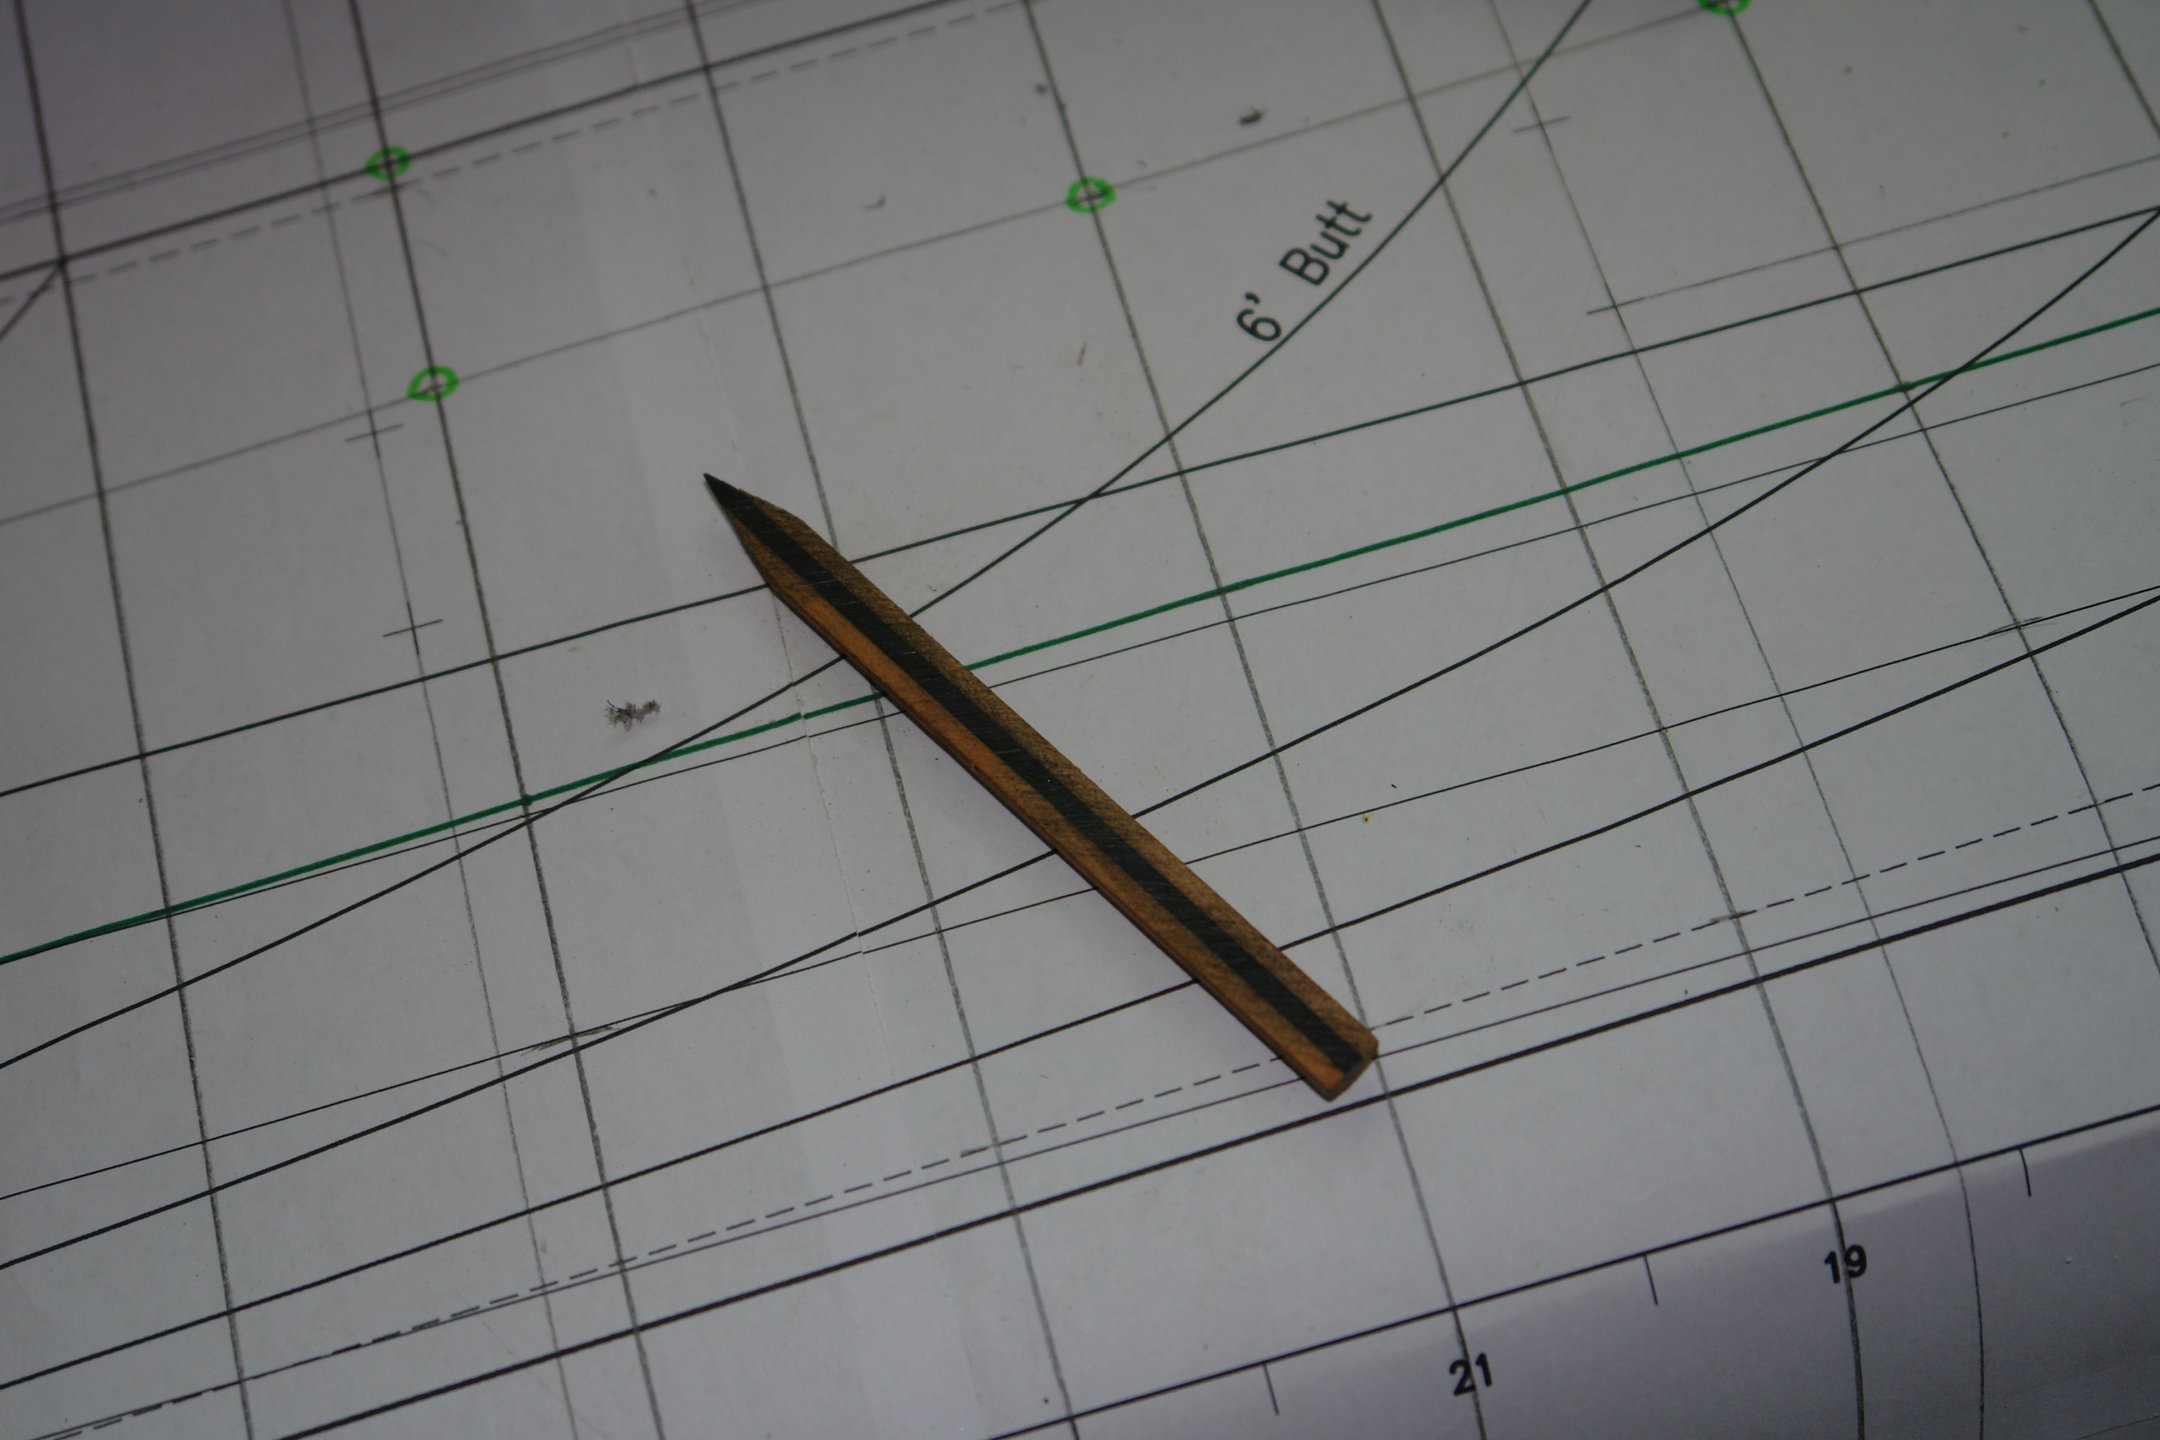
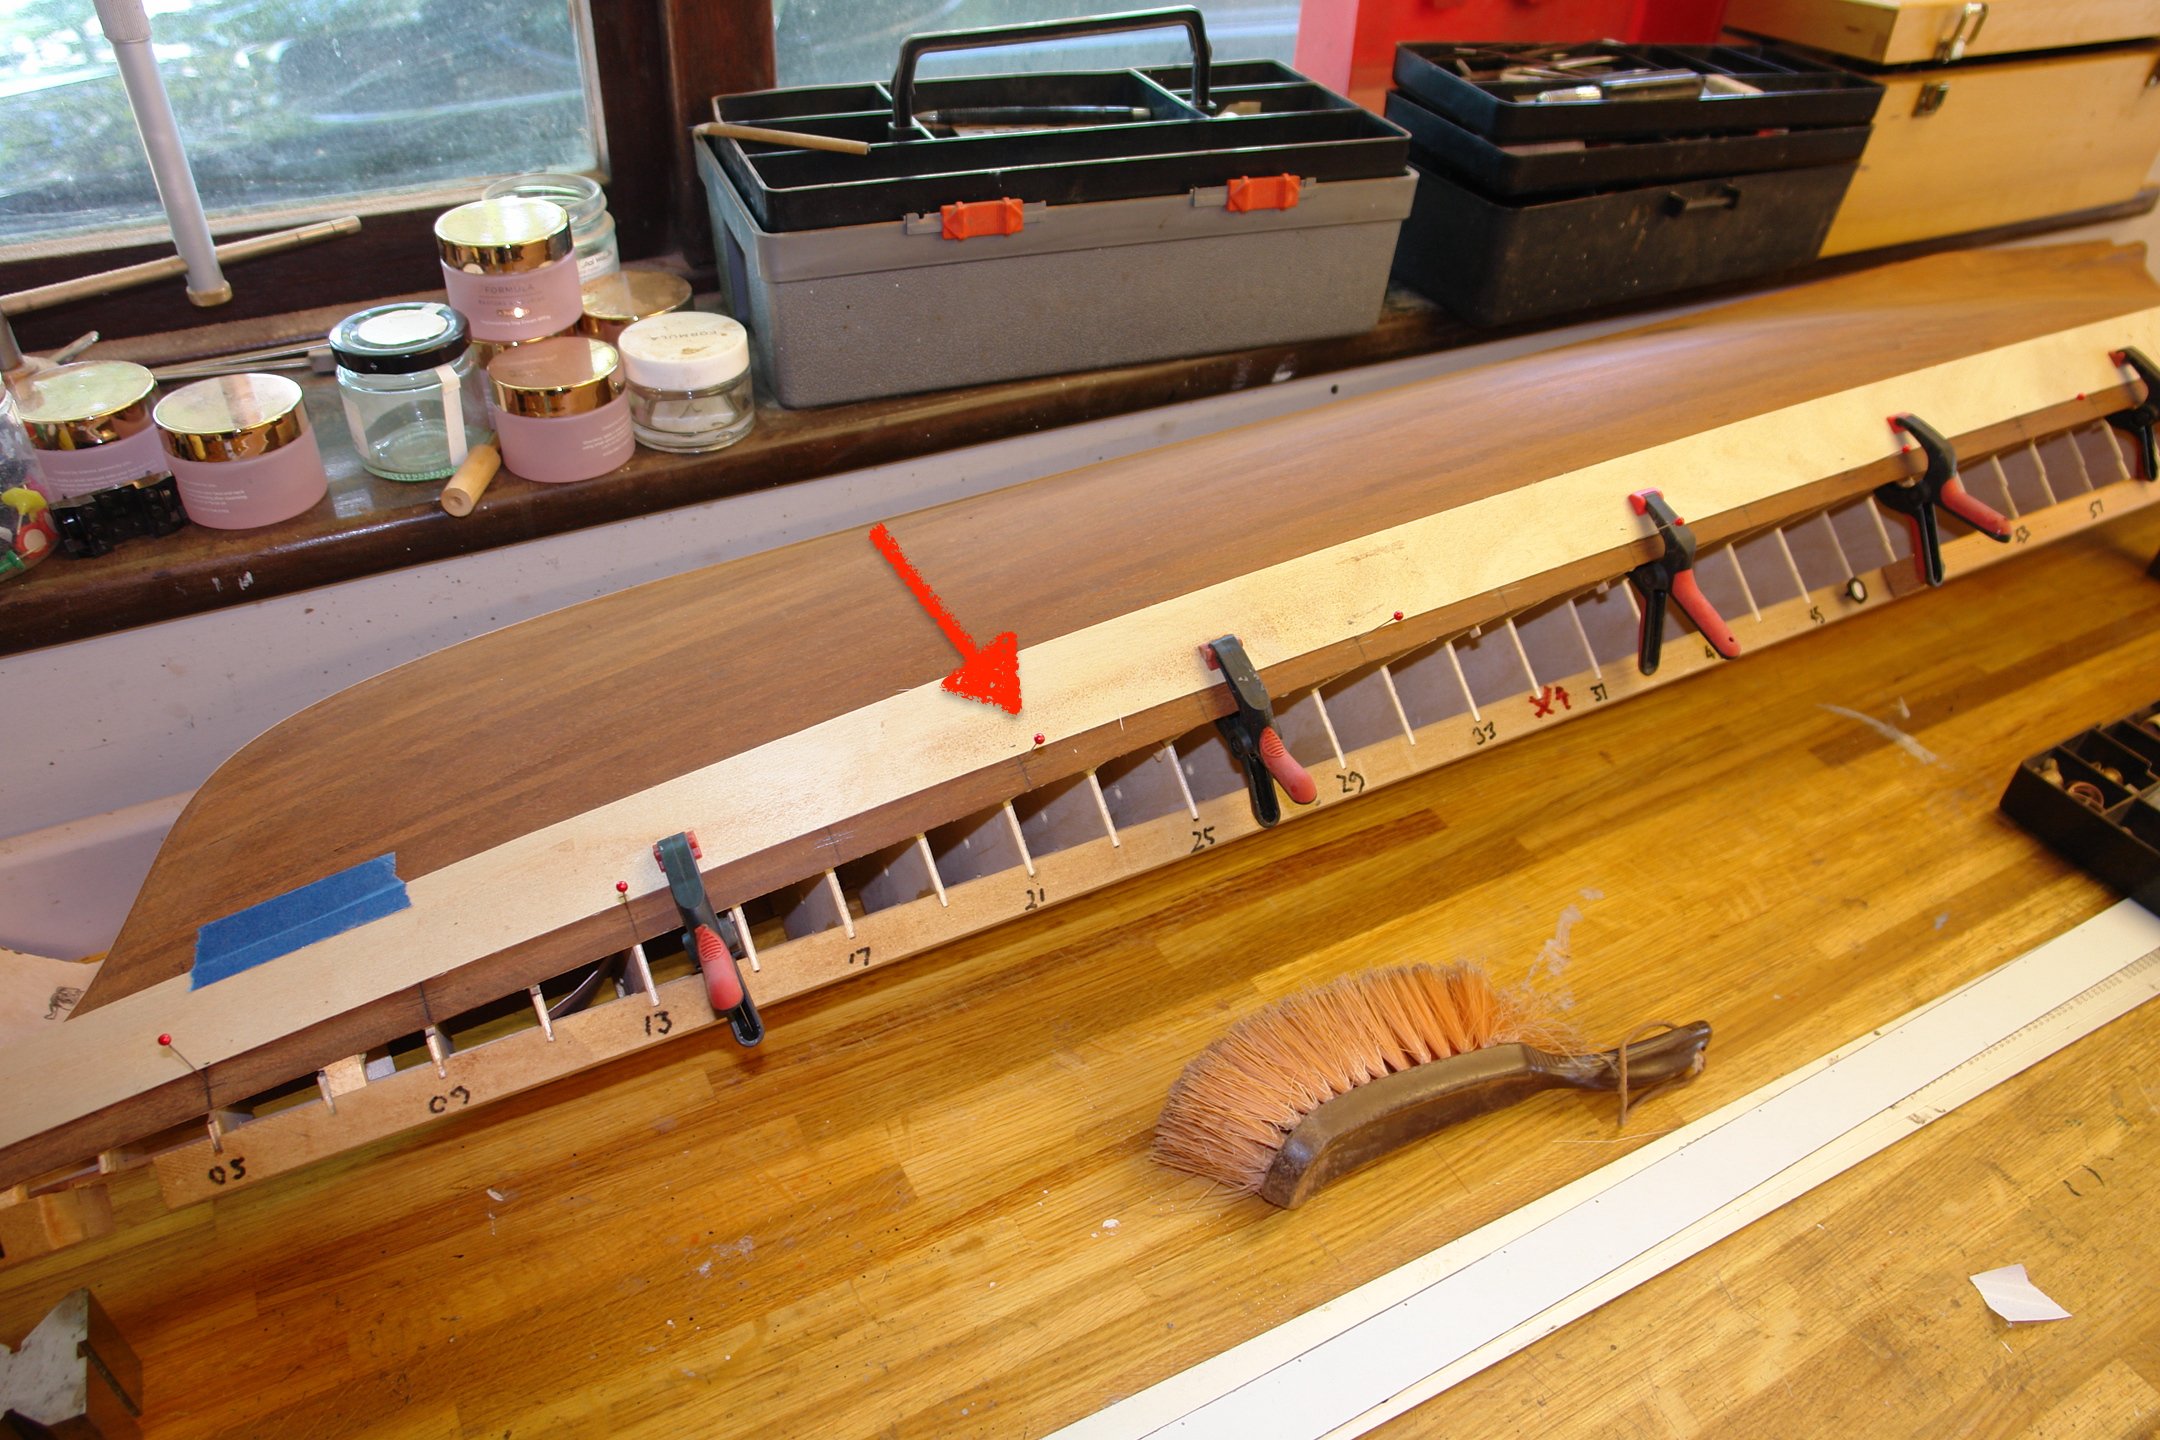
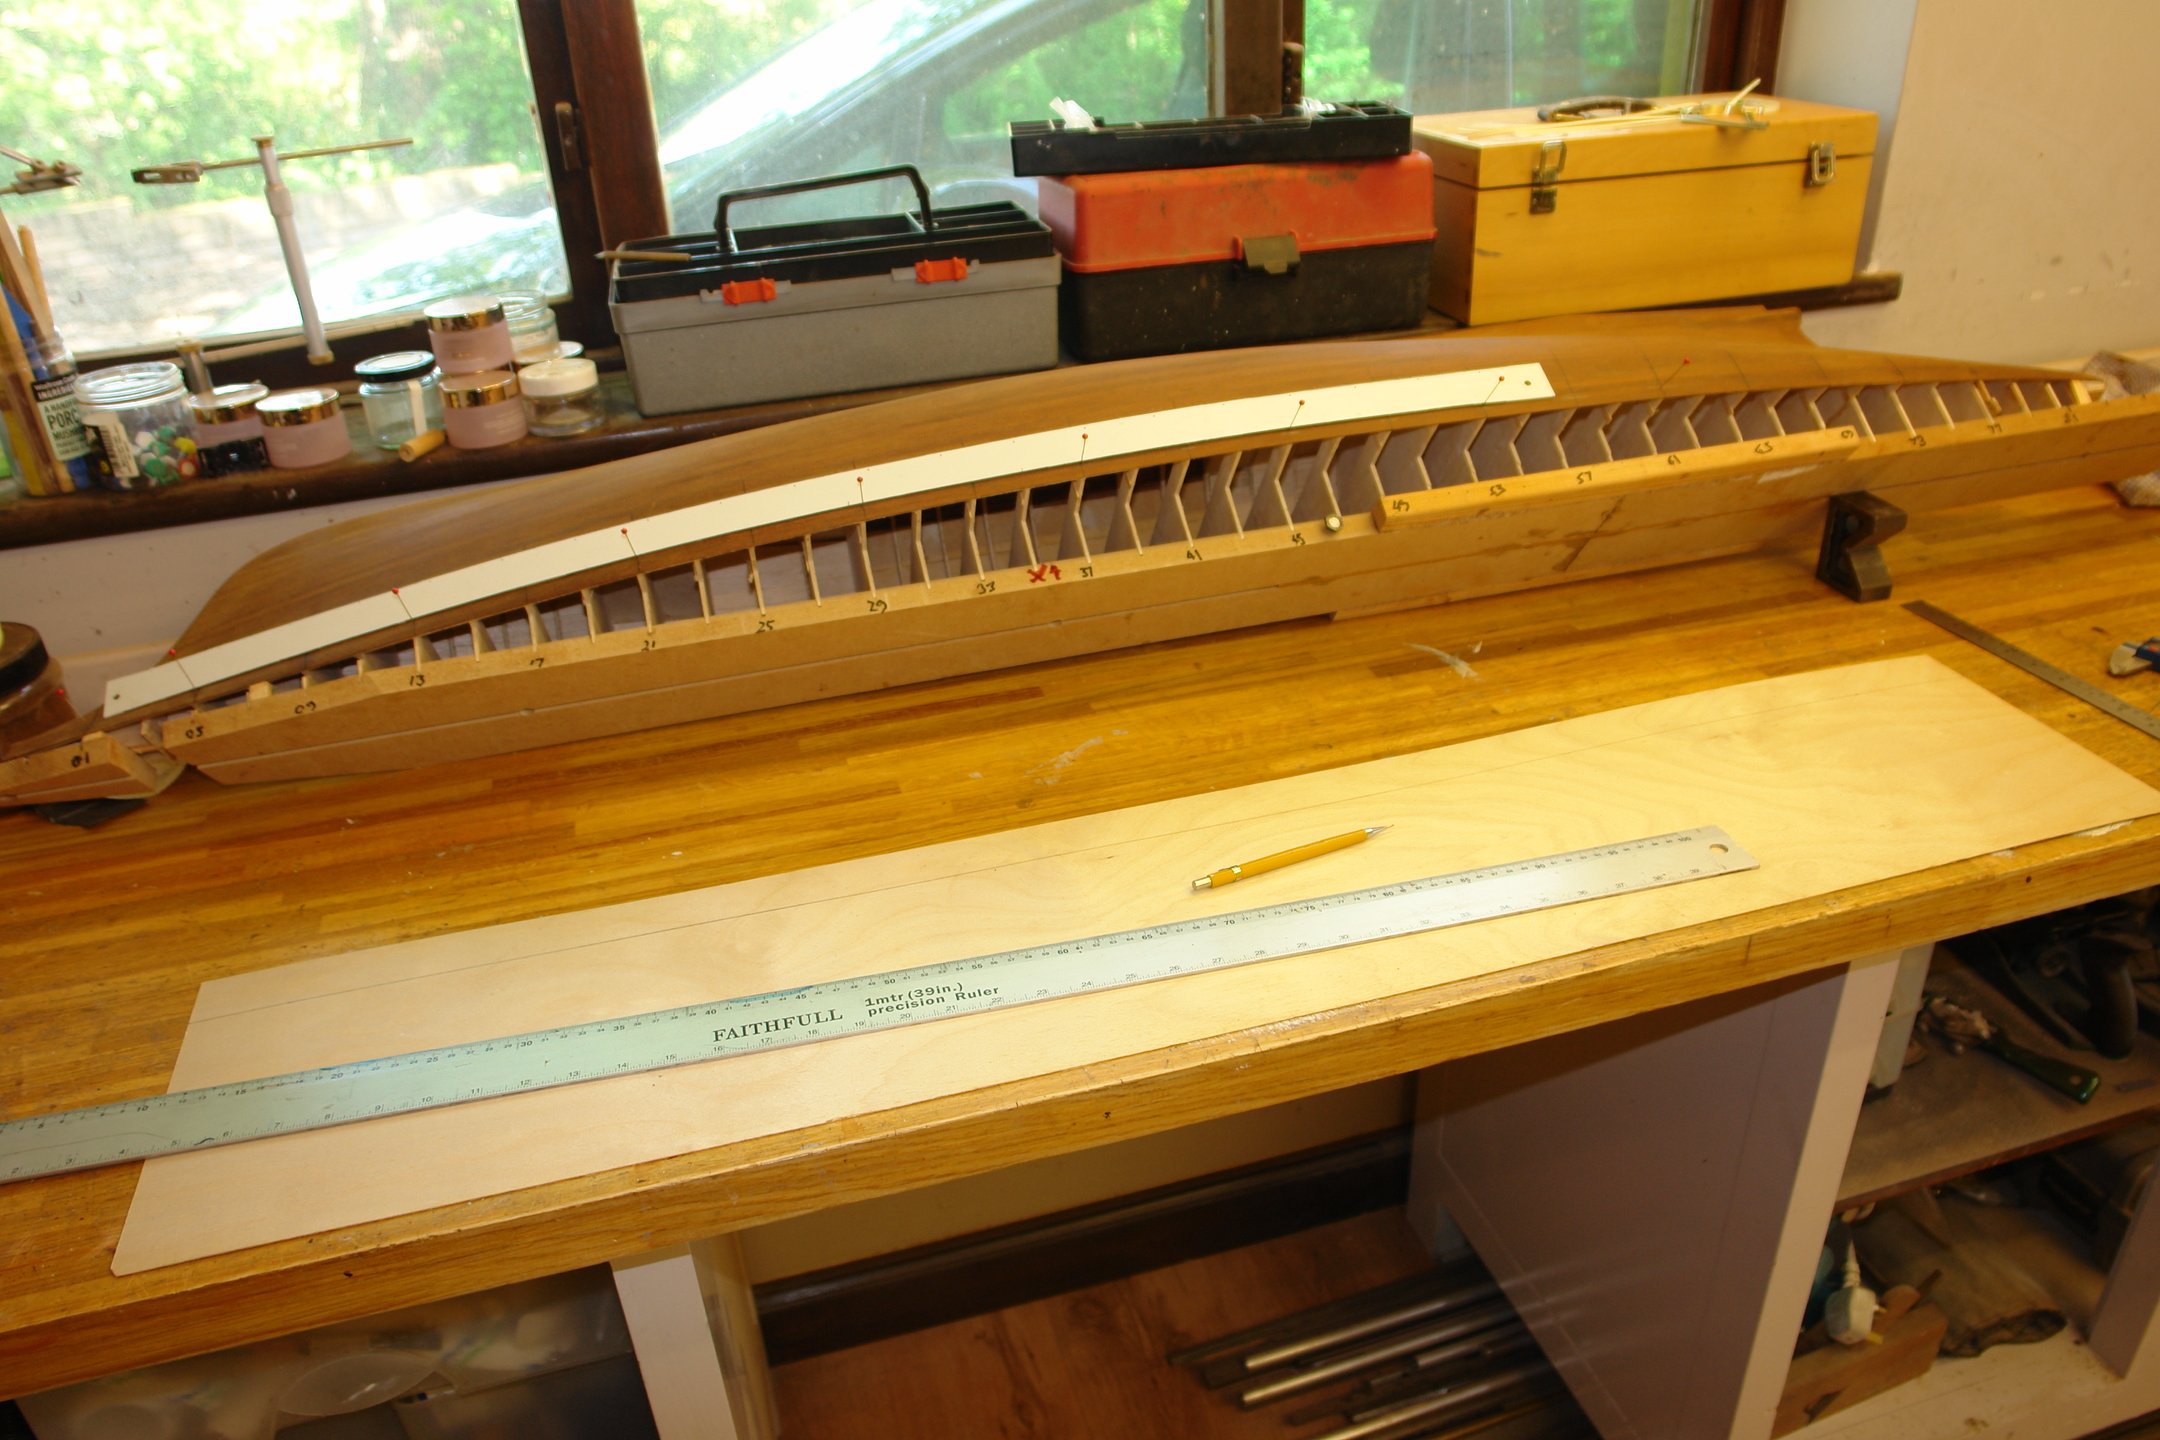
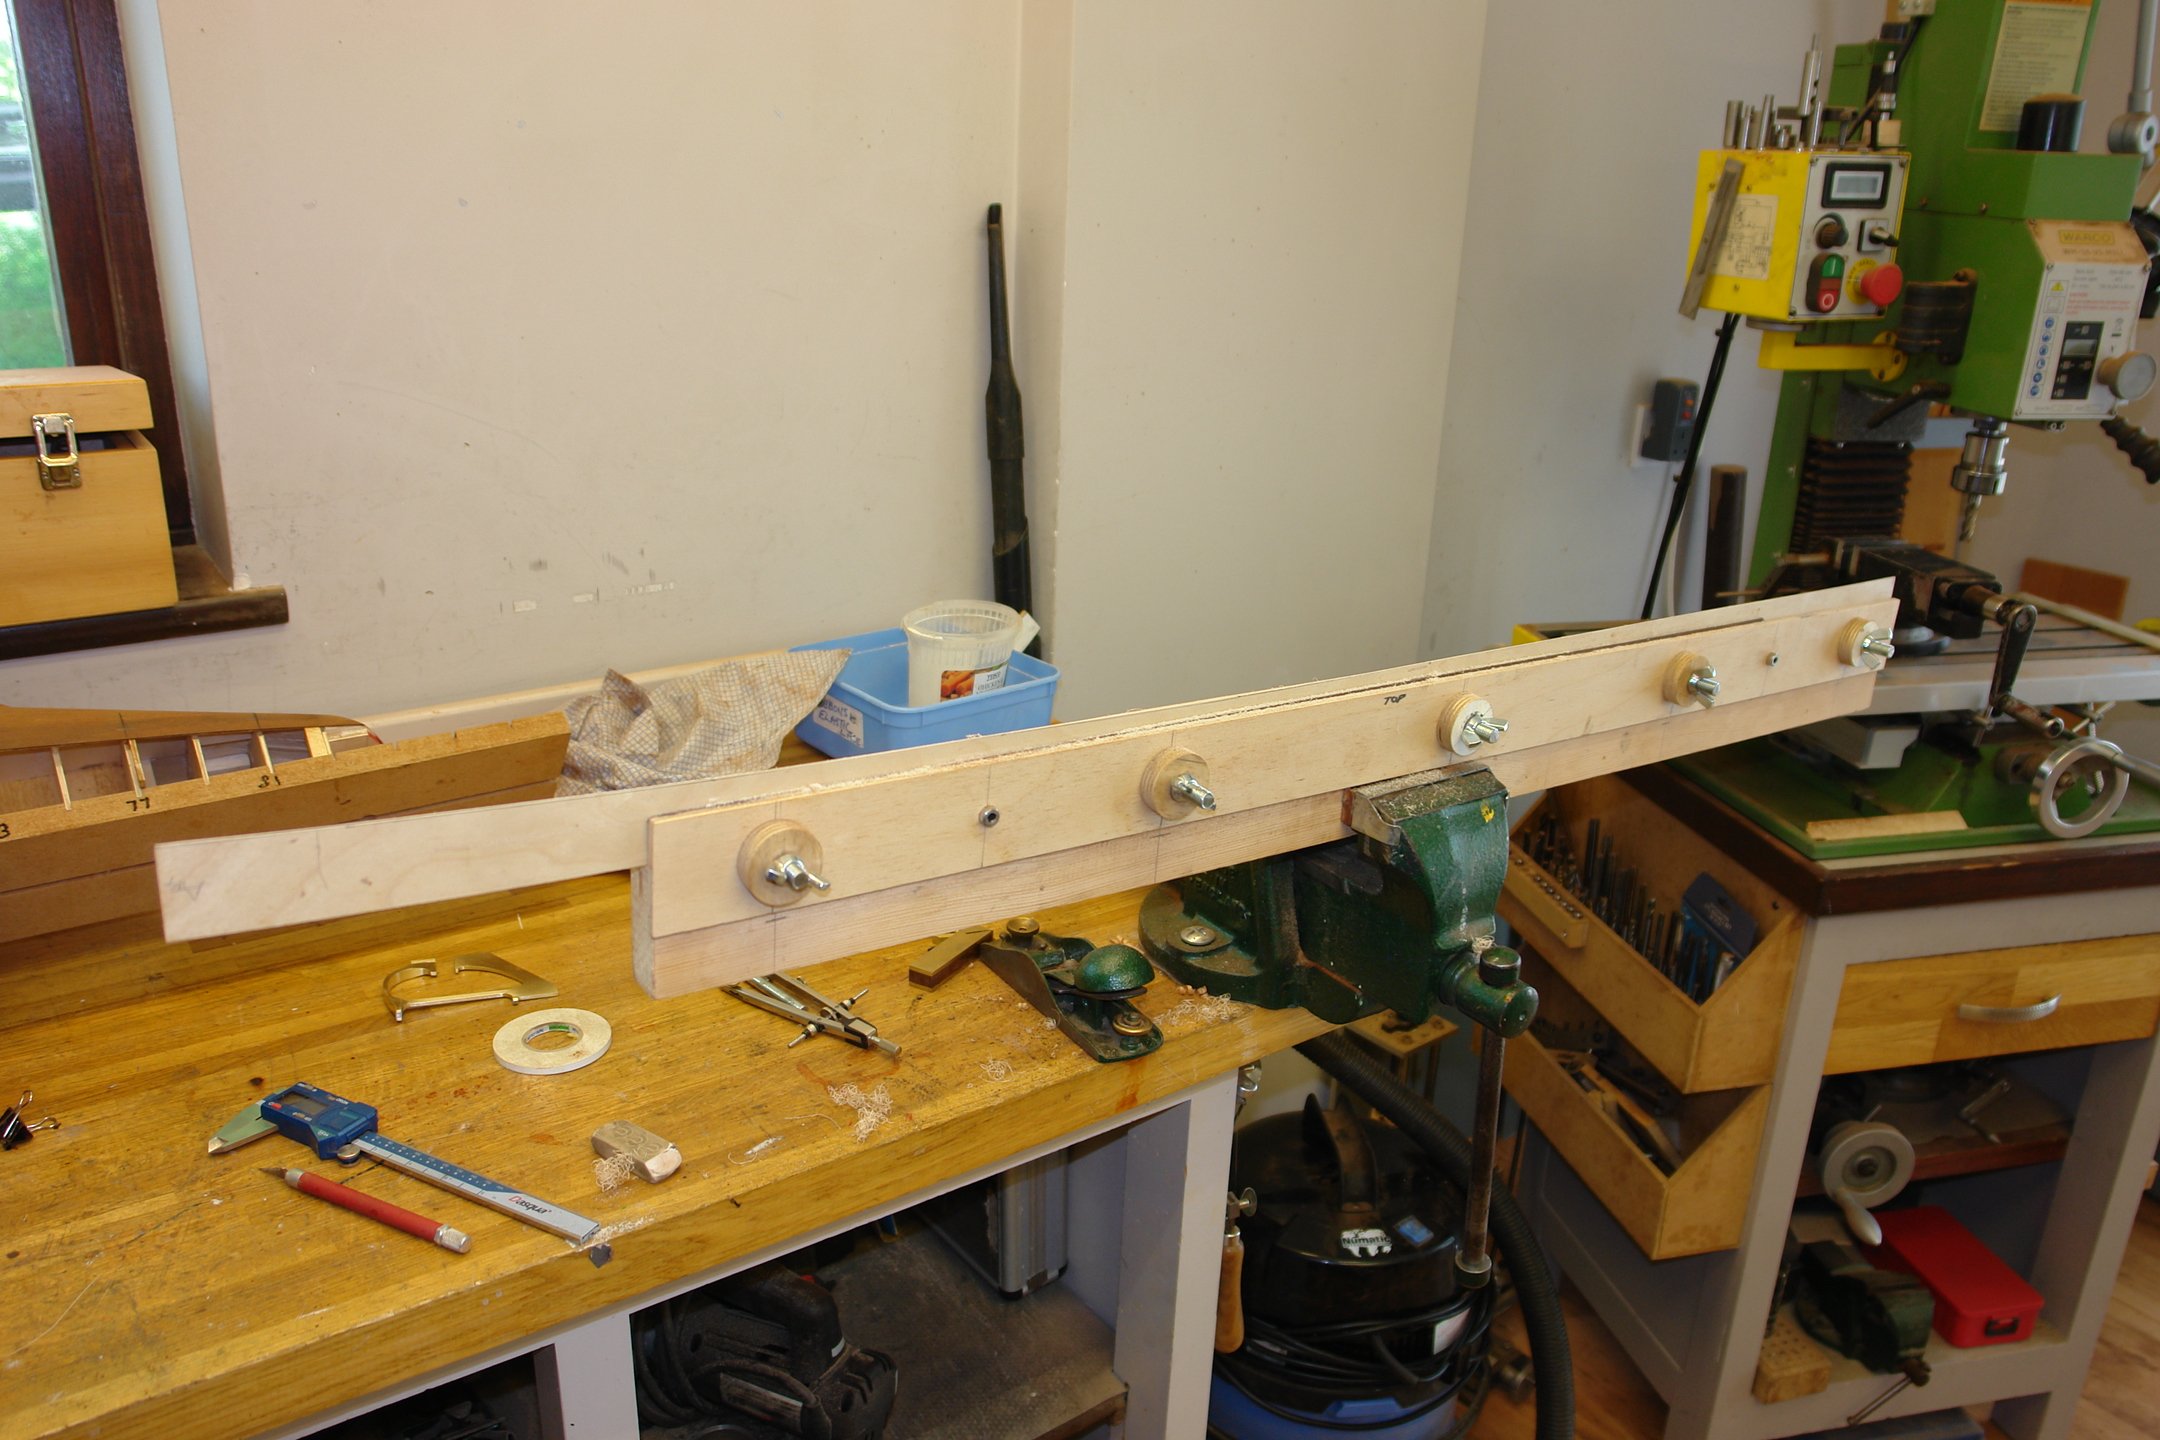
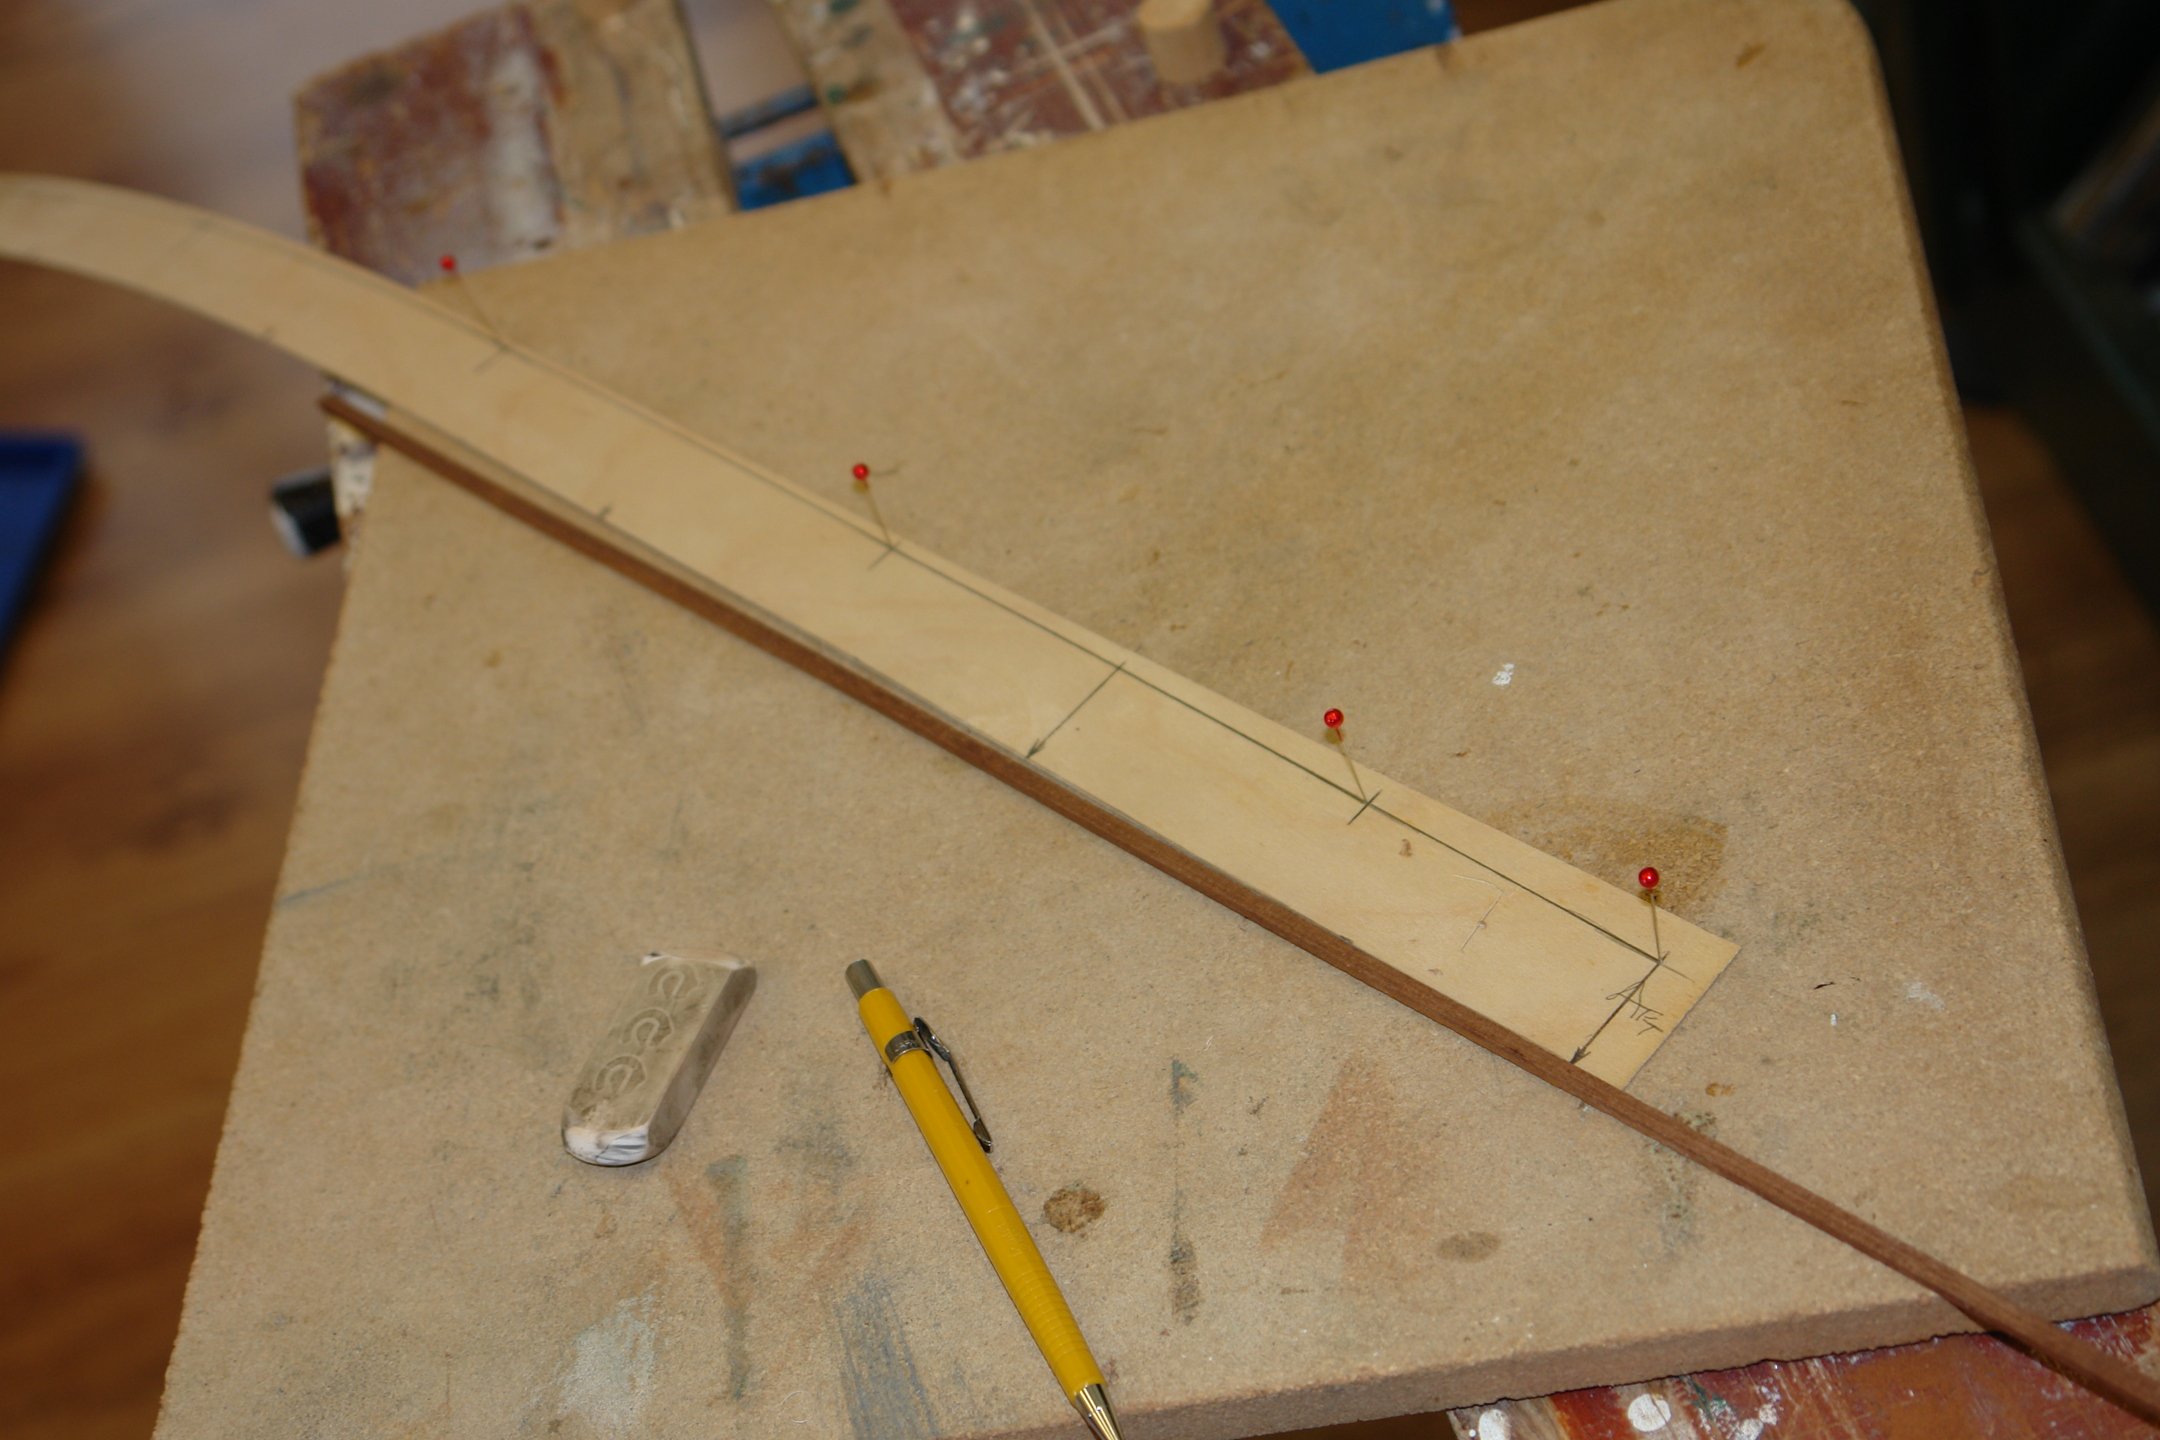
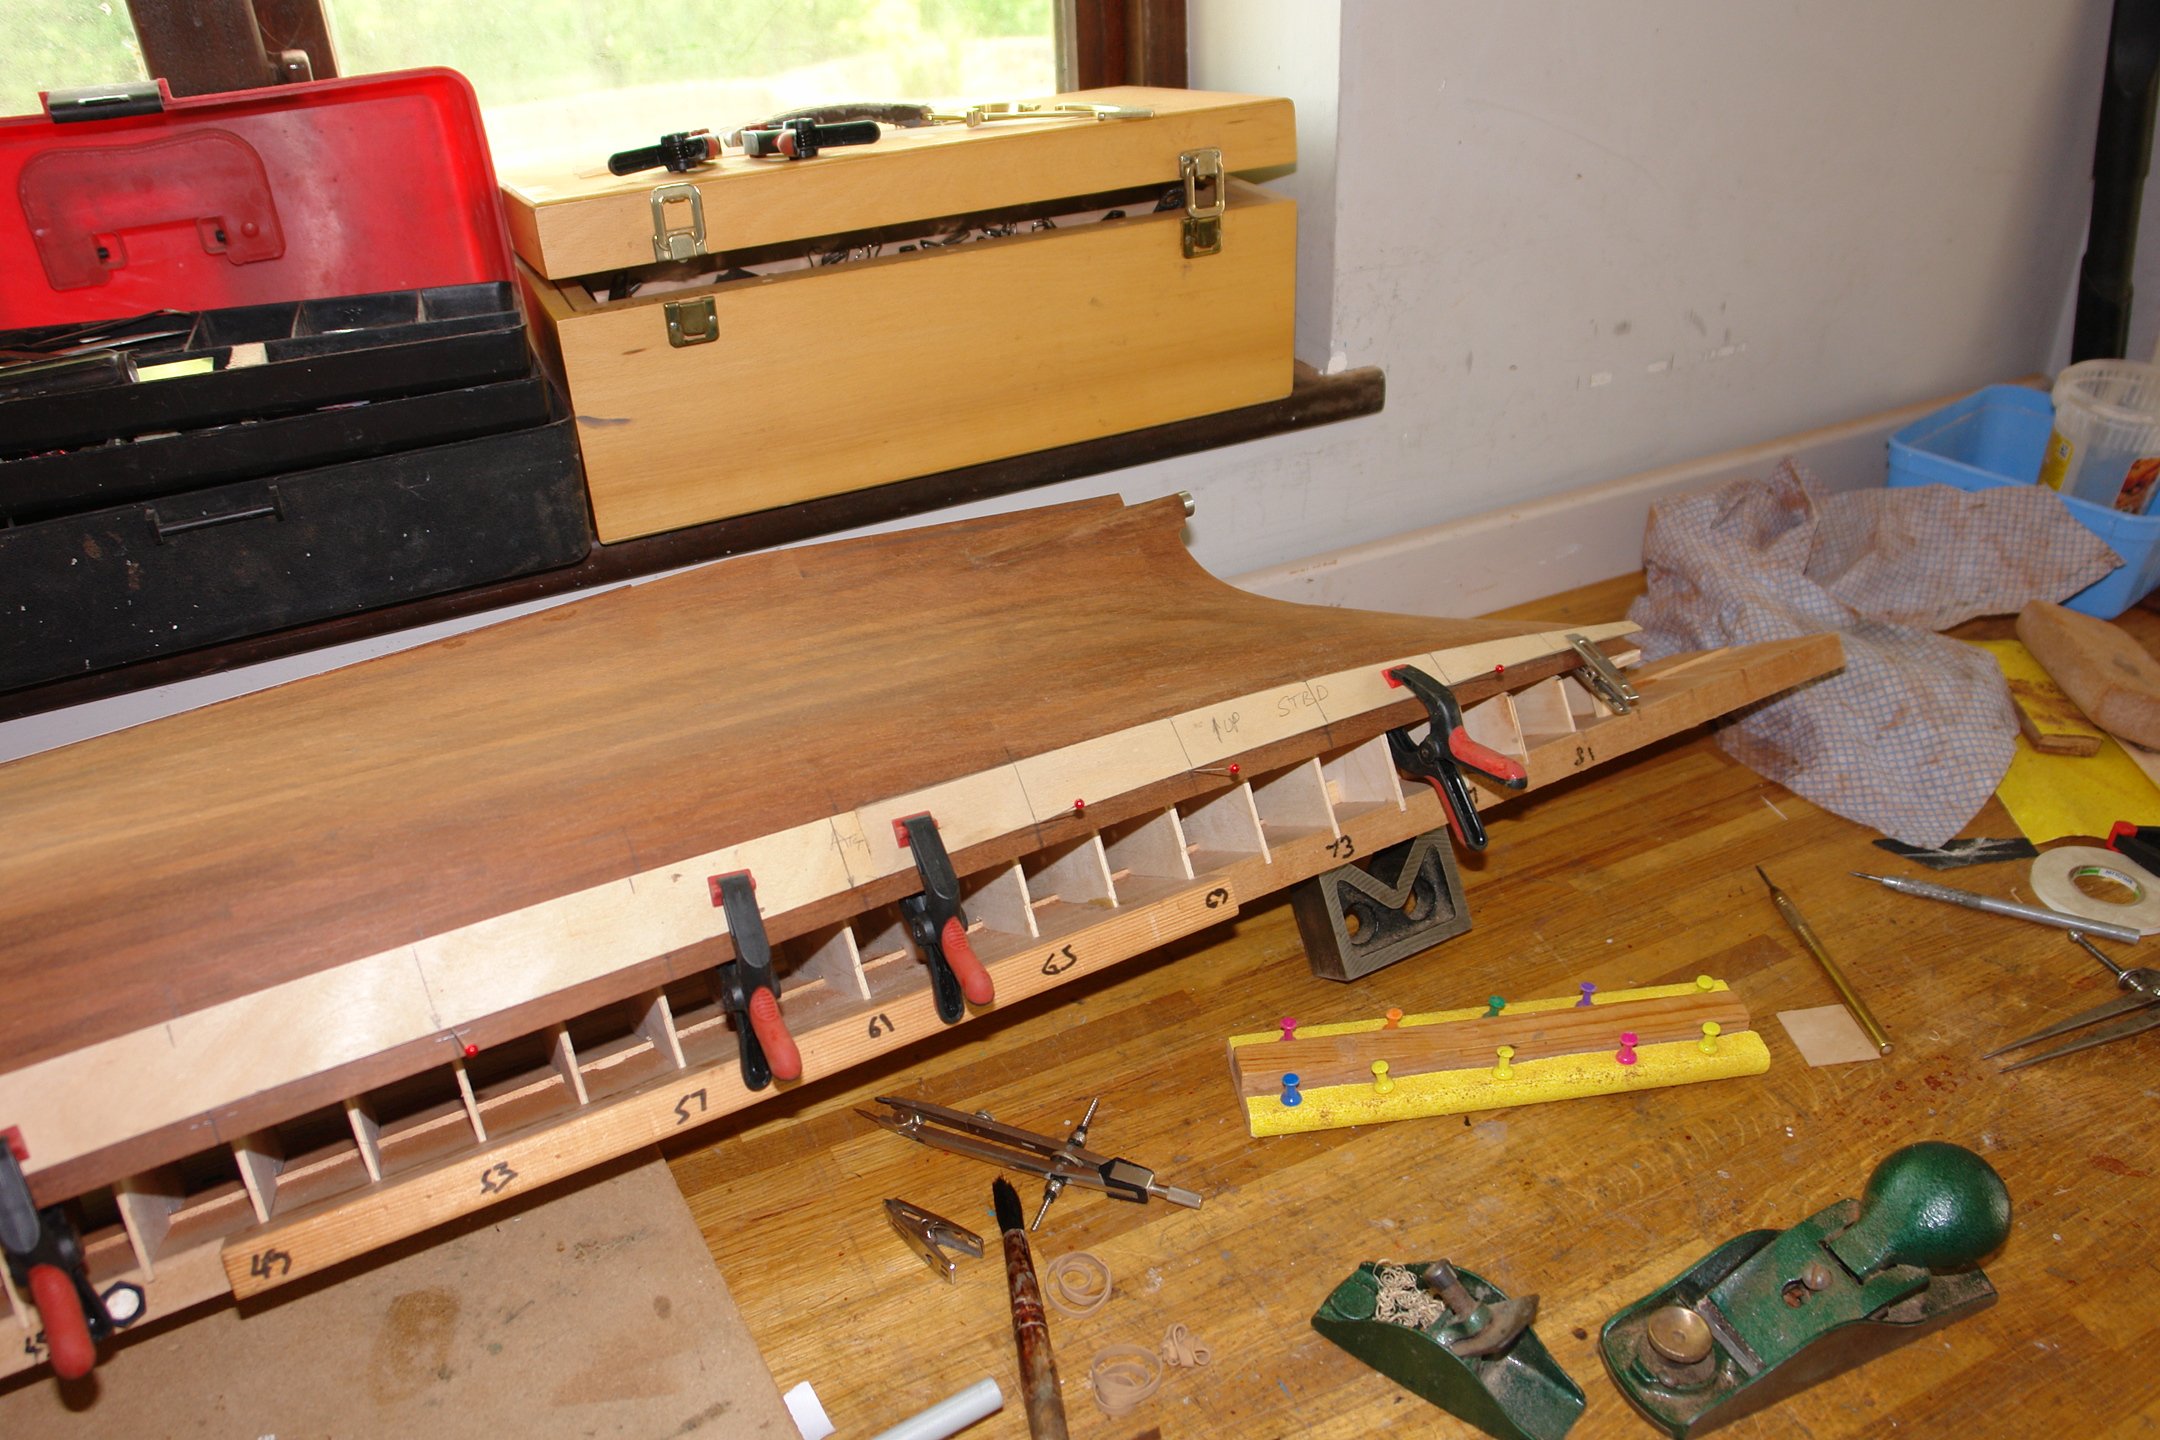
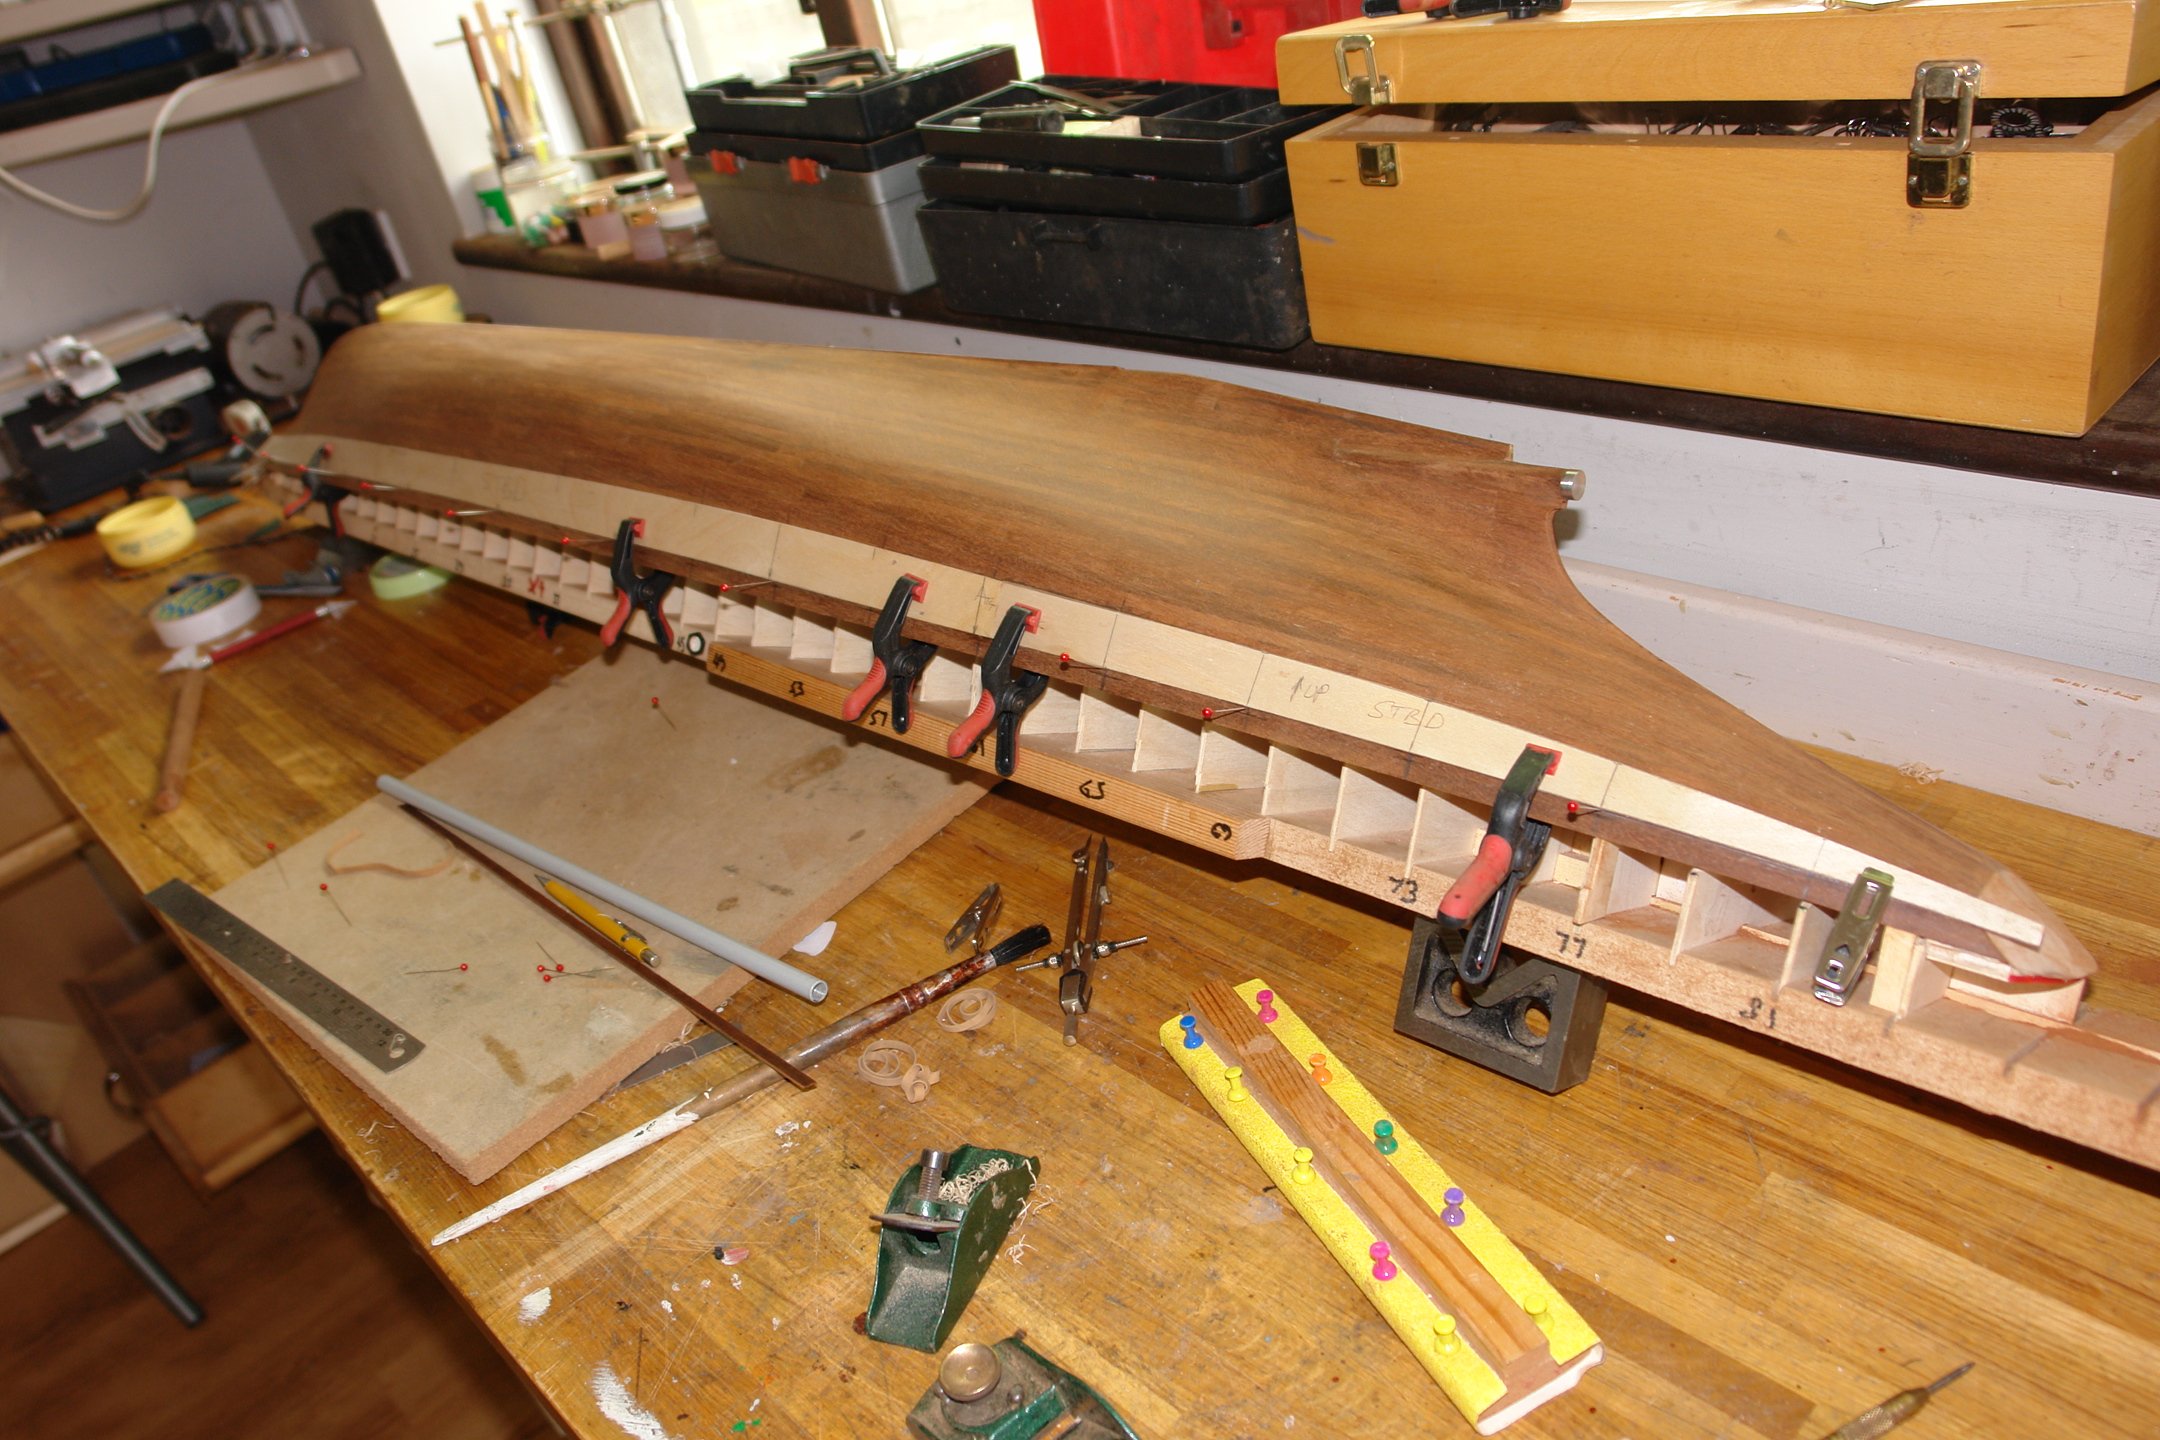
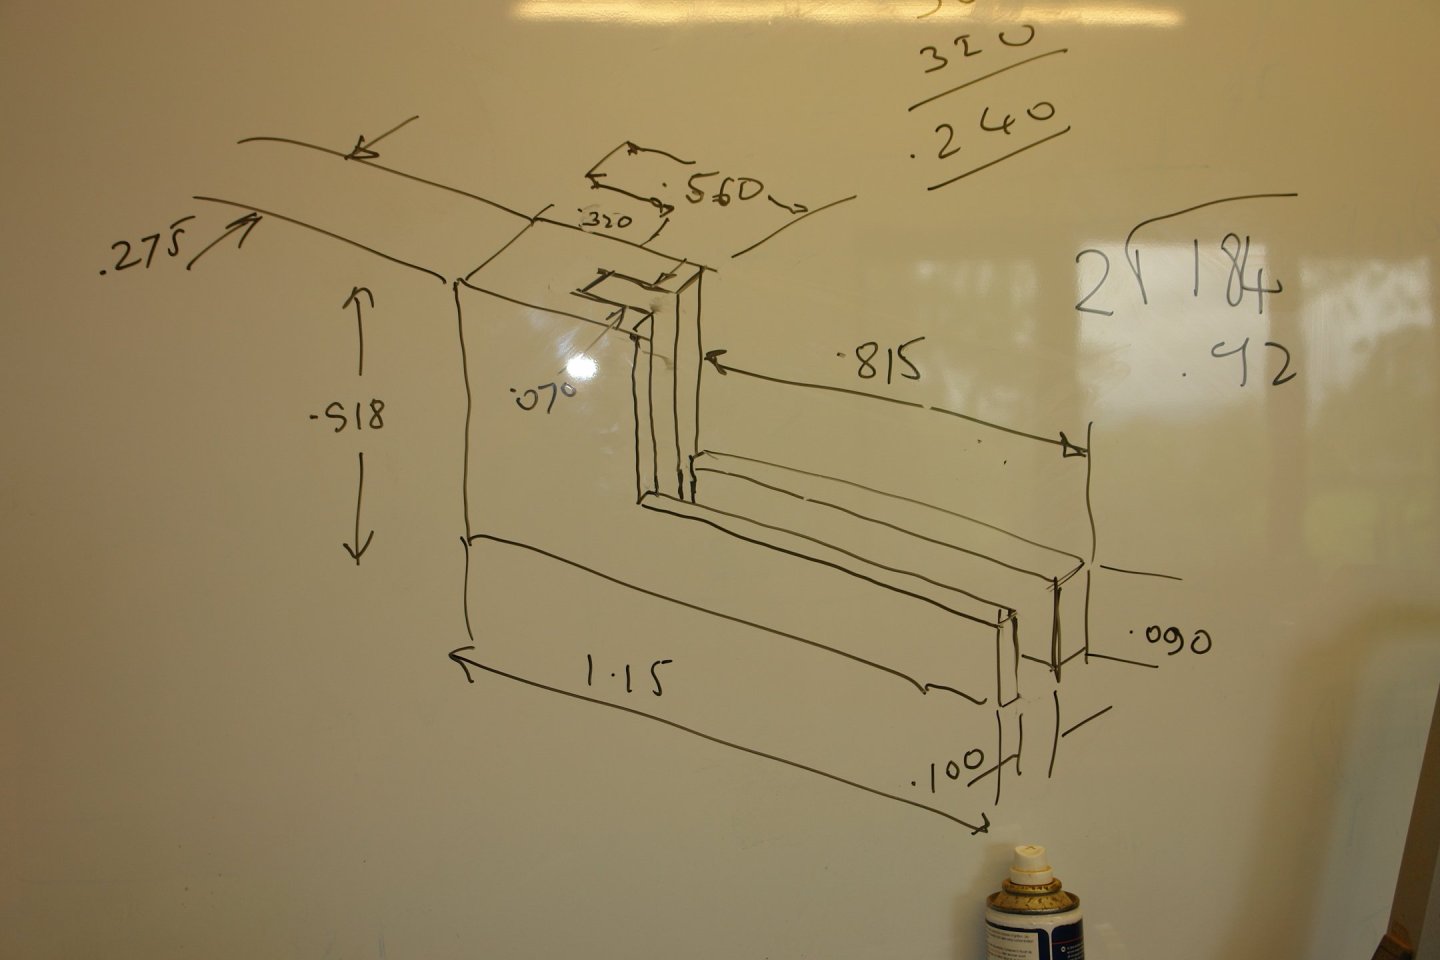
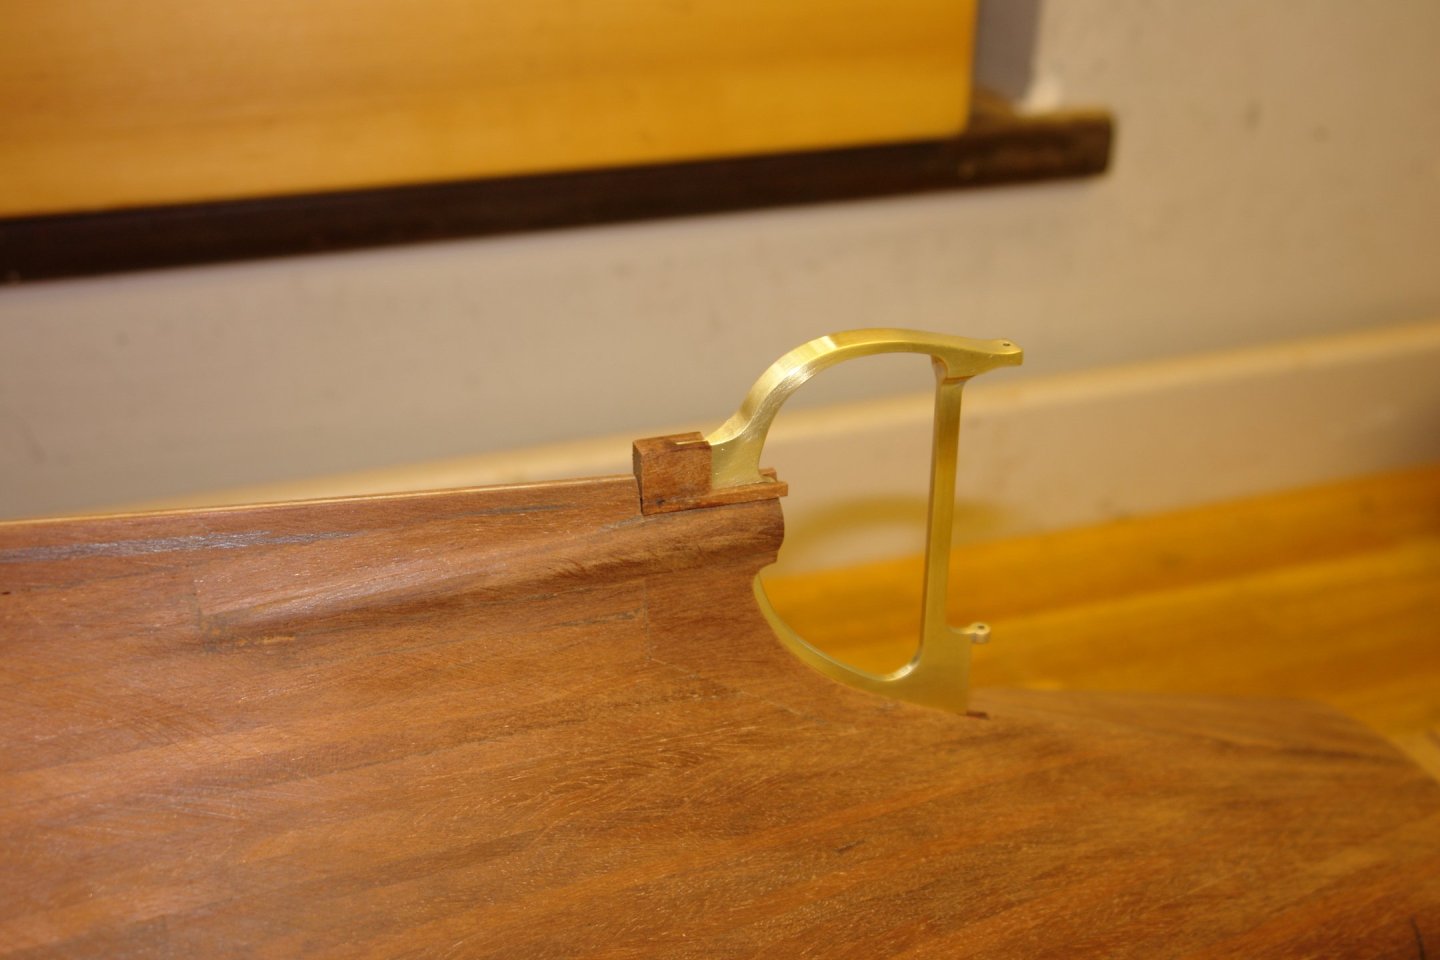
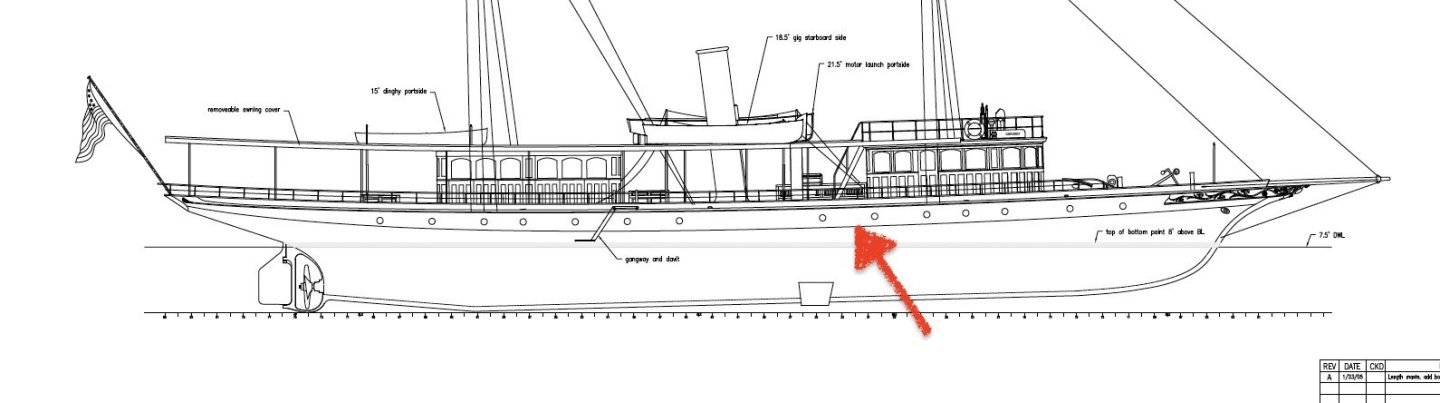
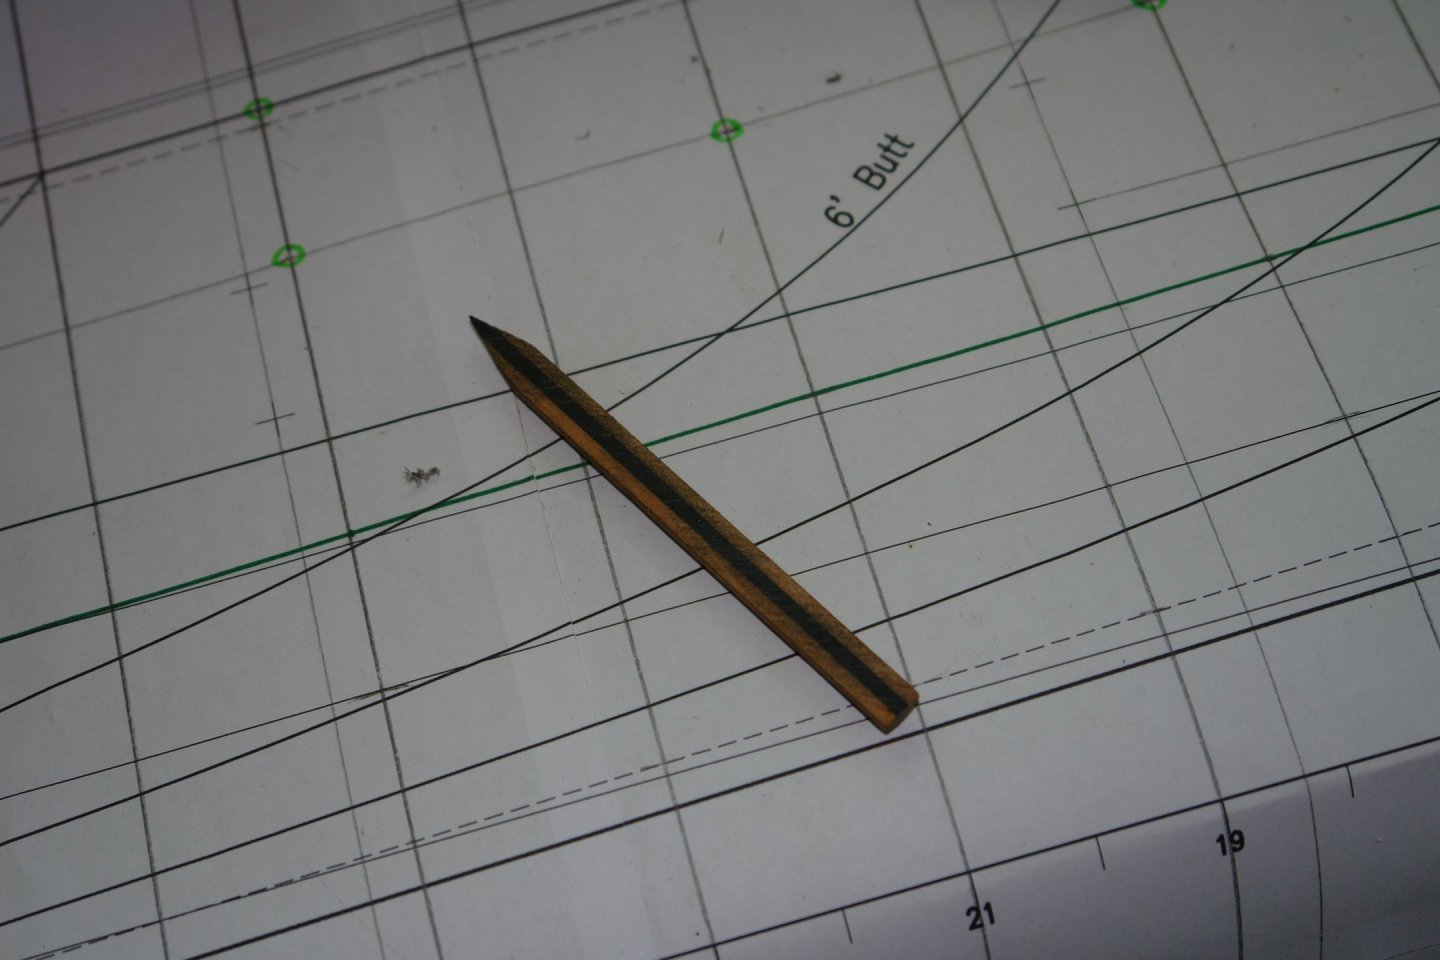
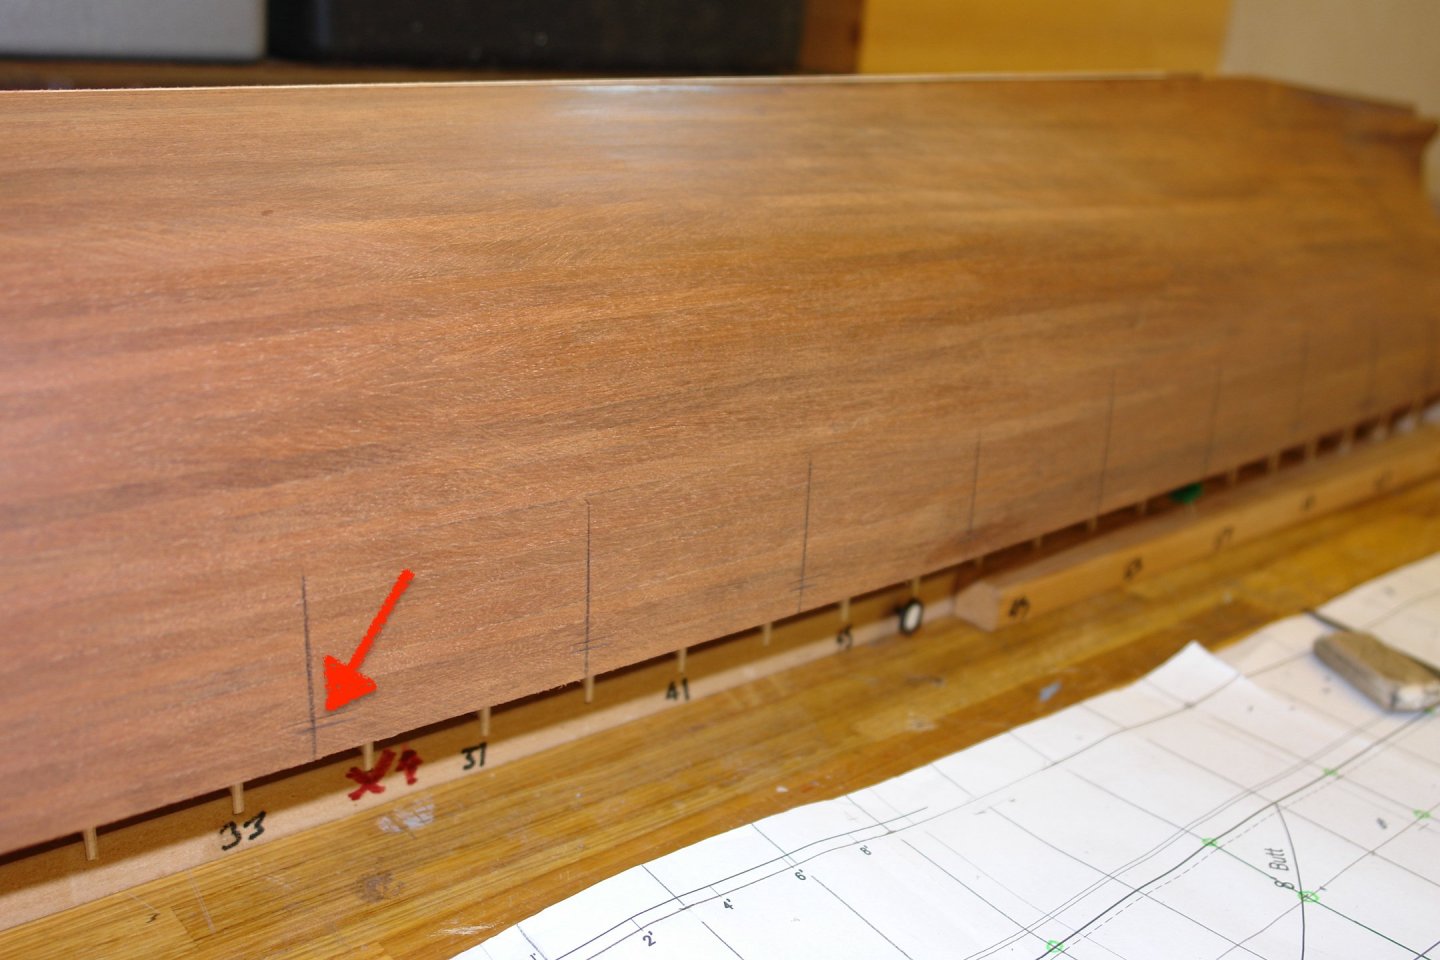
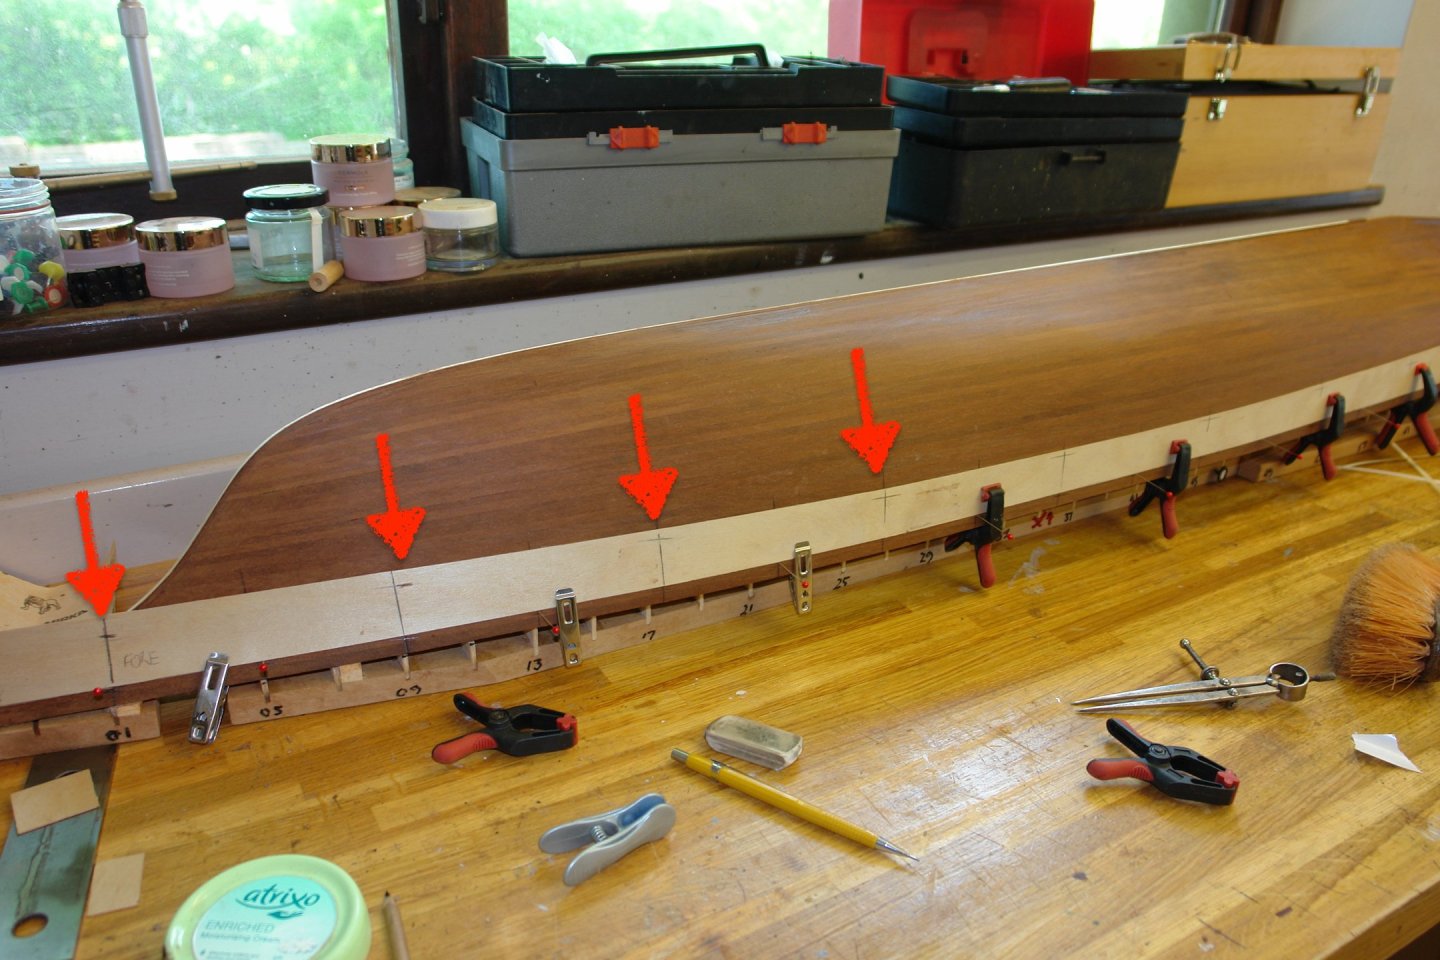
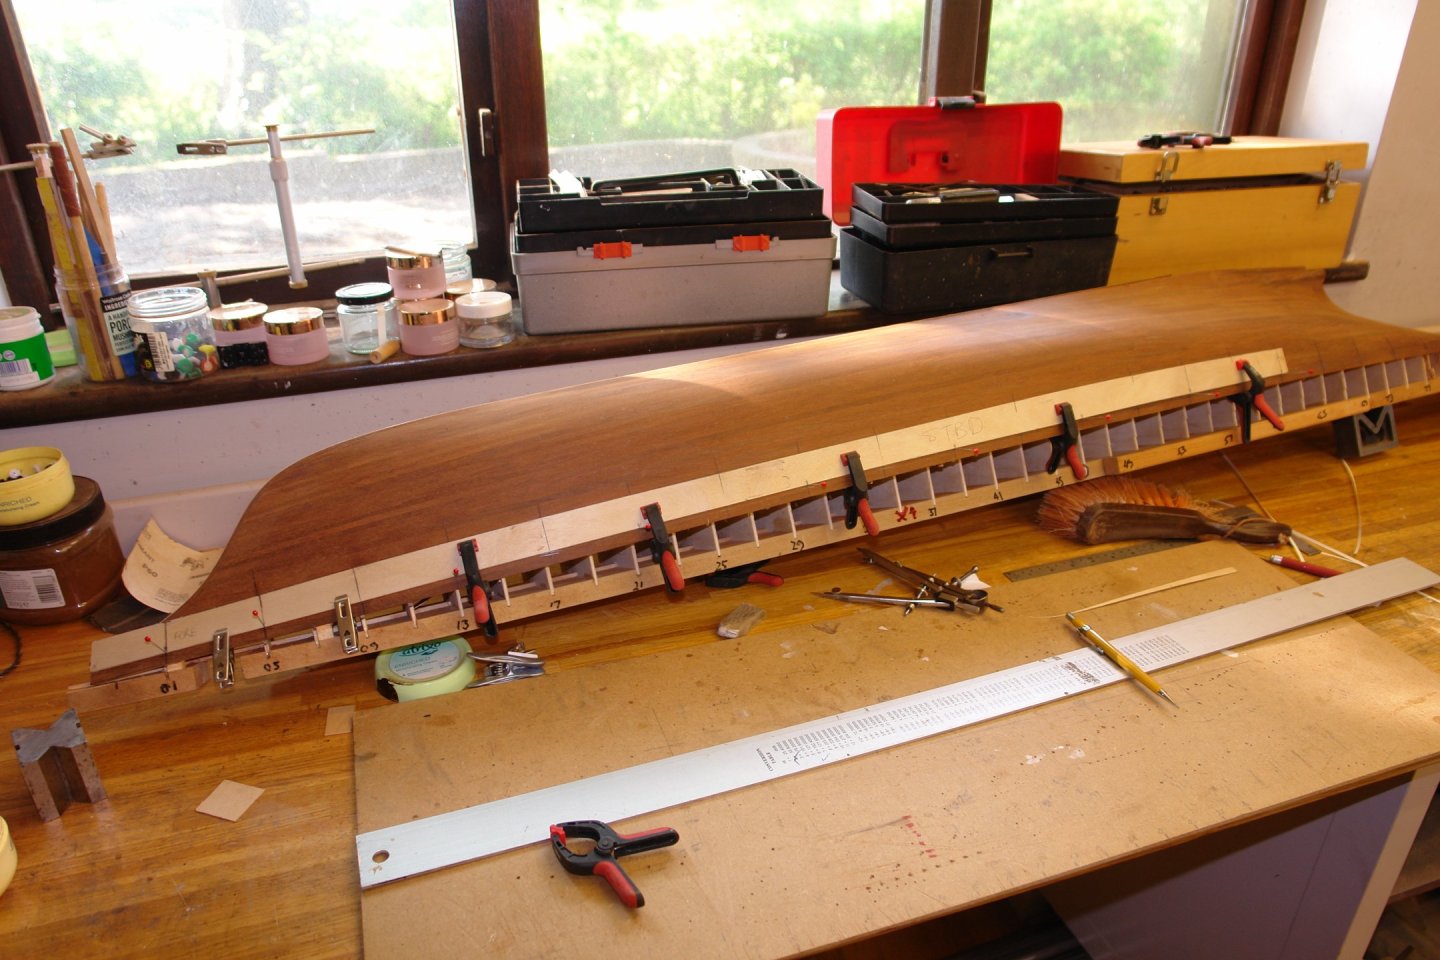
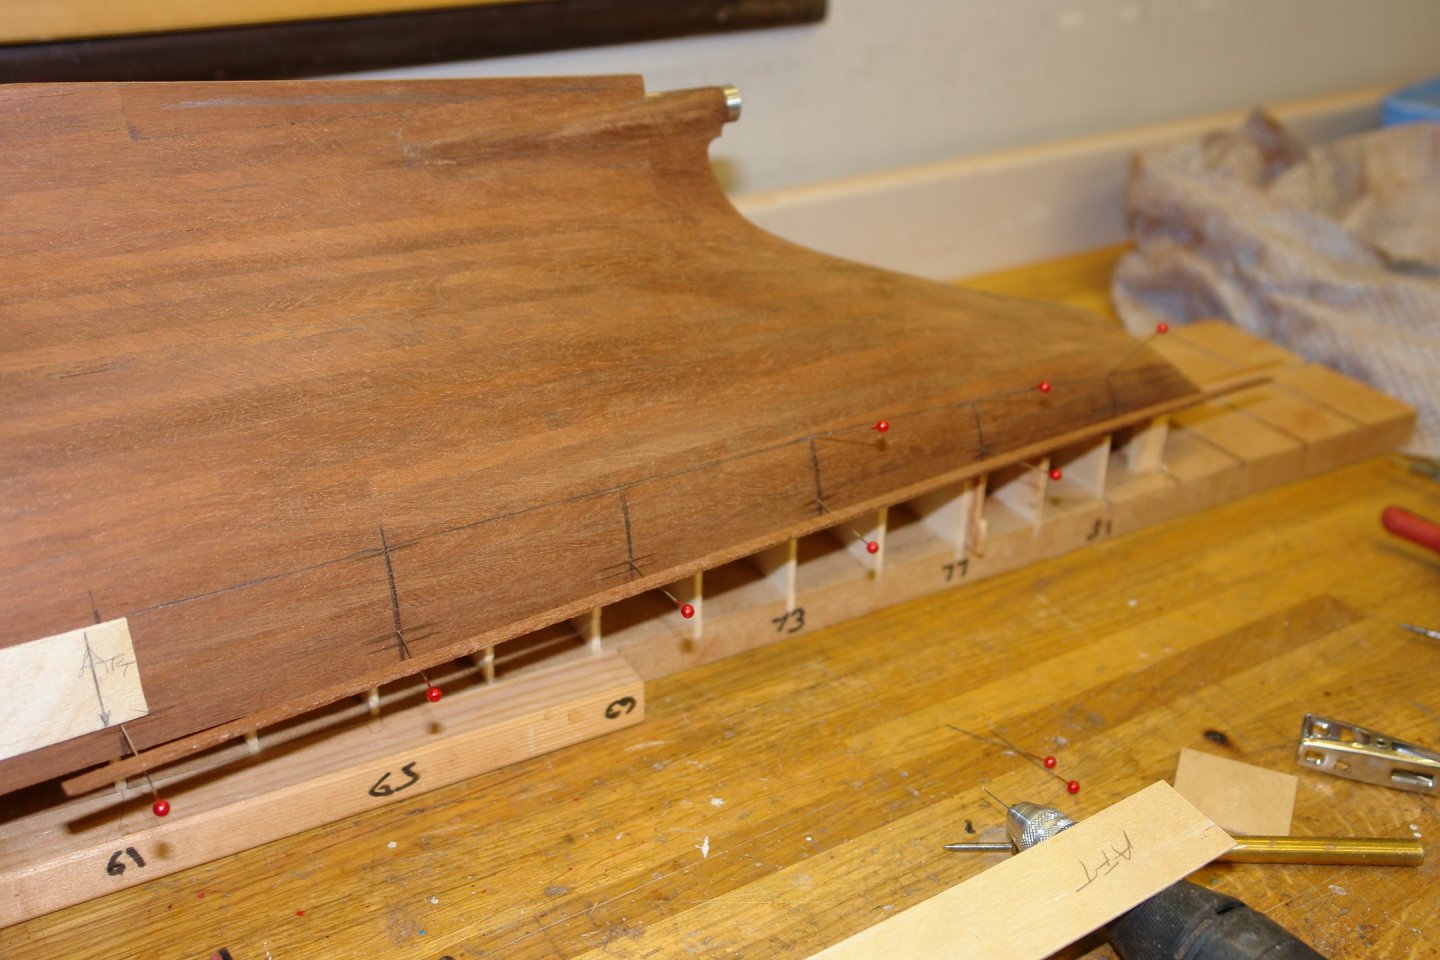
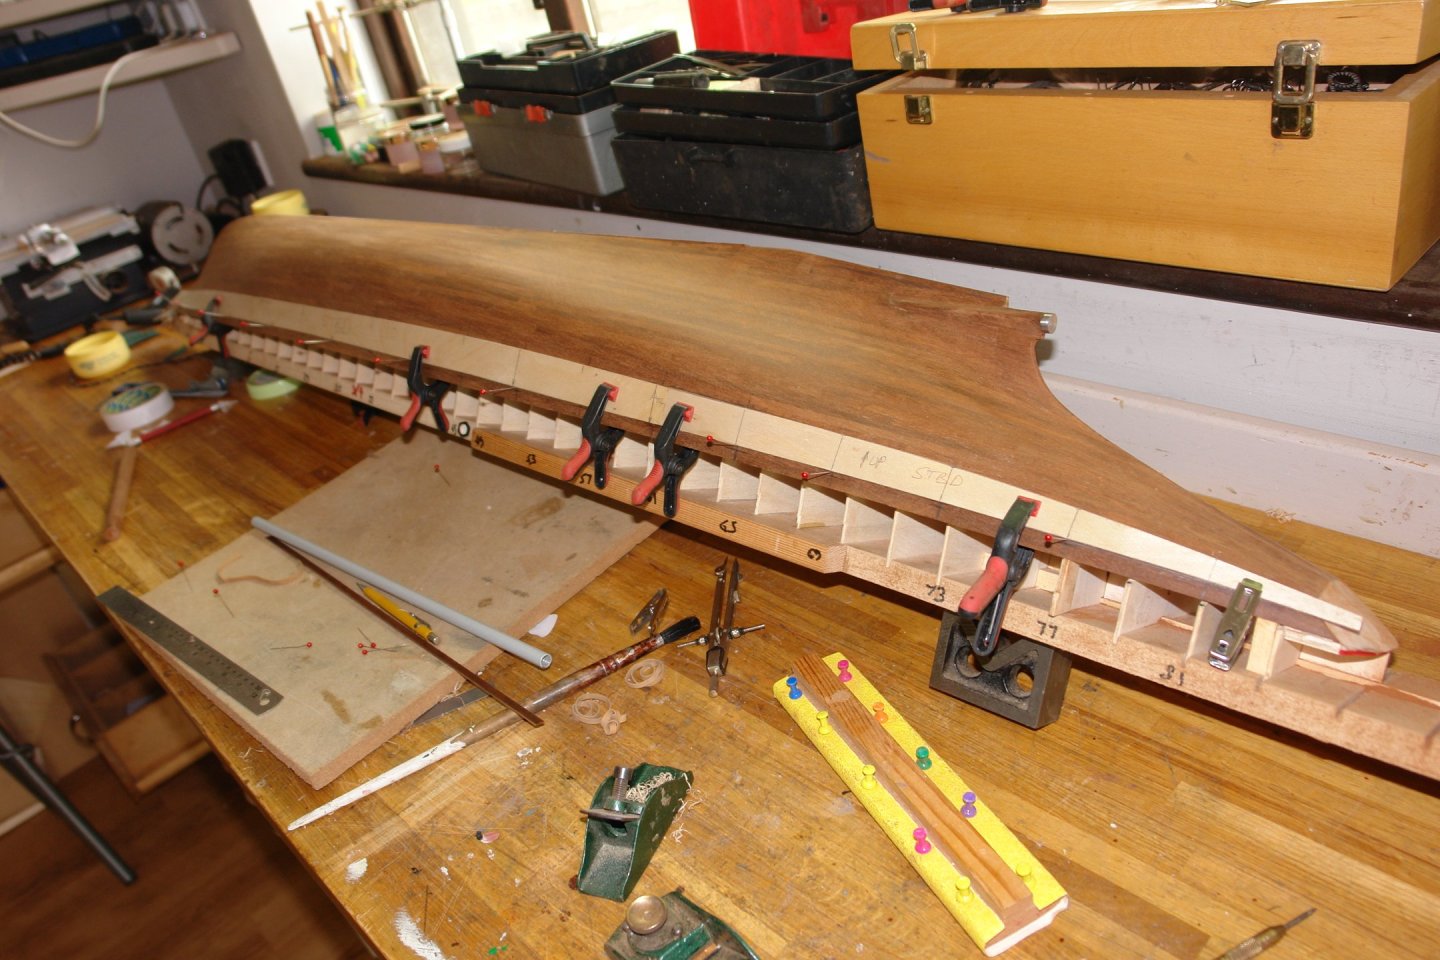
Thank you Gary - and thanks to all my other viewers, your visits to my log are much appreciated. Well that's another week gone by. We have had the builders in this week so I needed to watch what they were up to. We all get spoilt by MSW contributors attention to detail. I don't think any of us would be able to achieve general builders standards! As usual Cangarda progress hasn't been stellar. Firstly I drew the plan for that little bit at the end of the keel that I damaged. I then made it. I didn't shape it or glue it on though. I am saving that for a bit later when damage is less likely. Once bitten twice shy! The next step in the build was sorting out the stress compensation plate that runs the full length of the hull. I am going to create this by overlaying the hull with 1/32" birch ply. (Hence my previous comment about needing to paint the hull above the waterline). Getting the compensation plate correctly shaped and positioned could have been tricky had it not been featured in one of the drawings supplied by Rutherford's Boat Shop. I transferred the position of the compensation plate on to the lines drawing (red arrows) . Also note my special pencil. I needed the pencil to draw straight lines on the hull as the hull curved away from the straight edge. Hence I cut the side off to eliminate the effect of the cone produced by the pencil sharpener. The frame lines were then transferred to the hull at the positions corresponding to the green dots in the previous photo. The vertical height of the top edge (or is that the bottom) of the compensation pate was then marked on (just noticeable on the next photo). These points were then drilled with a .025" drill and sewing pins were inserted to define the line against which the plywood compensation plate needed to butt. An over width birch strip was then cut and offered up to the pins. Despite what the photo looks like the strip didn't butt up to all pins. The amount needing removal was then marked on the strip a this was planed away slowly while frequently checking the fit. The shaping is fairly obvious in the next photo. Once the correct shape was achieved it was clamped against the hull in preparation for transferring the lower edge positions on to the strip. The next photo shows the positions being marked. You will see the plate doesn't run the full length of the hull because I only had a 4 foot sheet of 1/32 birch ply. Because of the more pronounced vertical curvature of the hull at the stern the compensation plate plank wouldn't fit flush to the hull. I therefore needed a different approach to marking the shape of the plank. Hence both top and bottom edges were marked directly on the hull. The bottom (or is it top) edge of the front plate was then marked. I like to draw the curve by putting pins through at the marked out points and then pressing a flexible stick up against the pins to define the curve. I find the cork mat very useful. Many years ago it was a feature off the bathroom floor. The following shot shows the shaped plank held in position by clamps. The stern compensation plate was manufactured in the same way as the bow one and offered up to the hull. I took some time taking off fine slivers to get the upper and lower edges flowing together nicely at the join. The port side plates were then made using the starboard side as patterns. The vertical curvature of plate at the stern is going to be a challenge, it just don't wanna flex that much!!!!!!!! That's all friends.


-
That is correct Roel. I was thinking about those very long beams and steam plant sticking up above the deck in combination with that very narrow beam. It obviously works but the plans posted on Keith B's answer don't provide a lot of comfort. Not a vessel to take out in a blow!🙂 She will be ok - she has Ole Bob for company.
-
Very nicely done. Presumably they were very well ballasted to avoid upside down floating?
-
Ras - yes I had previously viewed that video. The main difference is that Mr Kenny's method has many more operational steps and hence more opportunities of errors to creep in. By attaching the side strips to a backing block at the correct angle and then setting the saw to half the depth of the side pieces both sides and be cut (identically) in one pass of the table saw. The only thing that then needs to be set for each cut is the moving the fence by the distance between the steps. Nice clean bends on the pipework. Well done.
- 128 replies
-
- 2
-
-
- zulu
- sternwheeler
- (and 1 more)
-
Keith - the plan is white stripe at the waterline. Green above waterline. Clear varnish below the waterline. I think that is the best compromise. The green above the waterline can't really be avoided for reasons that will become obvious over the next couple of weeks. Rick / Craig - thank you for your comments.
-
Paul. I am finding her surprisingly aesthetic given her quite angular lines. This probably owes a lot to the build quality you are achieving. All in all a very engaging build.
- 201 replies
-
- 5
-
-
-
- Oyster Sharpie
- first scratch build
- (and 1 more)
-
Well you seem to be speeding through this build Keith. Do remember however that I am expecting you to take decades to finish it. No dashing for the finishing post for you old boy!🙂
-
Well young Eric that turned out rather well. I think the deck cargo really adds to the realism and the weathering just lifts the whole boat to another level. I particularly liked the coal impregnated deck boards. I had assumed that the normal practice for river boats of this era would have been to fuel them with wood, but that clearly shows my lack of knowledge. I probably watched too much "Casey Jones" (Cannonball Express) as a child. Probably before your time🙂. Casey always seemed to burn wood. Really looking forward to your next project - assuming you do a build log?????