jbshan
-
Posts
1,222 -
Joined
-
Last visited
Content Type
Profiles
Forums
Gallery
Events
Everything posted by jbshan
-
 Once they could get her into a drydock, I have no doubt the shaft and propeller would be repaired. I wouldn't think that was repairable at sea.
 -
druxey may cancel this, but there are products you can get at an art store made for cleaning oil paintings. Windsor Newton makes one. A q-tip is indicated for this also, however. No matter what you use, it ain't gonna be quick.
-
So these are in lieu of or in addition to flag wagging? Apparently both the French and British had semaphore systems for long-distance transmission over land during the 1793-1815 period. No doubt the arms were bigger than in these photos for longer range, headland to headland or hilltop to hilltop.
-
If you were manning your 12 pdr. on one of those side turrets and the main battery fired on an aft bearing . . . Later: I did a little Googling and while I didn't find anybody who could testify to the results, nobody volunteered to go stand on top of a turret while the guns were fired.
- 342 replies
-
- 5
-

-
- dreadnought
- zvezda
- (and 2 more)
-
Dividers?
-
I'm thinking whoever is assigned to those 12 pdrs. (?) atop the main turrets is gonna have to strap themselves in or the suction from firing the big guns may get them.
- 342 replies
-
- 3
-
-
- dreadnought
- zvezda
- (and 2 more)
-
whats an easier build for a first kit
jbshan replied to rdestefano01's topic in Wood ship model kits
I've always favored the white canvas dinner jackets that have buckles up the back. White tie optional. Bluejacket, in Maine, is reputed to have a wide range of abilities in their models and a great support system for those building their kits. Just to mention one supplier and stay with the sartorial theme. -
Dunno if this would help. . . Some modelers put a small bevel on the edges of individual pieces to accentuate that they are individual. It's barely more than knocking the sharp corner off. The constant bevel on the outside surface may make inconsistencies a little deeper in less obvious. Could try on some of the scrap you've been generating??
-
whats an easier build for a first kit
jbshan replied to rdestefano01's topic in Wood ship model kits
There is a modeling group that meets at the Constitution. [uSS Constitution Model Shipwright Guild] I'm sure somebody here can give you some help in contacting them. A physical-presence assistance plan can also be a great help. -
Tool Maker's Surface Gauge
jbshan replied to jbelwood's topic in Modeling tools and Workshop Equipment
It doesn't need to be level unless you're using a level to level out the model. :-) It does need to be pretty much even, of course. -
First, your pumps. How very nice not to be working on those dratted guns, eh? All the pent-up skill coming out in the pumps. Well done, Sir. The Lexington rudder is done in the manner of that in 'The Fully Framed Model', by David Antscherl, using boxwood scraps from the Lexington semi-kit. All the seams you see are from using individual pieces to build up the blade of the rudder.
- 648 replies
-
- 3
-
-
- niagara
- model shipways
- (and 1 more)
-
That's beautiful, darrell. The top is indeed almost round. Note on my rudder the leading edge is straight, while on Niagara it has a jog forward. This is an improved design that allowed a round rudder port with much limited leaking compared to the early design. For us, we can drill a simple round hole, while the older design needs a fan-like shape to allow the rudder to swing properly. While I haven't always followed it, the rudder irons are set in to the face of the rudder, while those on the hull can stand proud of the hull plank. You'll only need to trim around the irons with an xacto™ and scrape off inside the marks to remove the paint. Again, this is Lexington, 1775. I can try to get some shots of Lawrence's rudder, but it's all black and I don't know how much useful info you could see.
- 648 replies
-
- 3
-
-
- niagara
- model shipways
- (and 1 more)
-
There wasn't a focs'l or compartment for crew quarters as such. There was a 'saloon' midships but I suspect most of the crew either slept on top of the stores in the hold or on deck. Just stick the cables down a convenient hatch after they have been belayed at the bitts.
- 843 replies
-
- 2
-
-
- niagara
- model shipways
- (and 2 more)
-
The lining may have been simply nailed on. It was apparently universal and sacrificial. Keep your fastenings (simulated) small until you can take a look, or make a sample piece for testing. Good cat tackle, etc.
- 843 replies
-
- 1
-
-
- niagara
- model shipways
- (and 2 more)
-
And, Mike, page 9 and 15 are from Lever.
-
American sailing warships with no plans or records
jbshan replied to CharlieZardoz's topic in Nautical/Naval History
On her 'round the world cruise (1847?) while in port at Rio, Mad Jack had Constitution painted all white, for tropical conditions.- 401 replies
-
- 3
-
-
- John Adams
- Alliance
- (and 3 more)
-
I think it would match the strop, Mike. Roughly. Don't go all retentive on us.
-
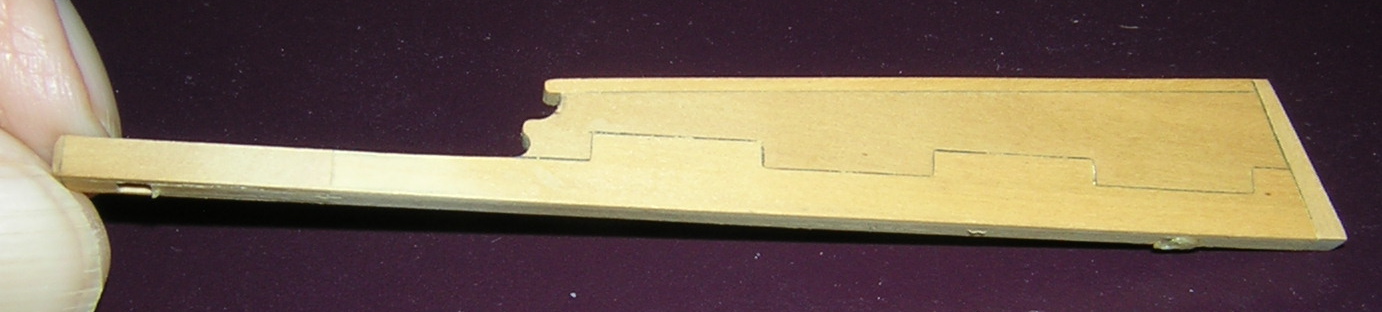
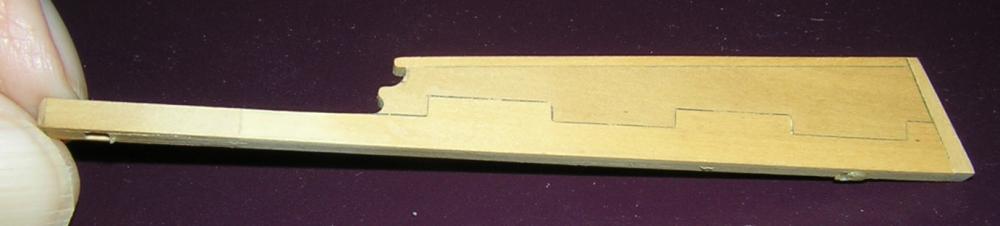
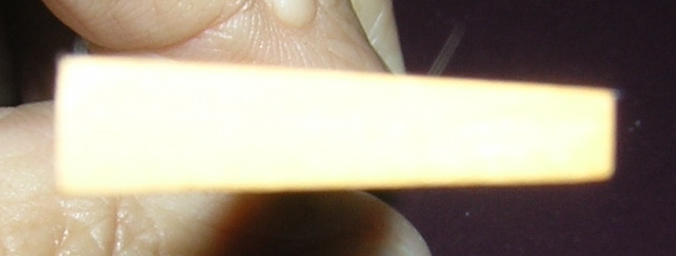
I'm really sorry, Darrell, the rudder should be tapered top down and front back. As is it will look clunky and not very streamlined. This should show on the plans, or in the book. (Sheet 3, bottom left, in the book, step 16, though that just tells you to go to the plans). If you haven't painted yet, the glue on the pintles should sand off with the taper and you can re-install them. From my Lexington. This rudder is easier to get off at the moment, though Lawrence's does dismount. Here is the sole. It's blurry, but you can see the shape. Here is the after face. Compare the thickness at the top with the bottom.

- 648 replies
-
- 3
-
-
- niagara
- model shipways
- (and 1 more)
-
Lees does the running and standing individually. Try sewing thread for seizing. You might wind up with Lydia Pinkhams Button and Carpet Thread. Lots of colors available, though a road trip may be in order to find a shop that caries such things anymore. Lever shows the way the spars go together. Lees shows how to make the spars. If you make your spars properly, you can assemble them onto the hull correctly, part 'A' into slot 'B', as it were. Easier perhaps to assemble some of the rigging onto the masts if you follow Lever's steps, be careful, though, as Lever covers both merchant and military. Plans: you may have to go back and forth from sheet to sheet to get all the info for a particular thing. Also keep an eye out for details or 'call outs', those little sketches surrounding the main drawings. I found both Lever and Lees understandable, though as with any technical language there is a learning curve just to open a page. There will be a quiz Friday.
-
#1 line size shown on one of the other staysail sheets, presuming they are all the same. #2 main royal backstay size shown on foremast royal backstay. Lees may help with stropping v seizing, the vang (the line in question) showing a very close proximity to the eyebolt. If stropped, the strop may end in two eyes that are then lashed together.
-
The first one is the sheet for a staysail, and is duplicated P&S. I suspect it is seized to the eyebolt, based on Lees, quoting Lever. The second is the royal backstay. This I think also is seized to the eyebolt, based on references I have seen showing it as coming to deadeyes on the channels. Darcy Lever, which you have, and David Lees, 'Masting and Rigging', are good sources, one period, one modern.
-
It looks as if you're going to have to go back to the plans and go block by block and eyebolt by eyebolt. Some seem to have hooks, some seem to be seized. A block with a becket could have a line hooked into the becket or a line seized to the becket. Maybe make a list, combining it with the belaying plan?
-
Concur with druxey. Upper edge of wale at the lower port line, lower edge of wale is the almost parallel line below that. It's 'almost parallel' because of the inward curvature of the hull and the way the wale has to twist to keep pace. All the detail on this is outboard. Sometimes they will show deck beams, drawn as little rectangles. This can help you to see what is going on. Sometimes they will show the plank both at midline and at the sides. This helps the most. These are seen on an inboard plan overlaid onto the sheer plan.
-
Secured to cleats or eyebolts, I suspect. The chain could have been belayed using stoppers, looped and lashed around the chain, then to an eye or ring bolt. The timberheads in the illus. seem to serve to locate the line and chain, but could have been used for one end of the line and a cleat for the other. Harland, 'Seamanship in the Age of Sail' has a fair amount on anchoring.
-
I don't have crayolas, Mike, but I bet you can find a grocery store that sells dijon mustard in a glass jar. :-) Paul, by 1800 not even the Royal Navy was using brass cannon. It was more expensive, and they had over a century experience to get the bugs out.