HOLIDAY DONATION DRIVE - SUPPORT MSW - DO YOUR PART TO KEEP THIS GREAT FORUM GOING! (Only 13 donations so far - C'mon guys!)
×


kurtvd19
-
Posts
3,031 -
Joined
-
Last visited
Content Type
Profiles
Forums
Gallery
Events
Everything posted by kurtvd19
-
 Sorry, but we only have one guy who can do the editing and then posting to the website. He's got a full time job and has had some critical work to finish before posting the video. I think it will be posted very soon.
 -
Do yourself a favor and look for another build log - this one hasn't been active since 2019.
-
Multiple applications will probably be needed. Keep it wet - don't let it dry or you will need to start all over. Have something under the piece to catch run off - don't let it ruin something it drips on. Some have used tissue to keep the area wet - applying more to the tissue so the underlying part is kept wet. Test occasionally and when soft do what works best to remove the excess. Repeat as needed.
-
What they are describing is how to remove epoxy type glues. One can use epoxy on wood so it can be a wood glue but ordinarily the term "wood glues" mean the white or yellow glues such as Titebond, Elmer's etc. Gorilla glue is a poly vinyl acetate glue (PVA) as are the Titebond glues. The Isopropyl alcohol works well on PVA glues. I have never use Gorilla glue on a model and would not use it due to it's foaming charistic - that may have caused your problem.
-
The common solvent for the white or yellow wood glues is Isopropyl Alcohol - you probably have some in your medicine cabinet. If you go to the drug store try to get the 90% stuff - whatever you get, go for the highest % you can obtain. The 90% costs more than the common medicine cabinet variety but it works a lot better and it's still quite affordable - just remember to put the cap on tightly between uses.
-
They are Bob Smith. Smith prints the customers name on the bottles. Best CA available.
-
Eric: As the bevels on the carlings are not seen you might make neater joints by making the ends of the carlings square and the pocket in the deck beam square. I can tell you from personal experience that I made the joints in the beams and carlings that way when this project was in the prototype stage. The one thing I did to the end of the carlings was to break the bottom end of the carling so that any wood left in the bottom of the deck beam pocket would not interfere with the bottom of the carling seating square. The left end of the carling shown in your photo will also work to be an easier fit - and the whole darn thing is hidden so make it easy on yourself. Also, it is easier to fit the pocket to the carling as you can sneak up on the fit - start with the pocket a bit undersized and slowly make it larger to fit the carling tightly. That's what the furniture makers do.
- 69 replies
-
- 10
-

-
Shortly before Alan died he talked to myself and two other individuals about working together to update both books. Unfortunately I am the youngster in the group and by far the junior when it comes to actual knowledge on the subjects. Neither of the others wanted to get tied up in such a project and I just do not have the knowledge to do the job. I have the publishing and distribution contact - the NRG - but alas I don't see that there will ever be an update done. I know that by making the existence of the books better known and being able to get them published we would sell a lot more than 3 copies a year!
-
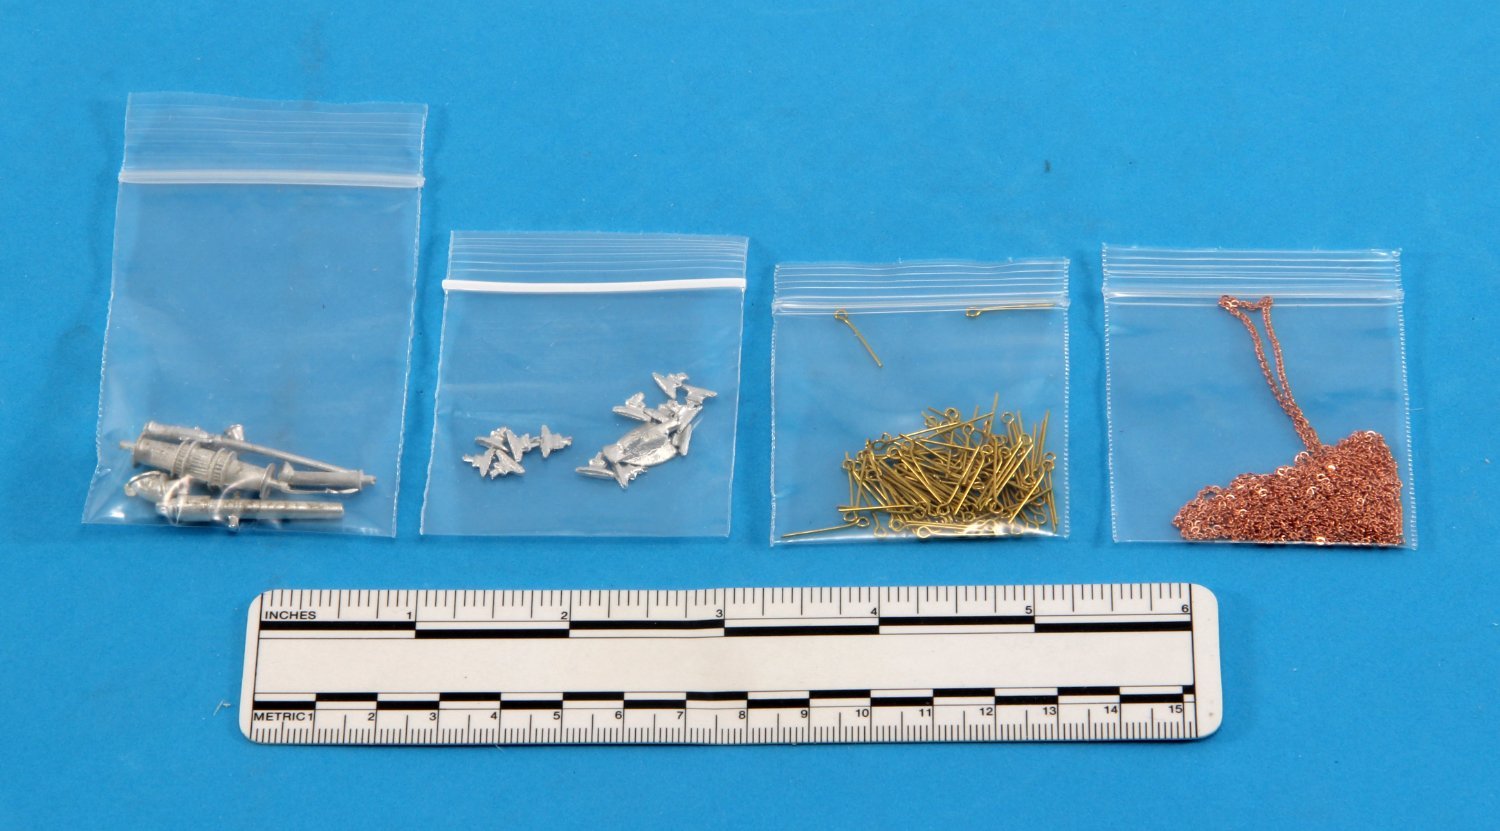
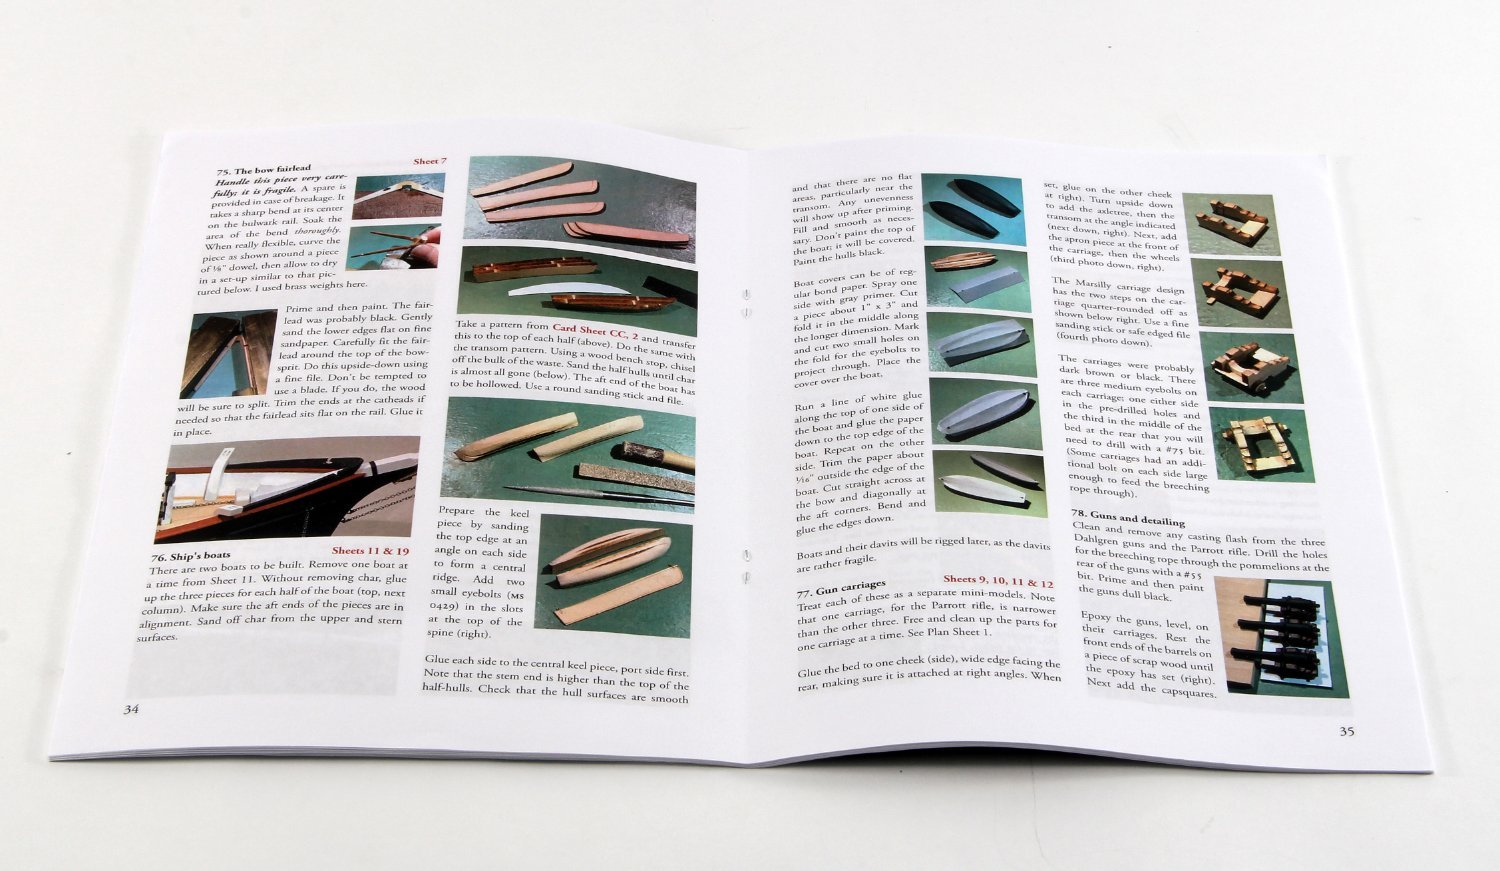
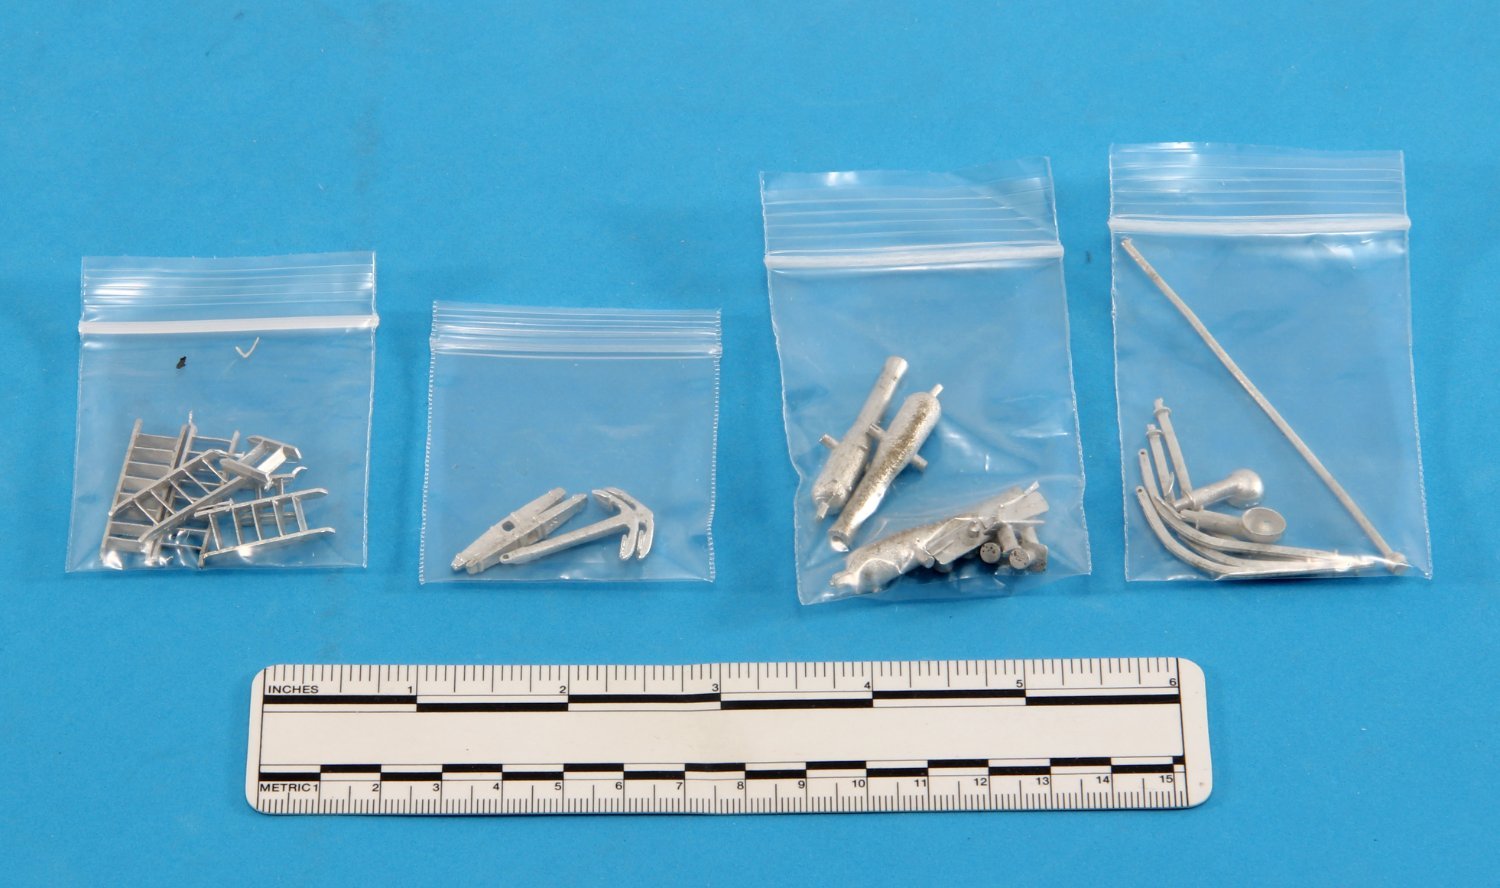
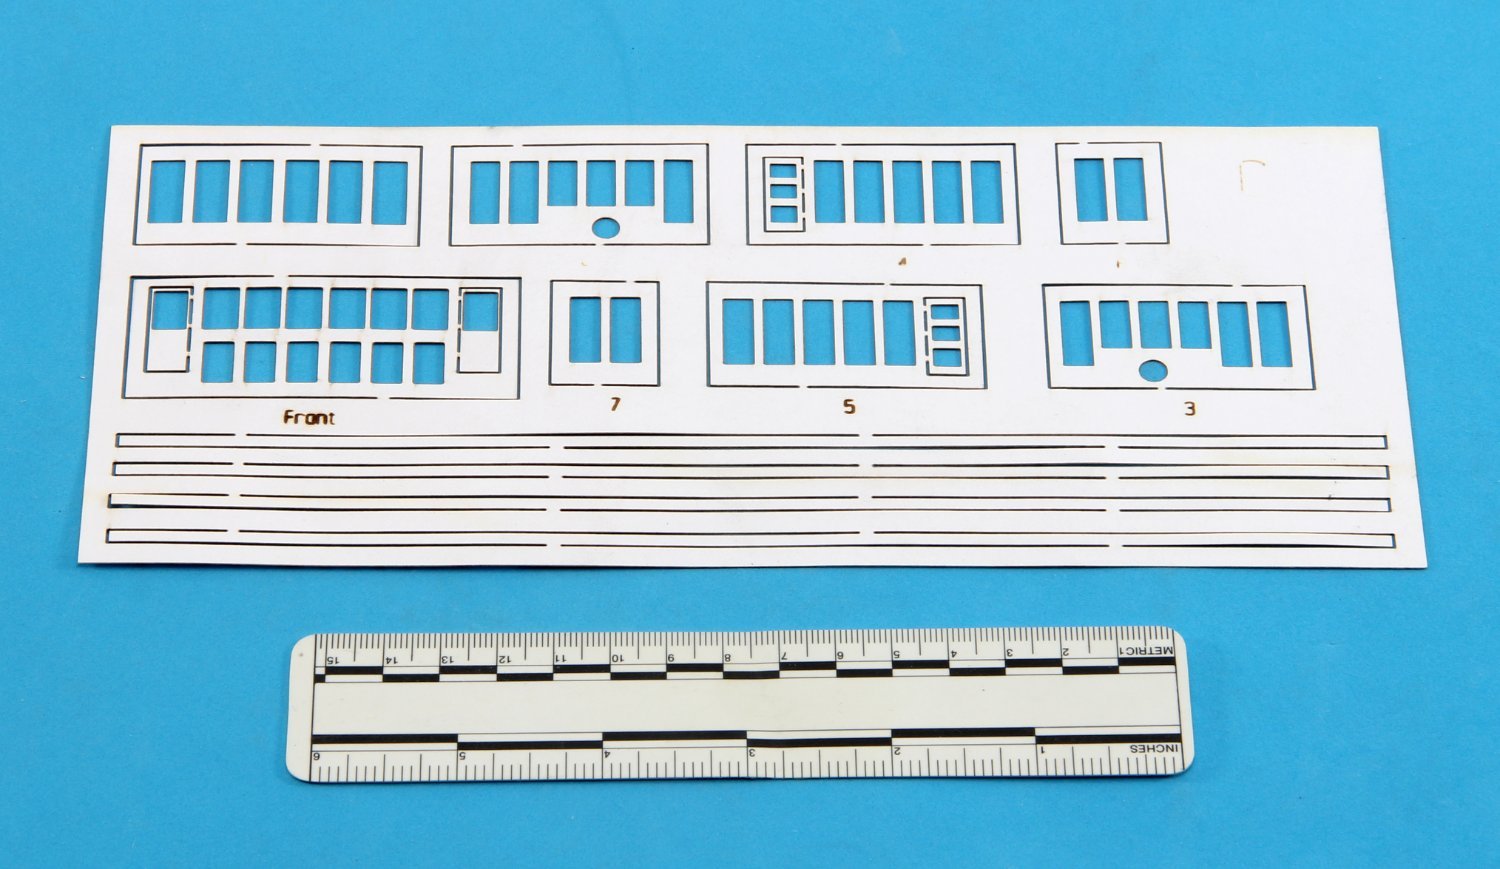
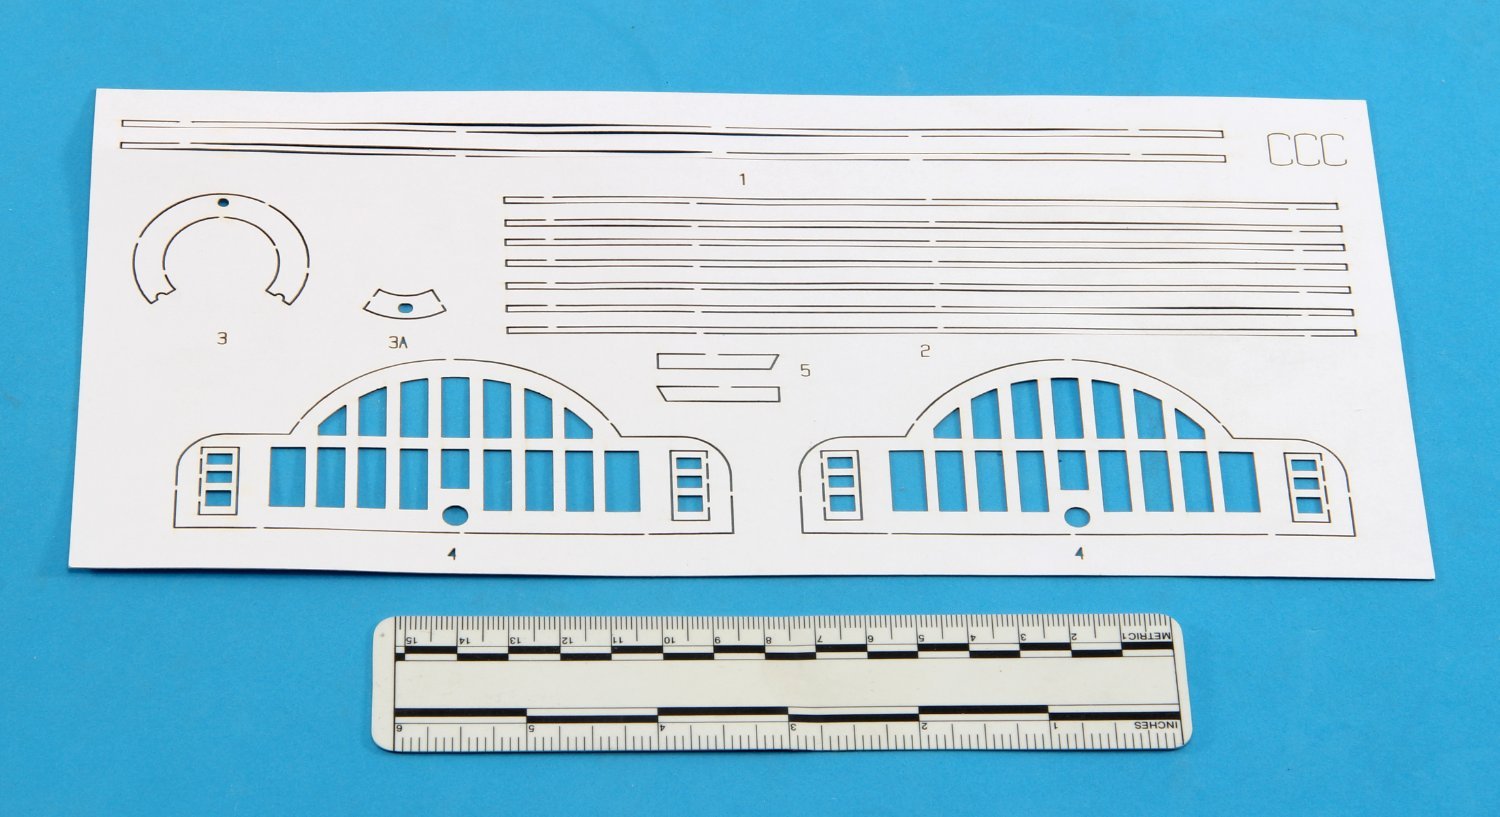
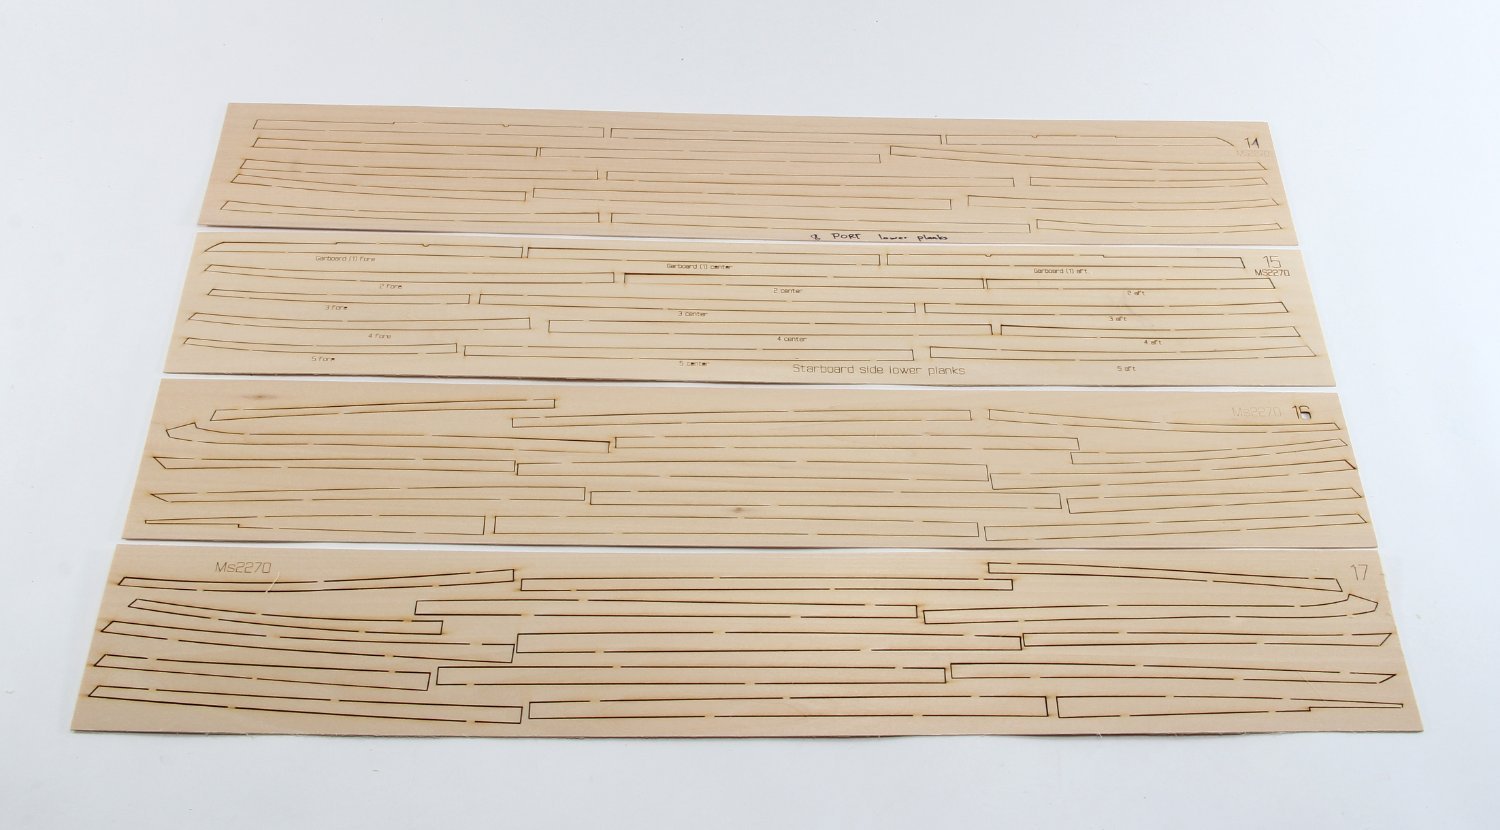
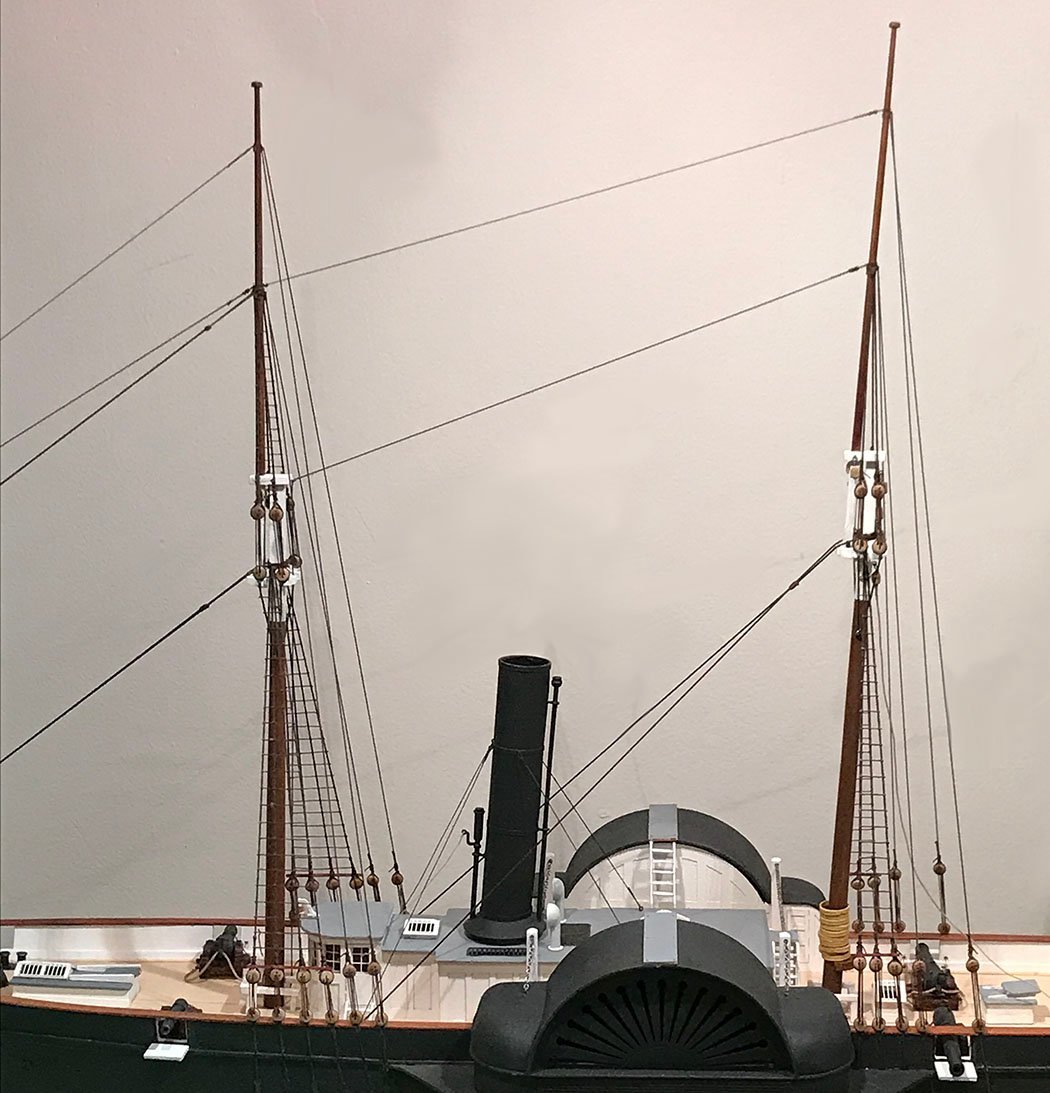
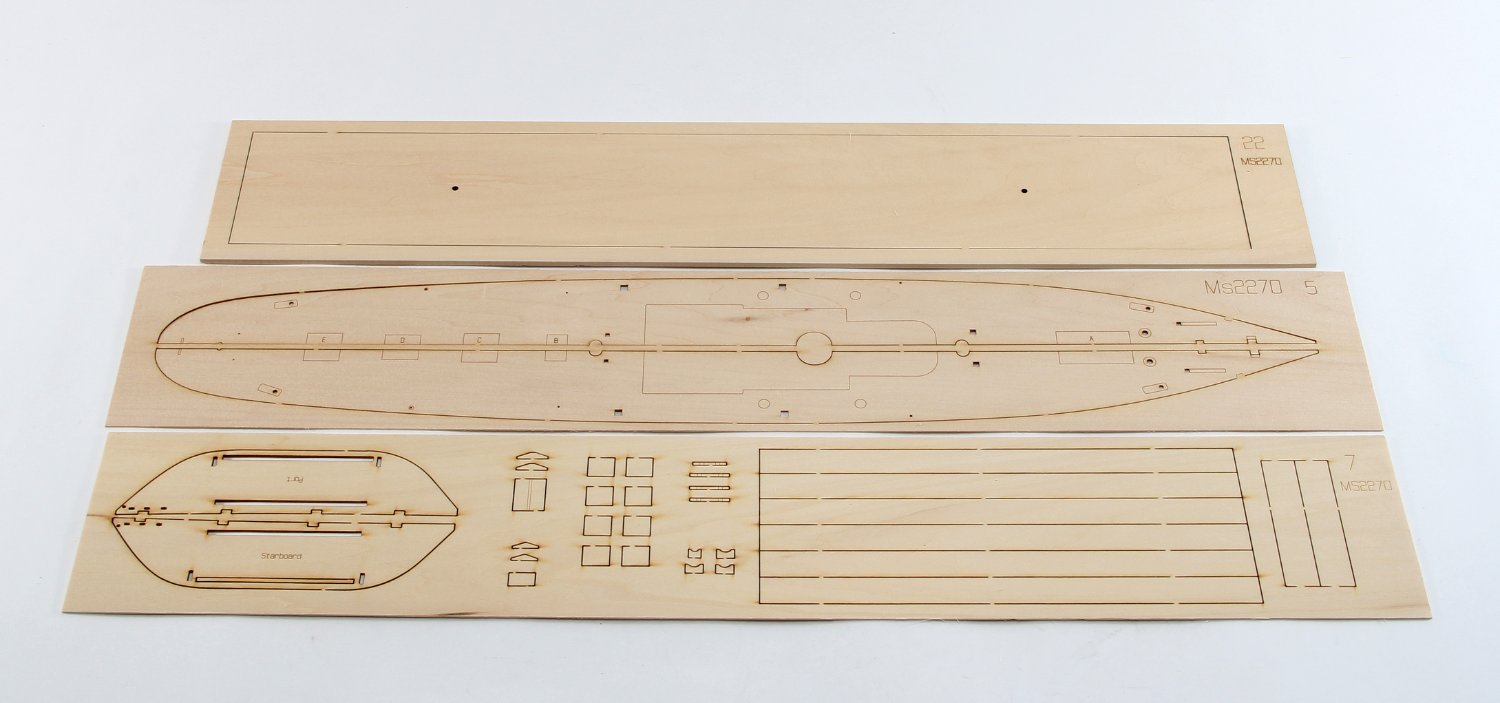
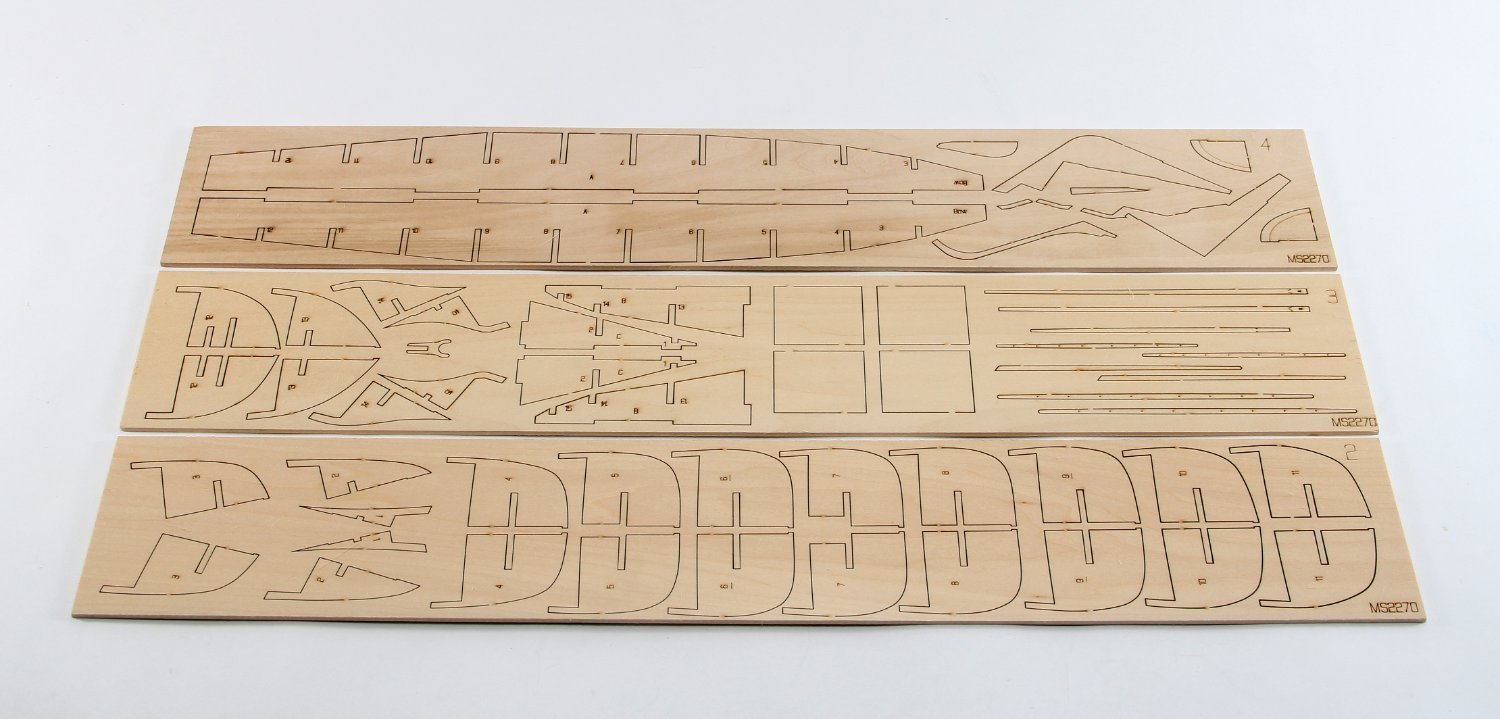
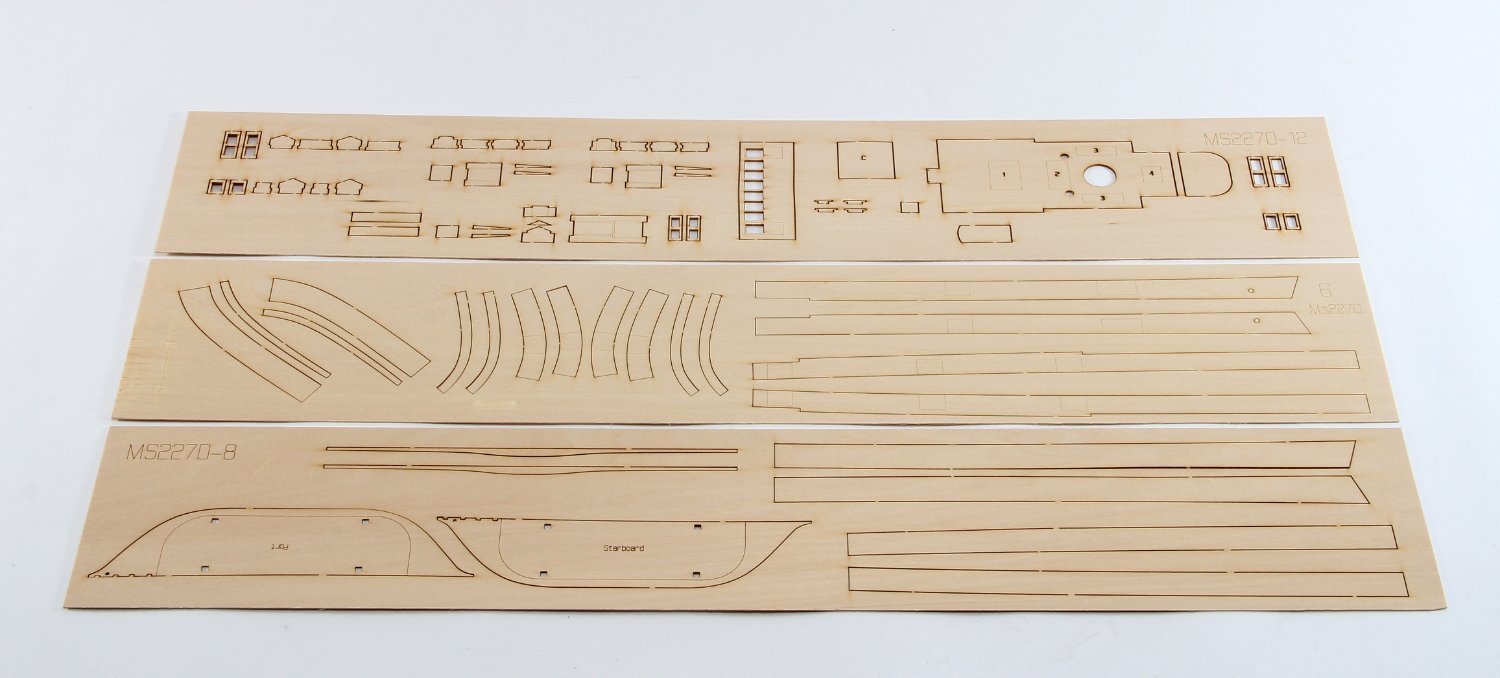
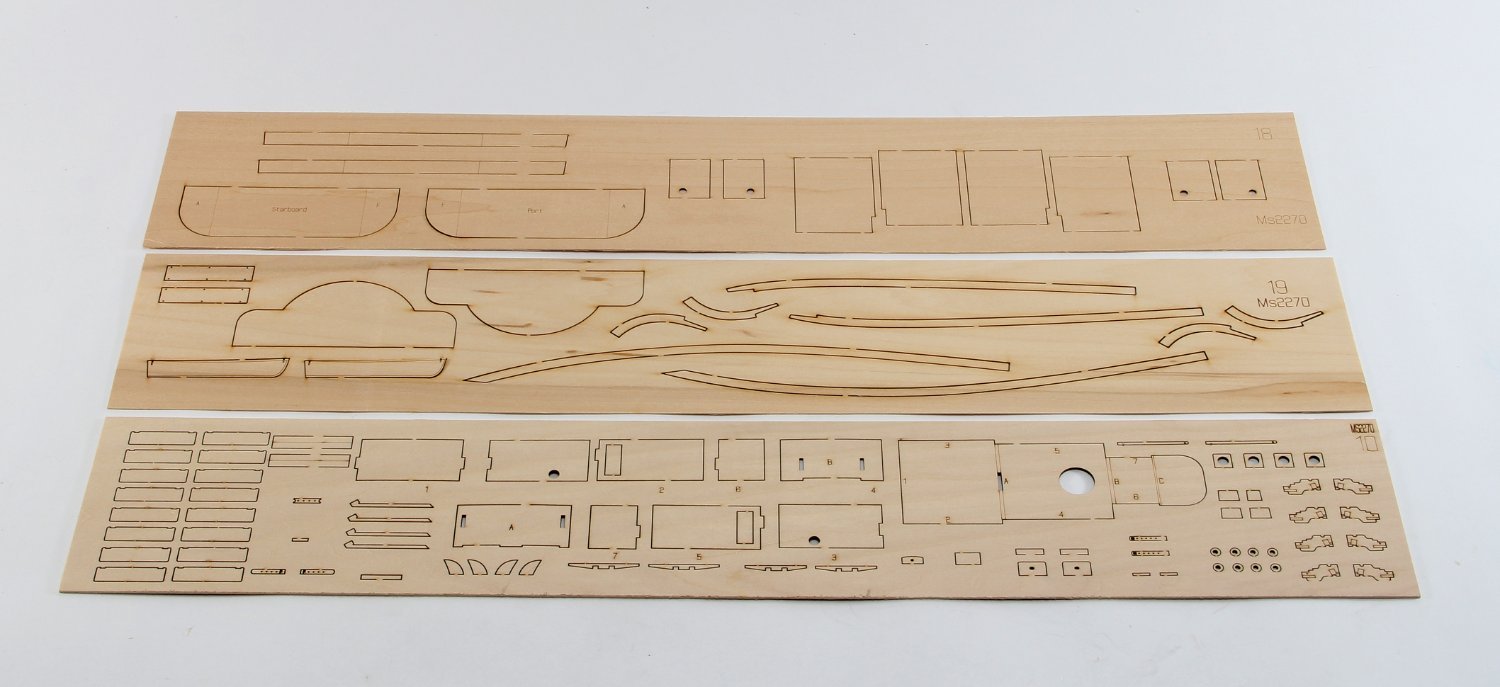
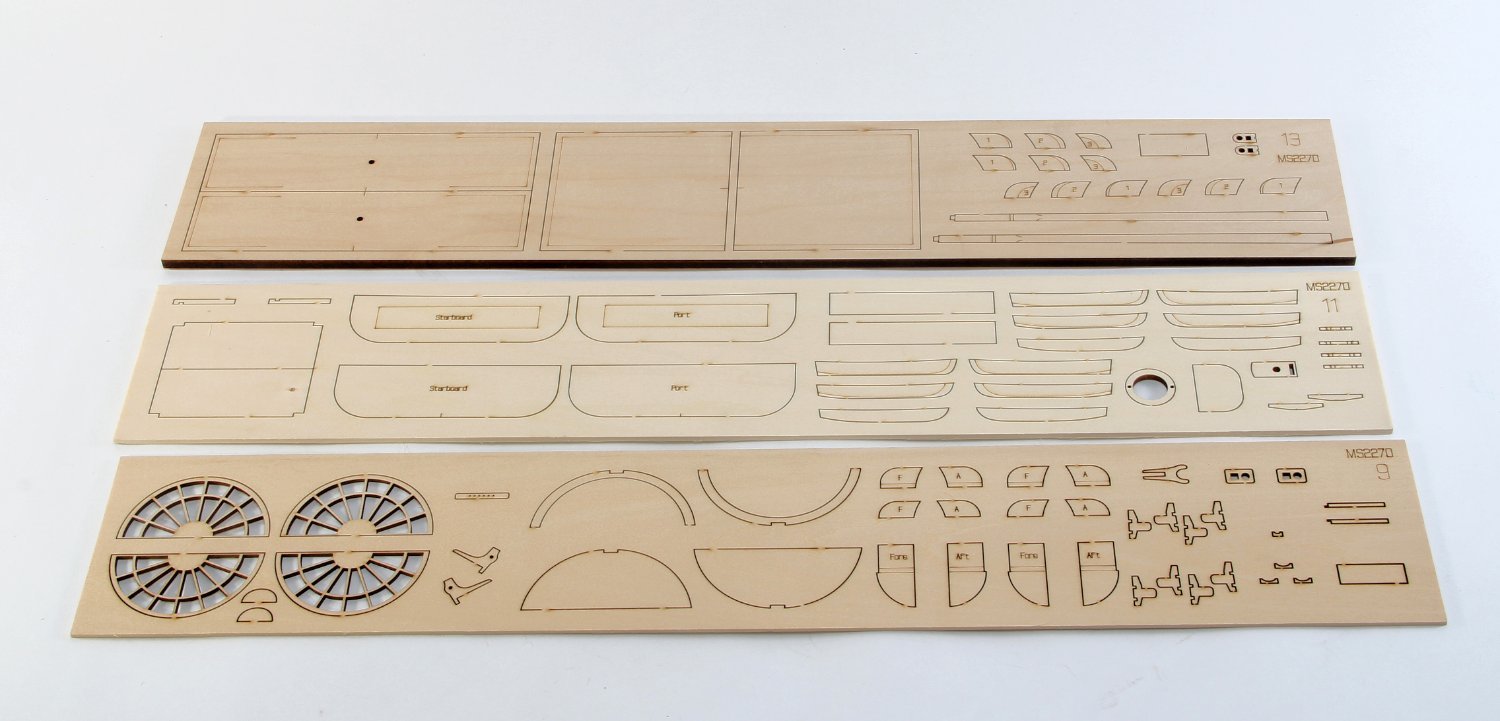
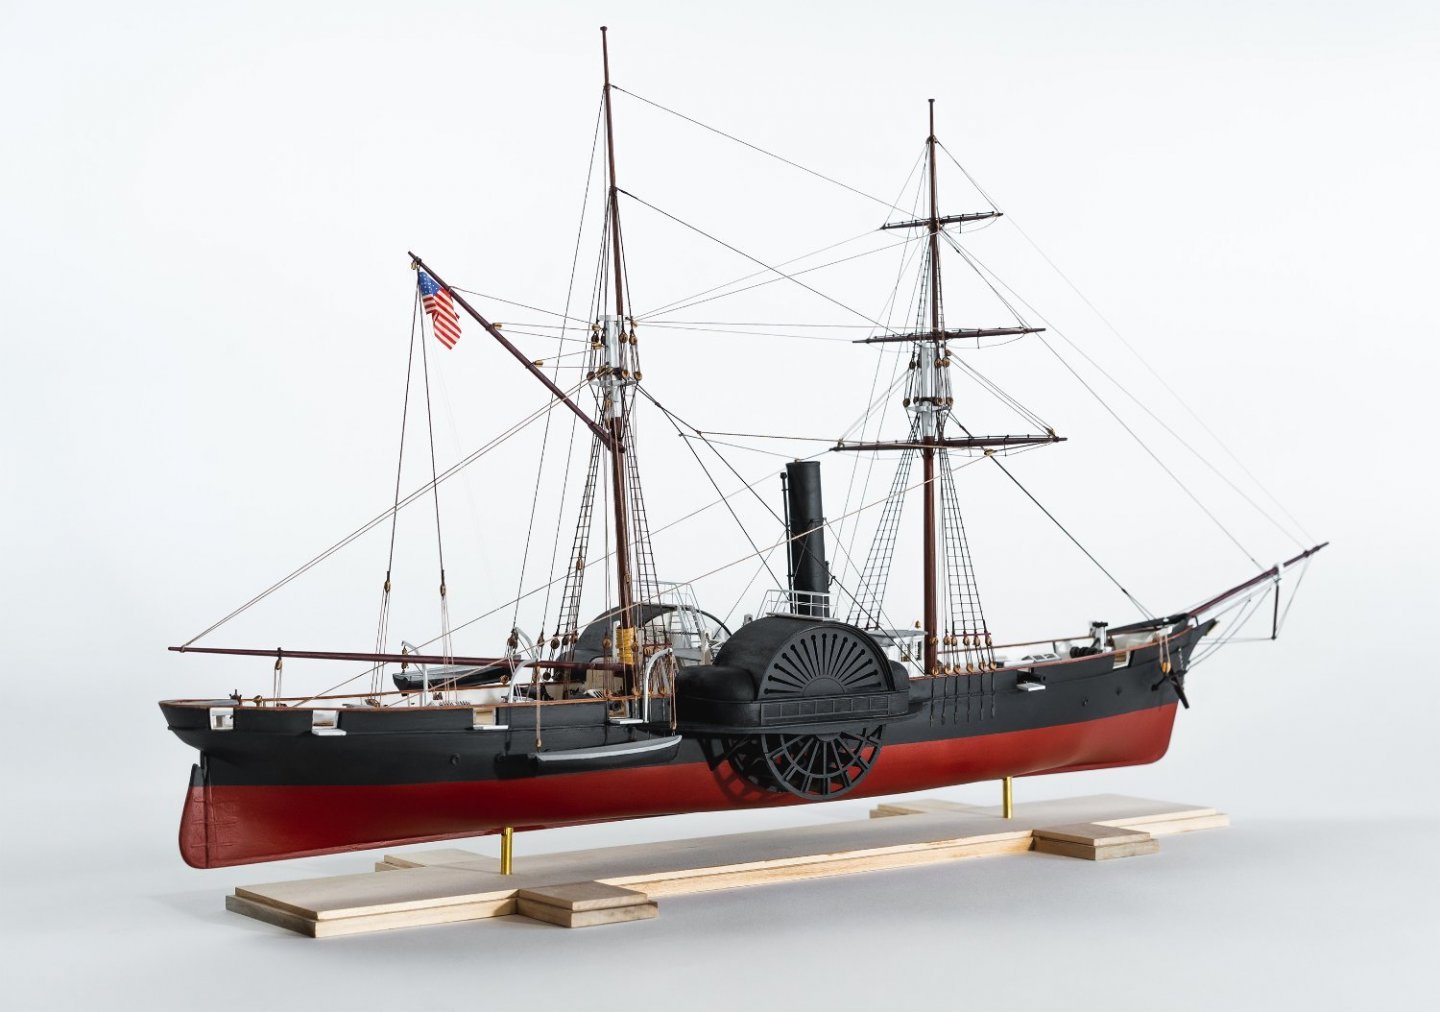
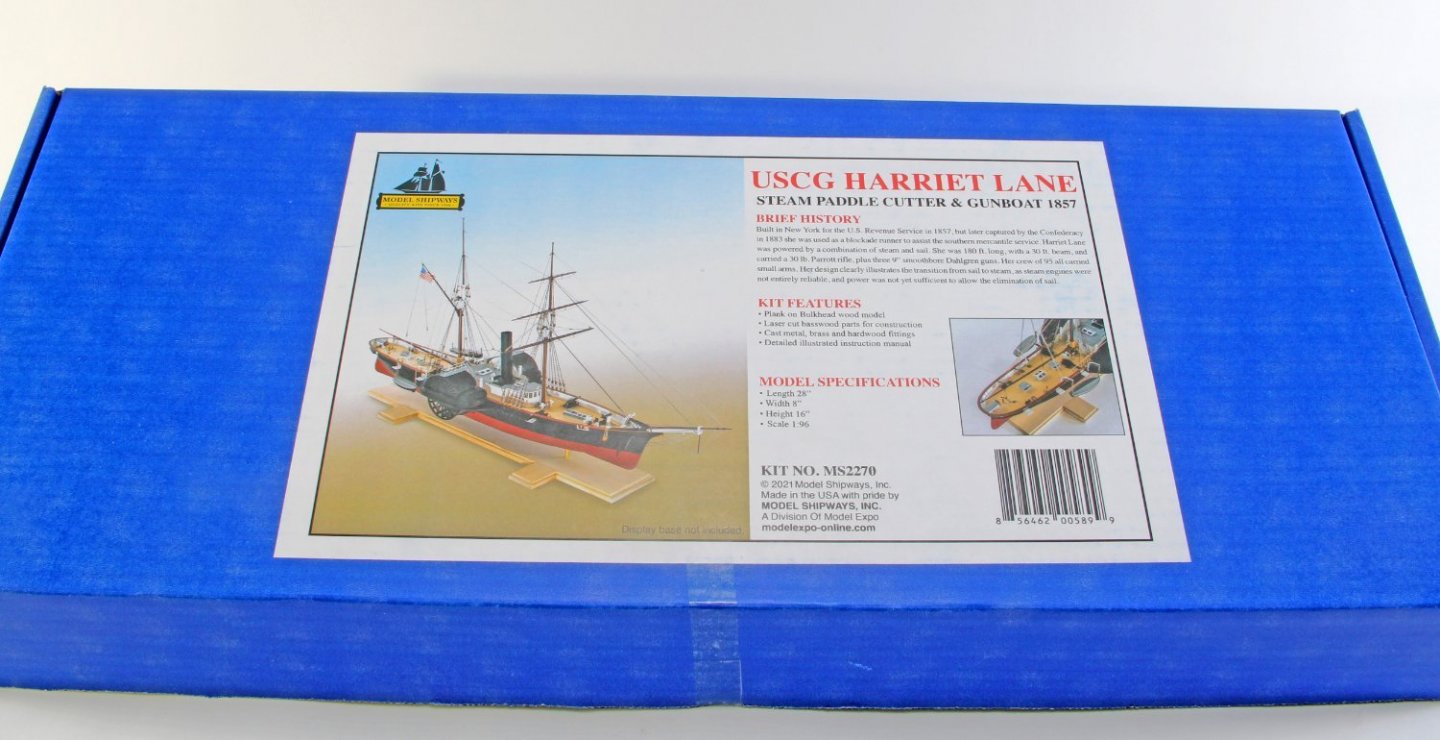
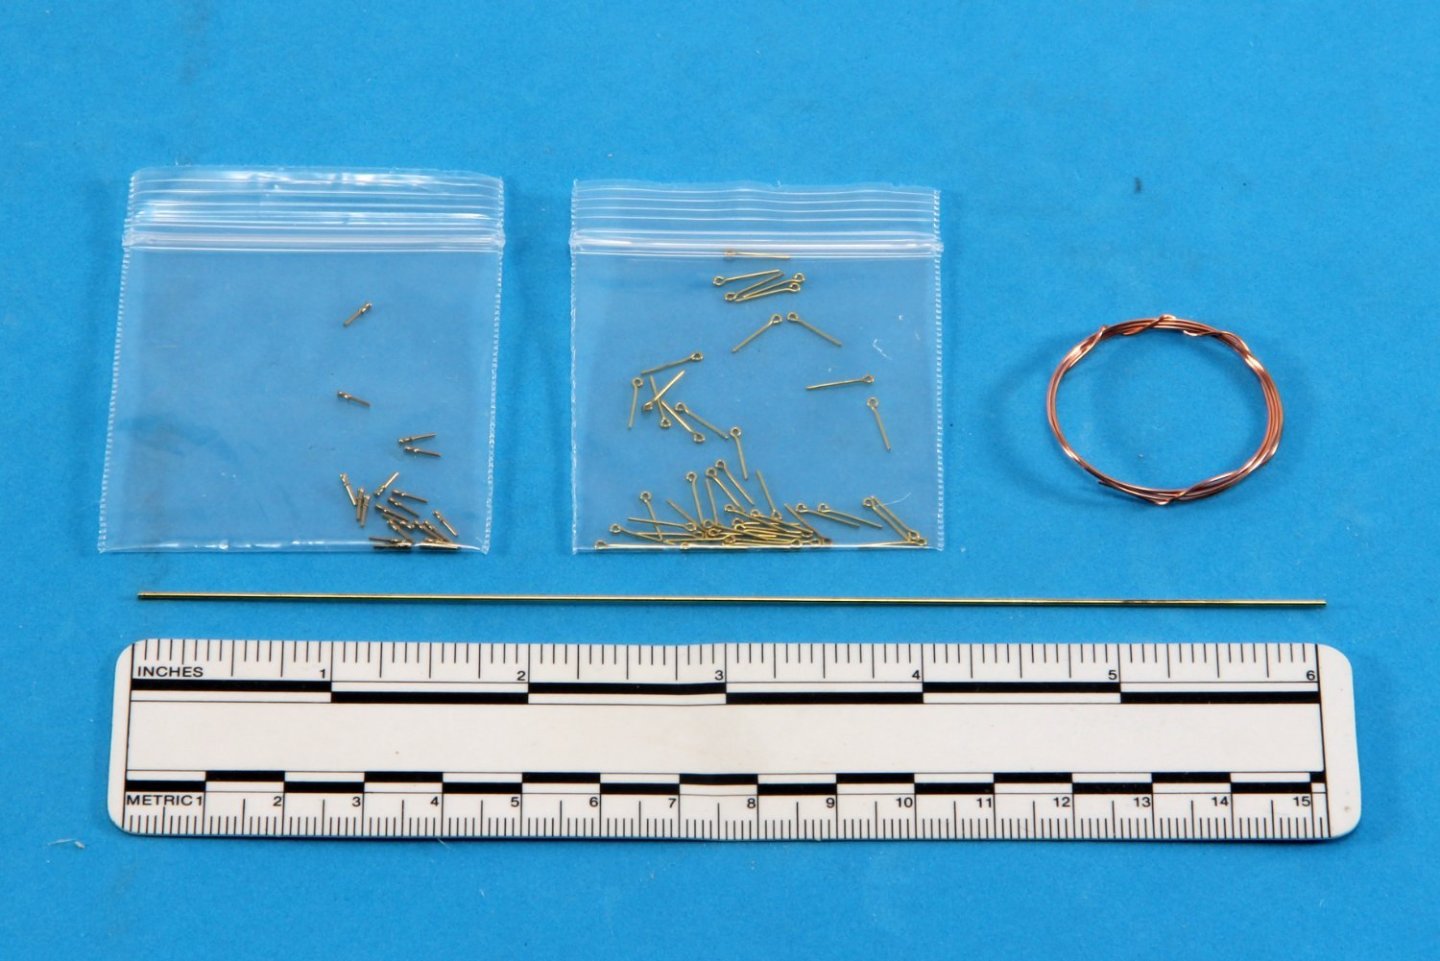
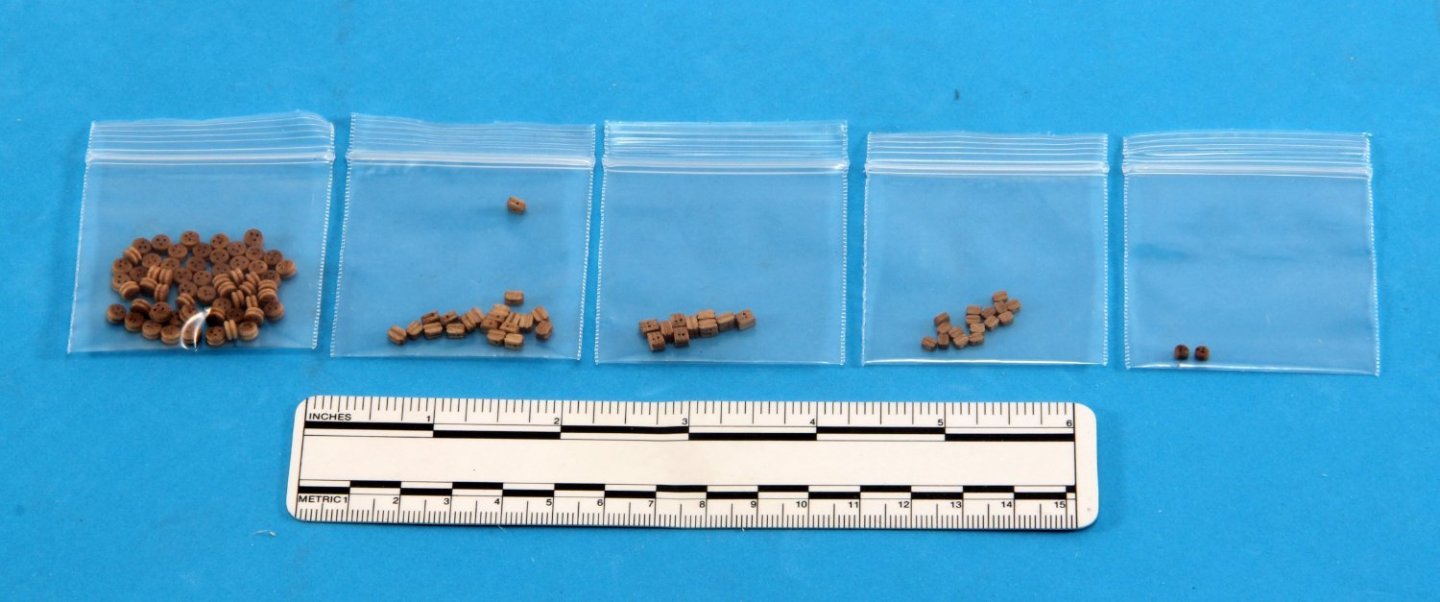
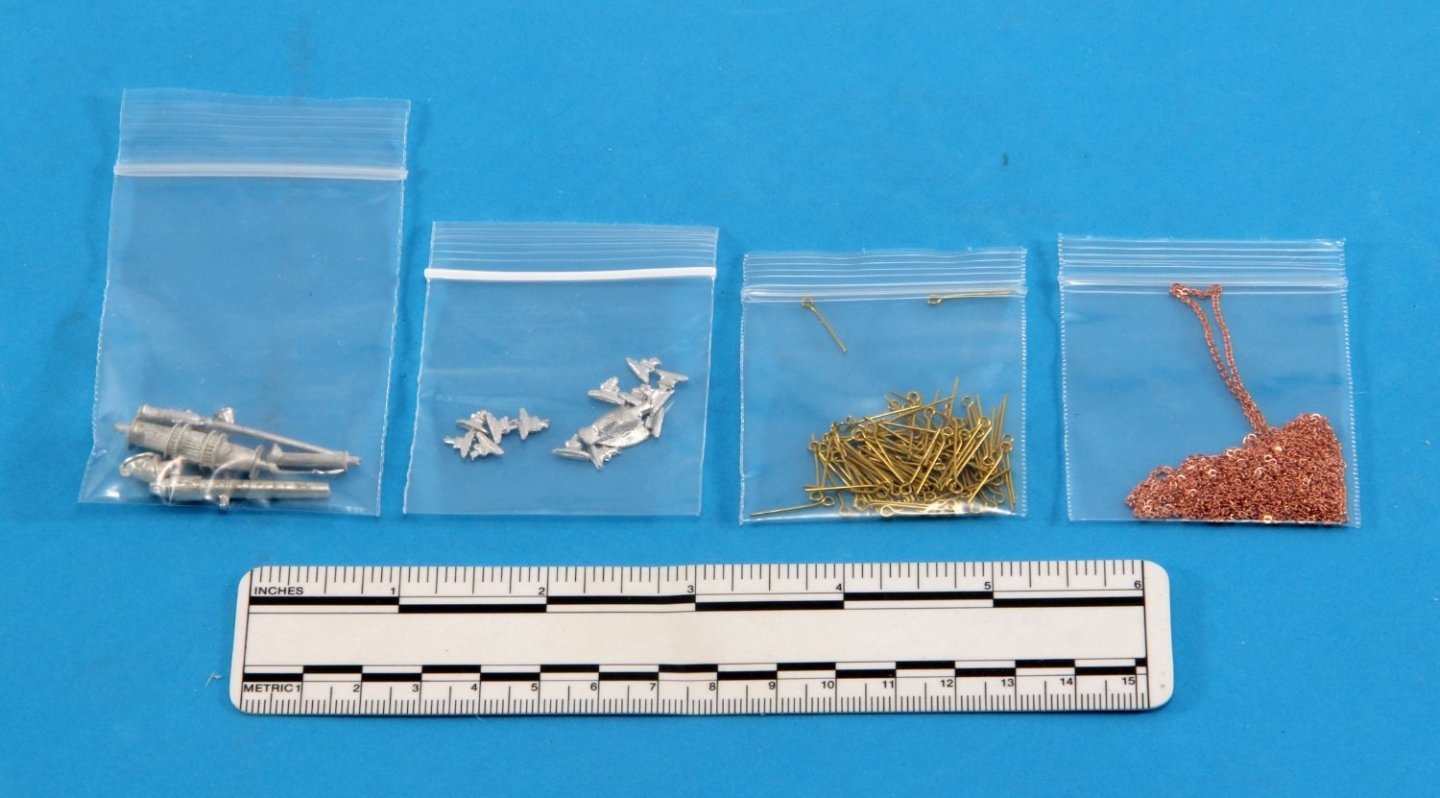
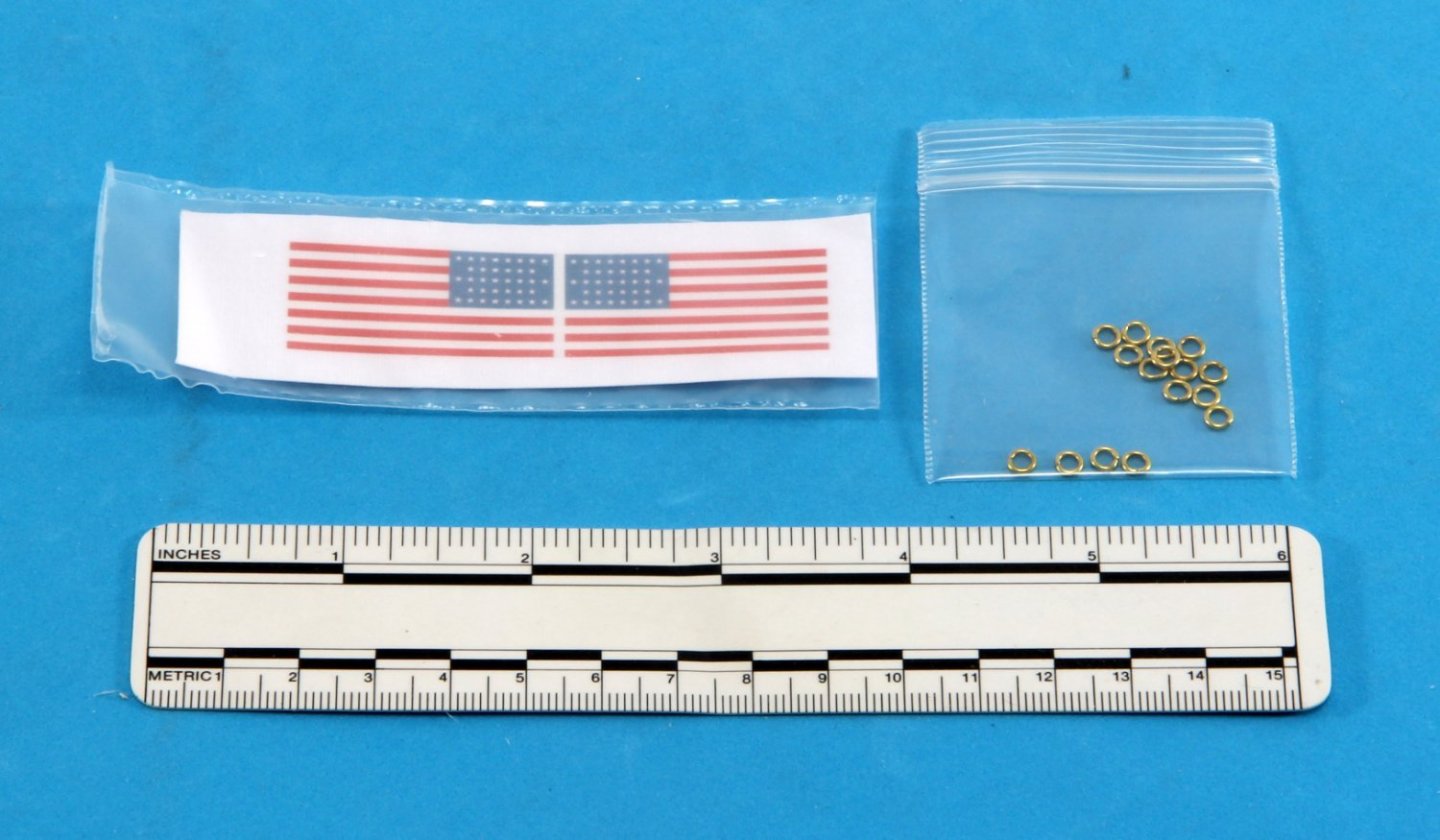
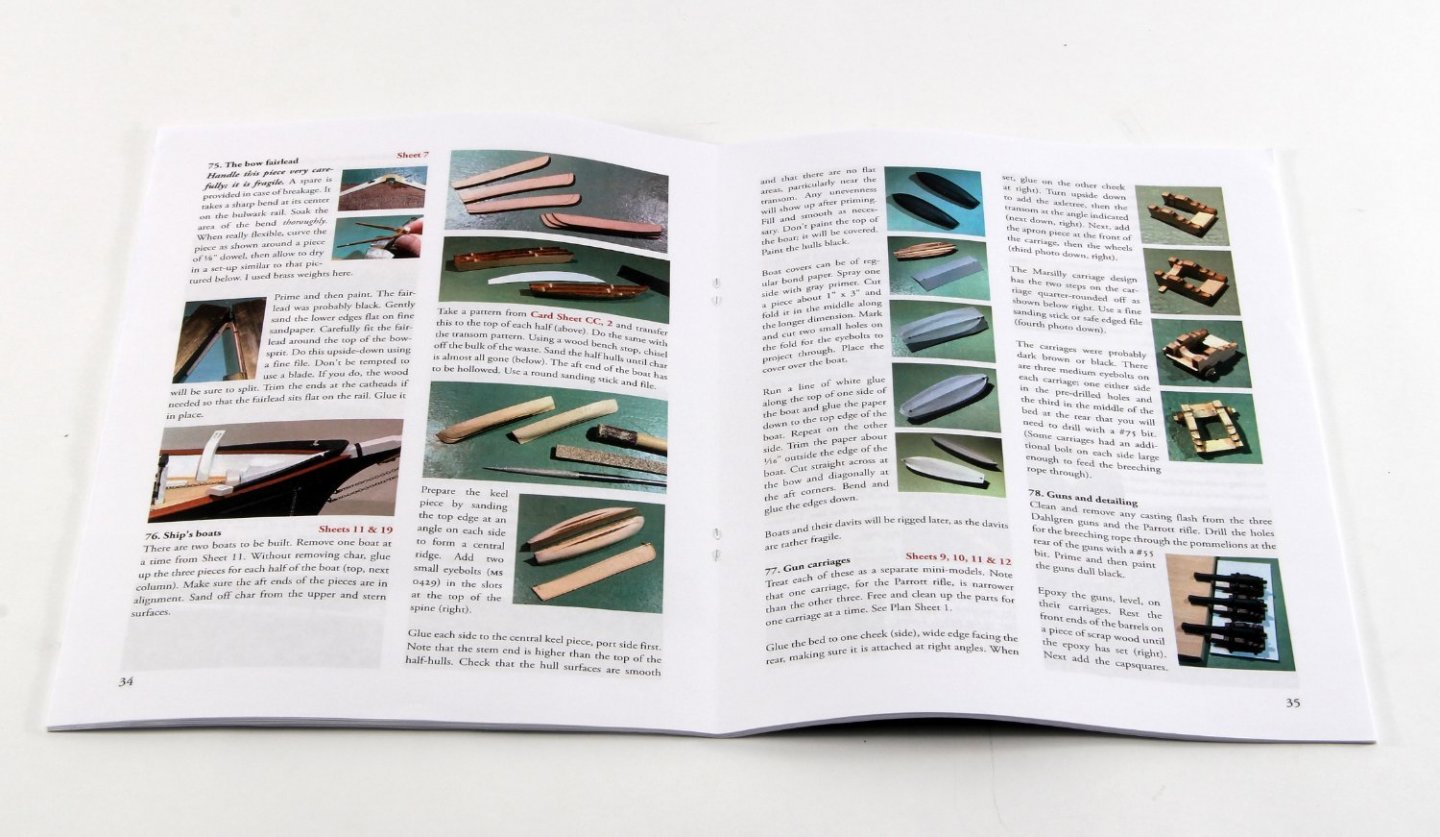
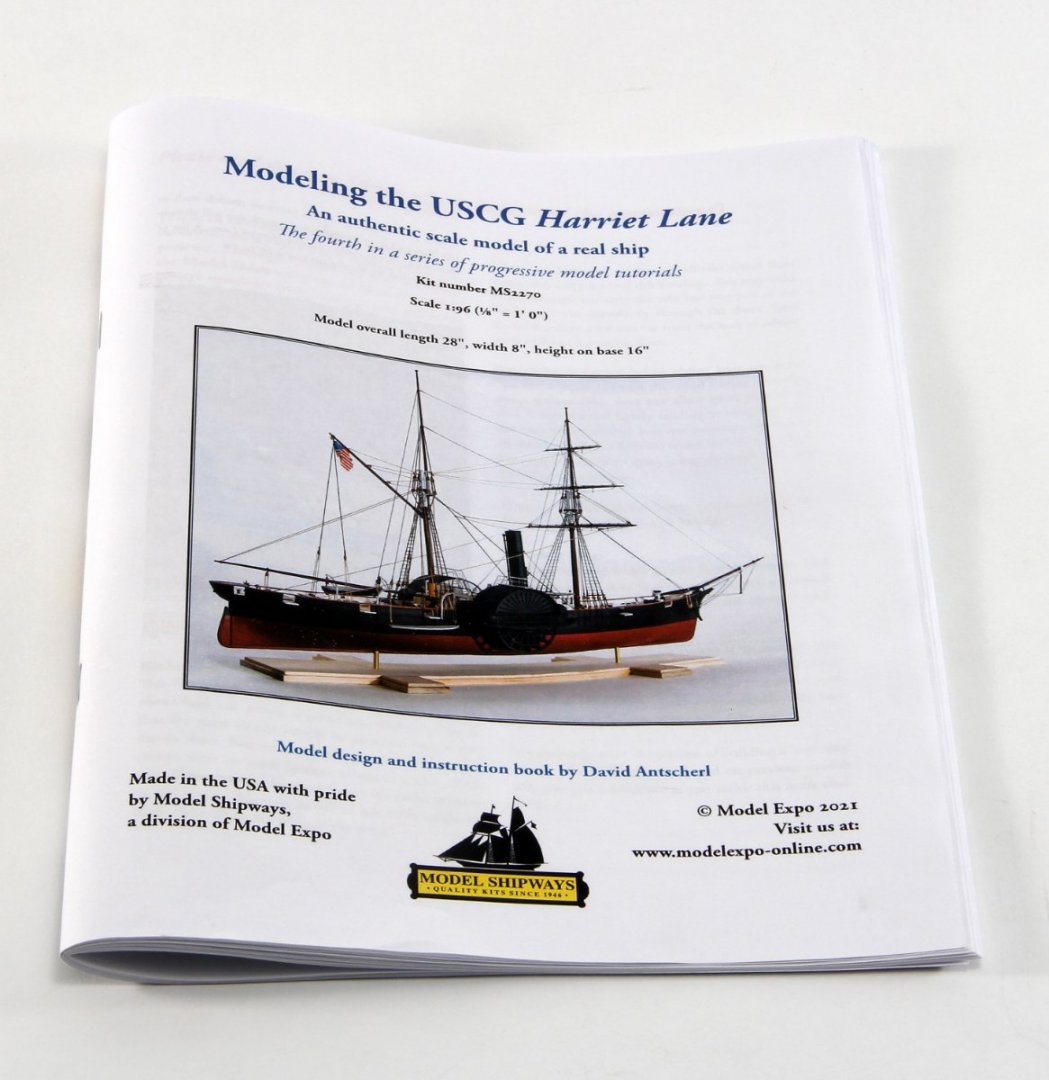
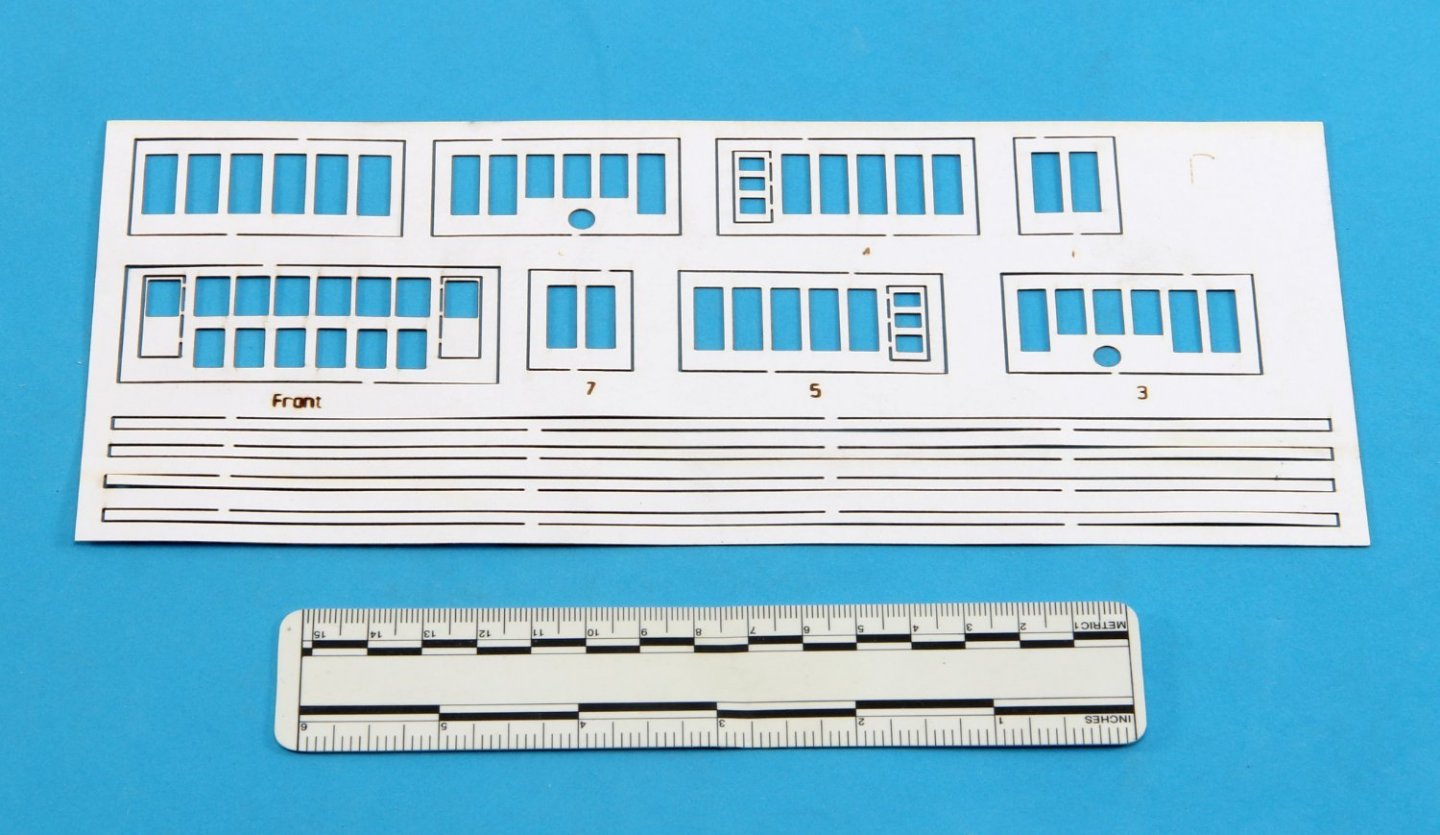
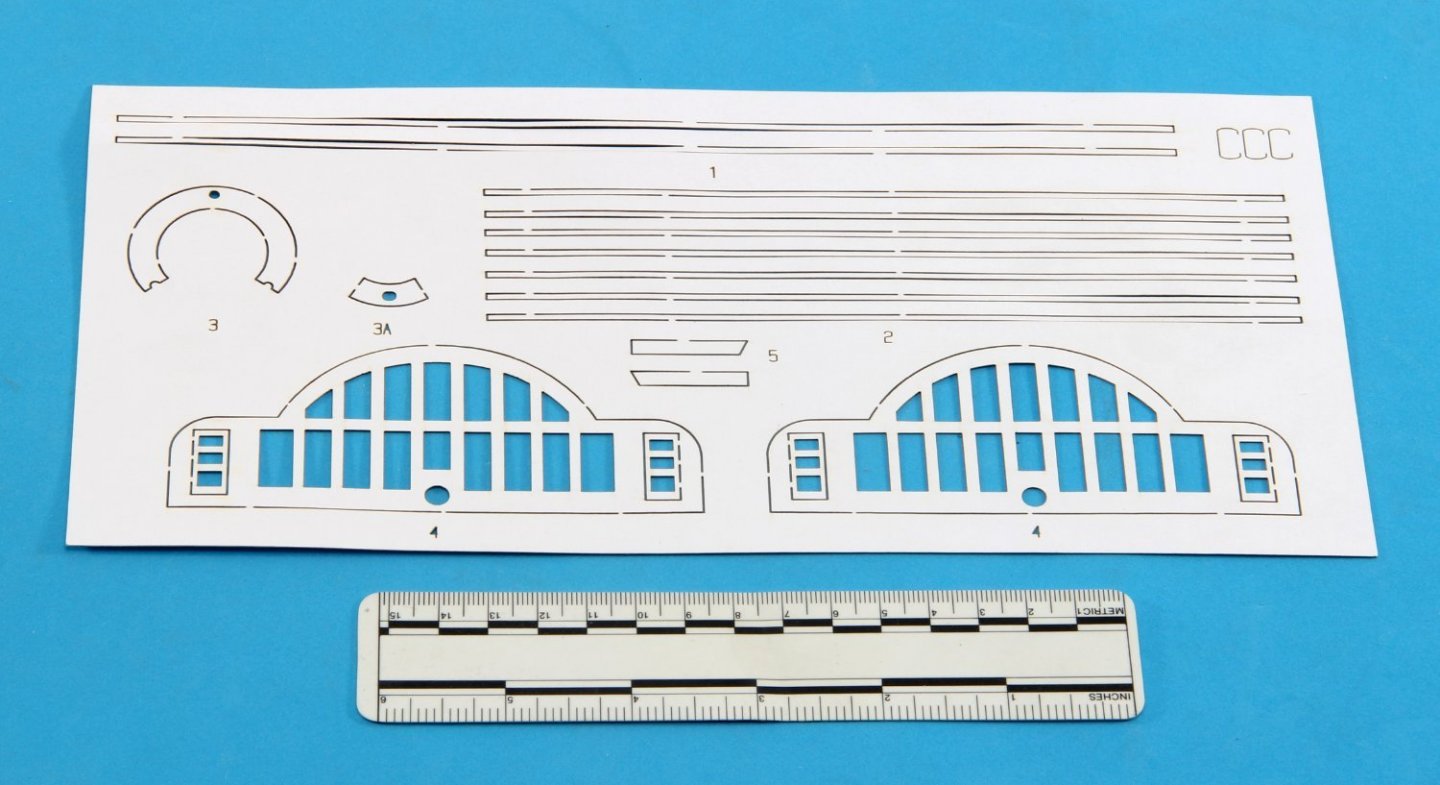
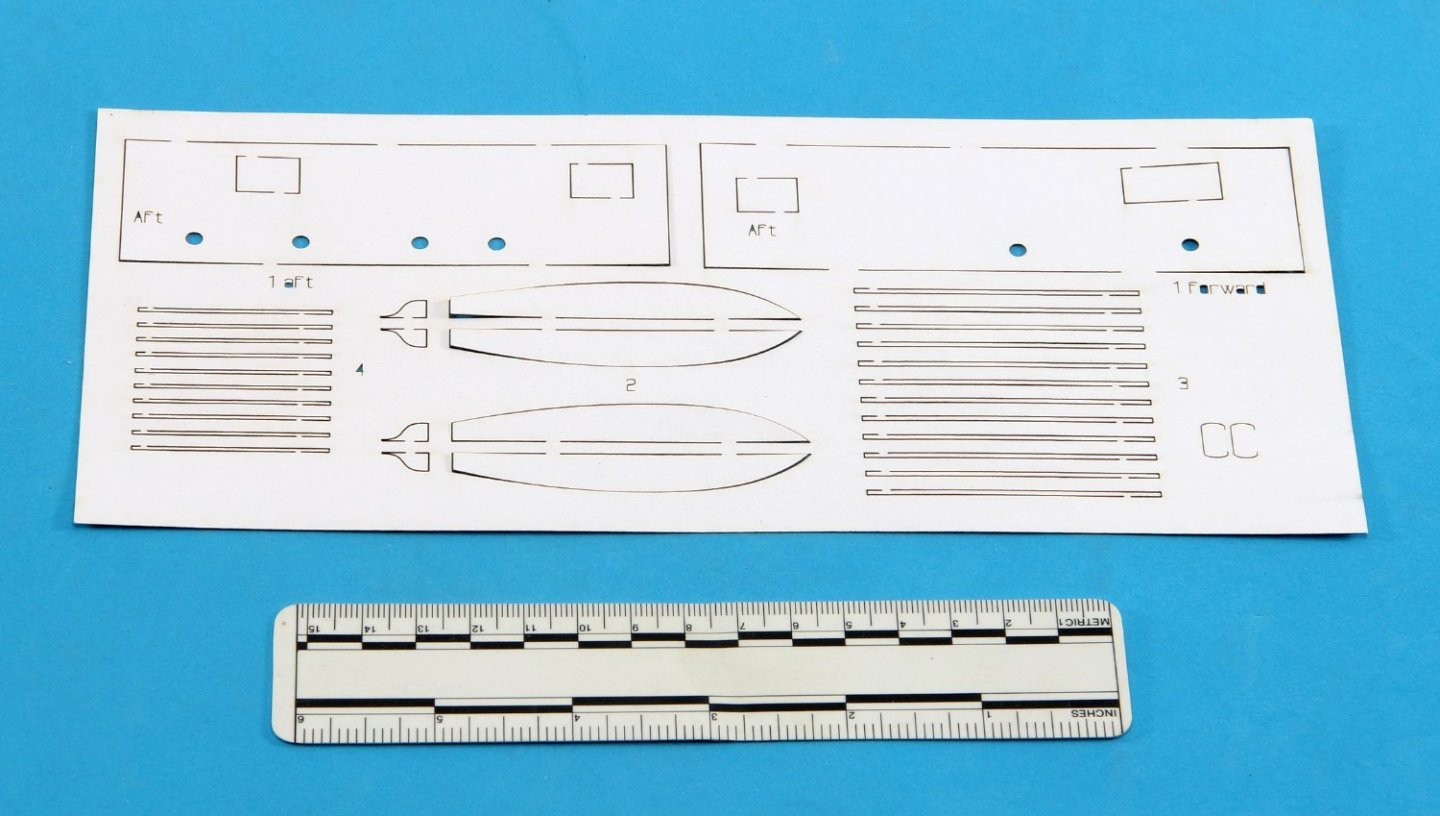
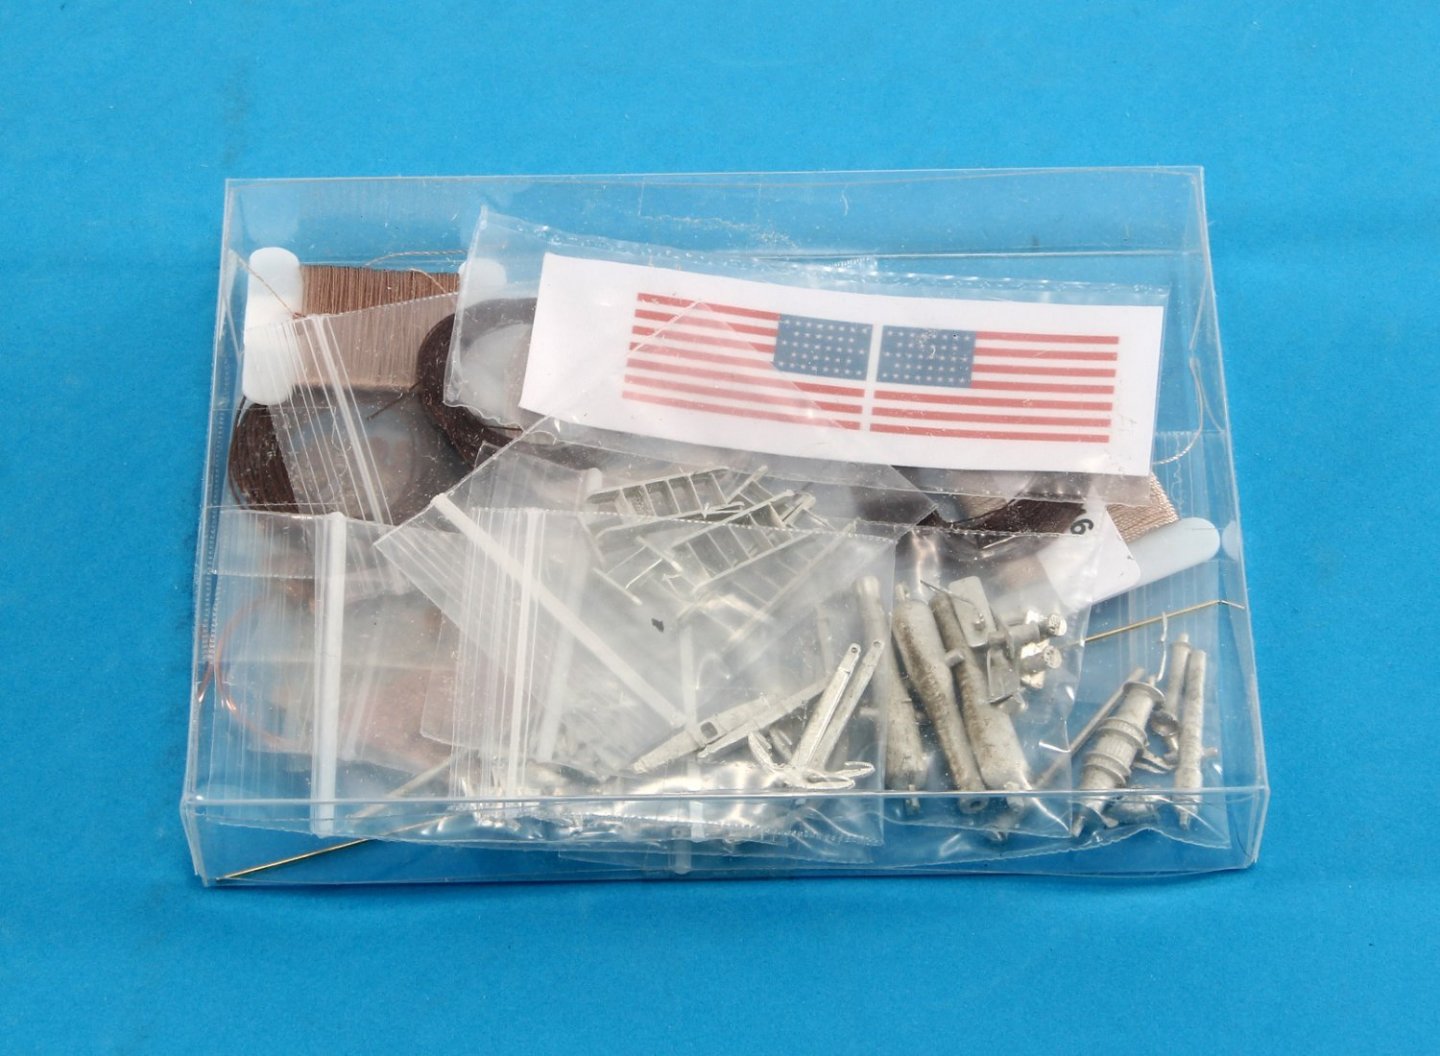
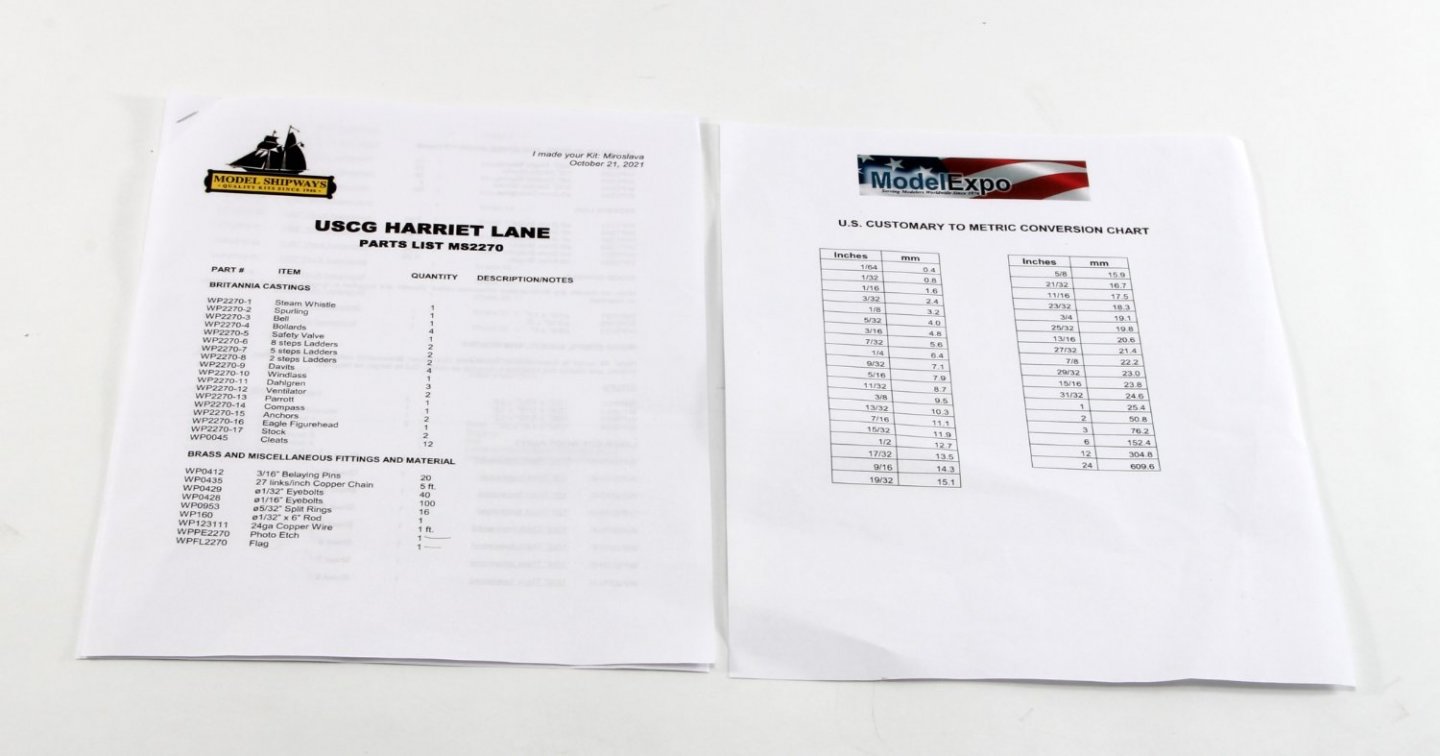
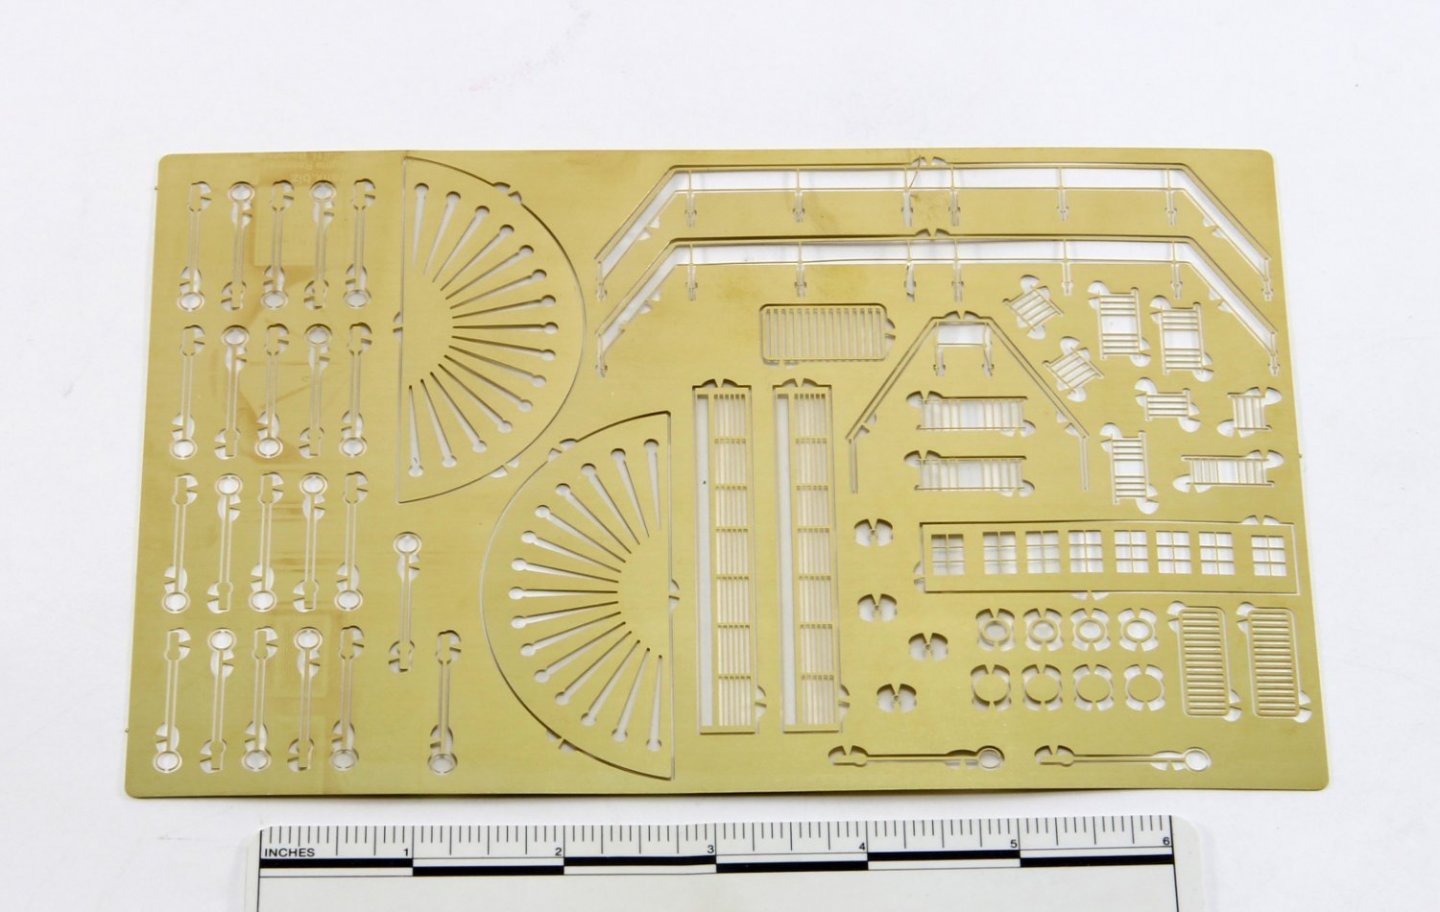
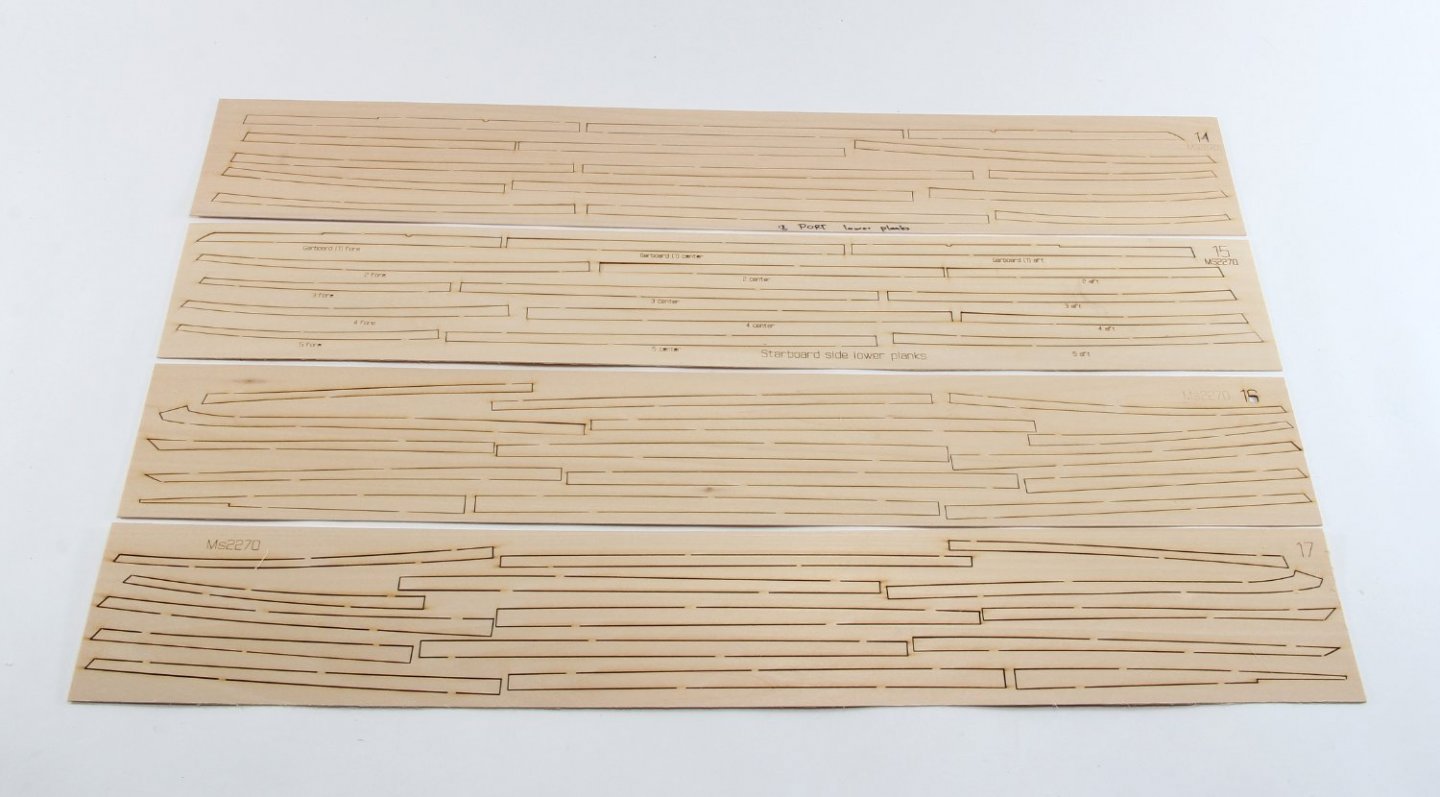
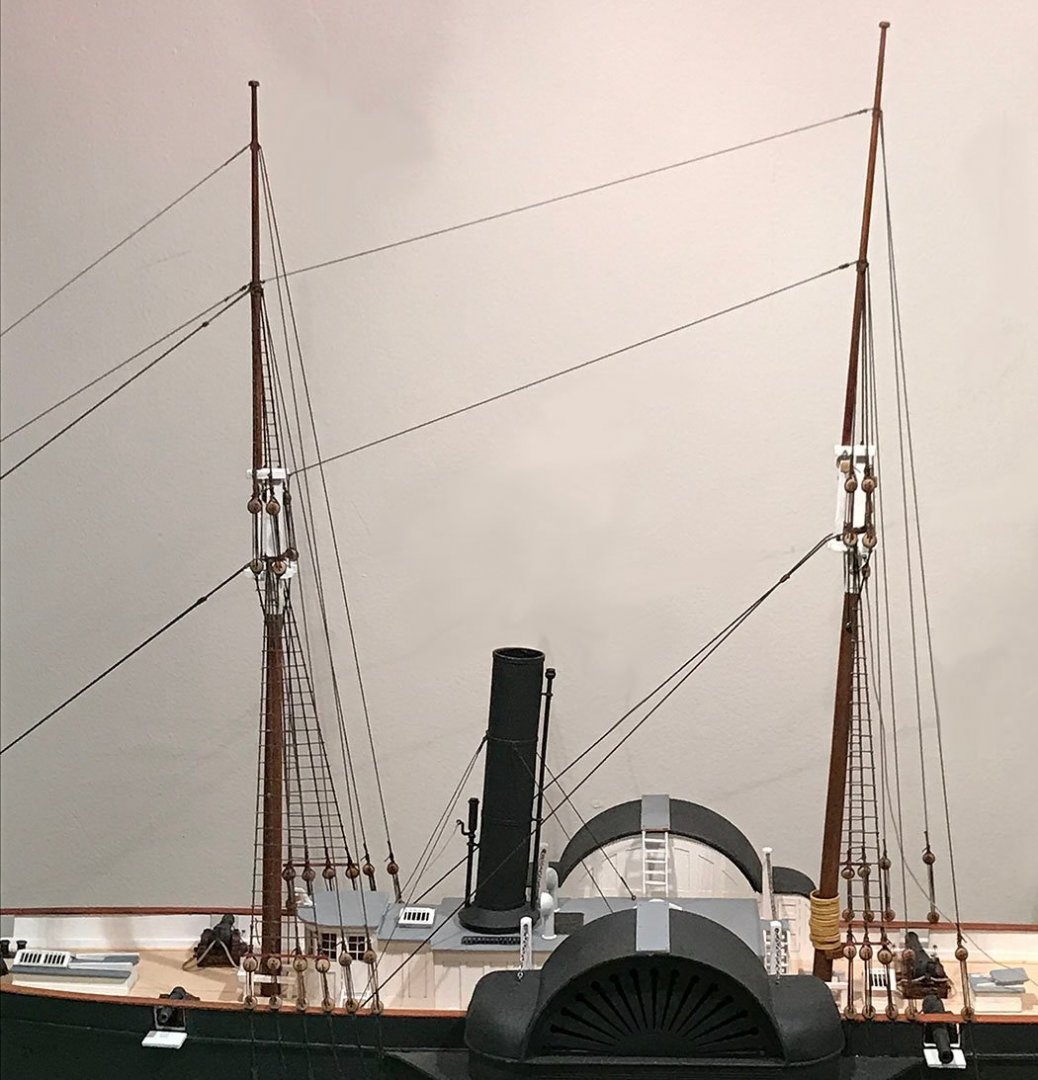
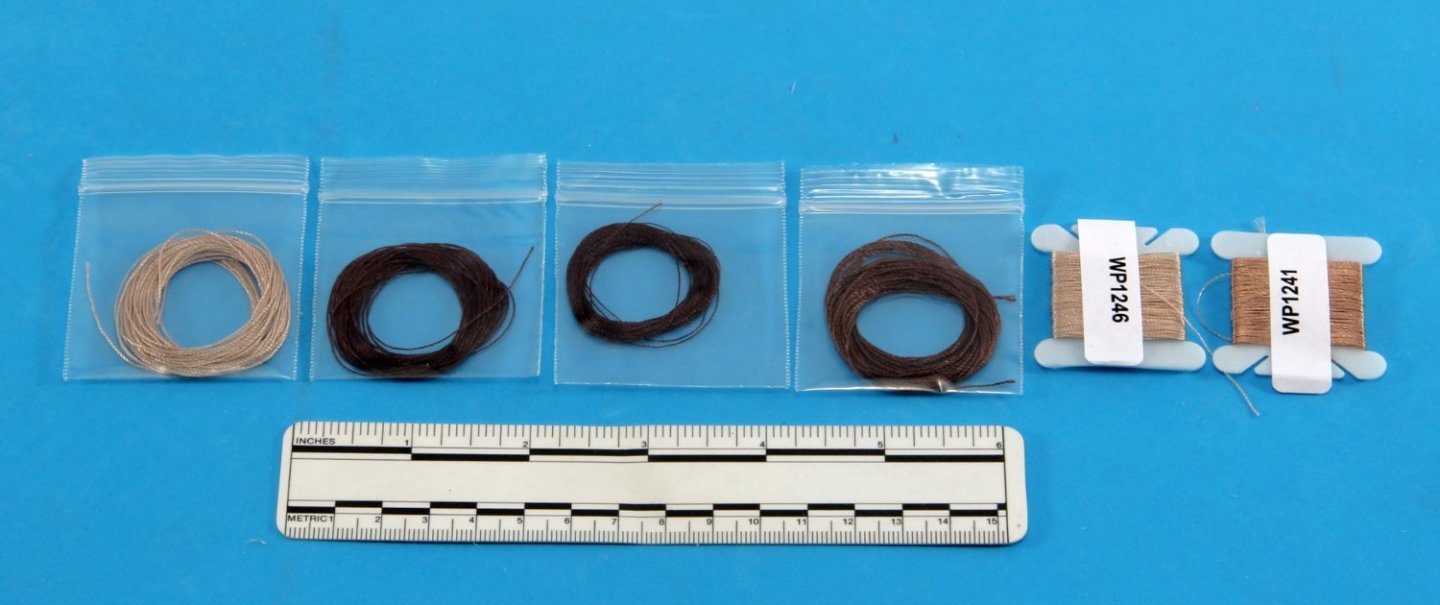
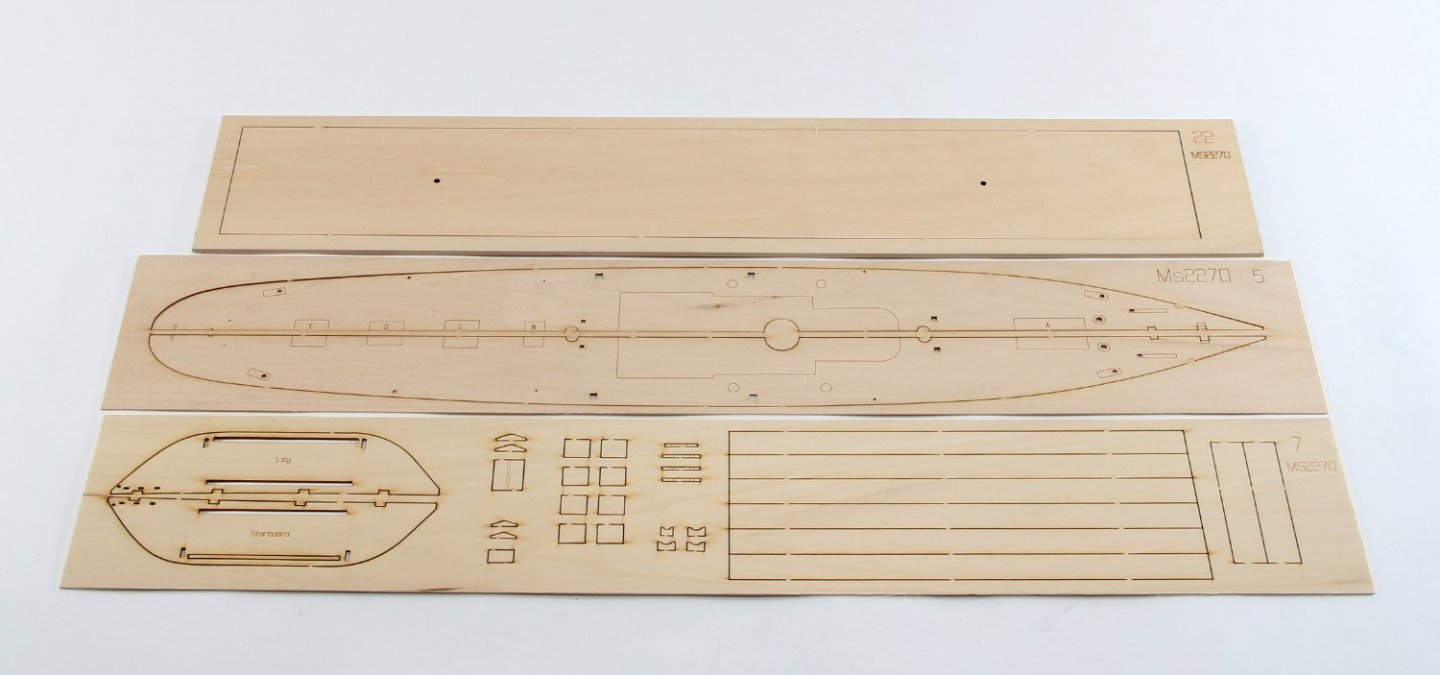
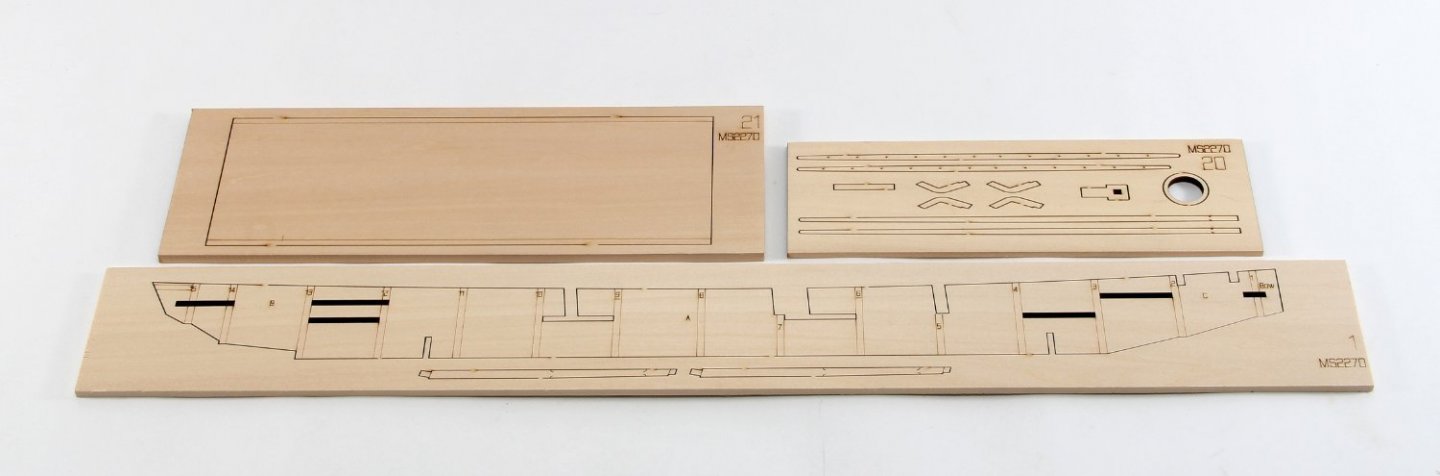
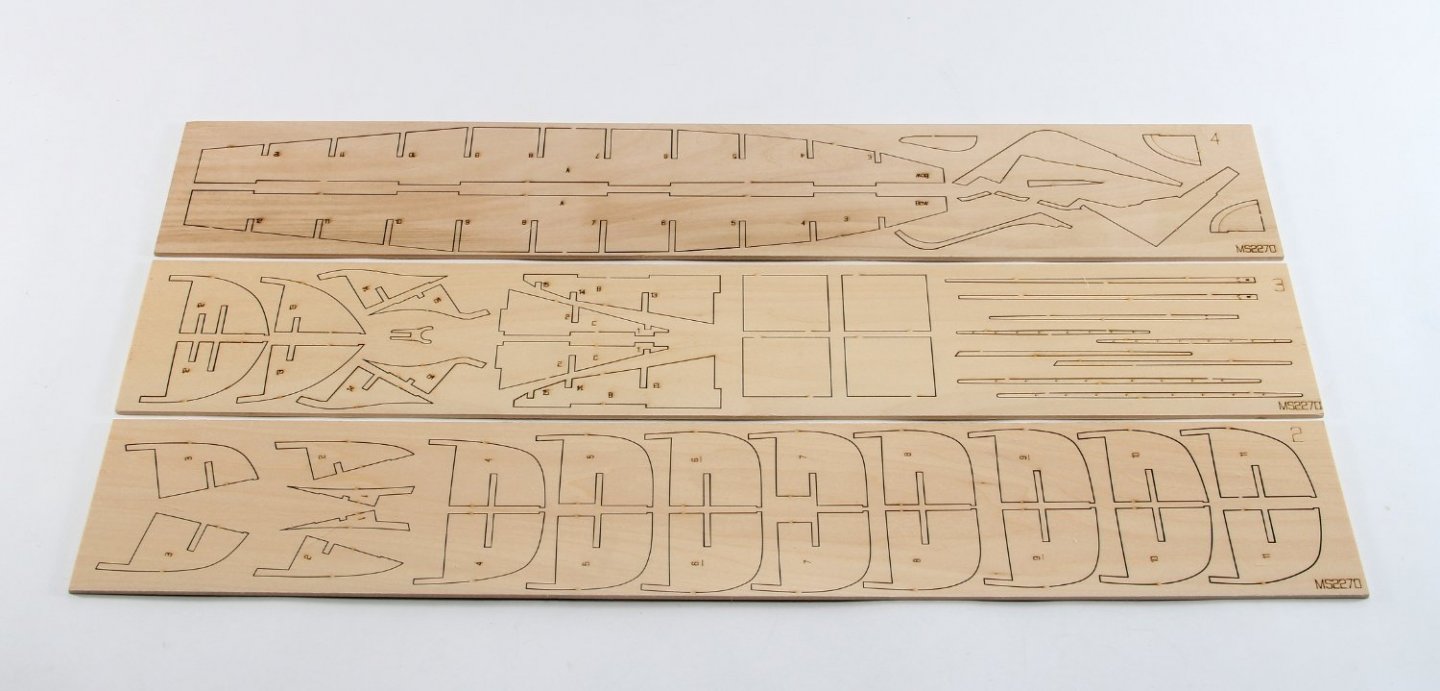
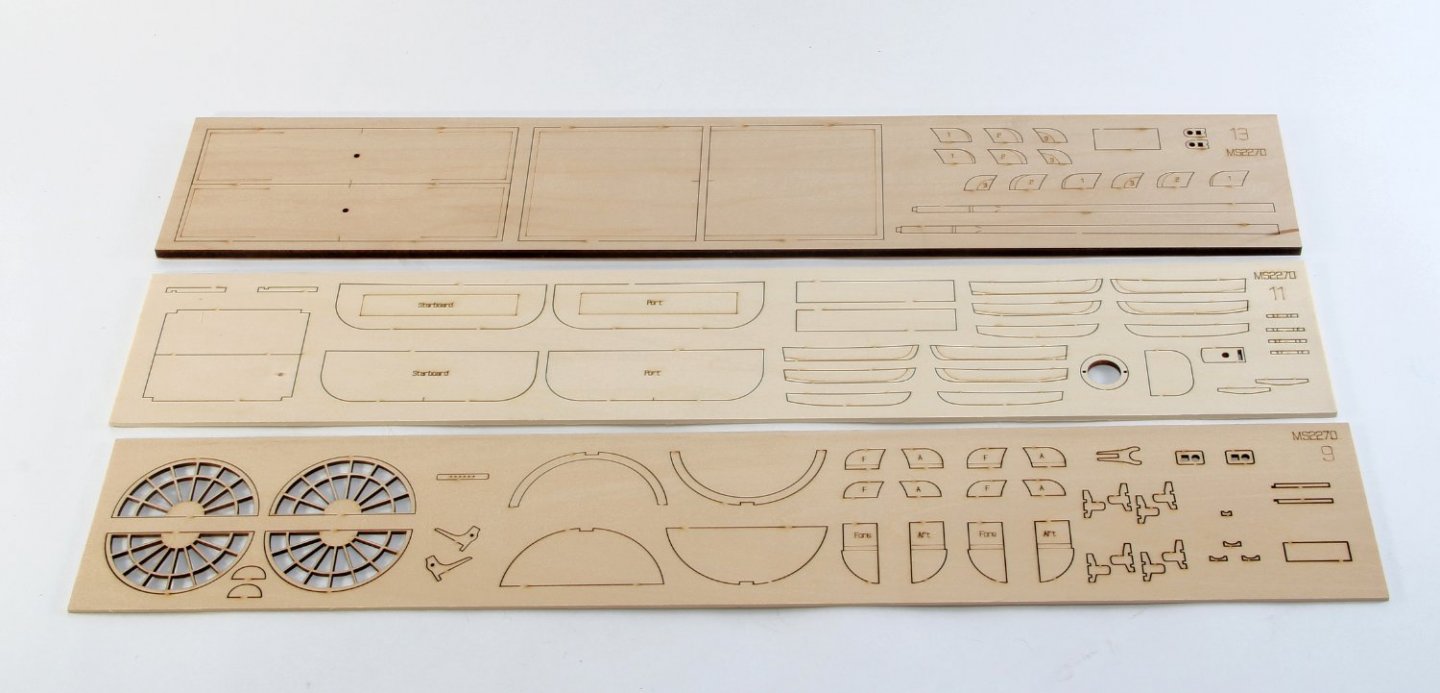
KIT REVIEW – USCG HARRIET LANE MODEL SHIPWAYS KIT #MS2270 Scale 1:96 (1/8' = 1'0") Length (overall) 28", Width 8", height (on base) 16" Plank on Bulkhead construction This kit is the fourth in a series of progressive model tutorials by David Antscherl for Model Shipways (Division of Model Expo) with the Lowell Grand Banks Dory, the Norwegian Sailing Pram and the Muscongus Bay Lobster Smack being the three previous models. All have been reviewed here. The kit comes in the usual sturdy blue box with a large color label showing a completed model. The box weighs just ounces less than 5 pounds. Upon opening the box, the plans are the first thing seen. There are five sheets of 18" x 36" plans labeled as Deck, Rigging, Sail and two sheets labeled as Rigging and Laser Cut Board Parts Identifier sheet (A-L) and (M-Y). The box also contains the following: Sixty-six page full-color instruction manual Twenty-two sheets of laser cut Basswood Three sheets of laser cut paper card Seven pieces - strip Basswood Three wood dowels Six rigging line spools Five packs of blocks Eighteen different Britannia castings – multiple pieces of several parts One sheet of Photo Etch Brass Misc. Brass and other parts Parts list – 3 pages The sixty-six-page full color instruction manual is well done. Before any assembly is started it is my recommendation that the modeler should read every word of the instructions before doing any assembly. The first page of the instructions cautions the reader in red print to read the instructions. There are numerous tips for the modeler designed to guide to building this or any other models. Tips are printed in red to help the modeler. There are also "Super Detail" tips throughout that provide ways to improve the accuracy of the model. The most important tip is "Take your time". There are hints throughout the instructions printed in red to catch the attention of the builder. Read them. Most tips will help with this kit and some of them will help in the future with any kit. Planking Sheets Planking is supplied slightly oversized but to the correct shape for the location intended. Adequate extra material is provided on the width of the parts to sand to fit. The other 18 sheets of laser cut wood Three Laser Cut Paper Sheets 5 1/2" x 8" x 0.0095 Photo Etch Brass Box of Cast Metal Pieces, Rigging Material, Flags & Wire Ladders, Anchors, Canons, Davits, Ventilators Belaying Pins, Eyebolts, Wire & Brass Rod Windlass, Cleats, Eyebolts, Chain Flag and Rings Blocks Rigging Line Rigging – in progress photo – Courtesy of David Antscherl Parts List – 3 pages and US to Metric Conversion sheet Overall, I think this is a great kit with good cast parts and laser cutting of the wood is very well done. The laser cut pre-spiled planking is a nice feature and will help most modelers produce a good planking job. The good instructions and plan sheets should leave nothing to be guessed at. The rigging line is very good quality. The blocks are decent quality for the size, but they are the typical kit supplied blocks with square edges so finicky modelers may look for replacement blocks. Thanks to David Antscherl for providing photographs of the finished model. Thanks to Model Shipways (division of Model Expo) for supplying the review kit.


-
It is the Howard Steamboat Museum in Jeffersonville, IN. (812) 283-3728 They usually have both books in stock for under $20 each (its been a bit so they might have raised the prices)
-
I recently started to watch a YouTube video about saw safety and stopped the video after about 30 seconds when the guy went to the saw with an open button up sweater with long sleeves AND a tie! At that point I stopped viewing the video because I figure that anybody who wears long sleeves and a tie while using a table saw is a certifiable idiot. YouTube has some excellent informational videos but also some that are pure BS.
-
Realistic Water
kurtvd19 replied to taylormade's topic in Painting, finishing and weathering products and techniques
SeaWatch Books published a book by Justin Camarata called - Waterline Dioramas: A Modelbuilder's Artform with a review here on MSW - It might be out of print but if you can borrow one it will be a good read. Check the model railroad sites as they do a lot of realistic water. -
Deleting albums
kurtvd19 replied to ChuckB's topic in Using the MSW forum - **NO MODELING CONTENT IN THIS SUB-FORUM**
Chuck: Go to the started album you want to delete and look at the top left box where your write up and other data is and note at the bottom right in the gray box with MANAGE ALBUM and a drop down arrow. Click on it and there is a choice to DELETE ALBUM. Click on it and the job is done. Make sure it's the one you want gone as it's final. -
If you want a lathe for model building this is not what you want. Do a search here on MSW for TAIG Lathe and Sherline Lathe there are also some others used for our hobby. There are several topics about picking out a lathe - check them out. Then if you have questions about a specific one for your use ask and you will get answers/opinions.
-
Roger: That was my first power modeling tool. Got it as a Christmas present when I was in 5th grade IIRC. I had it sitting around for years after moving on to better tools and it finally was gone - maybe at my parent's hands - I just don't remember. But I used it a lot back then.
-
I usually use my Preac for the brass but the Byrnes saw just uses larger diameter slitting blades like on the Preac. I like to make a sandwich of light aircraft plywood with the brass sheet sandwiched between the ply - everything stays nice and straight and the cut edge hardly needs to be sanded. Drop the cut piece in acetone and the glue is dissolved. The only thing I have ever used Duco cement on.
-
Back when I was on the FD and still on the ambulance I responded to a kickback situation and the saw operator wound up dead. Combination of penetrating wound and traumatic impact of the 2 x 4.
-
Mike: Looking good. Airbrushing will not fill in gaps. Don't even try. Your plan to use the filler is the way to go.
-
I do that sometimes but often just rely on selective focus of the webcam making me look sharp and everything else as a blur. I have been accused of false advertising when I look sharp though.😎
-
My local club meets Saturday evening. Being virtual at least I don't have to clean the shop for the meeting after doing the workshop.😎 It might be a bit before it's viewable on the website but it will get up there.
-
A recording will be available on the membership side of the website.
-
I use acrylic paints exclusively. I seal off the wood prior to painting with shellac - it dries very quickly and seals off the wood from the acrylic primer I use without raising any of the wood's grain. When the primer is applied there is no worry about having to knock down the wood fibers that are raised when acrylics are used w/o a sealer. I use a primer - Badger's STYLNYLREZ not only as a primer but sometimes as the final color. It's made in 16 different colors. I recently did a model sailboat that won a gold medal and it was painted exclusively with STYNYLREZ as the final colors. An added bonus I didn't have to take it home and put it in a case because a fellow modeler offered to purchase it and I said OK. I used to spay the wood with water - a light coat - to raise the grain, let it dry sand and repeat until no more raising of the grain occurred then I would prime/paint w/o having to sand wood fibers between color coats. I decided to simplify things and shellac was the answer. Others have said sanding sealer, etc. - nothing wrong with doing it tat way - but shellac works for me.
-
Lighting should be the first thing considered when trying to improve seeing the work. Years ago my Ophthalmologist told me to use bright white light and recommended Halogen lighting for reading and model work. I followed her advice and my eyestrain was no longer an issue. Later when my eyes were changing with age the new Ophthalmologist told me to do away with the hot halogen lights and switch to white LEDs. Changed my reading light and workbench overhead lights to LED and after getting a cataract fixed the LEDs look like the current answer. I had switched to glass lenses in my optivisor before the lighting issue and the combo of glass lenses and LED lights has been my answer. As to plastic lenses I wish they would just go away. My Ophthalmologist has just told me I need a minor procedure to fix my recent blurred vision issues because my implant lens (plastic) is clouded just like some car headlight covers get. A simple 5 minute laser procedure in the office will make the implant clear as the day it was implanted. Nobody ever told me about this - I would still have done the implant because I went from 20/400 w/o correction to 20/20 with the implant and have been assured my vision will again be 20/20 after the laser procedure. So if I have to get this done every 5-6 years no problem. I am sure the plastic lens implant is better than an actual glass lens in the eye so I will live with a plastic lens in my eye but not externally to help with magnification.
-
Chris: Hang onto the expensive set - especially if the lenses are glass - you will probably need the better setup as your eyes age. I used a plastic lens Optivisor for years - a few years ago I tried an Optivisor with glass lenses at a trade show and it didn't take me more than a few hours later that day to order an Optivisor with glass lenses. Difference is light night and day.
-
Which Ship Modelers Shop Notes
kurtvd19 replied to Dave_E's topic in Modeling tools and Workshop Equipment
I have to agree with Bob's reasoning and his recommendation to get Vol 2.