


kurtvd19
-
Posts
3,048 -
Joined
-
Last visited
Content Type
Profiles
Forums
Gallery
Events
Everything posted by kurtvd19
-
 Really a nice build that you can be very proud of completing.
- 263 replies
-
- 1
-

-
- Medway Longboat
- Syren Ship Model Company
- (and 1 more)
-
Photoetch brass black problems
kurtvd19 replied to Seems ok to me's topic in Metal Work, Soldering and Metal Fittings
Blacken it is no longer made. It was a small business - husband and wife - they were killed in a car accident a few years ago and the company died with them. -
Welcome to MSW Chuck.
-
NRG VIRTUAL WORKSHOP - AUGUST 21
kurtvd19 replied to kurtvd19's topic in NAUTICAL RESEARCH GUILD - News & Information
We concluded the workshop today and had 172 in attendance. Had a Q&A session after the talk concluded and everybody had the opportunity to ask questions. Many who registered did not show up but will be able to view the recording in the near future. We will send an email to NRG members to view it on the members side of the website. Those few non-members who signed up will get an email also. It isn't going to be posted immediately but within a short time. -
NRG VIRTUAL WORKSHOP - AUGUST 21
kurtvd19 replied to kurtvd19's topic in NAUTICAL RESEARCH GUILD - News & Information
There are plenty of seats available. Please register because those who are registered will be in the first group to get access. All members will, but not at the same time as those who registered. Once we pass 100 which was real early we paid the month fee for extra seats - we will never fill all those seats - the fee is very reasonable so it's not a burden. There are 251 registered and we have almost that many seats still available. -
NRG VIRTUAL WORKSHOP - AUGUST 21
kurtvd19 replied to kurtvd19's topic in NAUTICAL RESEARCH GUILD - News & Information
It will be recorded. It will be on the member only area of the web site for members to view. It is best to register so you get the first opportunity to view the video - at your leisure. It will be available to all members -but not always right away - we are still working our details. But those registered will be emailed a link within a few days of the event. For those non-members who signed up they will be provided with a link to the video also for a limited time. -
NRG VIRTUAL WORKSHOP - AUGUST 21
kurtvd19 replied to kurtvd19's topic in NAUTICAL RESEARCH GUILD - News & Information
Figure on at least one hour - there will be opportunity for questions. -
Dying/coloring rope; sources for purchase of quality rope
kurtvd19 replied to Tomculb's topic in Masting, rigging and sails
Chances are it doesn't resemble rope in appearance. -
They all go to classes together. They do it under the cover of going to the washroom together when out with the husbands. Always go in pairs - rule of the classroom. All public restrooms have a white board with the sayings to memorize written out. How else can you explain how they all say the exact same thing to us?
-
NRG VIRTUAL WORKSHOP - AUGUST 21
kurtvd19 replied to kurtvd19's topic in NAUTICAL RESEARCH GUILD - News & Information
THANKS -
NRG MODELERS WORKSHOP SATURDAY, AUGUST 21 The Ship Modeler's Ten Step Program or How to Transform Your Kit Model from Out of the Box to Out of this World You have built a few ship models “out of the box” but you are considering taking the next step towards kit-bashing. The idea is exciting, but you have no idea where to start. This presentation takes you through the process of transforming your kit build into a one-of-a-kind, historically correct ship model. From research to technique to bringing your model to life, NRG Chairman Toni Levine will show you how to make your model stand out from the crowd. To illustrate the Ten Steps, the presentation concludes with do’s and don’ts using her first kit model, Mantua’s Peregrine Galley, as a teaching aid. Details Date: Saturday, August 21, 2021, at 10:00am Central Location: Online, attend using your computer or tablet. Registration: Advance registration required. Cost: Free for current fully paid-up NRG members, $10 for non-members About NRG Online Workshops These workshops are presented online. You can attend from anywhere in the world, all you need is a computer, tablet, or mobile device. You'll be able to watch the presentation and ask questions during the Q&A period. NRG members can typically view a recording of the workshop later. Space is limited, and advance registration is required. NRG workshops are FREE to current fully paid-up NRG members. The cost for non-members to attend this Workshop is $10 US. NRG members will be able to select the FREE registration option after starting the registration process and entering the email address on file with the NRG. You may need to log into your NRG account to register for free. If you're not sure how to log into your account, click here for more information. Not an NRG member? Click here for information on joining! REGISTER CLICK ABOVE TO REGISTER After you complete registration, you'll receive an email with a link to attend the workshop. Just click that link at 10am Central on August 21, 2021, to attend. SAVE THE LINK. About the Presenter Toni Levine has been a Director of the Nautical Research Guild since 2013 and was elected Chairman this year. She has been a moderator on Model Ship World since 2017. She is a retired physician. Toni has been building models since she was a child, starting with a Monogram Hellcat that had been intended for her brother. Her first ship model was a Scientific Cutty Sark, built in high school; a model she still has. After her education was completed, Toni resumed model building, starting with plank on bulkhead kits and progressing to plank on frame scratch builds. Her most recent completed model is Atalanta, a British sloop of 1775 which was constructed following David Antscherl’s The Fully Framed Model. This model won several prizes at the 2019 Midwestern Model Ships and Boats Contest, including Gold Award, Modeler’s Choice and People’s Choice. Most recently, she developed a half hull kit to instruct novice and intermediate modelers how to correctly plank a hull and a monograph detailing how to build a capstan for intermediate and advanced modelers. Both projects are available through the Guild store.
-
How to access the digital NRG JOURNAL?
kurtvd19 replied to Zzzz's topic in NAUTICAL RESEARCH GUILD - News & Information
No. However we do sell CDs and Flash drives with back issues all the way back to day 1. Not only for the Journal but also Ships in Scale and Model Shipbuilder magazines. You can access the indexes of all 65 years of the Journal on-line and if specific articles are wanted they can be obtained for $2.50 per article. NRG members get 20% off the price of the CDs and Flash drives. -
You are right - it is designed for the beginner or for anybody wanting to learn the correct way to plank. Second sentence - Both - you can't plank properly until you have the frames in place and faired. Take your time and thoroughly read the instructions and make sure you understand them before proceeding to cut and shape wood. Check Toni's build log here for the definitive word.
-
The problem with this type besides weakening the wood is that the crimped side is no longer fit to be viewed - so if one uses this type they can't do open boats or anything where the inside of the plank is visible.
-
Painting Problems
kurtvd19 replied to Neil10's topic in Painting, finishing and weathering products and techniques
I agree totally with Roger. I believe what you show is compatible with wood - but try it to see. -
Painting Problems
kurtvd19 replied to Neil10's topic in Painting, finishing and weathering products and techniques
I have used Stynylrez for many wood models and it has filling properties. I would use wood varnish myself. Have no idea if plastic varnish would work - actually I don't even know what you mean by plastic varnish other than the Tamiya name denotes plastic. Reverse the question - would you use wood varnish on plastic? Not trying to be a smart*** but I find it a logical question that can guide many decisions with unknown materials. -
SESSION 2 HAS STARTED. July 30 to August 2. Same offer as first post here. Limited time. Again August 6 to August 9. After this it's go to the shows to get these deals.
-
Richard: Congratulations! You will enjoy them. Before you use the airbrush read the instructions what little there are - but familiarize yourself with the terminology and feel of the brush in your hand. Be advised that they are usually shipped with the needle retracted a bit so if you try to spray w/o checking it over you will not be successful in spraying! Also, shoot some water into a towel or rag just to get the feel of how the trigger movement affects the spray as well as changing the pressure up and down to get a good spray pattern - always try to use the minimum amount of pressure to get a good spray pattern. I haven't used anything higher than about 18 psi and most times shoot at 12 to 15. Glad to see the high roller trigger was included on your brush. It adds a lot of control over the old short trigger. The nice thing is that it is available and interchangeable with all of the Badger triggers on double action brushes (with a very few exceptions). I have added them to all of mine that didn't have them originally. The paint affects how much pressure you need. Be sure to read up on how to judge the paint's viscosity for spraying suitability - I will provide a reference here at the end. This video by Badger's President is a bit long but with the 101 booklet and this talk you will be well prepared to practice and get going. https://youtu.be/tsW-vN0_lHw Good luck Kurt Badger - UltimateAirbrush101.pdf
-
Can't go wrong with that combo. Being a double action brush you must practice more than with a single action brush - but it is a lot more versatile than a single action. Like any tool - you are not a master with it in 10 minutes.
-
There will be two more dates for this offer - but stock can be an issue - if you need more time. 7/30 to 8/2 and then 8/6 to 8/9 - same prices if the item you want is available. They will sell out of some of the more popular items.
-
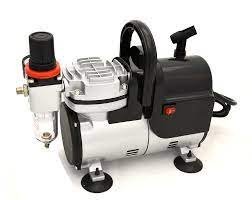
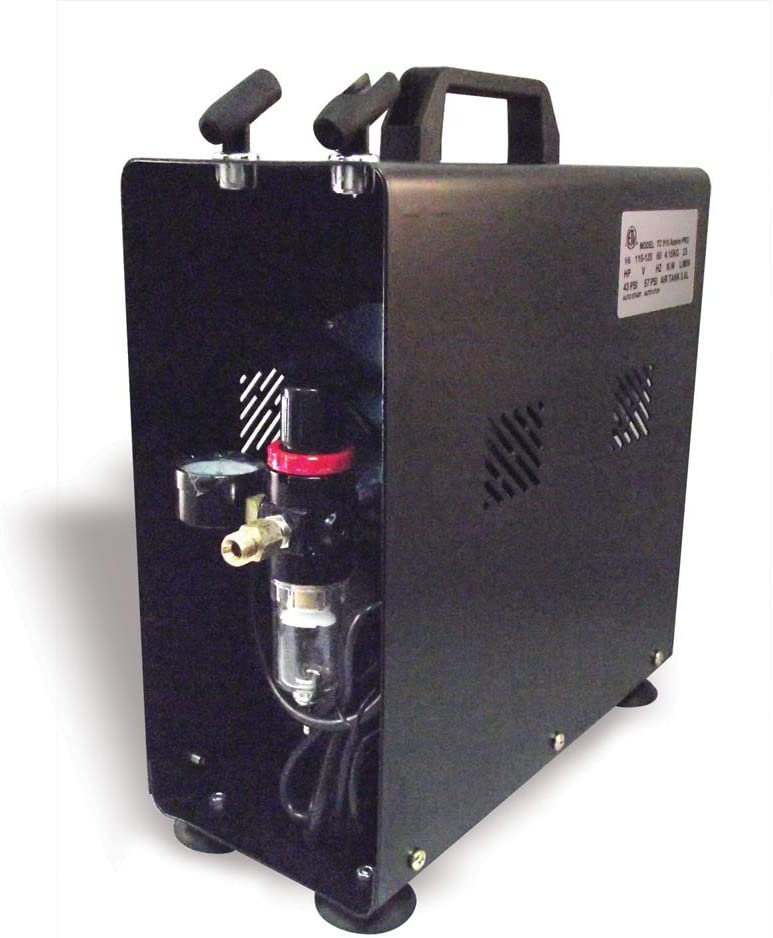
Actually the hose if of adequate length does a good job of removing pulsation as a problem. The test is - take the hose off the compressor and if it doesn't have a tank there will be some pulsation evident. Reattach the hose and w/o an airbrush check the air flow from the hose. The pulsation should not be evident. This works better the longer the hose, but the 6 or 10 ft braided hoses work fine (not at all sure using the thin plastic hoses). If there is pulsation evident from the end of the hose then adding a tank can help. In all my years of airbrushing using a decent air regulator off the compressor like the photo below with a 8 ft hose I have never had a pulsation issue regardless of the airbrush being used. The regulator acts as an in-line pressure control valve and I would never attempt to use any compressor for airbrushing w/o a pressure regulator. Don't use a regulator in-line closer to the brush but some do but my set up is compact and easy to adjust at the compressor. I now use a TC910 - below that has a tank but I got it more for the slightly extra capacity than for a tank. If you have a pulsation issue putting a storage tank in-line would solve any pulsation issue. Kurt
-
OK. I will pass this on. Thanks Eric.


