kurtvd19
-
Posts
3,048 -
Joined
-
Last visited
Content Type
Profiles
Forums
Gallery
Events
Everything posted by kurtvd19
-

NRG Capstan Project
kurtvd19 replied to tlevine's topic in - Build logs for subjects built 1751 - 1800
This isn't the type of project where templates are needed. Every dimension of each part is provided in full size so marking the parts in any scale the builder picks is able to be accomplished with more precision than printing out the plans to use as a template. The primary purpose of this project, like the half hull planking project is to educate the modeler. The NRG is chartered as an educational organization. Following the monograph will help educate builders in scales and drawing interpretations without going through unnecessary rescaling calculations. Toni's without access to the internet till next week. She may have more to add later. Take care, Kurt -
Air brush vs paint & brush
kurtvd19 replied to jefferyt's topic in Painting, finishing and weathering products and techniques
Do a search here as there are several discussions on airbrush use where your questions will most likely be answered. If you then have specific questions go ahead and ask for clarification or more data. -
A front surface mirror eliminates the gap that one sees between the half hull and the mirror's reflective surface that in a std mirror is on the back side. The front surface mirror is fragile and easilly scratched but once you see the difference the care is worth it. Front surface mirrors are expensive but a good source is scrapped copy machines - there are places that take these machines apart and sell the parts - mostly in major cities.
-
This model won a Gold award last night at the WI Maritime Museum's 44th annual contest (virtual this year). Dan entered in the Advanced category (he's won previous Gold awards so one must enter the next higher category each time until reaching the Advanced level). The sail details received nice comments. I too like his sawhorses. I have used sawhorses before but I really like his version and I will blatantly copy his version at some point.
- 24 replies
-
- 5
-

-
- Bluejacket Shipcrafters
- Finished
- (and 1 more)
-
I want to let everybody know that this model earned a SILVER award at the WI Maritime Museum's 44th Annual contest (virtual this year) last night. It was entered in the Scratch Built category. Congratulations to Eric.
- 599 replies
-
- 11
-
-

-
- sidewheeler
- arabia
- (and 4 more)
-
Glue for template
kurtvd19 replied to Koopyetz's topic in Building, Framing, Planking and plating a ships hull and deck
I have an Epsom scanner that doesn't induce distortion. Real easy to check - make a scan at 100% print it out at 100% and then using a light box or window hold the copy over the original to see how close it is. I have checked and the copy is identical. It's a home type with a maximum copy size of 9 x 14. -
Symmetry
kurtvd19 replied to Don Case's topic in Building, Framing, Planking and plating a ships hull and deck
A full size asymmetrical hull will tend to go in a big circle one way or the other - best to avoid if possible😎 -
Steamboats and other rivercraft - general discussion
kurtvd19 replied to Cathead's topic in Nautical/Naval History
Randy: I have been meaning to mention that the Murphy Library at LaCrosse, WI has THE collection of riverboat photographs and they might have something on the Z> BIDDLE. Ralph DuPae collected riverboat photographs from the western rivers regardless of how obscure. Ralph's knowledge of riverboats was second to none and he could recall any riverboat photograph he had ever seen and tell you what it showed. He helped me extensively in my search for photos of the towboat that pushed all but the first submarine produced in Manitowoc, WI to the gulf (from Lockport, IL) and recalled the number of photos of the boat that he had and what each showed. I paid him on the spot - we were at a meeting in IA -and got a large envelope of photos about 2 weeks later with exactly what he had described. All his photographs now make up the majority of the Murphy Libraries collection. I have lost contact with the librarians there but they have a reputation of being very helpful.- 281 replies
-
- 3
-
-
-
- Steamboats
- riverboats
- (and 3 more)
-
NRG Capstan Project
kurtvd19 replied to tlevine's topic in - Build logs for subjects built 1751 - 1800
Check the store on Monday.- 65 replies
-
- 11
-
-
-
Ken is absolutely not an artist which he readily admits. But he has a practical, down to Earth way of explaining how airbrushes work and how to use them. He is without question the most approachable and helpful ambassador of airbrushing. This video is absolutely worth the time it takes to watch. If you want to learn the basics this one is hard to beat. I recommend it to everybody who asks me how to get started. Thanks for mentioning this video Ron.
-
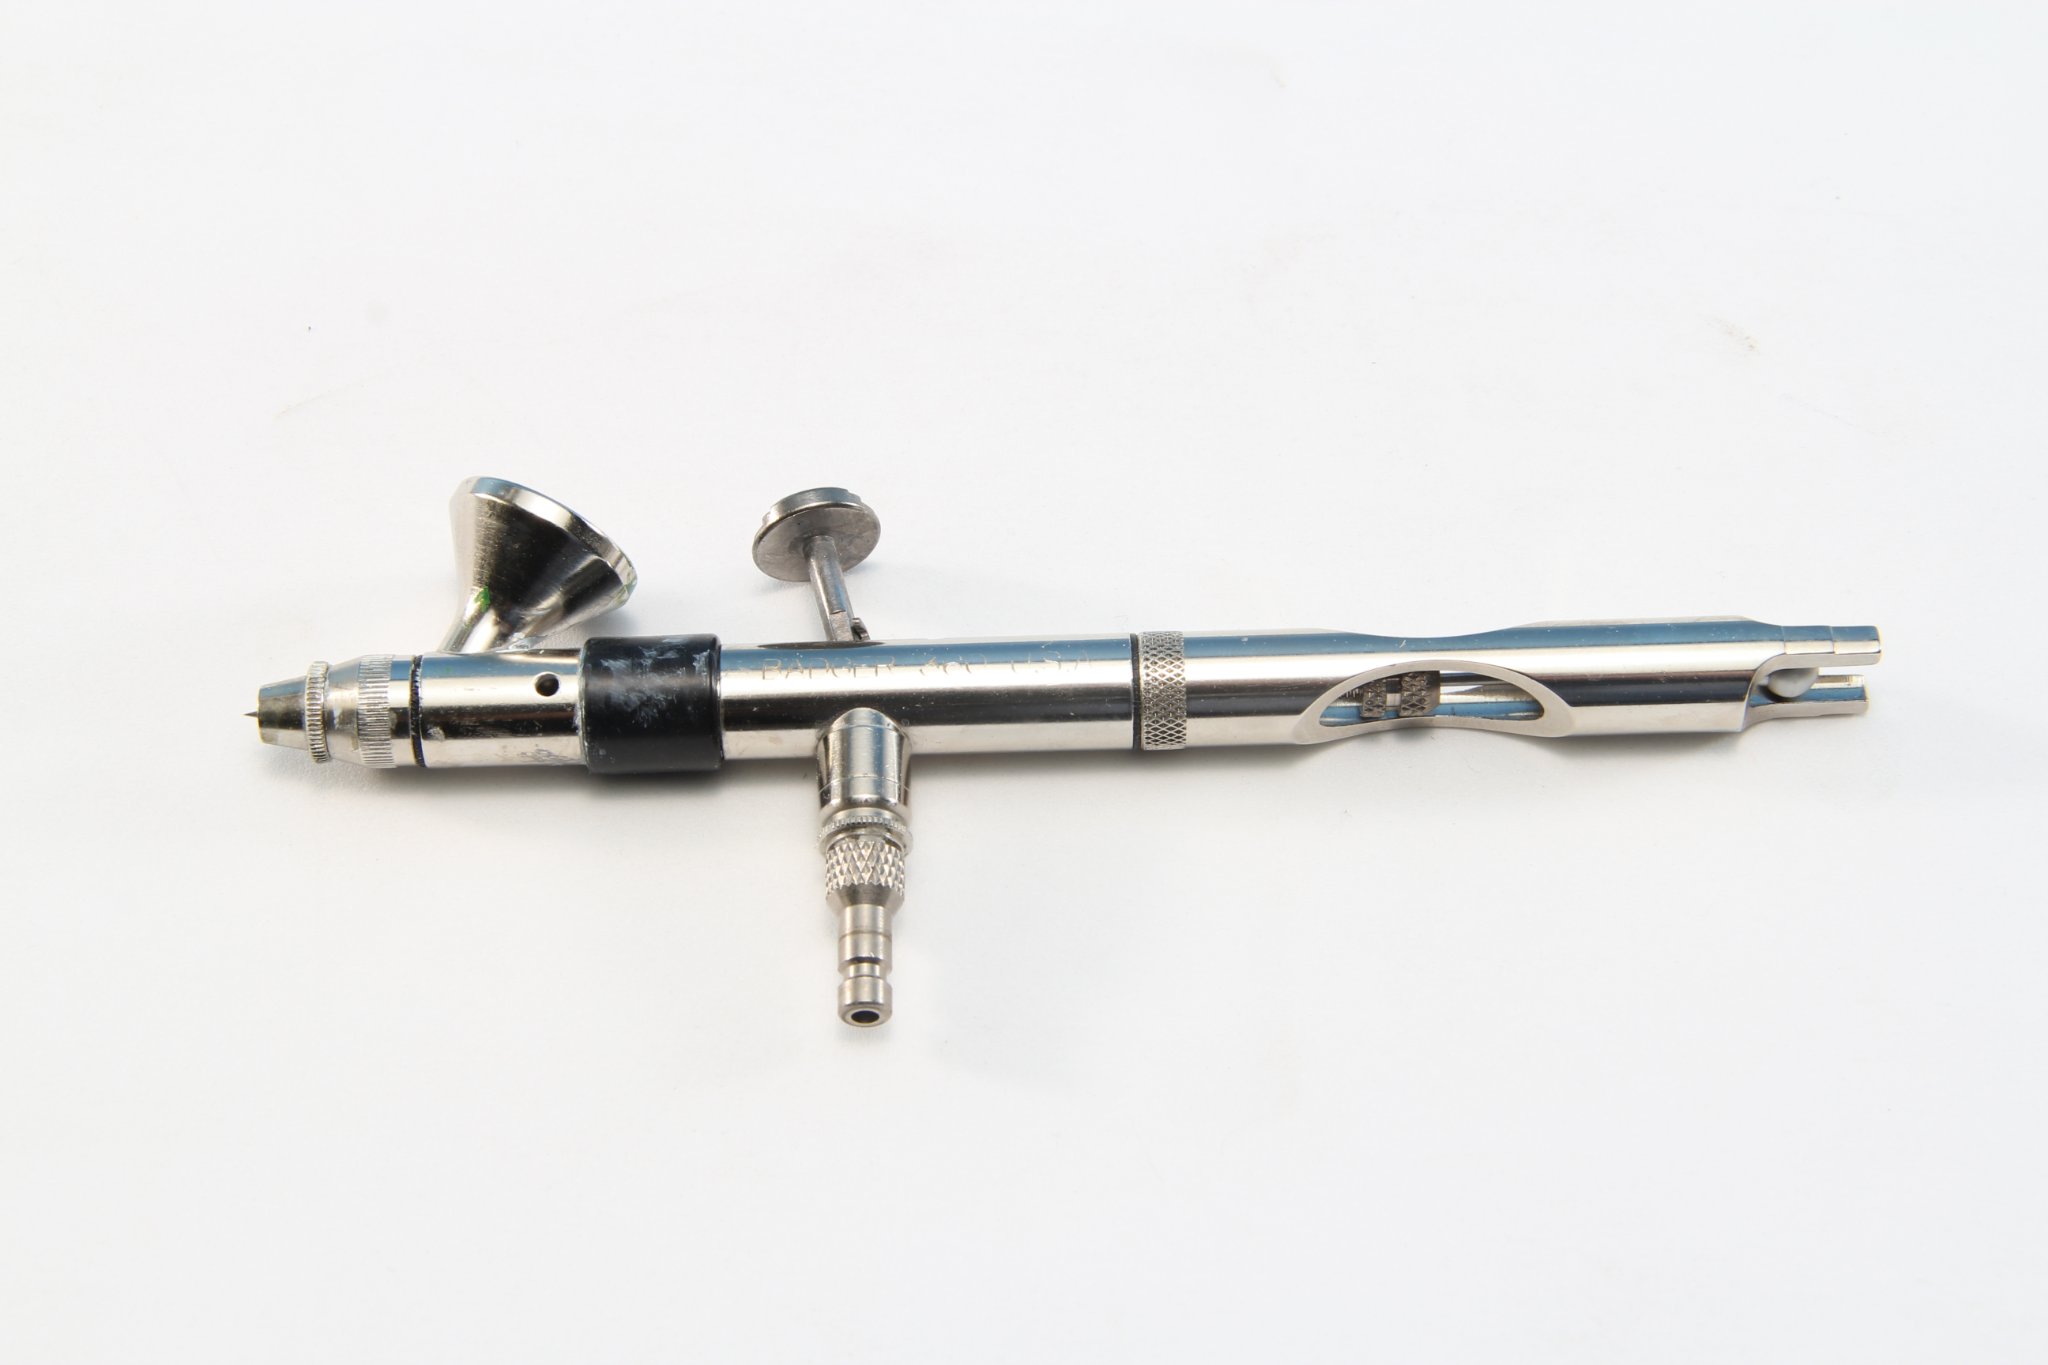
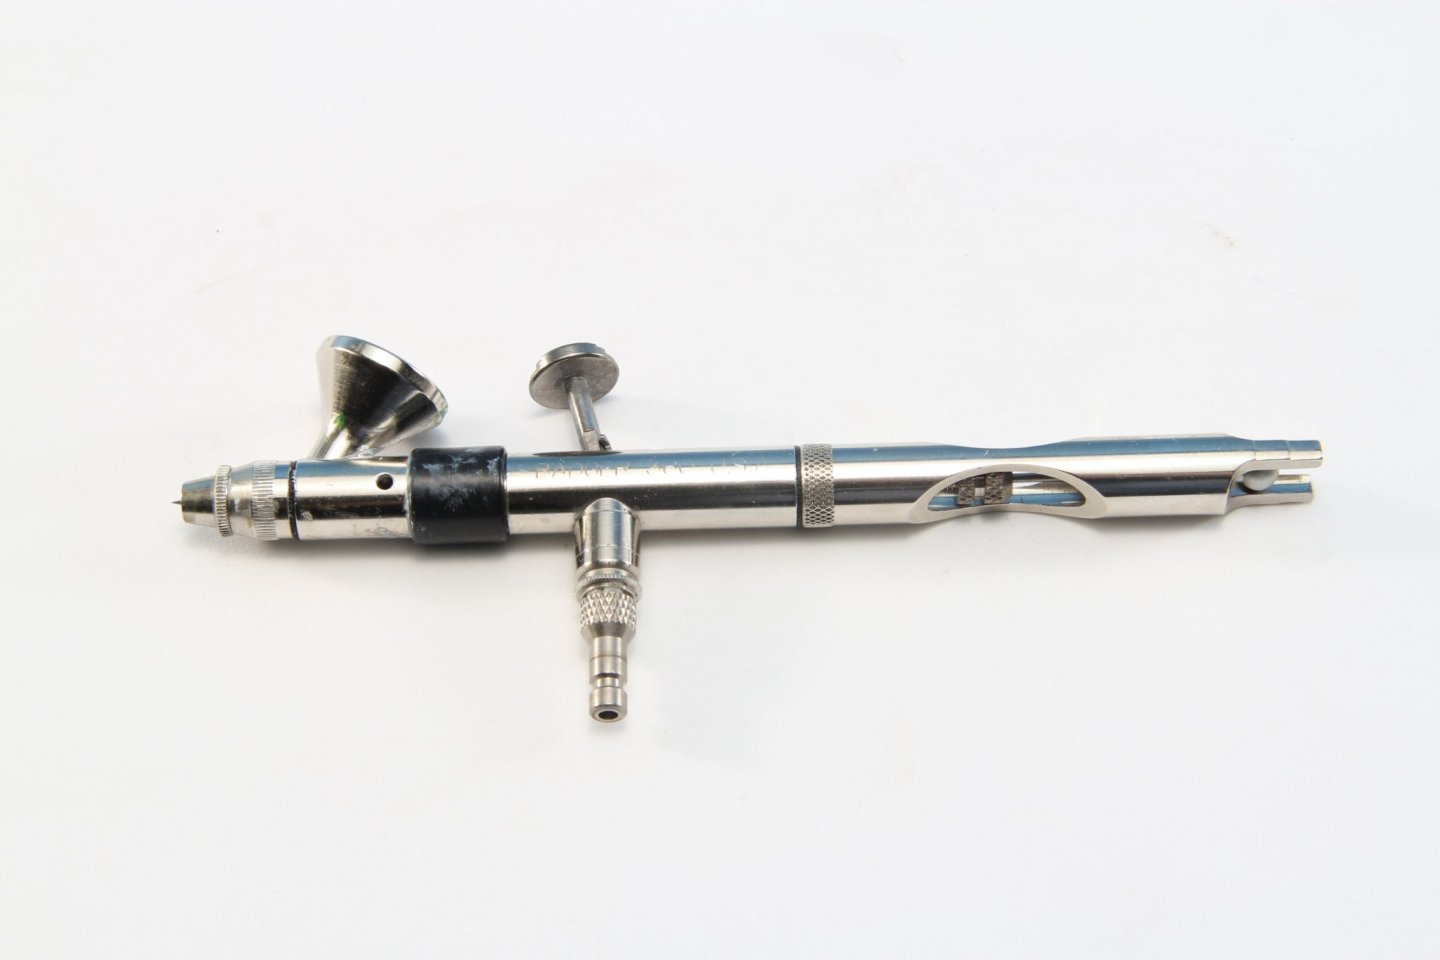
Diver: I am a Badger user. But anything I say can be applied to any name brand airbrush. The rip offs sold by Harbor Freight and similar places are to be avoided as the junk they are. If you want a simple to use airbrush that will give a good finish with the lowest learning curve the Badger 350 is my recommendation. I got the equivalent model in 1960 and used it exclusively for many years and still use it occasionally. I reach for it when I have larger areas to cover and that 12" Fiat with one main color is well withing the 350's capability. It is an single action, external mix, suction type brush. Being external mix means the finish will not be the finest finish one can get from an airbrush but it will be at least as good as a rattle can finish. An internal mix airbrush will always produce a better finish than an external mix brush - name brands compared. But I have had several models painted with a 350 win gold awards as have some close friends. $44.40 brush/bottles only. The next step up in a single action brush would be a Badger 200. This is a single action, external mix, suction feed brush. There are several 200's but the NH will do the job with the standard needle and all. $56 price - brush/bottles only. The next step up is a double action brush. The Badger 360-1 is called the Universal because it is both a suction feed and a gravity feed brush all in one. The front end rotates - thus the 360 - so a bottle can be lugged into the cup from the bottom. For finer jobs rotate the color cup to face upwards and paint can be put into the color cup and fed via gravity. This is especially nice when doing small parts or doing several color changes for detail parts. I hate having to use a jar and all the tubes and caps that need cleaning when plugging in a color jar to paint several small parts that the gravity feed feature would have allowed me to just drop in 4-5 drops and still have plenty left. There is a bigger learning curve to use a double action brush than a single action brush. Single action = push down for paint. Air and paint flow is adjusted separately off the model - - push down for air and then either open or shut down the nozzle to release more or less air and paint. And then paint. A double action brush = push down on the trigger to release air and then pull back on the trigger to release paint. Attached is a booklet that explains the terms I have used as well as additional information concerning airbrushes and airbrushing. I hope this helped. Any more questions just ask. Kurt Badger - UltimateAirbrush101.pdf

- 13 replies
-
- 10
-
-
Diver: First, what do you plan to paint? Miniatures or large r/c boats? I can help but you first need to describe what you plan to paint and what kind of paints you plan to use (if you have any thoughts on paint at this stage). There are great airbrushes for fine detail and there are great airbrushes for general painting. They are not often the same brush. Do you have an air compressor? There are a lot of variables that make a choice of a brush difficult. Answer these questions and I am sure we can set you up. Kurt
-
Vacuum (or Suction Pick-up Tool
kurtvd19 replied to Will Ferris's topic in Modeling tools and Workshop Equipment
Isn't it true that nobody sells anything for more than Micro-Mark? -
Steamboats and other rivercraft - general discussion
kurtvd19 replied to Cathead's topic in Nautical/Naval History
I agree with Eric that it is more likely a spar than any sort of cover rolled up. Way too uniform to be anything rolled up - especially that far above the deck. No sag. The roll down tarps in your photos show sag and nonuniform gathering as would be expected with tarps.- 281 replies
-
- 2
-
-
- Steamboats
- riverboats
- (and 3 more)
-
A finish is applied after the parts are assembled and sanded. It is a very rare part that isn't processed in some way after being removed from the sheet. I can't think of any laser cut part that can be finished prior to sanding to some extent.
-
Vacuum (or Suction Pick-up Tool
kurtvd19 replied to Will Ferris's topic in Modeling tools and Workshop Equipment
Below are a couple of pick up devices I have had for many years. The small one is the one I have used the most - simply squeeze the blue bulb place over the part to work with and squeeze again to release it. Using the larger one is a matter of pushing down on the black button grab the part by releasing it and pushing it again to release the part. It came with 2 or 3 other tips. Both work great.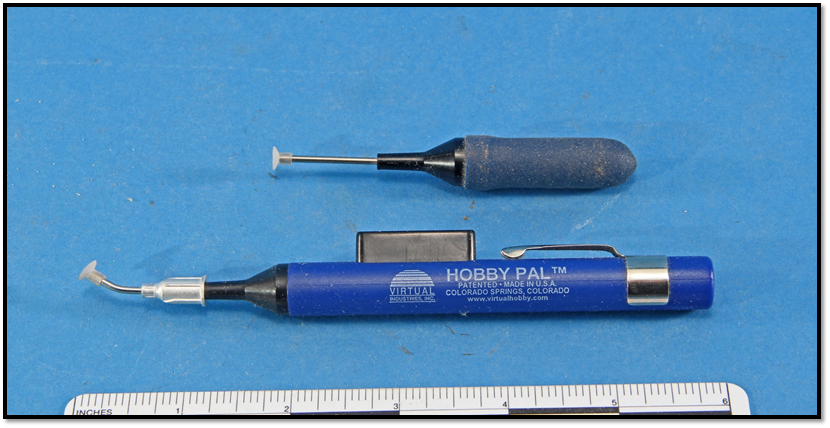
-
Steamboats and other rivercraft - general discussion
kurtvd19 replied to Cathead's topic in Nautical/Naval History
Randy: I think the Howard Steamboat Museum still has brand new copies for sale. I got my copy there. https://www.howardsteamboatmuseum.org/ Kurt- 281 replies
-
- 3
-
-
- Steamboats
- riverboats
- (and 3 more)
-
15 1/2 inches
-
Plexiglass And Plans Question
kurtvd19 replied to Mike the Maxx's topic in Modeling tools and Workshop Equipment
There are a couple of discussions regarding using plans in the shop that you can check out by doing a search. Many hang the plans using various means. My shop cat just sheds on the plans - and everything else in the shop. My worst problem with him is moving him if I need to view the plans that are laid out on a large drafting table - he is able to channel super power forces to suddenly be able to apply hundreds of pounds of force downward to resist being moved. I usually clamp my plans to a sheet of foam core board and set this on a large easel adjacent to my work table. Large plans get laid out on the drafting board. One problem with putting plans under plexi or regular glass is that you can no longer take measurements off the plans - in the case of non-dimensioned plans. -
Tell Me Why This Is A Bad Idea ( If it is )
kurtvd19 replied to Gregory's topic in Modeling tools and Workshop Equipment
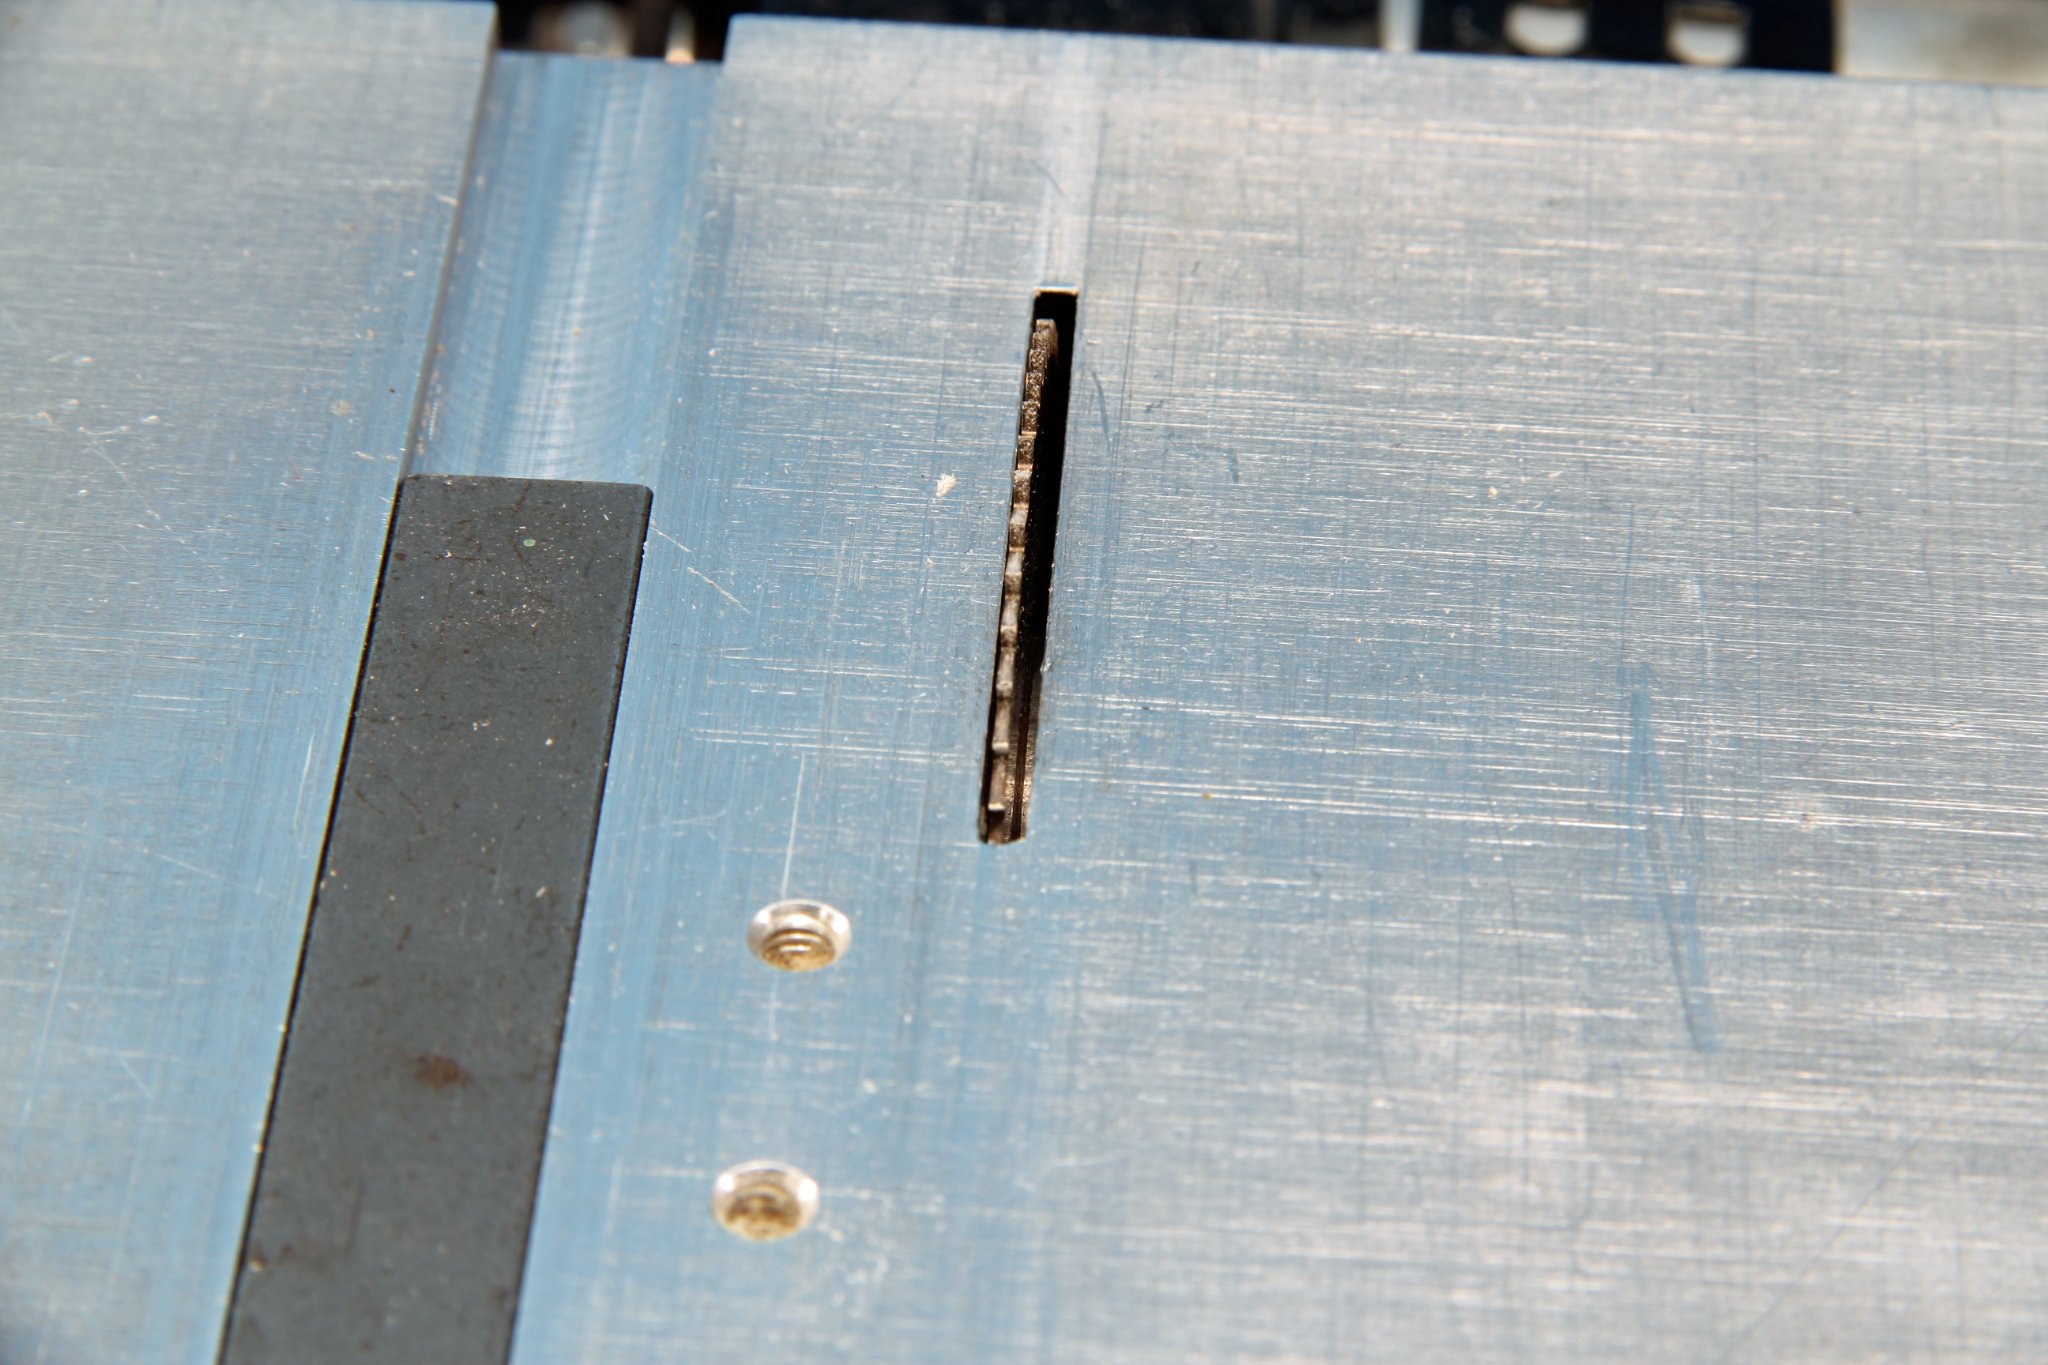
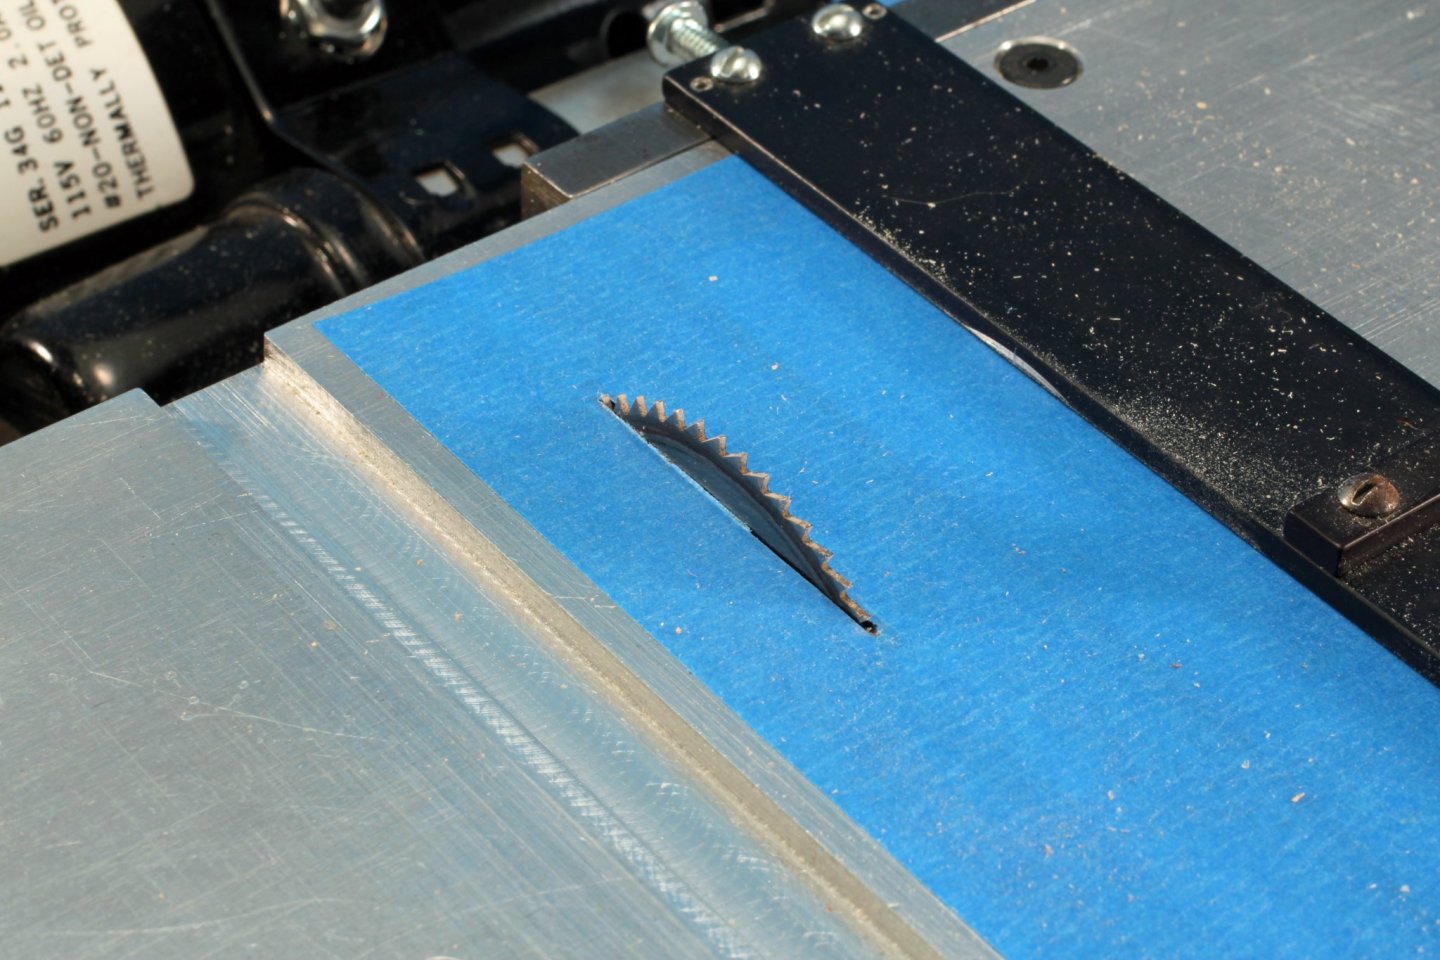
Regarding using tape as a Zero Clearance fix. If you have a Preac saw and are not a machinist you can't use a Zero Clearance insert due to the saw never having had one to start with. I have at times used tape on the Preac when the stock being cut is very thin. Stock, unmodified Preac's can cut a maximum of 1/4" due to the design of the saw. The slot in the table top for the blade measures 0.088" wide. The slitting blades for the Preac range from real thin up to about 0.045 - I am sure there are thicker blades that will fit but they aren't commonly used on this saw. Most consider a 0.032" blade as towards the upper end of what they use on a Preac. The first photo shows a 0.031 thick blade being used. Note the clearance on the sides of the blade. The second photo shows a Zero Clearance set up using painter's tape. I think it is perfectly adequate in this case. It does help with chip out when cutting very thin stock. I would never use or say it's an option to use tape on a Byrnes saw or anything bigger than the Preac with it's 1/4" max cut.
-
NEPTUNIA is a publication of the ASSOCIATION OF FRIENDS OF THE NATIONAL MARITIME MUSEUM - Musée de la Marine de Paris The NRG has a special relationship where we occasionally print articles from the other's Journals - with permission of the writers. This is essentially the only time we print previously published works due to an article being of special interest to our members. Our Editors handle translations as they publish only in French. Their web site is listed below. https://www.aamm.fr/
-
New to the community and wooden models
kurtvd19 replied to Harland Wolff's topic in New member Introductions
Welcome to MSW. -
Ships vs Boats
kurtvd19 replied to Mike from Aus's topic in Using the MSW forum - **NO MODELING CONTENT IN THIS SUB-FORUM**
There are no "ships" on the Great Lakes. 1,000 ft ore carriers are still boats. And of course all the submarines that were mfg in Manitowoc, WI were boats. -
2021 NRG CONFERENCE
kurtvd19 replied to kurtvd19's topic in NAUTICAL RESEARCH GUILD - News & Information
In the past we have done this as we have held most conferences within a hotel with banquet and meeting spaces. We will not be doing this when we hold the 2022 Conference there at the Channel Islands Maritime Museum as the entire conference with the exception of the tour will be held at the museum. There are many nearby hotels and we will provide a list for attendees. When the event is not in a hotel we have no bargaining power to get discounted rooms.