kurtvd19
-
Posts
3,043 -
Joined
-
Last visited
Content Type
Profiles
Forums
Gallery
Events
Everything posted by kurtvd19
-
 Ken: It's really looking good. Hooks look great - like how you flattened the hook portion. Kurt
- 440 replies
-
- 4
-

-
- niagara
- model shipways
- (and 1 more)
-
Toni: Great work. Like Greg says, the set up takes the time - but great results are being achieved. Kurt
-
Multiple builds at once? How do you keep it all organized?
kurtvd19 replied to eclipsefire's topic in Wood ship model kits
I usually have at least two going at a time as far as building goes. The research into future projects is also ongoing with multiple projects. As far as the keeping stuff organized, it helps that I have a 26' x 42' dedicated shop/office space with multiple benches and tables. The project being worked on at the moment is at the main bench with the other(s) on other tables or atop file cabinets. The various pieces that are not with the main part of the project are in plastic storage bins with either movable dividers or permanent dividers. It's easy to stack them as the parts can't get mixed. Keeping the research stuff organized is helped with file cabinets and plastic storage bins with hanging file folders - these too can be stacked. Writing is kept organized in the computer using a great writing program called Scrivener. Much easier to organize data and writing in it than in MS Word as each project has it's own "Notebook" and the dividers within it are sort of like a notebook where you just click on the folder and it's all in front of you. It's a serious writing tool - cheap only $40 but it has a real steep learning curve but once you know what you are doing it is great. Kurt -
2015 NRG Conference Update - MYSTIC
kurtvd19 replied to Chuck's topic in NAUTICAL RESEARCH GUILD - News & Information
Mike: Are you bringing any pickled moose lips to go with the beer? Kurt -
Looking for a Bench Top Drill Press
kurtvd19 replied to FlounderFillet5's topic in Modeling tools and Workshop Equipment
I just threw out that link as a FYI. I have the Micro Mark variable speed drill press with the extended column and like it a lot. I use it a lot but often just use my Craftsman drill press that sits right along side - but with the UMM micro chuck. Perfectly acceptable results using either. Kurt- 31 replies
-
- 5
-
-
- Drill Press
- Microlux
- (and 1 more)
-
Looking for a Bench Top Drill Press
kurtvd19 replied to FlounderFillet5's topic in Modeling tools and Workshop Equipment
I just got an email ad from Model Expo and they have a limited number of small drill presses for $69.99 - 57% off - using the offer code SERIOUS. Here is the link to the drill press - showing the regular price. I am not vouching for the quality of the tool - just making everybody aware of the sale - good till 9-21 or stock of 15 is gone as it says in the ad. http://www.modelexpo-online.com/product.asp?ITEMNO=bd170 Kurt- 31 replies
-
- 2
-
-
- Drill Press
- Microlux
- (and 1 more)
-
Looking for a Bench Top Drill Press
kurtvd19 replied to FlounderFillet5's topic in Modeling tools and Workshop Equipment
Max: Check out this link for a great mini-chuck - this guy's tools are great - and not expensive at all. I have this chuck and it is very good. I even adapted one for my dental drill. http://umm-usa.com/onlinestore/product_info.php?cPath=21_161&products_id=3338 Kurt- 31 replies
-
- 4
-
-
- Drill Press
- Microlux
- (and 1 more)
-
Looking for a Bench Top Drill Press
kurtvd19 replied to FlounderFillet5's topic in Modeling tools and Workshop Equipment
A pin vise or a small drill chuck can be chucked into the larger drill press. Kurt- 31 replies
-
- 4
-
-
- Drill Press
- Microlux
- (and 1 more)
-
Chuck: Actually I am working on two fully framed models. One is a commission for the WI Maritime Museum and the other is a canal boat from the Illinois & Michigan Canal. The first is 75% done and the latter is on the drawing board/CAD/final research stage. Kurt
- 504 replies
-
- 3
-
-
- washington
- galley
- (and 1 more)
-
Mick: I am not building the Washington - just following your build with great interest. Too busy shipping plan sets out and all the day to day NRG stuff to tackle this one. I am very interested in seeing the way you are laying out and making up the parts for the whole stern area. Kurt
- 504 replies
-
- 2
-
-
- washington
- galley
- (and 1 more)
-
Mick: Absolutely a great job. Your clear explanations and photos are surely helping a lot. Chuck asked the question before I had a chance and your photos and explanation were very helpful. Thanks, Kurt
- 504 replies
-
- 2
-
-
- washington
- galley
- (and 1 more)
-
I agree with Chuck's opinion on the line size - the blocks are smaller. I am sure I used the thinner line on the upper spar. Kurt
- 308 replies
-
- 2
-
-
- finished
- model shipways
- (and 1 more)
-
Steve: Yep, they are referring to a permanent pin. The yard isn't all that heavy and pinning it to the mast allows the lifting rigging to be tightened so that it looks like the weight of the yard is pulling down against the rigging. A pin isn't seen and is easy to undo if needed - unlike glue. You can rely on the other rigging lines for downward pull w/o pinning. The nice thing is that you can check how you like it w/o the pin as long as you don't secure the control lines (as it tells you not to do until after the awning structure is complete) and if you are happy - fine. If not then you can pin the yards to the mast. Kurt
- 308 replies
-
- 3
-
-
- finished
- model shipways
- (and 1 more)
-
Stay-Brite blackens the same as silver solder in my experience. Have never noticed any difference in the blackening of the Stay-Brite compared to the brass part of the assembly. Bob, will you be showing the blackening of the parts Wednesday night? Or are you leaving them natural until after the meeting so we can see the joints? Kurt
- 277 replies
-
- 1
-
-
- model shipways
- 18th century longboat
- (and 1 more)
-
Bob: Looks great. Not as hard as it's made out to be at all. I am sure the stay-brite would work perfectly but like you said, you now know how to silver solder for when it really counts. Kurt
- 277 replies
-
- 3
-
-
- model shipways
- 18th century longboat
- (and 1 more)
-
Clare: Leave a T shirt at home and pack the book instead - bring it with to Mystic. Can always buy a T shirt at Mystic to wear going home - justify the purchase of the souvenir T shirt! Kurt
- 4 replies
-
- 2
-
-
- Douglas Brooks
- Traditional Japanese Boats
- (and 1 more)
-
Clare: He will have books there to sell and will sign them - we are providing an author's table for this purpose. Kurt
- 4 replies
-
- 4
-
-
- Douglas Brooks
- Traditional Japanese Boats
- (and 1 more)
-
Ben: Just came across this build today. Glad to see you are taking this on. The Lakes are one of my main areas of interest and the Fitz has a special place there. I have tons of video of dives on the wreck (submersibles - as well as the Newt Suit dive to replace the bell). Saw prototype kit pieces for a HO scale model that I don't believe ever made it into production - BIG! I bet the completed resin kit would have weighed a lot more than I would ever want to move around. If you ever get a chance to see the model of the Fitz shipwreck at the WI Maritime Museum you will stand there for a long time looking at all the details. The model is made of heavy watercolor paper and it was made by the artist that was commissioned by the USCG during the initial investigation of the wreck. He was hired to make large drawings/paintings of the images from the initial ROV photographs for the inquiry board. He later made the model and supplemented the initial data he had with the stuff done by Cousteau so the model isn't as accurate as today's data shows but it is a great model showing the positions of the bow and stern sections, the piles of hatches and taconite. It is currently under a rotating ceiling light with blue gels that gives the appearance of light on water hitting the wreck though the facts are that at 630 feet there is zero light. The Fitz is a popular subject and about every 5 years or so we get a Fitz model entered in the model competition at the WI Maritime Museum and I always take a special interest in these. Other years I have to be content with models of other lakers that are entered and most are very excellent models - one of our regular contributors recently retired as first mate on the St. Mary's Challenger - a 109 year old steam bulk carrier that was converted to a barge coupled to a tug as an ATB - Articulated Tug Barge. His models are always dead on with the details. I am looking forward to your build. Kurt
- 40 replies
-
- 4
-
-
- edmund fitzgerald
- iron shipwrights
- (and 1 more)
-
Rod: Congratulations on completing a very nice model. The display stand and base are very nice too. Kurt
-
Mick: Chuck and I talked yesterday after your question (and my reply to you - in error as it turns out - sorry). Tug boats being my primary interest I was not as familiar with the 18th C practices as I thought I was. Take care, Kurt
- 504 replies
-
- 3
-
-
- washington
- galley
- (and 1 more)
-
Mick: Glad you are starting this build log. Jeff worked from plans from the National Maritime Museum plans taken off the ship after it was captured so the scarfs are probably correct. The Bibliography lists a good number of references Jeff used. Looking forward to watching your progress. Kurt
- 504 replies
-
- 3
-
-
- washington
- galley
- (and 1 more)
-
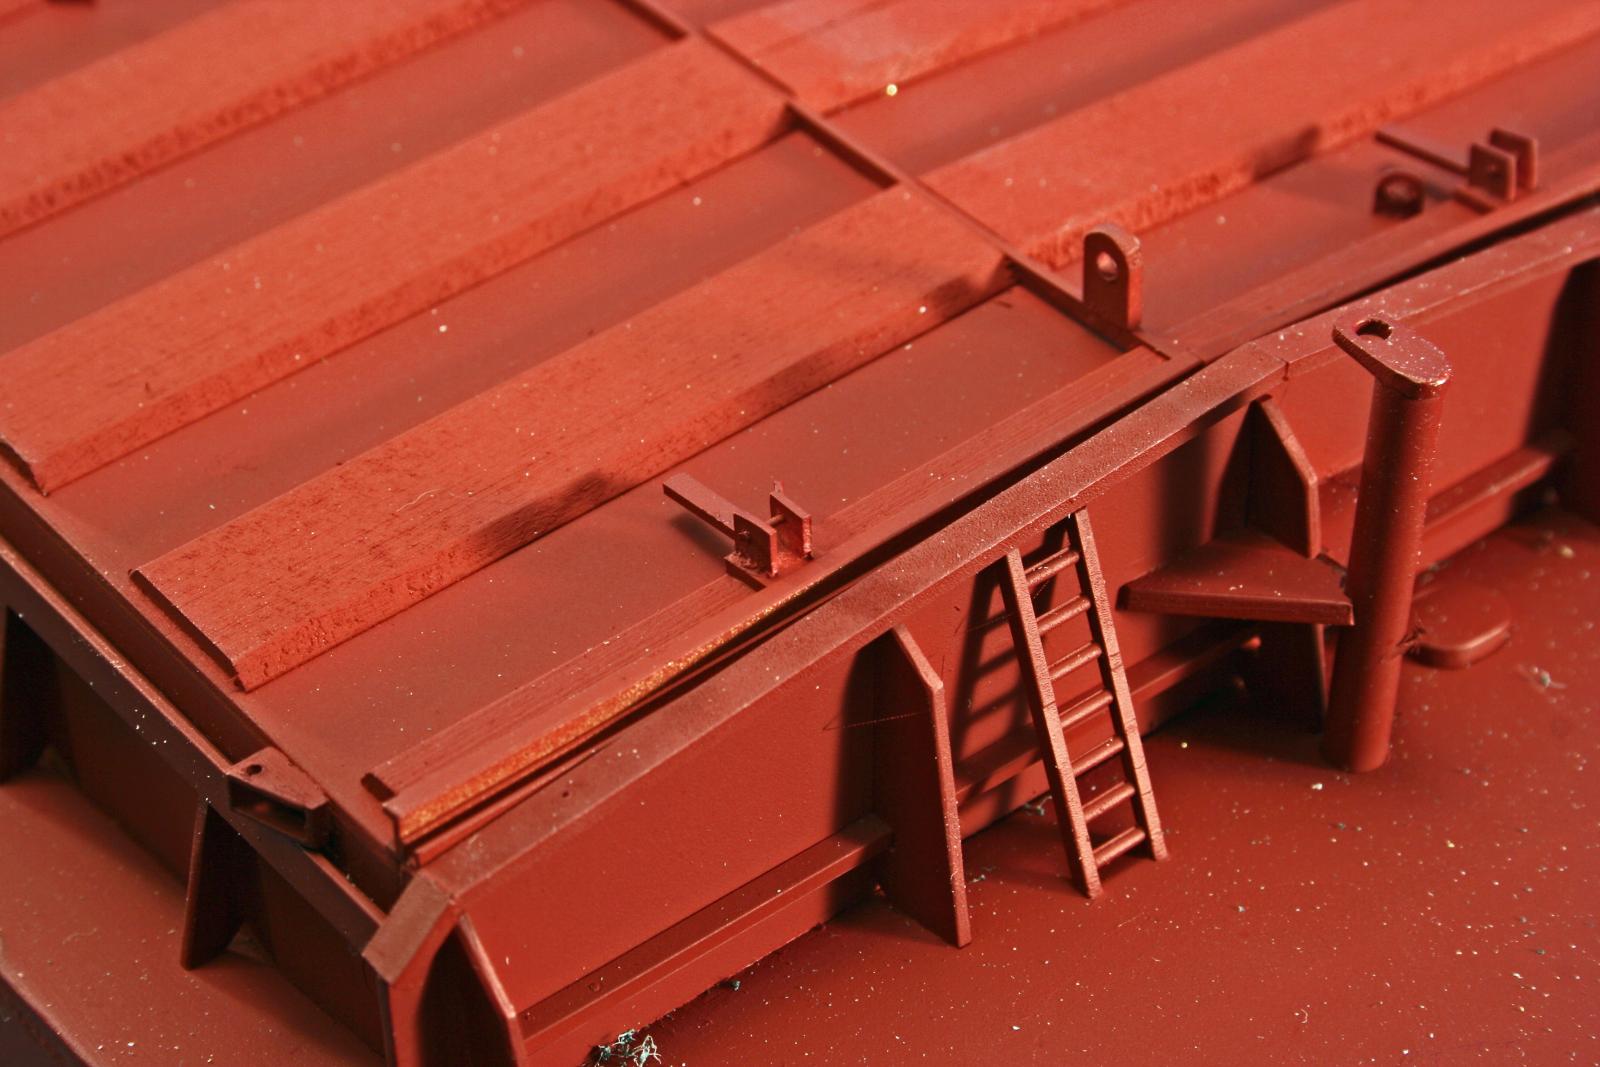
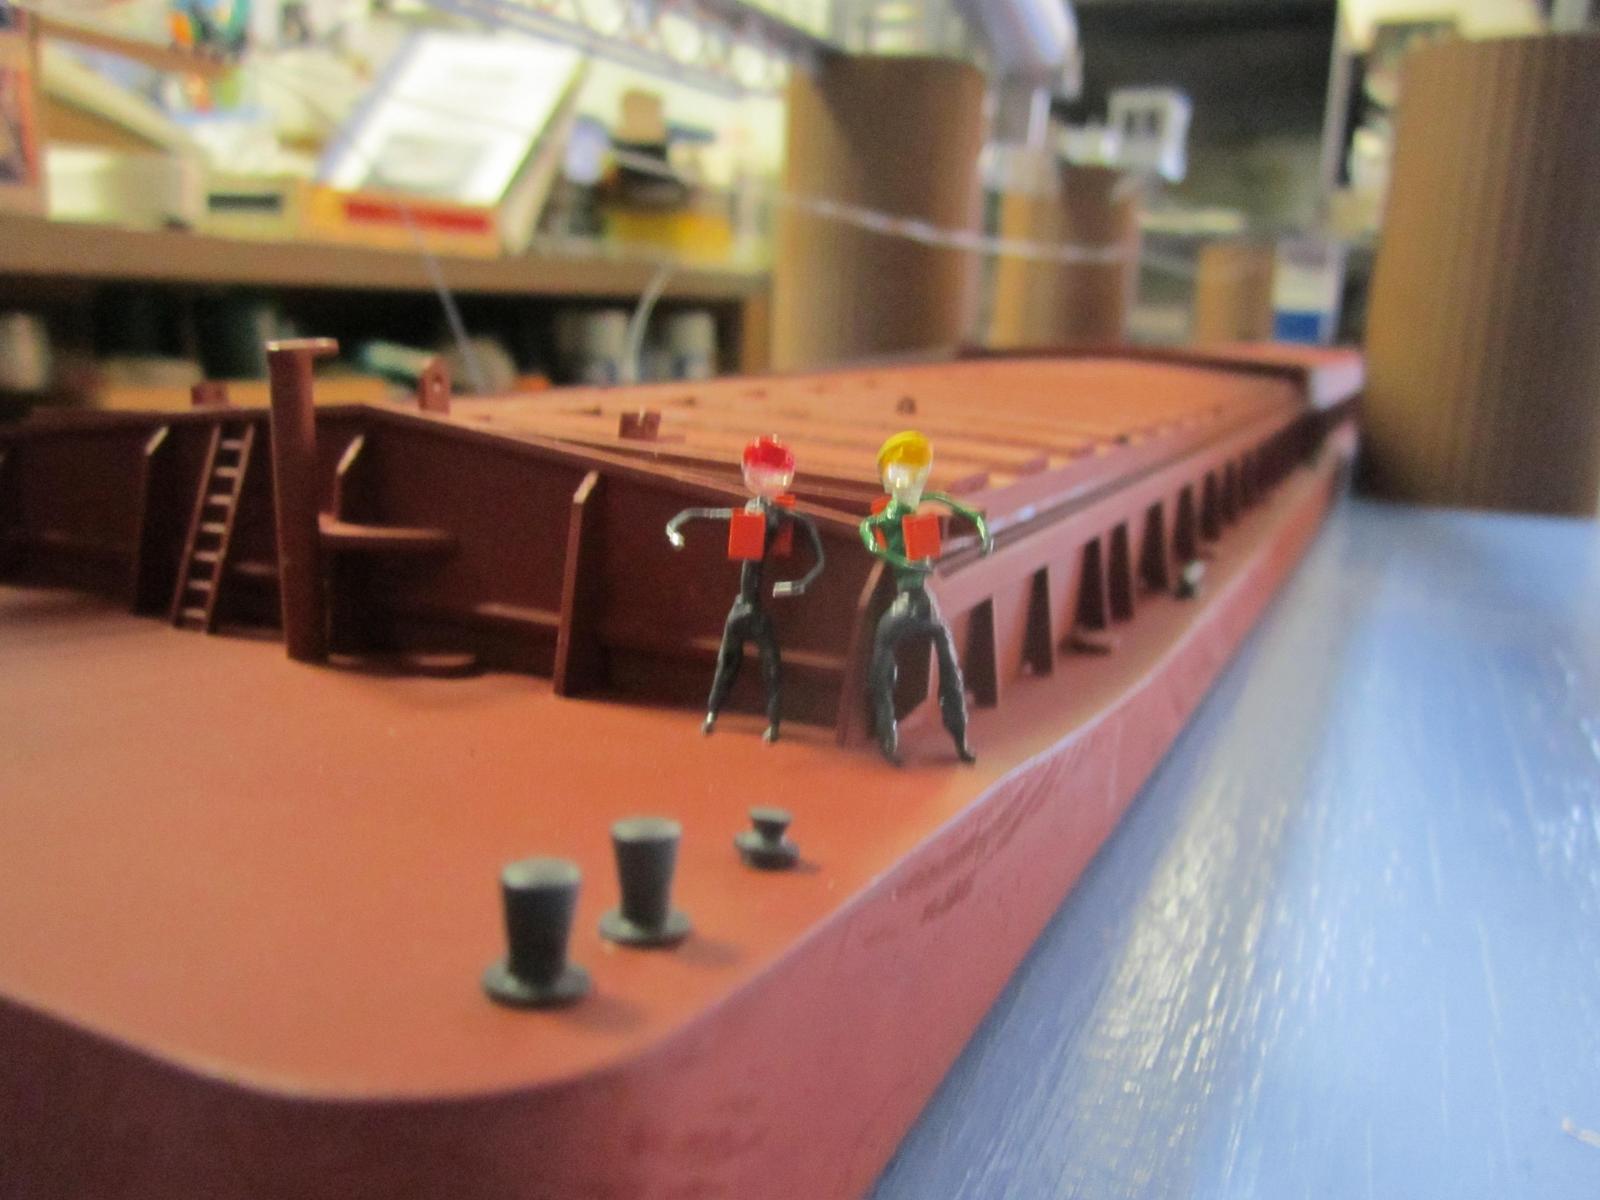
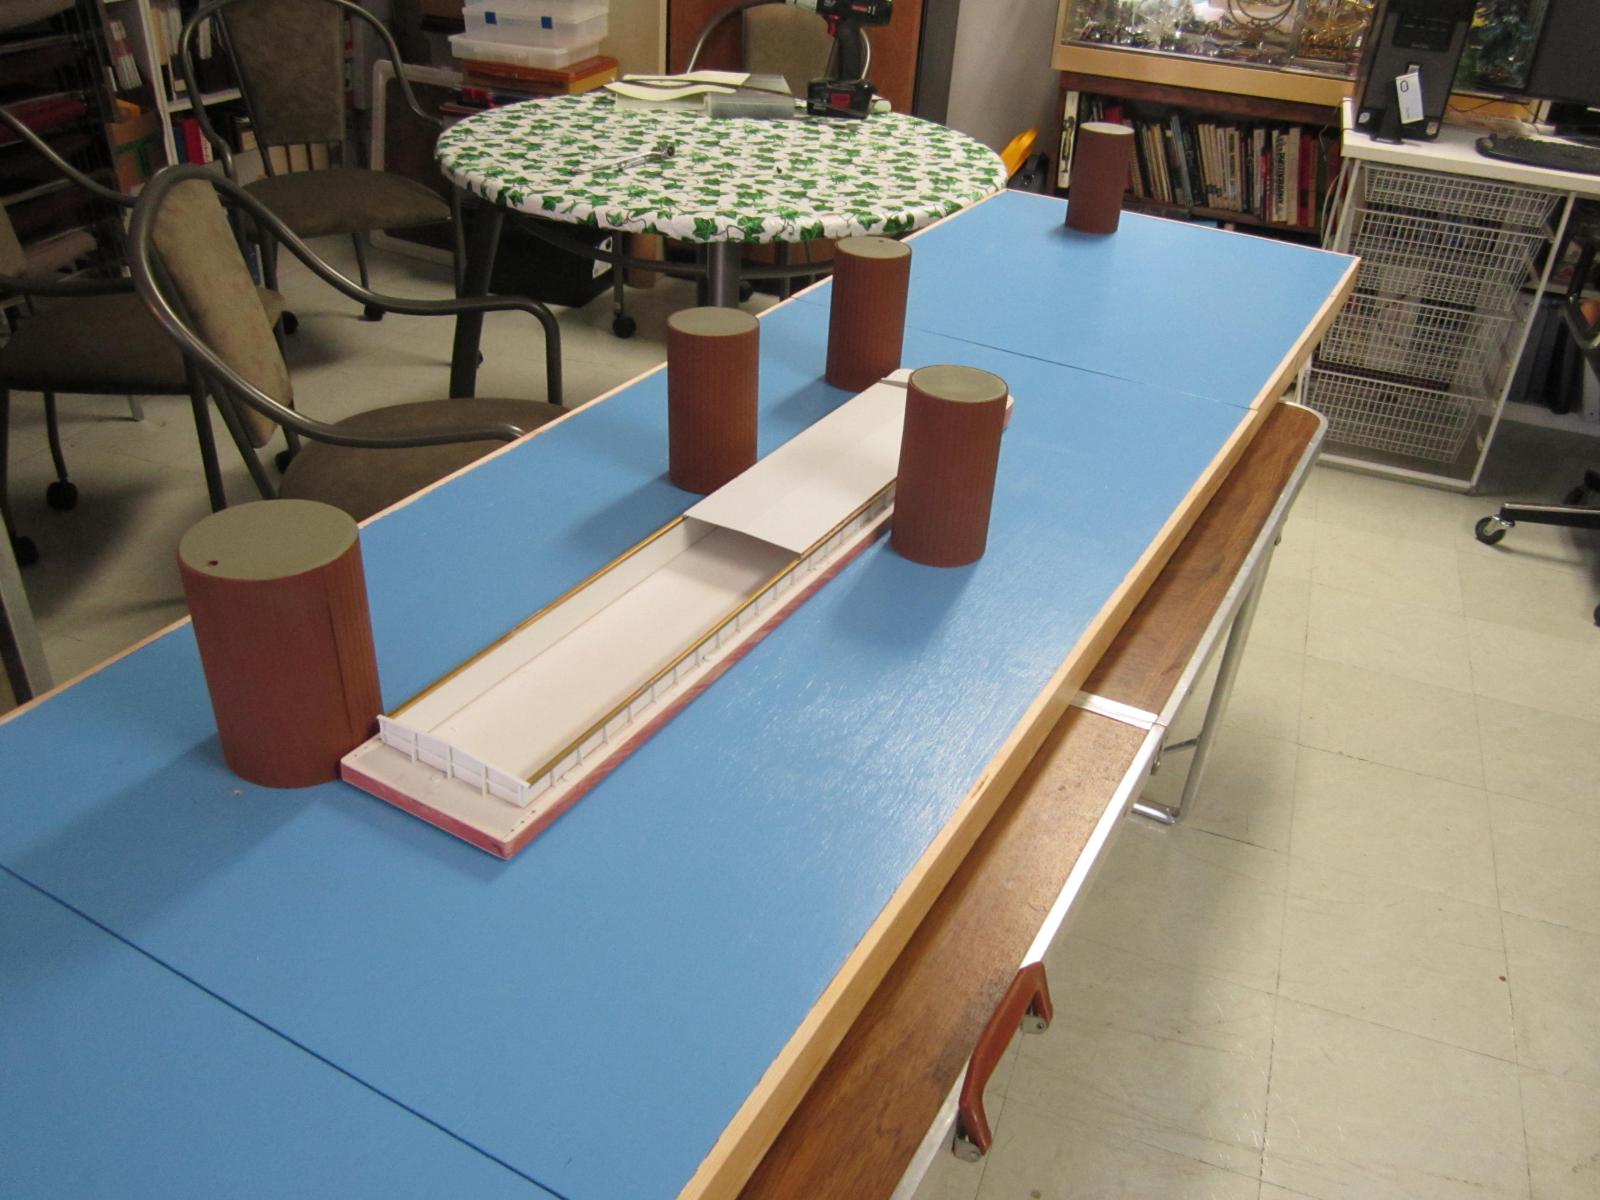
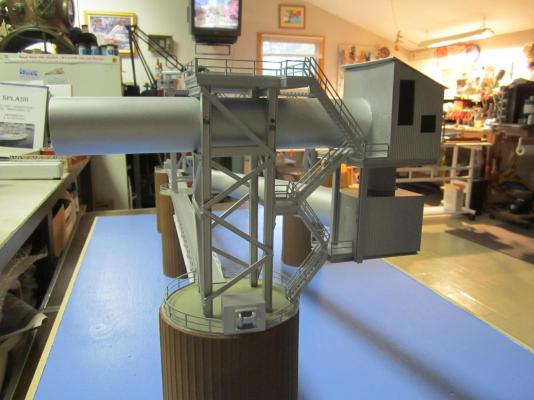
Cathead: The books are great - if you get them through the library loan I bet you will still purchase them later. The Museum people are a friendly bunch and will answer your questions. They have a lot of great models - but their lighting is poor and they all need cleaning. One of their board members told me recently that they are finally going to get them professionally cleaned. The steamboats were made directly south of the big house which sits just up a slight hill from the Ohio River - the site is now occupied by Jeffersonville Barge Co. and they build the big river barges right there. I wound up using Jeffersonville Barge Co. plans to build a 1/72 scale barge (along with a 9' diorama) for a legal case for a courtroom exhibit in a wrongful death case. River stuff is my main interest. Even better when you can get paid to build it. The overall photo of the very incomplete diorama shows the unpainted barge in place and the other photo shows the overhead loading machinery that is atop the three main cells (a scale 35' out of the water). BTW, water in the Ohio and other rivers is NOT blue, but being made for a jury to view we decided that showing brown water would maybe have them asking how the barge was floating on dirt. Also, the scale deckhands were made overly simple so as not to "confuse" jurors. This Atty. is a specialist in maritime cases and seeing that he won the case he must know what he's doing. The nice thing about this besides being paid very well to build a model is that he's promised this will not be the last case coming my way. It all helps to pay my way to NRG Conferences and lets me build what I want and buy the toys / tools to do so. Kurt


- 227 replies
-
- 10
-