kurtvd19
-
Posts
3,031 -
Joined
-
Last visited
Content Type
Profiles
Forums
Gallery
Events
Everything posted by kurtvd19
-

Paint brush verses air brush
kurtvd19 replied to medic's topic in Painting, finishing and weathering products and techniques
It's an airbrush for me for 90 percent of my painting. I use acrylics and airbrush cleanup is easy. The secret to airbrushing small areas is to use an airbrush meant for detail work vs one meant for larger areas. Spray cans are of limited use in my opinion with the hobby brands, Testors, etc. being OK but the use of hardware store paints (spray or cans) is to be avoided due to the size of the paint pigments. Model paints are in the 1 micron range while hardware store paints, meant to cover in one application range about 17 to 32 microns and will obscure details.. To avoid water based paints from raising the grain of basswood or other woods a coat of shellac sprayed or brushed will seal the wood and the water based paint applied over the shellac will not raise the grain. Kurt -
Top notch video like all of Paul's stuff. Kurt
-
Can i live without a BYRNES TABLE SAW
kurtvd19 replied to shihawk's topic in Modeling tools and Workshop Equipment
I have the extended fence option and use it most of the time. I got my saw long ago before the tilt away fence was std. so I retrofitted it by getting the new ***'y from Jim and returning the original. Anybody with an older version should get this upgrade - in my opinion. I have the tilting table and have actually used it very little. However, it was a life saver when I had to cut a bunch of 1/2 x 3/32 strips with 45 degree bevels on the long edges for a set of barge covers for a 1/72 model barge for a legal job on a tight schedule and the tilt table paid for itself on the time saved vs sanding accurate angles on about 6 ft of strip wood. The tilt table is a bit awkward to use unless you cut some wedges to match the angle you are cutting and put these wedges under the saw base making the table level with the bench top - in effect, tilting the saw (this tip came from Jim). Kurt -
Miniture machine screw sizes
kurtvd19 replied to grsjax's topic in Metal Work, Soldering and Metal Fittings
I have been working with some 0.5mm machine screws and nuts for shackles on a 1/12 scale sailboat model. I absolutely need magnification to even see them and threading a .5mm nut onto the machine screw is a real challenge. I wonder what the floor in the shop looks like where these things are made. I bought double the number I need in anticipation of several disappearing when dropped - even with my jewelers style pull out bench extension I know I will wind up dropping some. The source I use is Scale Hardware http://www.scalehardware.com/miniature-hex-bolts-c-1 If you are looking for slightly larger stuff such as 00-90 sizes then PSME - Precision Scale Model Engineering http://www.psmescale.com/ has nice stuff for a lot less. The catalog is expensive but the owner will take phone calls and tell you prices, etc. Just got some 00.90 screws and nuts from him - very good service from both of these places. Merry Christmas, Kurt -
David: The reviews on this plane are mixed from great to junk. It's nice and small and if you can get it good and sharp - this will depend on the actual quality of the blade (see the reviews below) as I know you can do the sharpening bit just fine it will probably fit your needs quite well. Kurt http://www.sawmillcreek.org/showthread.php?157725-stanley-102-103-a-good-purchase http://www.supertool.com/StanleyBG/stan12.htm http://stanleynumber103blockplane.wordpress.com/tag/stanley-block-plane/ http://lumberjocks.com/topics/22164
-
Let's talk 3D printers.
kurtvd19 replied to Keith_W's topic in Modeling tools and Workshop Equipment
The replication of carvings is a perfect application for 3D printing. The curvature of the underlying surfaces can be accommodated in the design and the parts can be attached without the not always successful bending of white metal castings (in the case of kits) which are generally quite crude. And for scratch building it will be great for those without carving skills. Many with the skill to build a scratch model shy away from doing so because of their lack of carving skills. Kurt -
Let's talk 3D printers.
kurtvd19 replied to Keith_W's topic in Modeling tools and Workshop Equipment
Joe: The last several meetings of the Association of Professional Model Makers have had presentations and discussions as well as hands on working with 3D printing and some other forms of rapid prototyping from the POV of those destined to be out of work if they don't get with the times. The handwriting is on the wall. Kurt -
Let's talk 3D printers.
kurtvd19 replied to Keith_W's topic in Modeling tools and Workshop Equipment
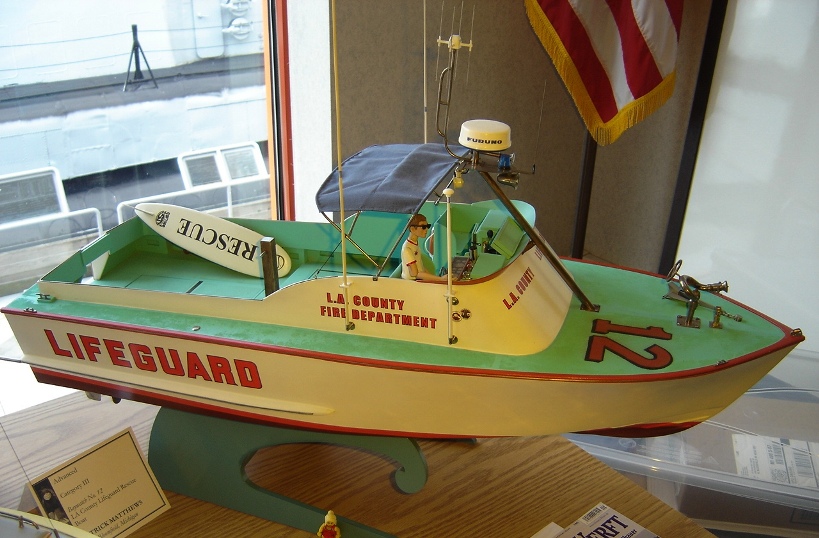
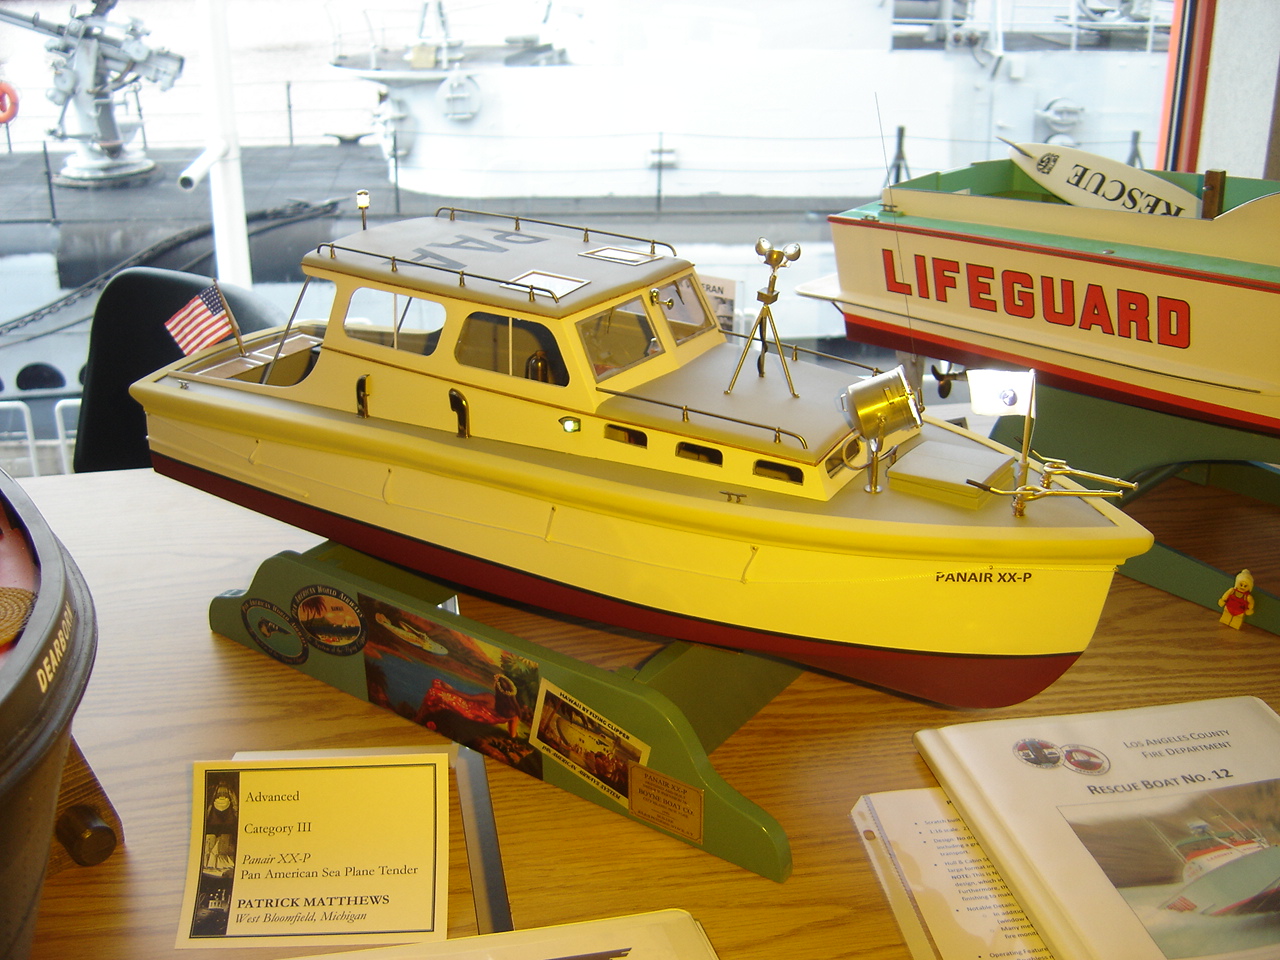
3D printing and rapid prototyping is taking a toll on the traditional commercial model shops that industry uses to make prototypes for testing and for executives to touch and feel. Two club members have recently had big down-turns in their commercial model shop business due to so many businesses now using rapid prototyping/3D printing to make samples for evaluations. There will always be work for these guys as the 3D printers just can't make an 8 foot diameter frying pan, a 12 foot Iguana emerging from its egg or a 6 foot tall egg for a housewares show or large architectural models though a lot of the auxiliary stuff for these large models is able to be done cheaper than by the model maker now using the new technologies. We already had a model with a lot of 3D printed parts (first photo) as well as one with almost the entire model done in 3D printing (second photo) take awards at the WI Maritime Museum's 2014 Show/Contest. Both models are by Pat Matthews. Like photo etch parts qualify as scratch built materials if the builder does the art/design work and a commercial printer supplies the photo etched metal the 3D pieces designed by the builder qualified the 3D parts as scratch built so both models took awards as scratch built models. Kurt

-
Let's talk 3D printers.
kurtvd19 replied to Keith_W's topic in Modeling tools and Workshop Equipment
Keith: I will check into making this article available for downloading from our NRG Store. The type of parts not suitable for printing at this time are stanchions and hand rails that are better done in photo etch as well as things like the telescoping or lifting towers of fire boats - originals are of strip steel with numerous "X" cross braces - again better done in photo etch. Essentially these are thin cross section parts w/o strength at the scale thicknesses - the parts that traditional injection molding has not reproduced well either. Kurt -
Let's talk 3D printers.
kurtvd19 replied to Keith_W's topic in Modeling tools and Workshop Equipment
There is an article in the Summer (59.2) issue of the Nautical Research Journal that very thoroughly explains the pros and cons of each type of 3D printing currently available. Pat Matthews wrote the article and was also a featured speaker at the NRG Conference in St. Louis in October where he showed and explained the limits and explored the possibilities of this new technology. Pat uses 3D printing extensively in his profession as an engineer for Ford as well as in building some great award winning models. He showed a large scale model boat built almost entirely from 3D printed parts as well as examples of parts not well suited for 3D printing (at least at this time). The type of printing for the application is very important as some is easier to clean up than others. Pat also pointed out that it isn't just as simple as doing the design in CAD and then ordering the parts as the services tend to place items into the printer that might not make for easy clean up due to the orientation the picked. Pat told of the ways one can arrange the parts to take advantage of the actual process used for the part to make the clean up easier. The points I took away from both the article and the talk at the conference was that it is not yet time for the modeler to invest in any of this equipment - use a service as they have the best technology that the individual just can't afford. Kurt -
Richard: It is called silver soldering because the solder has a high silver content. A more accurate term is actually silver brazing as the molecules at the joint change physical form and link with the silver solder and the other piece. This takes considerably more heat than simple soldering. Kurt
-
Steve: No rule that I am aware of - just sand to fit tight. It's not a lot but it is important. Kurt
-
Looking real good Dan. Lot's of progress since the last showing at the club. Kurt
-
The bottom of the plank will have a curve matching the top curve pretty closely but I fit the top first and then after it has dried in place the bottom is marked to the frame markings and cut and sanded. The extra width at the bottom allows the top to be fit a bit better after drying as Chuck related. If you get it close with the initial fit you will not have to sand too much for the final fit to worry about running out of width. The top bevel of the plank being fit is important so that you don't wind up with a large gap when sanding the planks smooth as any gap before sanding is only going to get wider as you progress. Kurt
-
the chopper ii problem
kurtvd19 replied to michael101's topic in Modeling tools and Workshop Equipment
We used the original Chopper in a production setting 8 hours a day - the groove can be filled with epoxy to level the surface. We would spread the glue at the end of the day and it was good to go in the AM - usually for a week or two. The secret to good square cuts is a sharp blade and use it for think strips - nothing over 1/8" thick. Use a miter box for the thicker stuff. Also, it will not work well with real hard wood like boxwood unless it's real thin. It's a RR modelers tool and they use basswood 99% of the time. Kurt -
Russel: There is a very good capstan model on the Institute for Nautical Archeology (INA) web site listed below. This is a very good model of the main capstan on HMS Victory. The model was made by Glen Grieco and is used in a class at the University by Dr. Kevin Chrisman. Both of these gentlemen were featured speakers at this year's NRG Conference last month in St. Louis. This should give you a good start. Kurt http://nautarch.tamu.edu/model/report2/
-
Chuck: Yeah, you are right about the lower plank having the other joints. I did follow the planking diagram and each plank is the length shown on the diagram. I was able to fit every plank onto a plank furnished in the kit and there were plenty extra even when I did use some of the wider planks for some that the instructions said could be made with narrower planks. Once you have the plank we have been discussing fit place please show us the bare plank as shaped. I just don't remember any plank causing a problem or not fitting on the planks furnished. Take care, Kurt
-
Storing Wipe-on-Poly
kurtvd19 replied to ortho85's topic in Painting, finishing and weathering products and techniques
MARBLES. Use cheap easily obtained marbles to keep air out of the can. As the liquid is used up drop marbles into the can to keep the fluid right up to the top of the can. As to ease of use I would suggest a smaller container like the plastic or glass jars sold for airbrush use - they come with caps. Dispense a small amount into the small jar and add marbles to the big can. I use a cheap soft plastic pipette to transfer liquids out of bigger containers into smaller containers - no need to worry about the marbles pouring out. Kurt- 6 replies
-
- 10
-

-
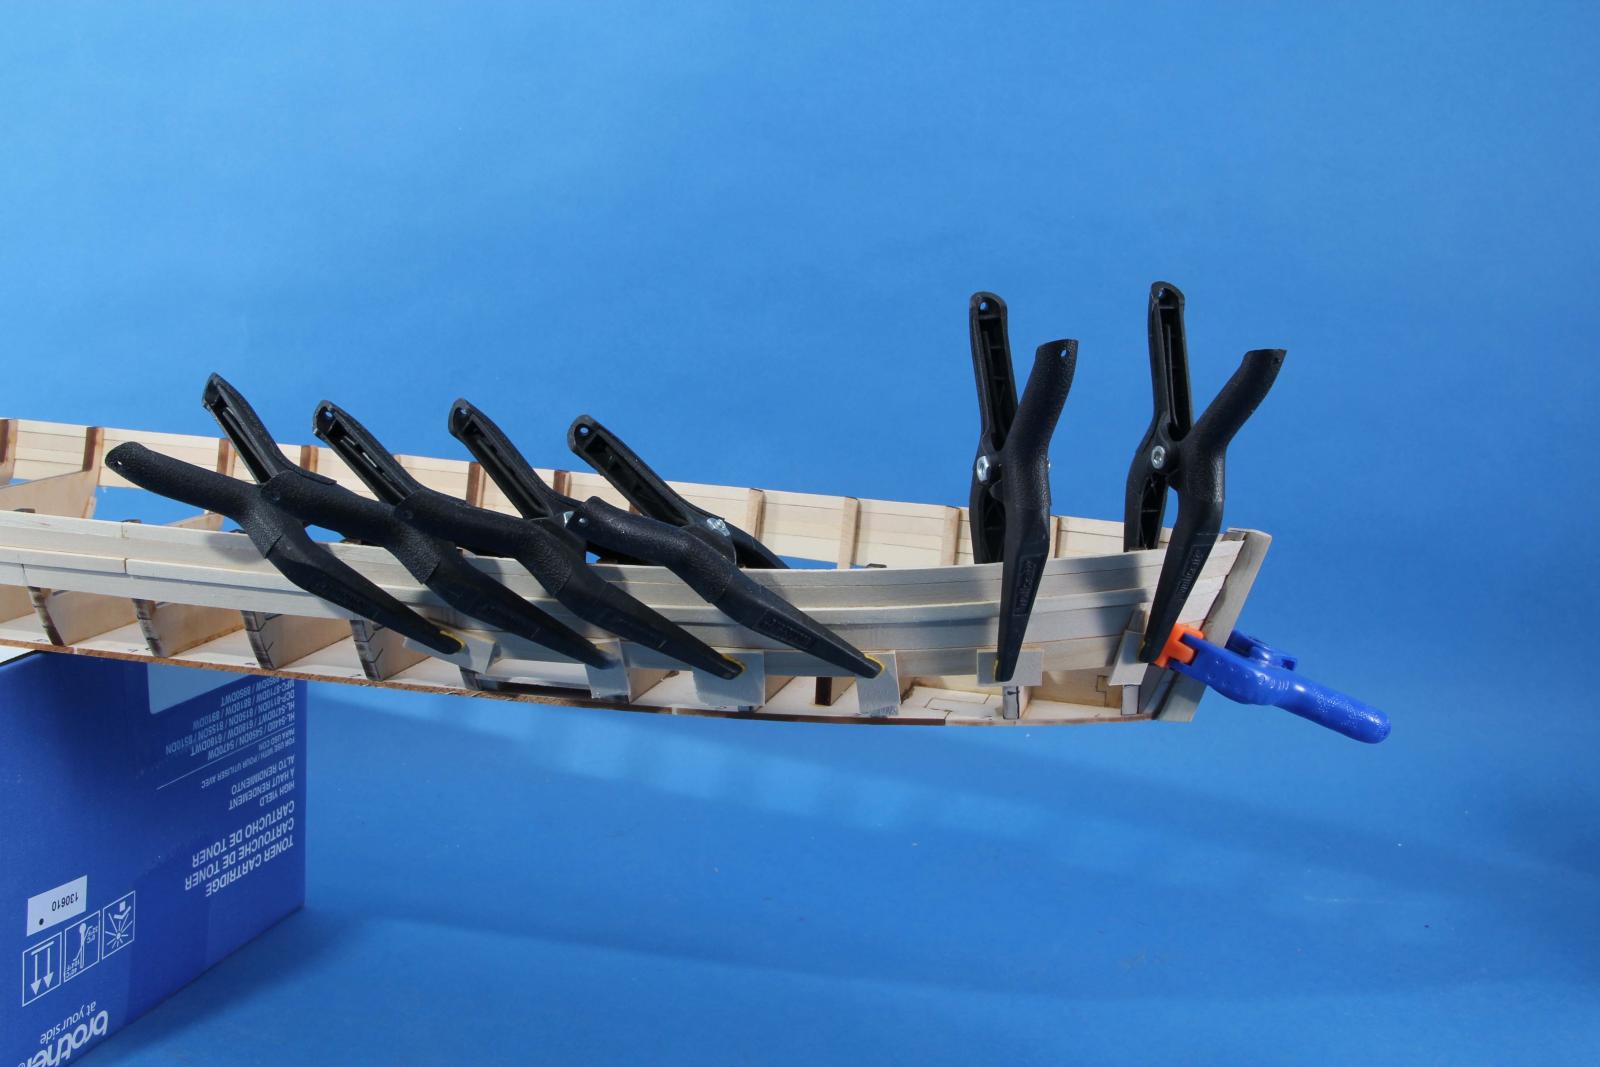
Chuck: You are correct. This is actually the longest plank other than the very lowest which is the same length to frame 9. I didn't measure it but I am sure you are right on the 13". I just do not remember that plank having such a curve. Unfortunately, my last shop clean up I looked at the planking templates I had cut from the file folders and said "Dump these - you are never going to do another of this model" and for a change I actually discarded them. Bummer. I am positive that each plank was able to be spiled from at most the widest planking strips w/o having to cut any wider strips. The plank that you showed yesterday seemed to curve a lot more than I remember. The photo attached shows the plank directly below the plank in question being fit to the model and it does show that plank going to frame 9. I just do not remember the plank having such a curve to it. I have probably just confused the issue. But if you got it to fit cutting it from another width piece I guess the problem is solved. Sorry that I don't have the answer. Maybe I should have paid more attention? Kurt

-
Has the ShipWright Software been discussed here? Is anybody using it? I bought this in early 2008 or so and the manual says that I was to receive a free version 2.0 when it was released but I never got it. Had installed this on an older computer and never used it beyond just a quick try of the program and got way too busy to explore it further. Just installed it onto my new unit and while looking in the manual decided to check on the updates. The URL www.shipwright.biz on the cover of the manual leads to a engineering firm. The software was purchased from Robert Furstenberger of Brentwod, MD. No listing is shown for him currently. Kurt
-
Chuck: I think it will work better if you follow the planking diagram and do not use planks the full length of the boat - or close to the full length as it appears you are doing by mentioning that the fold of the file folder is a problem. The problem you are having with the spiled plank running off the width of the plank can be eliminated by using planks the length as shown on the planking diagram and cocking the plank of the strip as you thought. Of course, you need to make the rough plank a bit longer than the final plank just to allow a bit of trimming at either or both ends as you do the final fitting. Also, get a good fit to the bottom of the plank above w/o tearing your hair out, trim the bottom of the plank to a rough width using the marks on the frames for the proper width and then wet the plank, clamp it in place, making as good a fit to the underside of the plank above and when dry do final fitting of the top edge to the plank above. Then,, do the final trimming of the lower edge of the plank to the marks from the frames, fair the edge and it should be a perfect fit. With the top edge a close fit and then soaking the plank, a bit of edge bending to make a real tight fit can be done w/o a problem. Take care, Kurt
- 259 replies
-
- 2
-
-
- Gunboat
- Philadelphia
- (and 1 more)
-
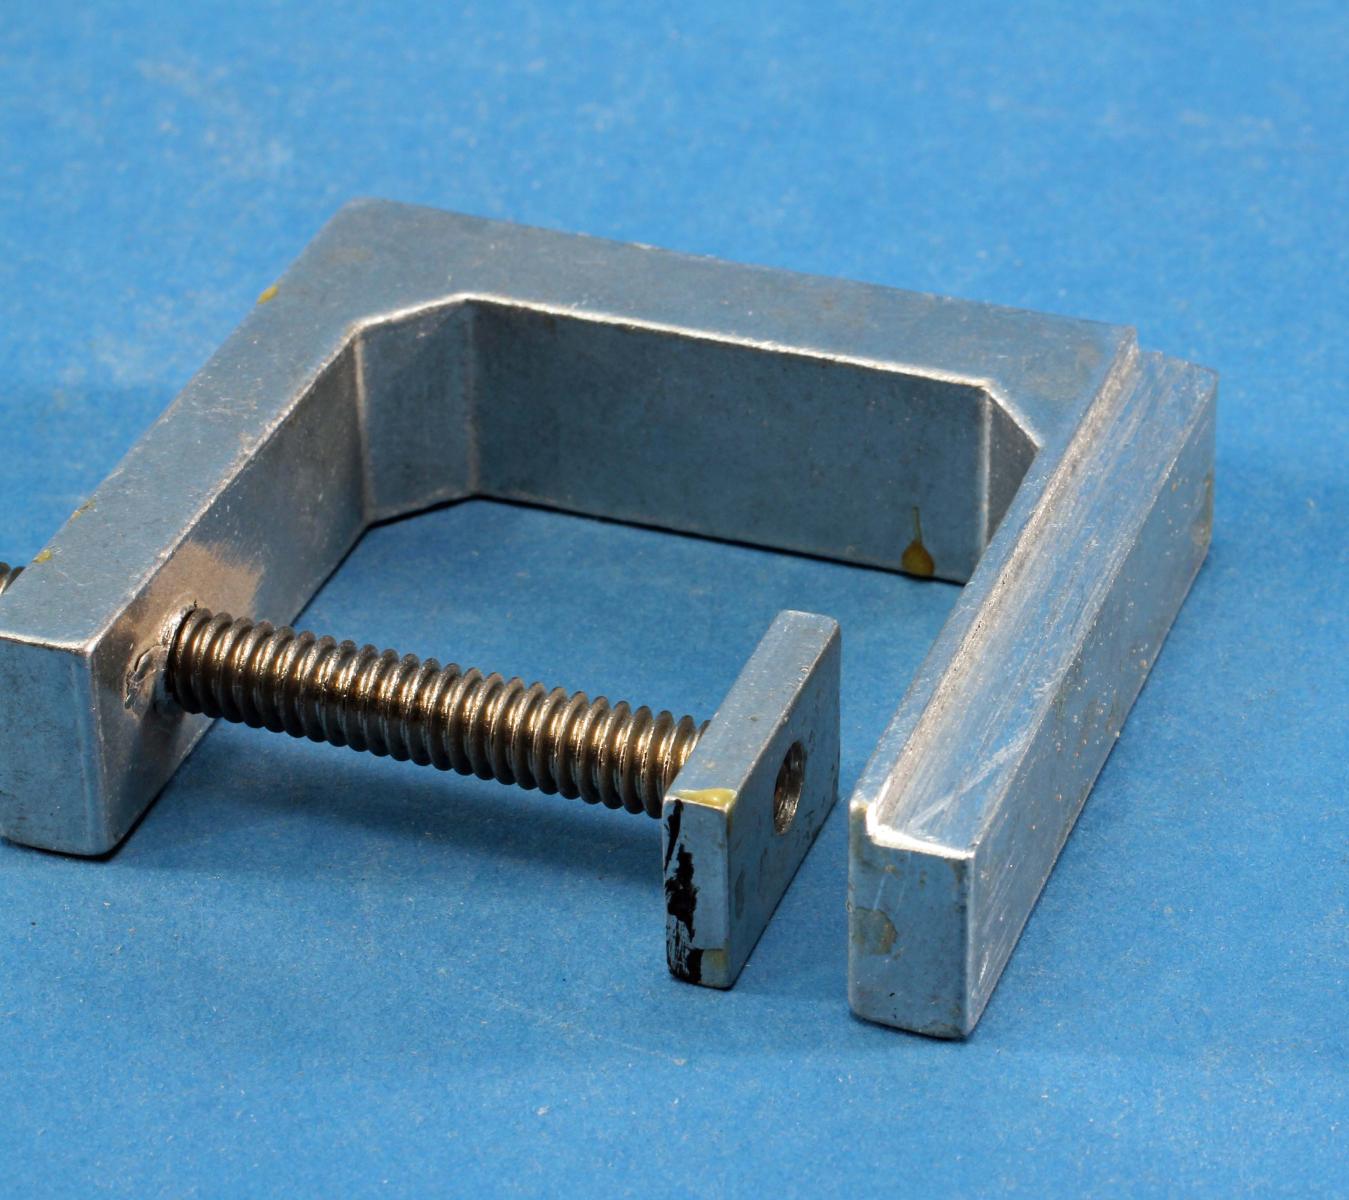
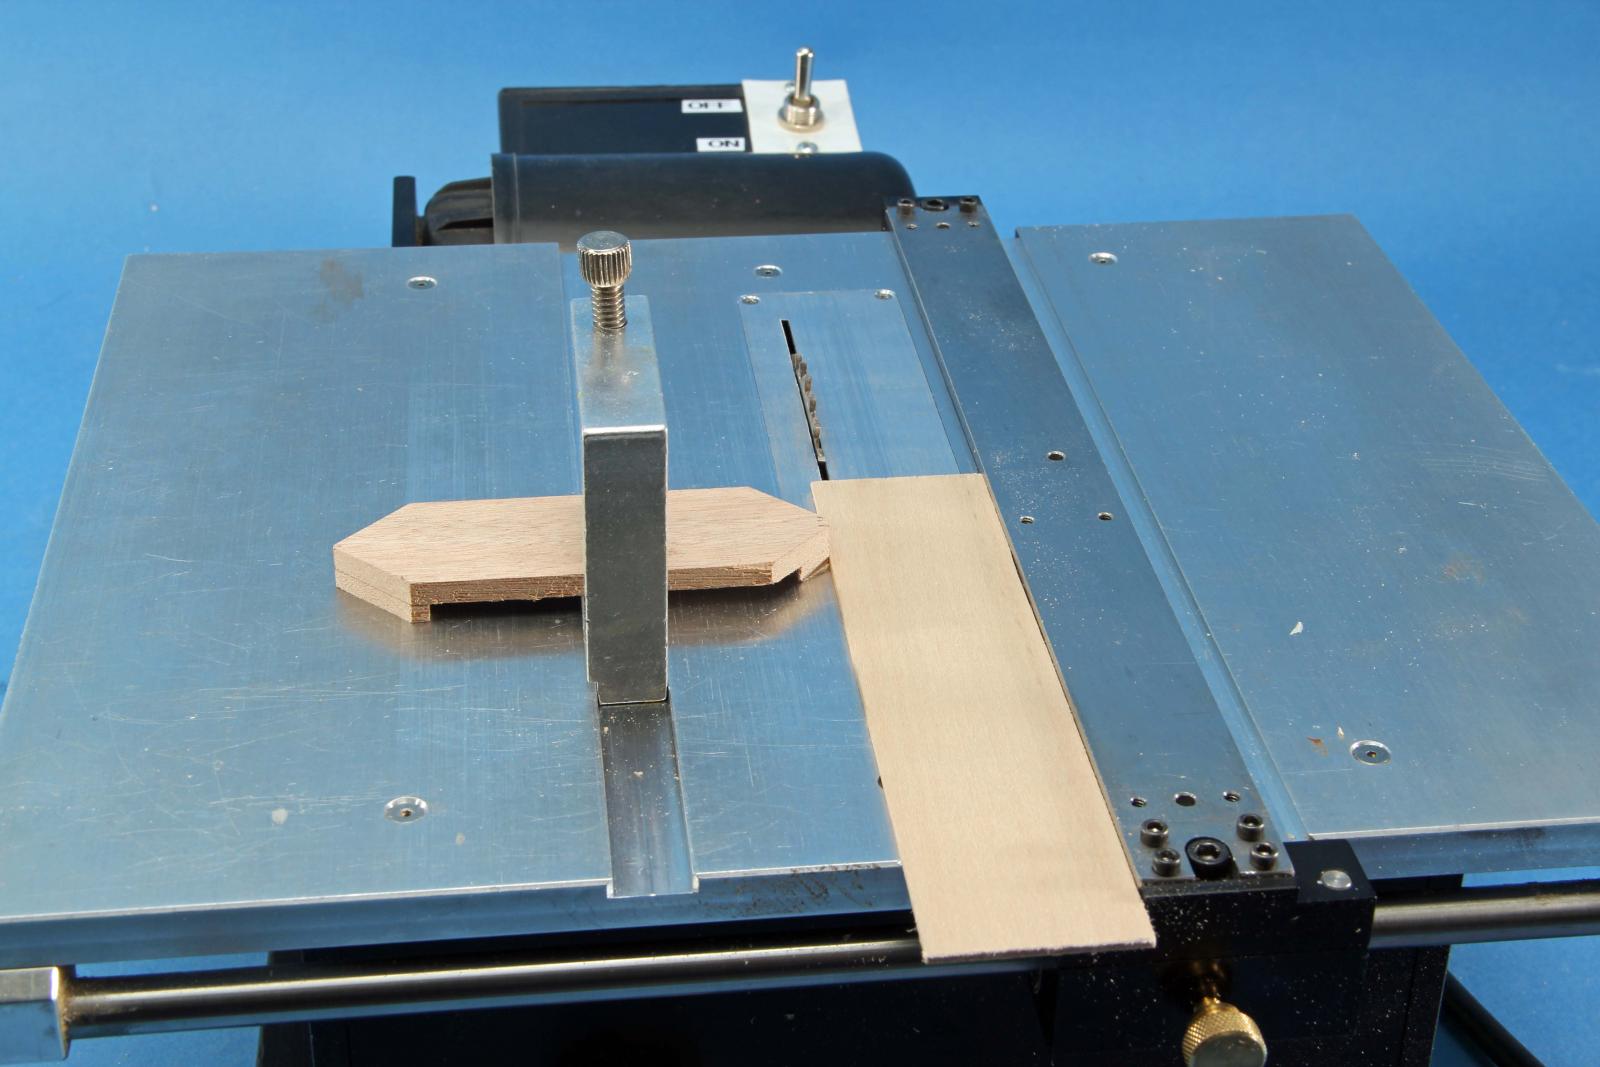
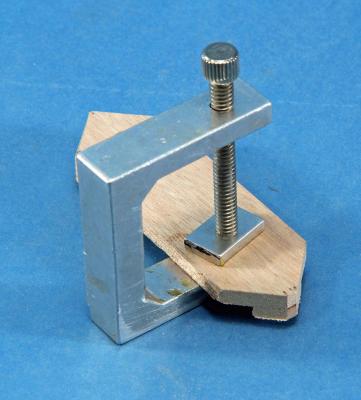
I use a shop made jig/fixture to cut repeated widths of thin stock. The clamp is an old Xacto clamp that has been narrowed to fit into the slot of the Byrnes saw. A mill is not needed - I used the carbide blade on the Byrnes saw to make the rabbet a close fit to the saw's miter groove. The wooden jig piece needs to have the ends thicker then the center area to fit to the clamp. I will be remaking the wooden piece from Plexiglas as this was just a test jig to get a job done. Now that I know it works for me the upgrade to Plexiglas will follow. The fixture is moved back, closer to the operator, when making cuts. Kurt


-
Don't need a cap for the top of the tube - just use a small plastic clamp at the top end of the plank to weight it down and to grab it. Will hold it submerged and you have a hany handle on the end too. Kurt
-
Looking good Chuck. Off to the NRG Conference this AM - preliminary stuff to do for the registration when the crowd starts to arrive tomorrow. Will catch up on your build next week. Take care, Kurt
- 259 replies
-
- 1
-
-
- Gunboat
- Philadelphia
- (and 1 more)
-
I too am just speculating on the effects of alcohol on wood, but there is no need to use it for bending as water or water plus heat is all that is needed to bend wood and the wood returns to equilibrium leaving the original structure and strength. If Marc wades in on the effects I will be all ears, but in my opinion, it's probably doing something to the wood that isn't going to make things better than before it was used. I do use regular Isopropyl Alcohol to soften yellow carpenters glue (Elmers & Titebond)glue to undo joints. Some say that the 90% stuff that needs to be obtained by special order is needed but I have never needed anything more than common and cheap Isopropyl. I have never had the occasion to soak a glued piece of wood. I apply the alcohol to the joint with a "Q" Tip or a syringe depending on how large the joint is - the more glue that was used the more alcohol that will be needed. I saturate the area of the glue joint and wait a bit but I keep an eye on it so the alcohol doesn't dry our before I apply more. I test the joint and as soon as it wiggles loose I remove the piece and I try to scrape any of the softened glue off the pieces. I let them dry before re-gluing the joint. Kurt