
HOLIDAY DONATION DRIVE - SUPPORT MSW - DO YOUR PART TO KEEP THIS GREAT FORUM GOING! (Only 44 donations so far out of 49,000 members - C'mon guys!)
×


peveka
-
Posts
202 -
Joined
-
Last visited
Content Type
Profiles
Forums
Gallery
Events
Everything posted by peveka
-
 ... or just turn back the "clog"? Thank you all for the likes! Cheers Pieter
 -
Welcome and best of luck with your build! Cheers Pieter
-
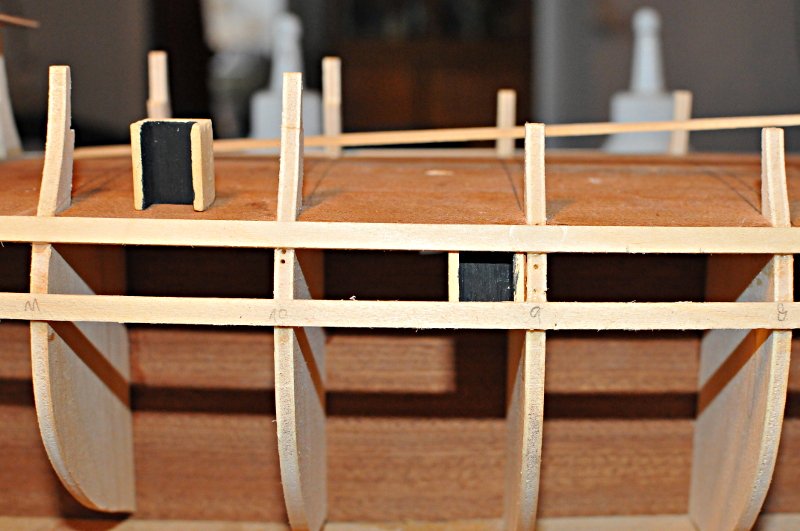
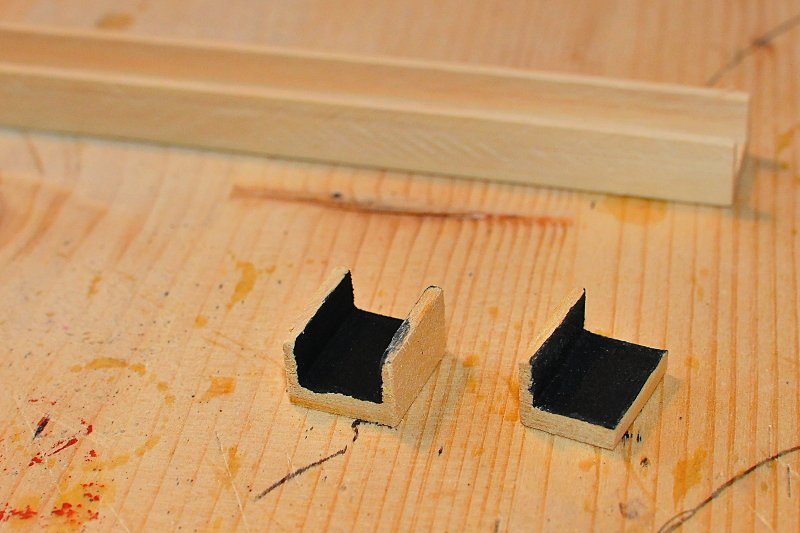
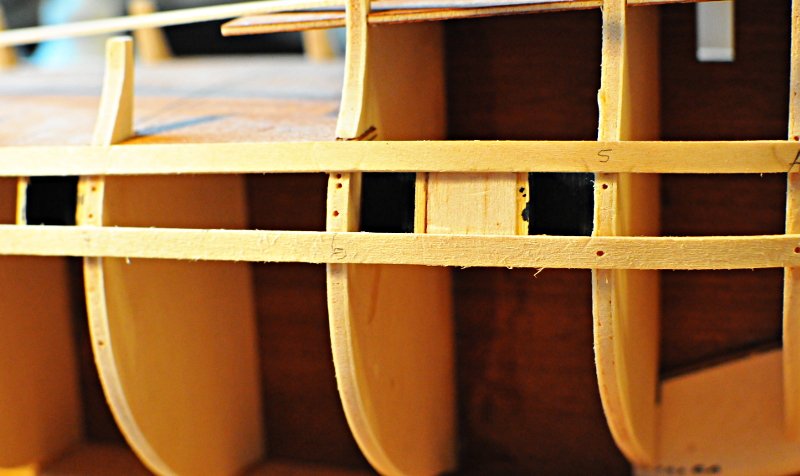
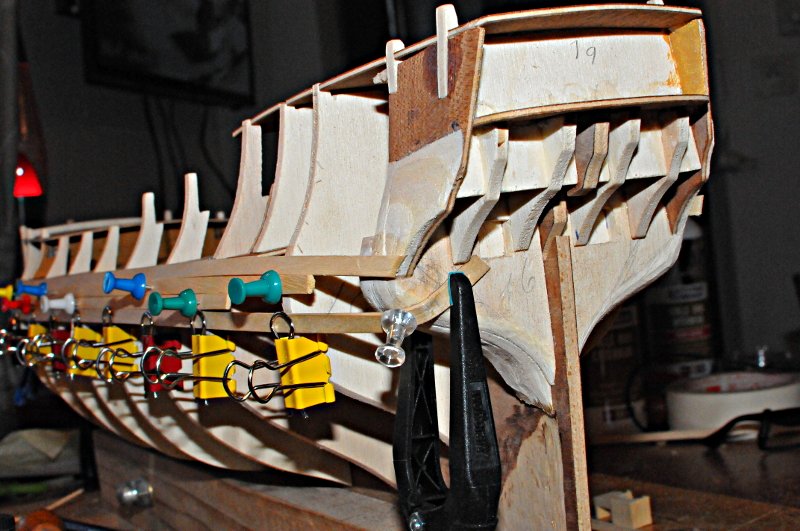
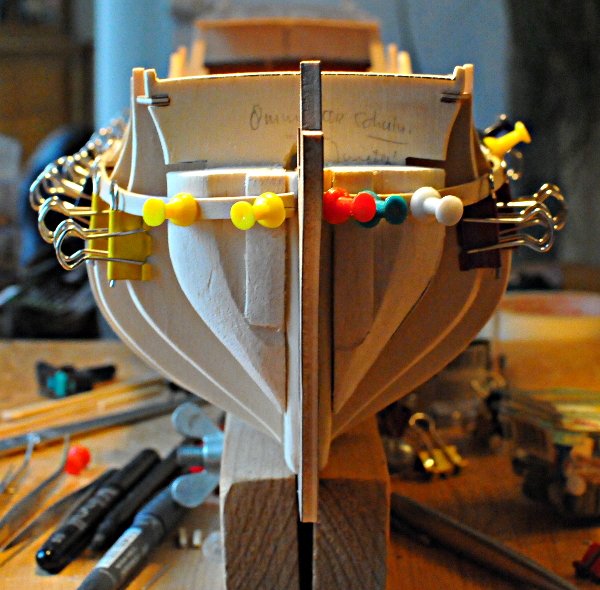
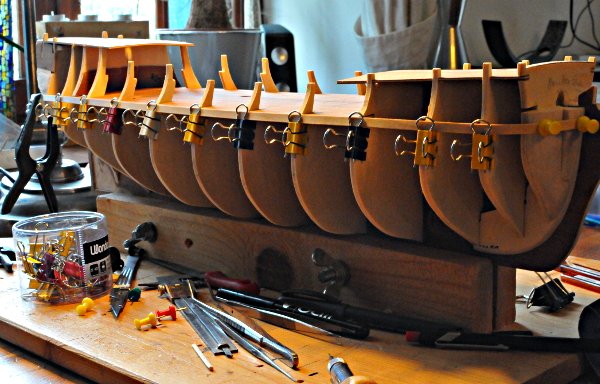
Small update. I've been working on the "cannon boxes". Between us, they are a bit a pain in the butt. Update (13/05/2019) after having glued in the boxes: if you are thinking about adding faux carriages for the dummy guns I refer to post #44 where I give a description of the procedure. Do not make the mistake I made Some are easy to place. These are the ones that are to be glued directly onto one of the bulwarks, they can easily be held in place with small clips. Unfortunately there are only 3 of these on each side. Apart from those there are 6 on each side that are to be glued exactly in the middle between two bulwarks. These can be held in place with clamps but if you're 1mm "queer" they jump off. Tricky but doable. Next are the ones where you have to cut off one side of the box (see pic) and glue them to a bulwark and to the two planks in front of them. These are really tricky because as soon as you put on a clip they jump away. Solution: I fitted a small piece of balsa between two of these half boxes to have something to put a clamp on. Picture below: On bulwark #9 you see one of the easy ones. The one in the middle between #10 and #11 will be a little trickier but as long as everything stays nice and straight it'll work. Below: Here's what I mean with "boxes". In the upper part of the pic you see the U-shaped piece of wood where you cut the boxes from. There are two sizes. On the left you see an uncut version, on the right is one with it's side cut off. Below. Two of these prepared boxes are fitted between bulwark #5 and #6. I found it impossible to hold them in place until the glue dried. They just tilt. So I glued a tight fitting piece of balsa between the two parts, let it dry and positioned the two held in place with a decent clasp. Voilà! Cheers Pieter
-
Update. I have been working on Nulli's quarterdeck. The plan is to build up the bulwarks including supporting beams. Later I will cut out at least two gunports, maybe I'll install caronades. I made a railing on the front of the deck. After dry fitting I found the supports totally out of scale (6mm for an estimated 1:100 scale is a bit heavy ...) so I am going to change these. Gunports on the main deck are finished. Decks are roughly sanded and will be scraped. I won't put on varnish until I've glued everything in place. Cheers Pieter
-
Hello from the king's Louis XIV city (France)
peveka replied to empathry's topic in New member Introductions
Je te souhaite cordialement la bienvenue dans ce superb forum! Greetings from le Phare Ouest, la douce Bretagne ;o) Cheers Pieter -
Hi Patrick I just discovered your log and I like it very much. Very detailed, very informative. Thank you for sharing! Cheers Pieter
- 756 replies
-
- 2
-

-
- galleon
- golden hind
- (and 2 more)
-
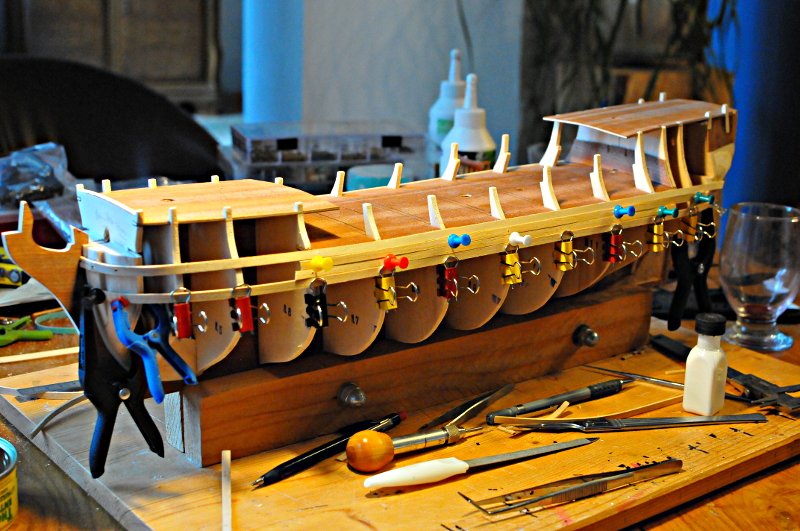
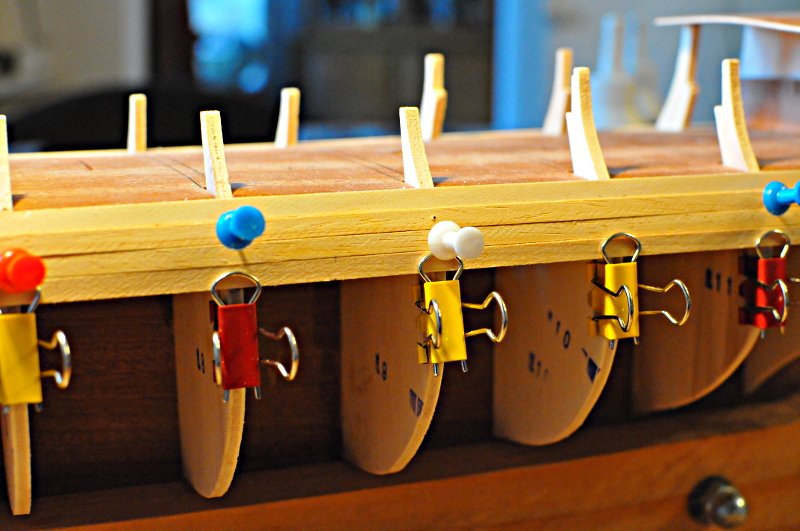
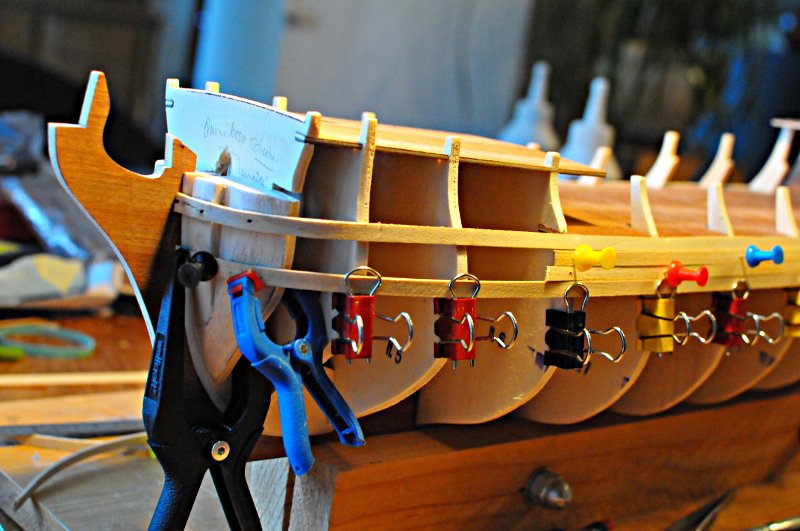
Update. Positioning the first plank was relatively easy, just follow the line of the decks. The second plank is supposed to be 10 mm below the first. One is not supposed to continue to glue planks below plank #1 because one needs space to build in the little boxes for the dummy canon. Of course one can measure 10mm and glue the 2nd plank but I struggled. Solution: I dry-fitted two planks to the bulwarks and positioned the 2nd plank after bending it. Bending at the bow was easy. Bending at the stern was a bit of a pain in the gluteal region but with soaking, a bending tool and heat I got the job more or less done. If there is ever going to be an award for the most useful invention related to planking I nominate the person who invented these modified paperclip thingies! Pic below: first plank positioned, two dry fitted below #1 and #2 held in place. Pic below: Same thing as above, close up. Pic below: The plans want the first upper planks to be evenly spaced. Putting these dry-fitted planks in between #1 and #2 makes that a little easier. Pic below: looking forward to the next, what, 7-8 of these. Not. Cheers Pieter
-
Hi Pat Welcome to this amazing forum! I've been thinking about building the Endeavour myself but chose the Bellona instead, maybe later ... I am definitely going to follow your work. Best of luck and have fun. Cheers from Brittany, France Pieter
-
Katie Melua comes to mind ... "9 million clove hitches is my thing" or something like that ... Cheers Pieter
-
Another one of those sacred moments ... first planks. Cheers Pieter
-
So that's how they do it. Take a Victory, simply cut off a couple pieces and rename her Bellona 😲 I stand in awe sir! Chapeau. Cheers Pieter
-
That literally made me laugh out loud ;o) Thank you for your encouragement! You have fun rigging ...🍻 Cheers Pieter
-
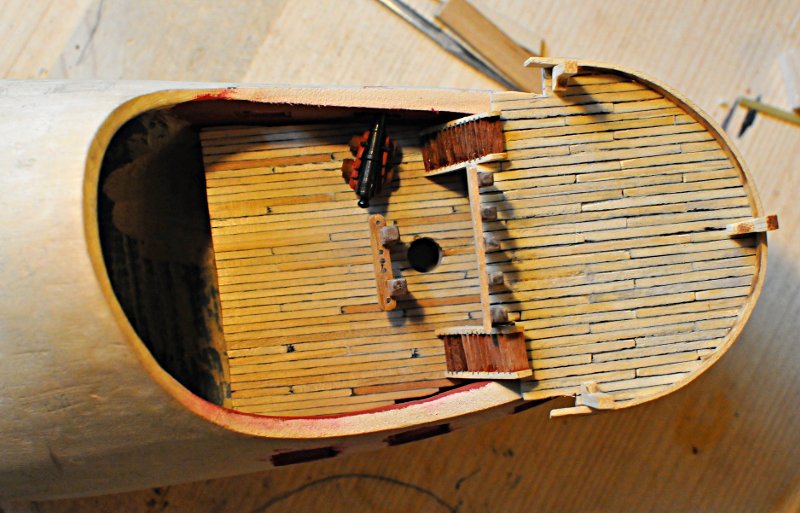
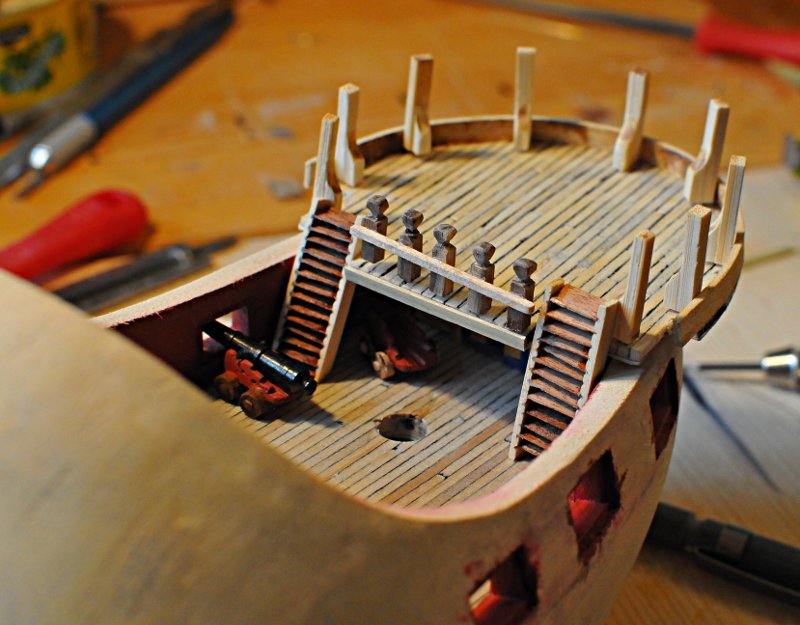
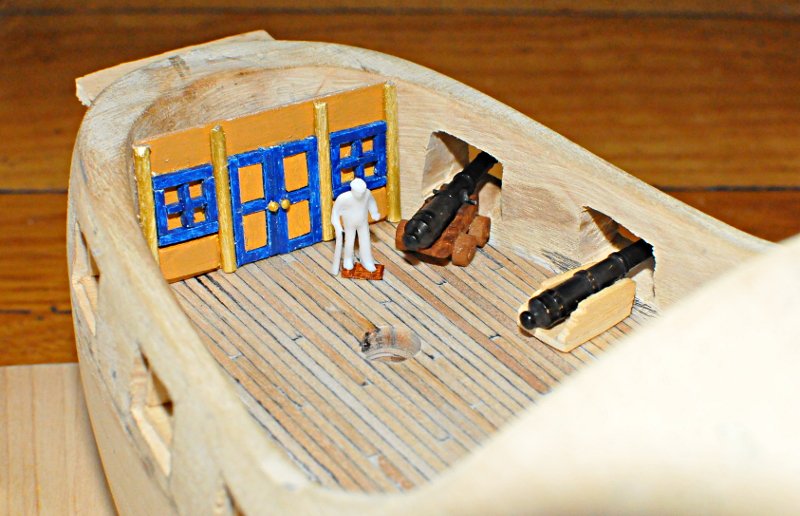
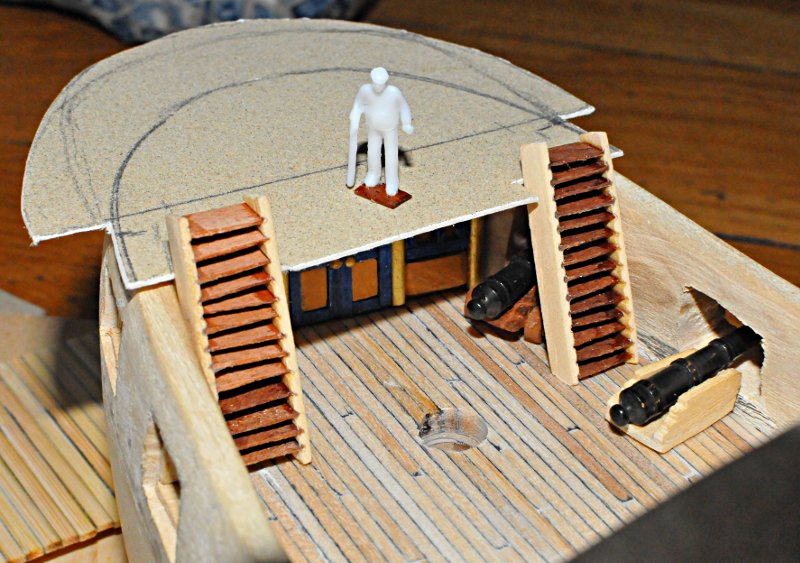
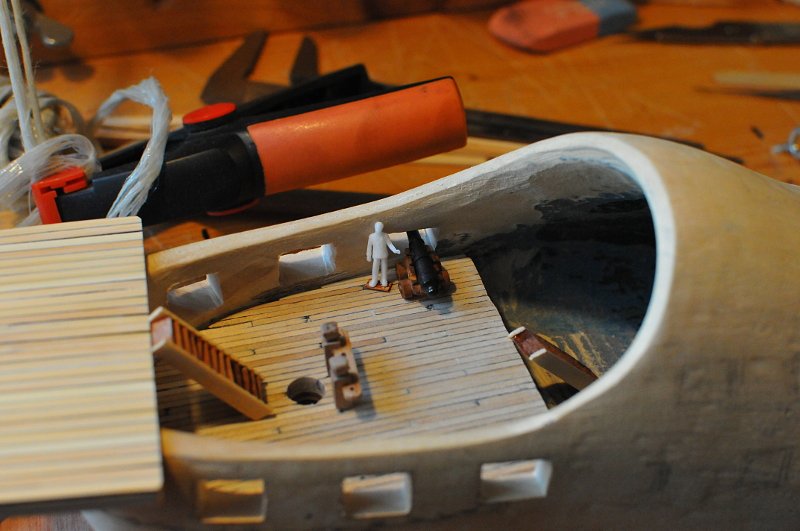
Update. Almost finished the entrance to the captain's cabin (just needs some touching up) and I changed the design for the quarterdeck because there was no space for the stairs and the cannon in front of the cabin. Cheers Pieter
-
Small update. Decks are glued, bulwarks are faired (is that the expression?), area at the stern has been prepared to avoid becoming too thick as compared to the rudder ... Right, let's start planking ;o) I just saw that 6 people are following this log, thank you for your interest! Cheers Pieter
-
Hi Ben Welcome! Cheers Pieter
-
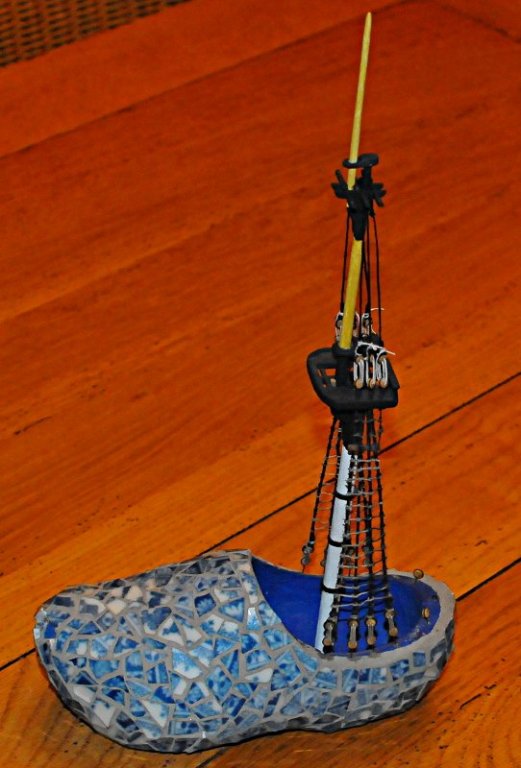
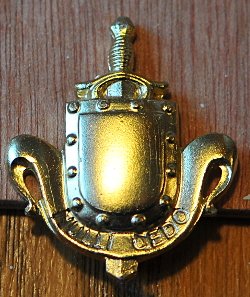
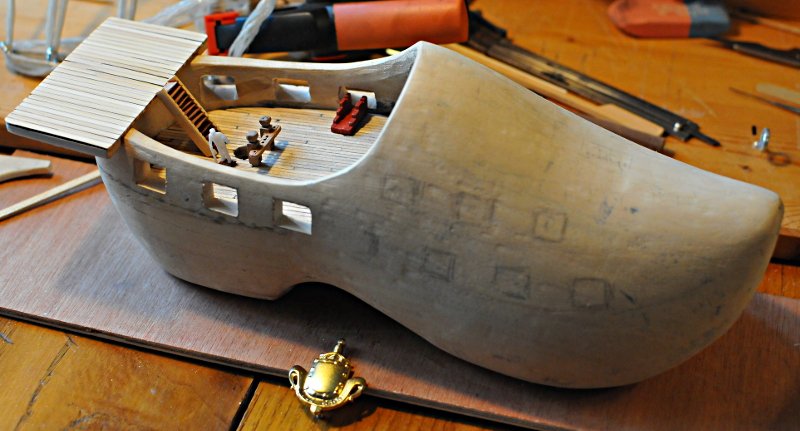
I am starting a build log on my fun project to rebuild the famous Dutch War Clog, the Nulli Cedo (« I will not budge »), also known as «The Menace of Medway». More about her history later. I am also building HMS Bellona but in stead of waiting for glue or paint to dry I might as well stay busy. I started with a very small clog which was absolutely inadequate to show the fierce appearance of these redoubtable sailing fortresses. So I took a size 5. I am going to build a main deck with the usual clutter, a quarterdeck, two "inner gun decks", a balcony for the captain to sit and relax and enjoy his jenever, two masts and a bowsprit which all shall be rigged 18th century style. I will arm her and paint her and give her a coat of arms on the bow. And I expect to have a lot of fun building her. Feel free to comment and if anybody has an idea to improve Nulli Cedo : please bring it on ! Picture below: first attempt. This mast will be used as the foremast on Nulli Cedo. Below: her Coat of Arms. Nulli Cedo: I will not budge. Below: The hull. Finest poplar ... First gunports opened, decks and stuff dry fitted, vague drawings of where the inner gun decks will be situated. I haven't decided what to do with the "foredeck", maybe 2 caronades ... Below: a closer look. So here goes. Enjoy. I will. Cheers Pieter
-
Hi all Would anybody be interested in a set of sails for the San Francisco number one? I built mine without sails and they are just lying around. Not that I am desperately in need of space but maybe someone can put them to use. Costs: postage (they come from France). Cheers Pieter
-
Almost 30 Years since my last build!
peveka replied to Todd Hart's topic in New member Introductions
I concur to the above (all of it). I would like to add: It would have to be sound proof. Both ways. Cheers Pieter -
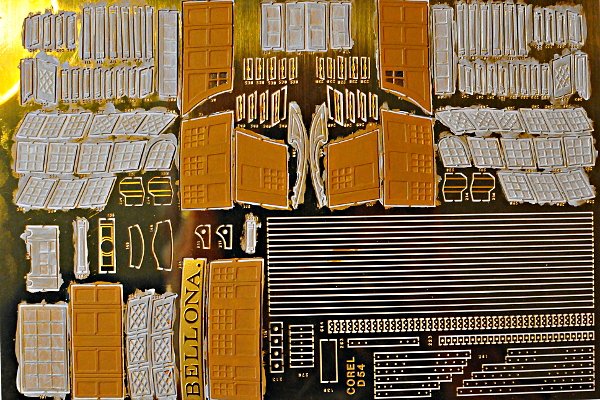
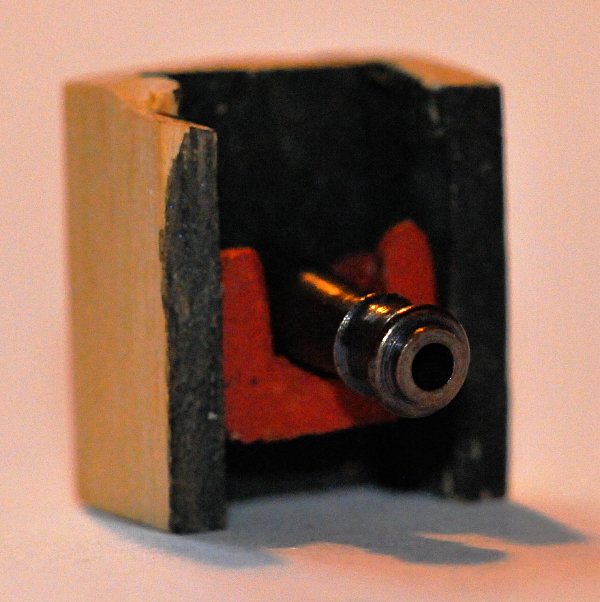
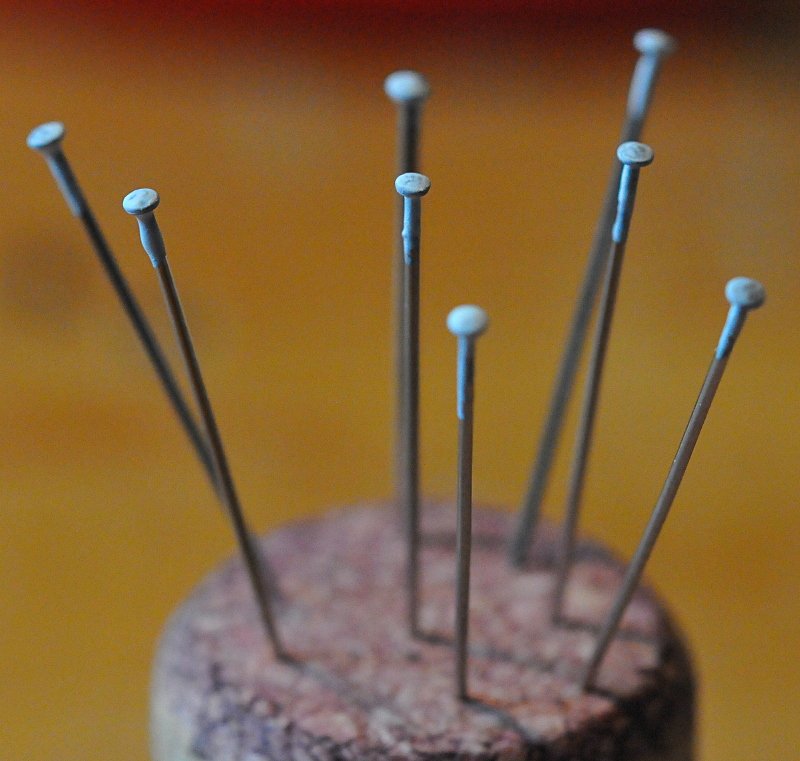
(Not so much) progress report What could be more exciting than watching paint dry ... I wanted to glue the other two decks and start fairing the hull but it seems like a good idea to position some PE parts first because with the decks fitted that could get tricky. But they have to be painted first. The Corel manual comes with an extensive list of how to paint which part so that's handy. I use a waterbased primer because the admiralty colors are waterbased too. I put on two layers of primer because one layer didn't cover enough. After that I needed 4 layers of yellow ochre. I really like the colors, they are quite warm and don't sort of explode off the ship if you know what I mean ;o) I used Harlequin's idea of blackening the windows with a pencil and I think that works quite well, thanks HQ! Now I just let the paint dry. Mean time, just to do something useful, I experimented a little with the dummy cannons. They have to be put in small box-like structures. The kit comes with two U-shaped "bars" and one has to cut off different lengths for different cannon sizes. When put in said box it doesn't really look right so I stole someone's idea to make a dummy carriage and that came out like this, not half bad. So now I've got to make about 40 of these. Oh, nearly forgot. The PE doors come without doorknobs so my admiral supplied me with some raw material to fix that little problem. First layer of primer drying. Cheers Pieter
-
Hi Harlequin Thanks for the warning. The false keel is 5mm so I guess if I gently work myself backwards beginning at bulwark #11 I could end up with some 2.5 mm at the stern and compensate the rest with the planking. Will be a dusty procedure ;o) Cheers Pieter
-
I knew I'd seen it before somewhere ... ;o) Cheers Pieter
-
Aaah I get it. Otherwise the keel would be "thicker" than the rudder, right? Thank you for clarifying! Cheers Pieter
