


EKE
-
Posts
231 -
Joined
-
Last visited
Content Type
Profiles
Forums
Gallery
Events
Posts posted by EKE
-
-
This is looking really great, Bradley! Well done.
-
7 hours ago, James H said:
`I absolutely love this.
That black upper hull, registration number and the overall finish and attention to detail.
Amazing that this is a first build.
Thanks so much Jim! Appreciate the kind words. Now I need to figure out all the rigging bits. Fortunately this model is not too complicated in that regard. -
24 minutes ago, Keithbrad80 said:
This looks awesome! You killed it on this build so far, I’m looking forward to seeing it rigged!
Bradley
Thanks Bradley! Me too!
-
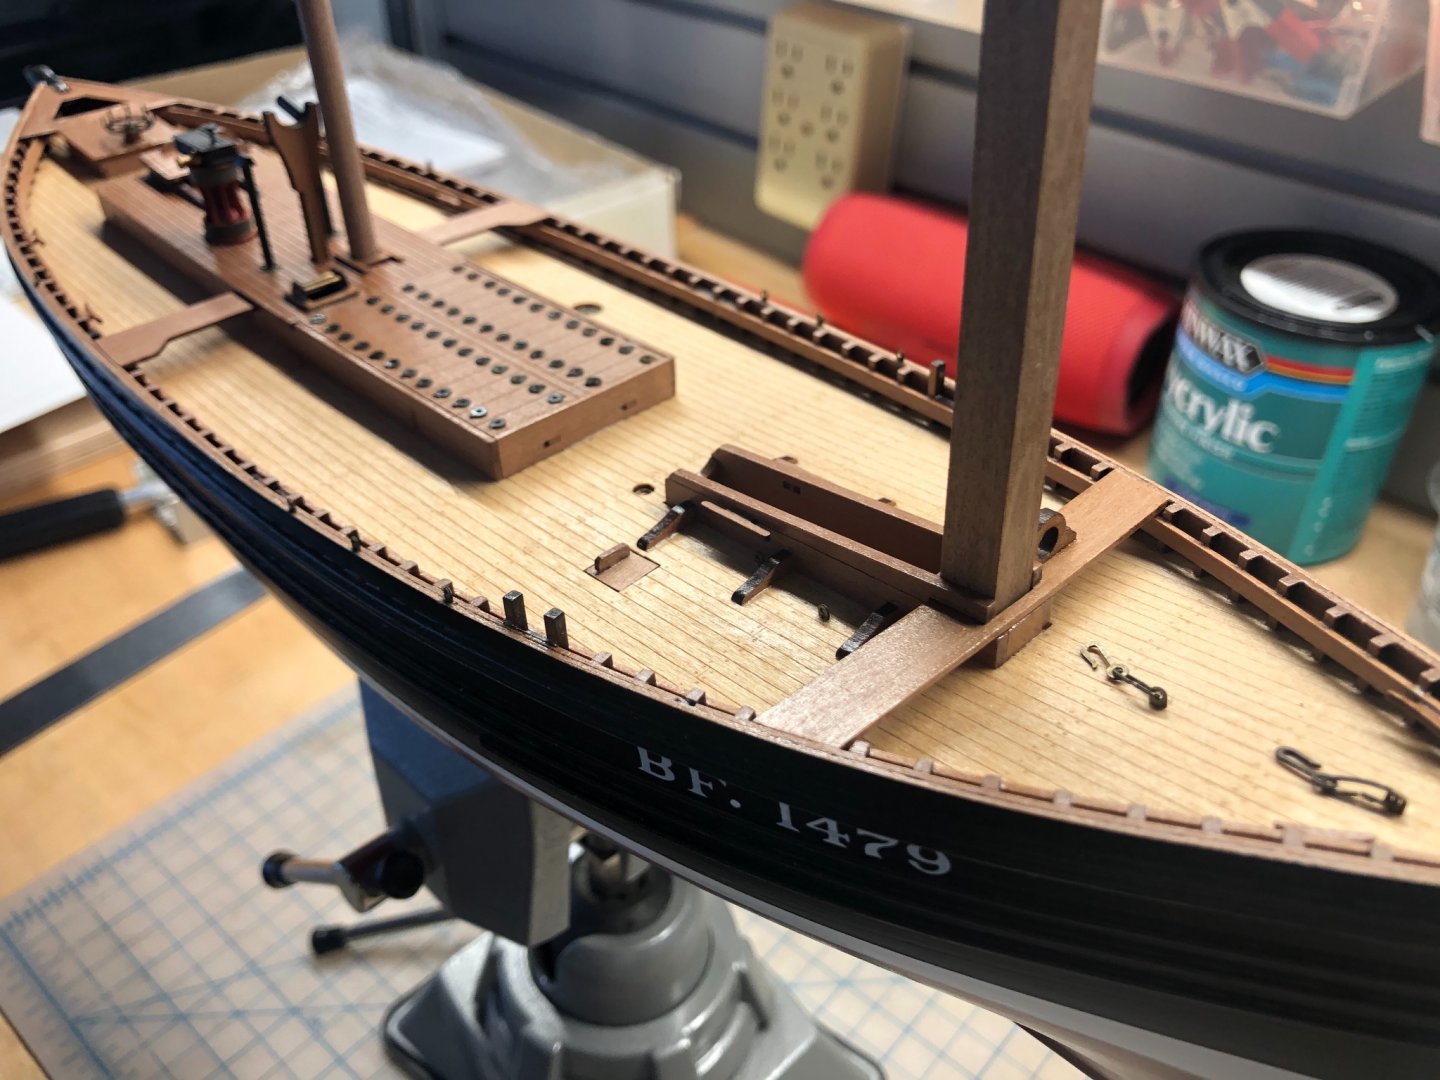
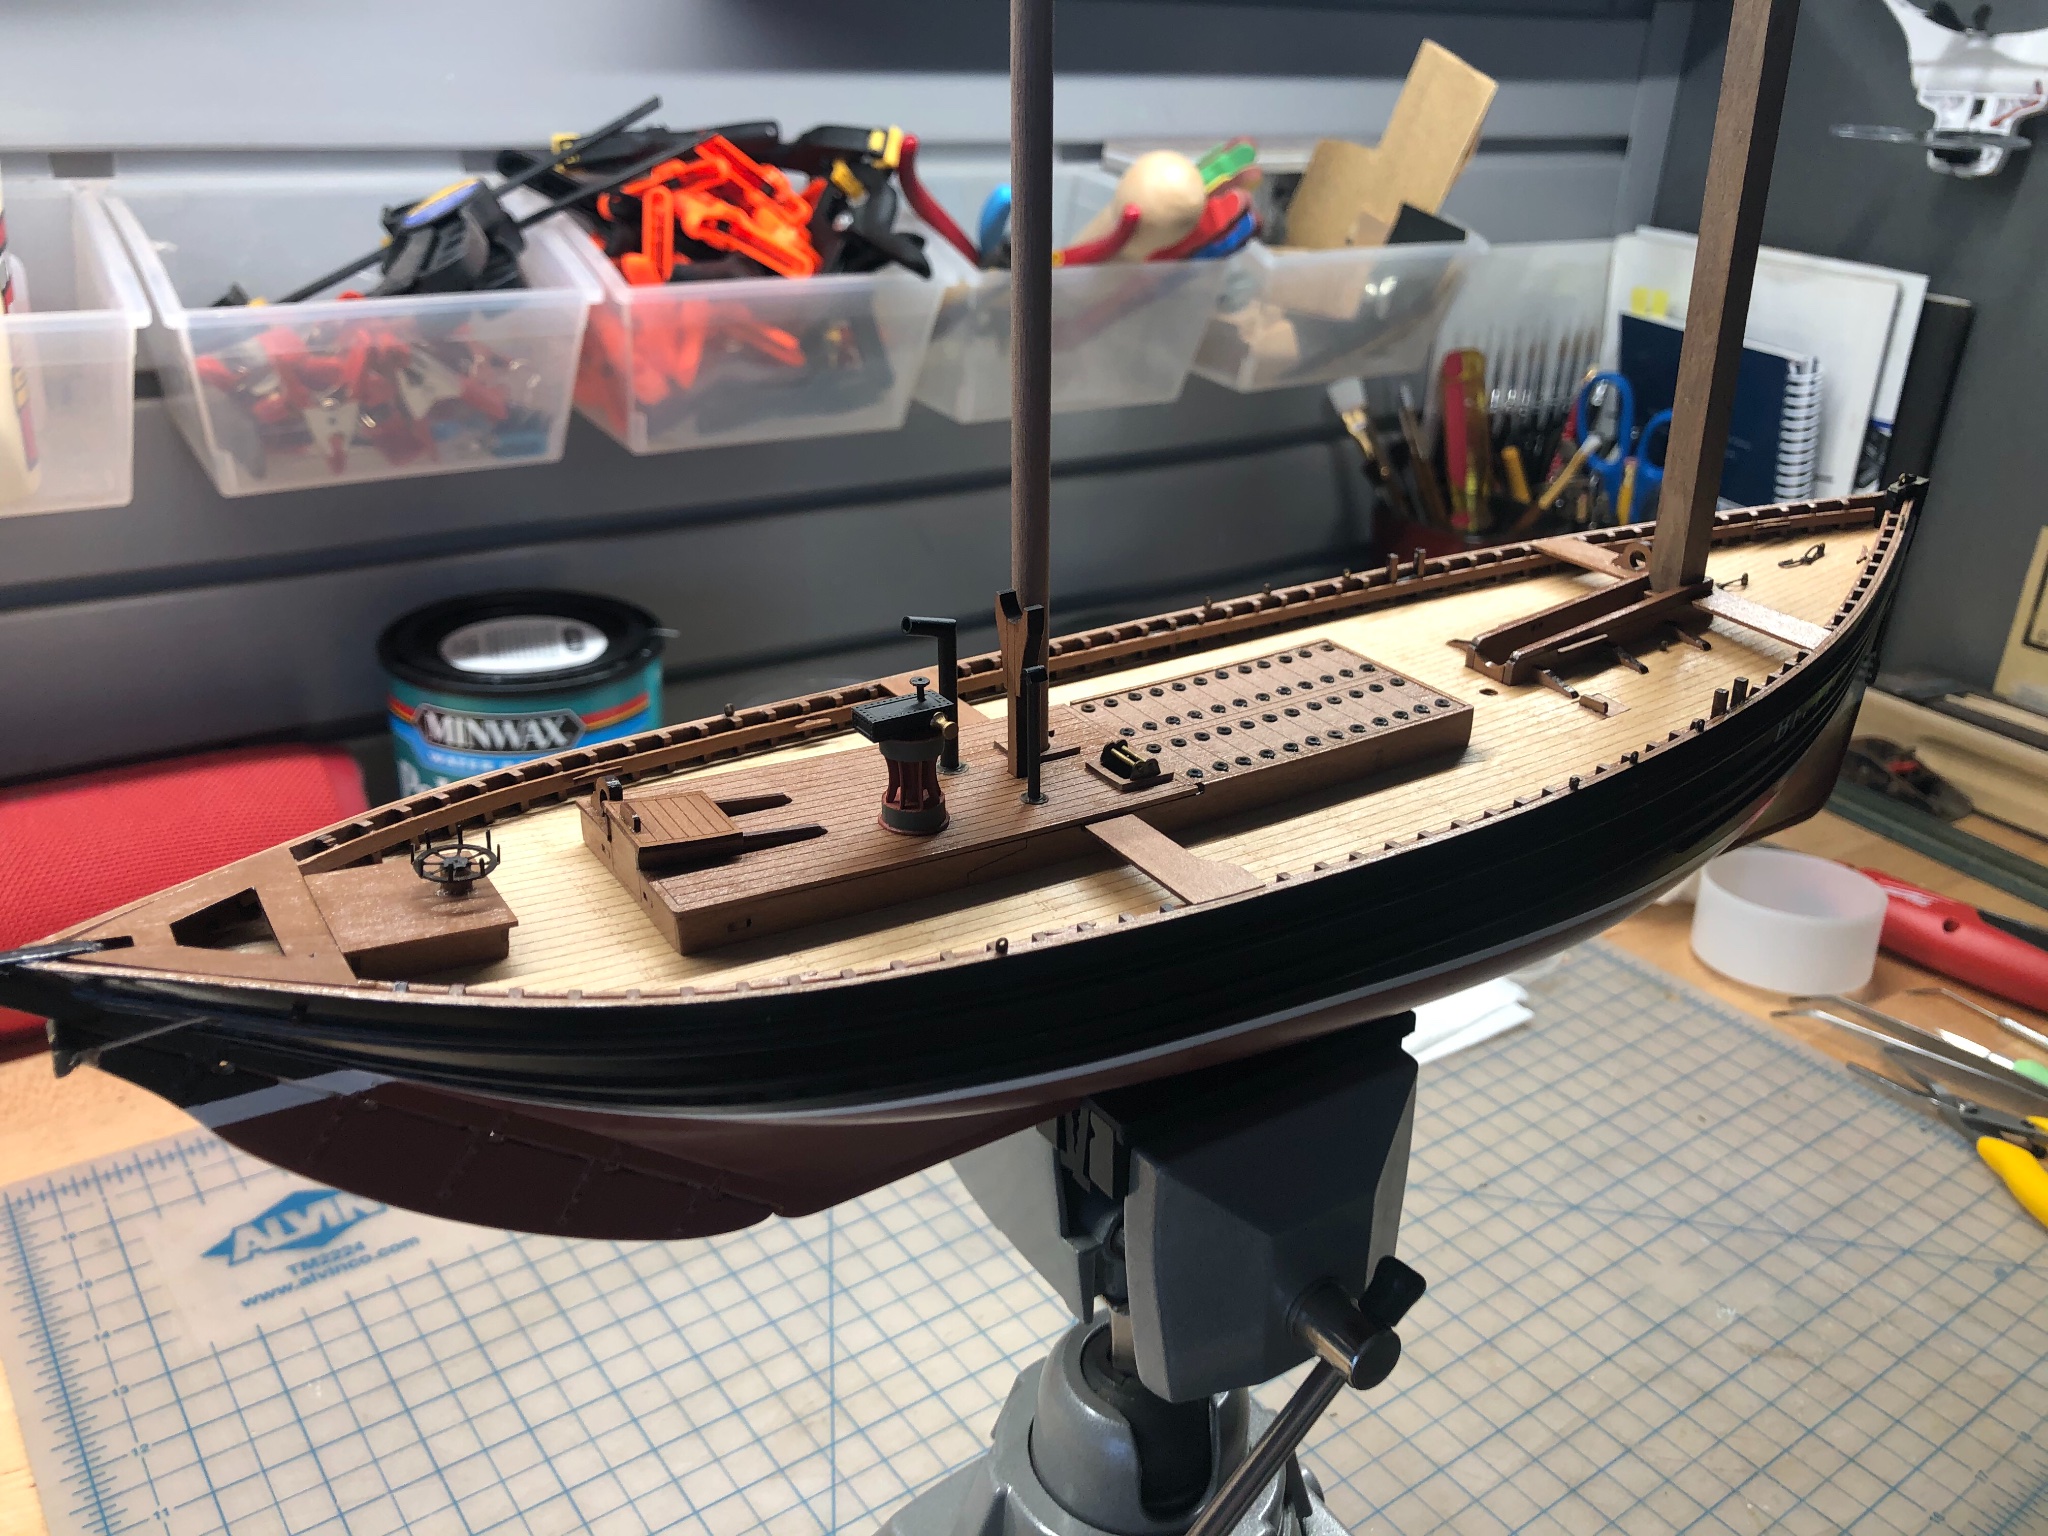
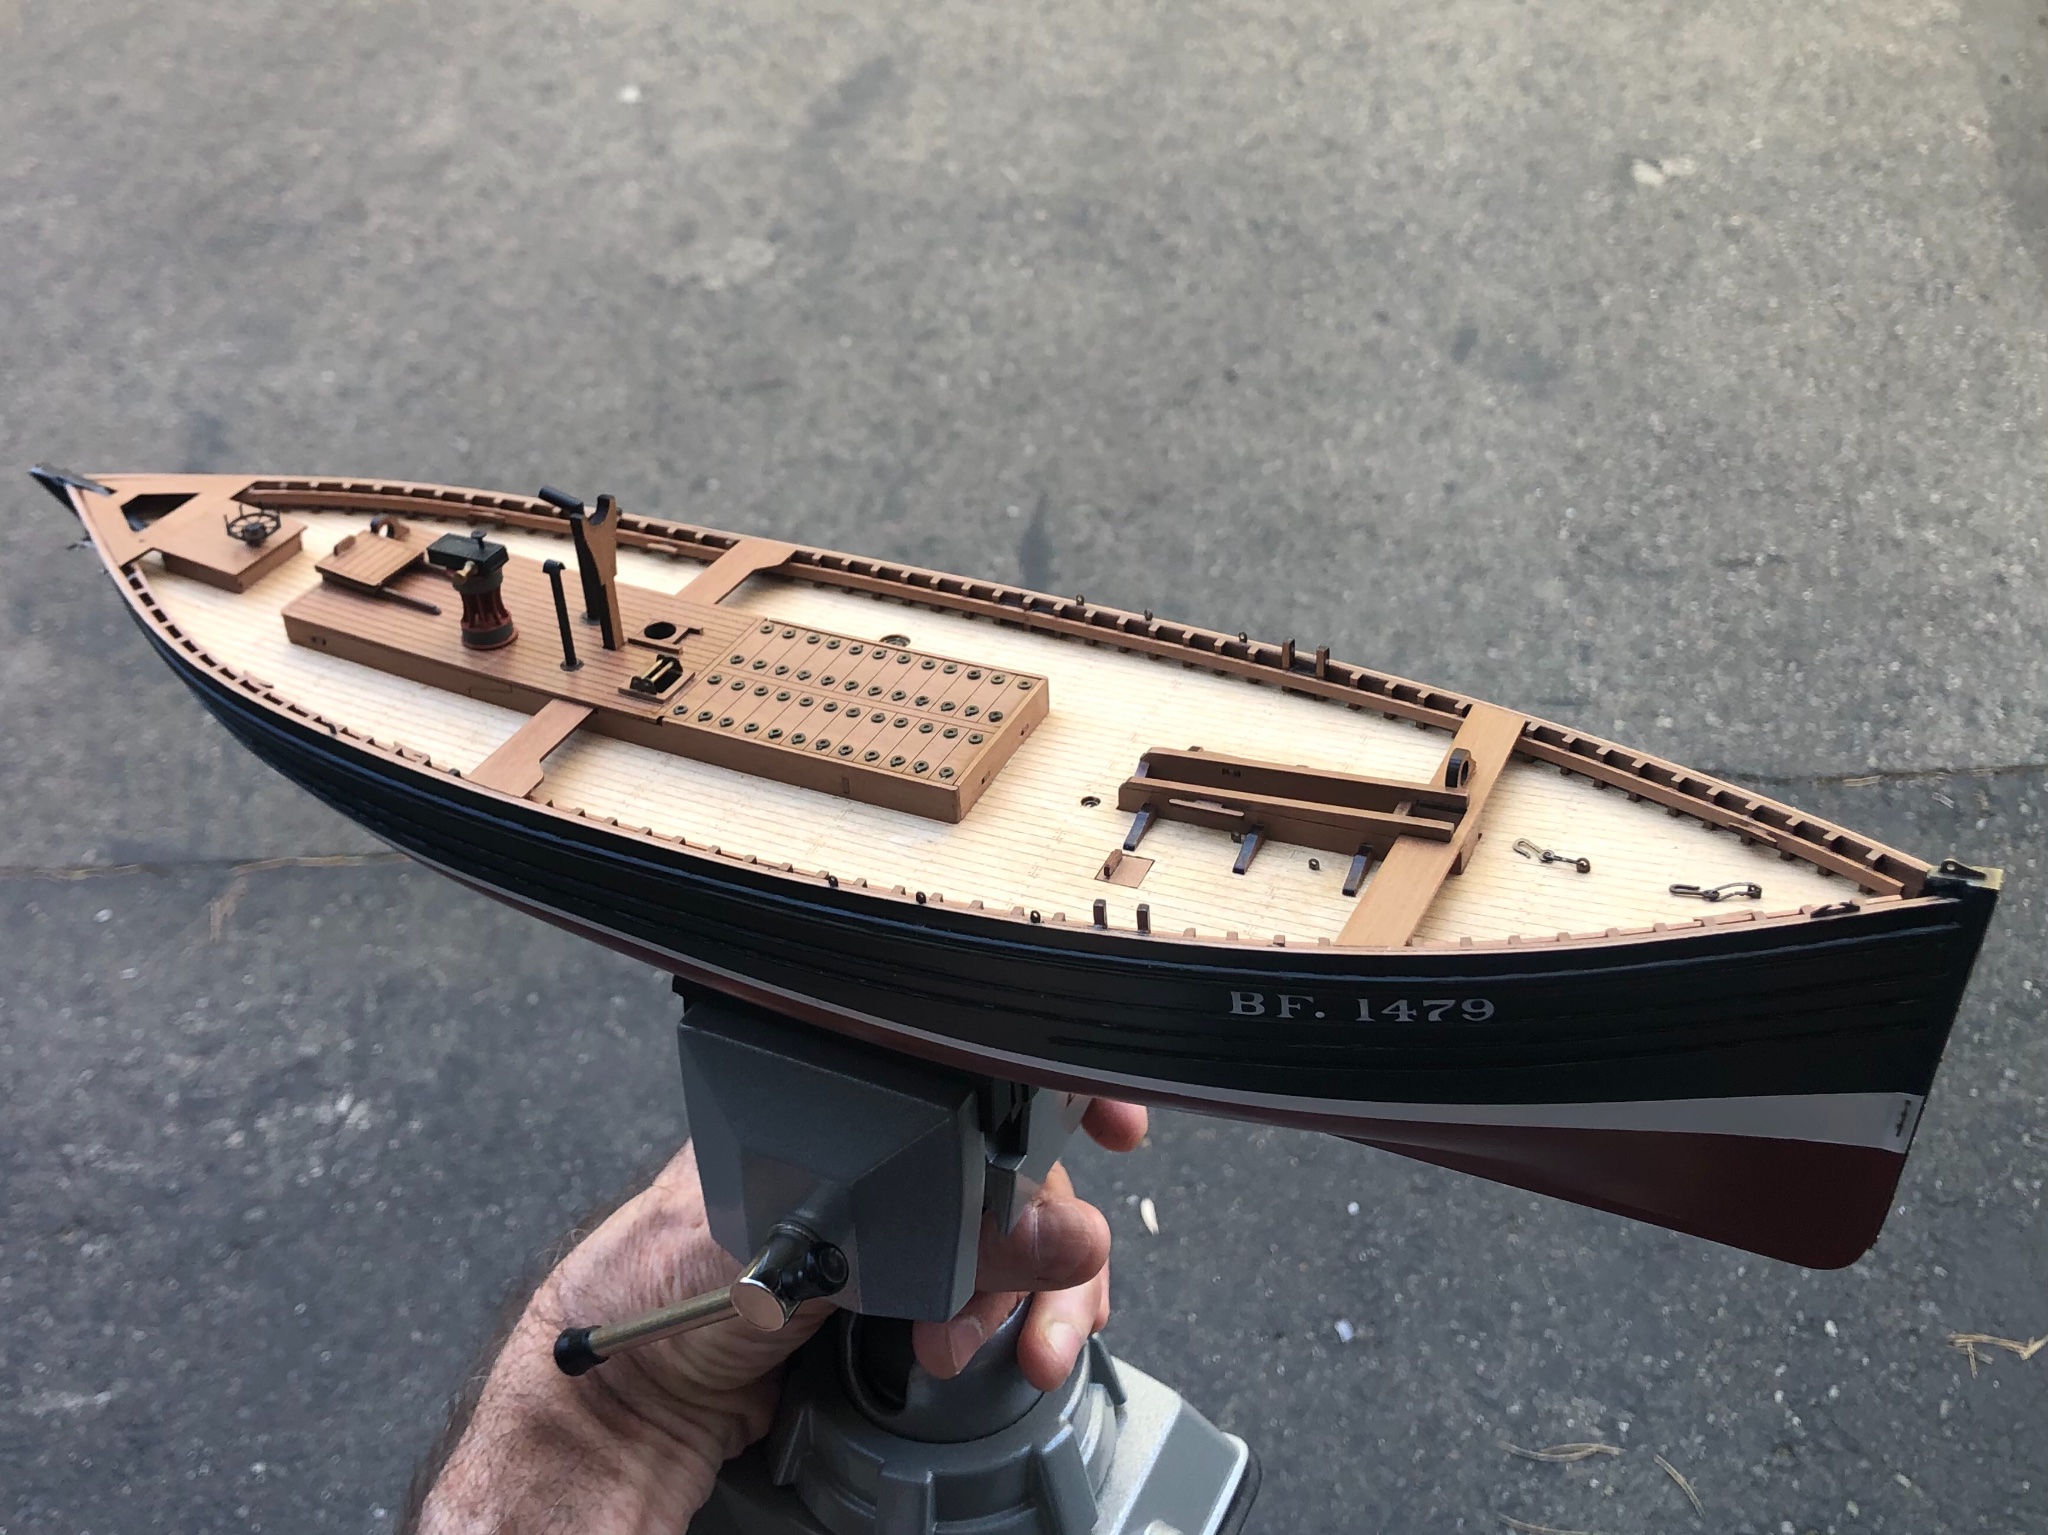
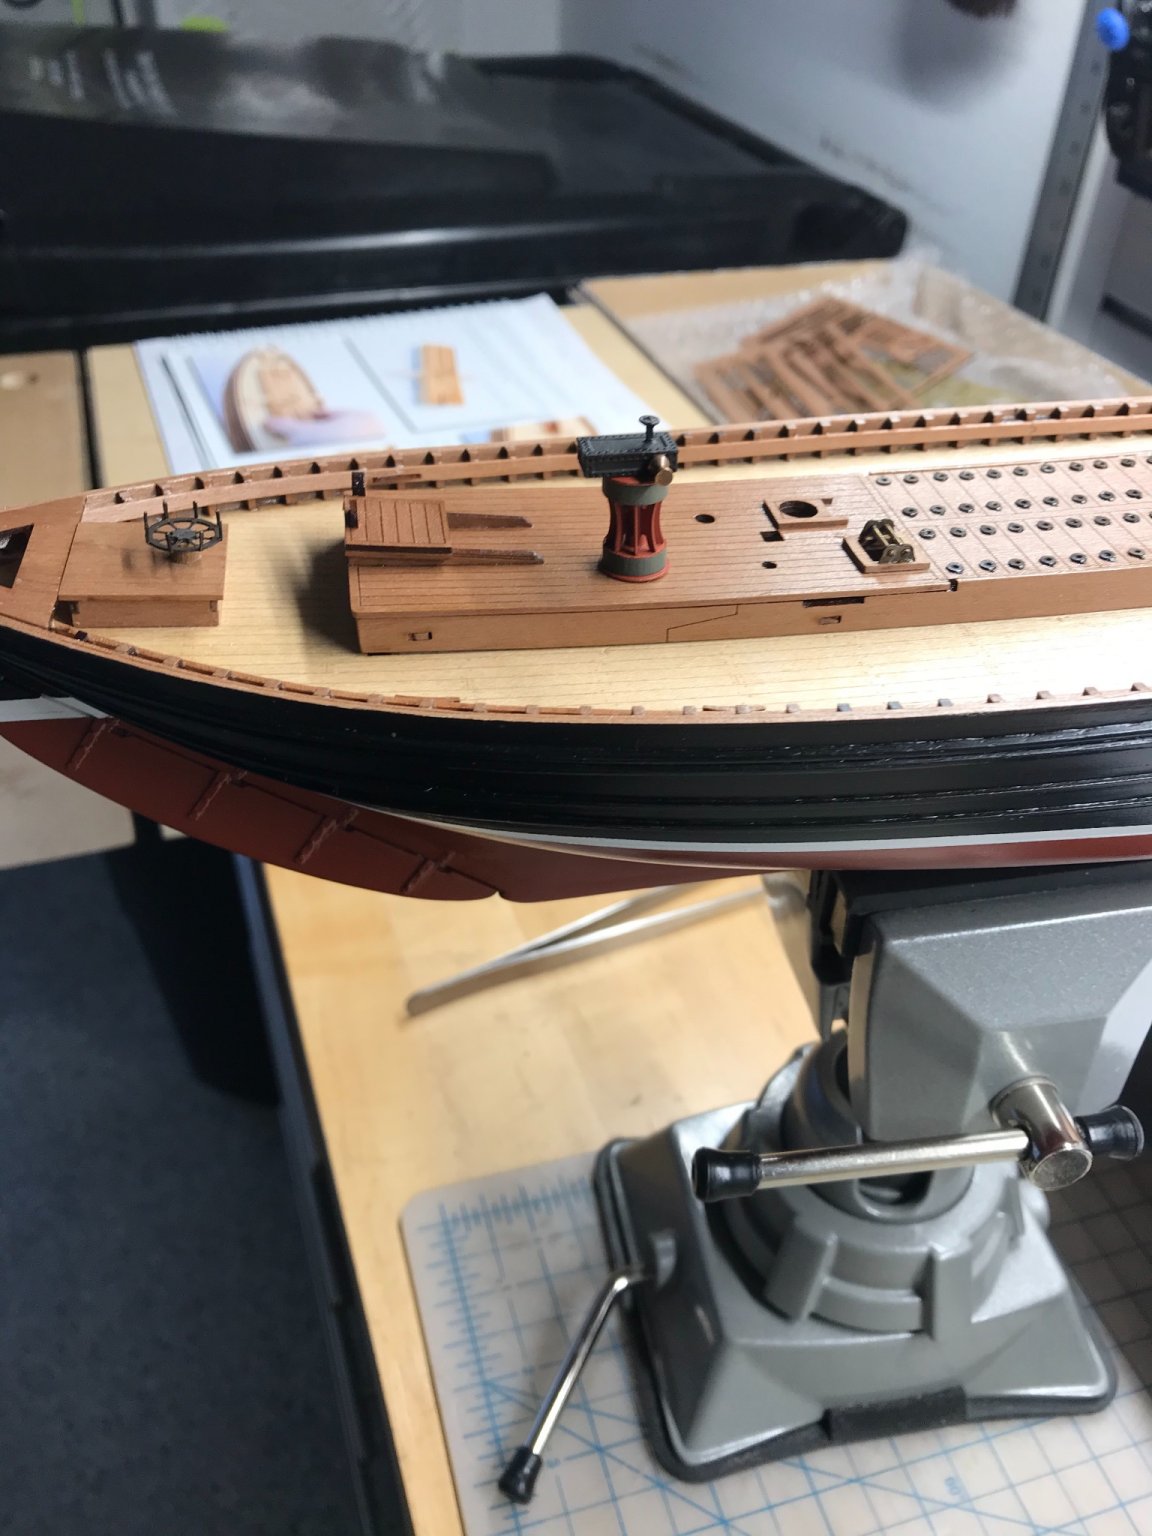
Time for an undate. I have finished the deck details, fittings and furniture. Most all of this is installed exactly according to the plans, with a couple small changes/upgrades.
There are two flues which exit the top of the main cabin house. I'm presuming that the largest is a flue for the steam boiler, which drives the steam capstan and winch. This is the one with the top which angles aft. I’m guessing the smaller flue is for a coal stove which I understand was more or less standard equipment on these boats, for cabin heating and cooking. In vintage photos, it seems that these flues often had a sheet metal hood cowling at the top, so I fashioned one to match some of the examples I found.
Another change I made was to add pad eye hardpoints in four locations along the port rail, to mirror the ones called for on the starboard rail in the plans. These are for mast stays and halyards. Although only one side would be used at a time, and the plans call for the boat to be rigged on starboard tack, as a sailor I know that the boat would surely be on port tack at times, so the halyards and running stays would need to be move to the weather side. So it makes sense that there would be hard points on the port side as well. So I added those. Otherwise, all of the details are per the kit instructions.
It feels good to get to this point, I have to say. Now I’m on to masts, spars and rigging!


- BobG, chris watton, yvesvidal and 8 others
-
 11
11
-
39 minutes ago, Blue Ensign said:
Thanks Erik, a great find, I hadn’t seen it.
Some great detail shots of equipment and how it was used, and of the scale.
The warp rollers along the rail slotted into sockets are something I pondered about, altho’ I did fit the sockets.
I note the relative sizes of the Cran baskets and net floats to the crew.
👍
B.E.
You absolutely nailed the baskets! 👌I loved seeing how they harnessed and hoisted the baskets off the boat, filled with fish. 🐟
-
I’m pondering whether to fab up one of the net rollers myself. I’m going to watch the film again closely to see where exactly they were installed and how they were fitted.
-
For you Zulu aficionados, I came across this fantastic video this morning, entitled “Drifting”. It looks to have been made sometime in the 1940’s. The boats are all converted to steam power by this time, but many of them appear to have been sailing drifters at one time... Zulus and Fifies. The film goes through the process of drift fishing for herring in great detail. Lots of interesting information here. There’s much detail on how the various fittings around the deck were used, and some nice video of the crews using the nets, fish holds, steam capstan, etc.
B.E. - not sure if you have seen this, but you’d certainly appreciate it. Enjoy!
-Erik
- Rik Thistle, chris watton and DB789
-
3
-
On 1/5/2021 at 3:33 PM, Allen B said:
EKE. I've been following your magnificent build with admiration and great interest. As a newbie, Zulu is going to be either my 1st or 2nd build shortly. Would you please answer a question for me regarding the scale size of the registration letters/numbers . Are they N, Ho or O ? Thank you. Al.
Hi Allen,So sorry it took me so long to get back to you. Thanks so much for the kind words! The lettering I used is from Woodland Scenics, which is a great company which sells gear tailored to the model railroad community. I used their dry transfer lettering, RR Roman style, white. The size is 3/16”, which is just perfect to fit between the rubbing strakes on the side of the hull.
Hope this helps! Good to meet you.
-Erik
-
-
18 hours ago, Keithbrad80 said:
yesterday I spent a while thinking about how I wanted to approach the copper plates. I’m using a pounce wheel to create the riveting patterns, I tried to create a jig where I would use a stamp to create the rivets but that didn’t work. Instead I created a two part jig for the copper plates.
Hi Bradley! Great job on the hull painting. Are you planning to do some filling before panting a second coat?
I think your copper plate jig looks really well conceived, and should work very well. Terrific job, can’t wait to see the results!
-Erik
-
What a great shape that hull has, too. Looks so fast. I can just imagine that clipper charging through the seas under full sail and a 25-knot following breeze! Those boats were just magnificent. Isn’t it great to make models of ships like these, to capture a bit of their magic in the mind’s eye?
-
This looks wonderful, Bradley. Planking a hull of that size is quite a task, you must be pretty pleased with yourself!
-
4 hours ago, Rik Thistle said:
"... two small brass ports in the deck.... I immersed the part in the brass blackening solution....the bolt marks stayed a nice bright bronze color.... a small air bubble must have formed at each of the bolt marks, "
That's an interesting one. Did it happen on both brass ports?
Thanks Richard. It’s a bit hard to tell, since the other port is much smaller, and it’s very hard to see the detail clearly. -
8 hours ago, Keithbrad80 said:
Your skills and attention to detail is very impressive for a first build! Things are looking very sharp, nice work on the capstan your paint job is very clean!
Bradley
Thanks very much for the kind words, Bradley! -
Just started following your build, Bob. Well done so far, and a really great job on the second planking. Inspiring!
I’ve been building another of Mr. Watton’s kits, and I have to say the design and engineering has been impressive. Enjoy!
- Old Collingwood, BobG and Ryland Craze
-
3
-
-
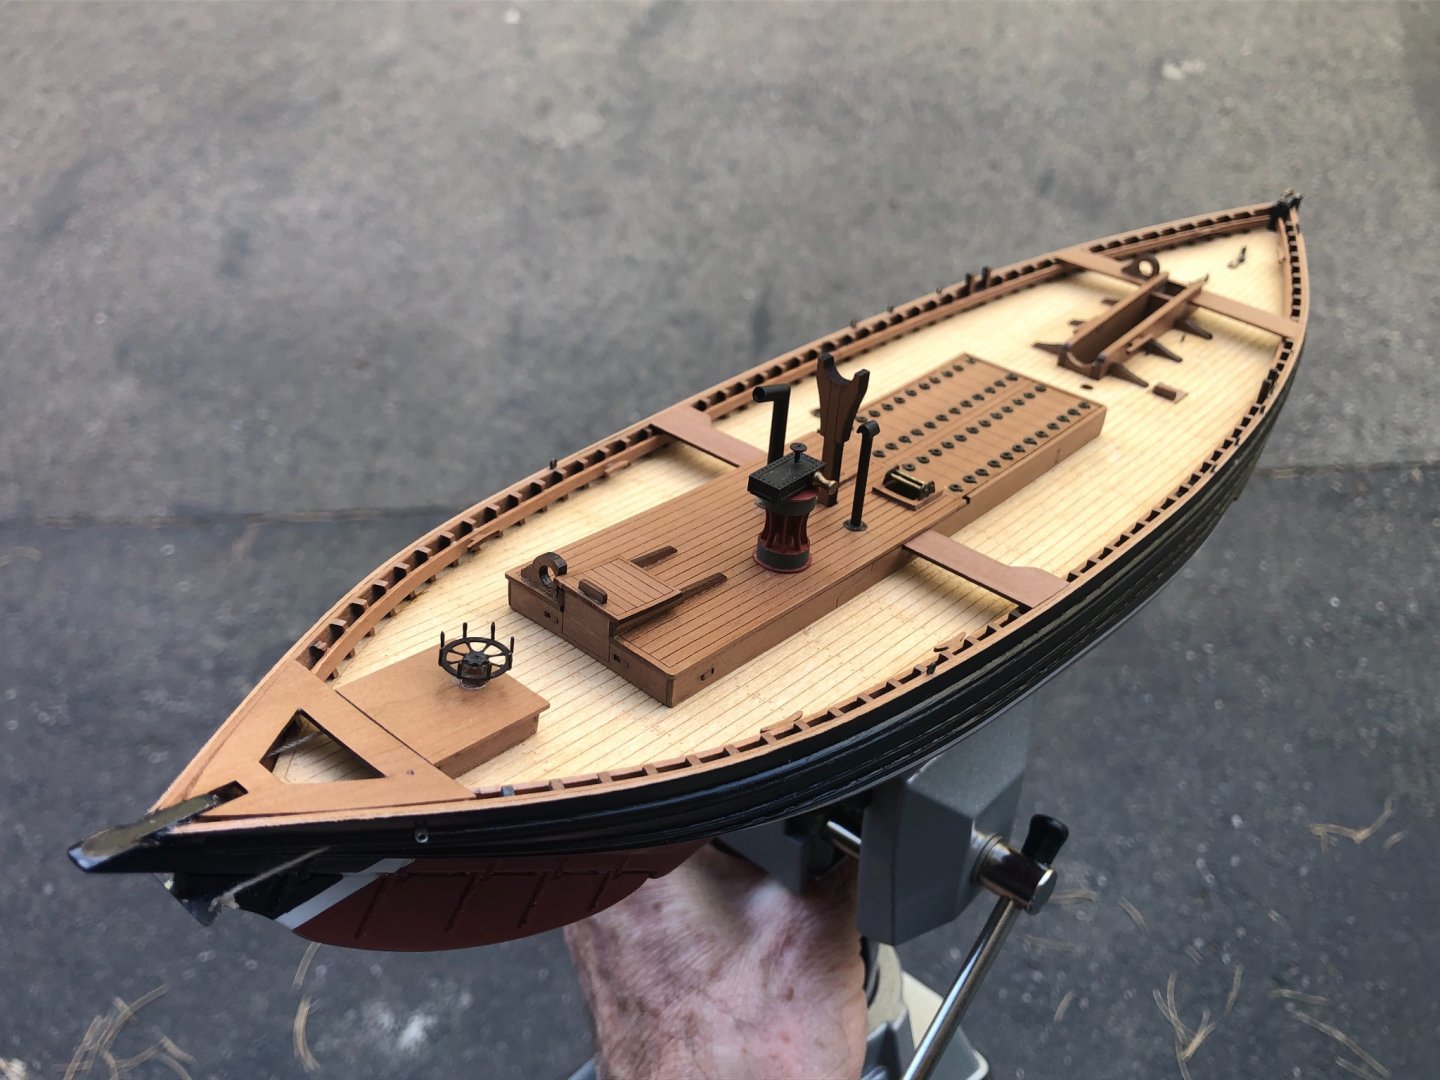
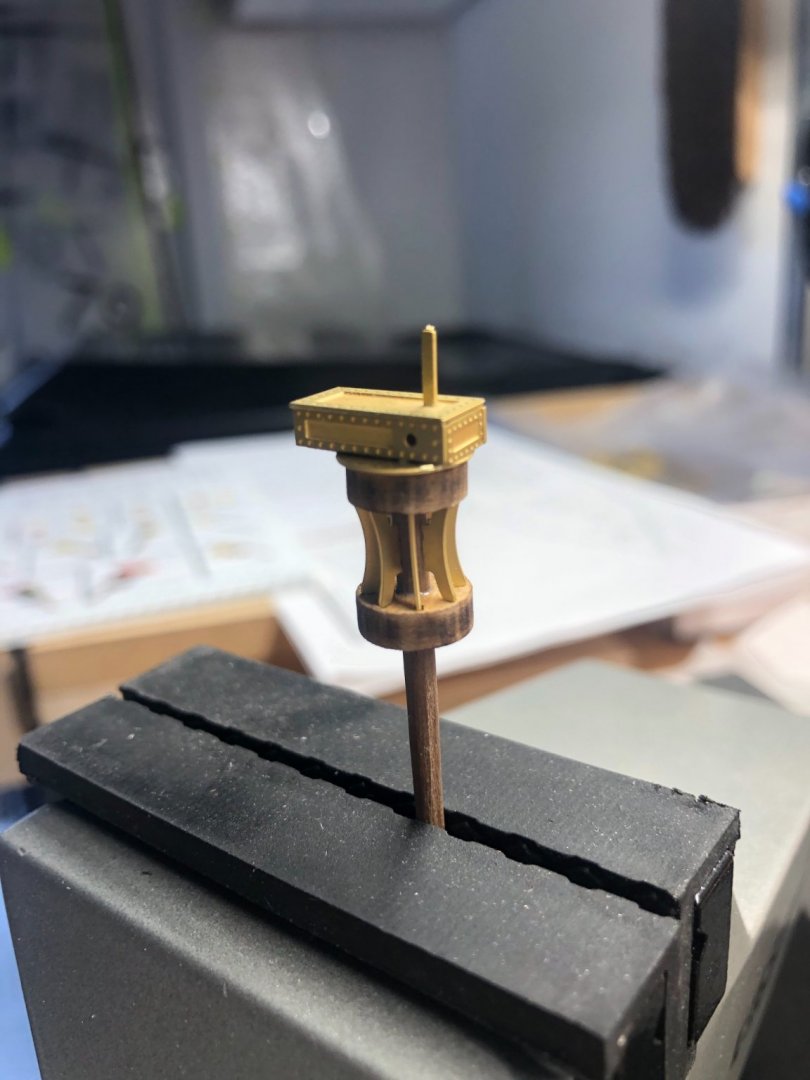
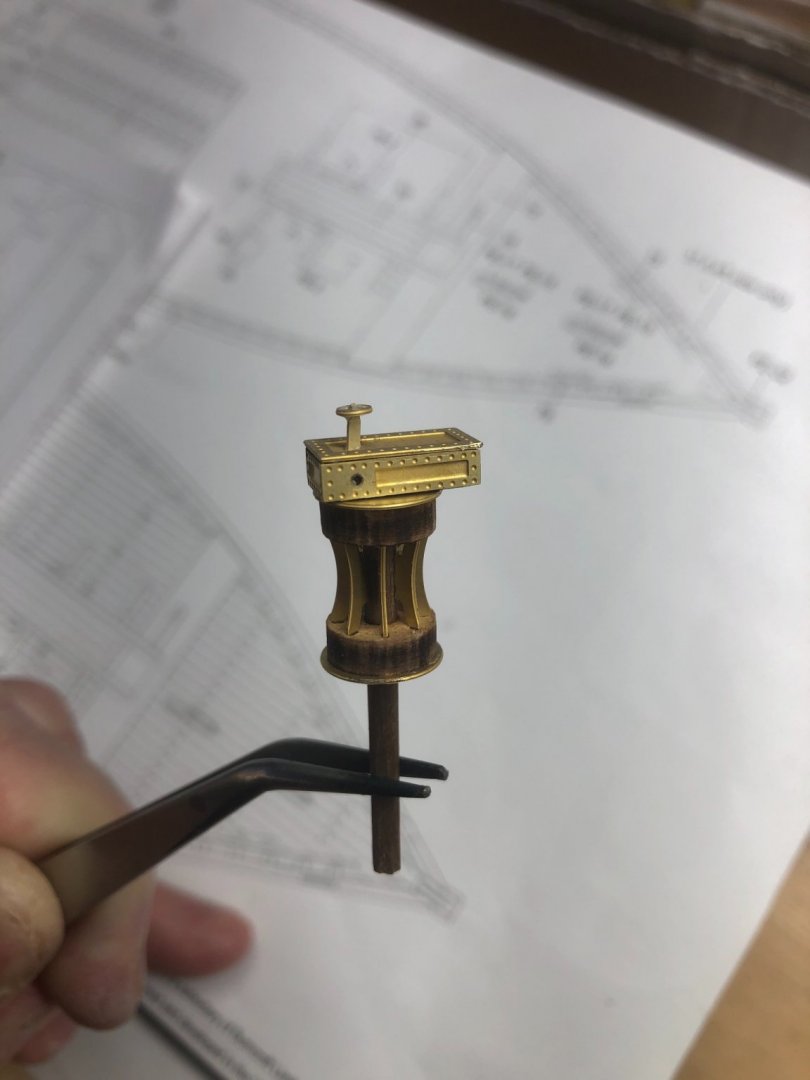
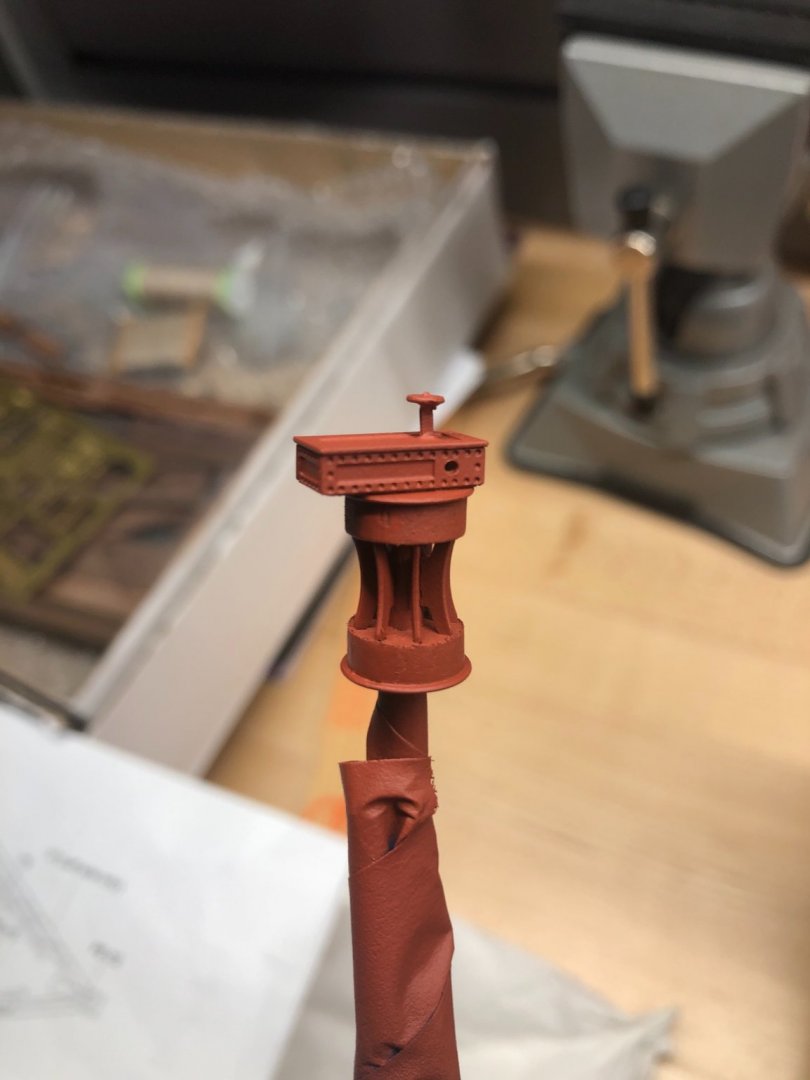
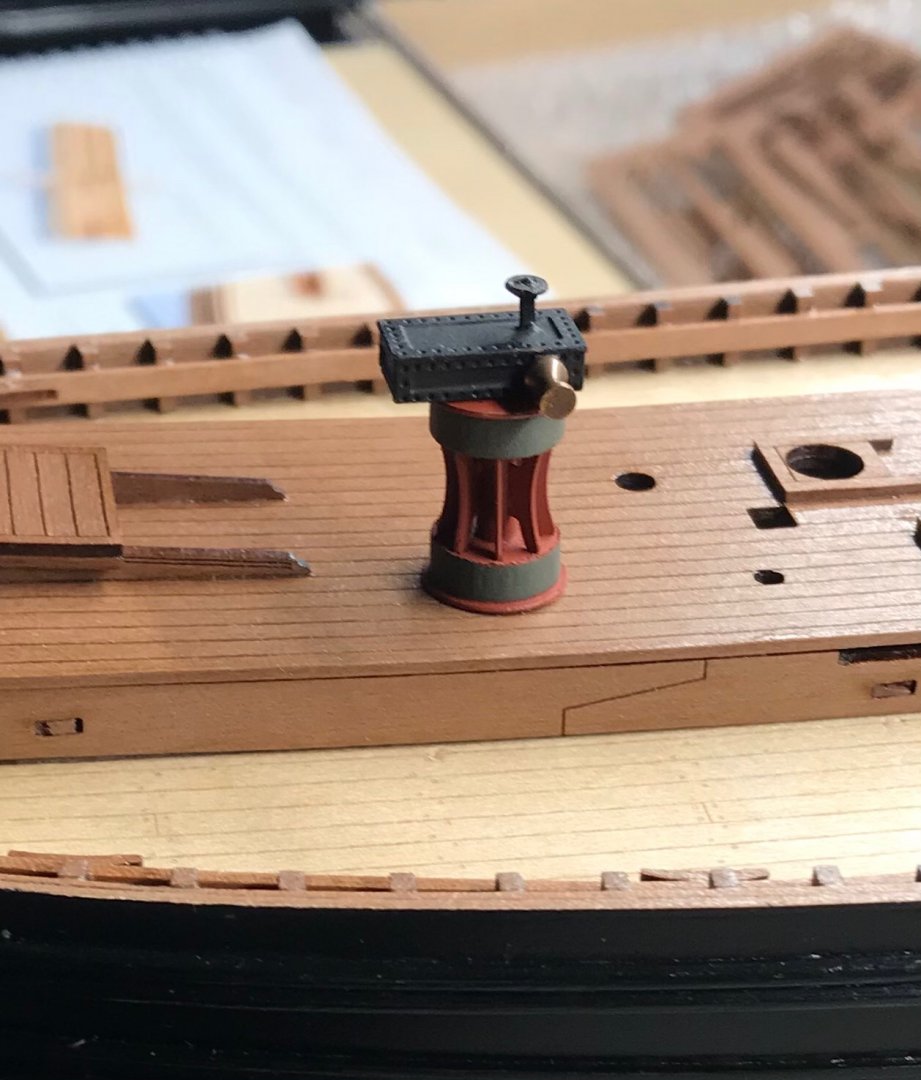
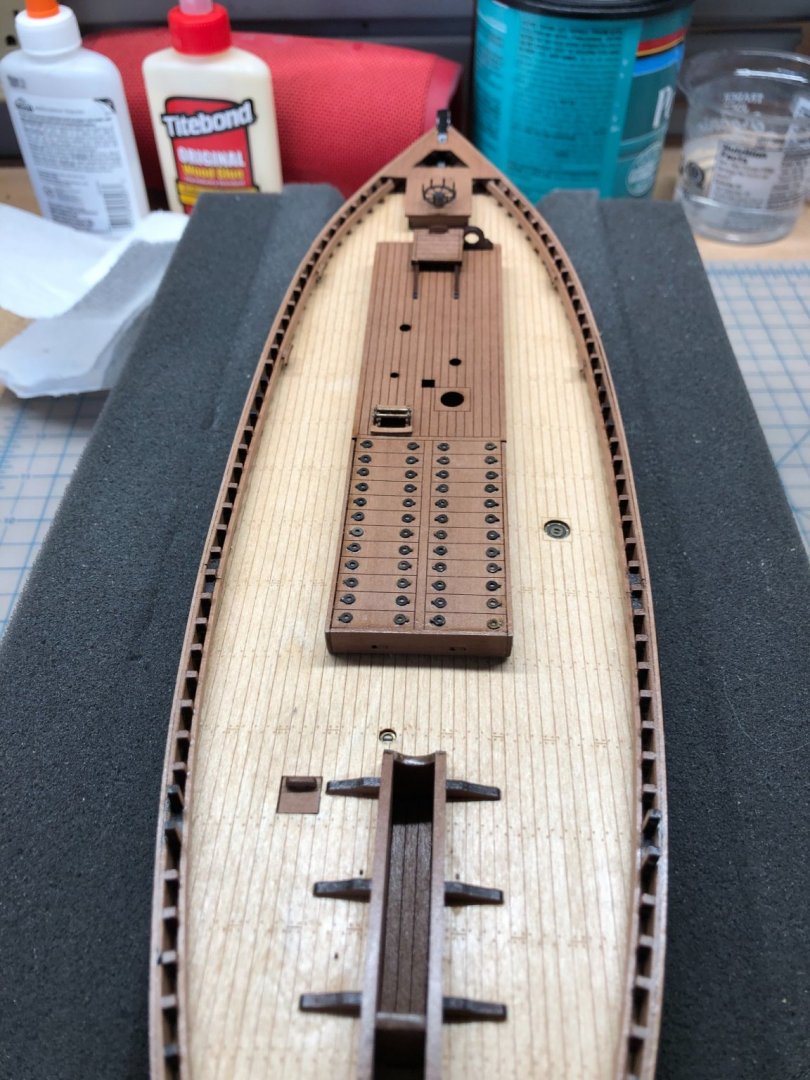
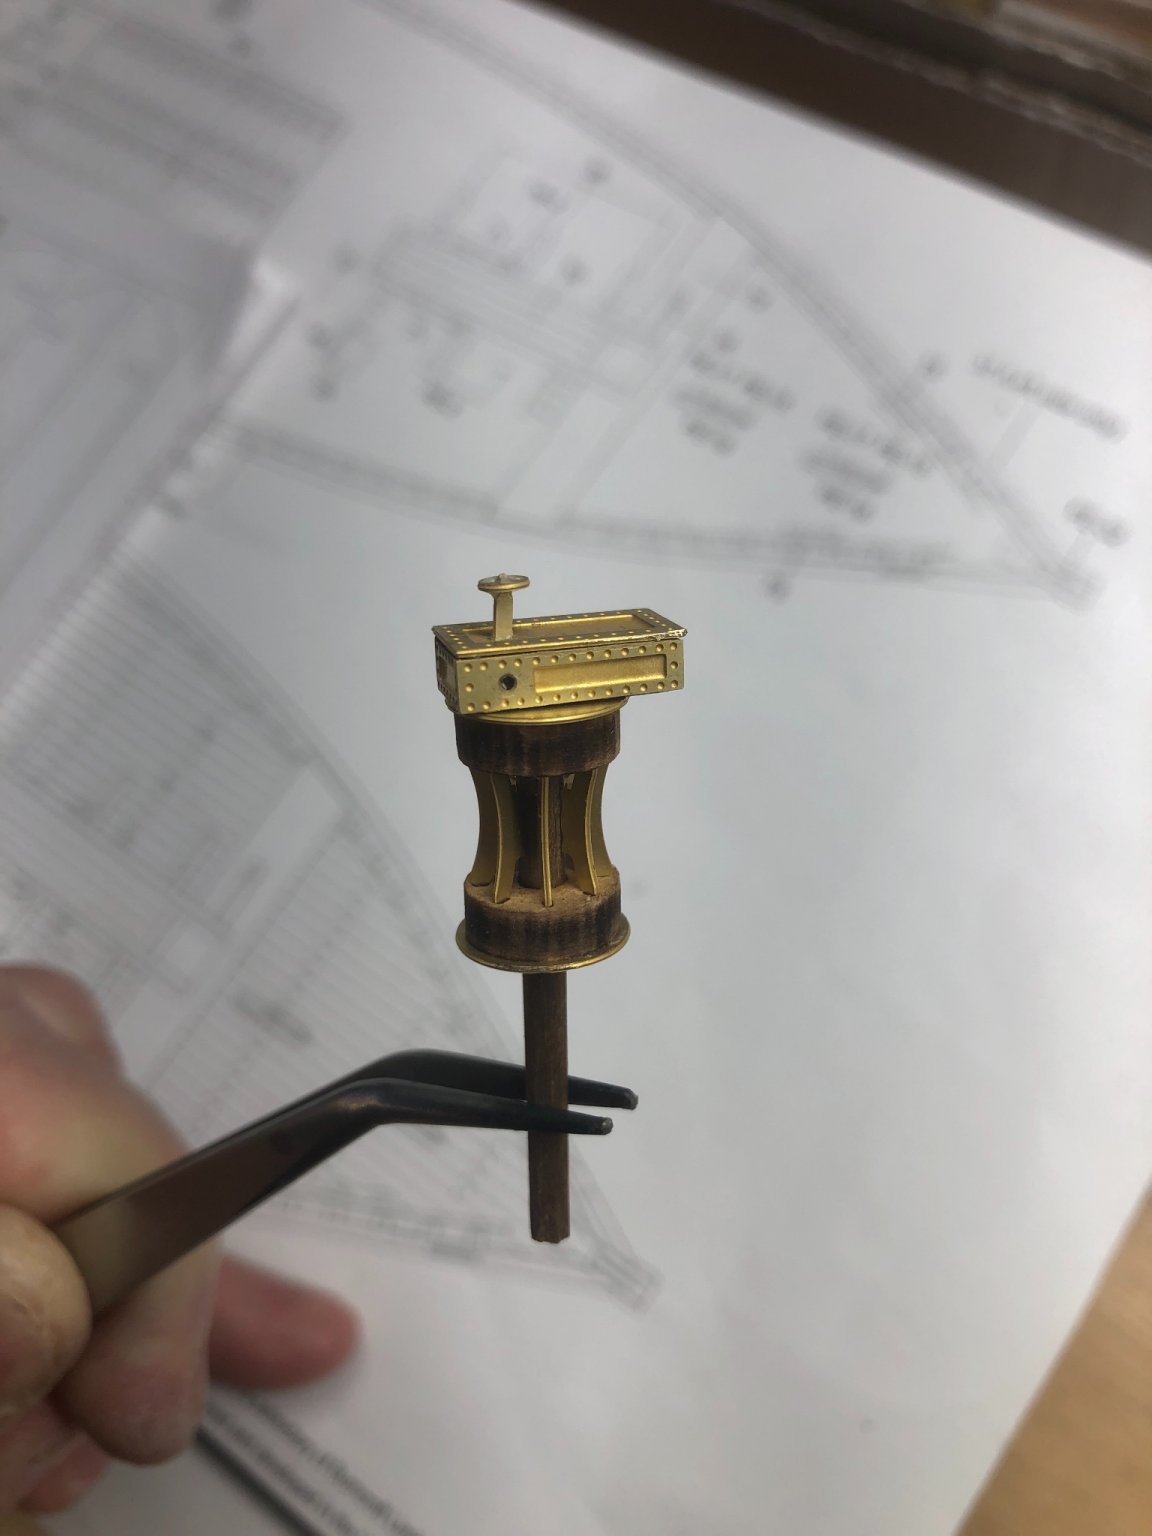
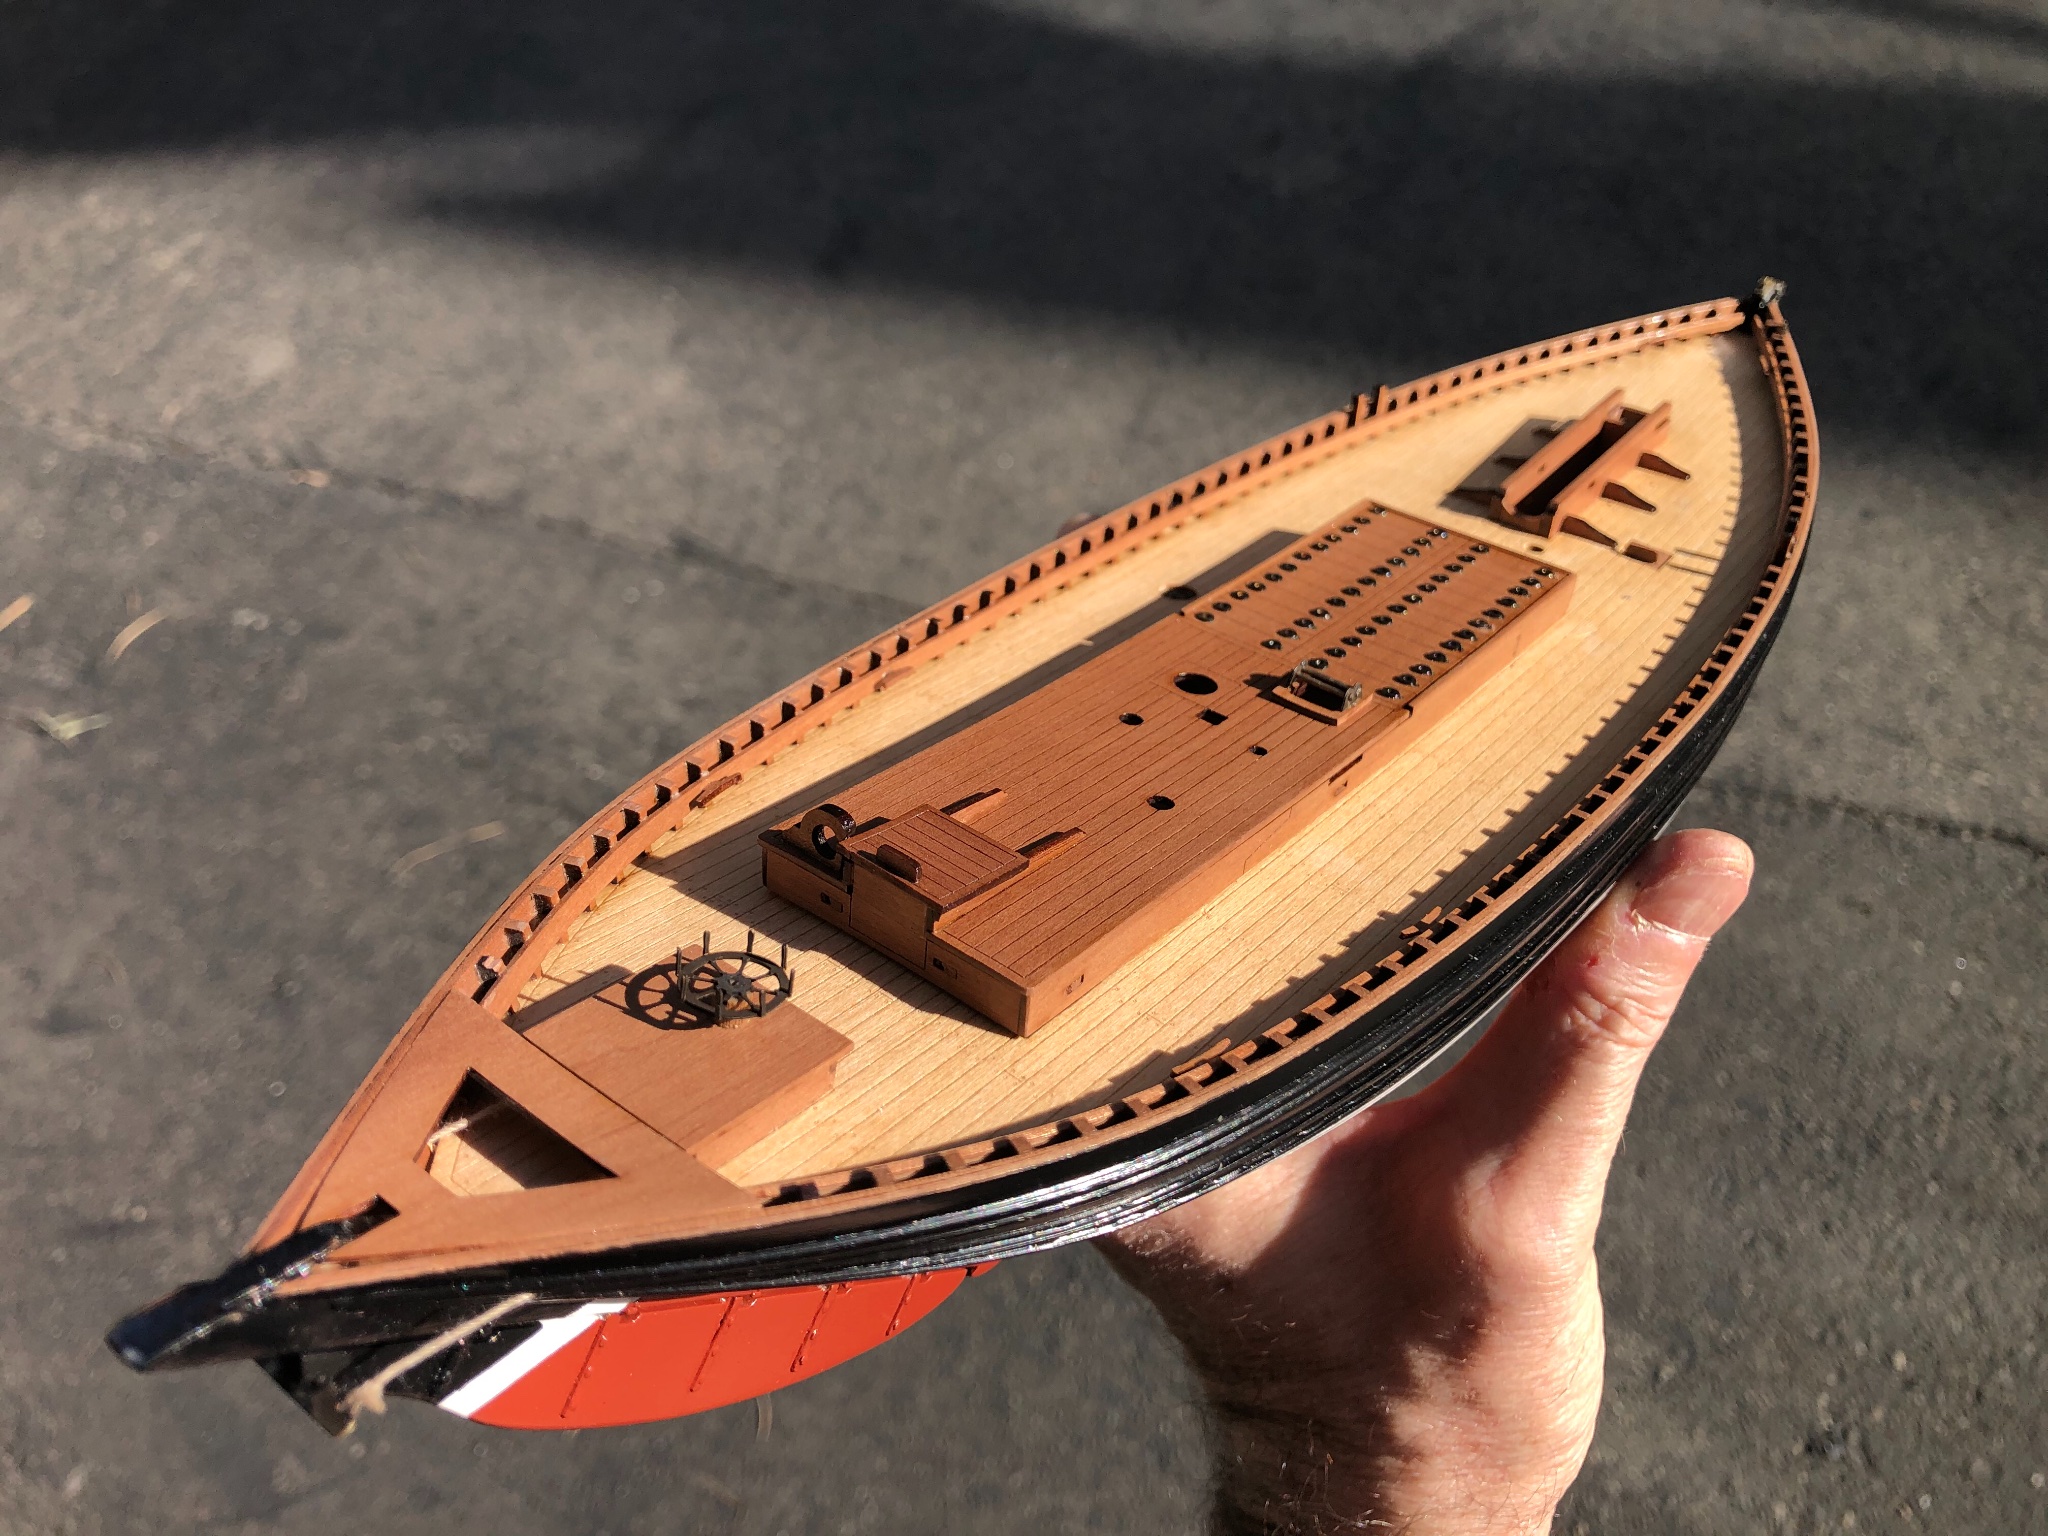
I also built and installed the steam capstan. This has got to be one of the neatest bits of design and engineering in the kit. In the photos you see here on MSW, it looks large, because it’s so carefully detailed (and because James has a lovely close-up lens!), but truth is it’s tiny. And it’s made of a bunch of even tinier parts, walnut dowel, PE plating and blades (whelps?), and MDF drums. And they all fit together to make the coolest little machine you ever saw. It’s brilliant, and really fun to build.
I assembled the “mighty mite”, and spayed it with red primer. Then I painted the machine box at the top in black acrylic, and painted the circumference of the two drums in a grey-green for contrast. And then as a final touch, I glued on the nice little brass winch on the side, after blackening it a touch to take the sheen off and weather it.
The attention to detail in this kit is quite stunning, especially for one that is ostensibly targeting beginners. Comparing the details to the drawings of BF1479 Fidelity from the Greenwich Museum, I have to say that Chris has missed very little. Quite authentic indeed.

- Jack12477, Blue Ensign, marktiedens and 5 others
-
8
-
12 minutes ago, James H said:
This has been a triumph. Your attention to detail is superb.
Lovely of you to say so, Jim. Thanks so much. I do think it’s coming along well so far. I’m really grateful for all of the guidance and support from all of you here on MSW. -
13 minutes ago, Blue Ensign said:
Very neat work Erik, all looking good.
B.E.
Thanks, B.E.!
-
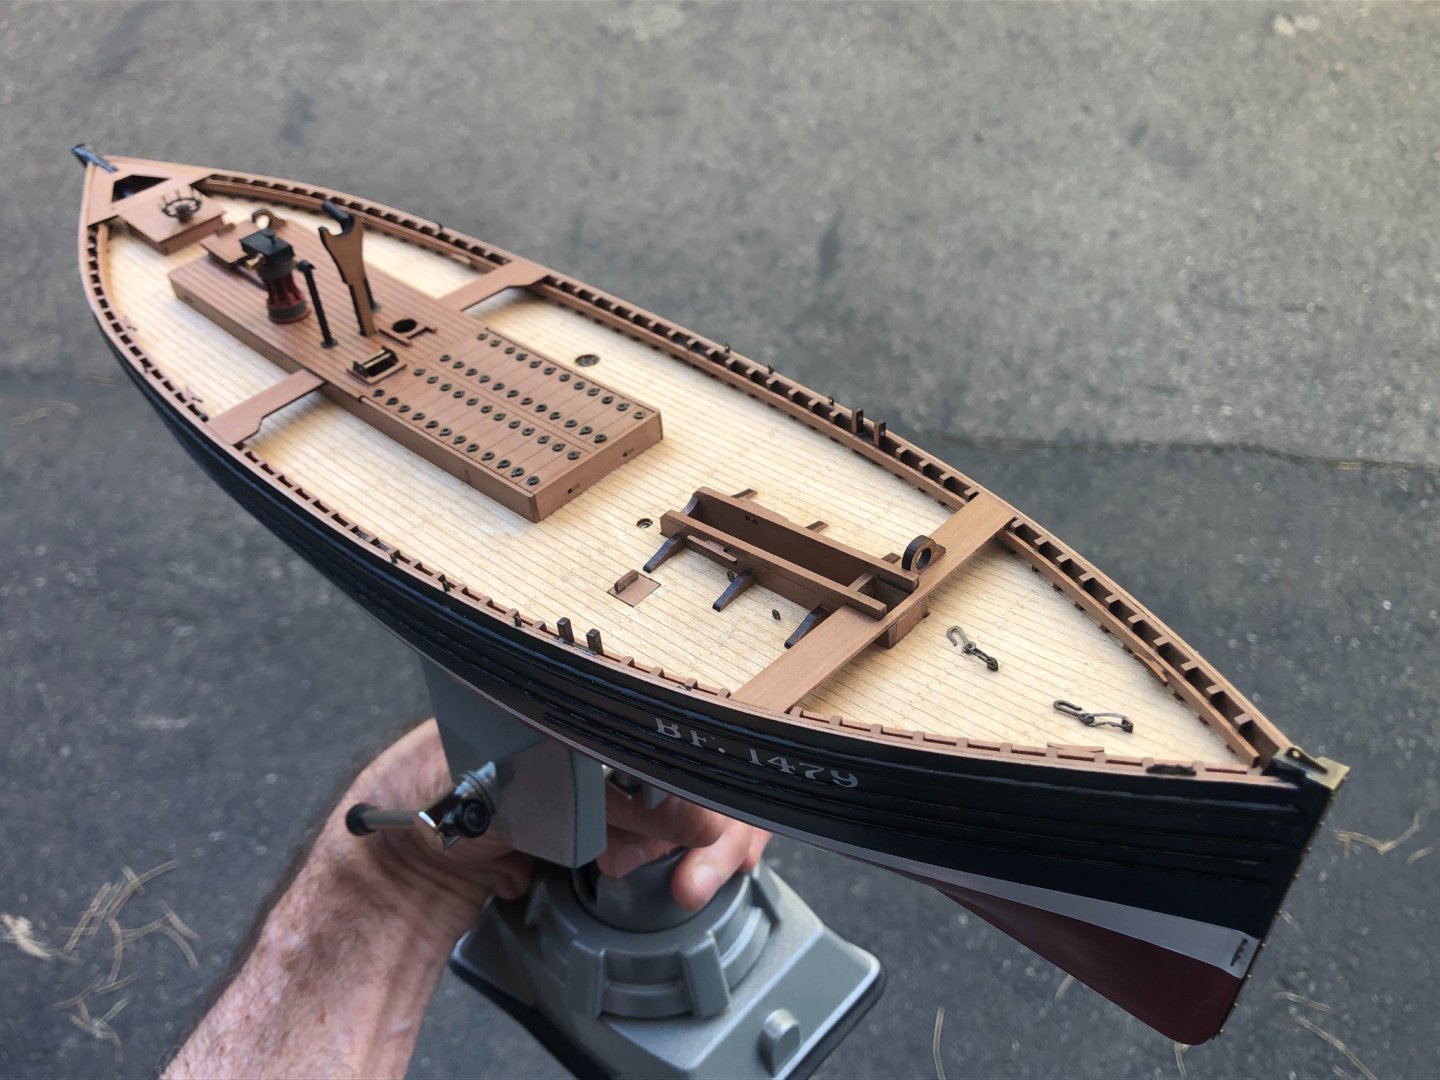
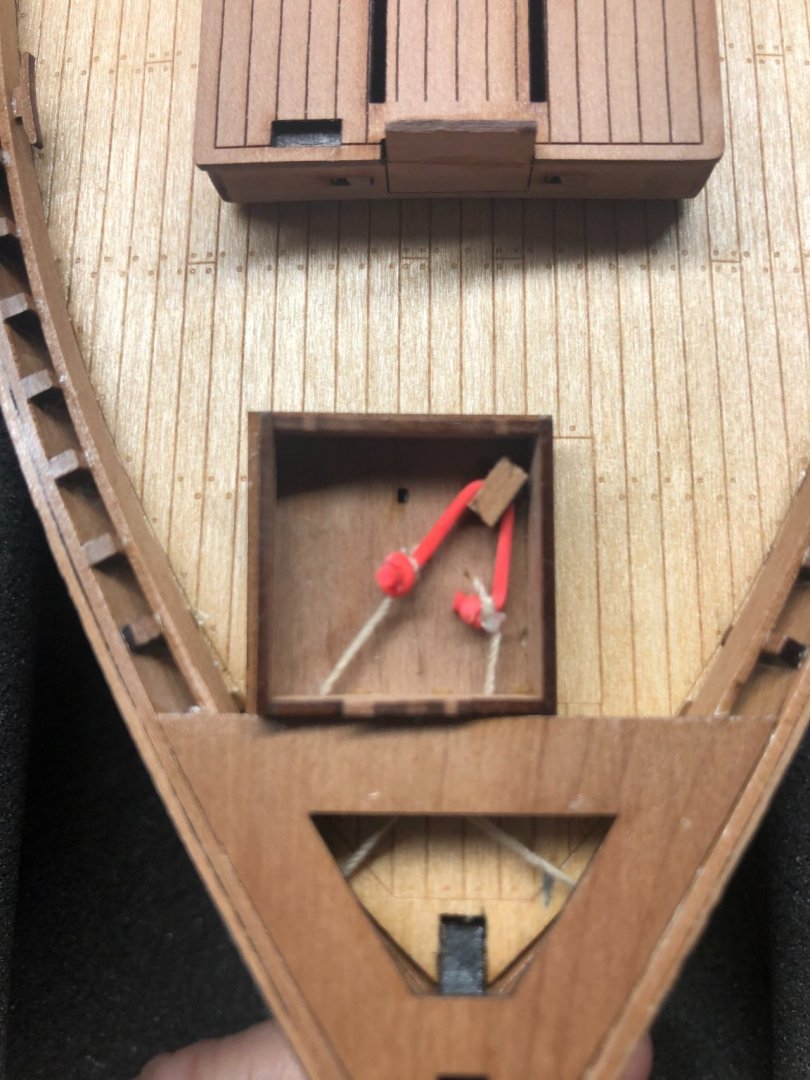
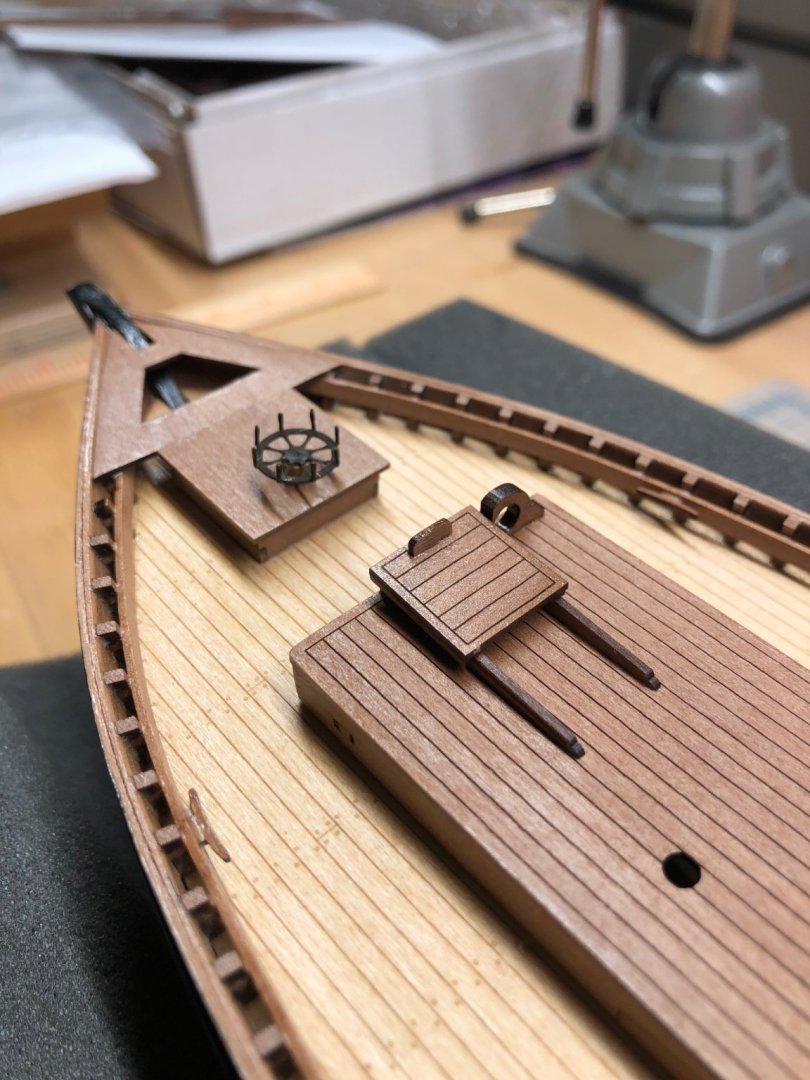
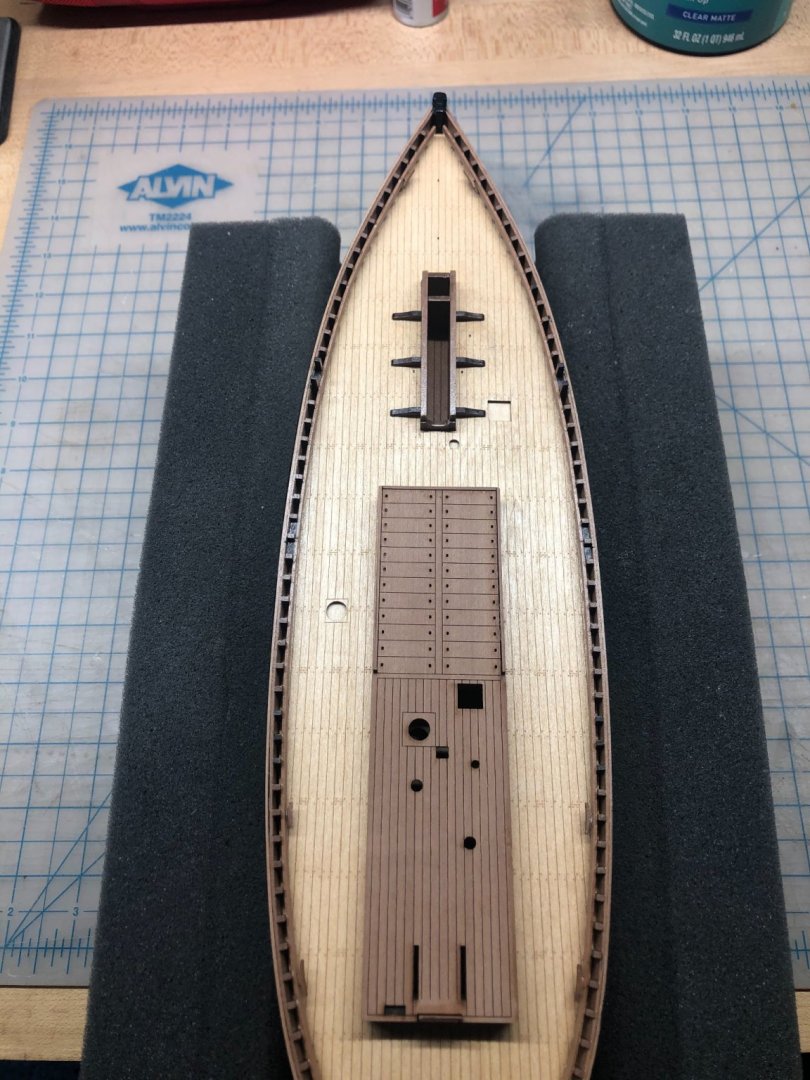
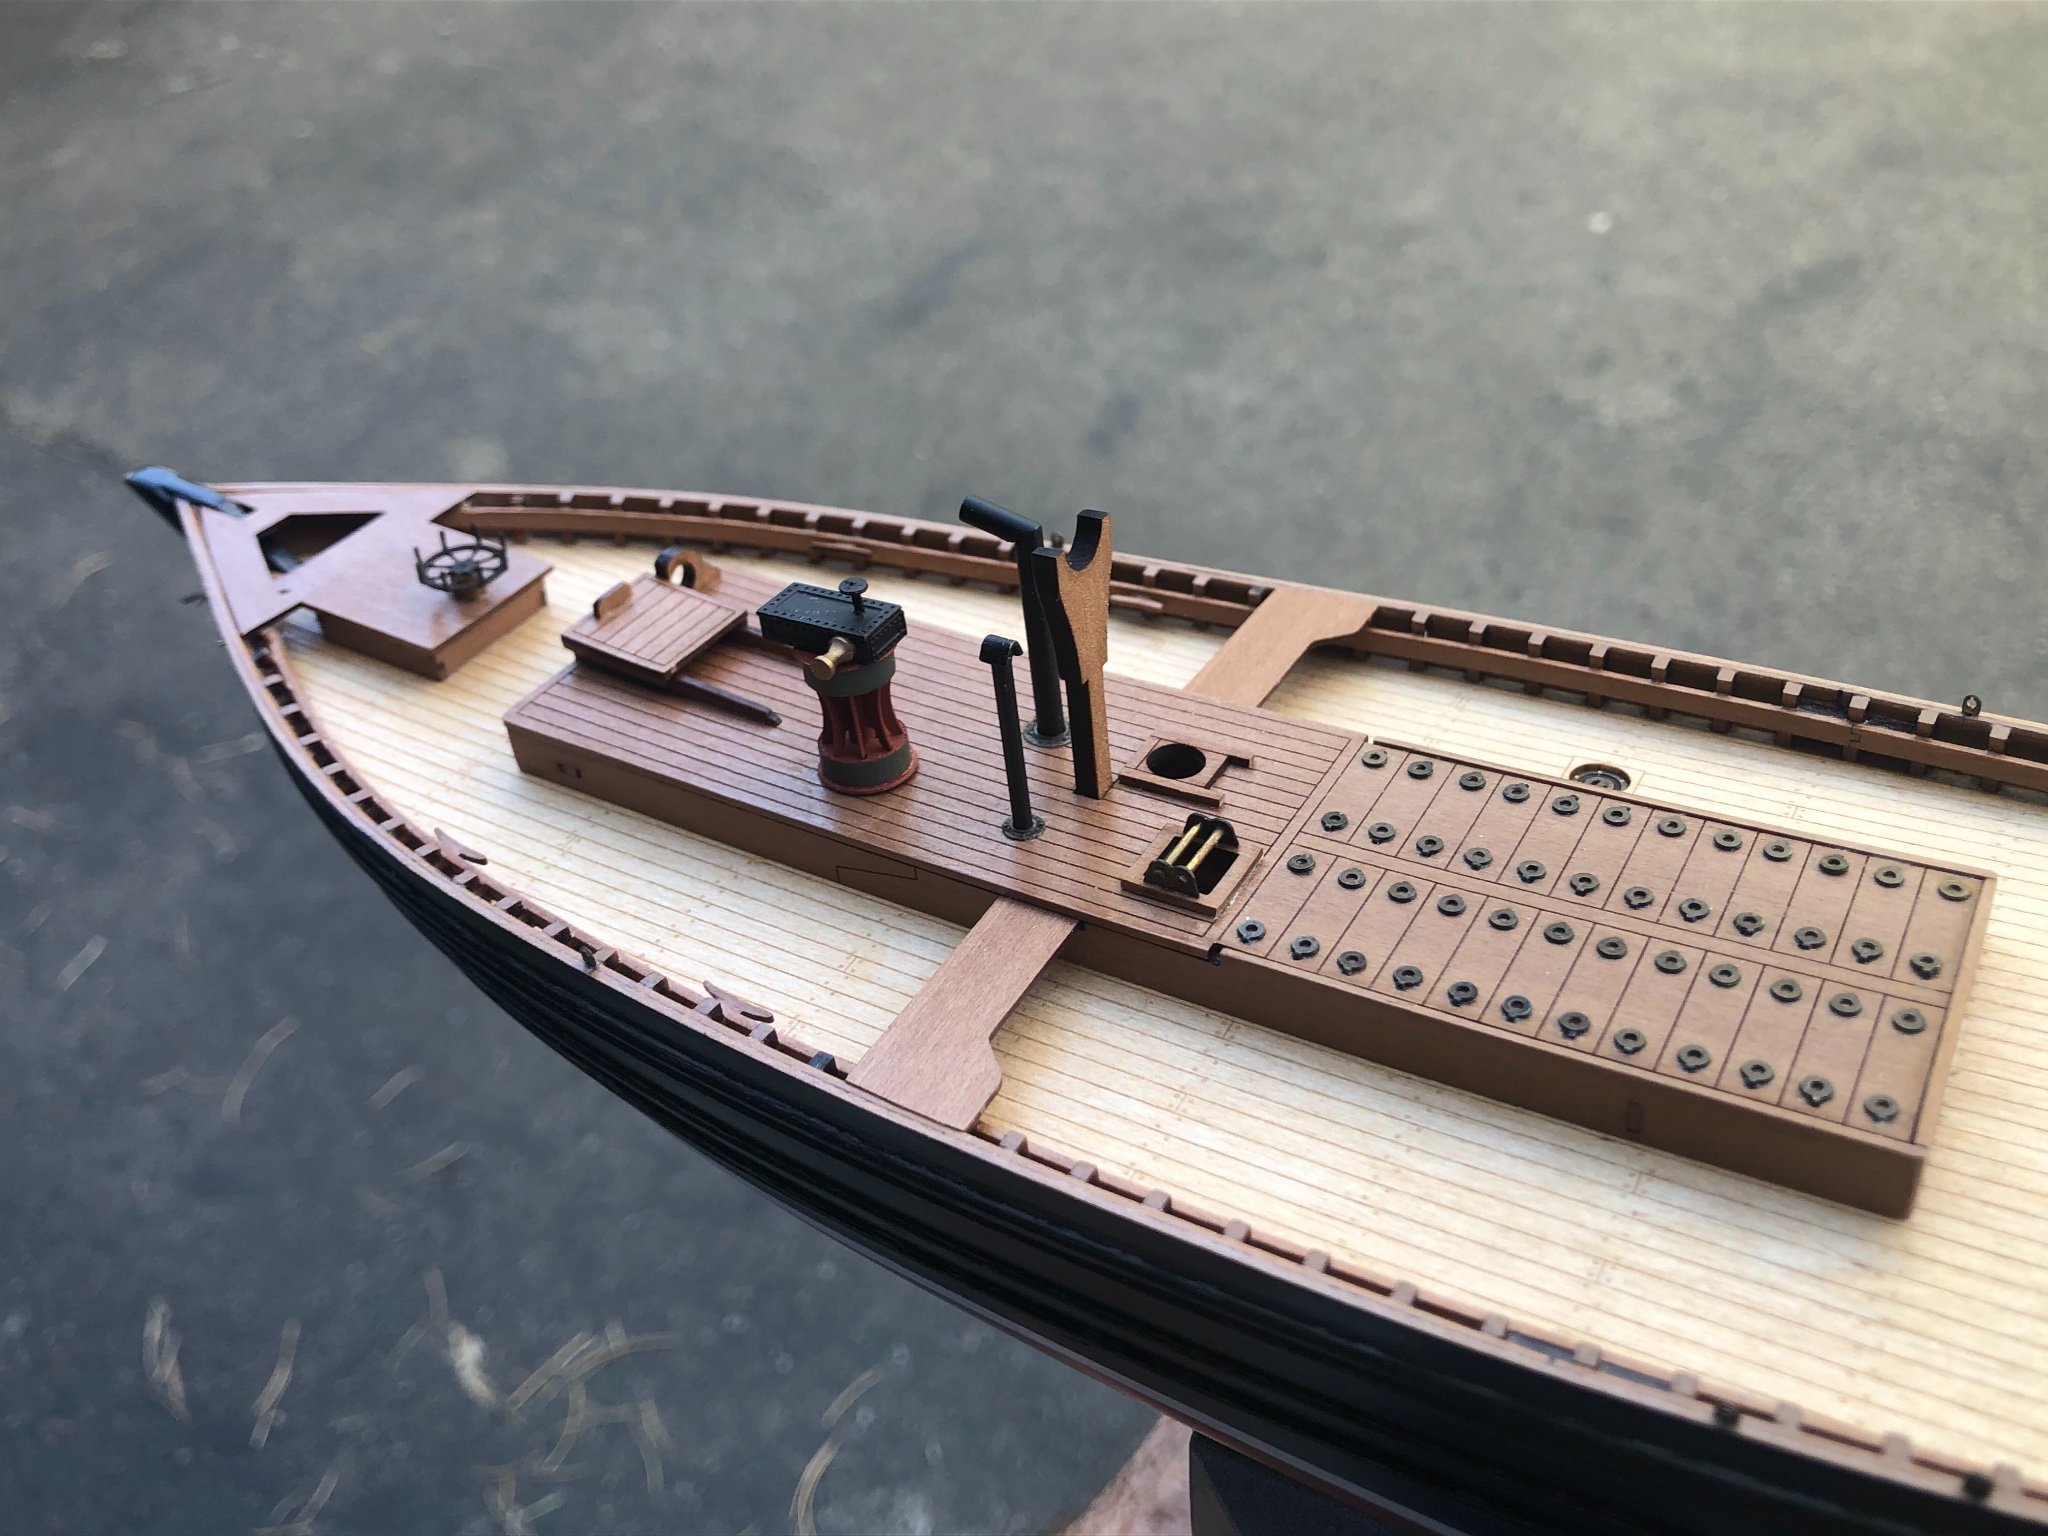
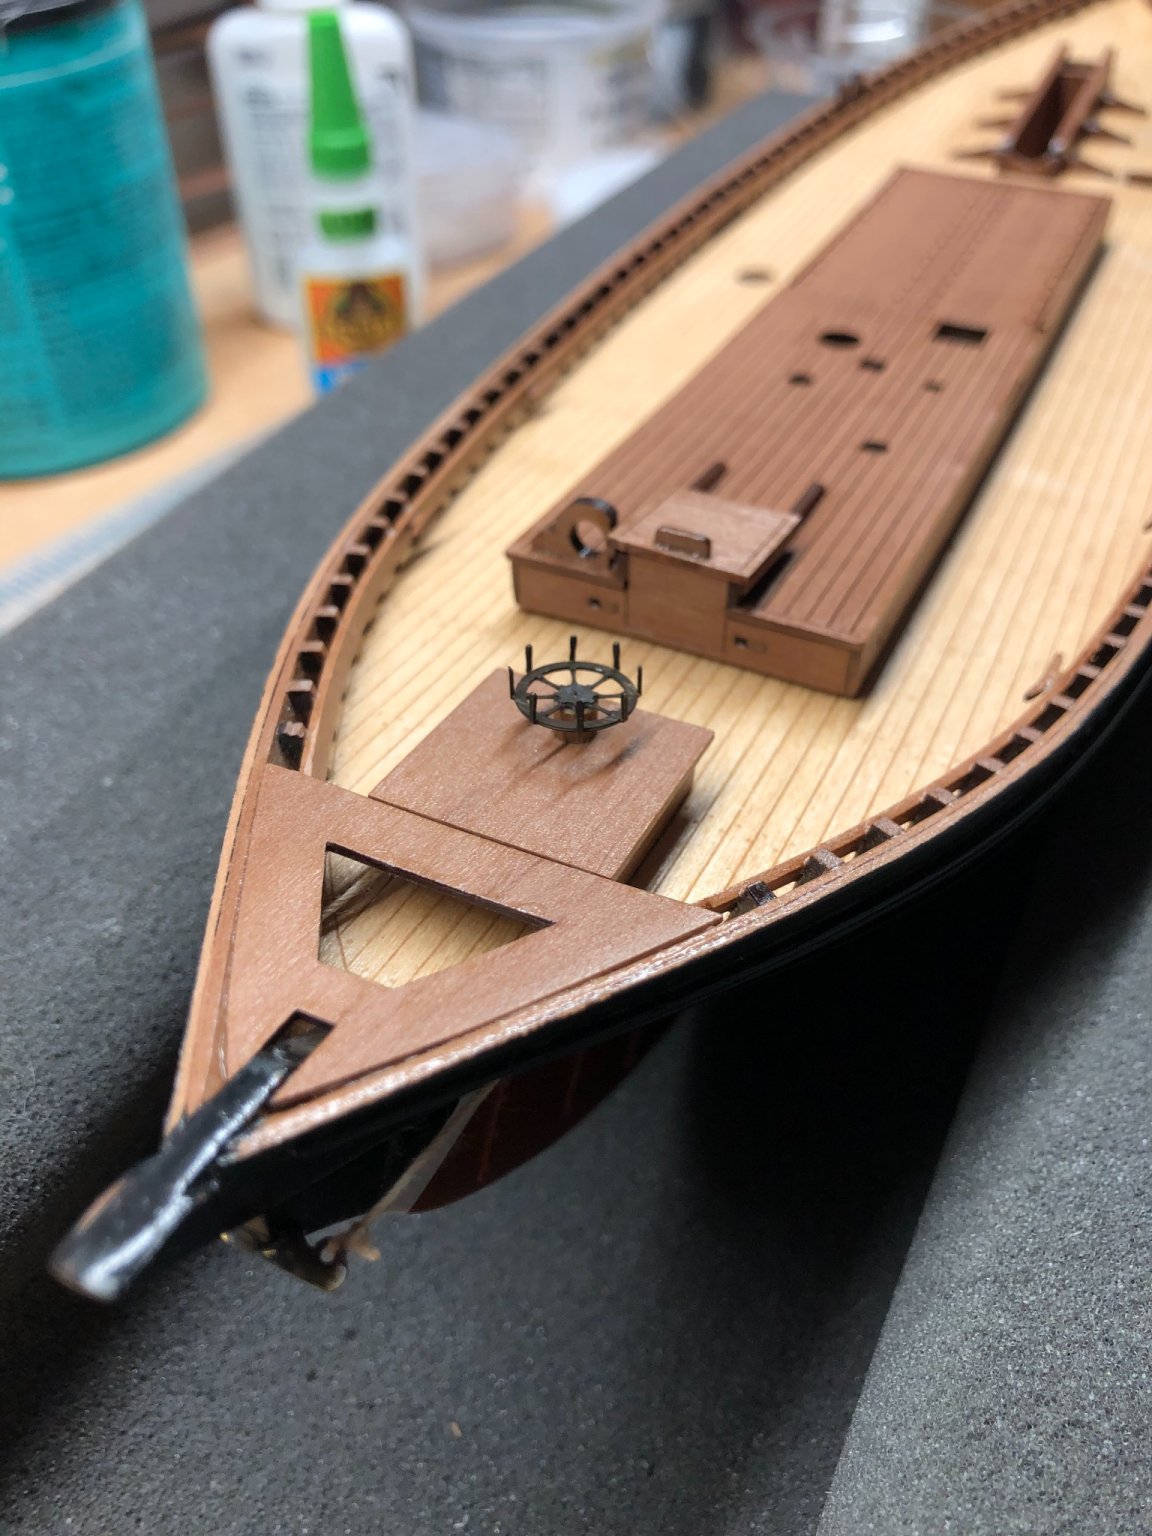
Been making some progress on deck details. First I installed the triangular thwart brace at the stern, and built the small aft steering gear house. This is an easily built small slab-sided deck house which contained the steering quadrant. The steering lines exit the aft side of the house, and go through holes in the bulwark to terminate at the fitting on the top of the rudder. I didn’t want the lines to sag over time, so I installed a little elastic “snubber” inside the house, so when I put a little tension on the lines while tying them to the rudder fitting, they will stay taught.
I also built the companionway hatch, which has sliding rails on the deck of the main deck house. All very authentically detailed by Chris in the kit. This is all so well designed.


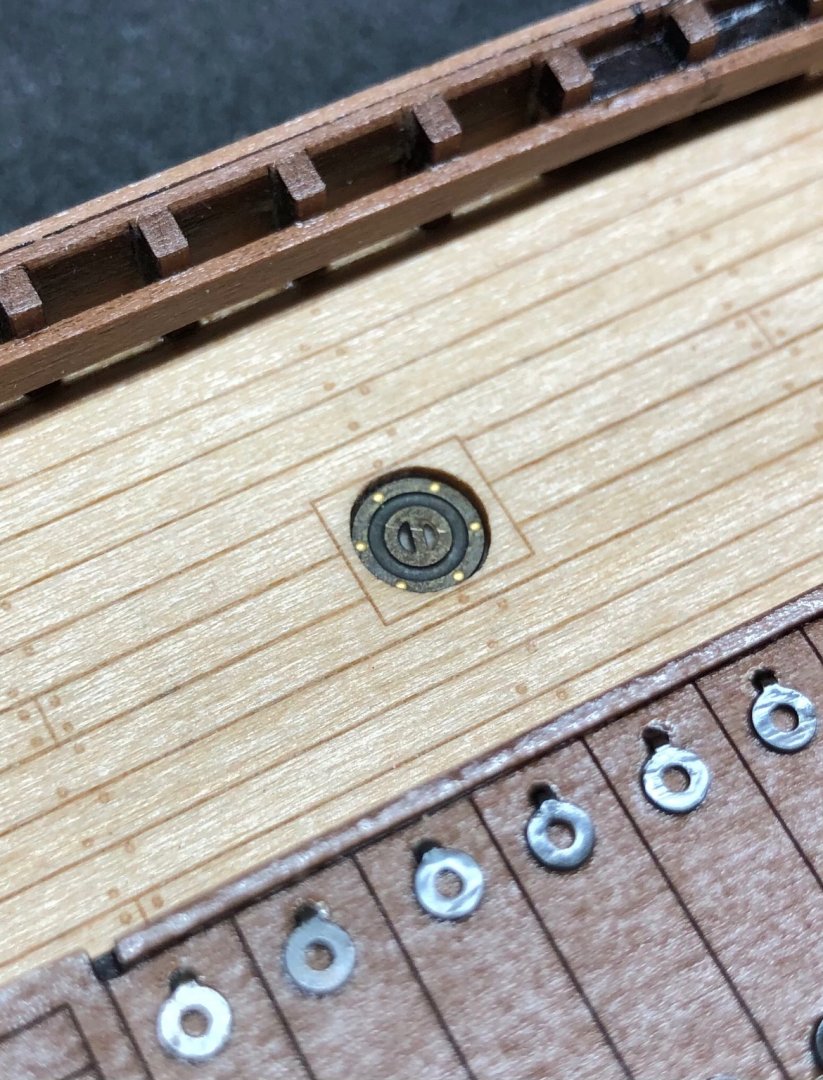
Then I started work on various deck details. Added all of the little handles to the fish hold hatches. These are all PE brass, which I darkened with brass blackening solution. Installation of these handles is a bit more involved than is described in the manual, as the holes for the outer handles on each side fall over the framework of the deck house, so they must be drilled out first before the pins for the handles can be fully inserted. No problem there, but be aware of this.
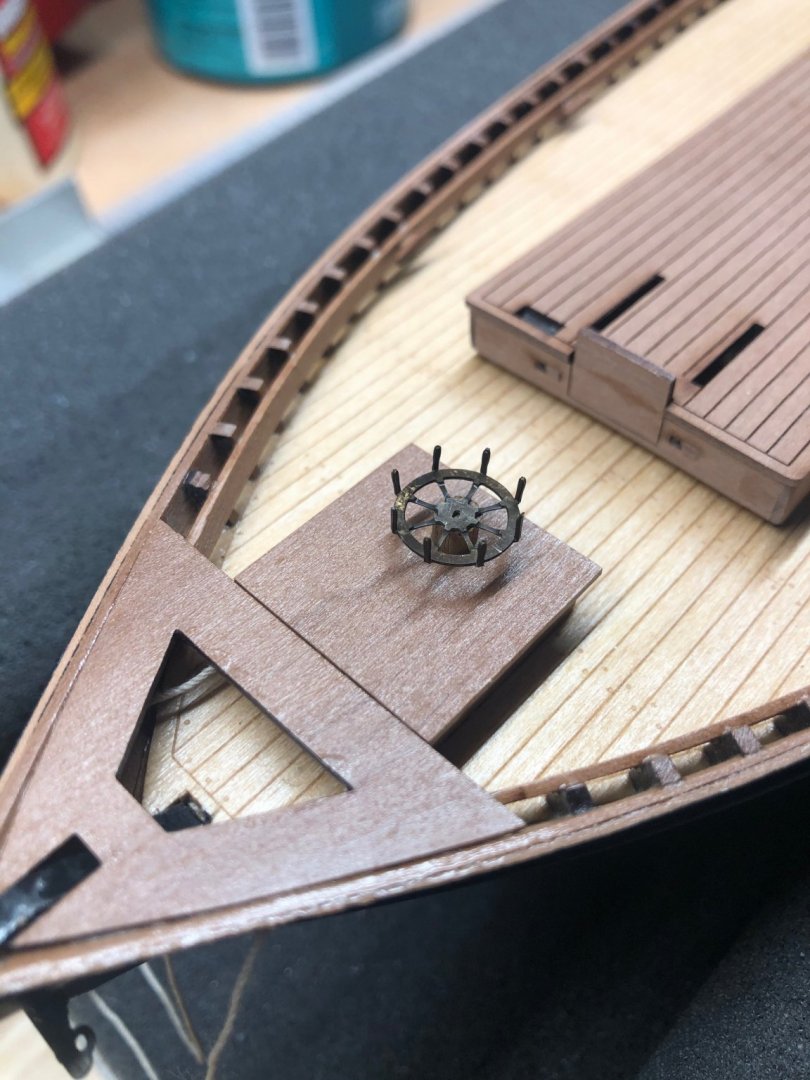
Built up the steering wheel, and blackened it. I lowered the mounting of this a bit from where Chris has it in the kit. Seemed a bit too high at scale for it to be properly reached. Looks right to me now.
One other interesting thing I discovered. There are two small brass ports in the deck, which I am guessing are for filling fuel and potable water tanks. The larger of the two (fuel?) had some nice photo-etched detail, including a radial bolting pattern on it. I immersed the part in the brass blackening solution, and let it sit until I thought it had a nice bronzey brown patina, then pulled it out and washed it. Well, the bolt marks stayed a nice bright bronze color, which is a really nice contrast to the darker patina of the rest of the port...it really brings out the detail. All I can think of is that when I immersed it in the solution, a small air bubble must have formed at each of the bolt marks, which kept the solution from reaching the brass there. Lucky happenstance. I wonder if there’s some experimentation to be done here, maybe with silicone grease applied with a needle...?


- Rik Thistle, James H, Blue Ensign and 7 others
-
10
-
B.E.-
What a pleasure it was to follow along on your beautiful build log. It’s been an inspiration, and I have learned so much. Thank you for taking the time to share all your techniques and insights.
Muirneag is just beautiful!
-E
- Martin W, BobG, Mirabell61 and 3 others
-
6
-
Hi Bradley! I’m not sure why I haven’t checked in on your Flying Fish, but I’m glad I finally made it here. She’s looking really great! I just love clippers. One day I’ll have the courage to build one. I thought my Zulu had a lot of timber.
") fantastic job so far!
fantastic job so far!
I hope your hand is healing well. Happy Holidays! 🎄
- BobG and Keithbrad80
-
2
-
It’s been a couple weeks since I’ve posted an update here. Work has been a bit of a blur. My studio had a big client presentation on Thursday, which my team has been working towards for the last few months. We presented final drawings for our clients’ new house and grounds. And we knocked it out of the park. I am so proud of our team, and of the lovely project we shared with the owners.
Now things slow down a bit as we approach the holiday, so I can concentrate on the really important things... such as ship modeling.
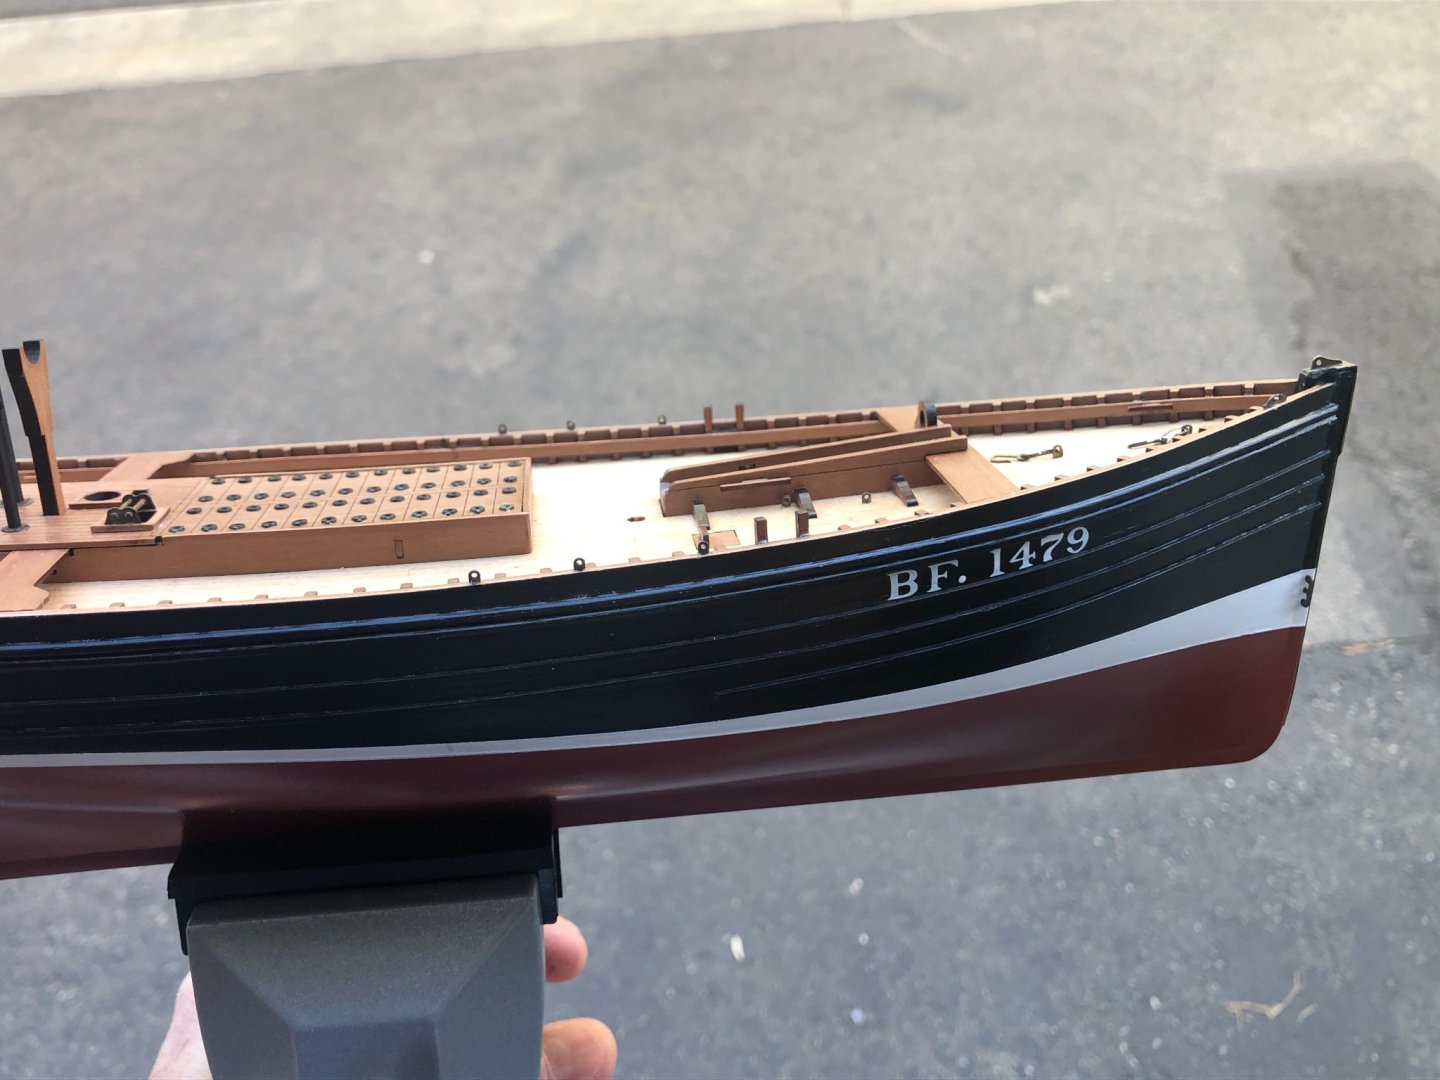
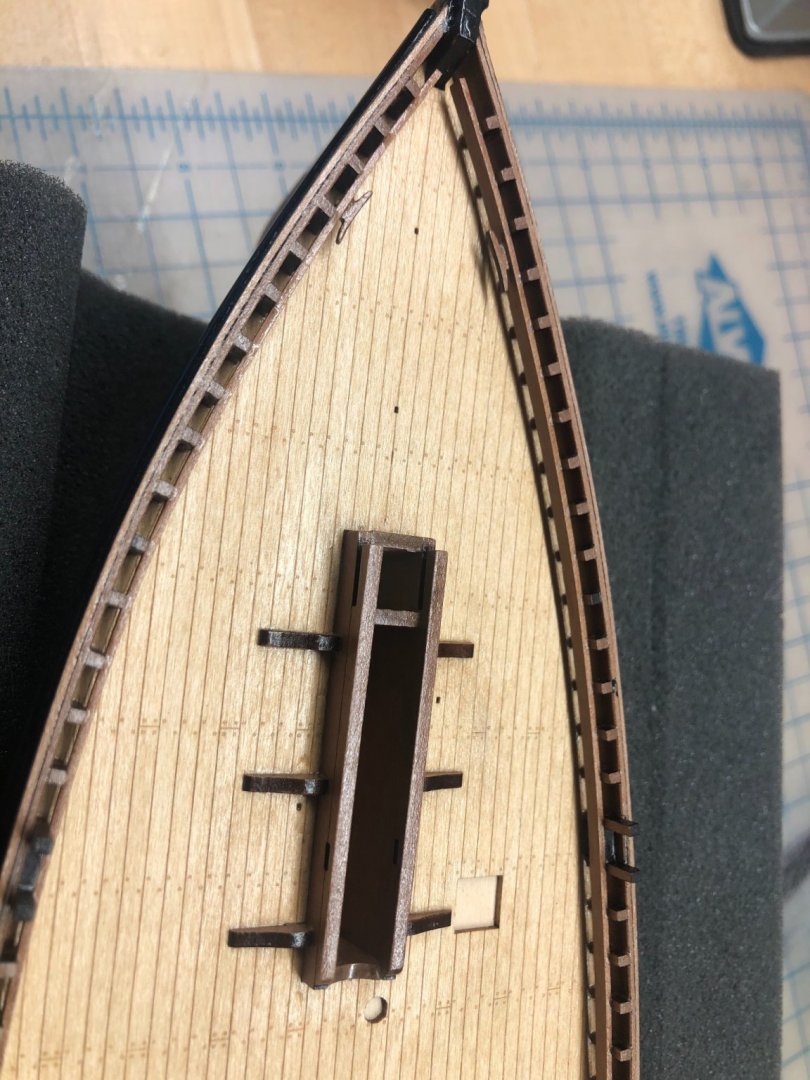
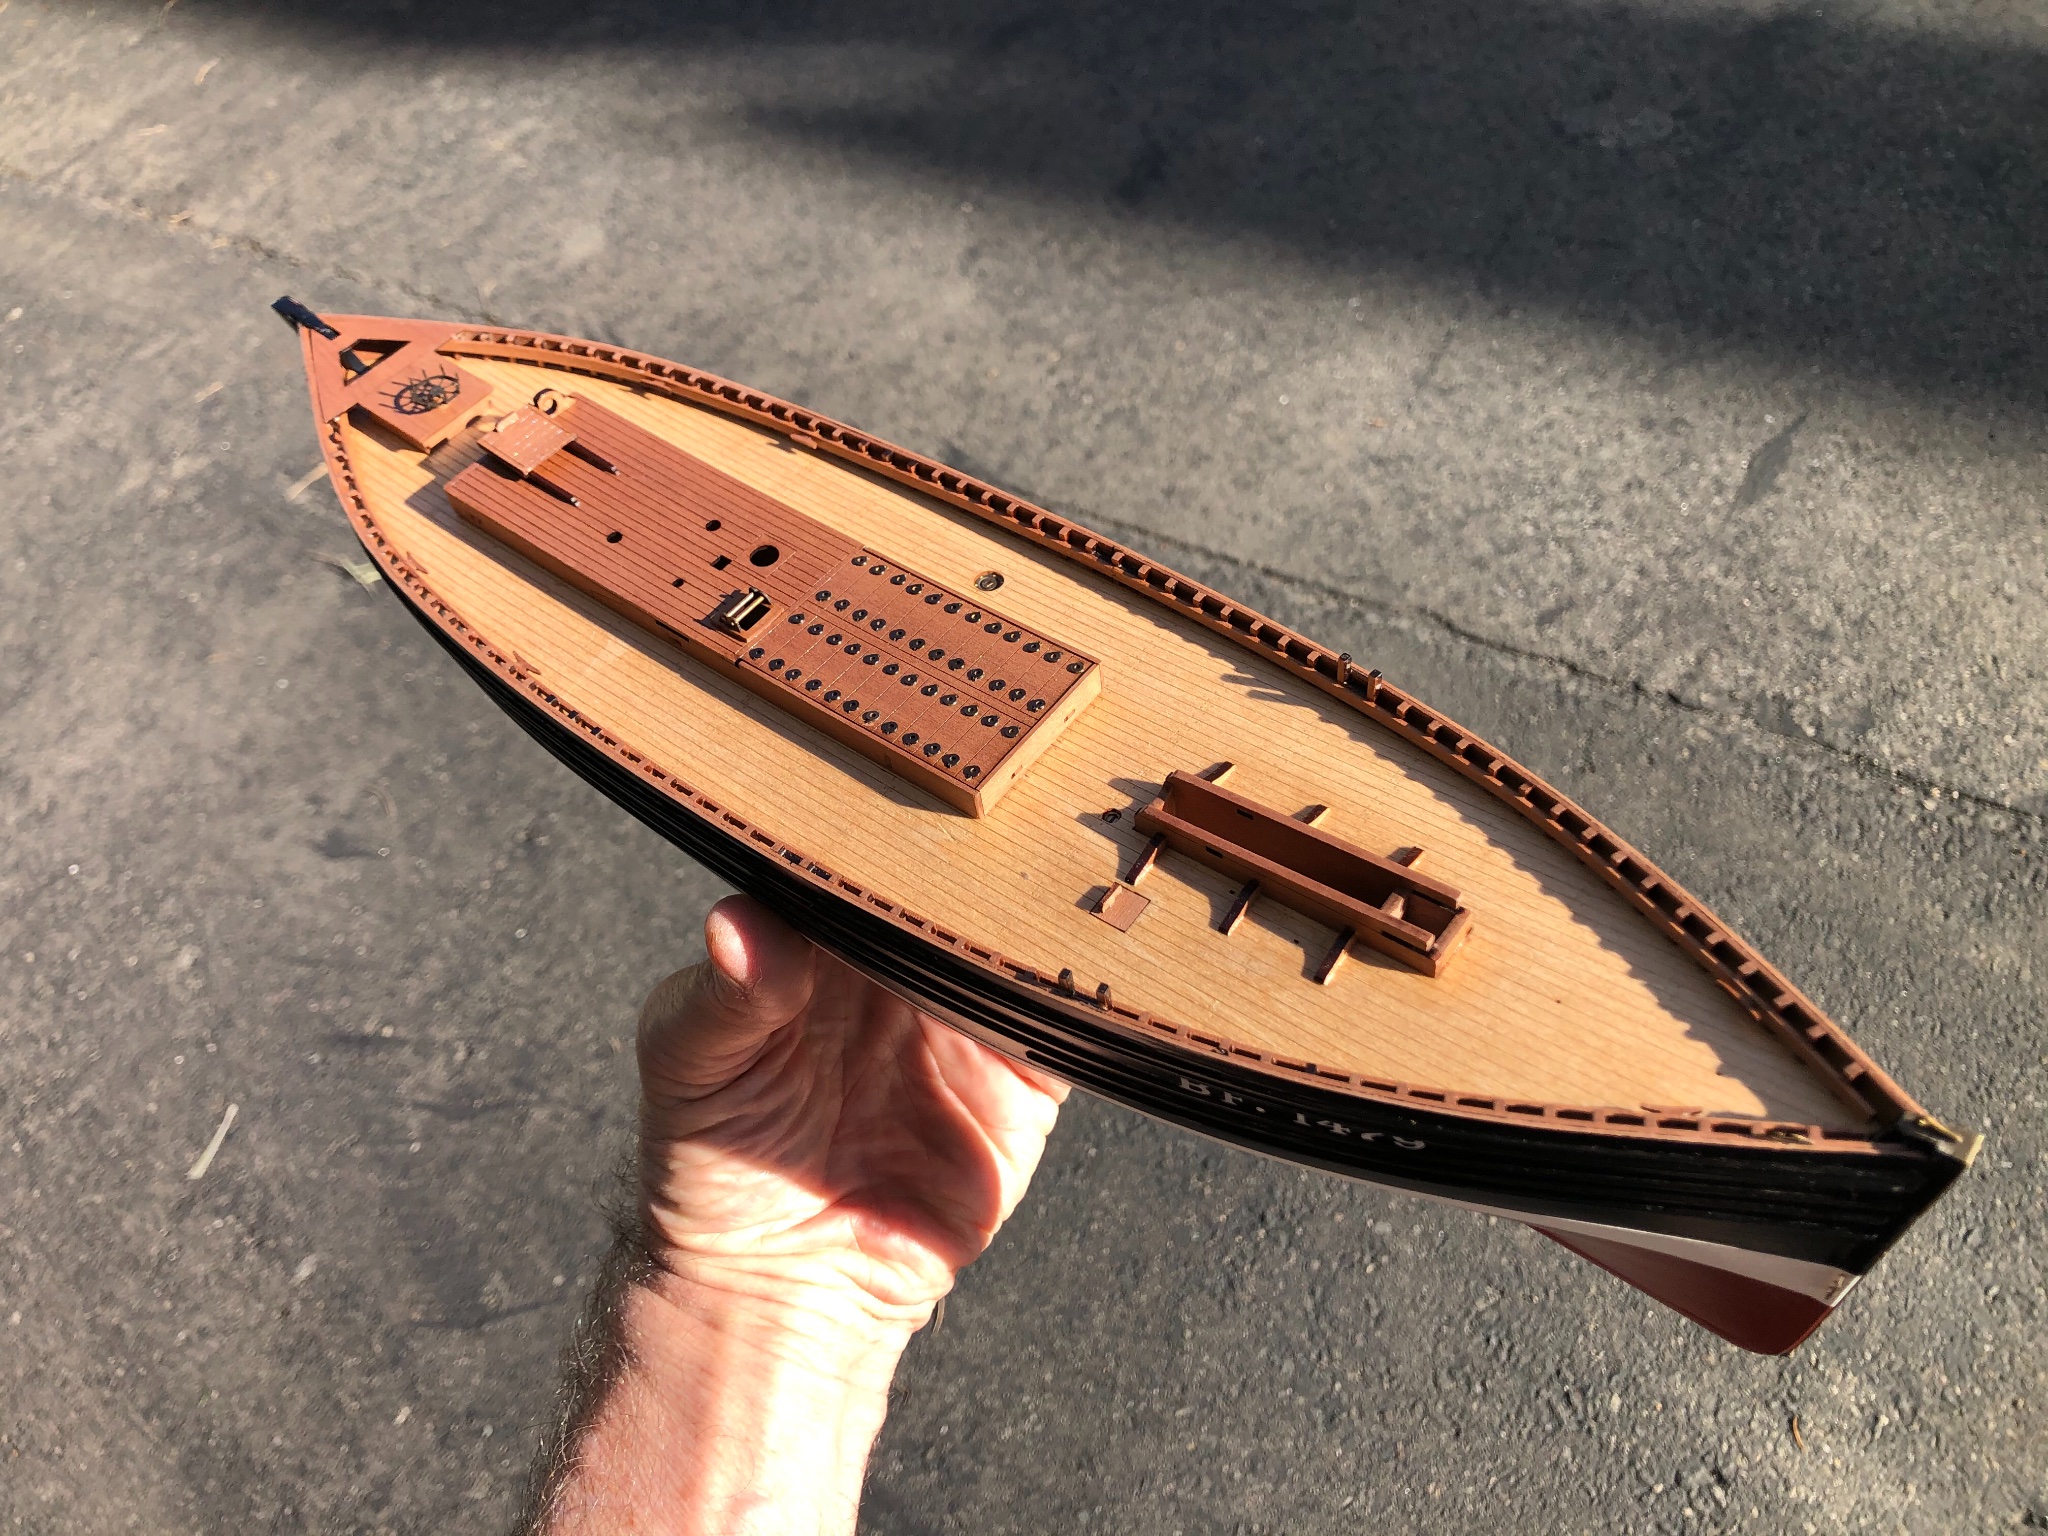
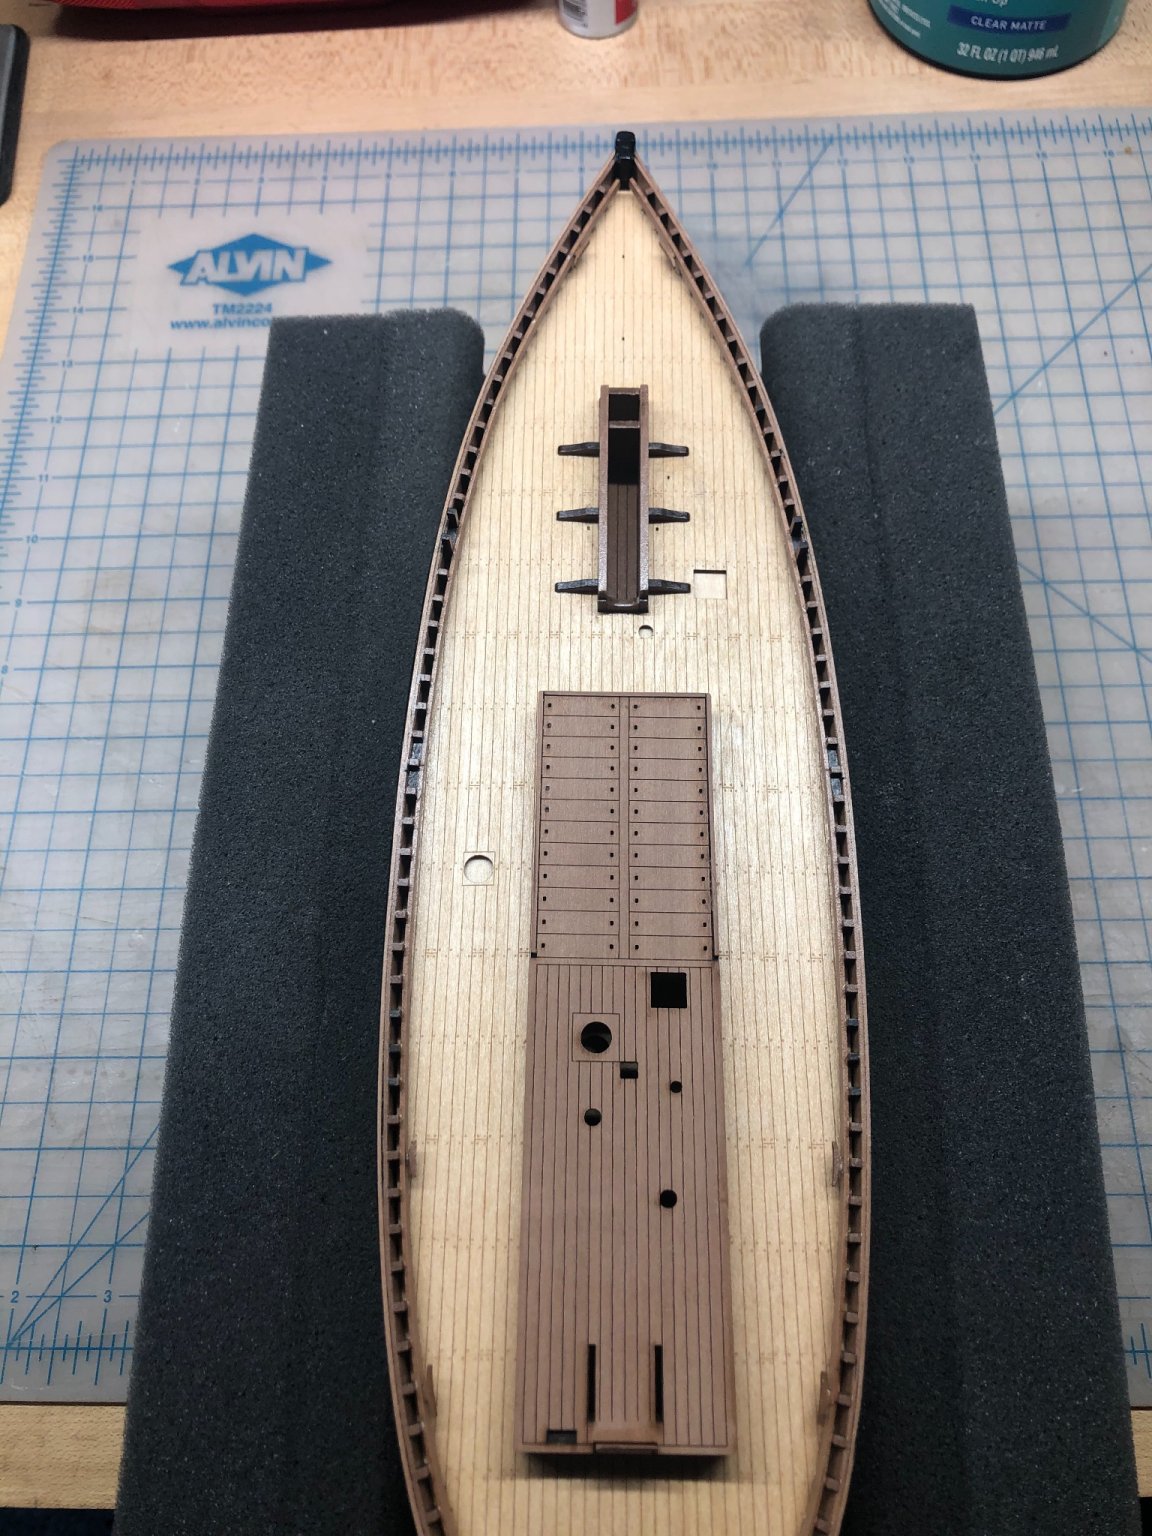
I finished the timberheads, all 98 of them (yes, I counted.
") ). As I said before, this is not a particularly difficult task, it just takes patience. Then I added the side rails, which are developed in two parts per side, with a very nice little dovetail joint in the middle. These fit perfectly, and it would be hard to mess this up, as Chris has provided laser-etched marks on each timberhead, to mark the correct position. He even provided a vertical mark at the midpoint, to mark the location of the joint, so it’s really easy to make sure the rails on each side are in the same spot fore-and-aft (yes Chris, I noticed! Thank you. 👌). I glued them in with white PVA, and clamped them to make sure they conformed to the curve.
). As I said before, this is not a particularly difficult task, it just takes patience. Then I added the side rails, which are developed in two parts per side, with a very nice little dovetail joint in the middle. These fit perfectly, and it would be hard to mess this up, as Chris has provided laser-etched marks on each timberhead, to mark the correct position. He even provided a vertical mark at the midpoint, to mark the location of the joint, so it’s really easy to make sure the rails on each side are in the same spot fore-and-aft (yes Chris, I noticed! Thank you. 👌). I glued them in with white PVA, and clamped them to make sure they conformed to the curve.
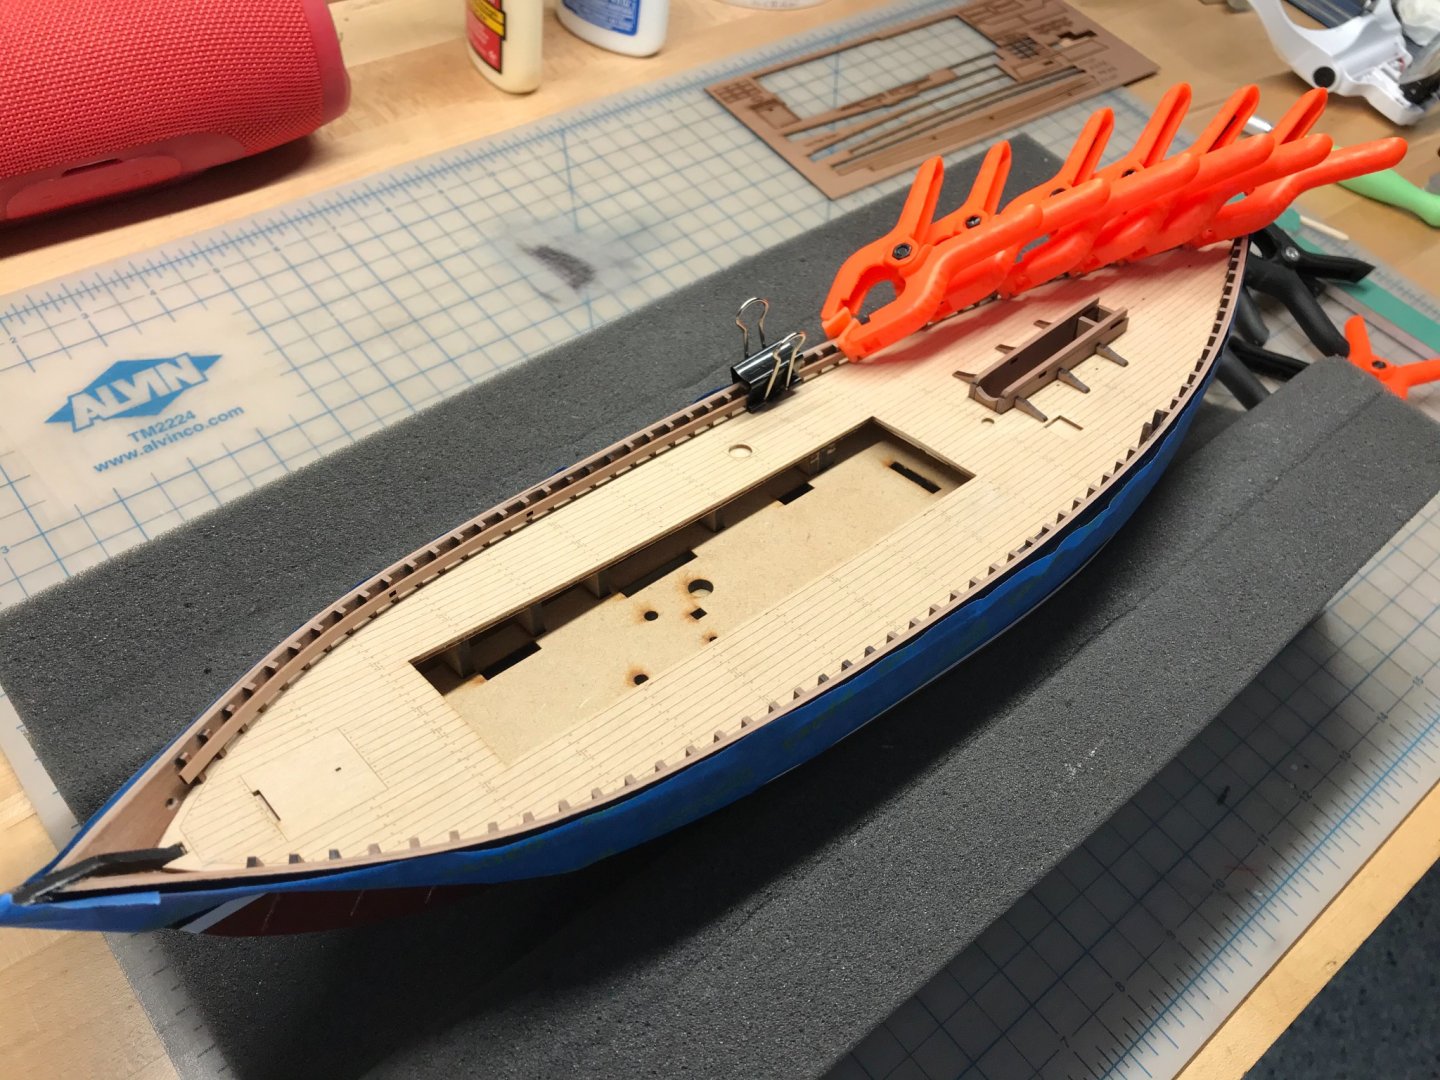
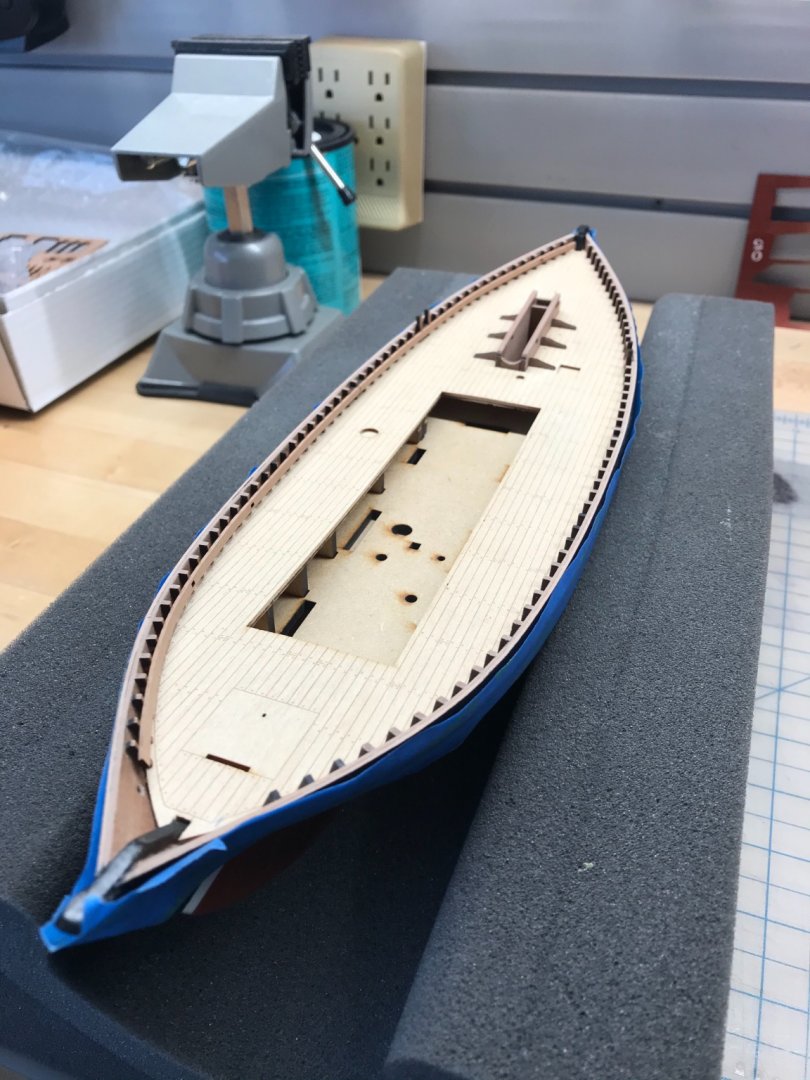
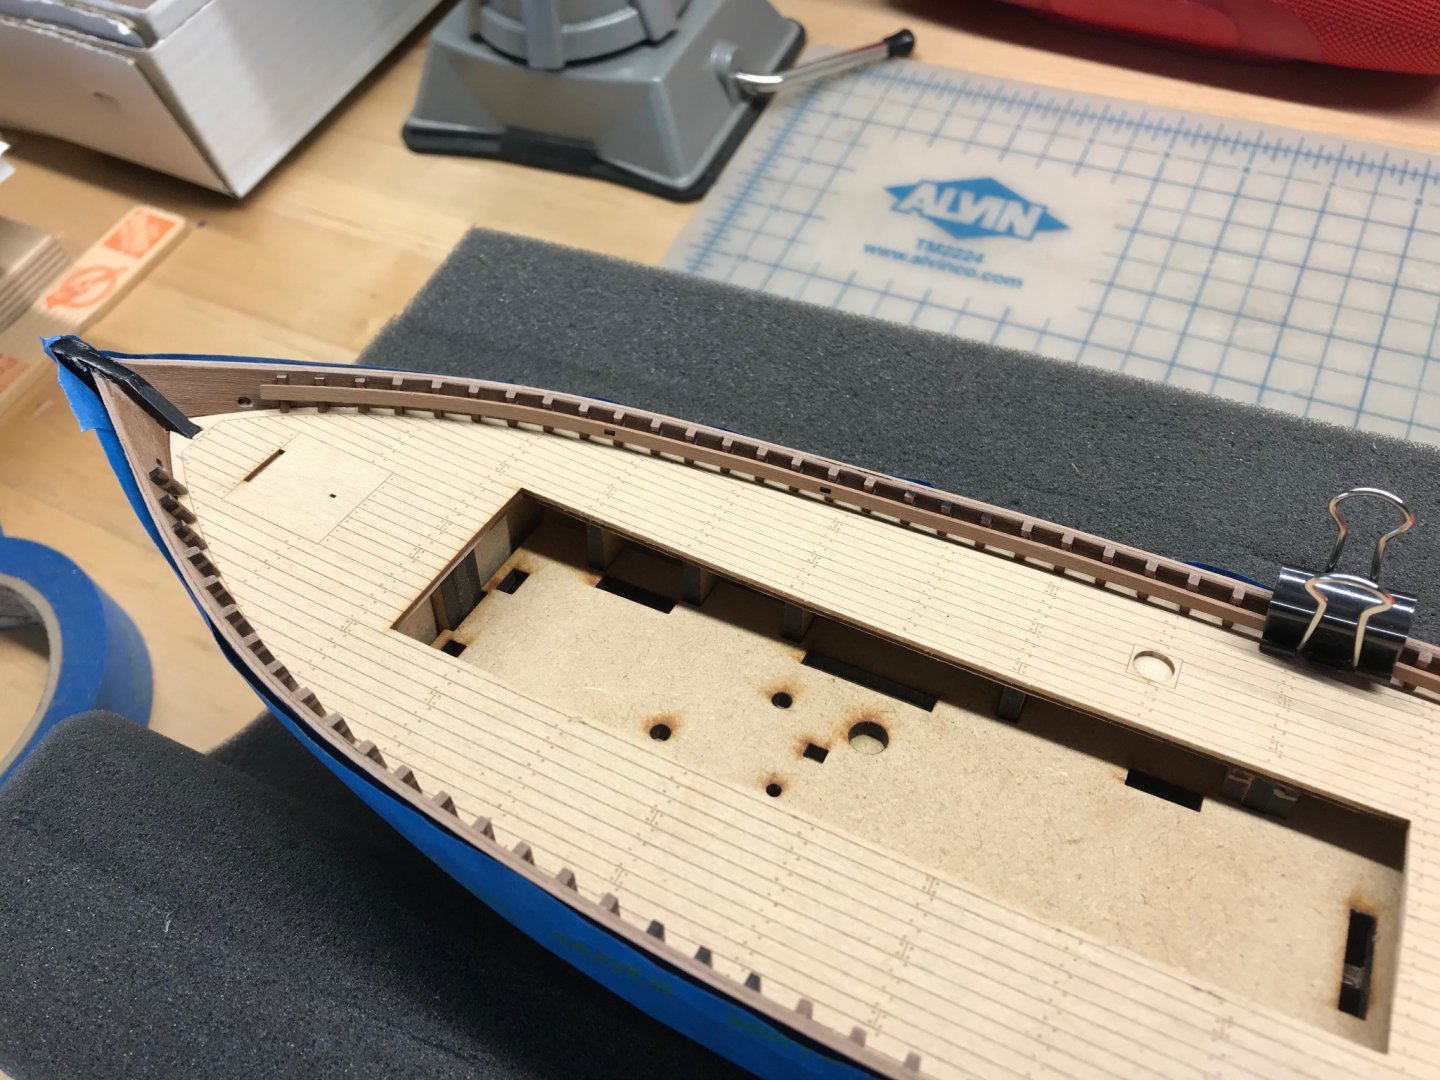
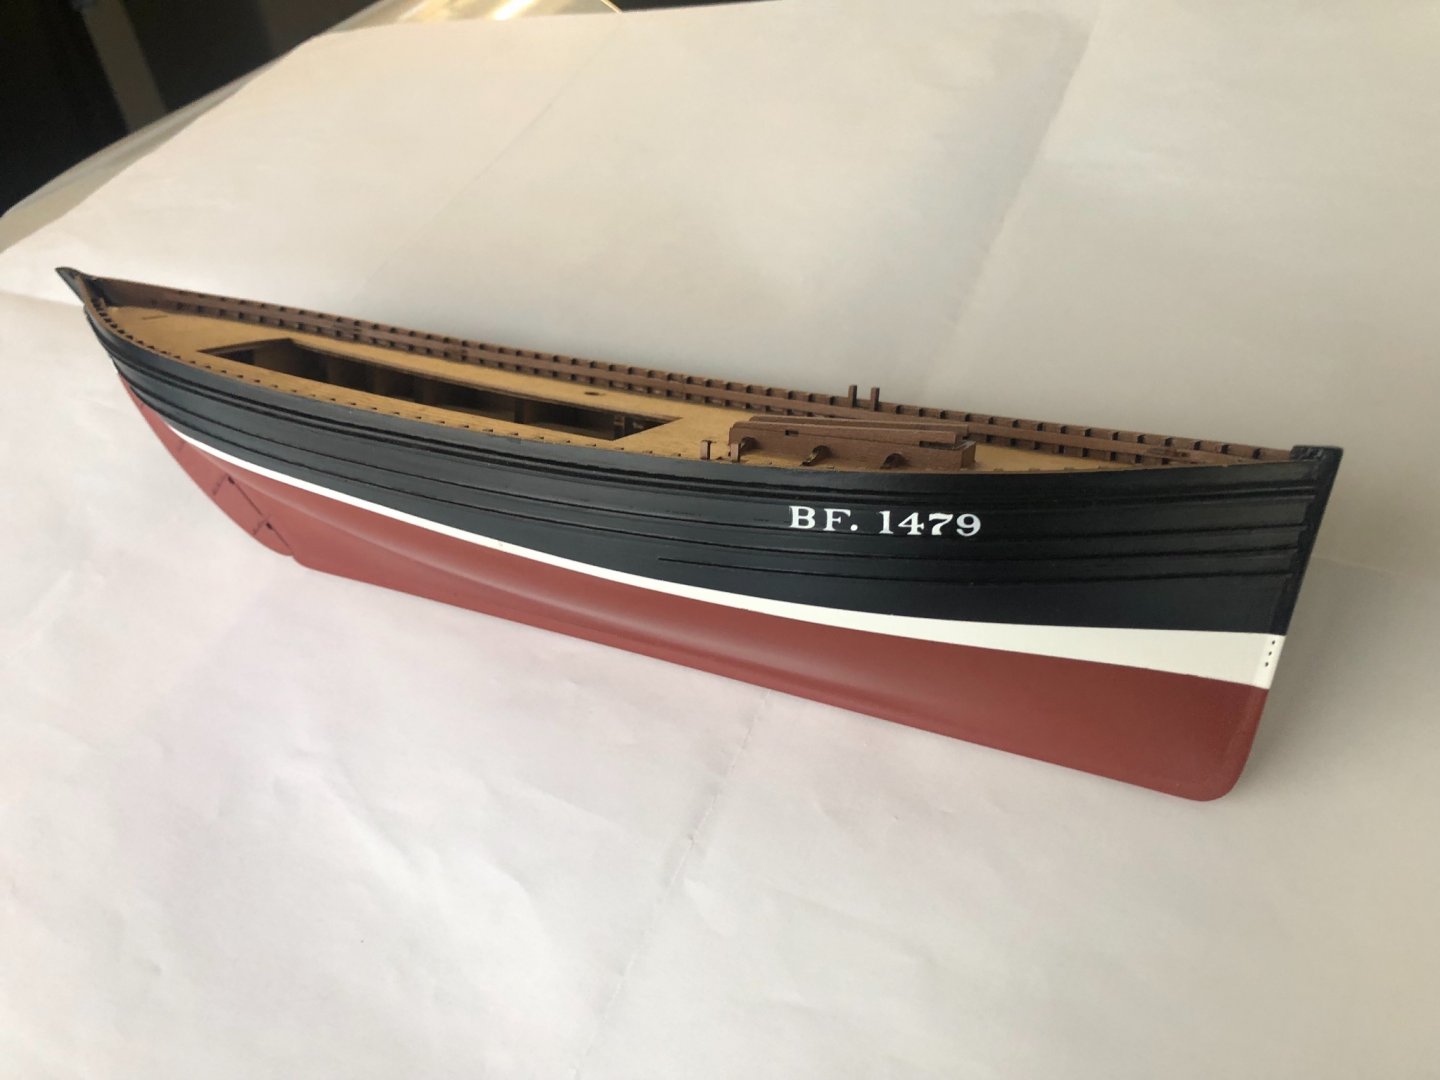
Then I added six adorable little cleats to the rails, and then gave the deck a light sanding with 600 grit paper, just to take the fuzz of of it, but not enough to ruin the beautiful etching. Then I gave the deck and rails two coats of matte poly varnish. I like the subtle satin sheen of this Minwax poly. Good stuff.
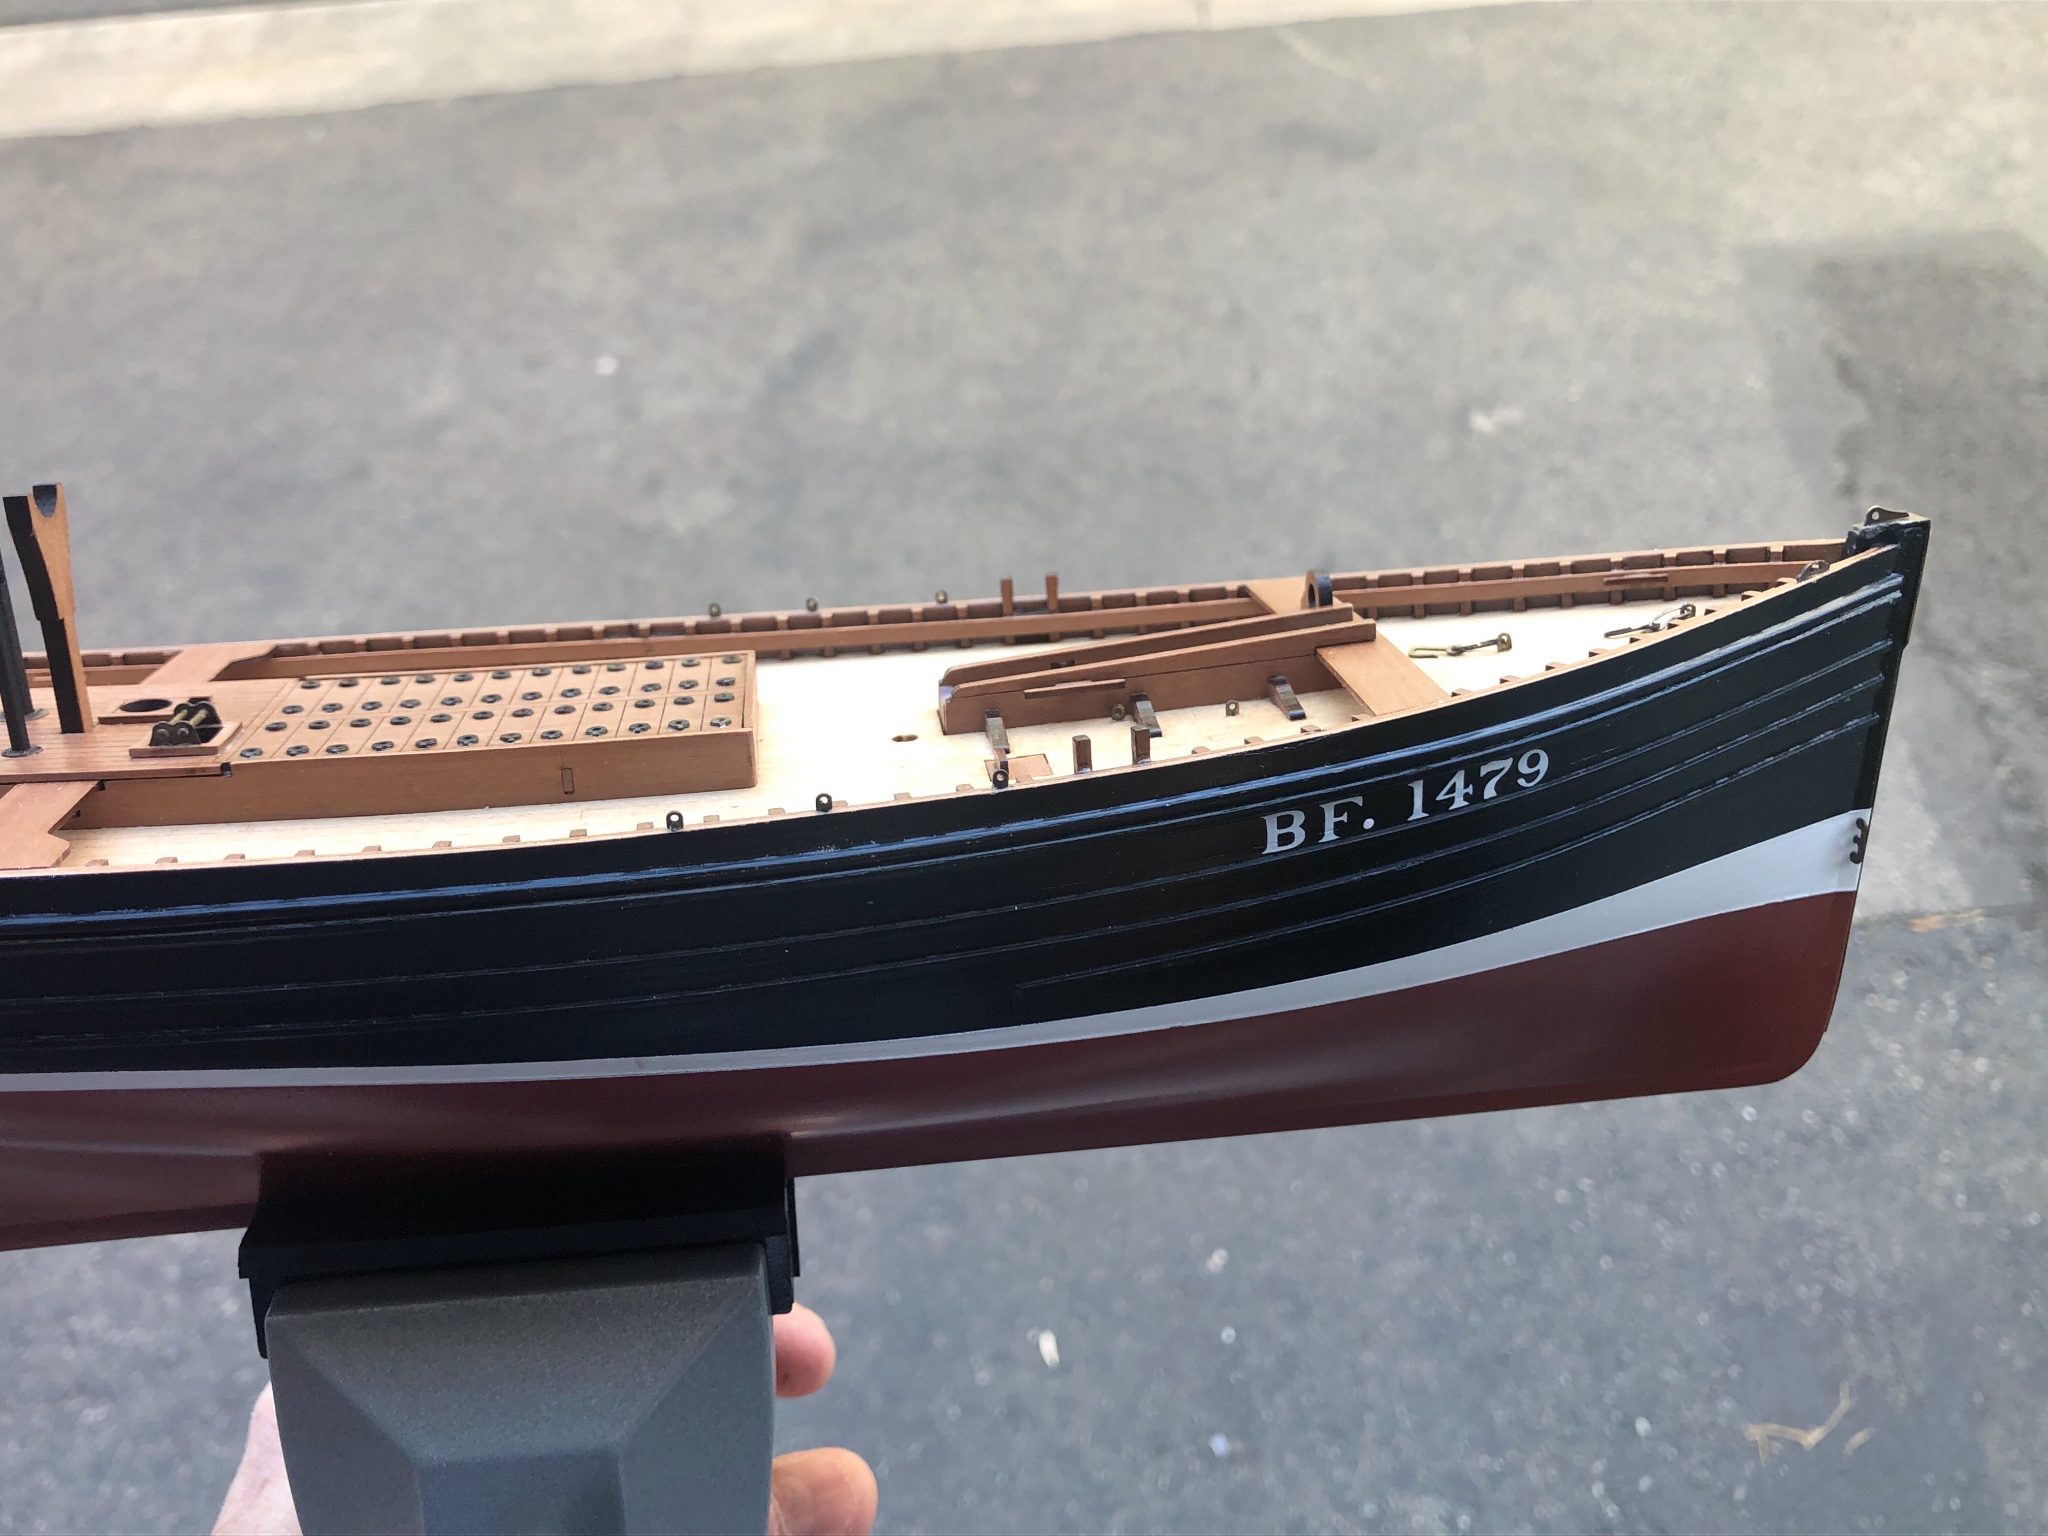
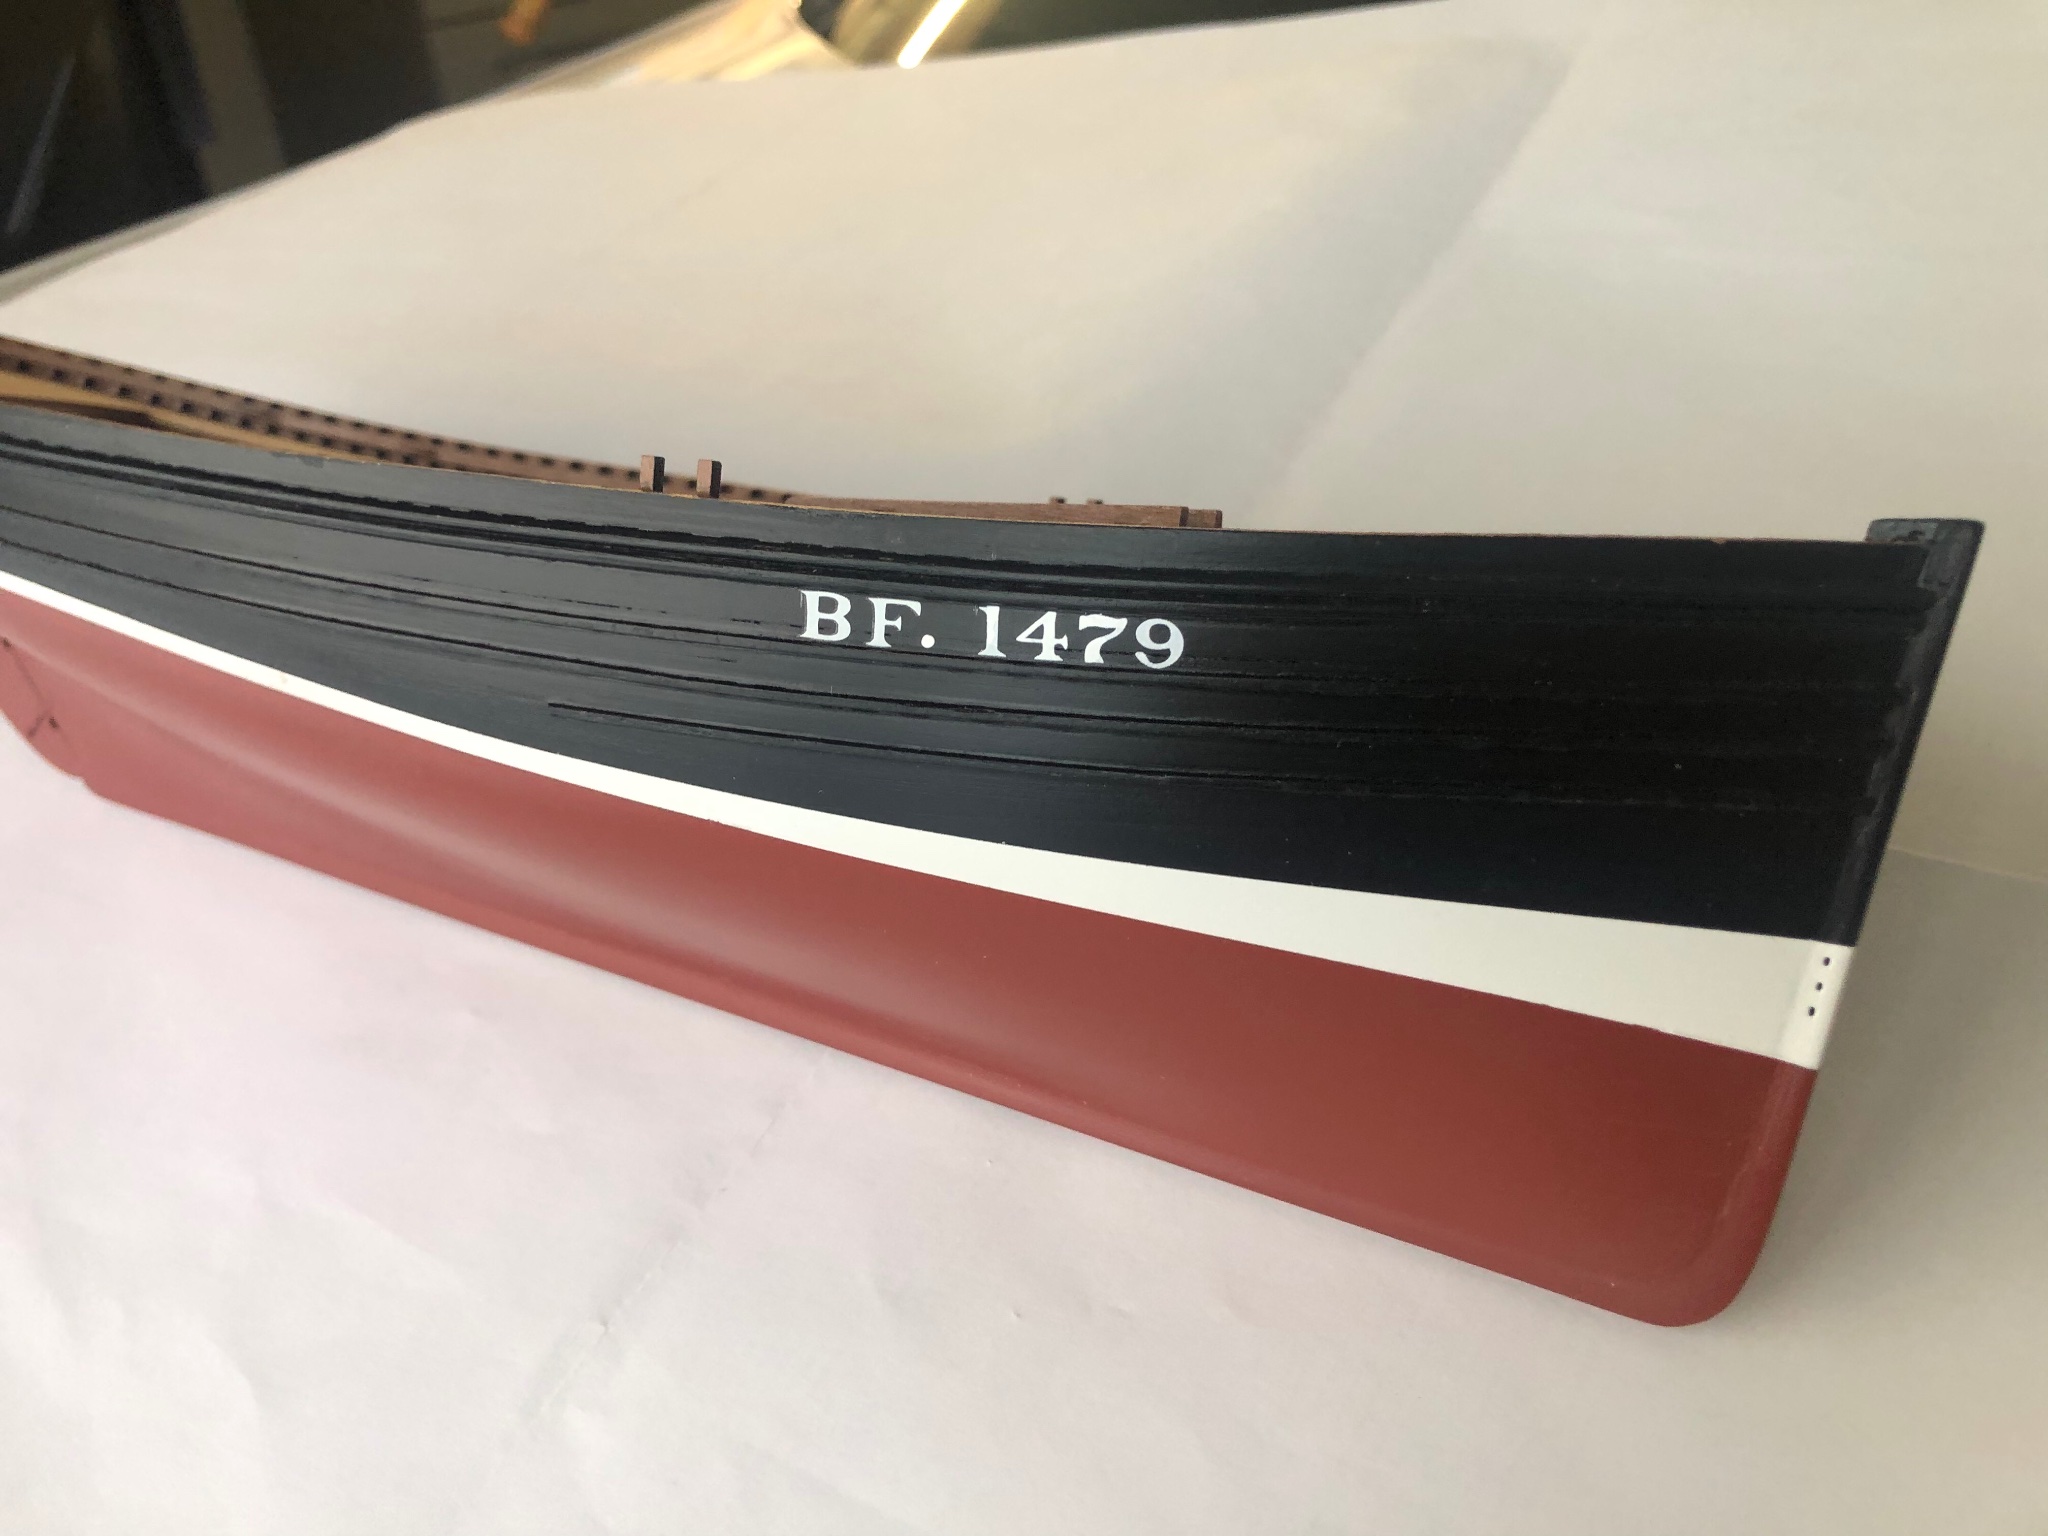
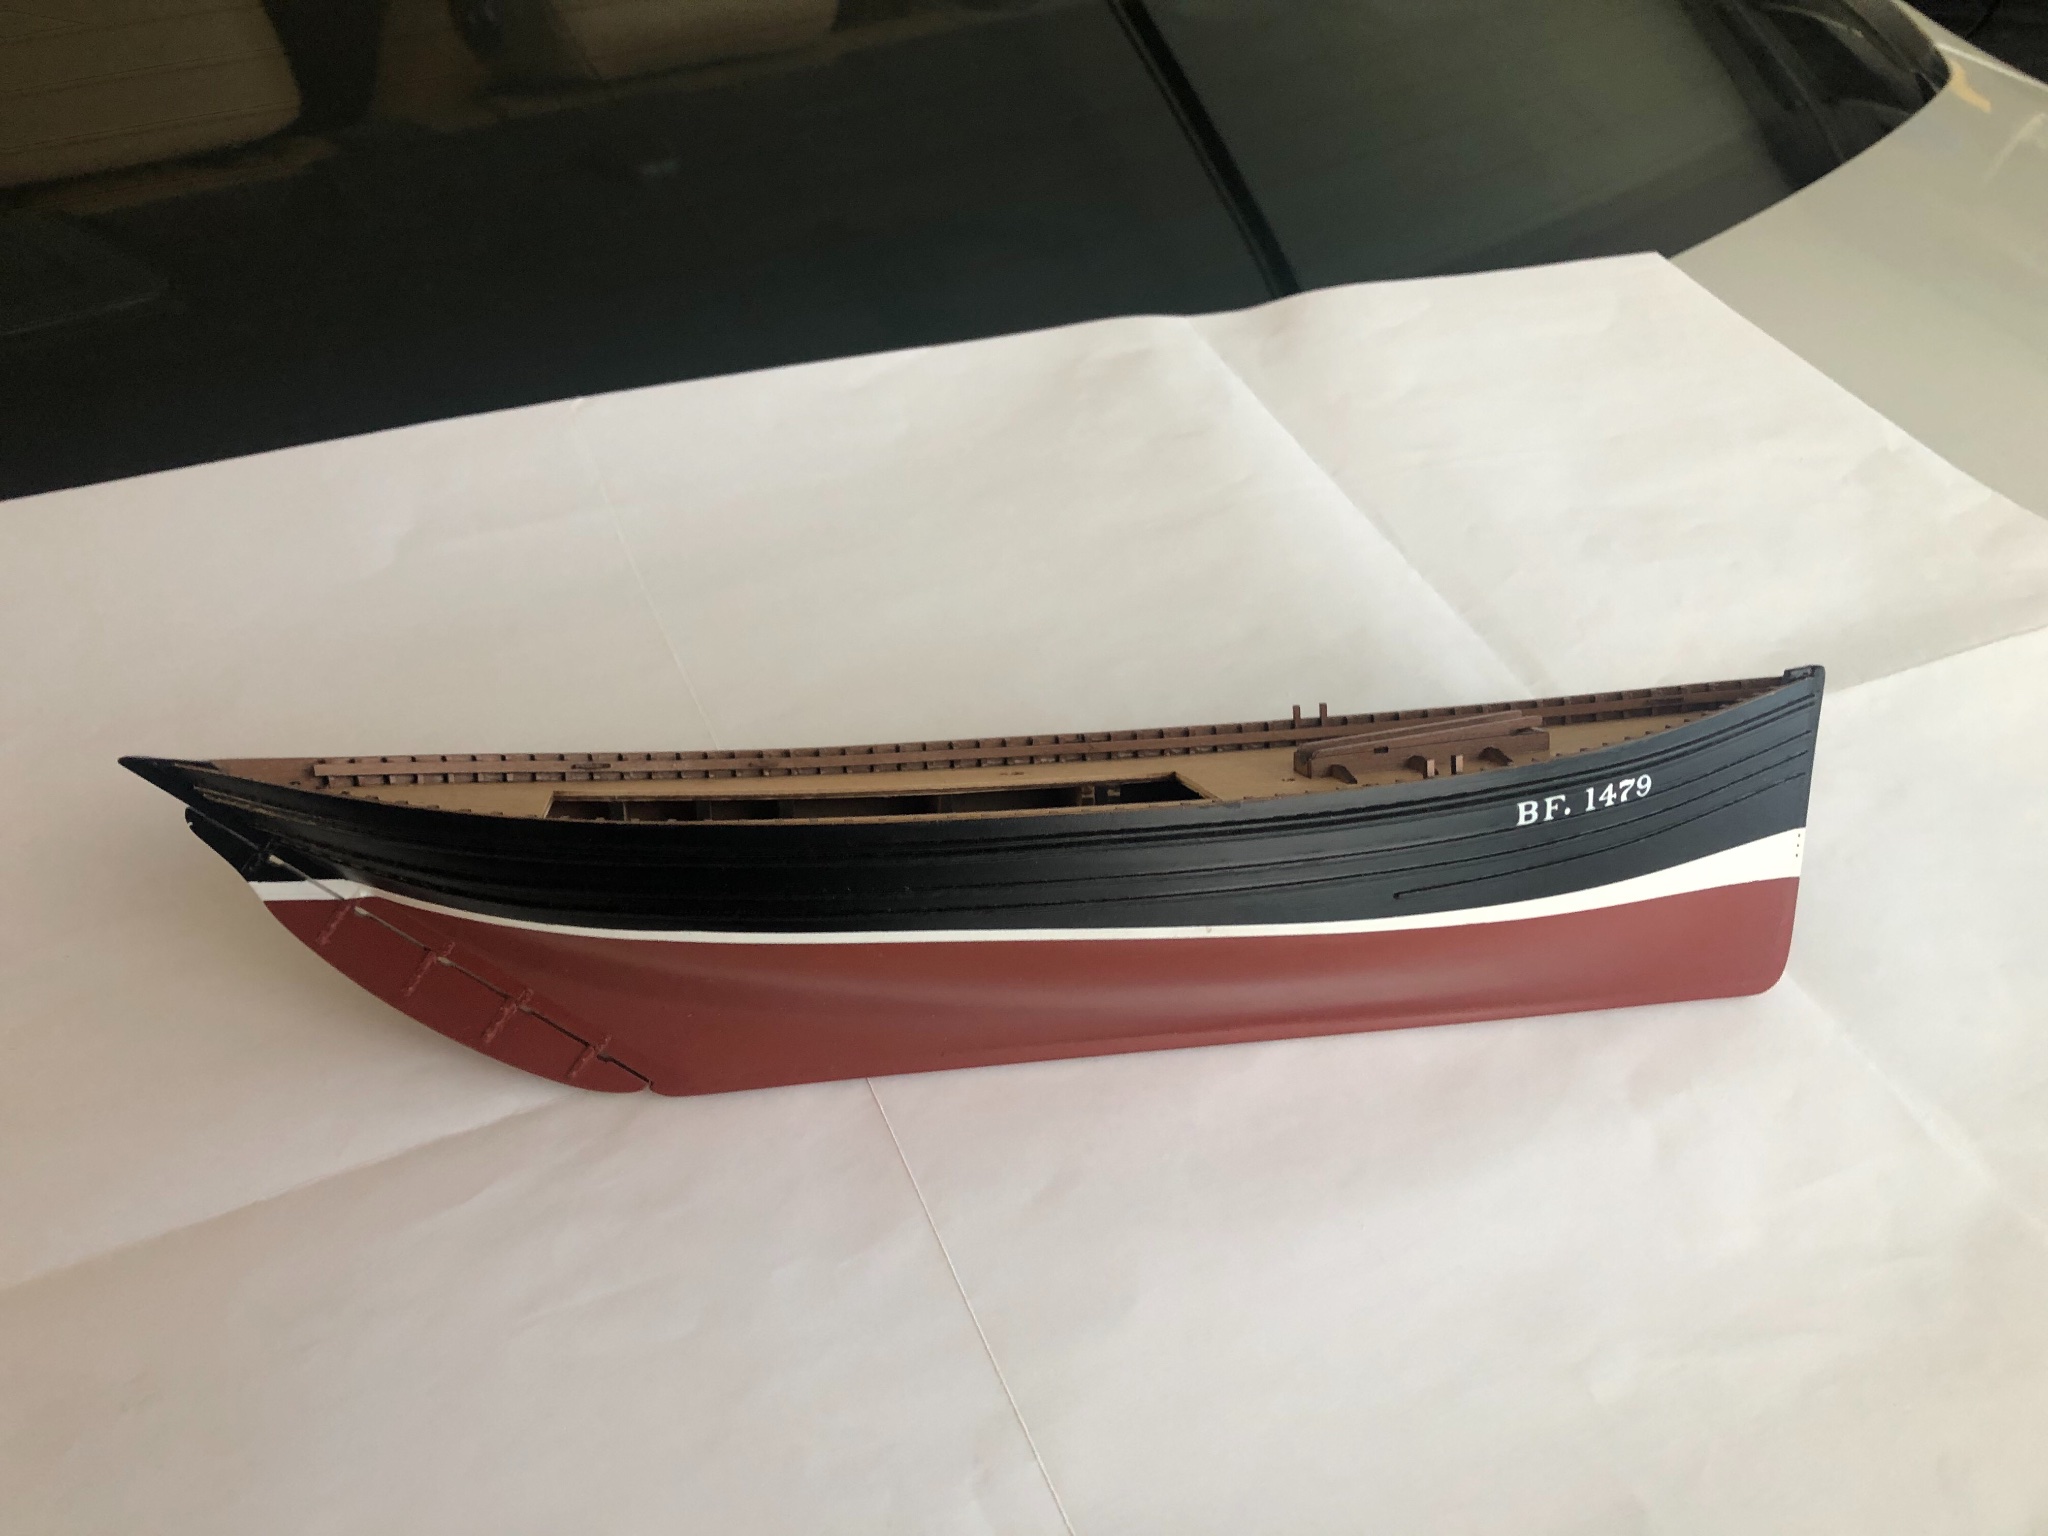
Then I added the registration number on to the sides of the hull. This was done with white dry transfer letters (RR Roman, white, from Woodland Scenics). Came out well, I think, and it gives the boat real character. I made the little decimal point with a toothpick, and white acrylic.
The number identifies her as BF 1479 Fidelity, the Zulu from those beautiful drawings at the Greenwich Museum, which closely resembles Chris’ design. The “BF” is for Banff, her port of registration.


- marktiedens, Keithbrad80, JpR62 and 8 others
-
11
-
40 minutes ago, Jim Lad said:
Shouldn't the numbers be lower down - "Immediately above the close reef"?
John
Take a look at the photo of the Fifie at the top of this page. This seems to be the usual location. I suppose the general practice of having it higher on the sail might have been practical. Easier to see from a distance?


Lady Isabella by EKE - FINISHED - Vanguard Models - 1:64 - Zulu
in - Kit build logs for subjects built from 1851 - 1900
Posted · Edited by EKE
No worries at all, Allen. Happens all the time.