HOLIDAY DONATION DRIVE - SUPPORT MSW - DO YOUR PART TO KEEP THIS GREAT FORUM GOING! (Only 36 donations so far out of 49,000 members - C'mon guys!)
×

Robert29
-
Posts
417 -
Joined
-
Last visited
Content Type
Profiles
Forums
Gallery
Events
Everything posted by Robert29
-
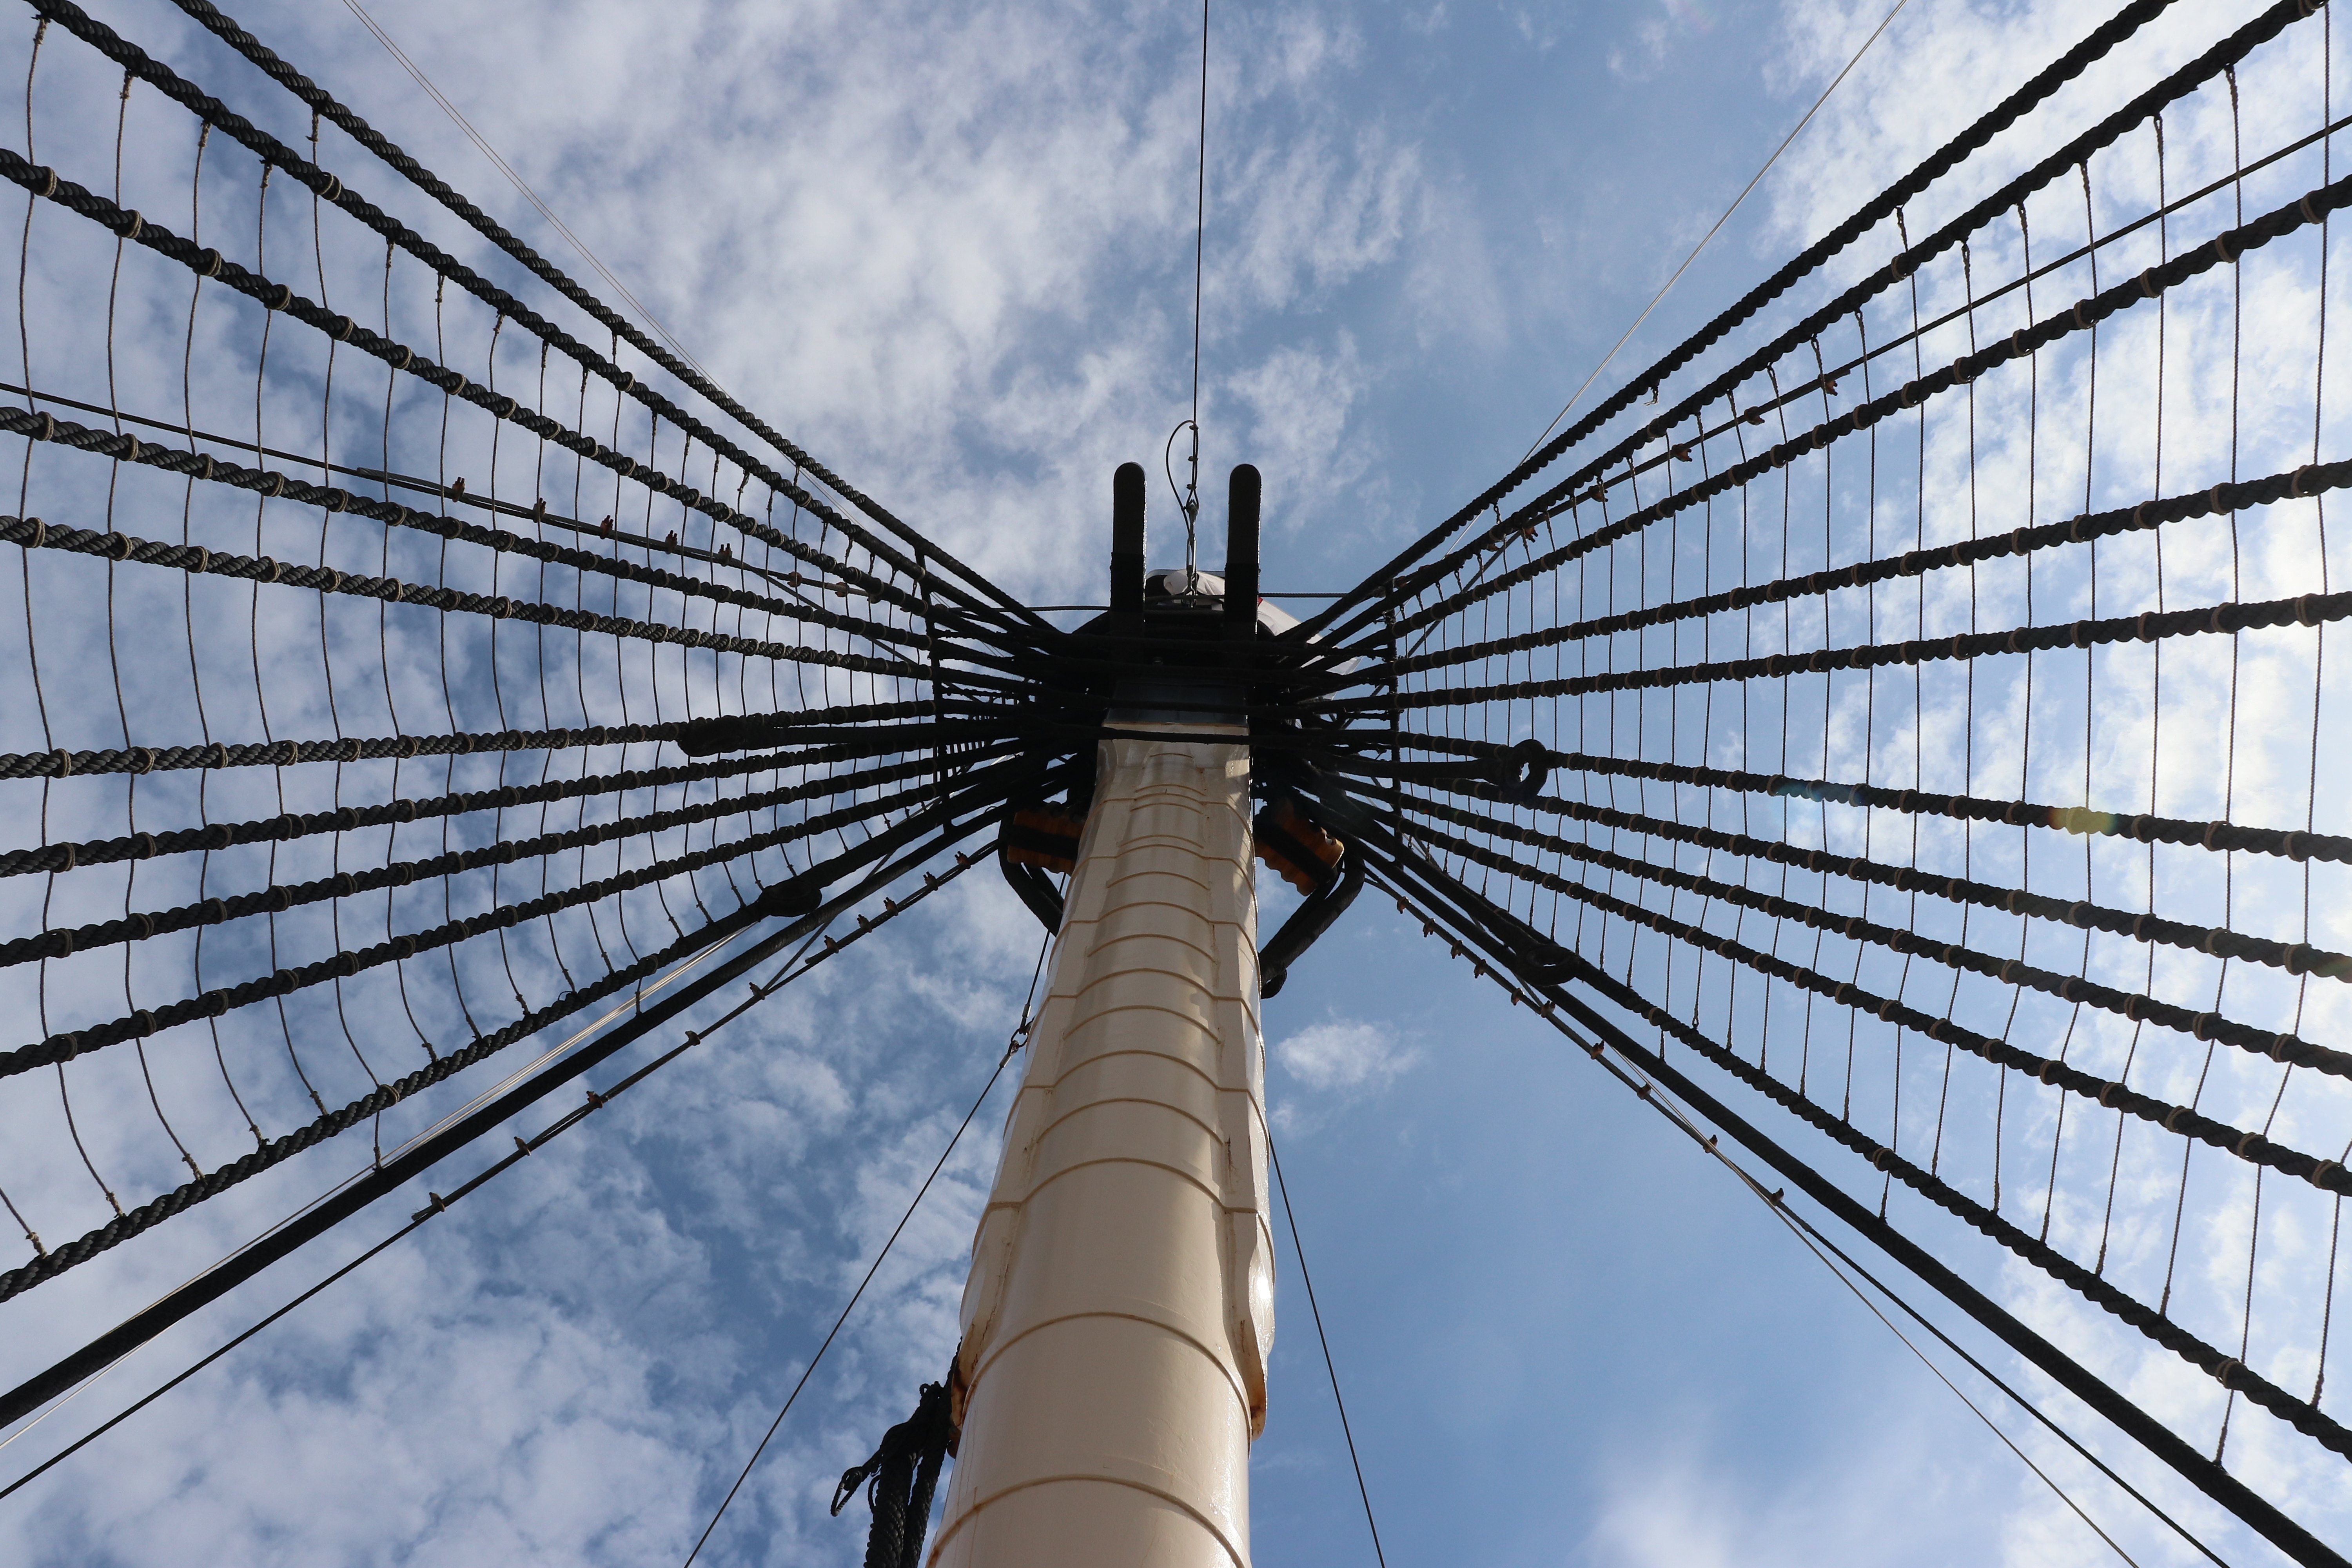
 Great pictures Rich, thanks for sharing. I will definitely be referring to them for some detail. My daughter lives in Stratford-Upon-Avon, hopefully on one of my visits to her from Malta I should also give HMS Victory a visit, Portsmouth is not that far from Stratford. Robert
- 414 replies
-
- 1
-

-
- caldercraft
- victory
- (and 1 more)
-
Ah, sorry Donn, I haven't fitted the glass yet. In the instructions manual it tells you to stick a piece of transparent plastic (cut from a sheet supplied with the kit) on the inside of the gallery, but I didn't like the idea as this was going to leave a gap between the plastic and the brass window frame. I intended to cut a piece of plastic exactly the size of the brass window and fix it in the indent on the gallery skin. I know this is going to create another problem for me as now with the extra thickness of the plastic the brass frame is going to protrude further out from the gallery quarter gallery skin, and this is not going to look good. I think I will find a thinner plastic sheet and maybe deepen a bit more the indent on the gallery skin. If it comes to the worst I think I would have to cover the gallery skin with some thin planking to gain that extra bit. This problem is only on the side gallery as the stern is different, it has two fascias and the plastic is sandwiched in between. I have to do some thinking how I am going to finish it. If I am not clear please let me know and I will try to explain better. Robert
-
Thank you Heinz, and thank you for the likes. Donn, thank you for your comment, much appreciated. The material I used for the quarter gallery is all the once supplied with the kit. I can't really complain for the wood supplied with the kit. Up to now the only strips I had to change was the walnut 1mm x 16 mm which is used to line the gunports. It's thickness was 0.8mm instead of 1mm and very brittle. It kept splitting in two easily whist trying to trim it down to size. But otherwise the rest was very good. Robert
-
Eager to see you progress Paul. Robert
-
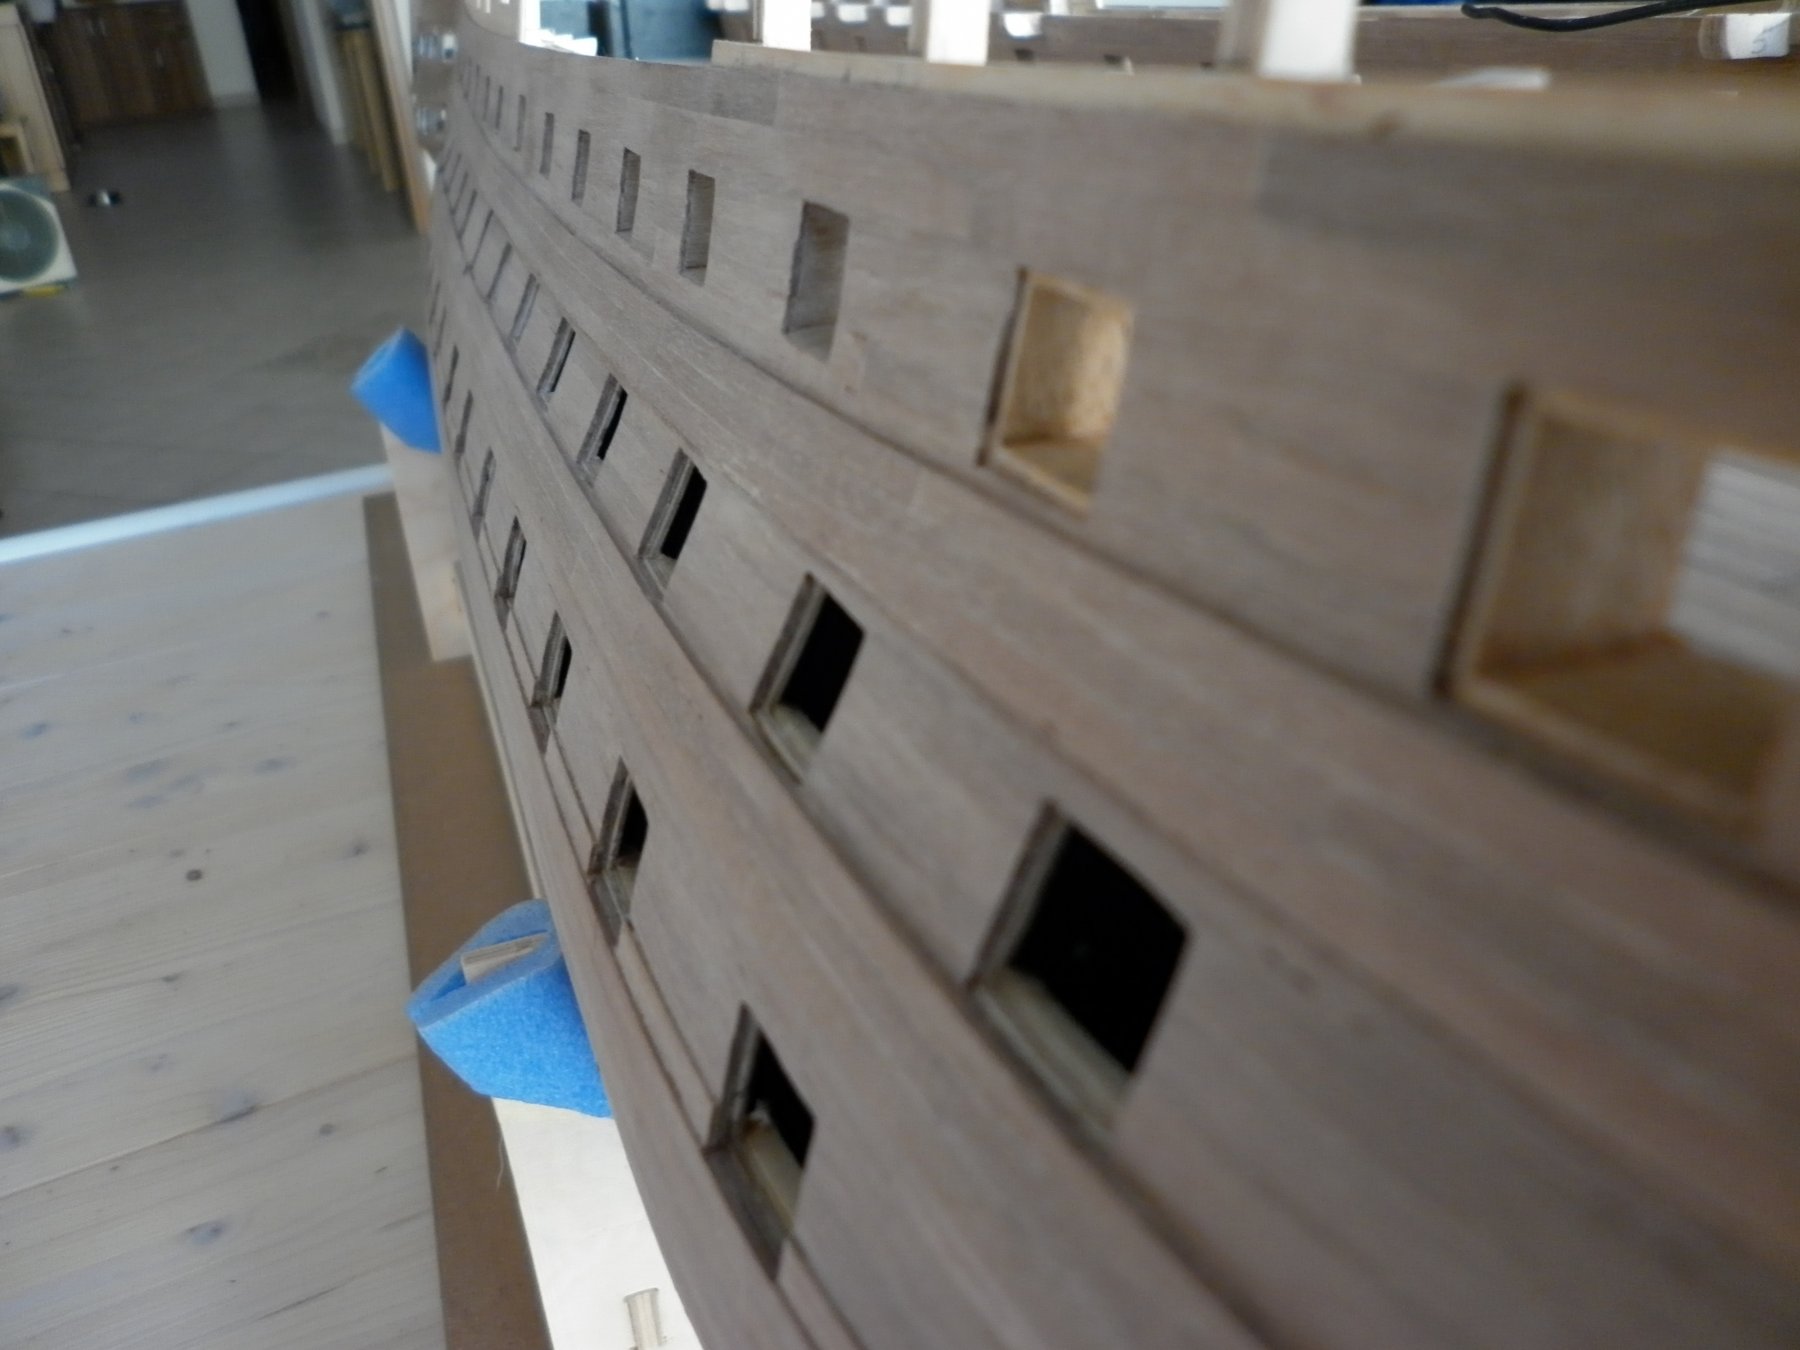
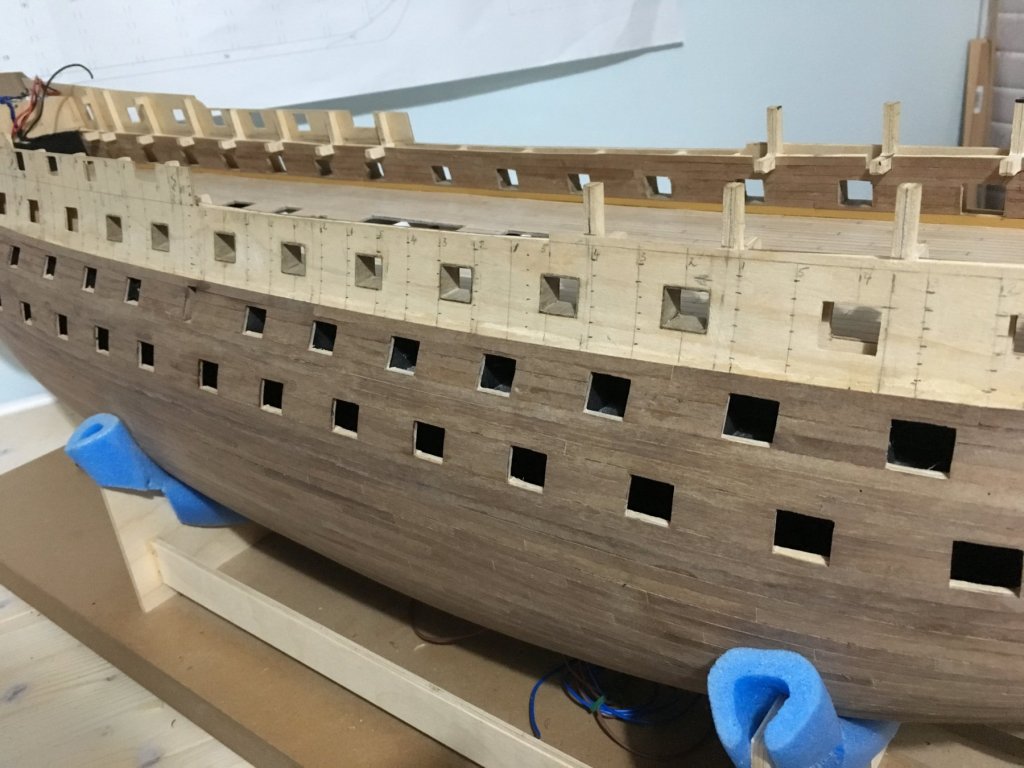
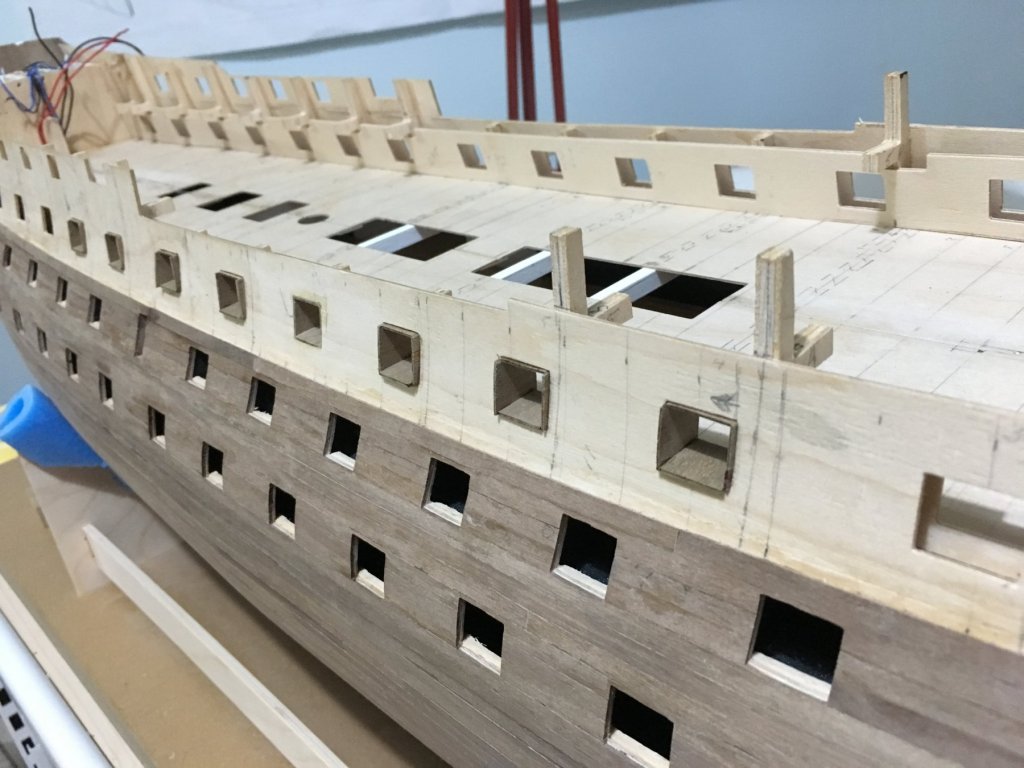
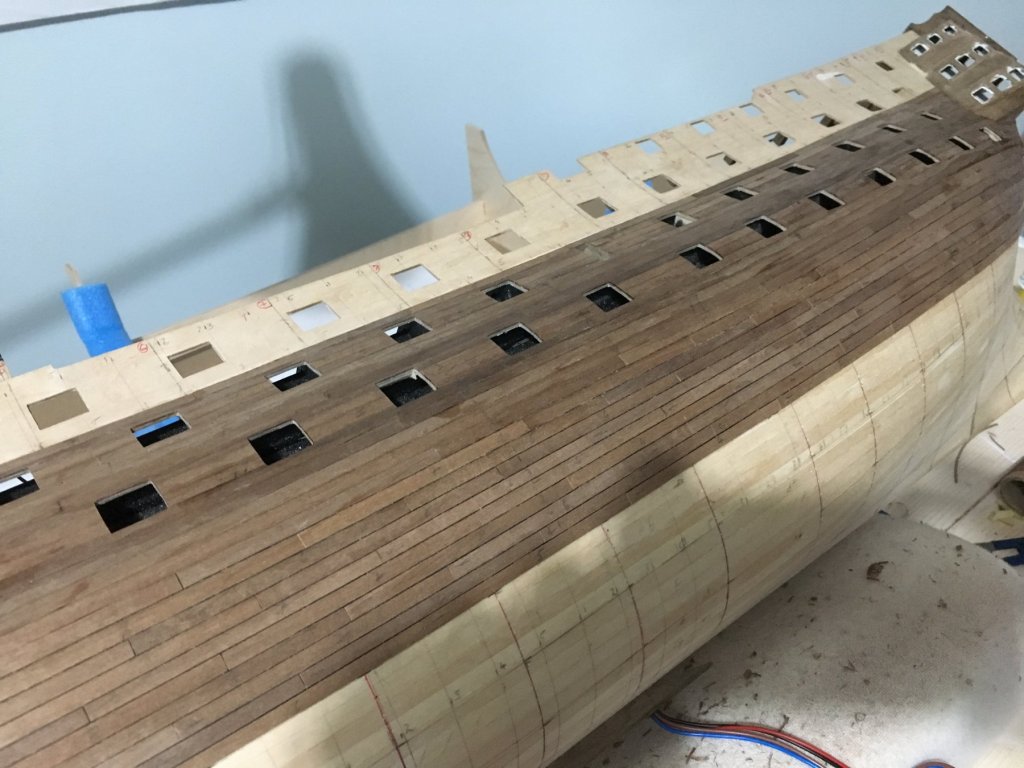
Thank you Graham. Another update, moving slowly. Wales all finished and gunport linings for the upper gun deck finished as well. Next step is the gunport linings for for the lower and middle gun decks. I have a feeling it is not going to be easy at all. When I finish the linings I will fill the space between the planks in the lower part of the hull and finish. For the upper gun deck linings, the walnut strips (1mm x 16mm) supplied with the kit was impossible to use. The thickness which was supposed to be 1mm was under 0.8mm and apart from that it was very brittle. More often than not, it kept splitting in two while trying to trim to size. Had to order some new ones with the right thickness. Worked out fine. Regrads Robert


- 527 replies
-
- 12
-
-

-
- caldercraft
- victory
- (and 1 more)
-
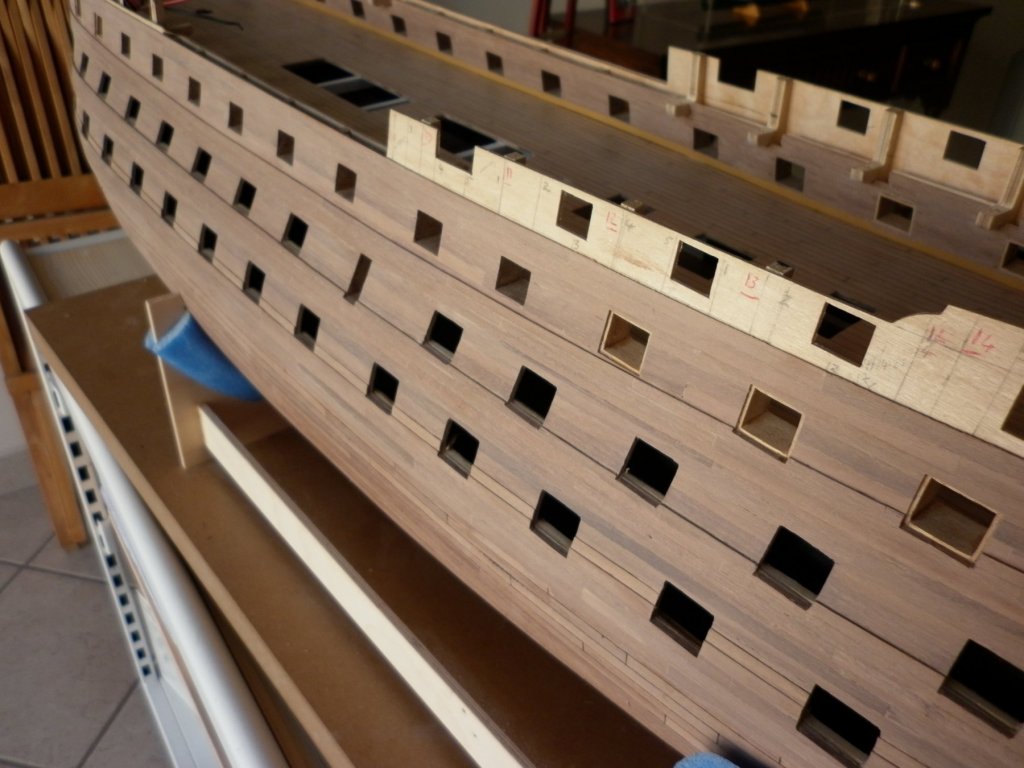
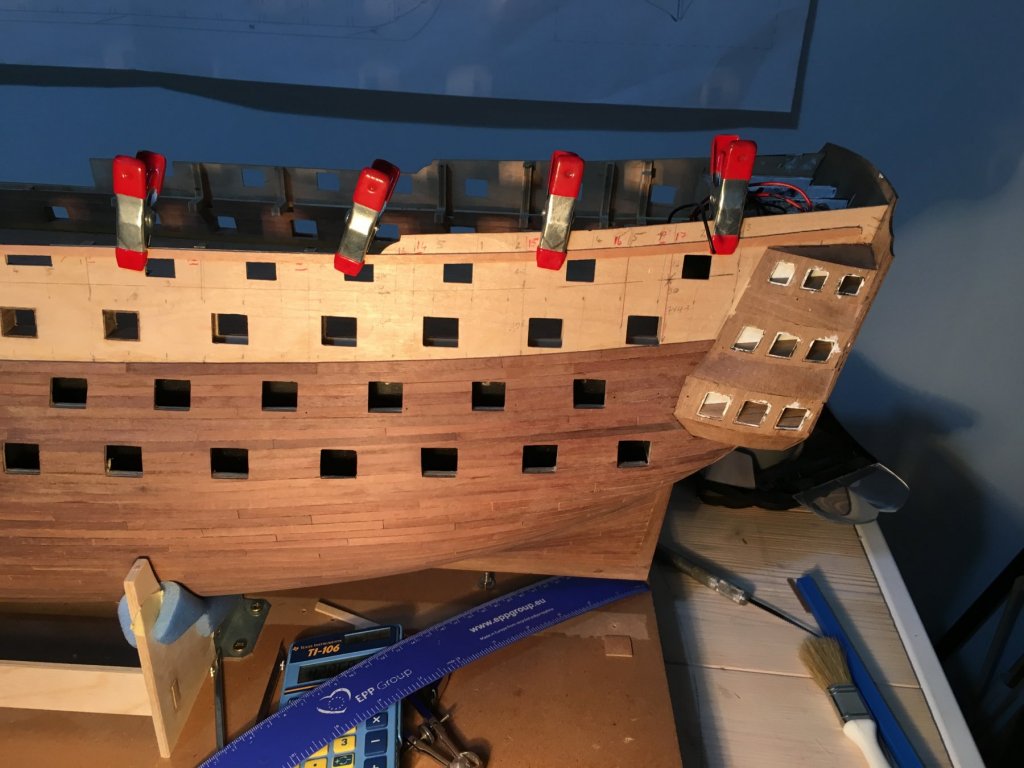
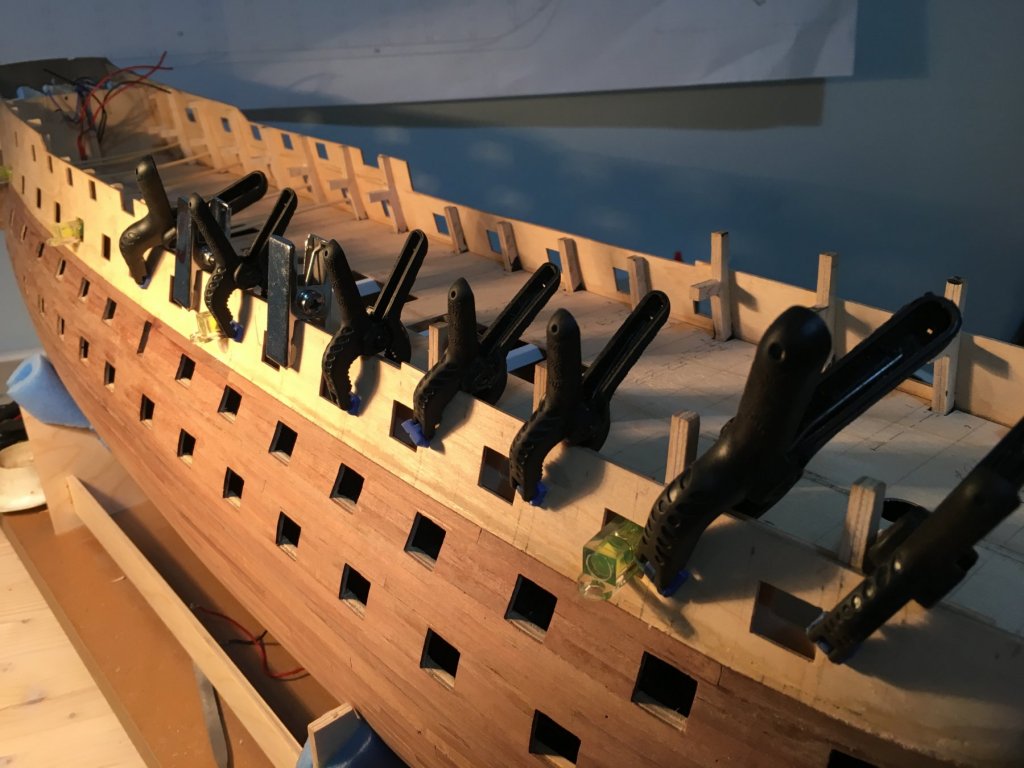
Thank you for the likes and thank you Kevin for your comment. Looking forward for your Victory updates. Your work is lovely. A small update: I finished the planking on the top gun deck inner bulwark, still needs sanding. I painted the first lower plank before fixing so that I have a clean cut line from the deck. Started work on the outer gunport pattern planking. Planned how many planks go in and what tapering and bending they need. Width for individual planks calculated and marked on the patterns. In the coming days hopefully I will start the planking and continue with the wales. Robert


- 527 replies
-
- 8
-
-
- caldercraft
- victory
- (and 1 more)
-
Looking good, it was my second build as well before I started the HMS Victory. I learned a lot building it. It was also Artesania Latina but apparently the european version kit is quite different. Robert
-
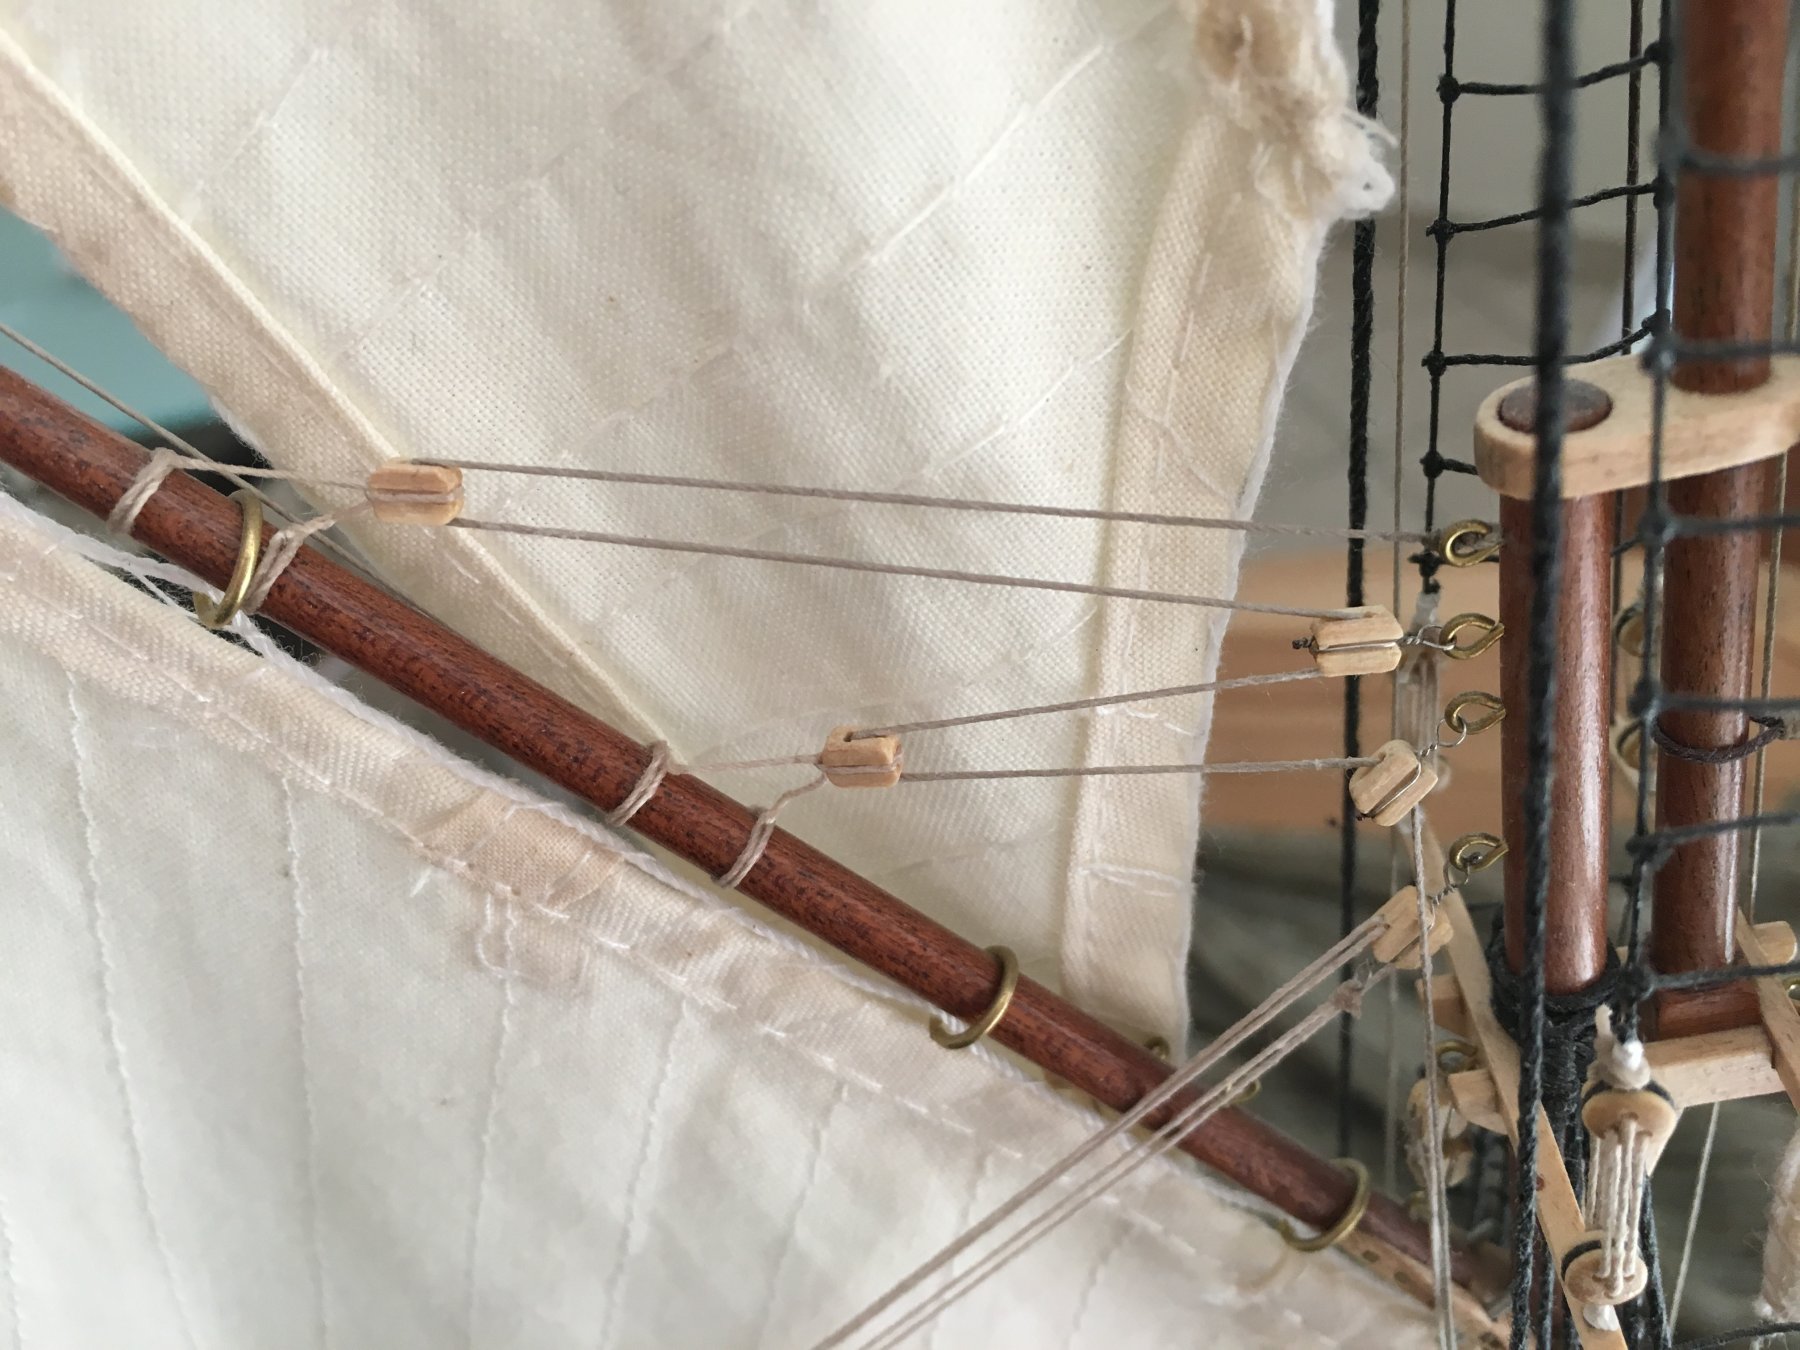
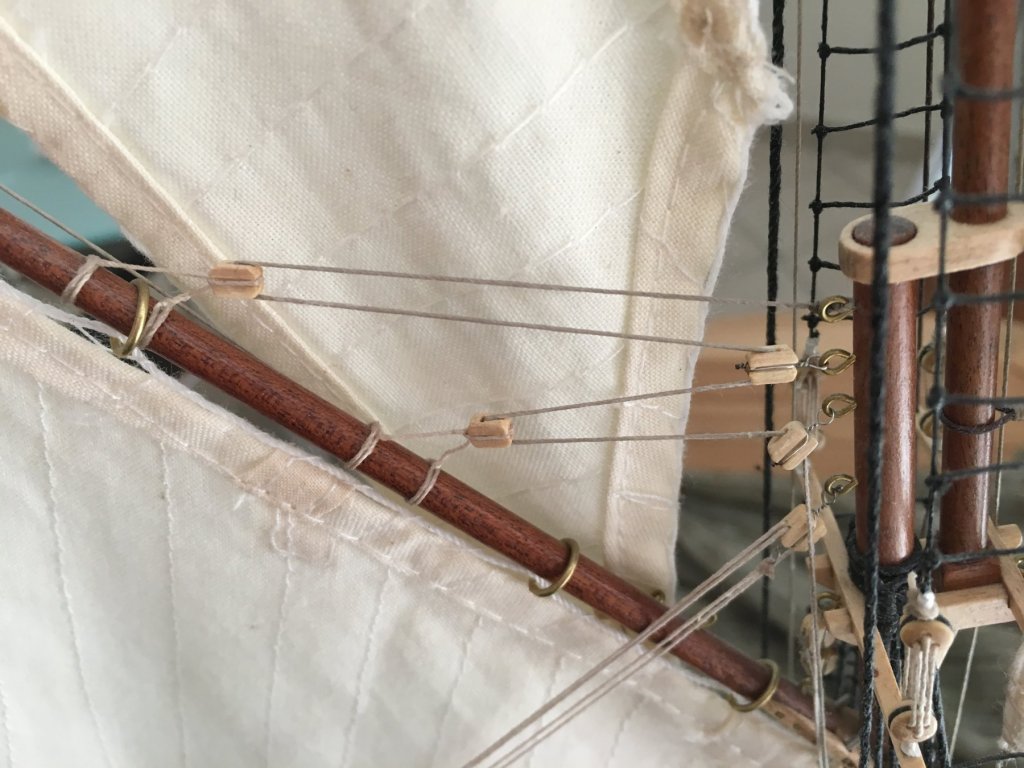
Morning Henry, My apologies for taking so long to reply. All you have to do is, with a thread go round the block and tie it leaving two ends long enough to tie to the gaff. After tying it to the block I always go over it with some thinned white glue to keep the thread in place. Then determine the position of the block on the gaf, tie one end to the gaff, going around the gaff a couple of times and going over it with glue. Then tie the other end, taking care of the length of thread between the block and the gaff. Leaving the second one too long will look slackened, as all the tension will be on the other end, leaving it too short will make the other end look slackened. I have attached a close up for you. Hope this is of help to you. Robert
- 66 replies
-
- 1
-
-
- bluenose ii
- artesania latina
- (and 1 more)
-
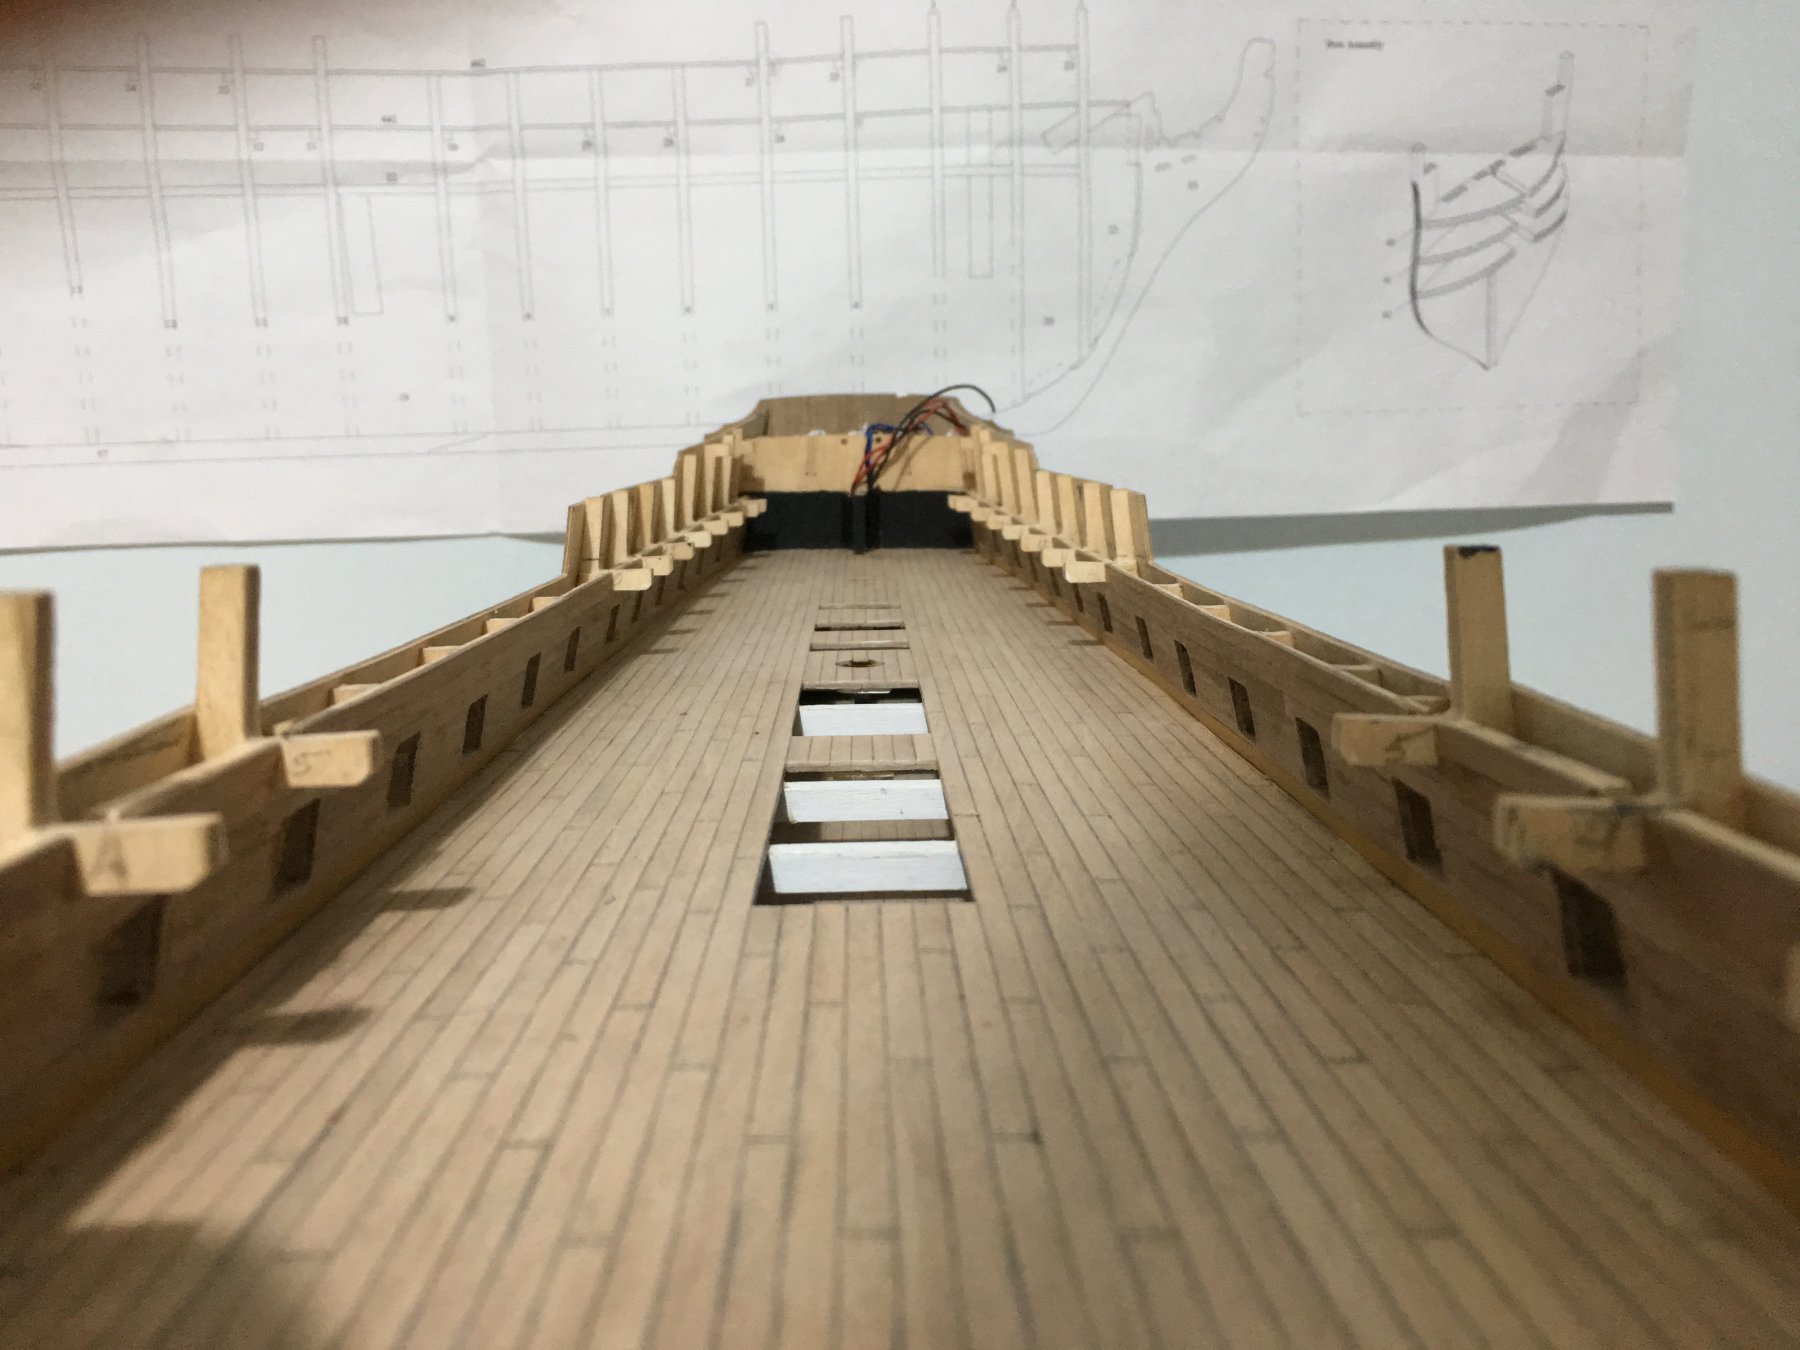
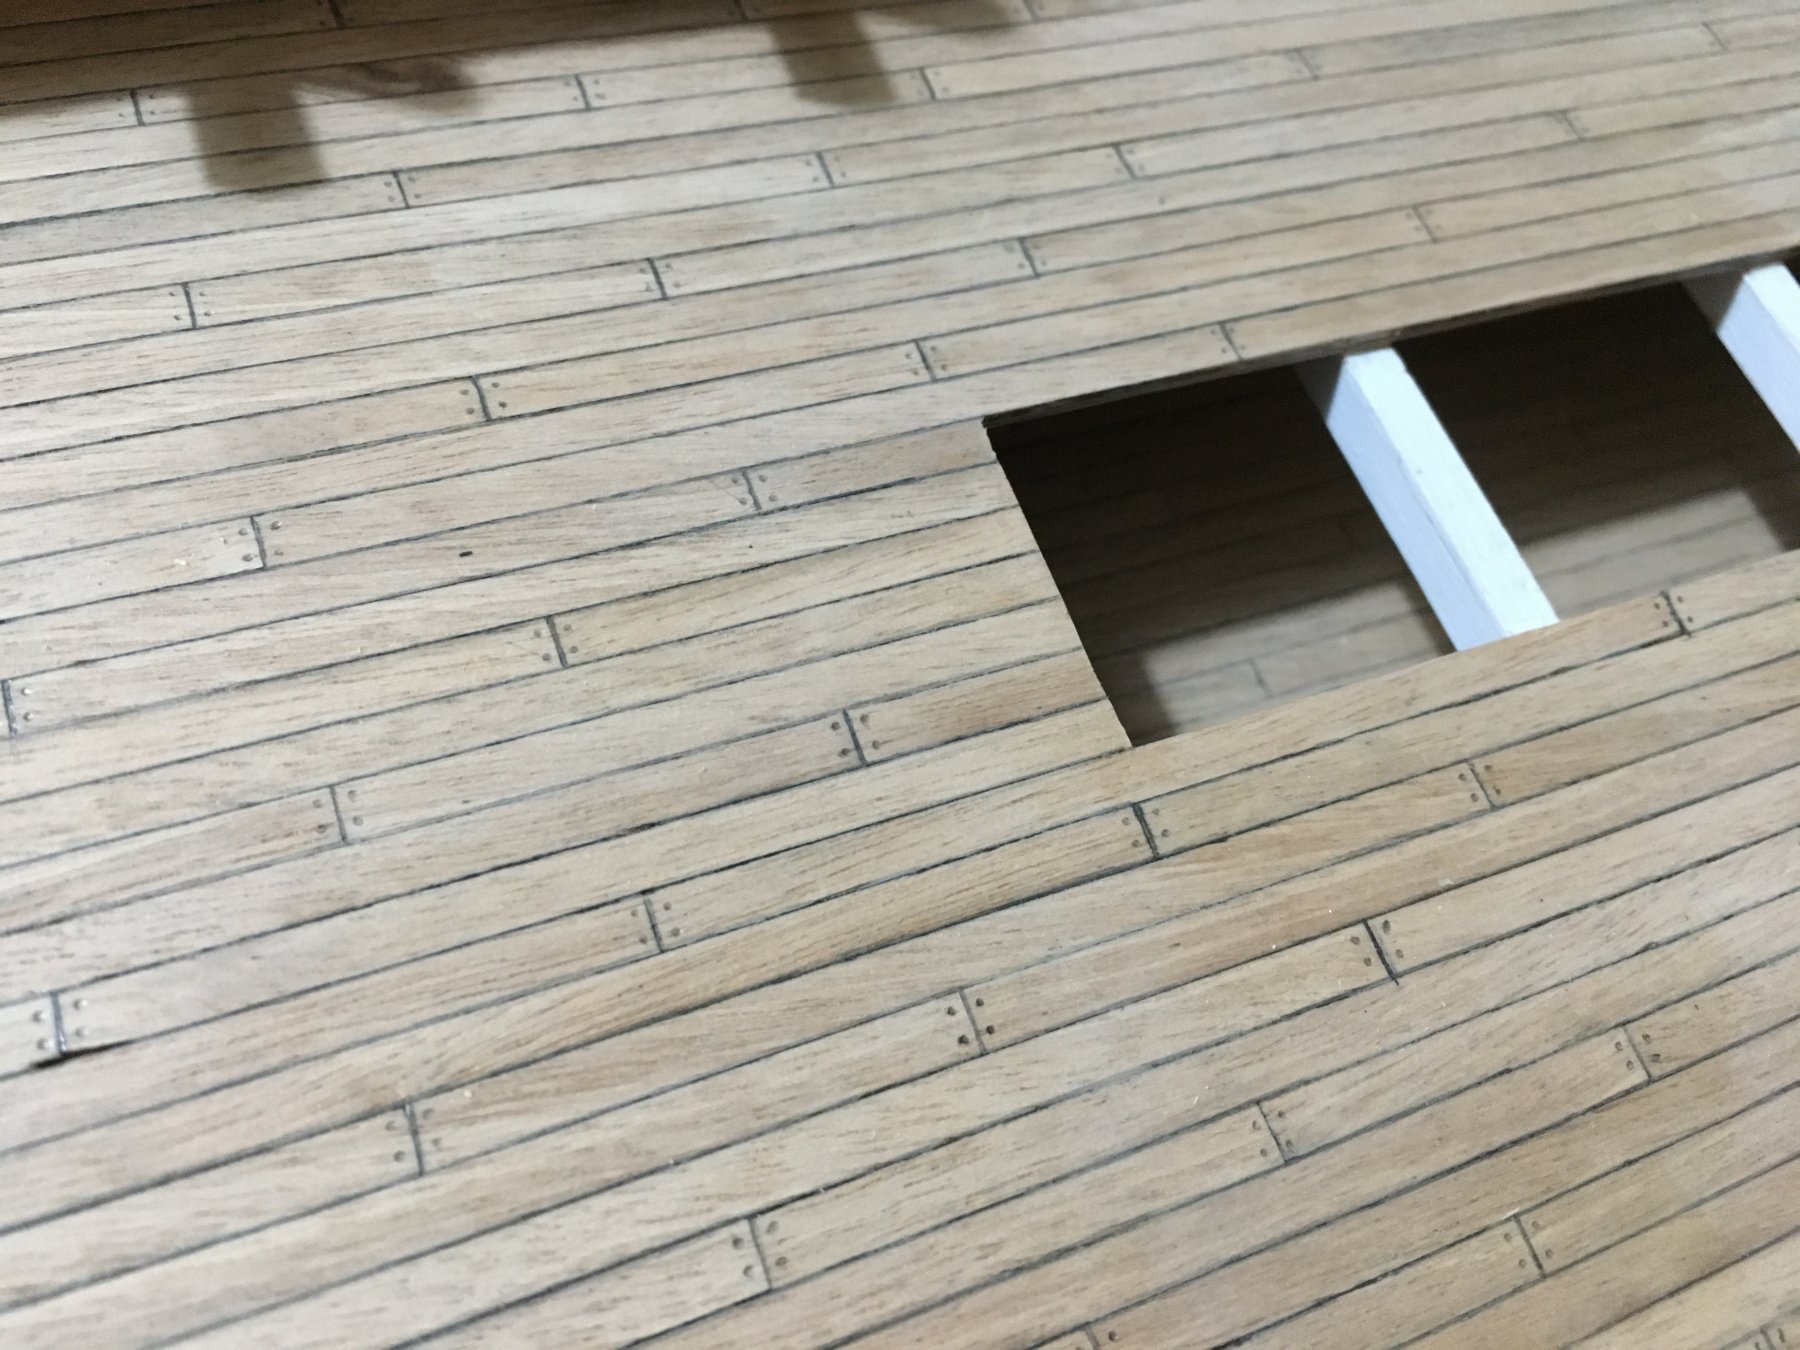
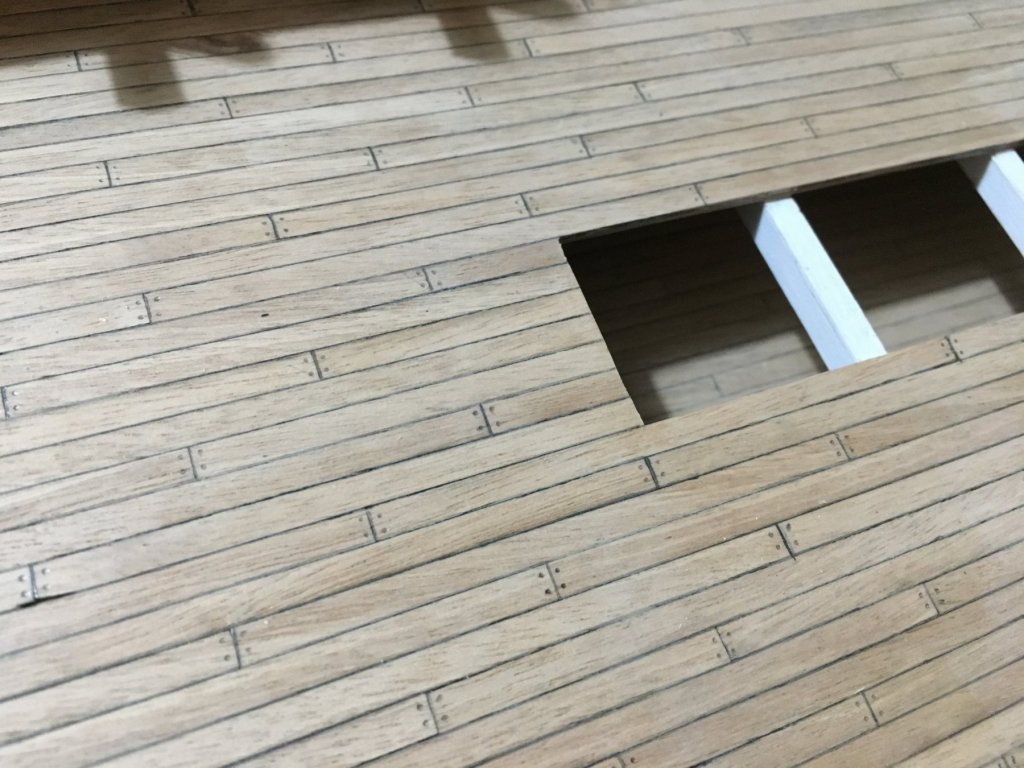
Thank you for the likes and thank you for your nice comment Nigel. Upper gun deck planking ready. Since I had to remove quite a bit from the lower edge of the inner bulwark pattern to align the gunports I have also added a strip of basswood all around the upper edge of the inner bulwark pattern to bring it to the right level and to avoid any problems in planking its sides. As for the treenails I was not sure if to do them or not. I decided to do them. I think the deck looks better with them. I just marked a dot lightly with a pencil after the first varnish coat. Next step is the planking of the inner bulwark pattern Robert


- 527 replies
-
- 11
-
-
- caldercraft
- victory
- (and 1 more)
-
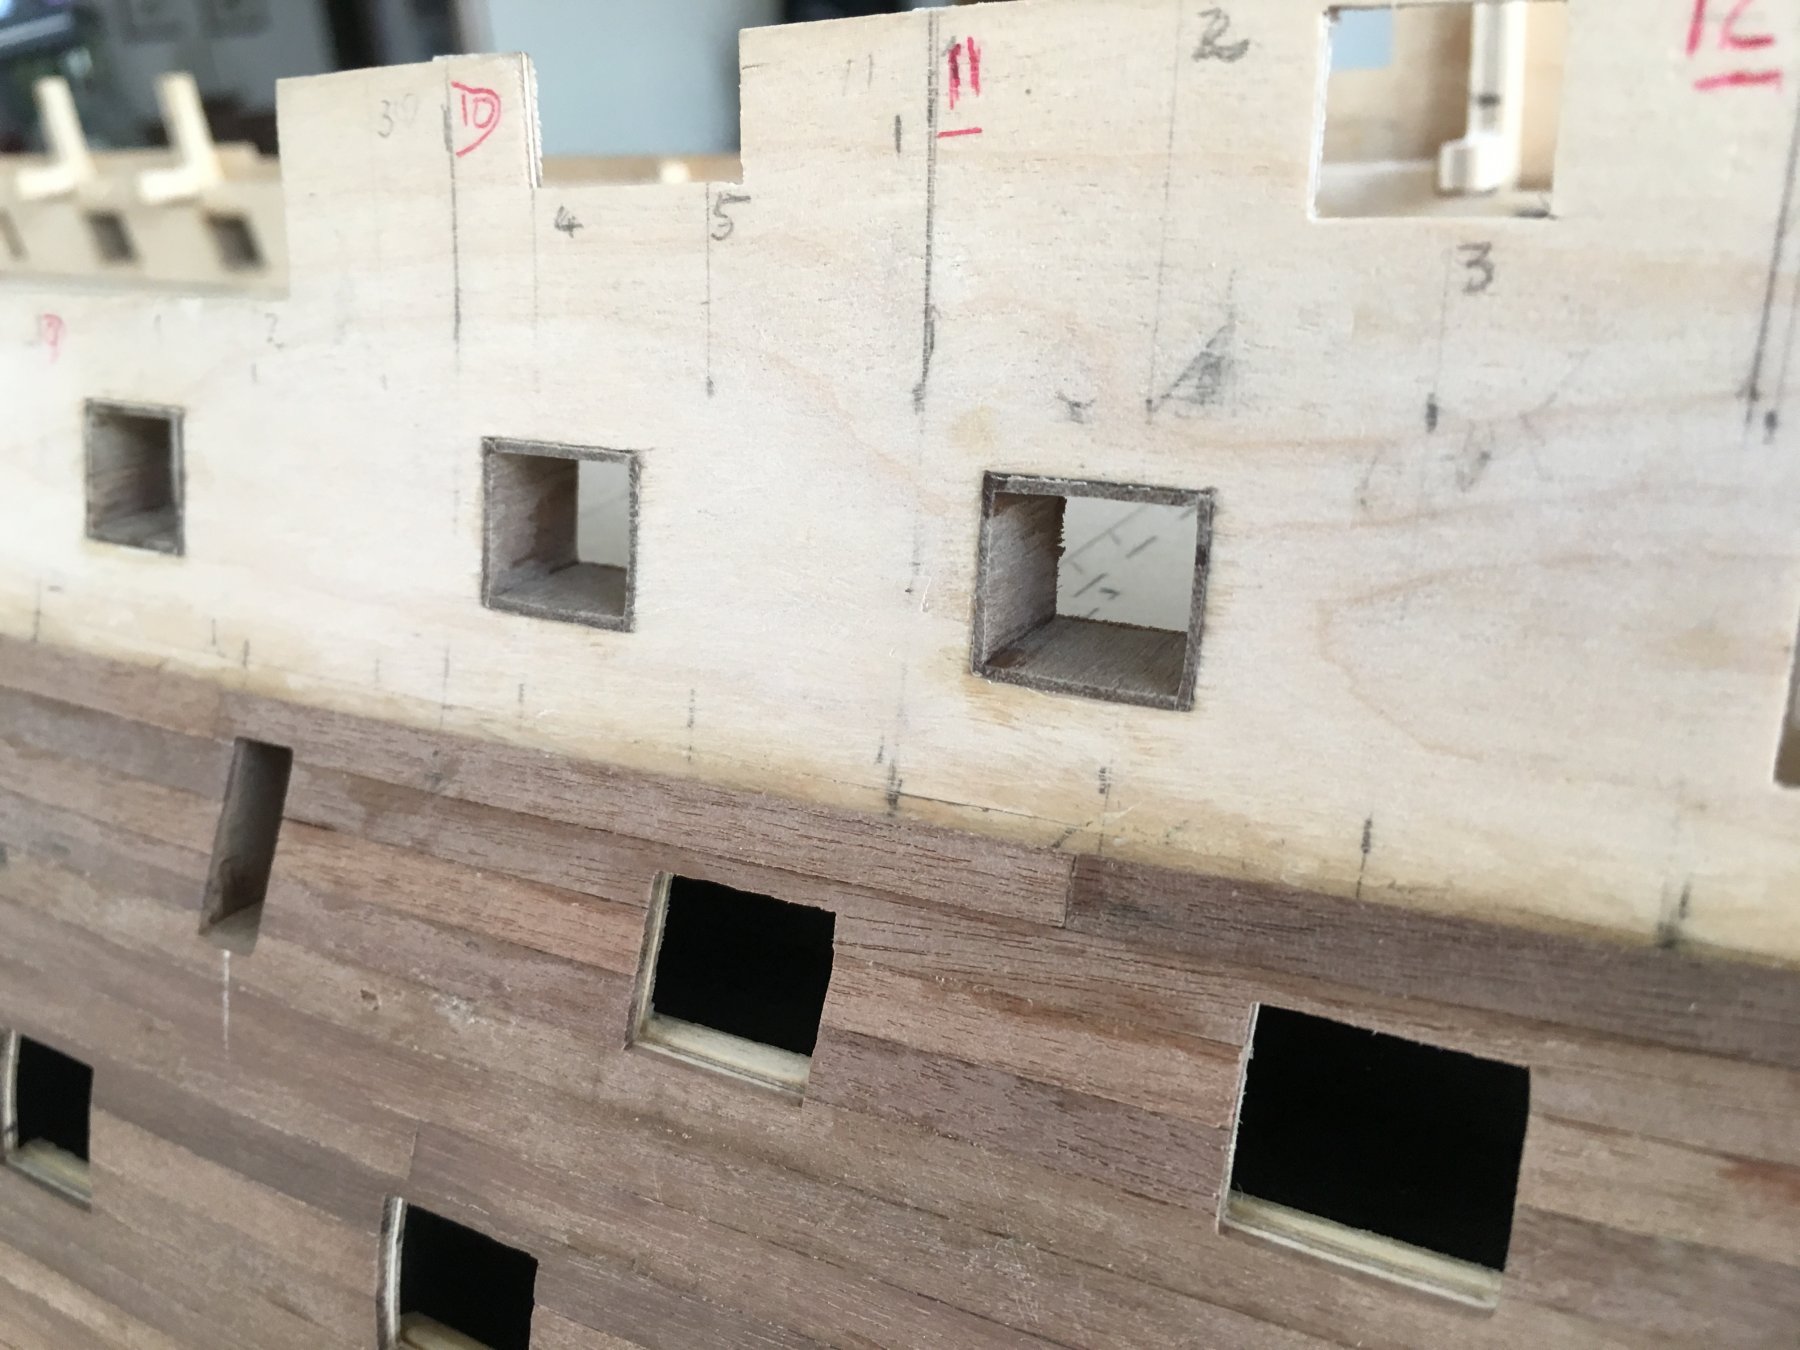
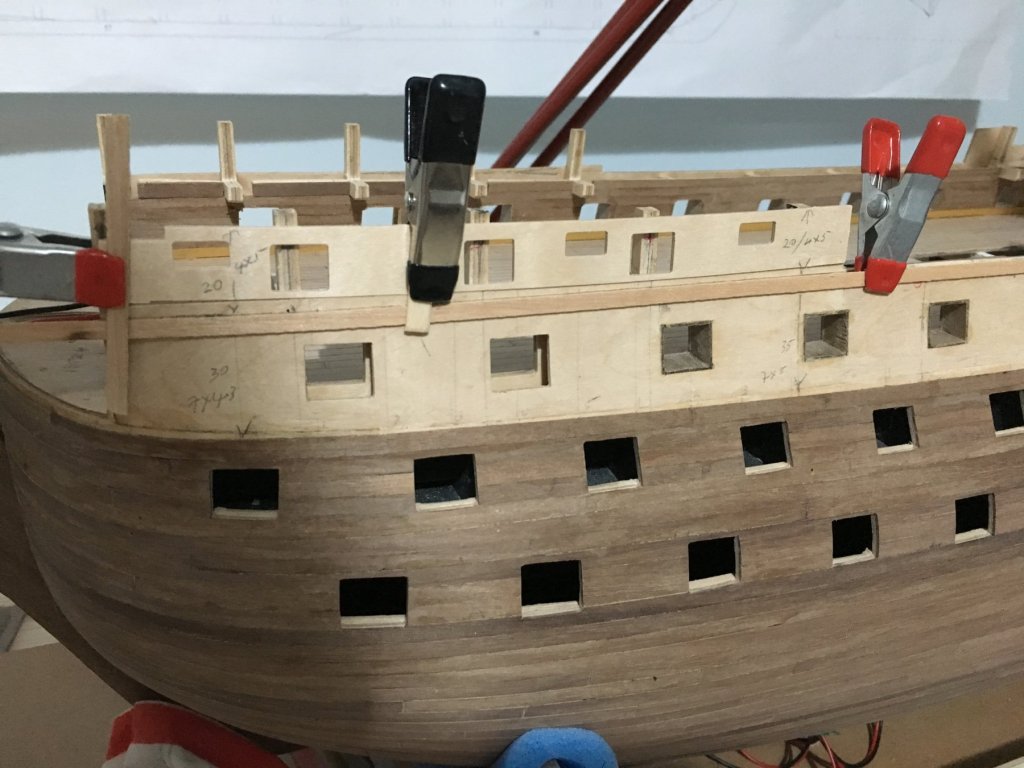
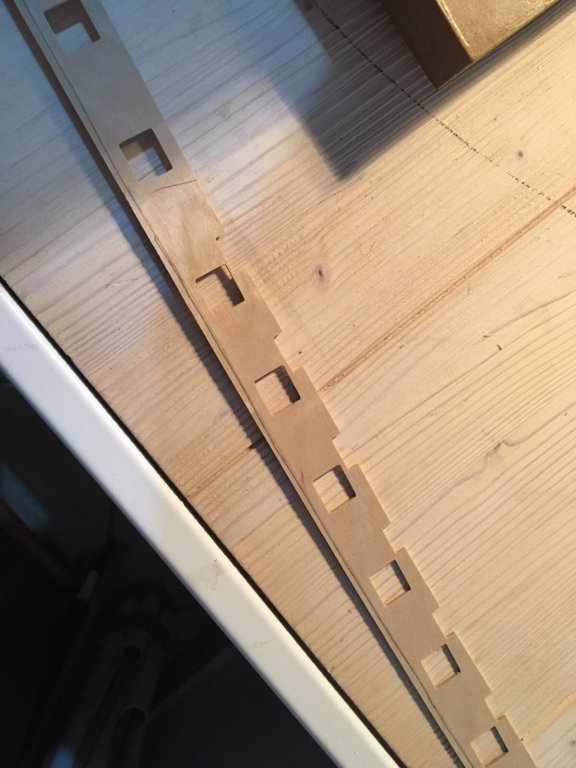
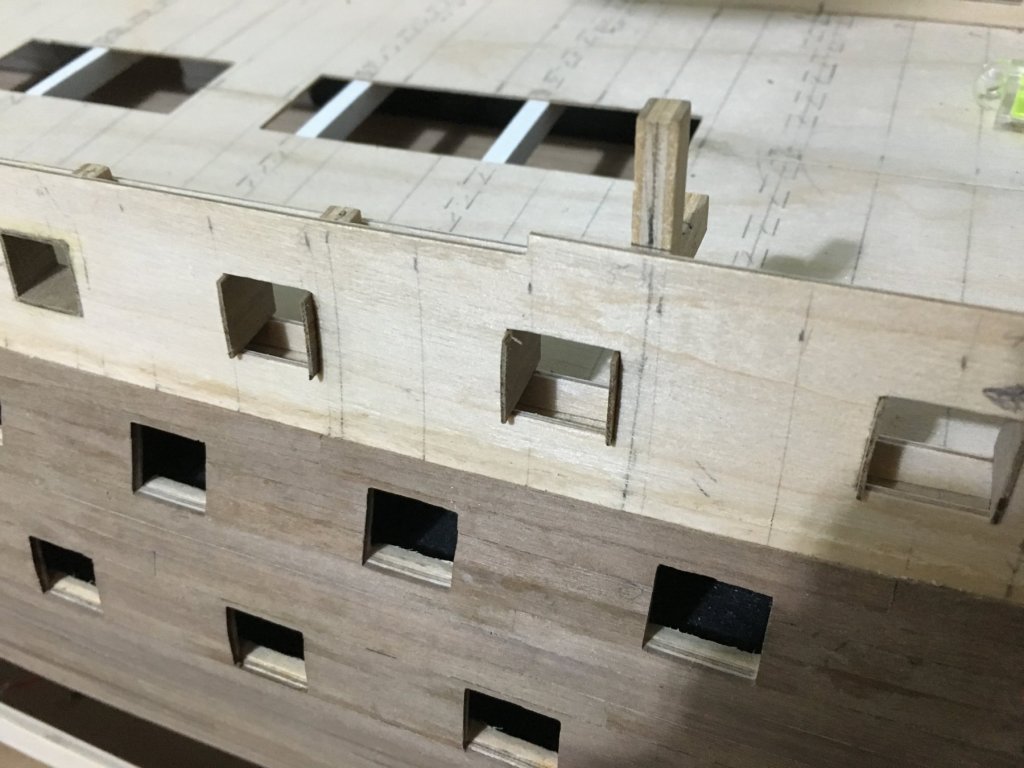
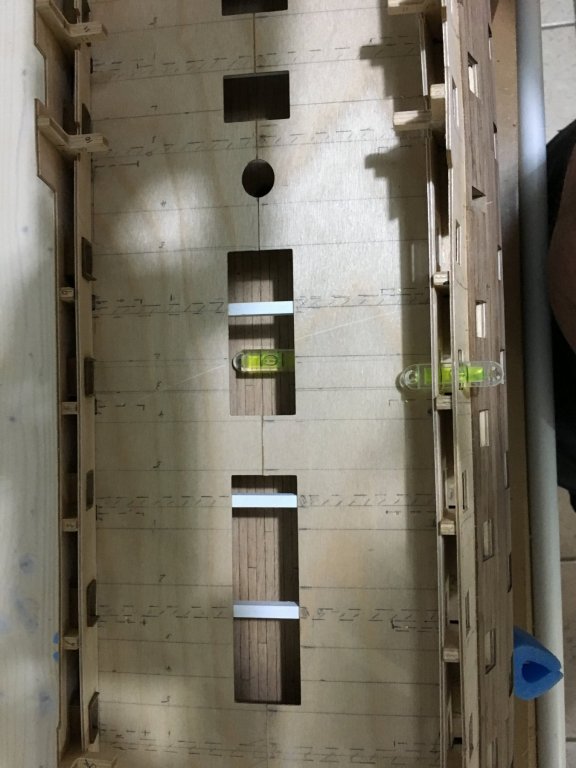
Gun deck inner bulwark gunport patterns in place. To align the height of the gun ports of the inner pattern with that of the outside pattern, I had to shave off quite a bit from the lower edge of the inner pattern. I found those small cheap spirit levels quite useful for the job. Linings for the gunports without lids are ready as well. Robert
- 527 replies
-
- 8
-
-
- caldercraft
- victory
- (and 1 more)
-
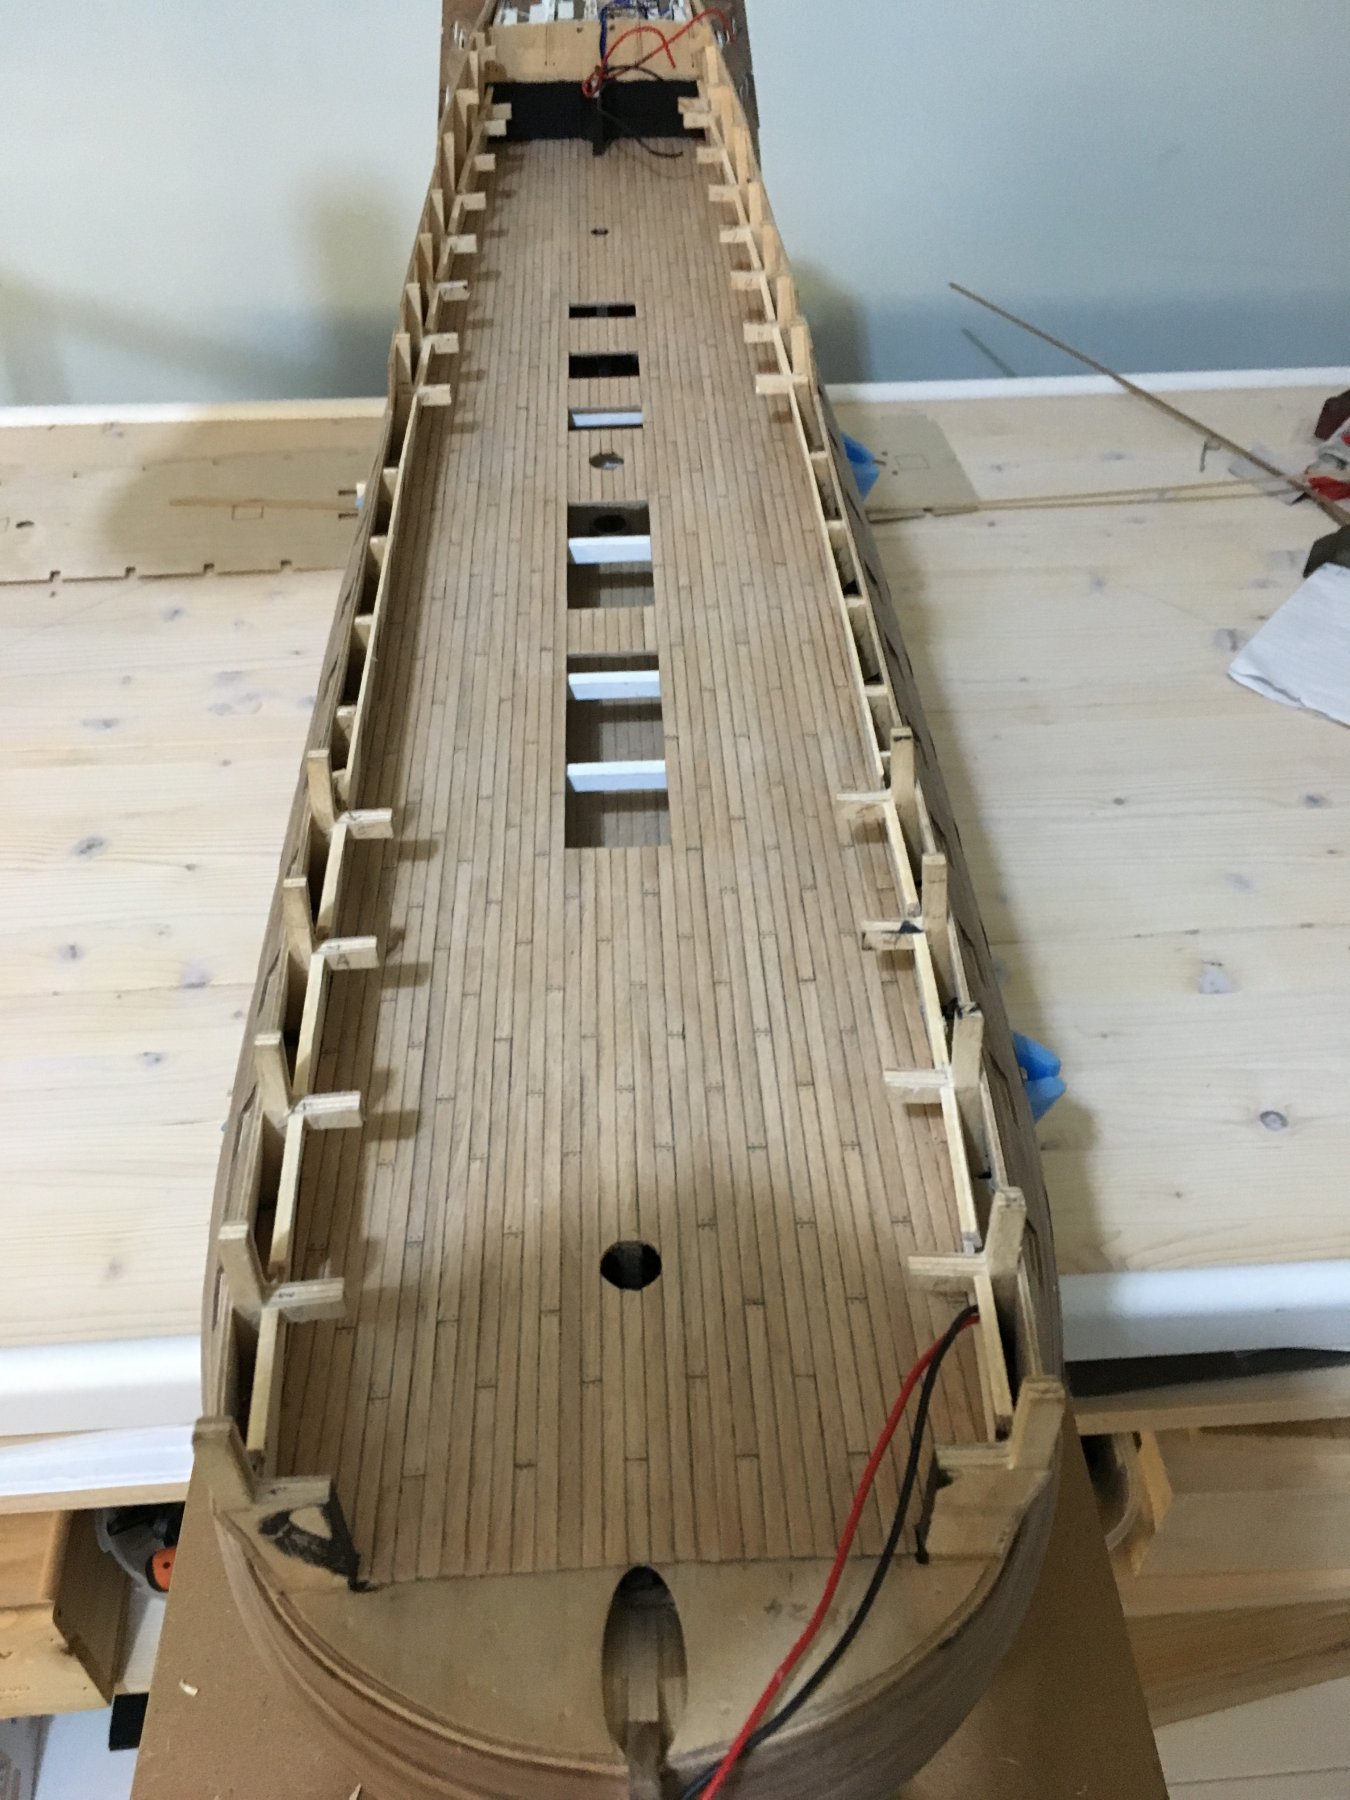
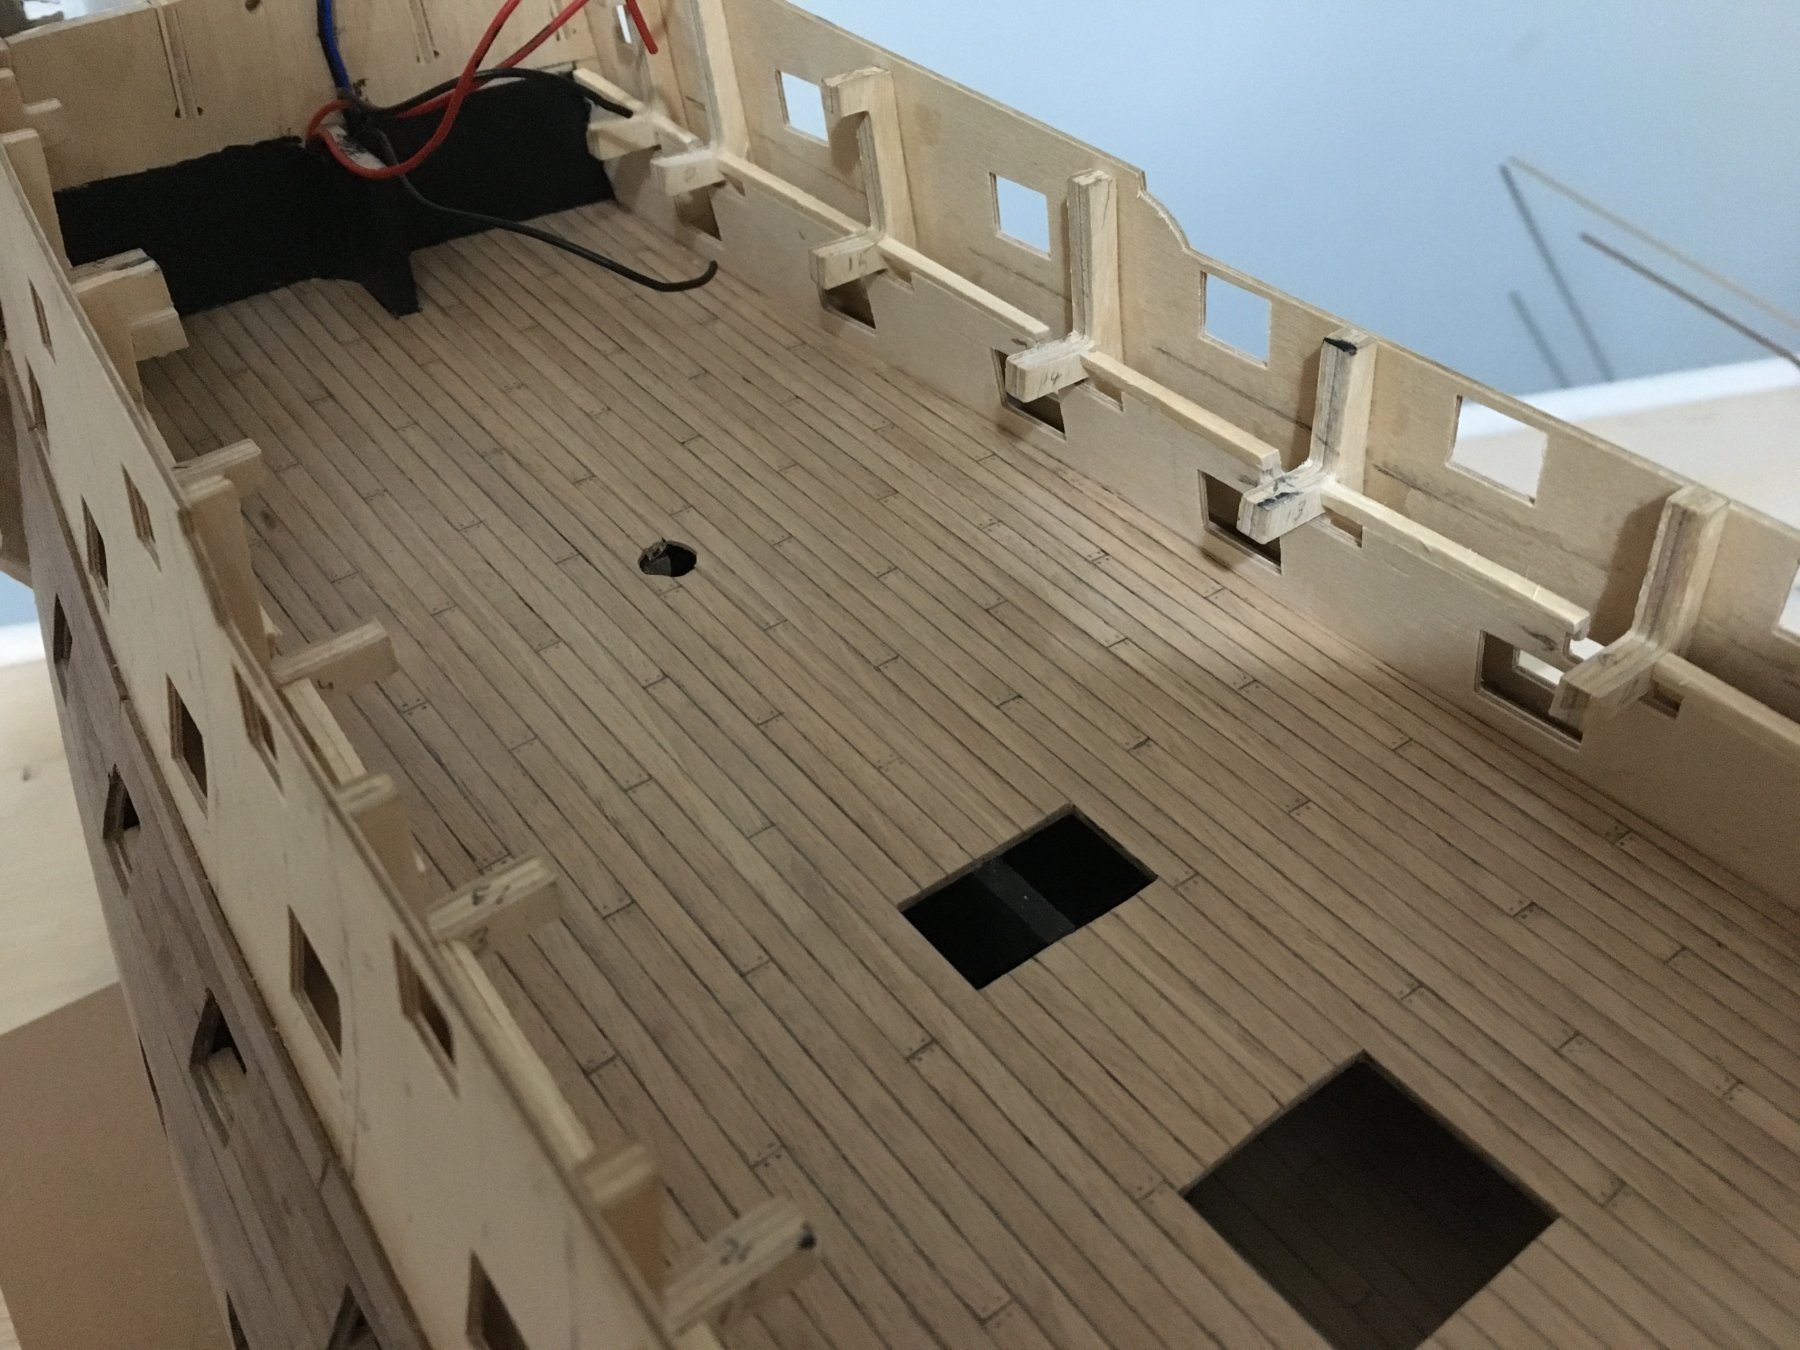
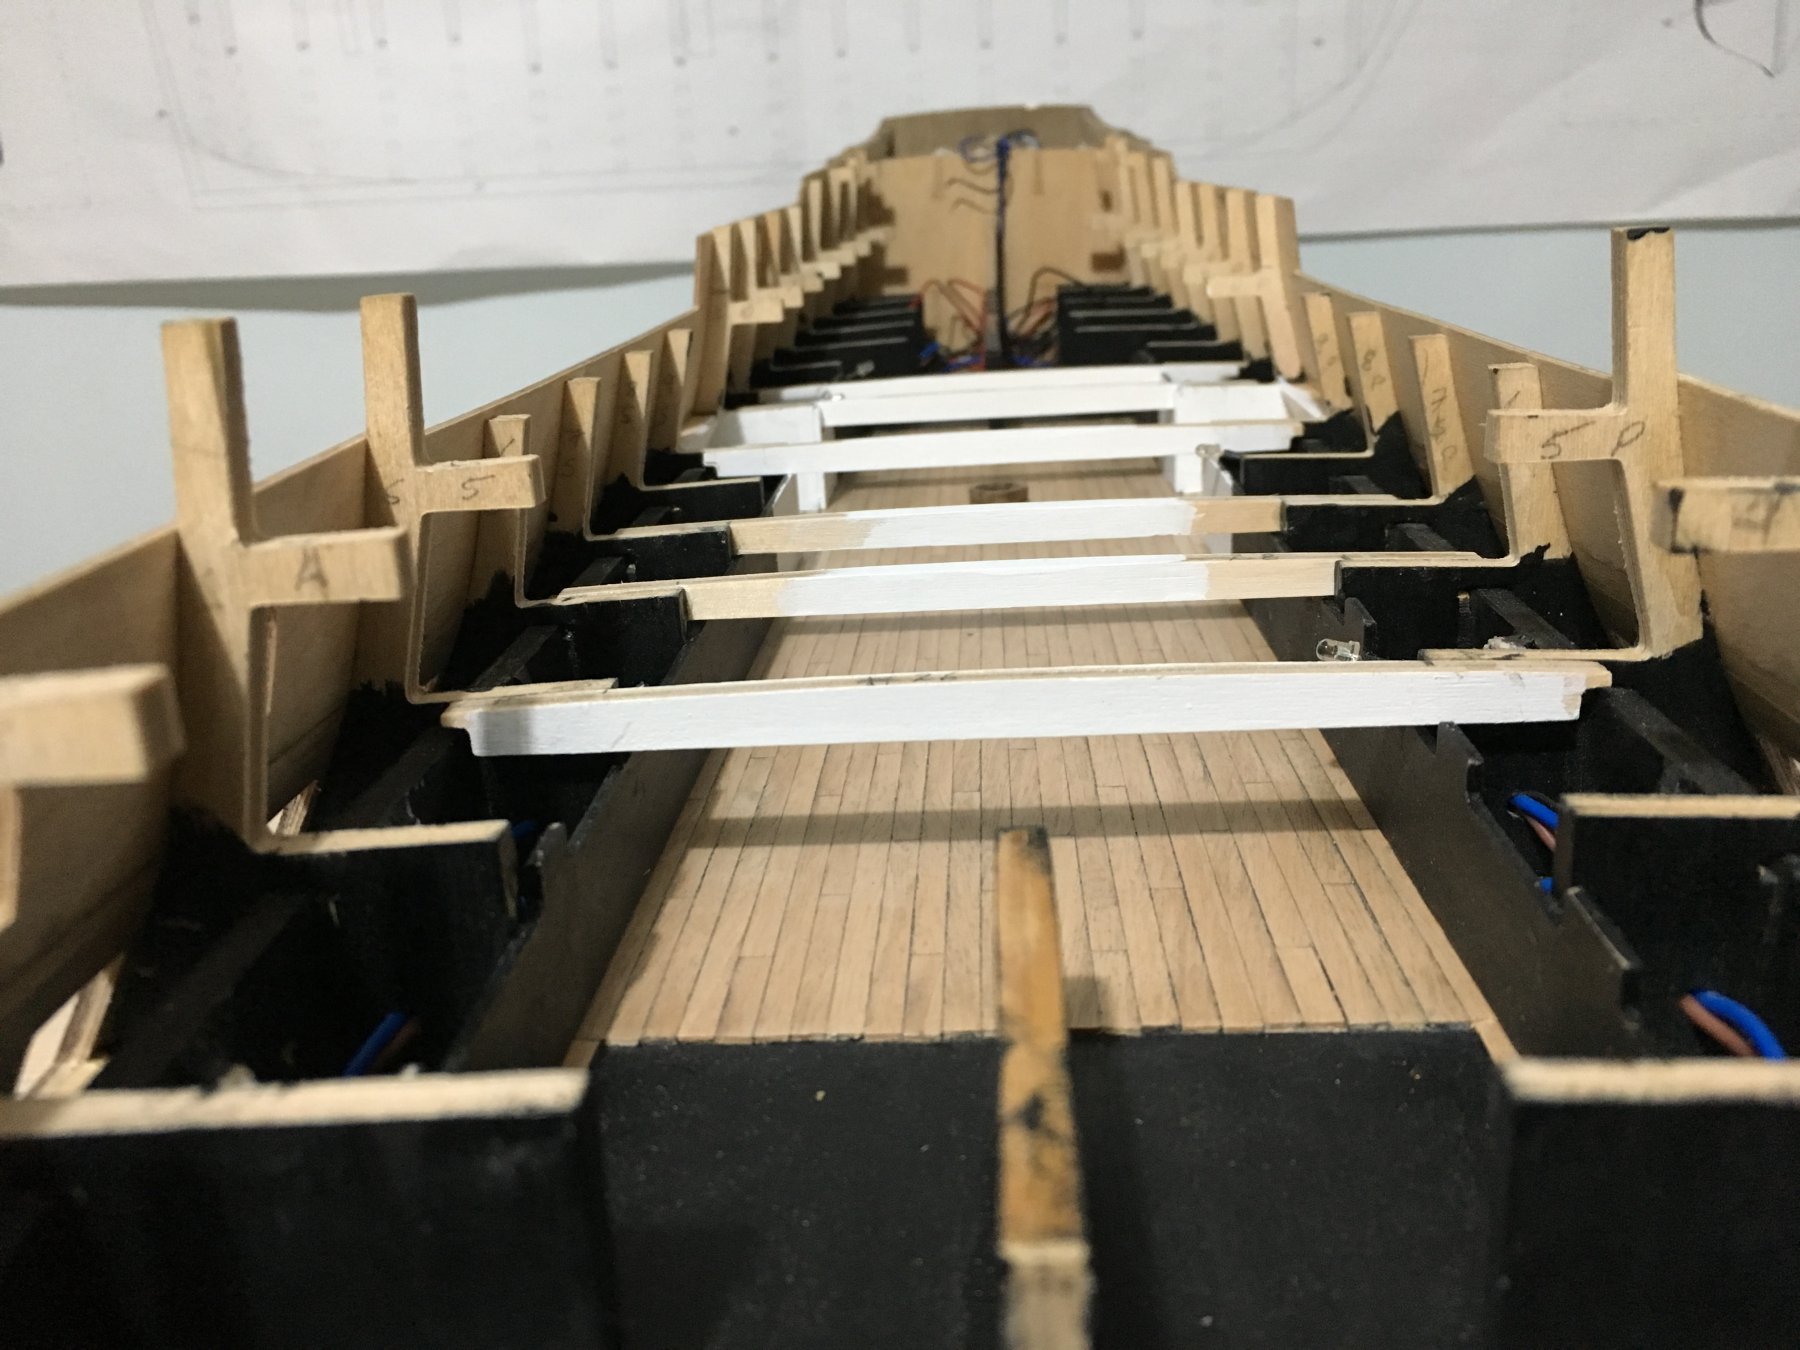
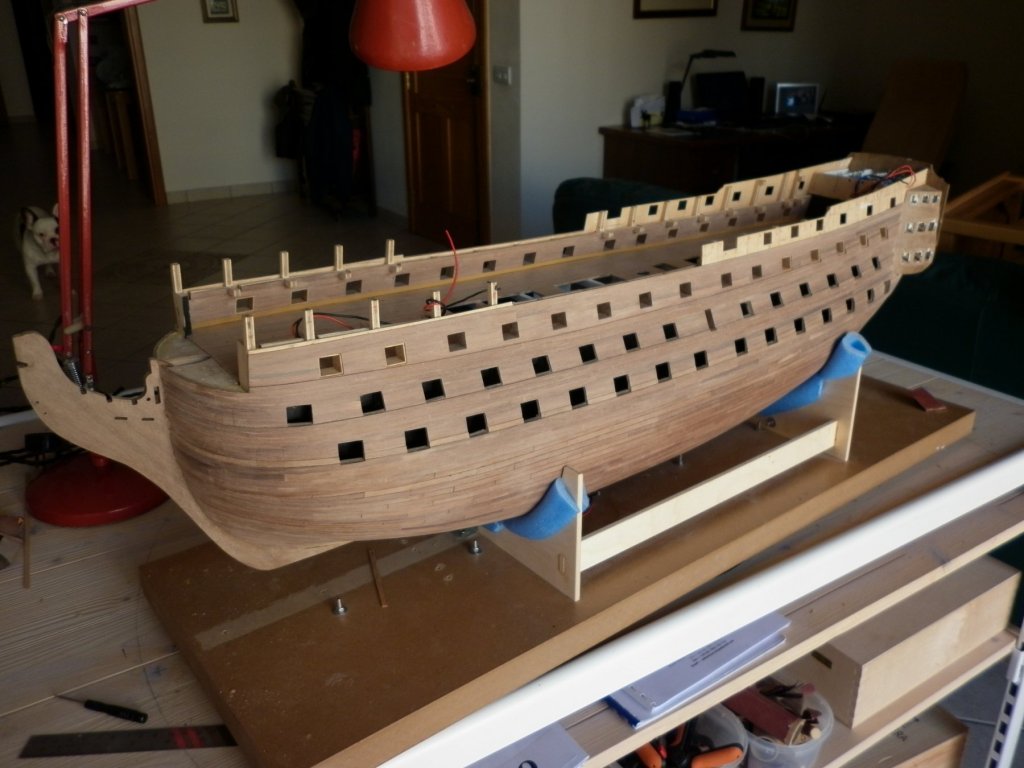
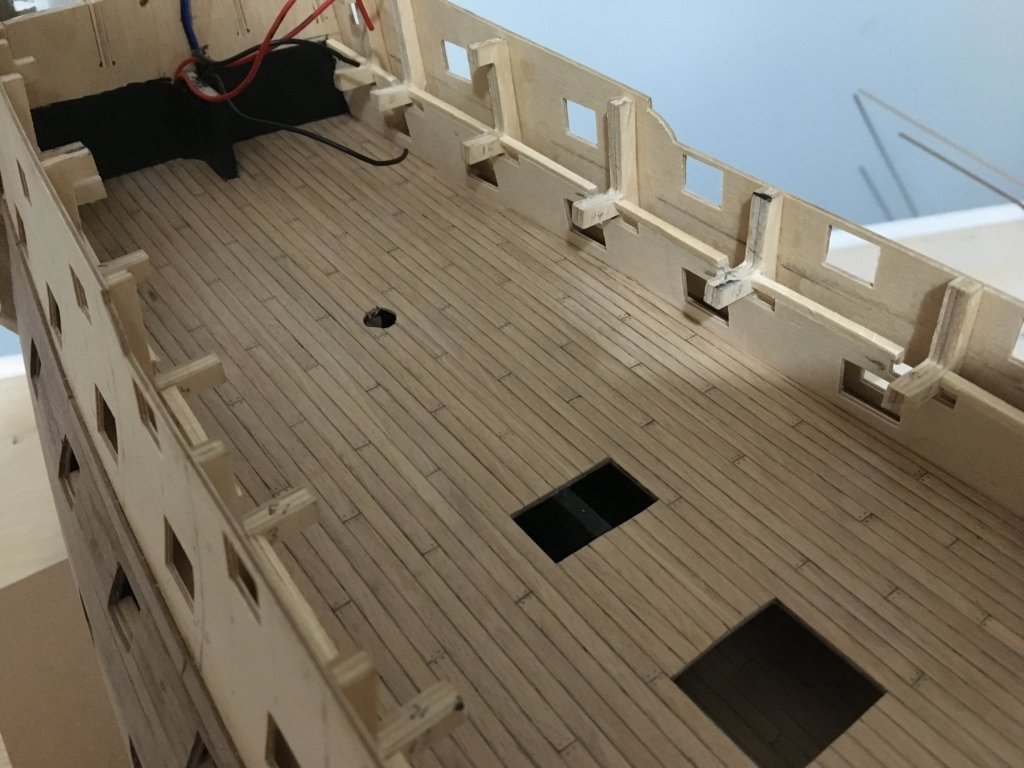
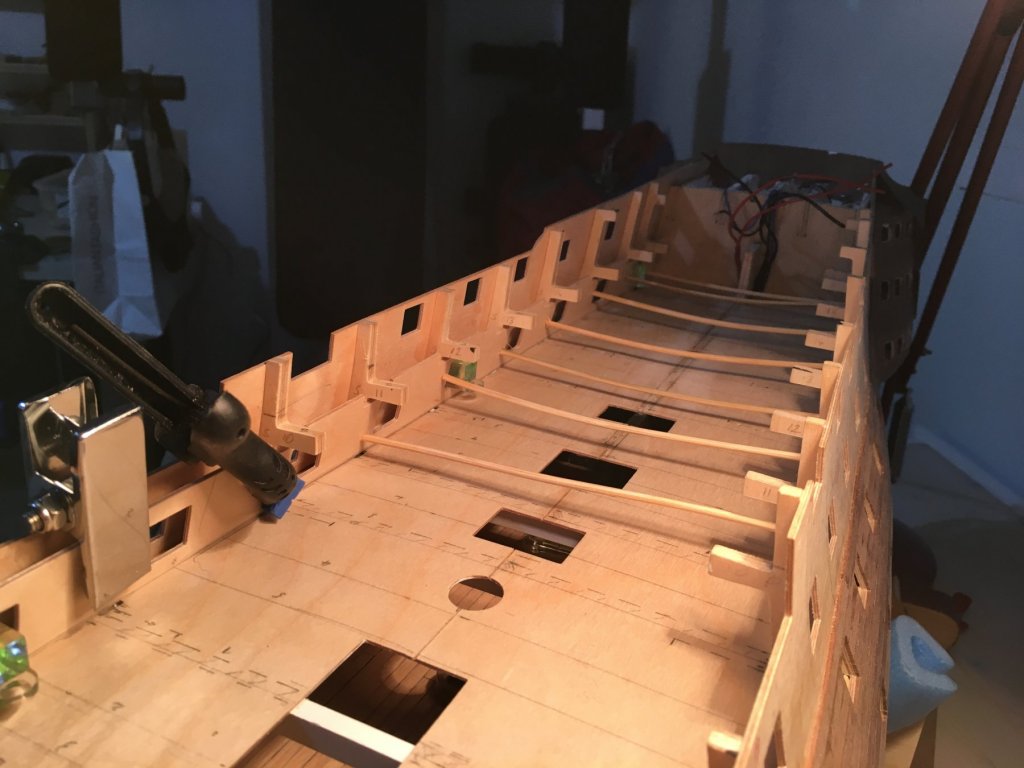
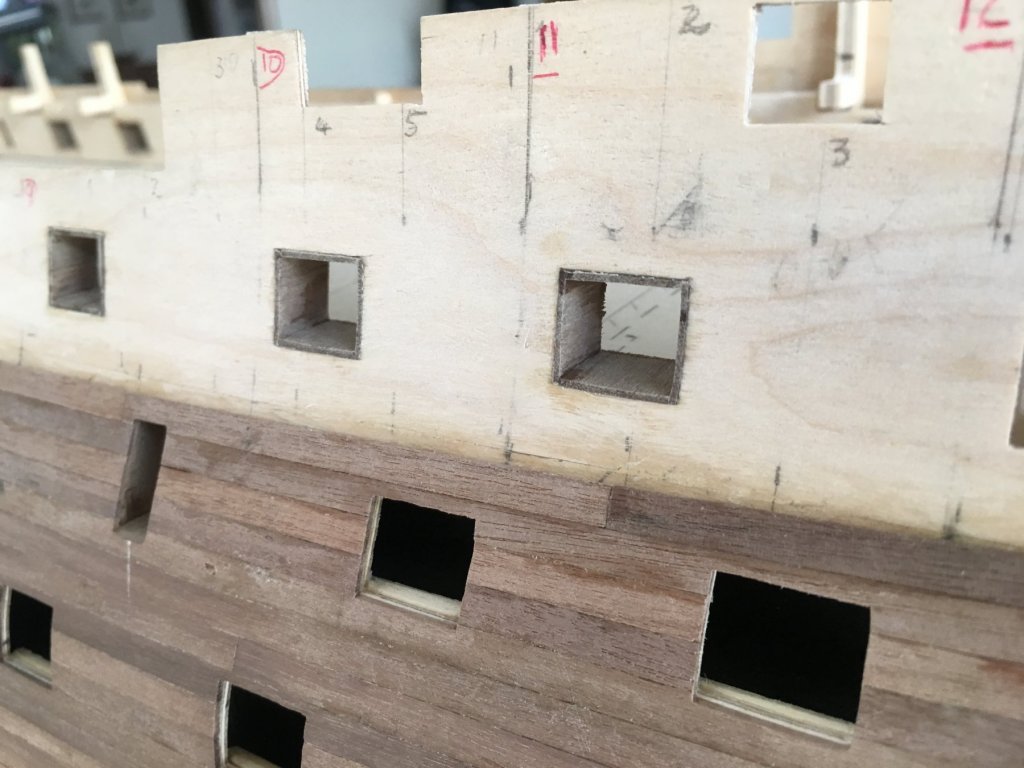
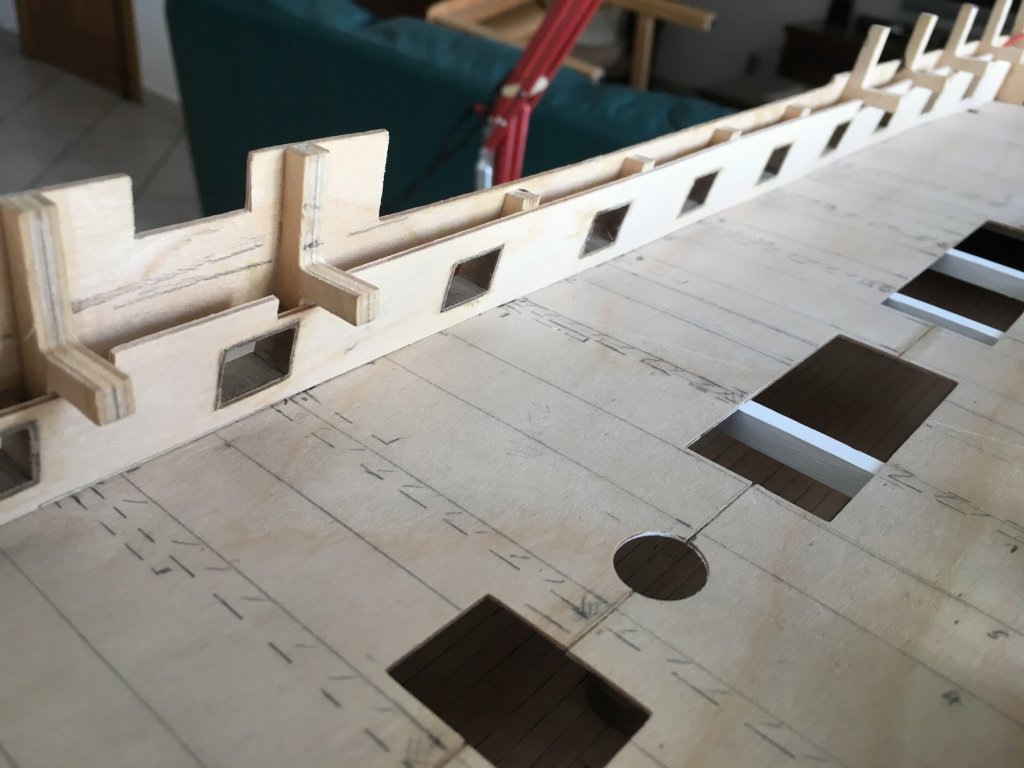
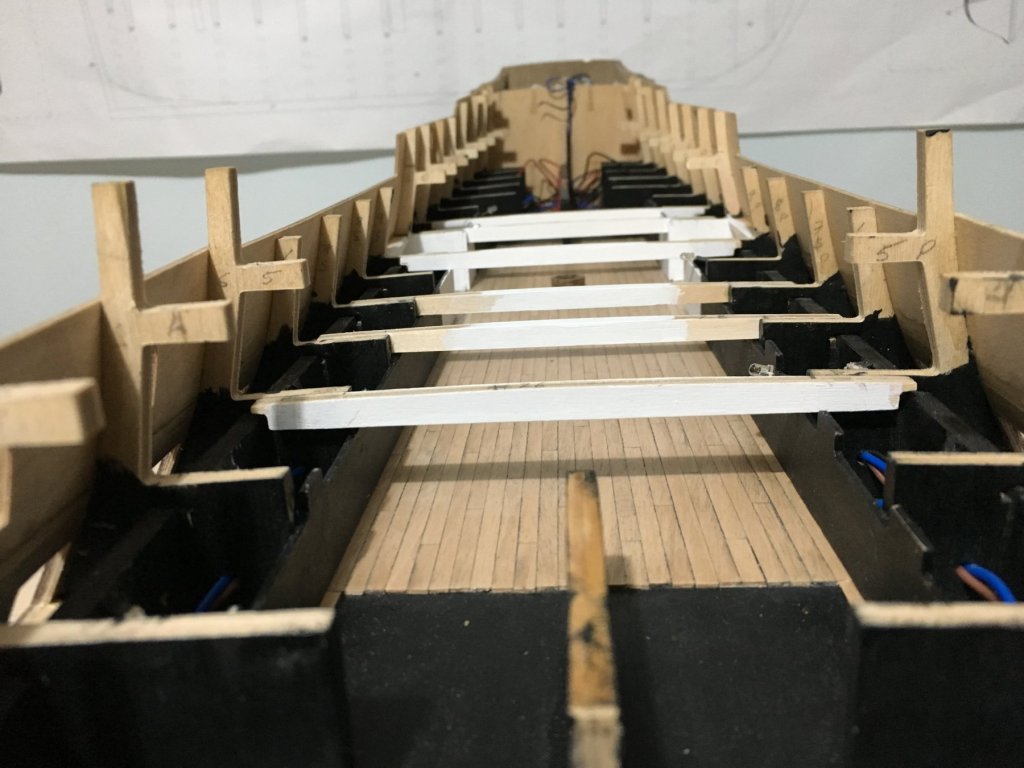
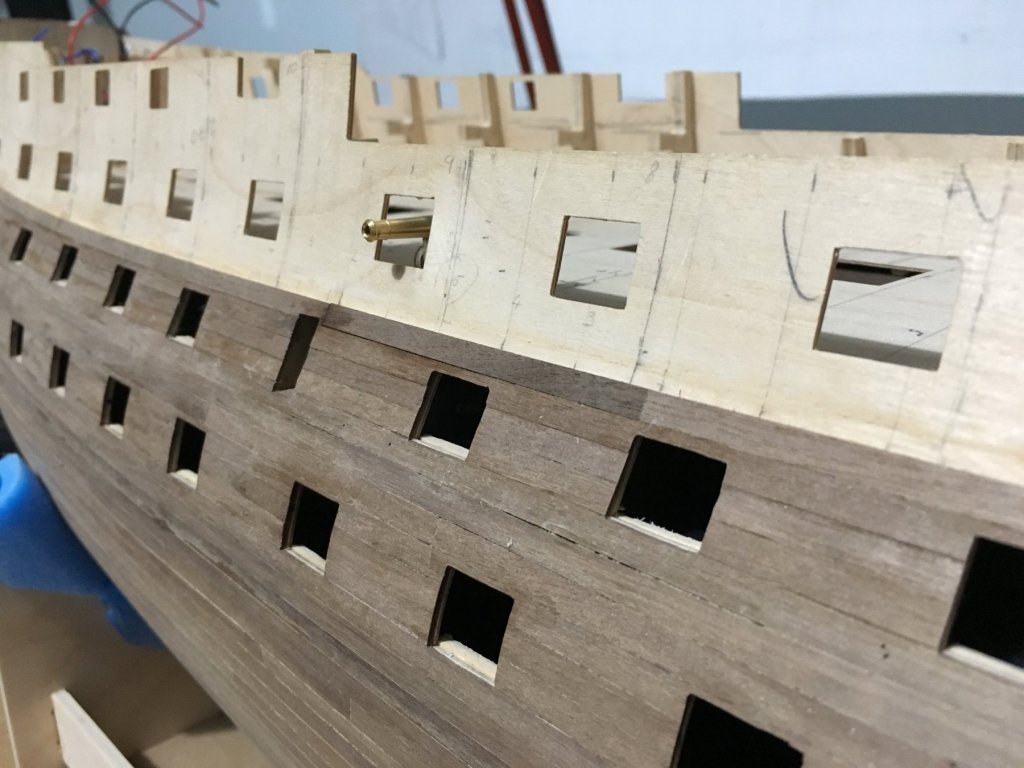
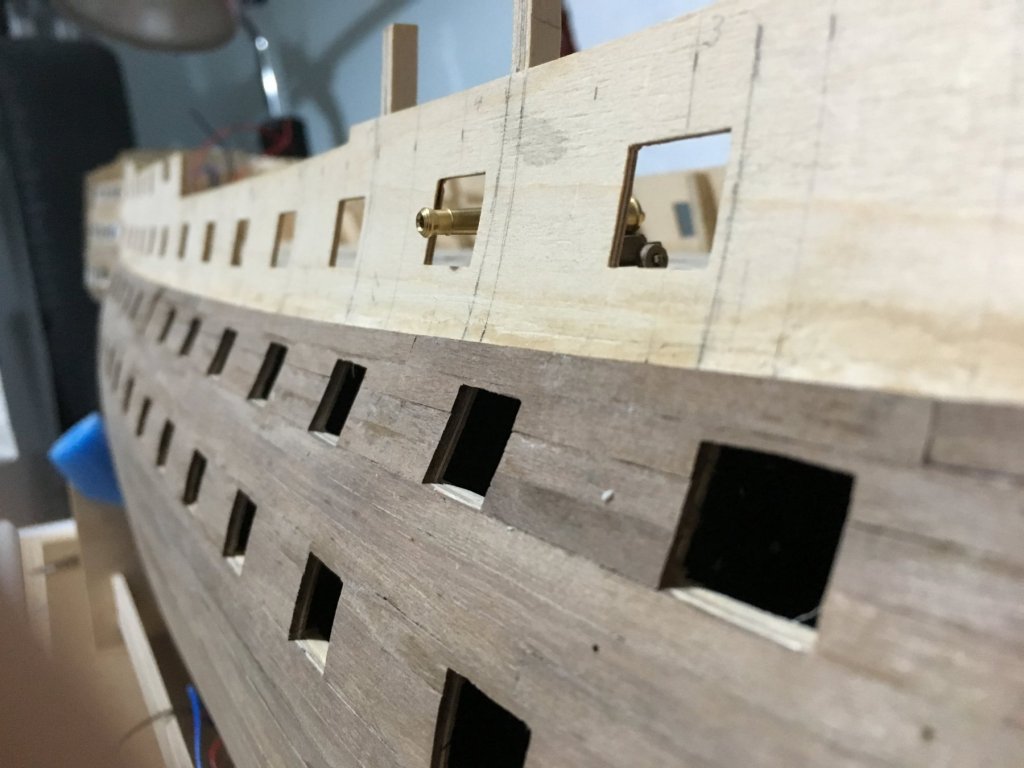
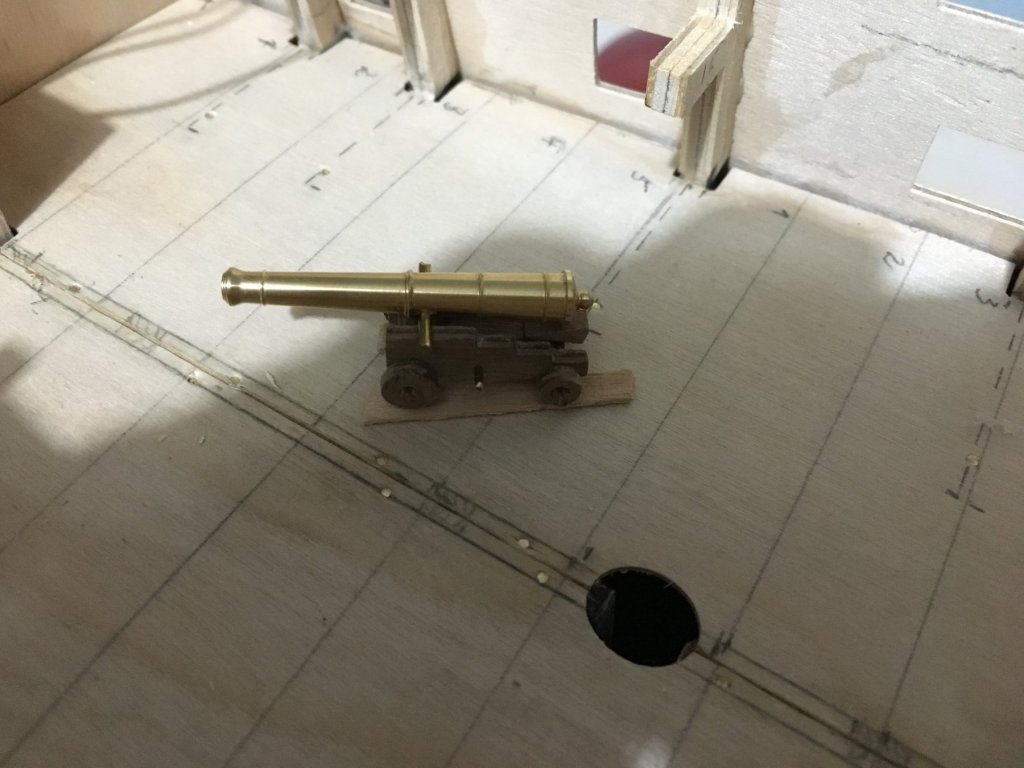
Fitted the upper gun deck. Since I am putting in lights inside the middle gun deck I tried them on before closing with the upper gun deck. Realised that from the outside, looking through the gun ports a light strip was showing coming underneath the dummy barrel strips, so I fitted some strips behind the dummy barrel strips to barrier the light. Also added some detail next to the inside of the entry ports that can show when the lights are on. Beams in place Fitted half the deck. When I tried the deck as a whole peace you have to bend it so much to put it in that I still can’t believe it did not break in two. You have to trim it and check in place so I decided it was not worth the risk so I split it in two halves with a Stanley knife. Work was much easier like that. Fitted the other half. Where possible I used nails but where not possible I used supports to hold the deck in place until glue was dry. On the beams I avoided using nails. Just a few places where there were no beams and because I split it in two, some reinforcement was needed. Glued a piece of thin plywood from underneath. Deck ready in place Looking through the entry ports. Dry fitted one of the cannon carriages, fitted two piece of the deck planks underneath and checked if the cannons are centred in the gun ports. They seem to be perfect. There is also a way how you can fine tune the height position of the cannons. When building the carriages, there is a piece called Quoin (165) which is fitted on the carriage just under the back of the cannon. Don’t glue this, glue it when you are placing the carriages in place on the deck. By moving this quoin forward or backwards the cannon will tilt up or down. Next step is fitting the gun deck inner bulwark gunport pattern. From what I can see, to get the gun port openings on the inner pattern in line with those of the outer pattern, a lot of trimming is needed on the lower edge of the inner pattern. But that is no problem as it will be planked. The problem would have been if the cannons were not the right height with the gun port opening on the outer pattern. Robert


- 527 replies
-
- 8
-
-
- caldercraft
- victory
- (and 1 more)
-
Nigel, Thank you for your nice comment. You are most welcome. Michael, Thank you for your nice comment as well. Maybe they are a bit inflated but I try my best!!!! Robert
- 527 replies
-
- 2
-
-
- caldercraft
- victory
- (and 1 more)
-
Graham you keep amazing me with the jigs you make. Robert
-
Heinz, I know what you mean, it is not a question of what is right and what is wrong, it is a matter of taste. I have seen models copper plated which are beautiful and others wood finished, both marvellous. Yours is beautiful. Michael Zemmel That's it Michael, I made the second planking with the intention of finishing it in wood, so it was much more work to scale and bend the planks to get the best finish I could. Now to cover everything is such a waste. To get that finish I am already half way to the padded cell, if I start copper plating now, I think I have to finish the Victory in the padded cell. Robert
- 527 replies
-
- 1
-
-
- caldercraft
- victory
- (and 1 more)
-
Thank you very much for the likes. Heinz and Scott thank you for your nice comments. I am still hesitant if to finish the lower part of the hull in wood or to copper plate. On one side I think it should be copper plated as that is the actual finish of HMS Victory, on the other hand I prefer it on a wood finish. If I copper plate all the work taken to run the planks as neat as possible will be a waste to cover with copper plates now. Any suggestions!!!! Robert
-
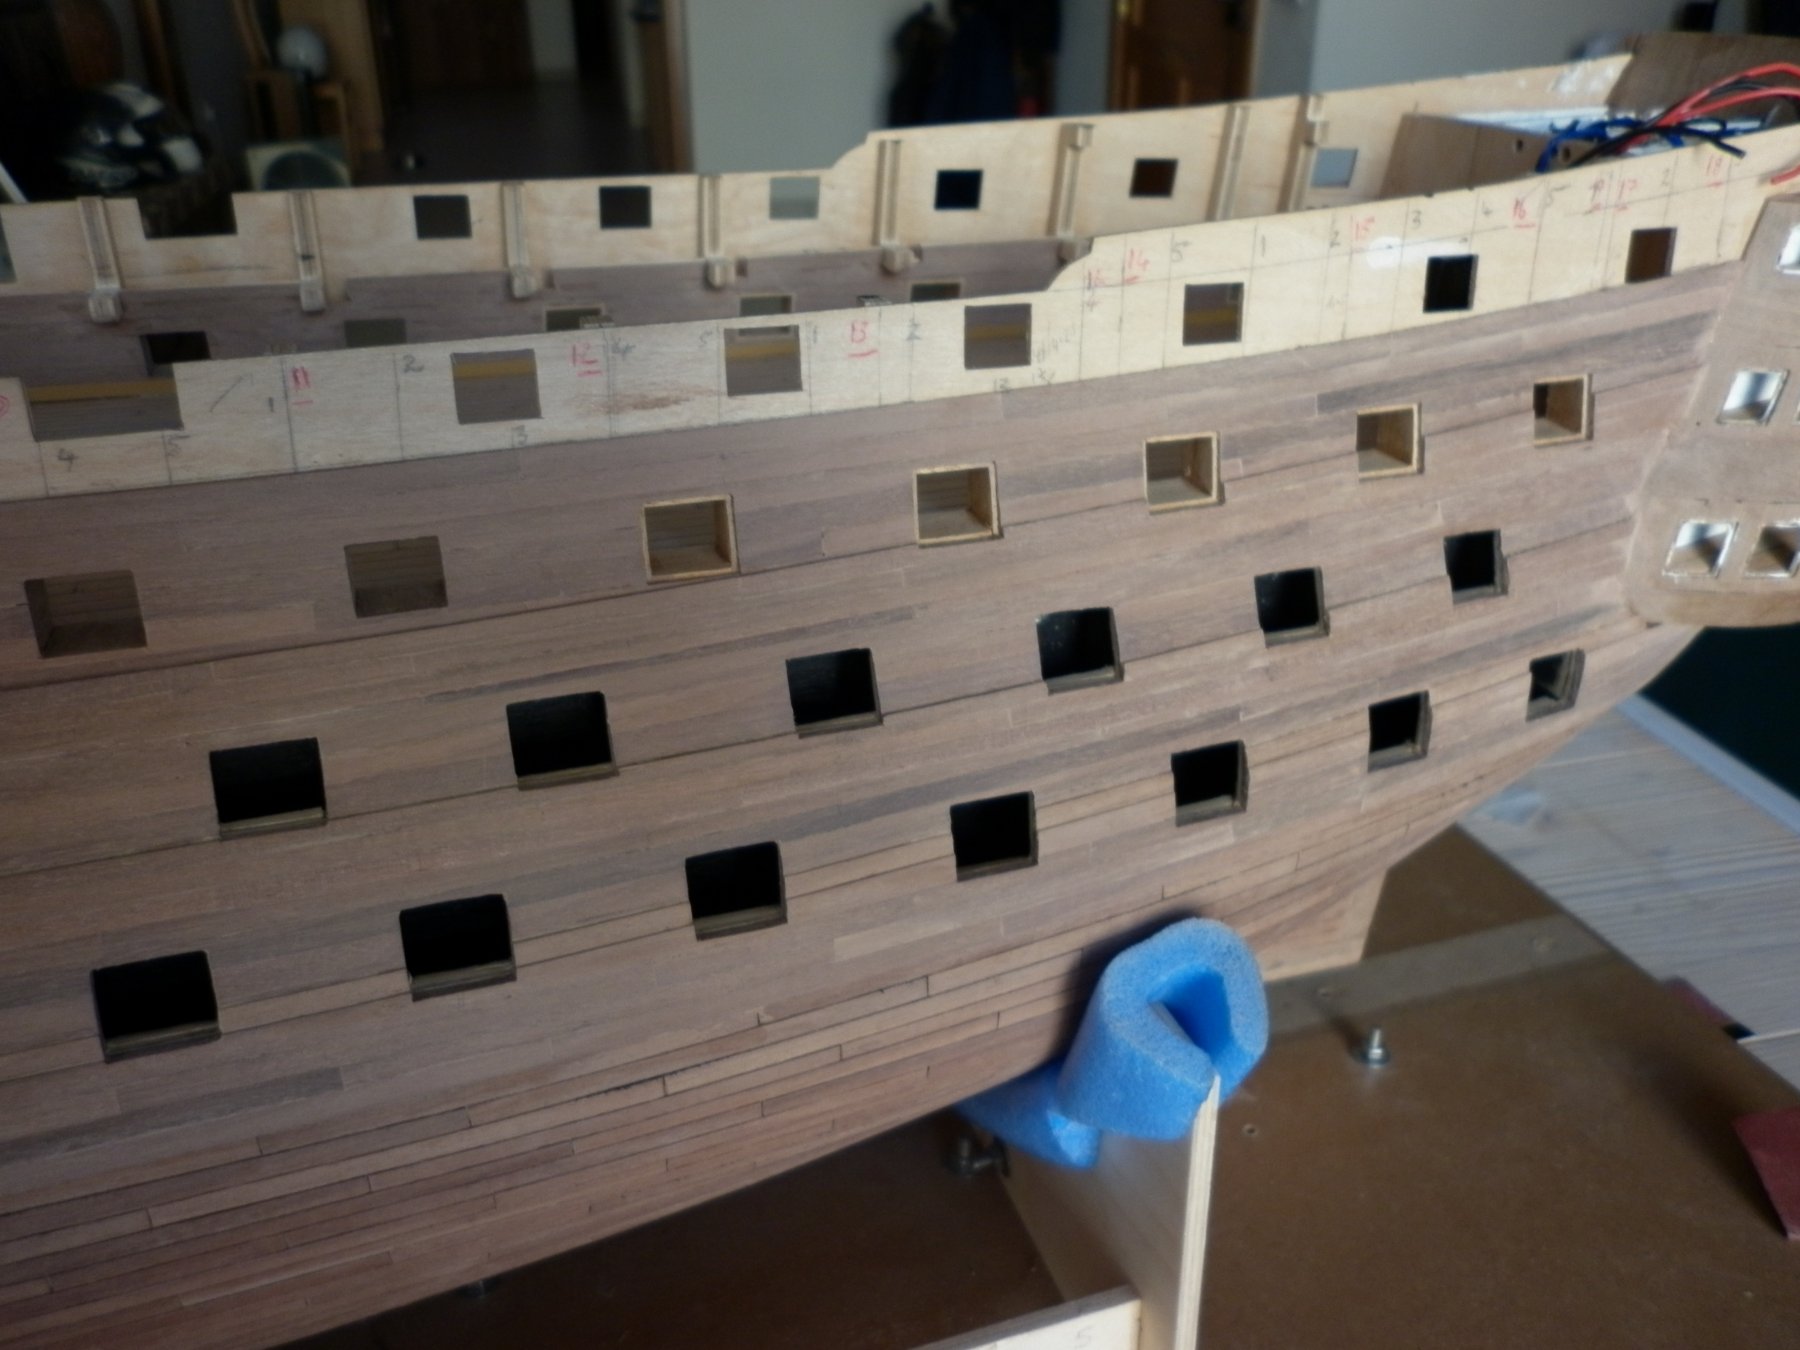
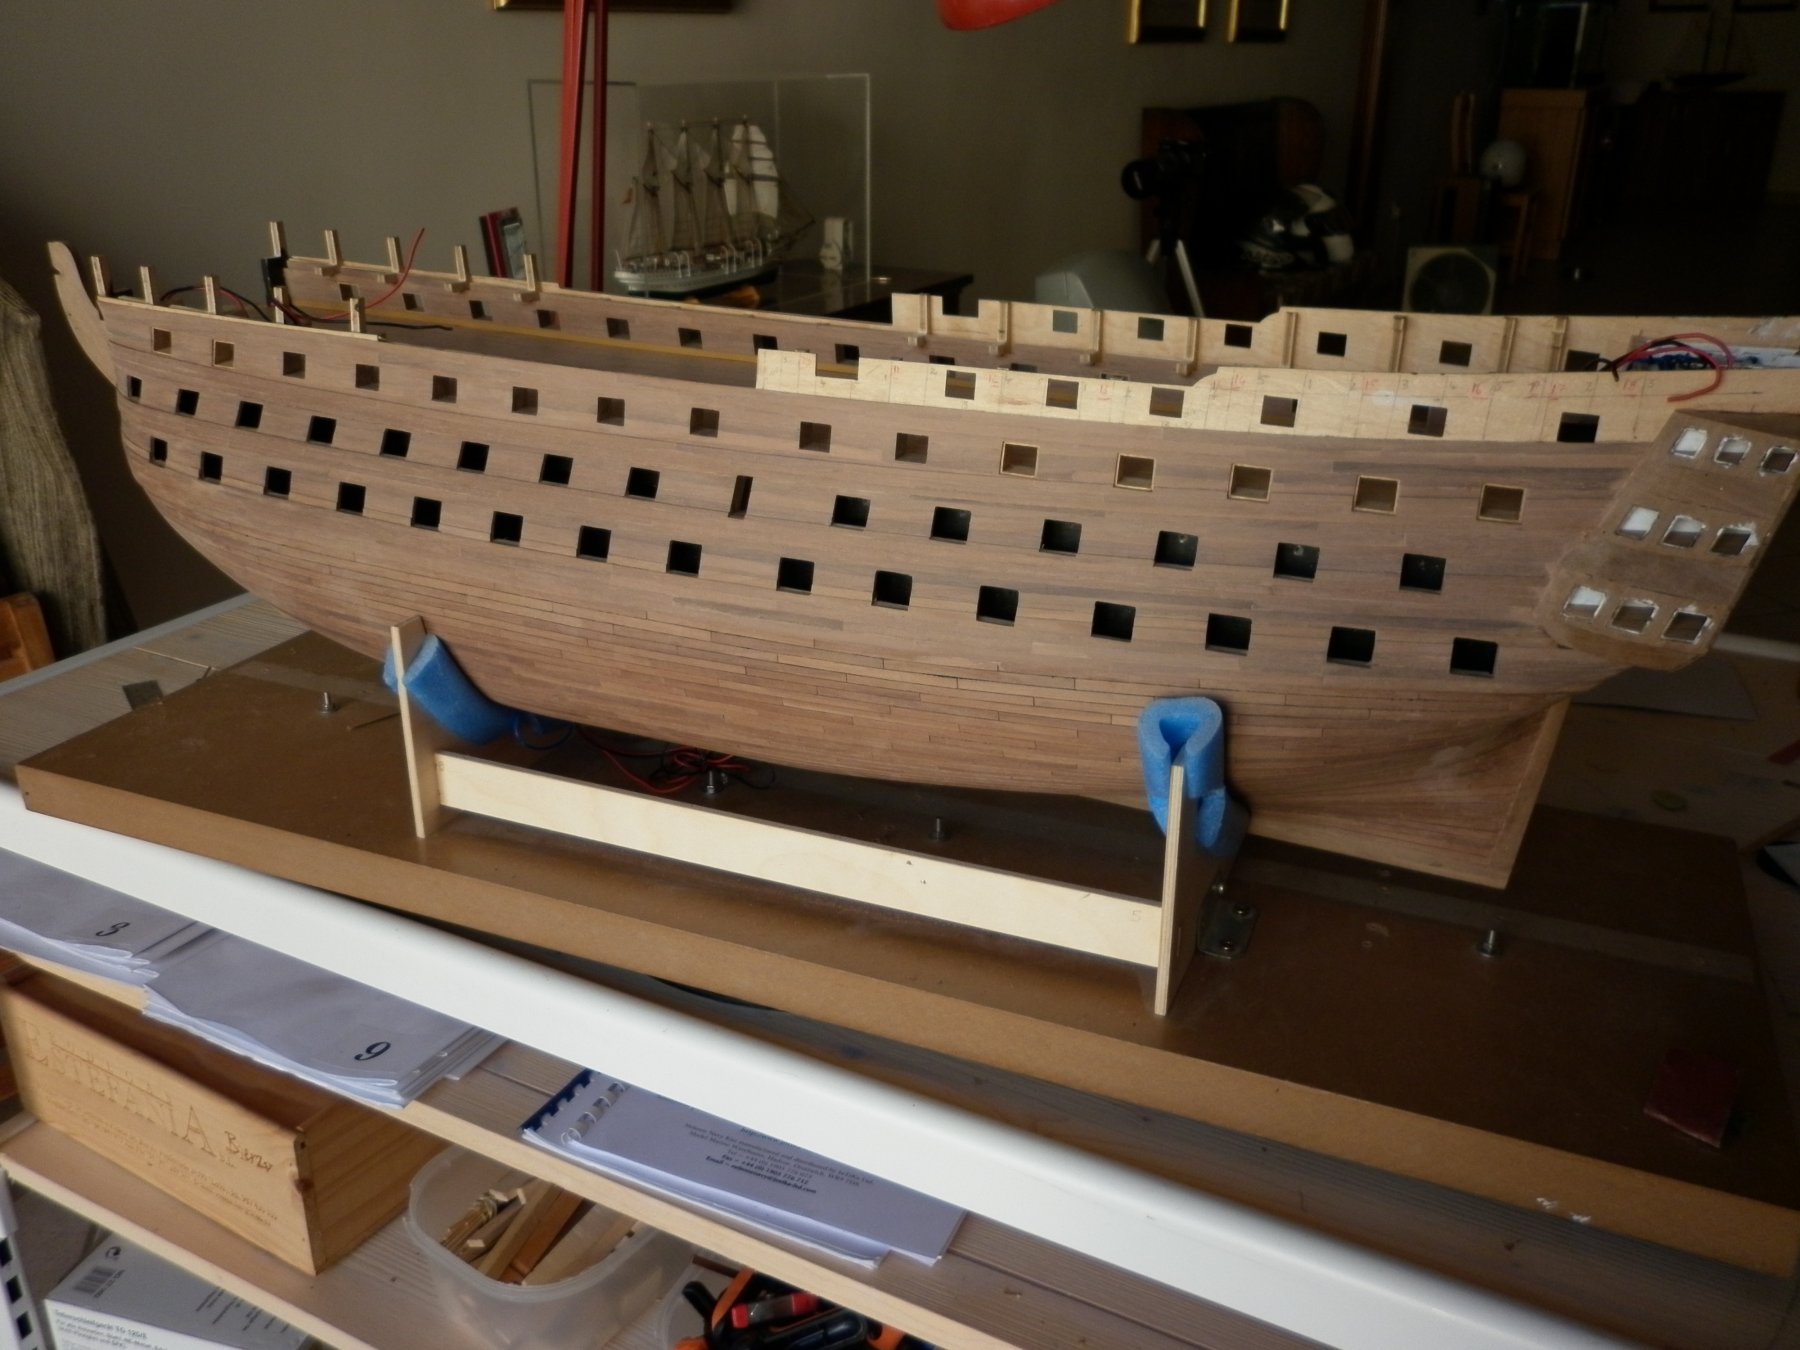
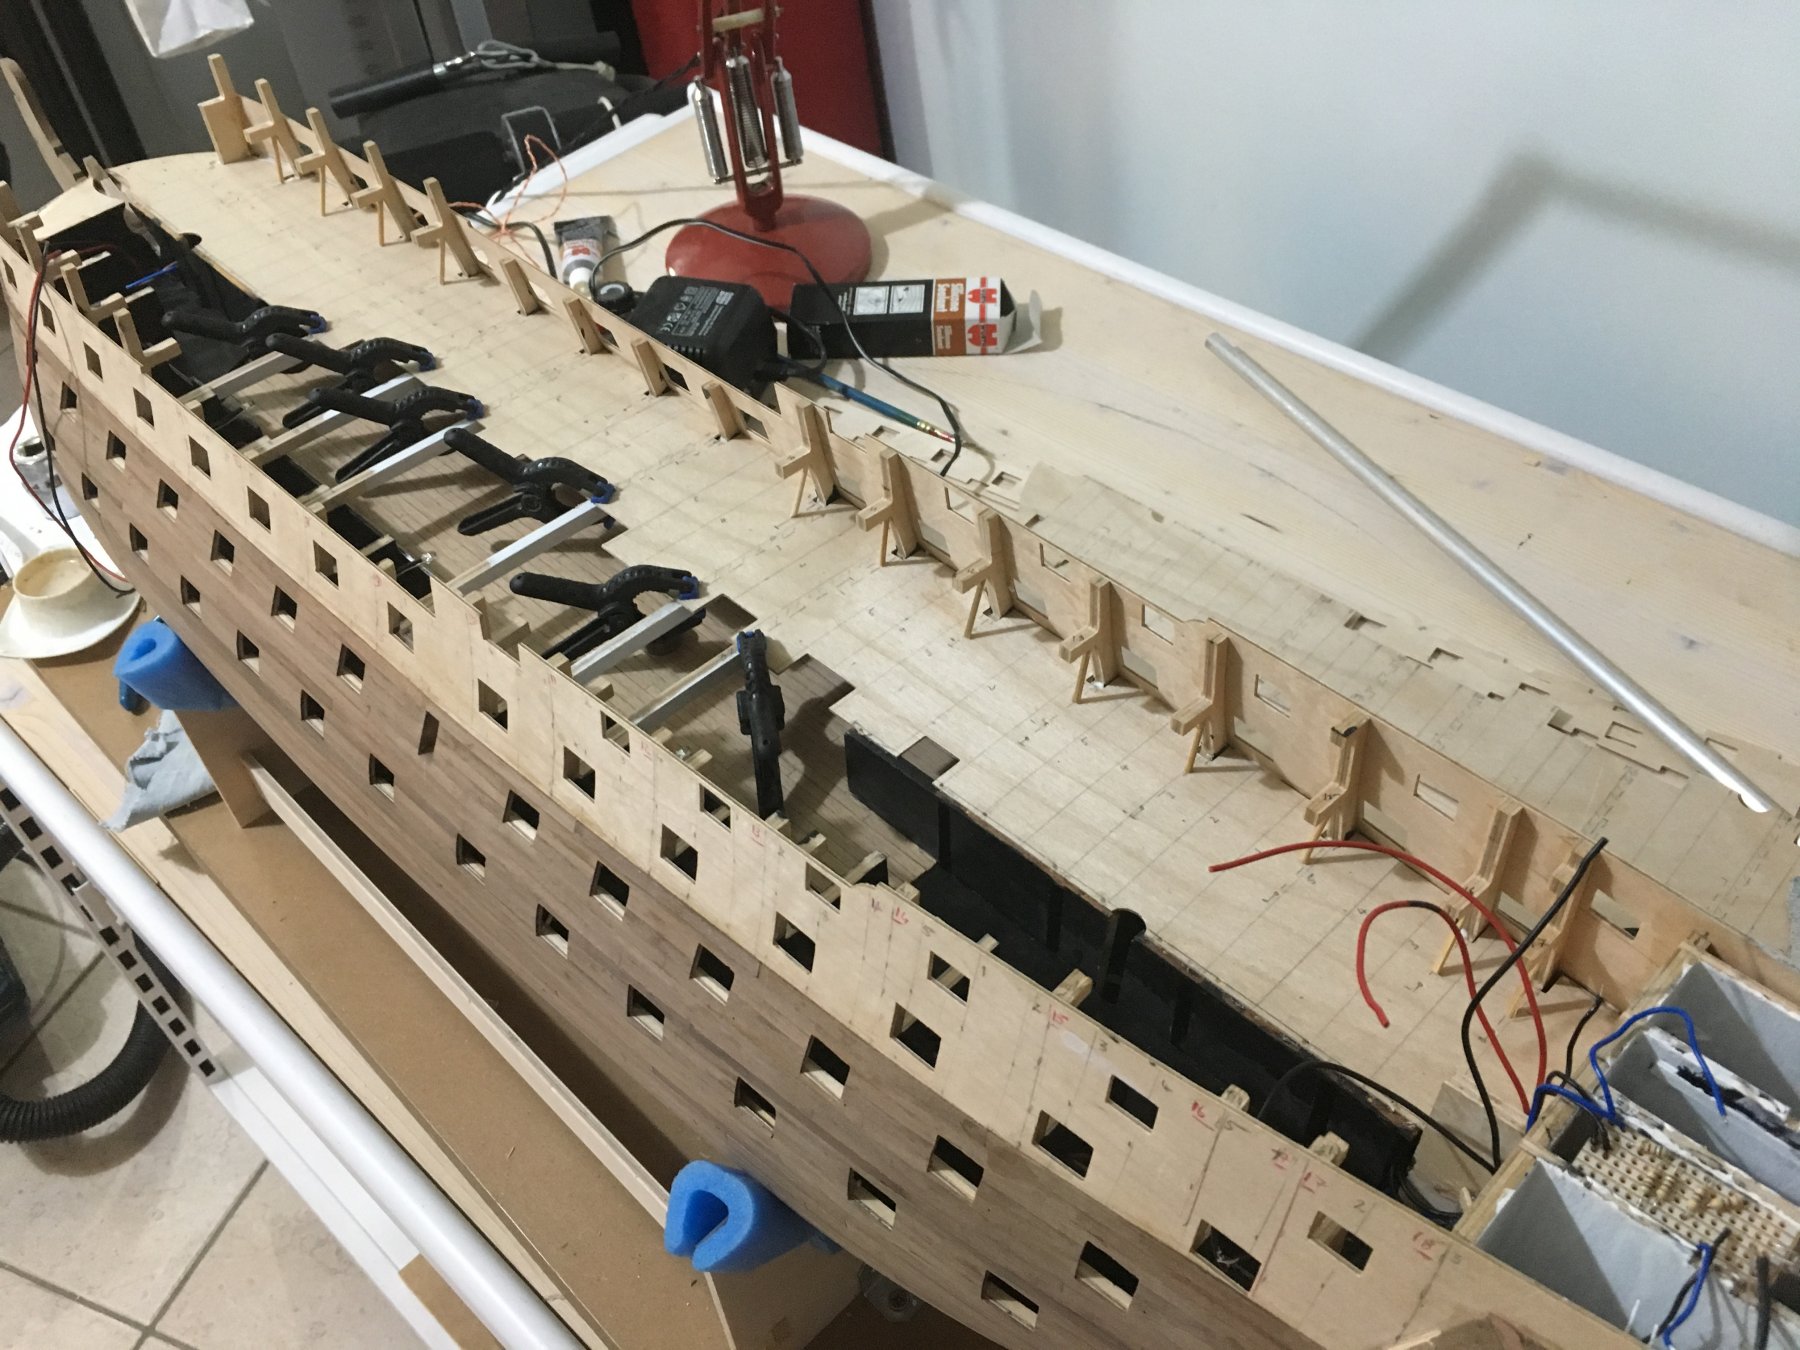
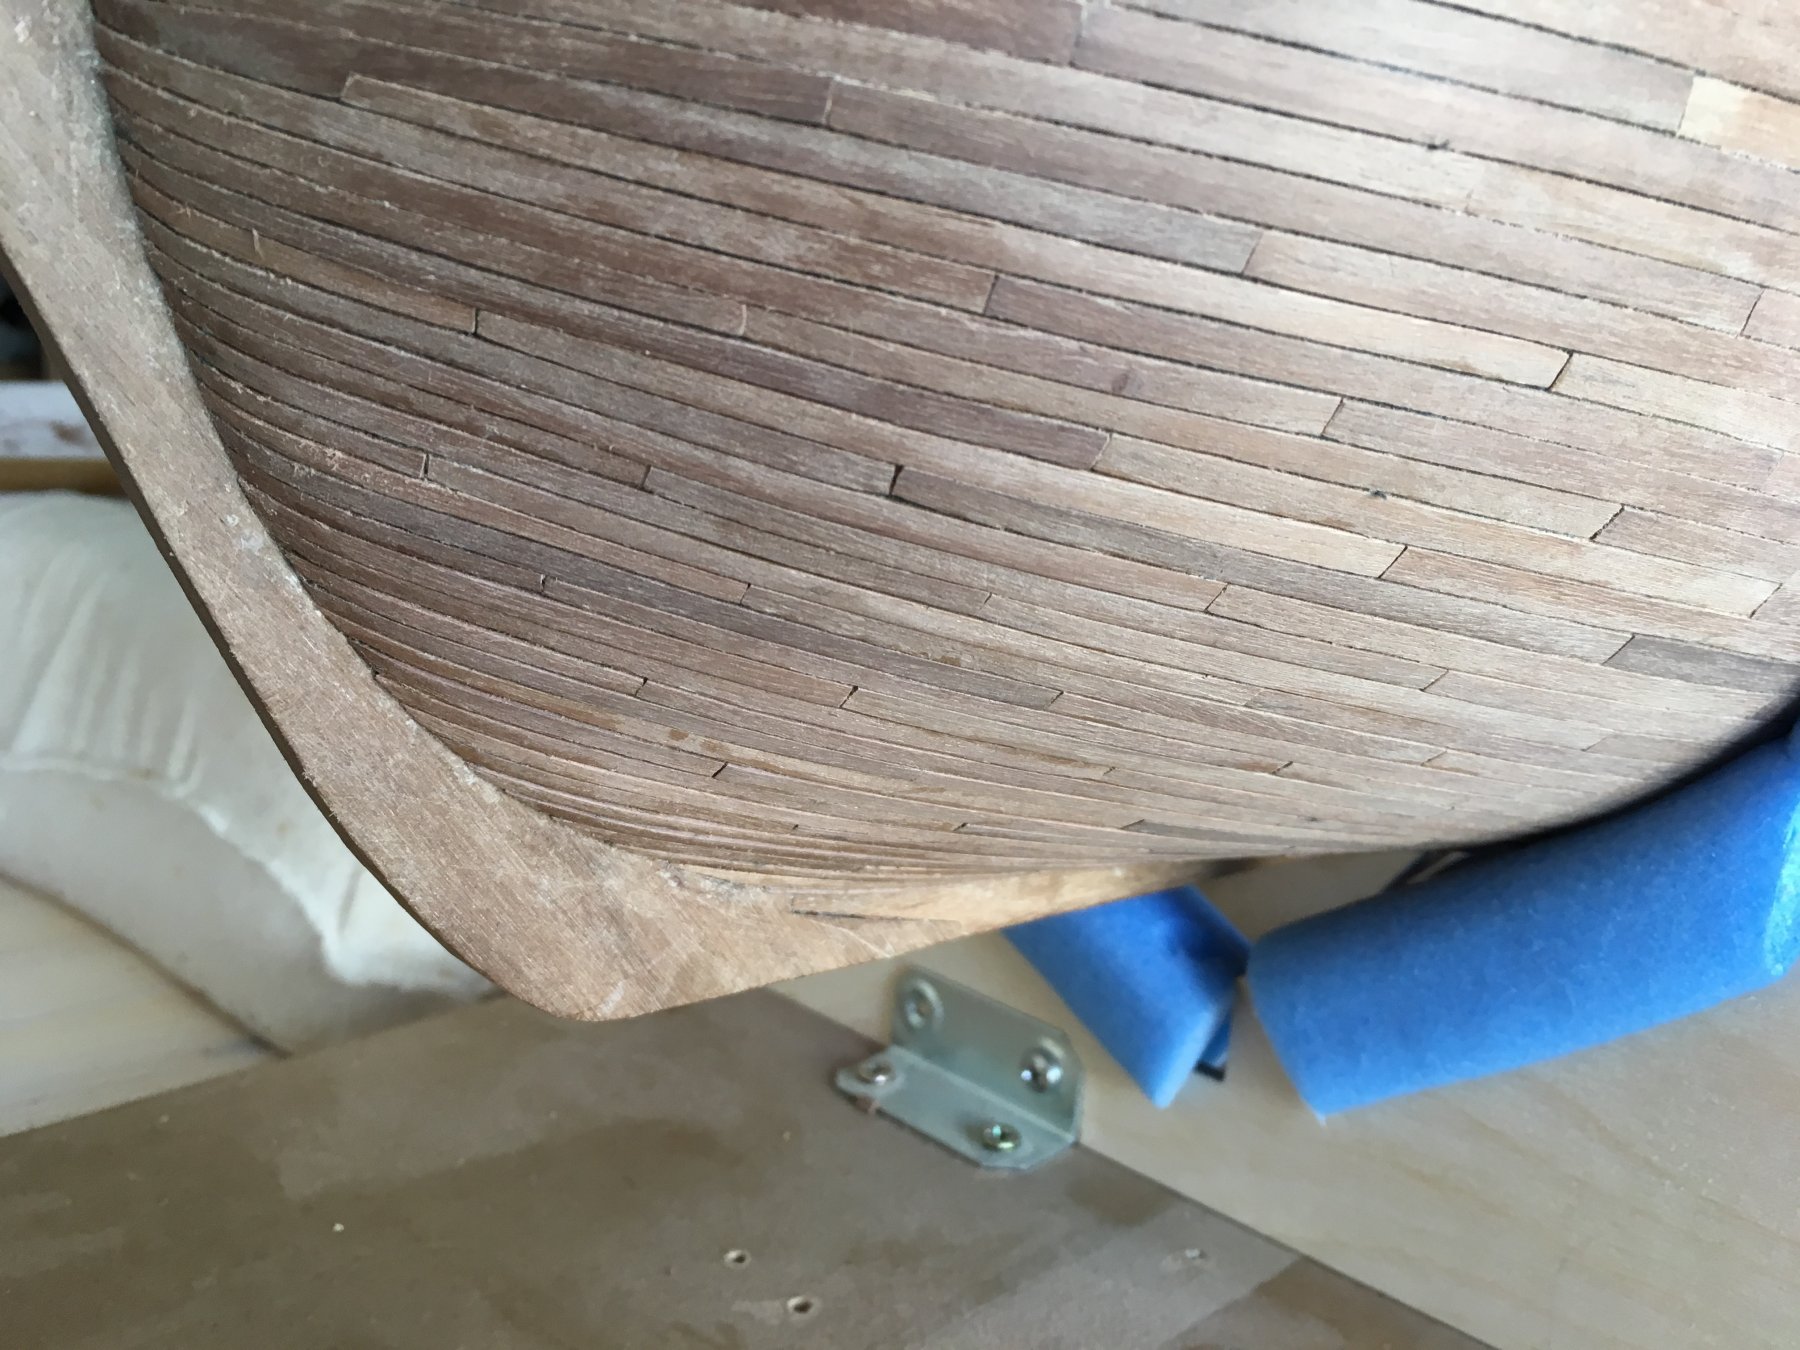
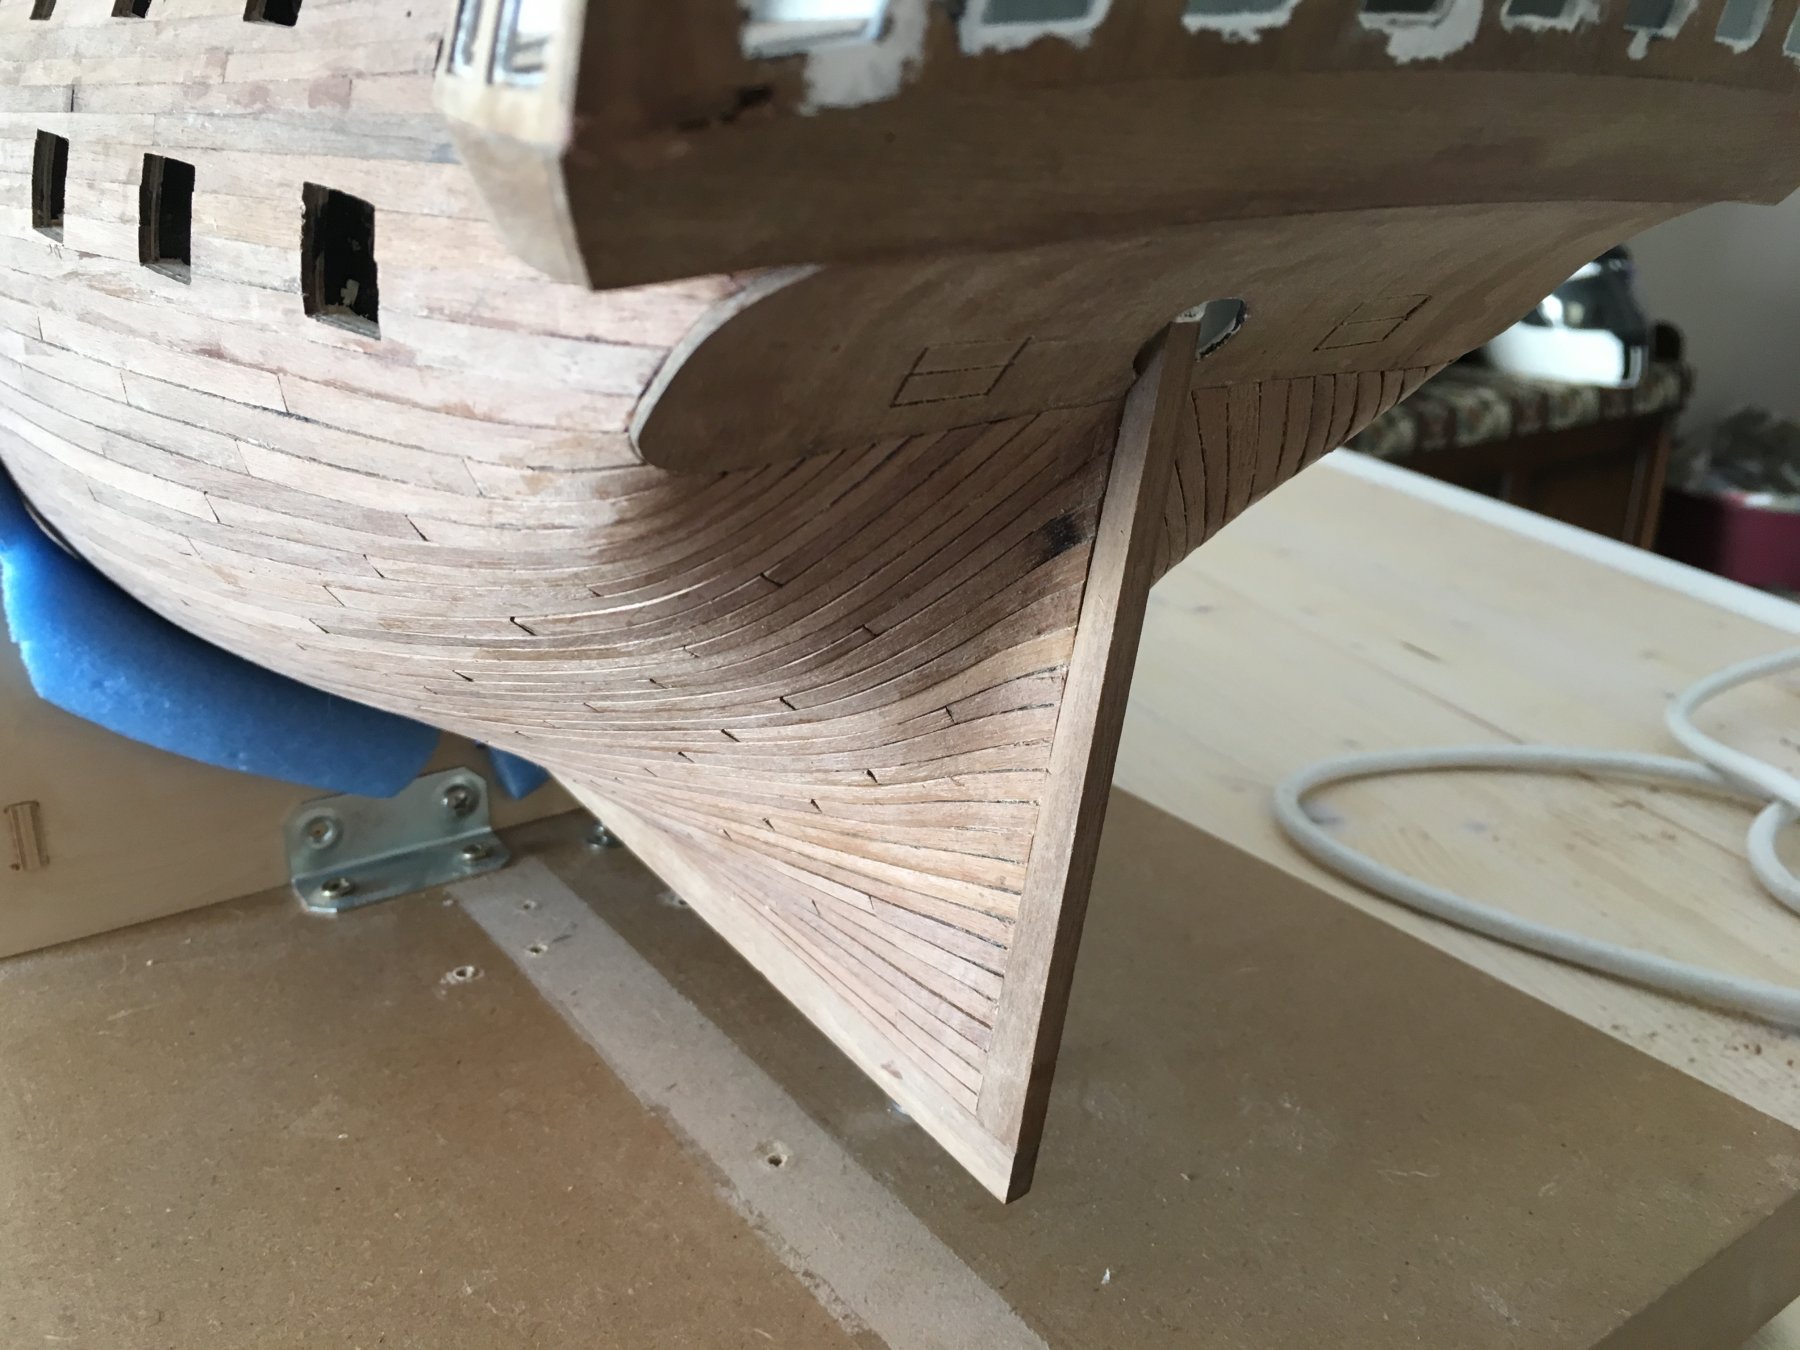
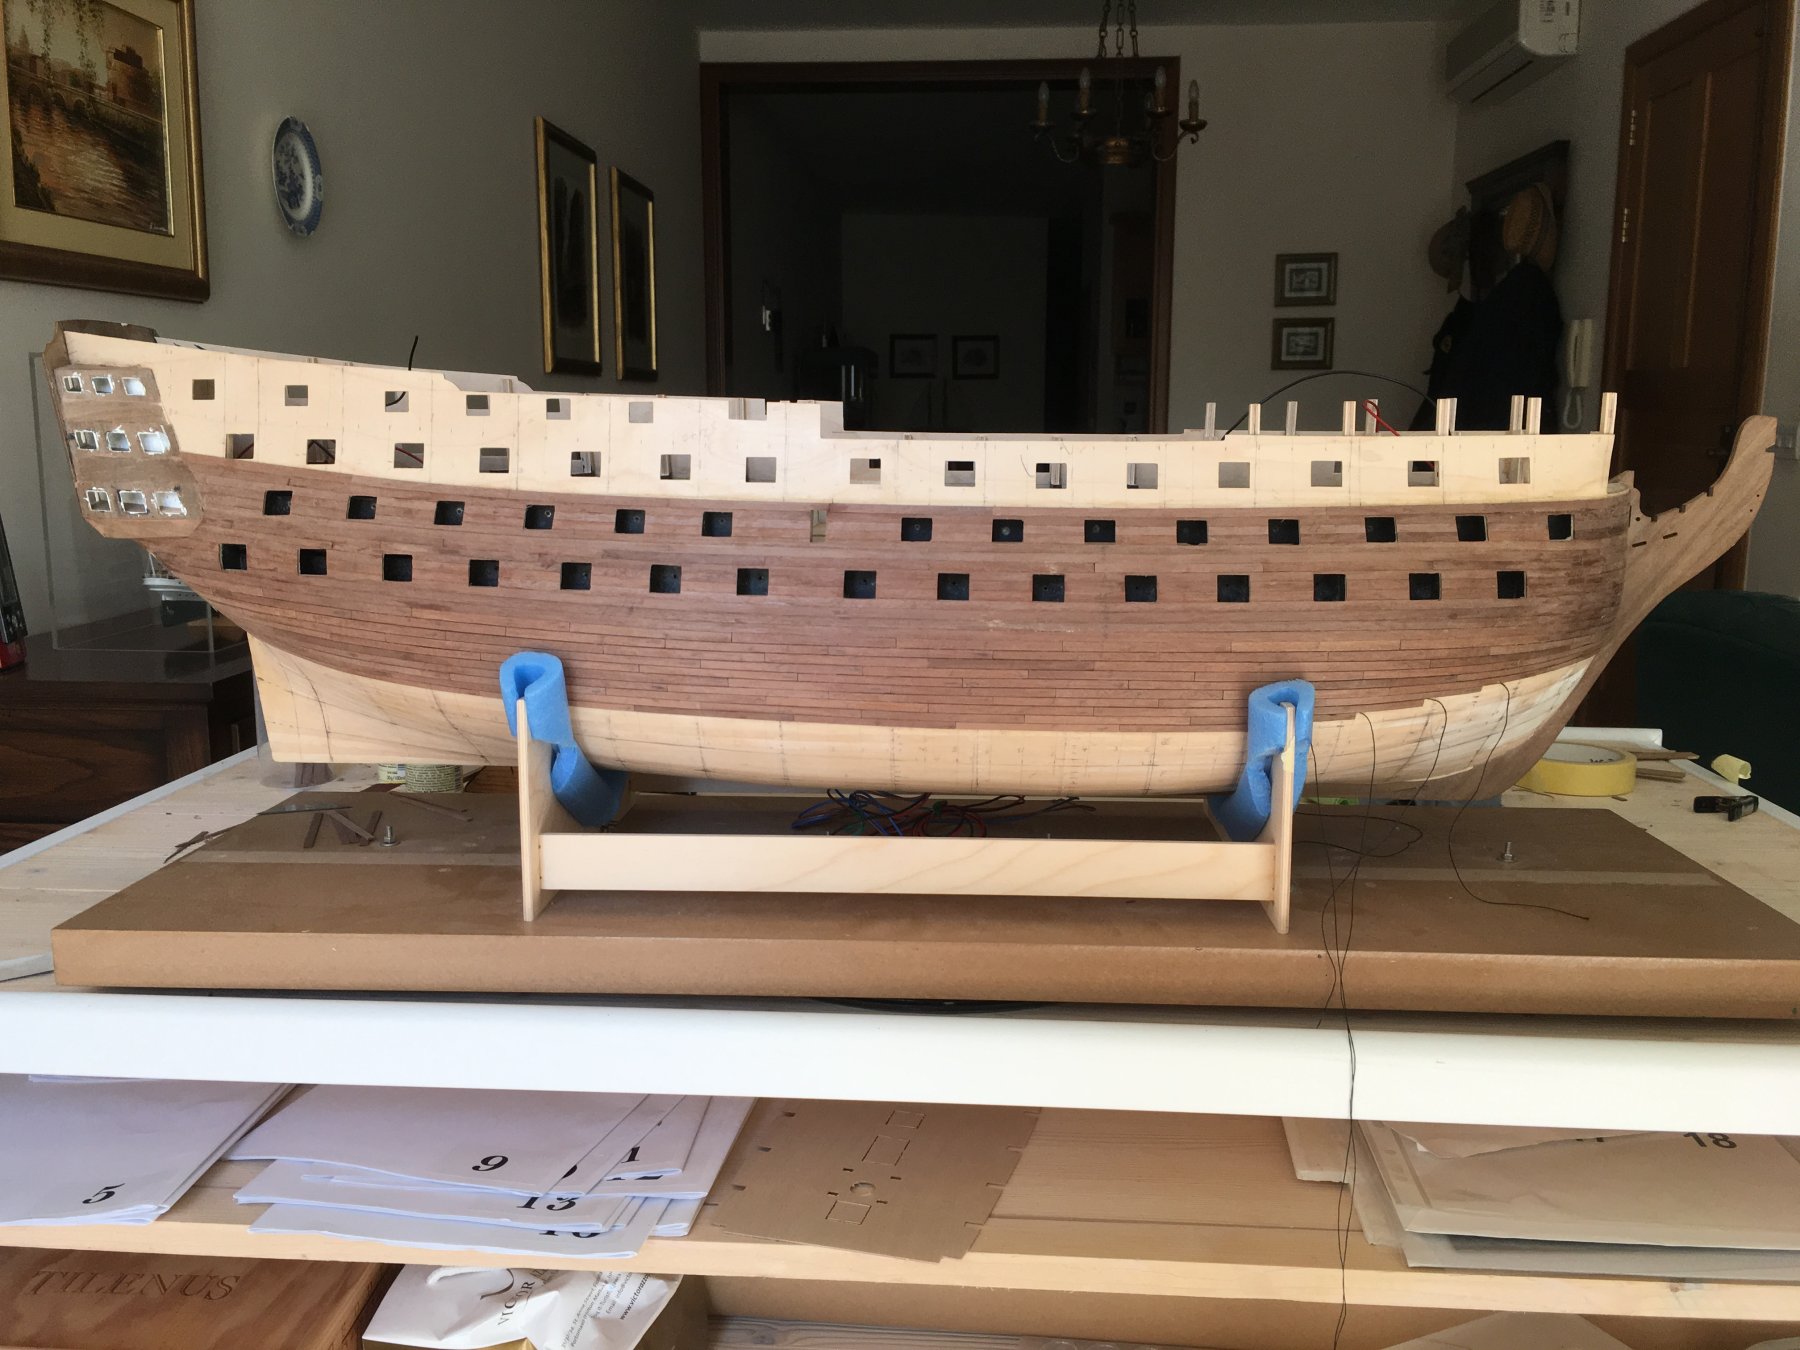
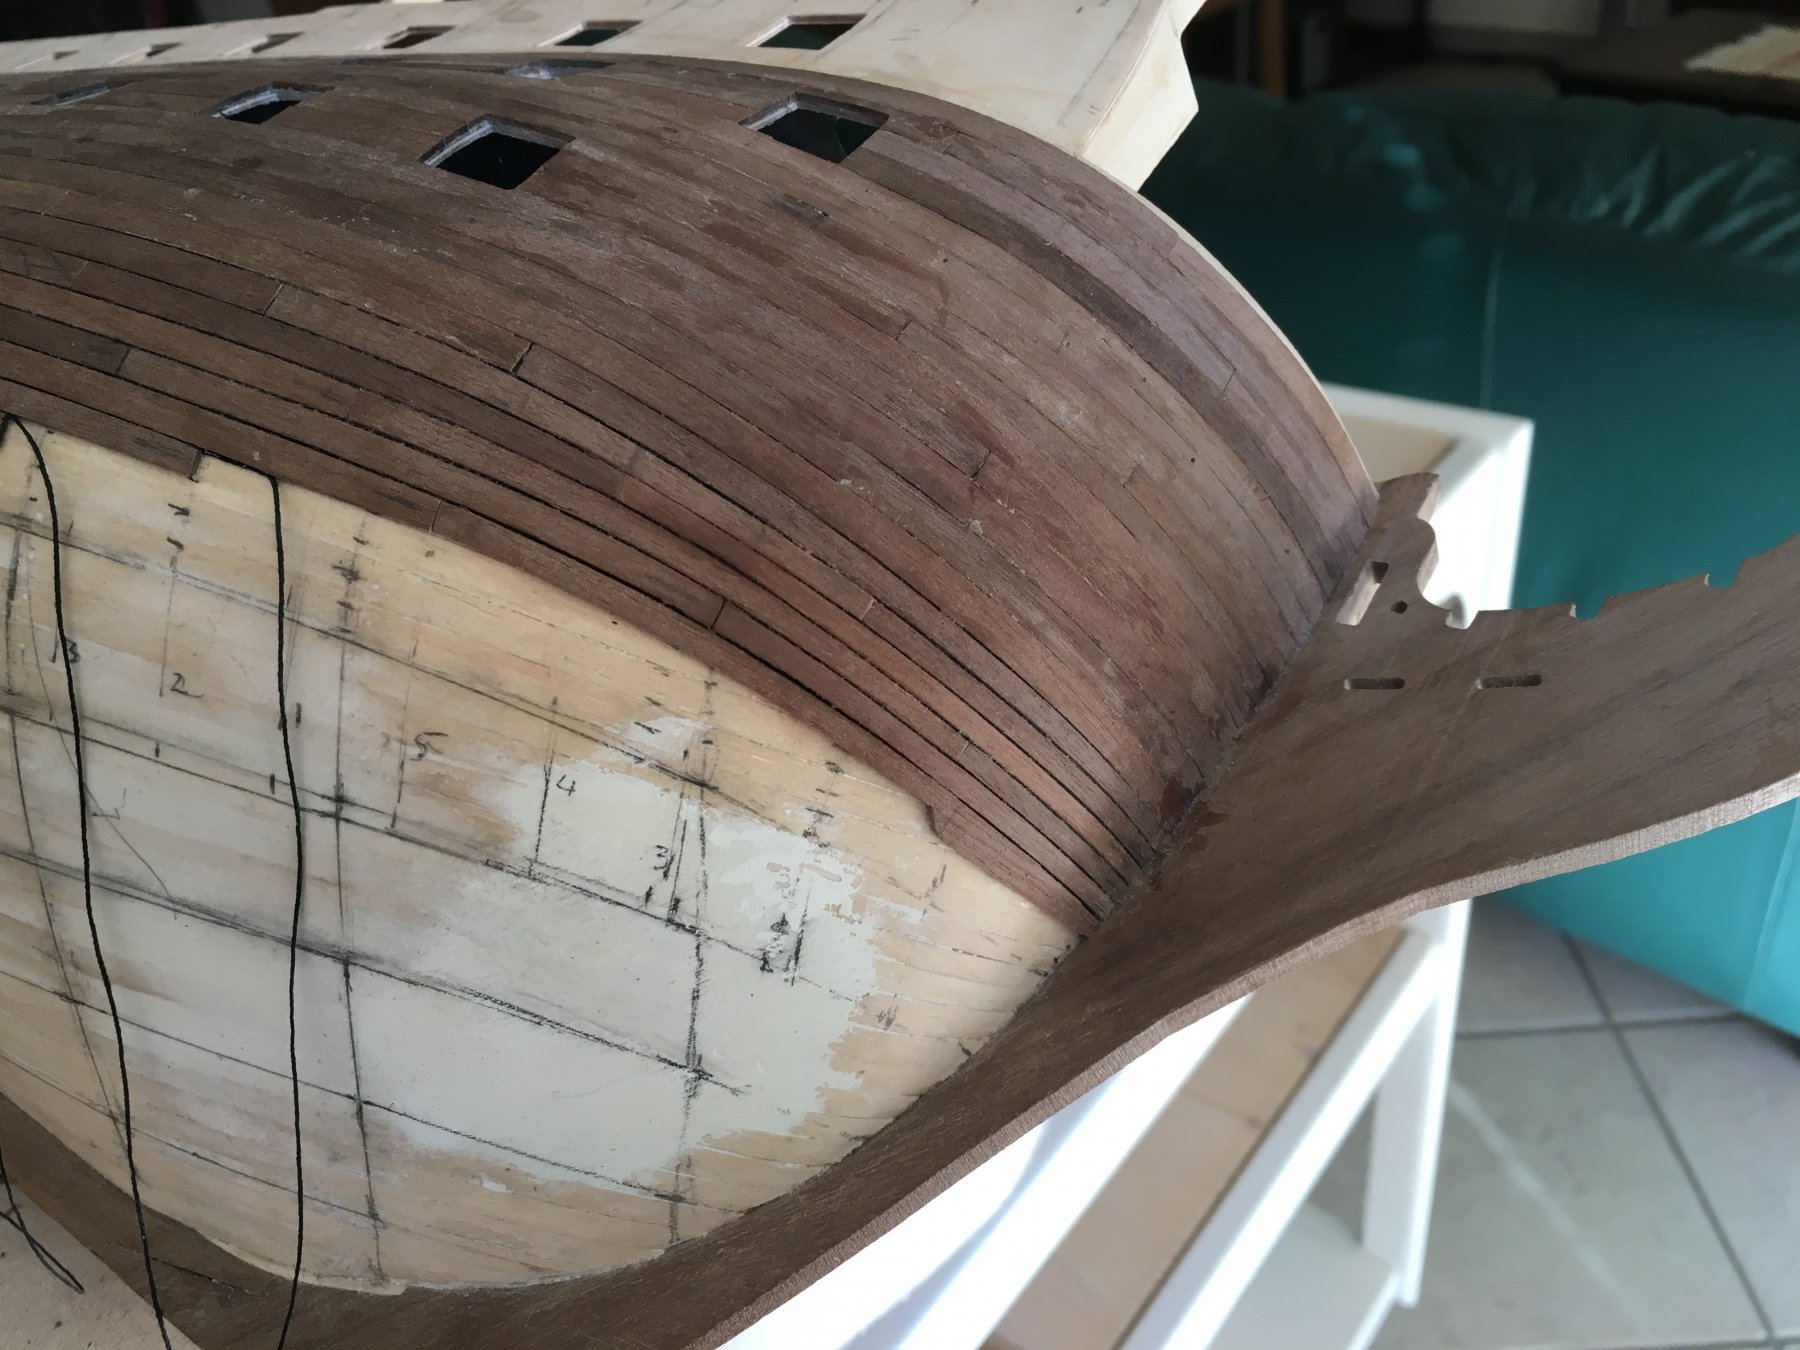
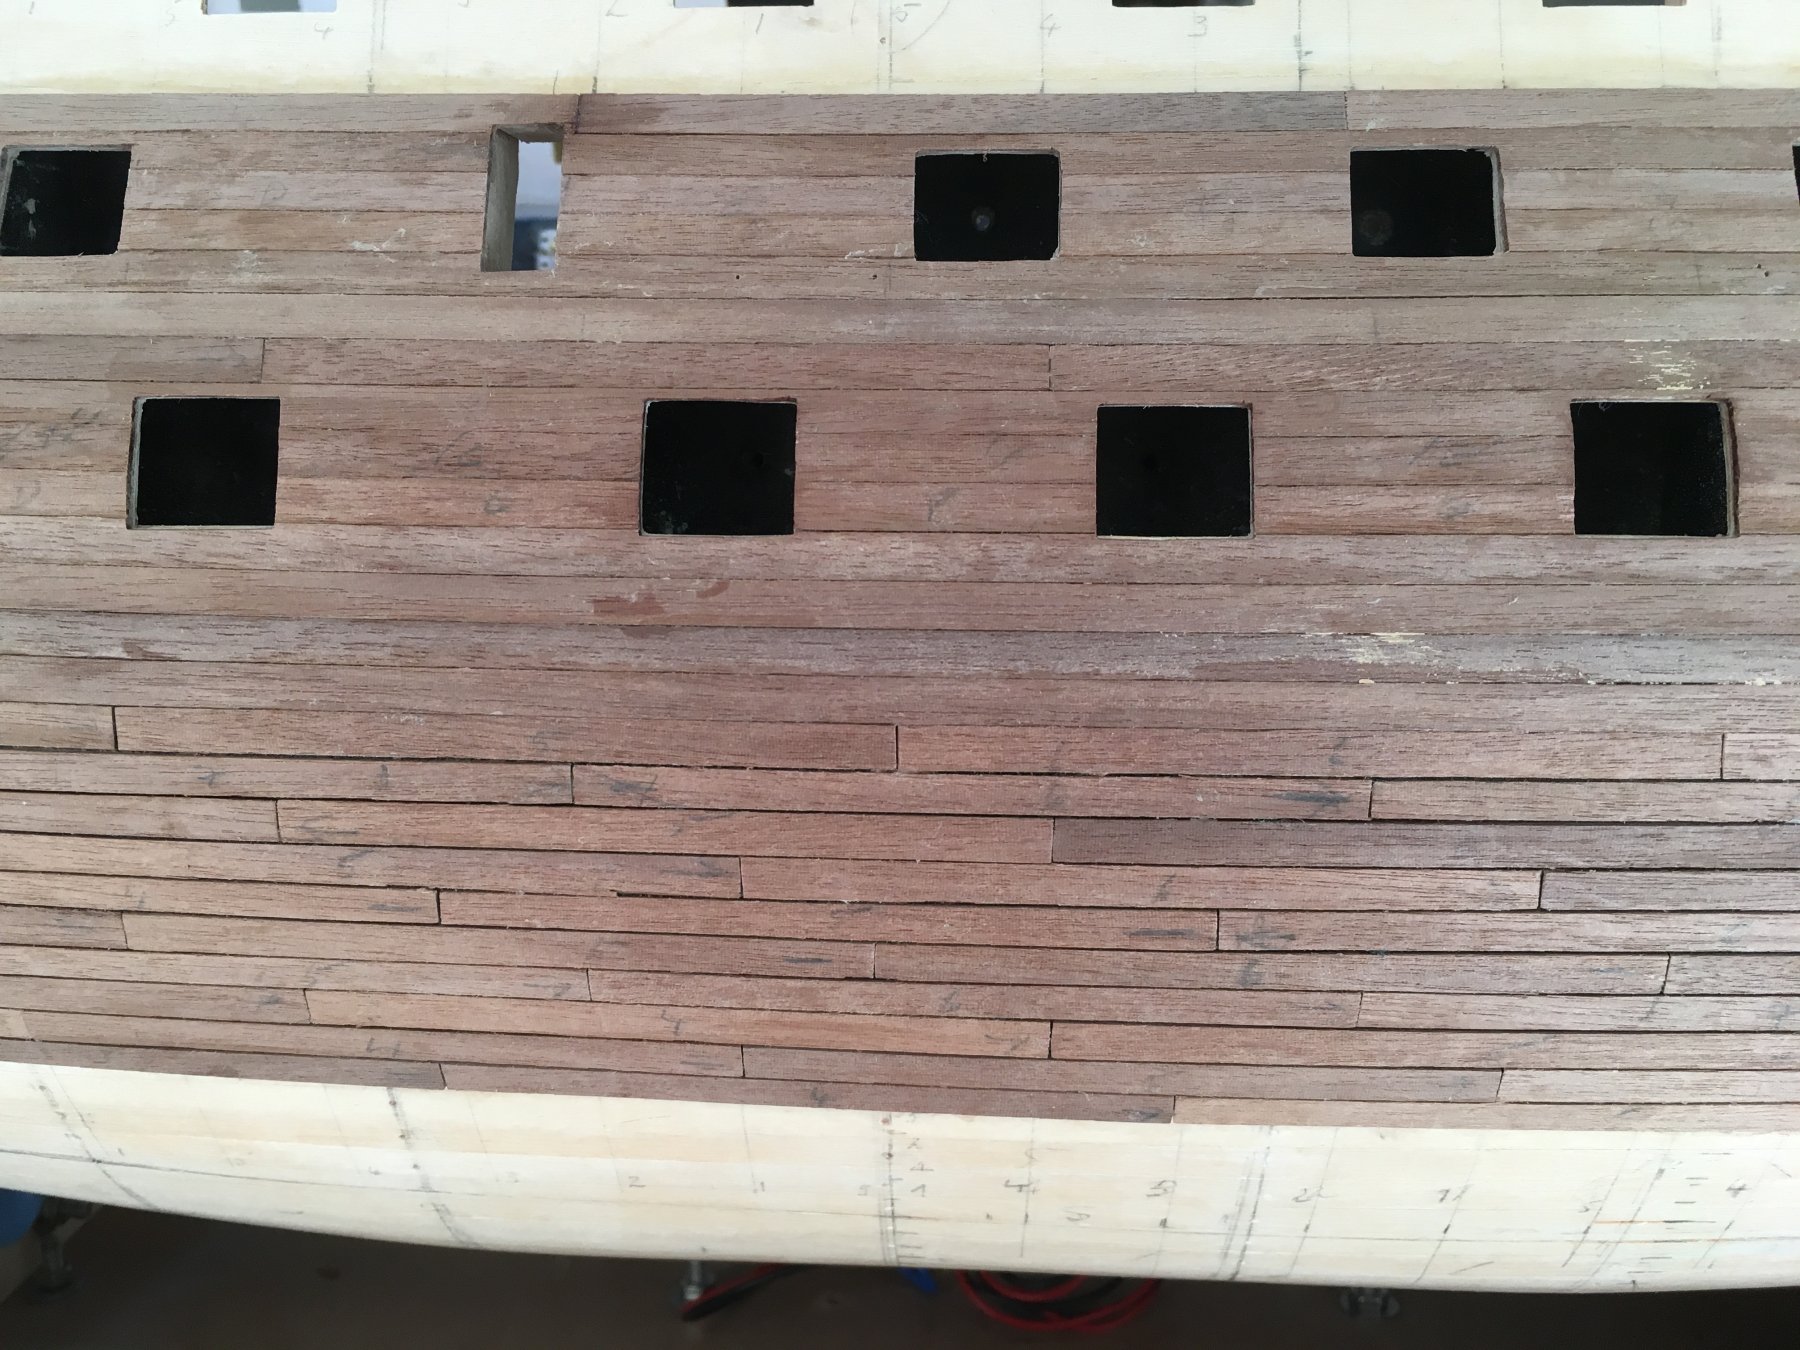
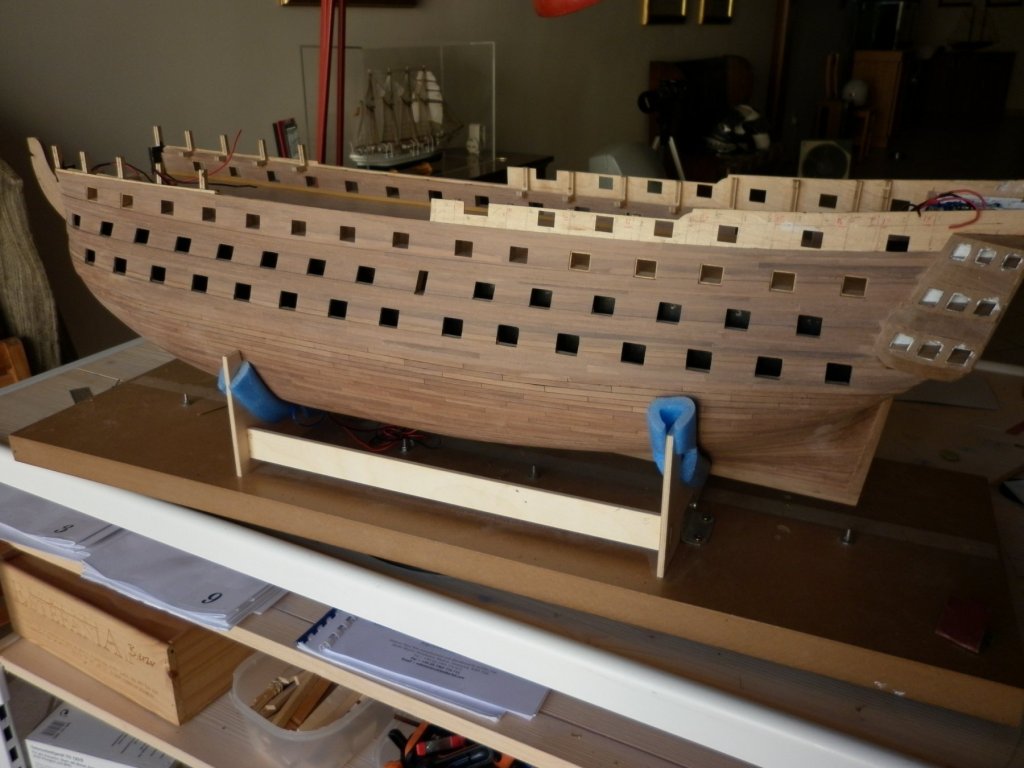
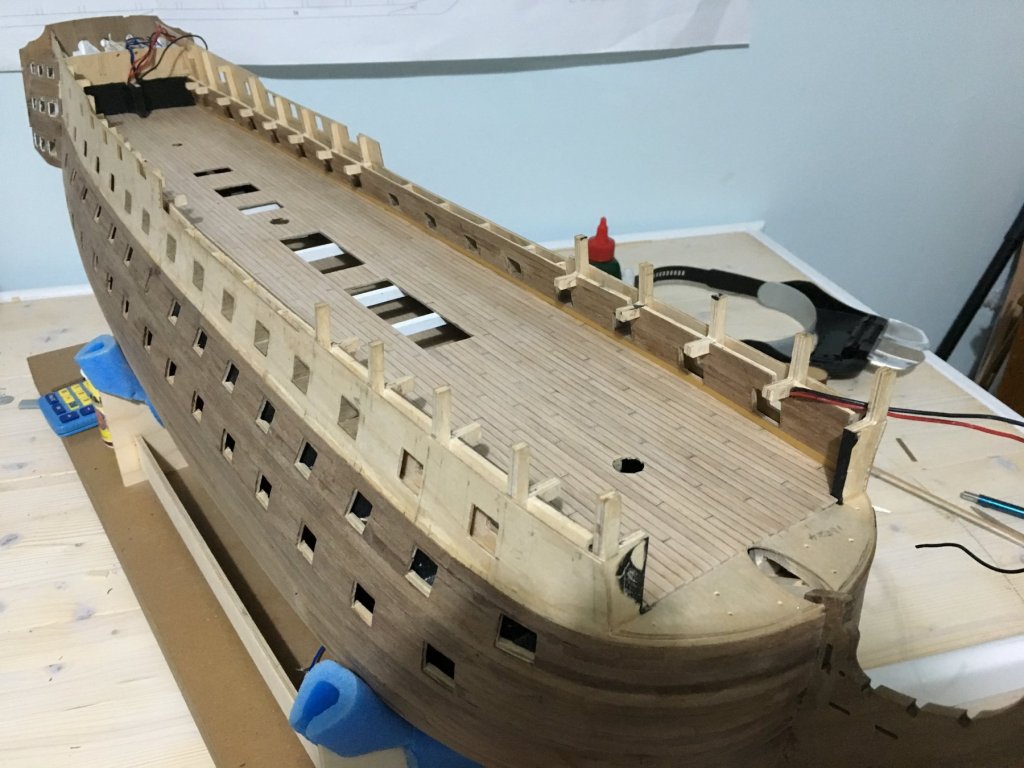
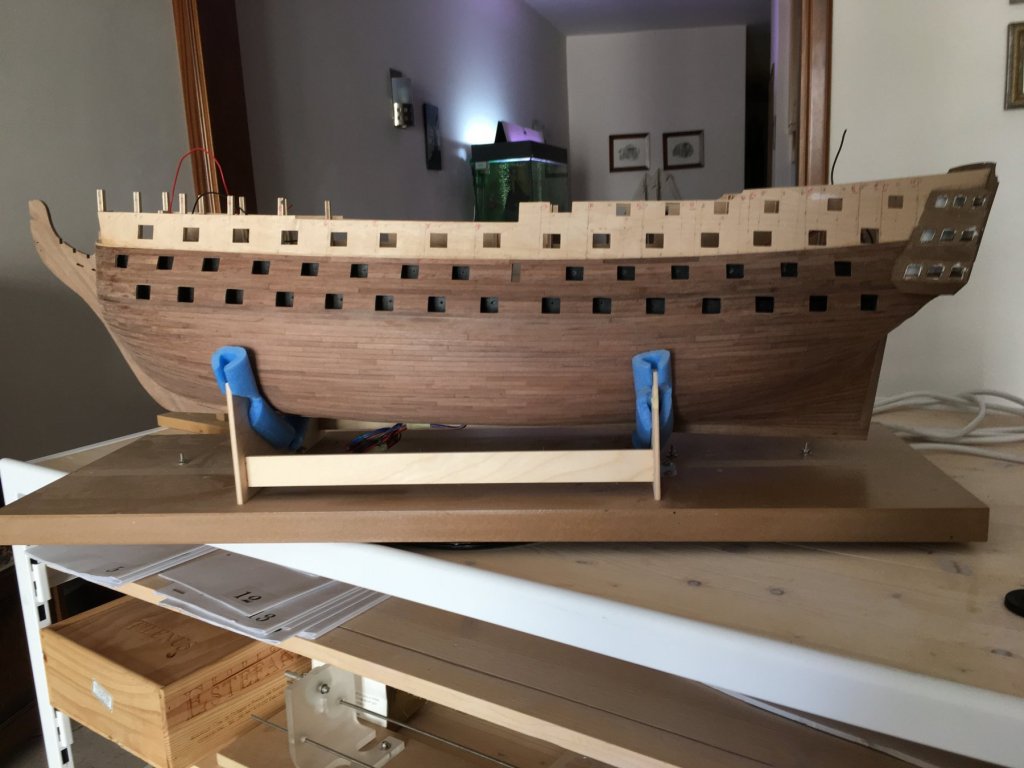
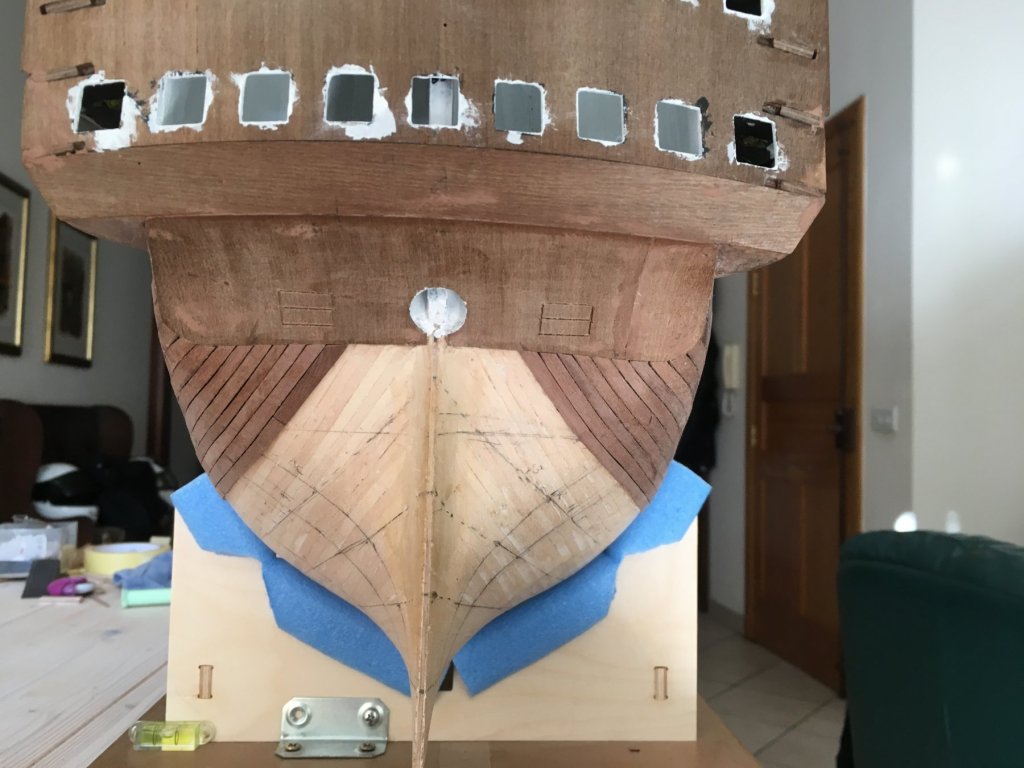
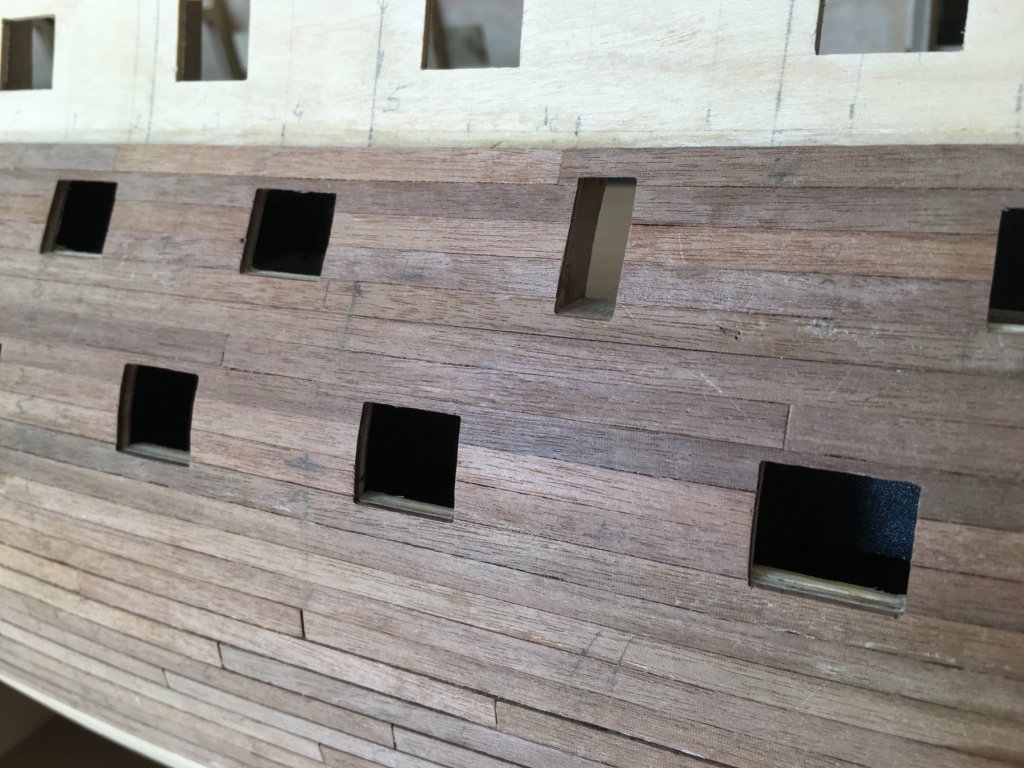
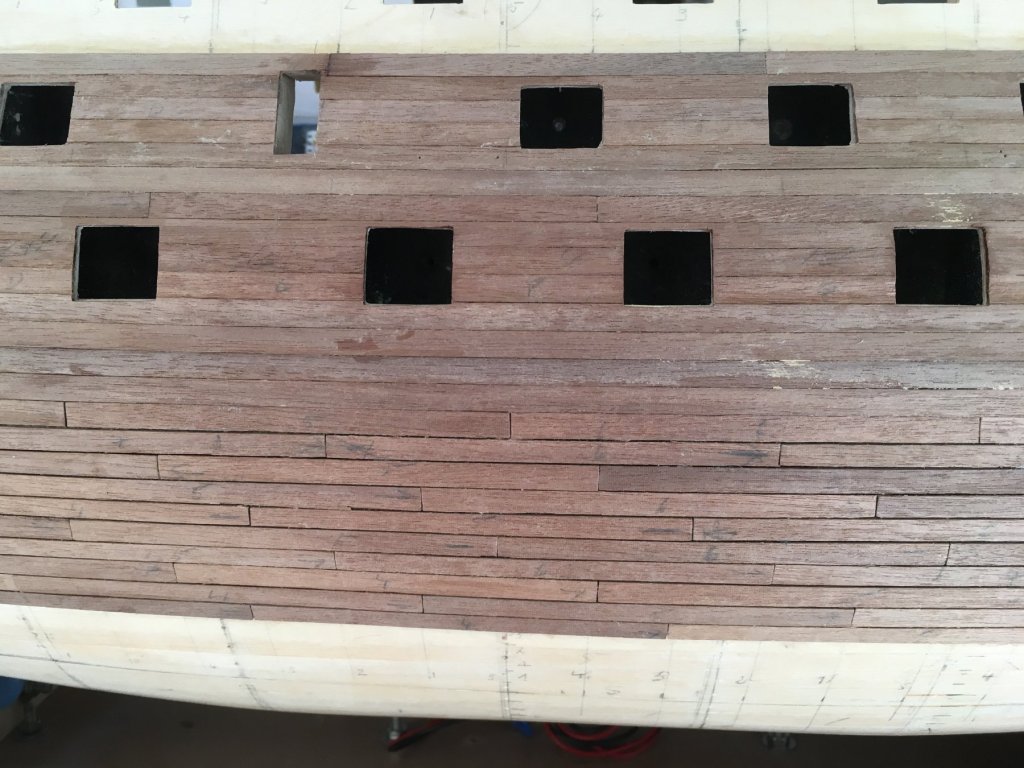
Finally lower part of the hull all covered with the second planking, but still needs more work, sanding, sealing, varnishing... The small gap between the planks has been purposely left so I will fill with a black filler. Probably now I will continue work on the upper gun deck and continue the upper part of the hull and wales later. A few photos: Robert


- 527 replies
-
- 24
-
-
-
- caldercraft
- victory
- (and 1 more)
-
Thank you Chieffy. Your kit is probably a bit different from my european version. Likewise in mine I had some wrong measurements and also a few small things missing, but on the whole it is a nice kit and a very good kit to learn on. I sent you a message with some details for the boom mast saddle, hope they are of help to you. Robert
-
Really nice work Graham. Will be following your build. Robert
-
Thank you Ian, and thank you again for the initial suggestions with the filler blocks when I was still hesitant if to do them or not. I would have regretted it if I hadn't taken your advise. Robert
-
Thank you Heinz and a belated Happy Easter to you and your family too. Visited your new post, I don't have words for it, it is a great build. Robert
- 527 replies
-
- 2
-
-
- caldercraft
- victory
- (and 1 more)
-
Heinz, Just amazing. Your work is such an inspiration for me. You keep surprising me with the finish of your work. A build that truly deserves to be admired. Robert
-
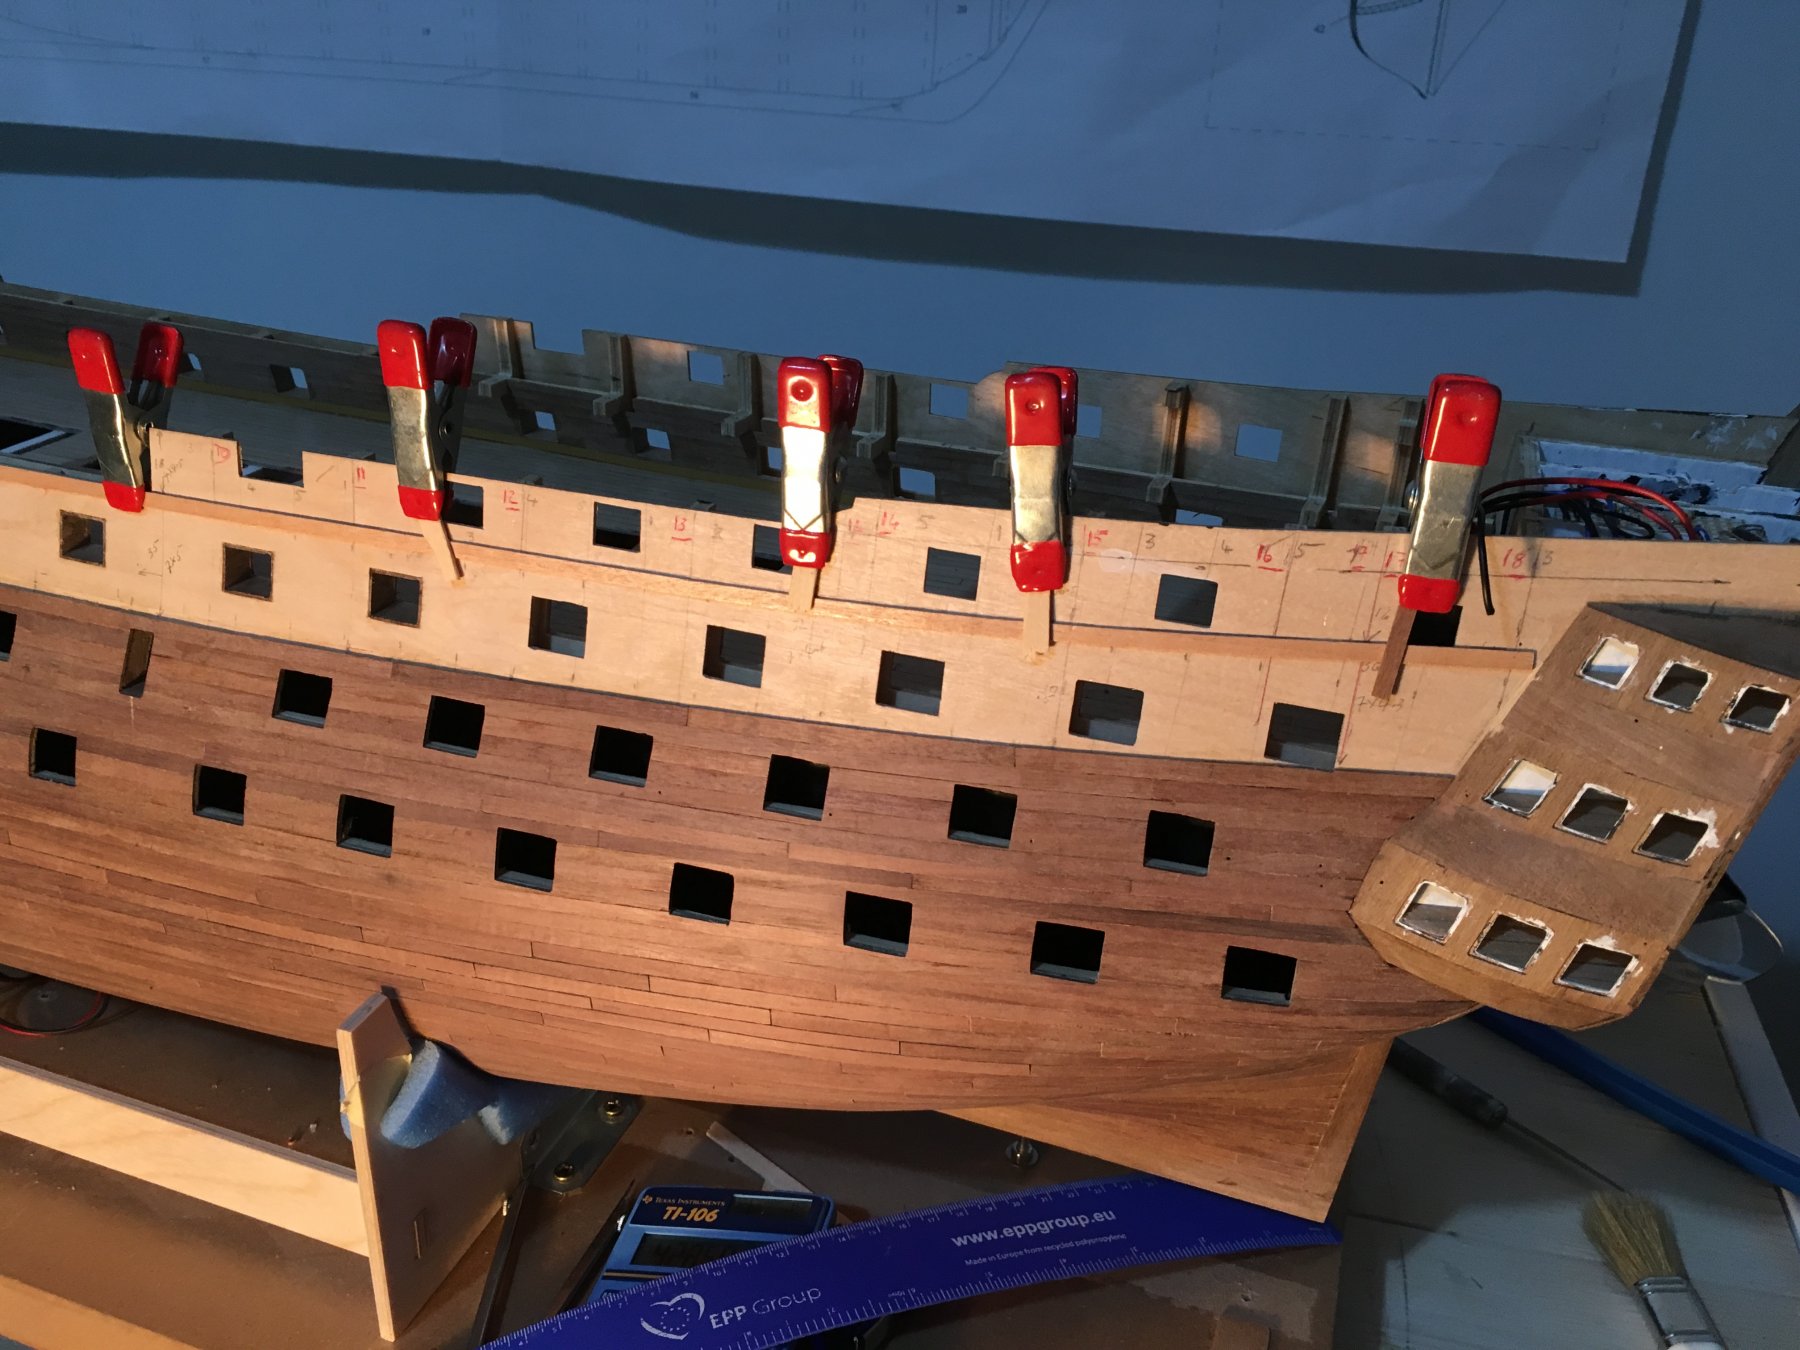
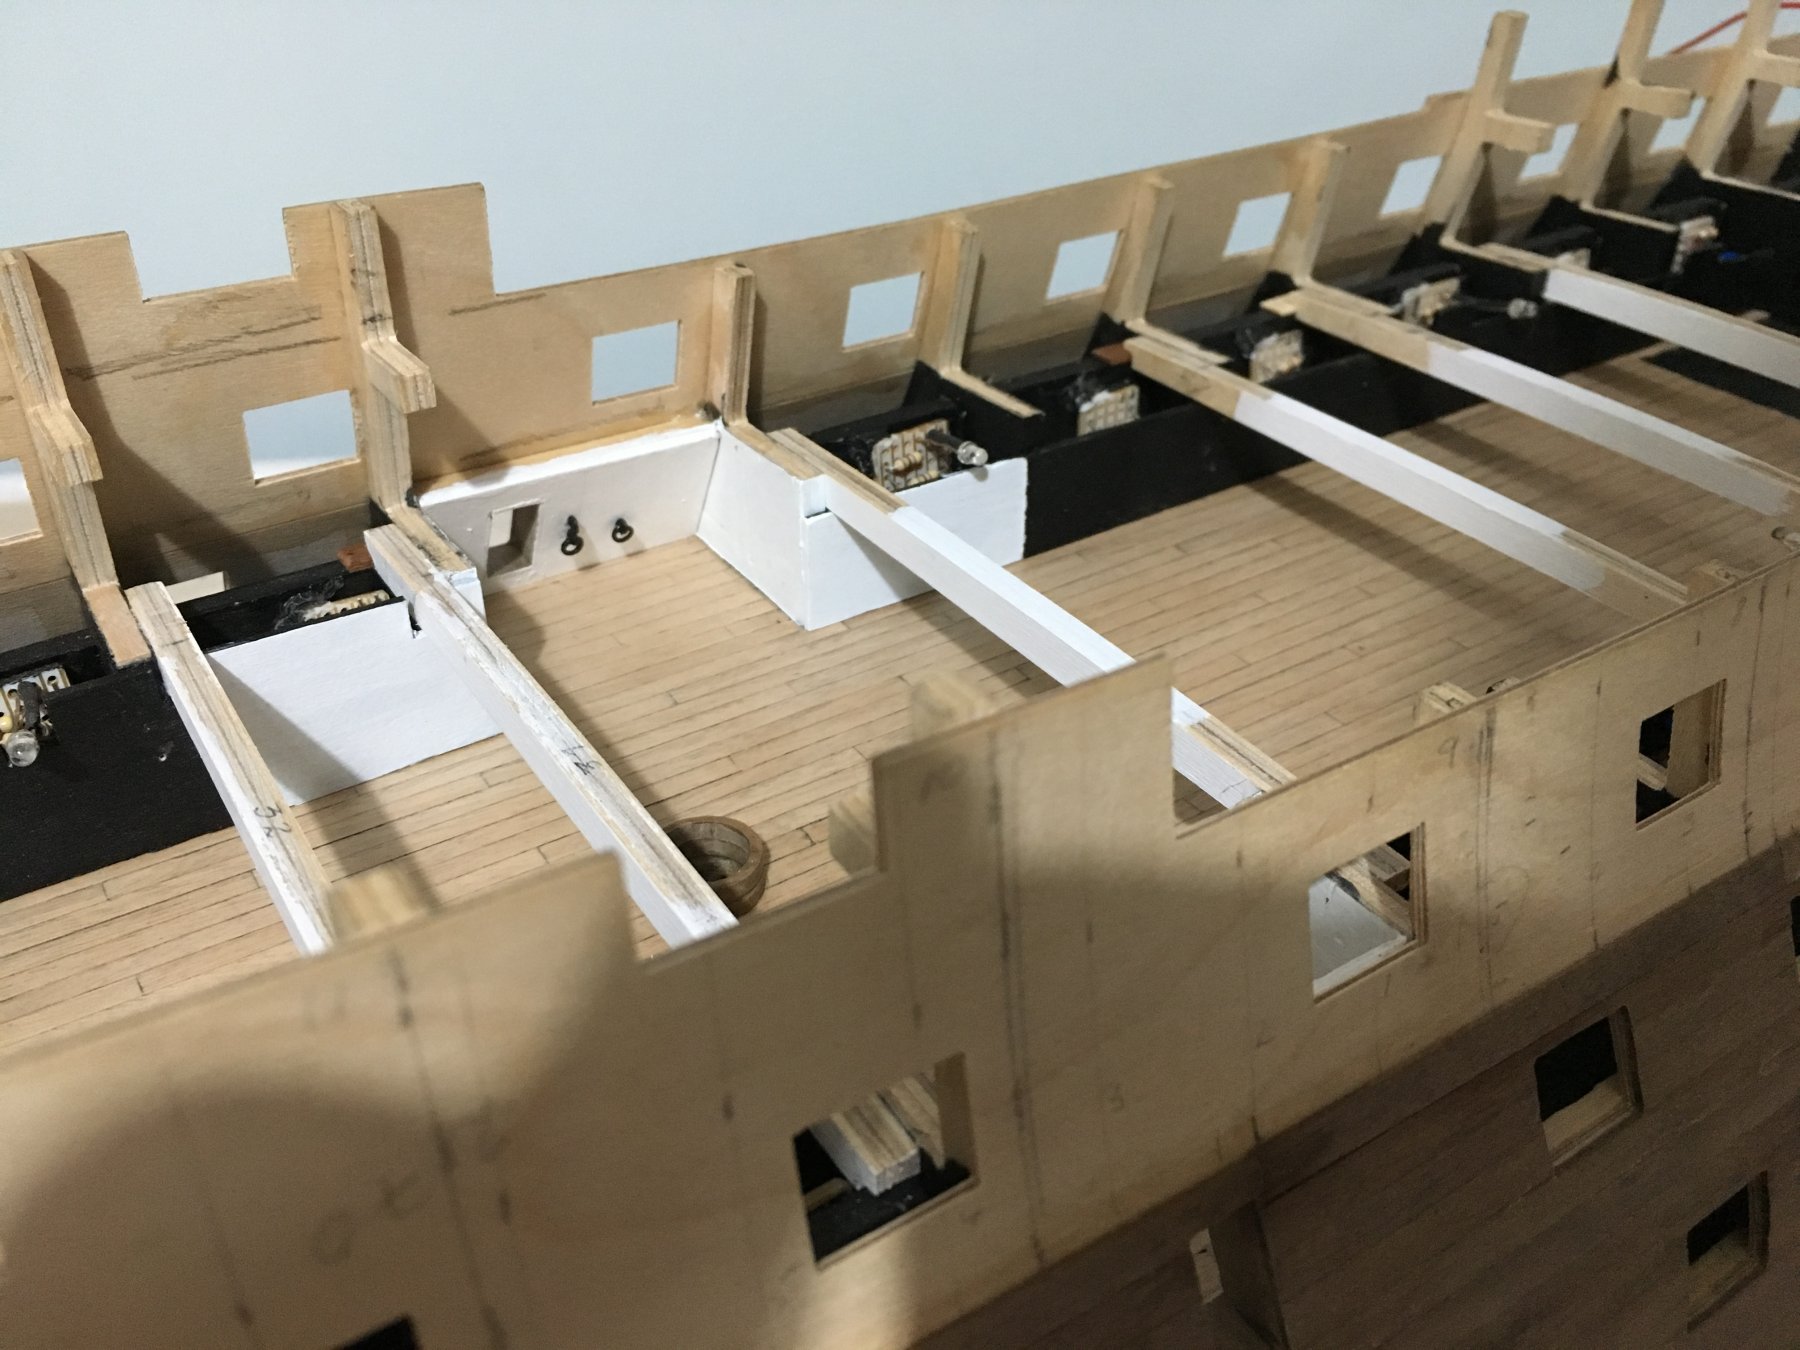
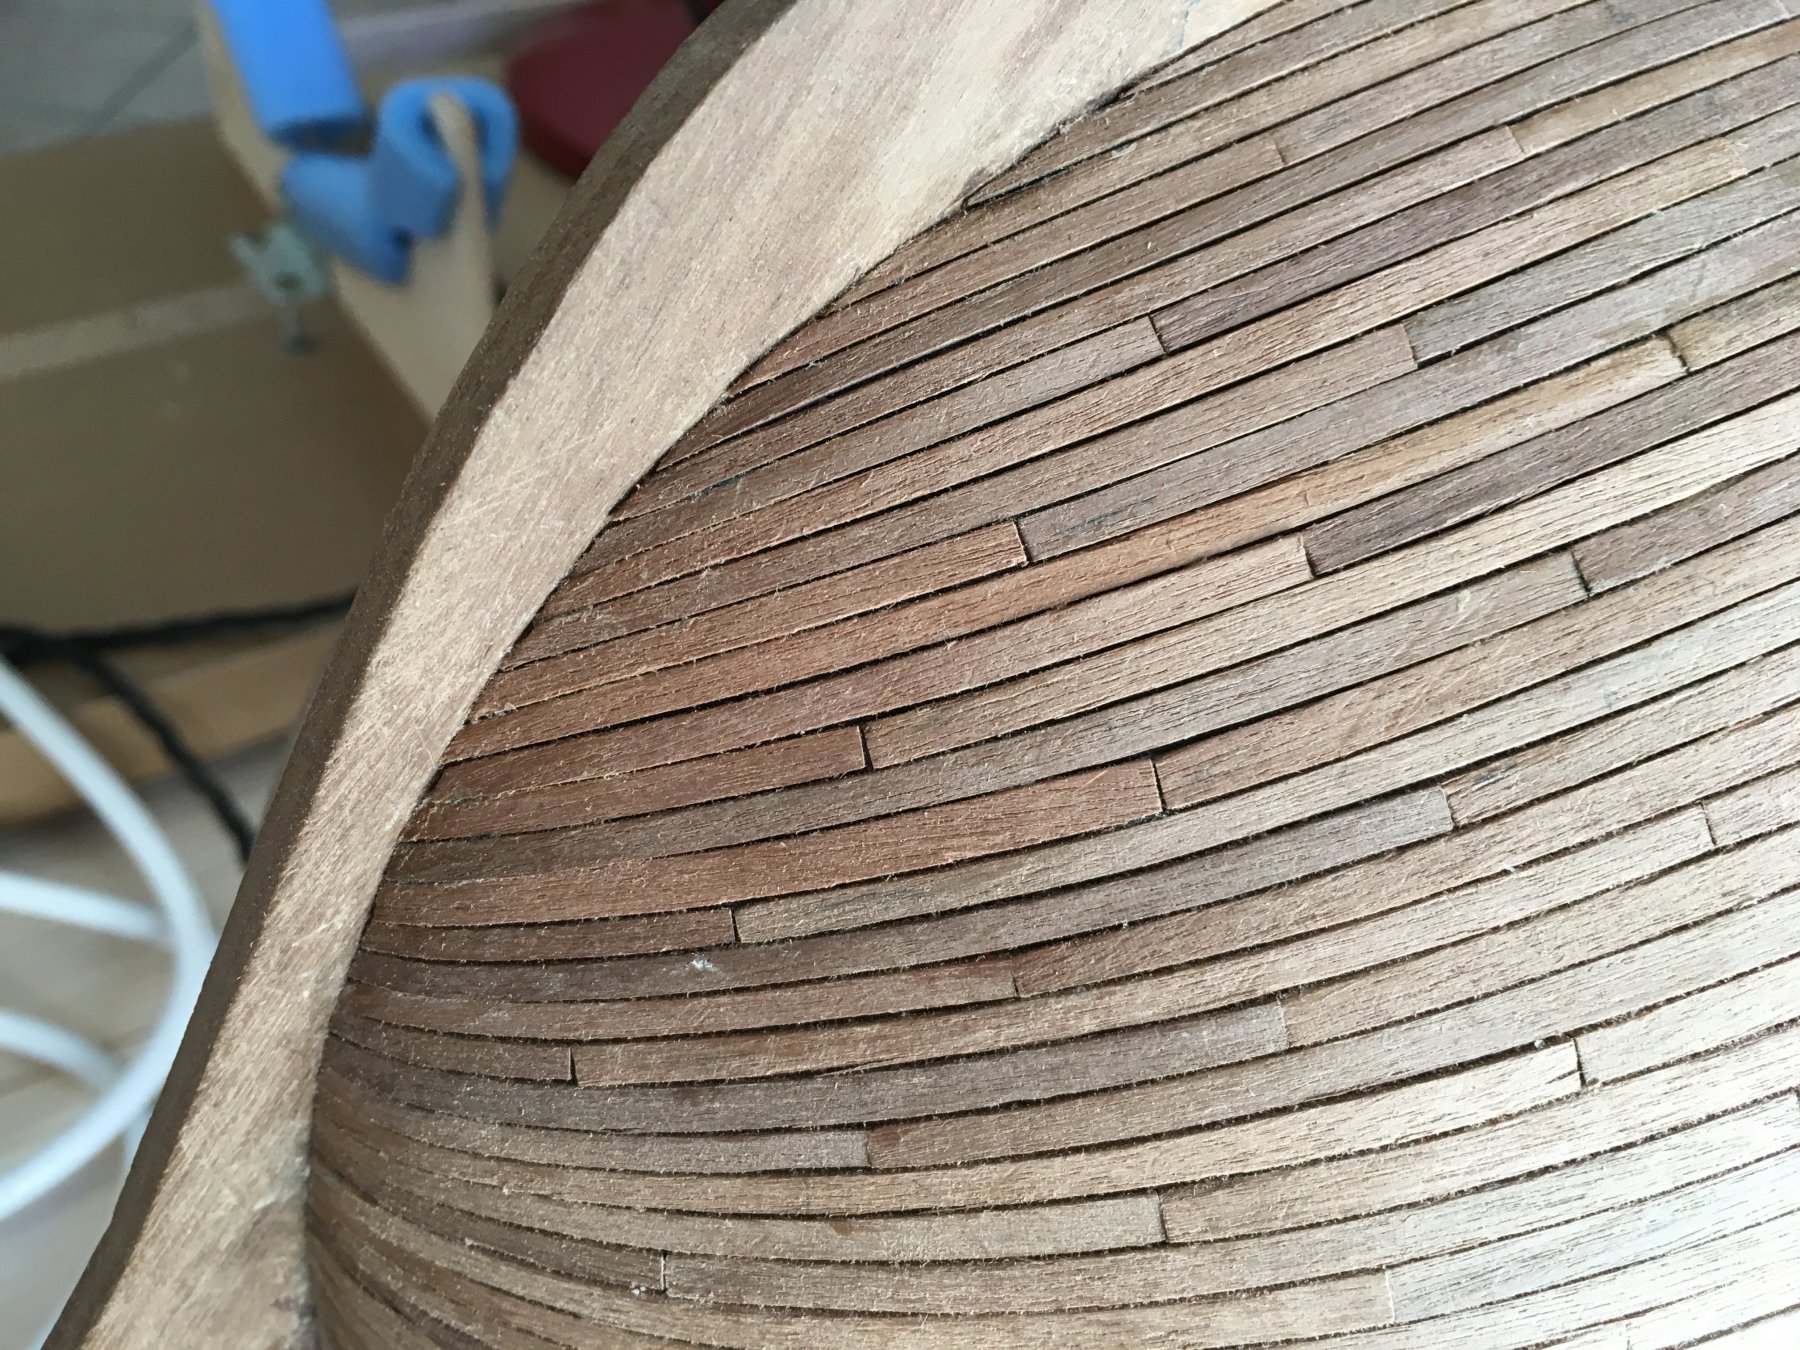
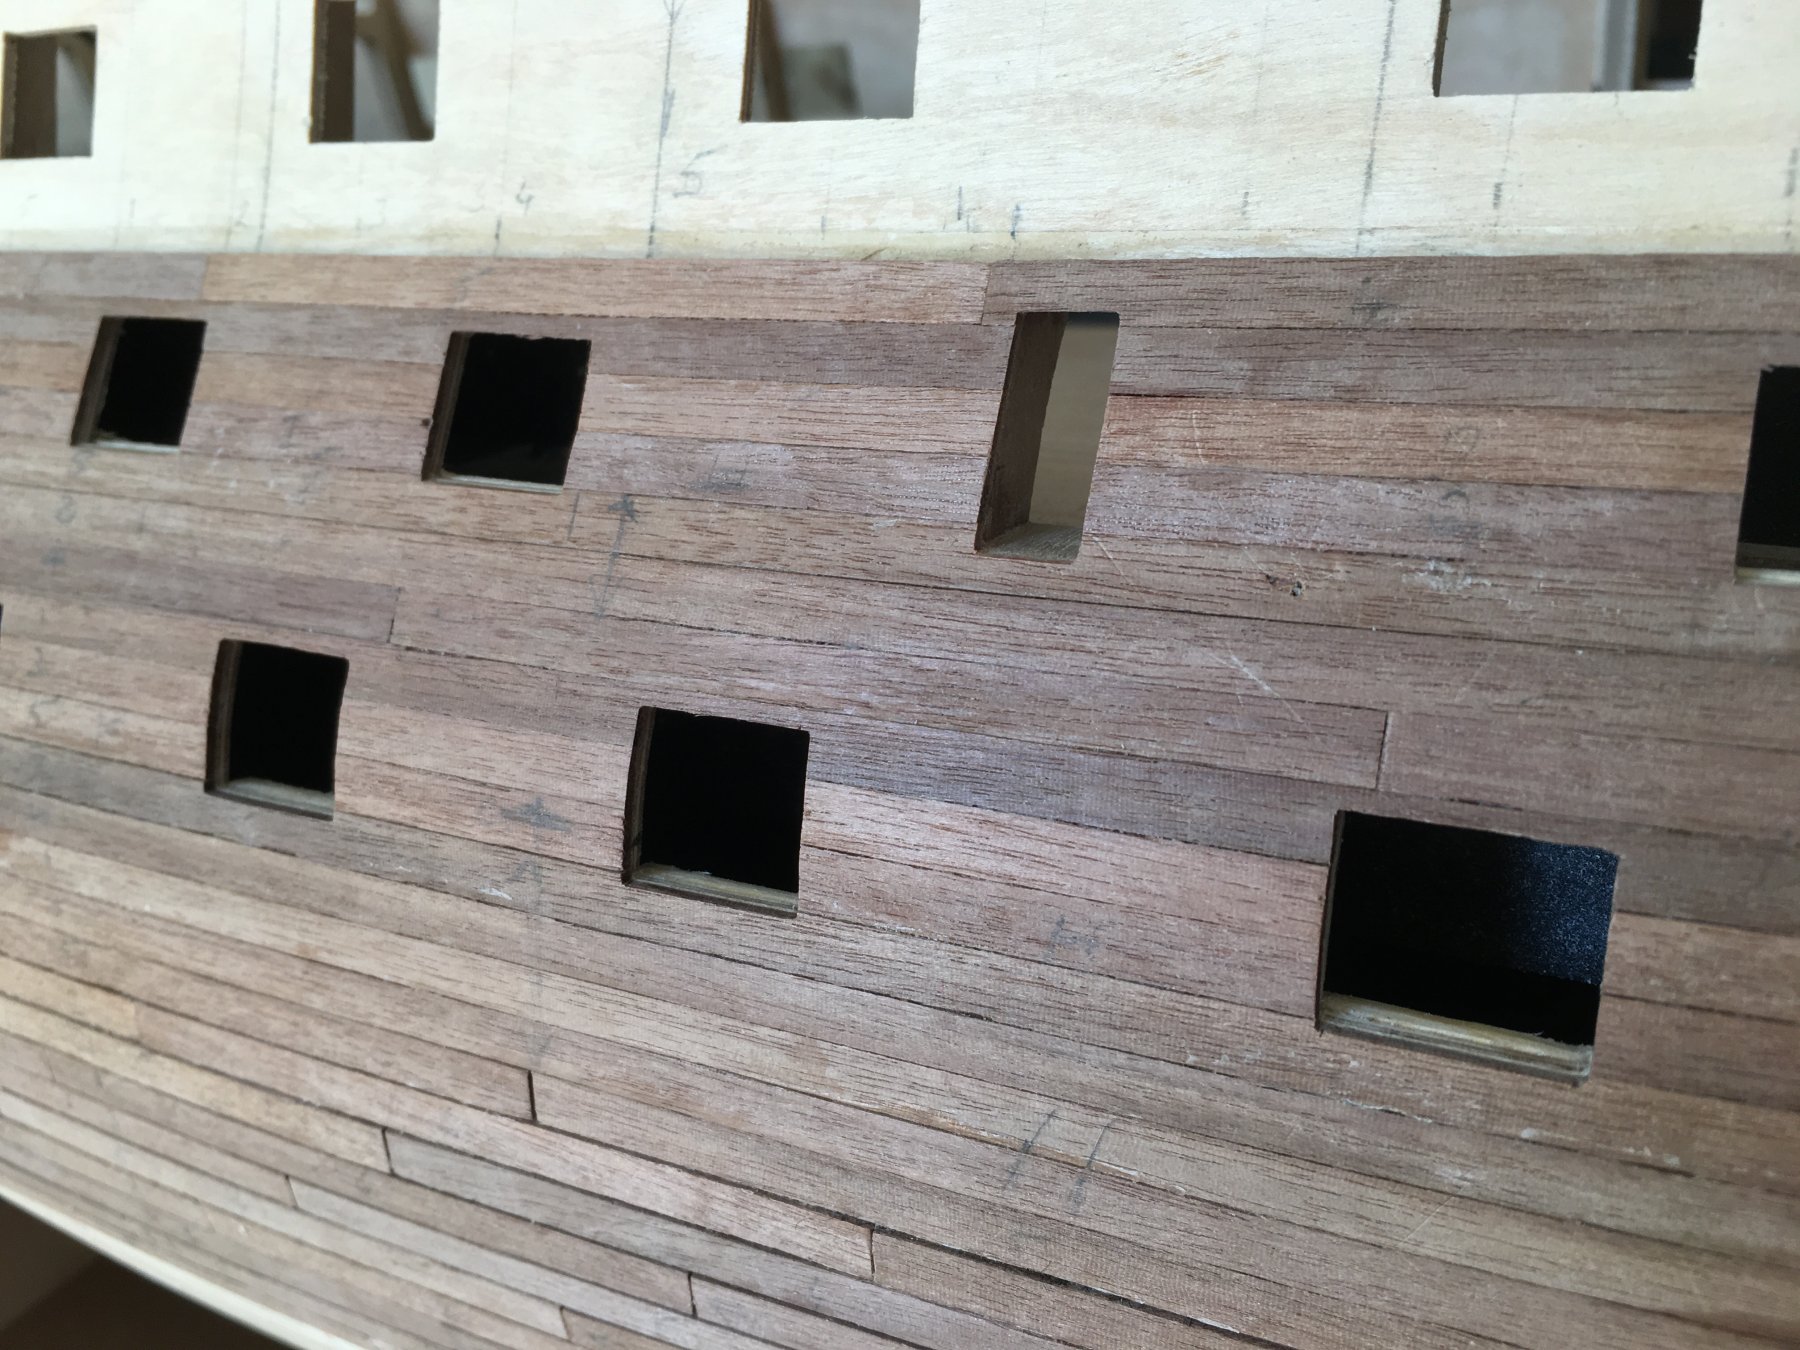
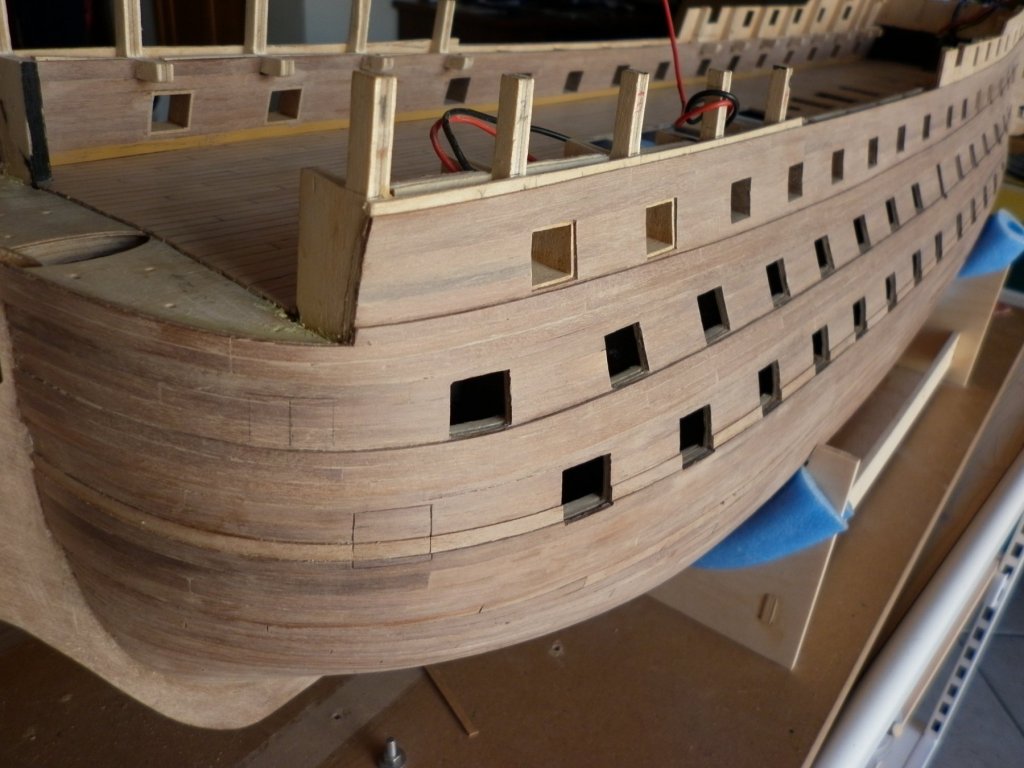
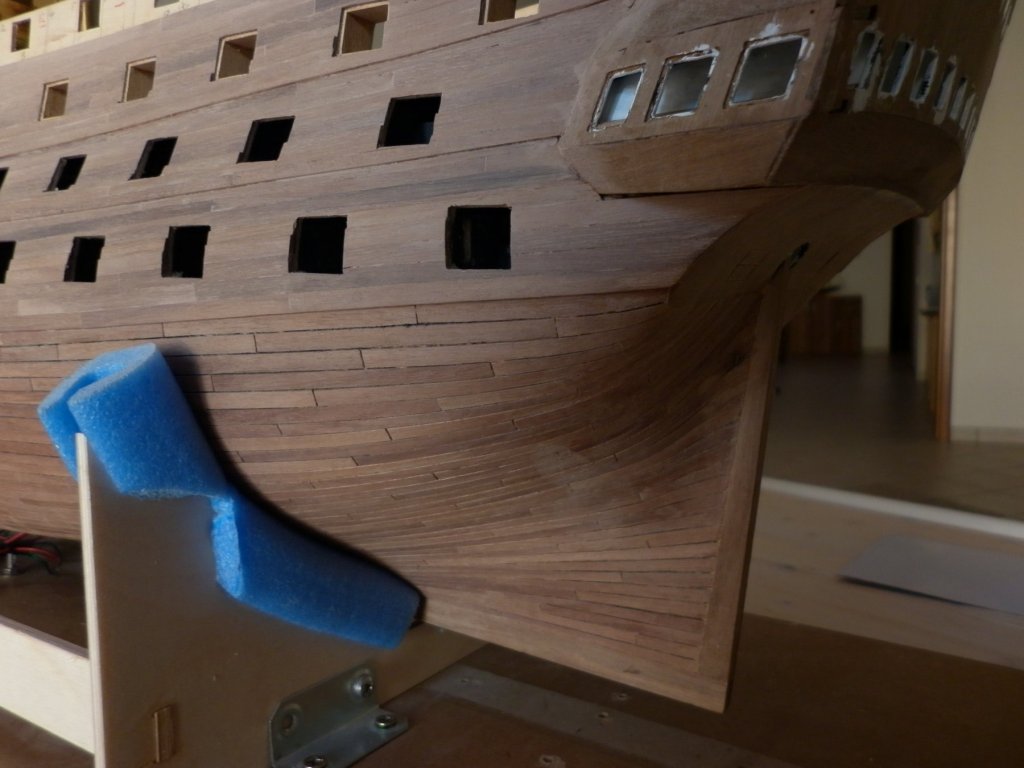
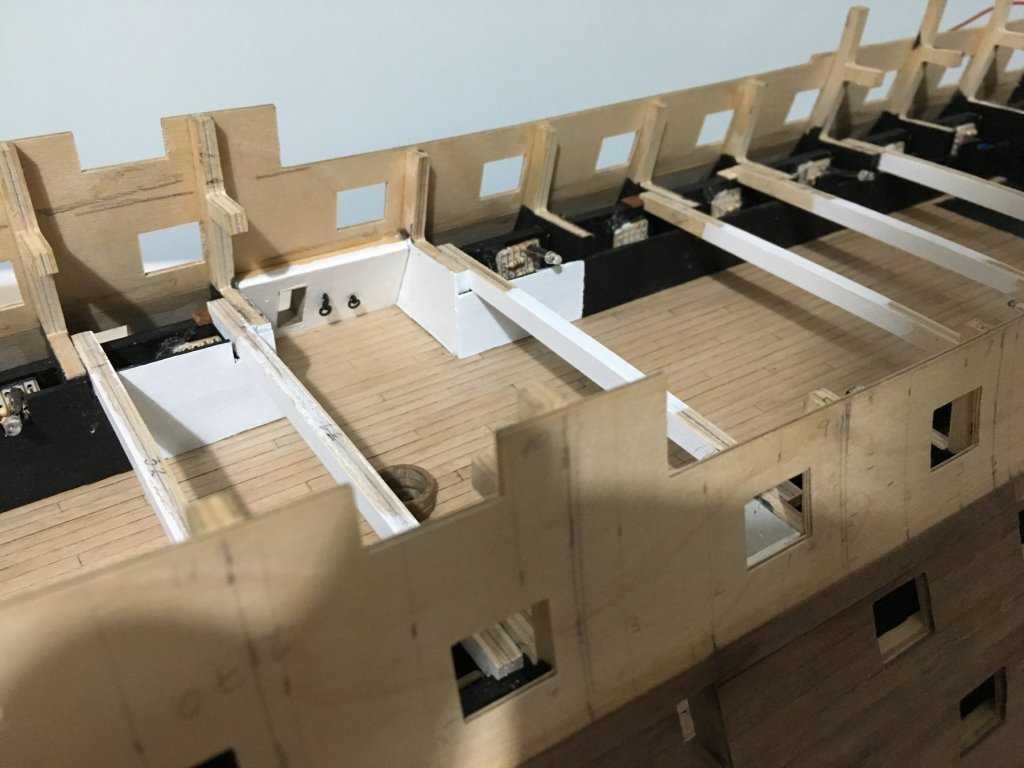
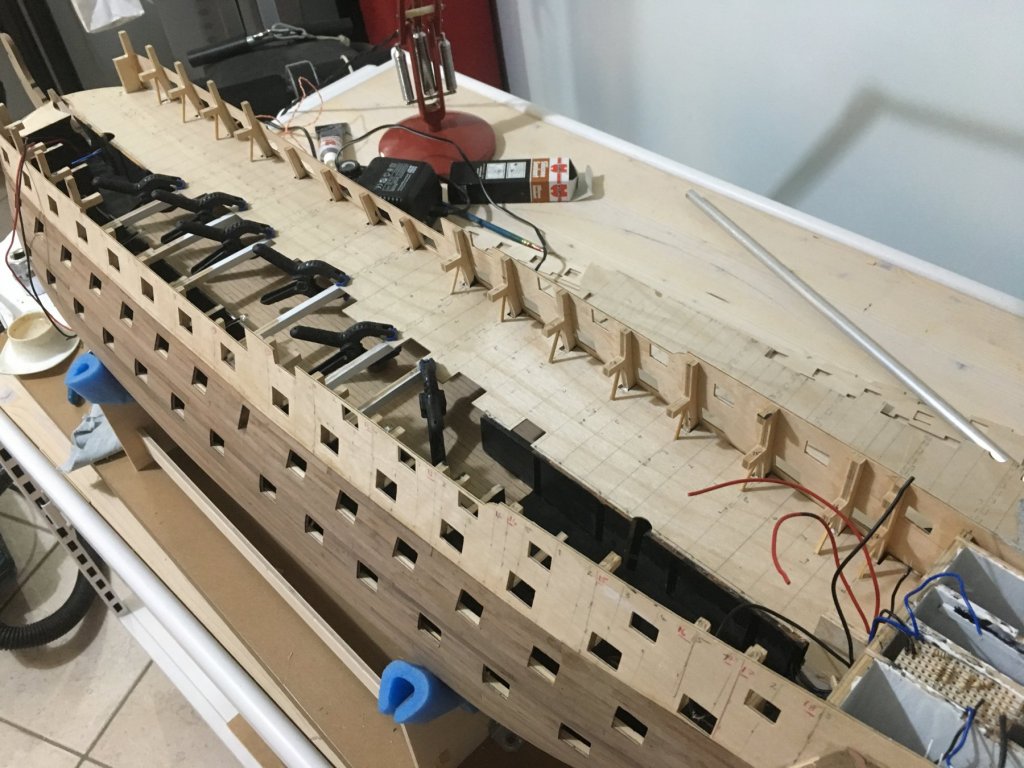
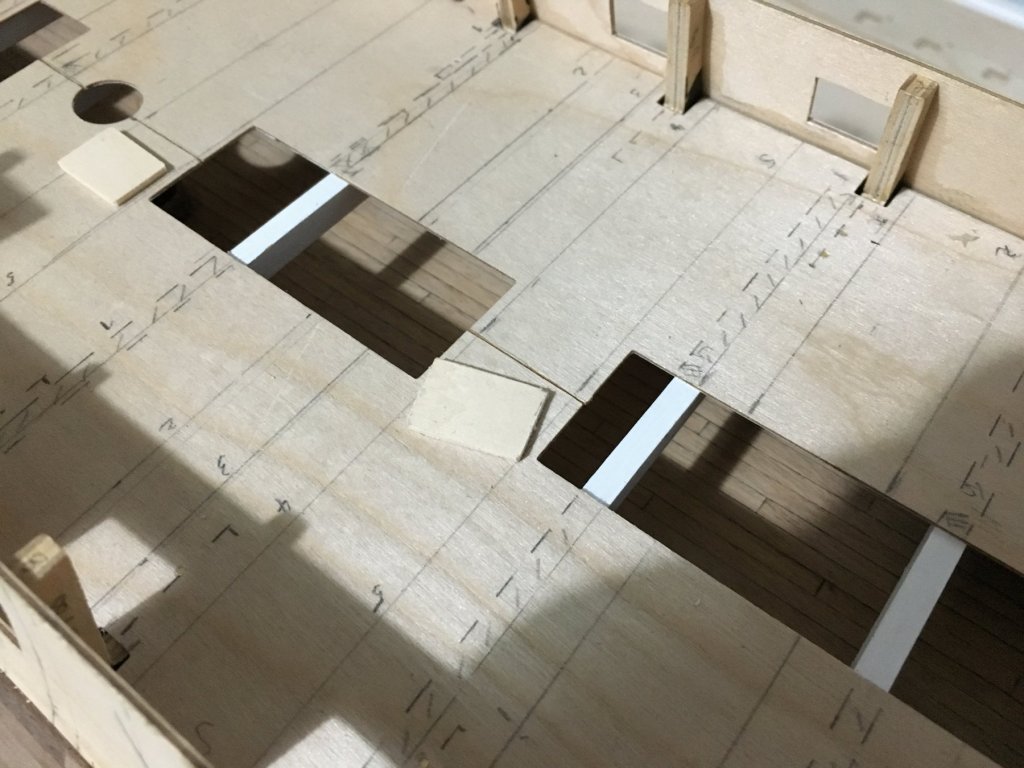
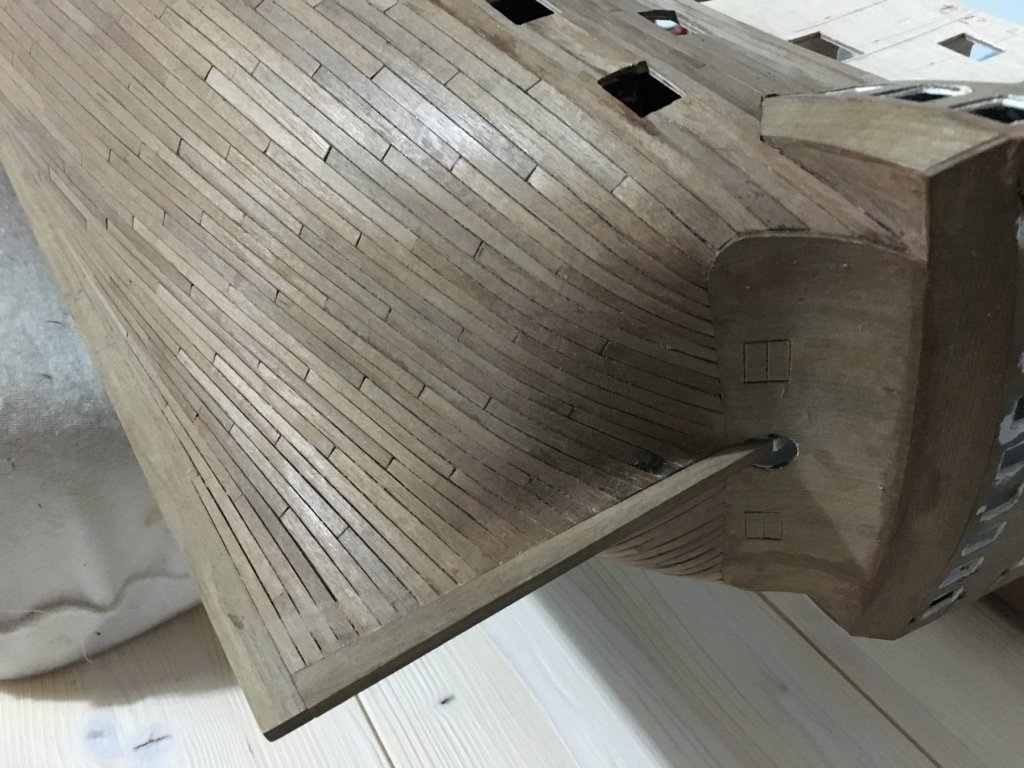
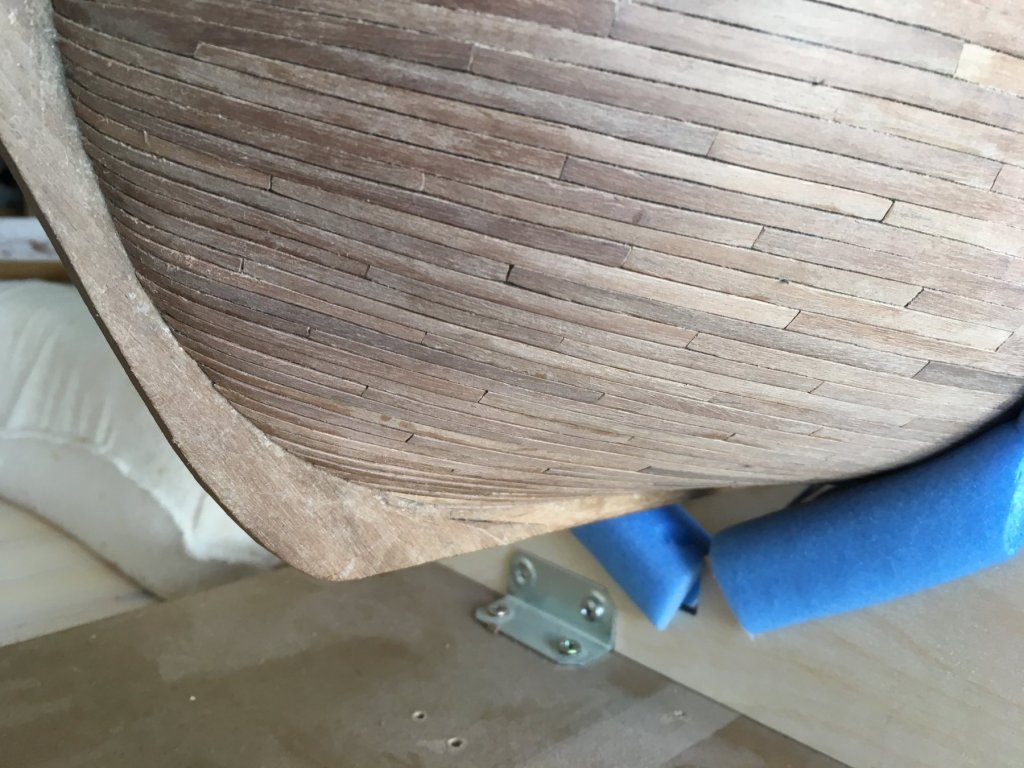
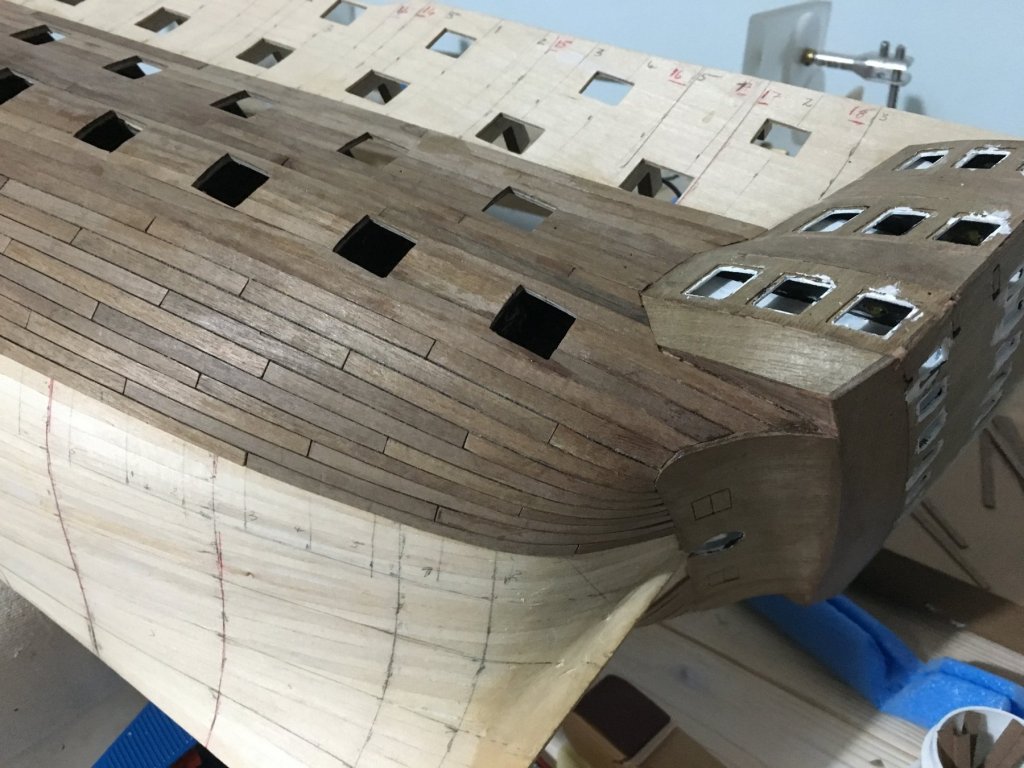
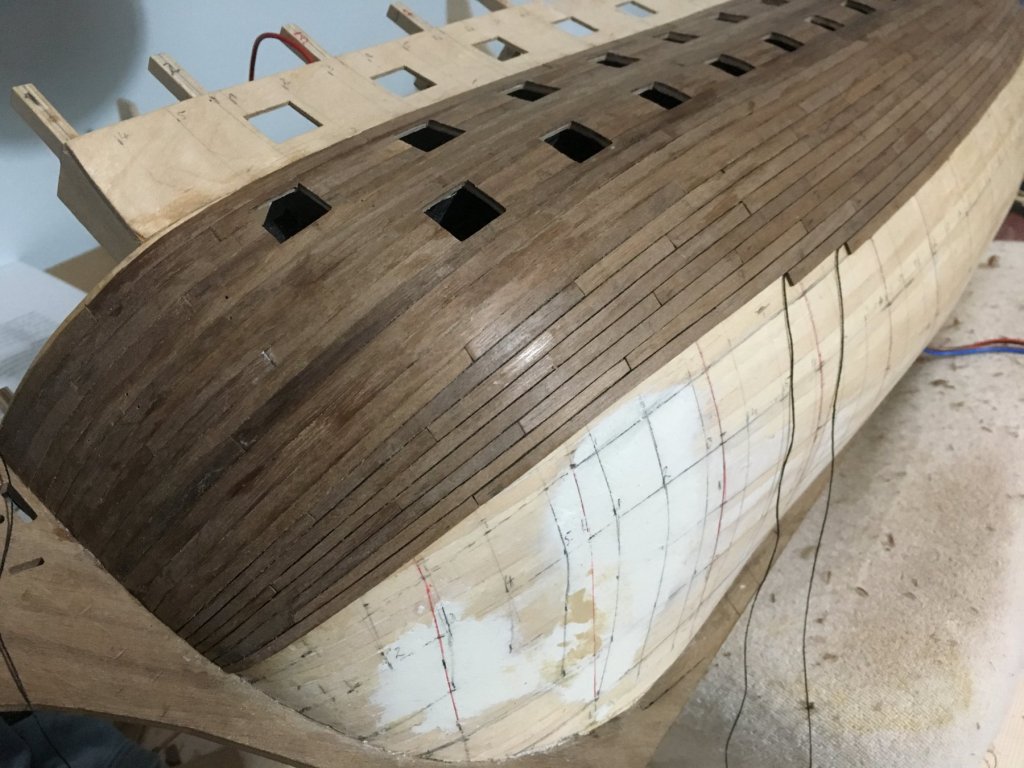
Another update, moving slowly but will get there someday!! I am using the walnut supplied with the kit and to fit the planks I am using a combination of spiling and edge bending. There is no doubt about it, that spiling is the best way to go. Since I made my calculations on 5mm planks in width and I am leaving a small gap in between, where the curvature is small, I am getting away with it with spiling, especially where the planks narrow more. But there are places especially at the bow, that apart from spiling as much as can I have to do a bit of edge bending as well. The top part of the hull is going to be painted, and the lower part is not going to be copper plated, I am leaving it on wood. I left a small gap in between planks which later on I will fill with black filler so that the individual planks will show more (stole Heinz's idea). They will not come out as much as the deck planking as with the filler the walnut will darken a bit too. The planks which on the photo are showing whole lengths are the once which will be covered again with the wales. Can't wait to have the stern fascia and the quarter gallery finished to cover the mess of paint on them. I had painted the inside all black, but after I glued everything in place and tried the lights, I thought that they would look better wit the inside white, so I had to paint them through the windows. I also planked the floor of the side quarter galleries through the windows. Had to go for a drop strake as the ends were going to be too narrow in this band. Robert


- 527 replies
-
- 12
-
-
- caldercraft
- victory
- (and 1 more)
-
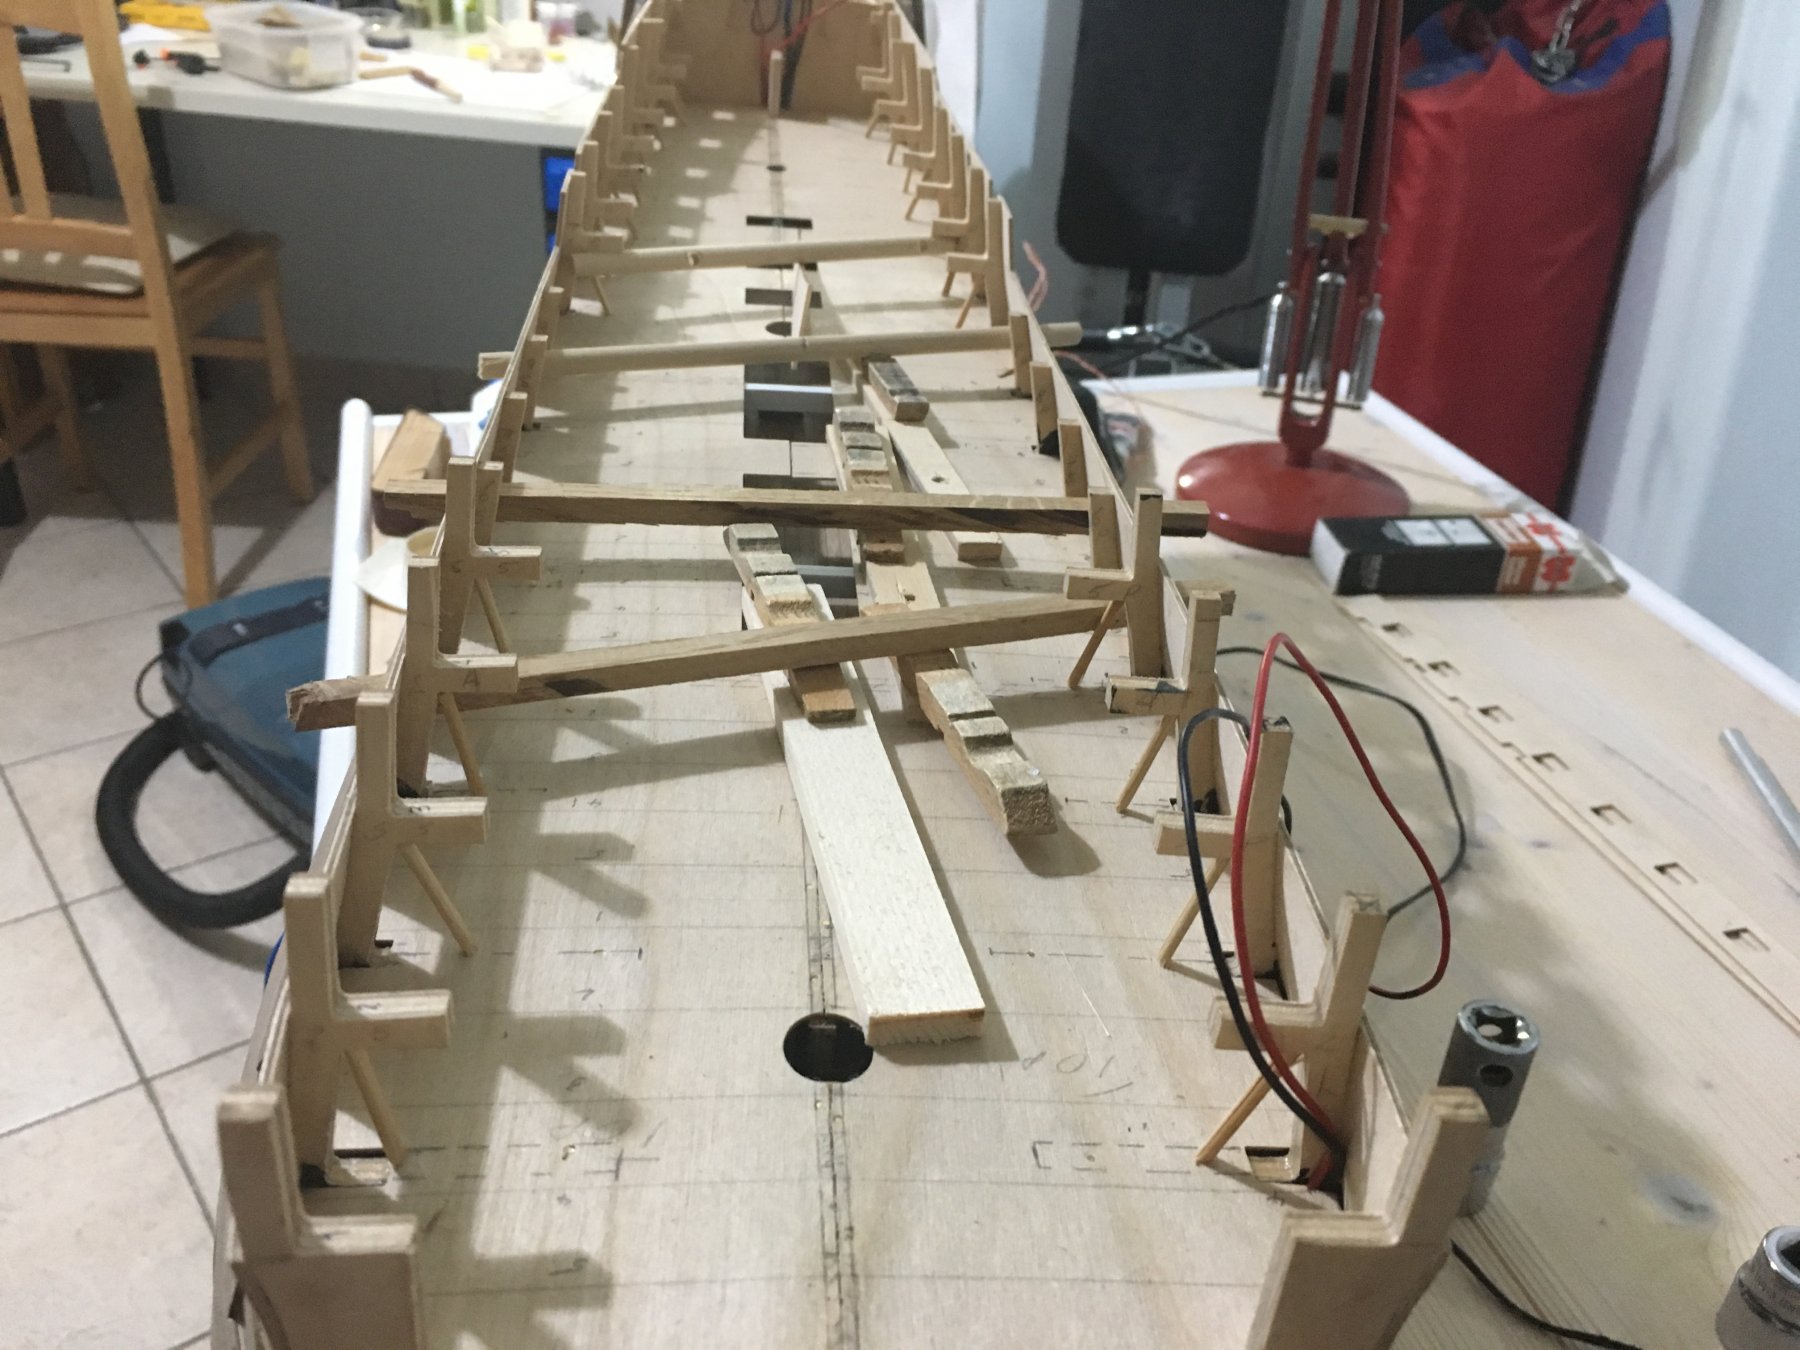
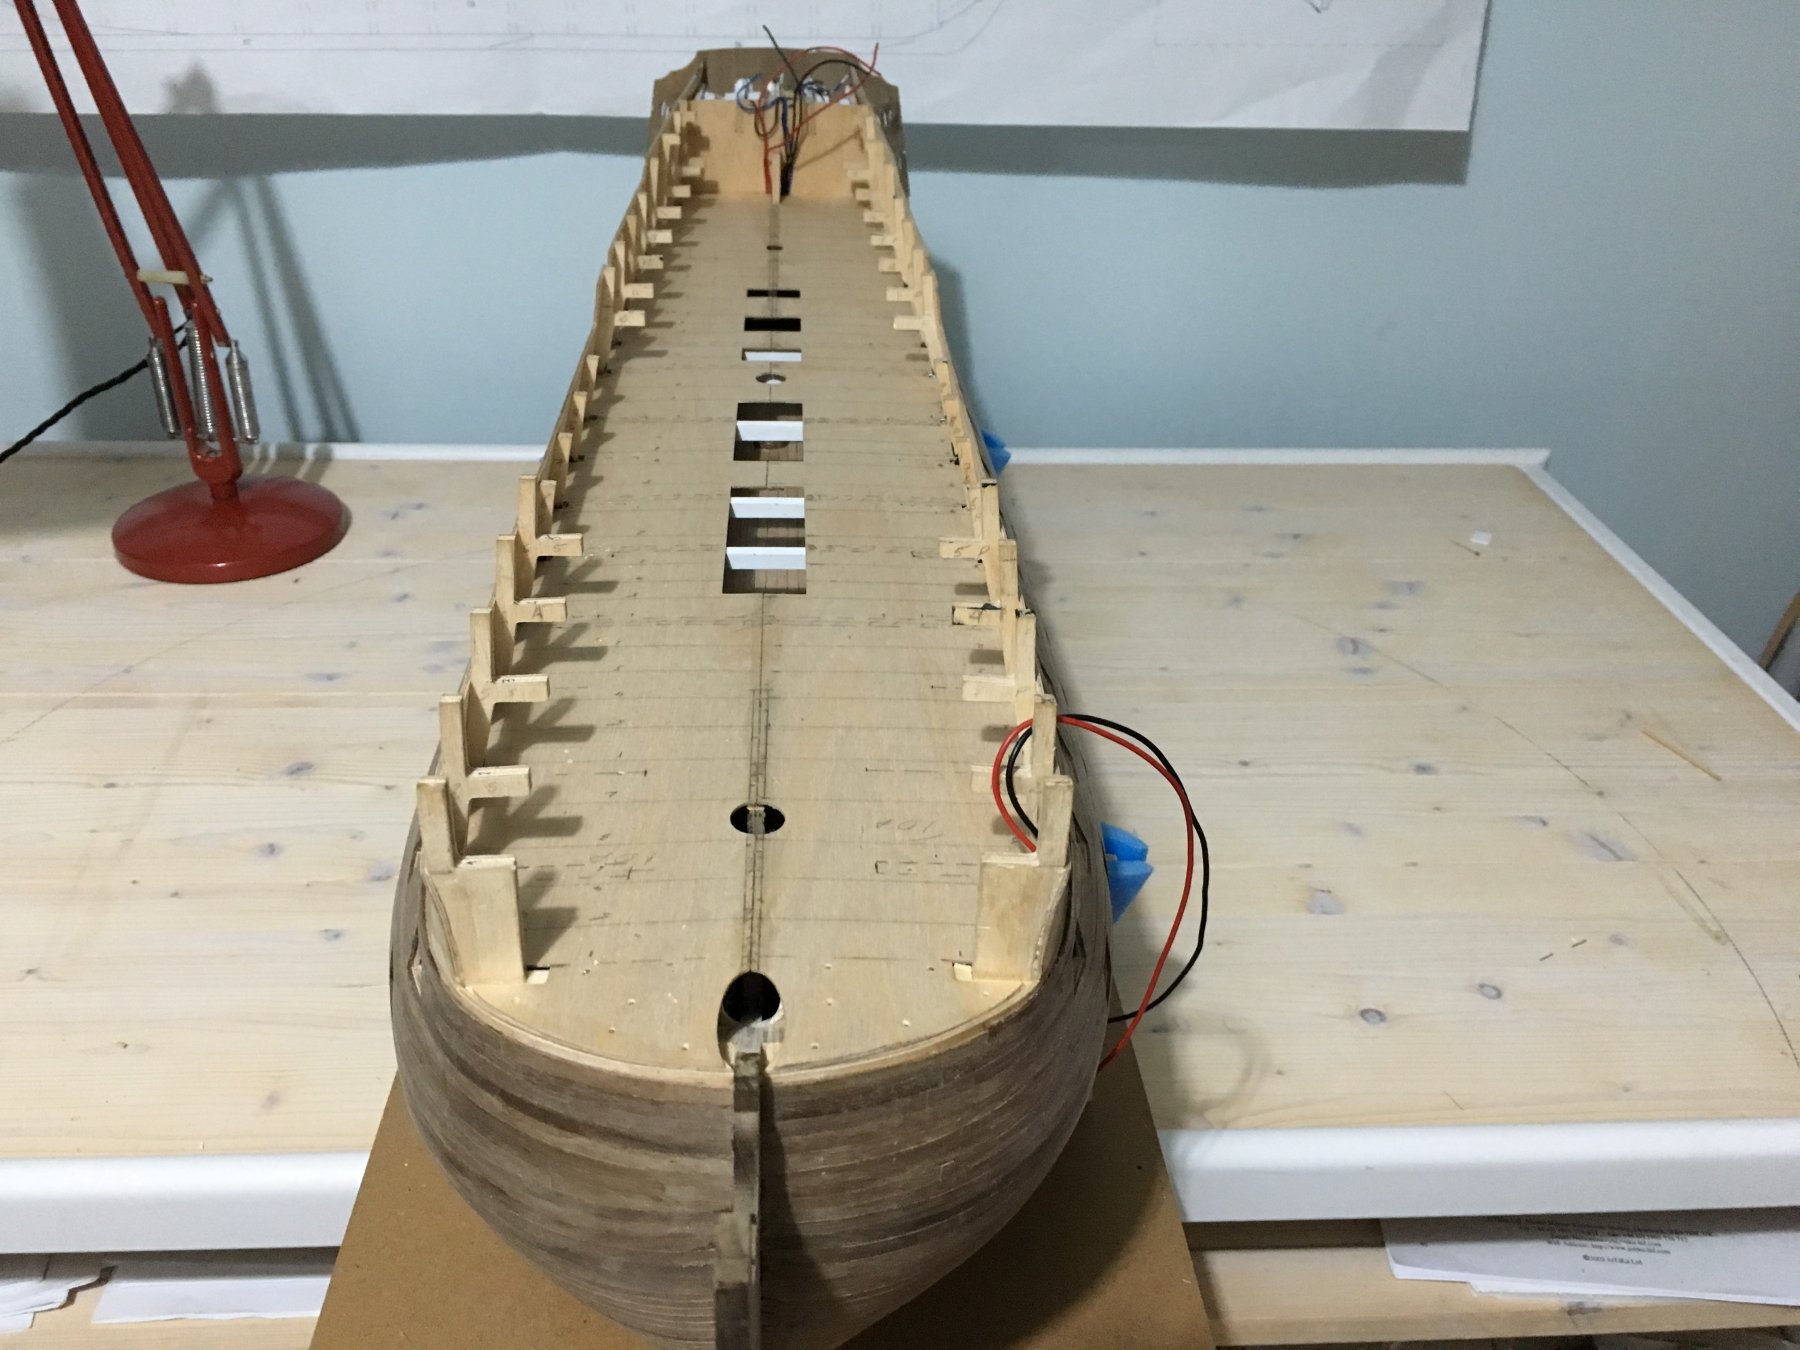
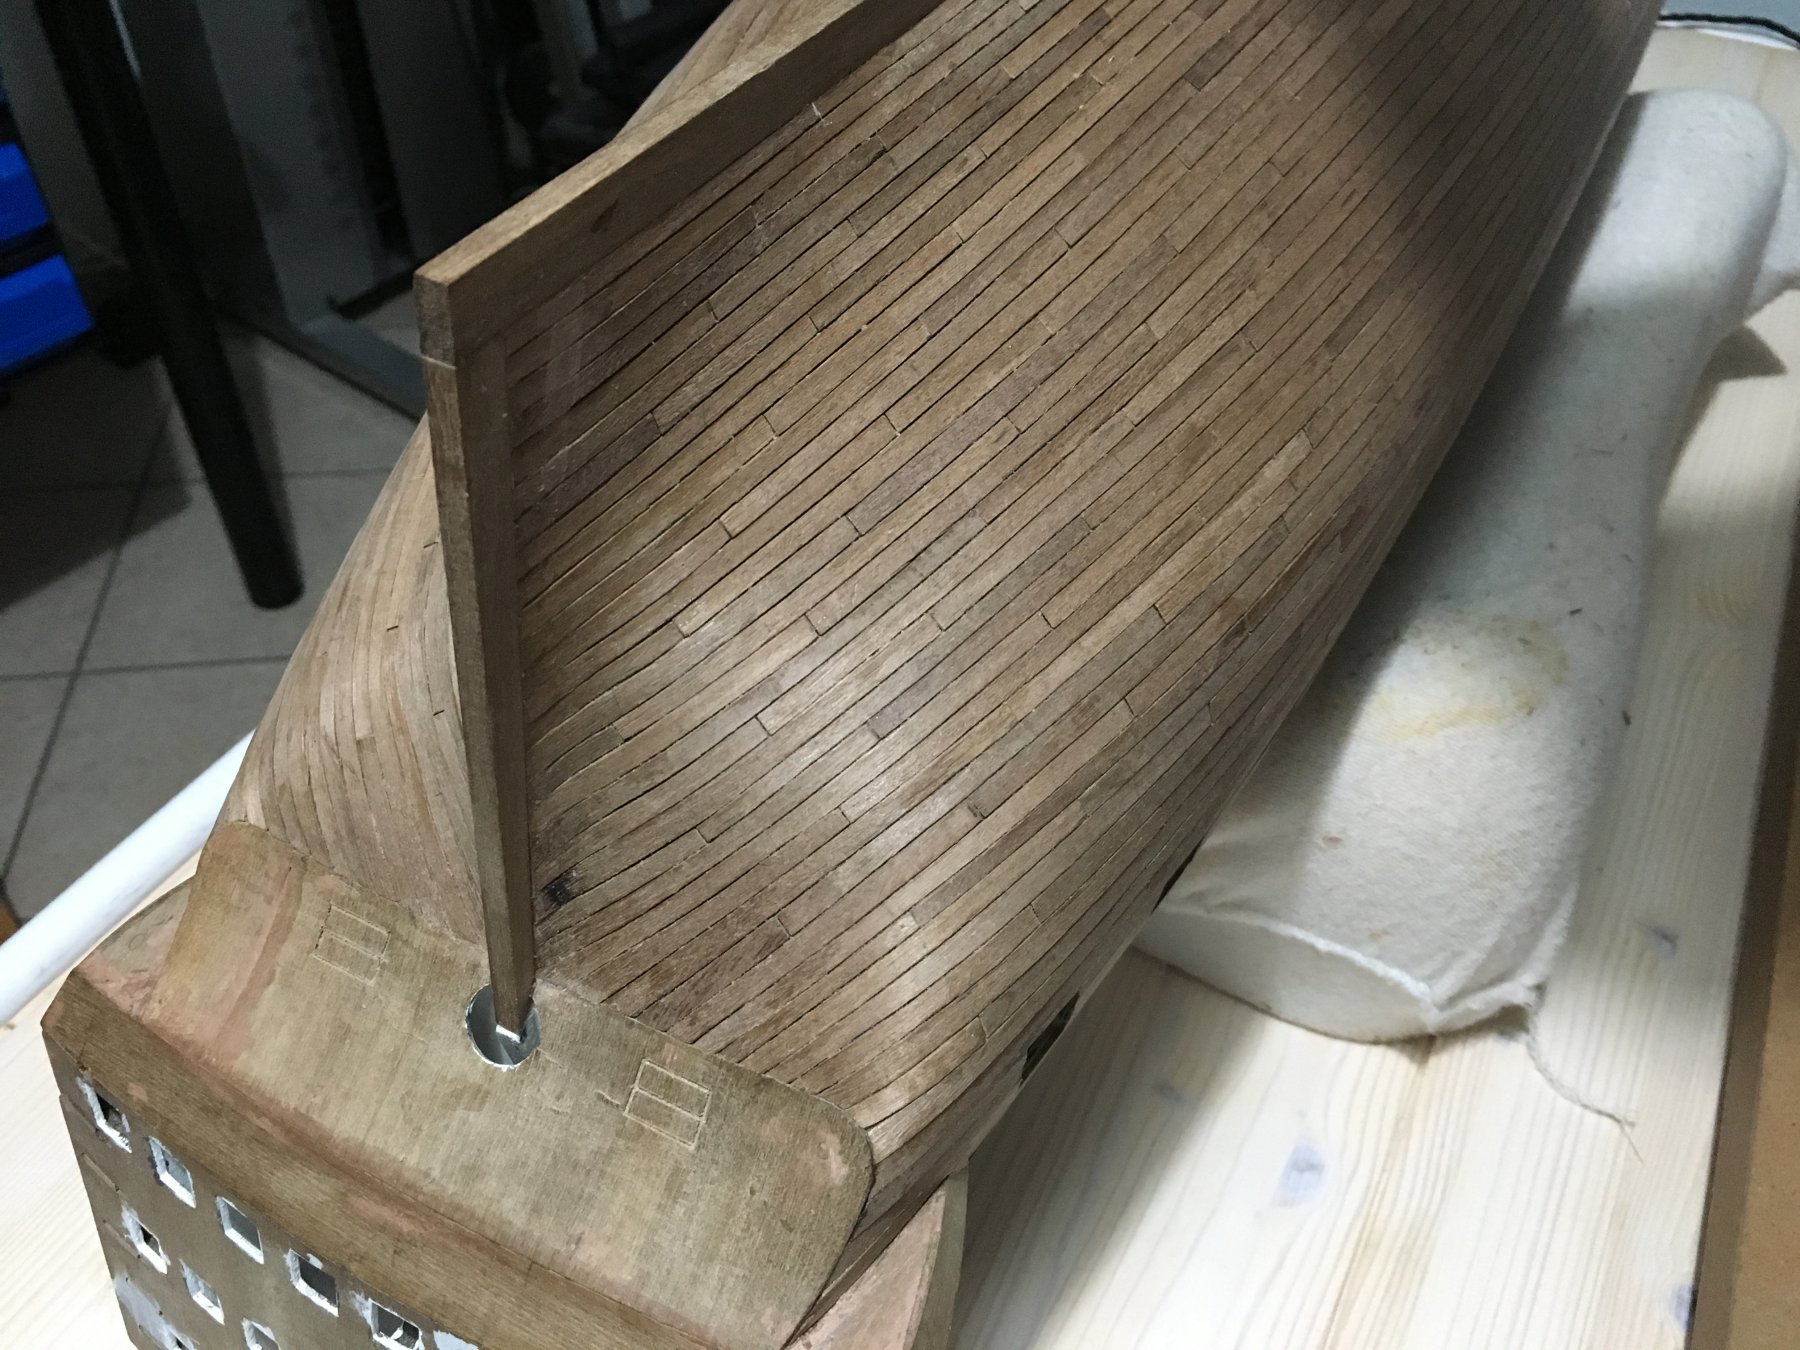
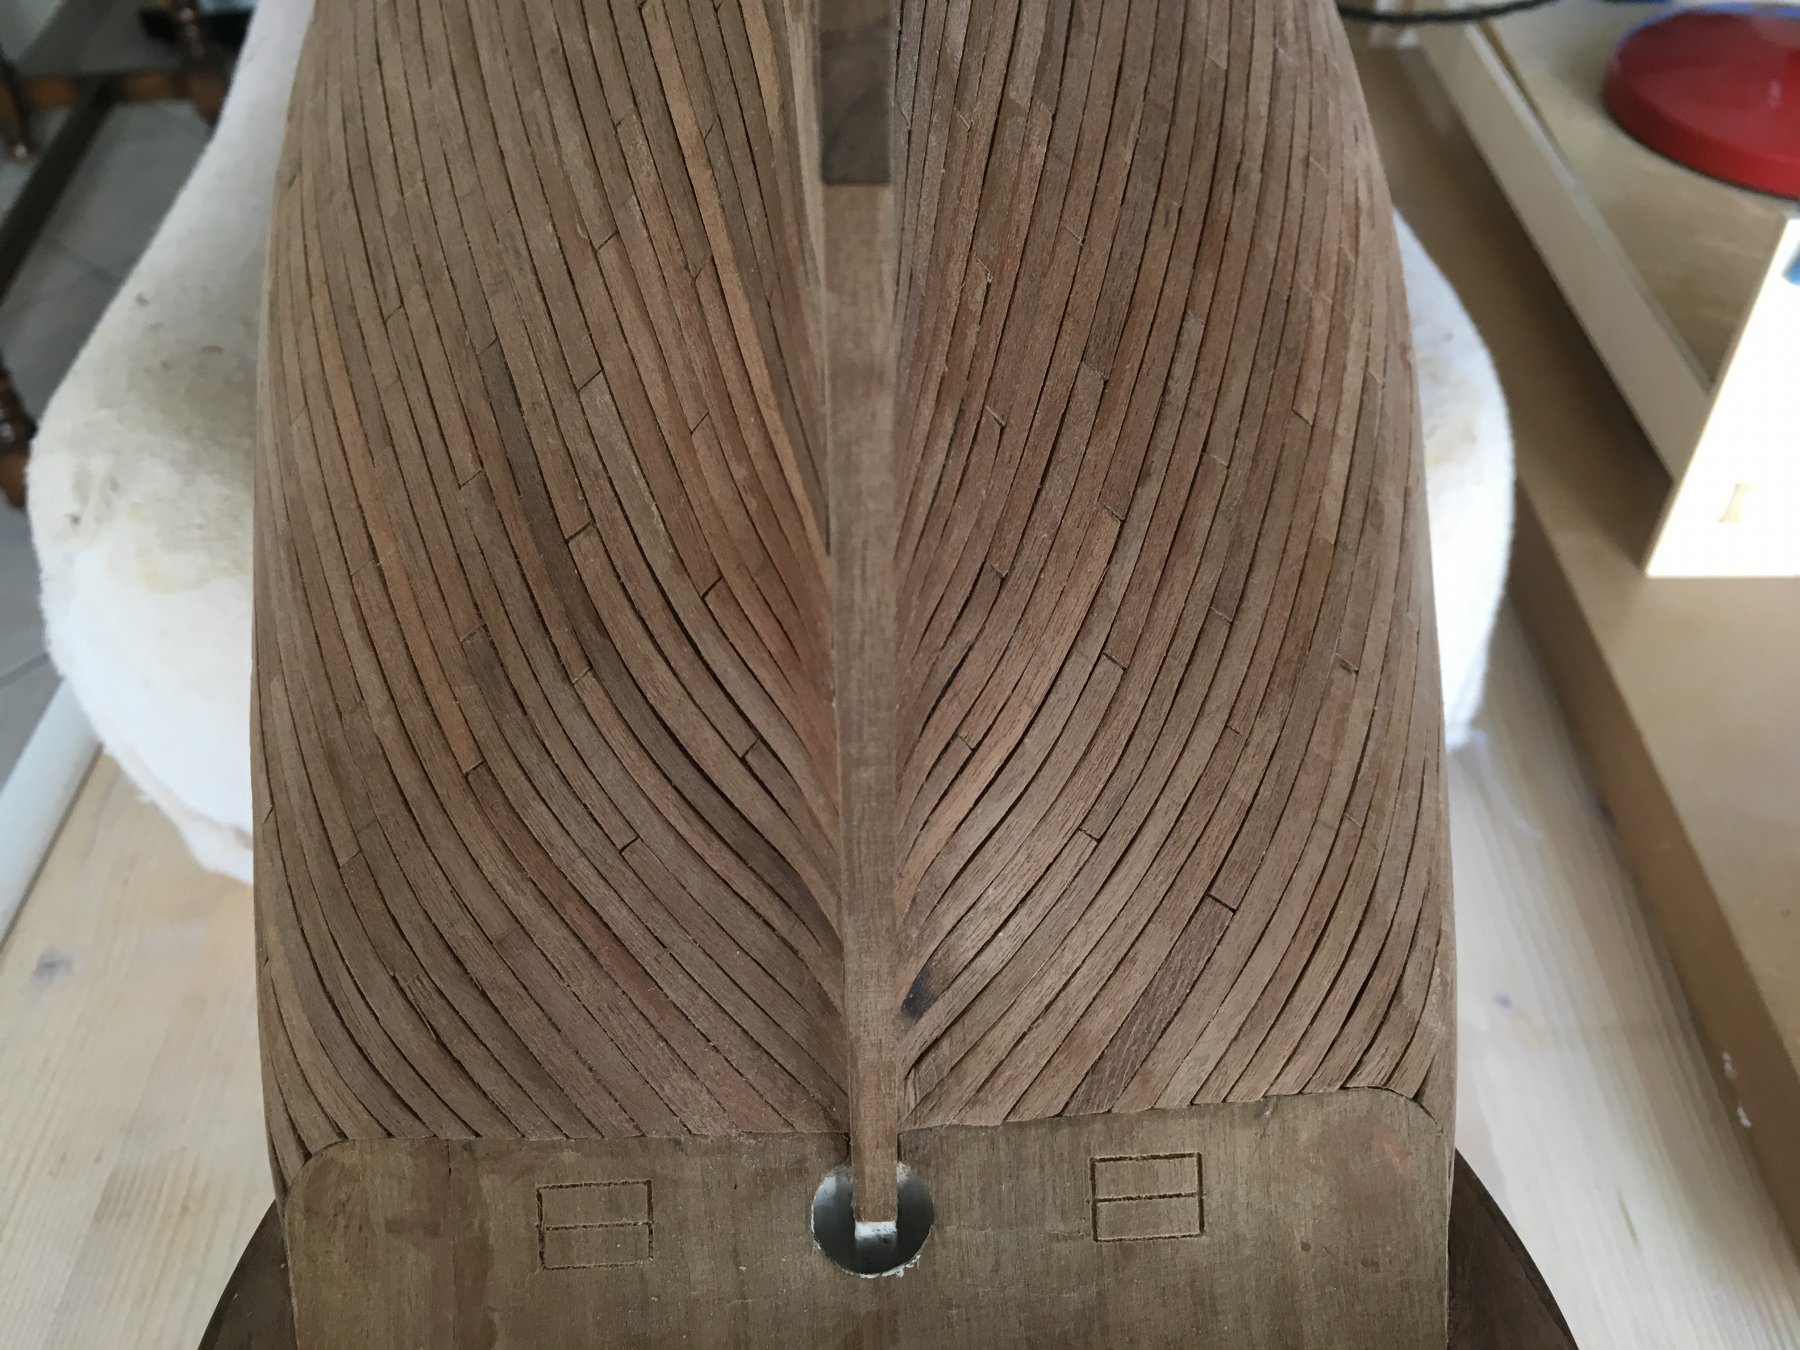
Very nice work Mike. You have been given some good advice above. When I did mine I did as Charter 33 advised you, I adjusted the central slot length to bring it in line with the top of the middle support. Any slight differences can be sanded down together with the stern extensions. Also I fitted the stern extensions 105 and 106 before I fitted the bulkhead in place. As David has already advised you, it is VERY important that bulkhead 18 is fitted exactly without any sideway shifts for the reasons he pointed out for you. Keep up the good work Mike. Another thing Mike, have you thought of how you are going to display the finished model. If you are going to drill holes in the keel to take rods, now is the time to do them. I used 3mm threaded rods and embedded a nut for each in the keel. I also reinforced the sides by gluing a piece of plywood on each side where the holes were drilled in the keel. Robert
-
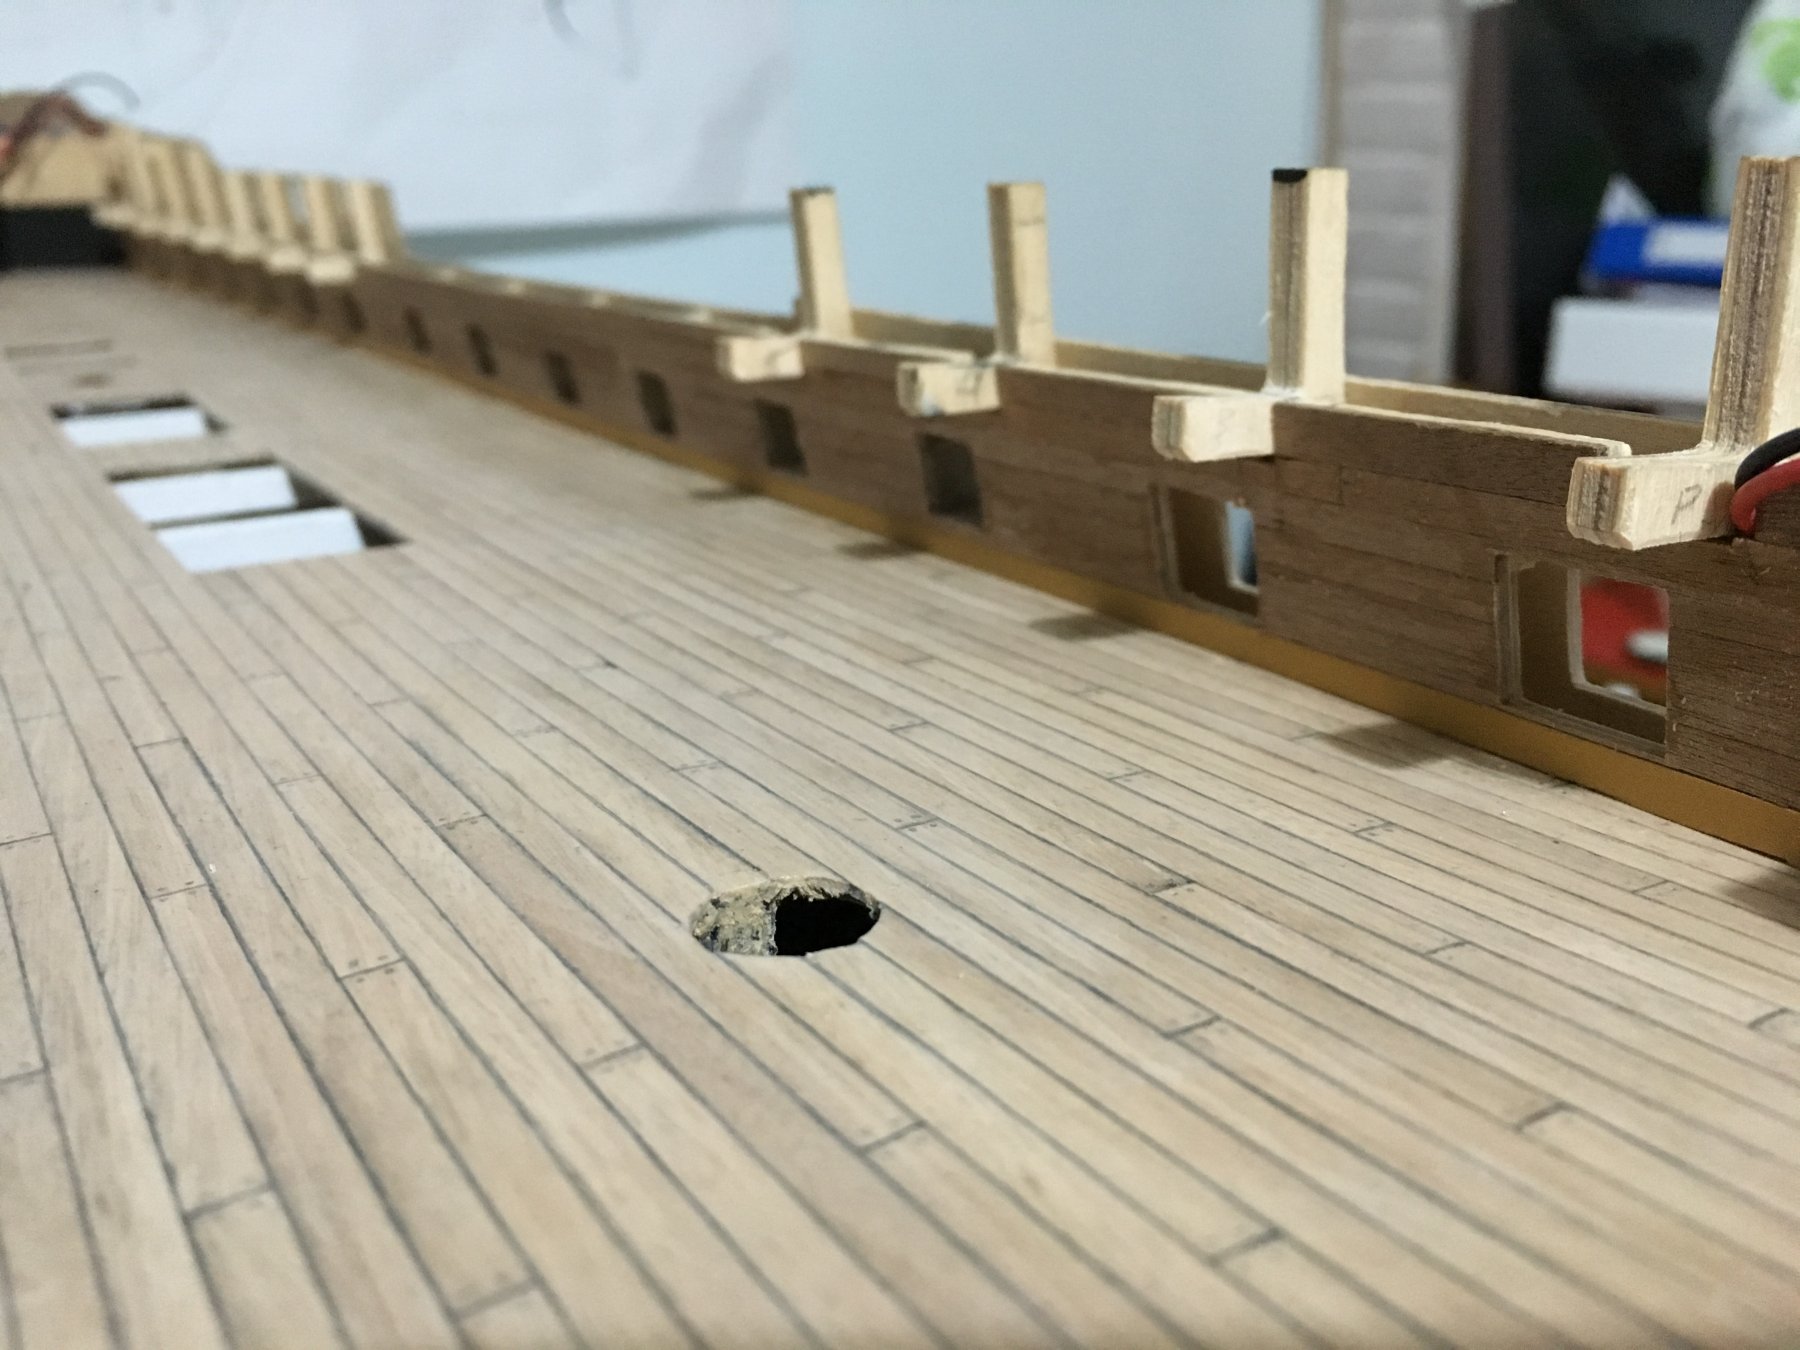
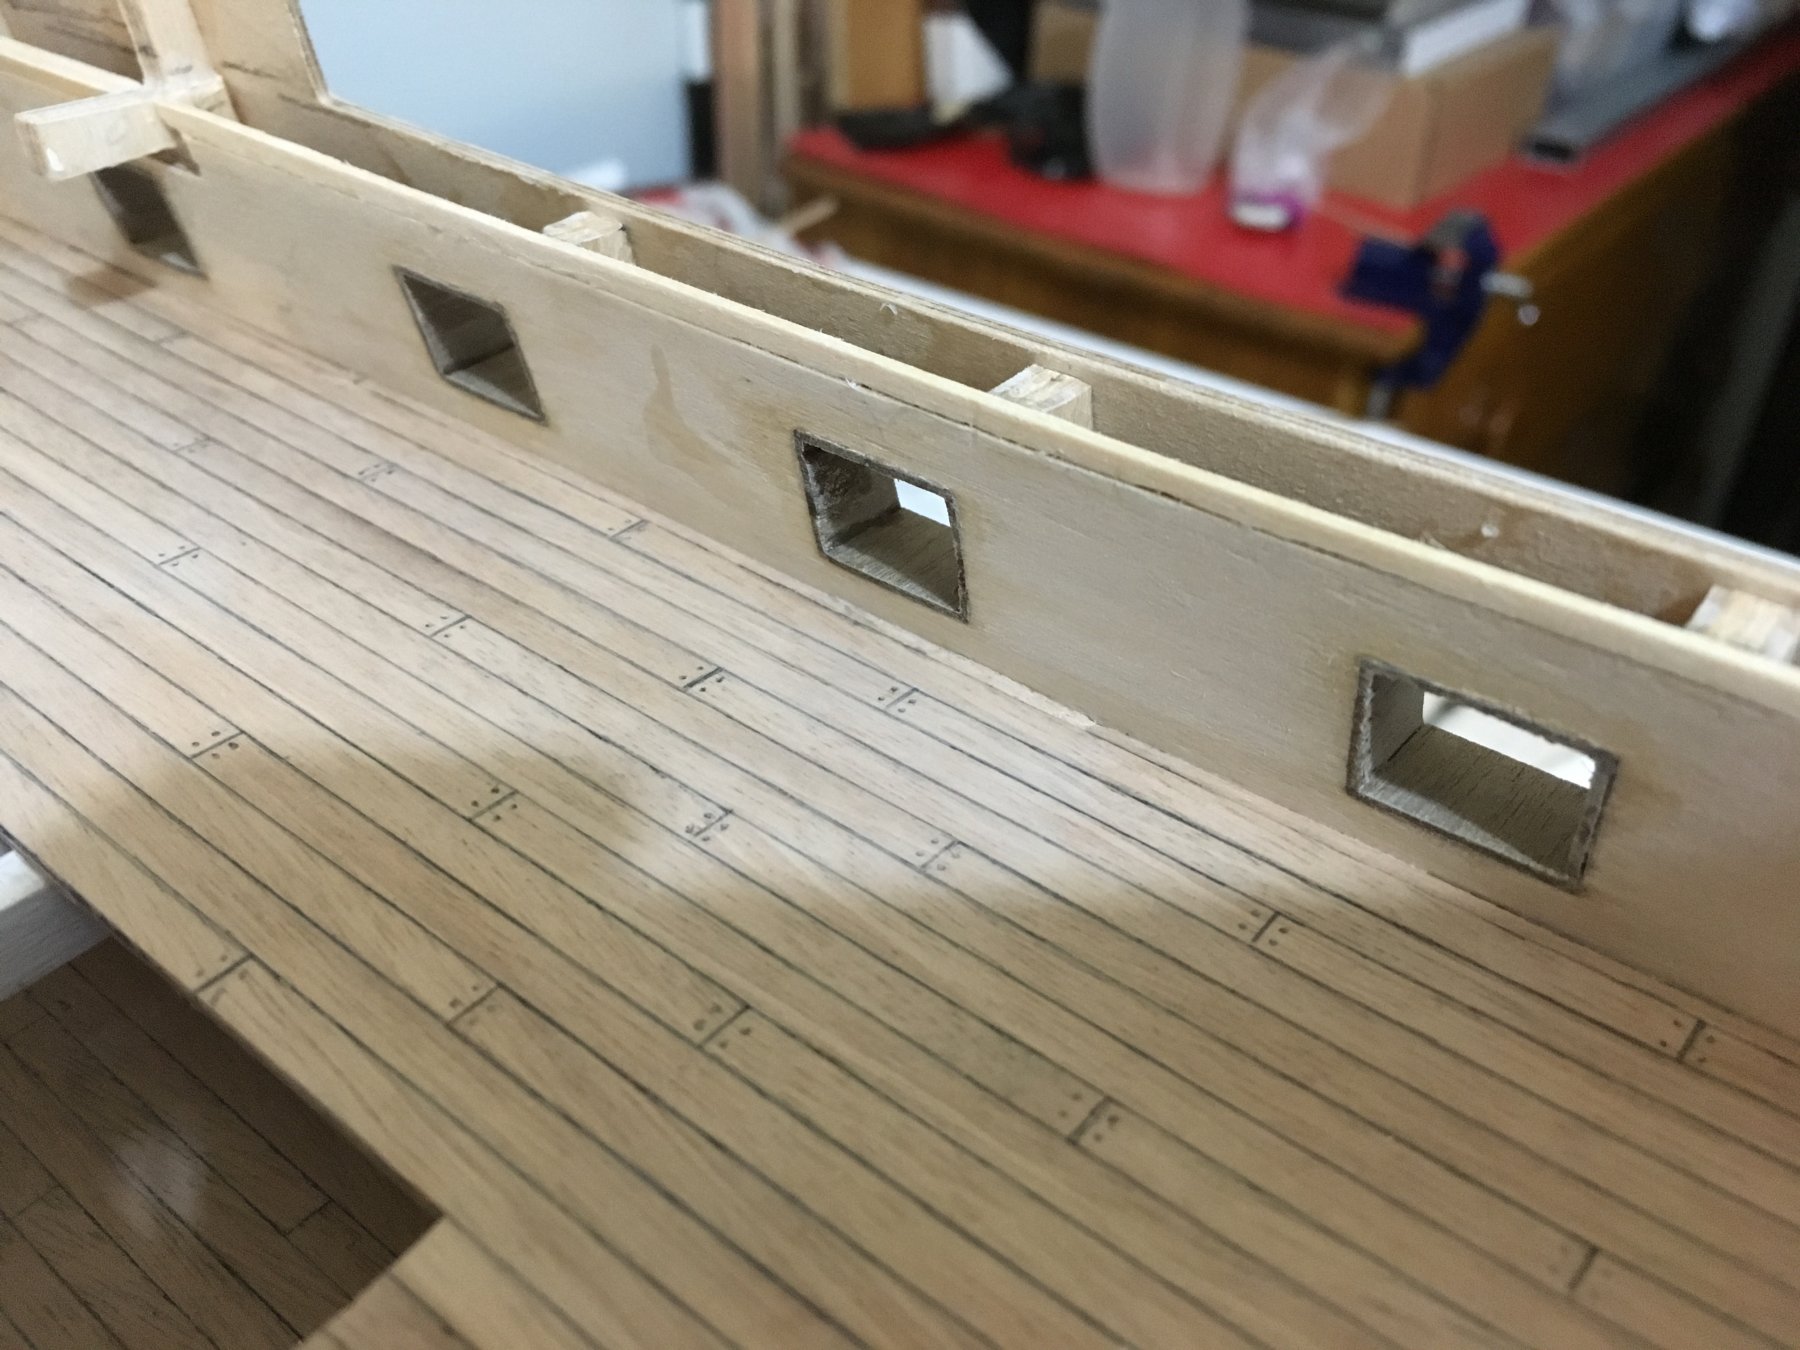
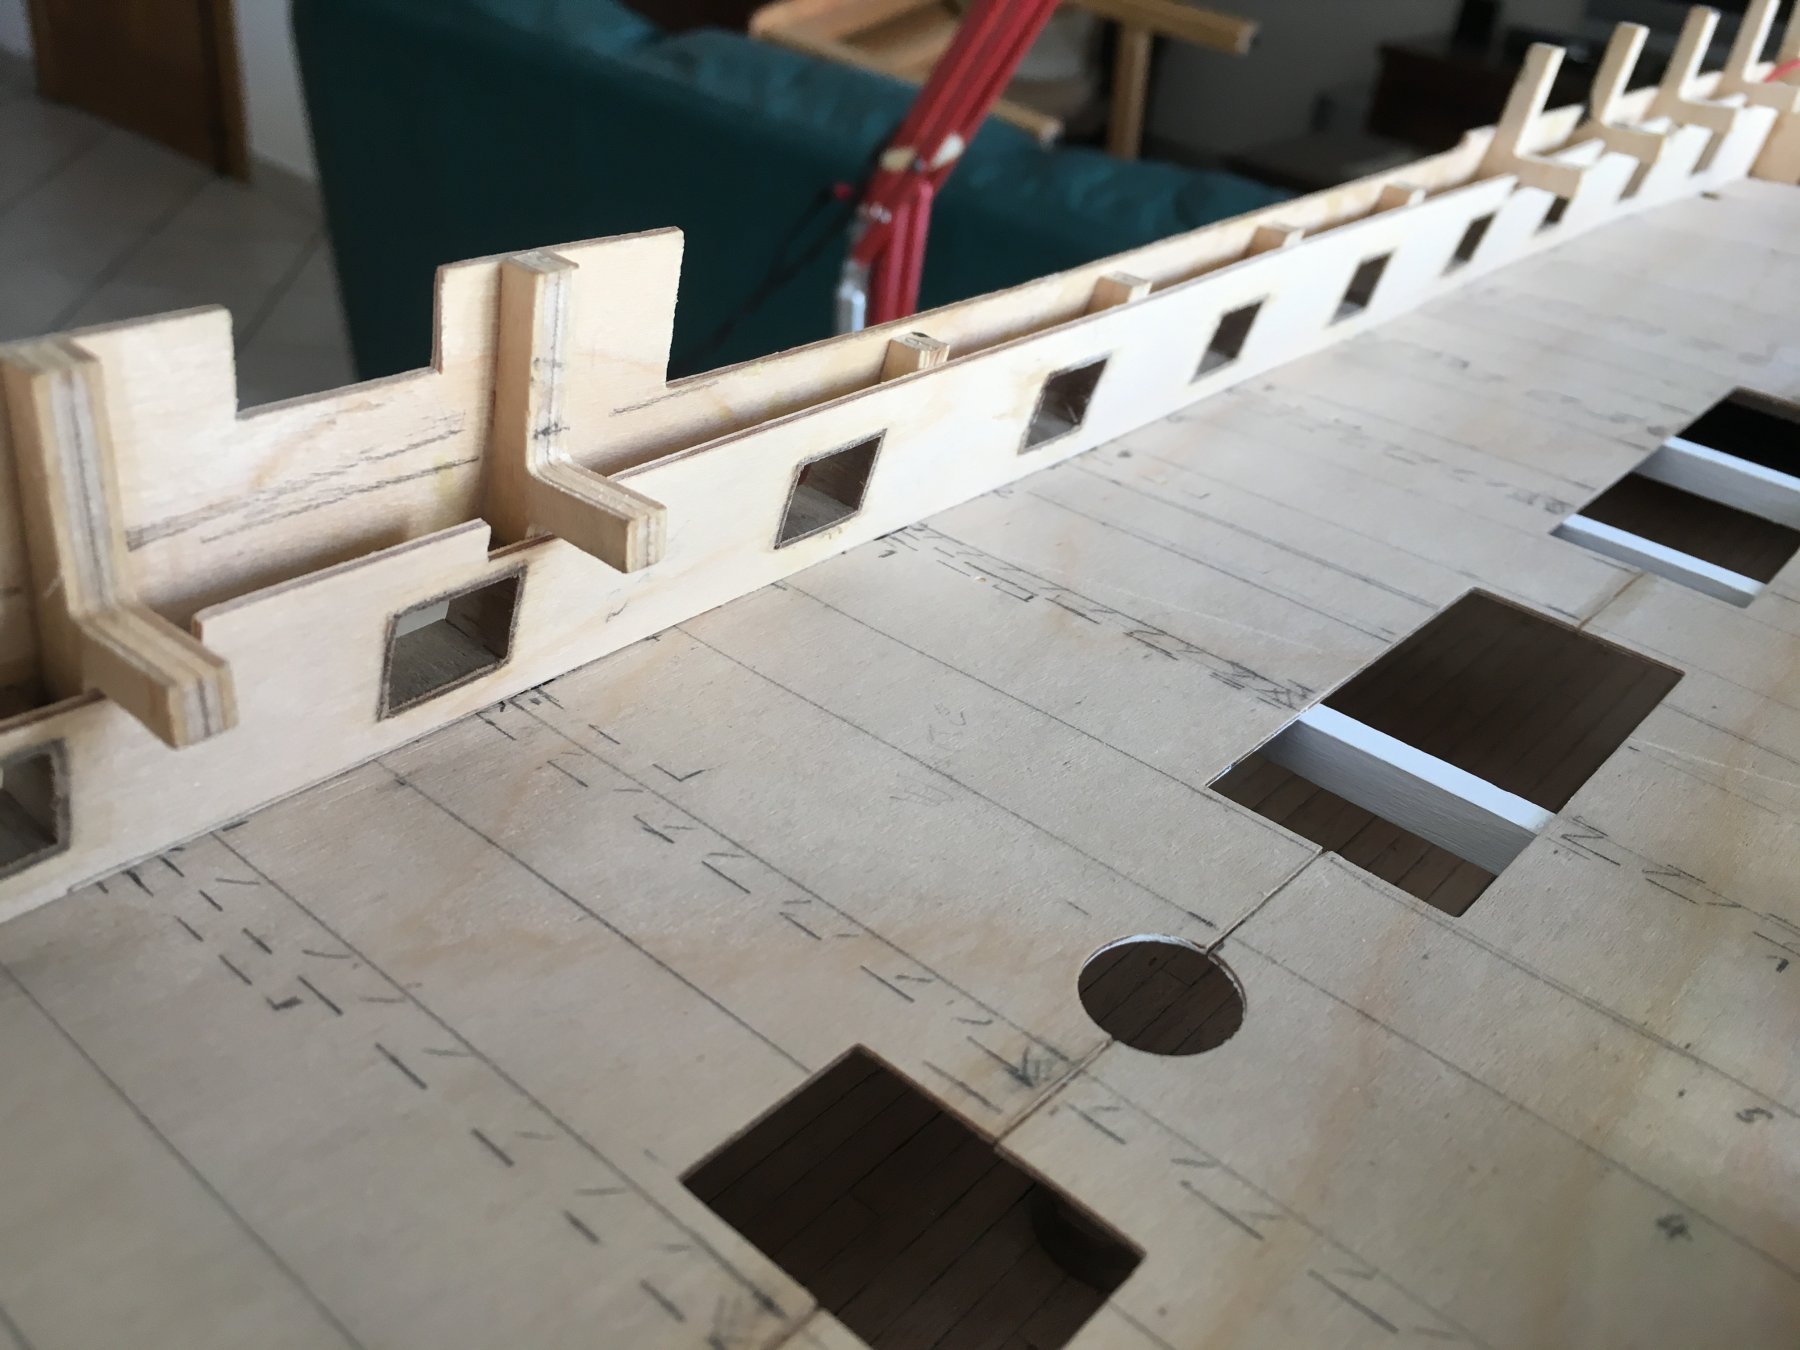
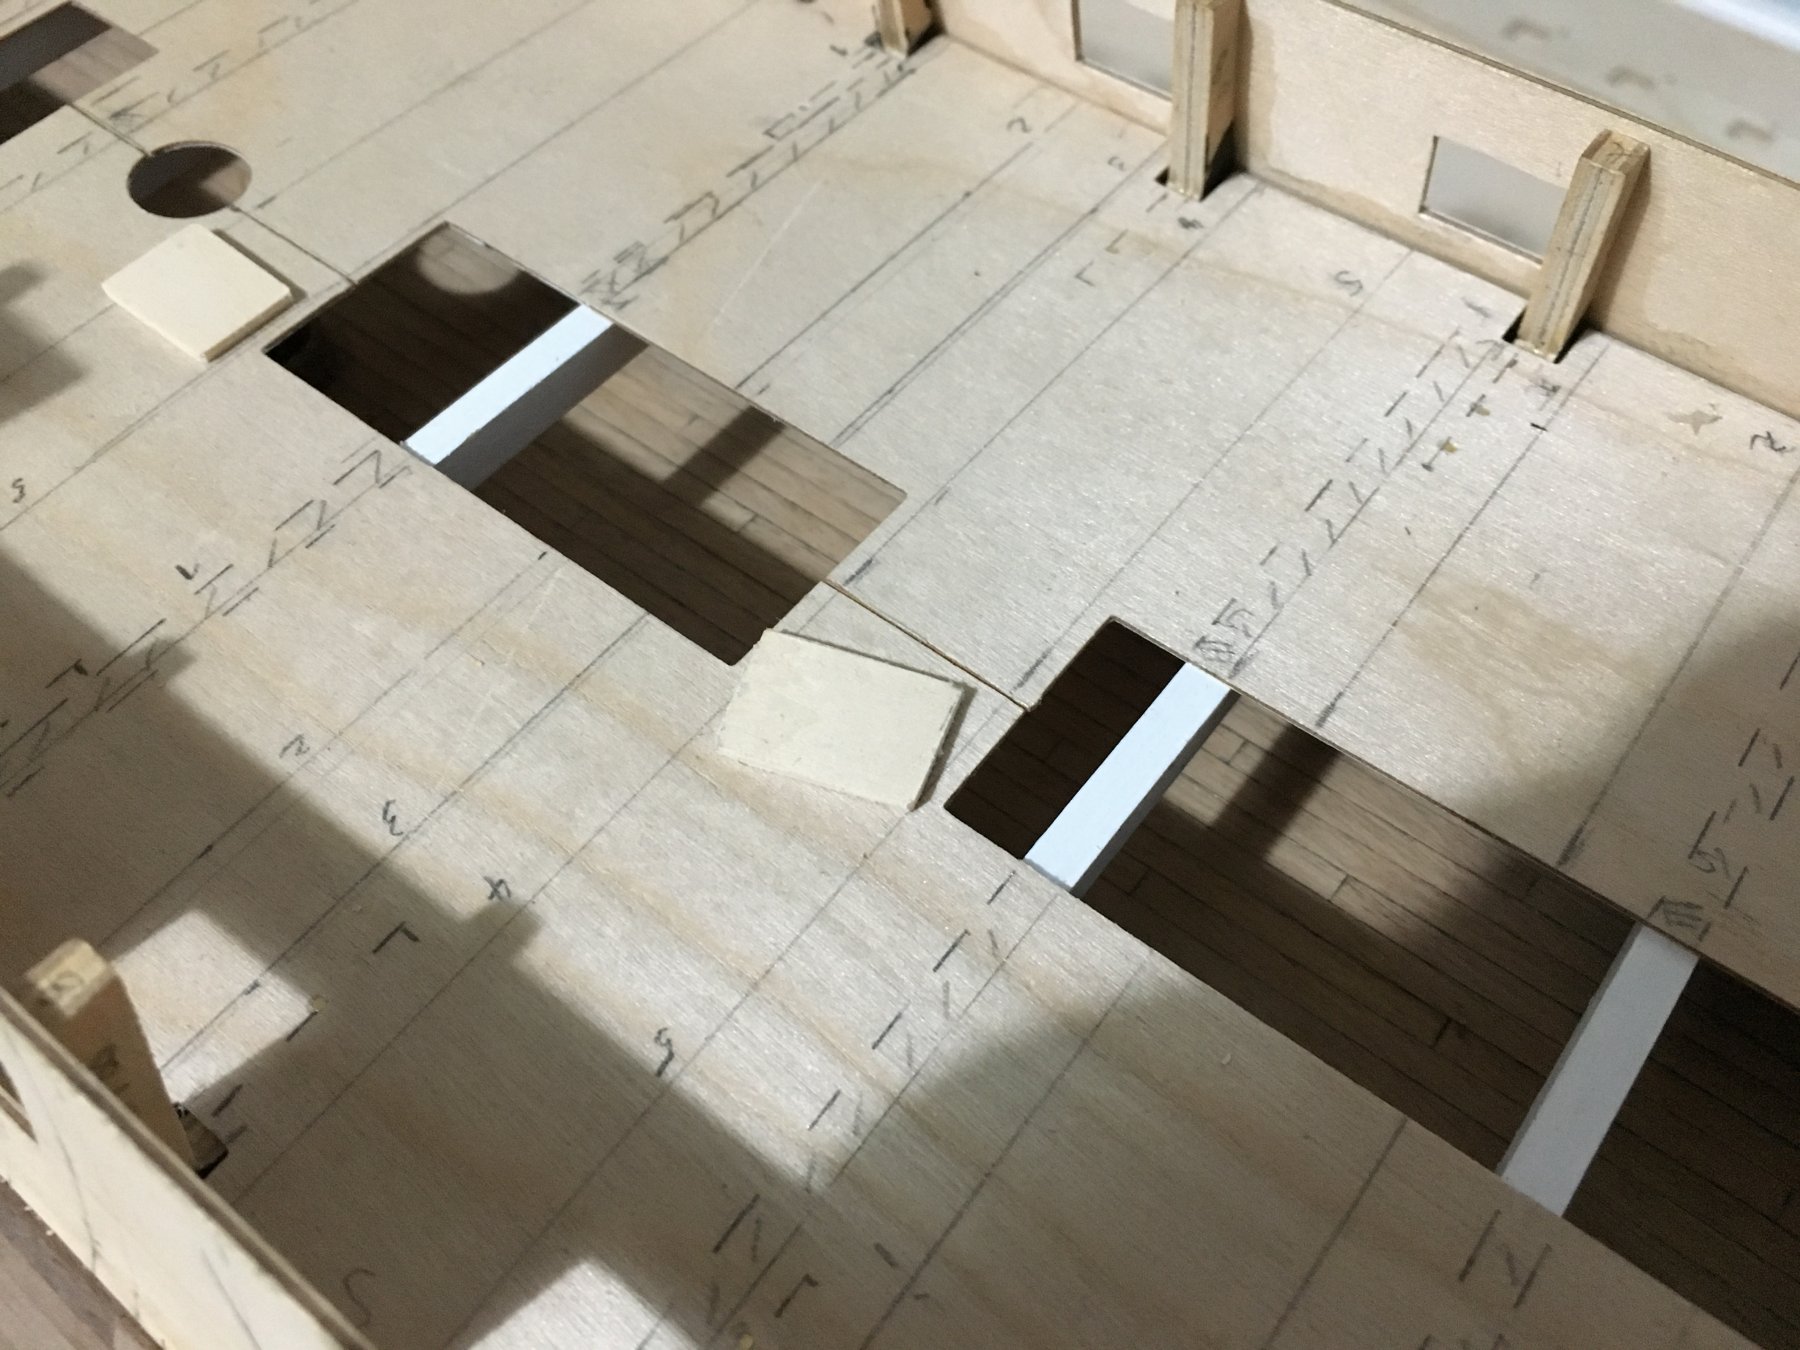
I used normal white wood glue for the waterways and all planking. After marking and gone over the markings with a blade it was quite easy to chisel away. You have to be carefully for the trimmed edges to keep them clean and sharp. The underlaying plywood doesn't matter as it is going to be covered again. Robert
- 66 replies
-
- 1
-
-
- bluenose ii
- artesania latina
- (and 1 more)