HOLIDAY DONATION DRIVE - SUPPORT MSW - DO YOUR PART TO KEEP THIS GREAT FORUM GOING! (Only 24 donations so far out of 49,000 members - C'mon guys!)
×

Robert29
-
Posts
417 -
Joined
-
Last visited
Content Type
Profiles
Forums
Gallery
Events
Everything posted by Robert29
-
 Signed up. Very interesting, hope the 10,000 sign up target is reached. Robert
 -
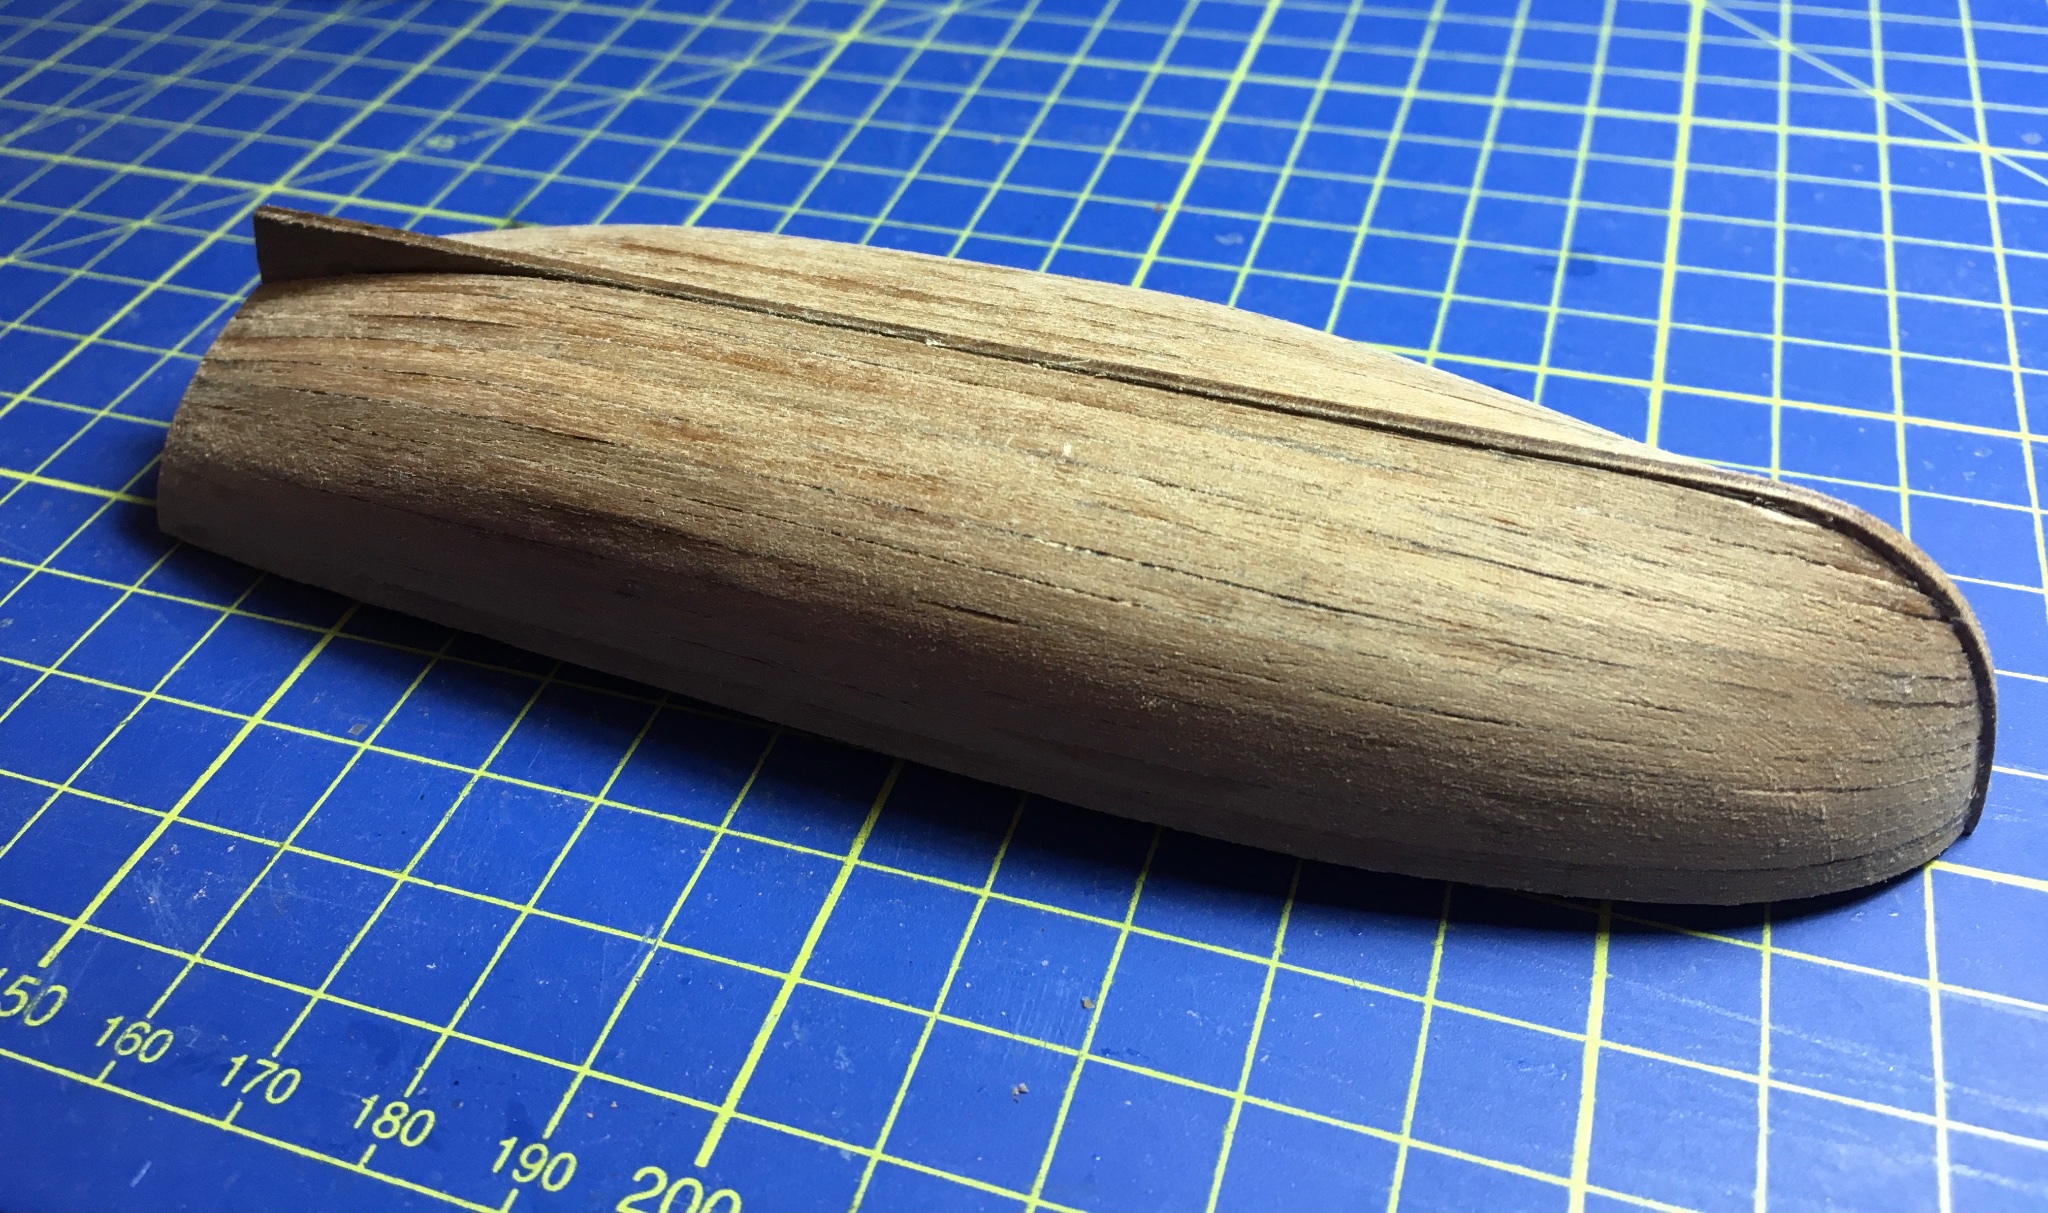
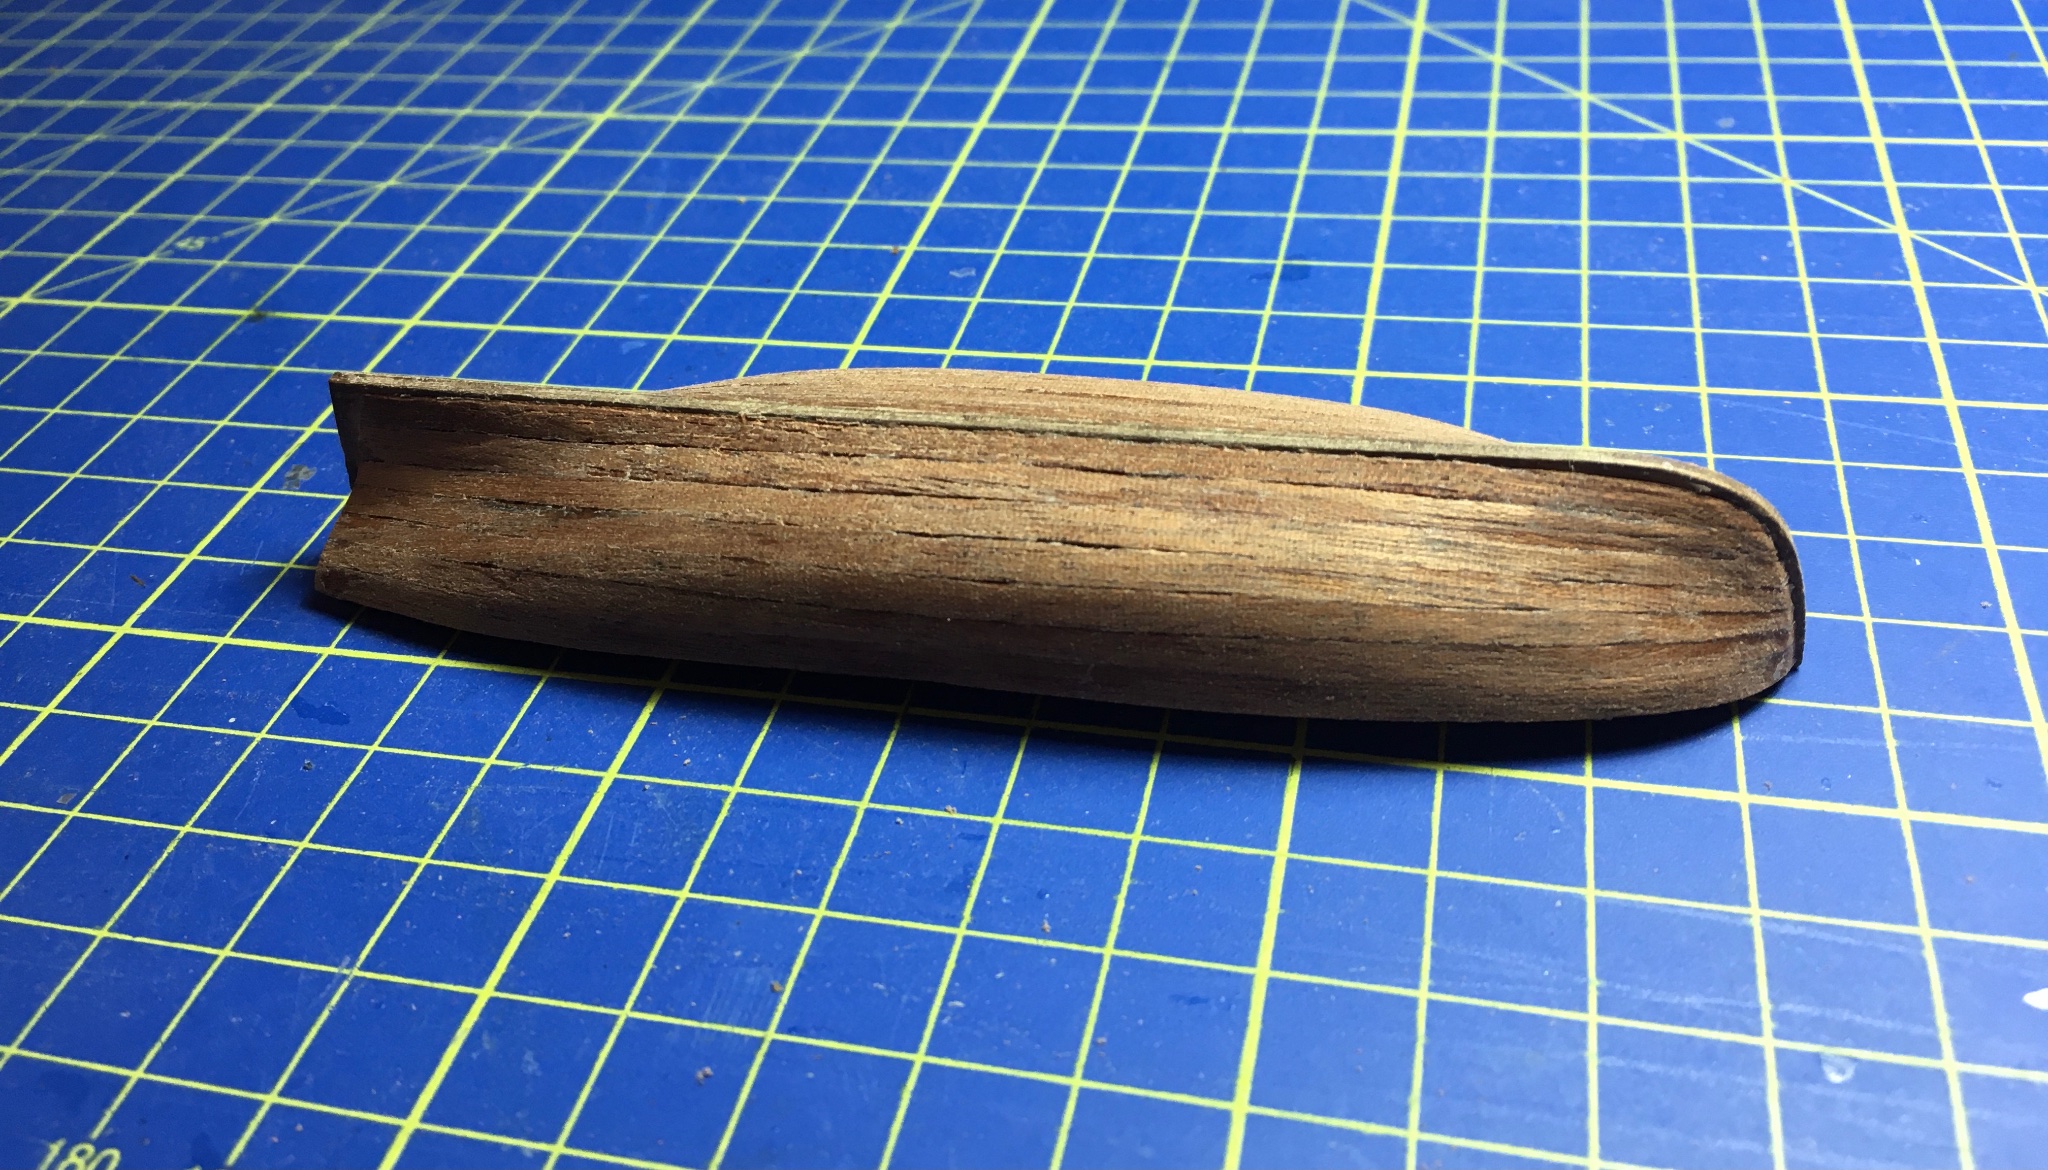
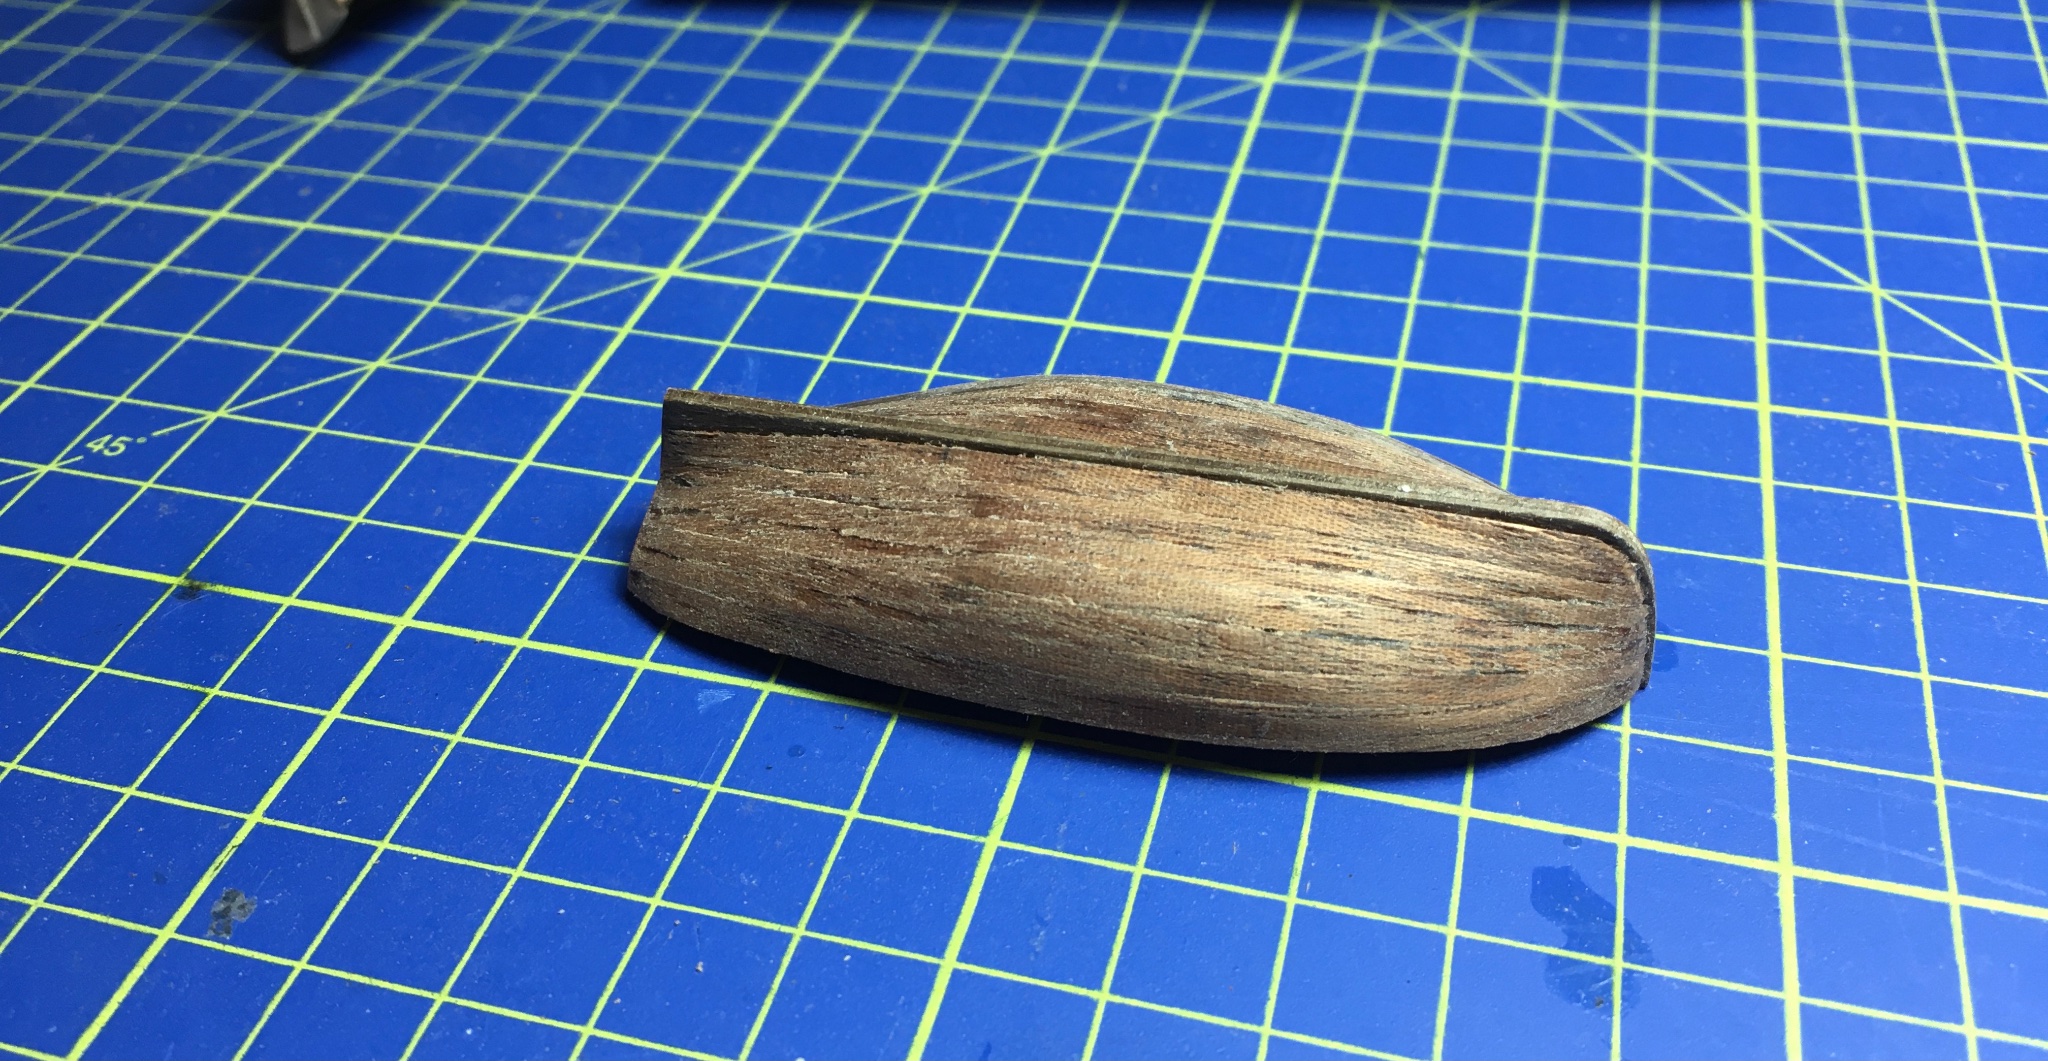
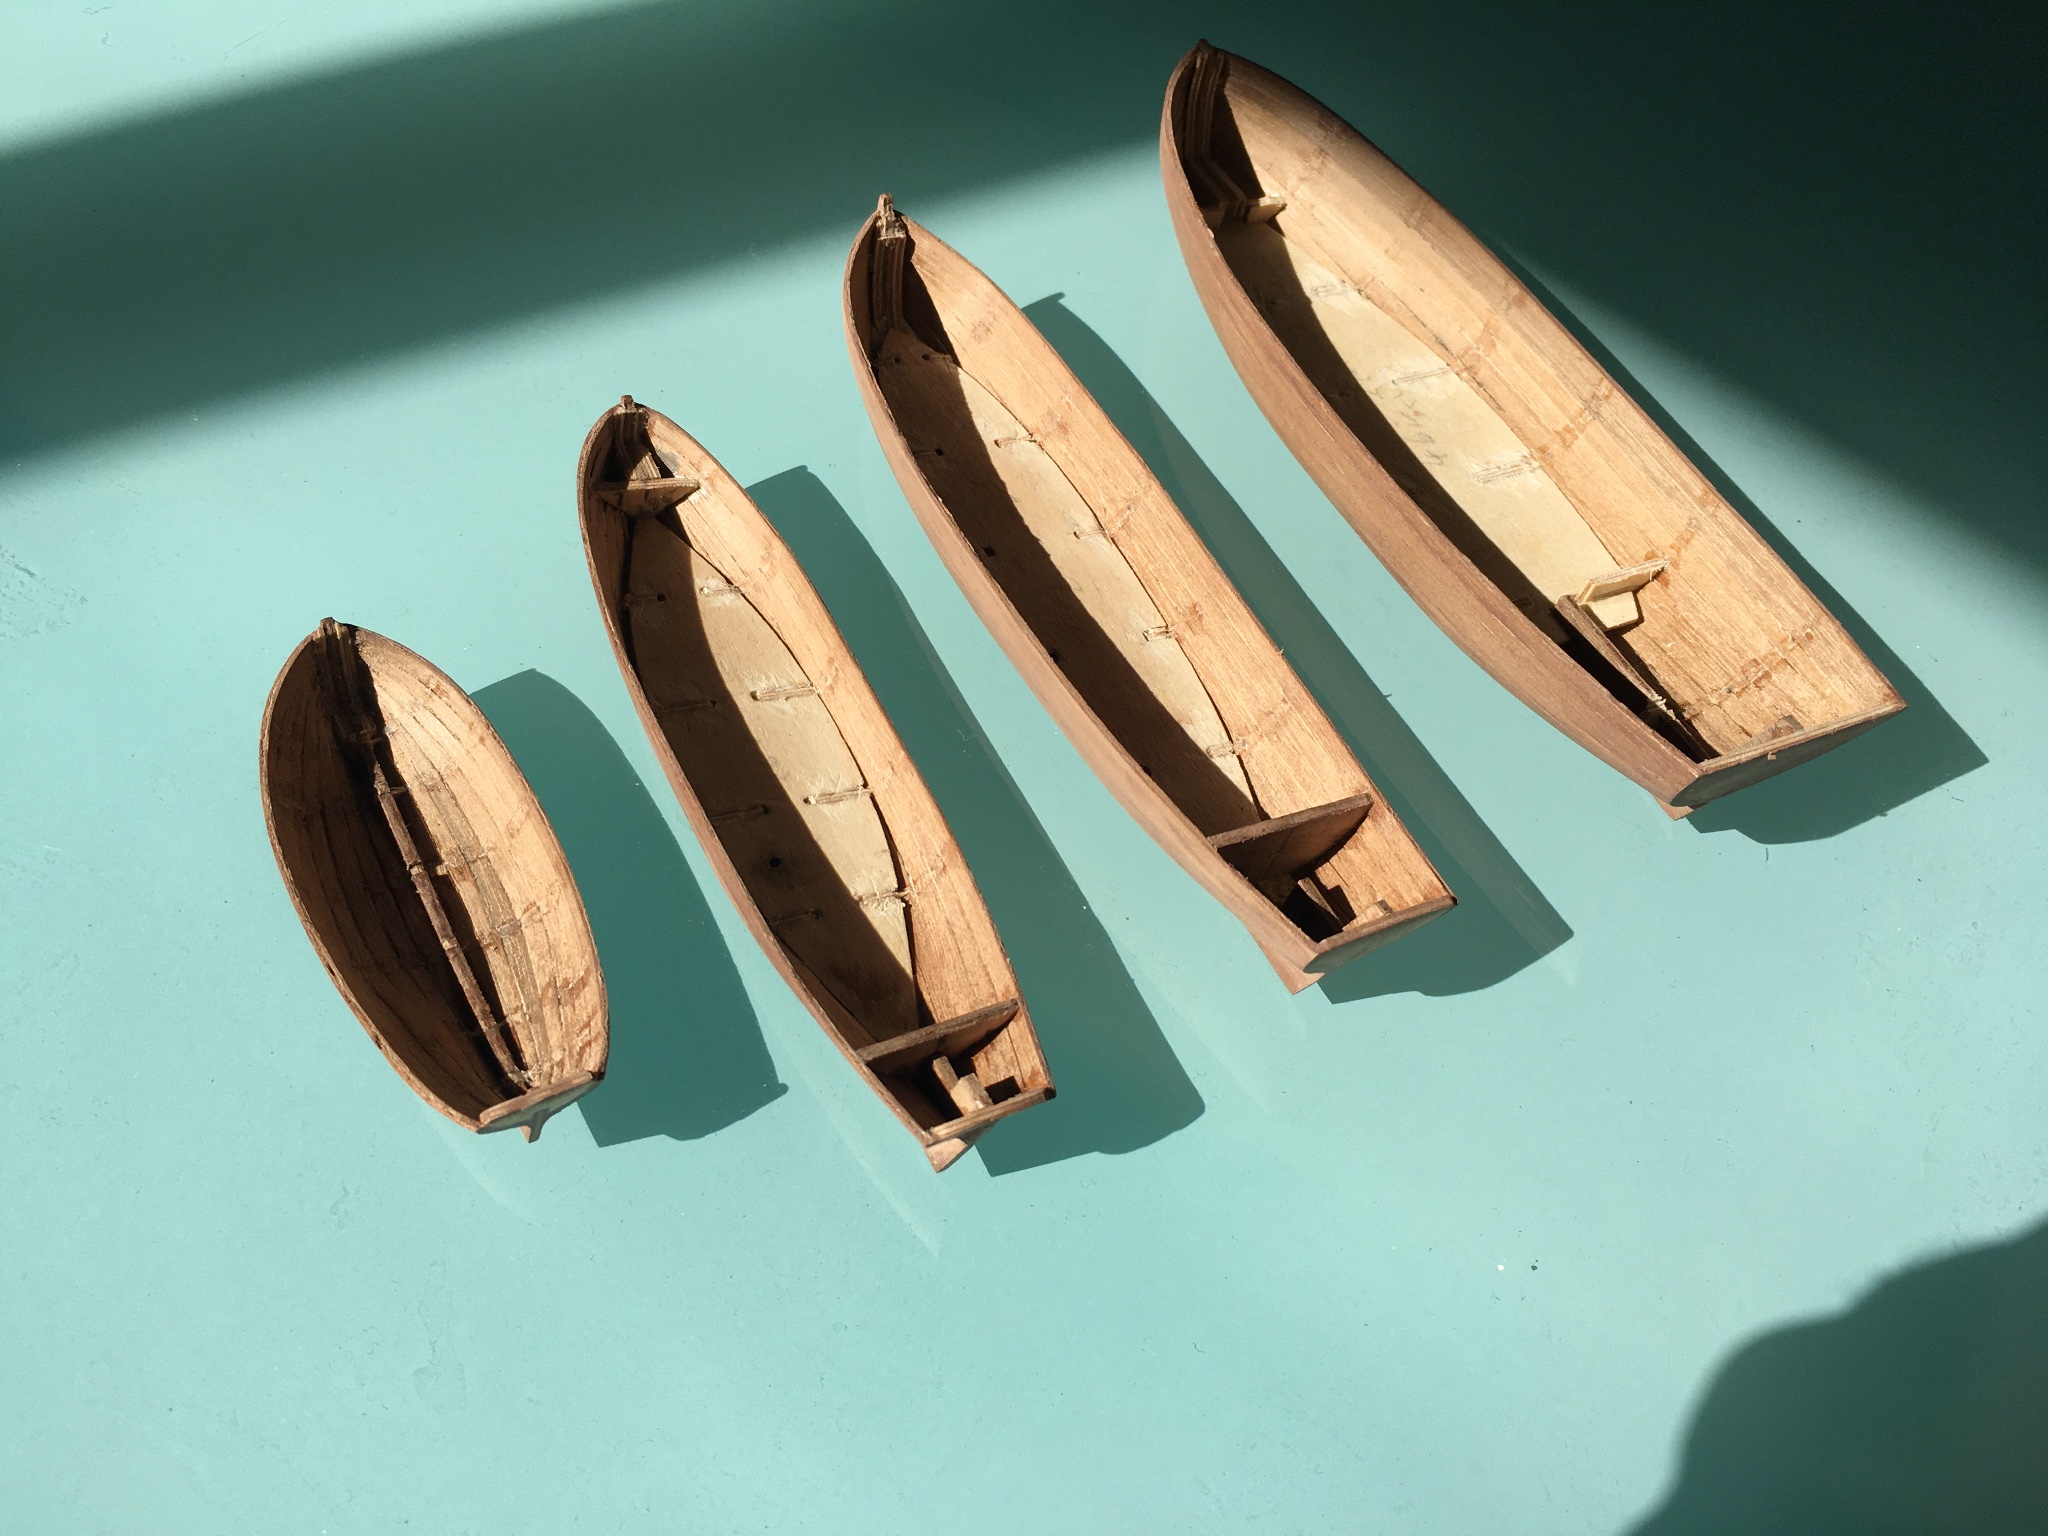
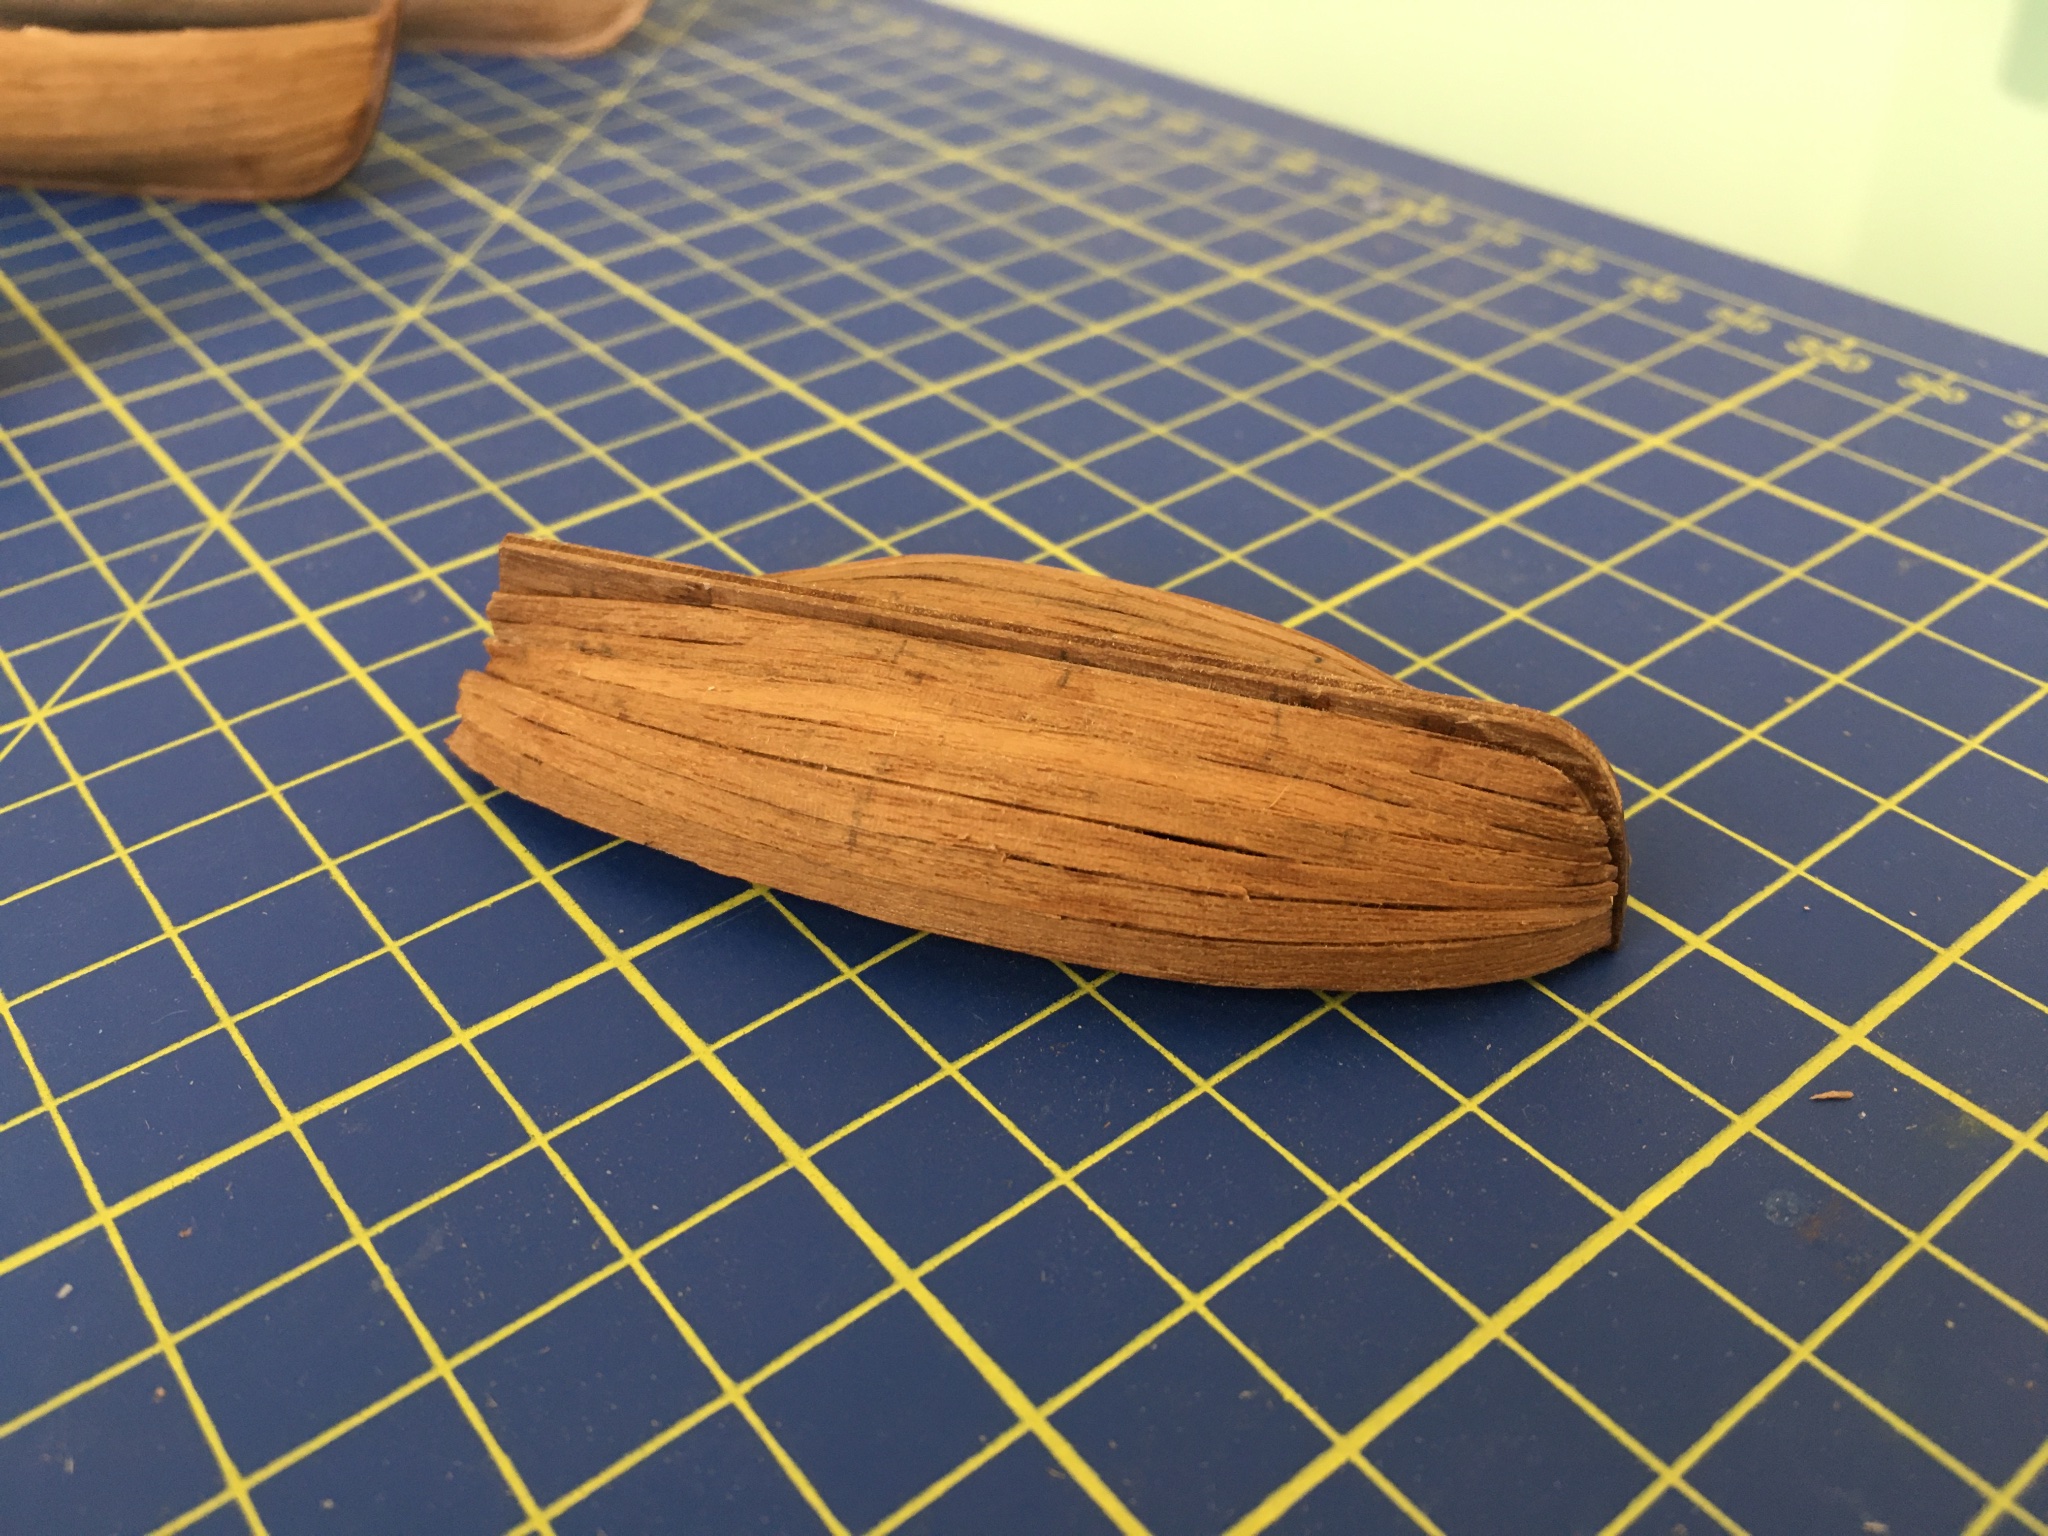
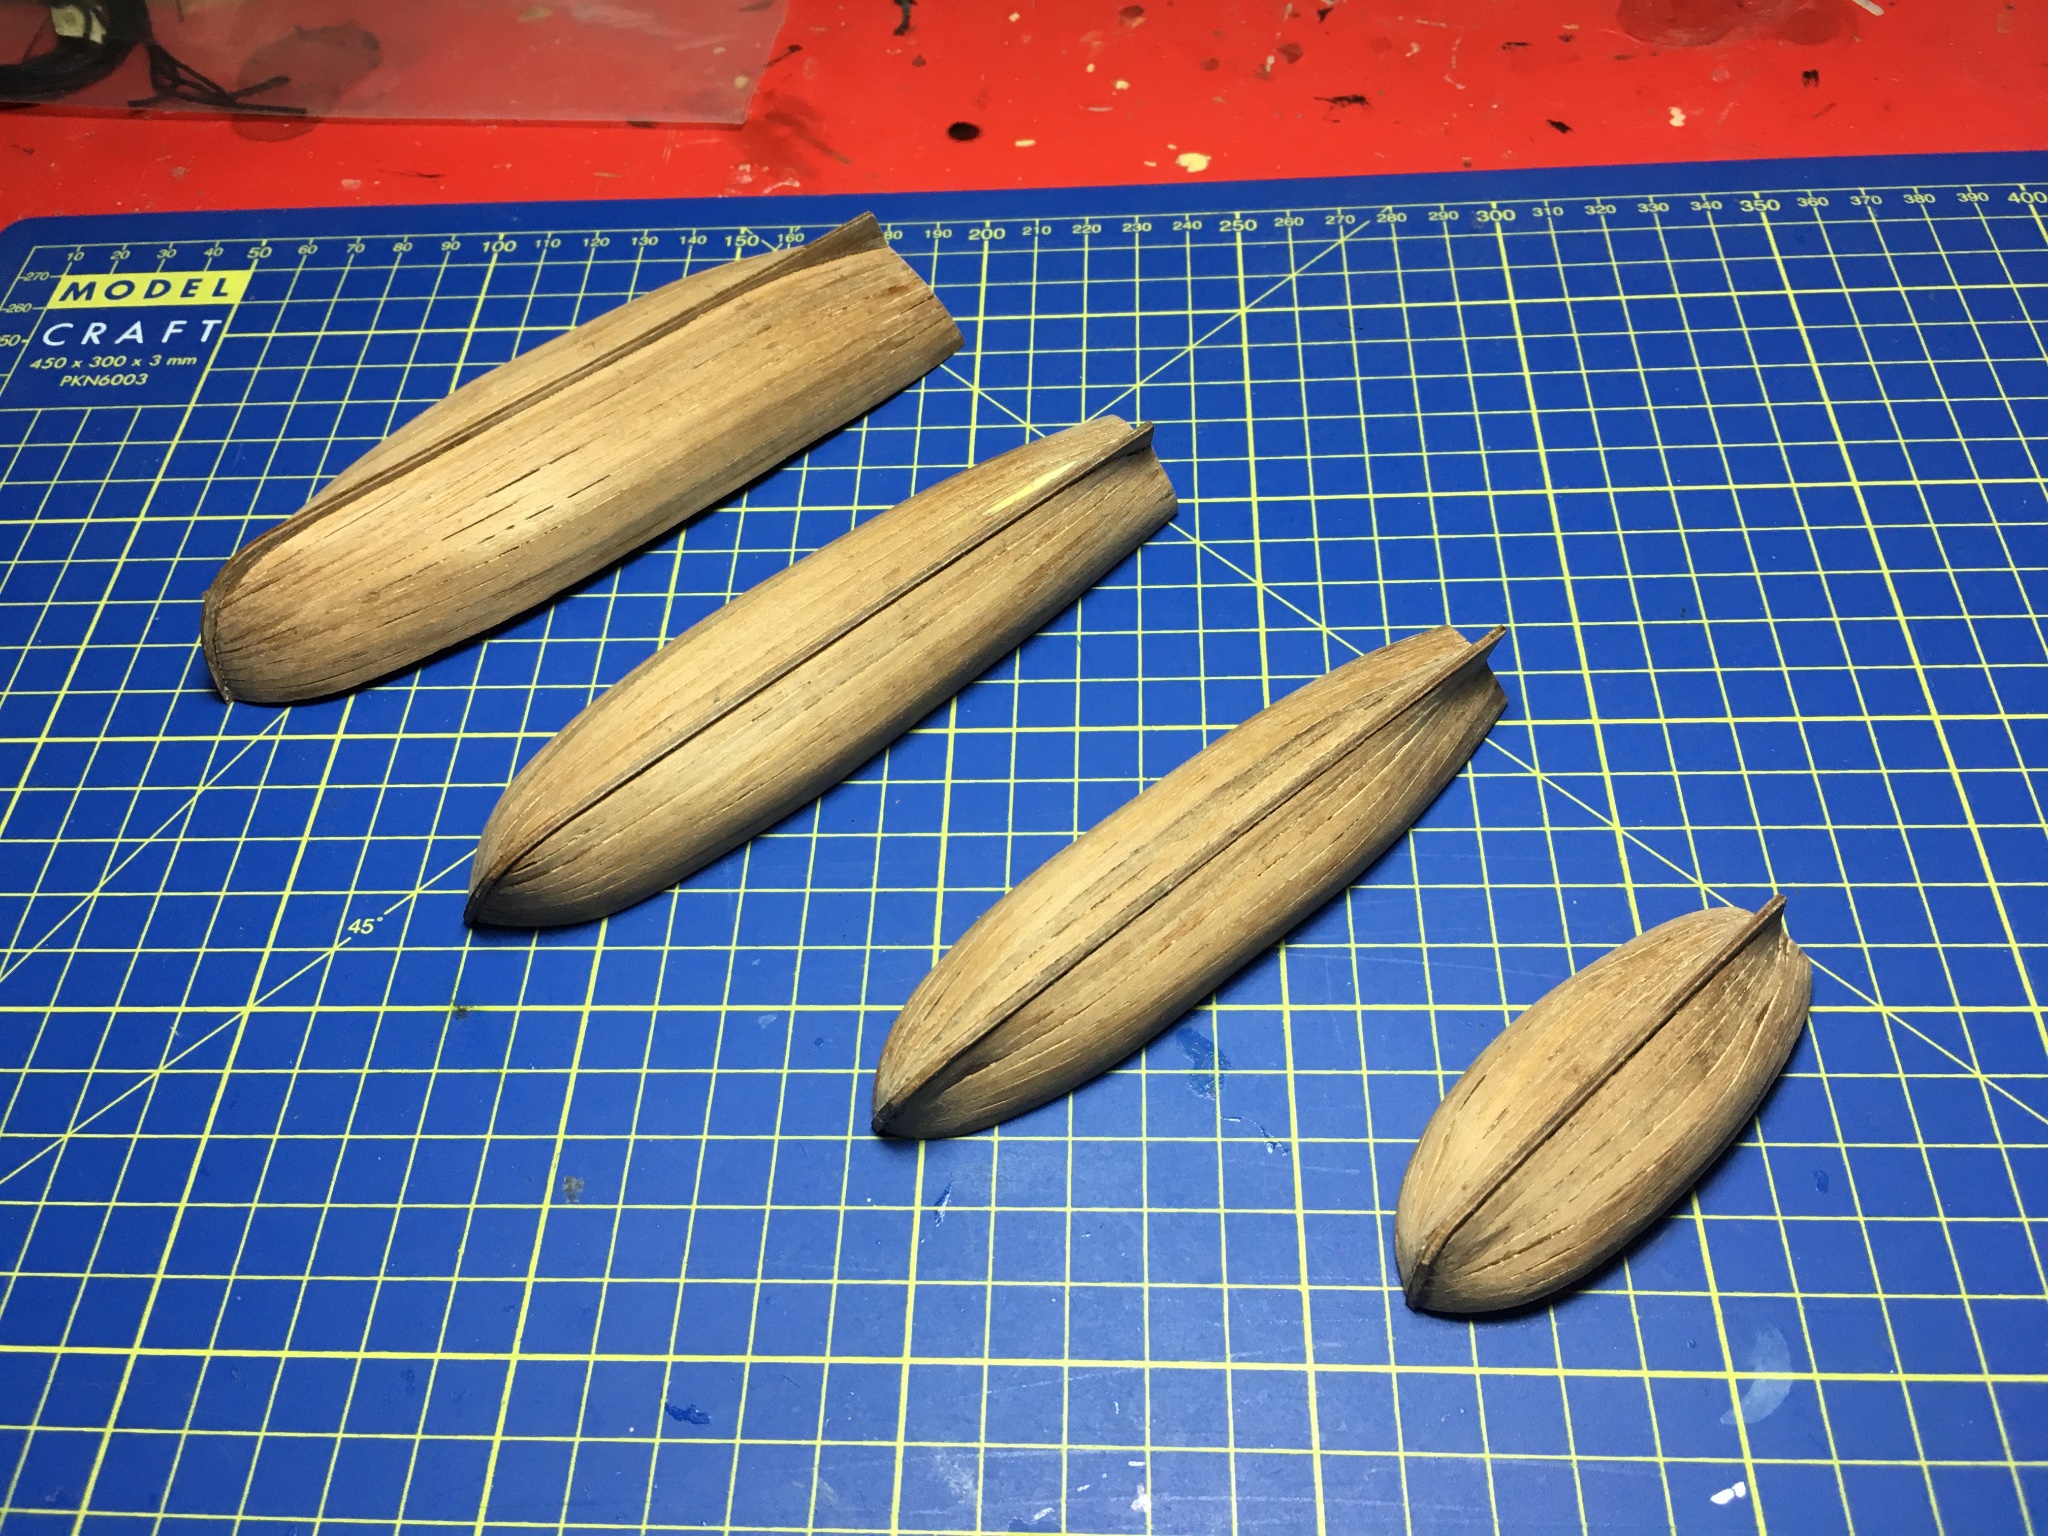
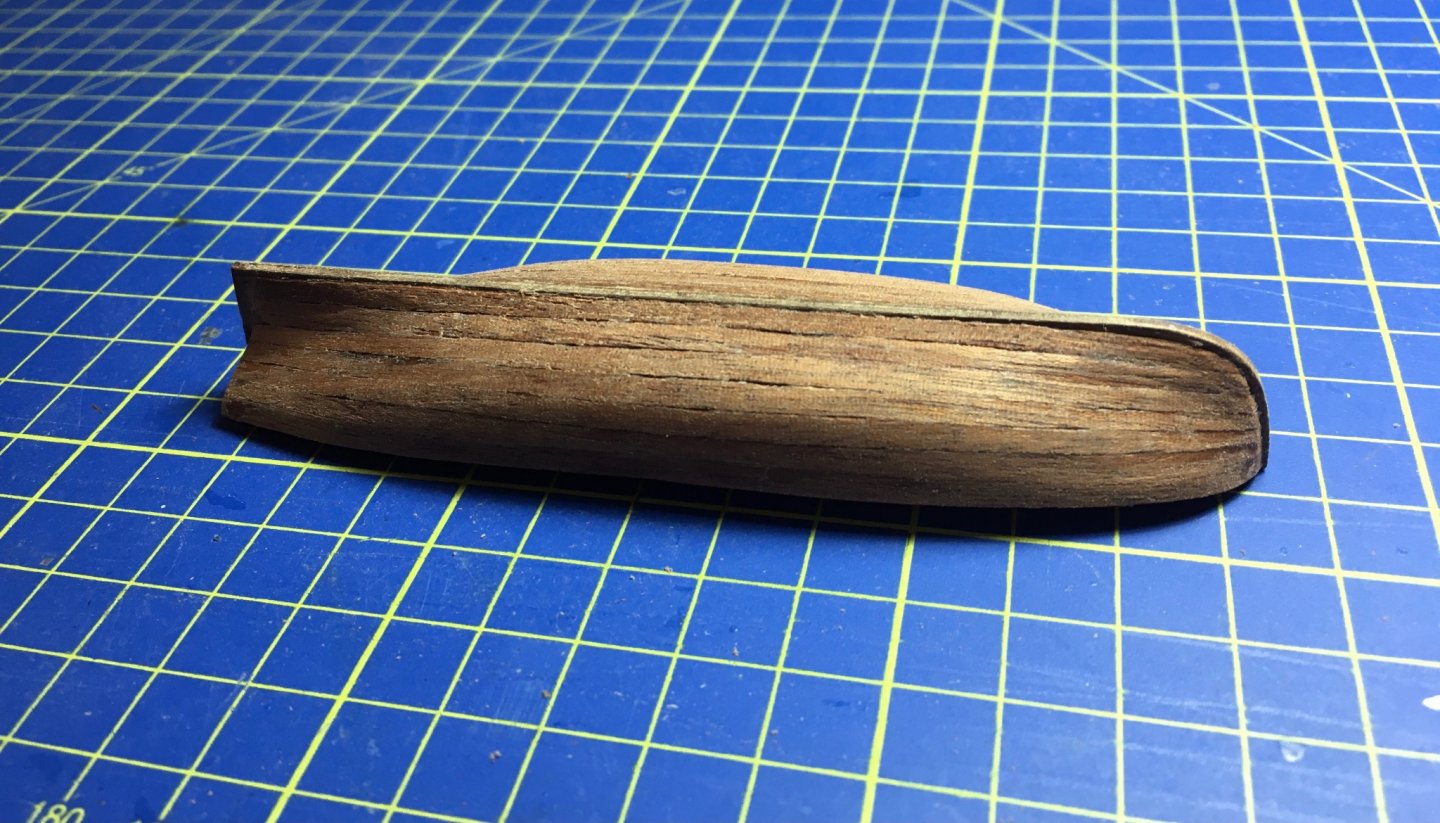
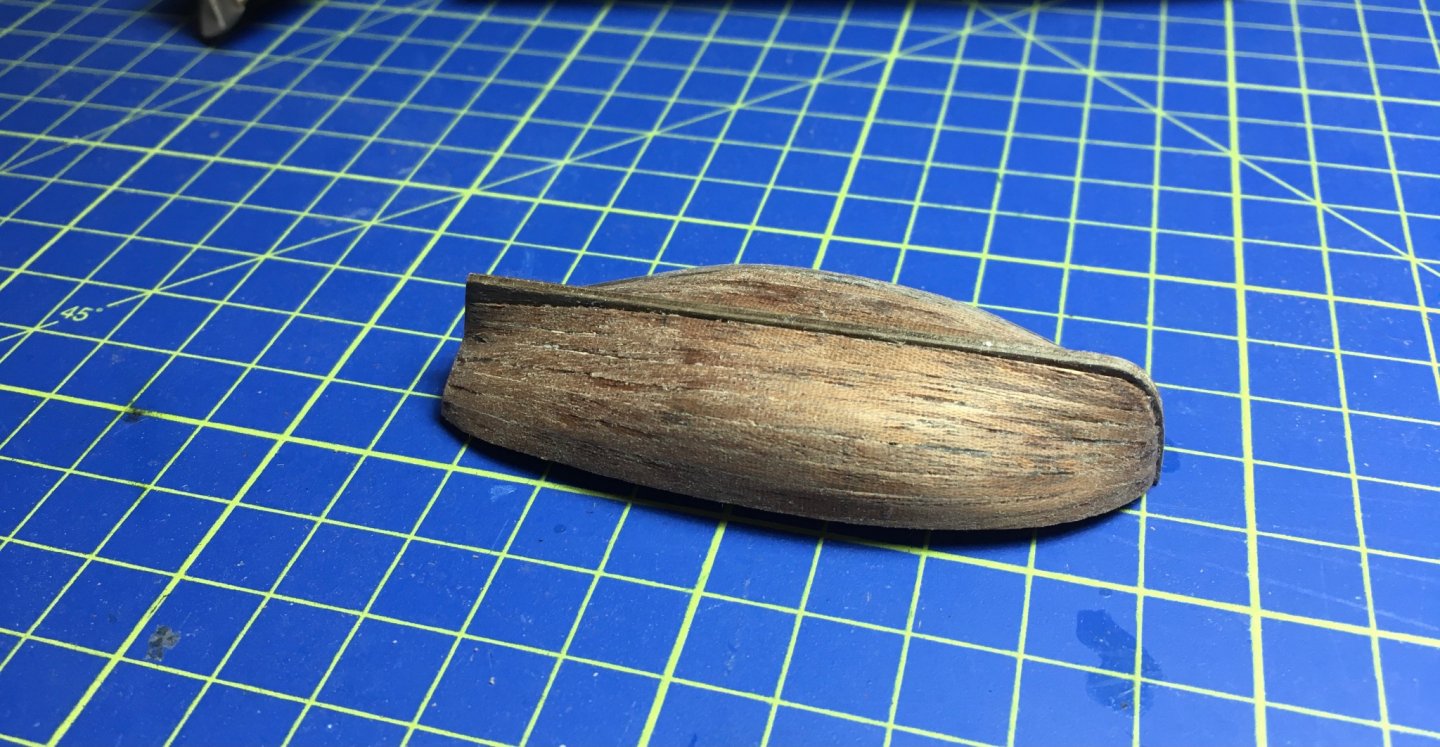
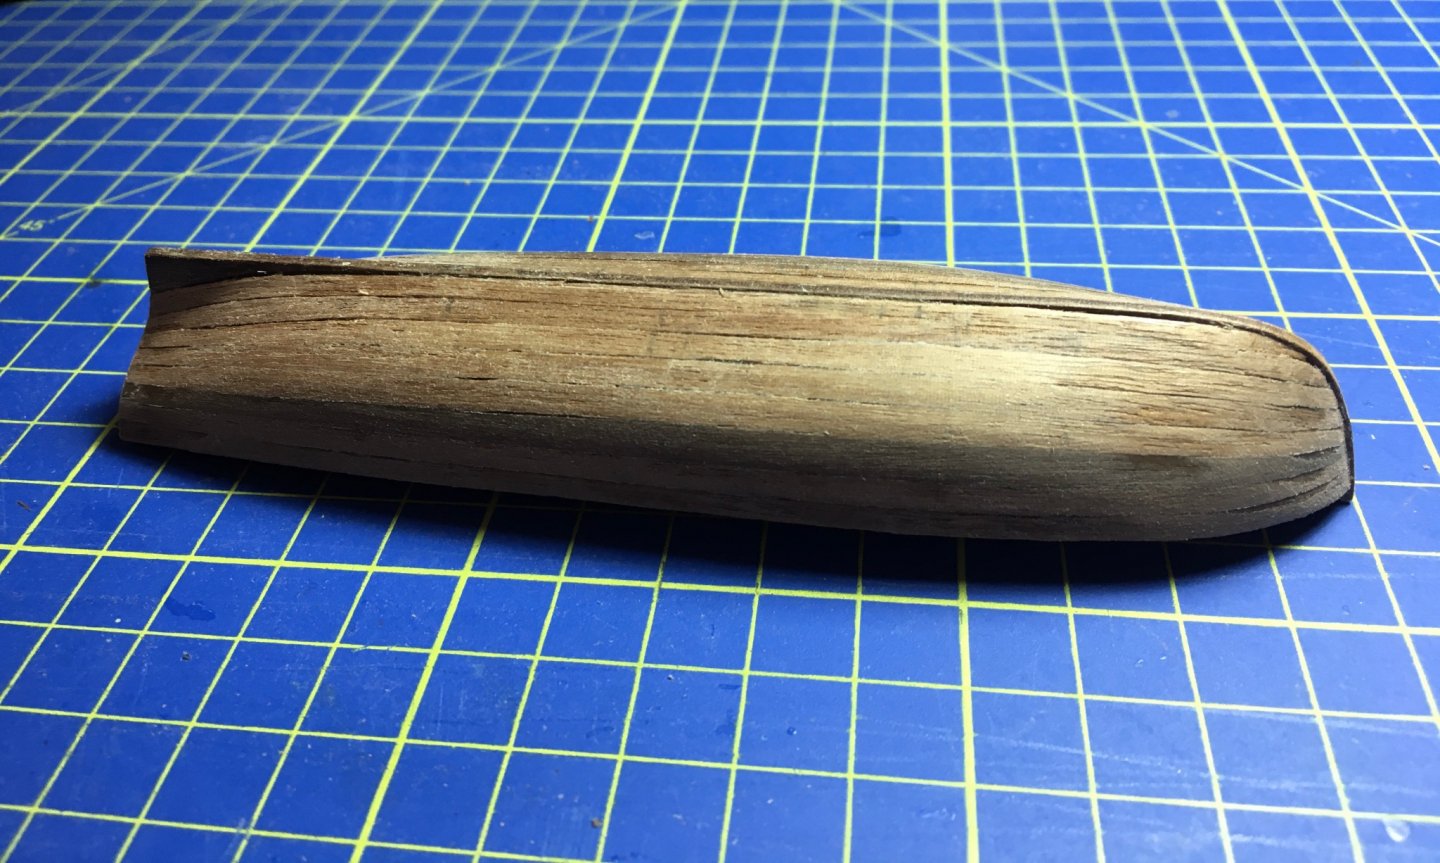
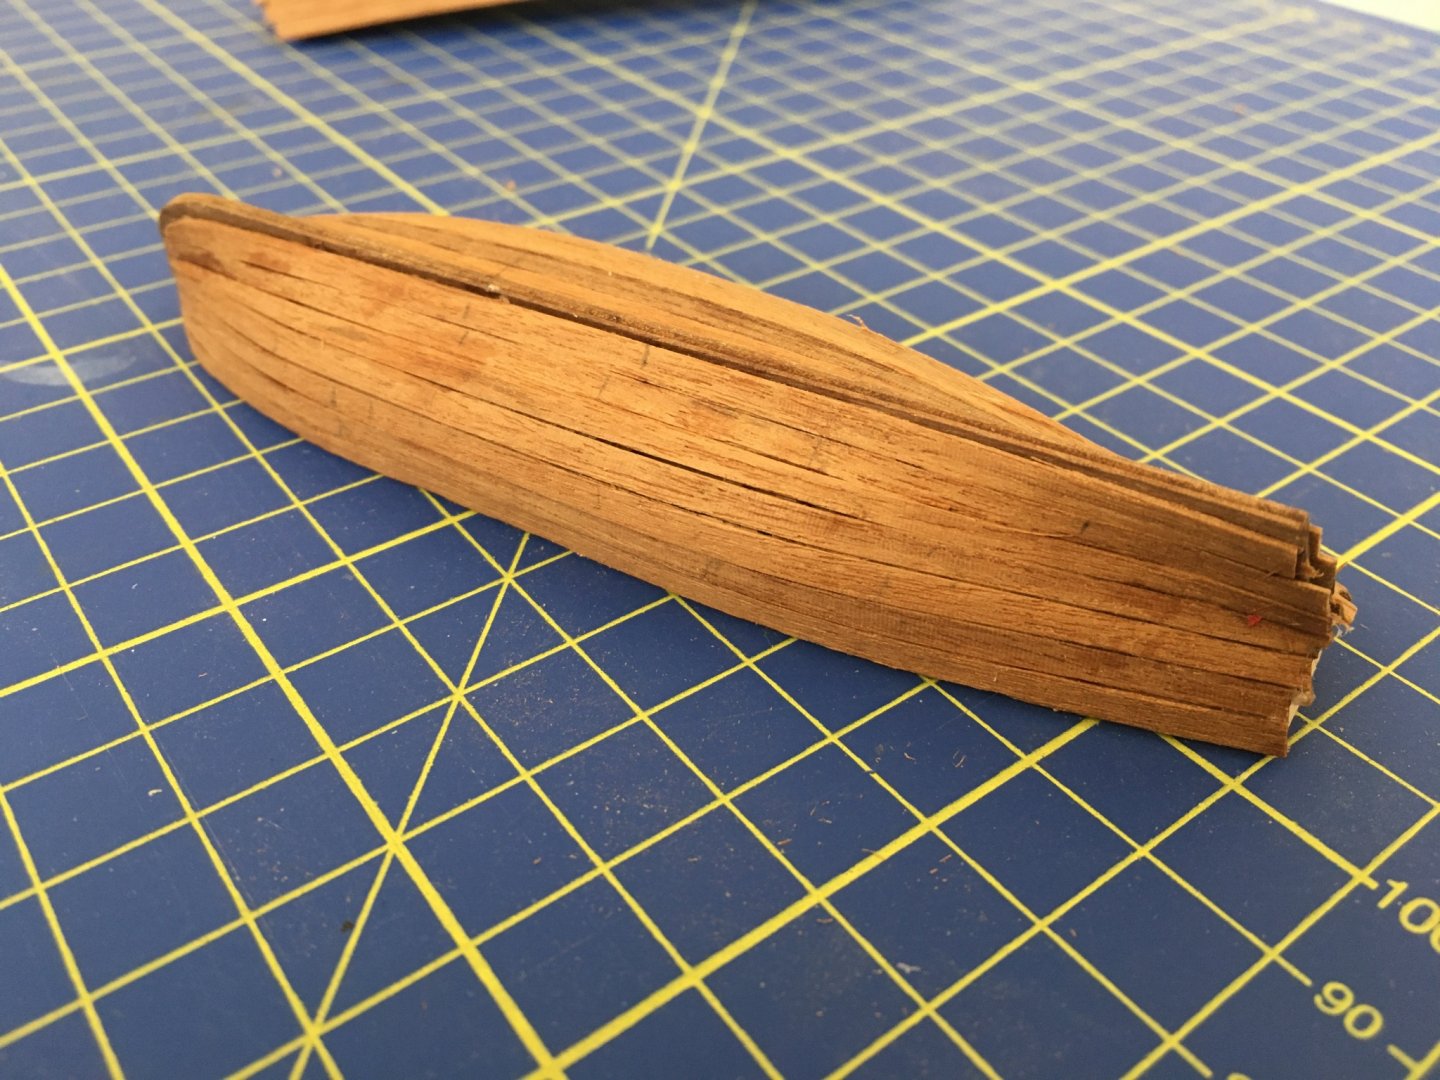
Will, MD and Heinz thank you for your comments. Thank you also for the likes. My intention was to do the boats in between the rigging. Although I started some work on the shrouds I got carried away with the boats and continued working on them. The boats are a project in themselves. I will try to put as much detail in them as possible because I think they will be very eye catching when you are looking at the complete model. On the Launch and the Barge, for the second planking I used the 0.5mm Walnut as indicated in the manual. For the Pinnace and the Cutter I did not use the 0.5mm Walnut supplied with the kit. I had some left overs of Sapele from the model Bluenose II. It was slightly thinner, 0.4mm and more flexible, which I thought made it a better material for the second planking because of the small size of the boats. Outer hull brushed with watered down PVA glue, left to dry, sanded, then gone over them with a fine filler and left to dry. When filler was thoroughly dry hull sanded with fine sand paper and inside bulkheads removed. Robert


- 527 replies
-
- 8
-

-
- caldercraft
- victory
- (and 1 more)
-
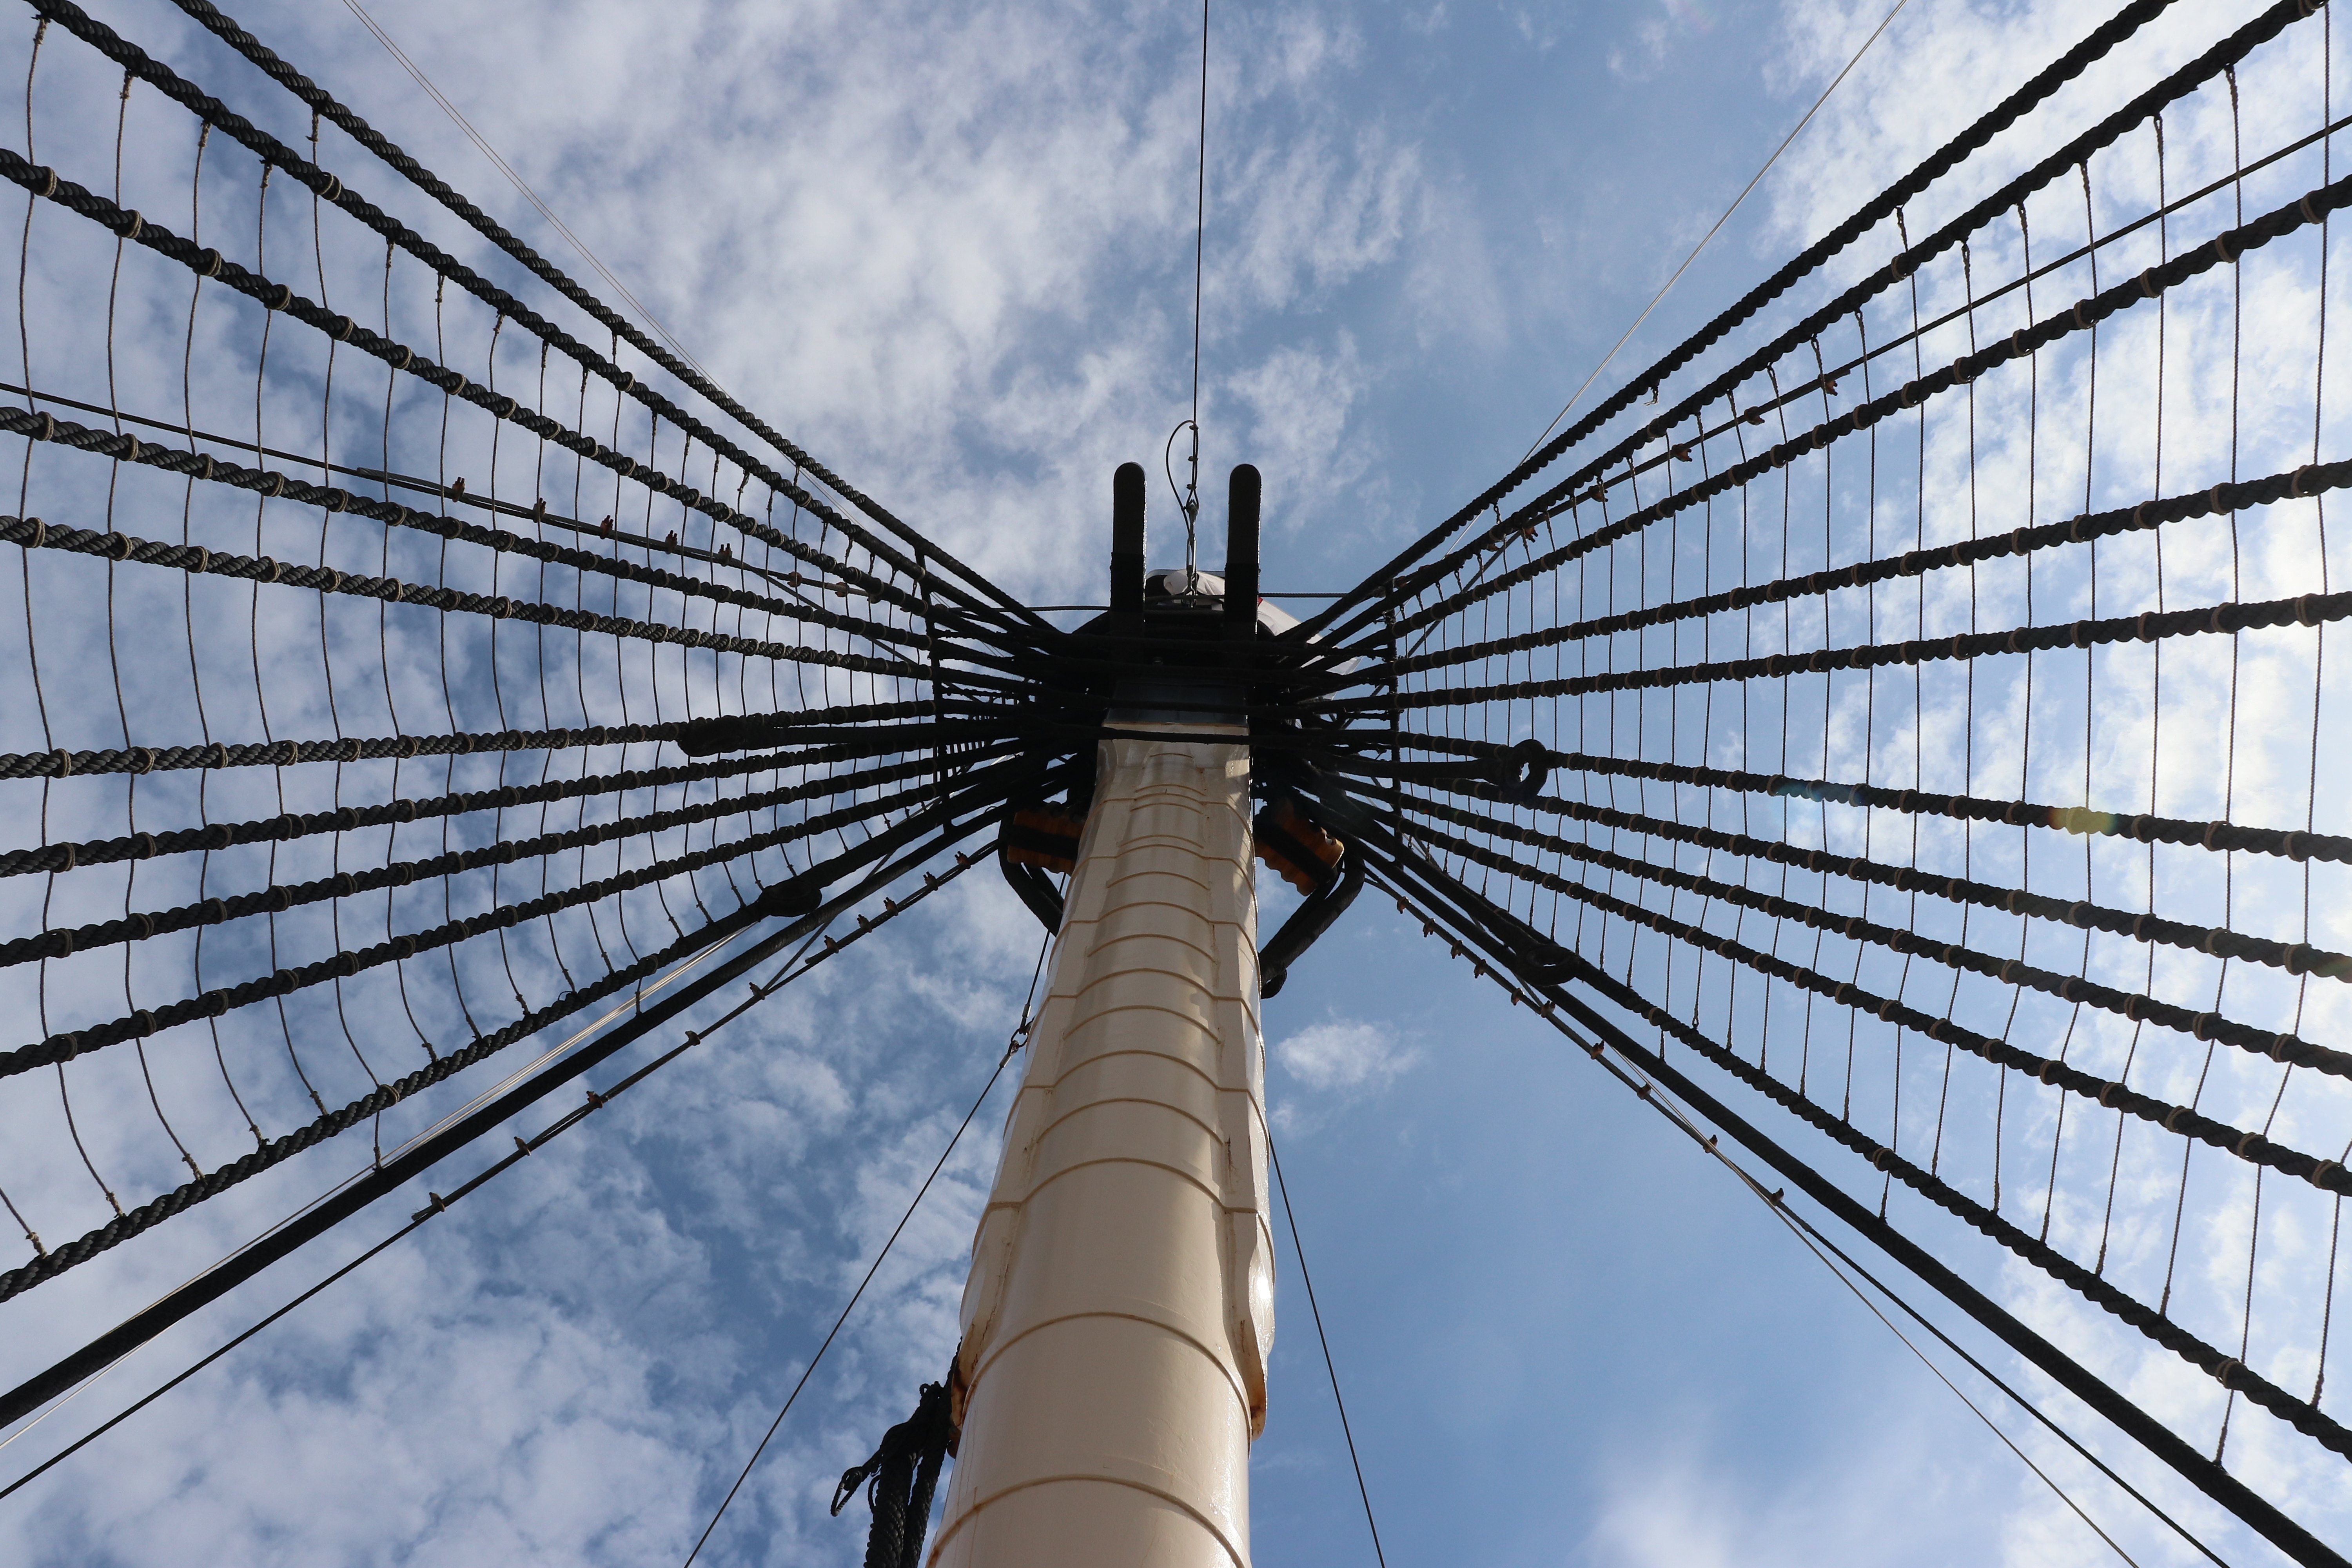
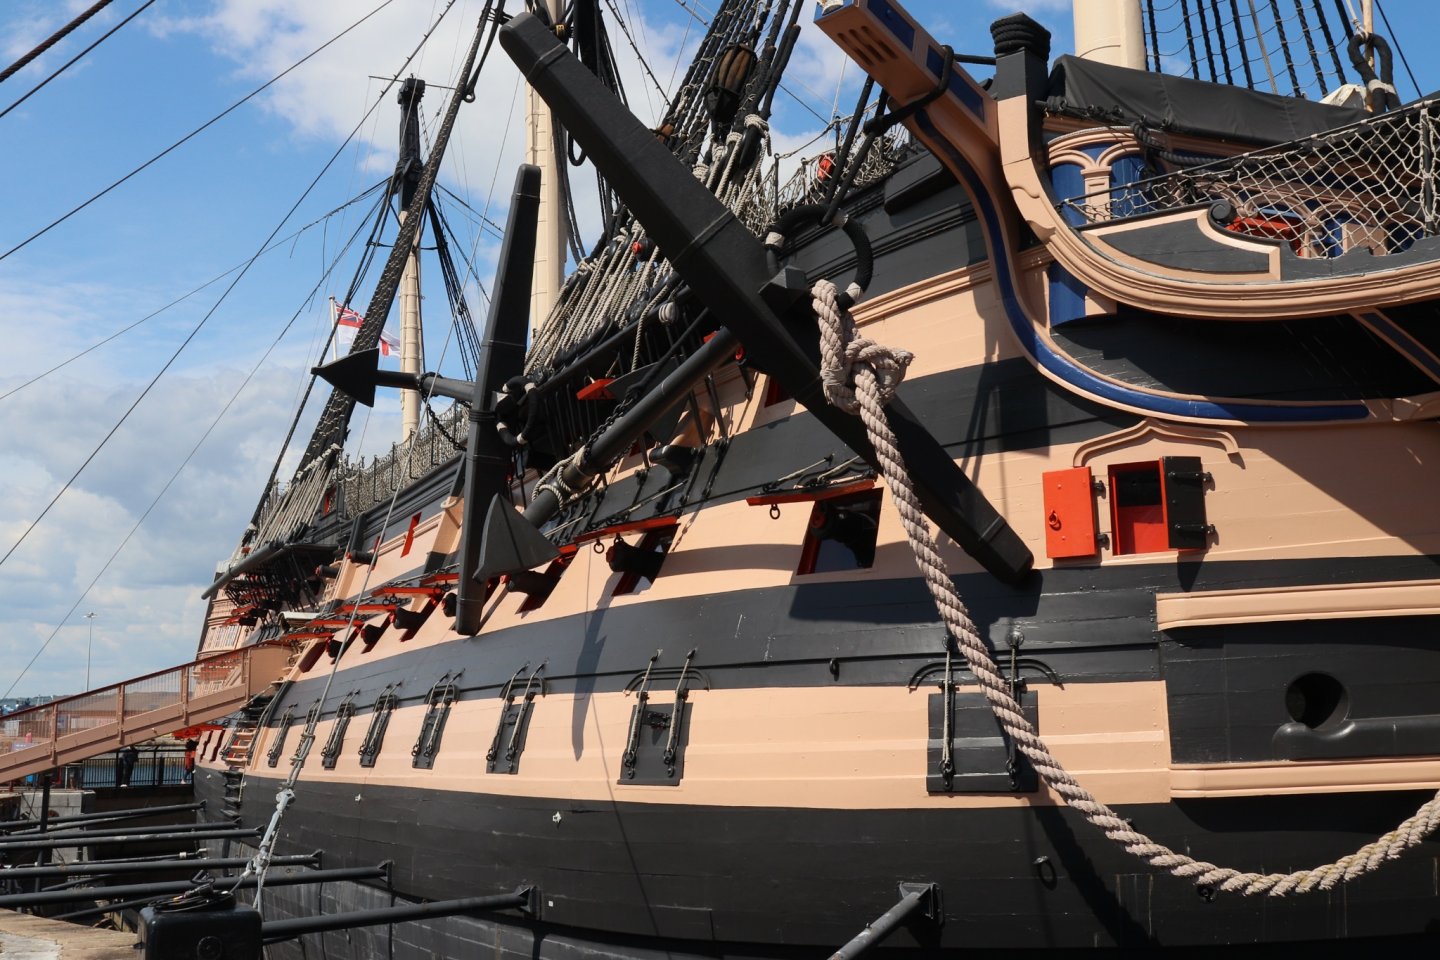
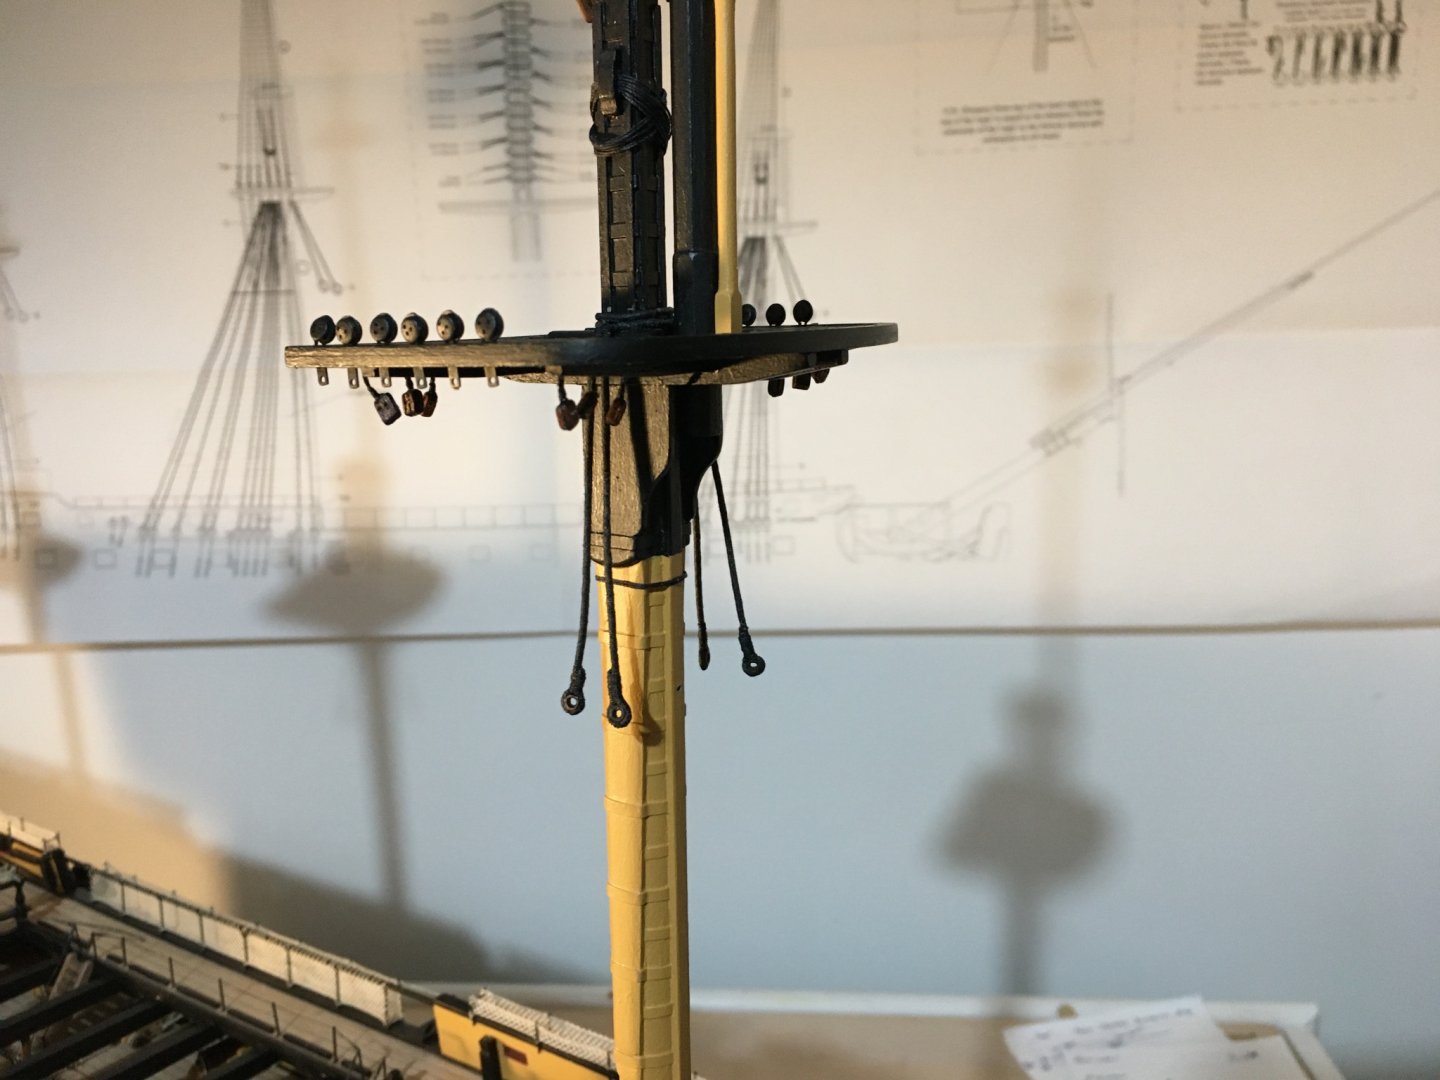
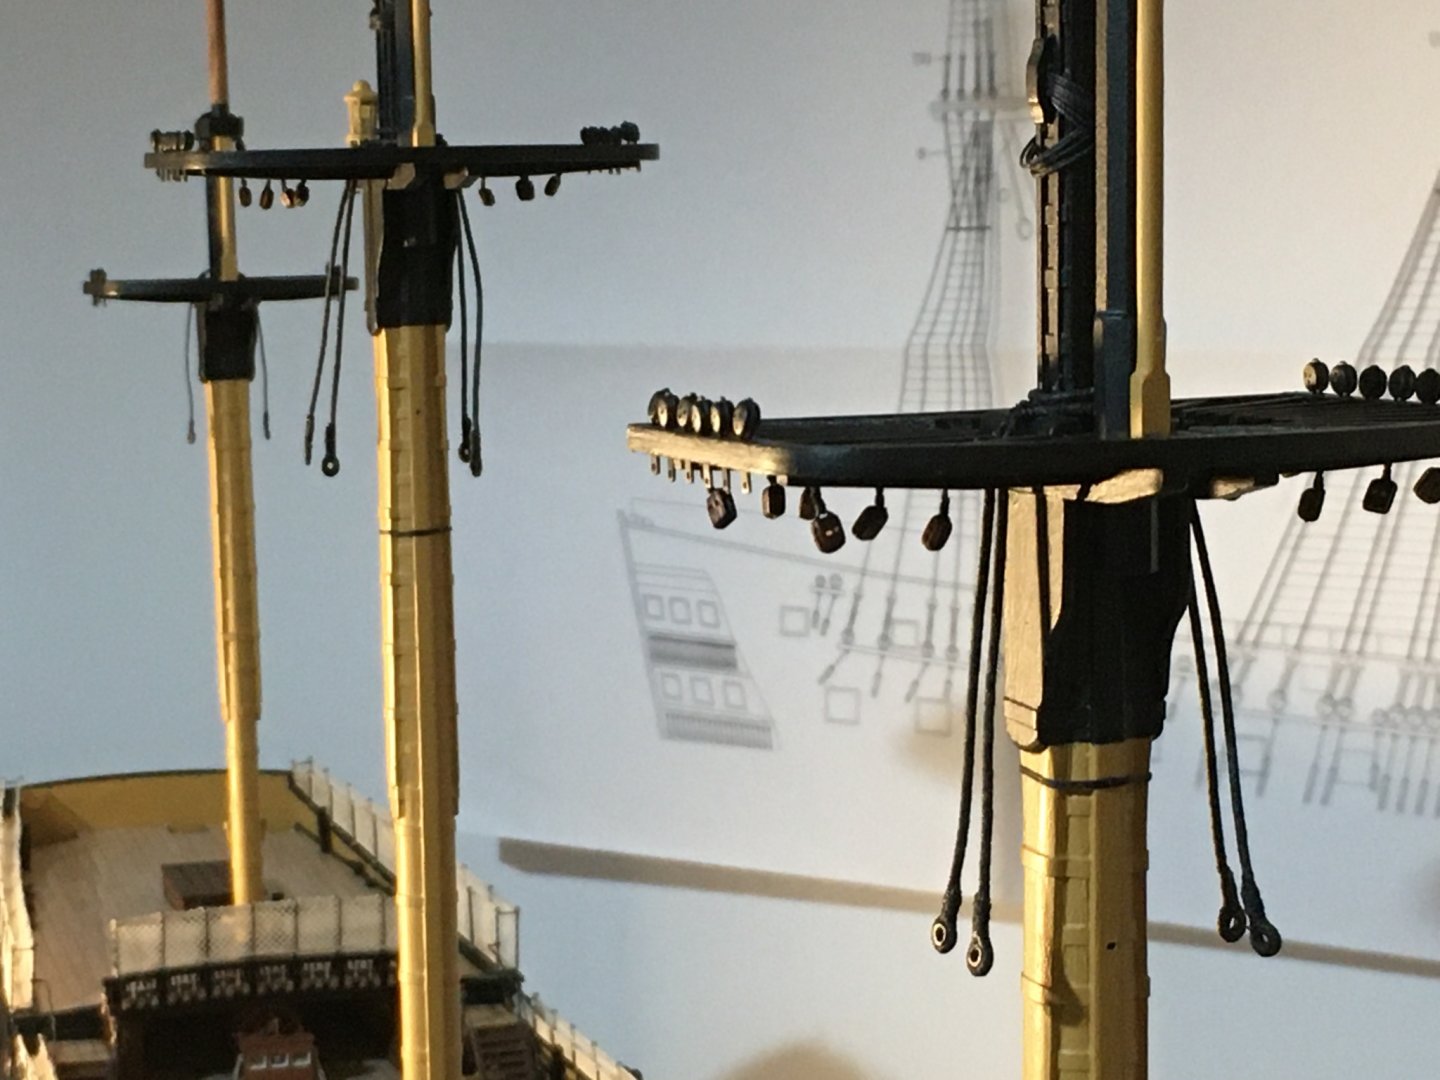
Nice mast details Paul. Sometimes it is very frustrating when looking for details and you end up finding conflicting answers and you never know which is the right one. You end up with more questions than answers. The only thing I can say is that when I visited the Victory at Portsmouth the Mizzen mast had no rubbing paunch on it. If you enlarge this photo that I had taken, you will notice that there is a rubbing paunch on the fore and main mast but there isn't any on the Mizzen mast. If there was one and at some time it had been removed I wouldn't know. In my build I decided to leave it without the rubbing paunch. Robert
-
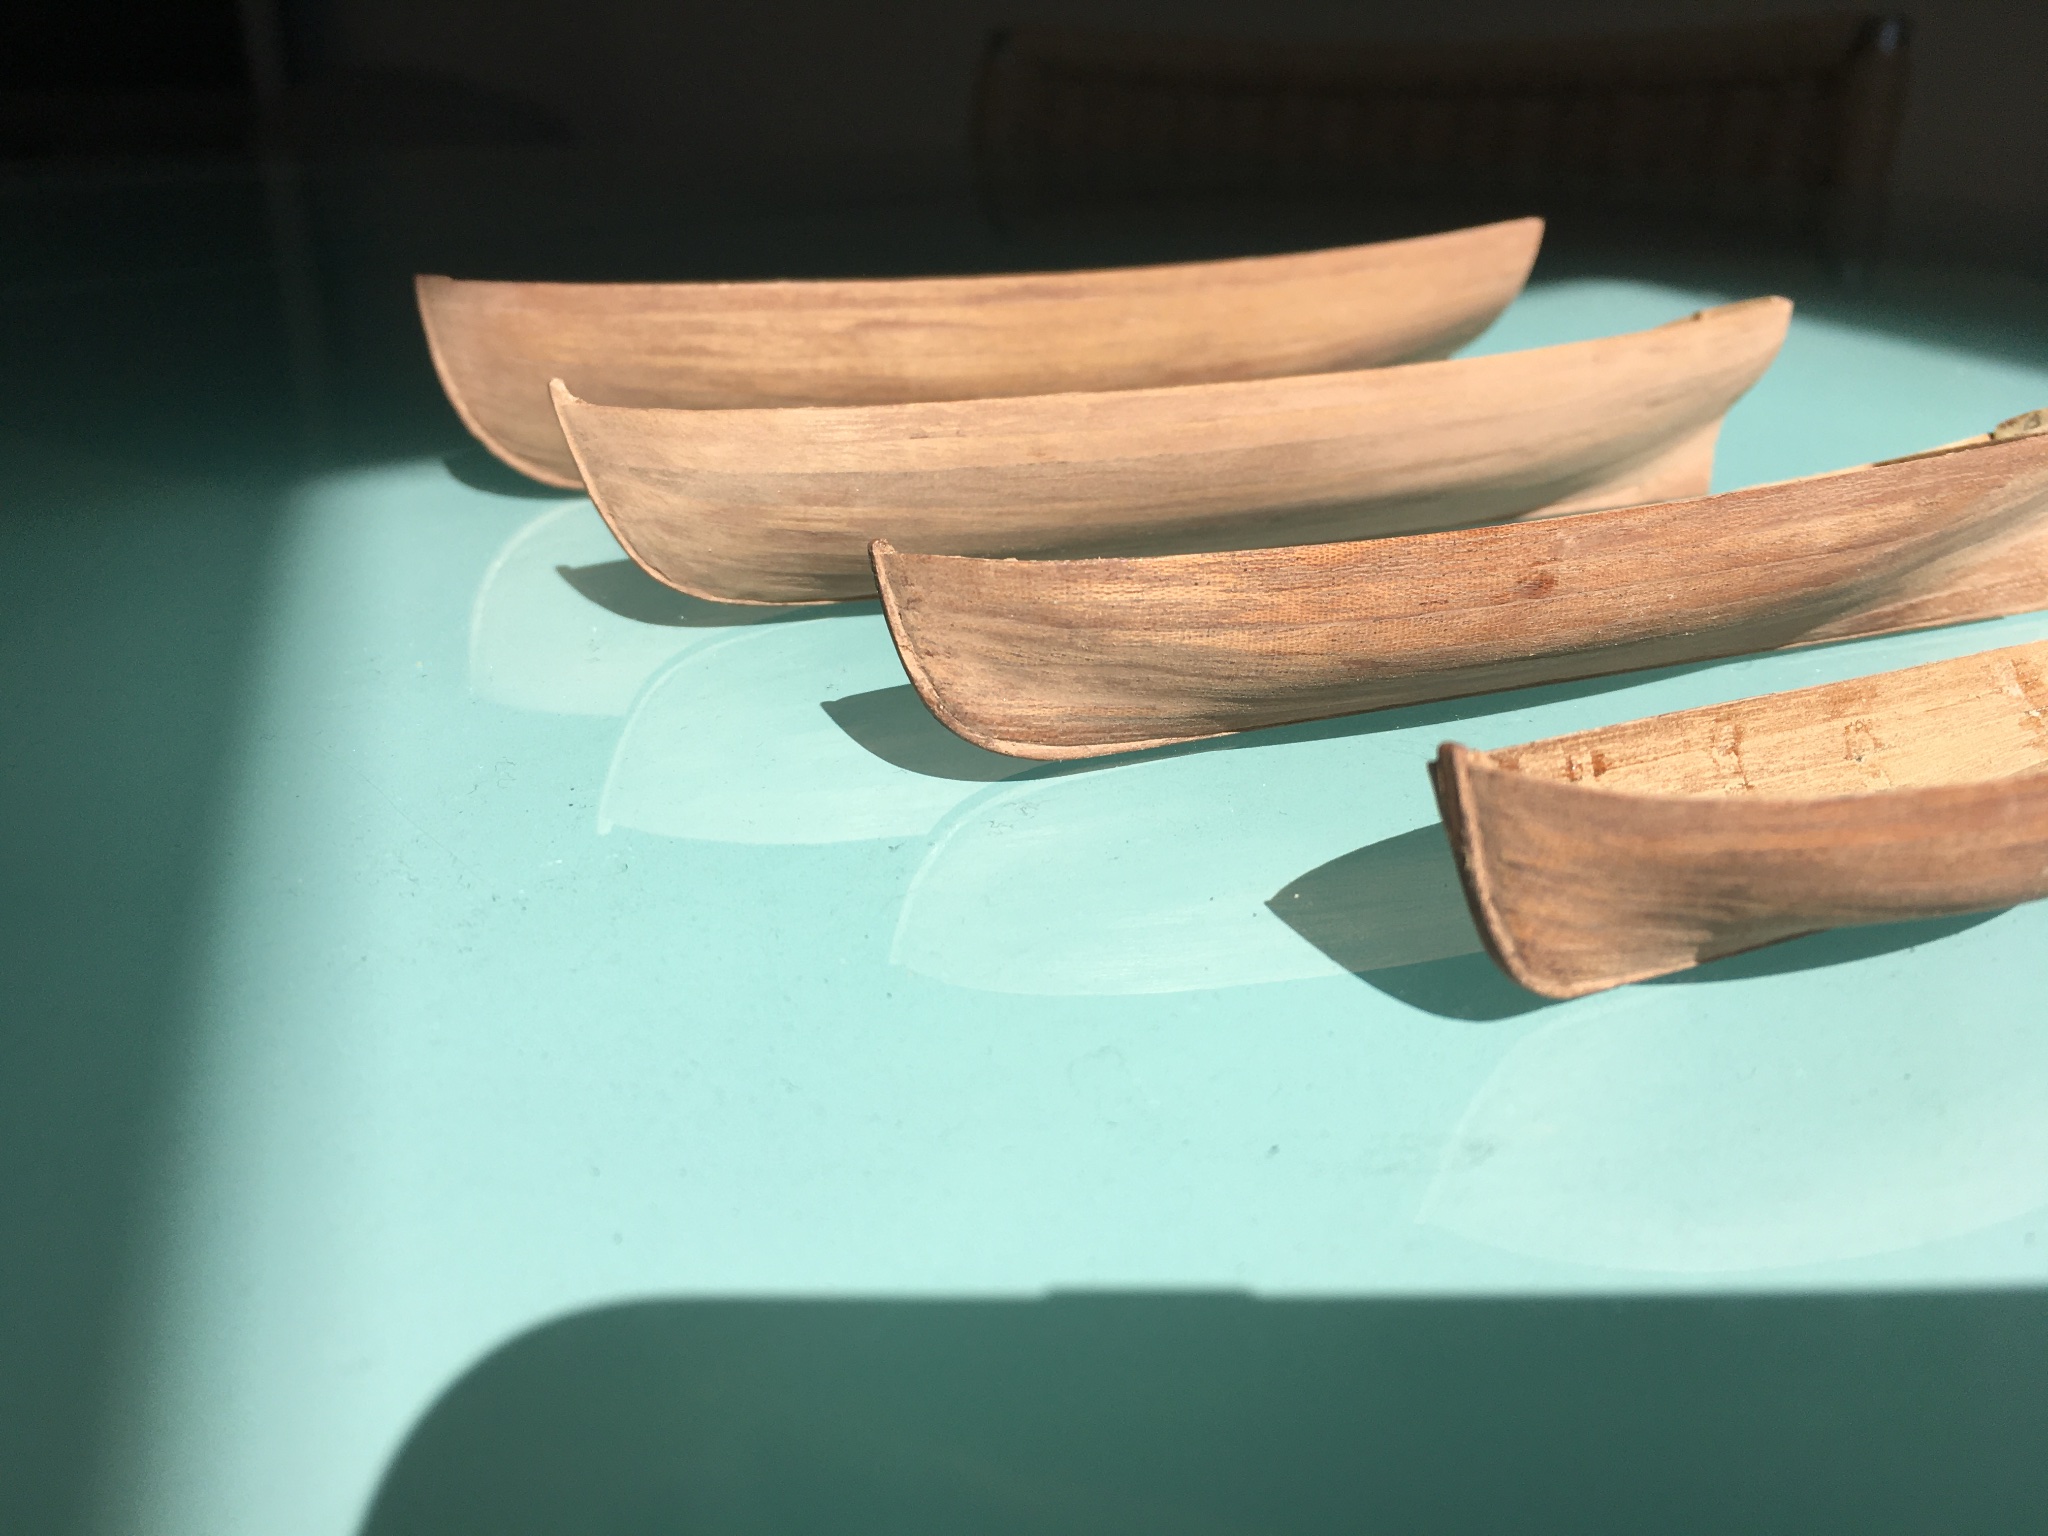
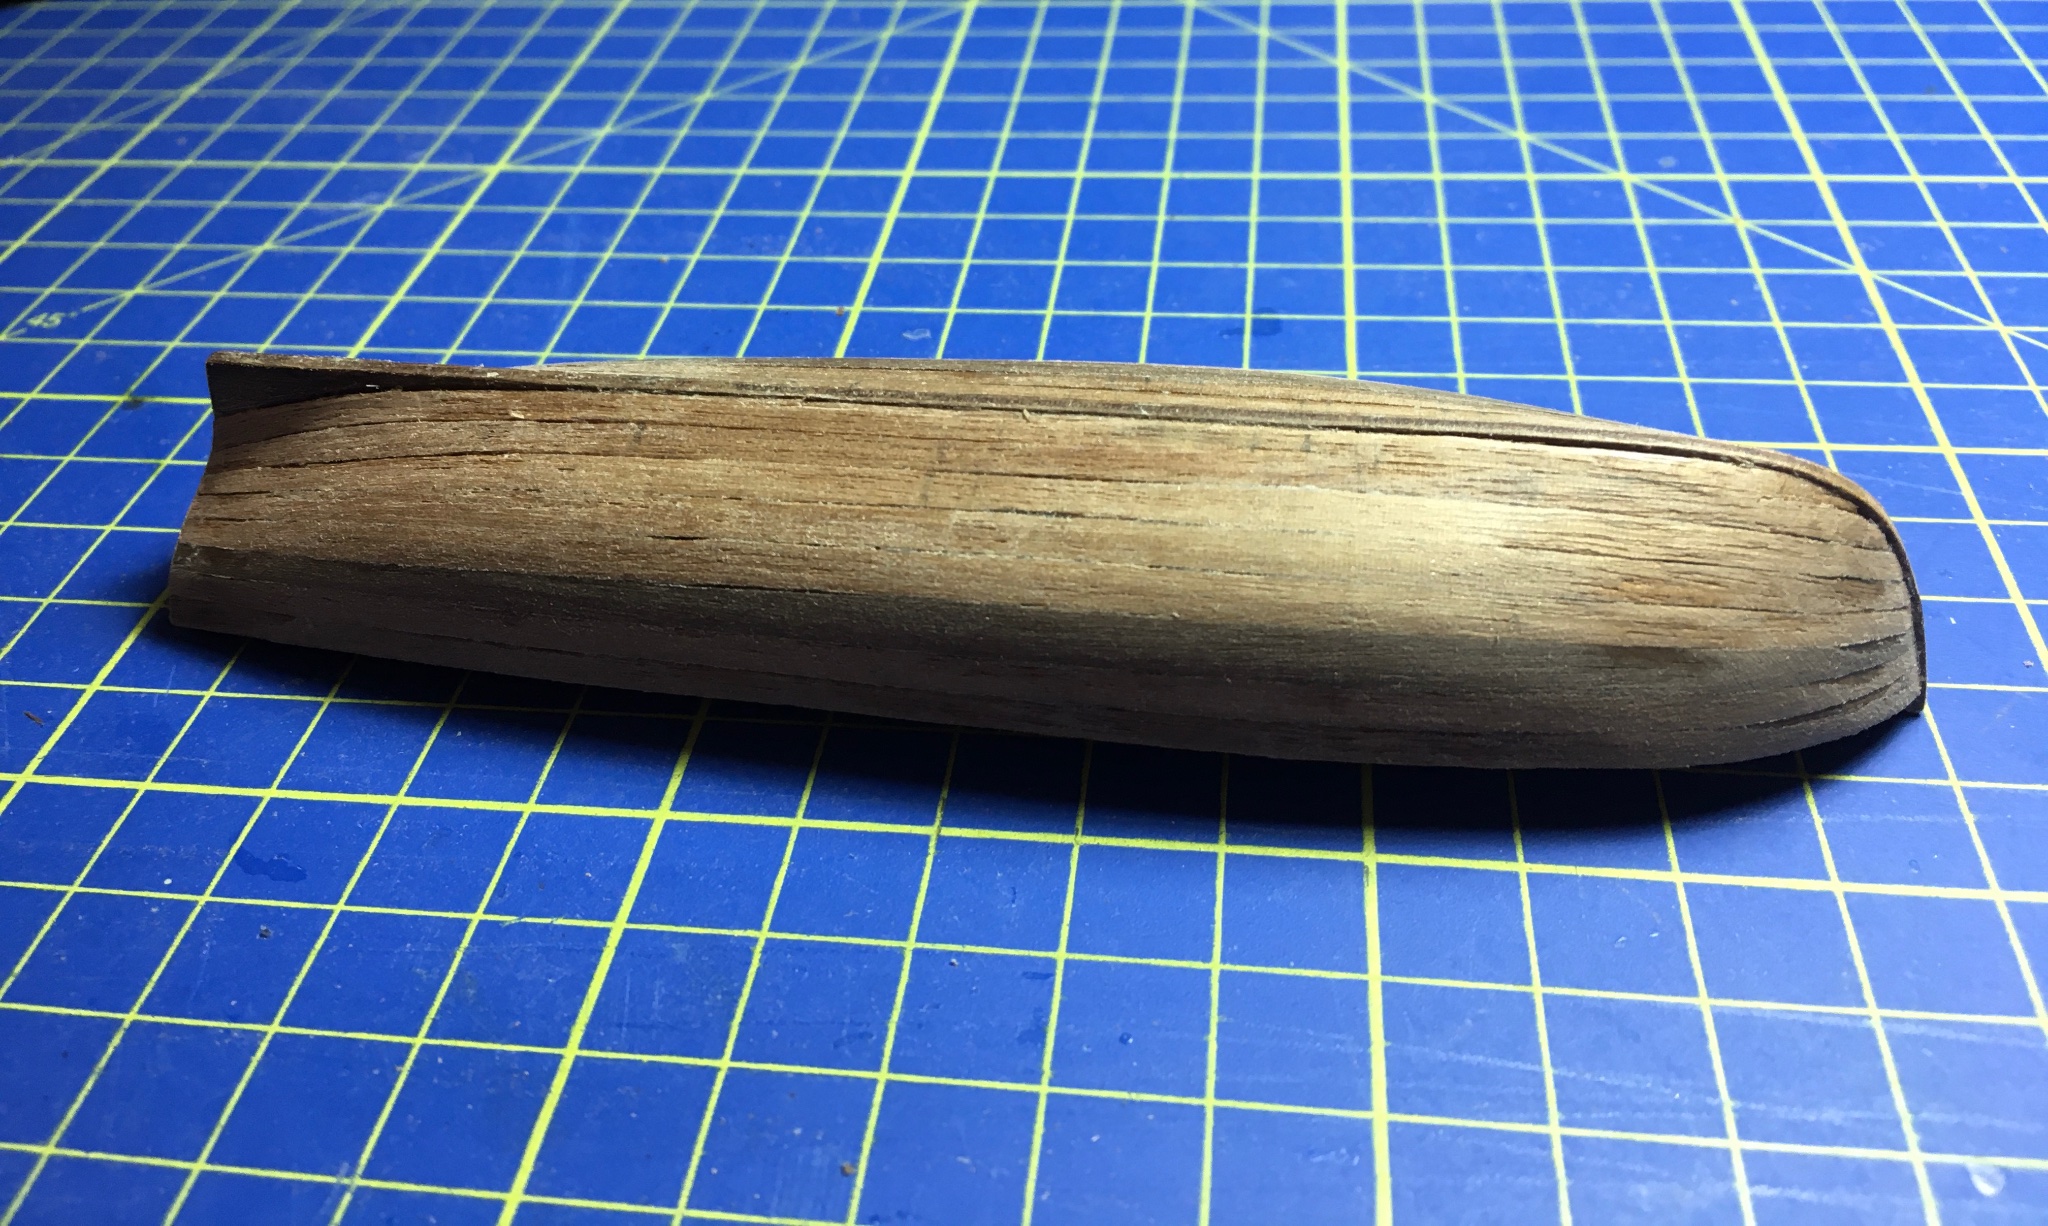
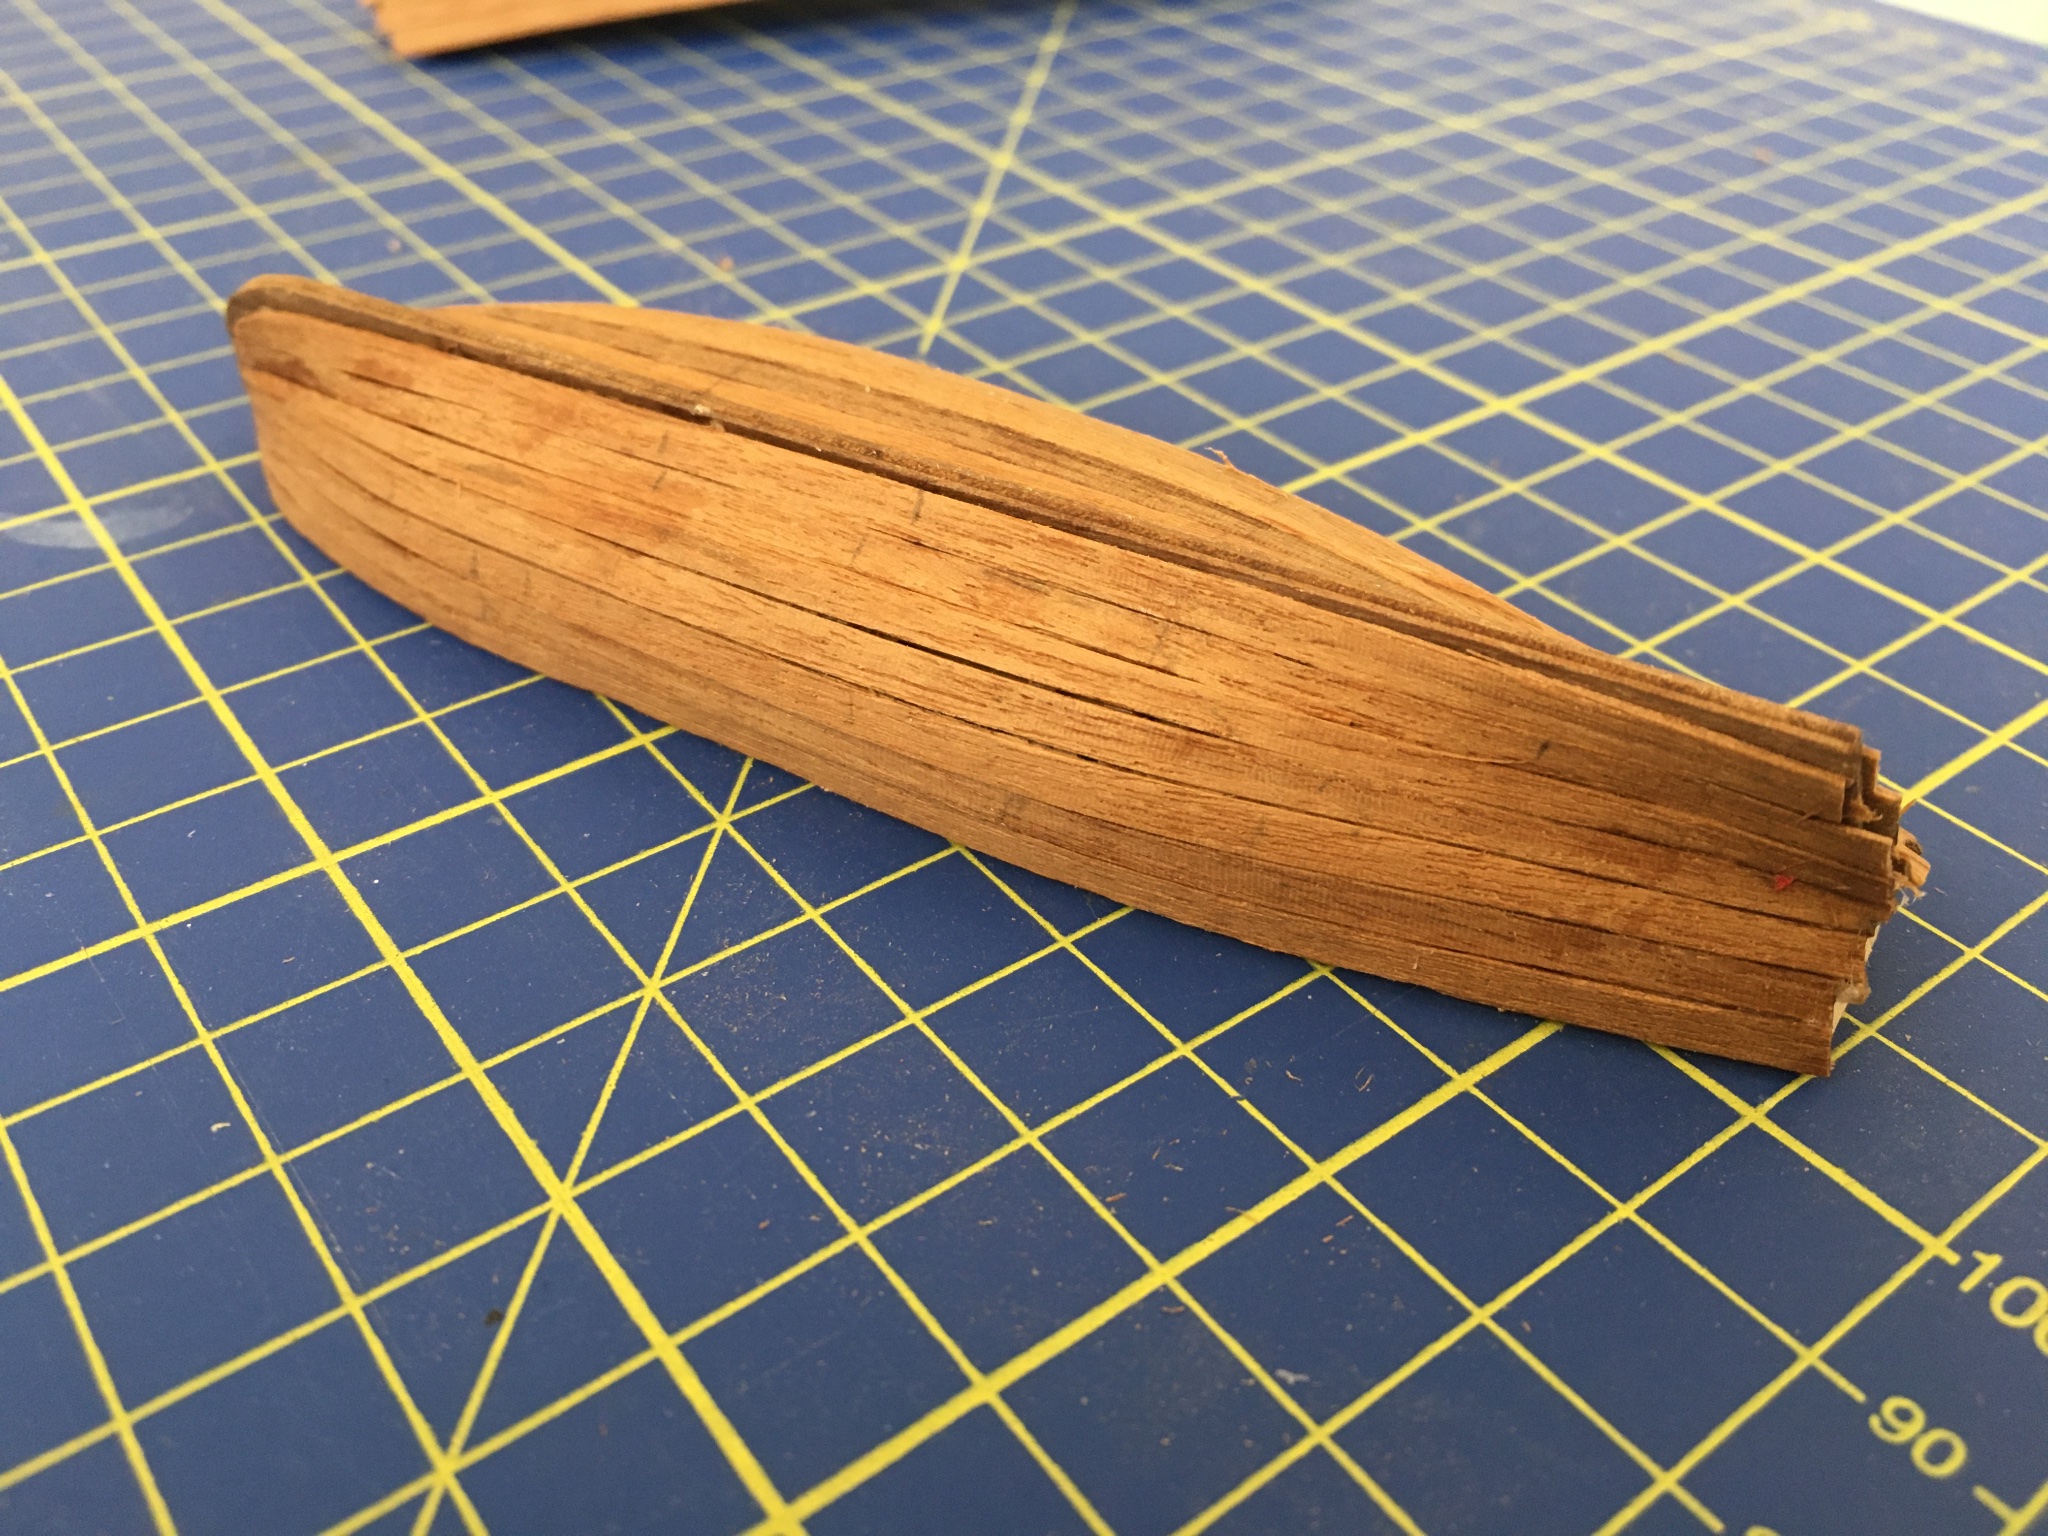
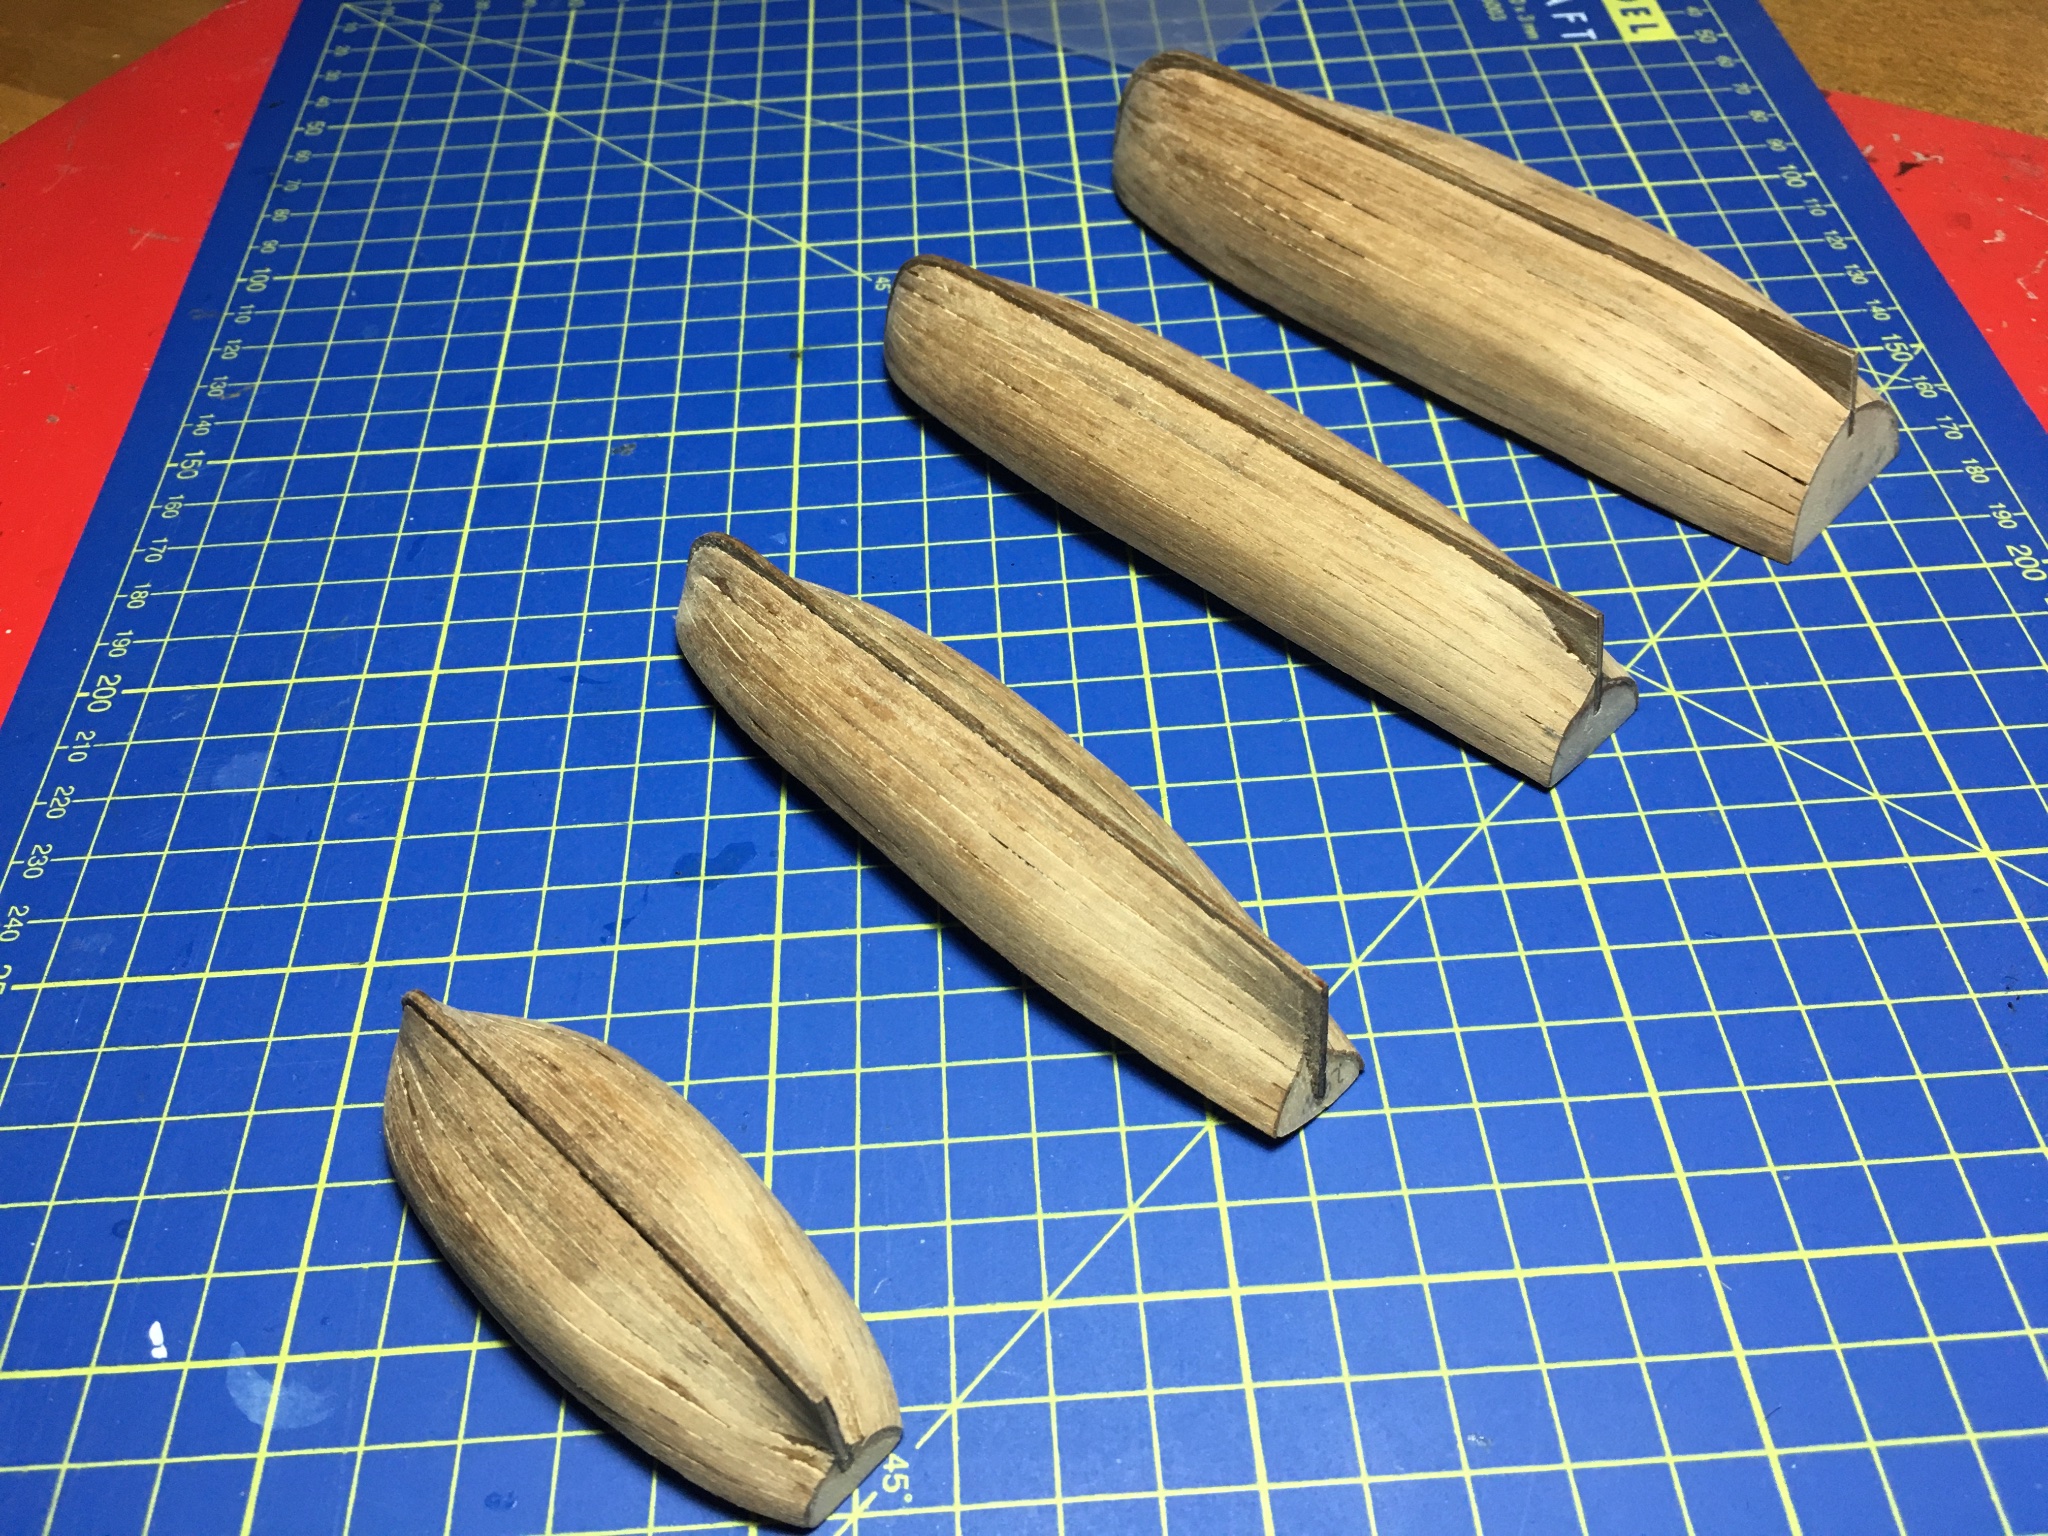
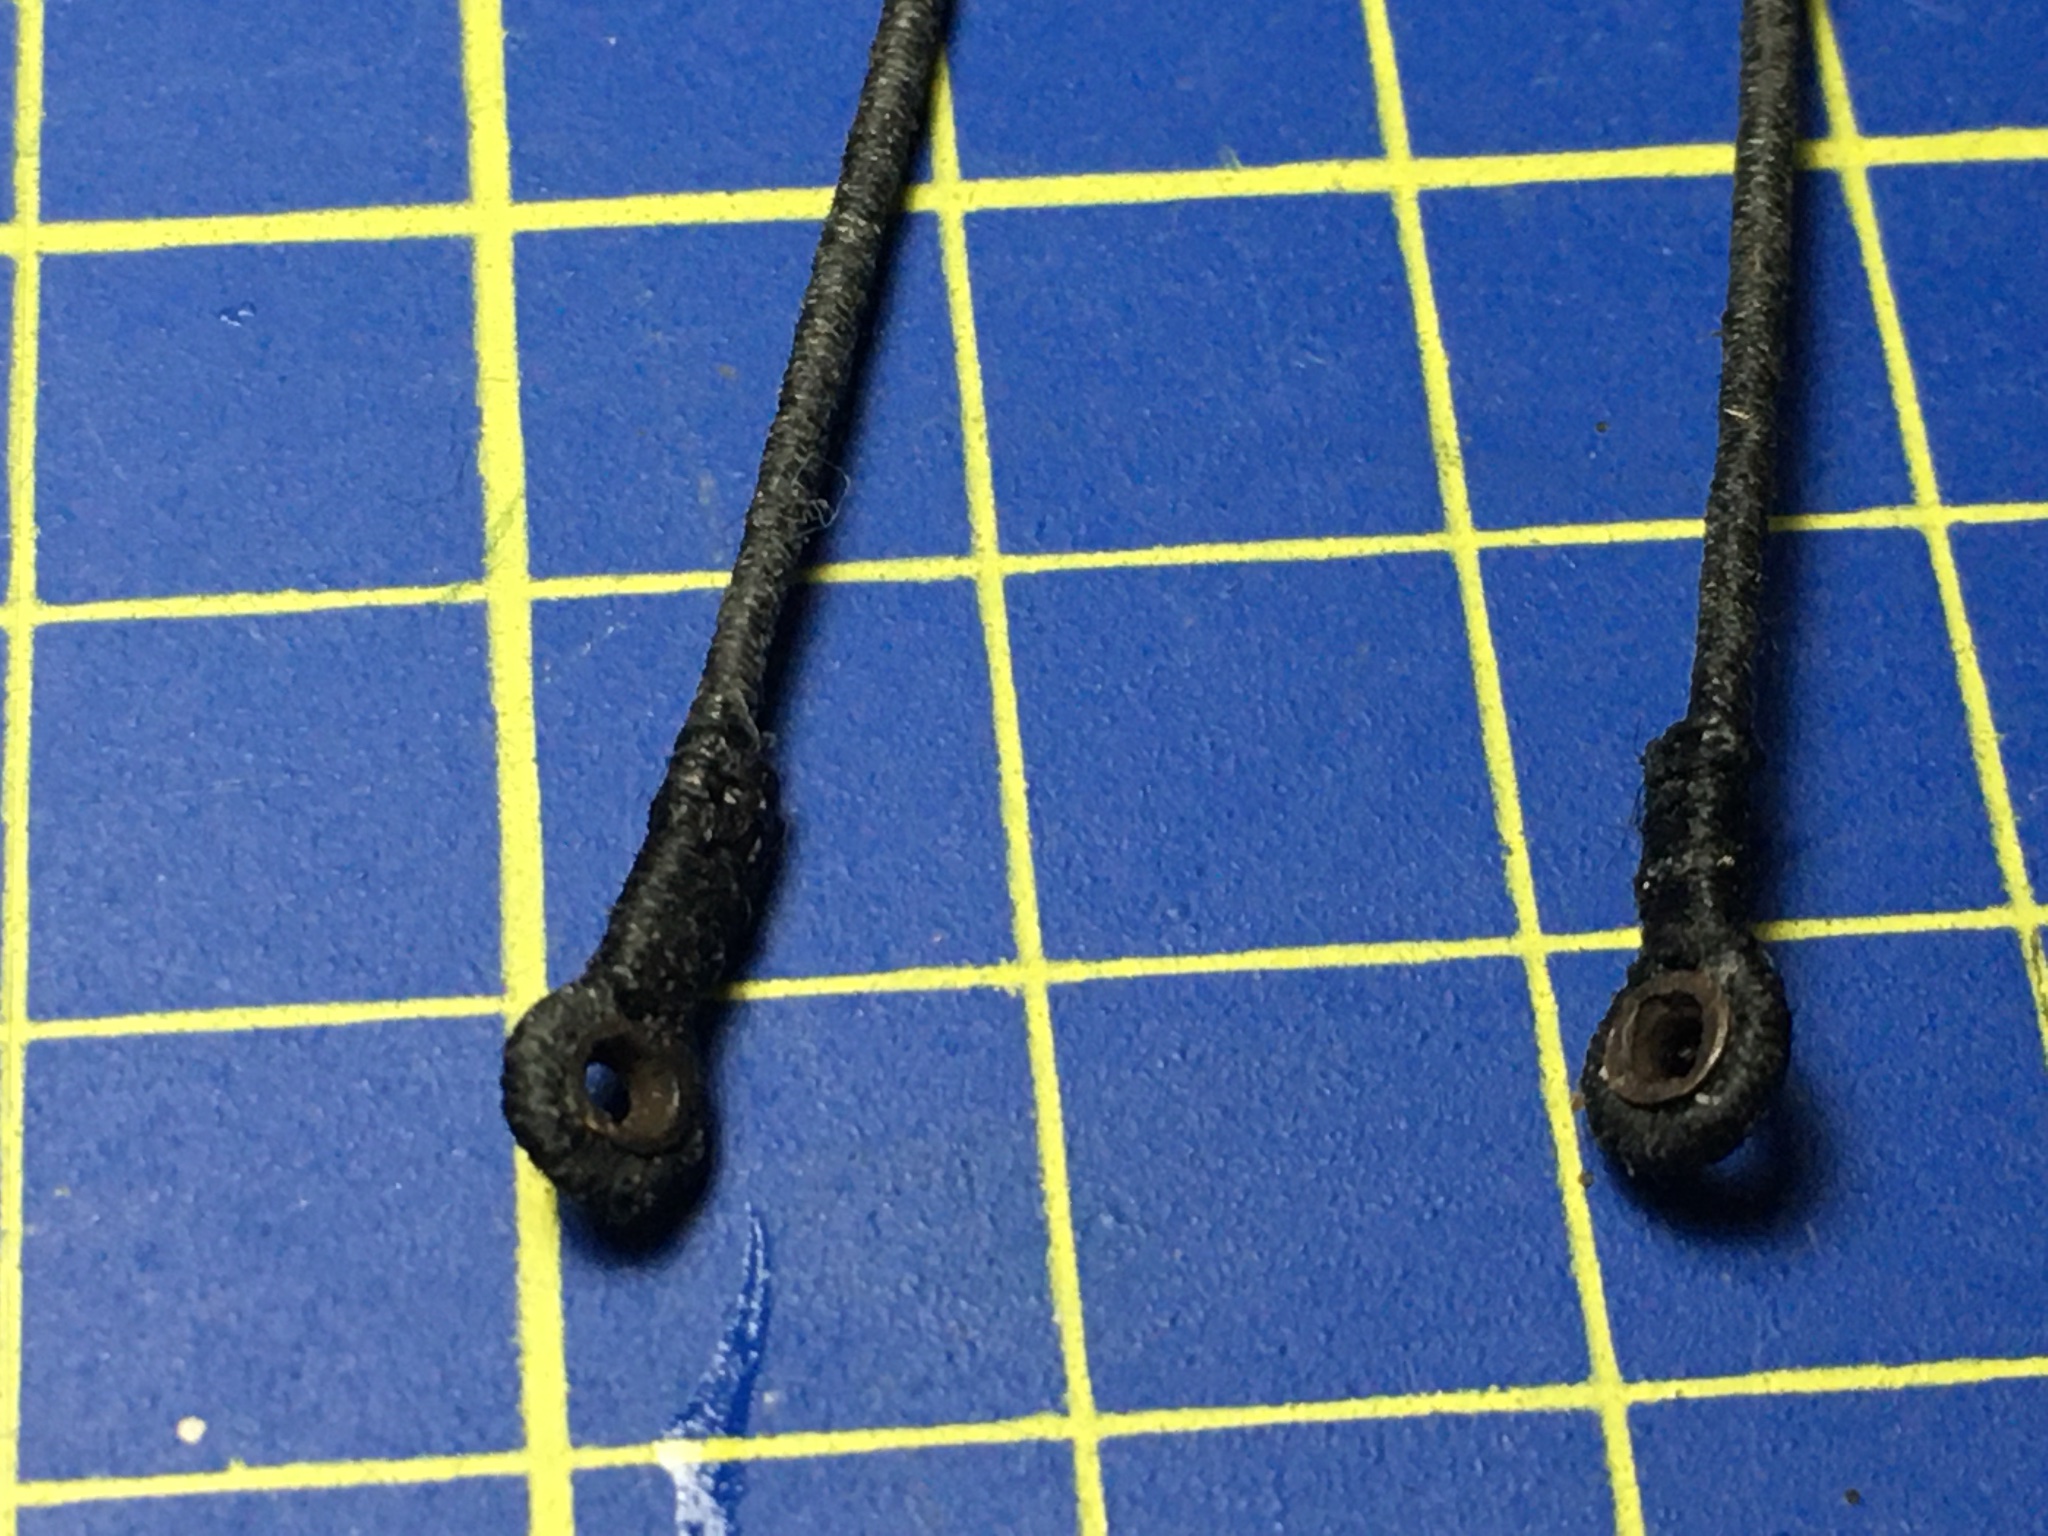
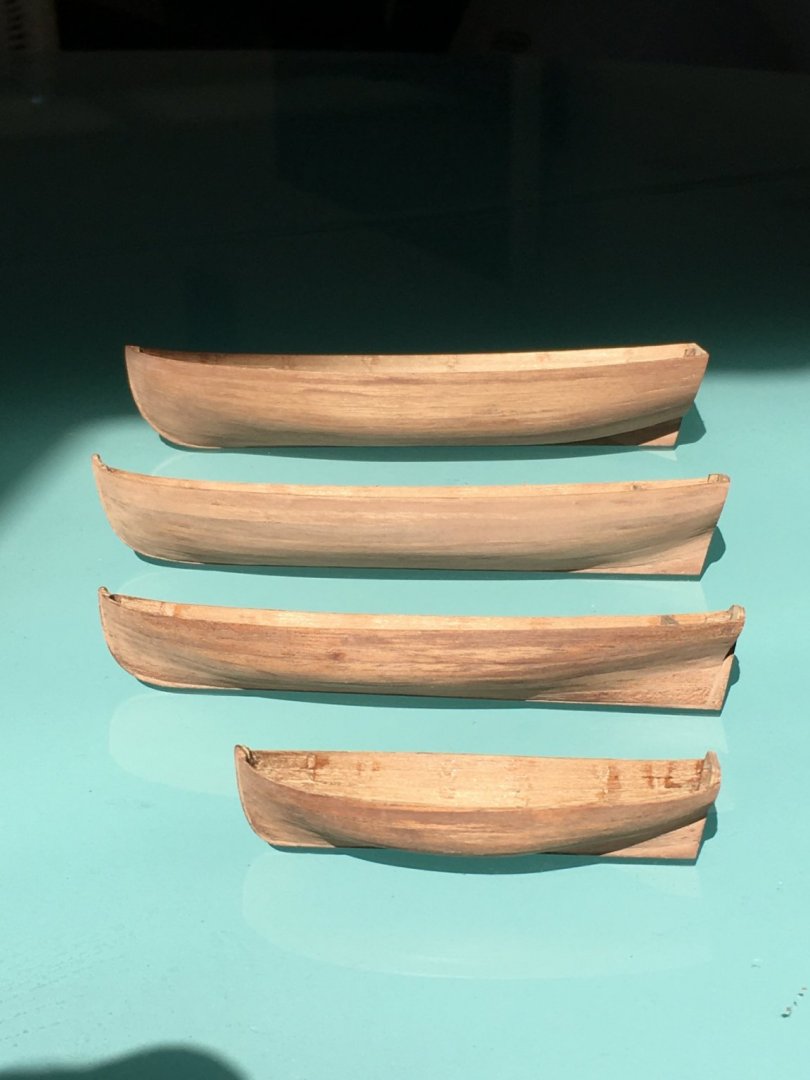
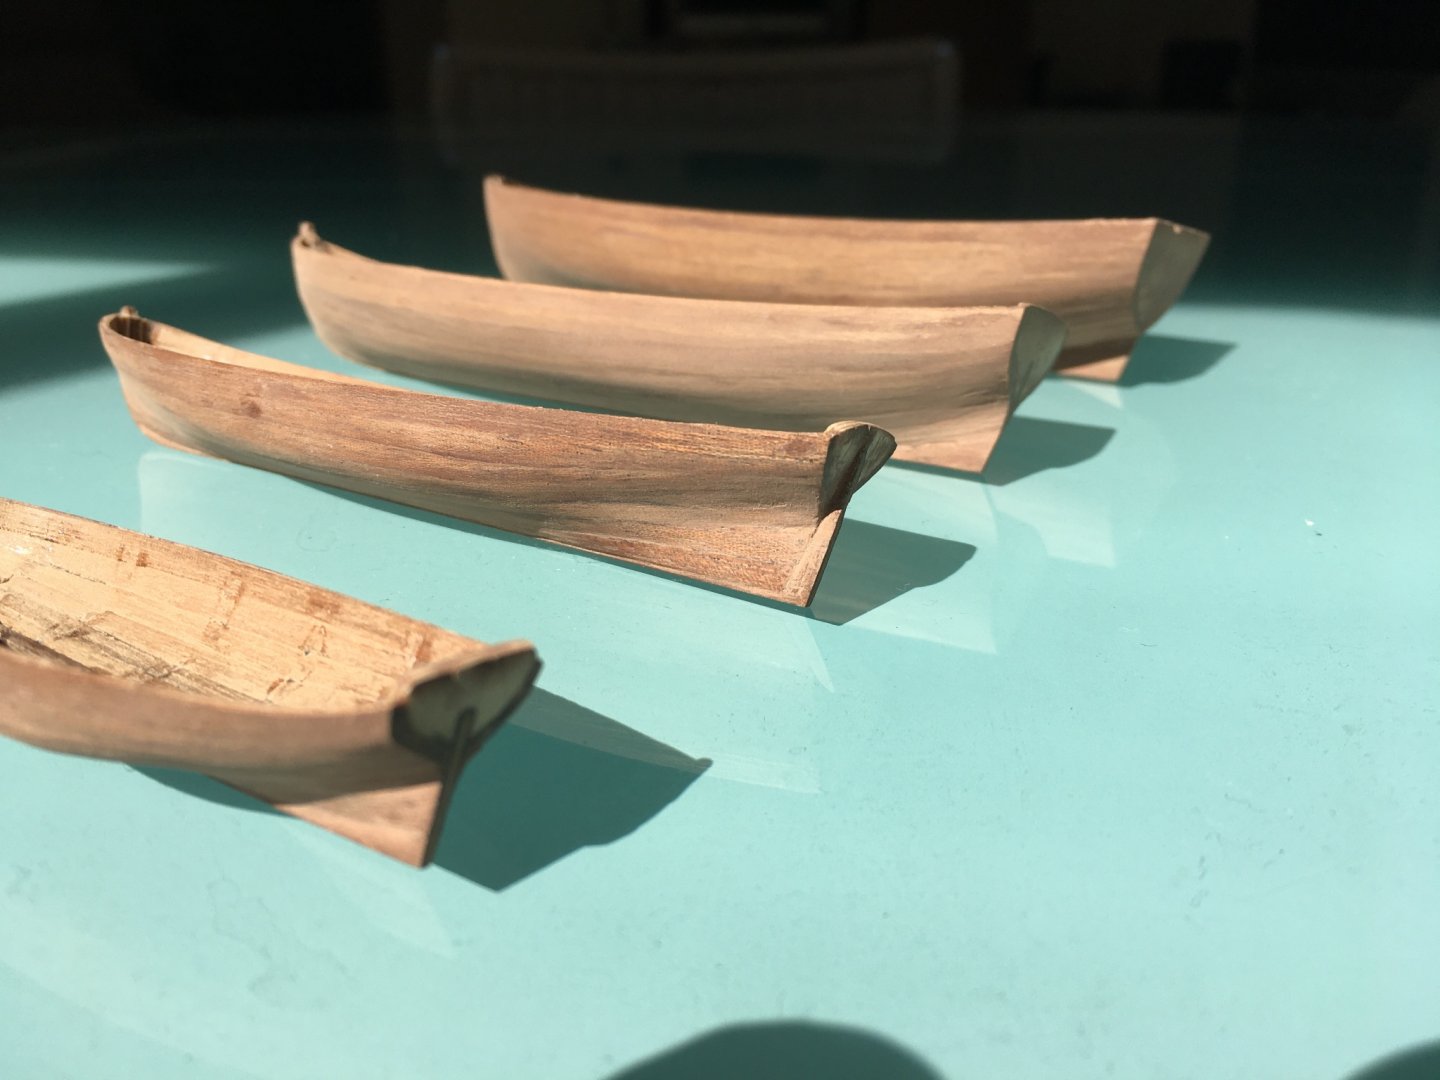
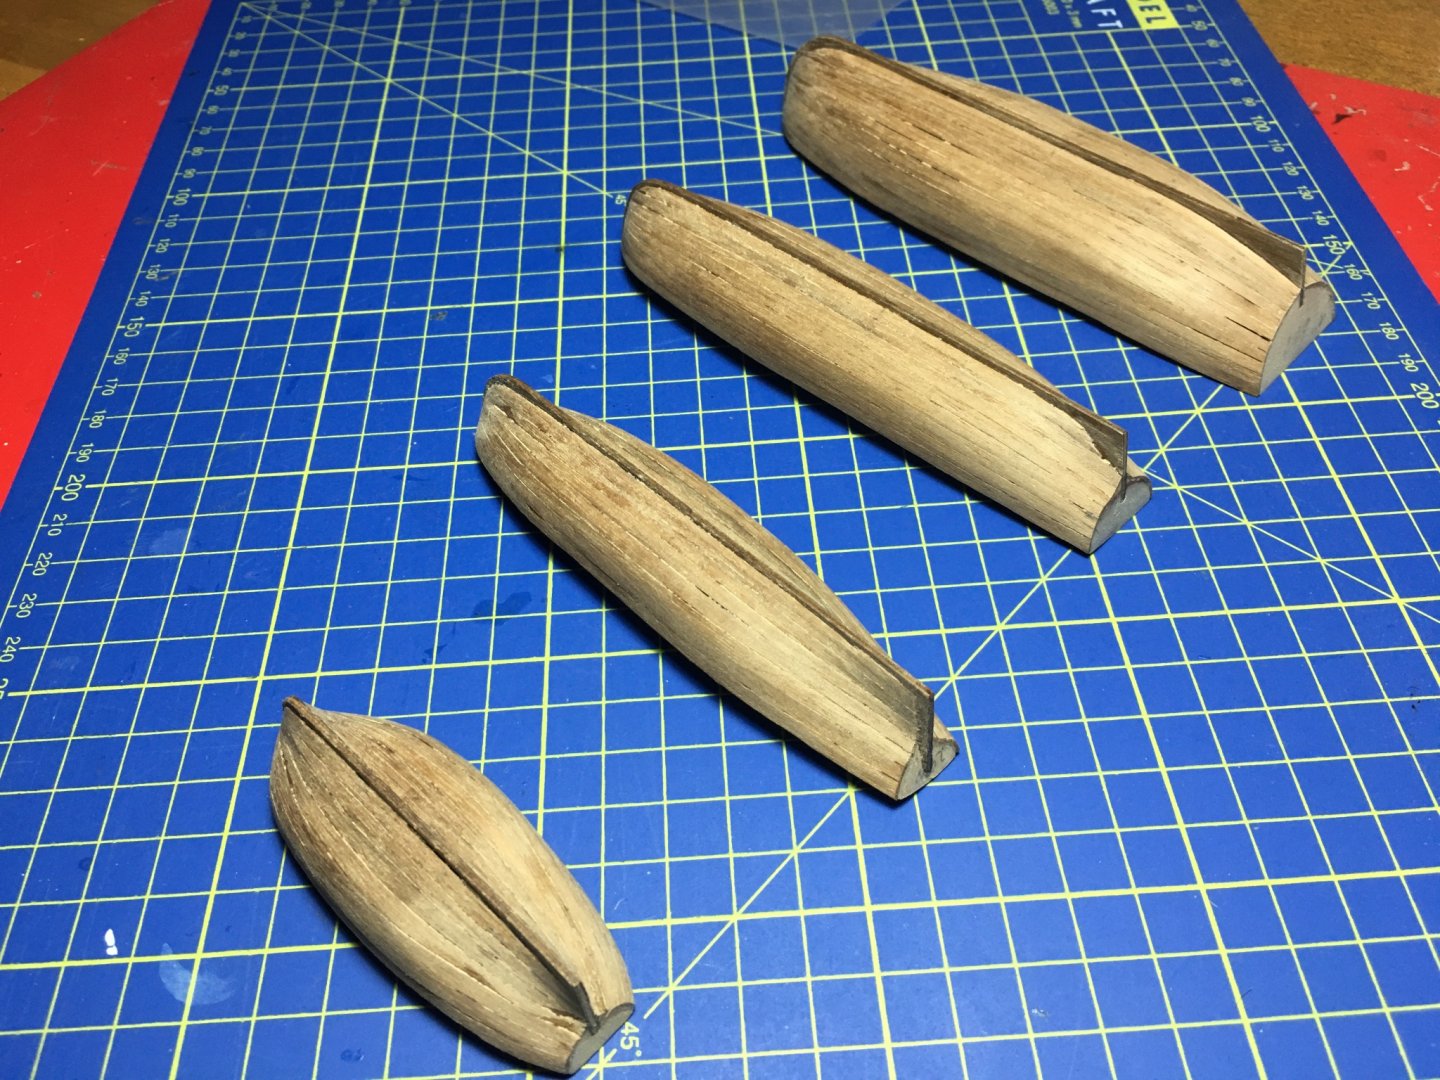
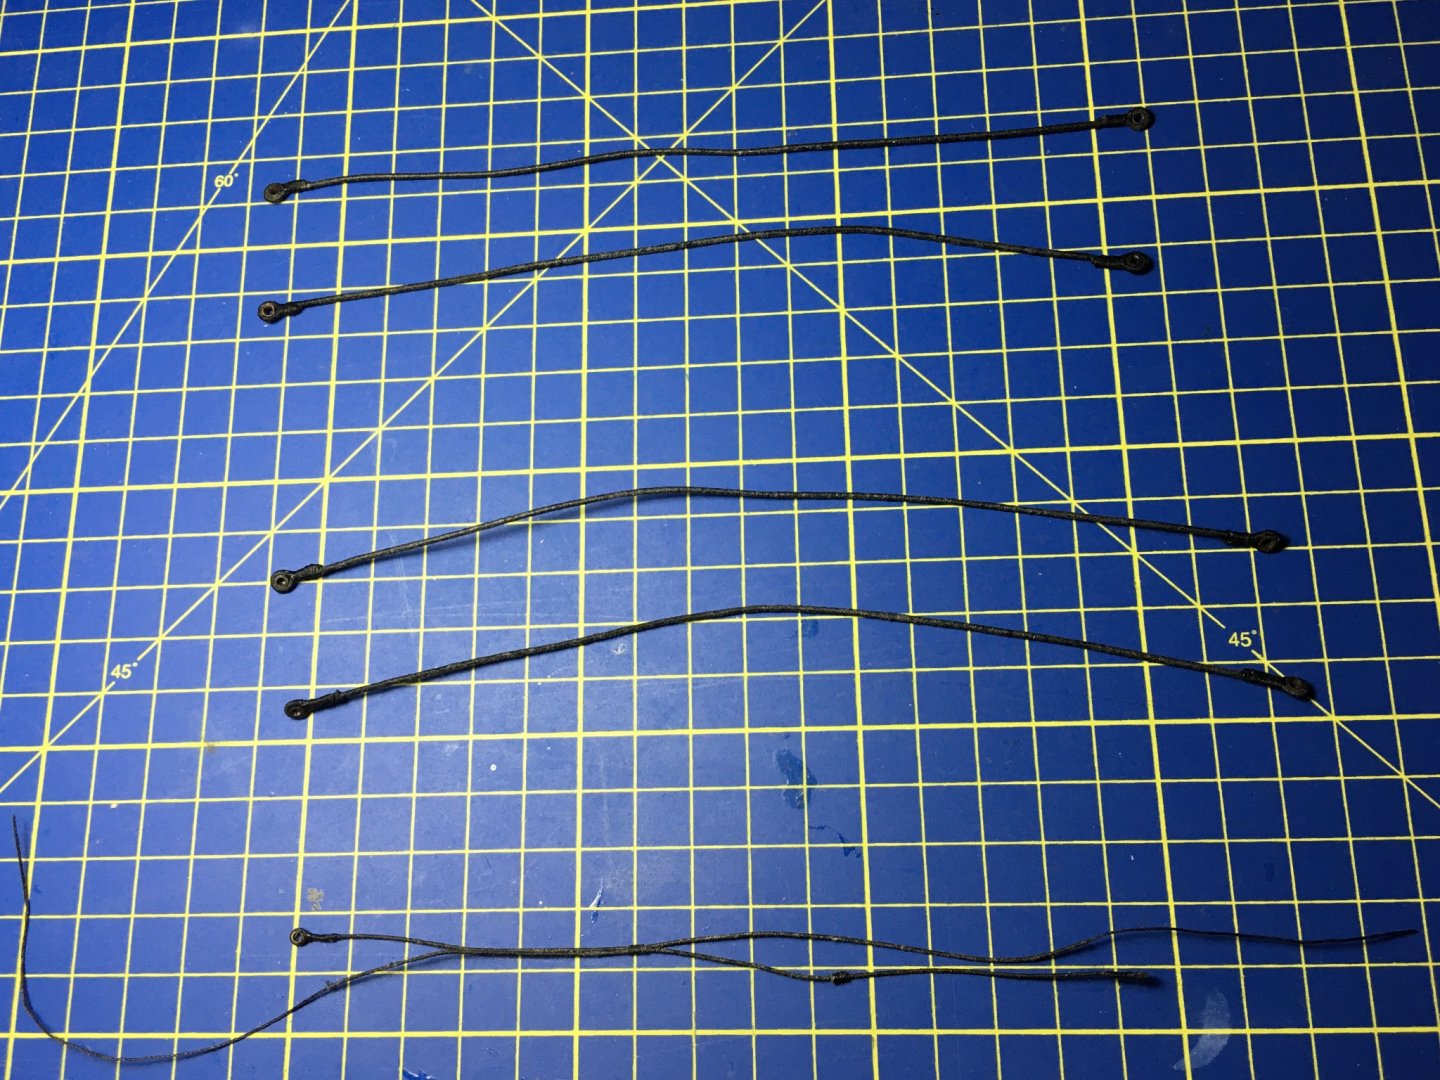
Whilst still waiting for the brass tubes for the thimbles I finished the boats with the first planking. The Launch with the first plank. The Launch planked all over. The Pinnace. The Cutter. All four boats brushed all over with watered down white glue, trimmed and sanded, ready for the second planking. Having received the brass tubes I finished the lower masts pendants. For the fore and main mast pendants I used the 2mm diam. brass tube for the thimbles, and for the mizzen mast I used the 1.5mm diam. tube, and blackened them. I served the lines for the pendants all along before fitting the thimbles. Pendants rigged in place. One problem that I found rigging them in place was that when you loop the pendant round the mast and tie a knot round the two lines you will not be able to push back the knot because of the line being served. I had to tie the knot exactly in its place otherwise I wasn't able to slide it back. With the line not served it is quite easy to slide the knots. I will have the same problem with the shrouds. I don't know if there is any other way to go about it!!! Now I can start work on the shrouds. Robert


- 527 replies
-
- 10
-
-
- caldercraft
- victory
- (and 1 more)
-
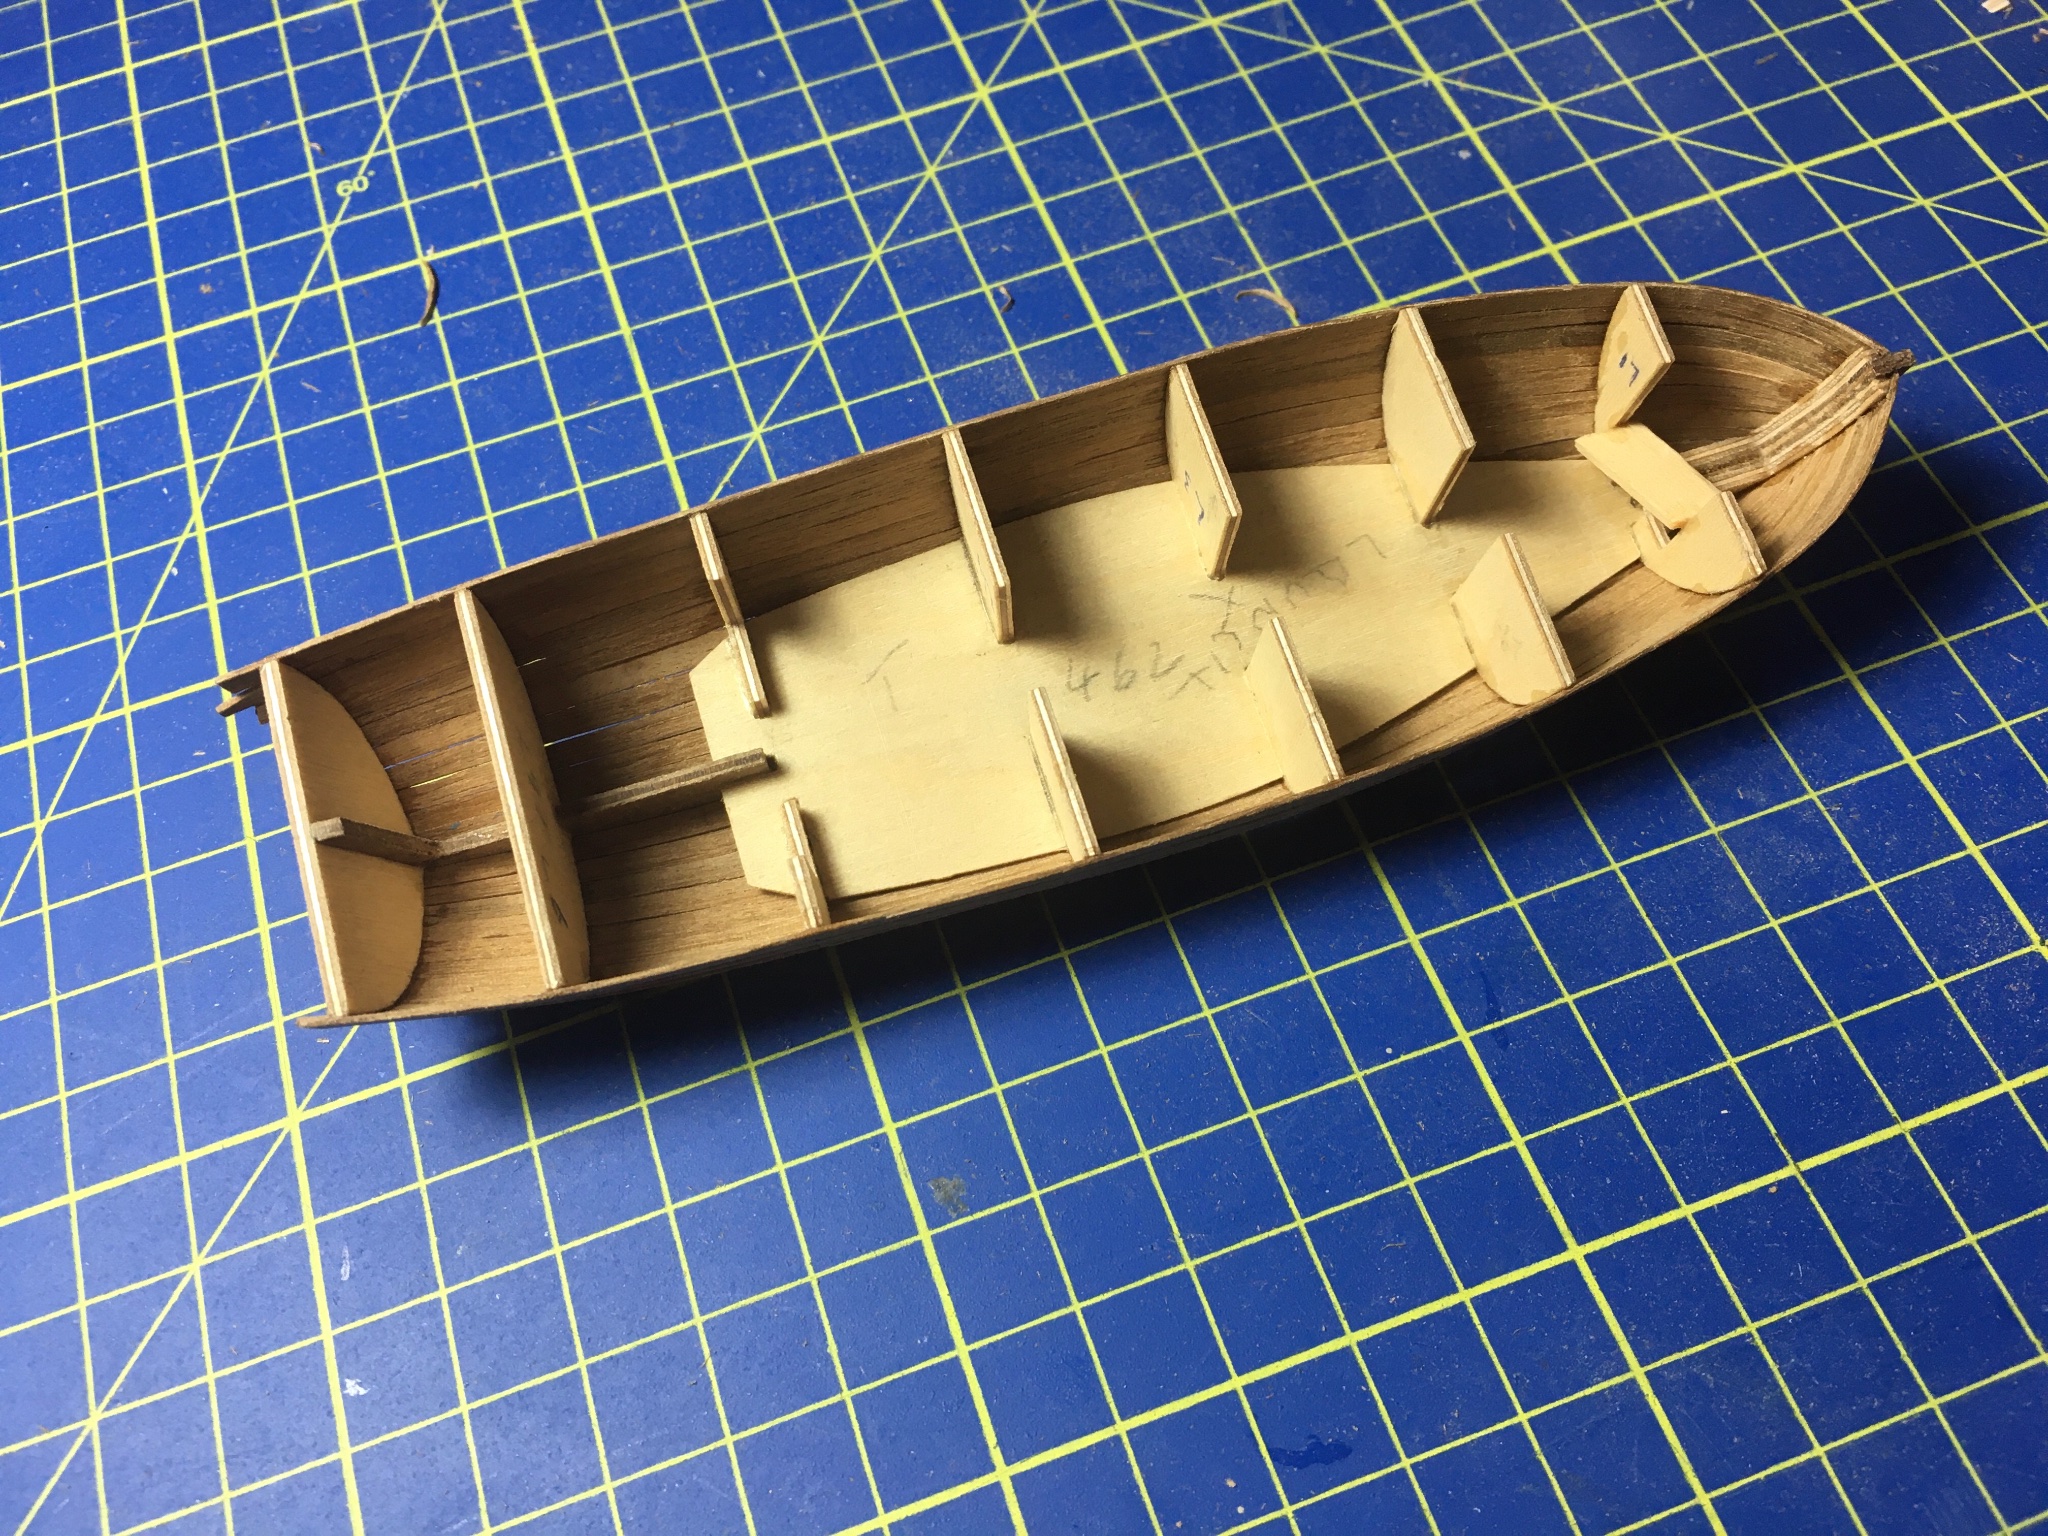
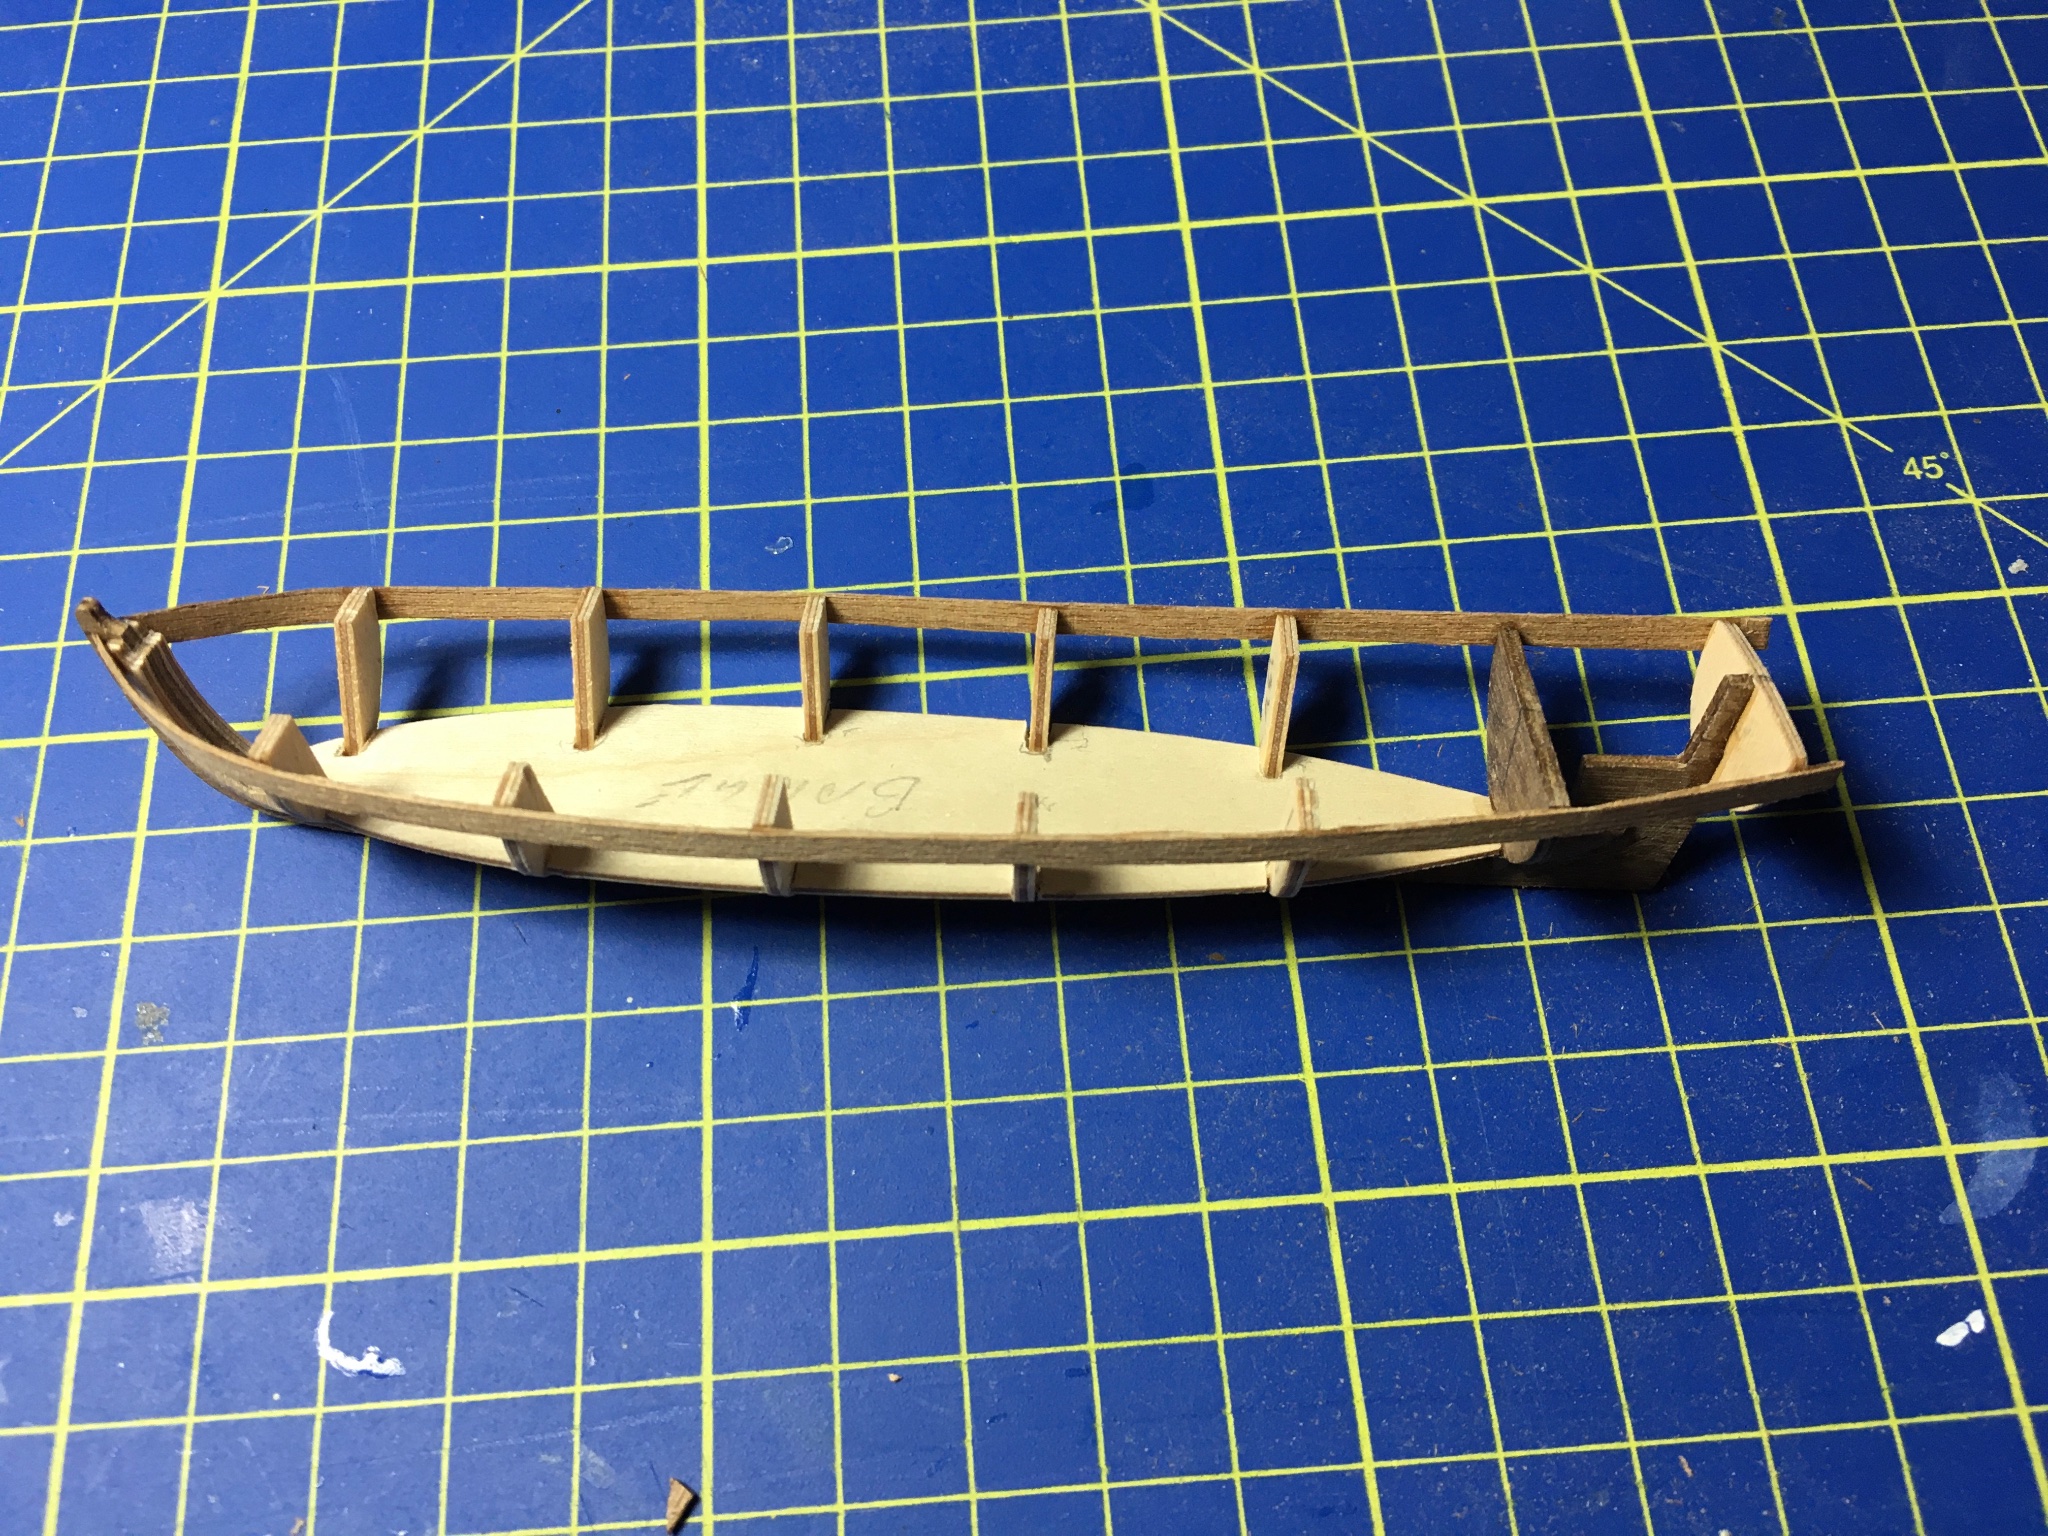
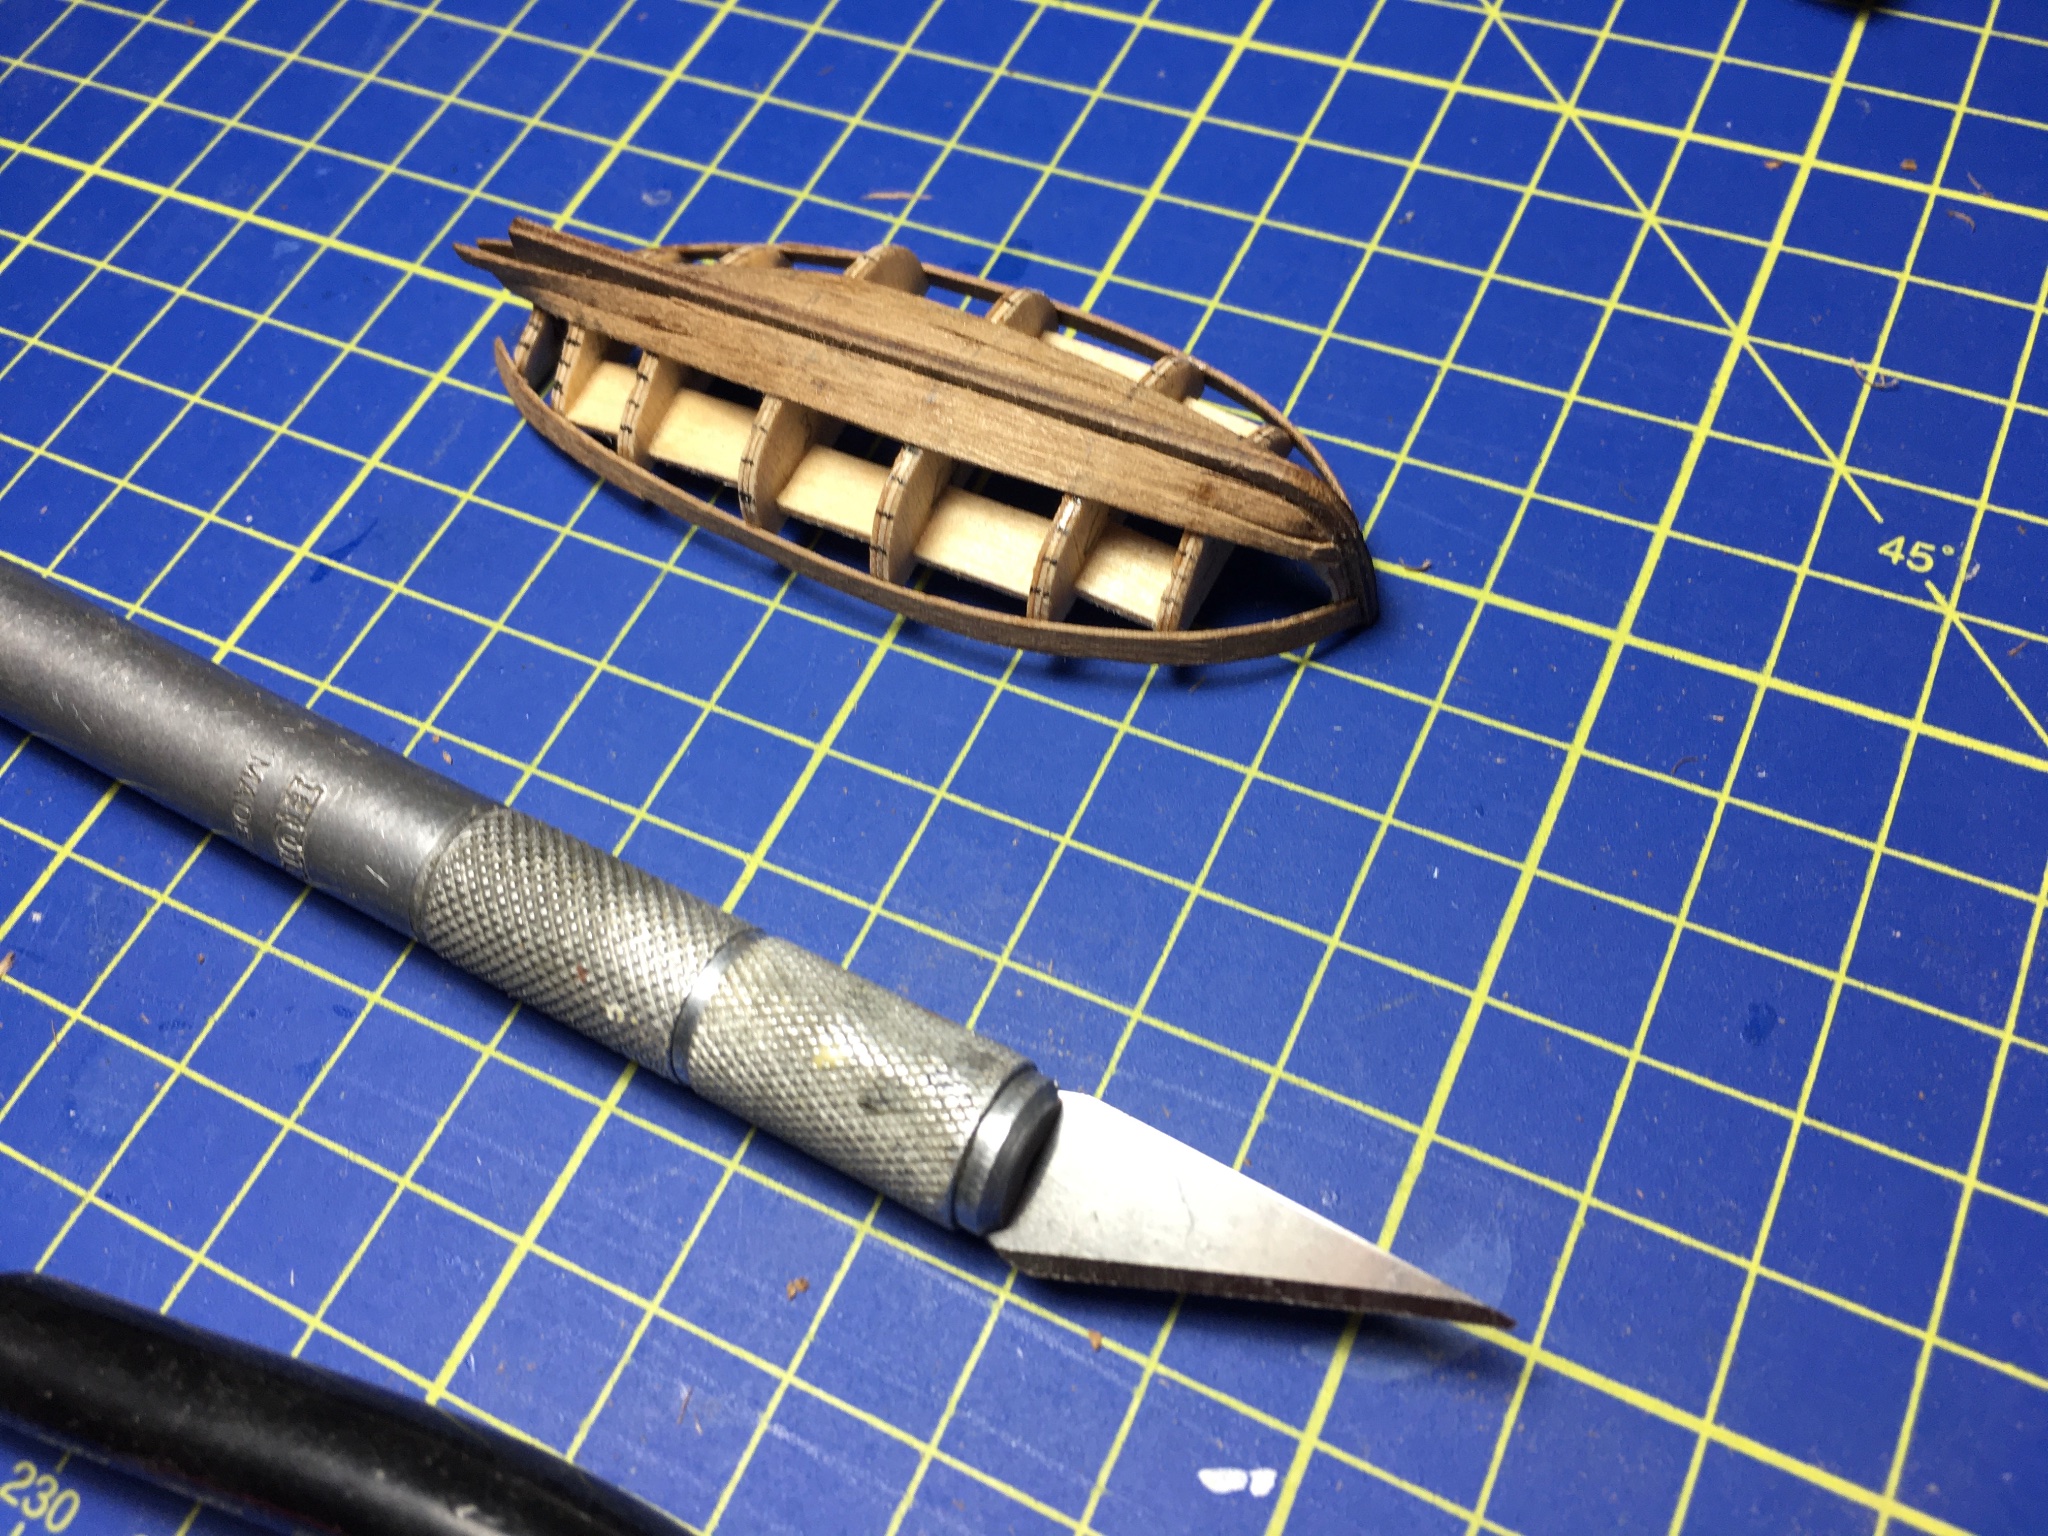
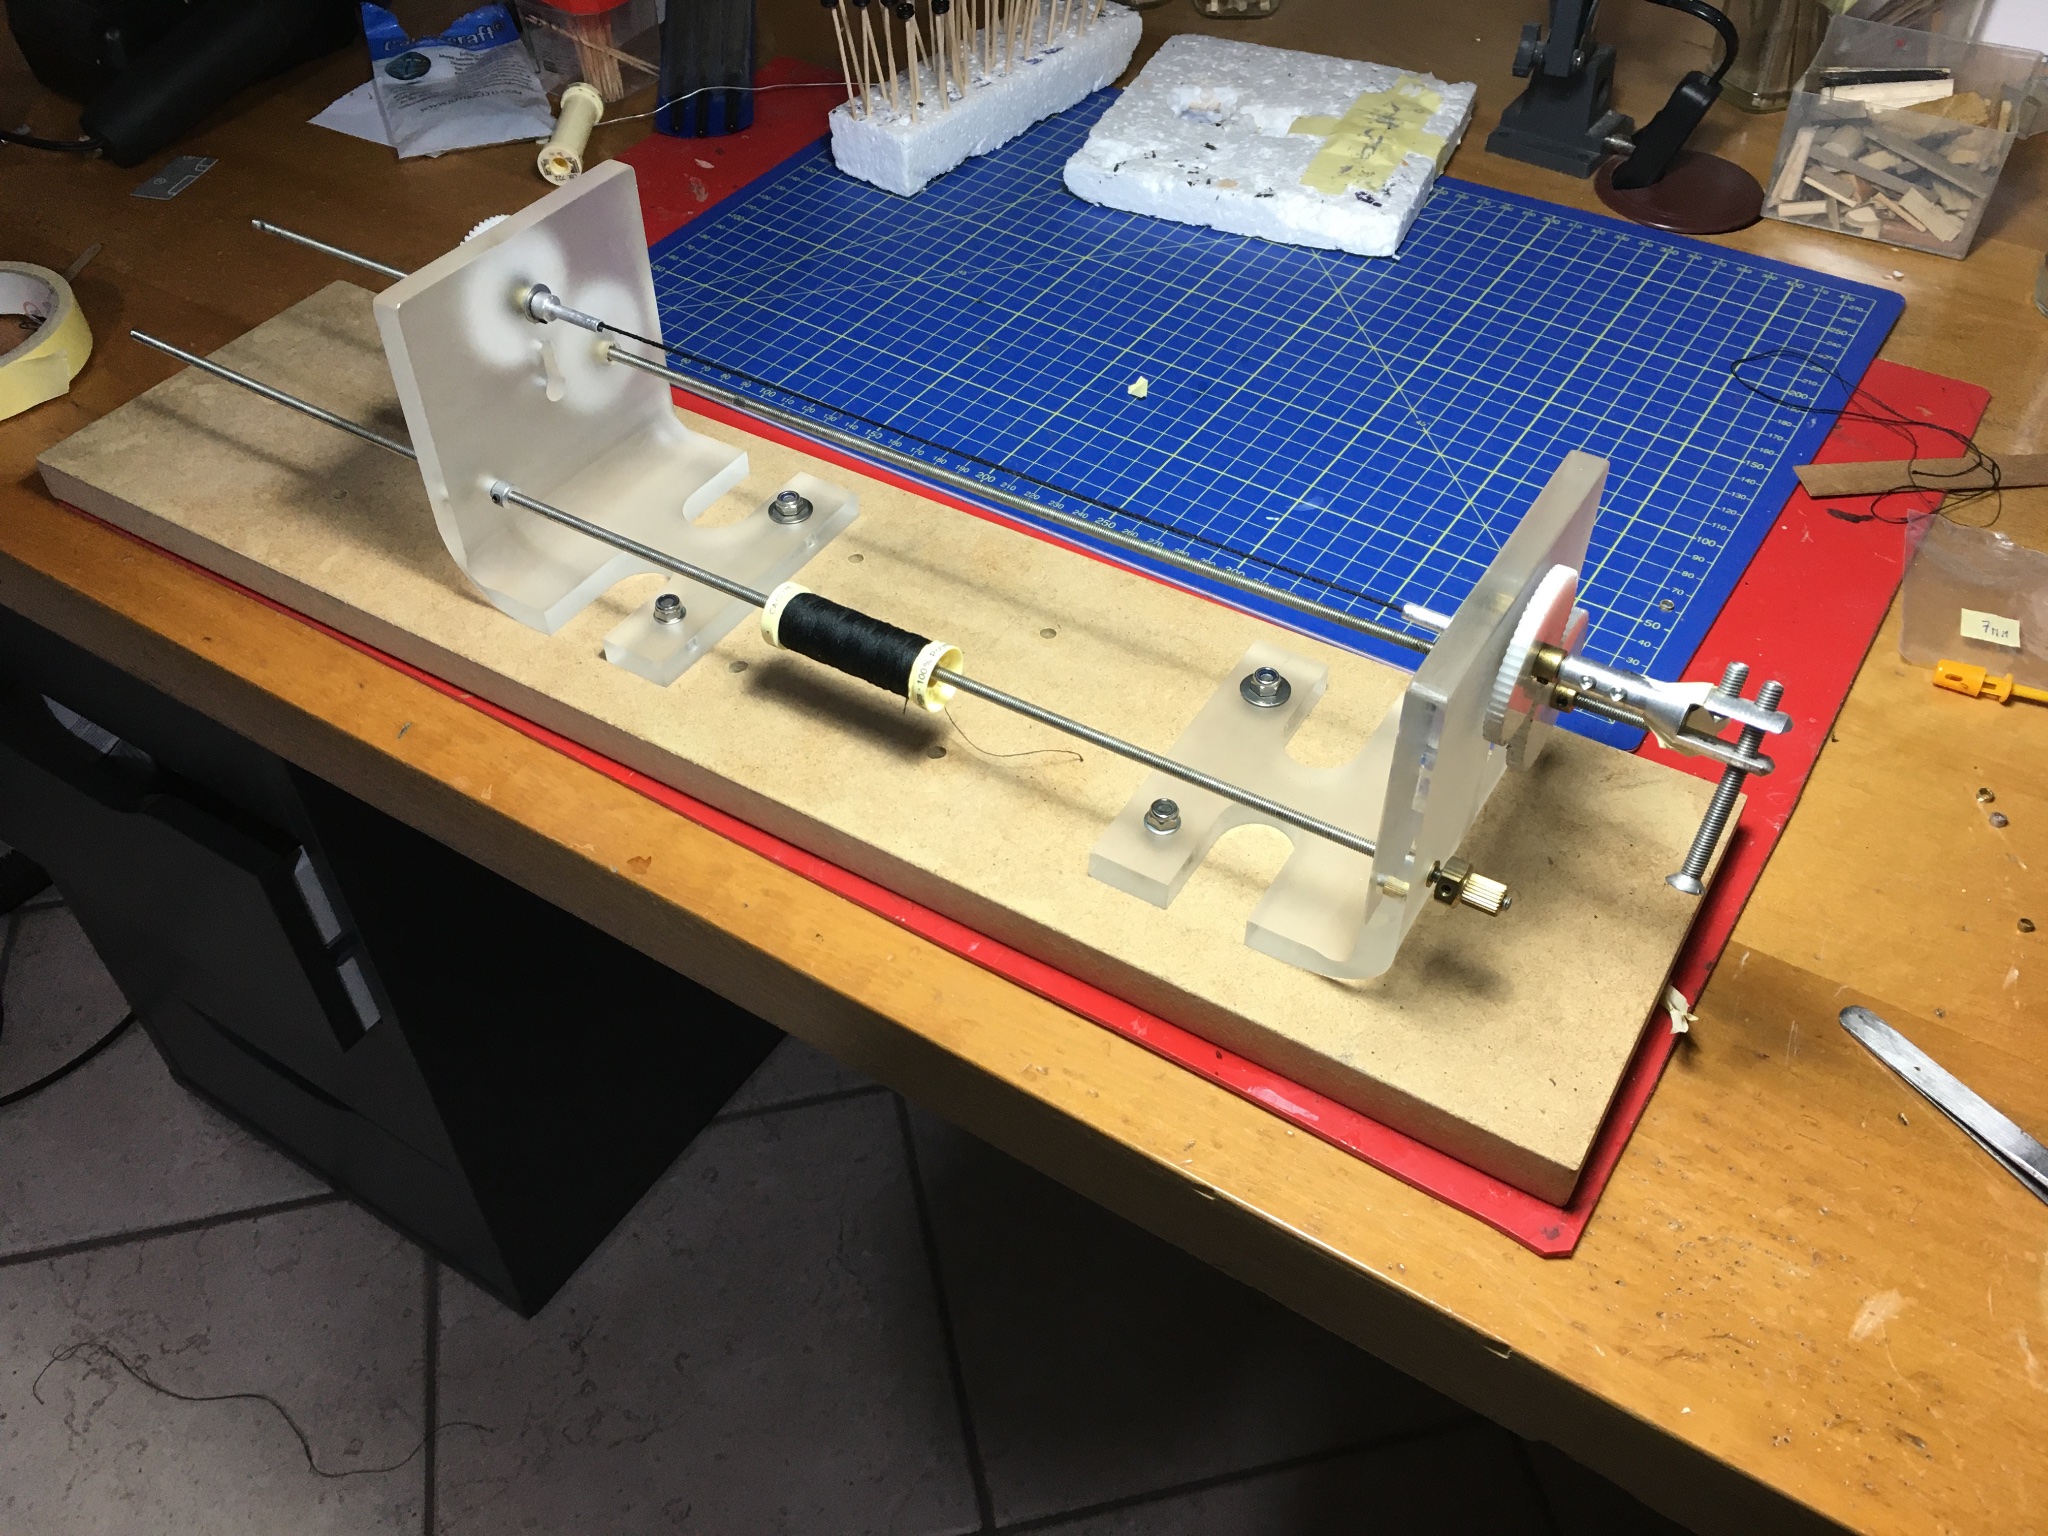
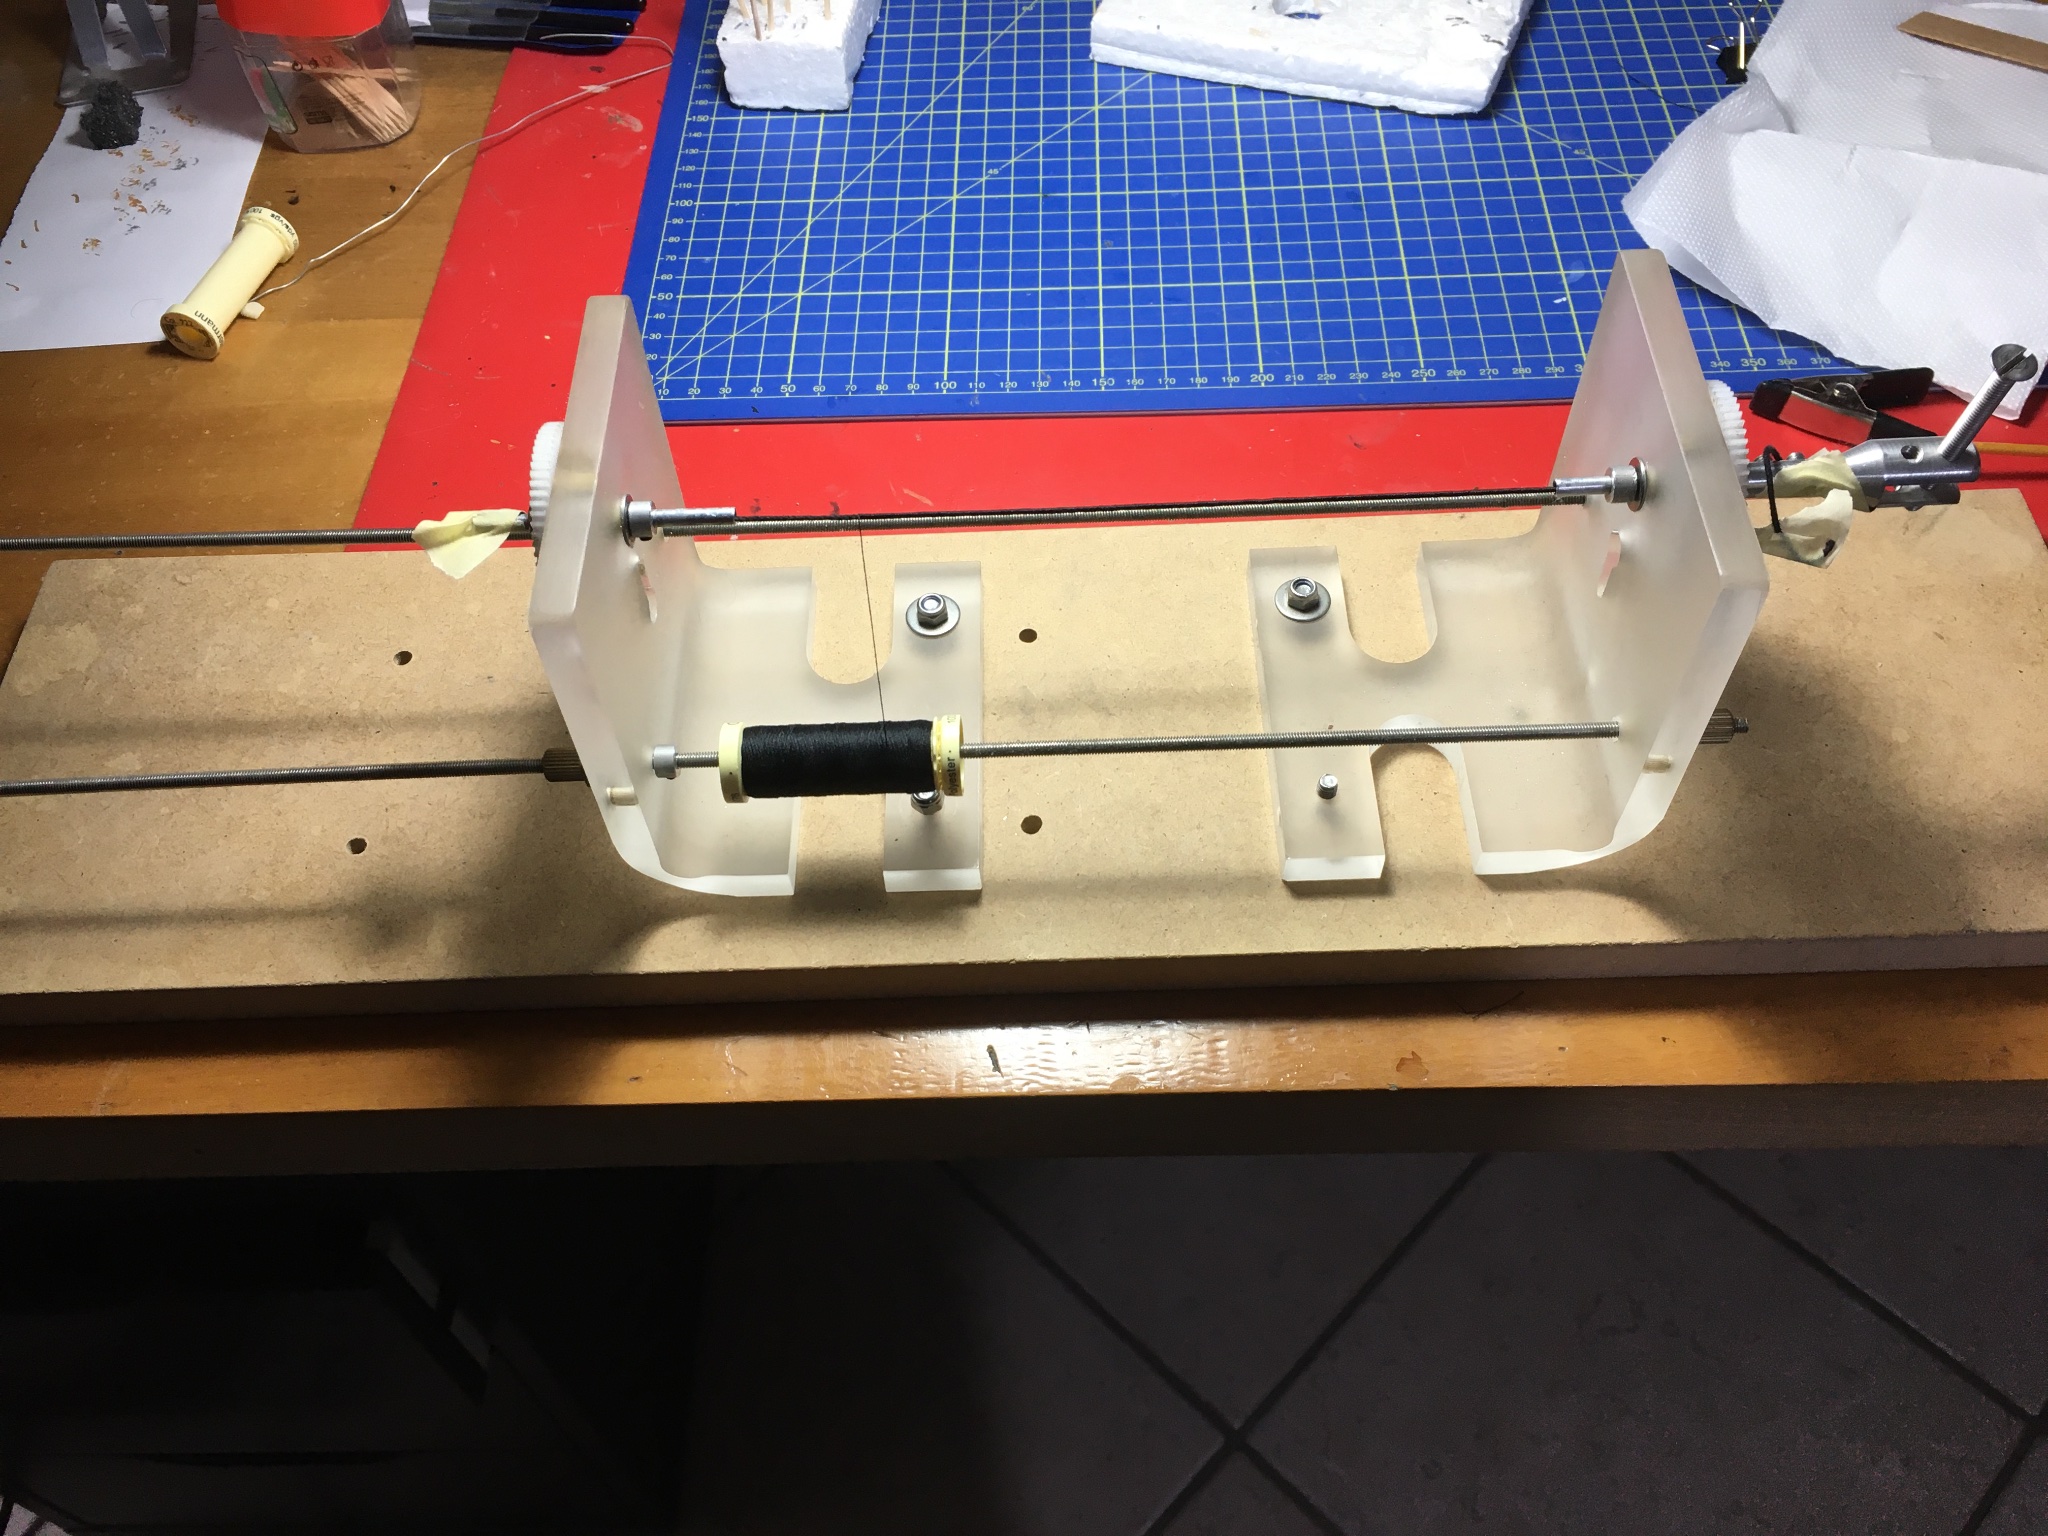
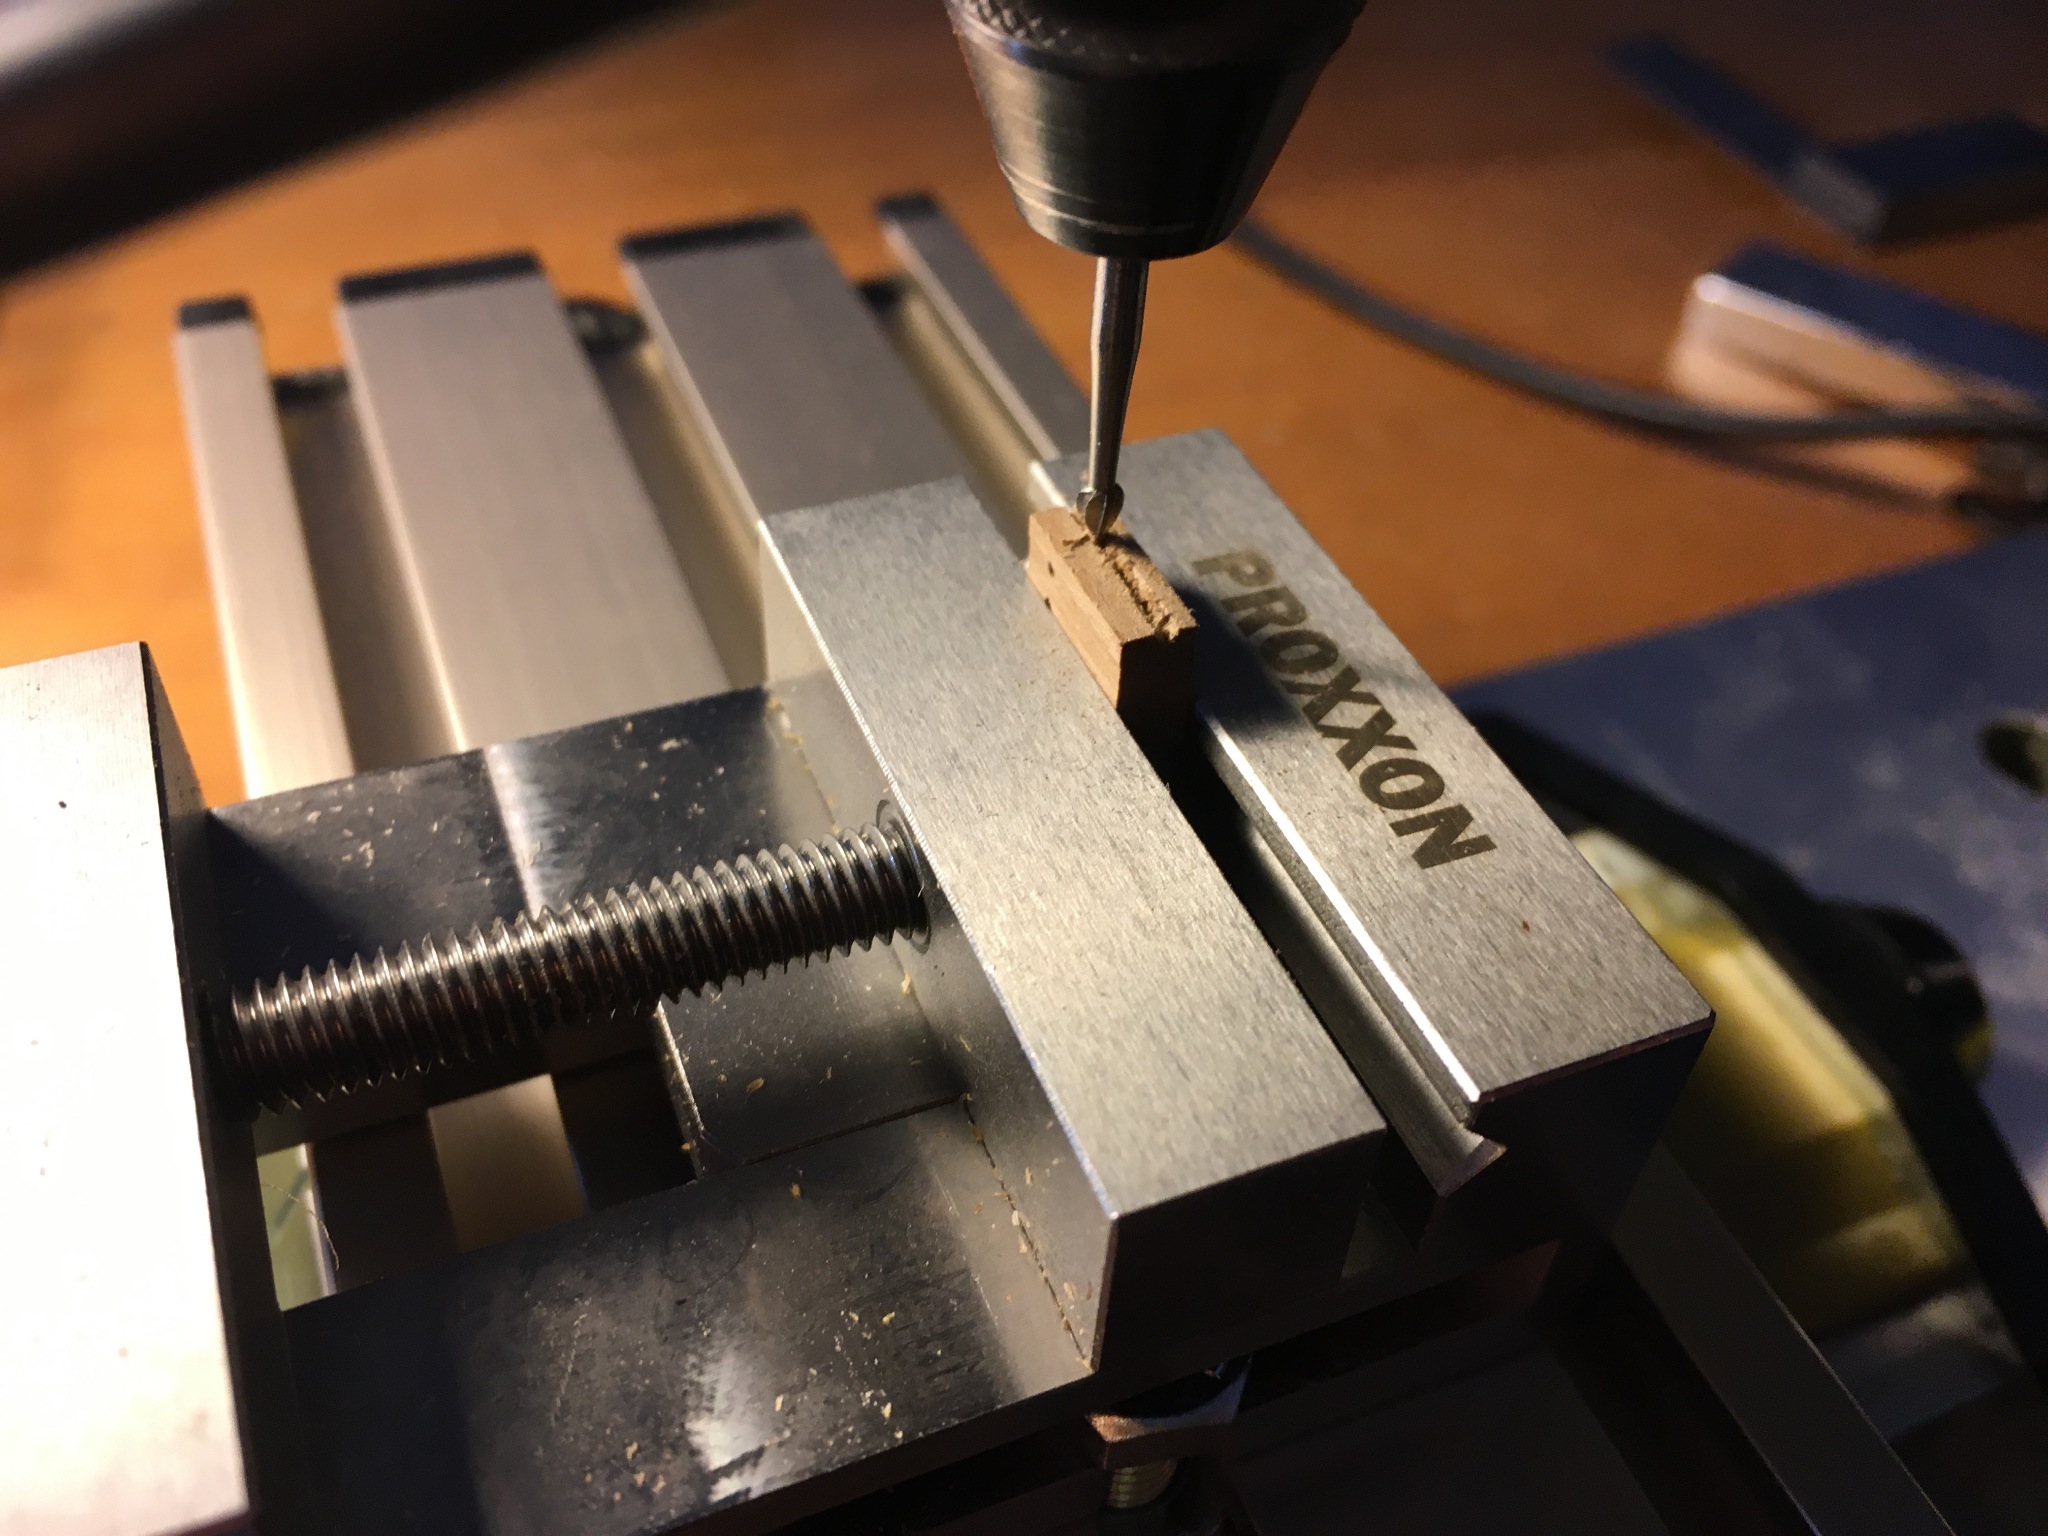
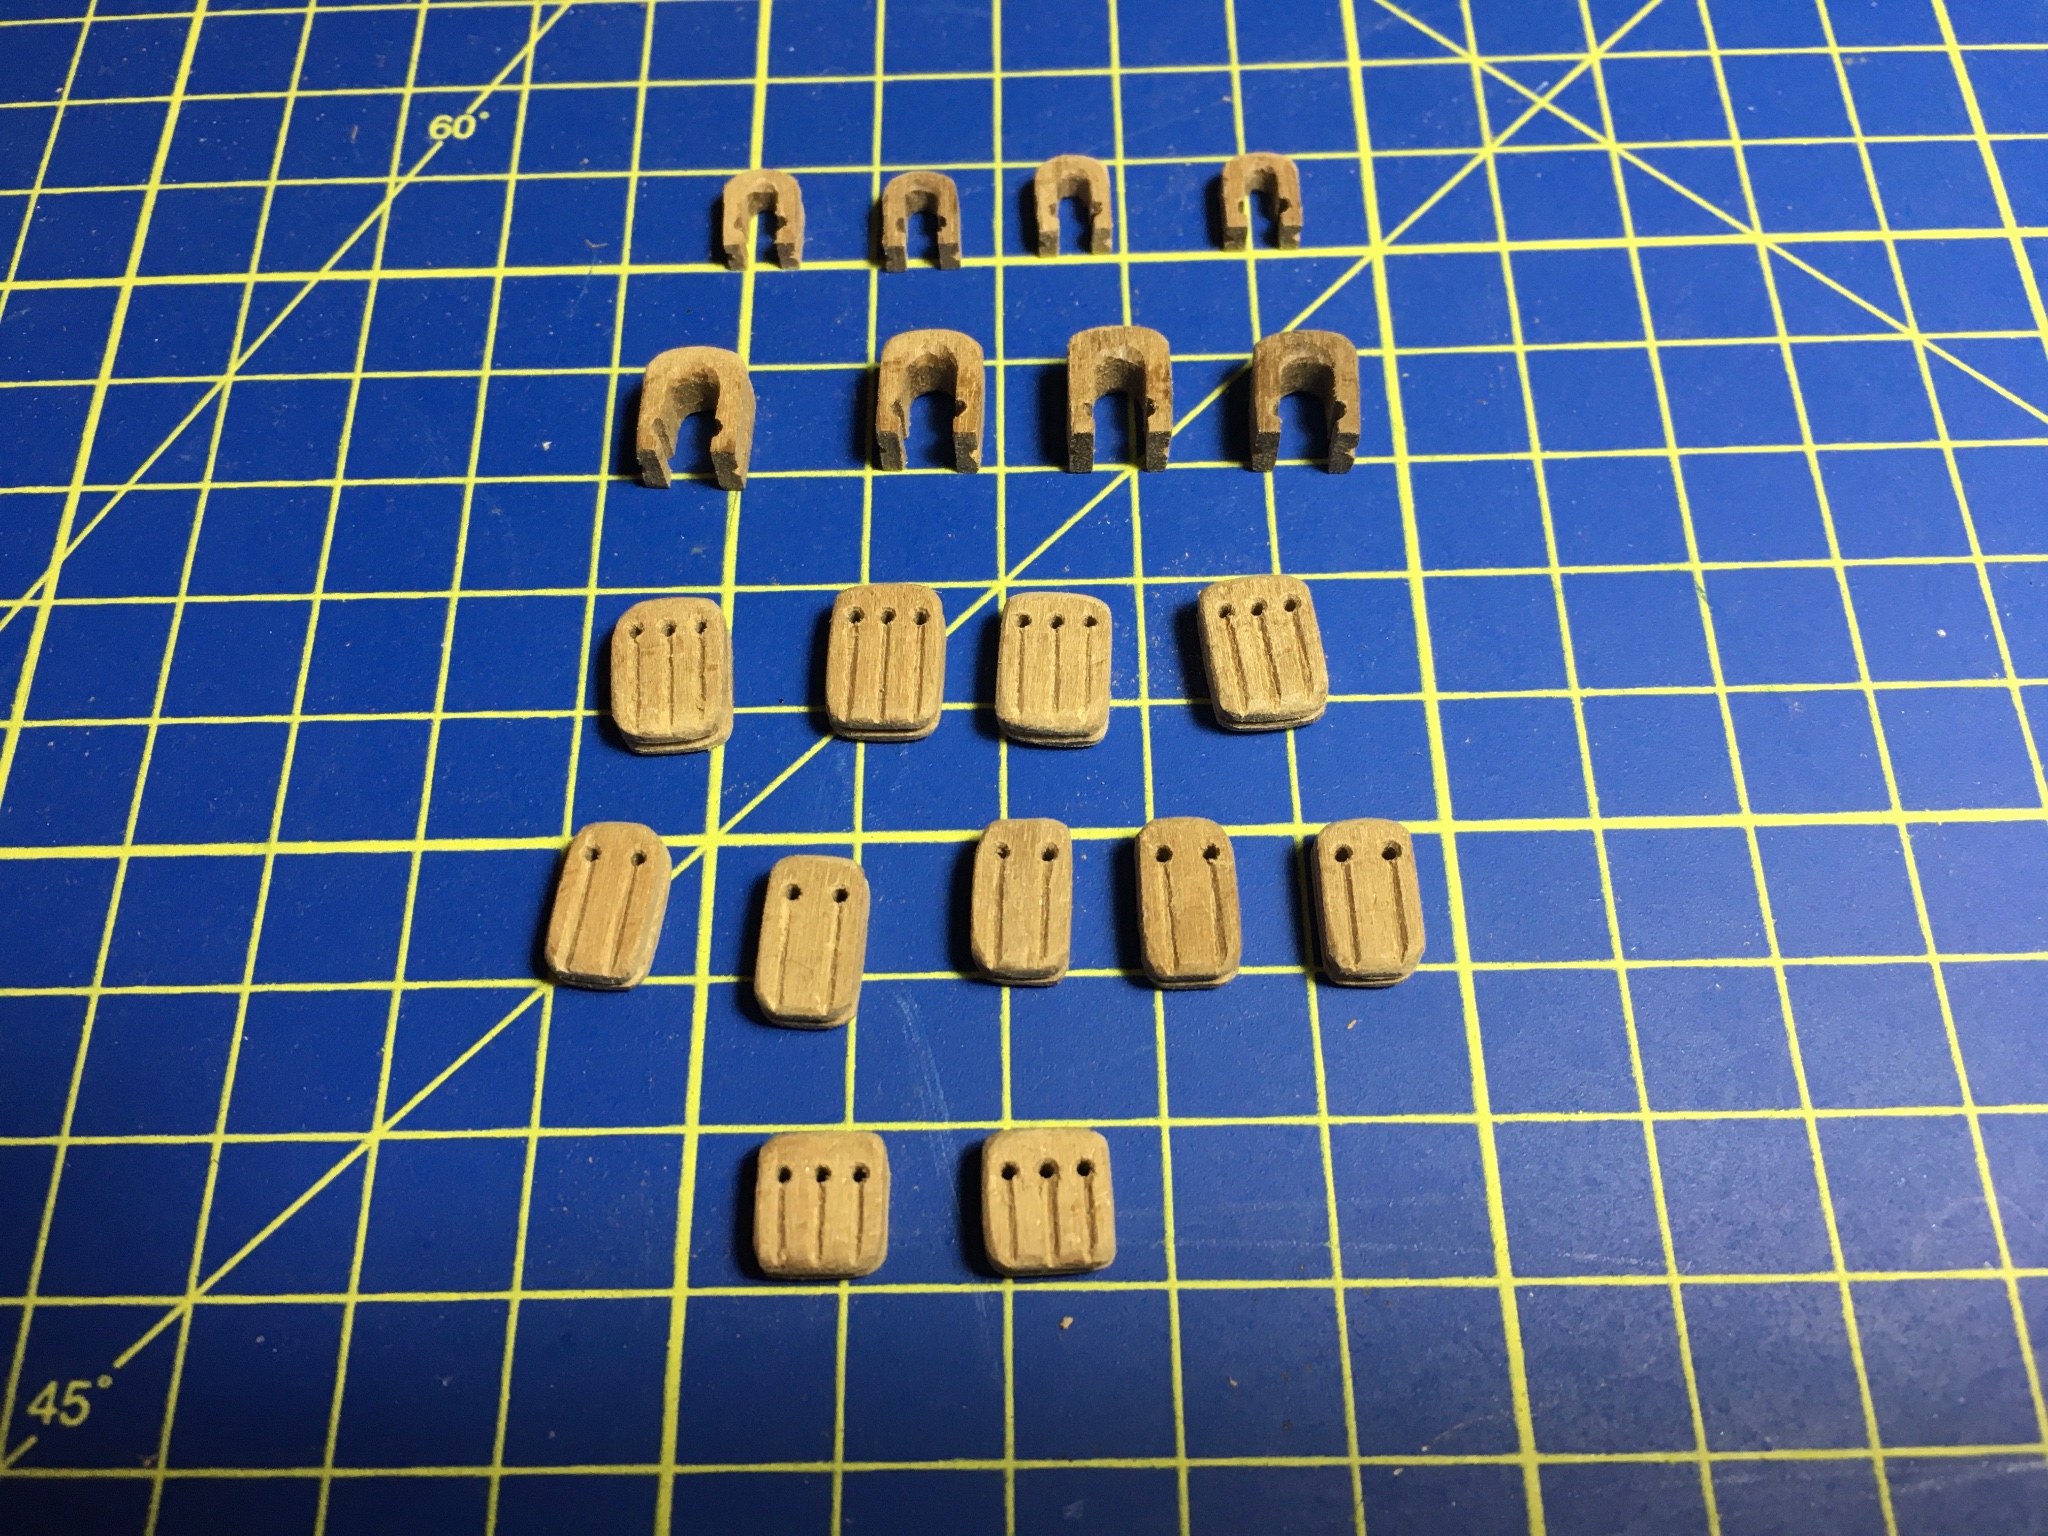
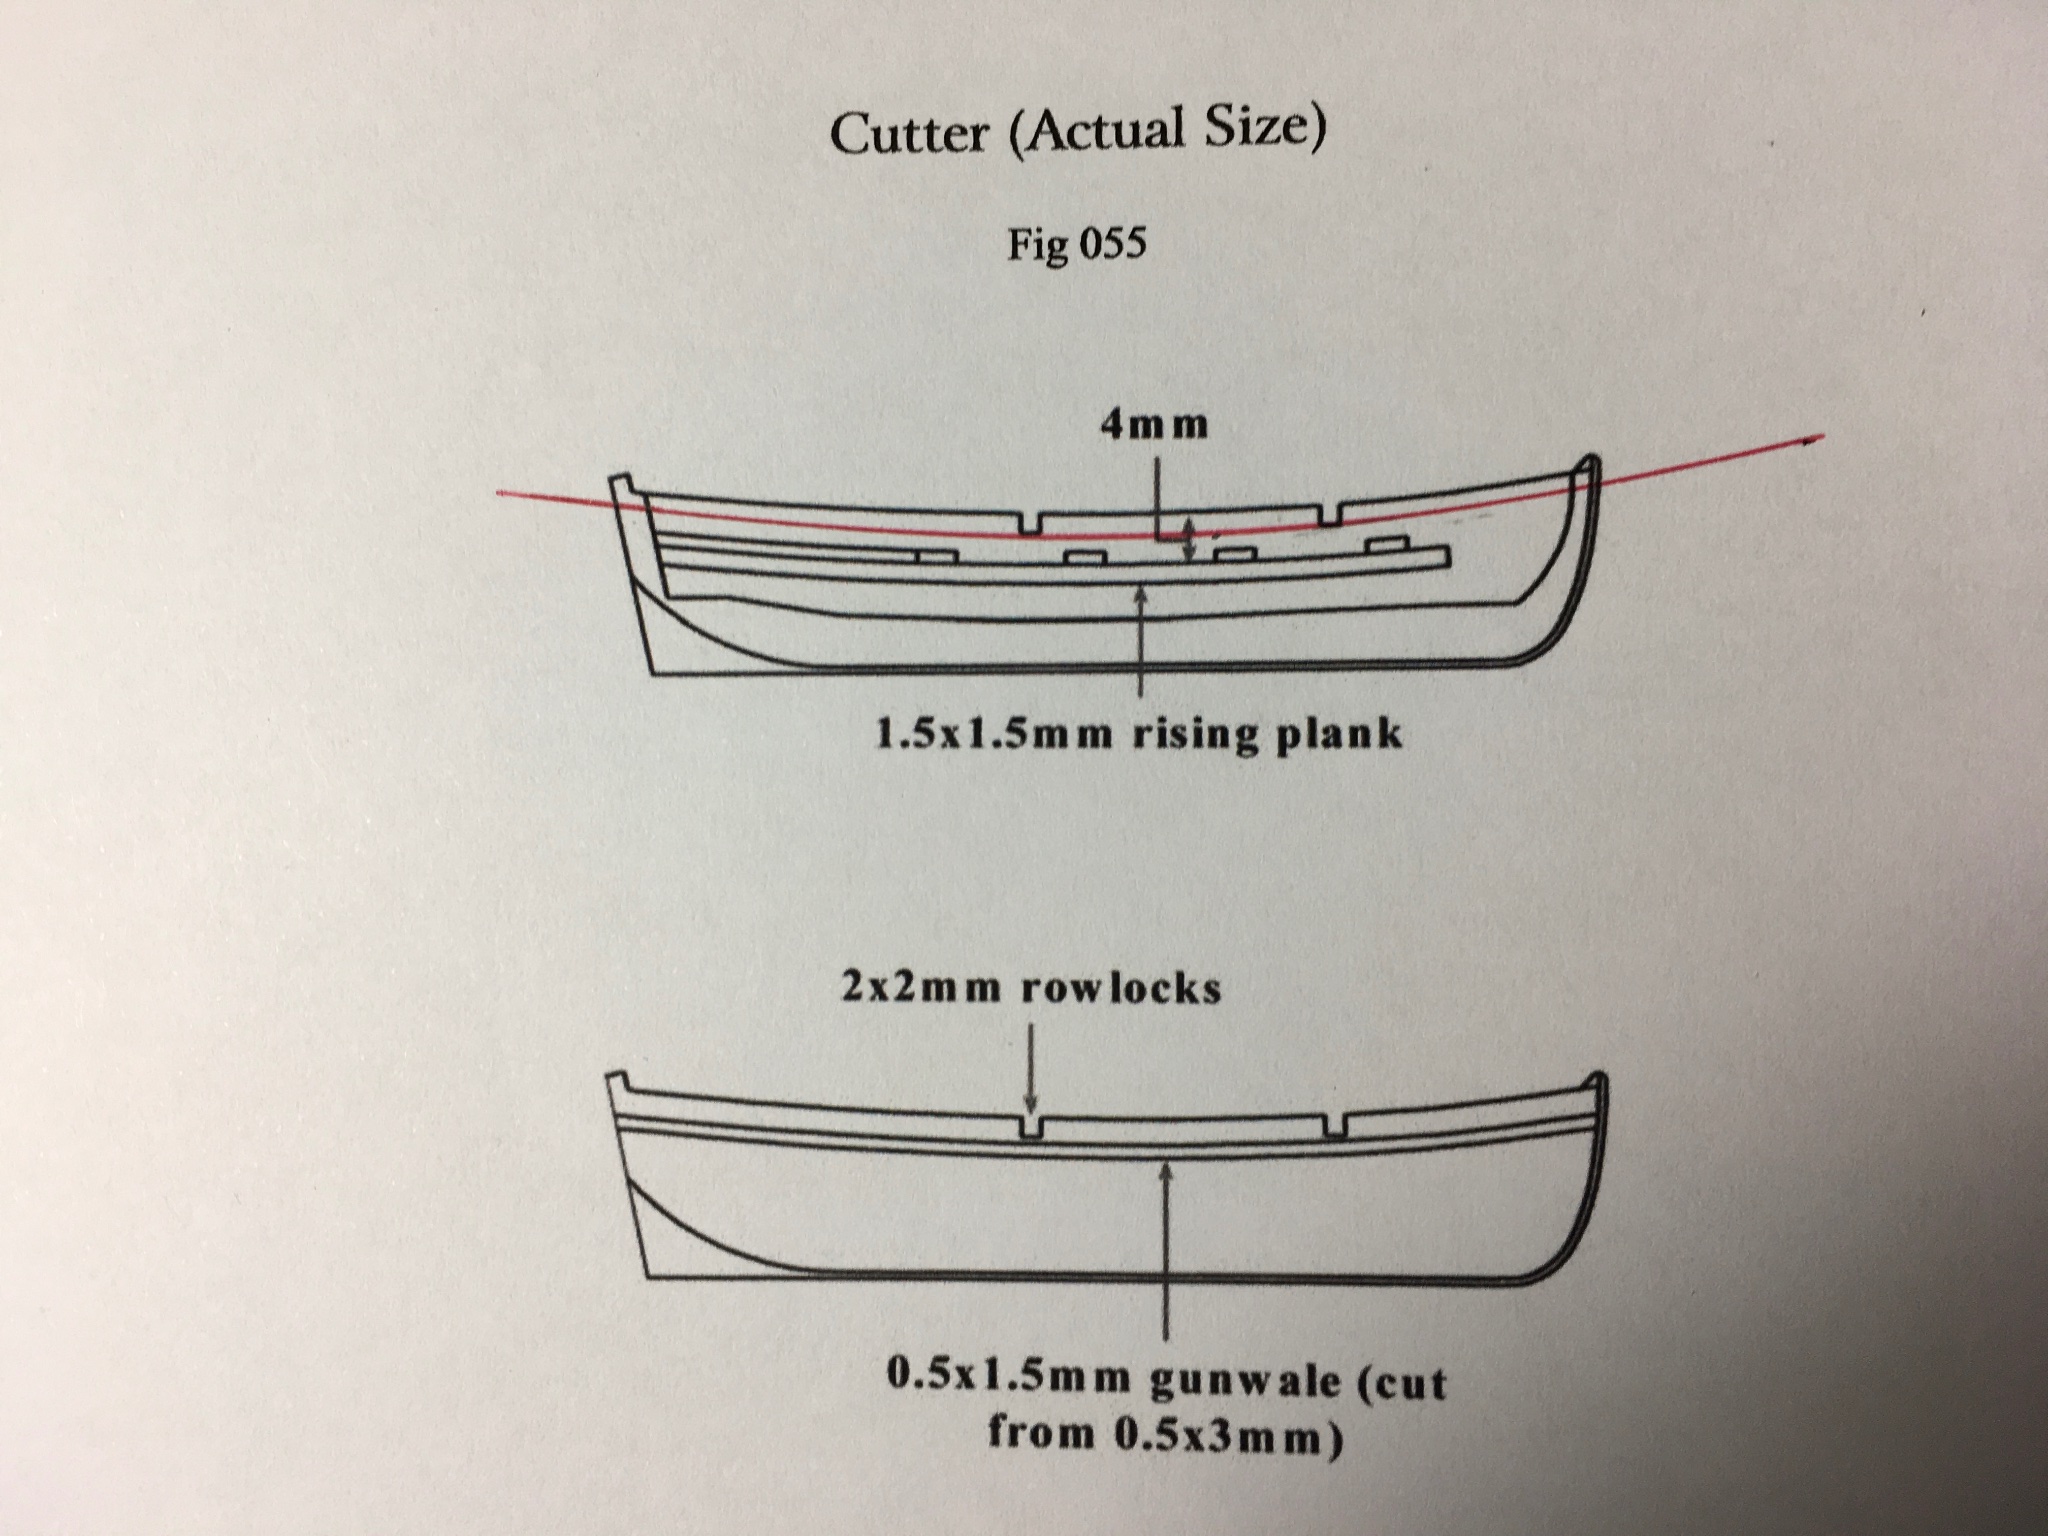
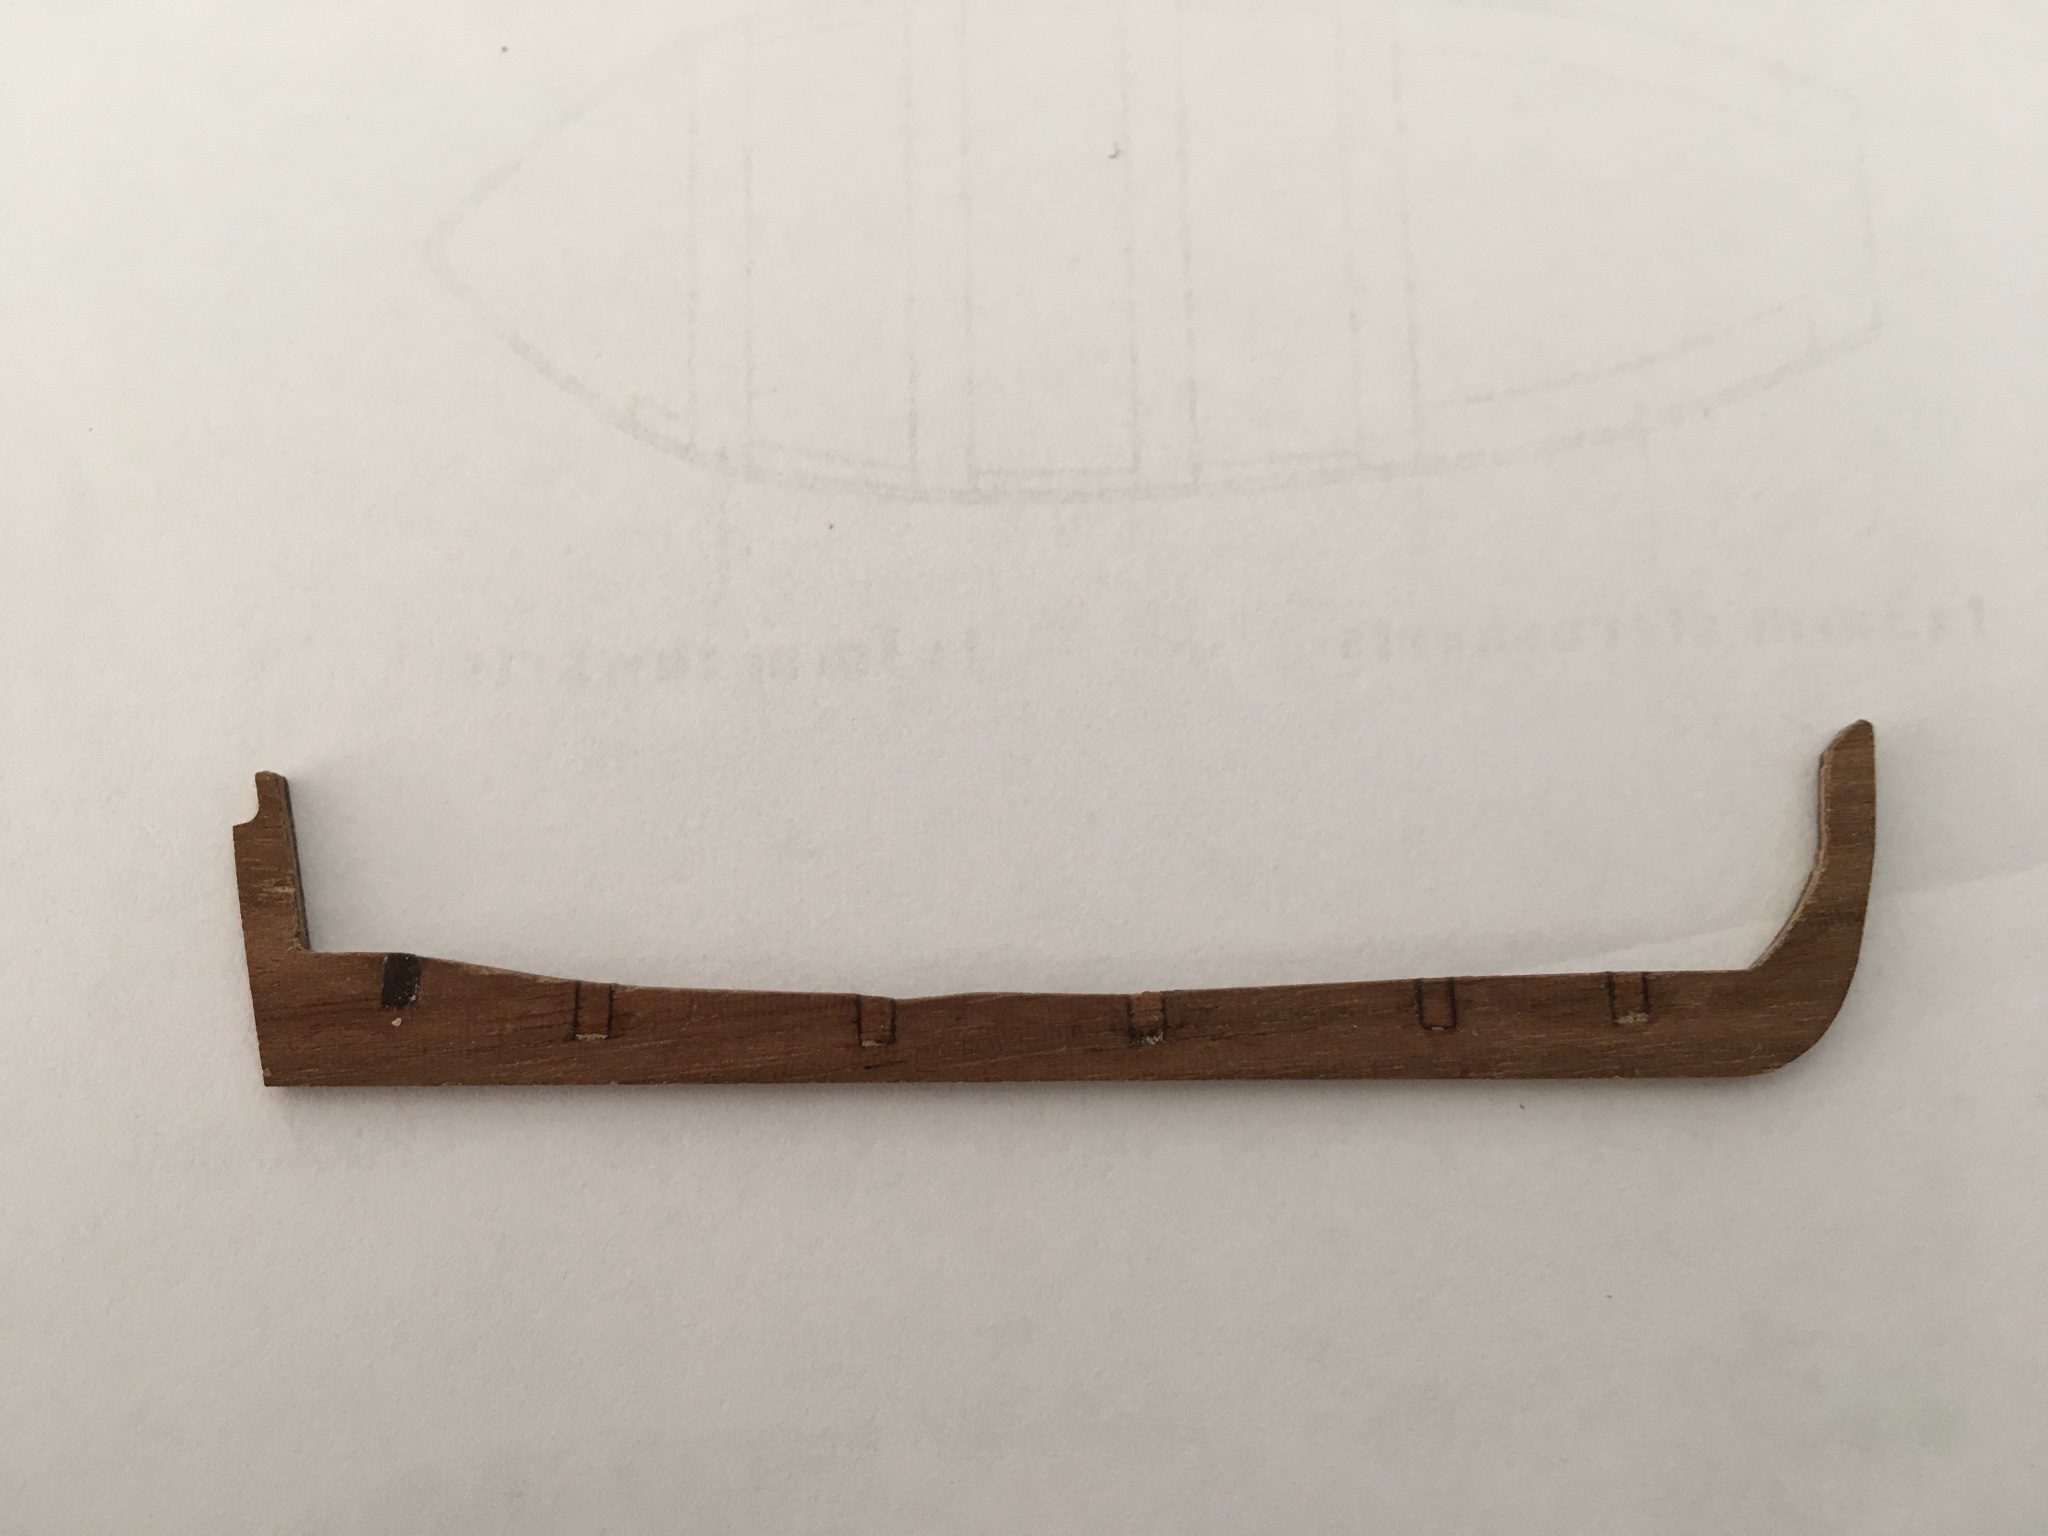
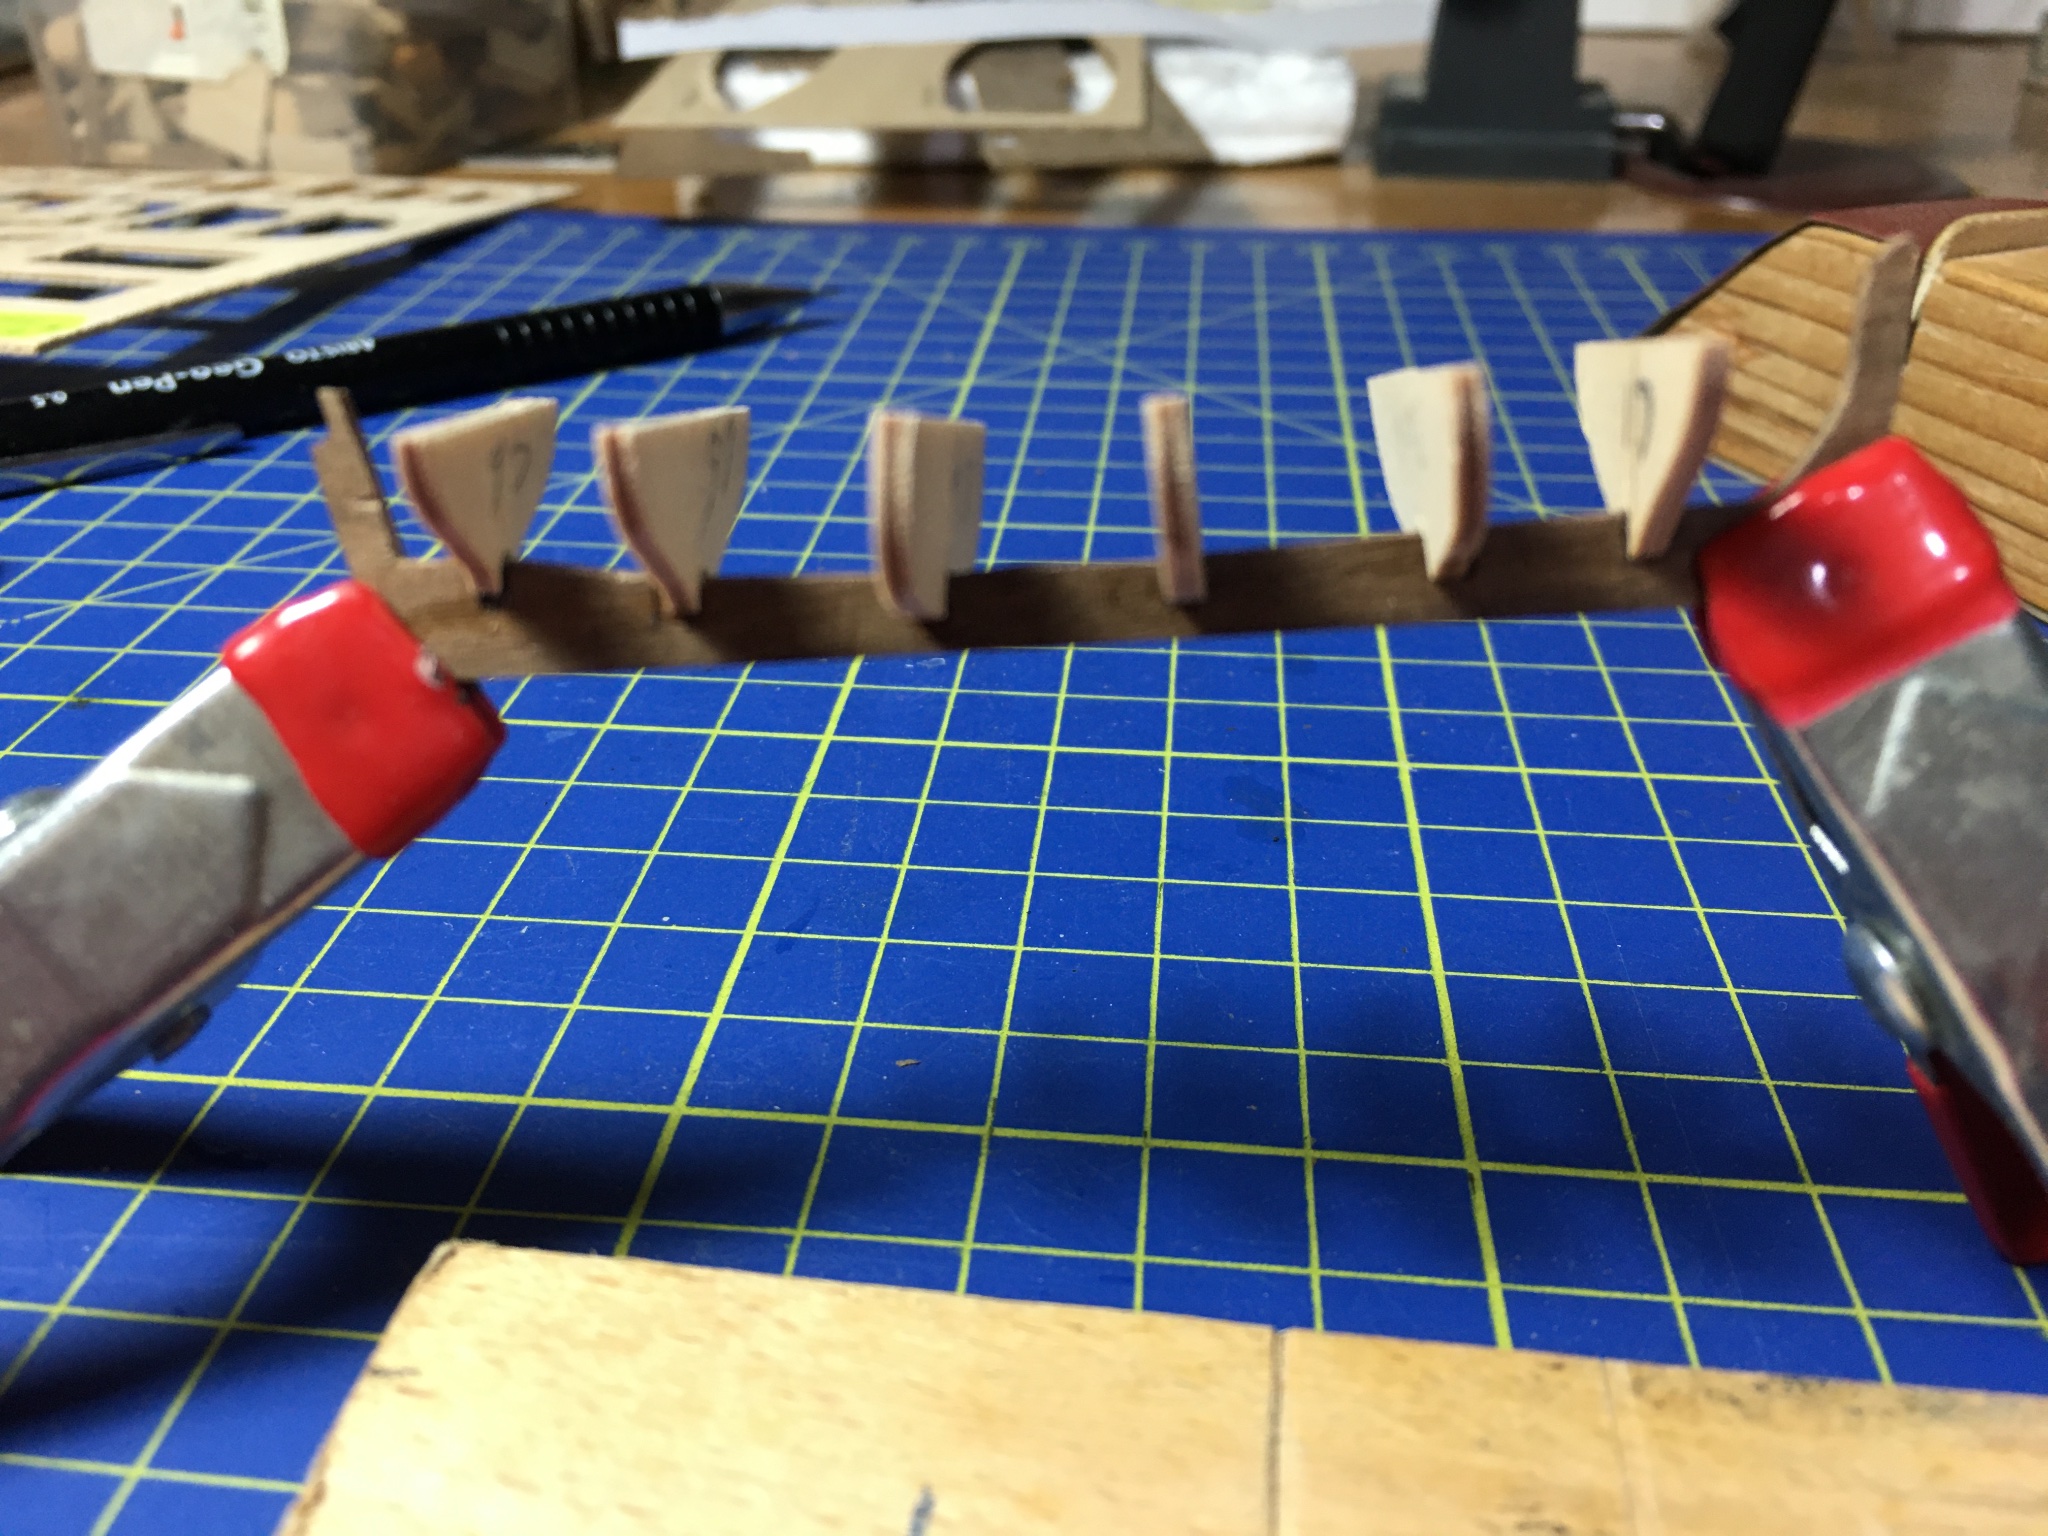
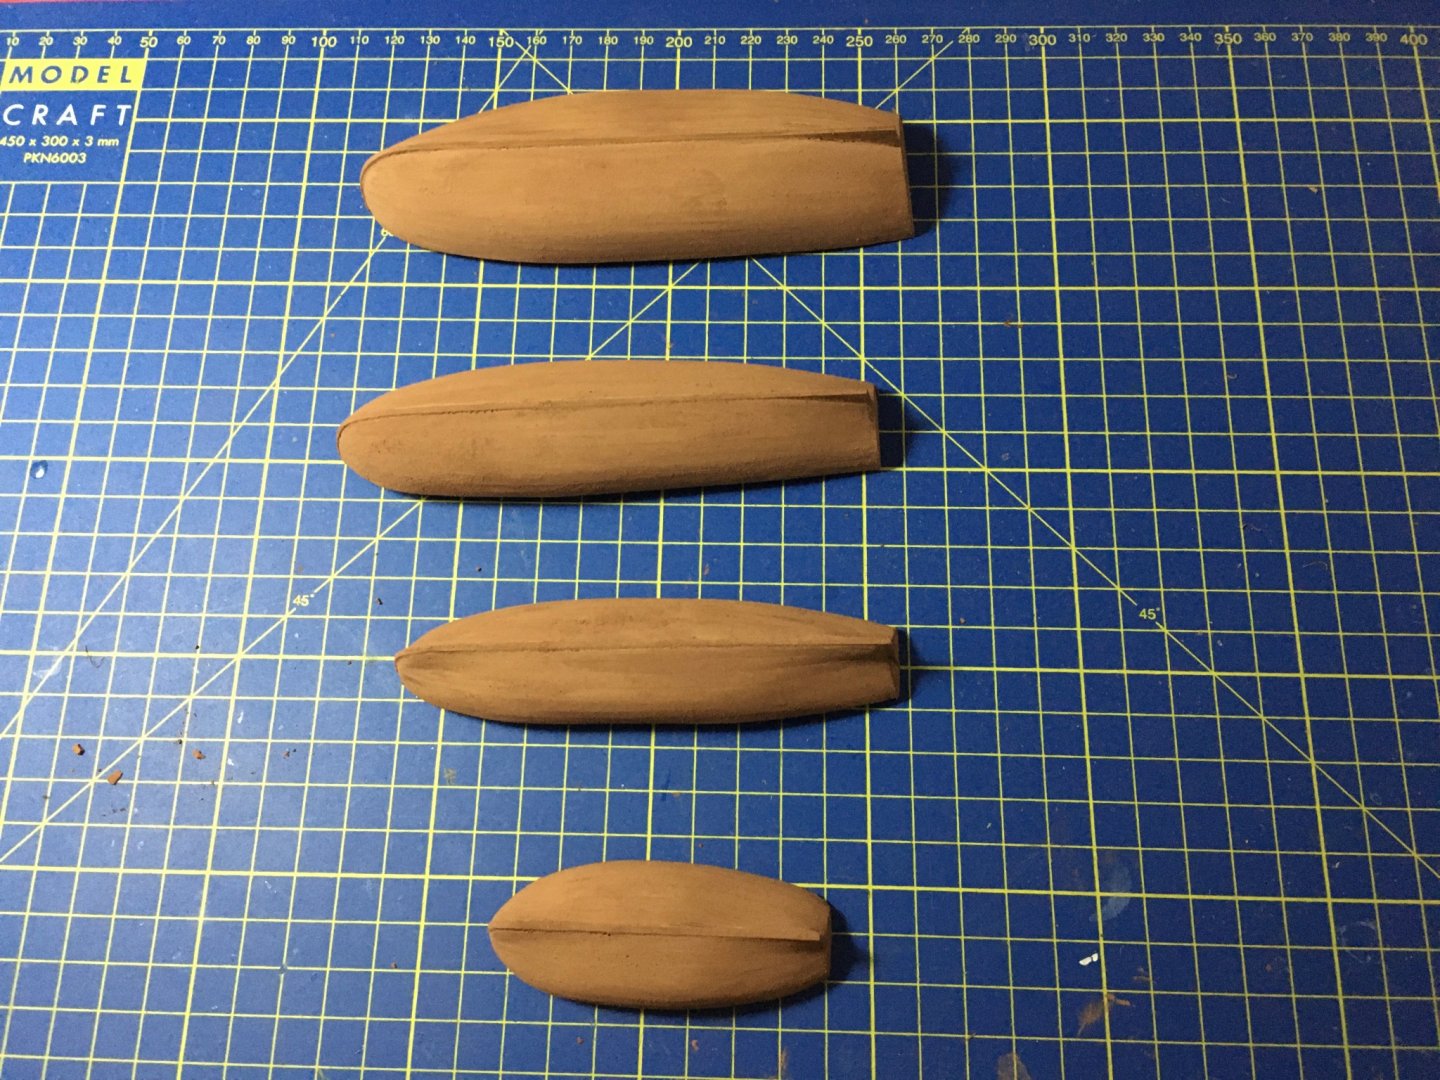
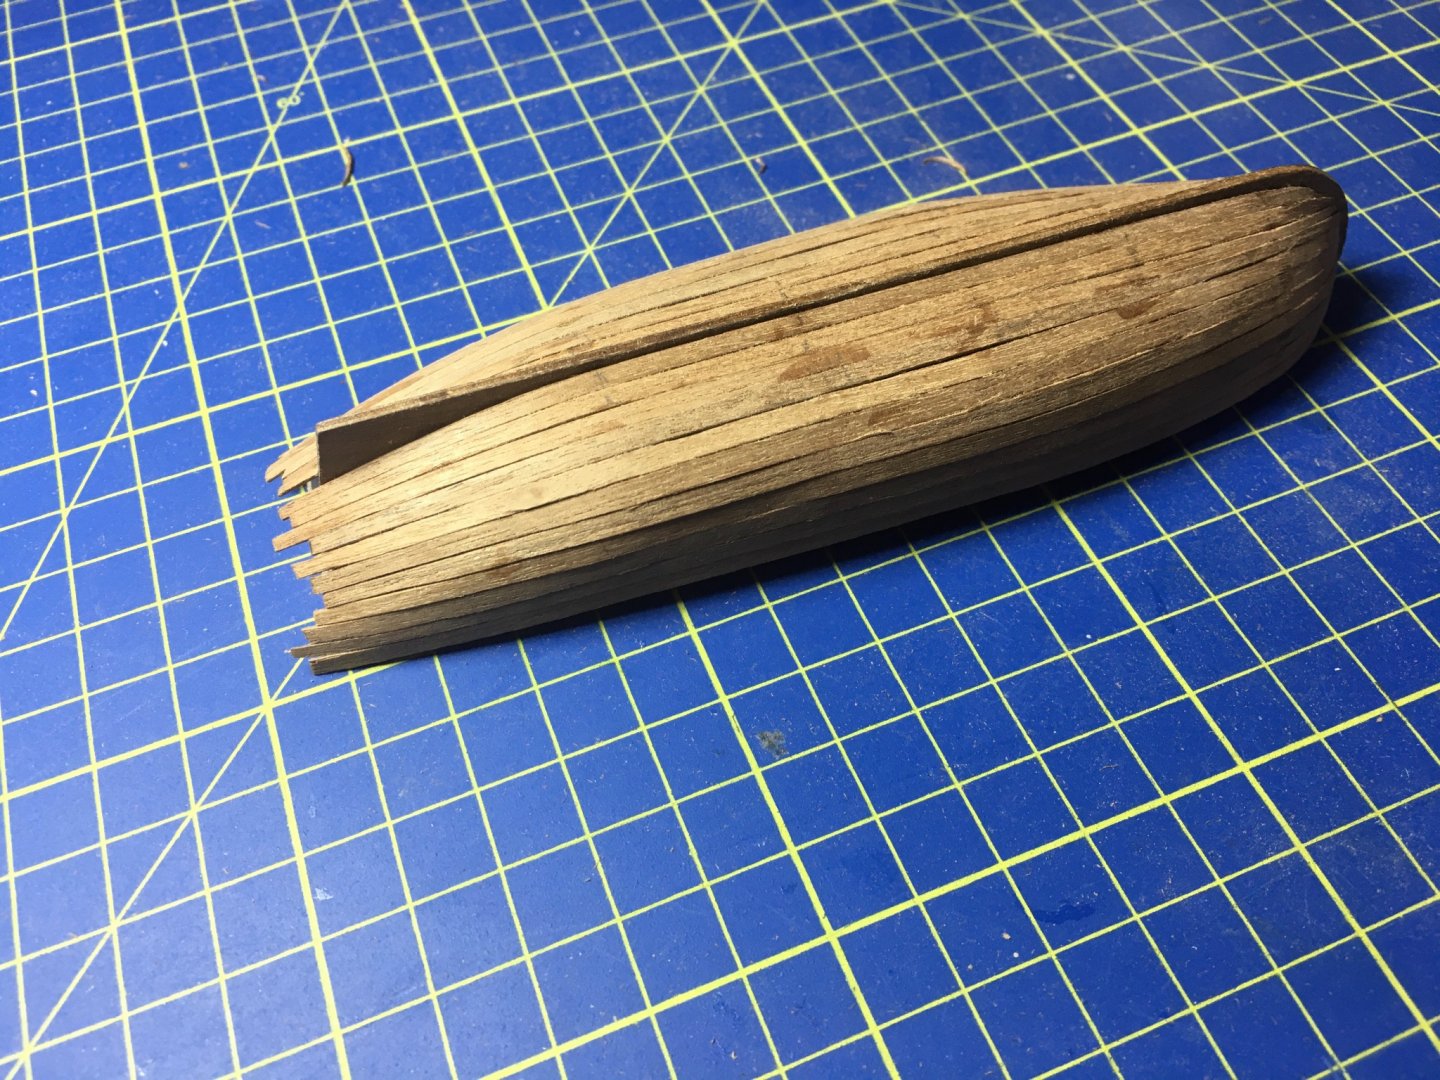
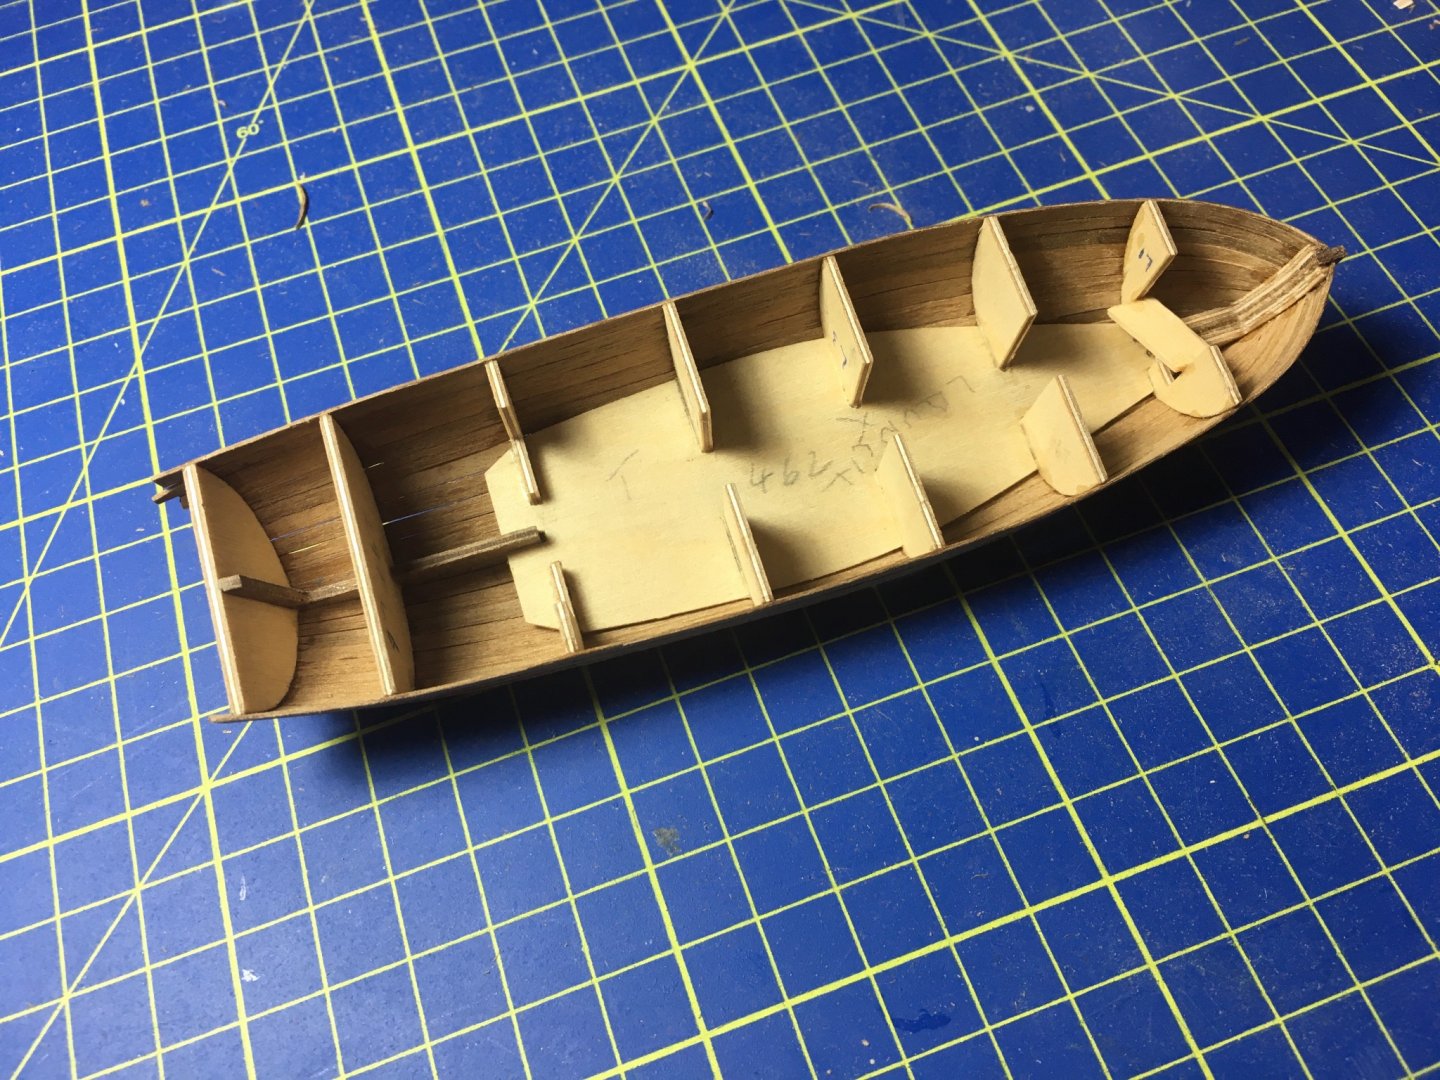
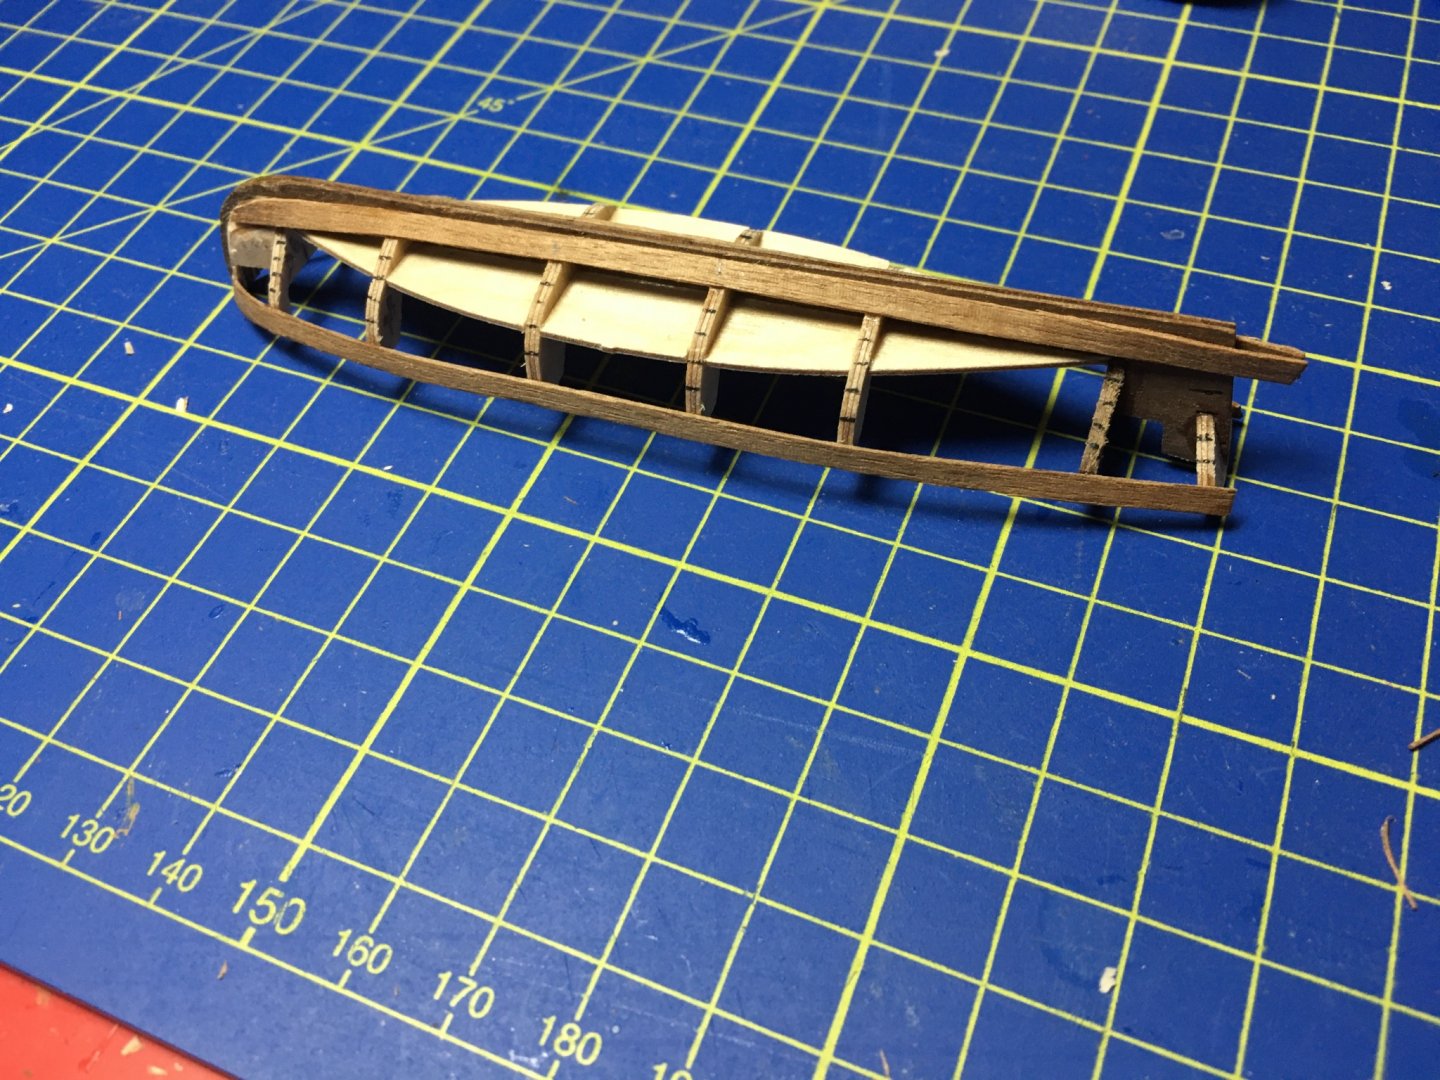
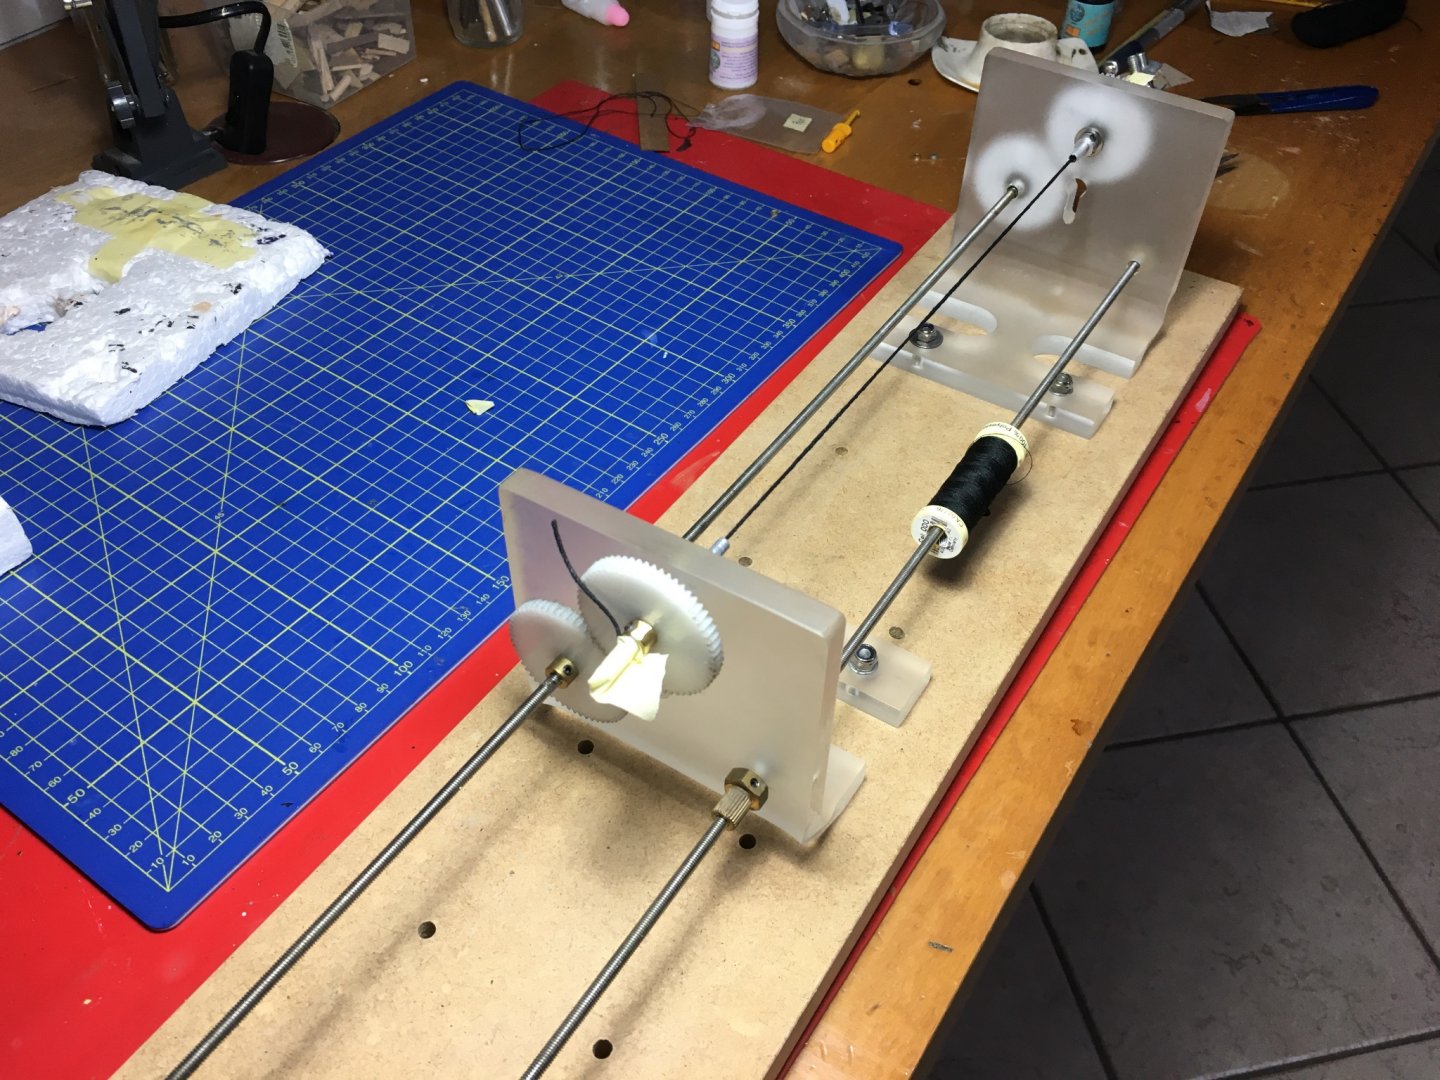
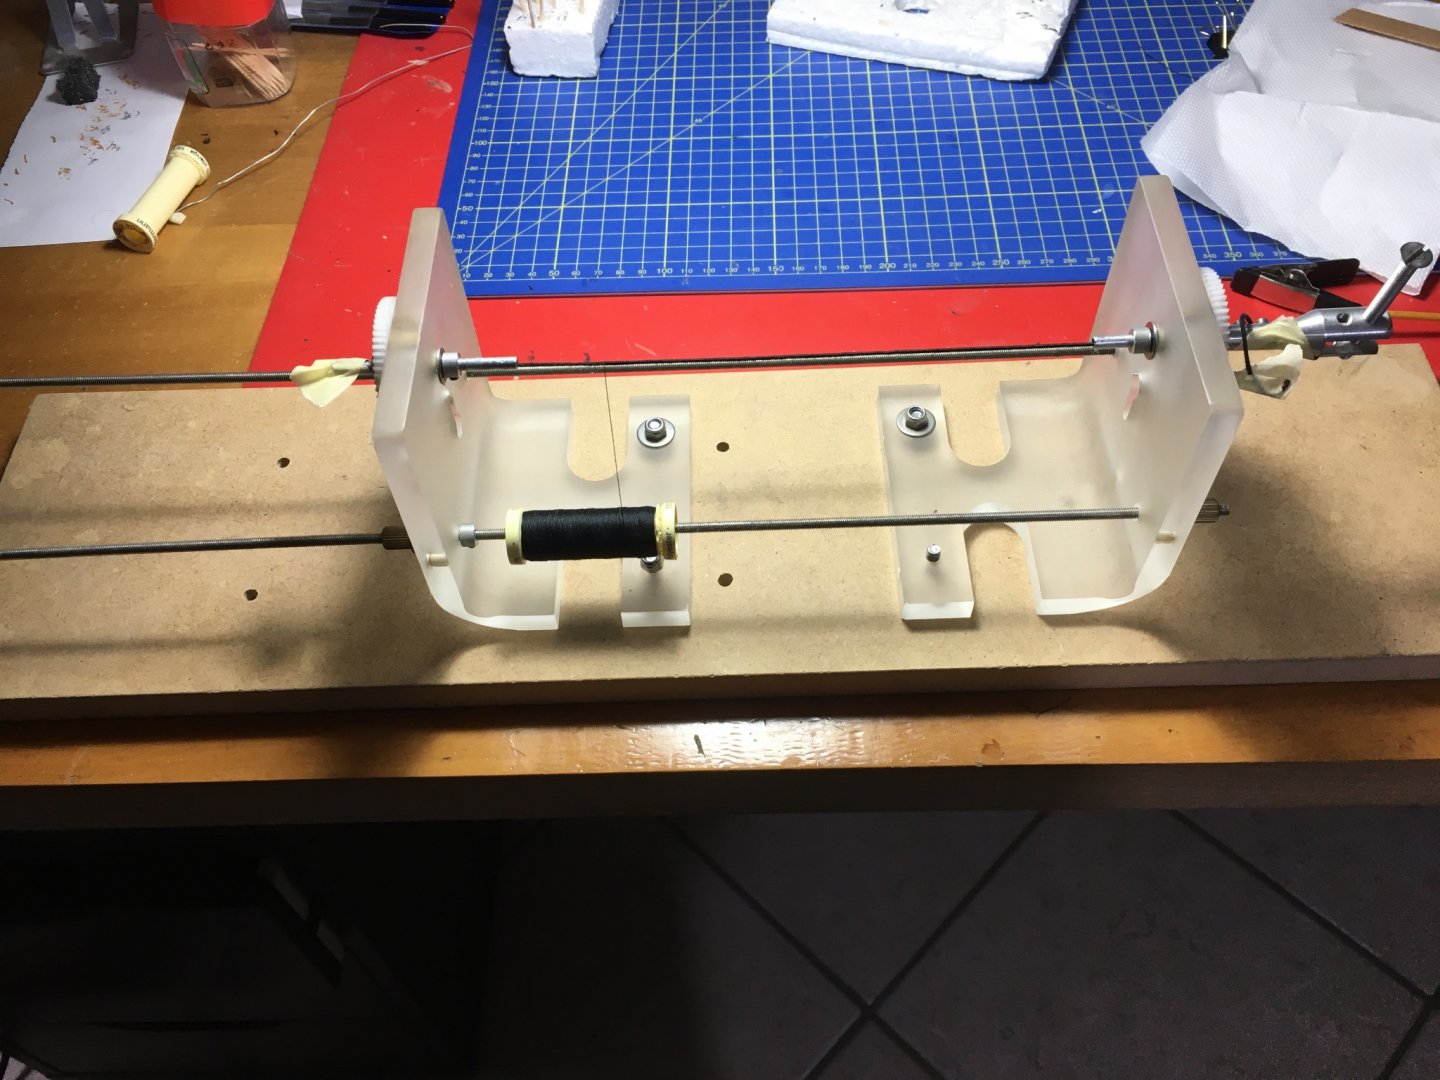
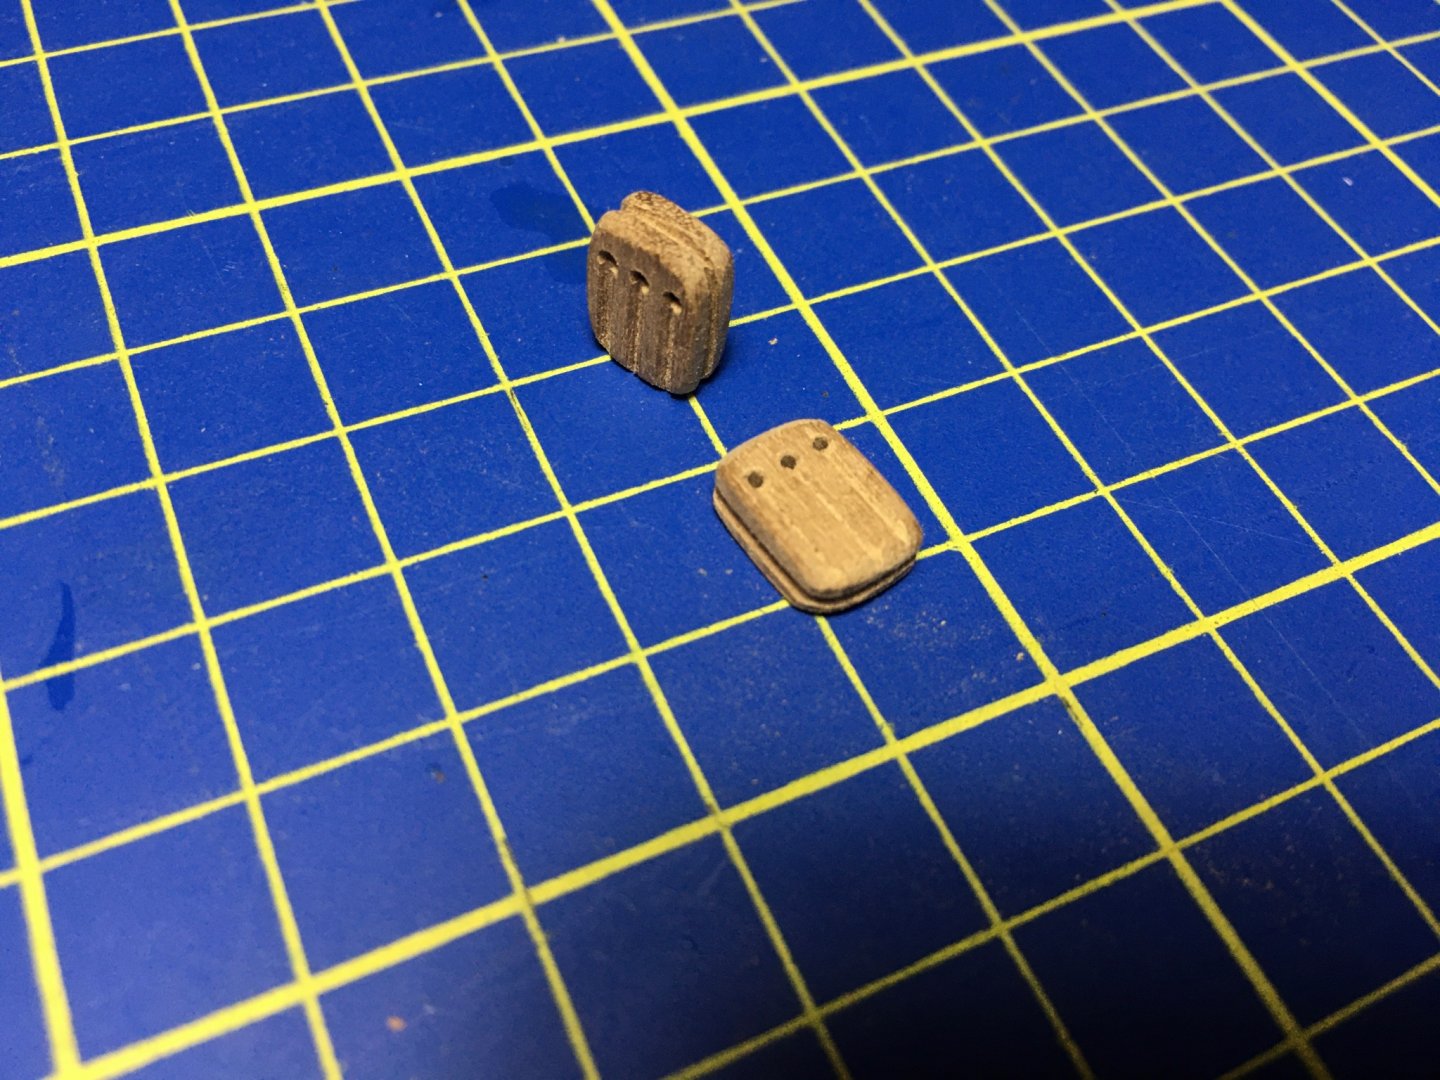
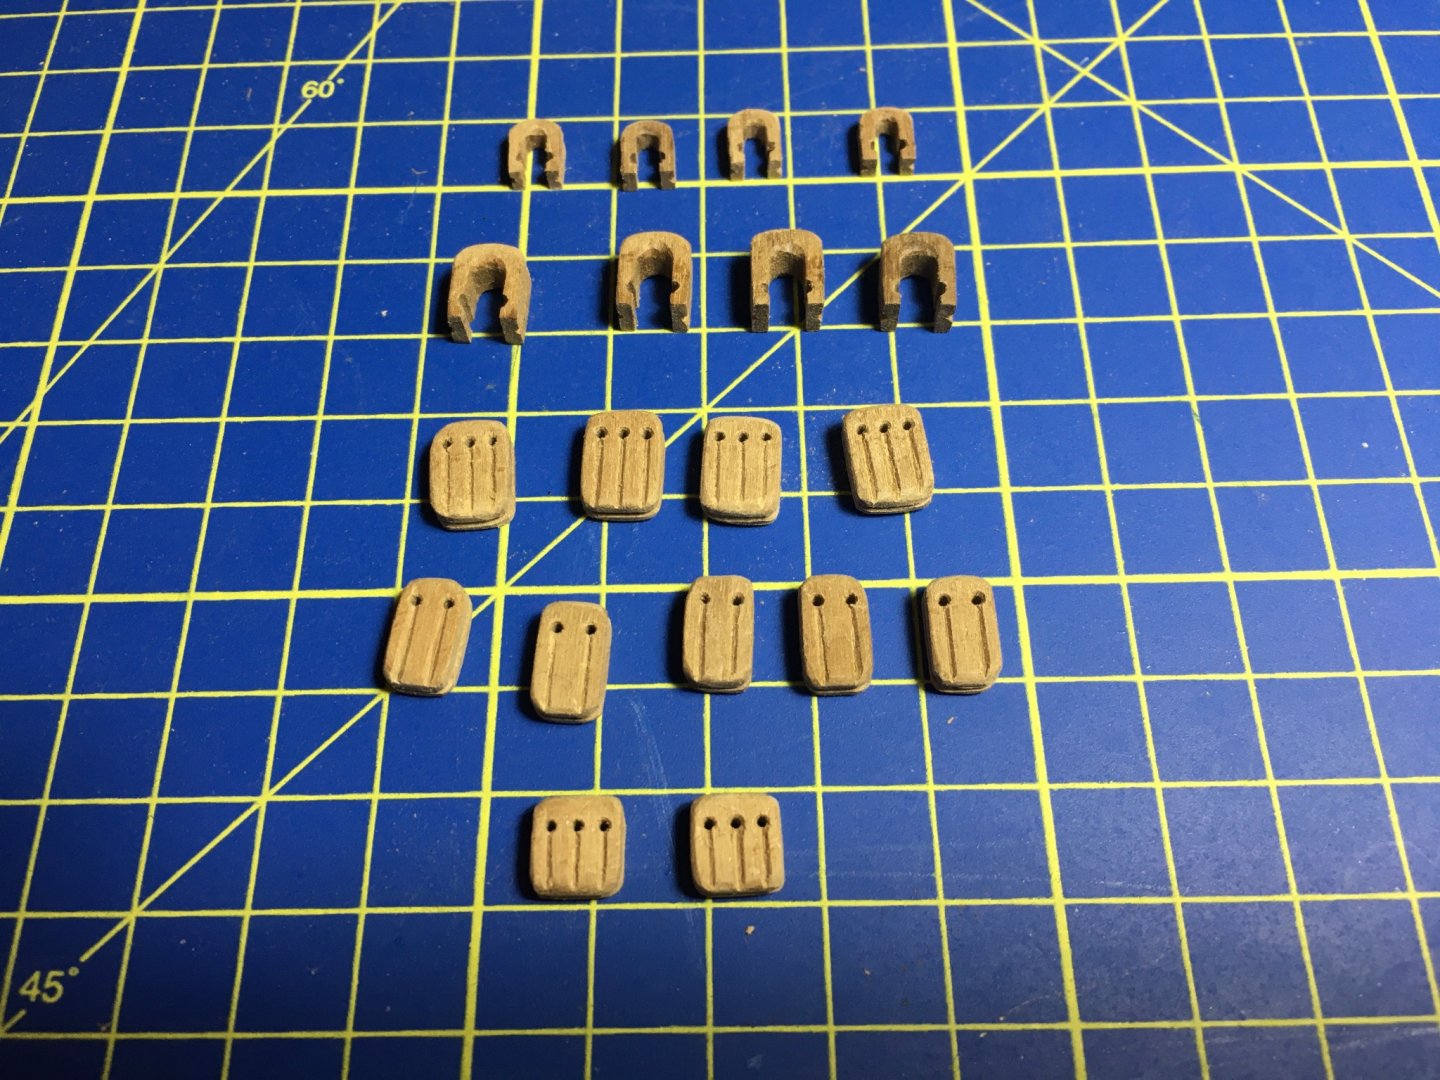
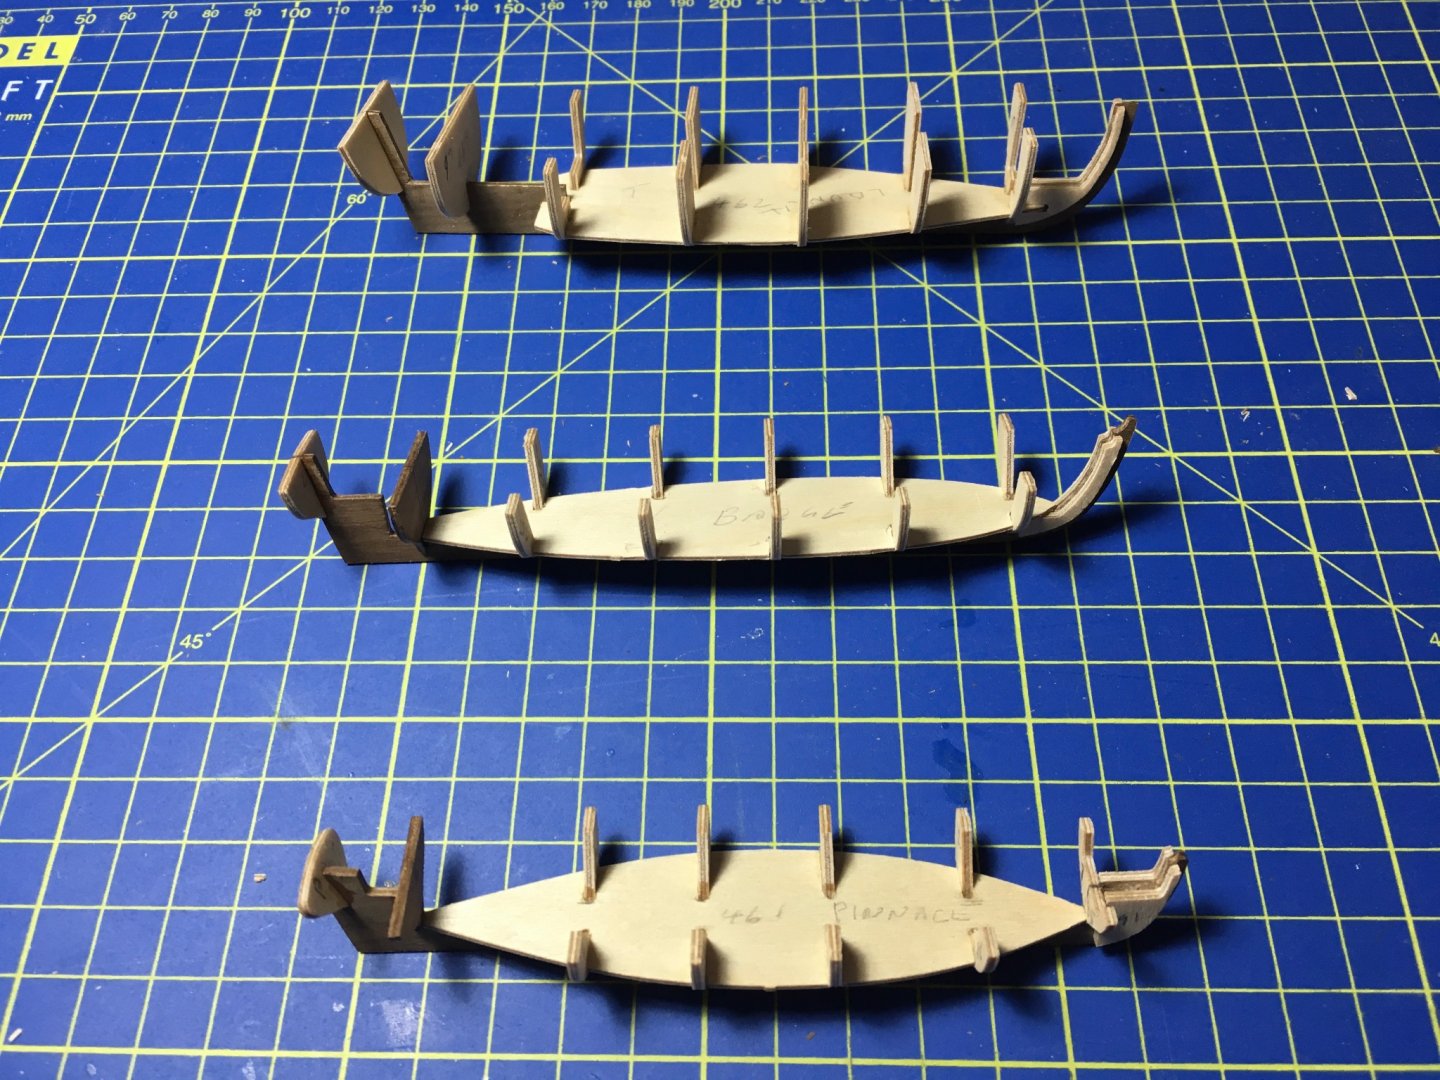
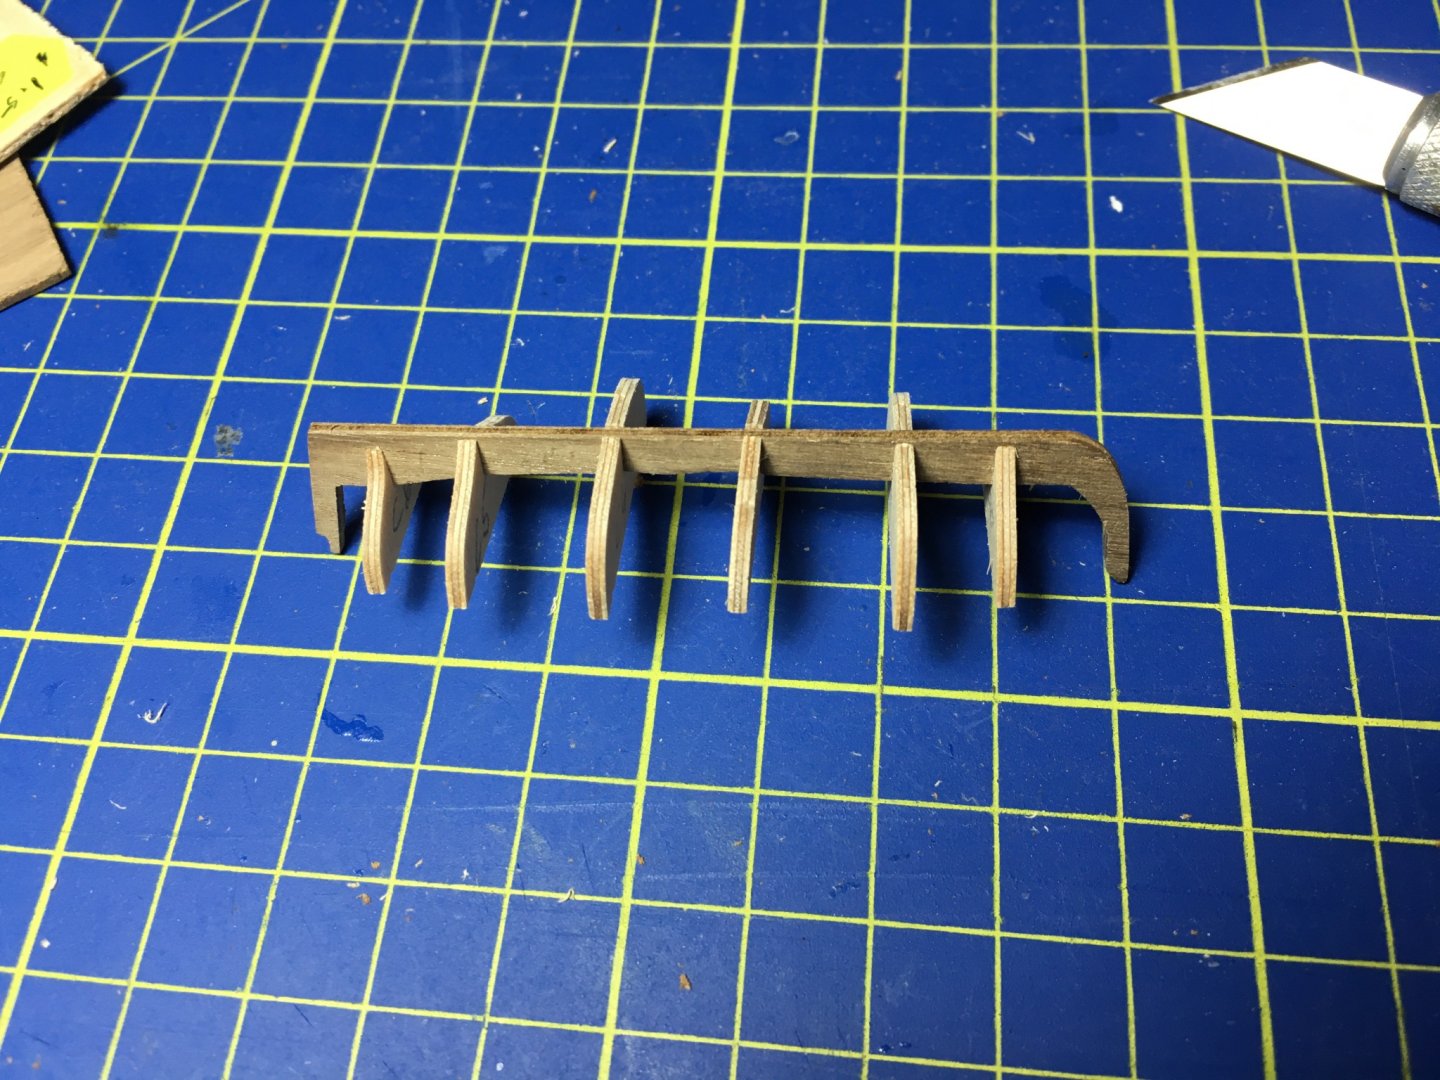
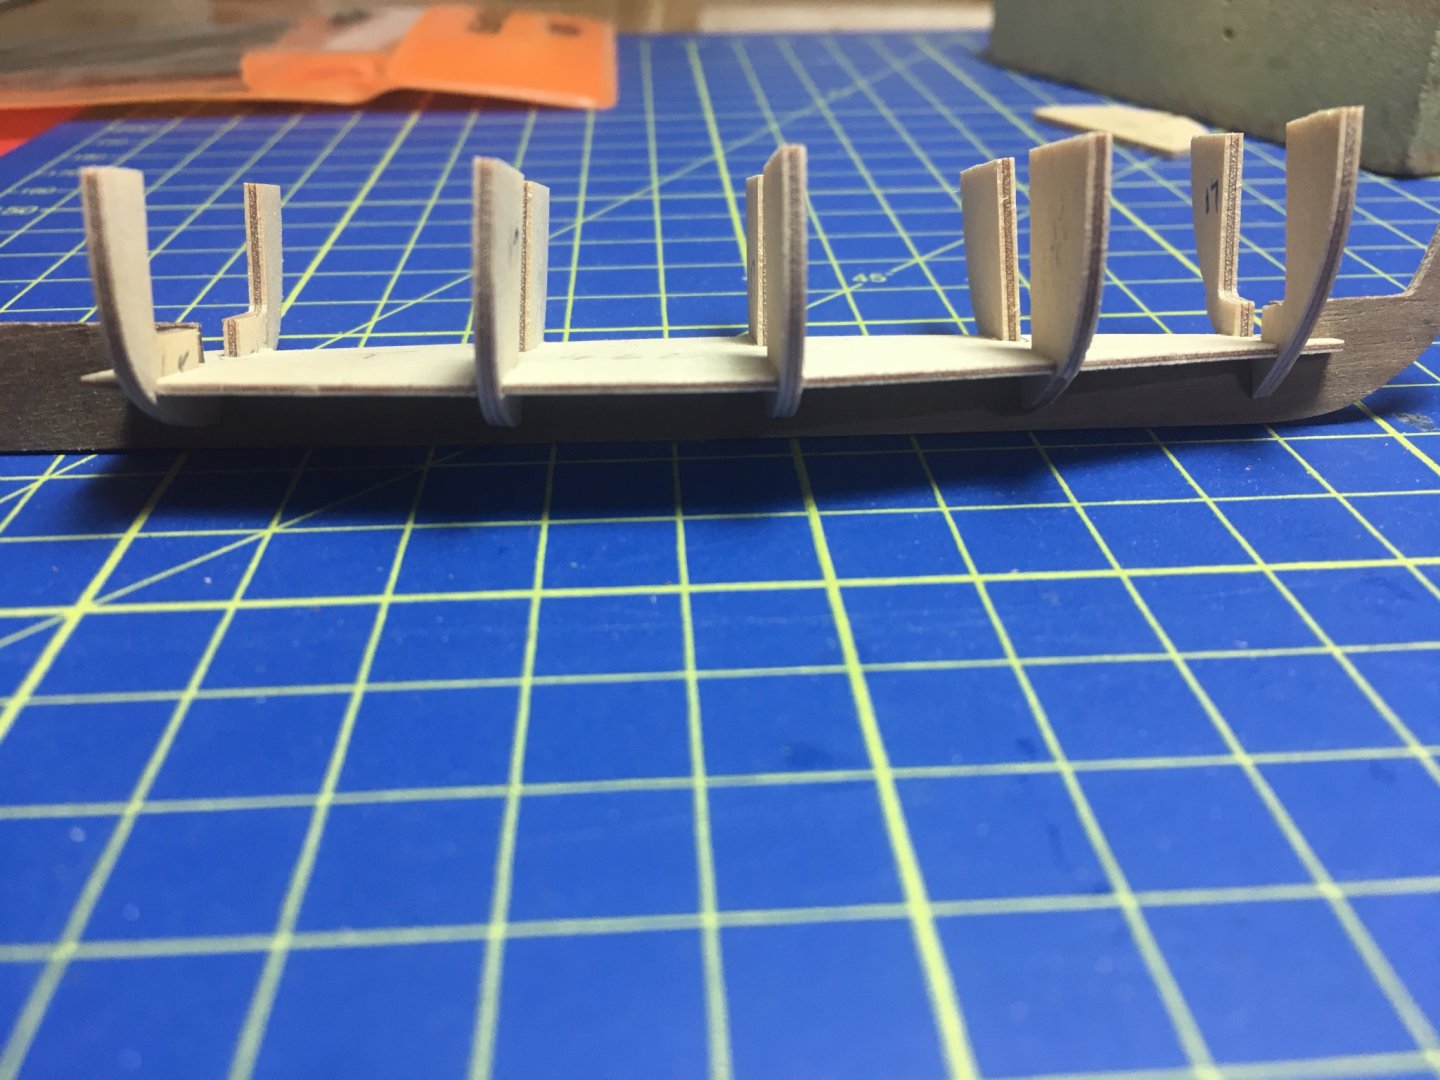
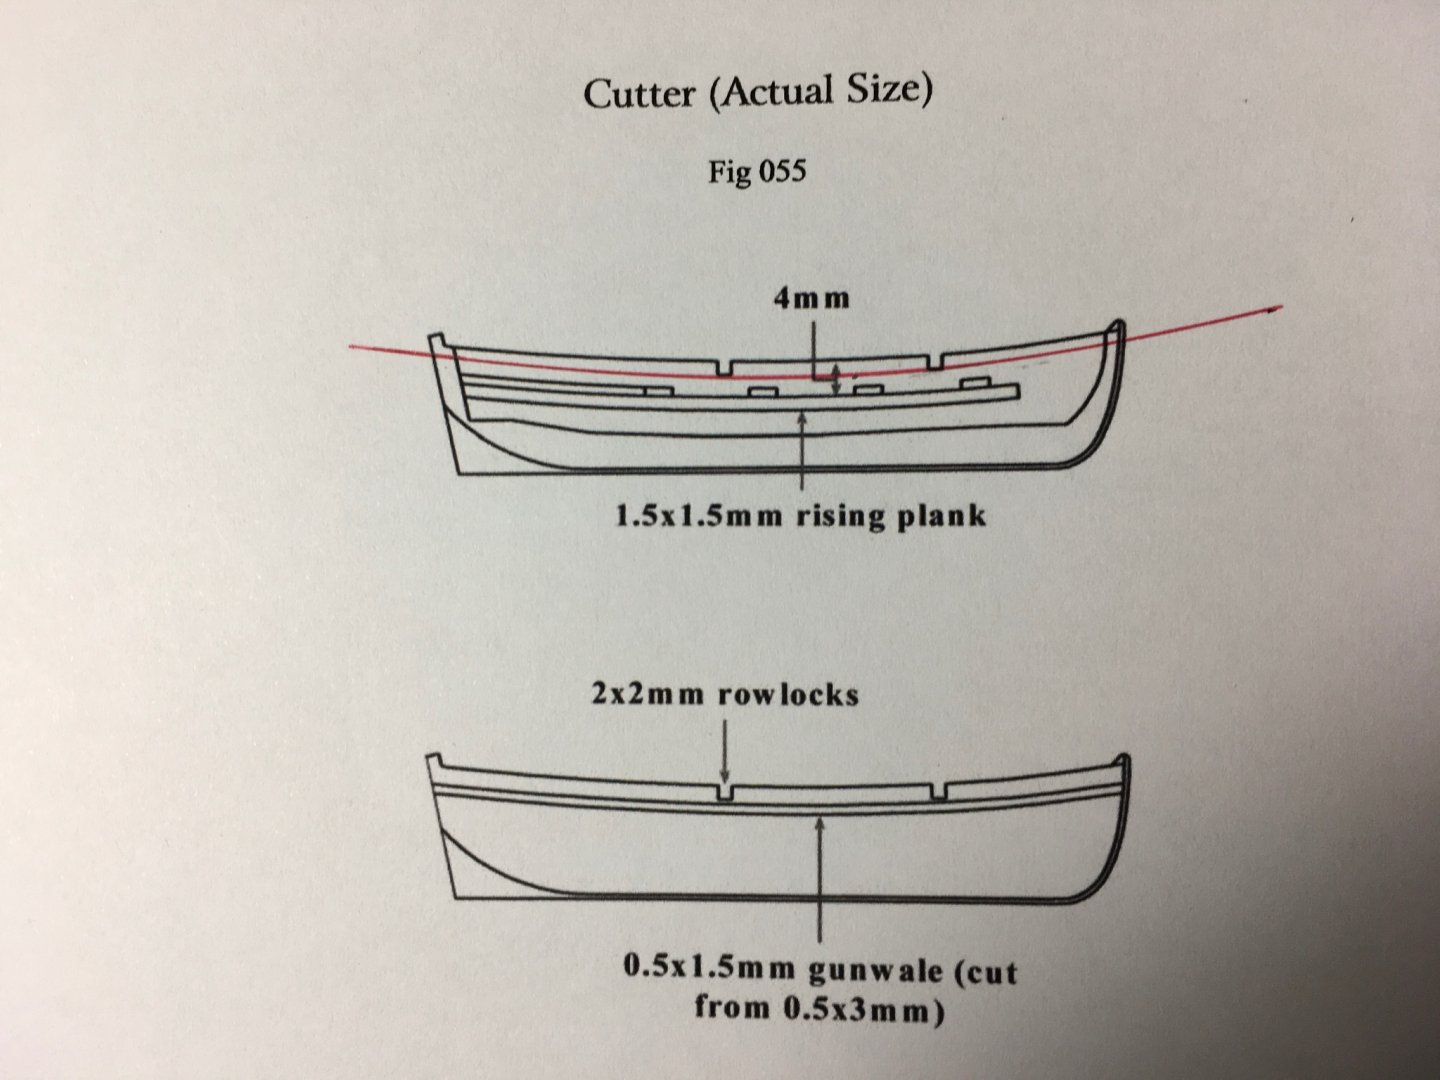
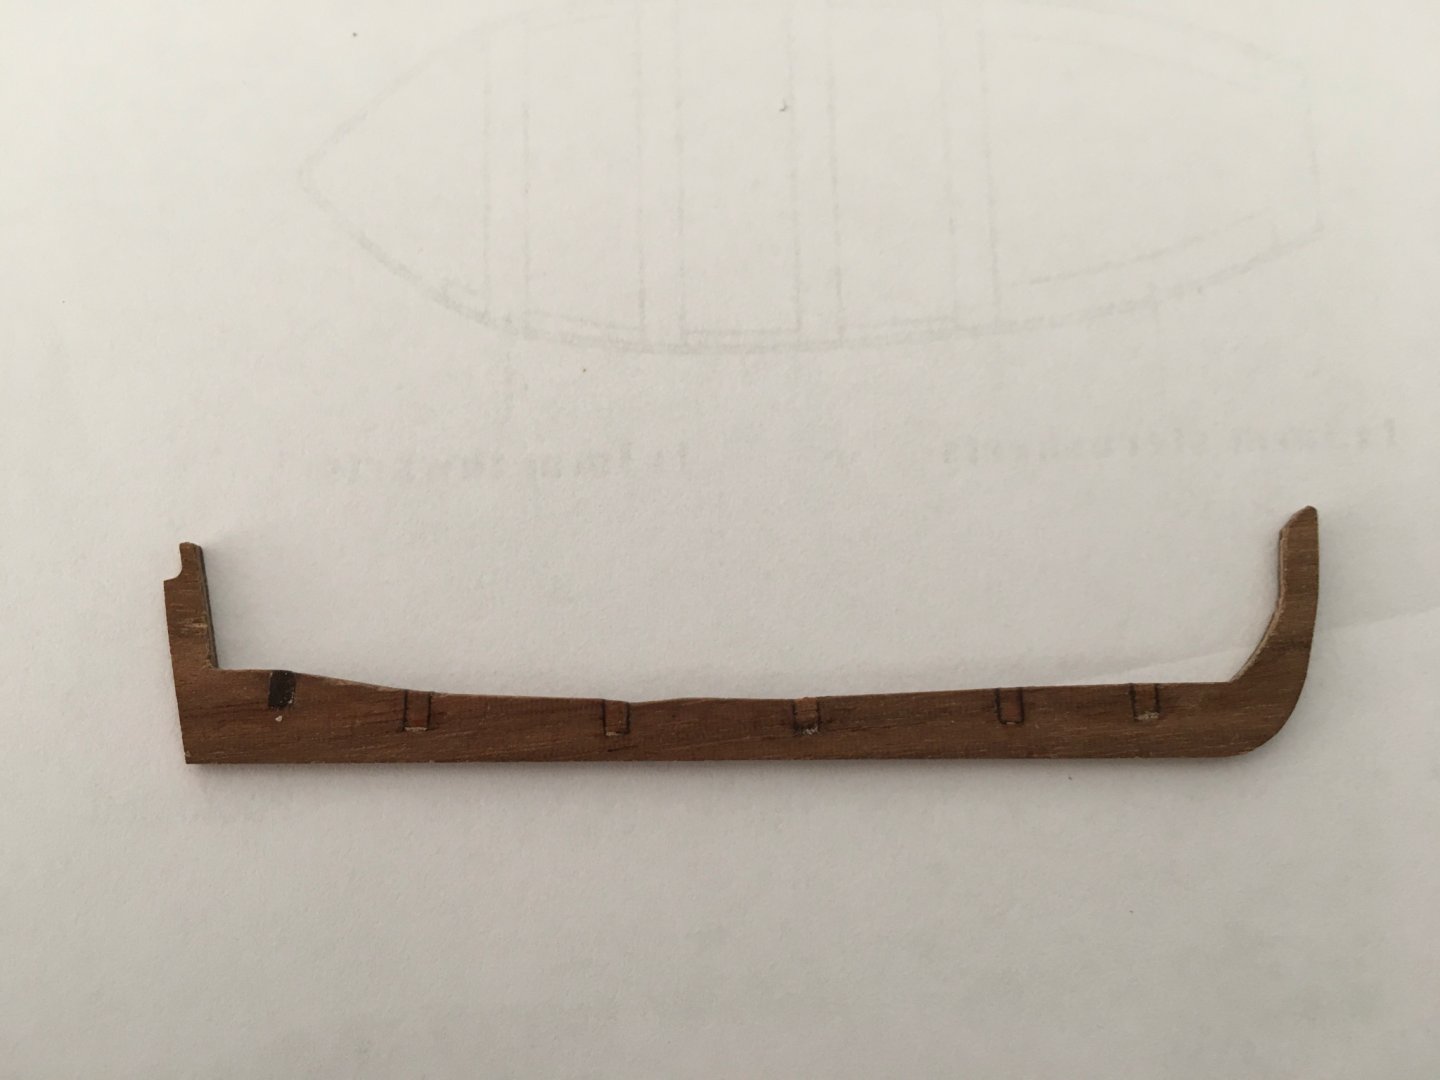
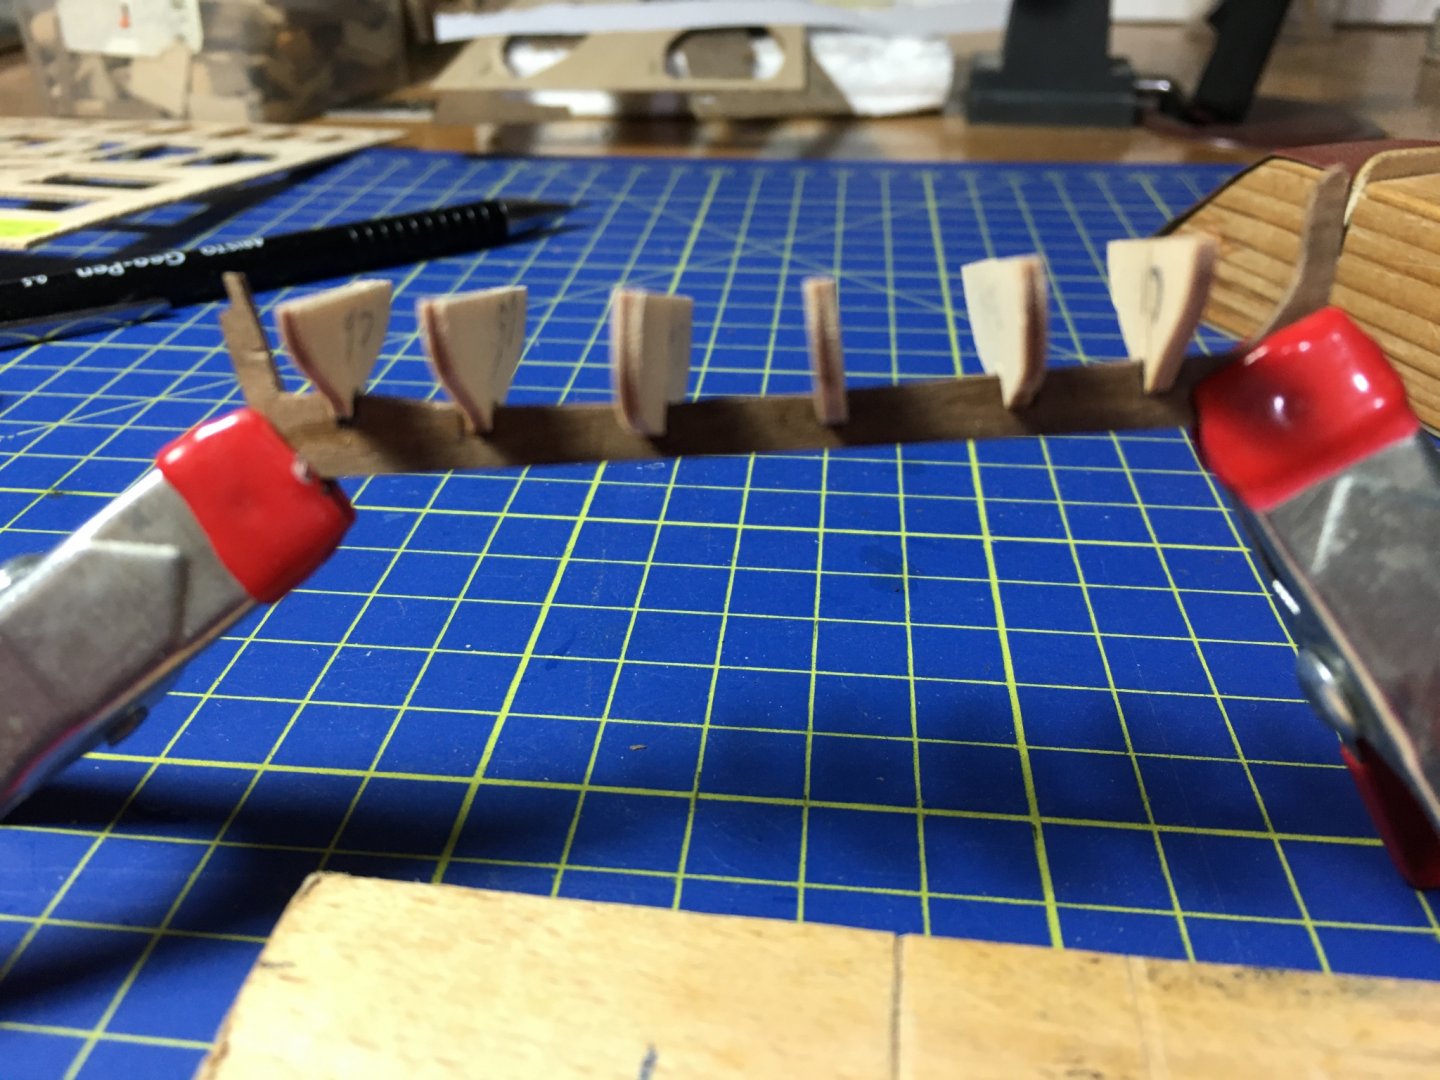
Mort, Thank you for your reply. Guess you are right, depends on the size of the rope you are serving. So I took out the serving machine I had made at the very start of the project but have never used up to now and give it a trial run. It ran pretty good and was amazed how accurate and quickly you can serve the lines with this machine. After a trial runs on the 1.3mm line used for the pendants I decided to go for the thinnest thread for serving. This is the serving machine I had made, of course I took the ideas from this forum, from those which are ready made to buy and from those that builders made themselves. In my garage I found two perspex angles which were a holder of something, a piece of mdf, which was already the size I needed and after some planning I bought the gears, rods, and a few bolts and nuts that I needed. Their cost was only a few euros. As you can see the length can be adjusted by undoing the bolts and moving the angles to the other pre drilled holes in the board. Although there are some serving machines which are pretty expensive and come with a motor and so on, which do a very good job, there are also others which are quite cheap and do the job just as well but maybe take a bit longer. So if you do not want to take the hassle of doing it, you can buy one at a very reasonable price. In my opinion, if you are not doing it as a fun project, its not worth the hassle for the price you can get one.😁 Anyway, so as I had stated in my previous post I was starting with the Burton Pendants, so I served the lines for them, which ran pretty smooth. I intended to put thimbles at the end of the pendants. In an earlier post I had posted how I made tiny thimbles from brass tubes. But I have a small problem, the line used for the pendants is quite thick, 1.3mm, and the thimbles I had made (out of 1.5mm diam. tube were too small, and the next tube size I have is too big. So I had to shelve the rigging until I order more brass tubes. I am ordering 2mm and 2.5mm diam. and see which is best. In the meantime I continued on some other work. I prepared the 10mm Jeer Blocks, the 8.5mm Cat Blocks and the Open Hearts for the stays which will be used further on. I made the grooves on my proton table. Cleaned and sanded. Blocks and hearts dyed and varnished. I started work on the boats as well. My intension was to start the boats and do them little by little whilst I am doing the rigging, sort of every now and then having a break from the rigging. There are four boats in all and here are the Launch, the Barge and the Pinnace. Trimmed and glued the bulkheads, floor and keel glued together ready for planking. But when I came to the Cutter and dry fitted the bulkheads to the keel I noticed something was not right. If you look at the photo when you insert the bulkhead into the keel notches, the bulkheads go down to the very lower edge of the keel, leaving no space for the planking, that is the planking will be protruding further out then the keel itself!!! This is a picture of the Launch and this is how more or less the space between the edge of the keel and the bulkheads should be with the Cutter as well. On checking the dimensions with the drawing (full scale) in the manual I also realised that if I had to fit them like this the top edge of the bulkheads would be substantially lower than they should be. In the next photo I marked in red the position were they would be. So you end up with the front (stem) and the back of the keel (stern post) much higher than hull of the boat. I tried to look in other caldercraft Victory builds, but strangely enough nobody mentions it. I think that there is a miscalculation. The best I could think of to solve this problem is to fit the bulkheads at a higher level, thus getting the space needed between the edge of the keel and the bulkheads and rising the sides of the hull to the right height. I blanked all the notches in the keel, so by ding this the bulkheads will go up by the same depth of those notches. The only disadvantage is that the bulkheads will have a much less strong fitting to the keel and might break off while doing the planking. But I think this can be overcome by inserting and gluing some sort of spacers in between the bulkheads, and anyway all the bulkheads are to be removed after the planking. Here are the bulkheads dry fitted. The space down the edge of the keel is better and the top edge of the bulkheads is also much better to the relative height of the front and back of the keel. I will align and glue the bulkheads and let you know the outcome of the boat. Robert


- 527 replies
-
- 6
-
-
- caldercraft
- victory
- (and 1 more)
-
Really nice work and the serving is fantastic. I am just about to start the serving on the shrouds and pendants on my current Victory build. It is the first time that I am doing any serving and I do not have the faintest idea what size of line to use. I appreciate if you can let me know what size of line you used for serving. Robert
- 950 replies
-
- 1
-
-
- syren
- model shipways
- (and 1 more)
-
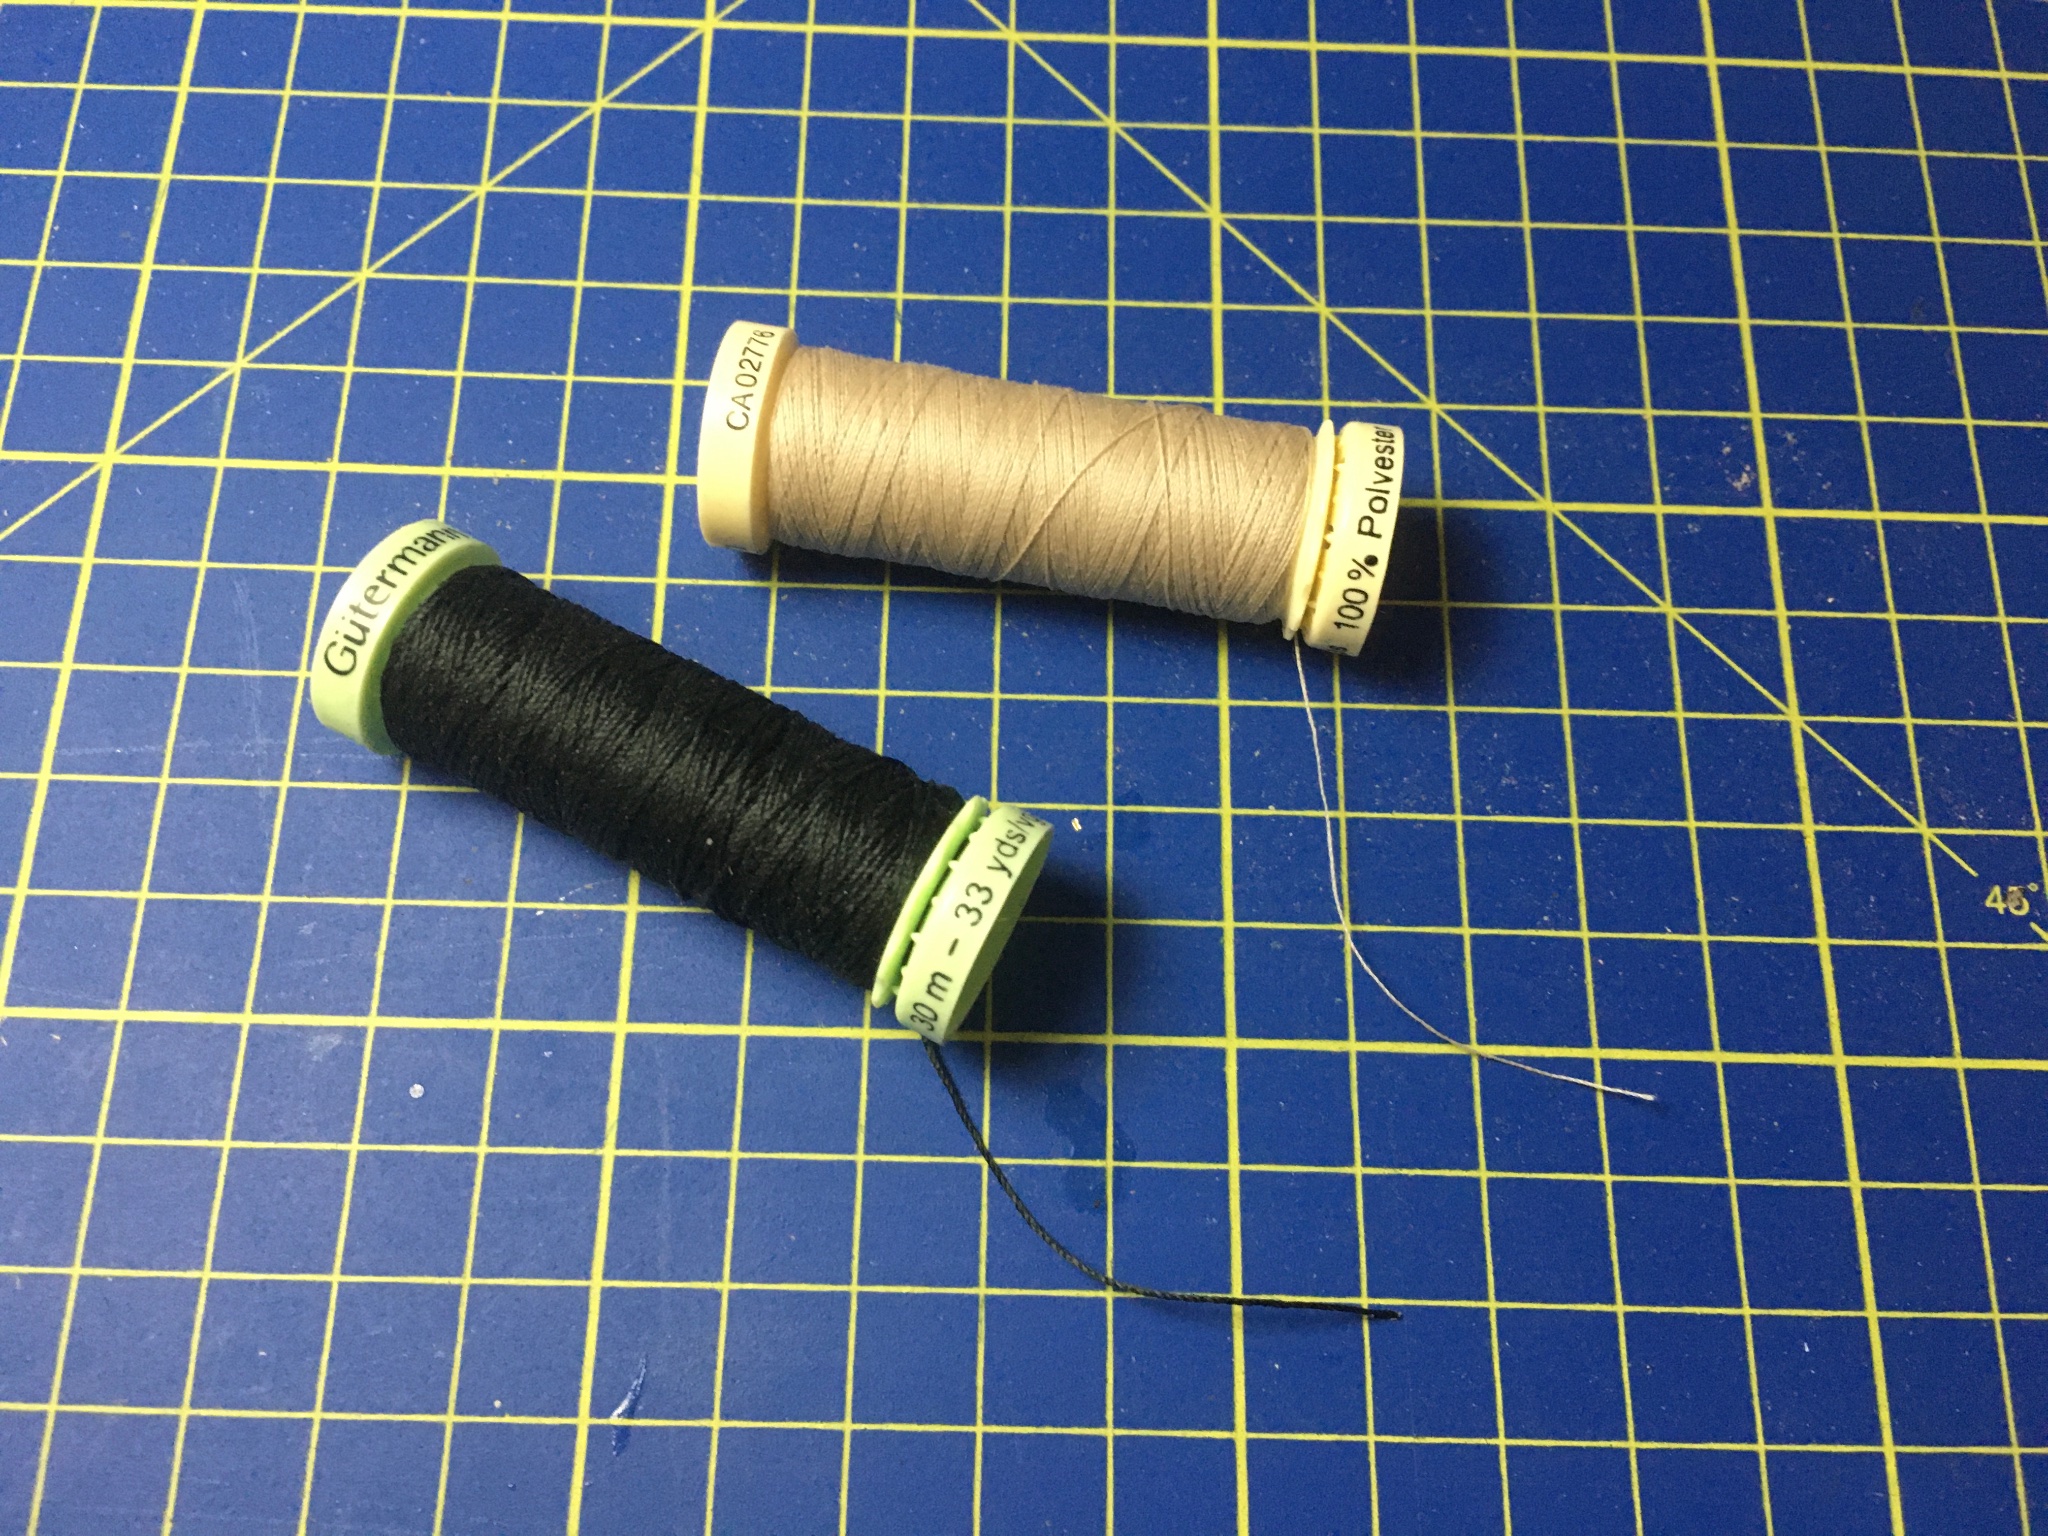
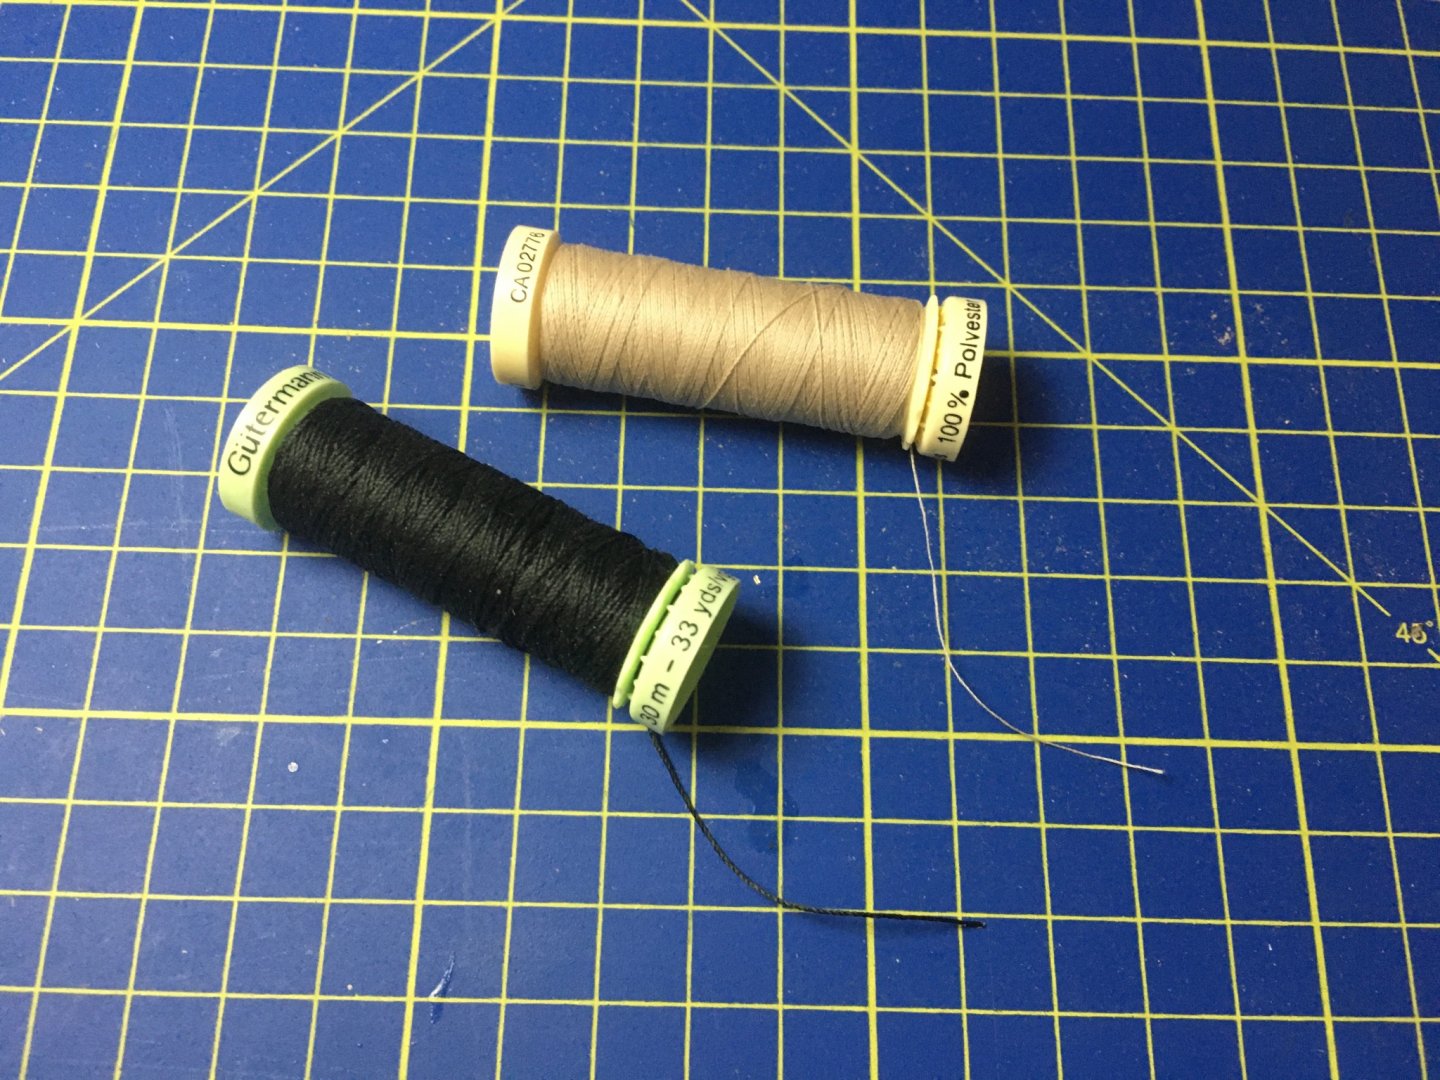
Bossman and Anthony, thank you for your comments. I am just about to start on the rigging, a subject on which I still have a long way to go to learn. I will be starting with the Burton Pendants and the Shrouds. In the kit manual they are indicated to be done with 1.3mm line. I intend to serve the pendants and the shrouds (the part that goes round the mast), but my first obstacle is what size of line should I use for the serving, which I have never done. From a local store I can get two different types of Gutermann thread. The one on the cream reel is very thin, I think it is about 0.1mm, apparently it is the normal sewing size. I tried a small piece with it and I think it is too thin, you don't really see the effect of the serving. The one with the green reel is thicker, it is about 0.5mm, which I haven't tried yet. This is completely new to me and knowing there are builders on this forum with much greater experience and know how on this subject, I would appreciate any suggestions of what size of thread should I use. Thanking you for any suggestions. Robert
-
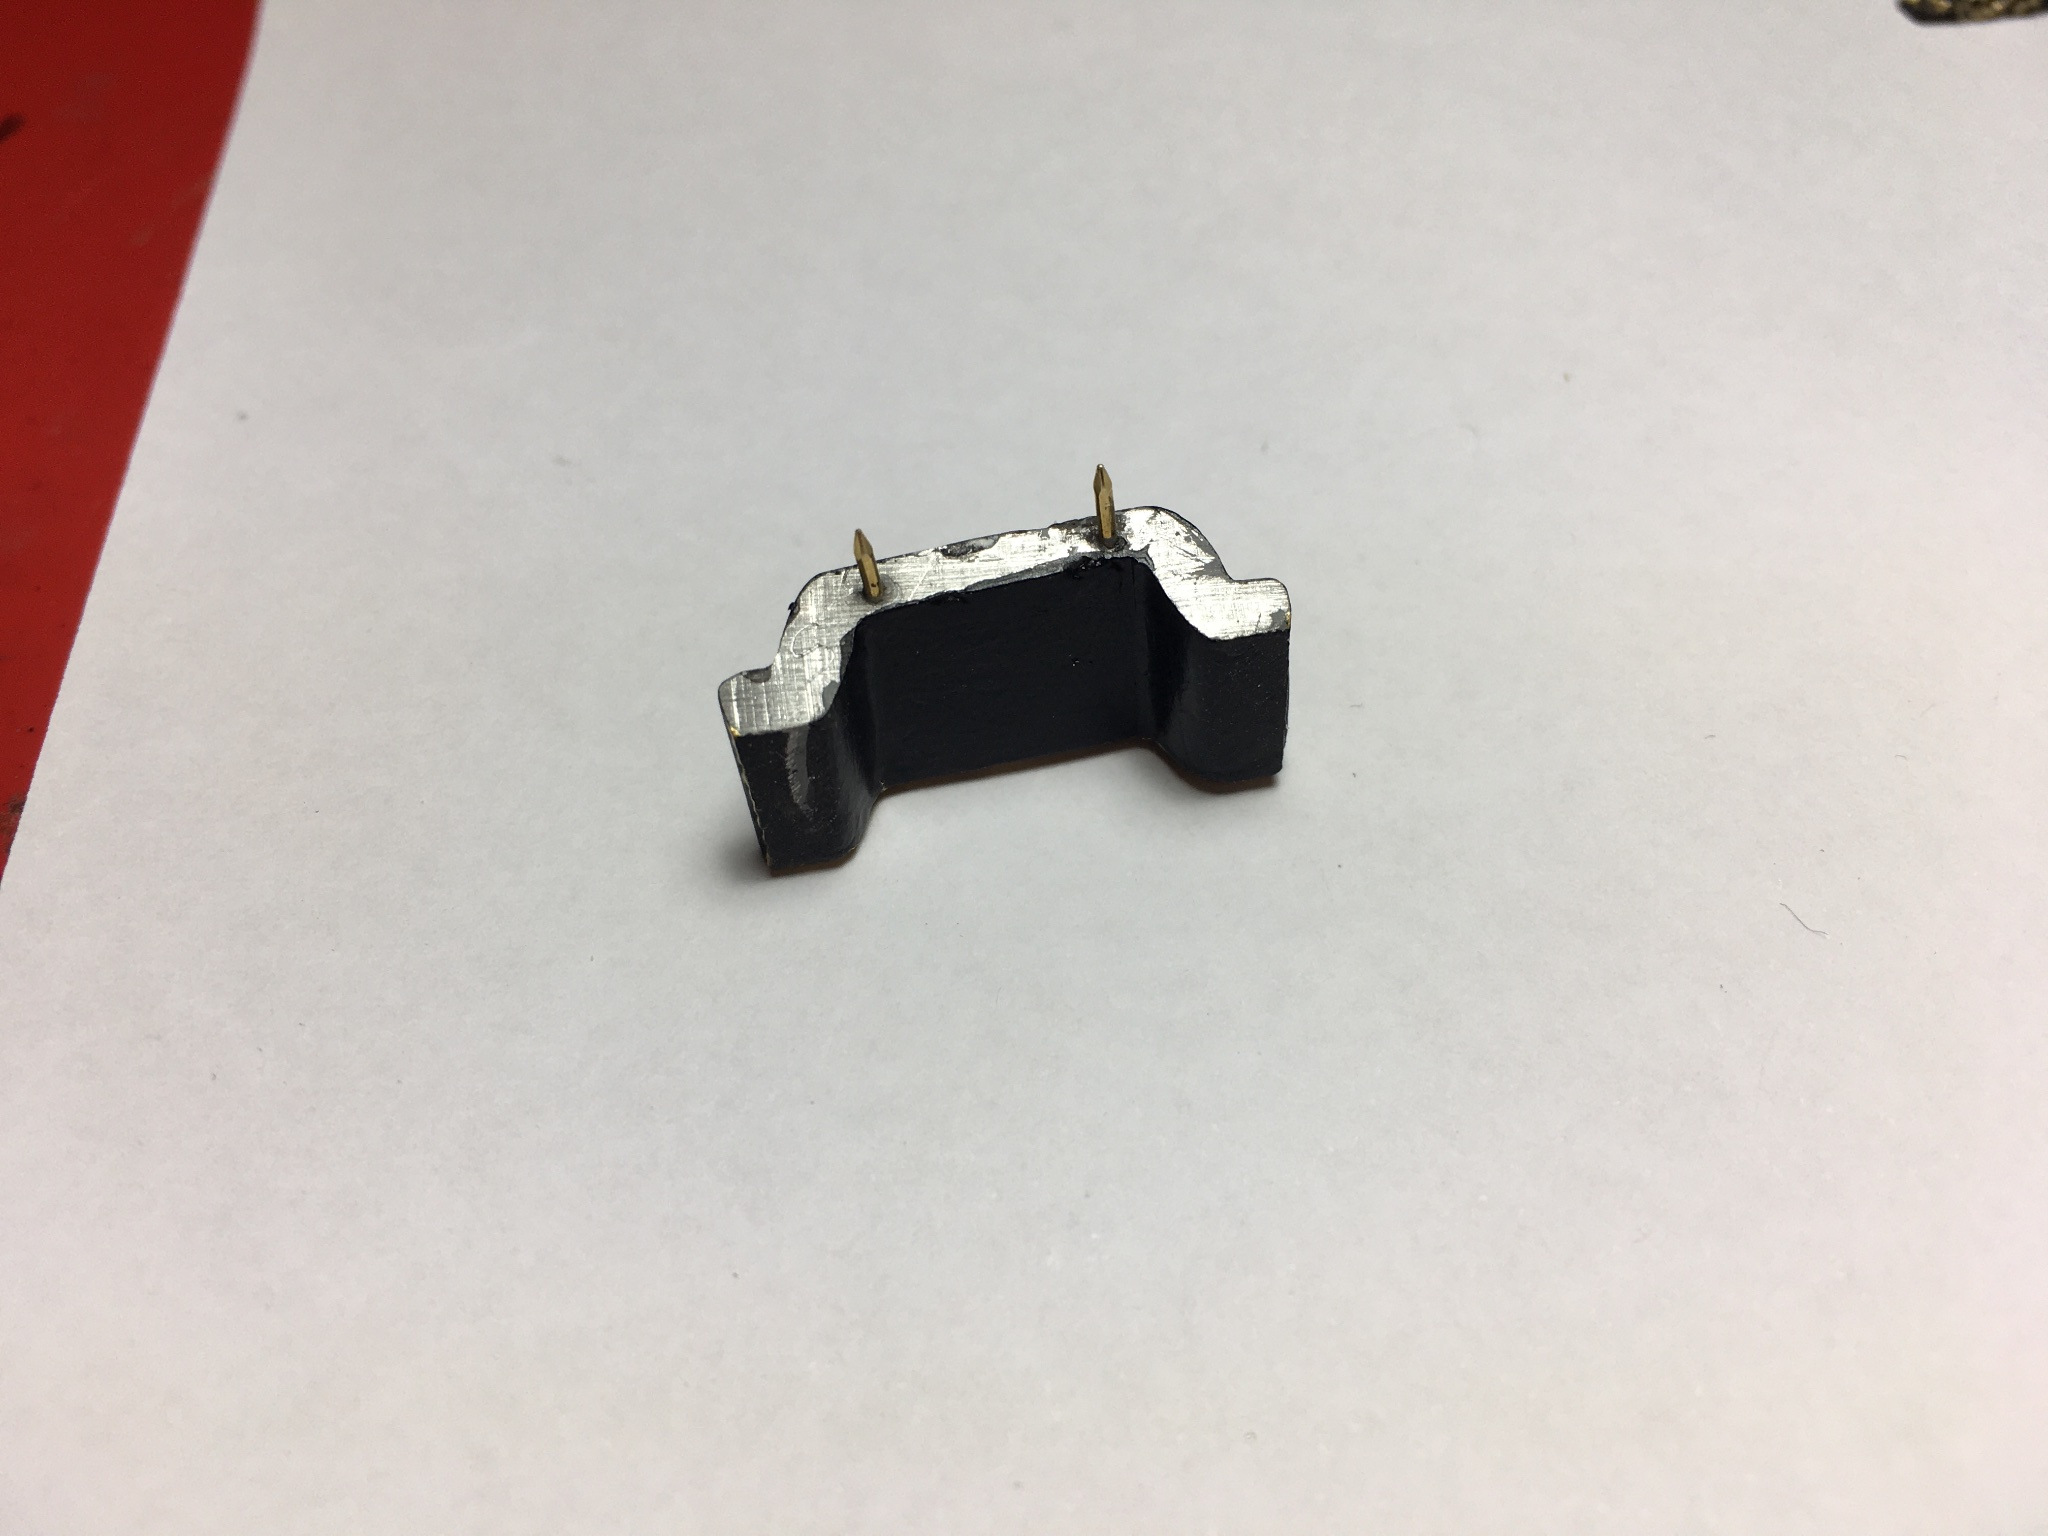
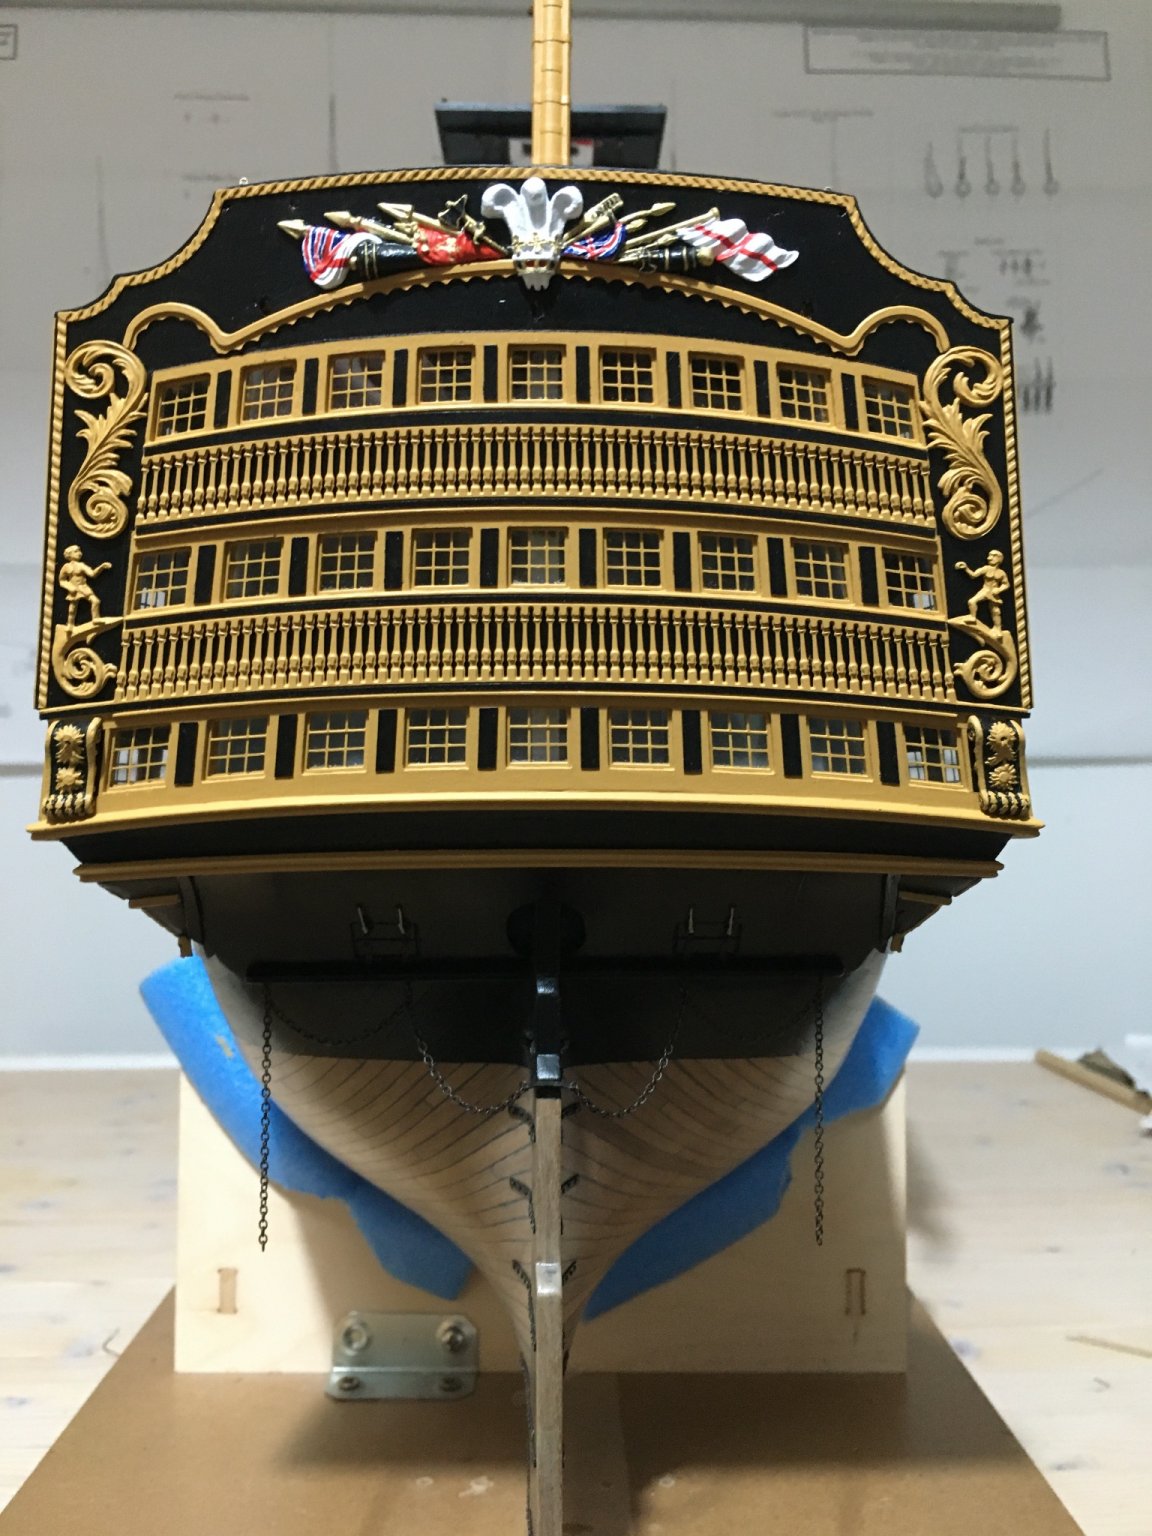
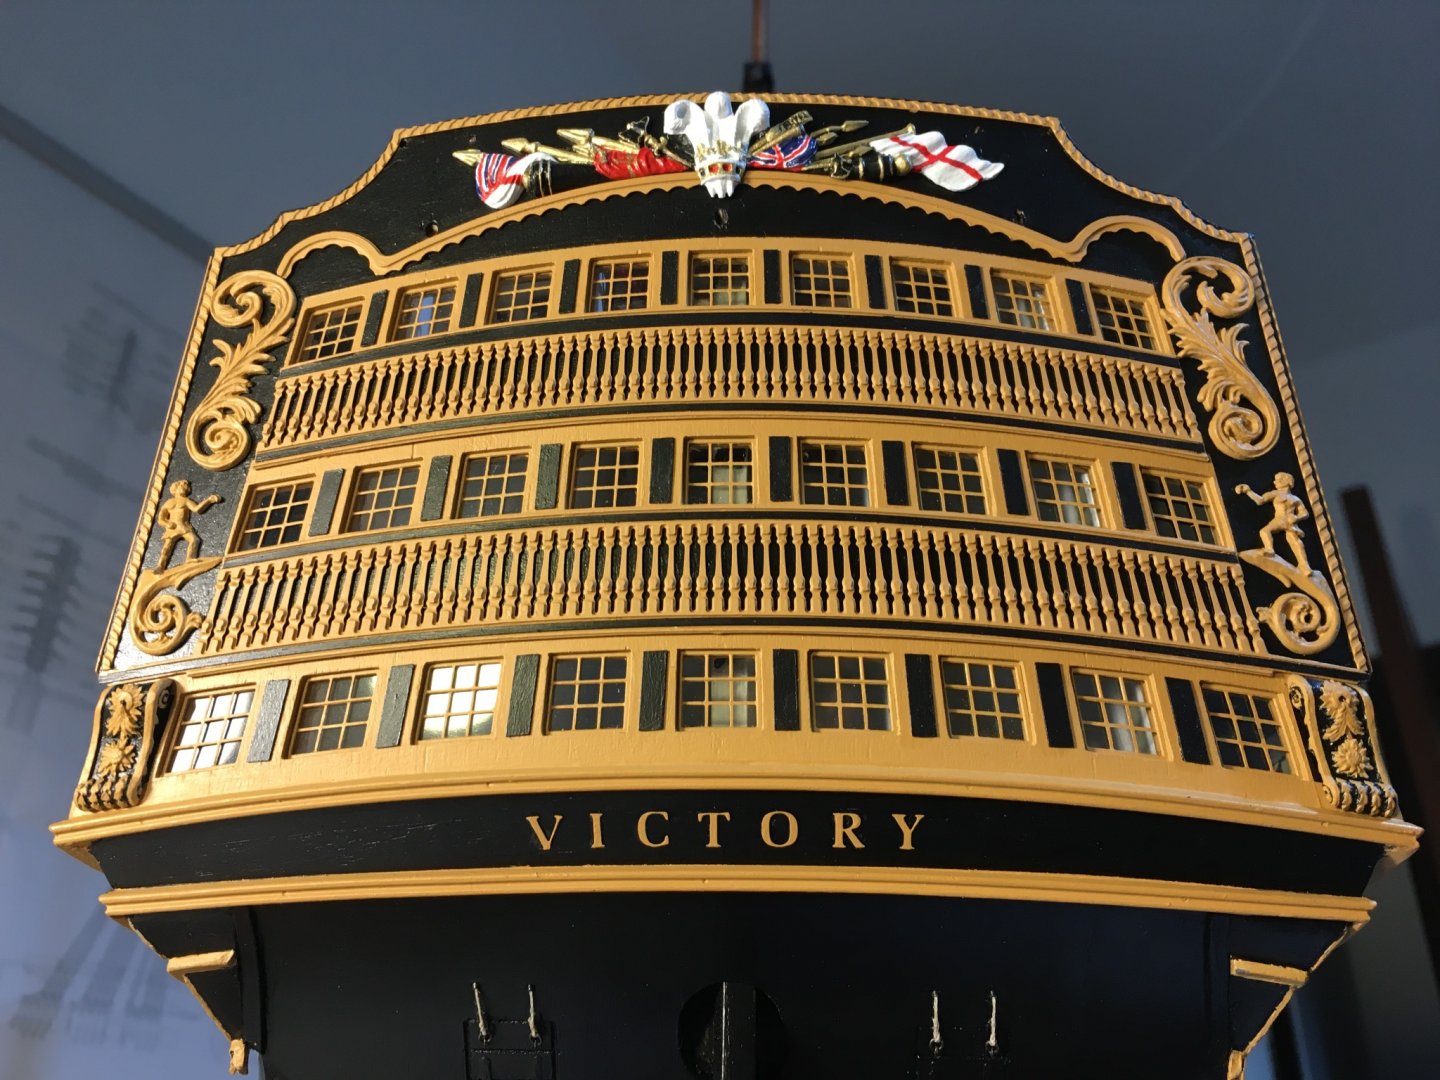
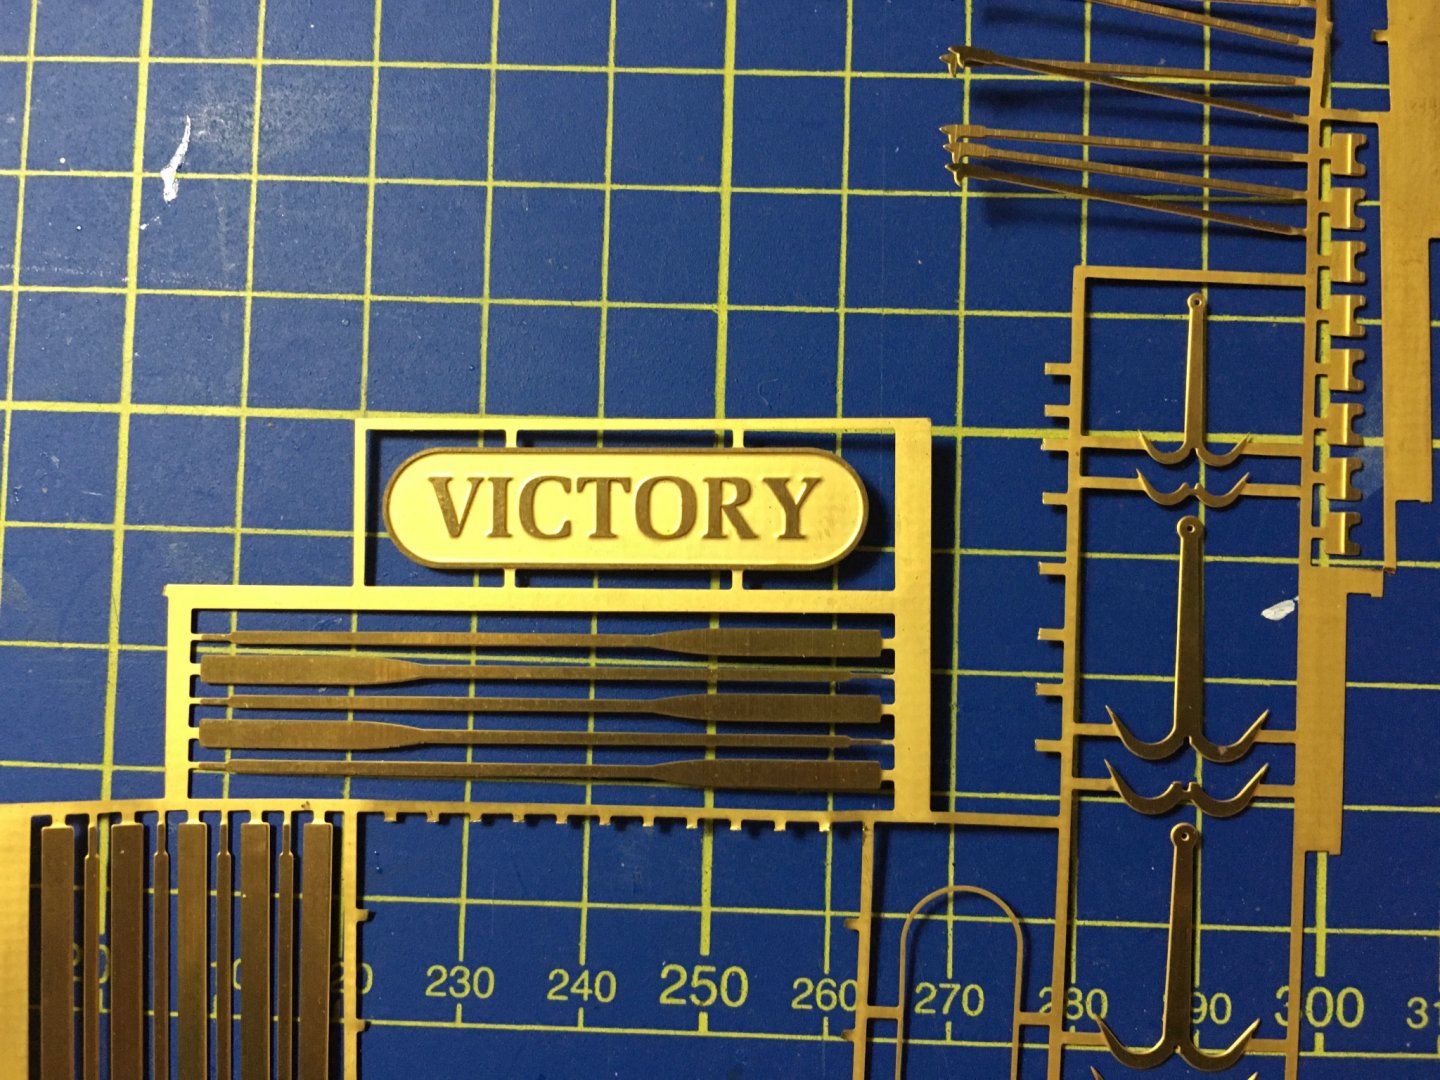
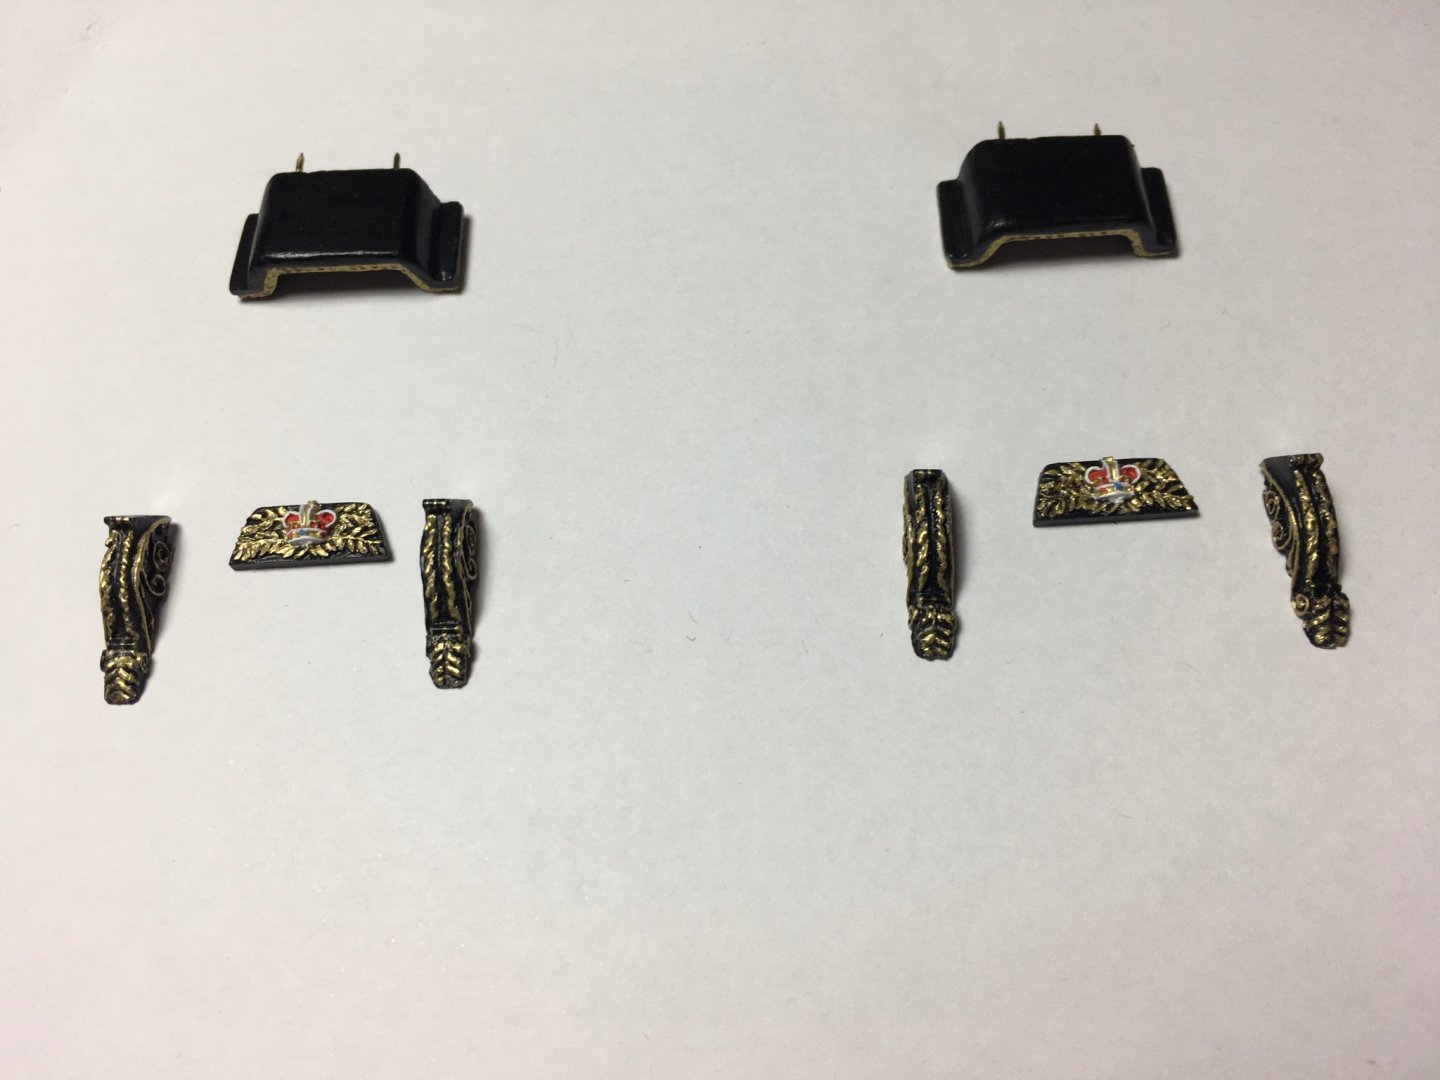
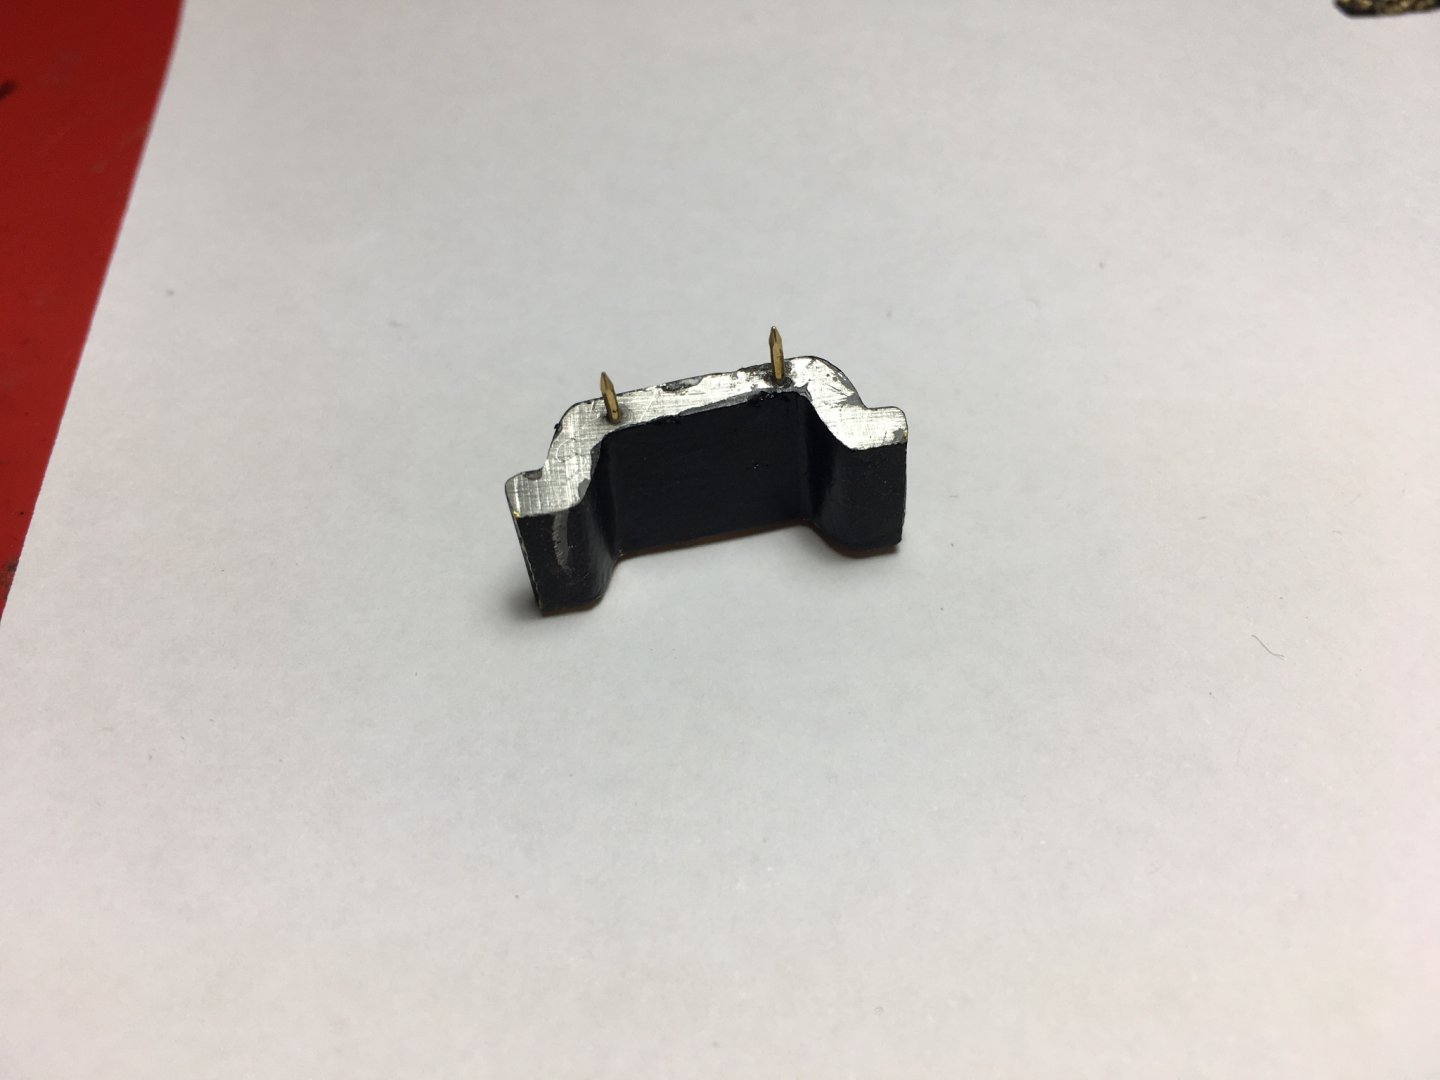
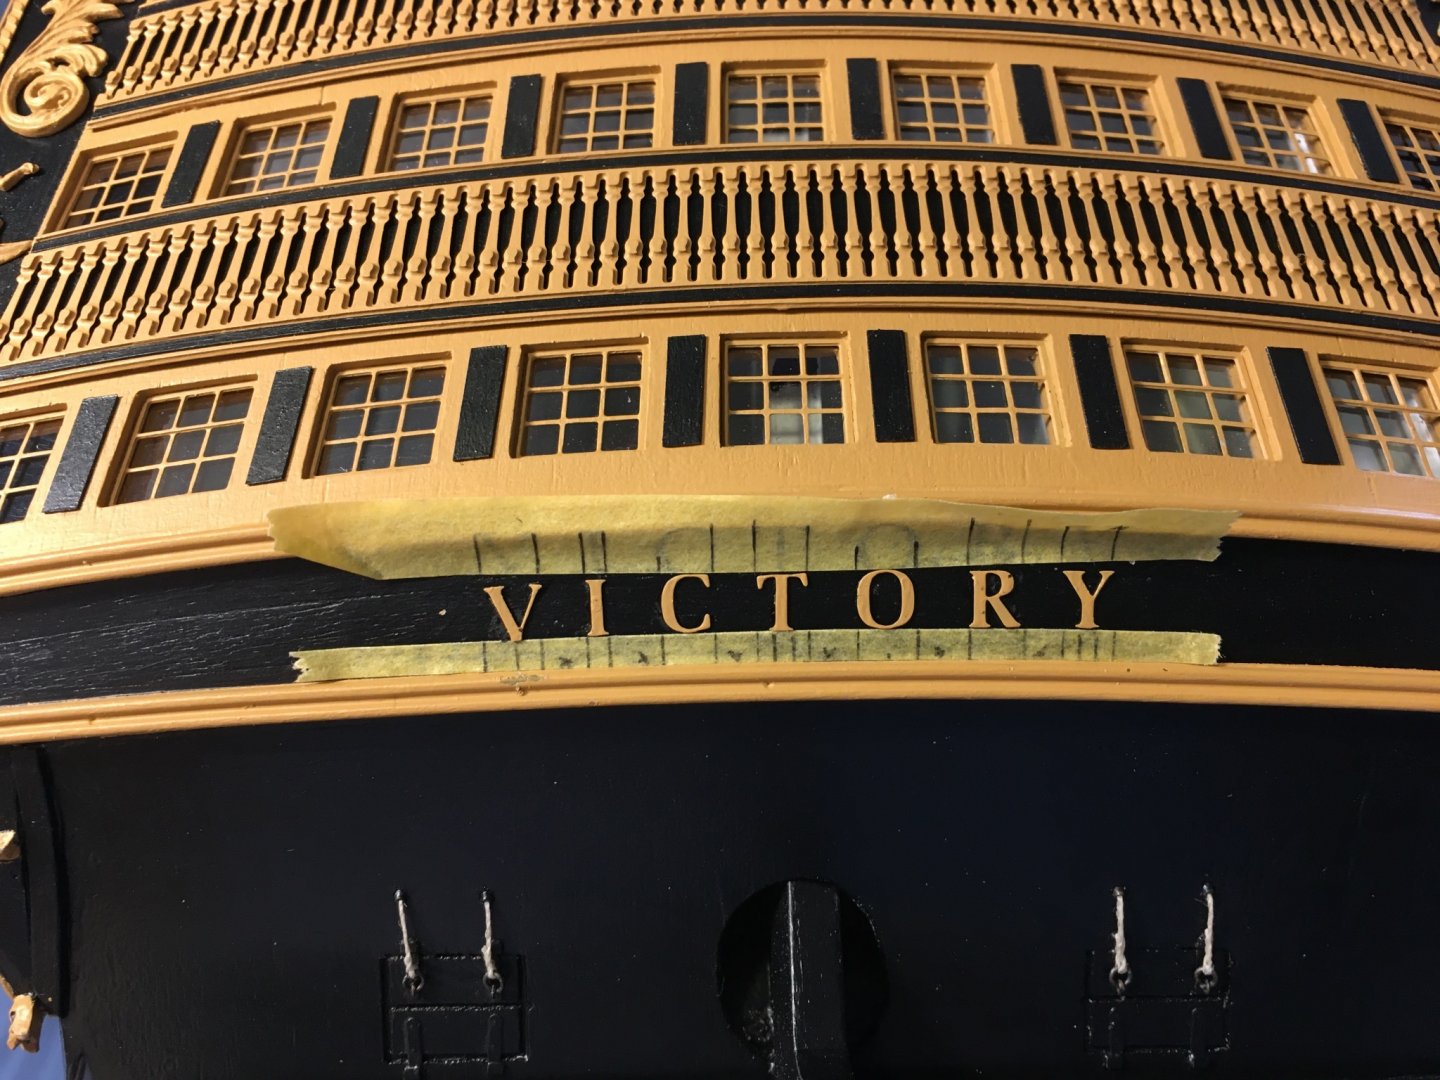
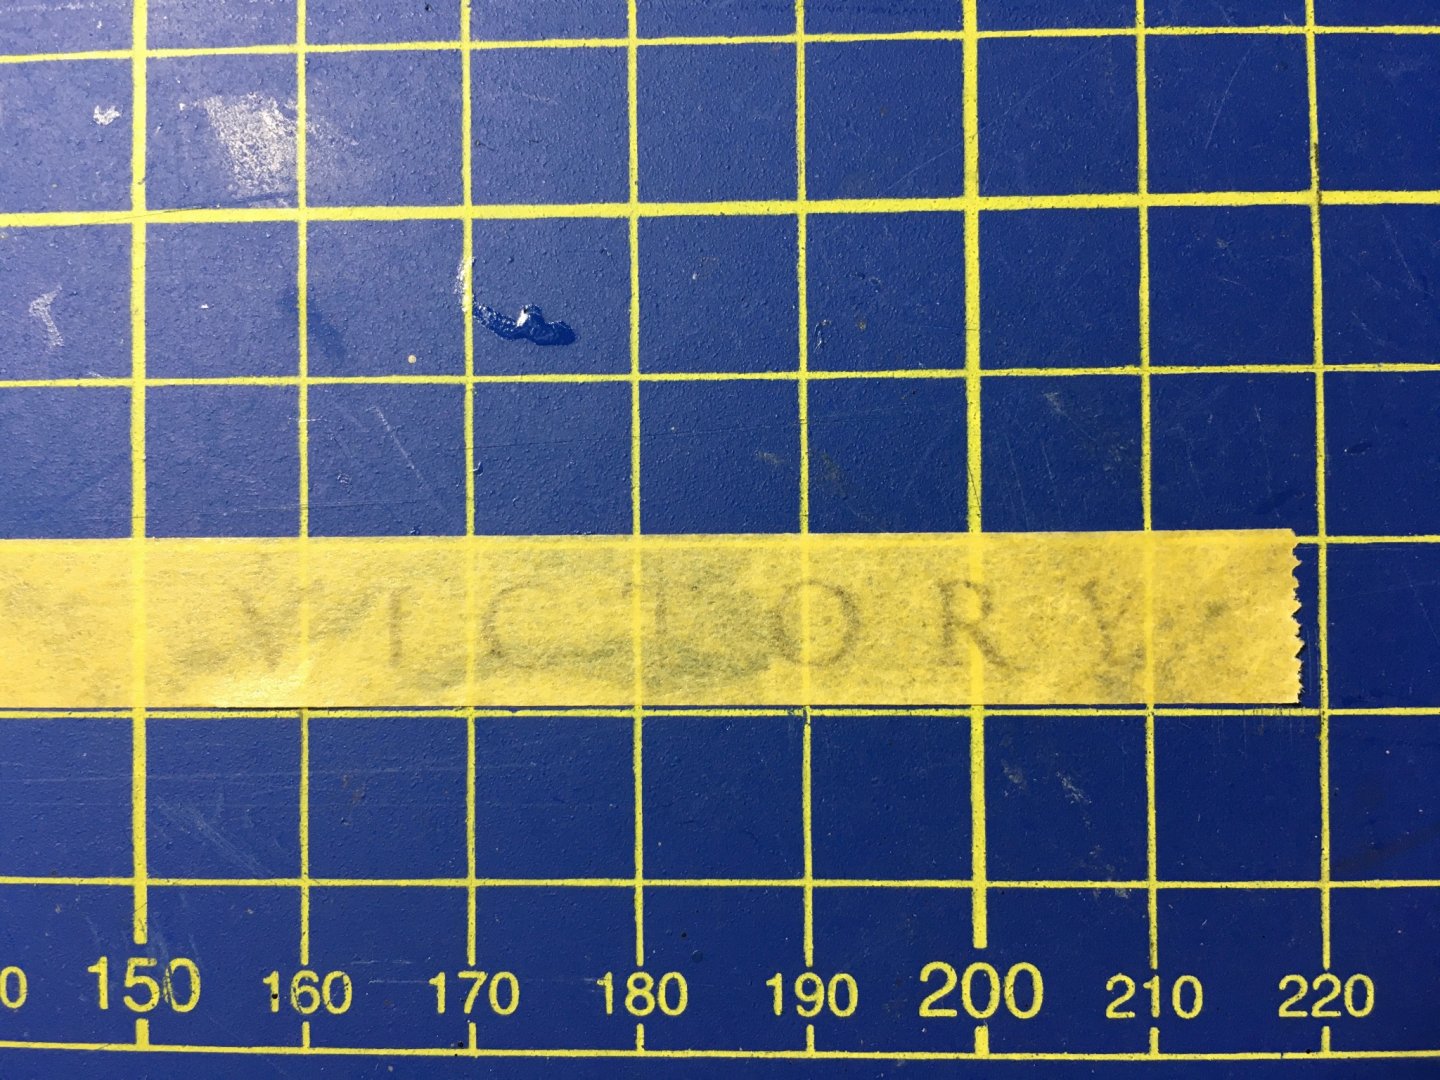
Thank you Michael and thank you all for the likes. I have a small update. I fixed the Victory letters to the stern. They are quite tiny and fragile. I glued them with just a small dab of CA glue. This is how I marked the positions of the letters. a. With the computer I printed the 'VICTORY', same size as the supplied brass letters, using double spacing between the letters, on a plain paper. b. As soon as I printed it I took a piece of Tamaya masking tape, which is slightly transparent, and stuck it on top of the printed letters. Took the tape off again and the letters were transferred to the back of the tape (on the side of the glue). c. With a thin marker I drew some lines marking the side positions of the letters and some of them the centre as well. Then with a blade I cut the tape in two all along the base of the letters. The bottom part of the tape is about 3mm. I centred this on the stern and against the brass profile underneath the letters. This served as a guide for the right spacing and to be horizontally in line with each other along the brass profile. The other half of he tape I taped on top just as a guide to know that the letters are perpendicular. When you use CA glue on a painted surface, the glue melts the paint a bit and does not dry immediately. It gives you a few seconds, enough to adjust the letters in their exact position. The result after taking off the tape and retouching the letters with paint. I was wondering if it's a good idea to go all over the letterings and cover all that area with a coat of matt clear varnish so that all the tiny fragile ends will adhere to the stern with the varnish. This was the other name plate supplied with the kit. Of course this would have been much easier to paint and fit but I think the individual letters are more authentic. I also painted the Side Entry port castings. I think I will fit them in place after I finish the shrouds. As you can see I have driven two brass pins into the back of the side entry arch for a stronger fit and also as a guide to their exact position. This has been done before painting them and holes to accommodate these pins are already prepared on the hull over the side door. This way I will eliminate handling them as much as possible as I will only have to put some glue and slide them in their respective holes. Robert
- 527 replies
-
- 5
-
-
- caldercraft
- victory
- (and 1 more)
-
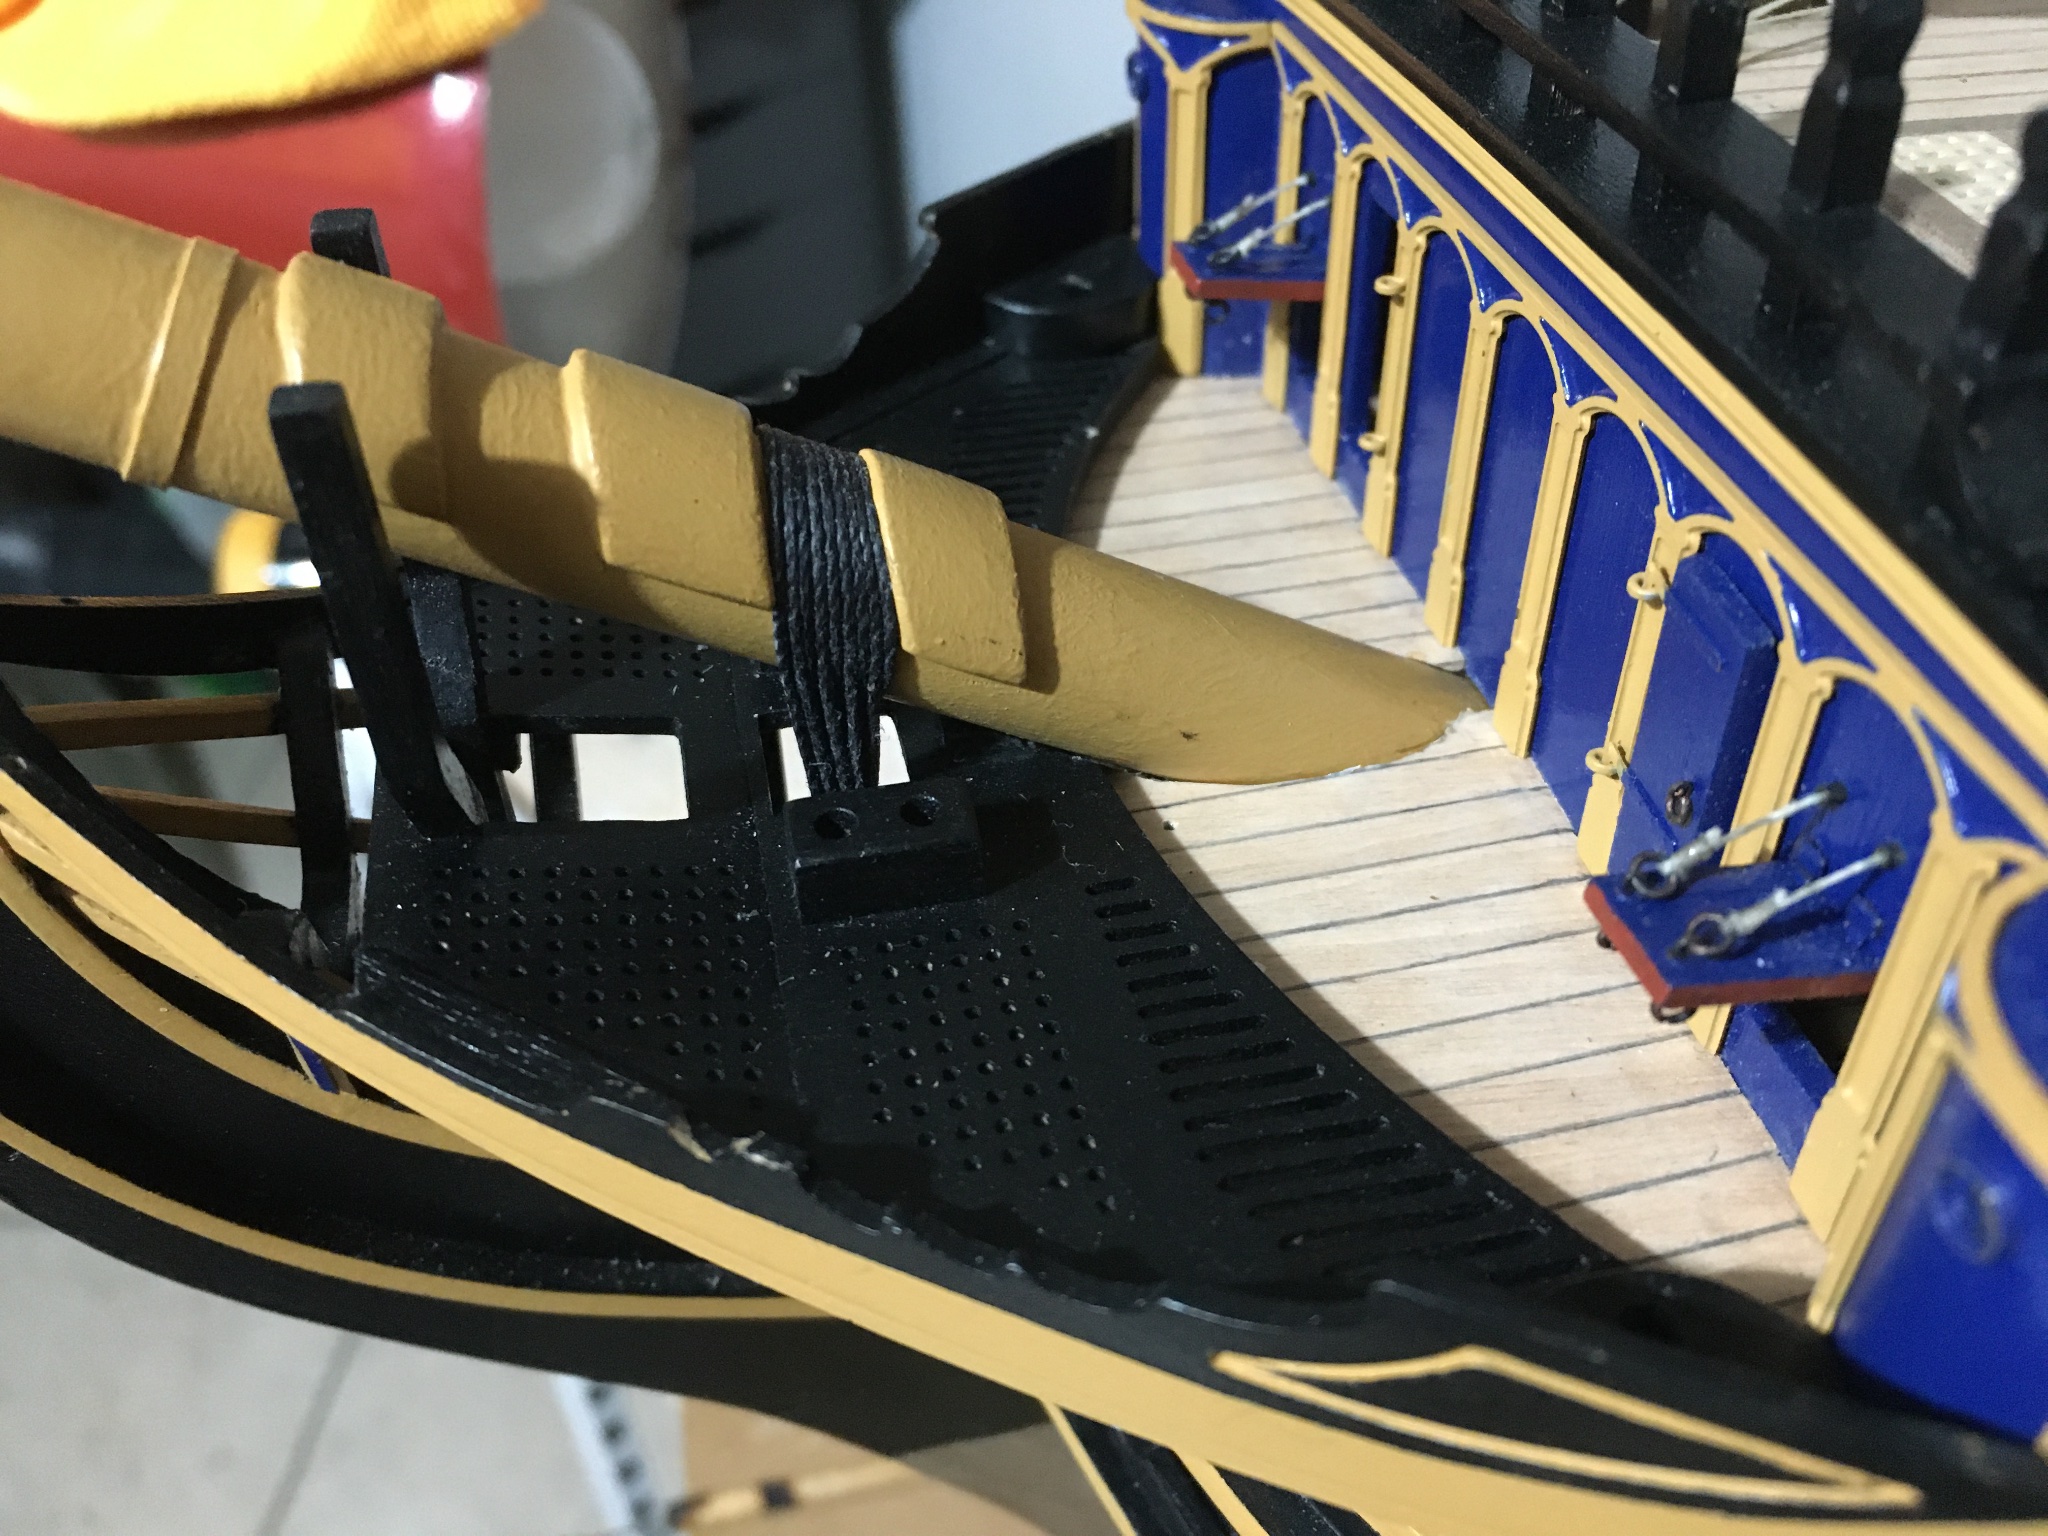
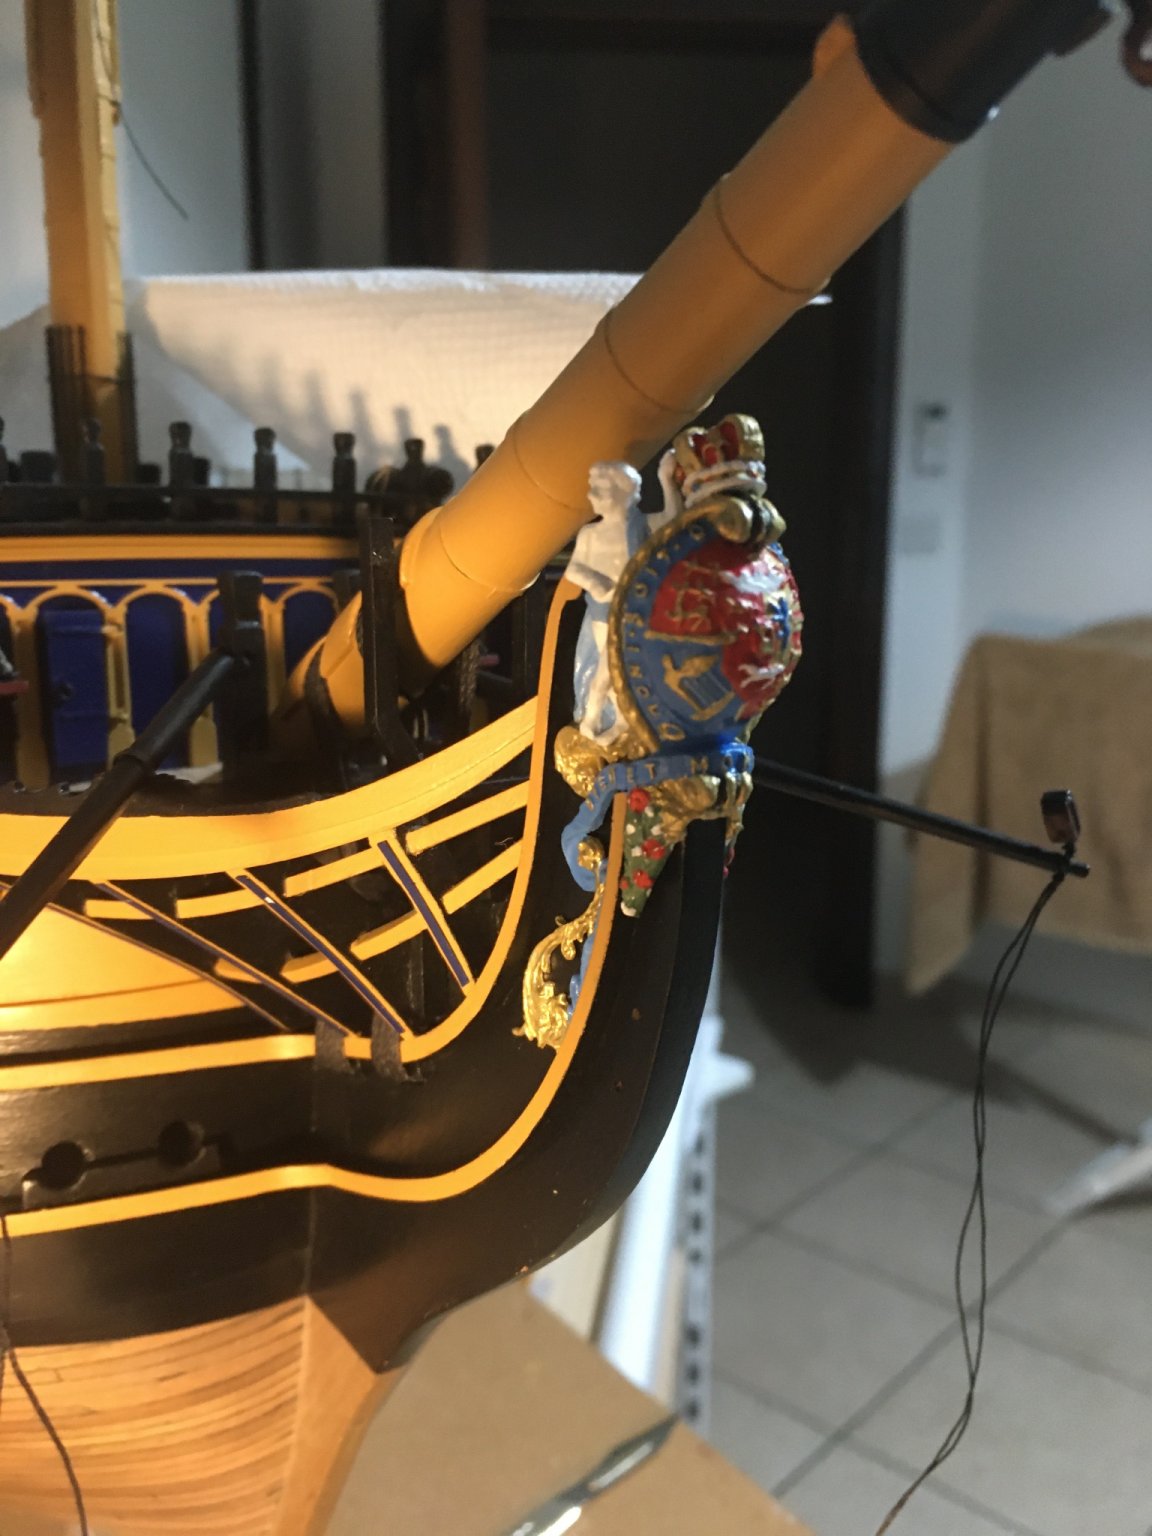
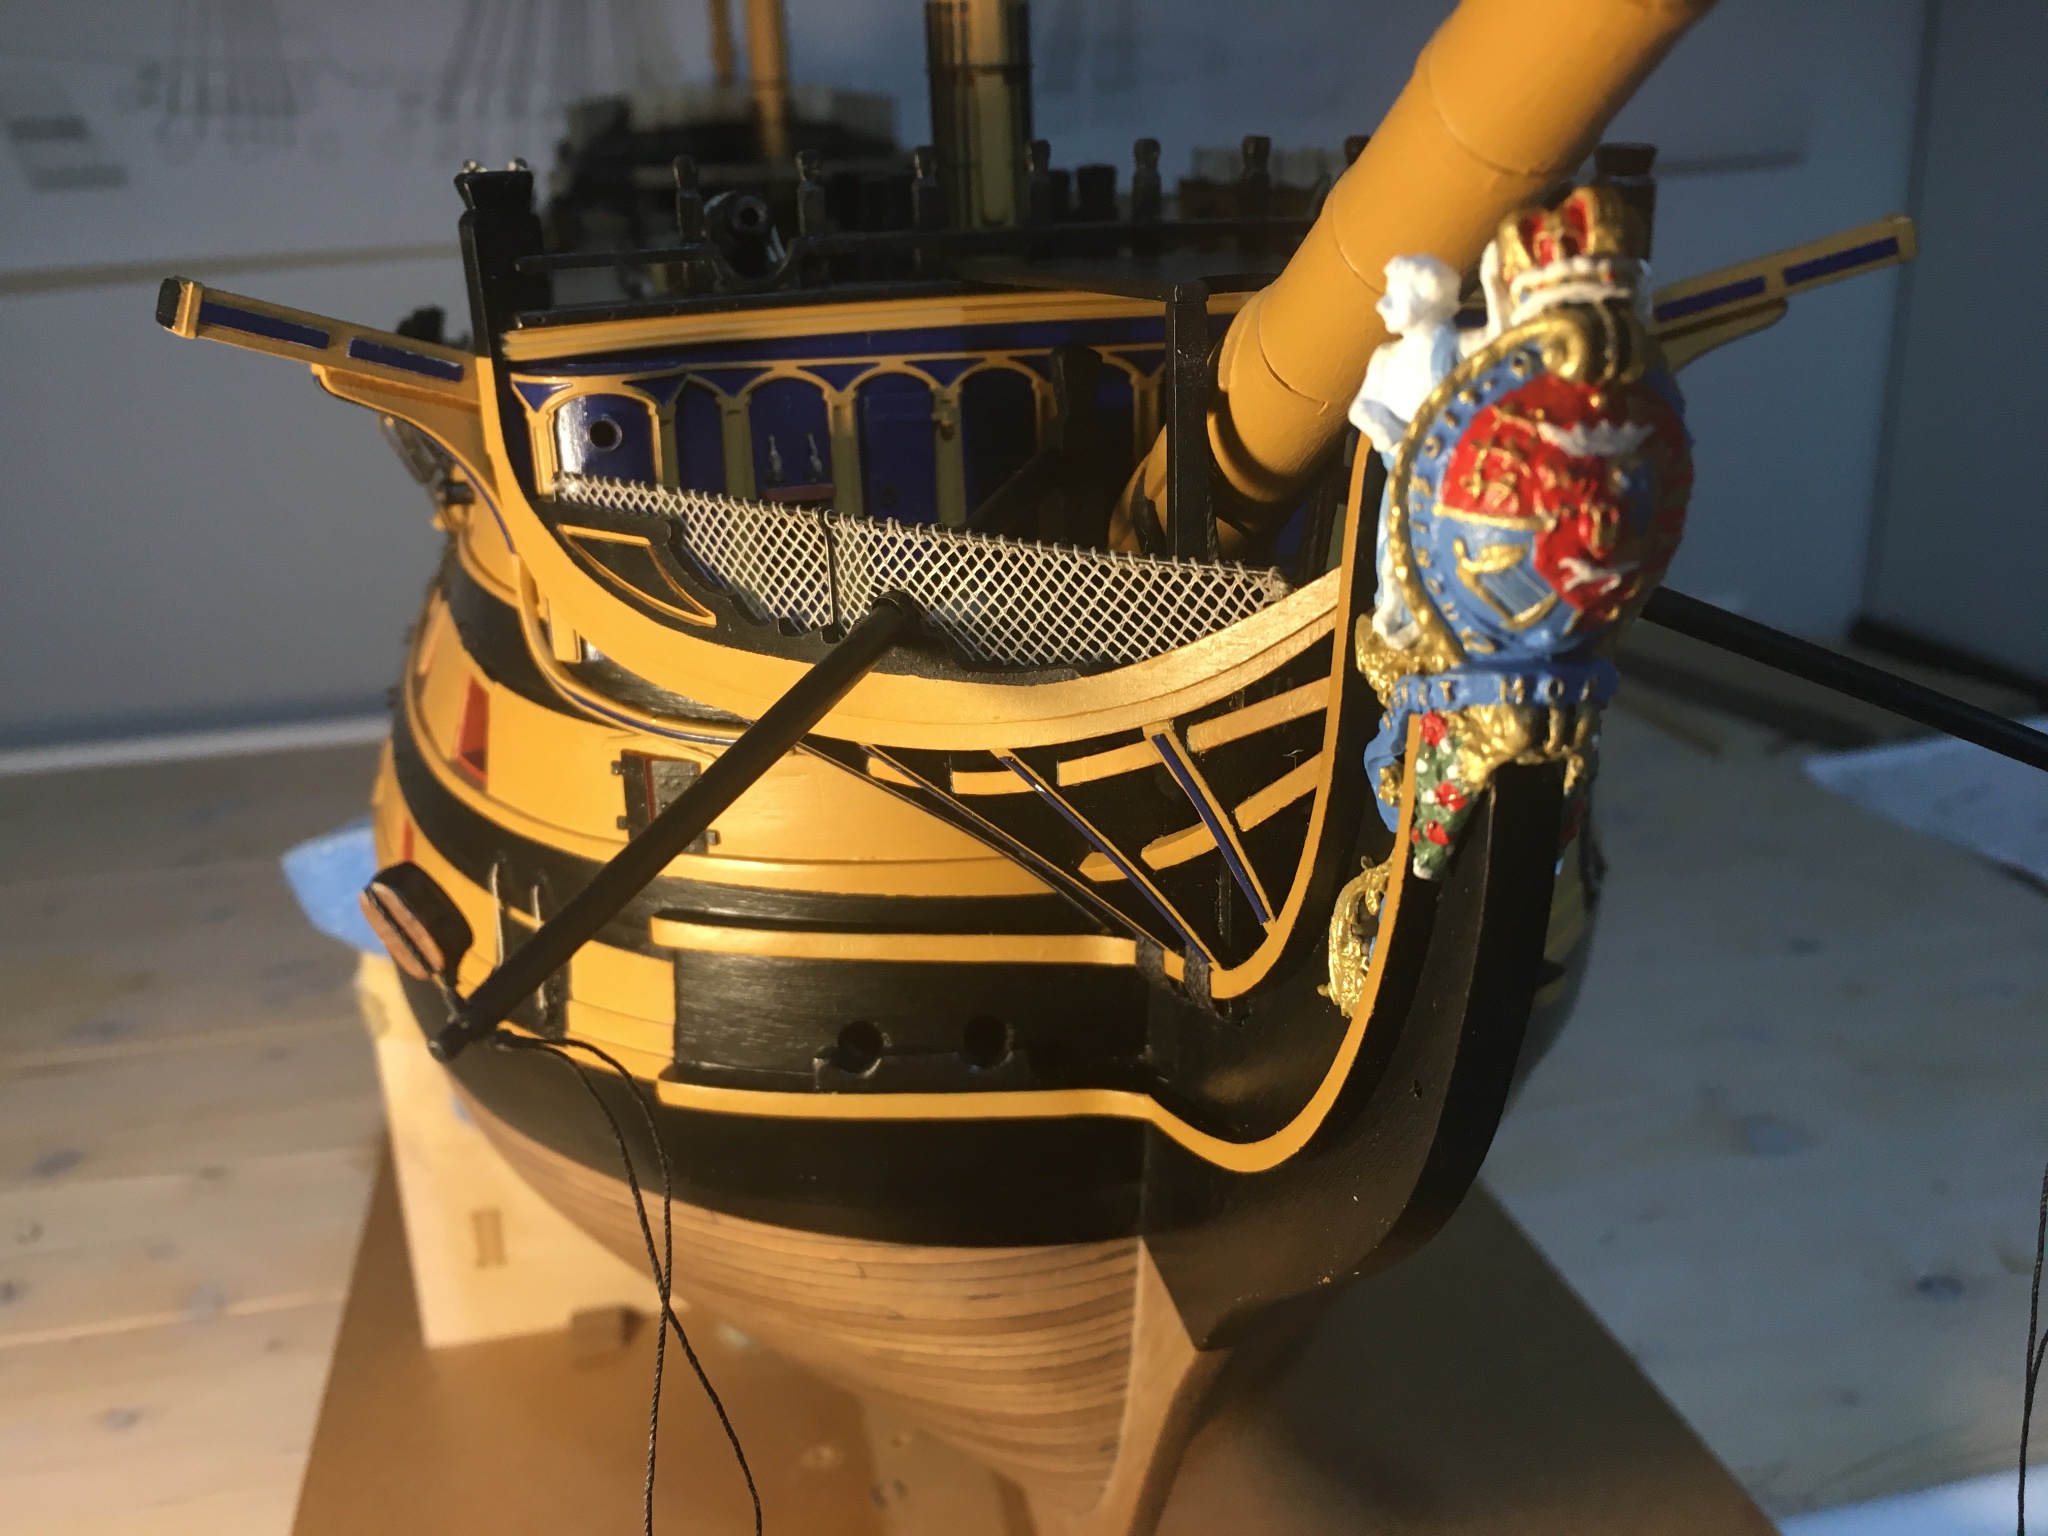
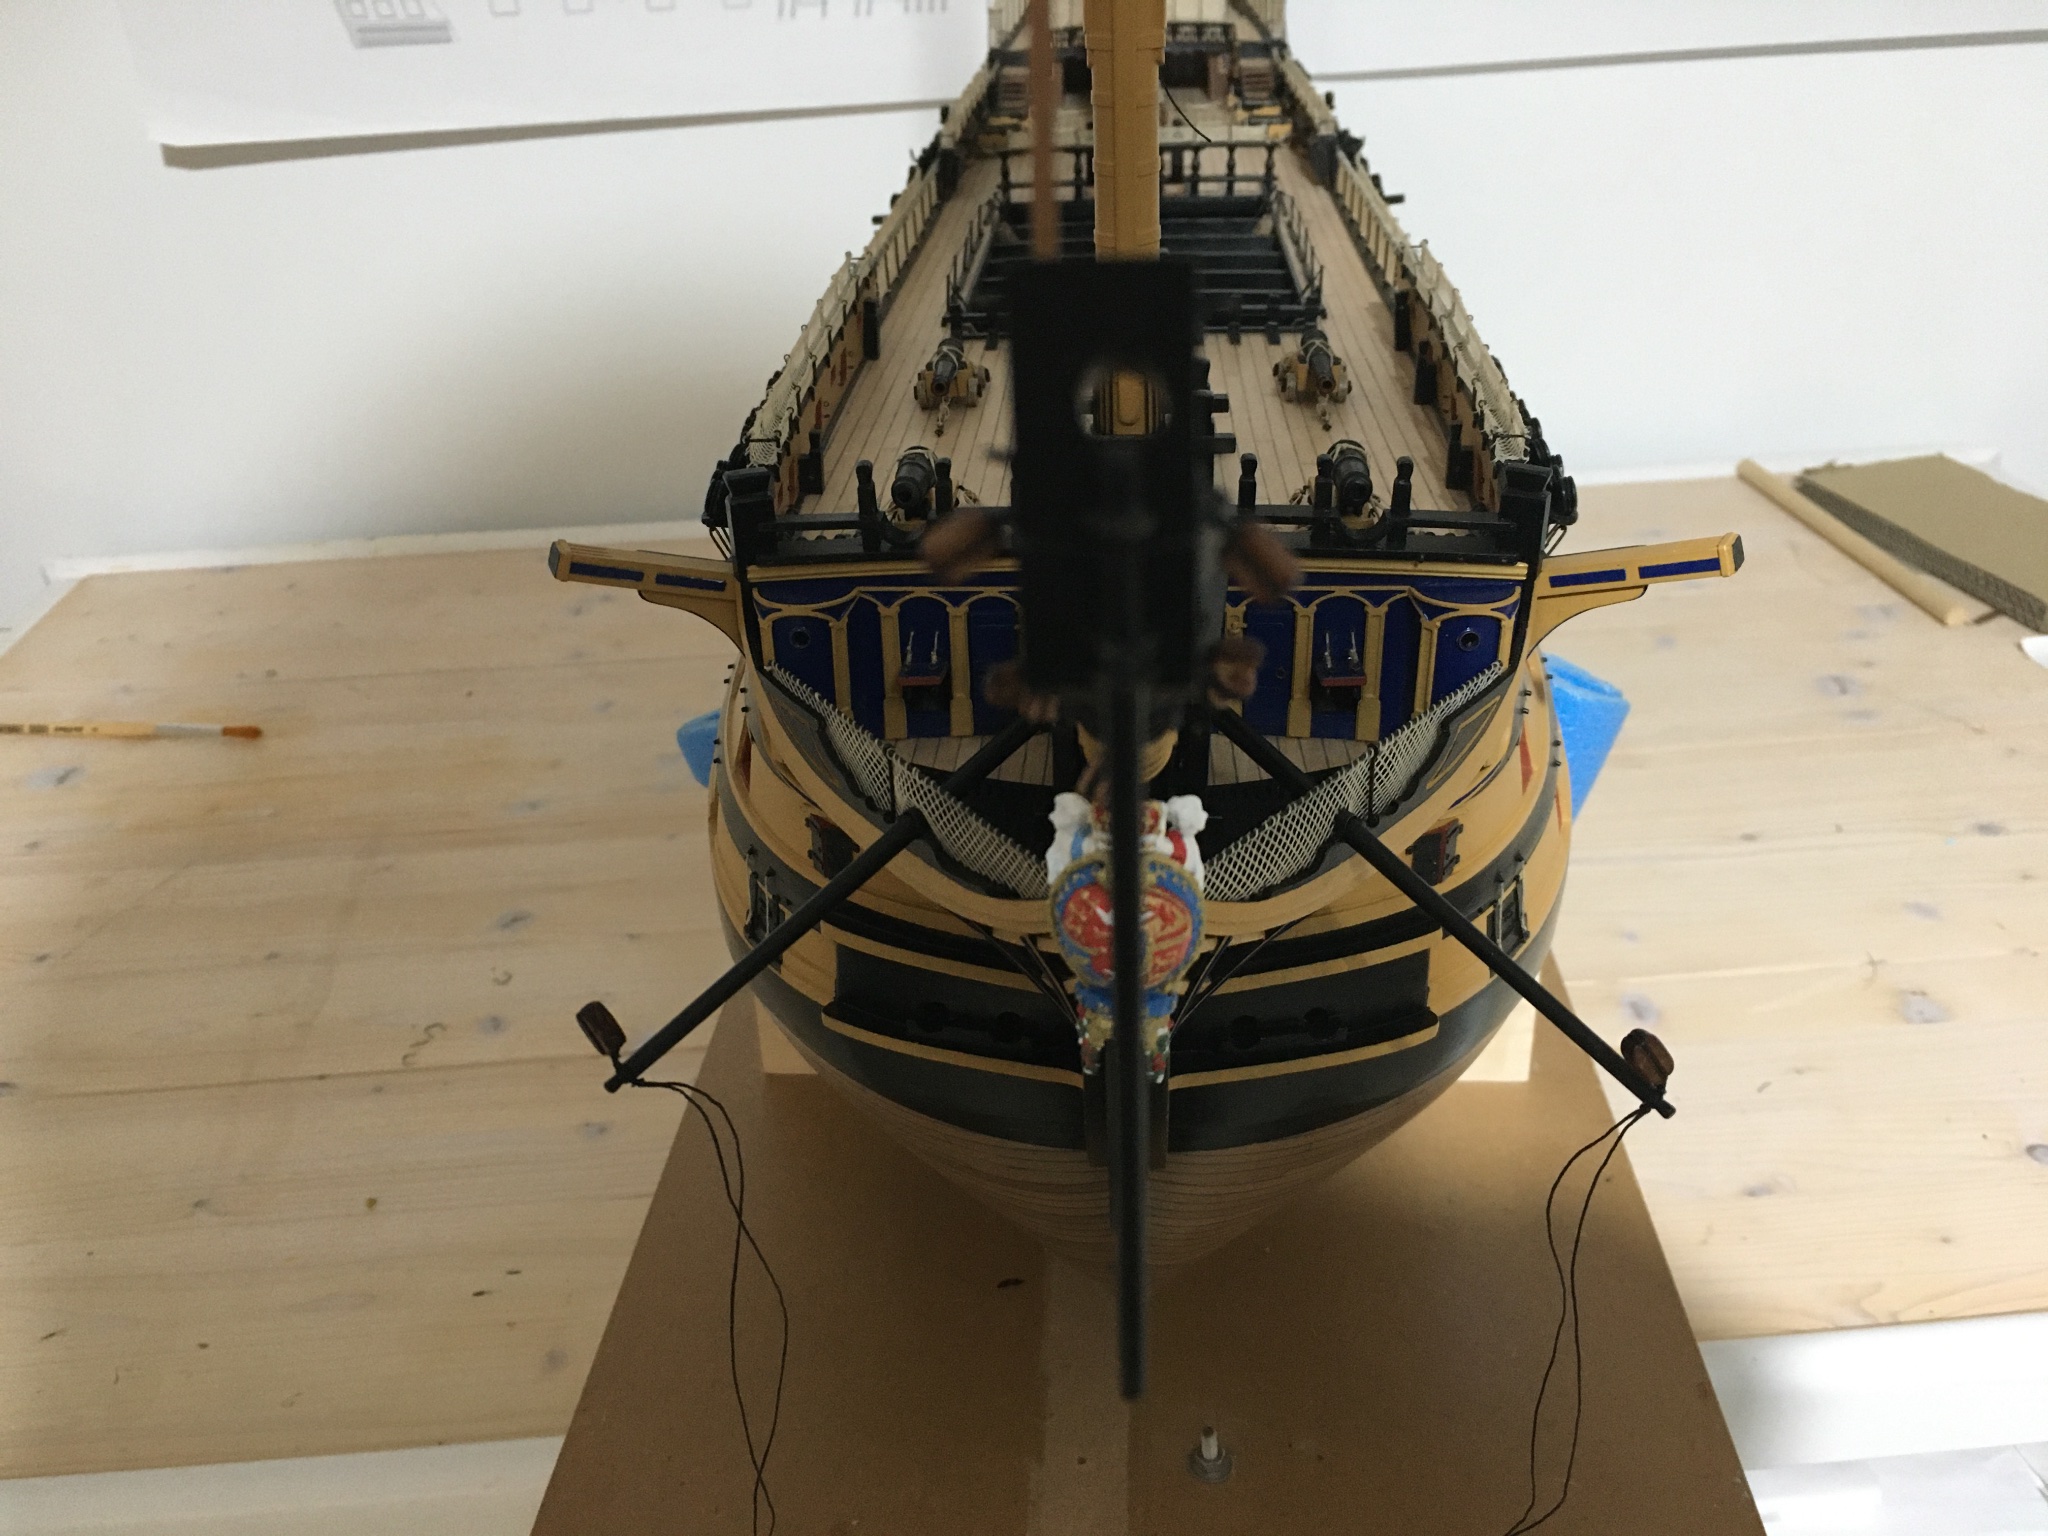
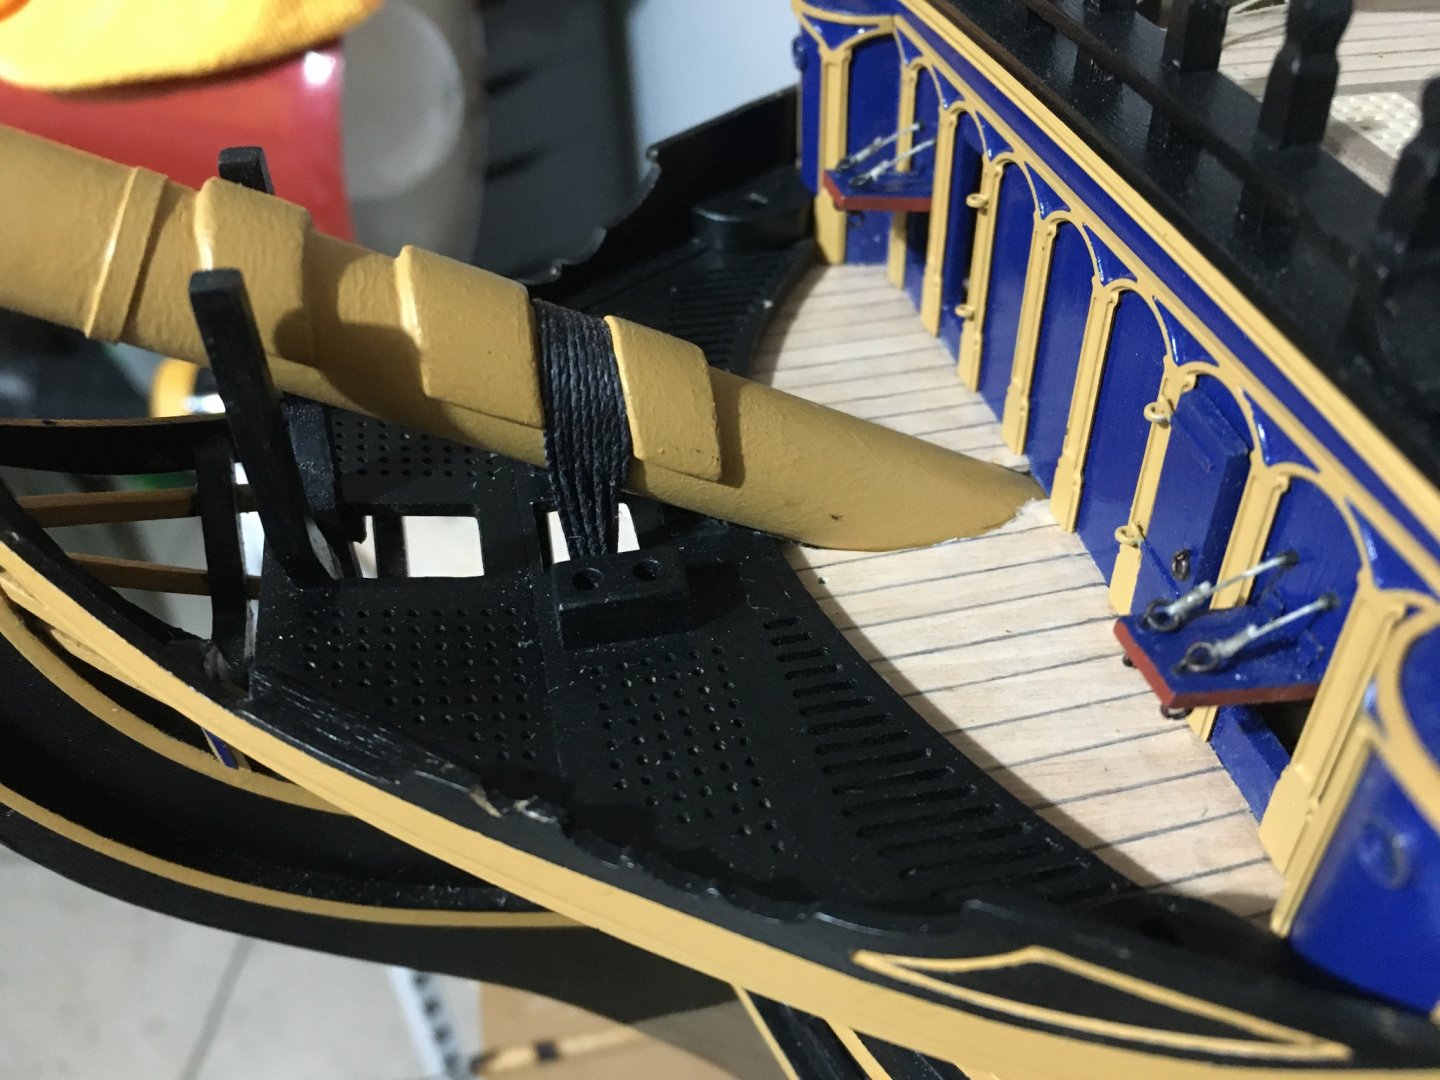
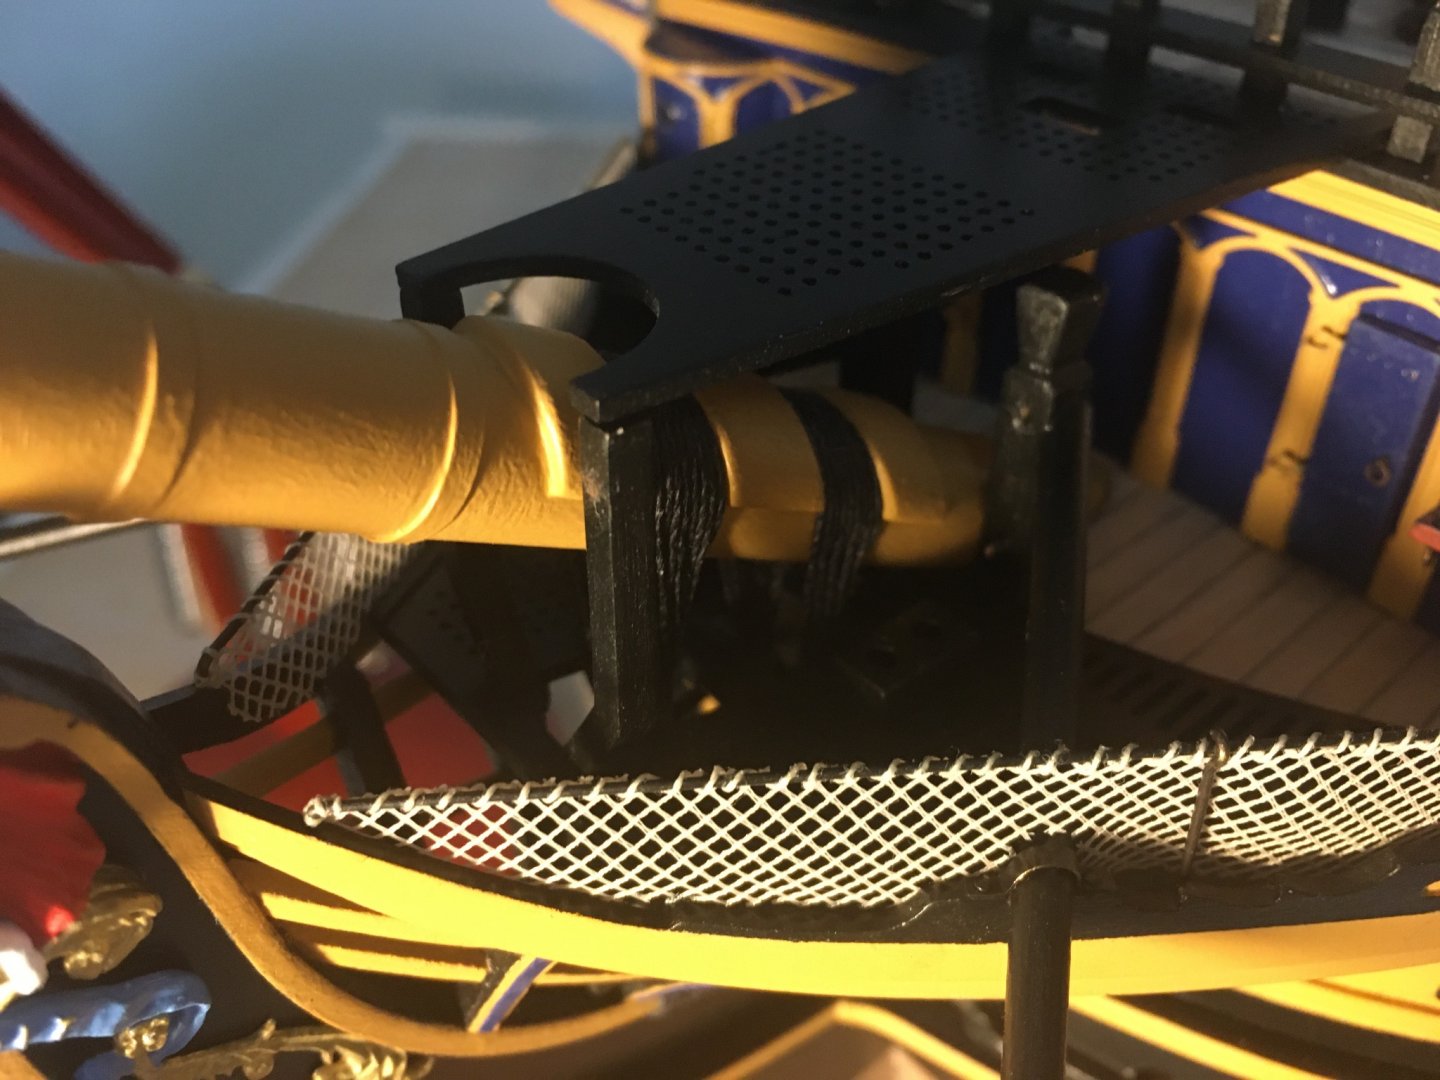
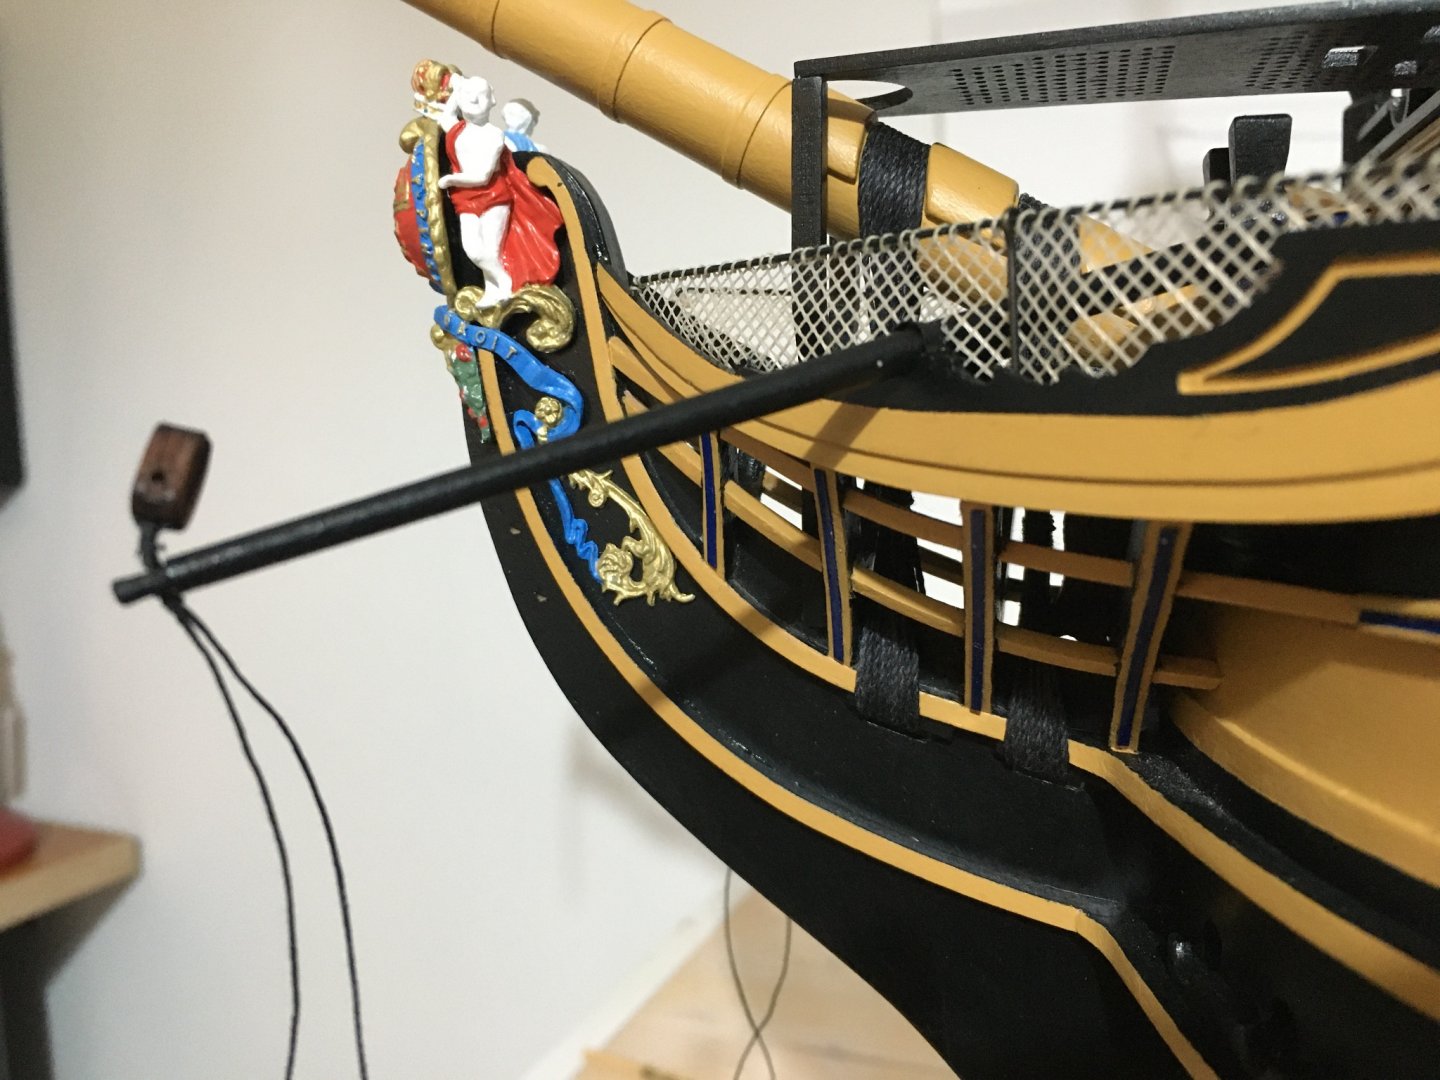
The bowsprit is fitted in place and gammoning done. Passing the line in between the bow rails was not that straight forward. When doing the gammoning saddles I had calculated that the distance between them will accommodate exactly the nine turns of gammoning. While doing the gammoning I managed to knock down one of the cat heads, but already fitted back. Then fitted the knights heads, with the boomkins already attached to them. I seized the boomkin shrouds and the block beforehand. When possible, seizing is much easier done when items are still in your hands. I worked two saddle bars to hold the boomkin in place on the main rail. Figurehead fitted in place as well. Net railing also fitted, but for the moment it is only dry fitted to be able to remove if needed to the bowsprit rigging. The marines' walk is only dry fitted as well. Robert


- 527 replies
-
- 10
-
-
- caldercraft
- victory
- (and 1 more)
-
Nice writeup and explanation Michael. Taking your time and planning the best approach to do things always pays off at the end. Keep up your good work Michael. Robert
-
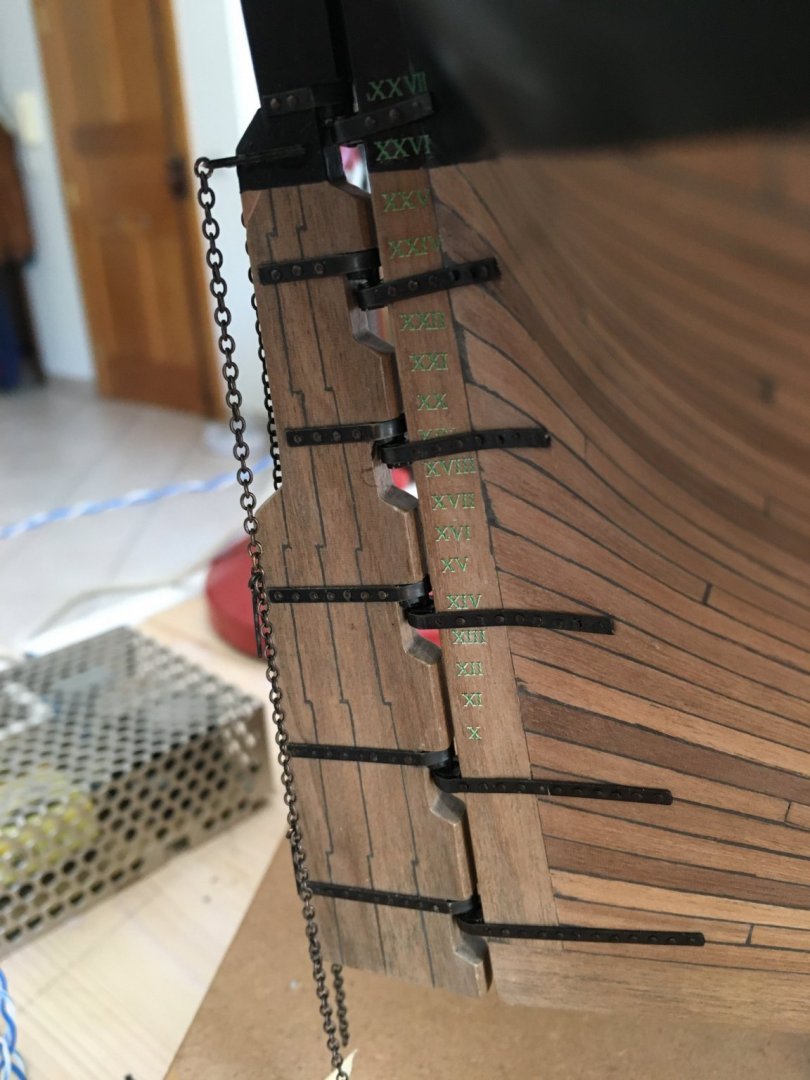
Hi md, thank you for your comment and especially for the website for the Roman numbers. They look great, pity I did not know about them before. In my case, my only hesitation is that, although they are very small (2.5mm high) they might be a bit too big for my scale (1:72). The decals I used are 1.5mm. I doubt it if they make them that small. Graham, I try my best and I owe most of my moderate ability to a lot of members in this forum, who are magnificent builders, from whom I learned a lot. Robert
- 527 replies
-
- 1
-
-
- caldercraft
- victory
- (and 1 more)
-
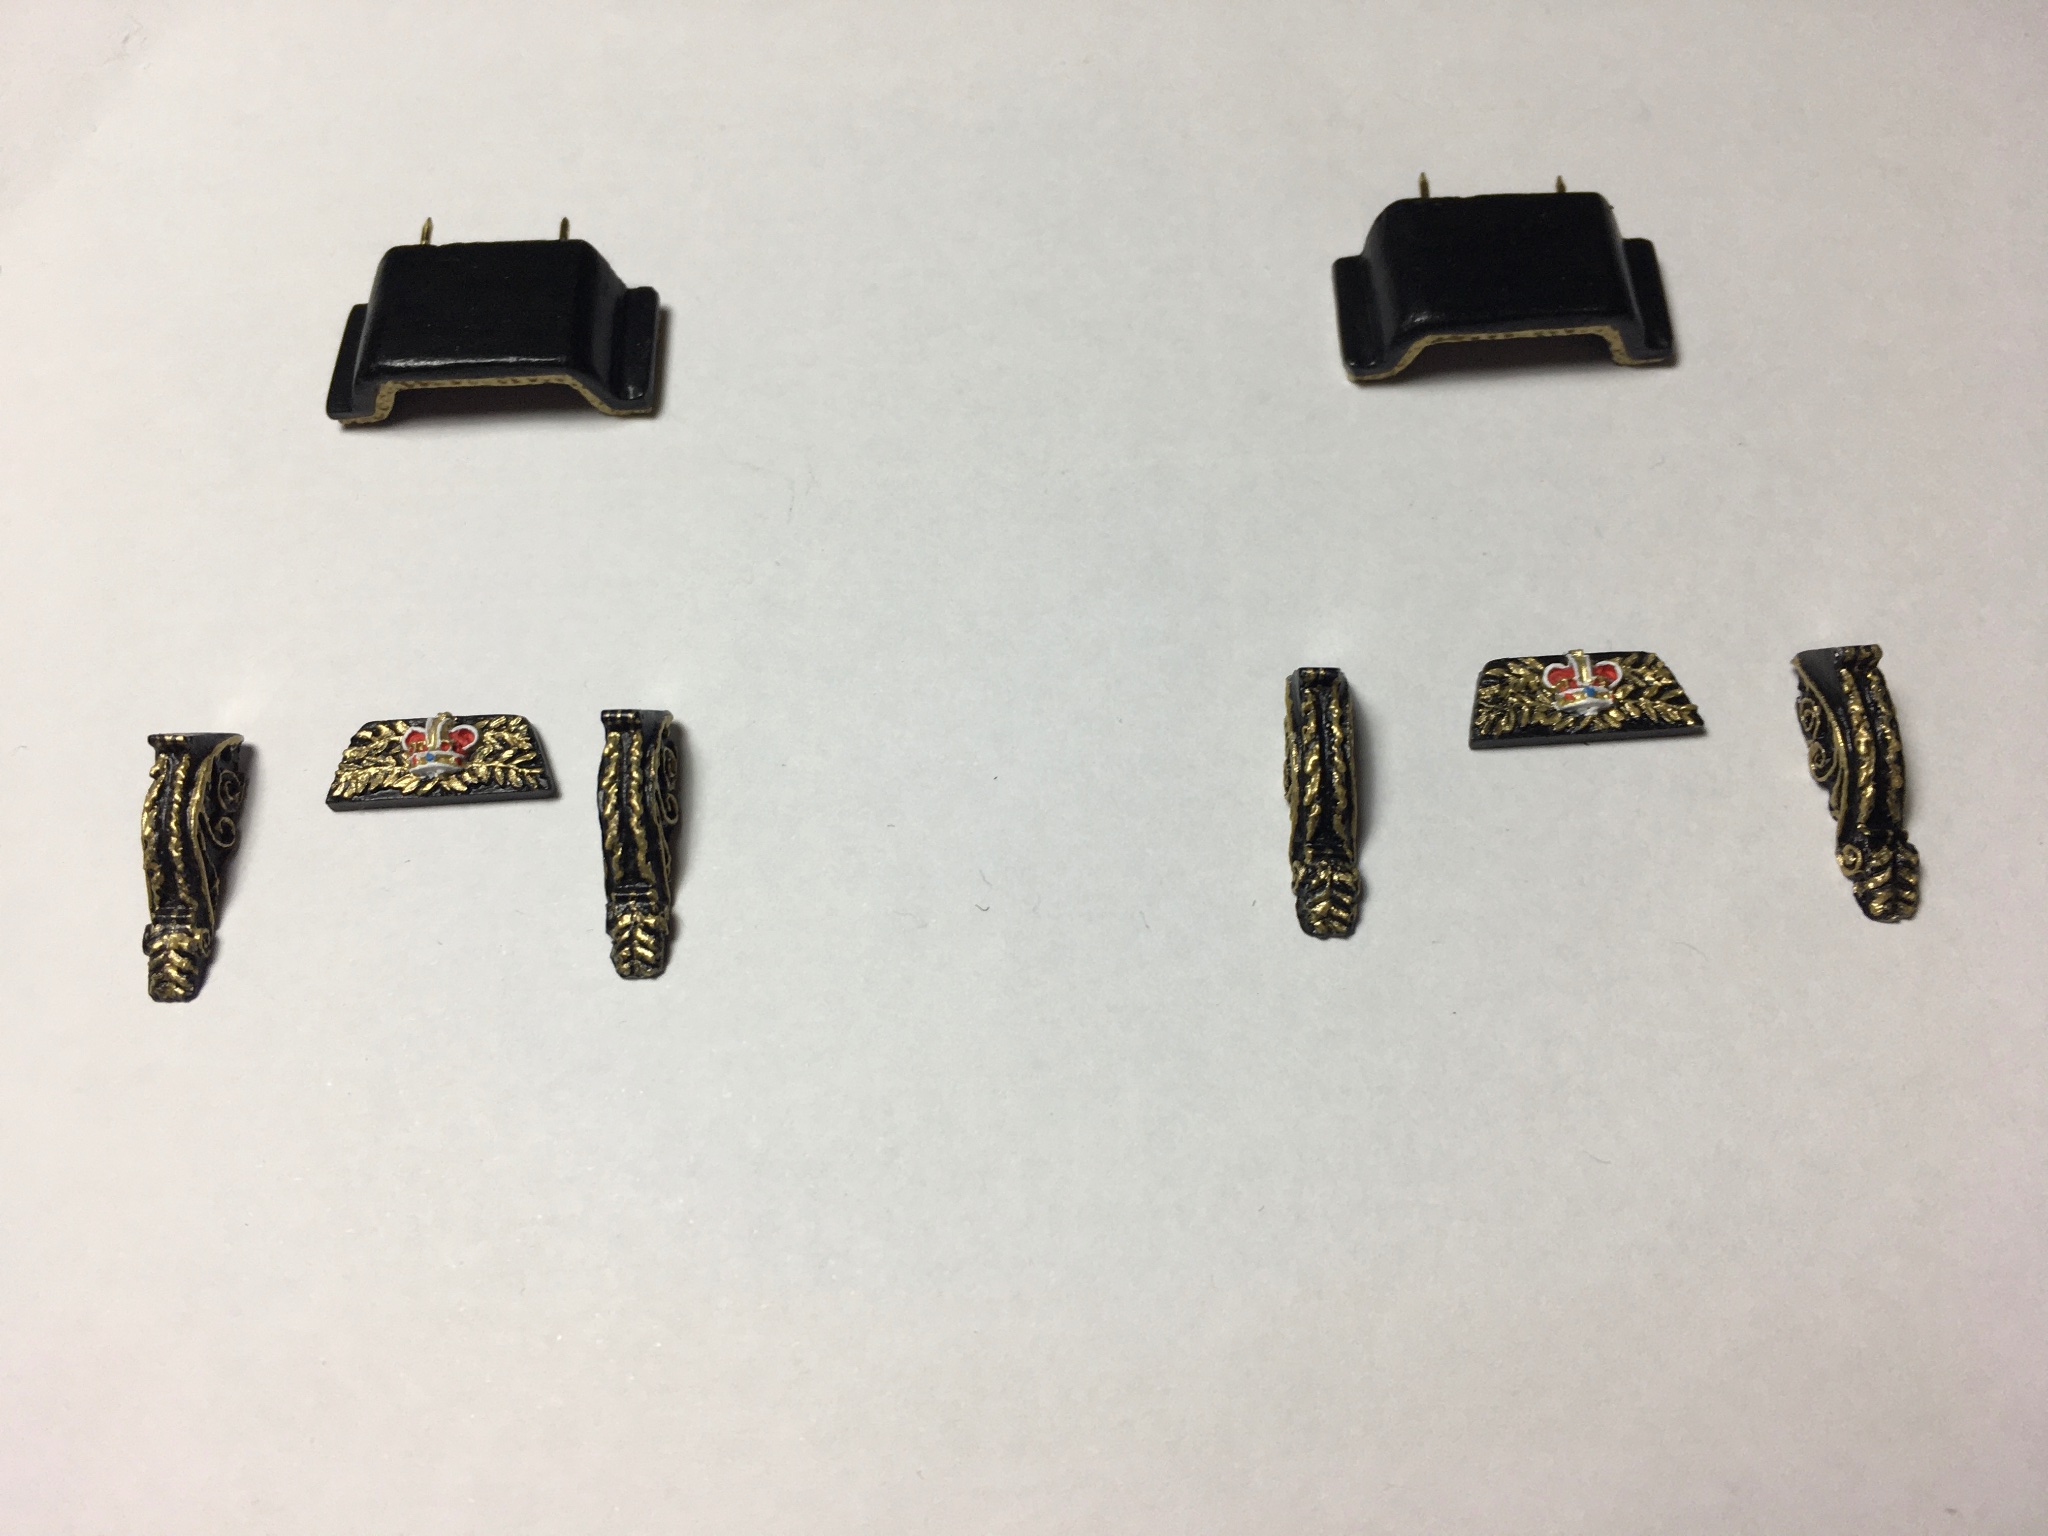
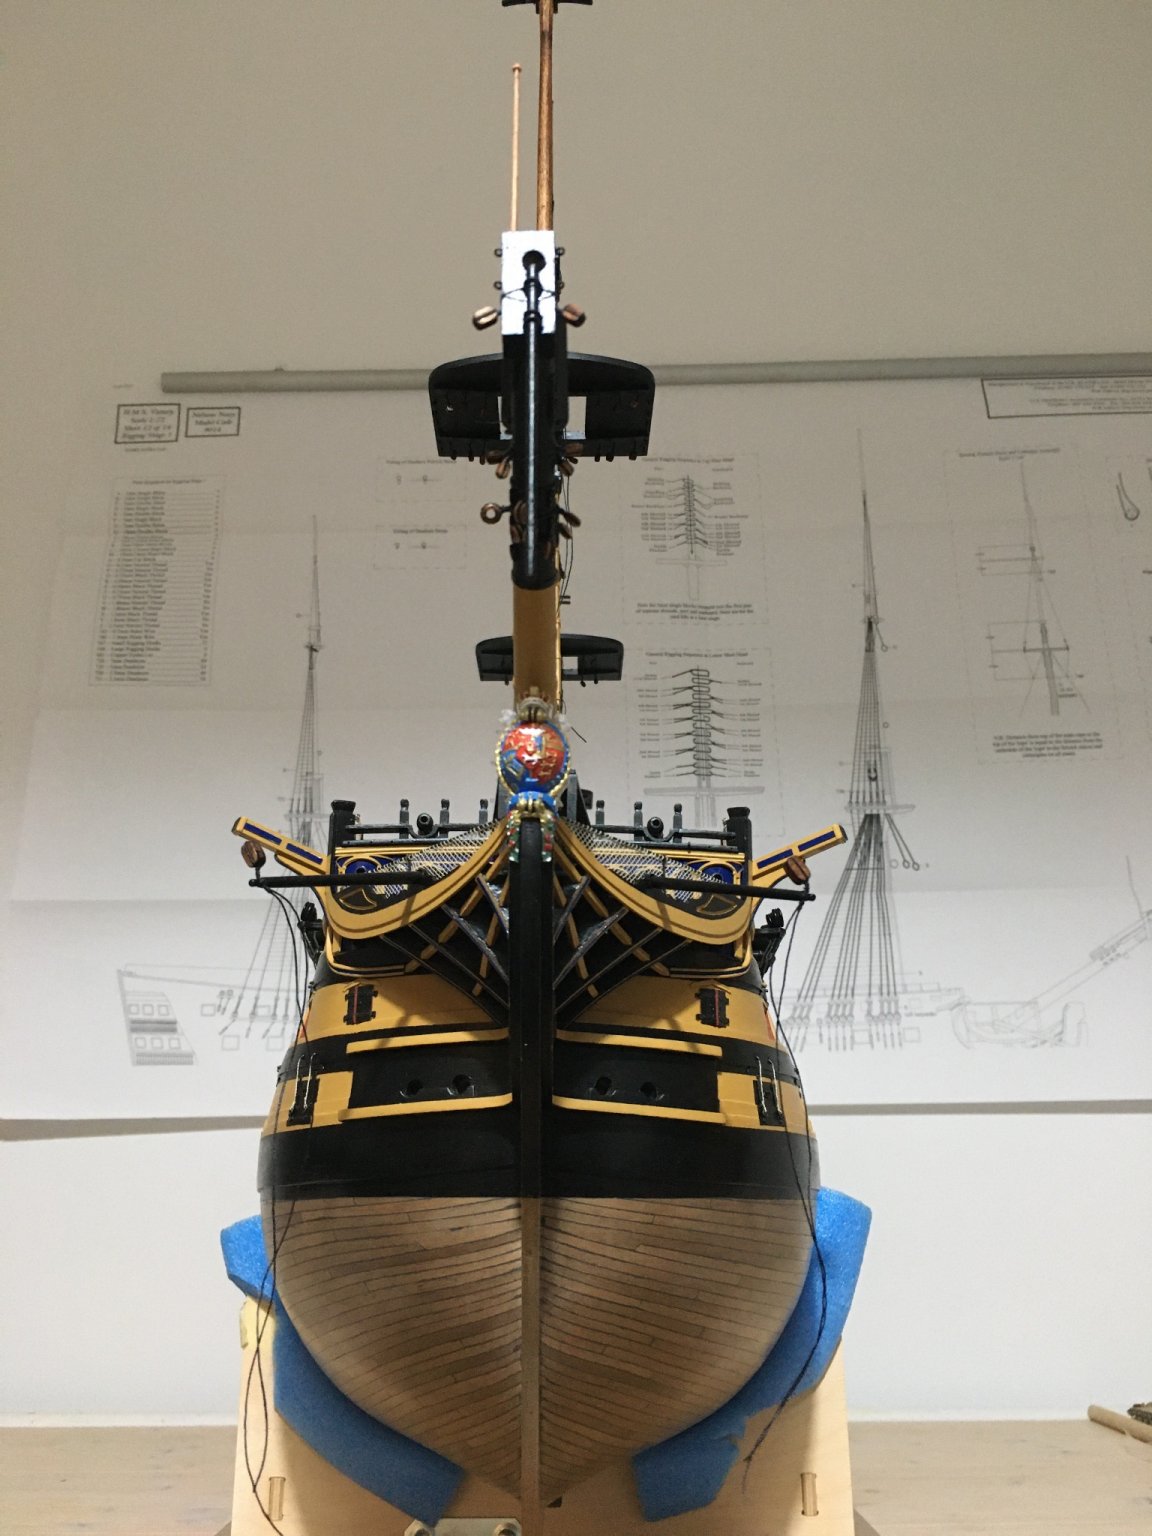
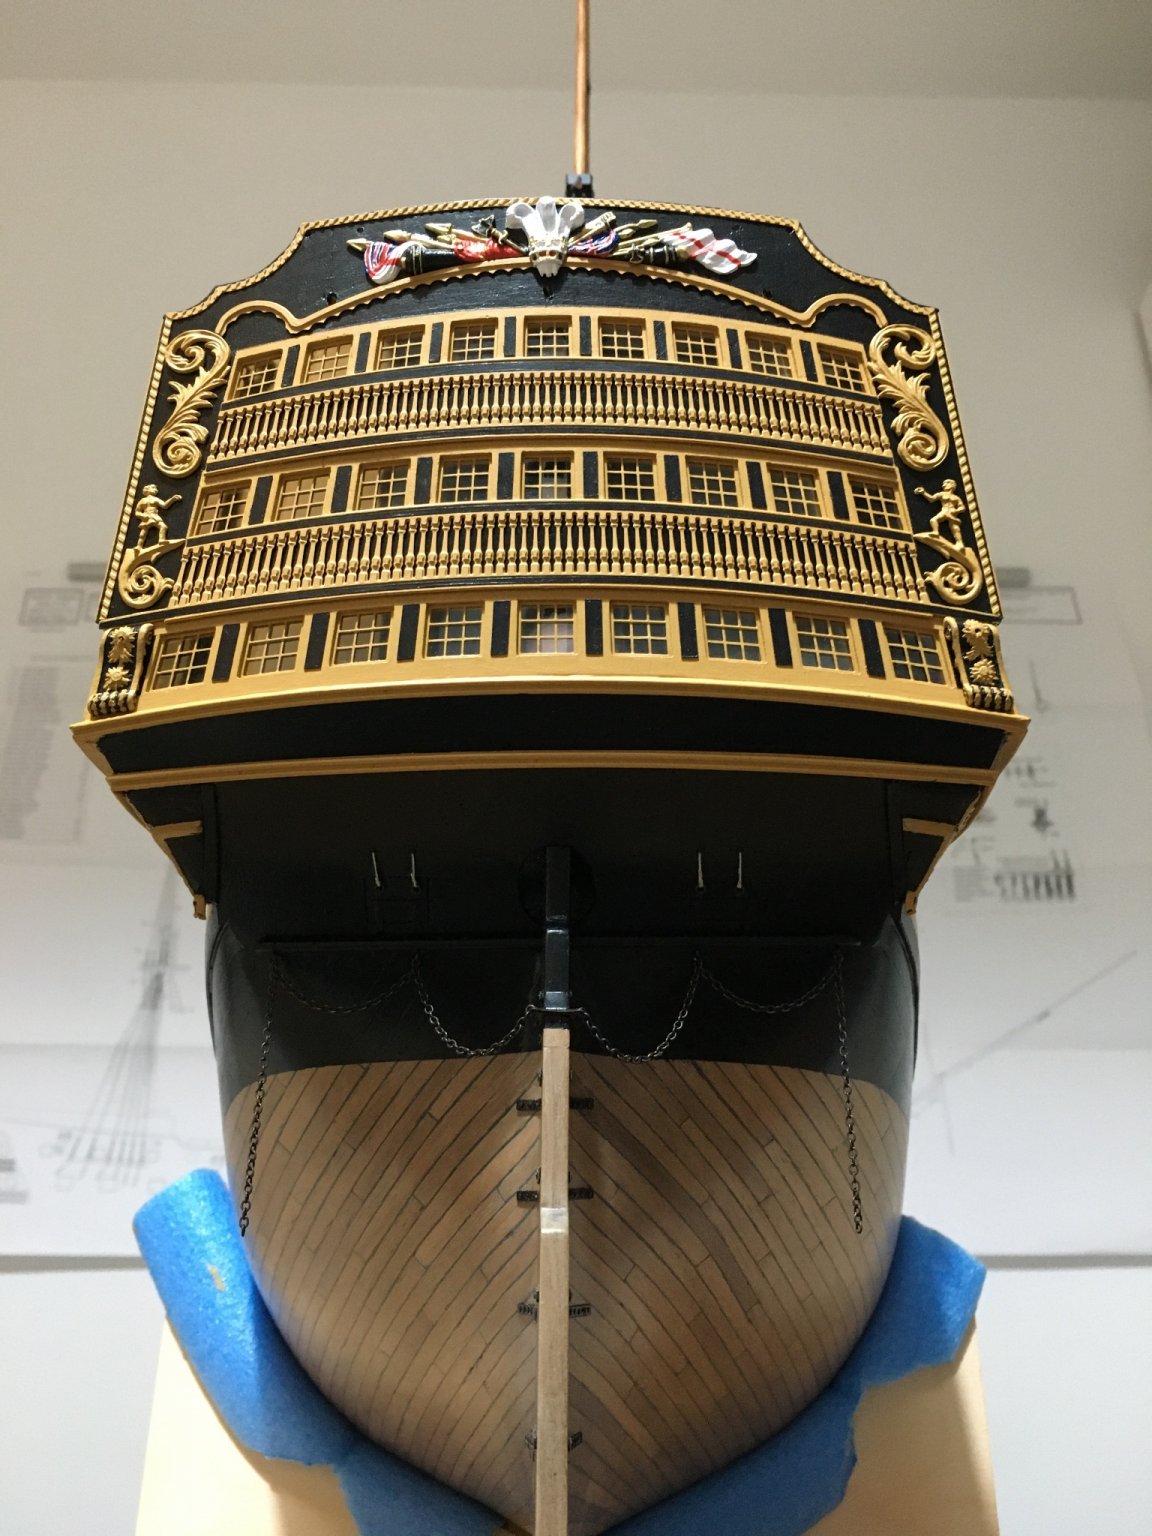
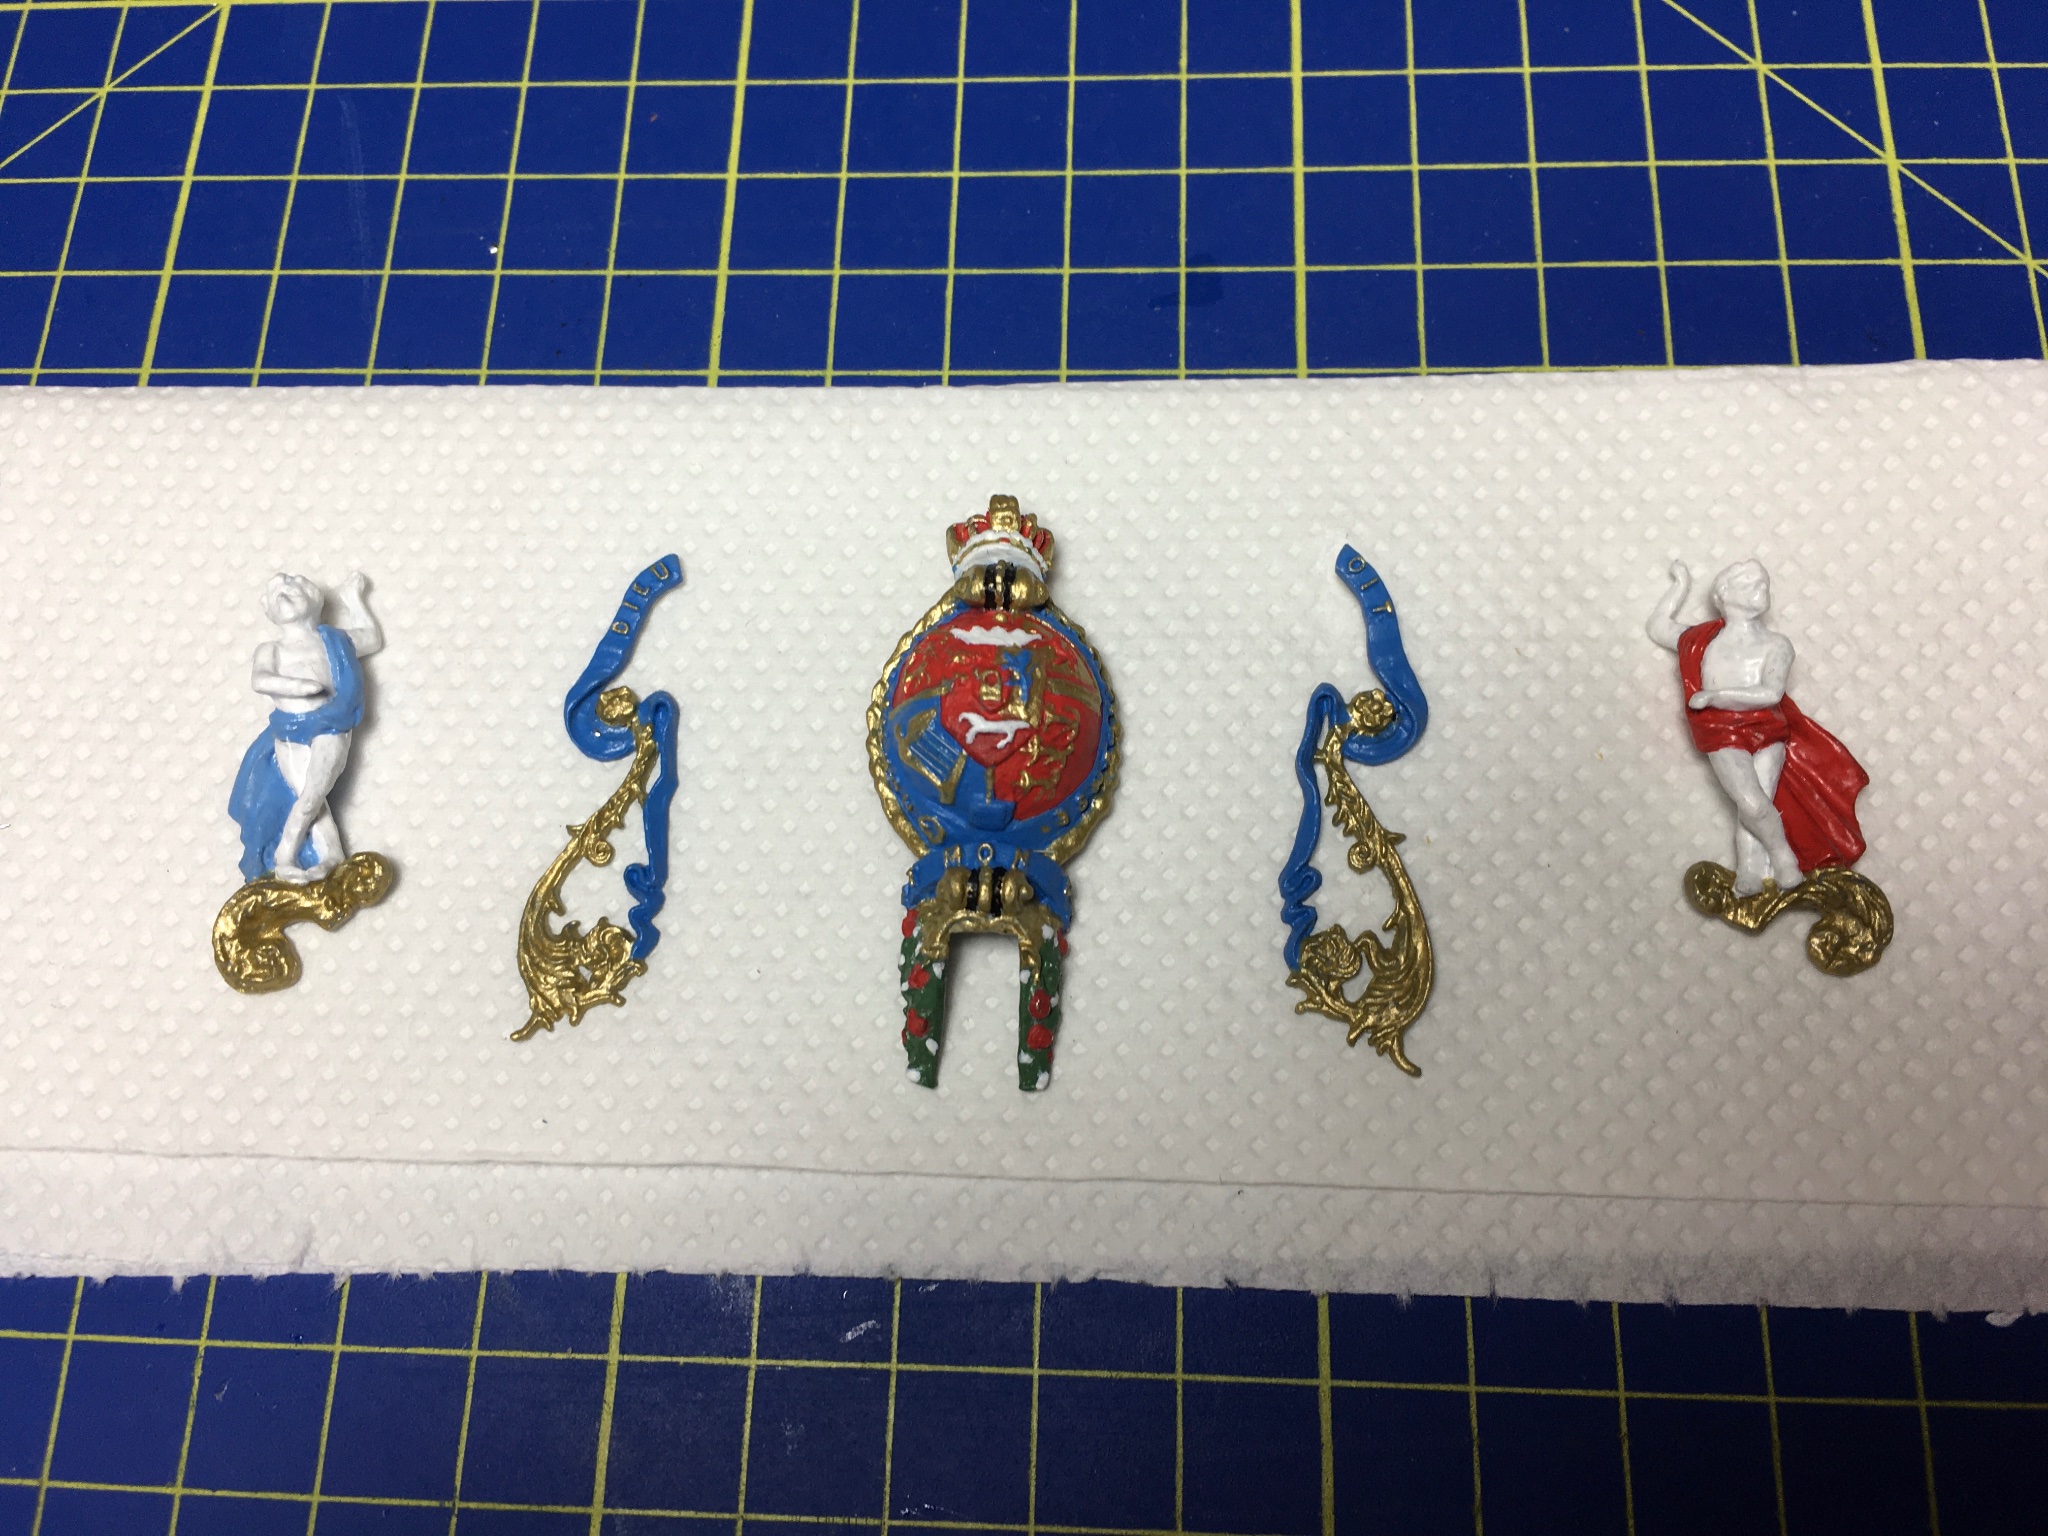
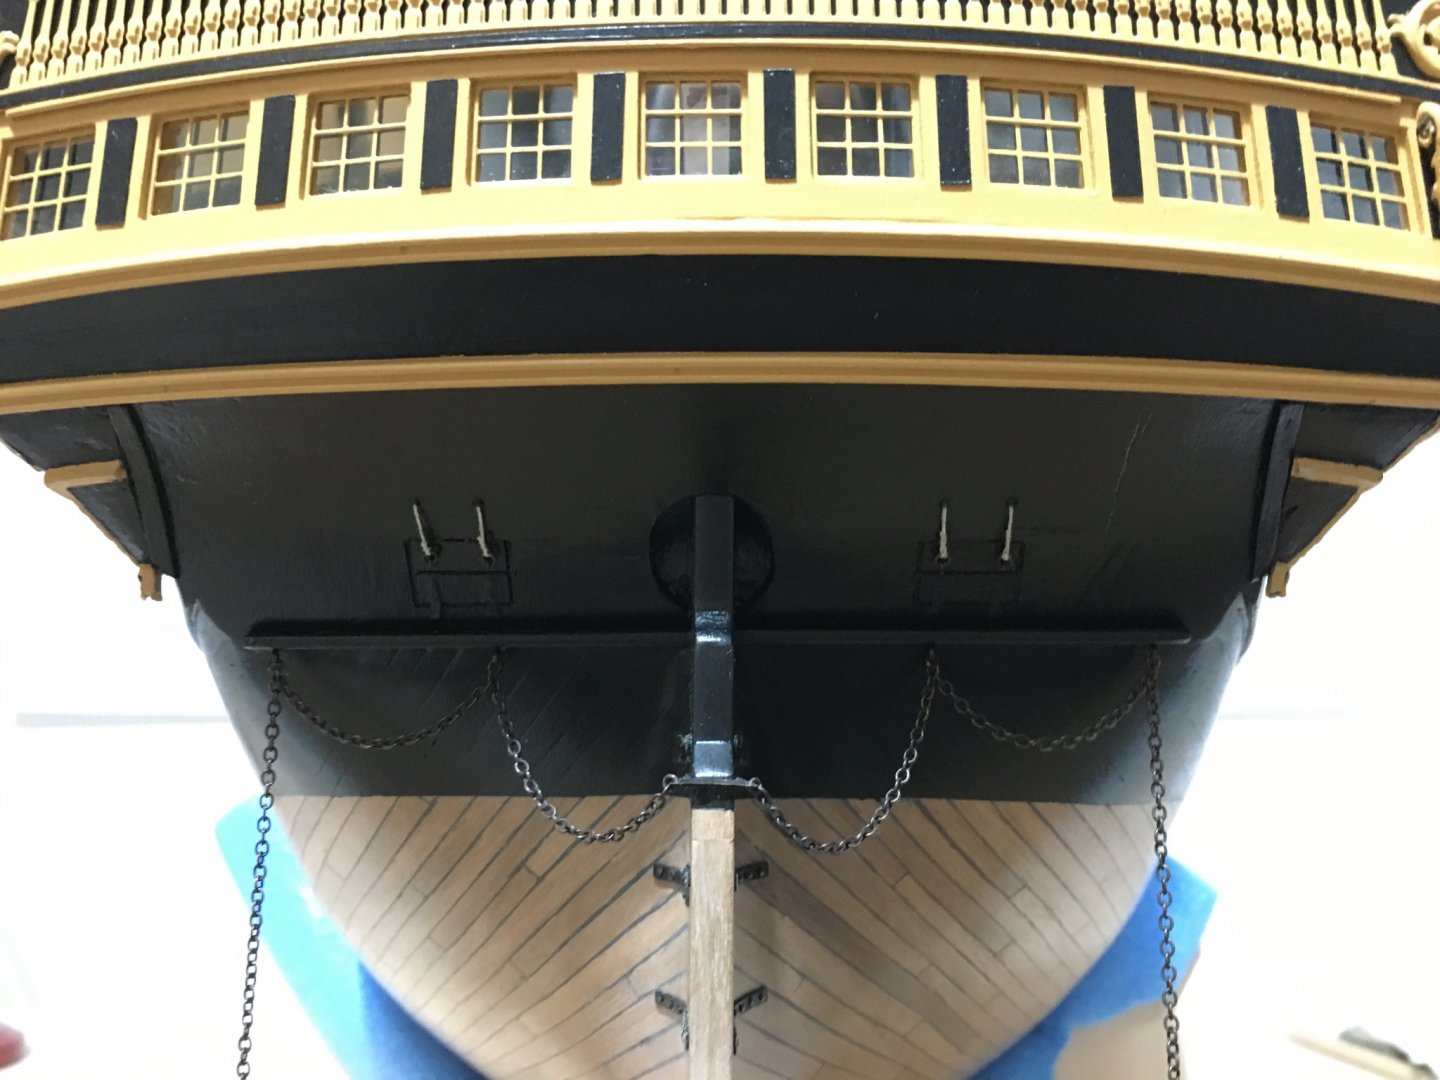
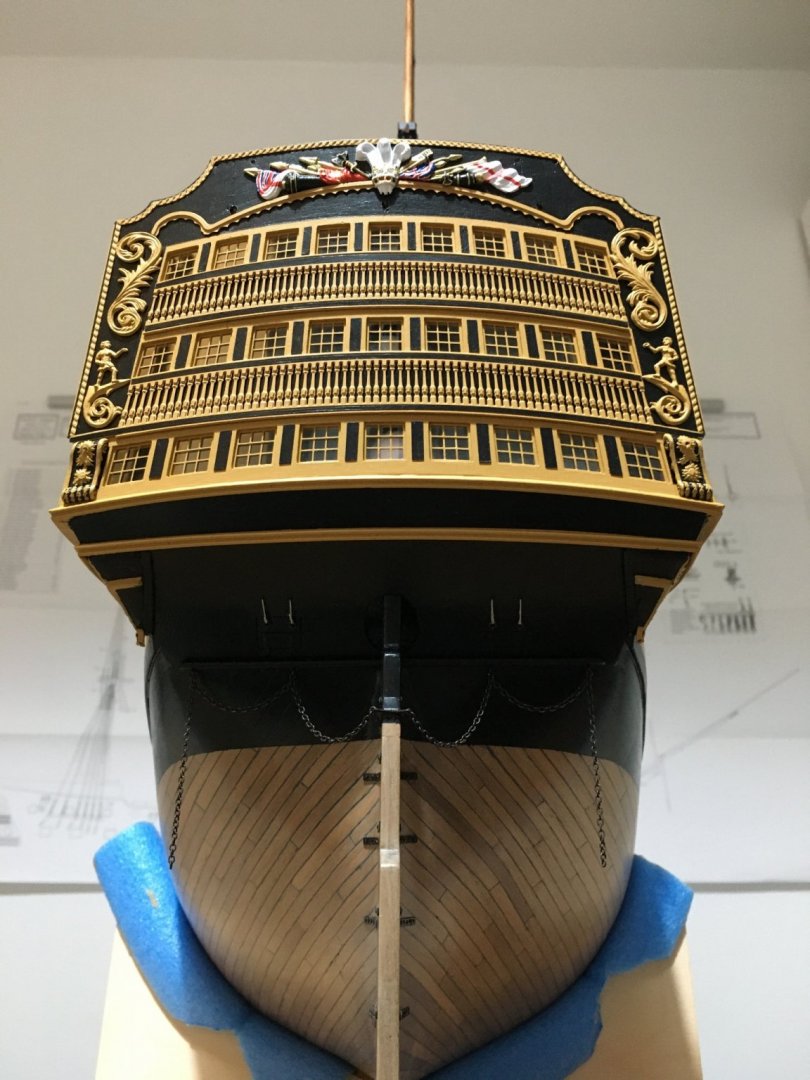
Eamonn, Roberts and Michael, thank you for your comments. I have a small update. Painted and fitted the stern trophy of arms. Also fitted the chain under the stern. I am not much of an artist, took me a long time to paint and retouch. Figurehead painted but I will not be fitting it for now. I will first do some further work on the bow first. I have prepared the railings on the bow. They are only dry fitted for now. My aim is to prepare the parts that go on the bow so that when I start fitting them I do not have to stay measuring, trying fits and so on, they will be ready and just fit in place, thus avoiding damaging parts already fitted. My next step is to fit the bowsprit, which is already prepared, do the gammoning, and when that is ready start fitting the parts on the bow plus the figurehead. I am still undecided which name plate to use on the lower part of the stern. With the kit there is a nameplate as a whole, and there are individual letters which in my opinion look better. The first, of course is much easier to fit, as it is one whole piece, but the latter, apart from the problem that you have to keep them in line and equally spaced, some of the letters are quite fragile. I might have a go at the individual letter. Robert


- 527 replies
-
- 6
-
-
- caldercraft
- victory
- (and 1 more)
-
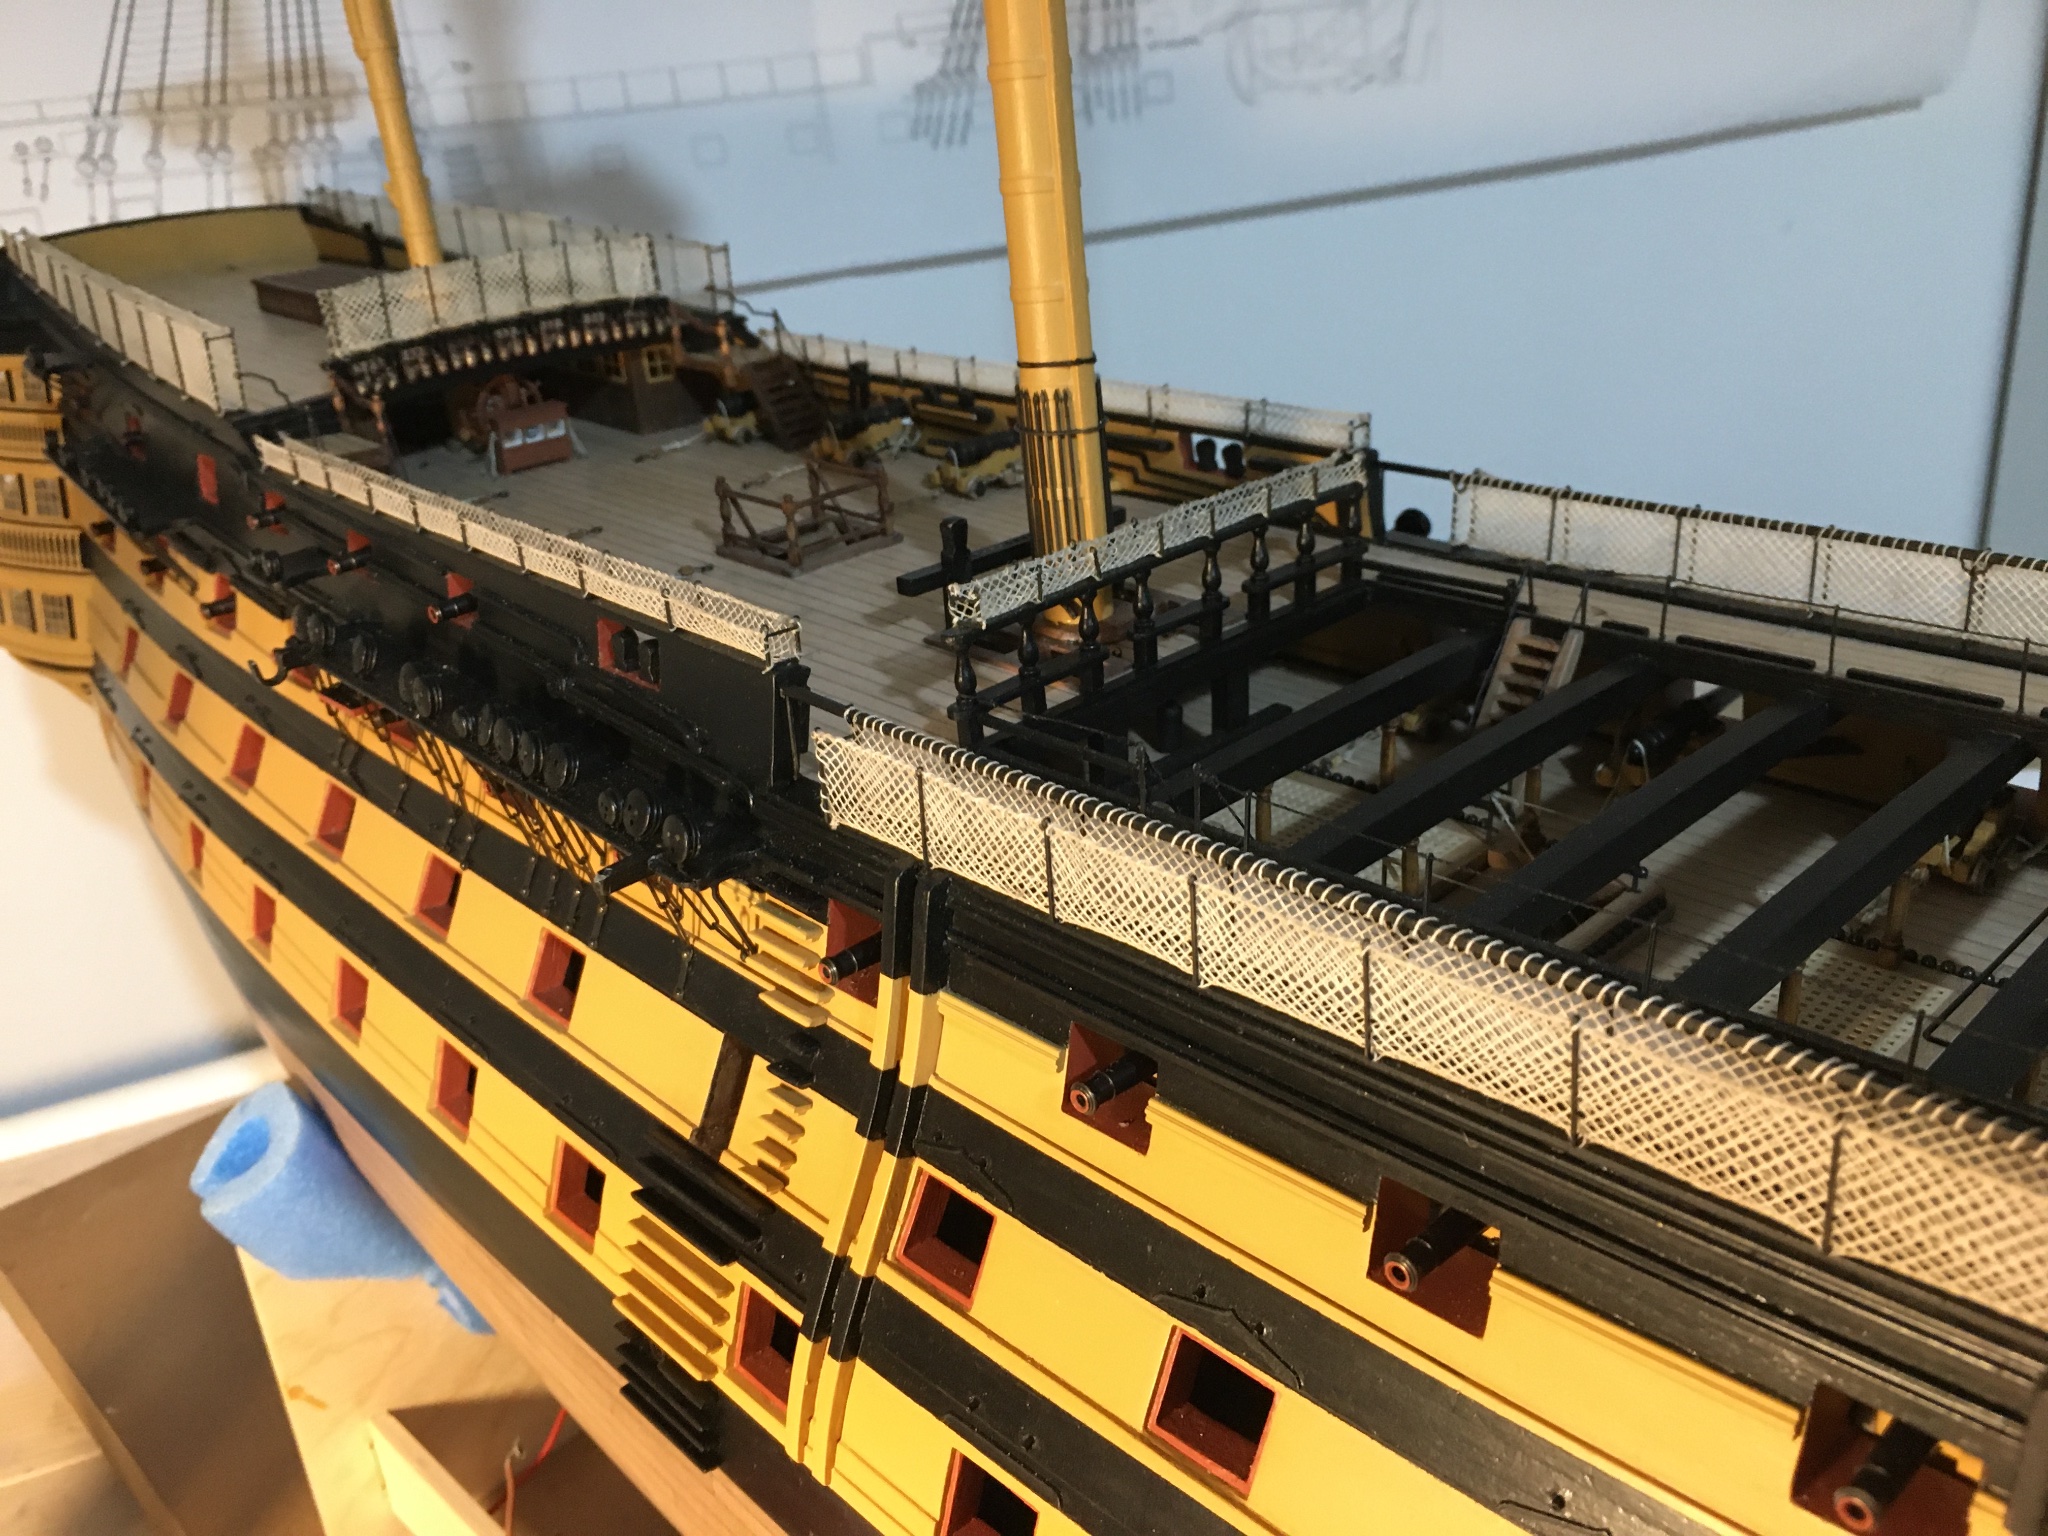
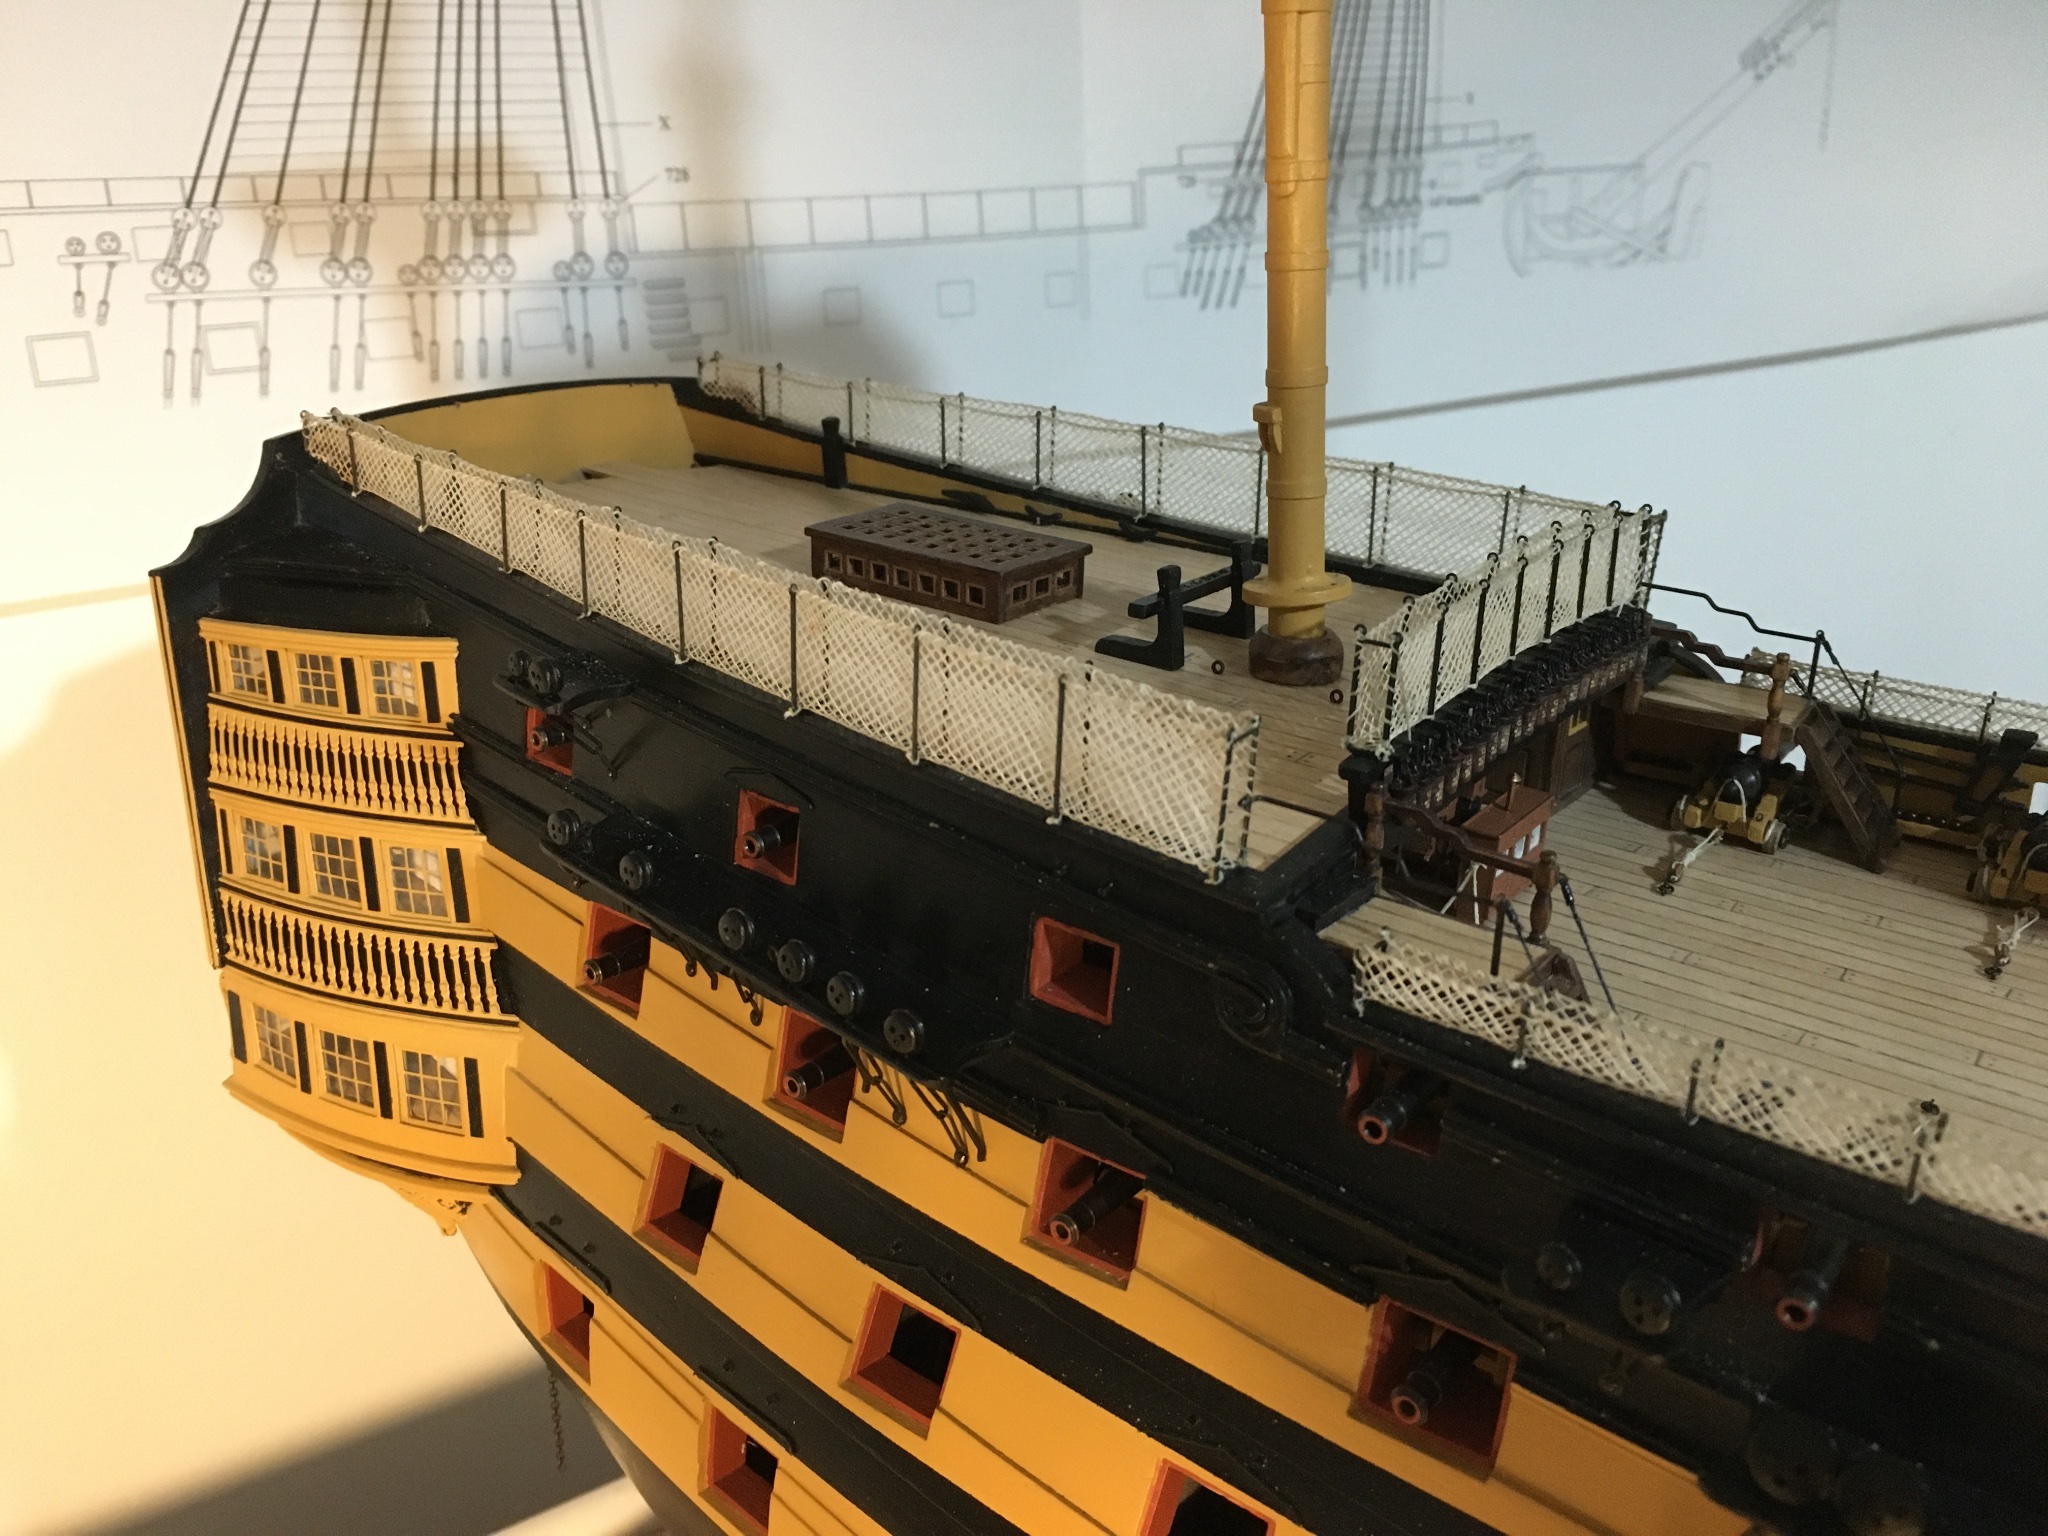
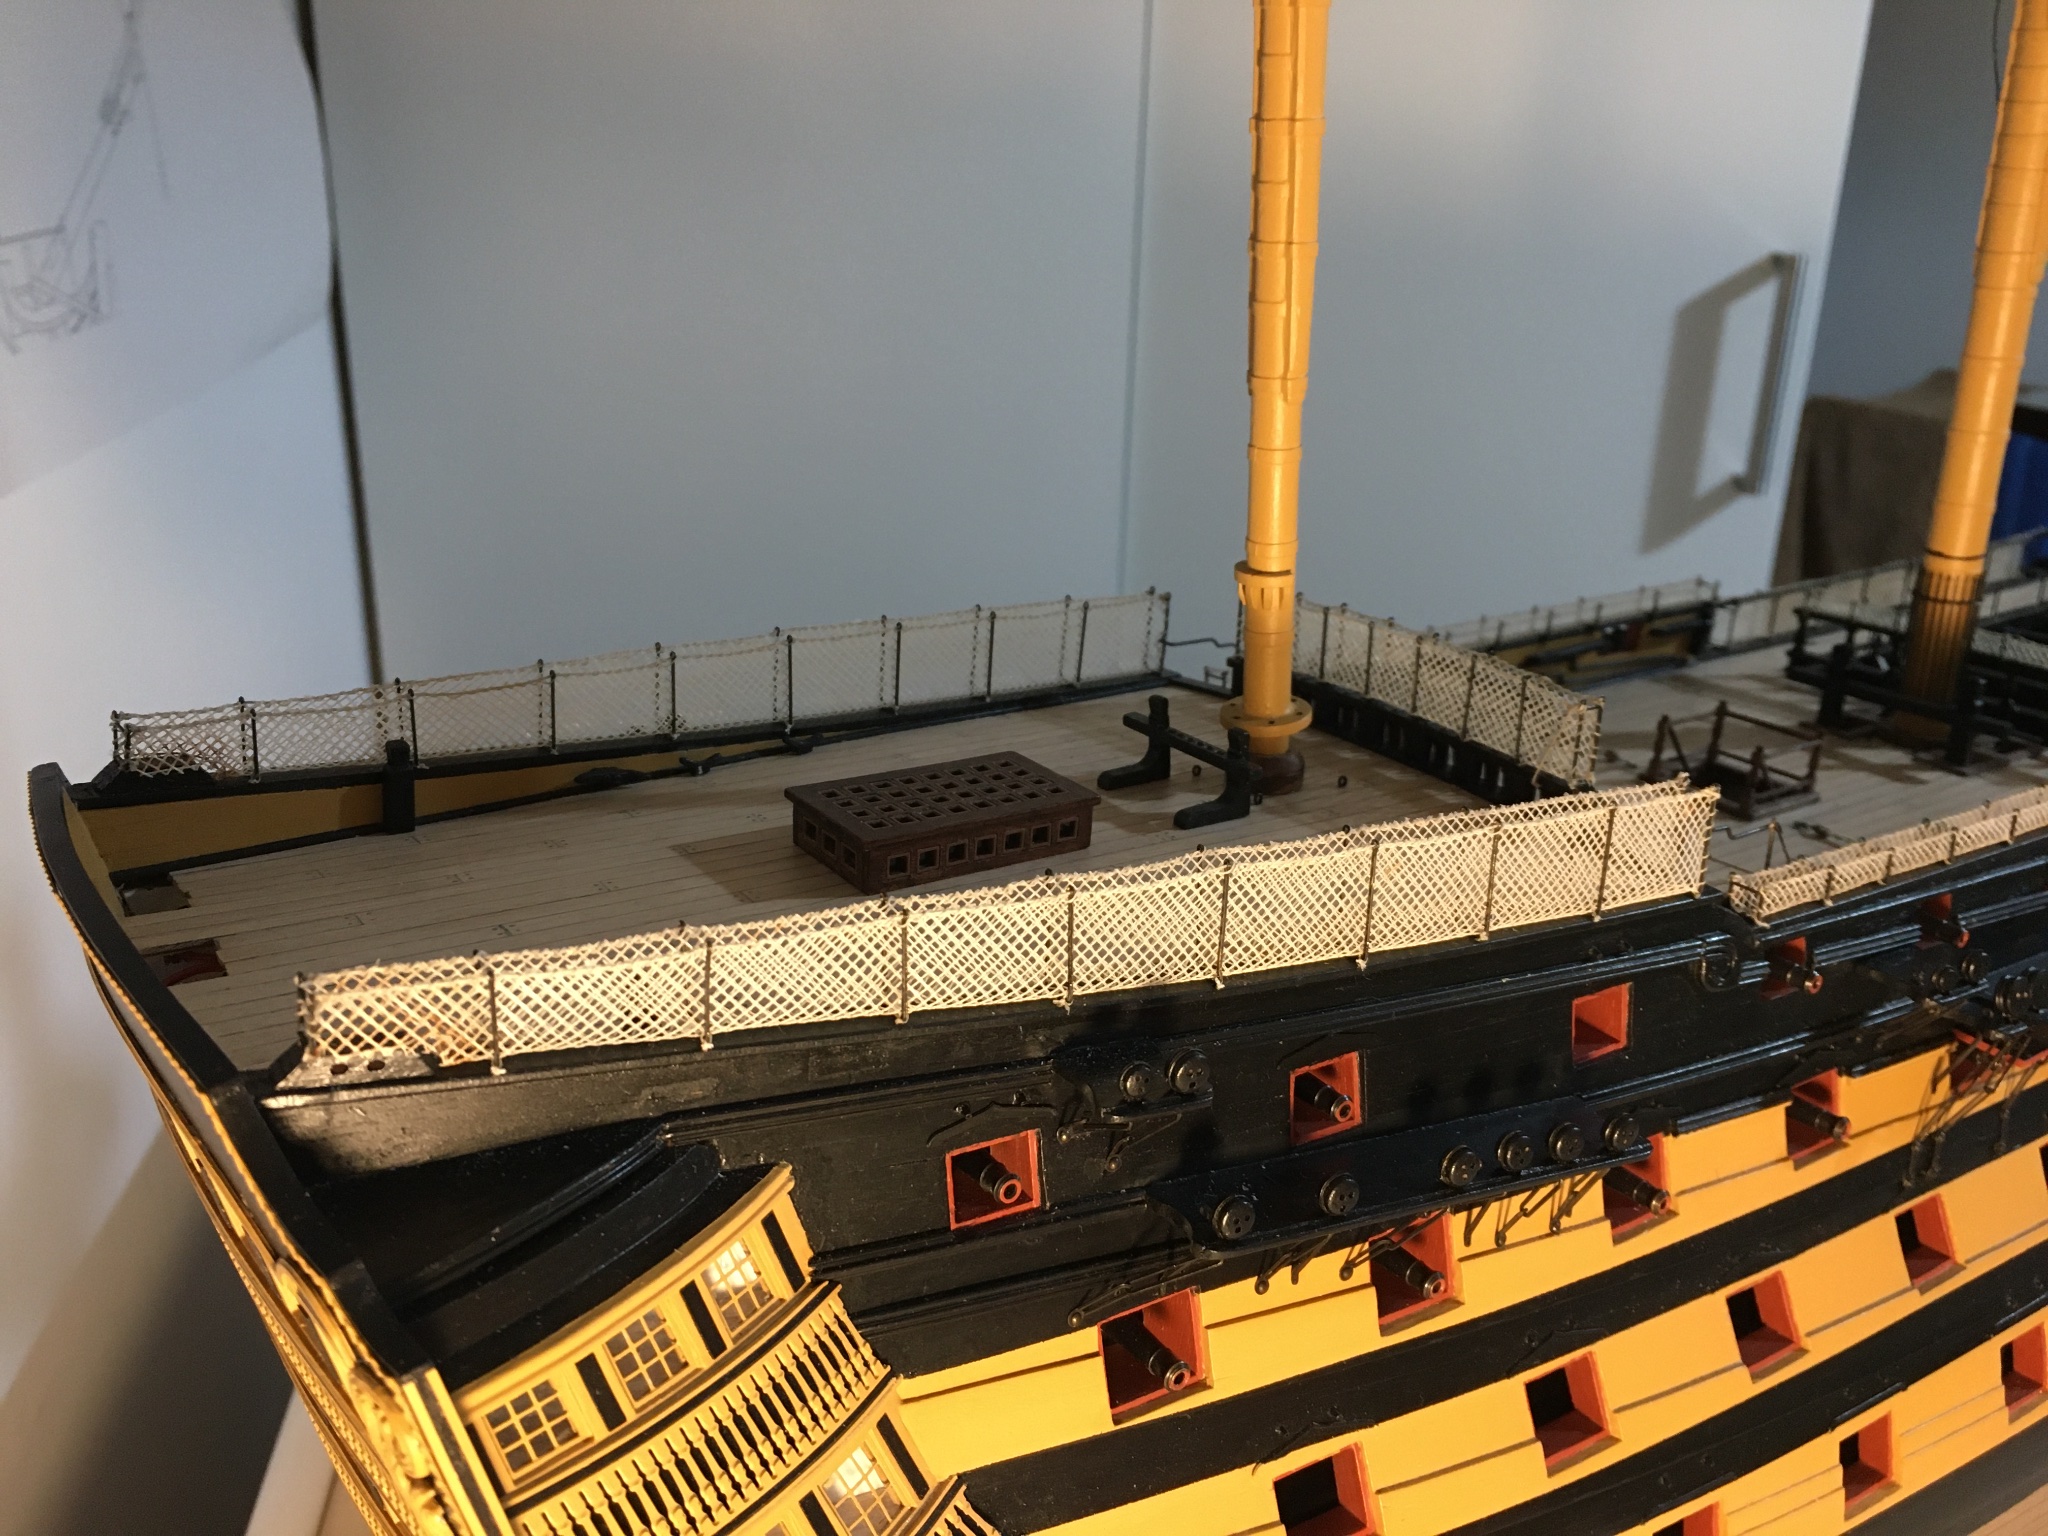
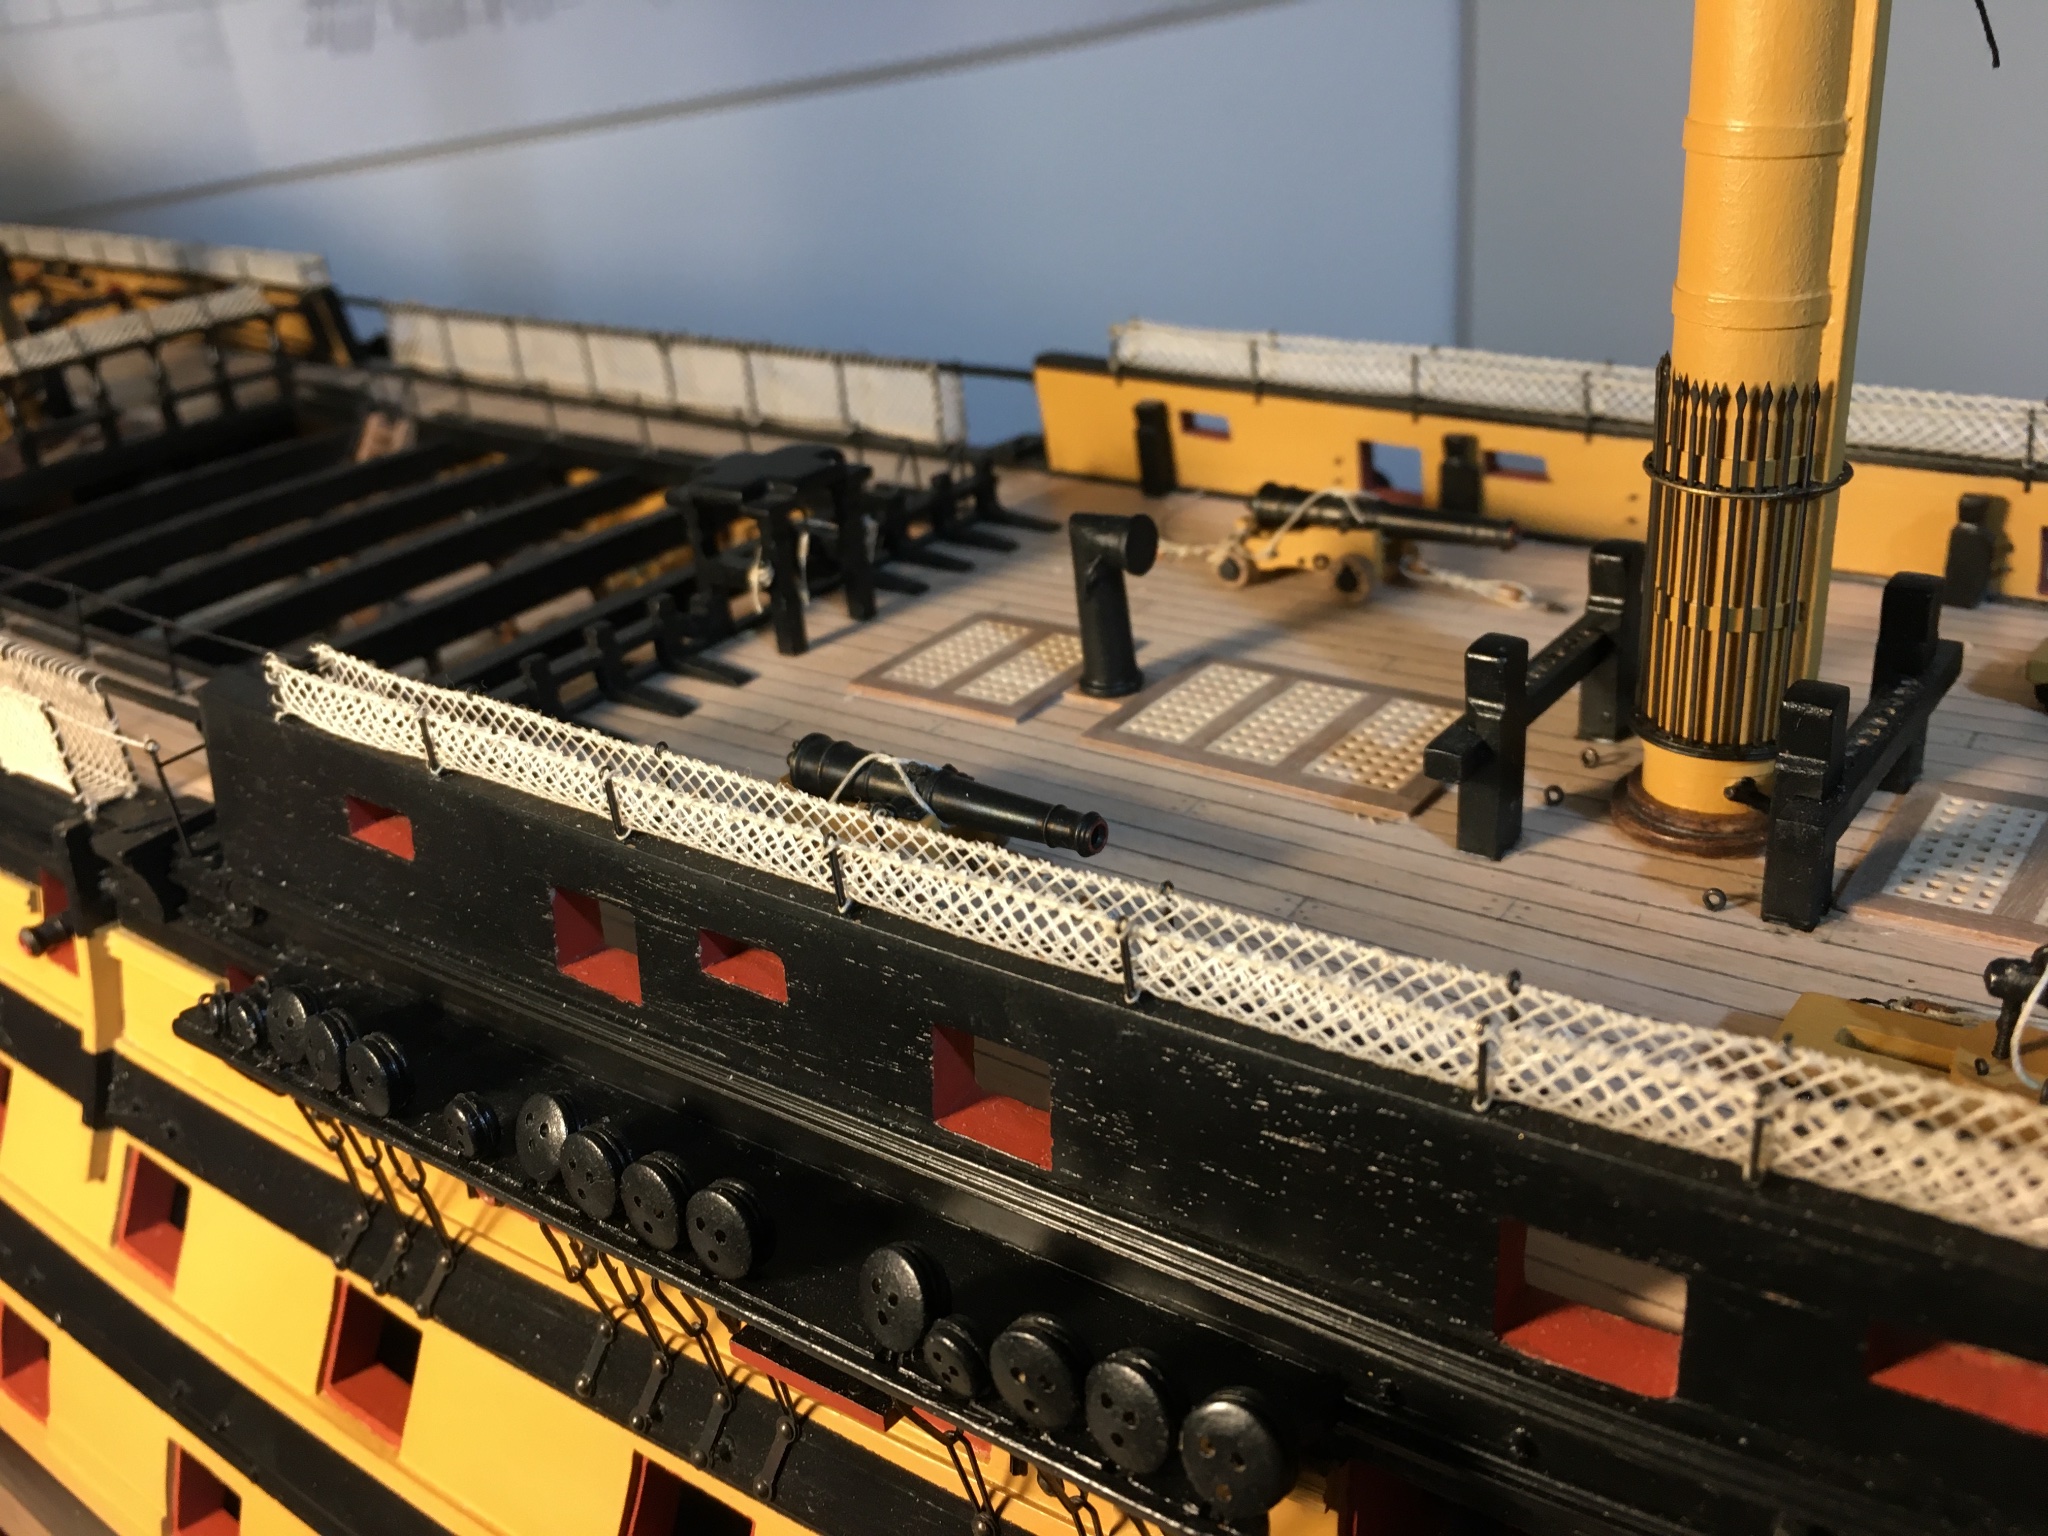
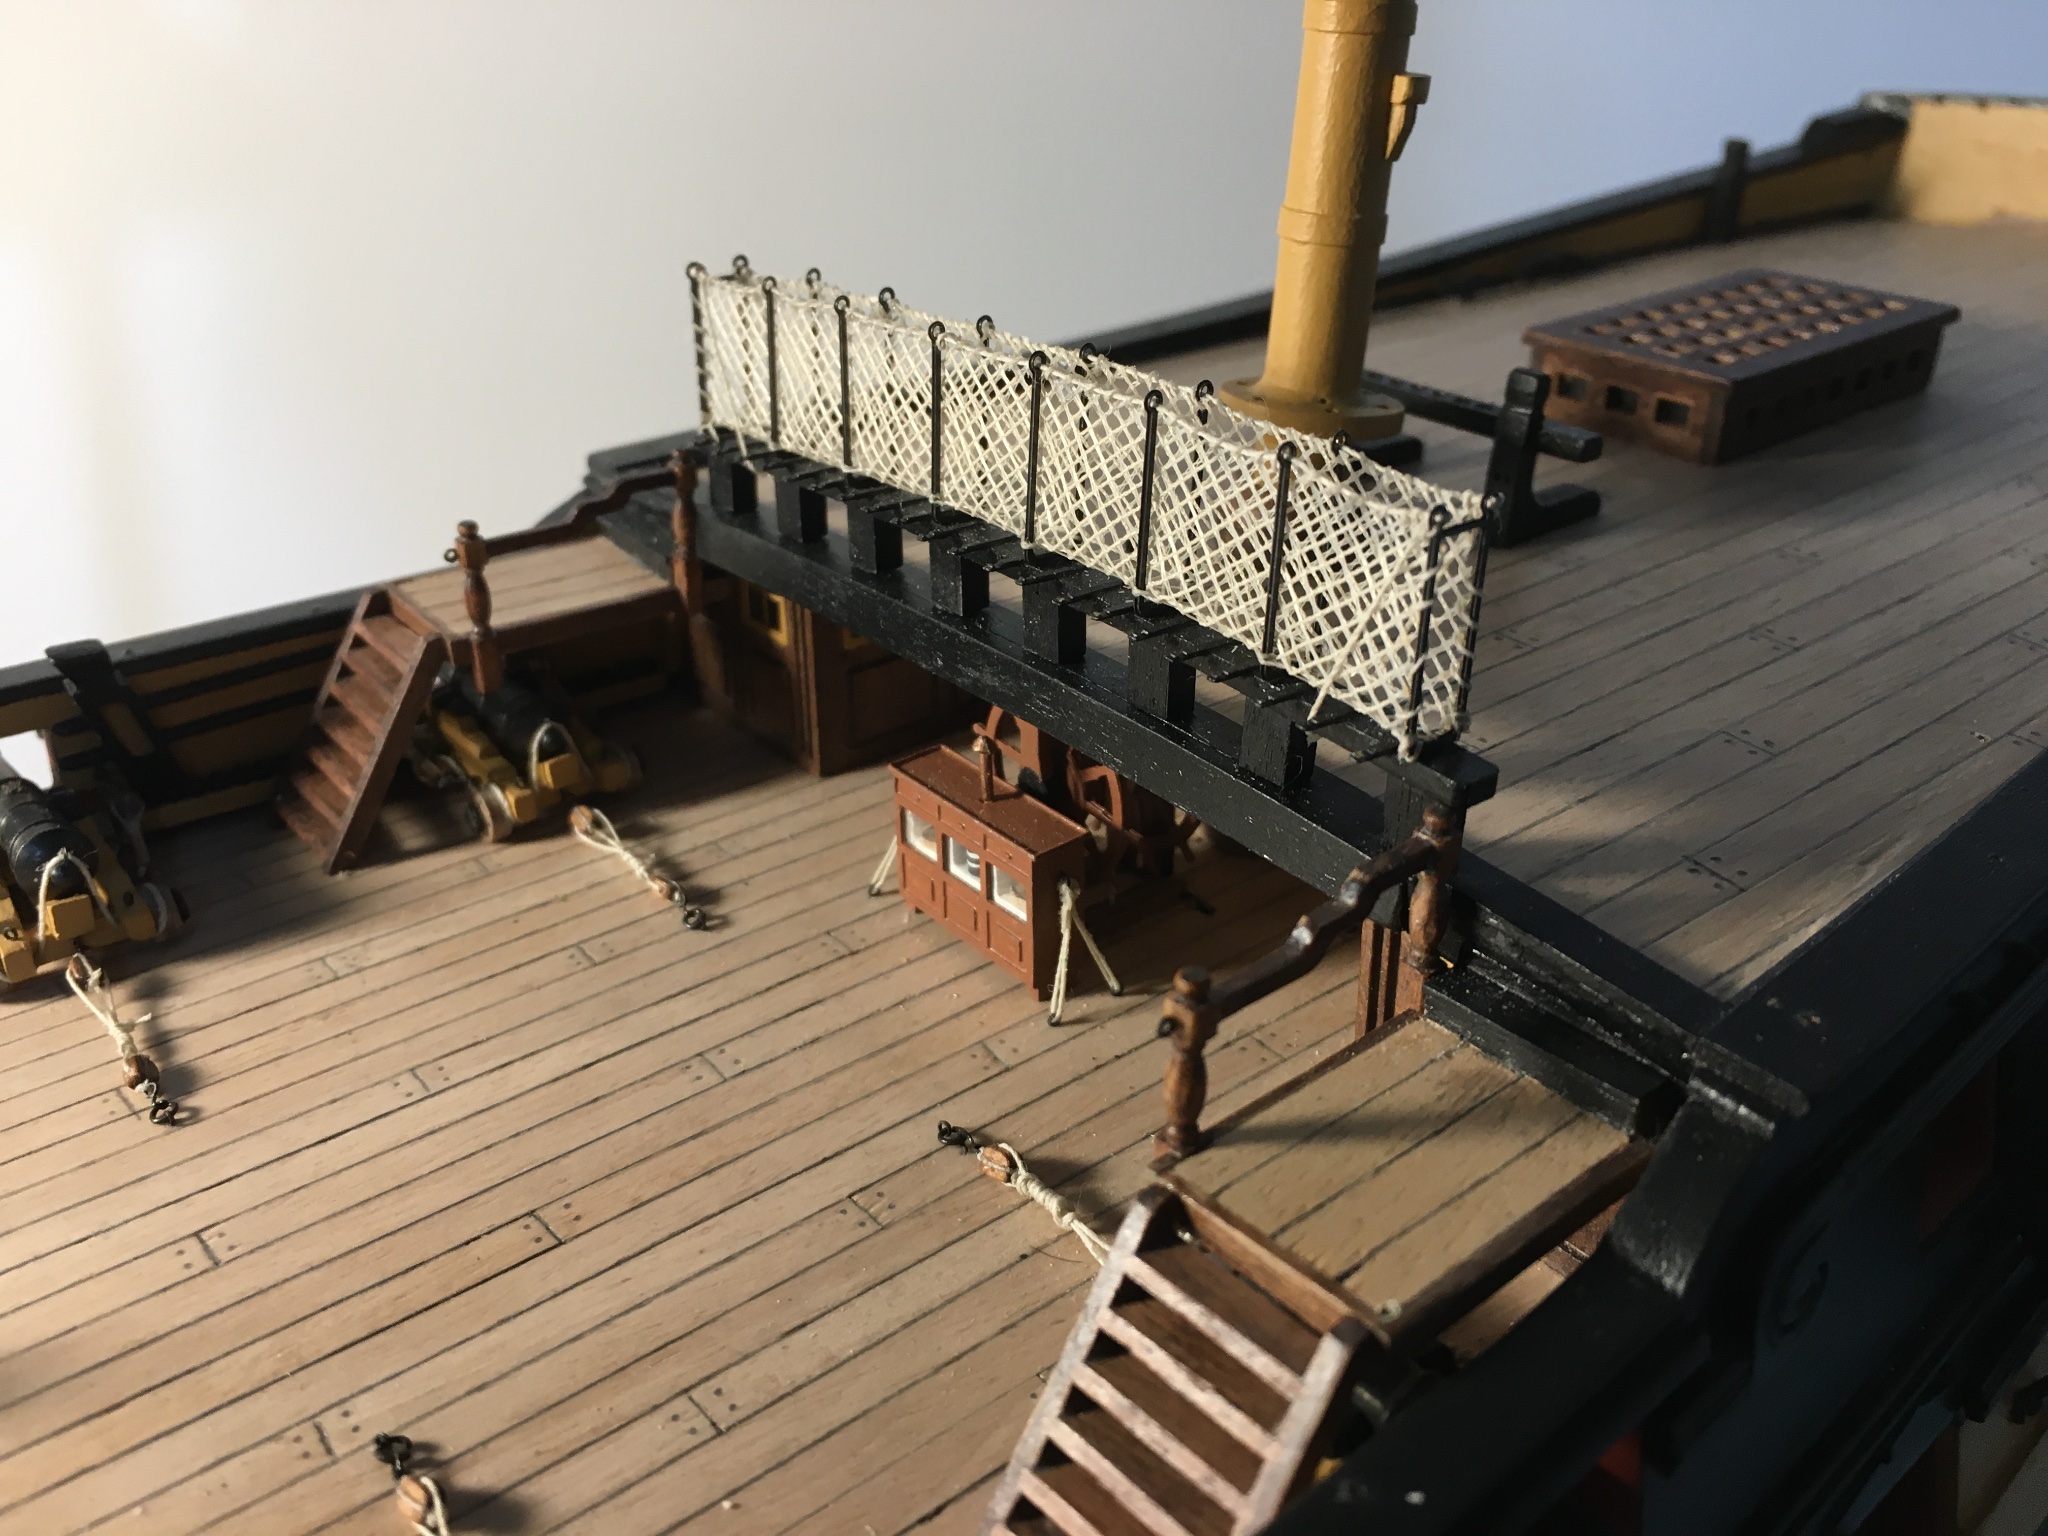
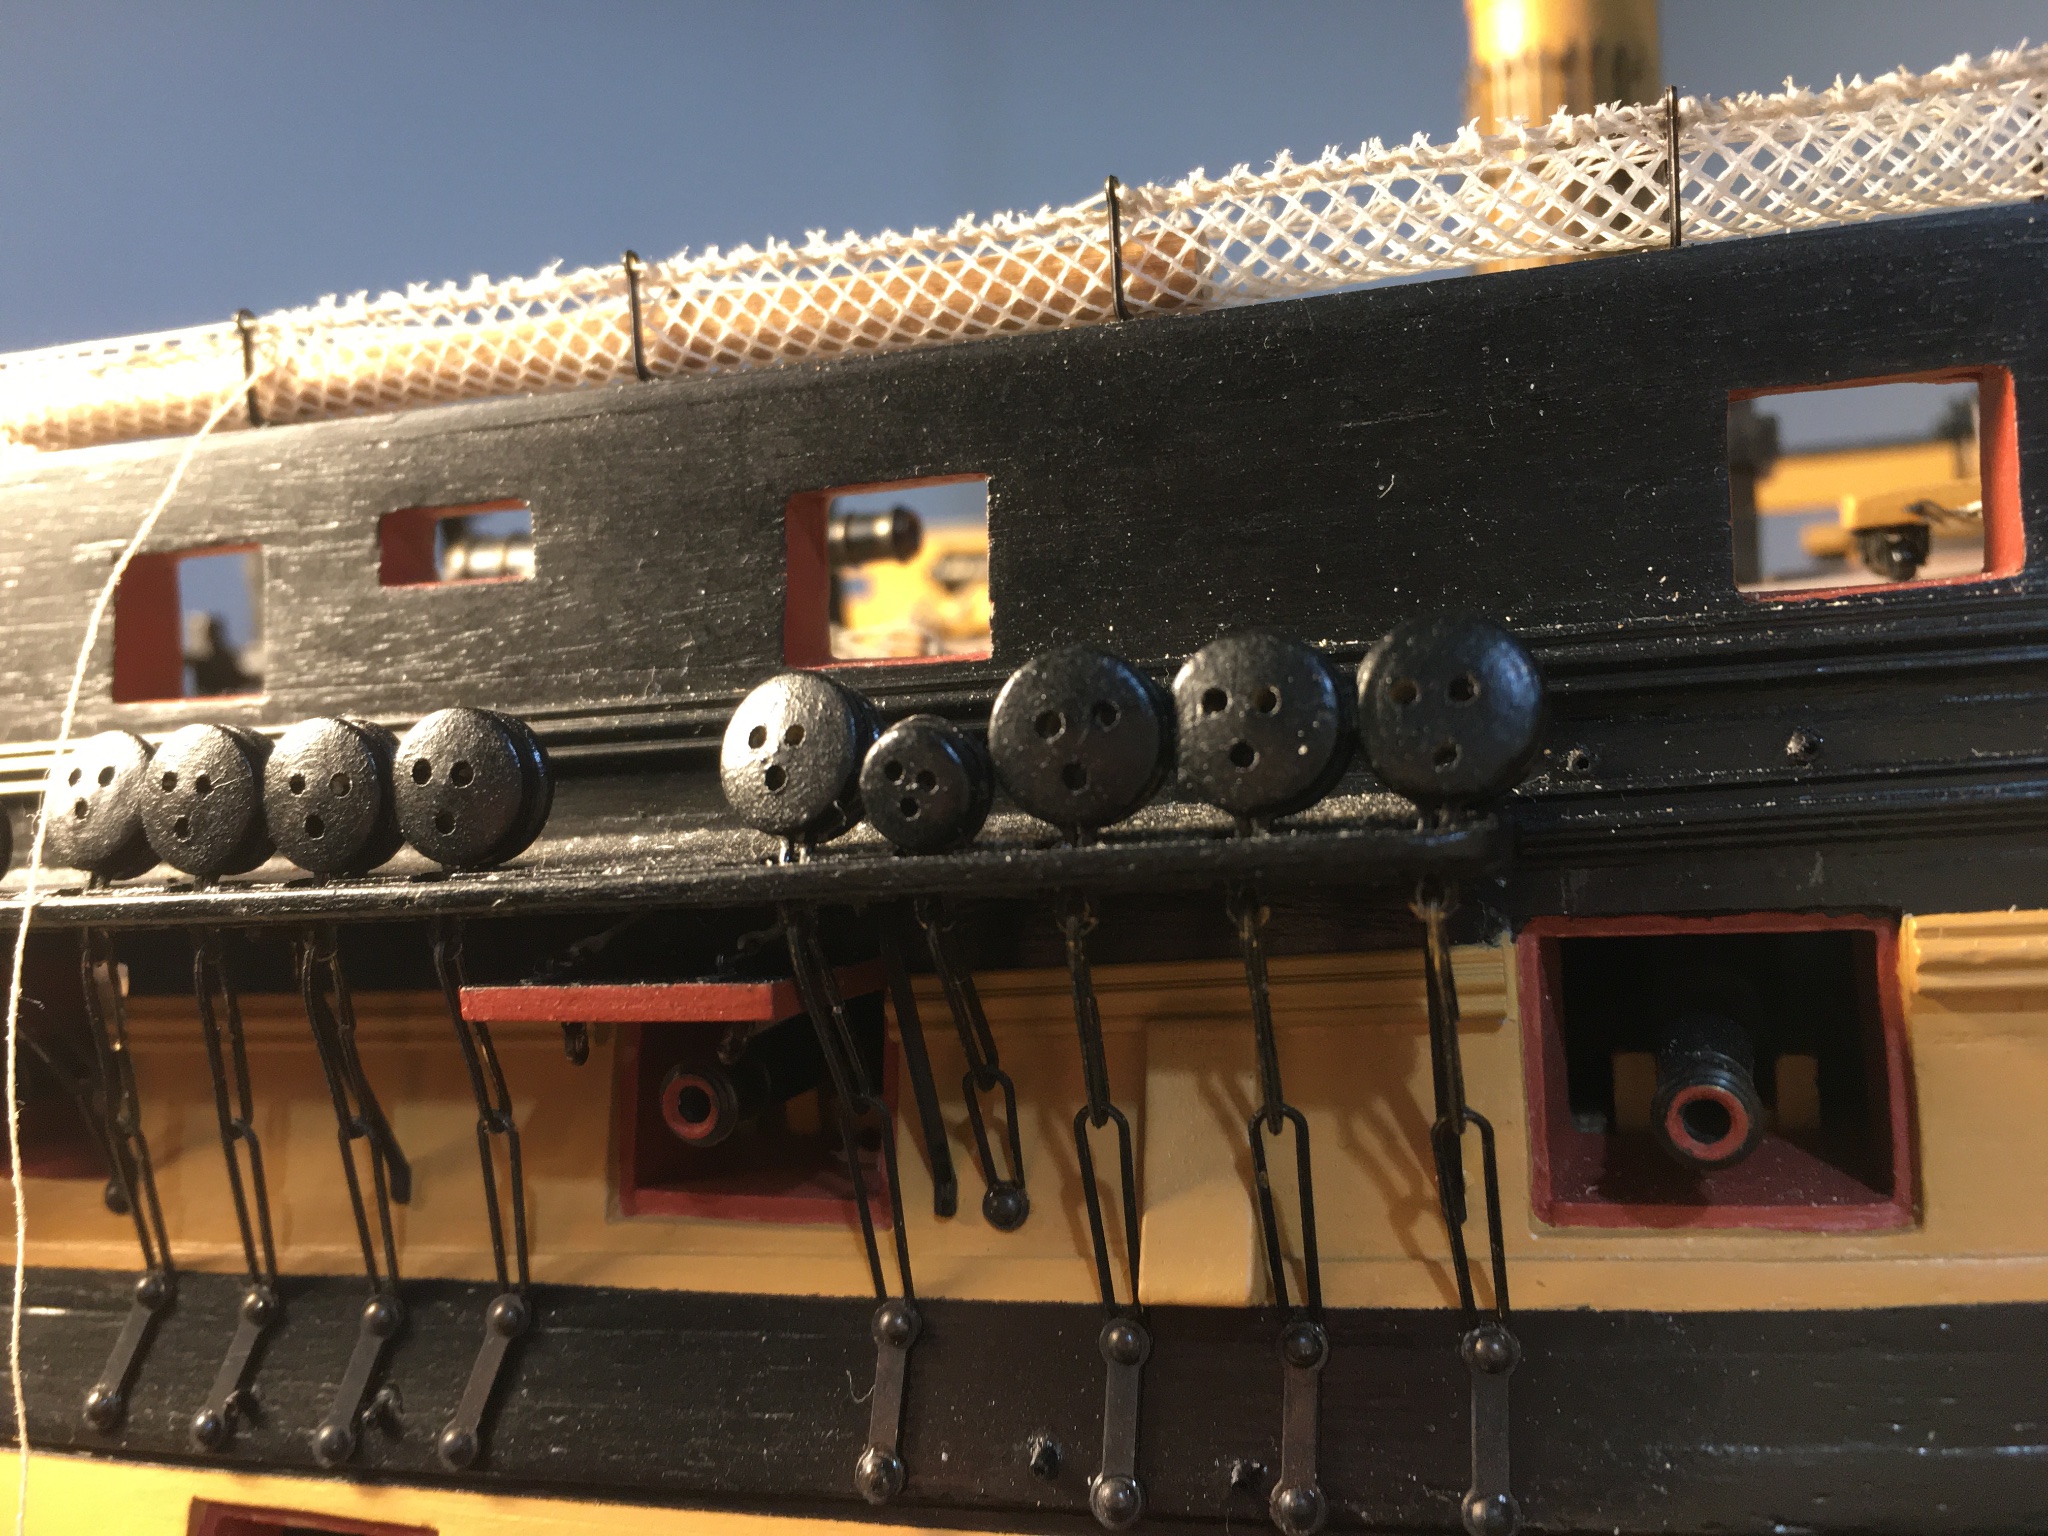
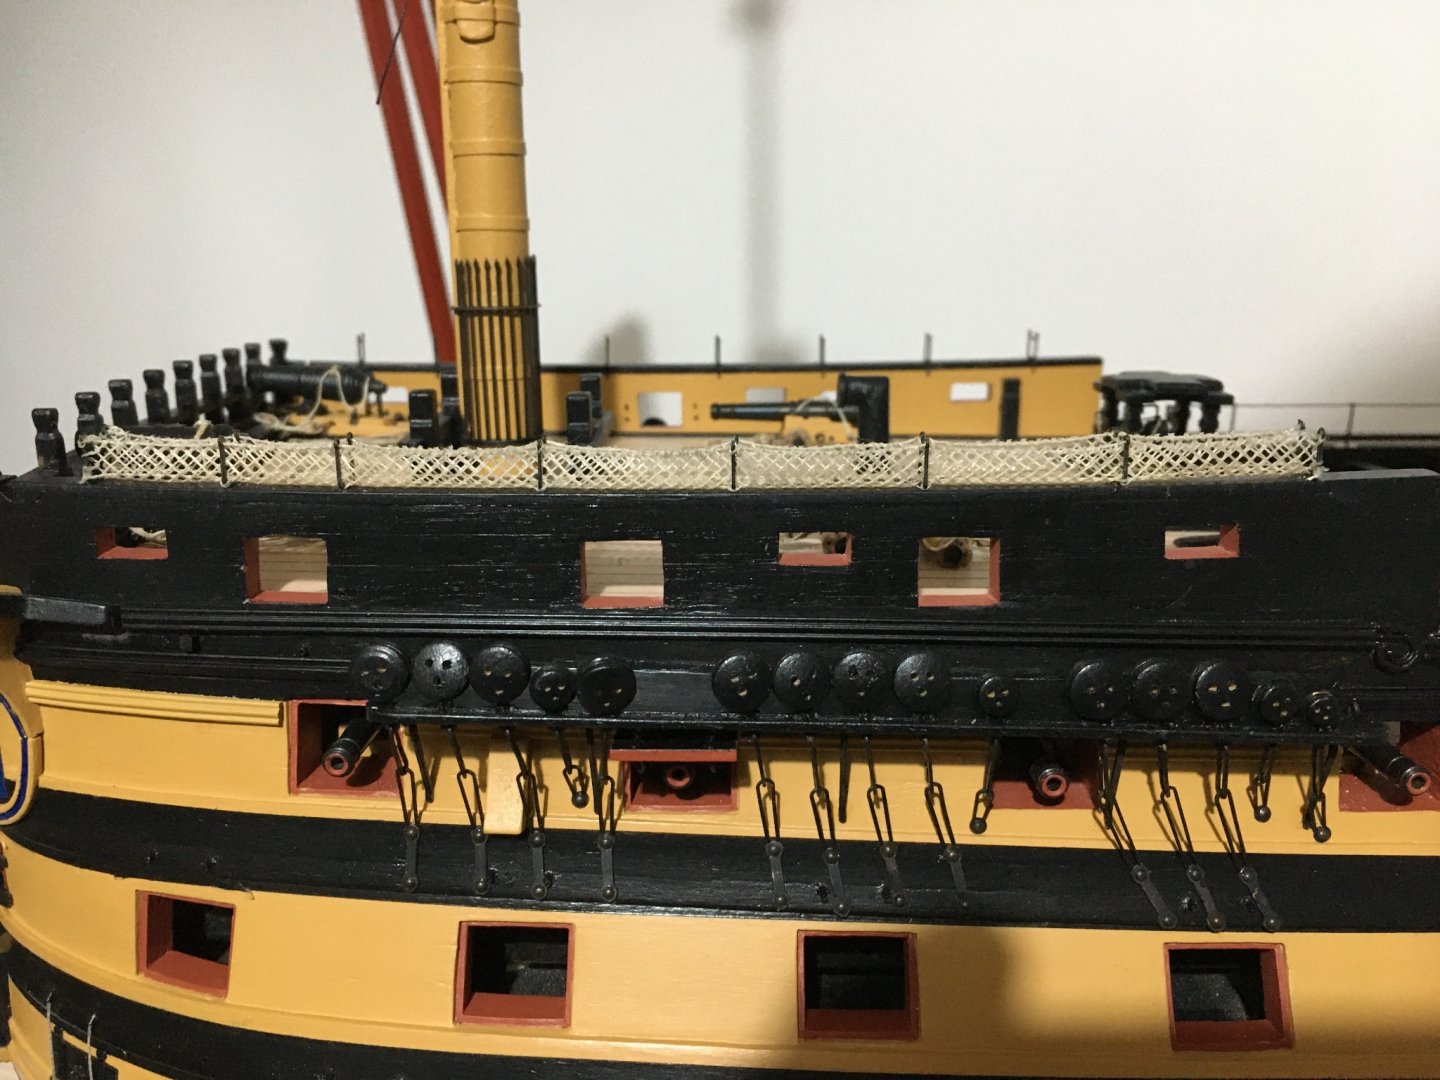
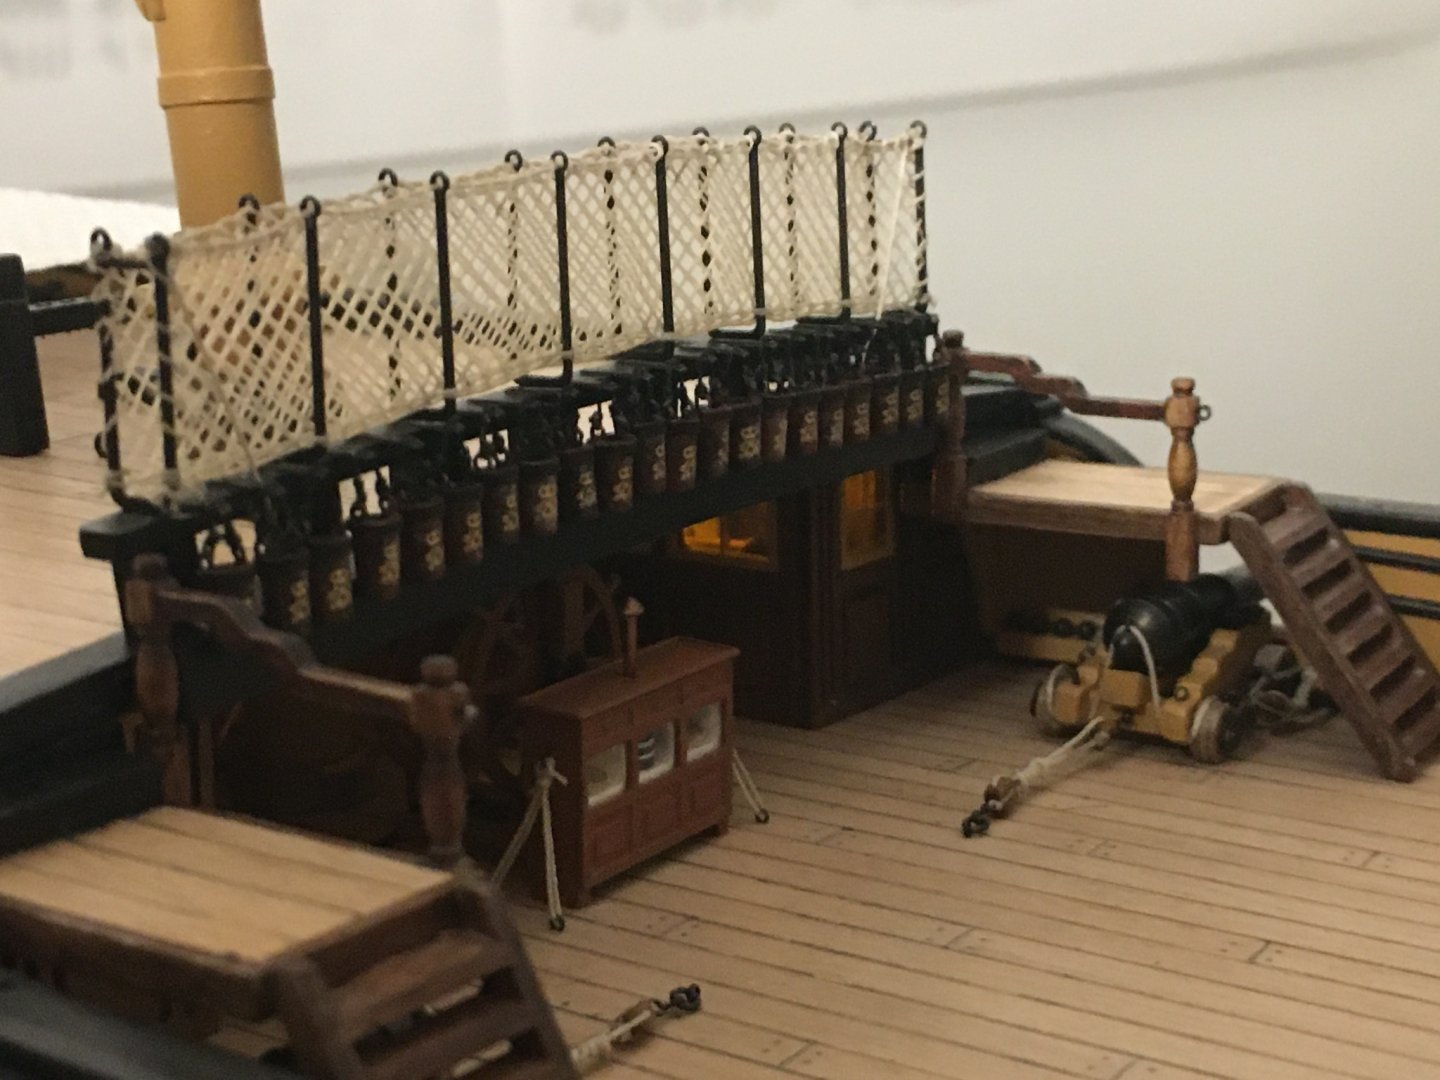
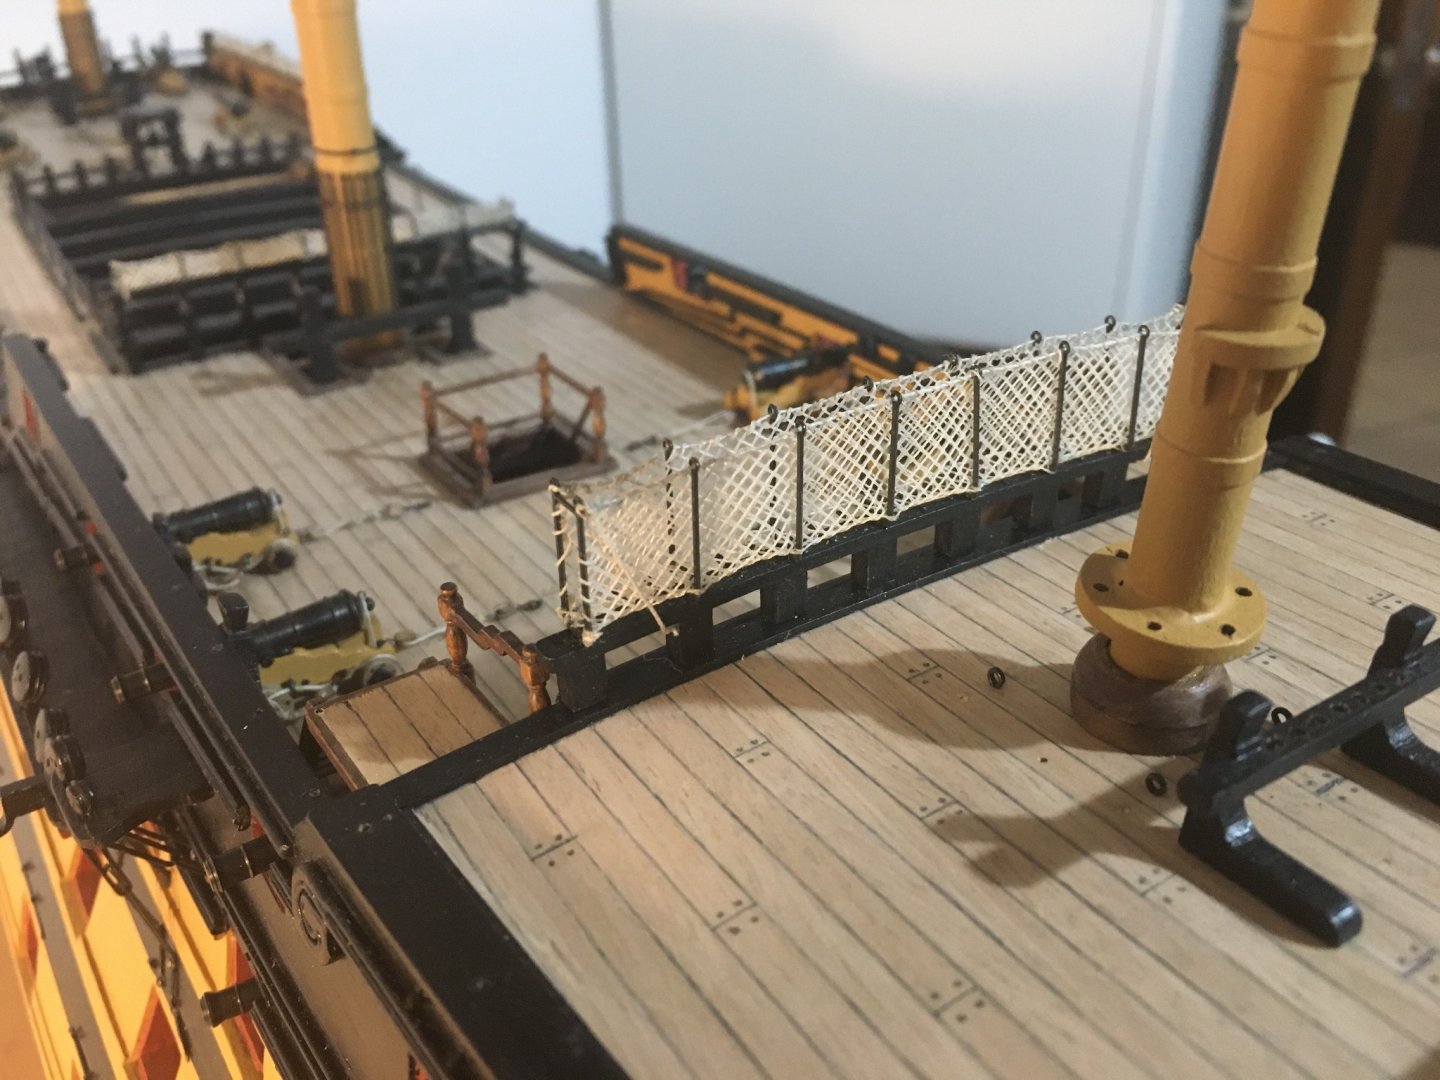
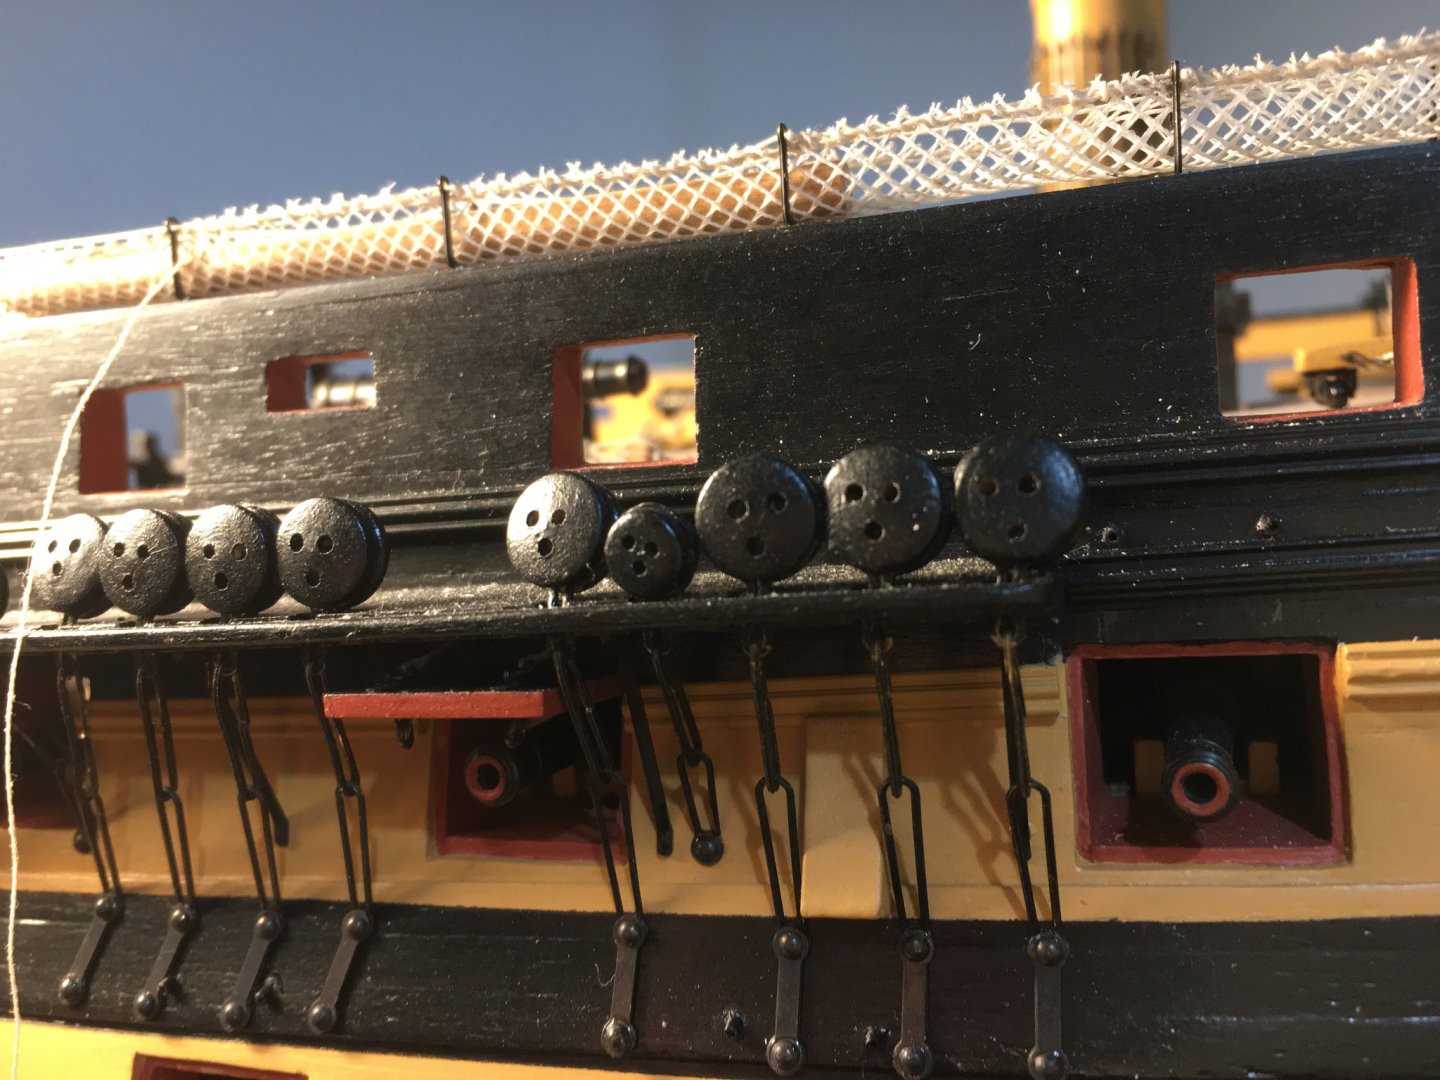
Hi Graham, thankyou for your encouragement. Enjoy your retirement, now is the time to try and catch up to do things you did not find time for before. Pity you are not updating your build anymore, I am sure you are doing a great job on your Victory. I am retired as well, to be honest I cannot imagine myself without the access to a computer, as I use it for a lot of other things apart from this forum, such as my other hobby, photography. Anthony, thank you for your comments. I have another small update. I continued the work on the hammock cranes. I really wanted to finish them because I was worried that I was going to loose some of the brass etched cranes. I counted them every time I handled them to trim them, blacken, etc. In fact I was short a couple of times and had to really look hard for them, finding them on the floor. There are no extra once with the kit, you have the exact quantity. I also rigged the hand rails for the stairs leading to the poop deck. I had started with the Hammock cranes on the forecastle, and after I did the rest I decided that the netting on he forecastle was a bit too stretched, so I took the off and did them again, cutting the net slightly wider. Robert


- 527 replies
-
- 11
-
-
- caldercraft
- victory
- (and 1 more)
-
Congratulations, a very beautiful model. Although I am building a different model I still visited your detailed work to admire and learn from. Robert
- 800 replies
-
- 2
-
-
- snake
- caldercraft
- (and 1 more)
-
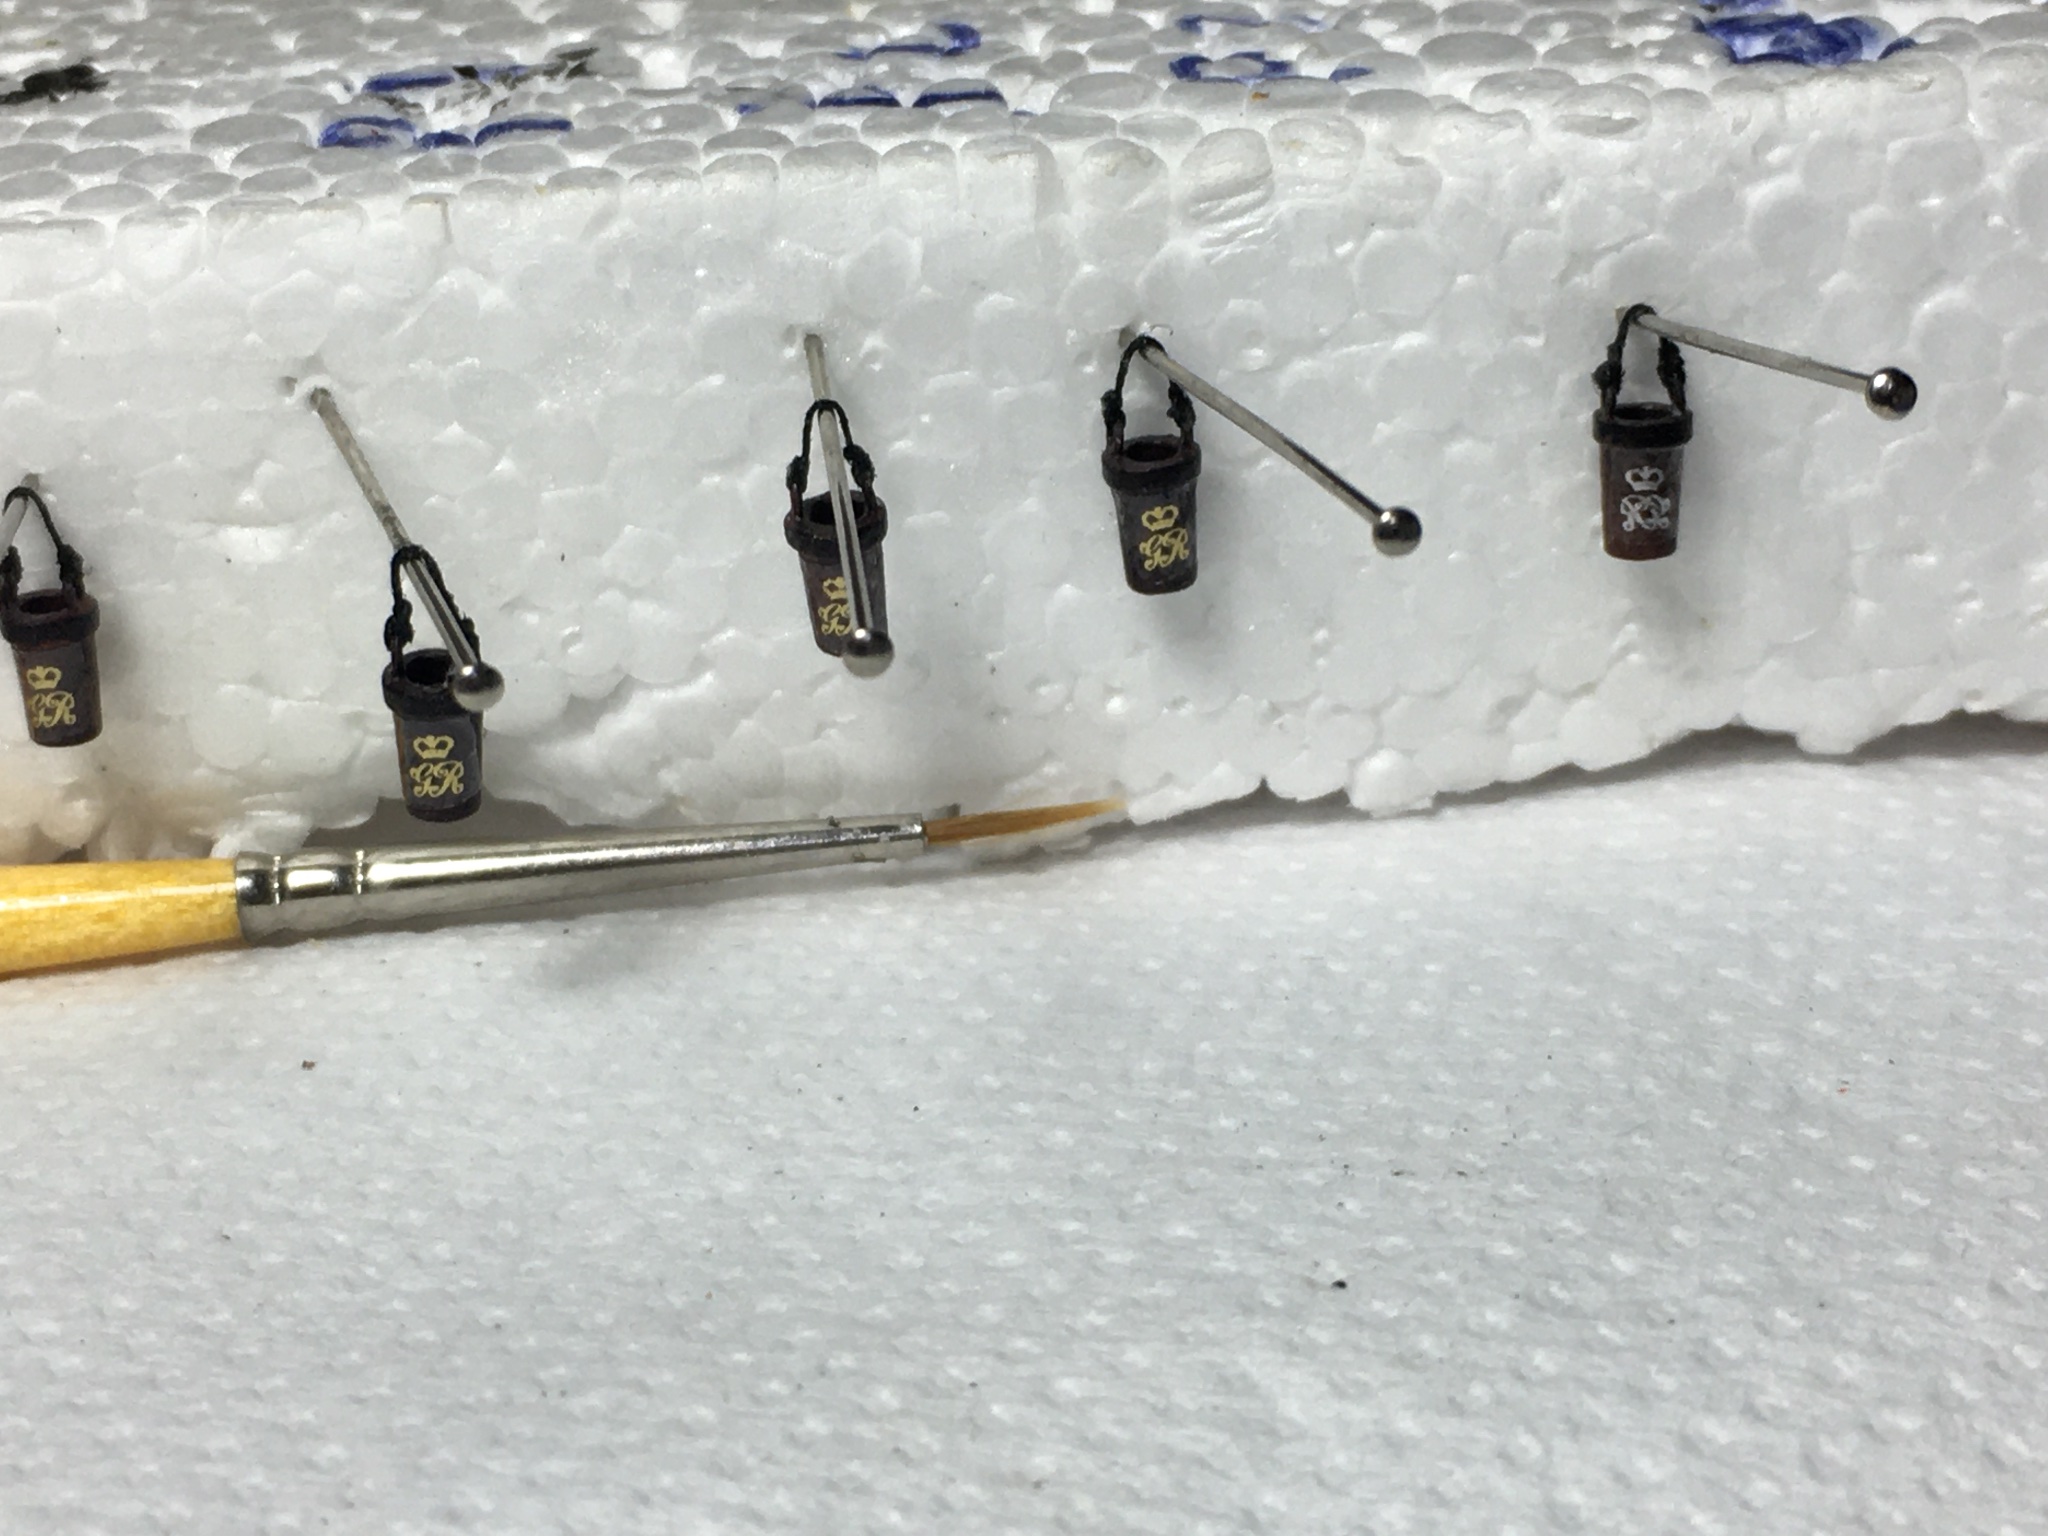
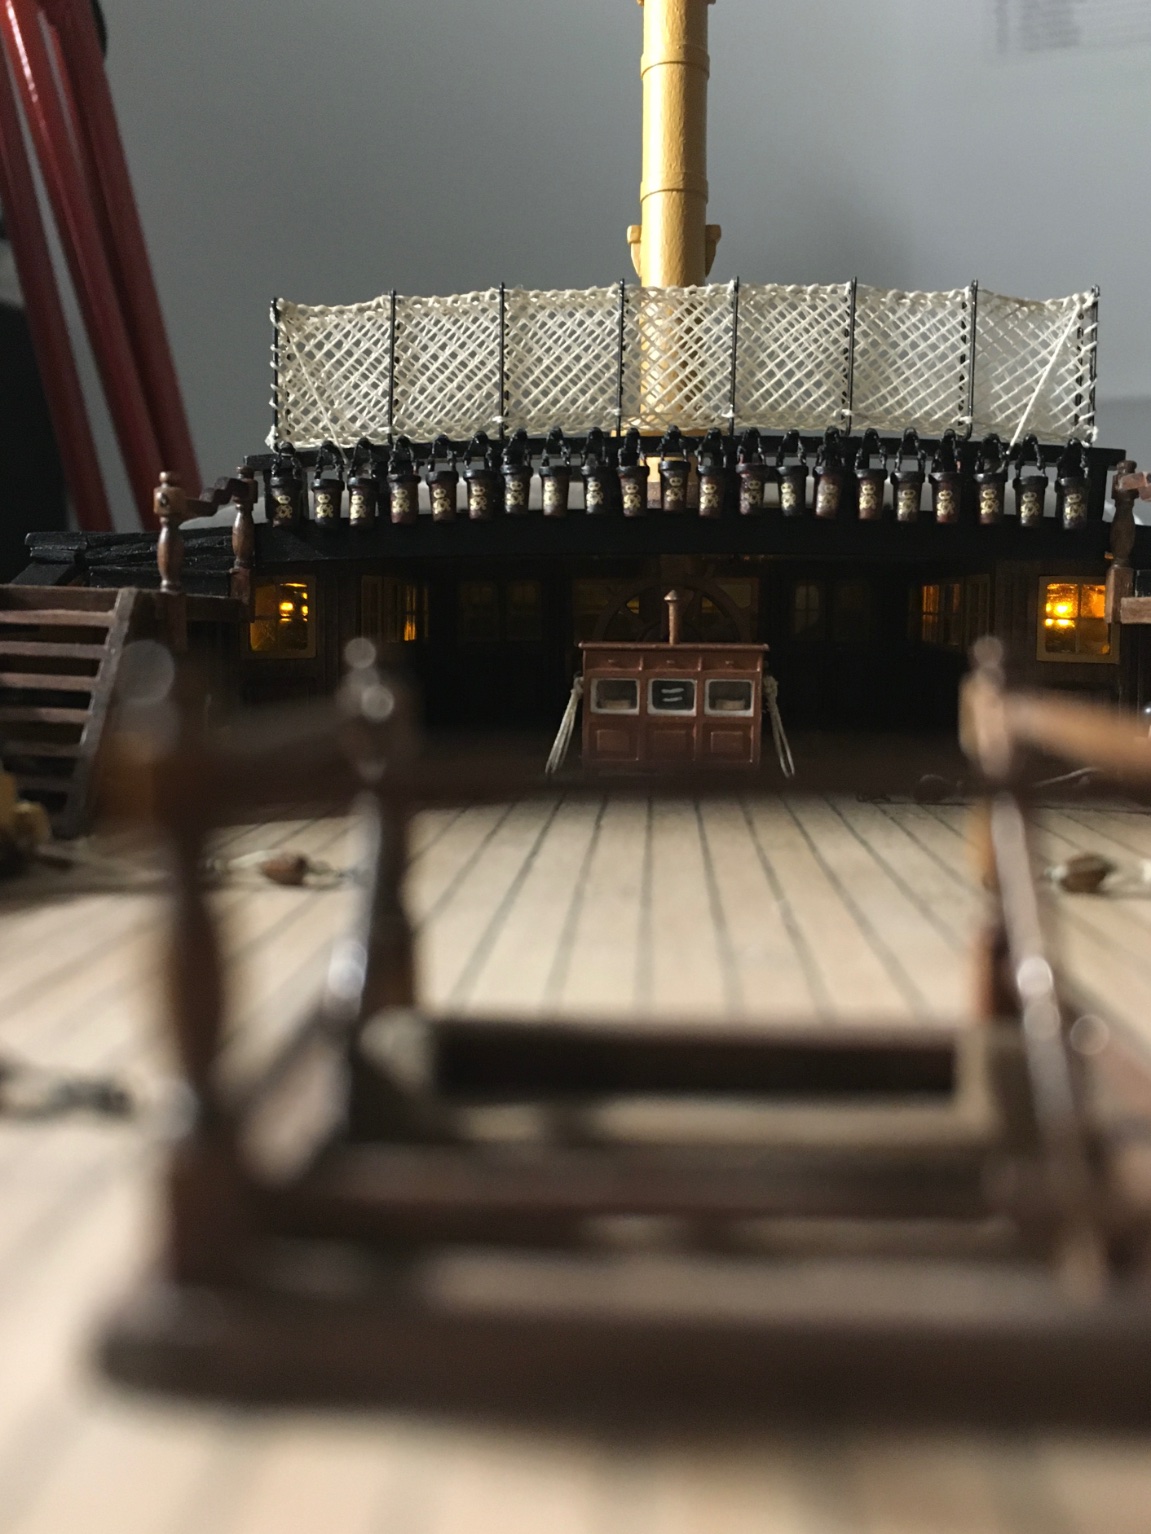
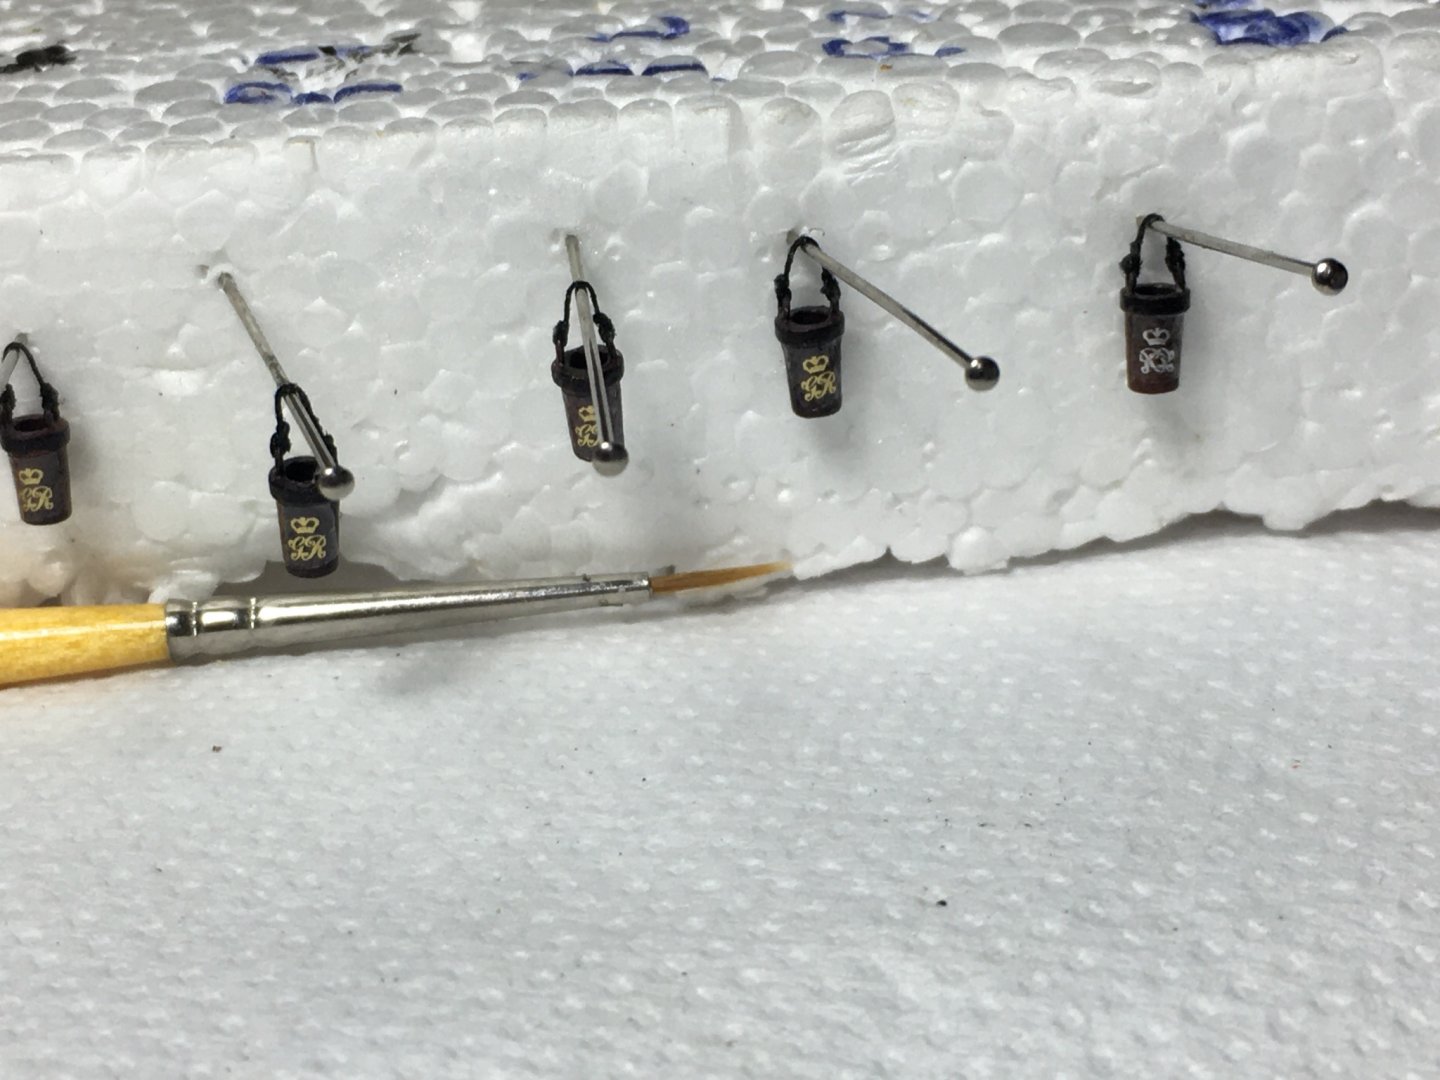
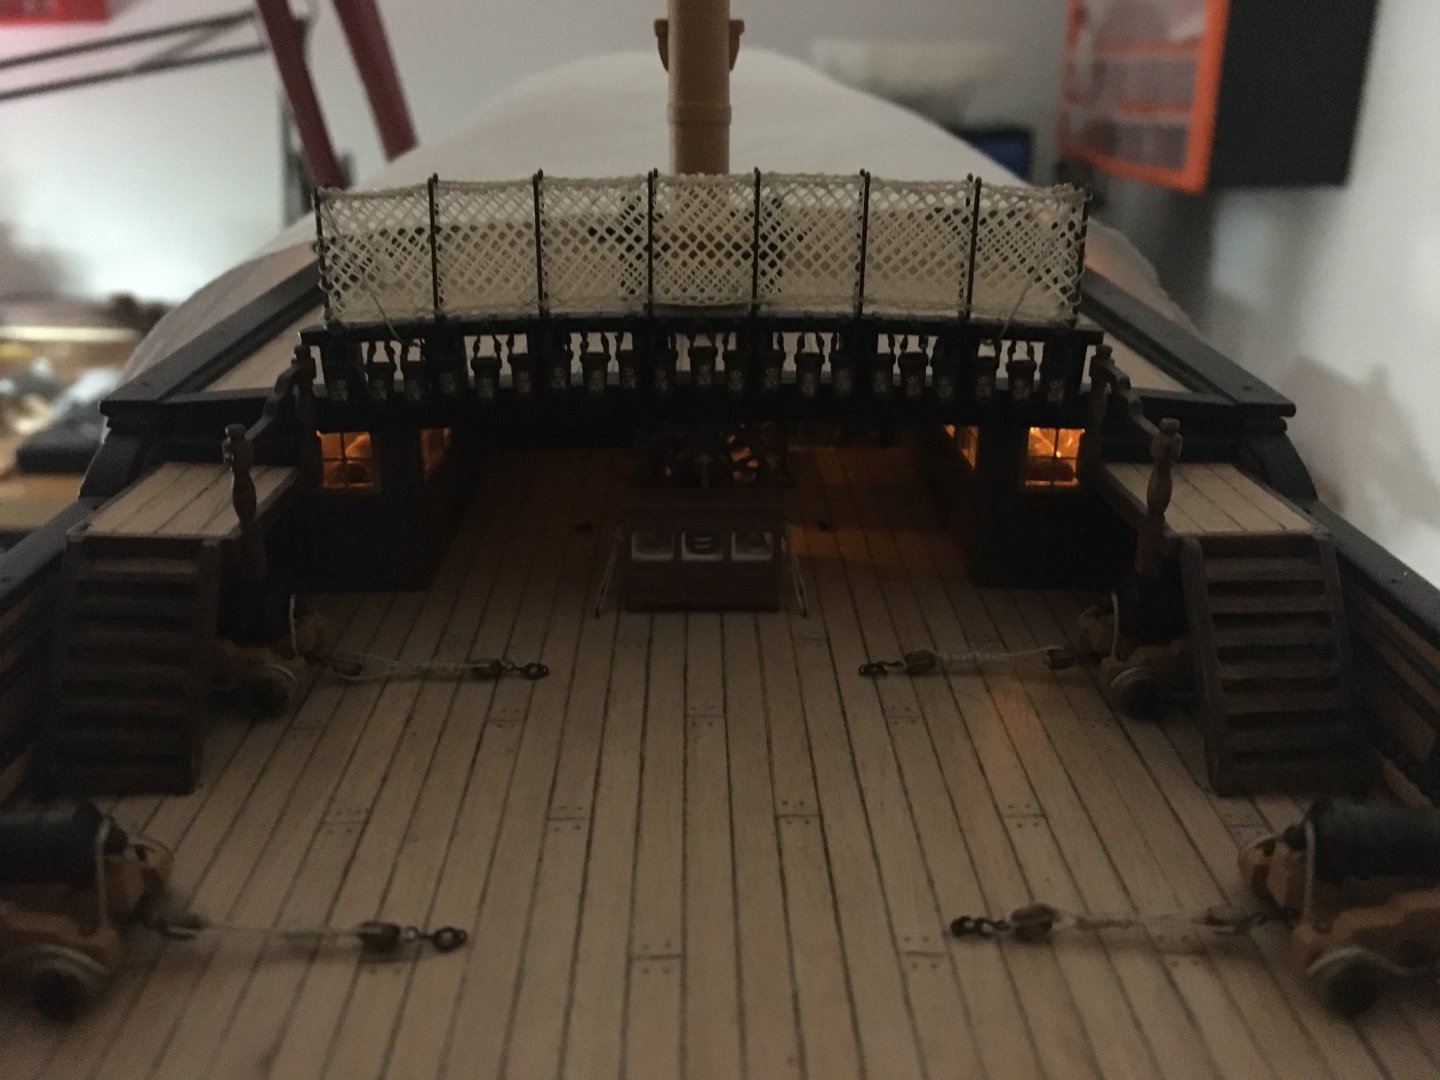
Finally I received the decals and finished the fire buckets. The actual fire buckets on HMS Victory were made of leather so I tried to paint them as close as I could to look like the leather colour. I used the walnut colour paint and the red ochre. I did not mix them together, I just dipped the brush in the walnut then in the red ochre, sort of mixing the two colours together but not getting a uniform colour. When dry I put on the monogram decals. Wish I had some more experience in fixing decals. When decals were dry I painted over them with matt varnish as a protector as they are quite delicate and easily scratched. When the varnish dried some areas of the decals, where they are transparent, became a bit misty. I went over them again with the liquid Micro Sol and became a bit better. To the naked eye they are hardly visible but in photos they become more visible. With the lights inside the cabins on. I also put the Roman numbers (depth markers) on the stern post. I had ordered them together with the decals. Now I can continue with the rest of the hammock cranes. Robert NB. If it is of any interest to other builders I ordered the decals from Bedlam Creations. (www.bedlamcreations.com). You give them the image of what you want, dimensions and they do it for you. I know you can do them yourself on a computer, but when doing very small decals, if you do not have a very good printer that can print in very small fine details they will not come out good.


- 527 replies
-
- 10
-
-
- caldercraft
- victory
- (and 1 more)
-
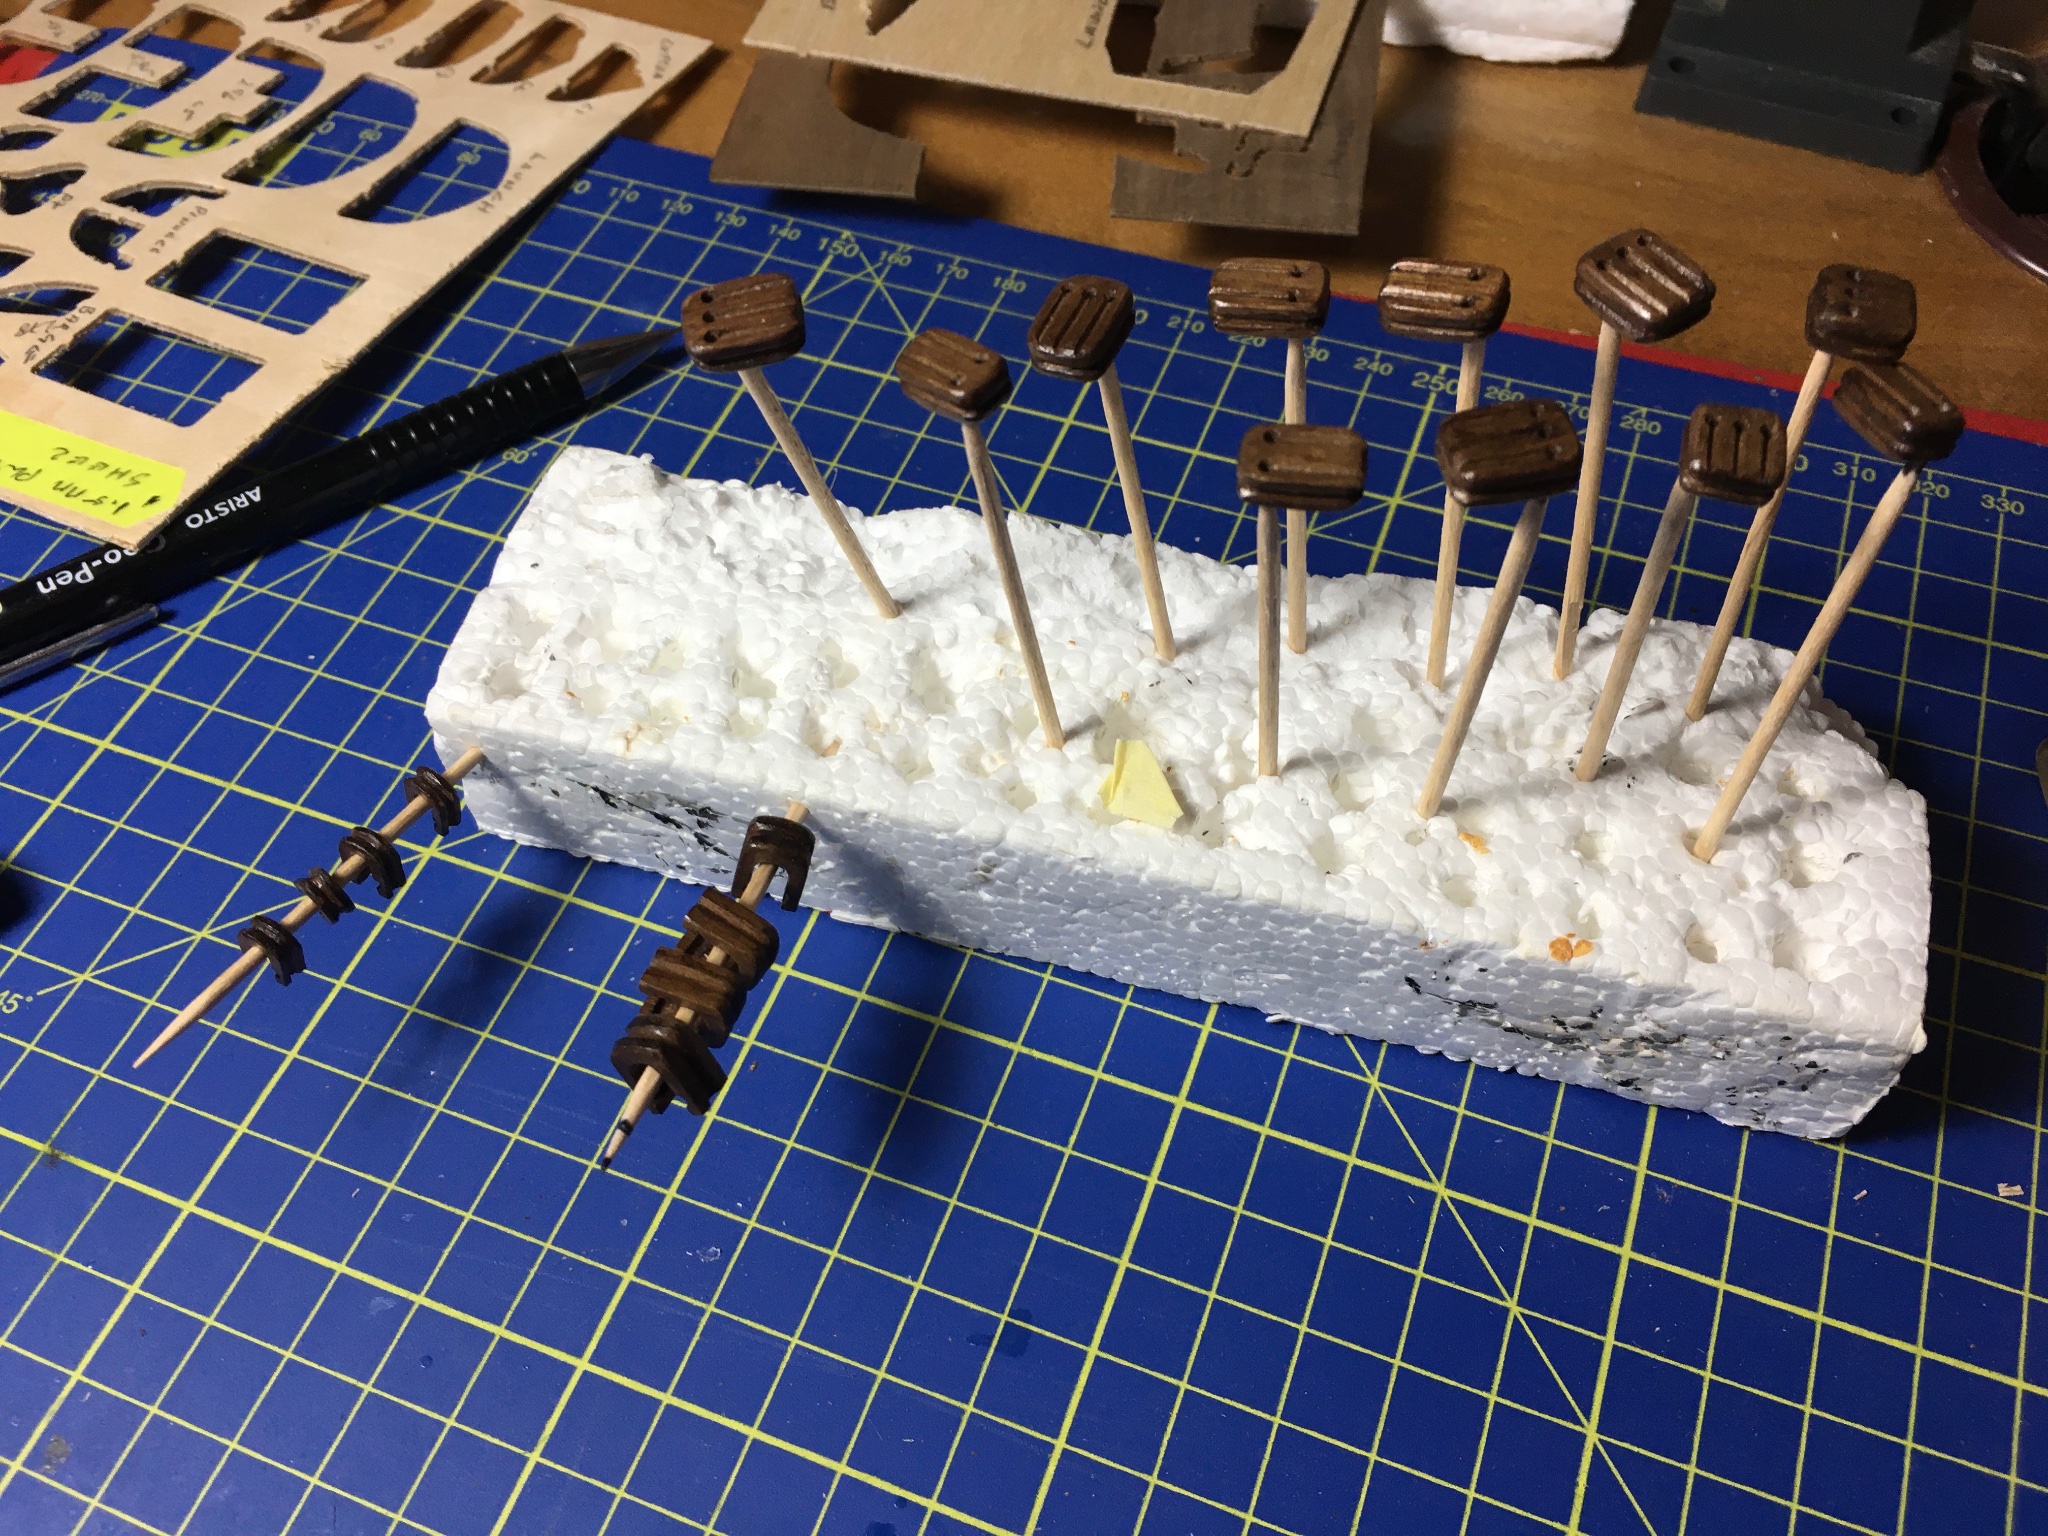
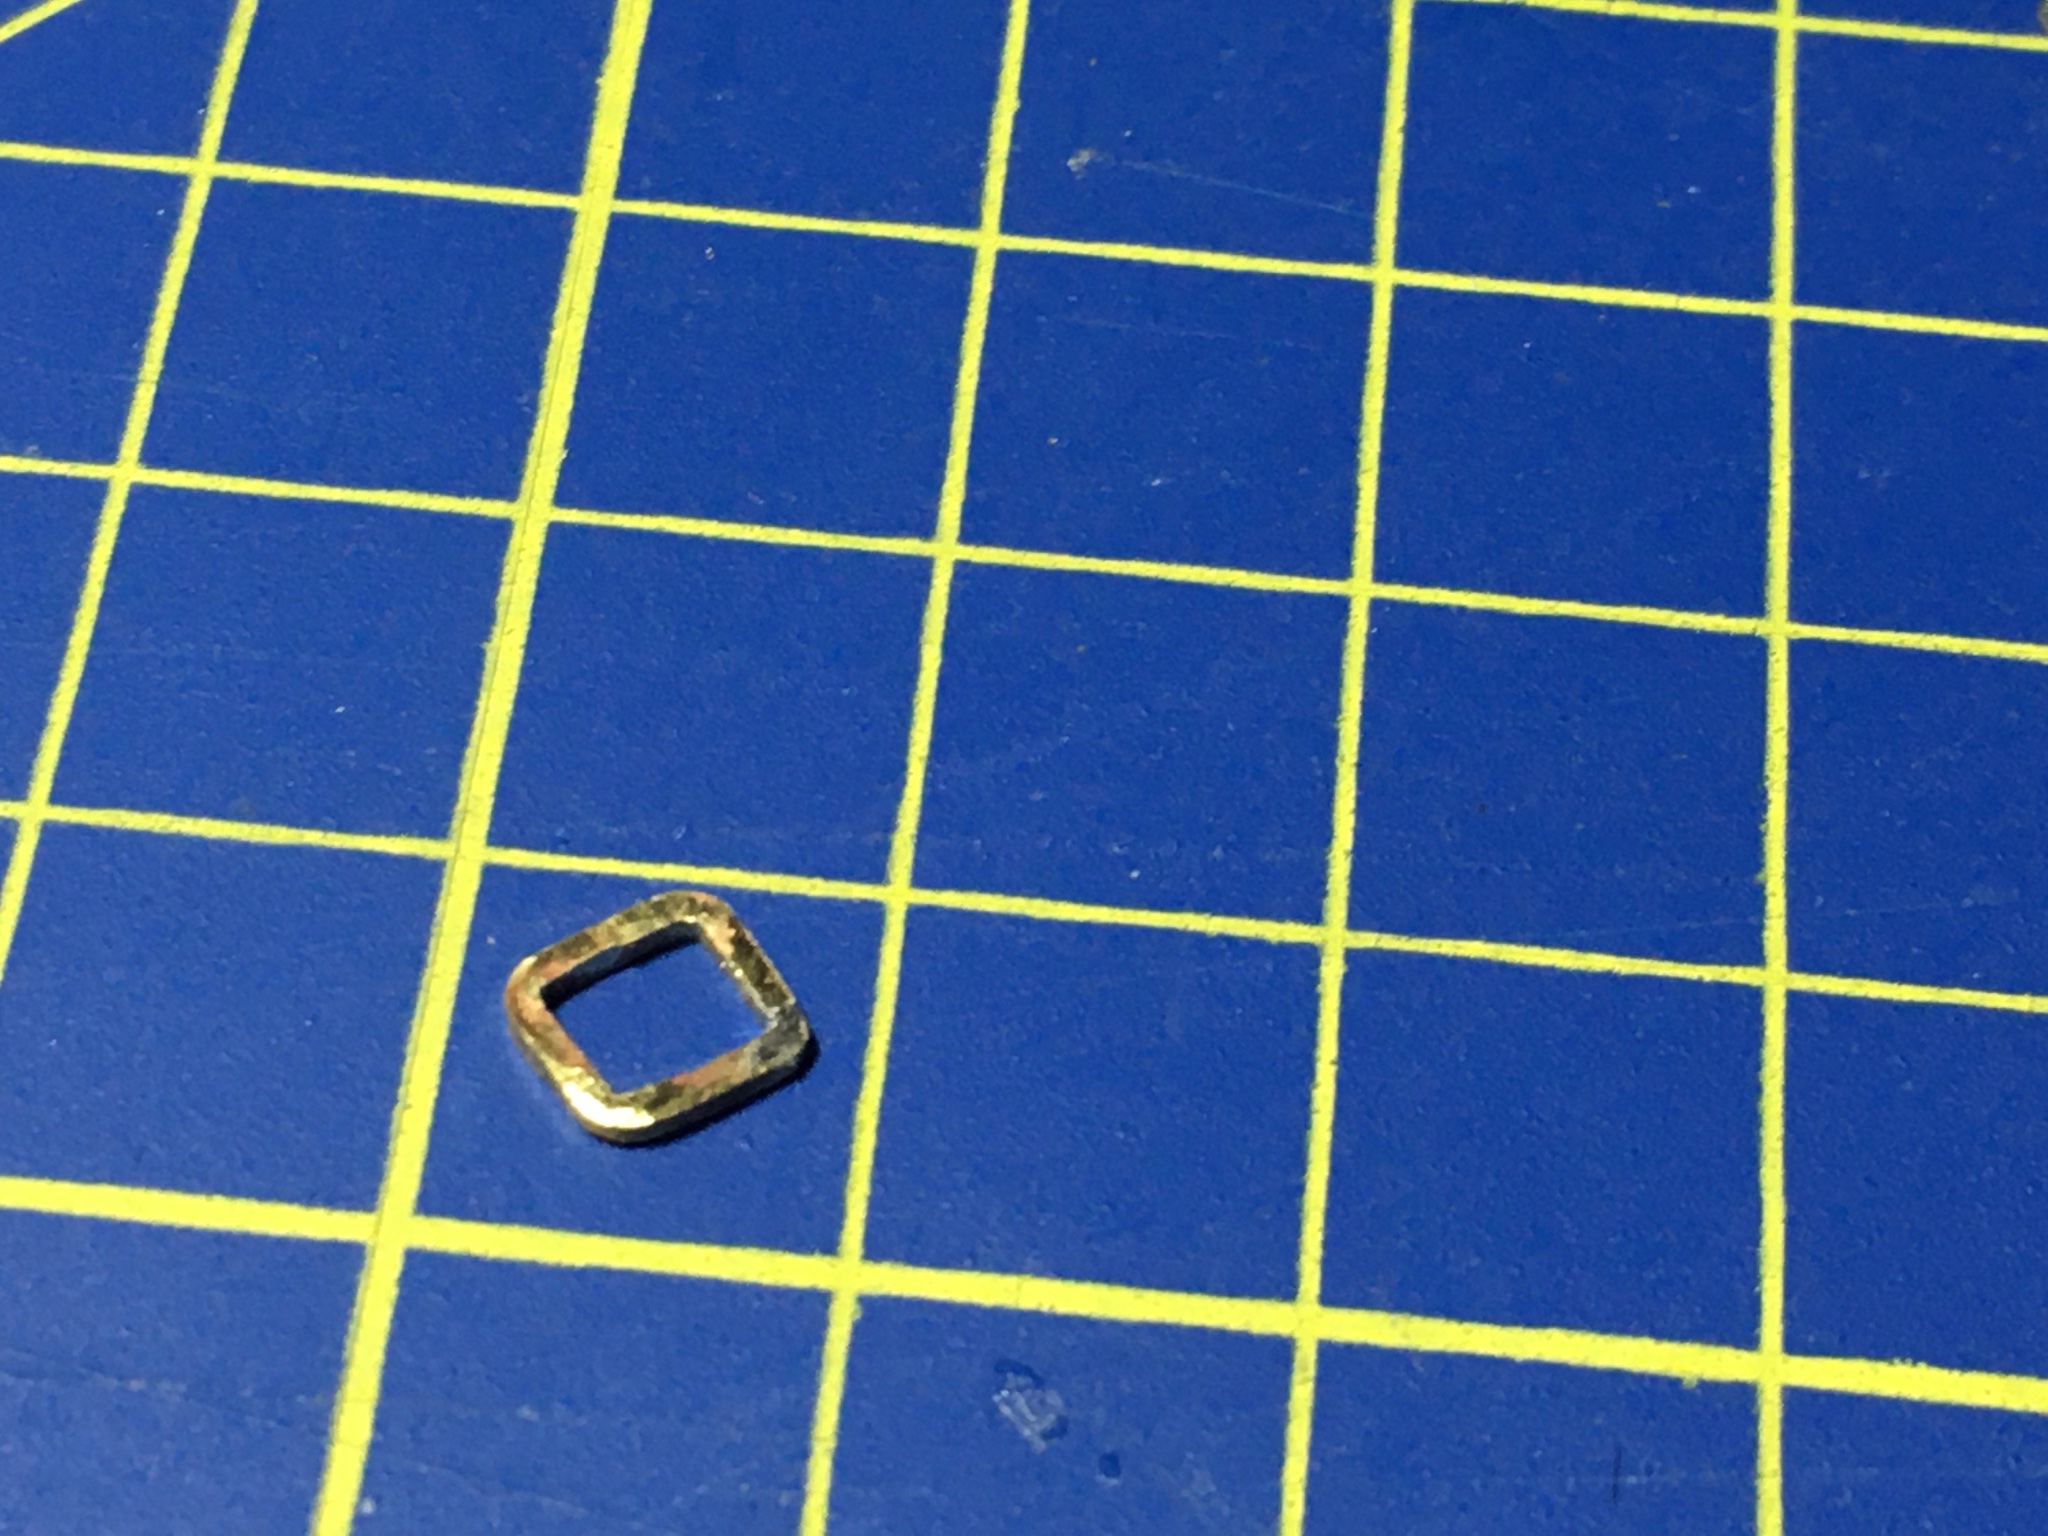
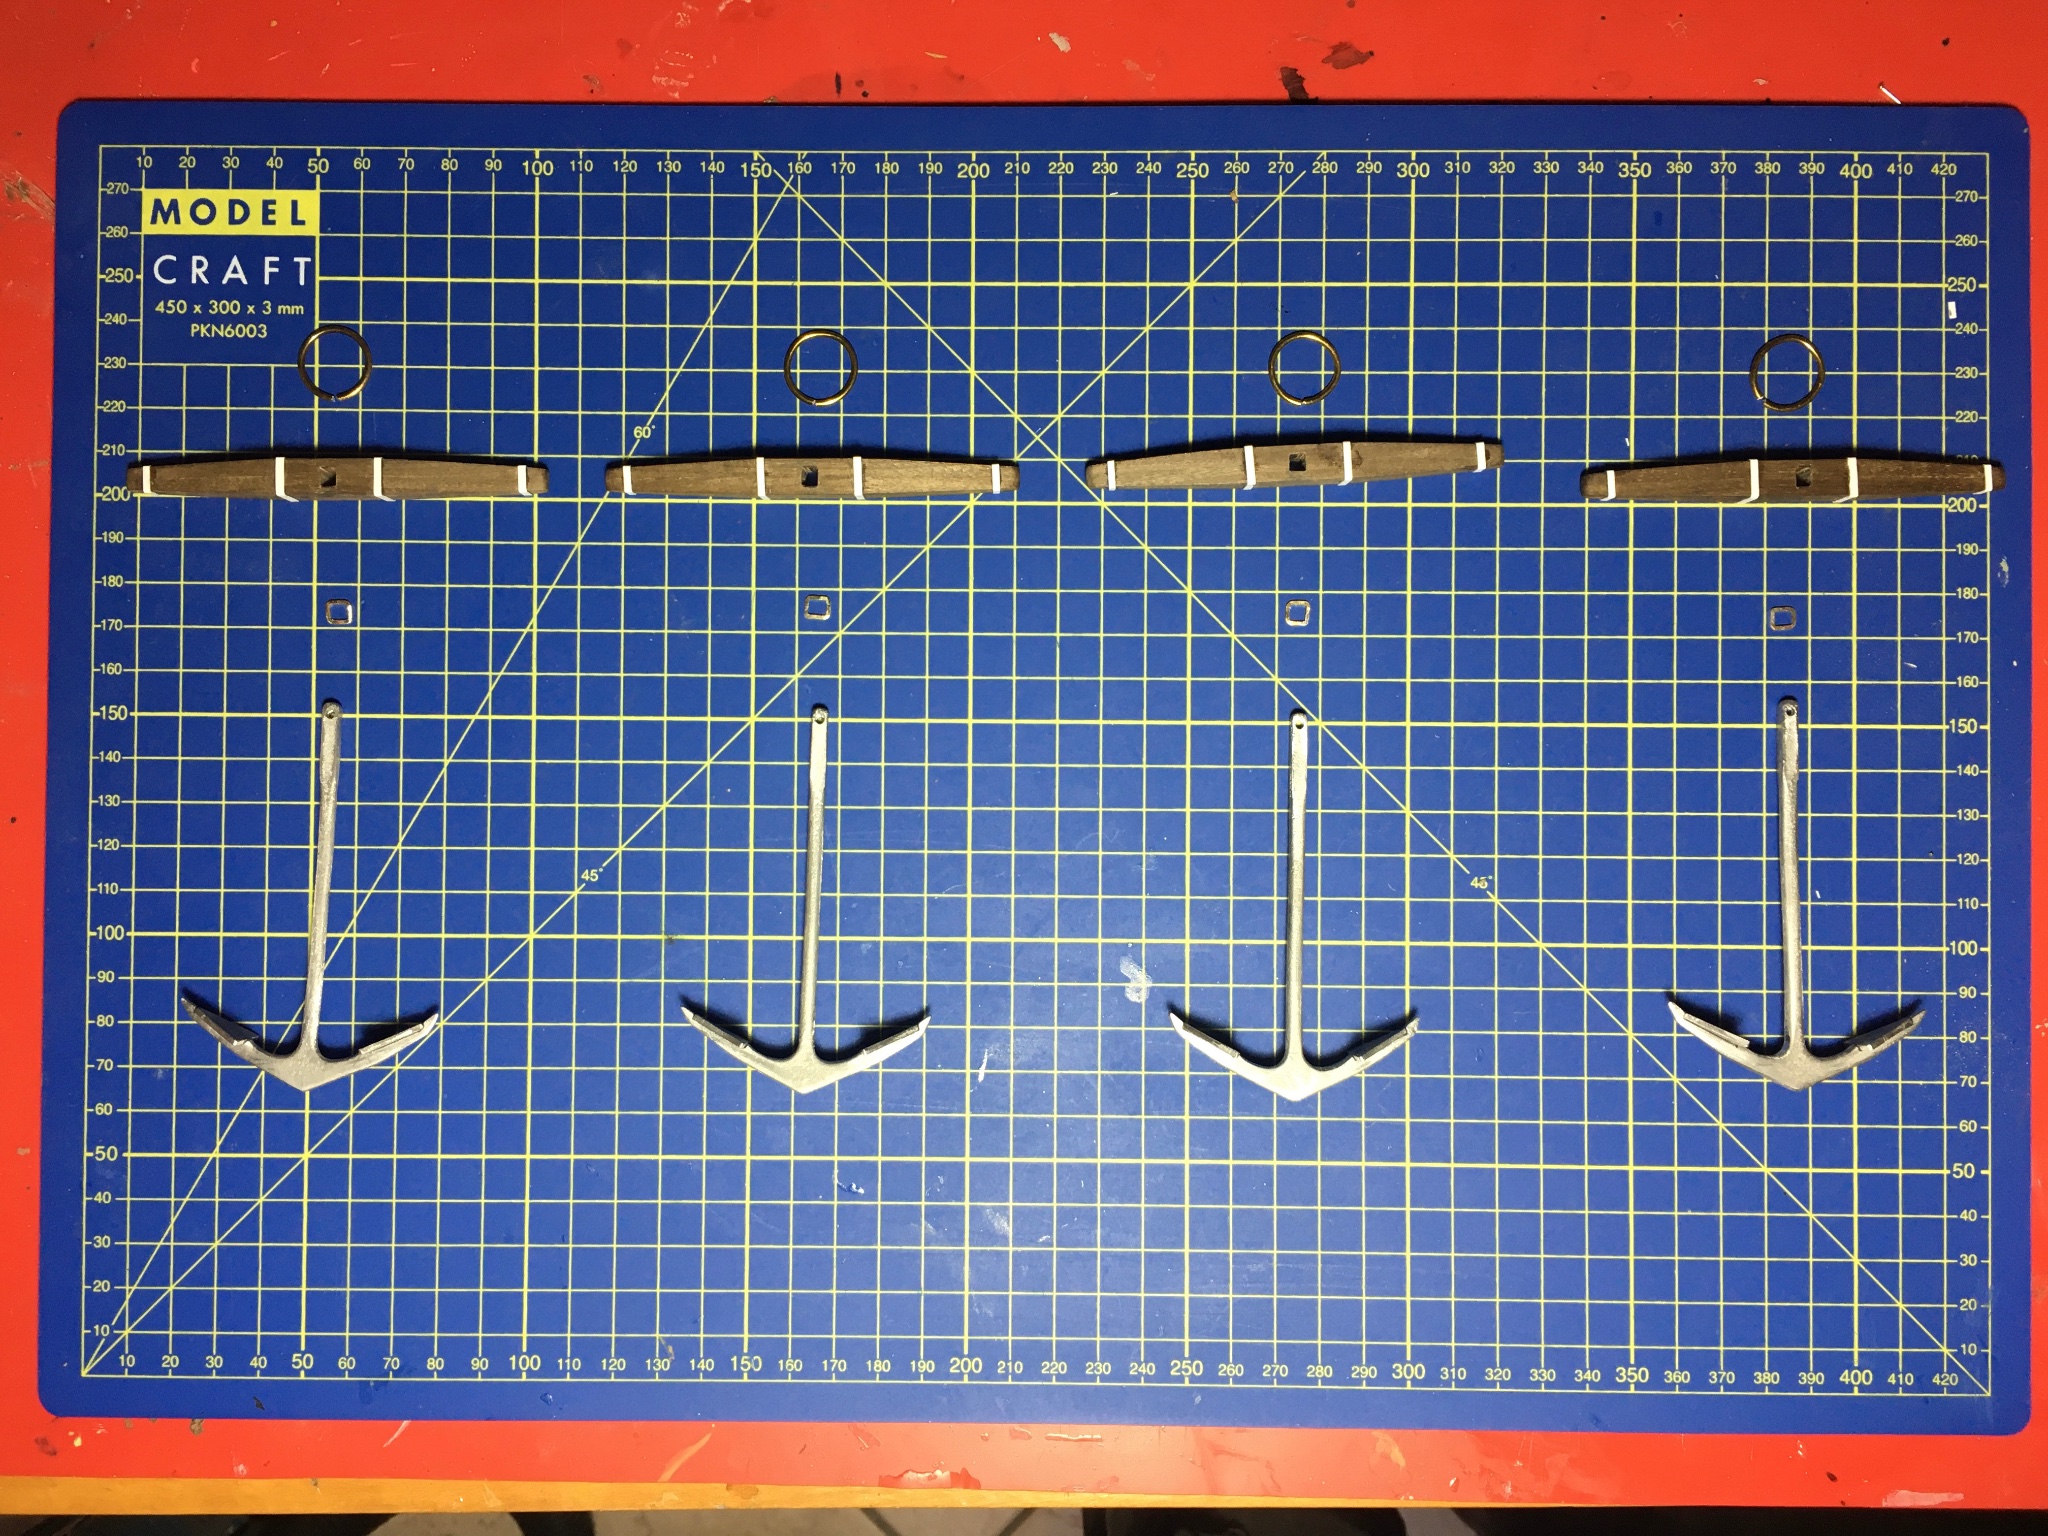
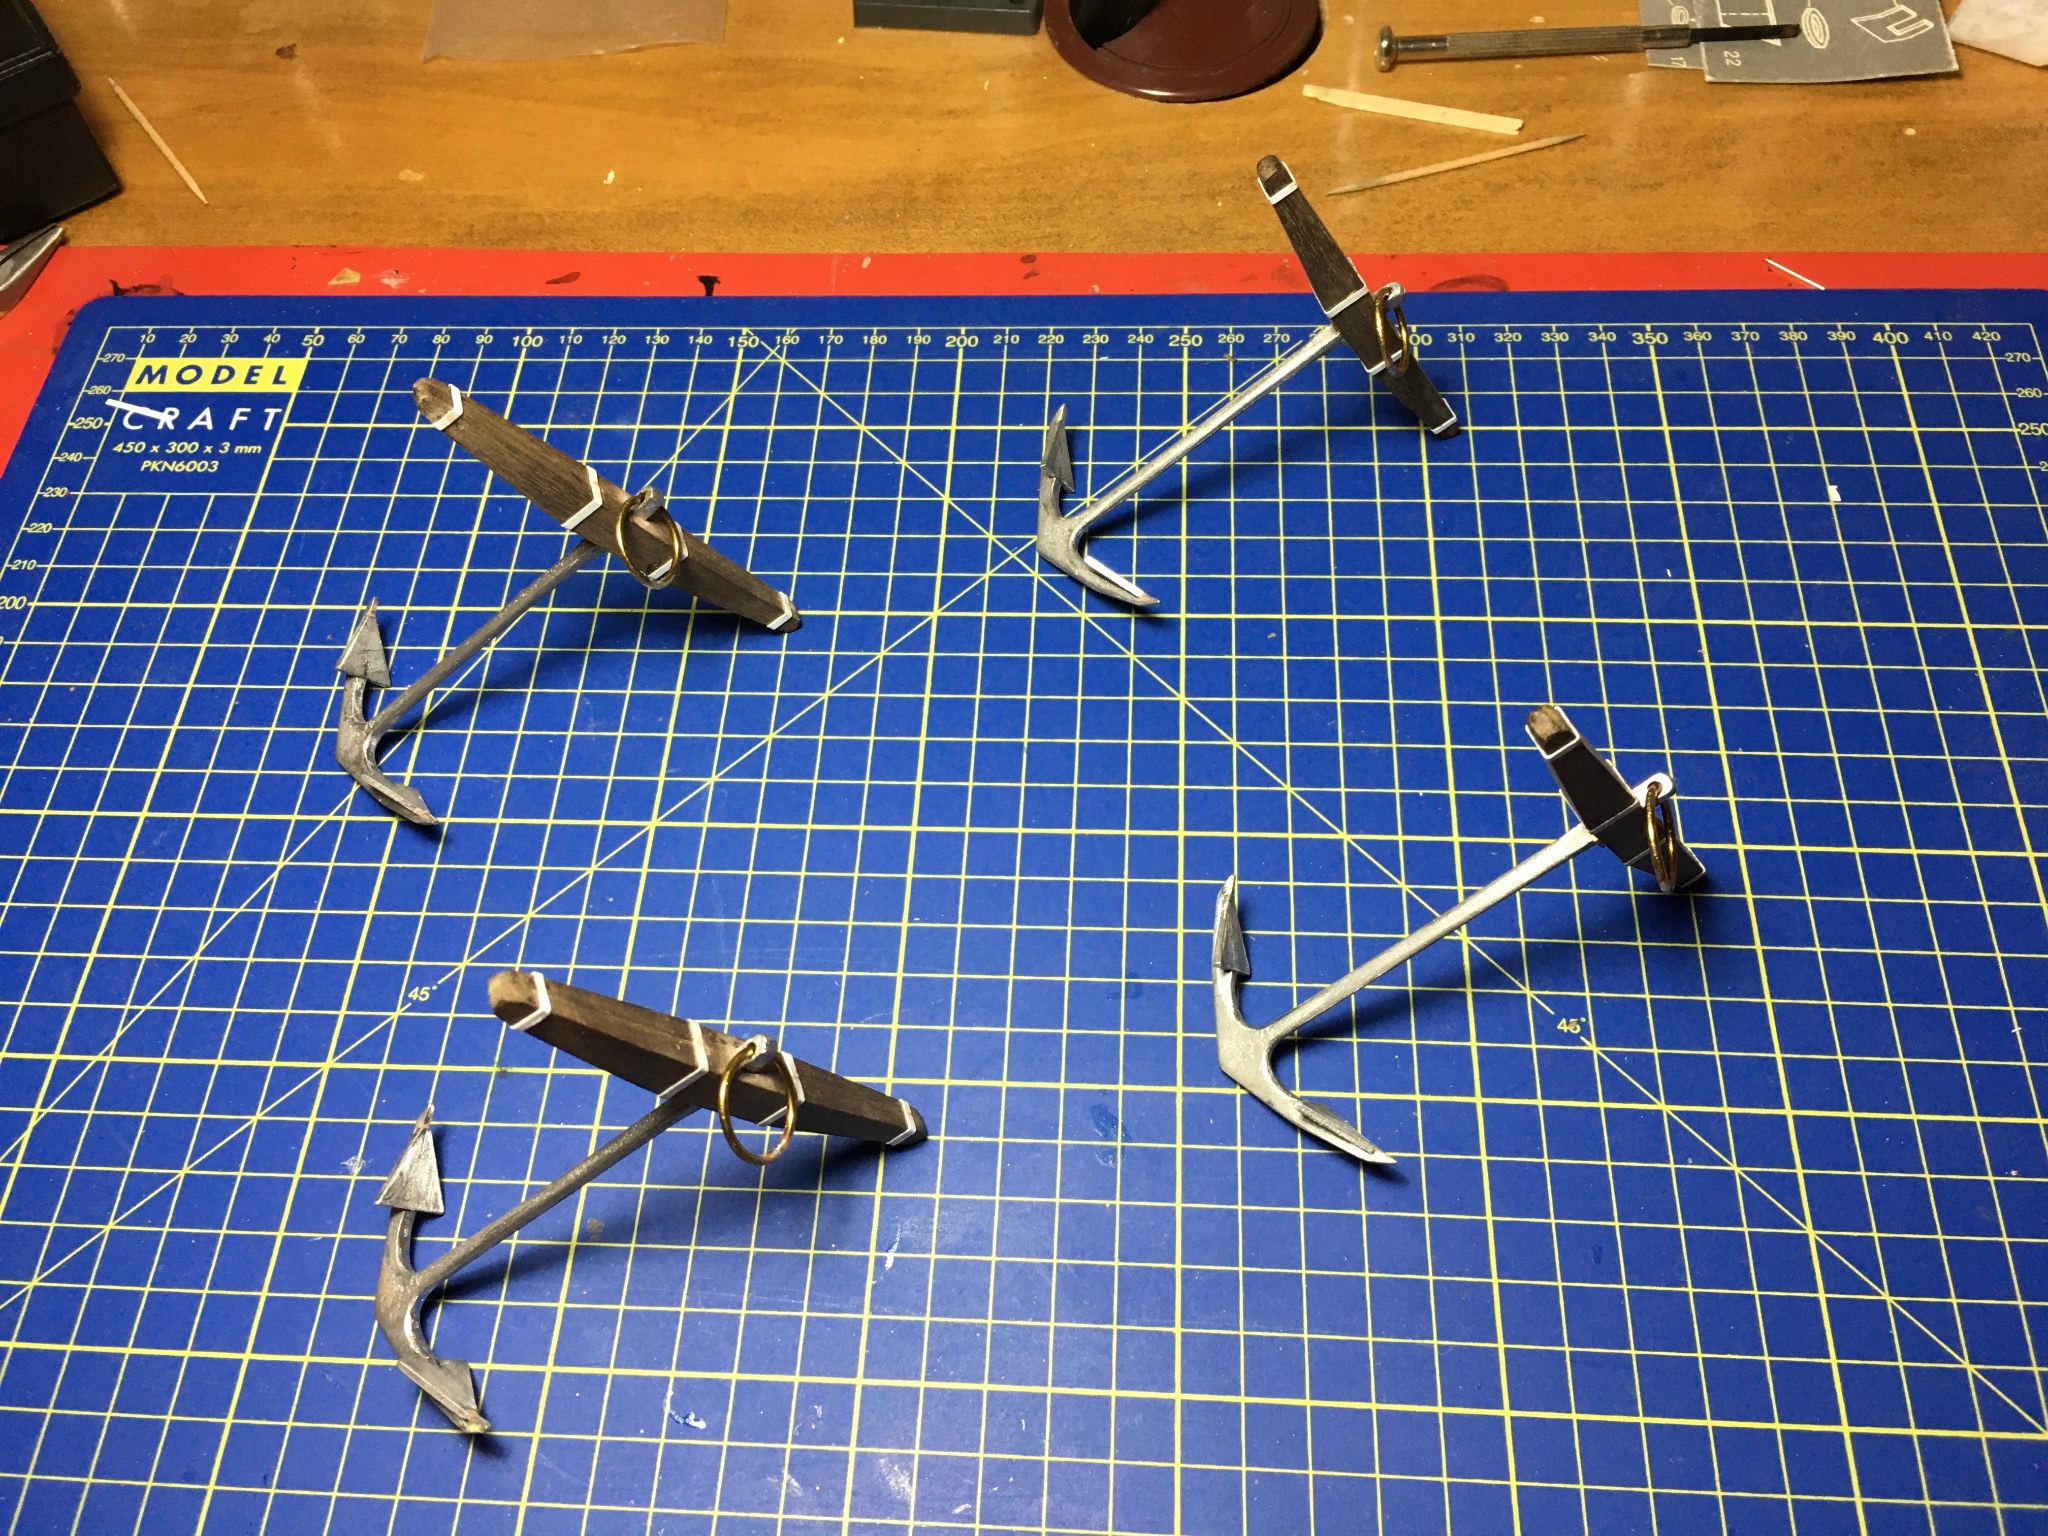
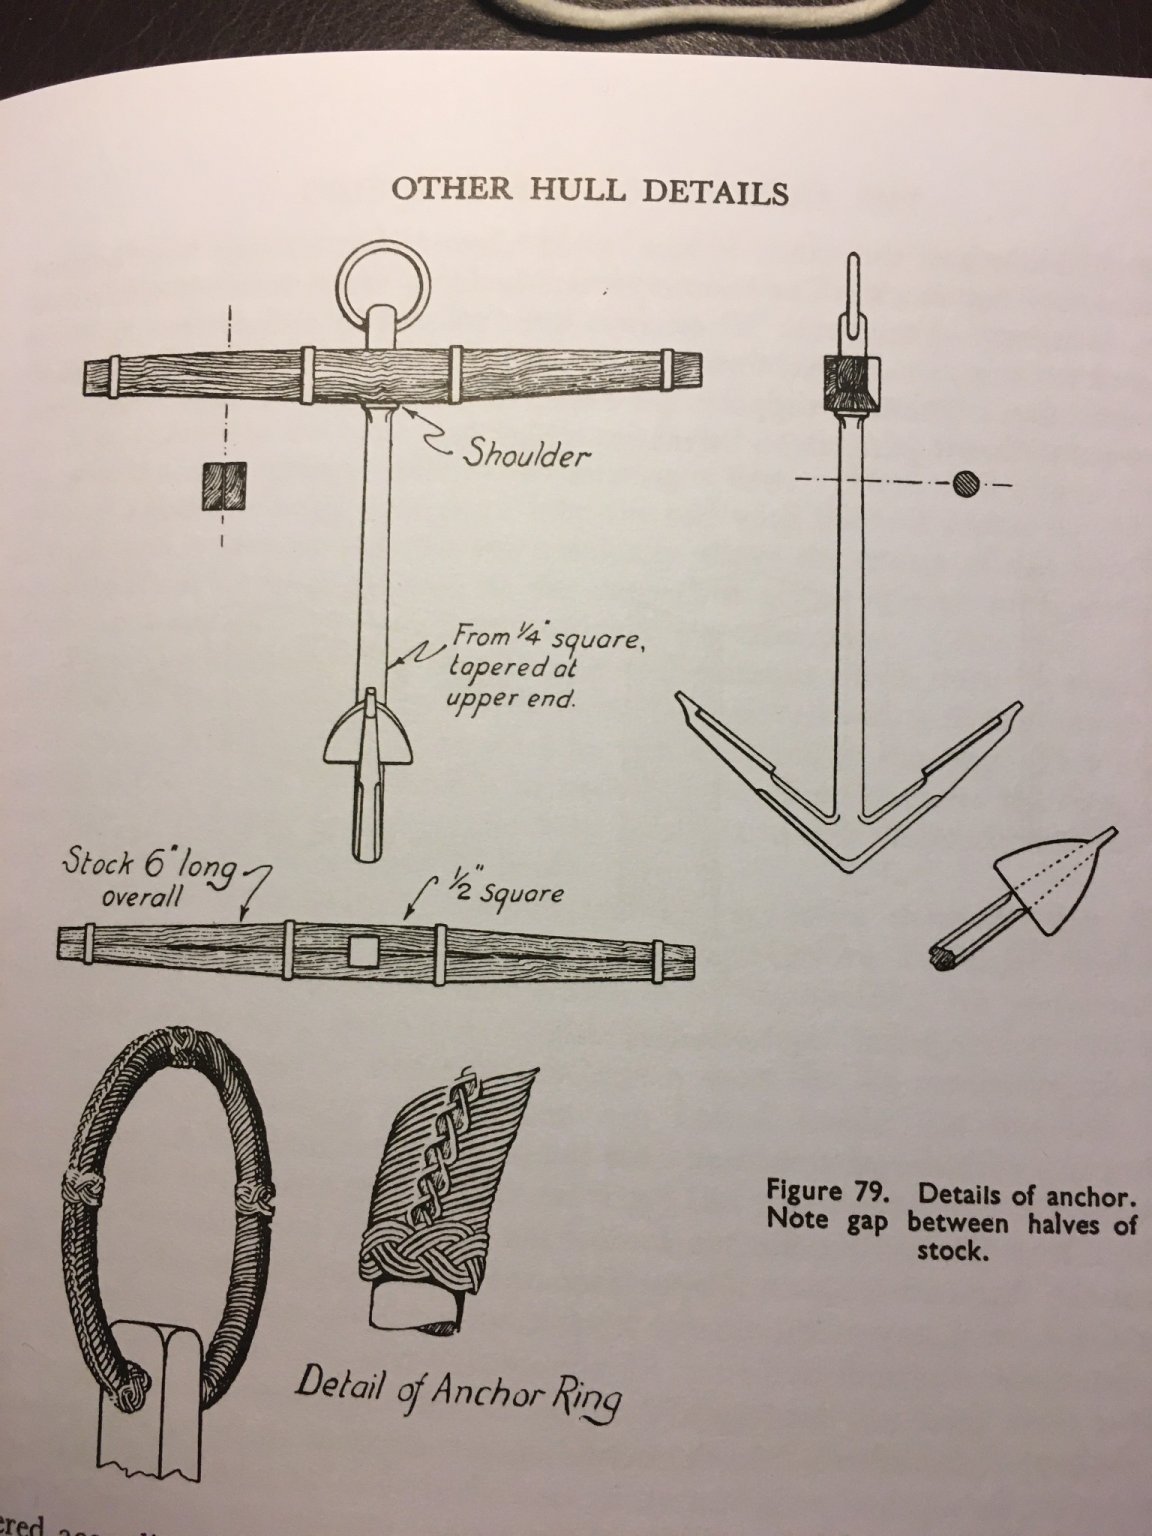
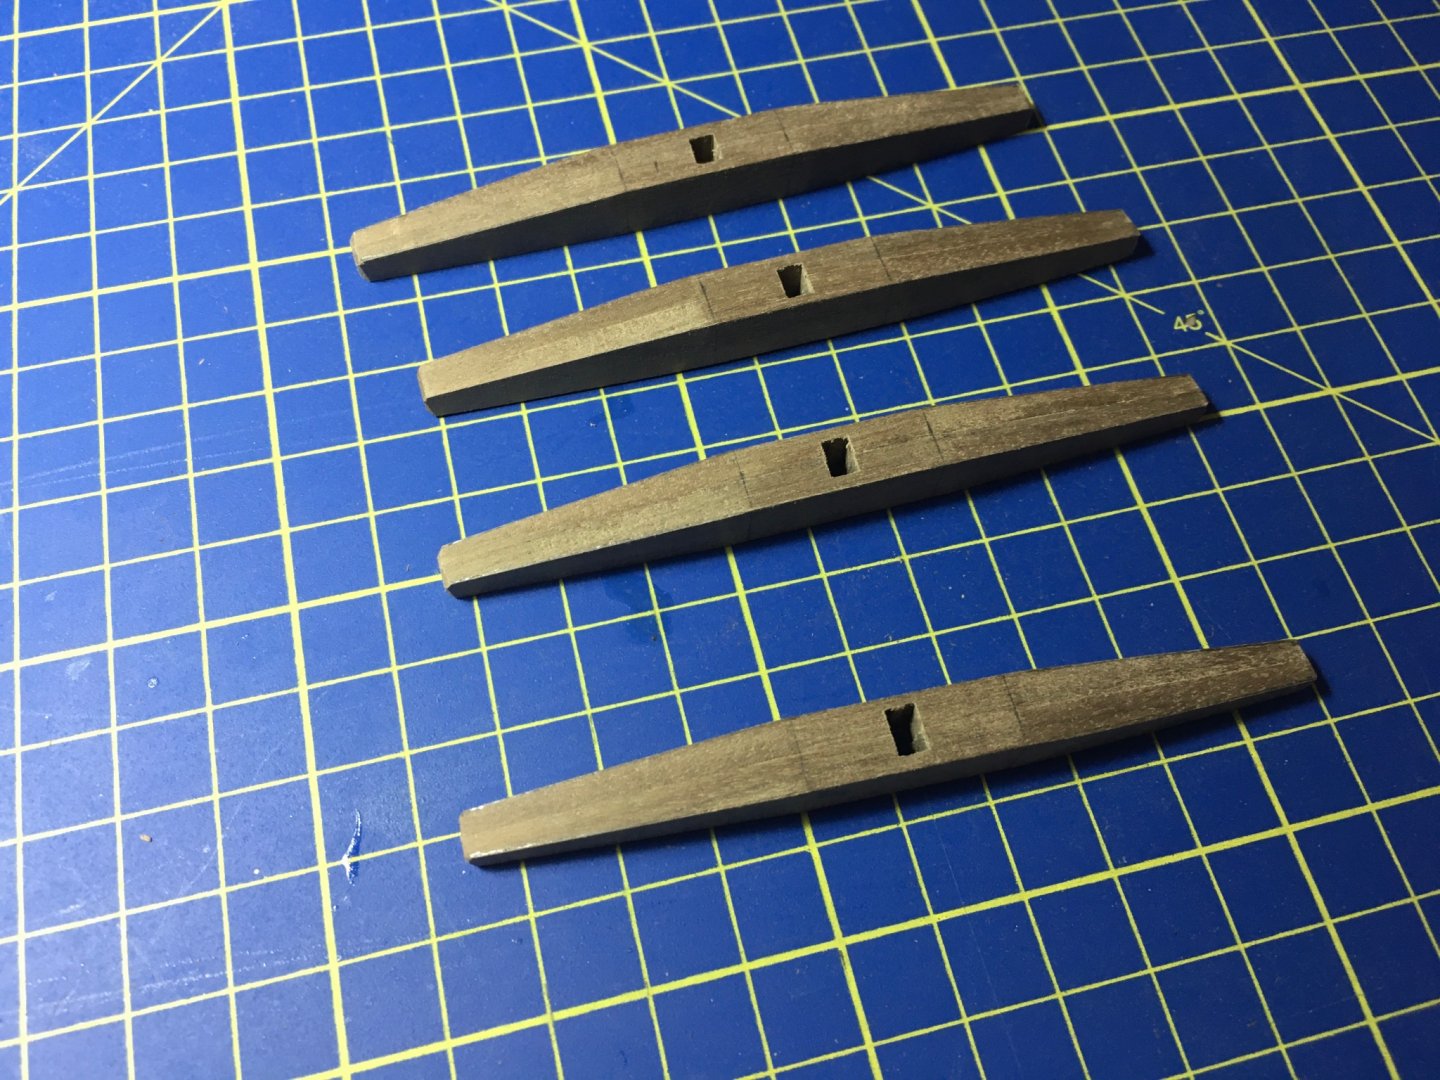
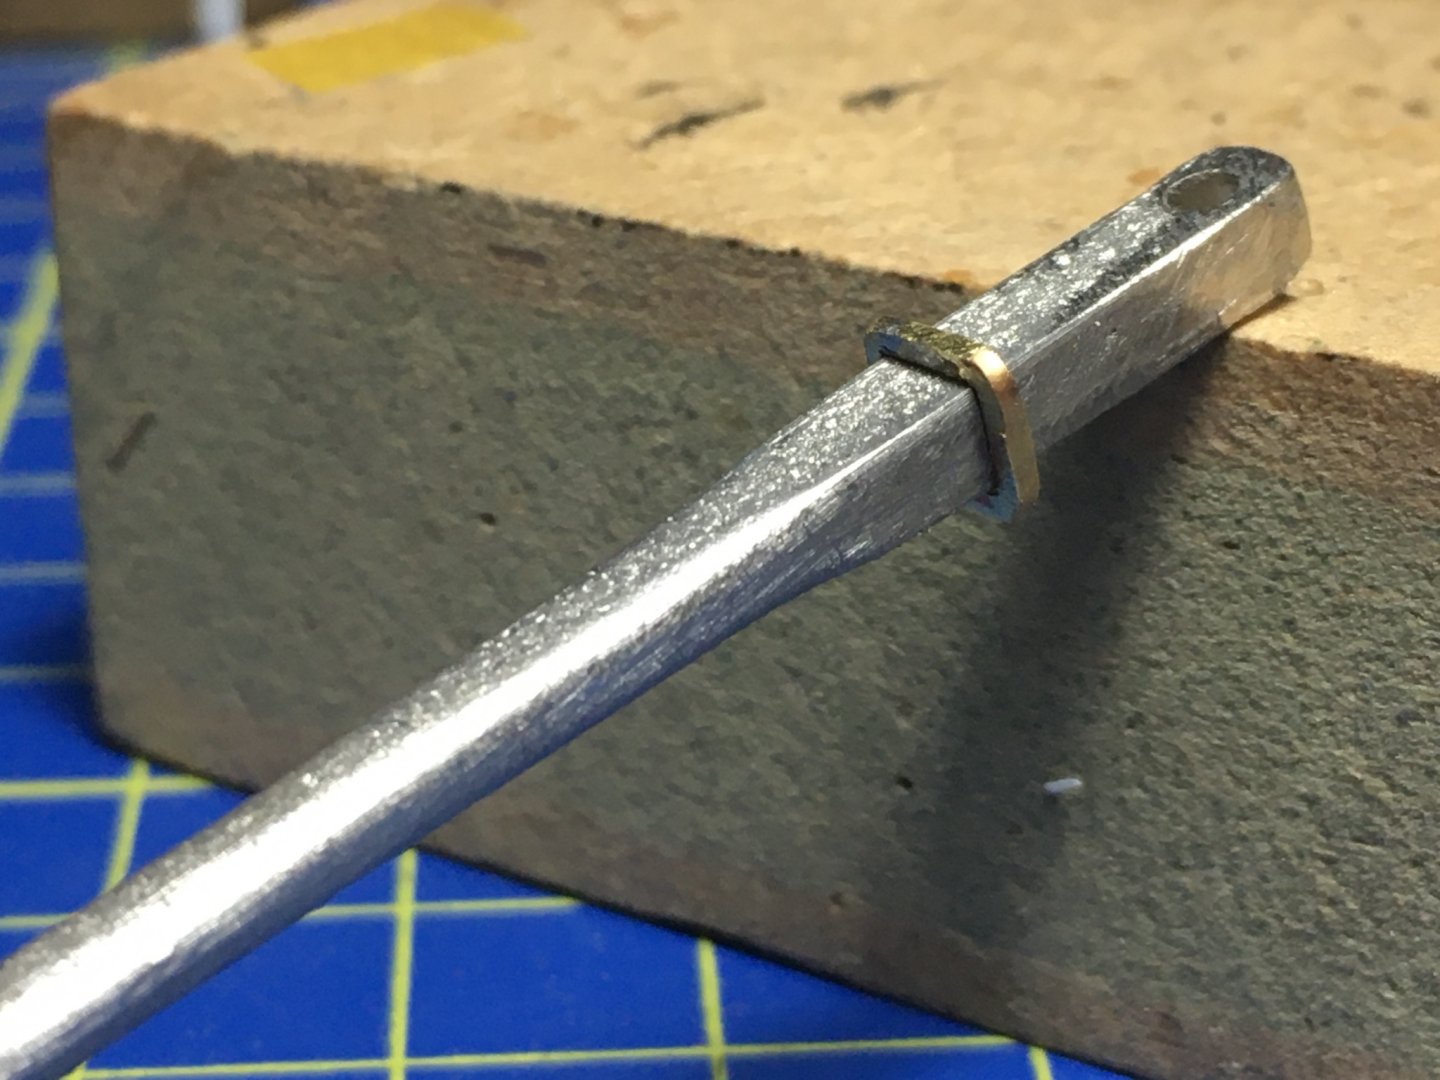
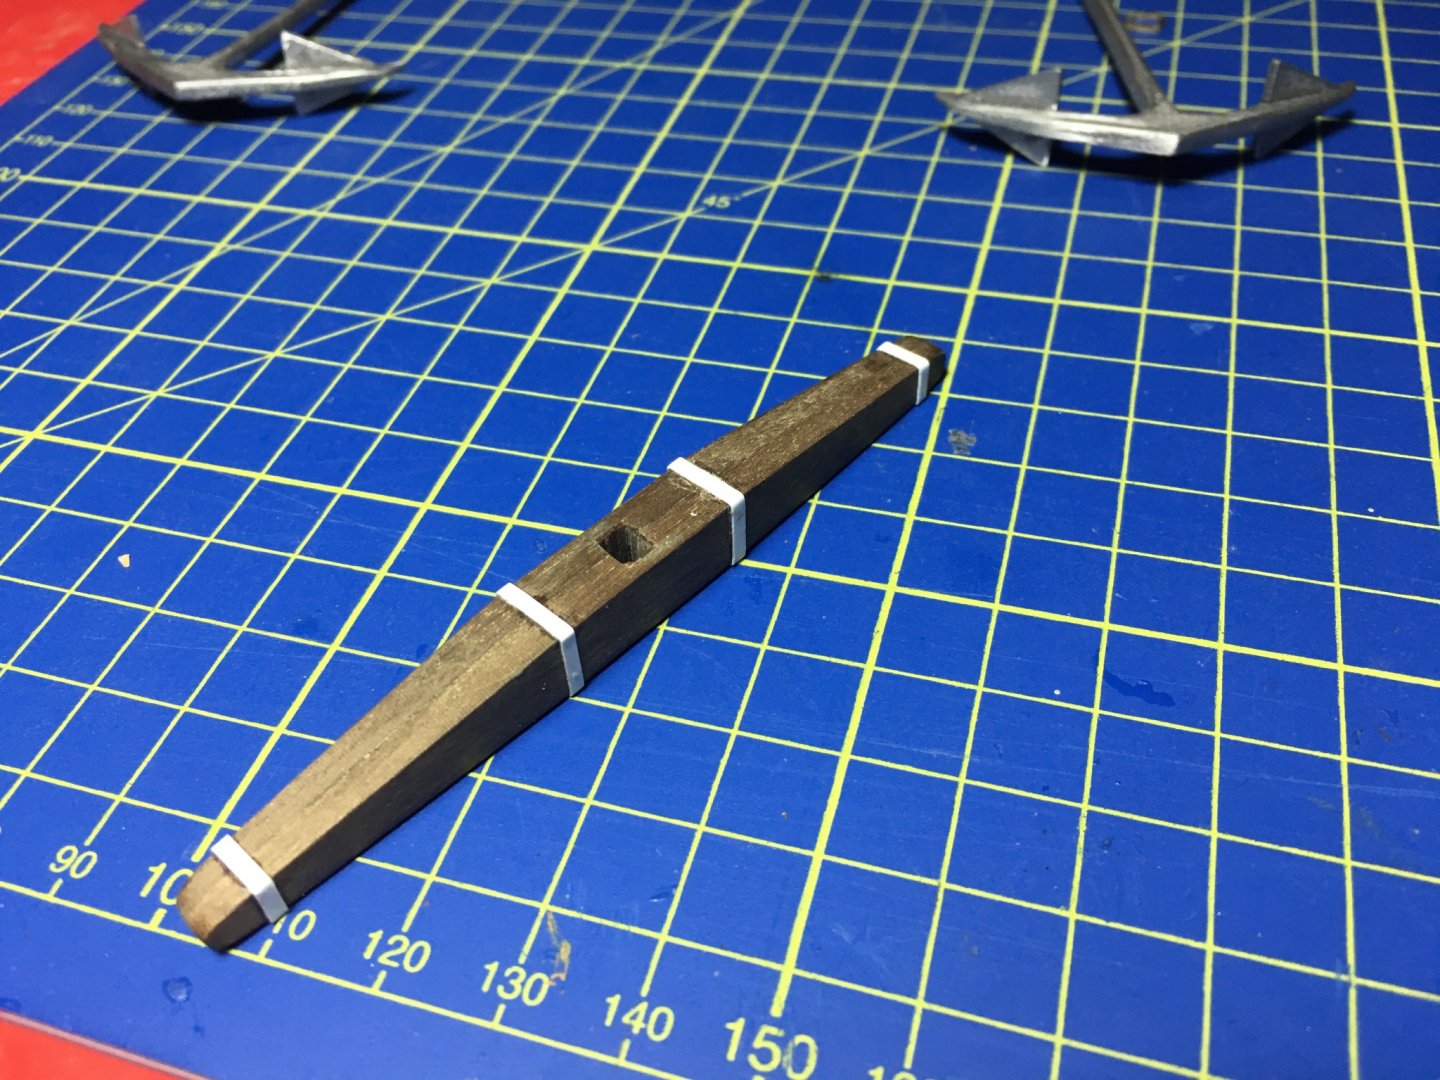
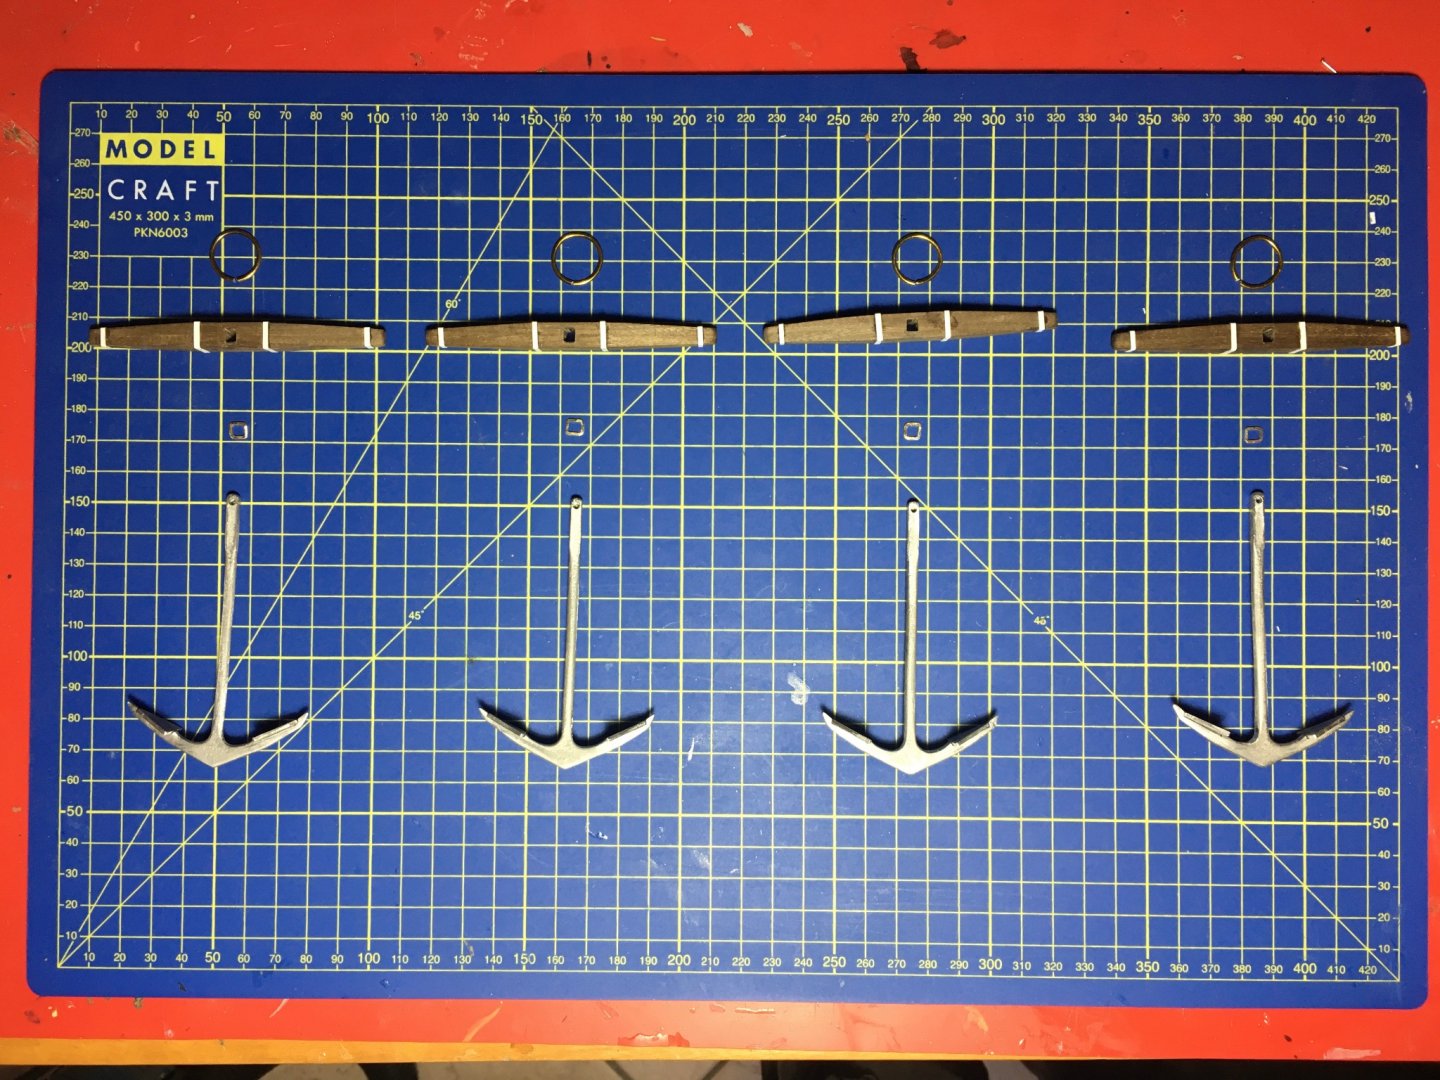
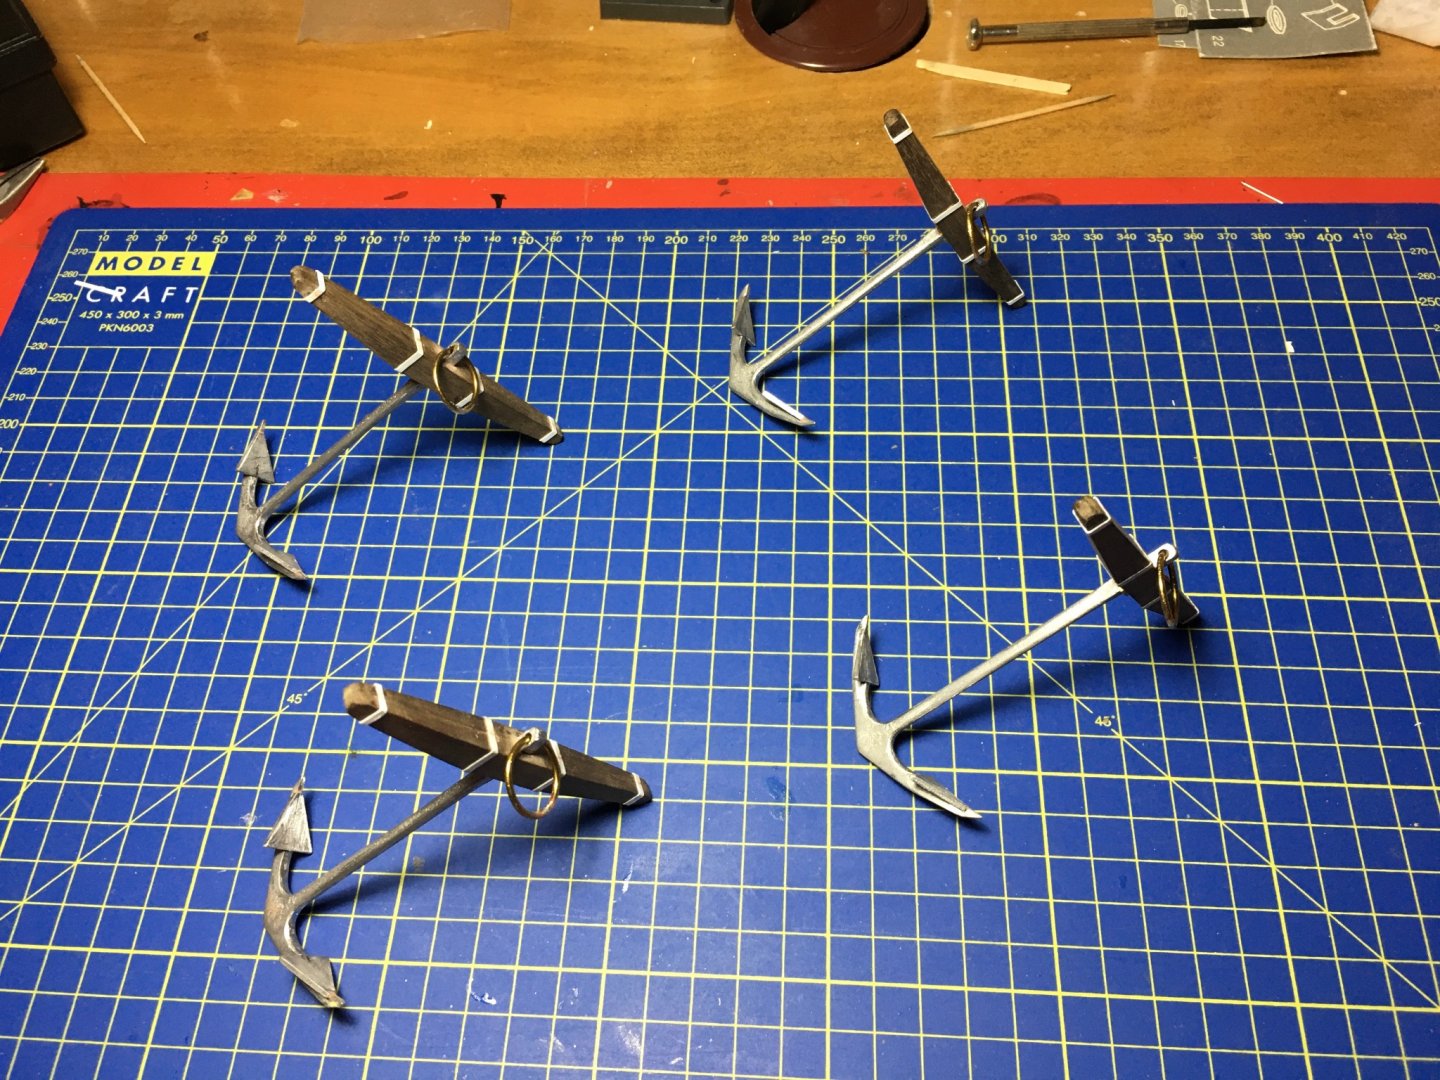
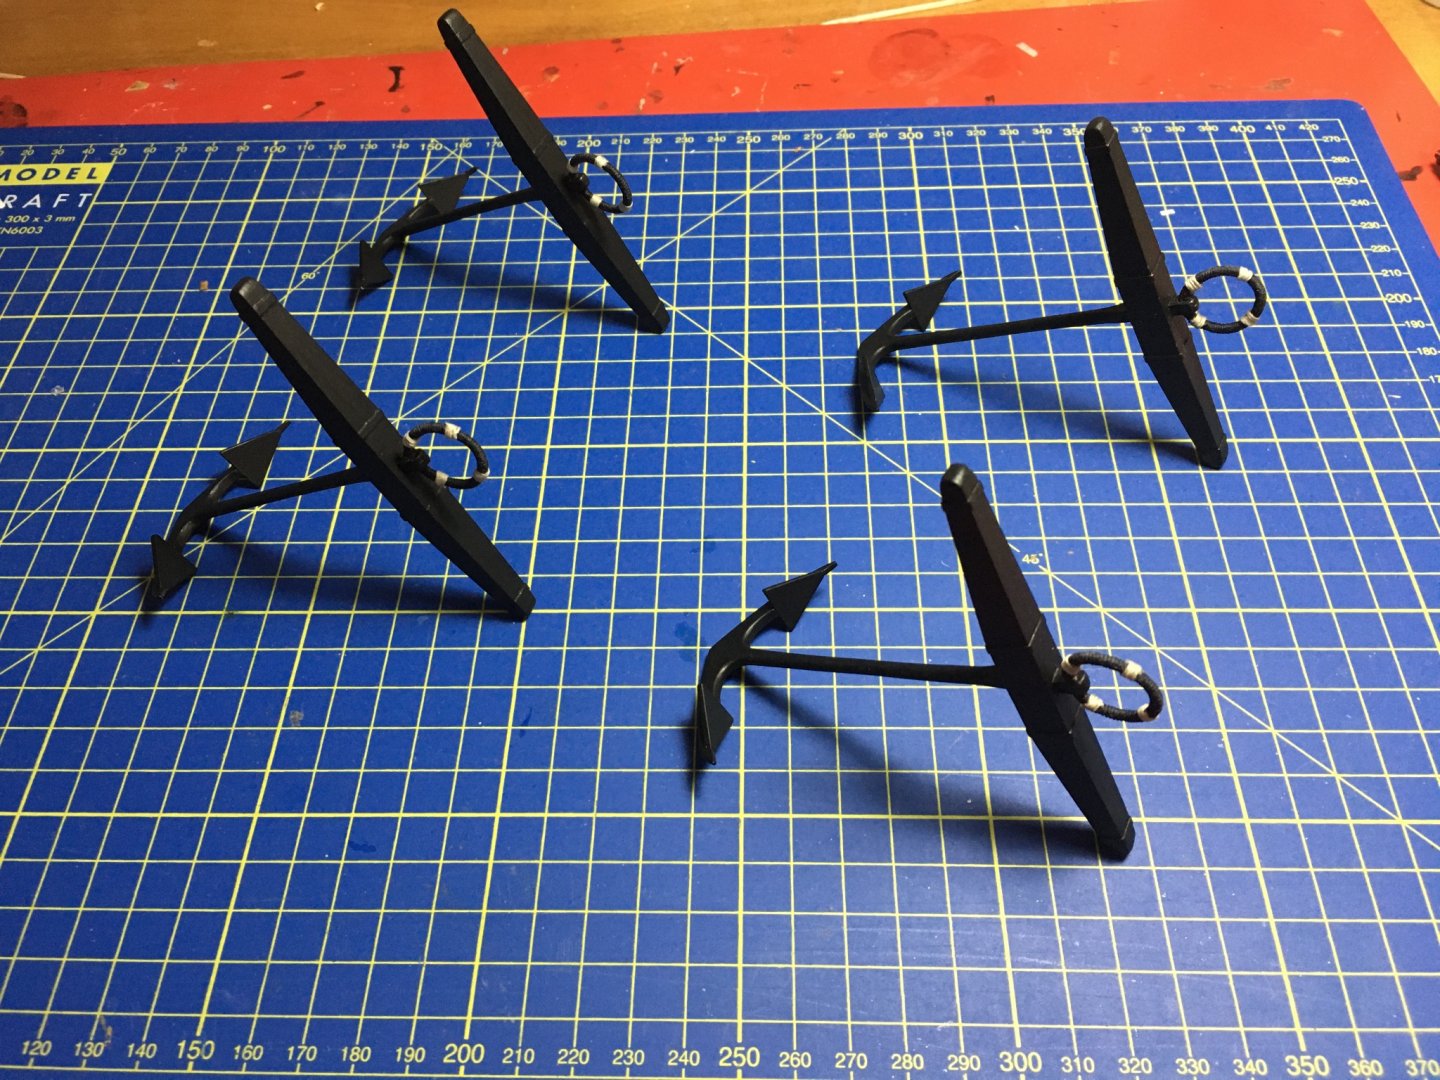
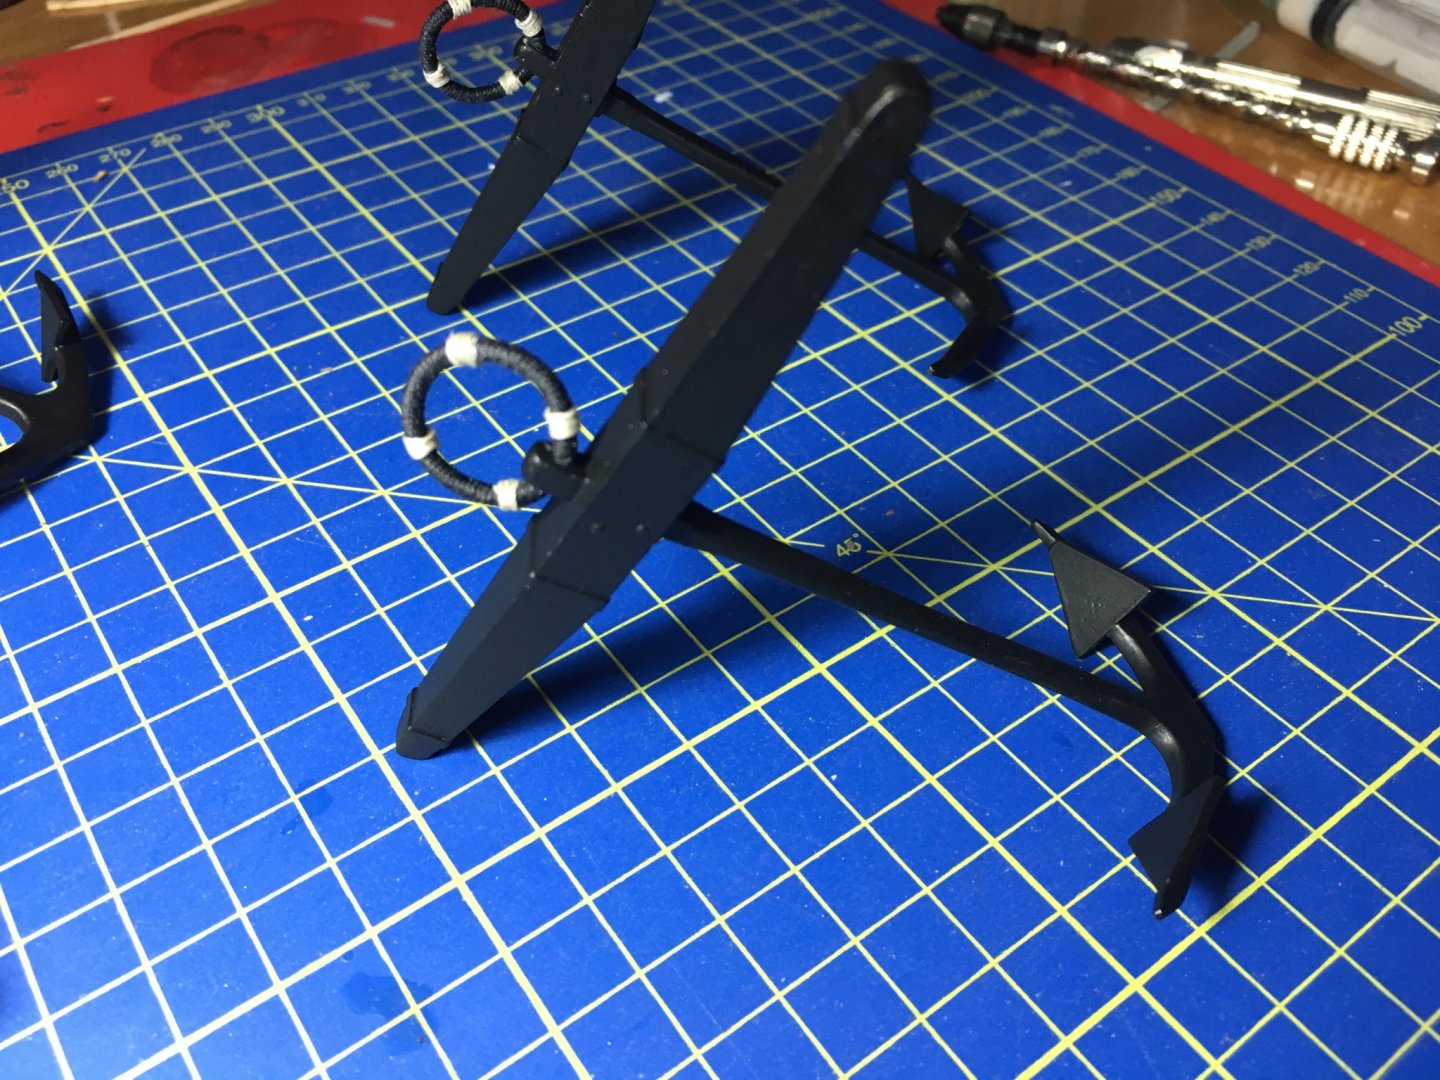
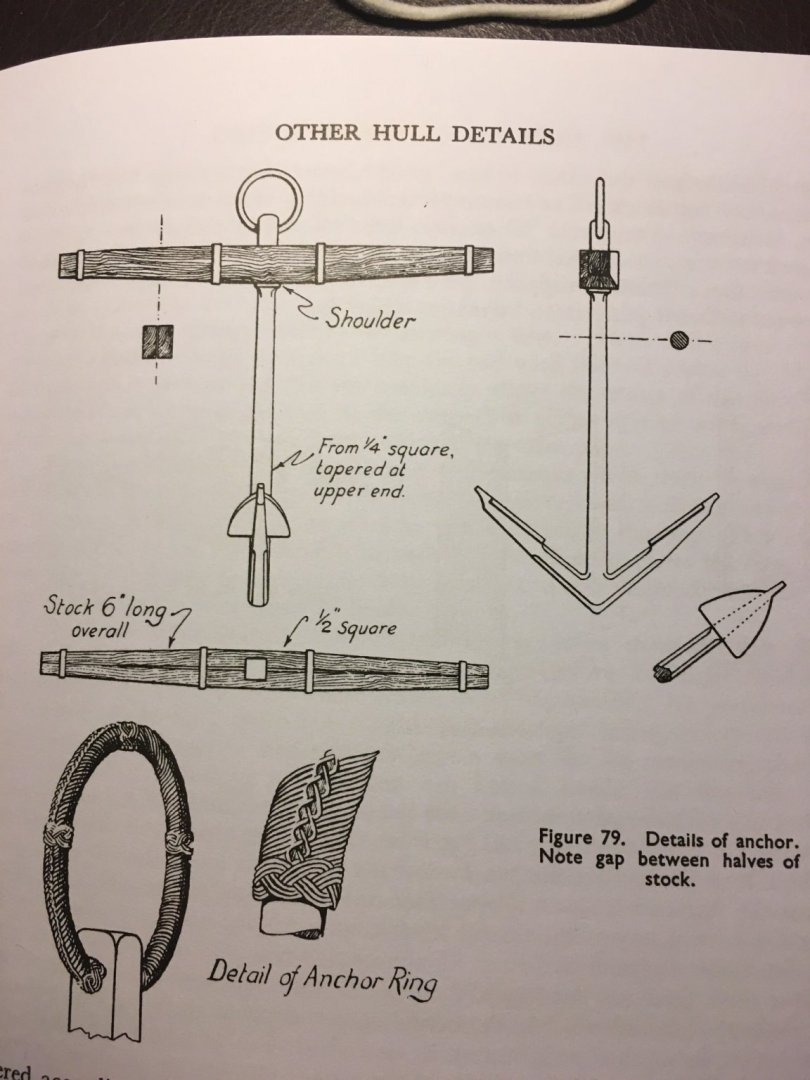
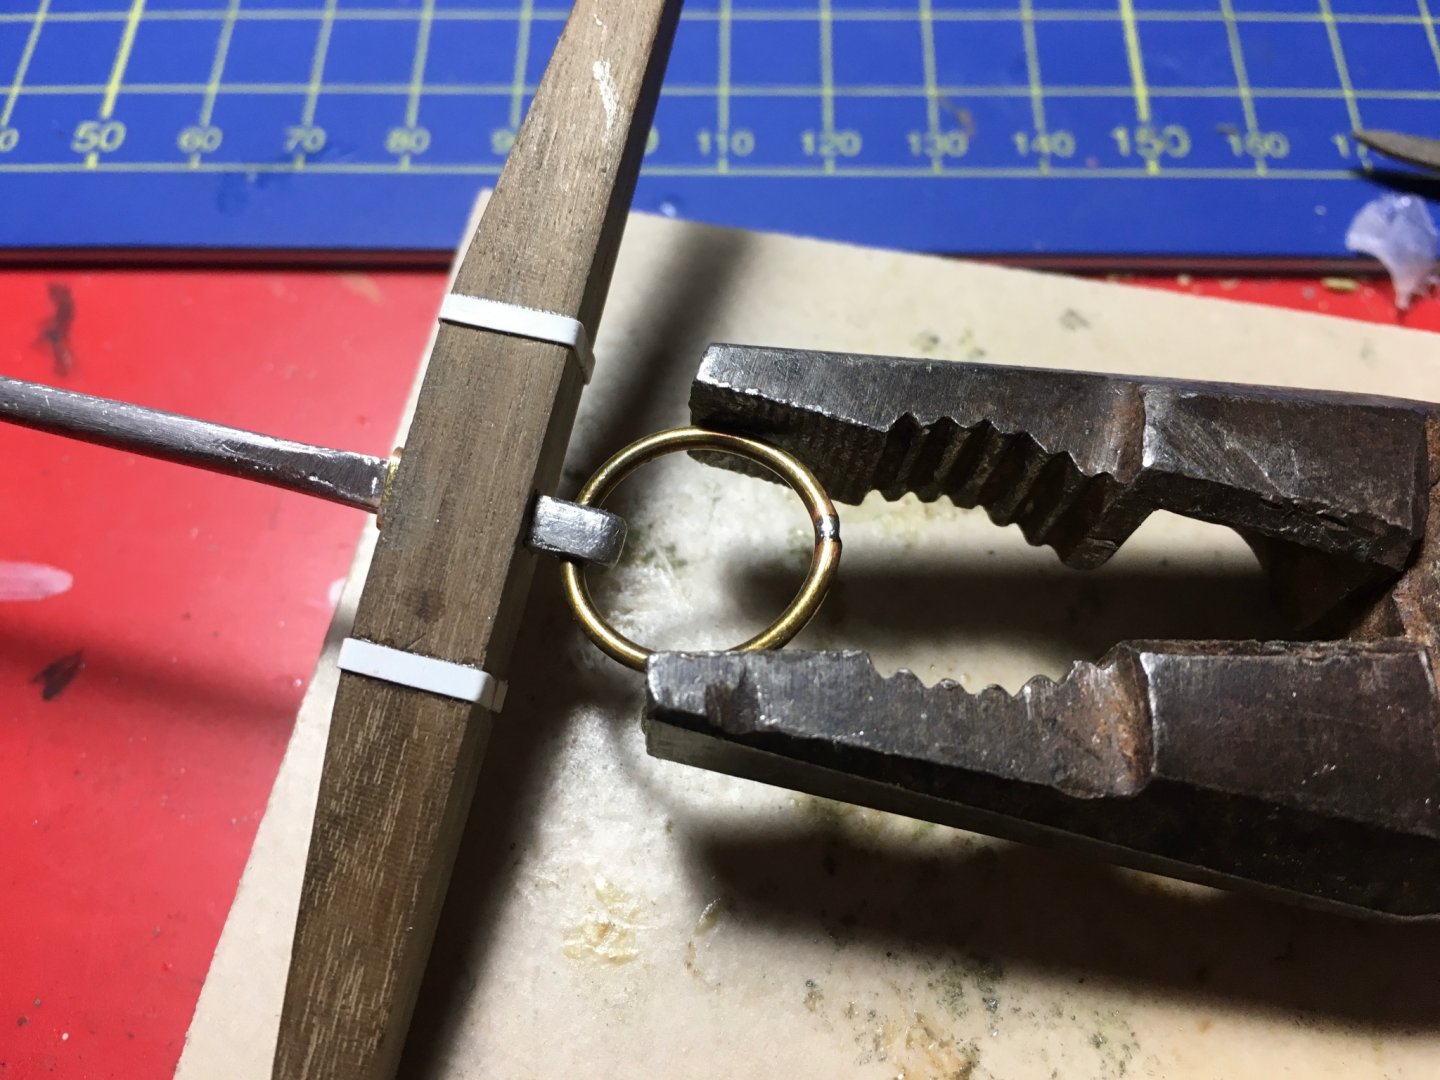
Thank you Paul, not really way ahead of you, I notice in your build that you have finished parts that I haven't done yet, such as fitting the gunport lids in place and other work. You are doing a great job on your Victory. Believe it or not I am still waiting to receive the decals for the fire buckets, which I like to finish before I continue the rest of the hammock cranes and netting. In the meantime I thought I might as well do something else, so I prepared the four big anchors. In the kit manual it shows the stock of the anchor tapered only on the underside. But from the this drawing and from internet images it is clearly tapered on the sides as well, only the top is flat all along. The drawing also shows a shoulder on the shank to keep the stock in place. I simulated this with a square brass rod by bending it in a square to fit the square part of the shank. Bands made from styrene strips. Rings shaped and all parts ready to be fitted together. Shank, shoulder, stock fitted together and ring soldered in place. Anchors painted, pudding round the rings is simulated with black thread and four seizings with natural thread. Robert

- 527 replies
-
- 9
-
-
- caldercraft
- victory
- (and 1 more)
-
HMS Victory by Helli - Caldercraft
Robert29 replied to Helli's topic in - Kit build logs for subjects built from 1751 - 1800
That is really nice work Helli. The ship boats are so detailed and the rigging of the blocks to the yards is so neat. Great work. Robert -
Roberts, Thank you for your nice comments. I learned a lot from this forum from other builders, so I definitely don't mind welcoming you on board, and wherever I can help you don't hesitate to ask. Happy new year. Heinz, thank you and a happy new year to you and your family too. Robert
- 527 replies
-
- 1
-

-
- caldercraft
- victory
- (and 1 more)
-
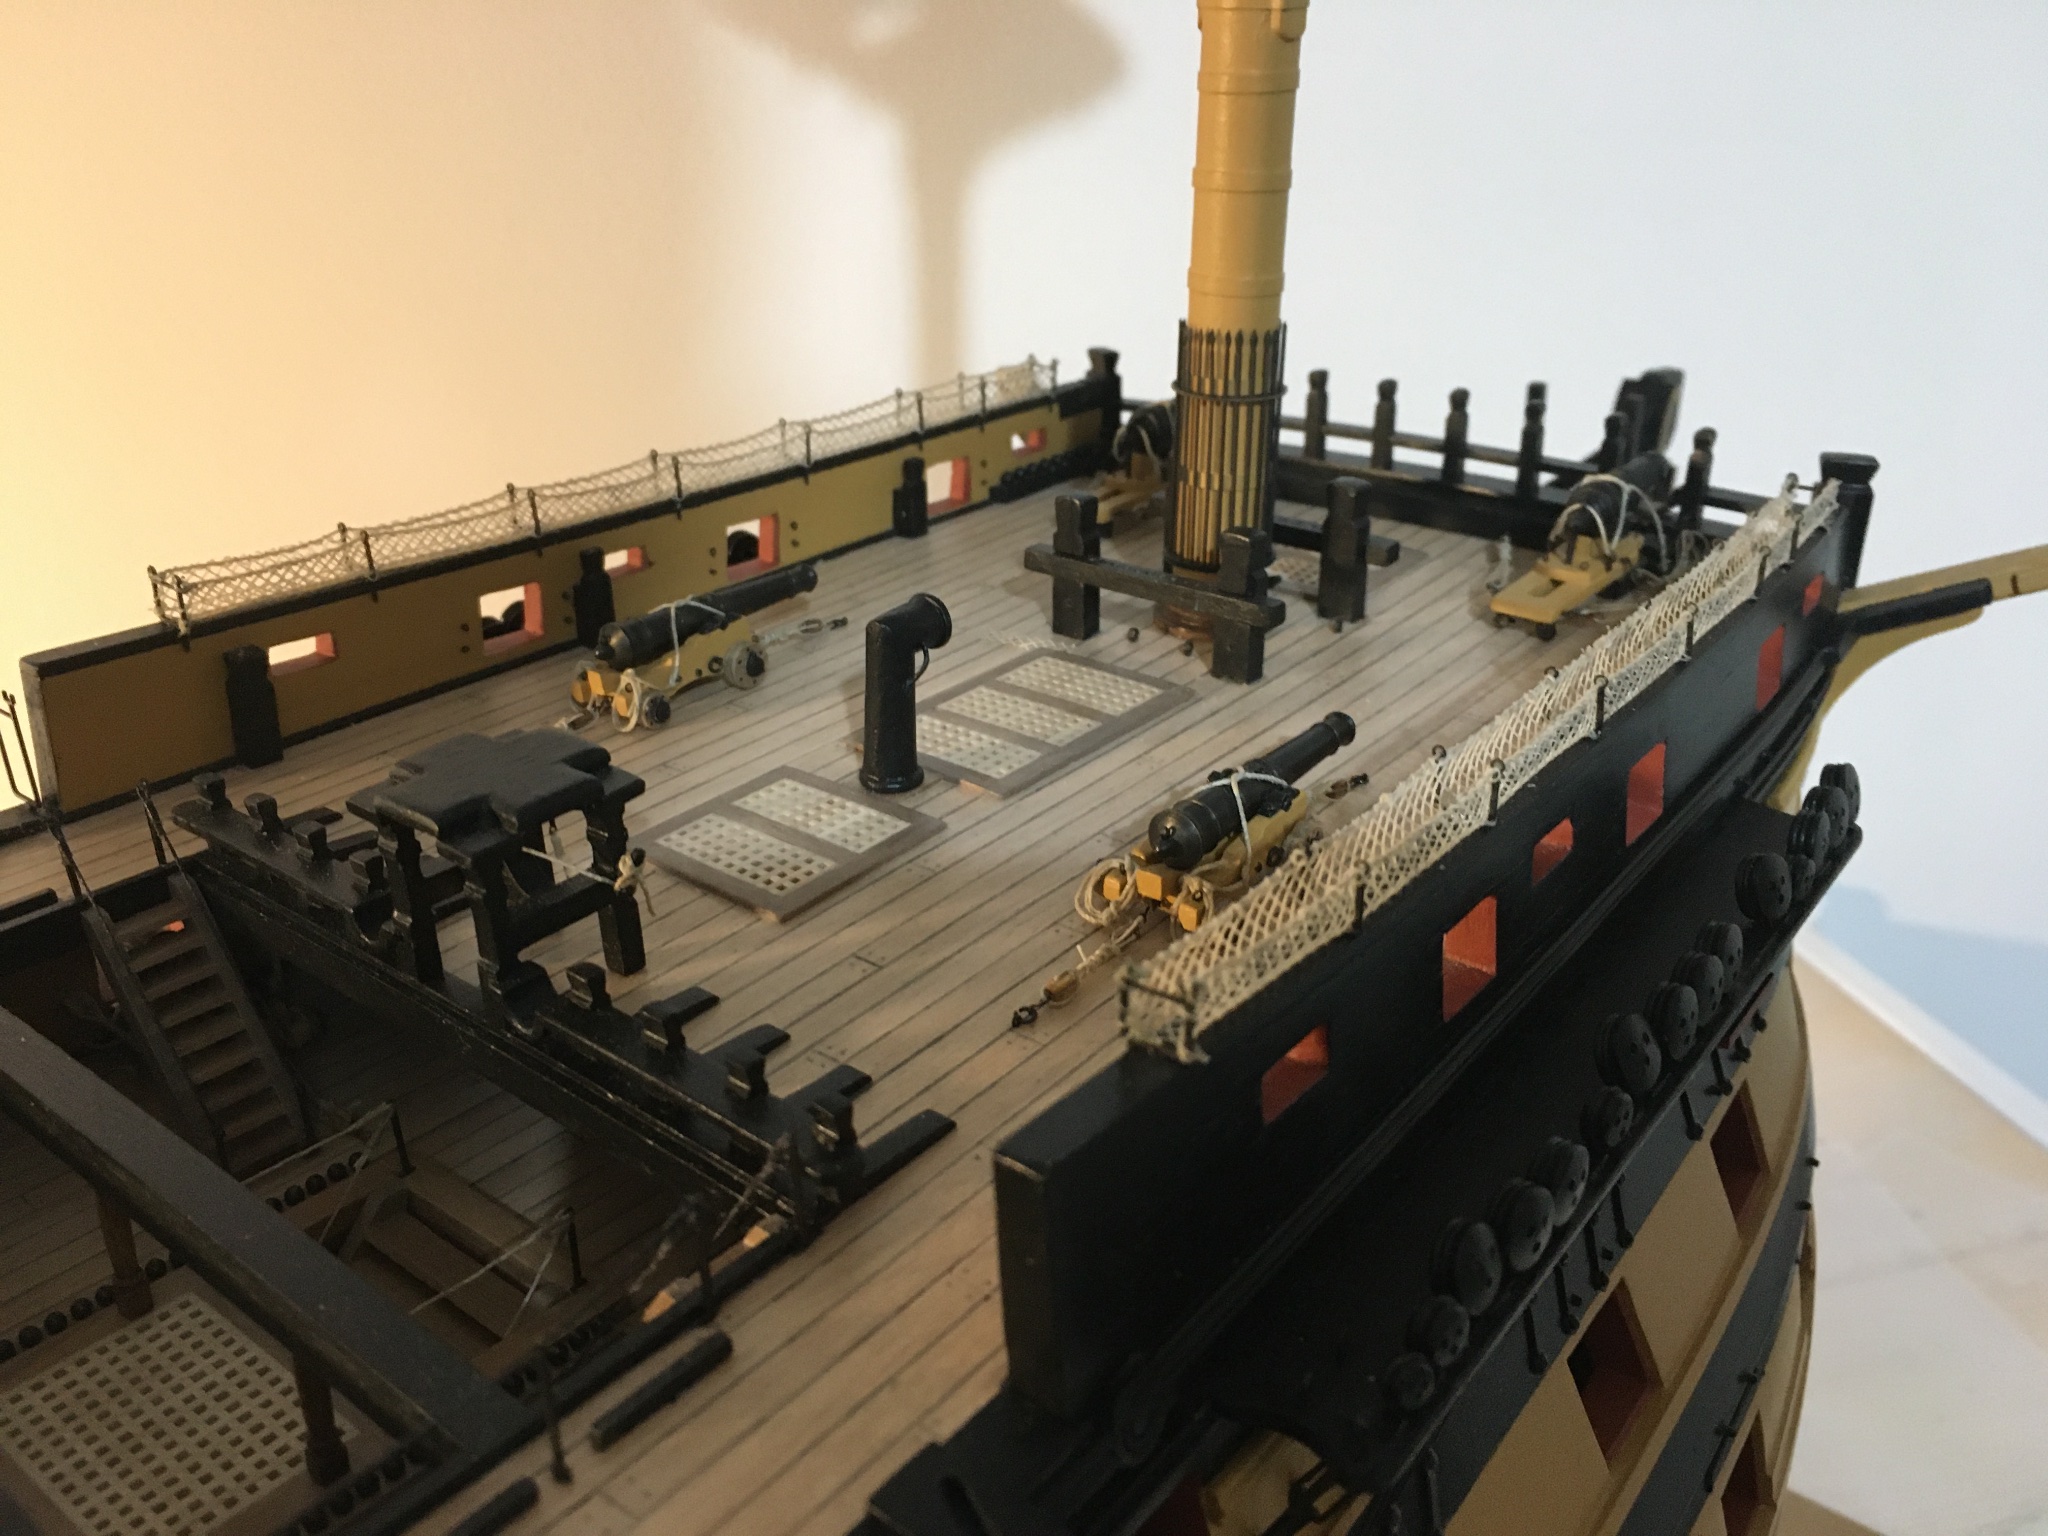
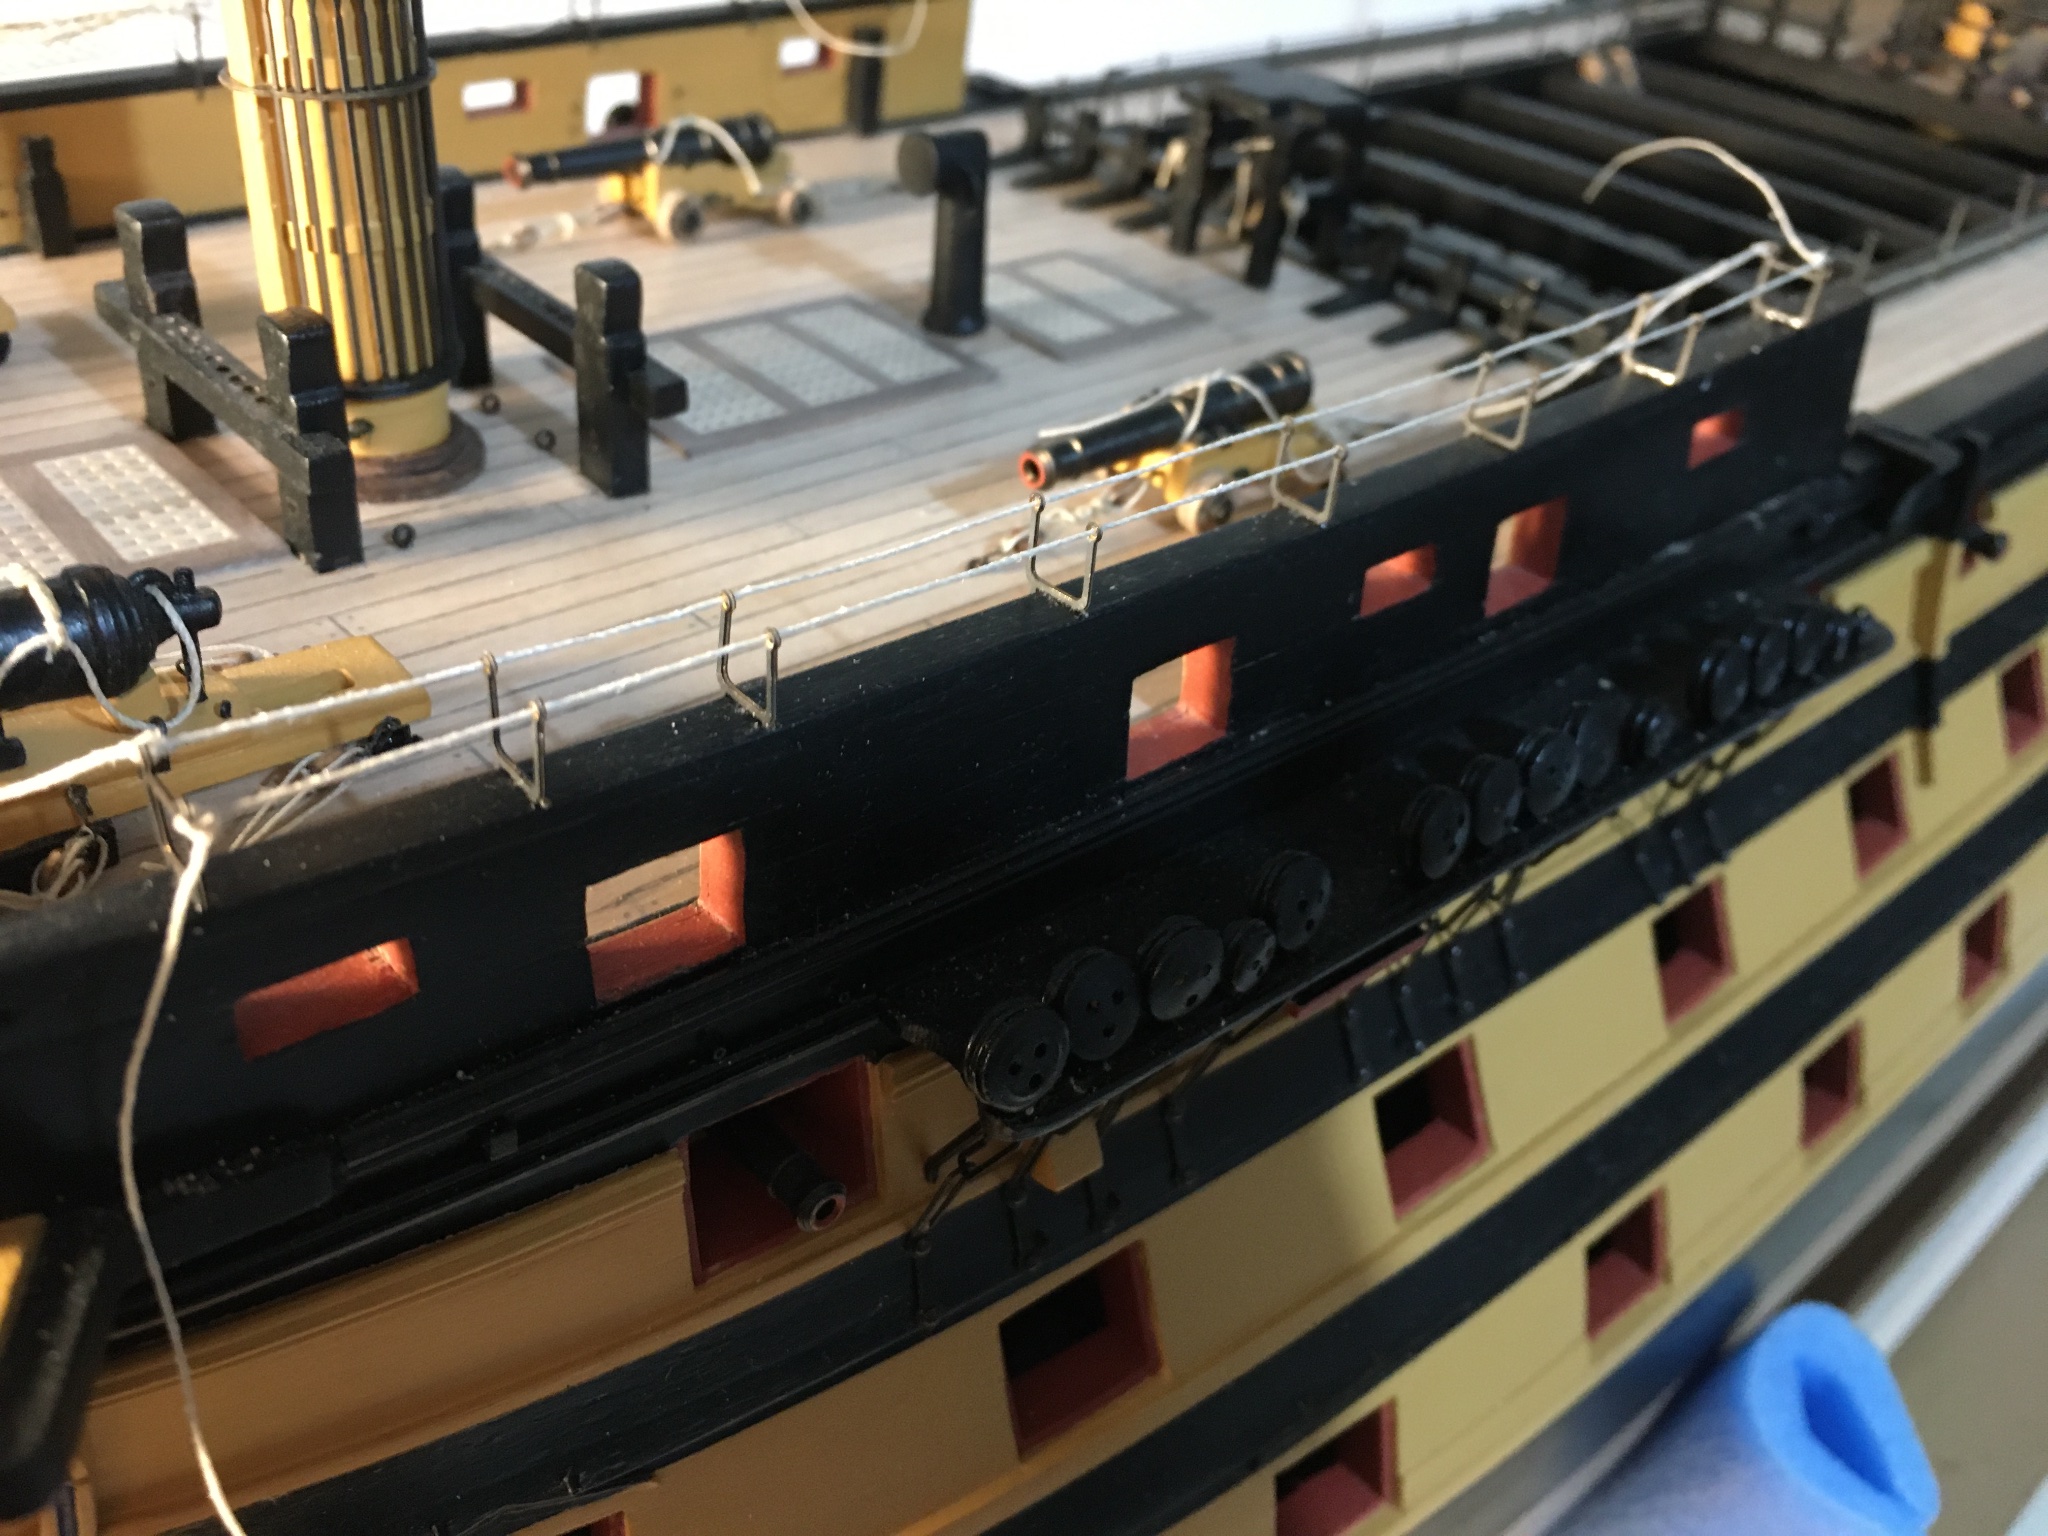
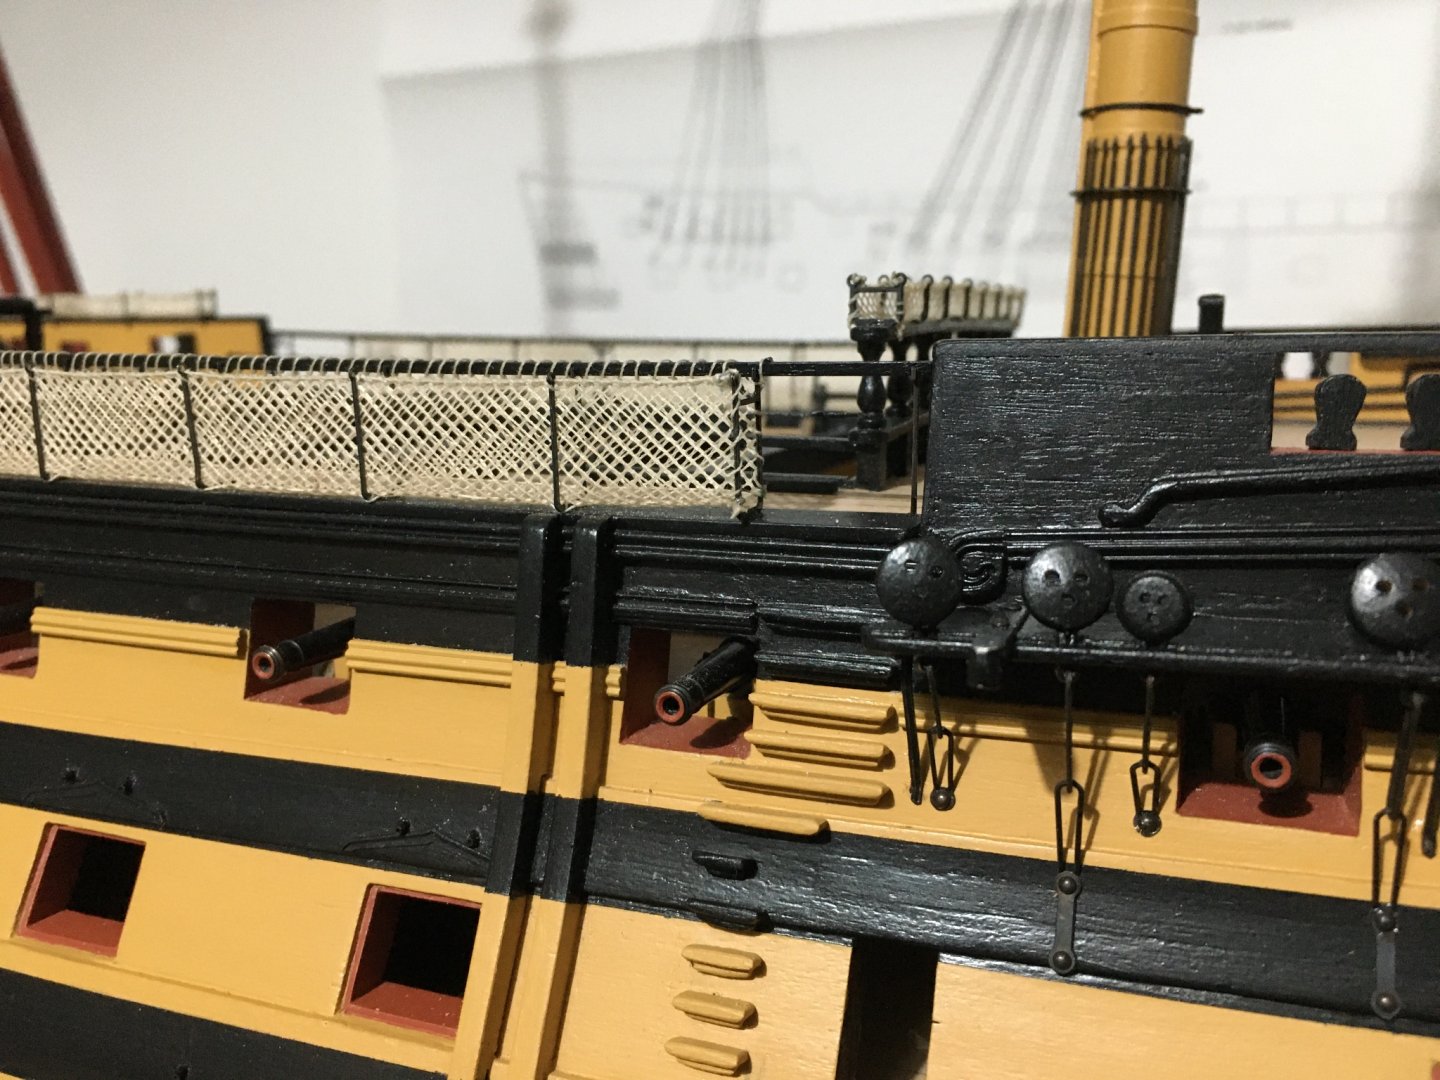
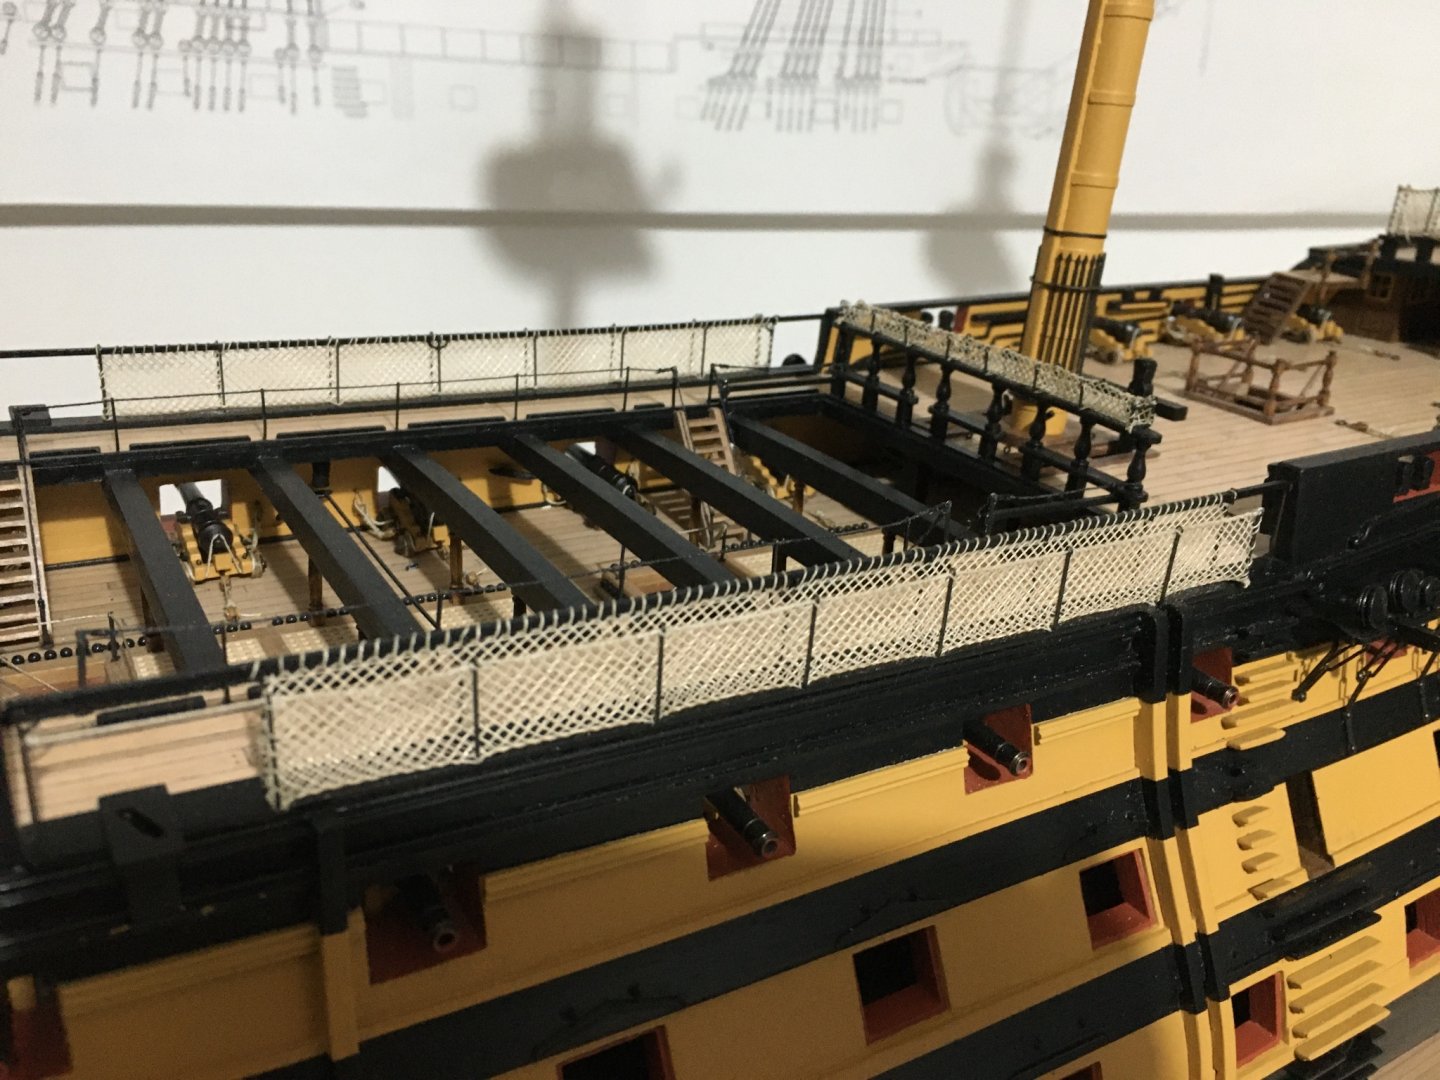
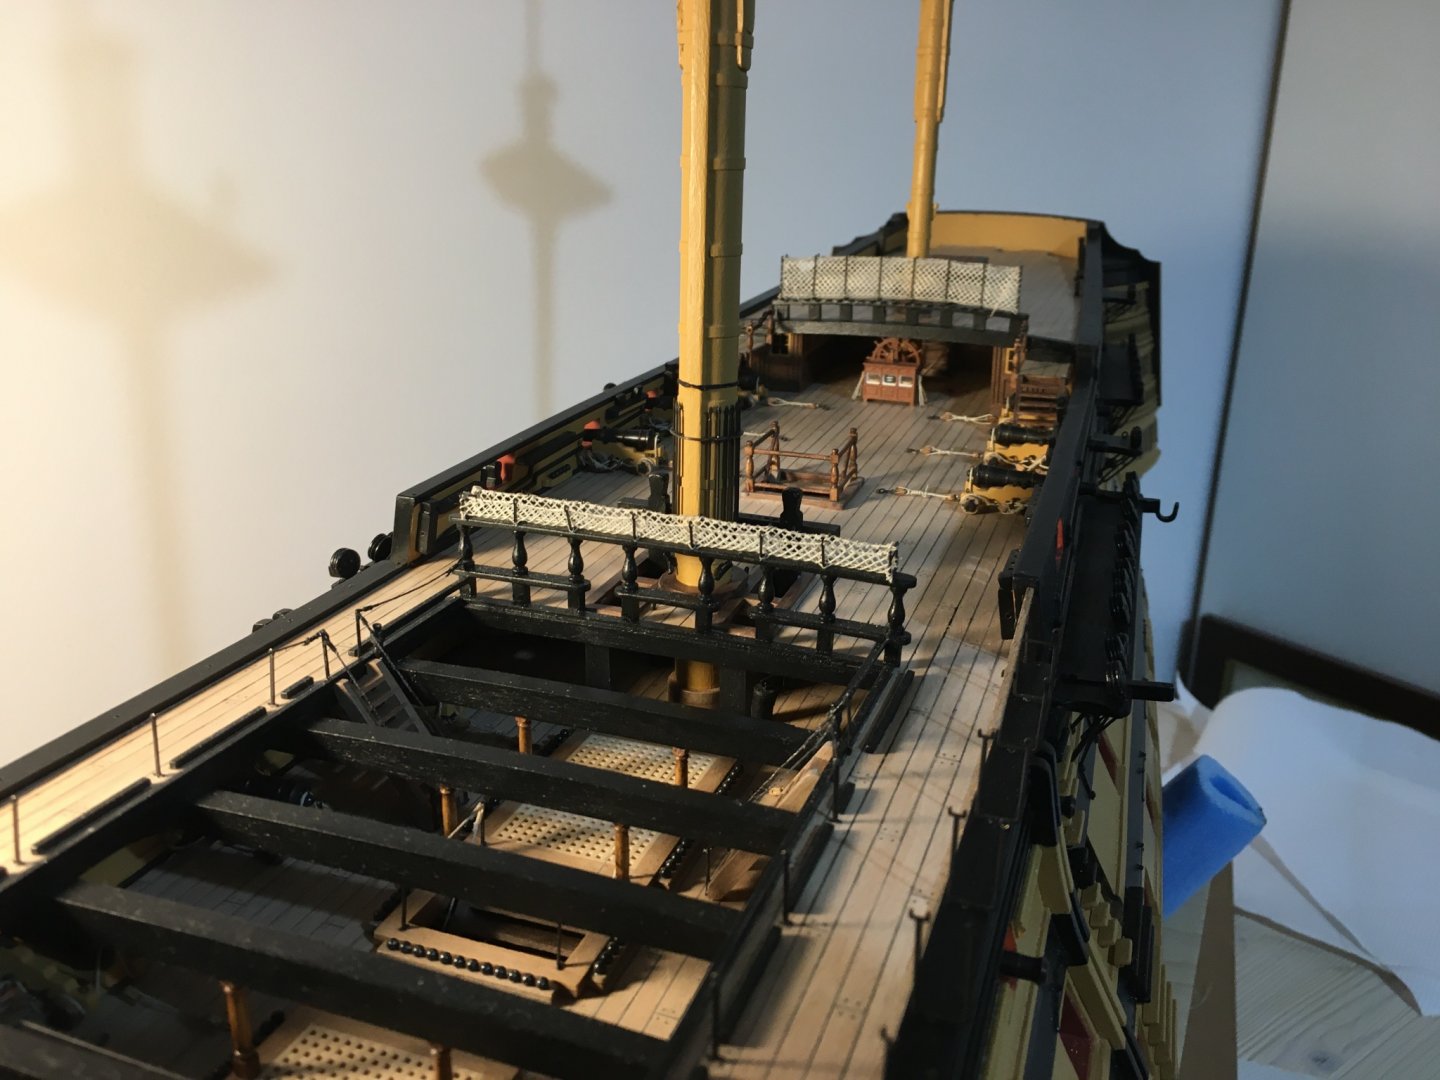
Thank you Michael, A small update on the hammock cranes. I finished the waist hammock cranes with the netting. The area where the anchor is going to rest I decided that it is best to leave it with no netting at all, Before I carry on with the poop and the quarterdeck hammock cranes I would prefer to finish and fit in place the fire buckets but I am still waiting to receive the monogram decals I had ordered. Hopefully I will receive them by next week. Robert


- 527 replies
-
- 10
-
-
- caldercraft
- victory
- (and 1 more)
-
Nice jig Michael. On my Victory I had used a drilled block of wood with a spirit level and I had to readjust a few of them, but with your jig I think you get the positions spot on. Through experience I have learned that it is always worth the time spent on making jigs, especially when you have repetitive work. Robert
-
Merry Christmas and a happy healthy New Year to you too Helli and to all members of this great forum. Robert
- 527 replies
-
- 3
-
-
- caldercraft
- victory
- (and 1 more)
-
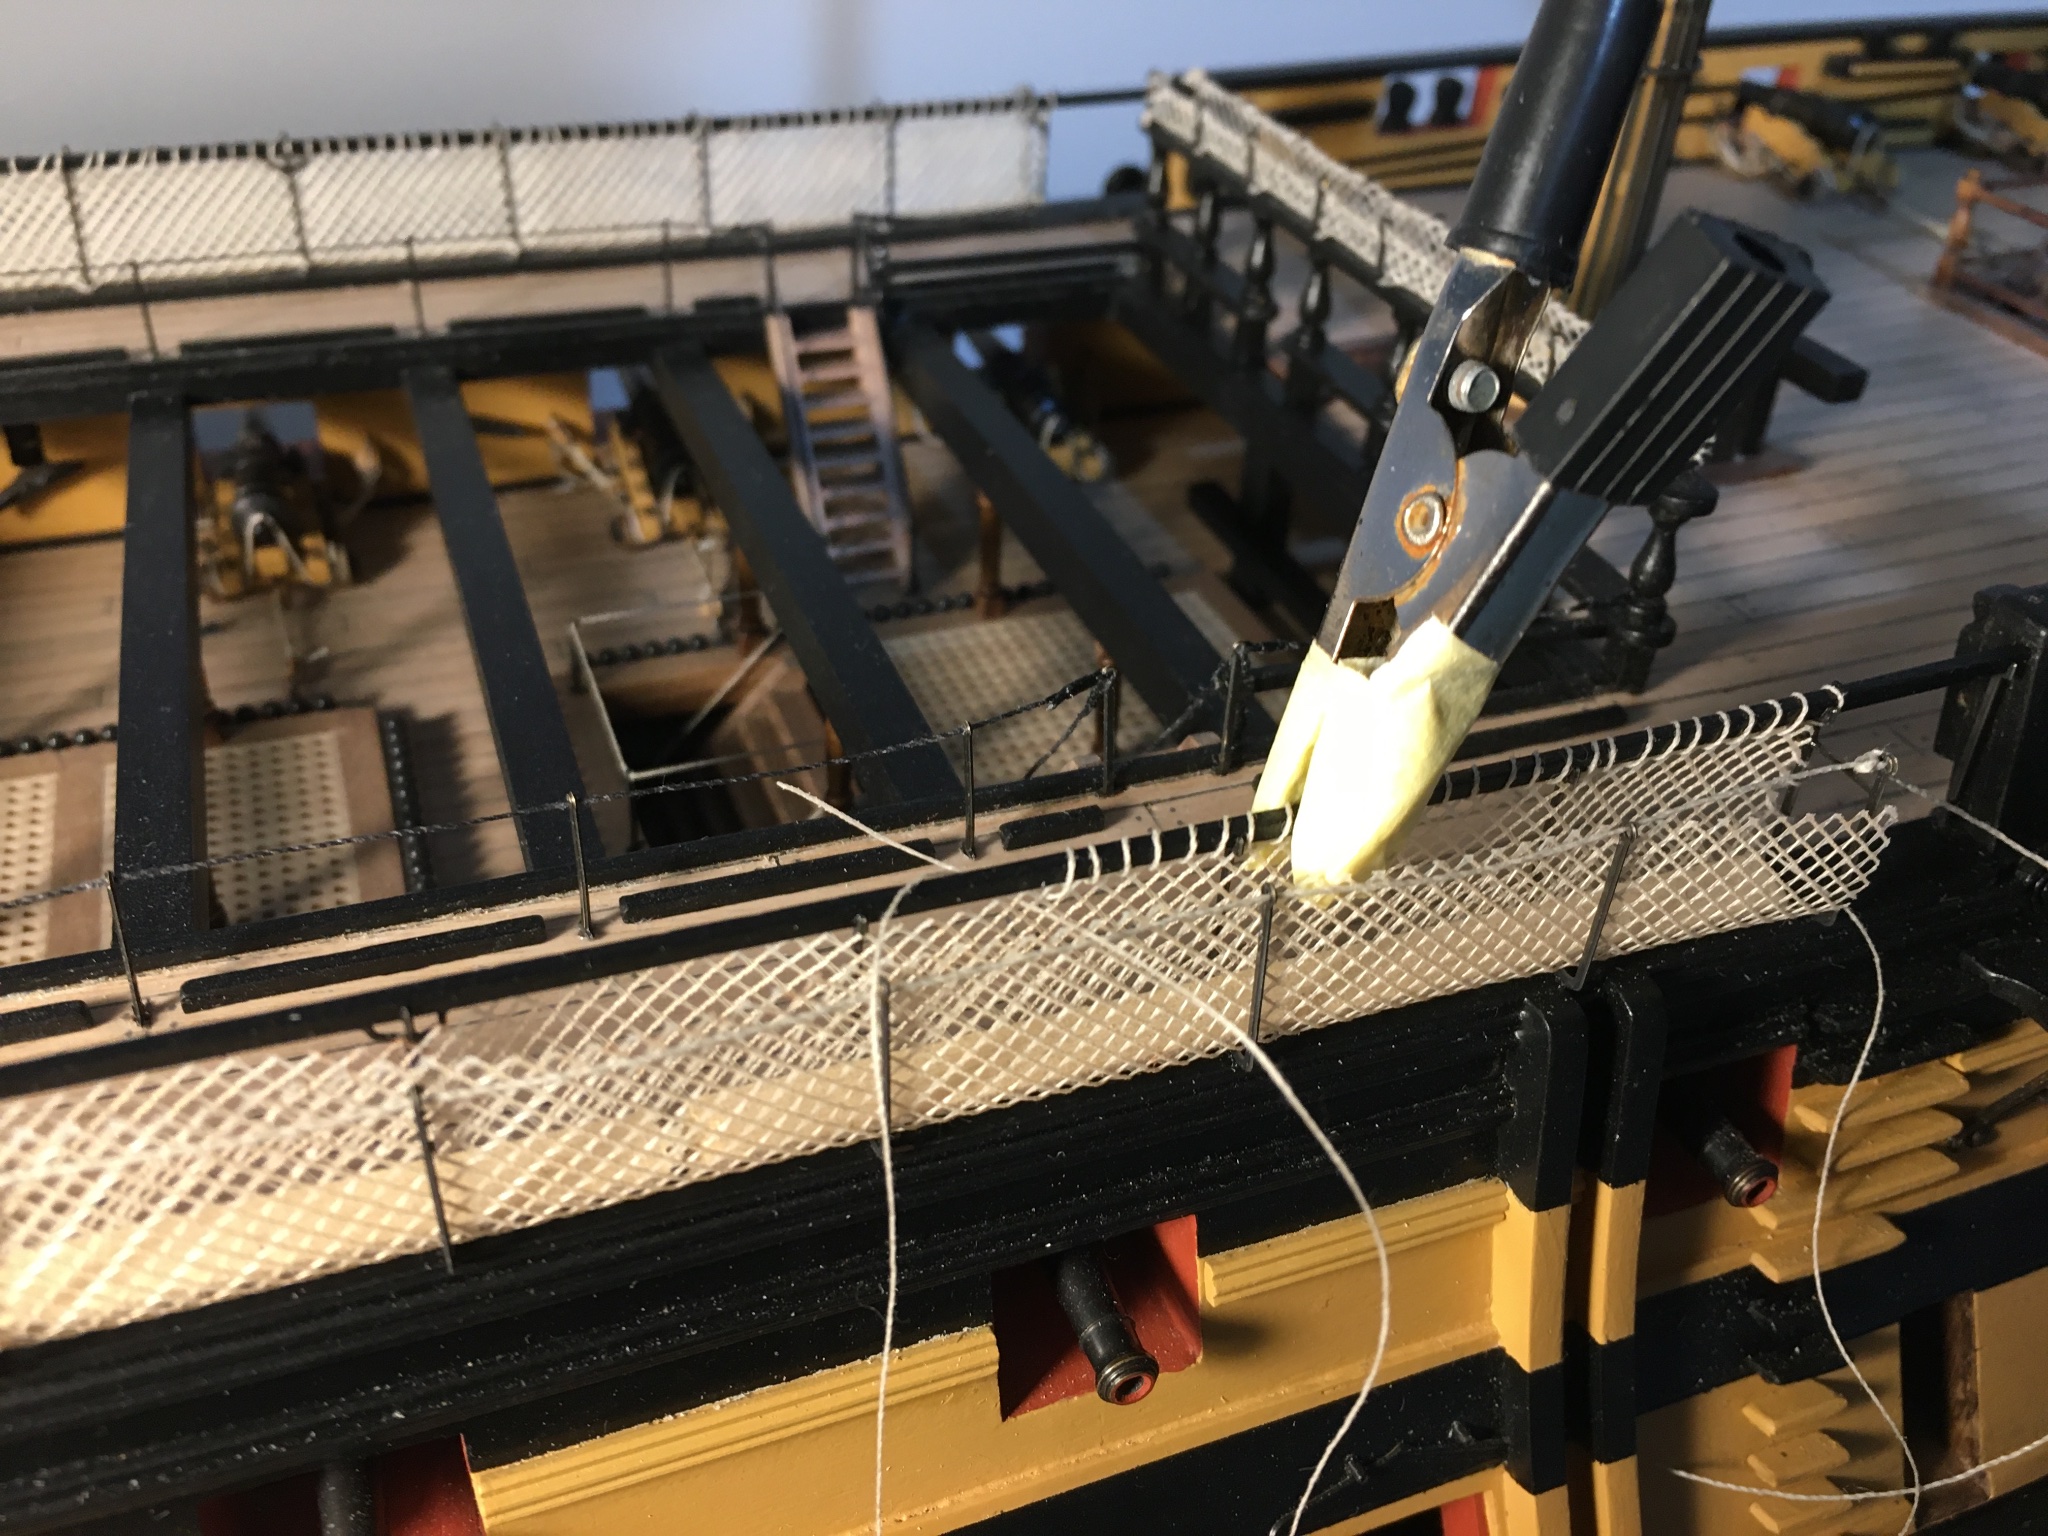
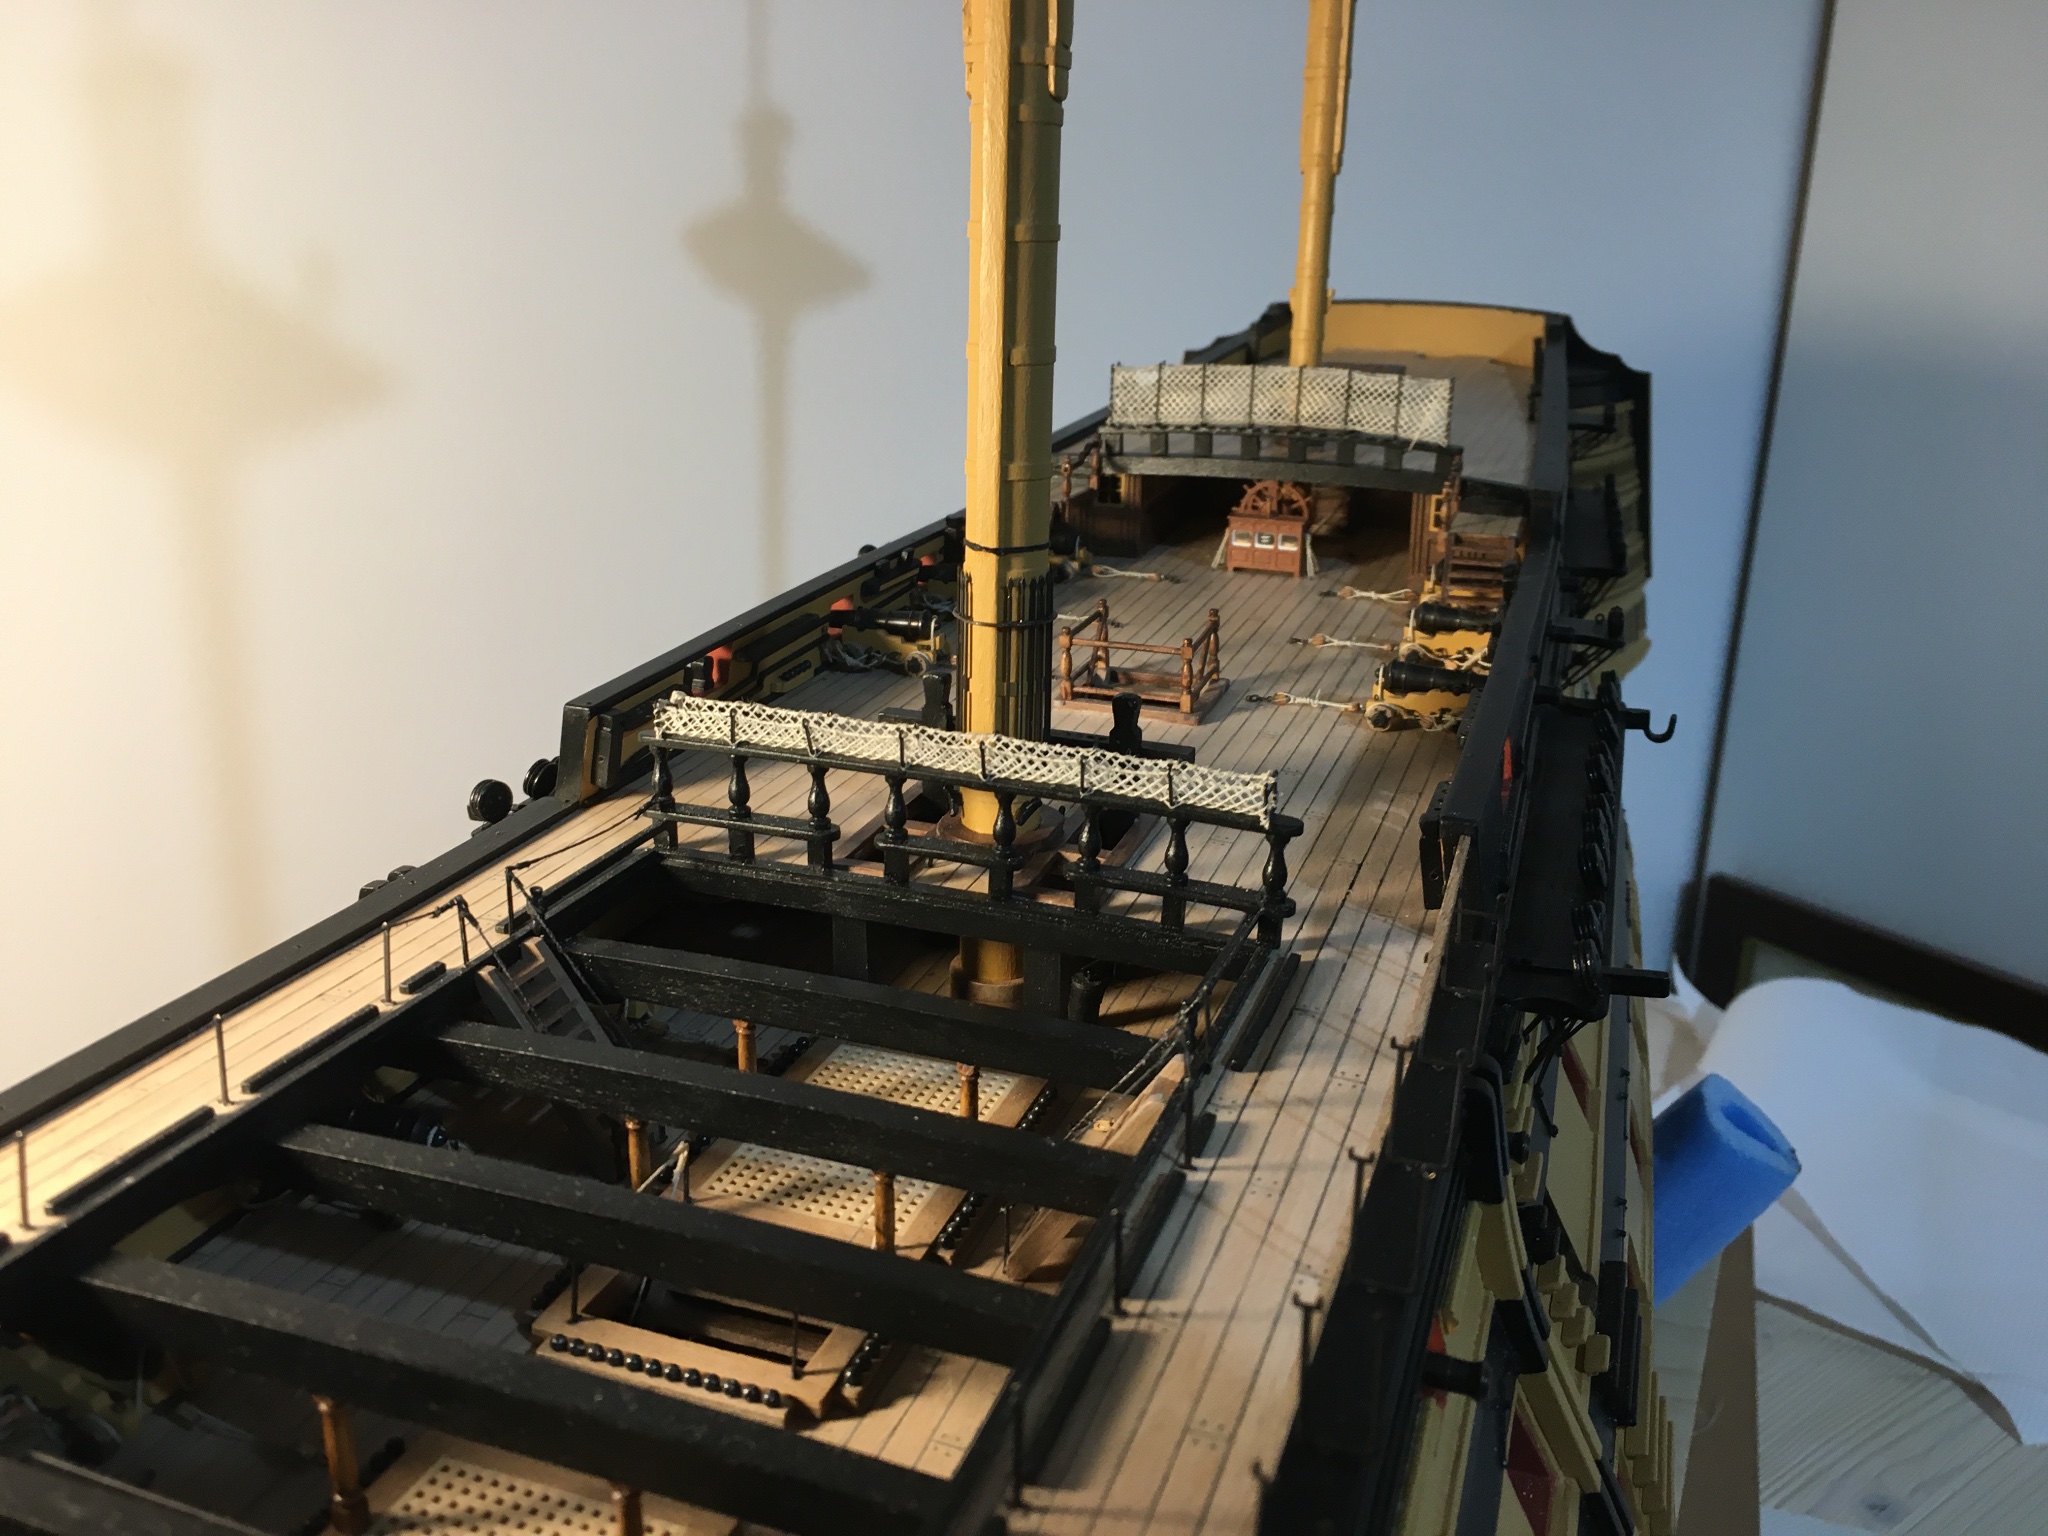
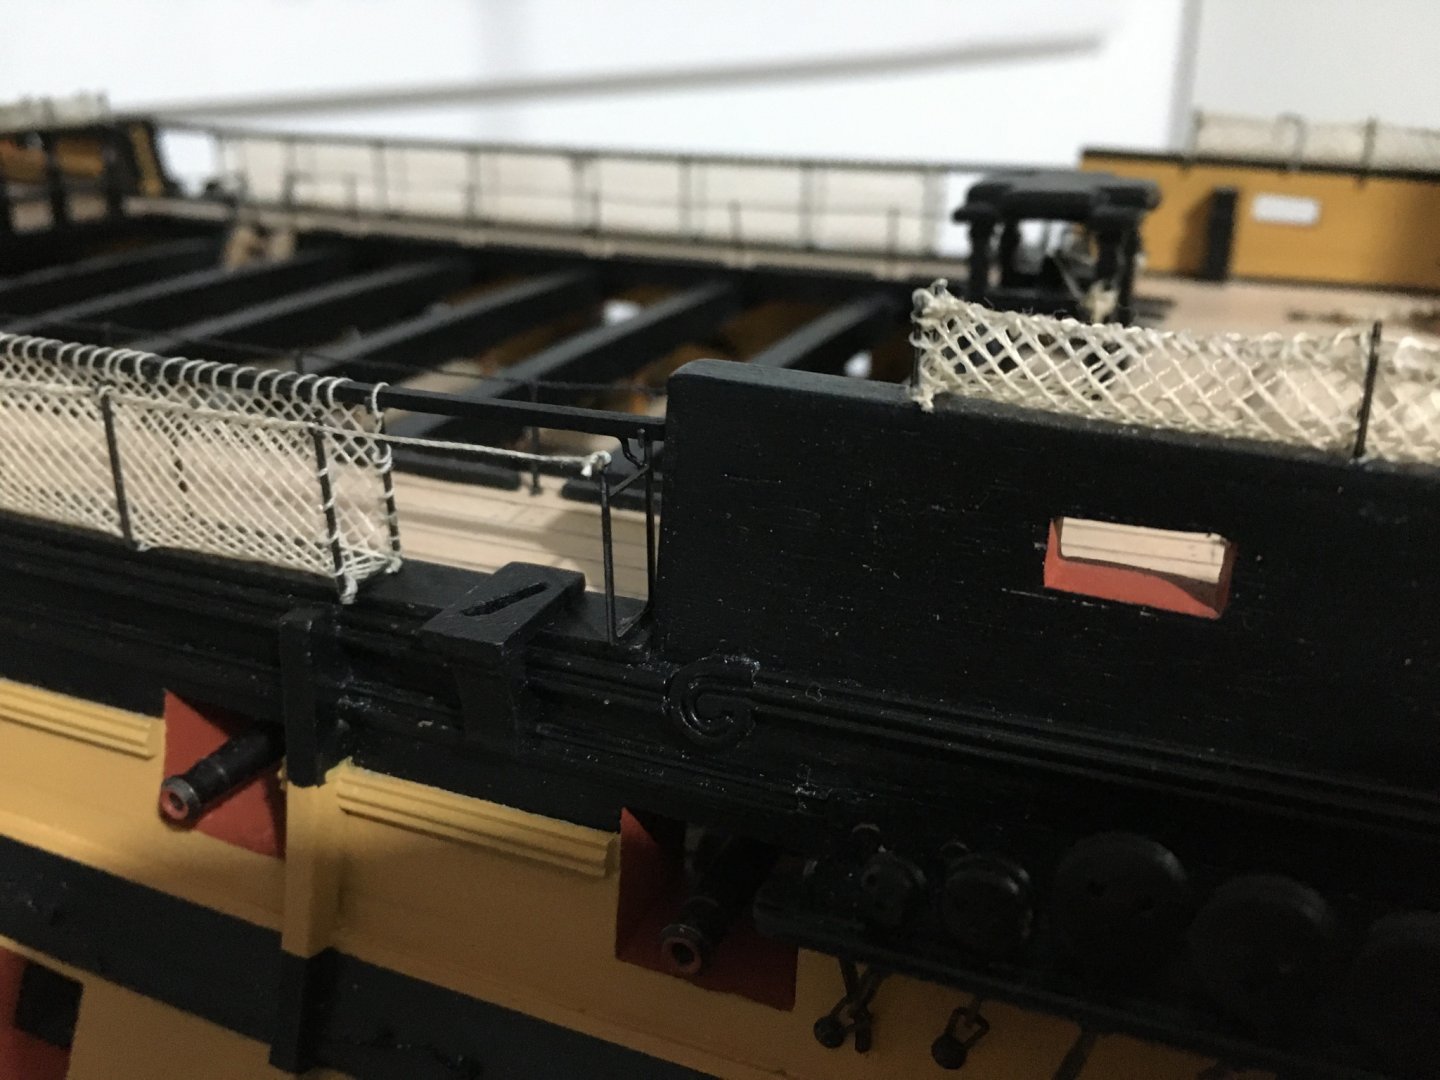
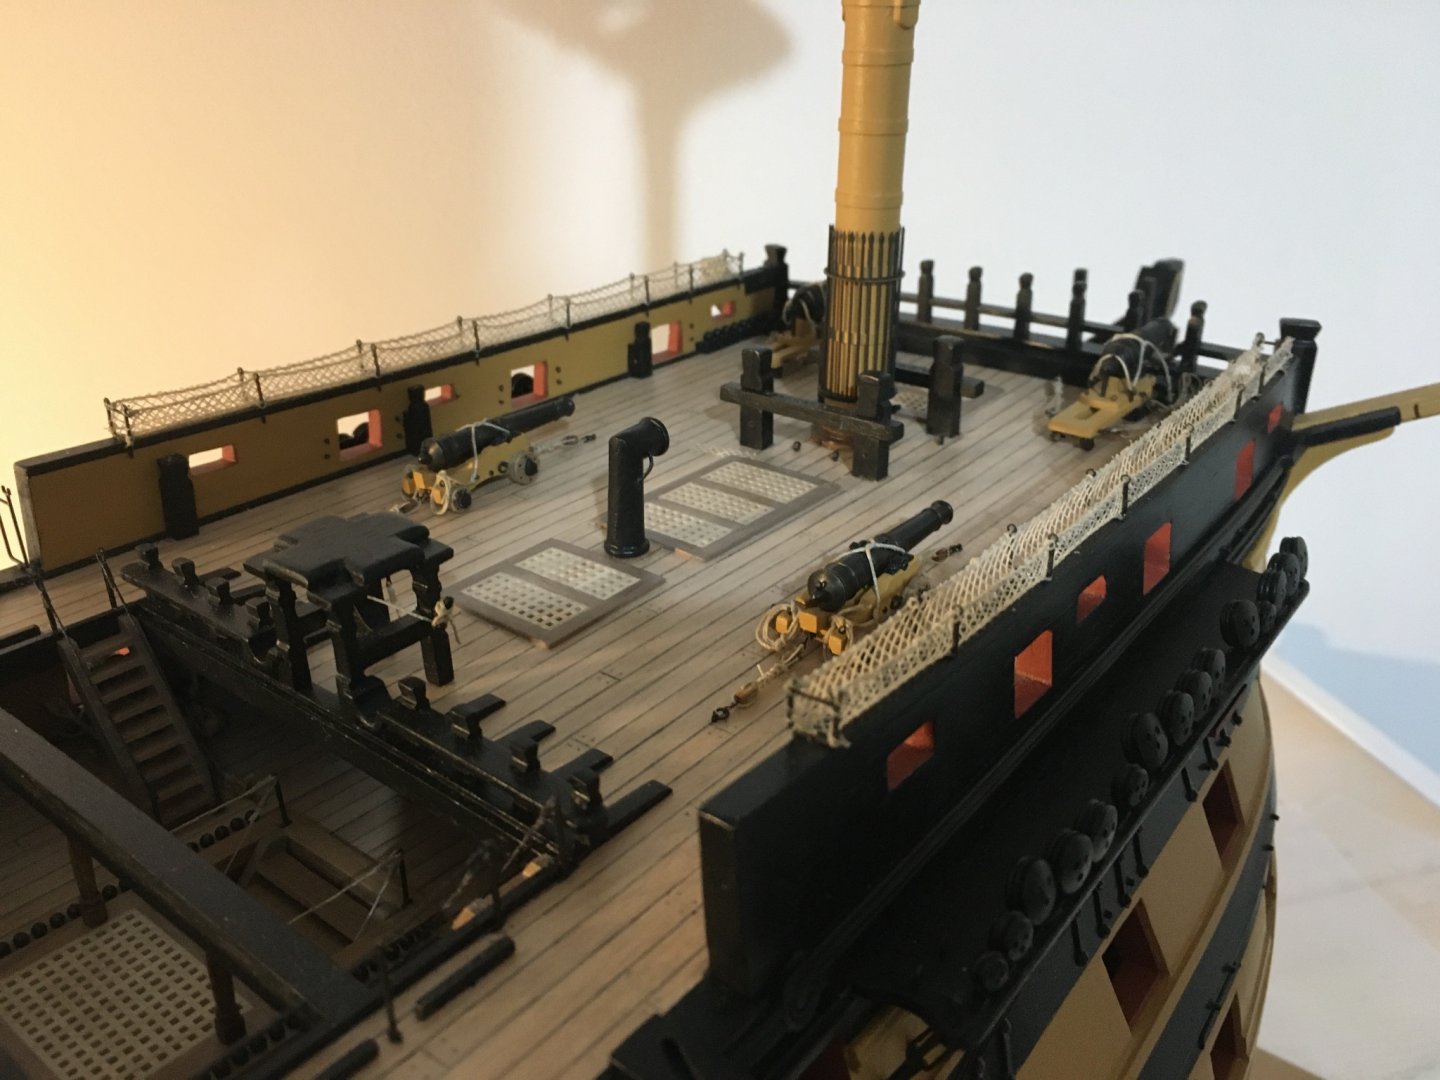
Progress on the hammock cranes and netting is very slow. I finished both Forecastle hammock cranes. Also finished the Quarter Barricade Hammock Cranes and the Poop Deck Hammock Cranes with netting. Once I dry fitted the waist hammock cranes I realised that when fitting the anchor, the side that rests on the palm block has to go through the netting of the hammock cranes. I have to see if I can do something more realistic than just cutting a slit in the net. Robert

- 527 replies
-
- 12
-
-
- caldercraft
- victory
- (and 1 more)
-
Hello Heinz You did a wonderful job with the netting on your Victory. When I had just the nylon tulle I was thinking of having a go at doing the net myself after I saw yours and Nick's (Pompey2). It looks great on both. But to be honest I was trying to avoid it, as you said yourself it is a lot of work, and wasn't sure if I could make it that good. So when I found the other material, although I would have preferred it in cotton then polyester I thought it would do the job good enough and save a lot of work. Robert
- 527 replies
-
- 1
-
-
- caldercraft
- victory
- (and 1 more)
-
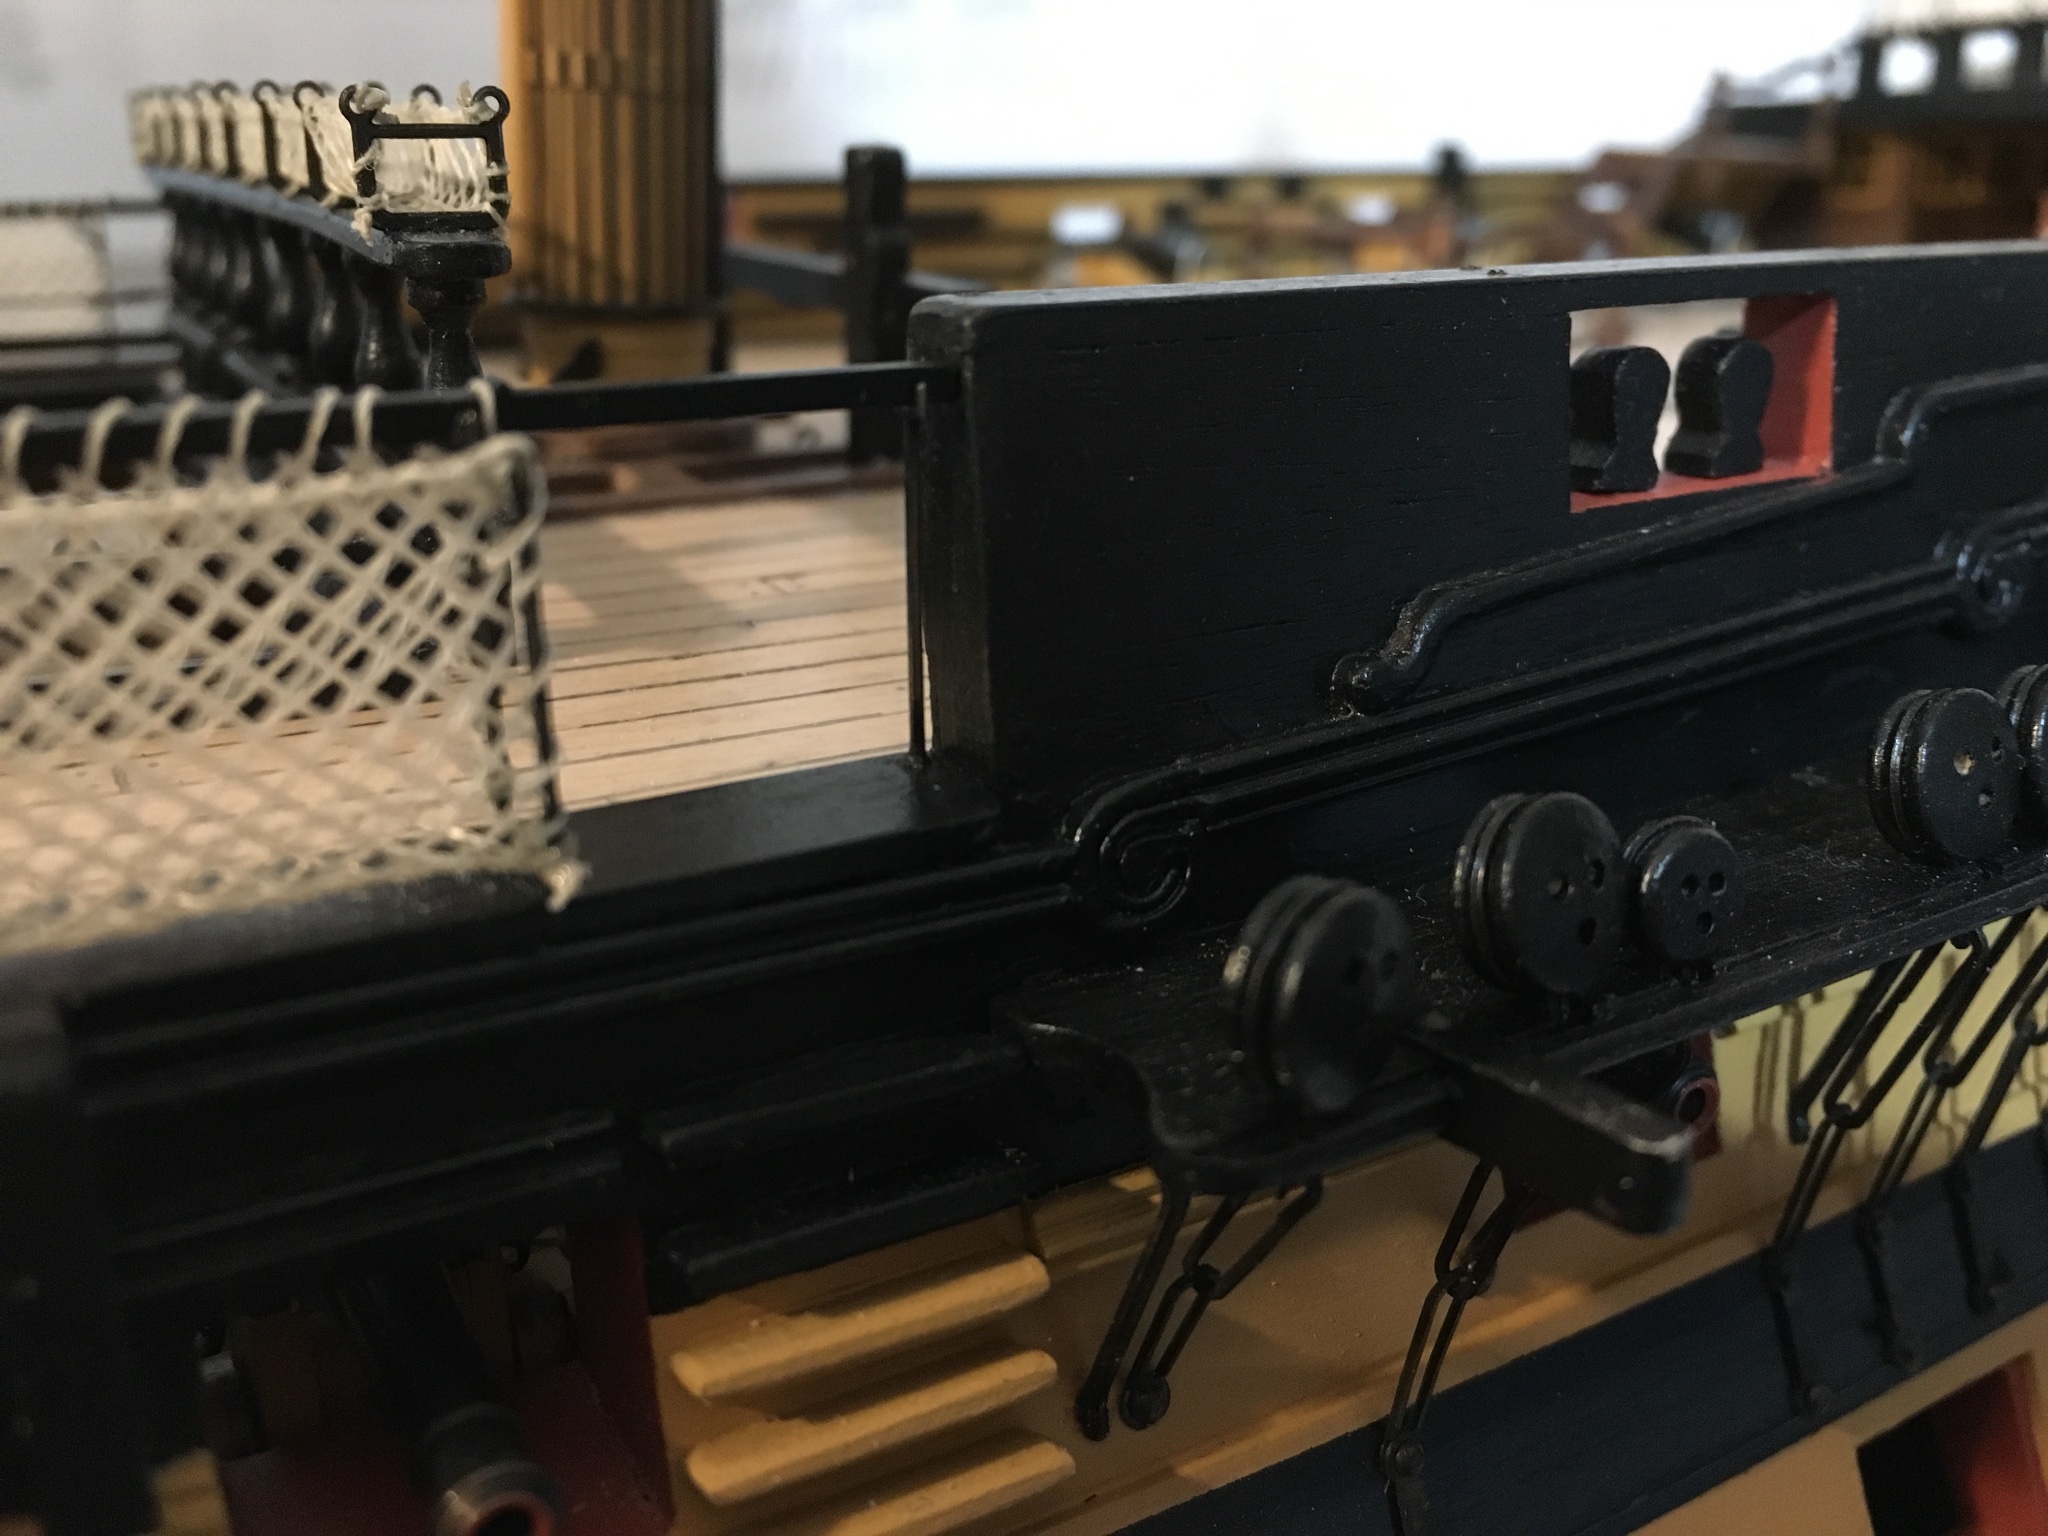
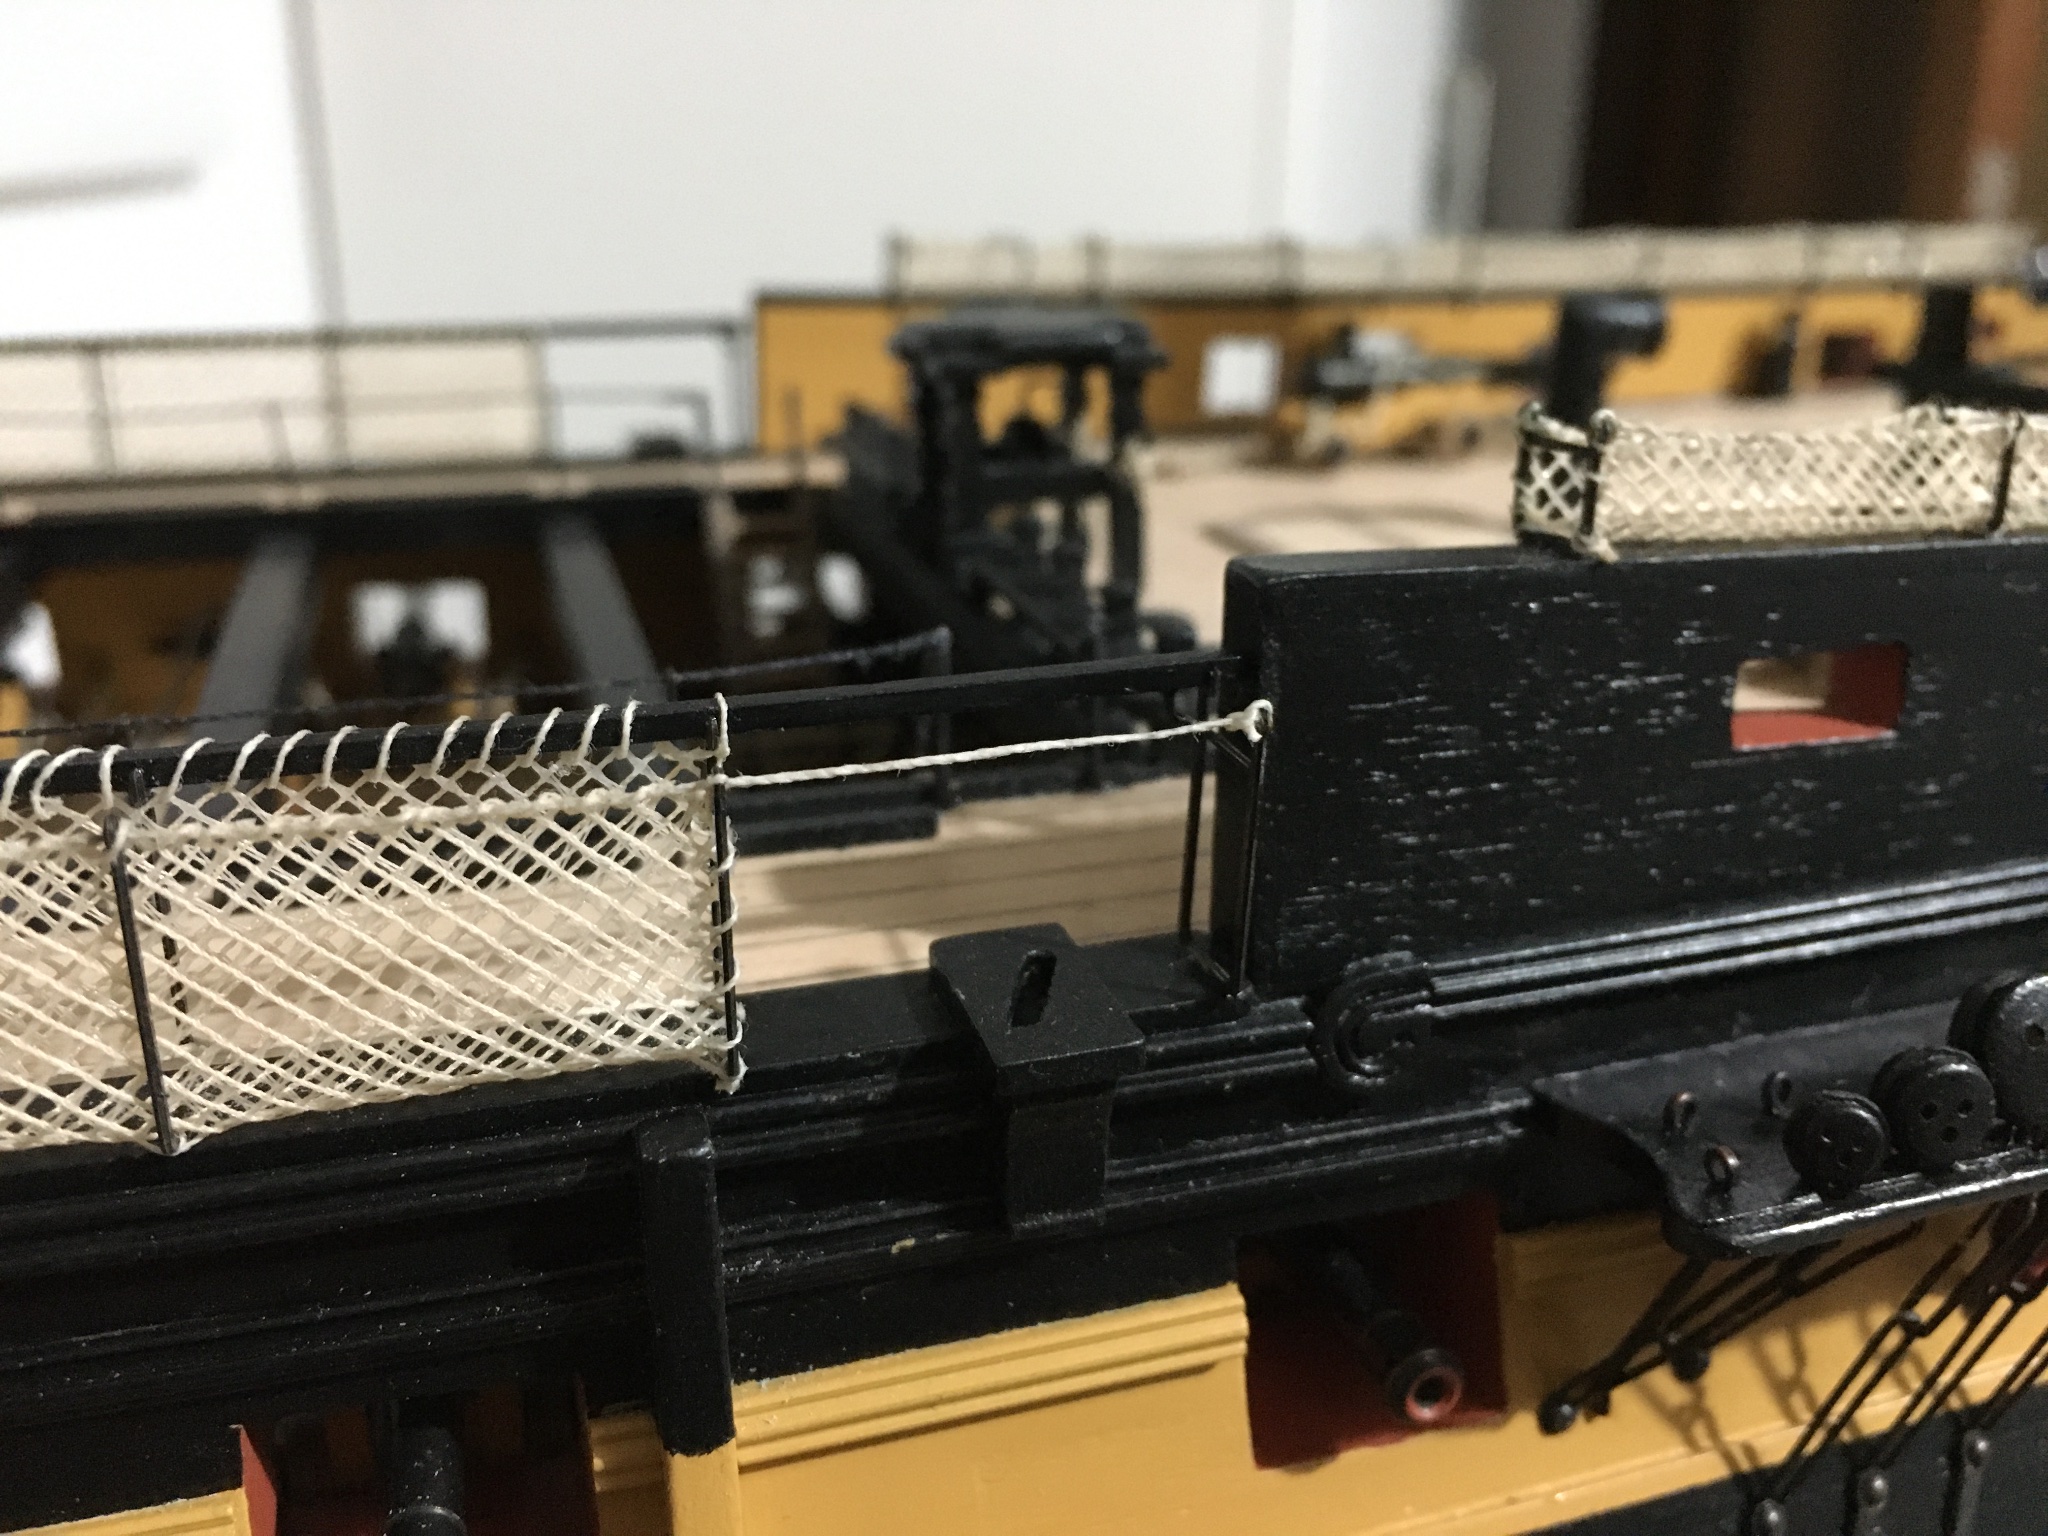
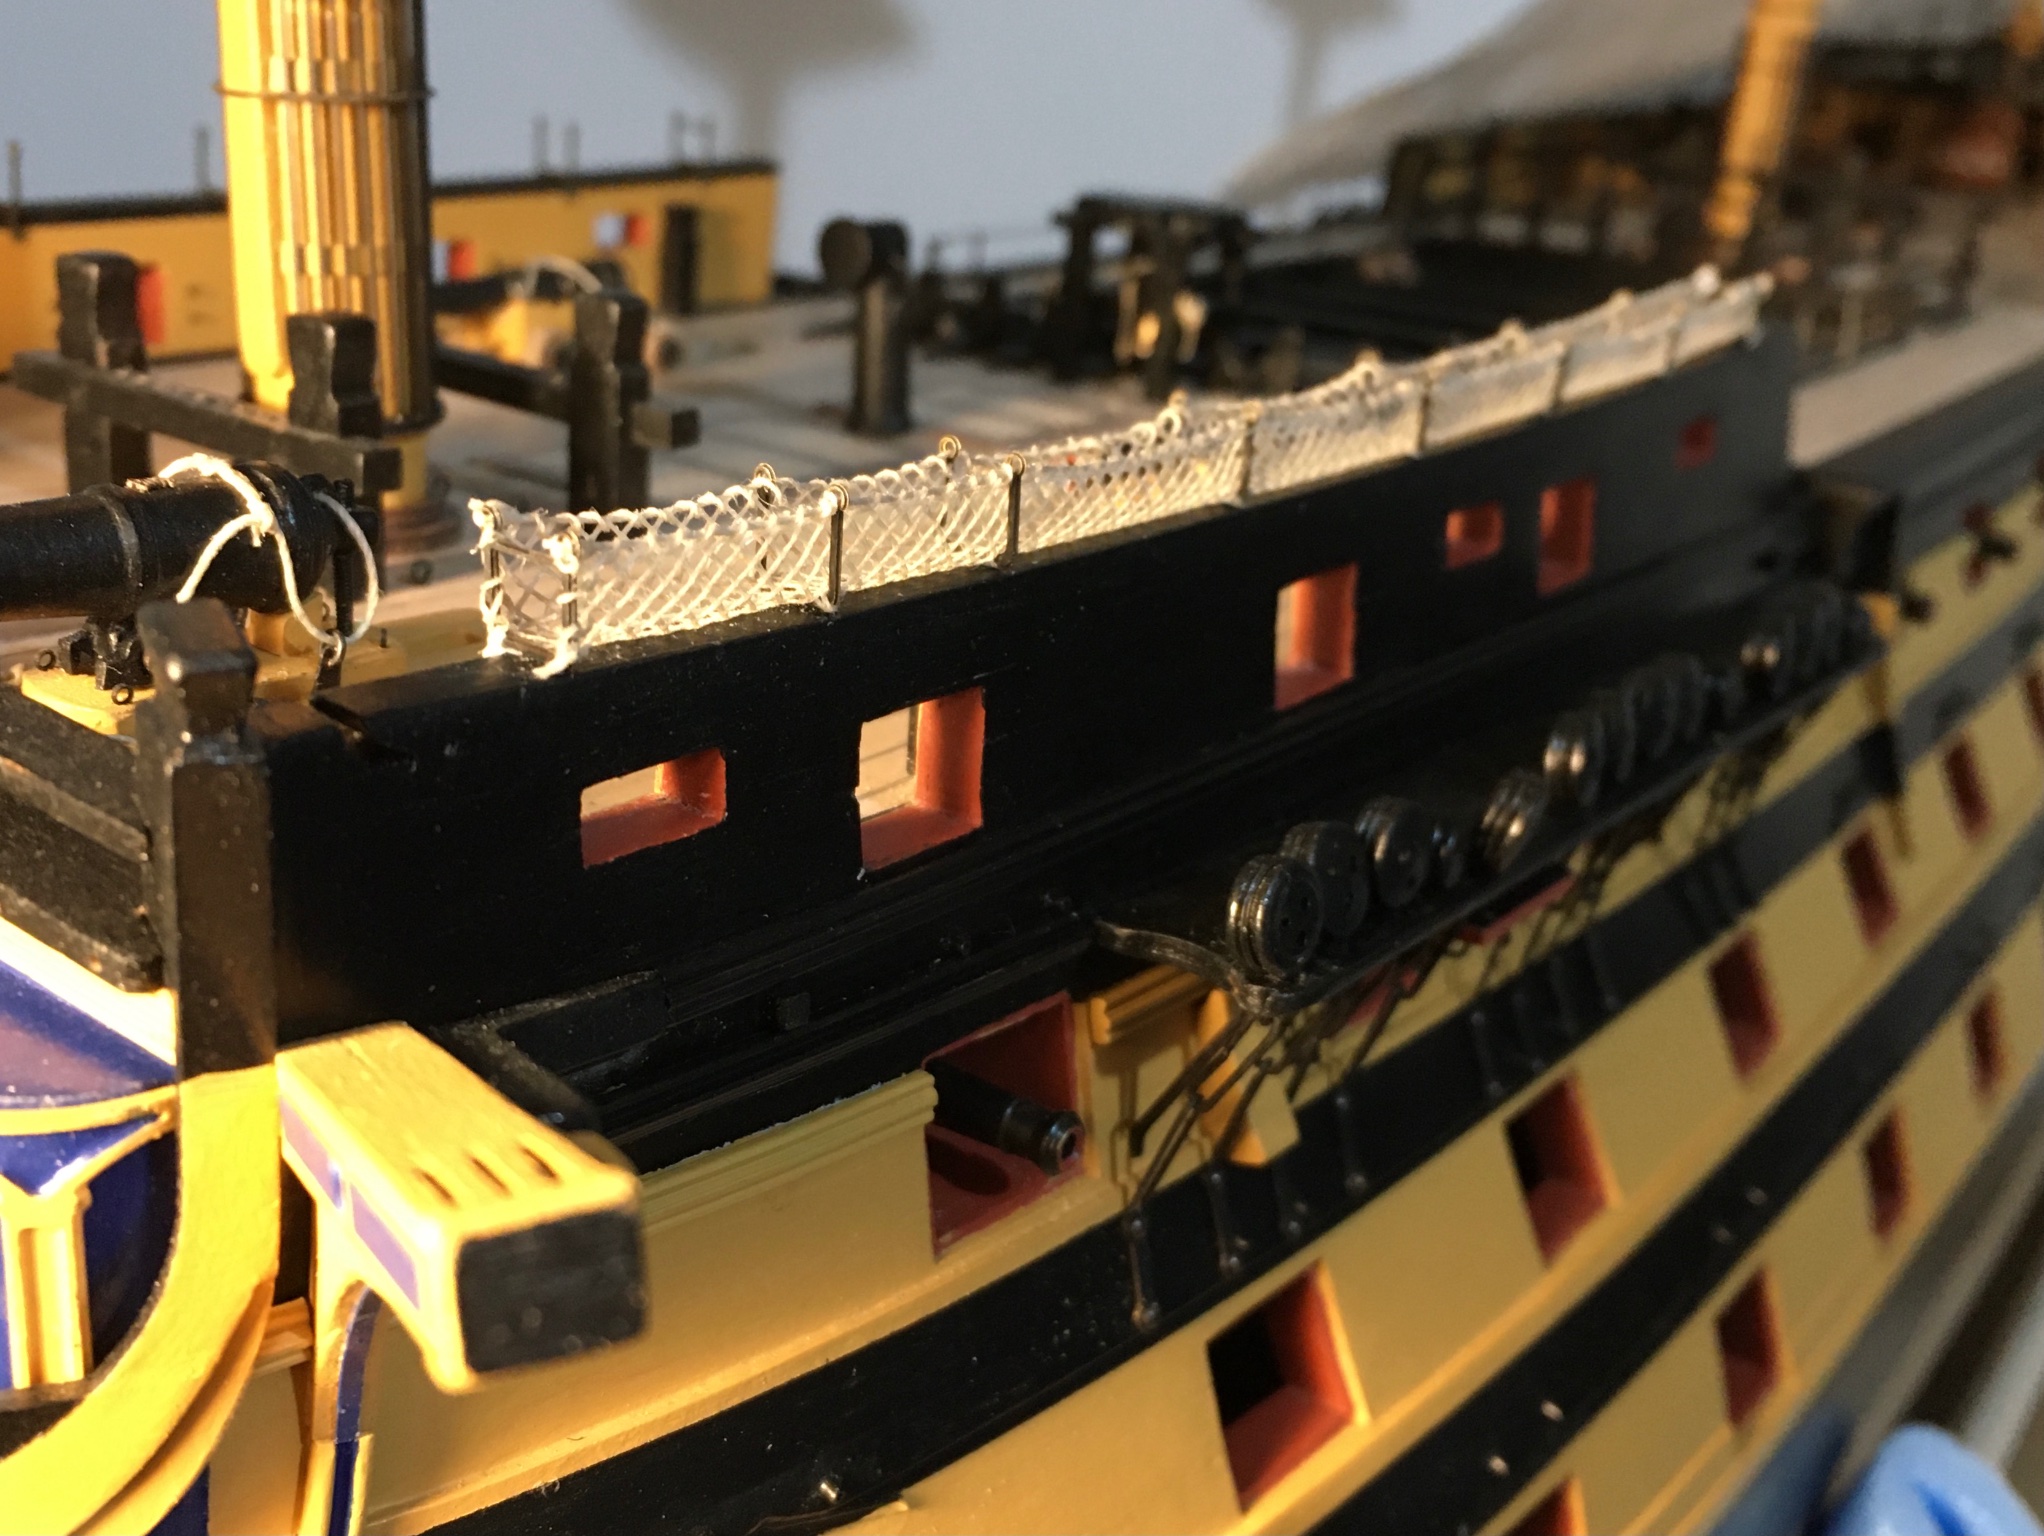
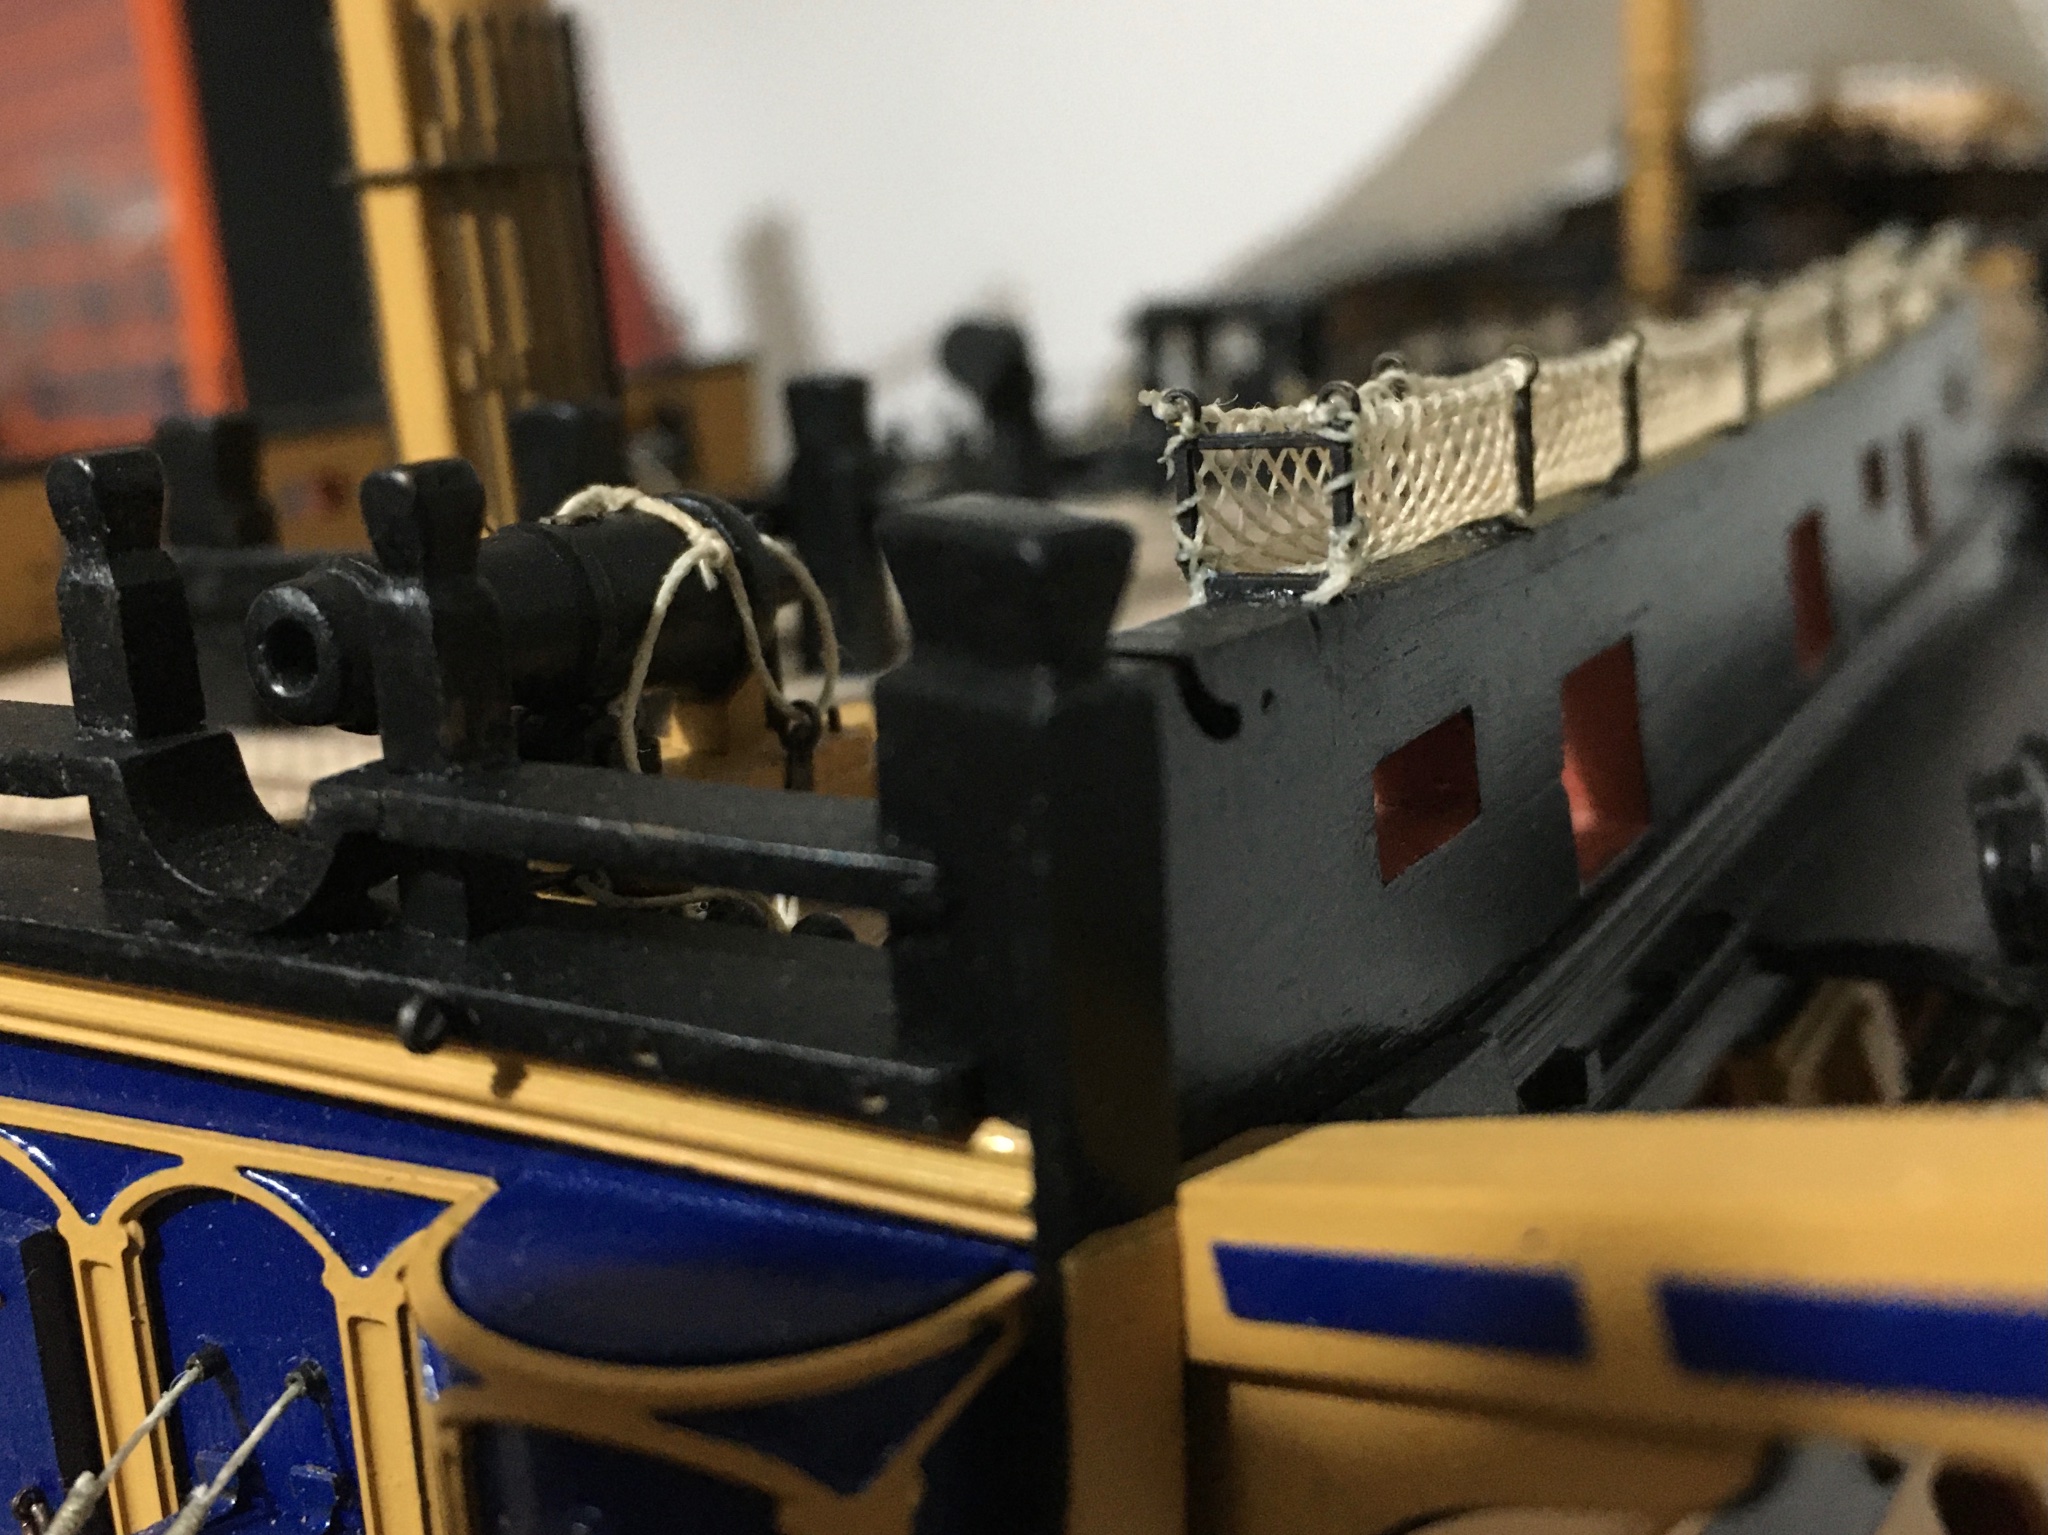
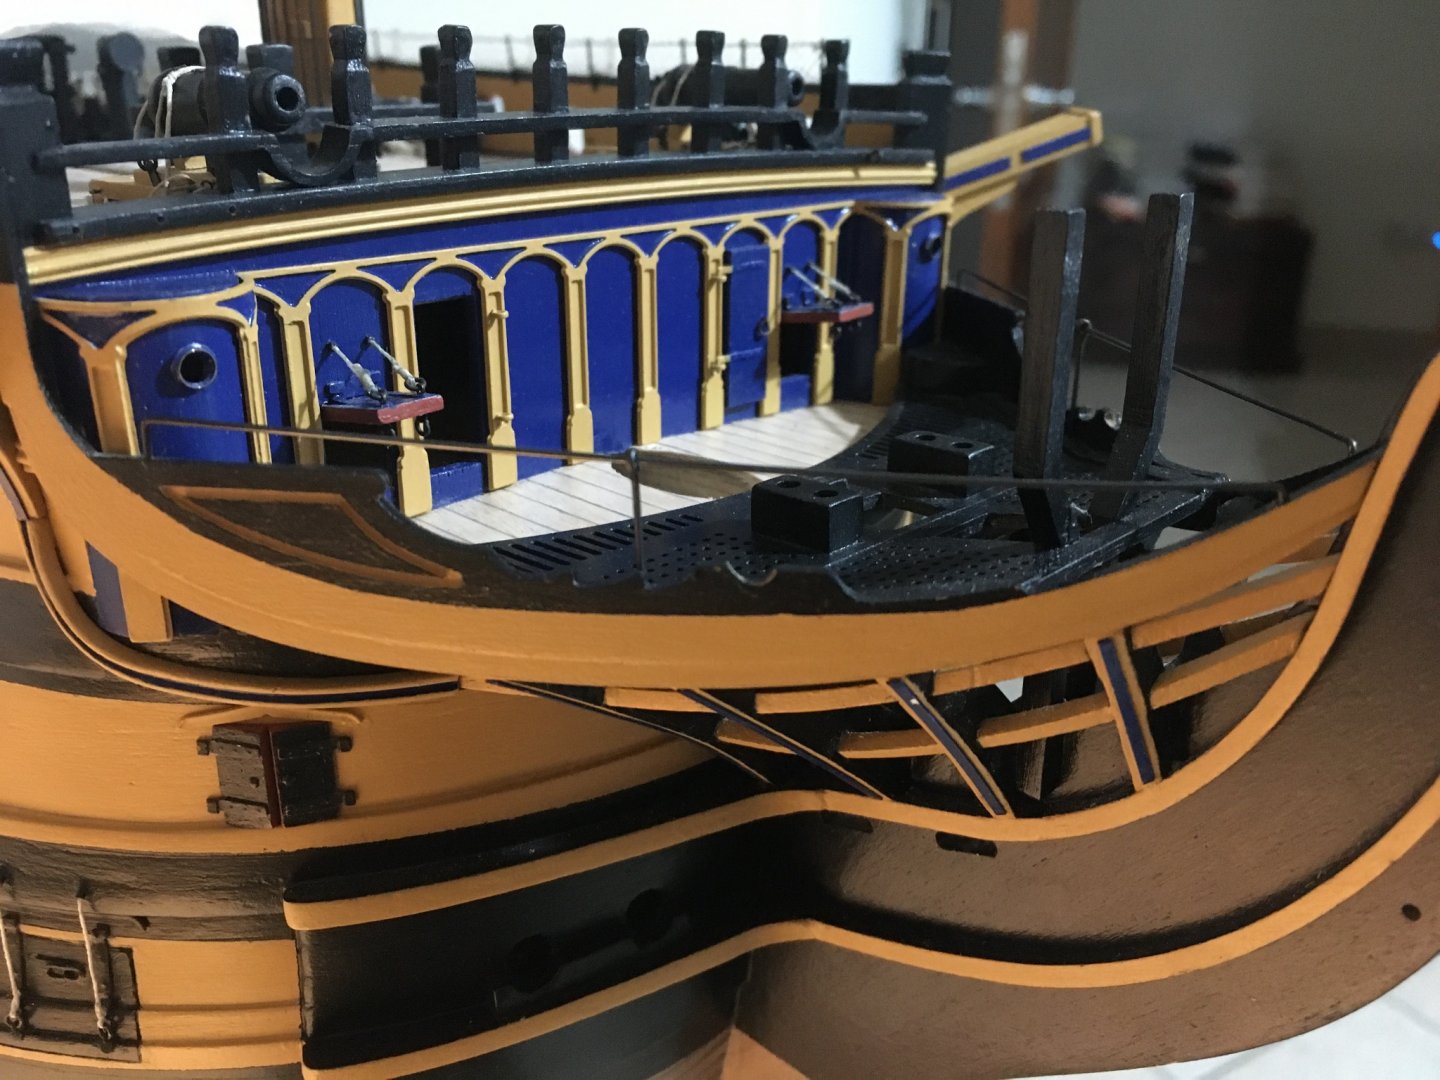
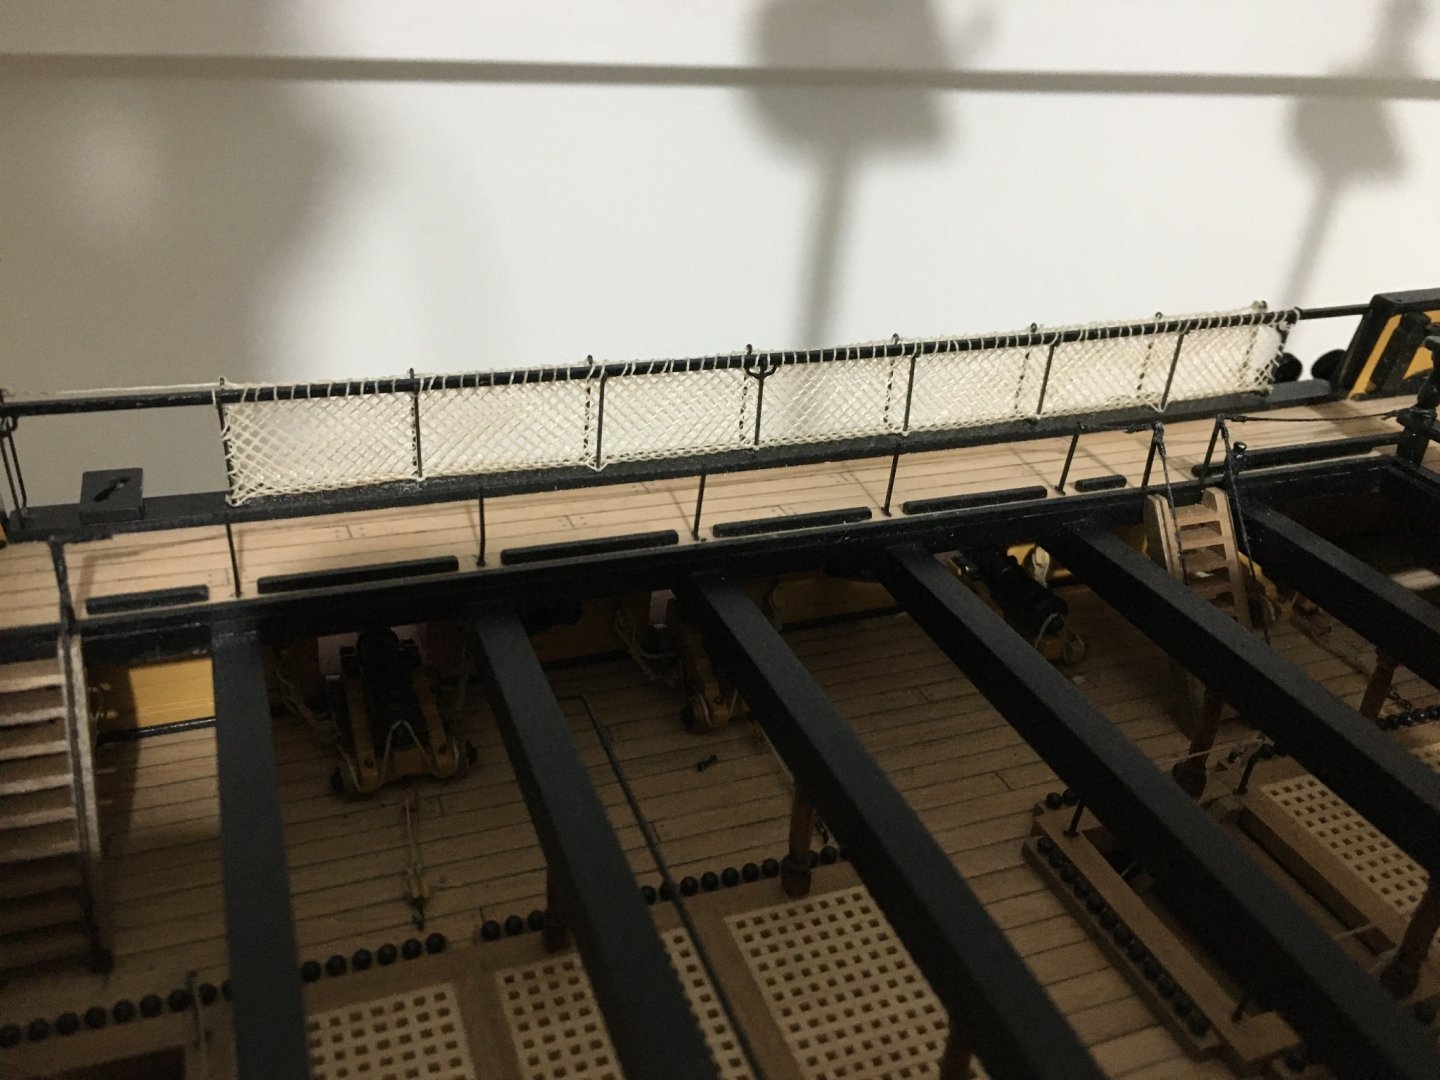
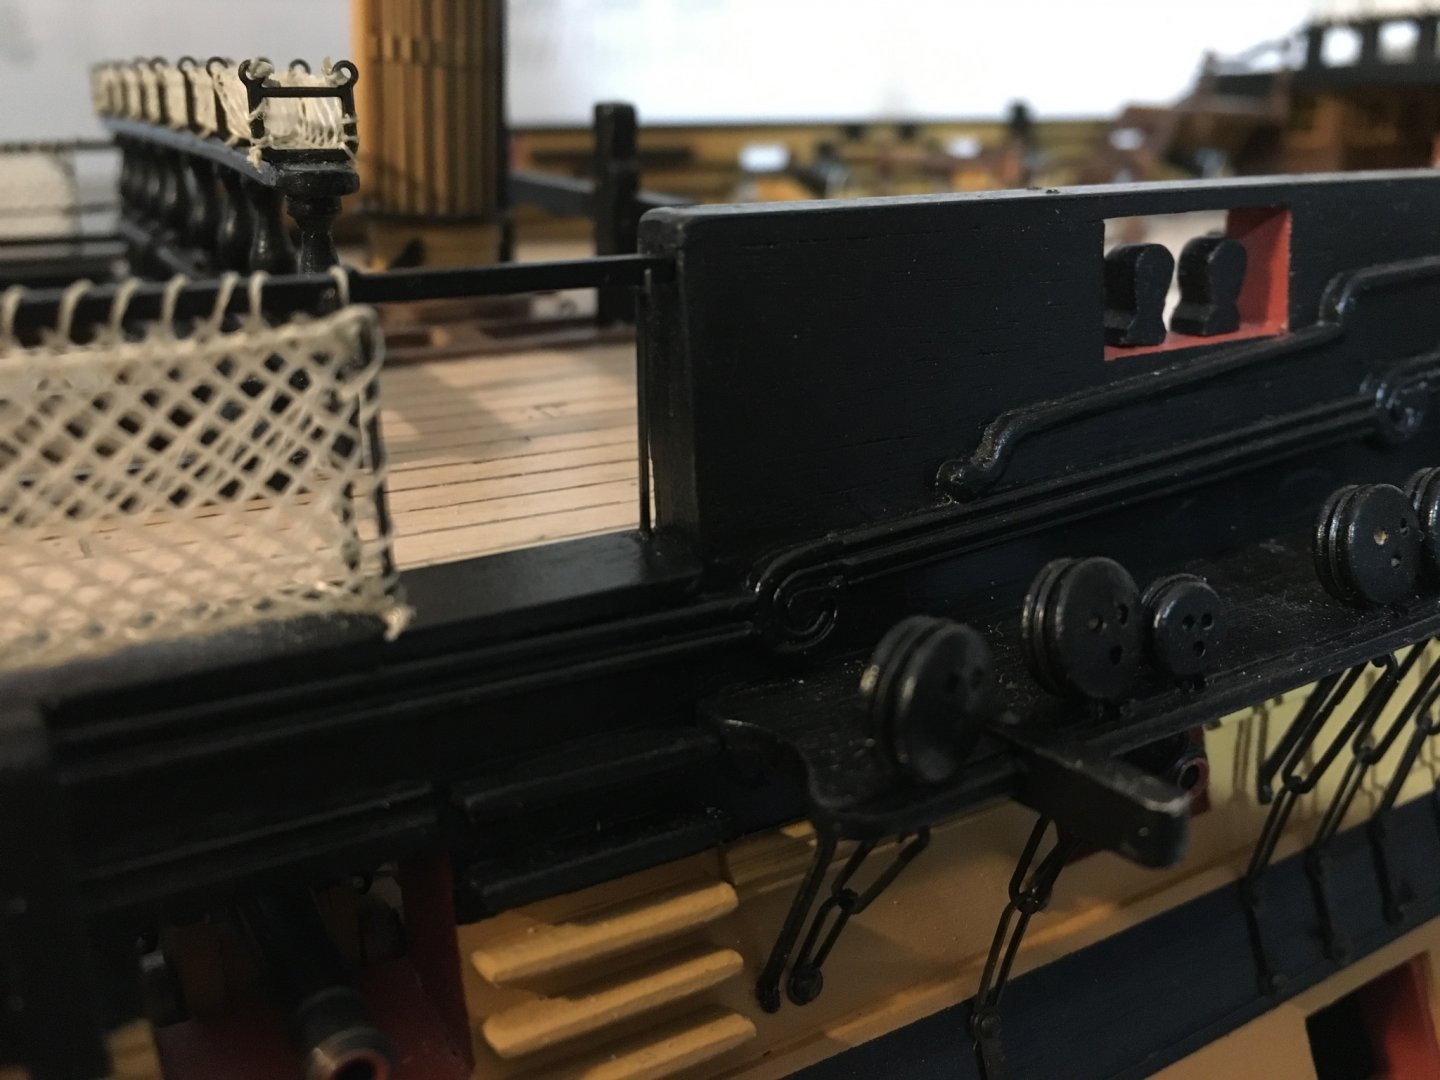
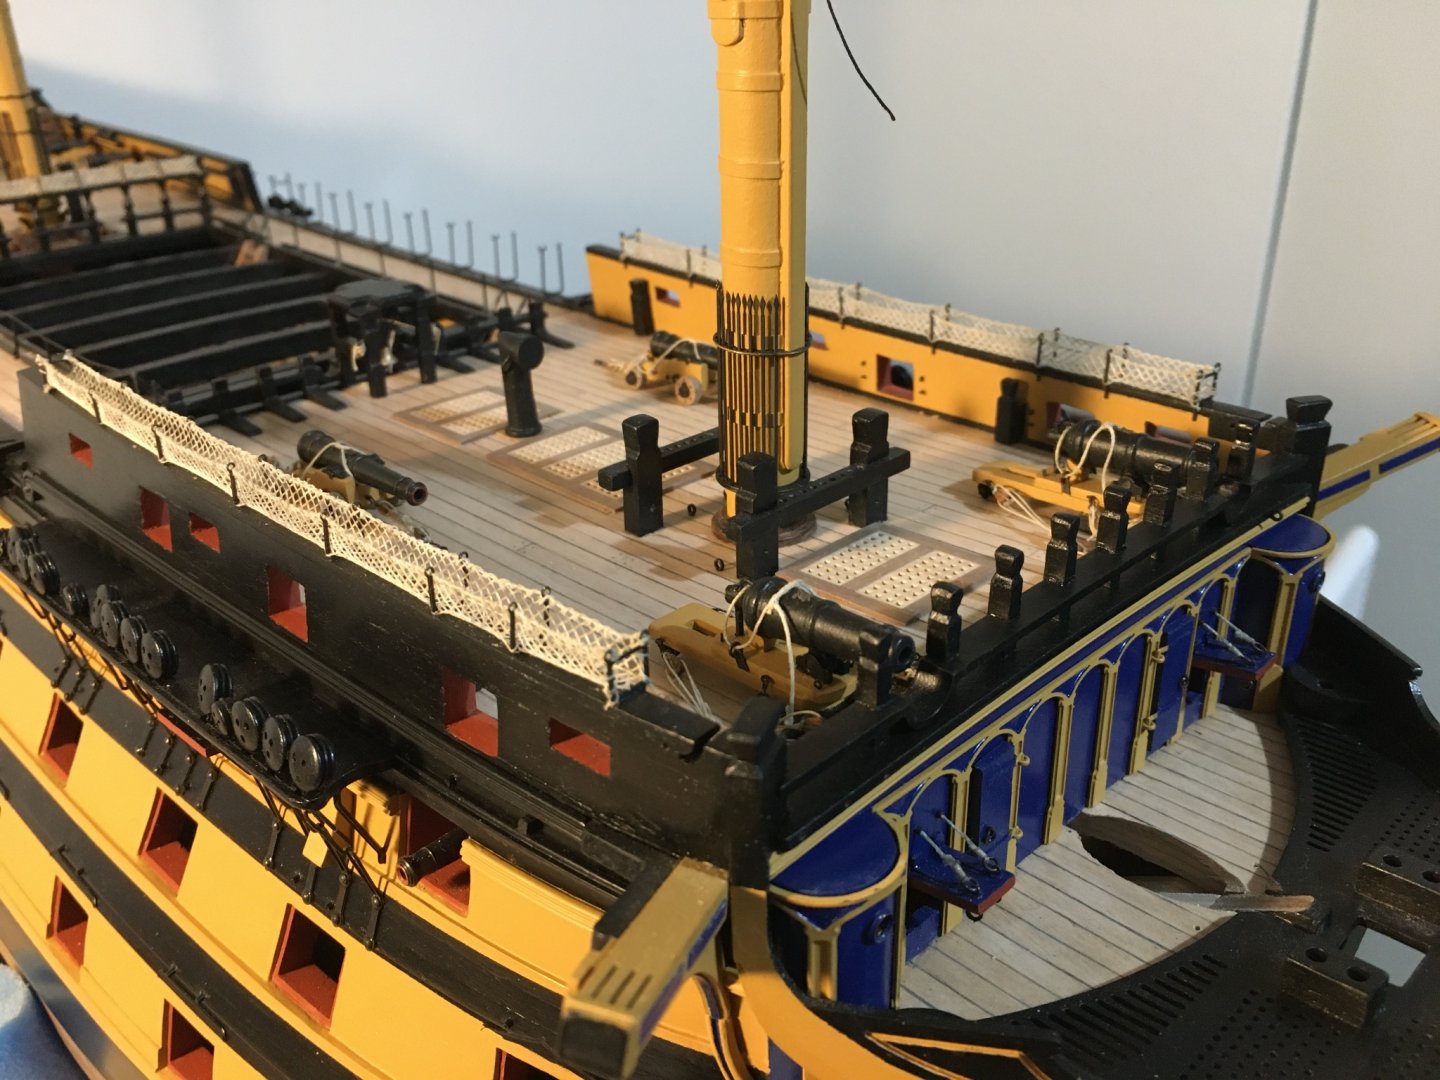
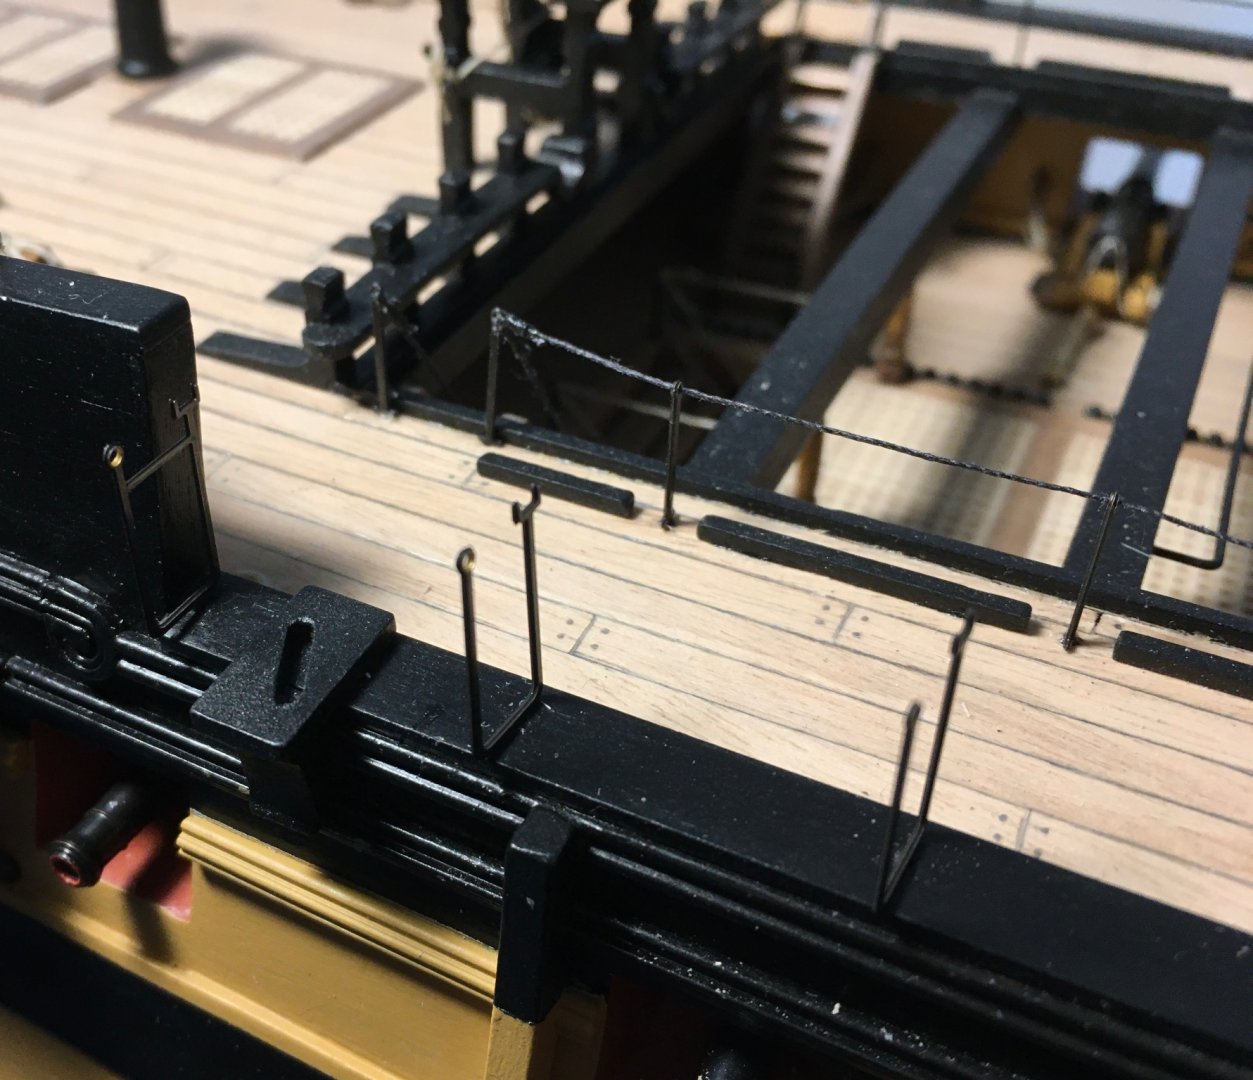
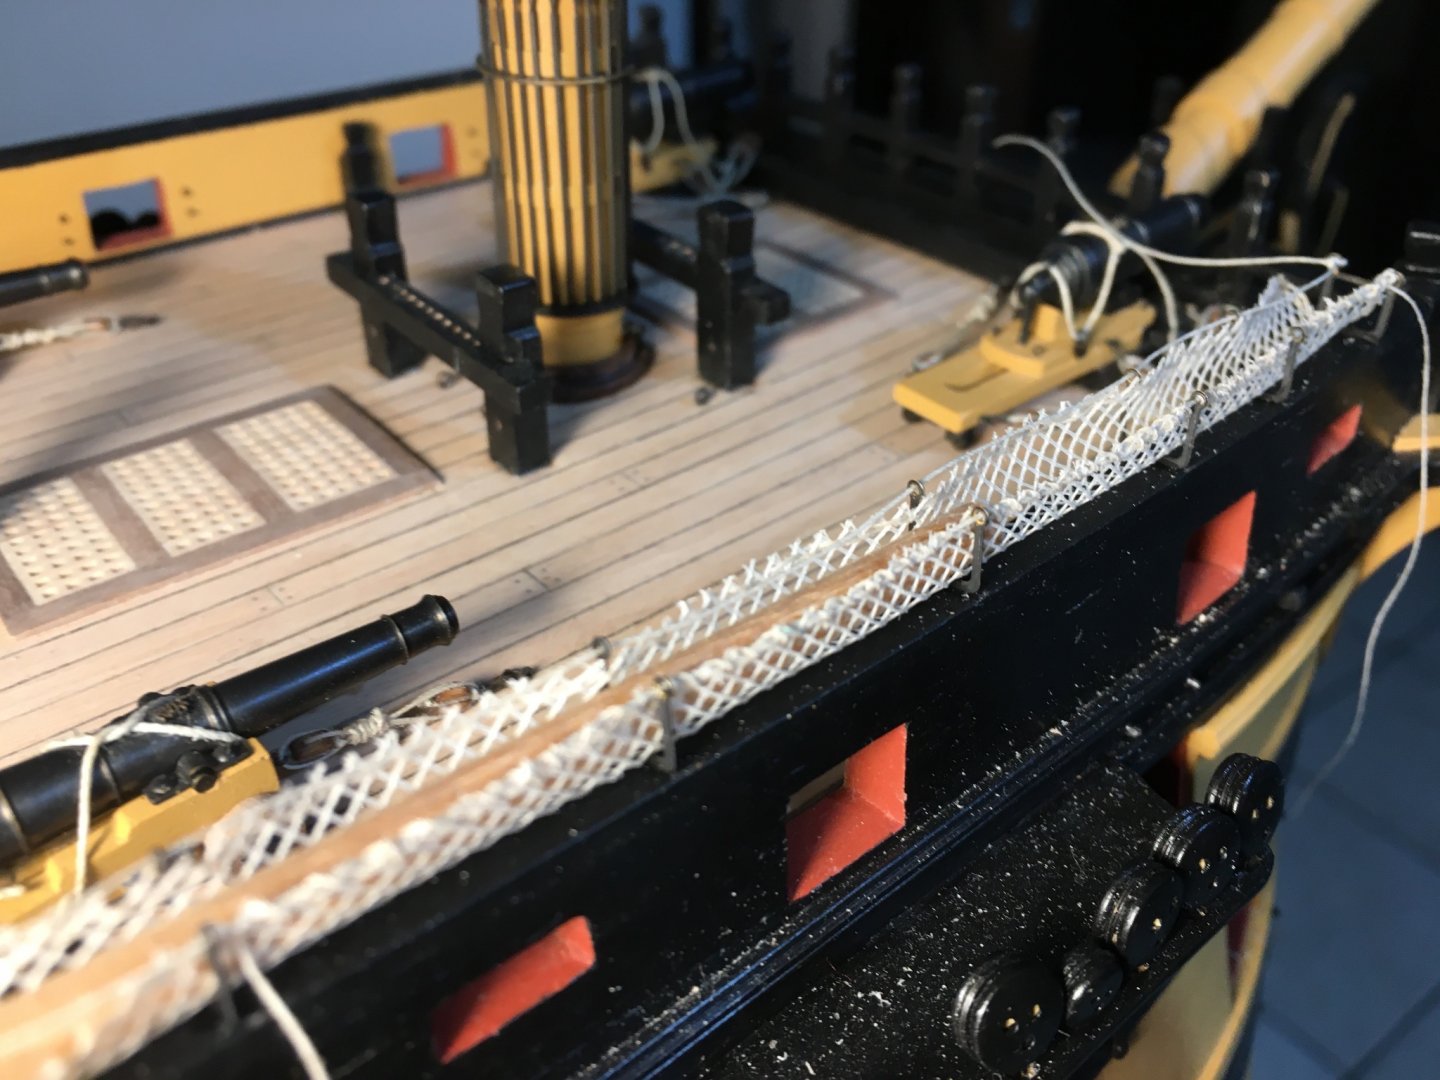
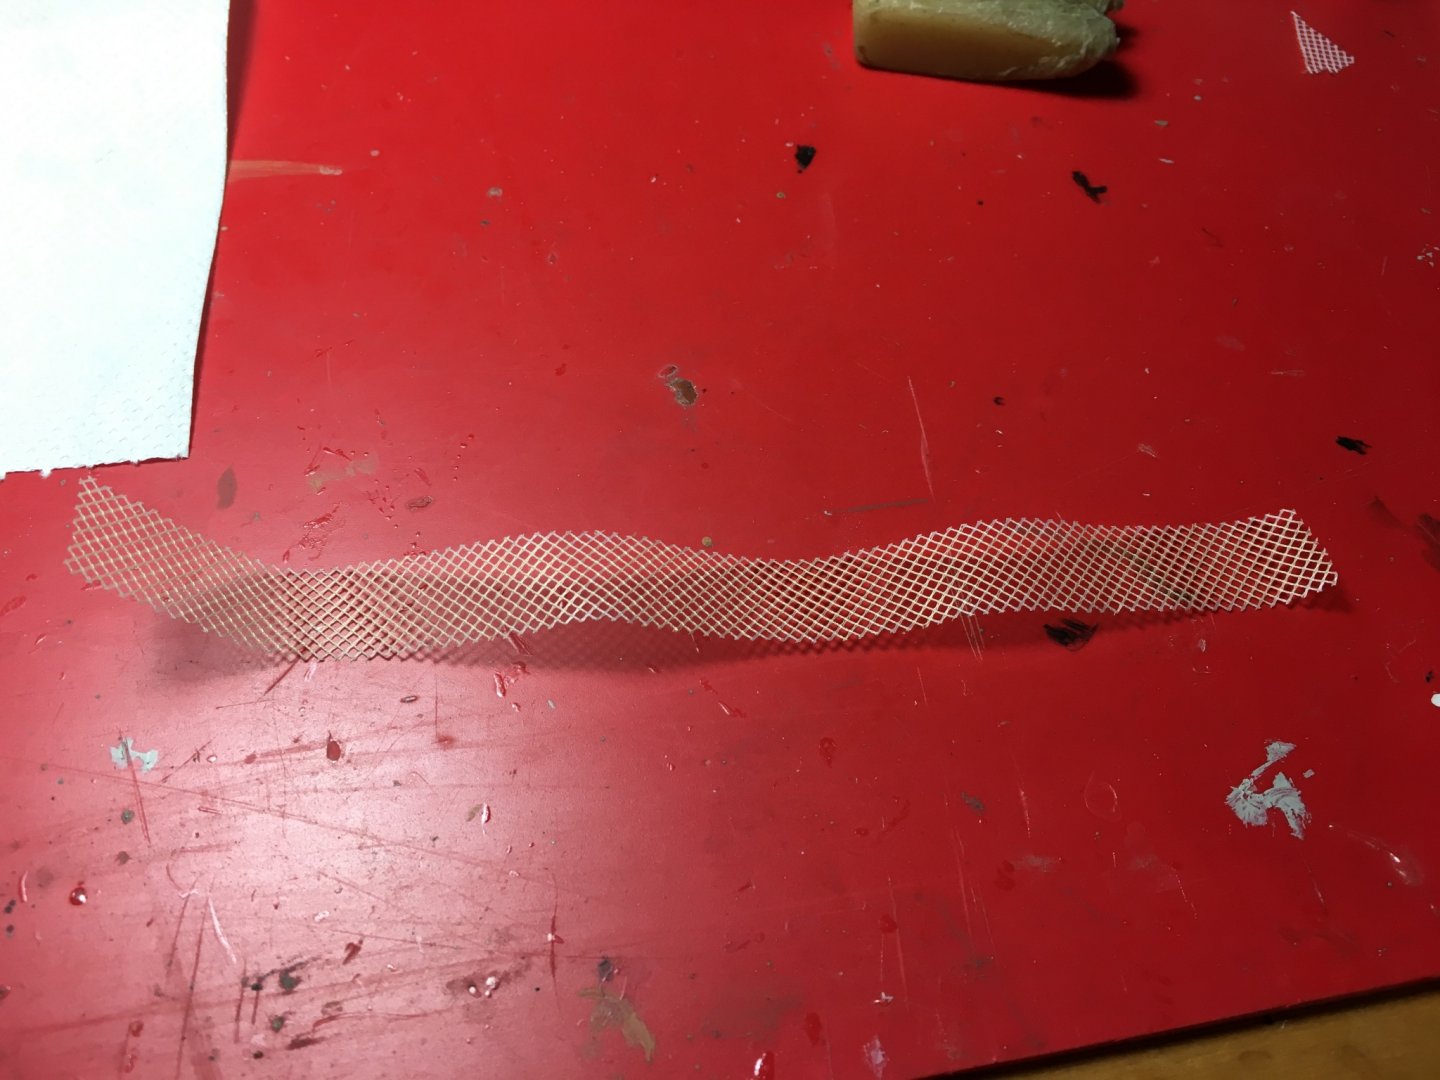
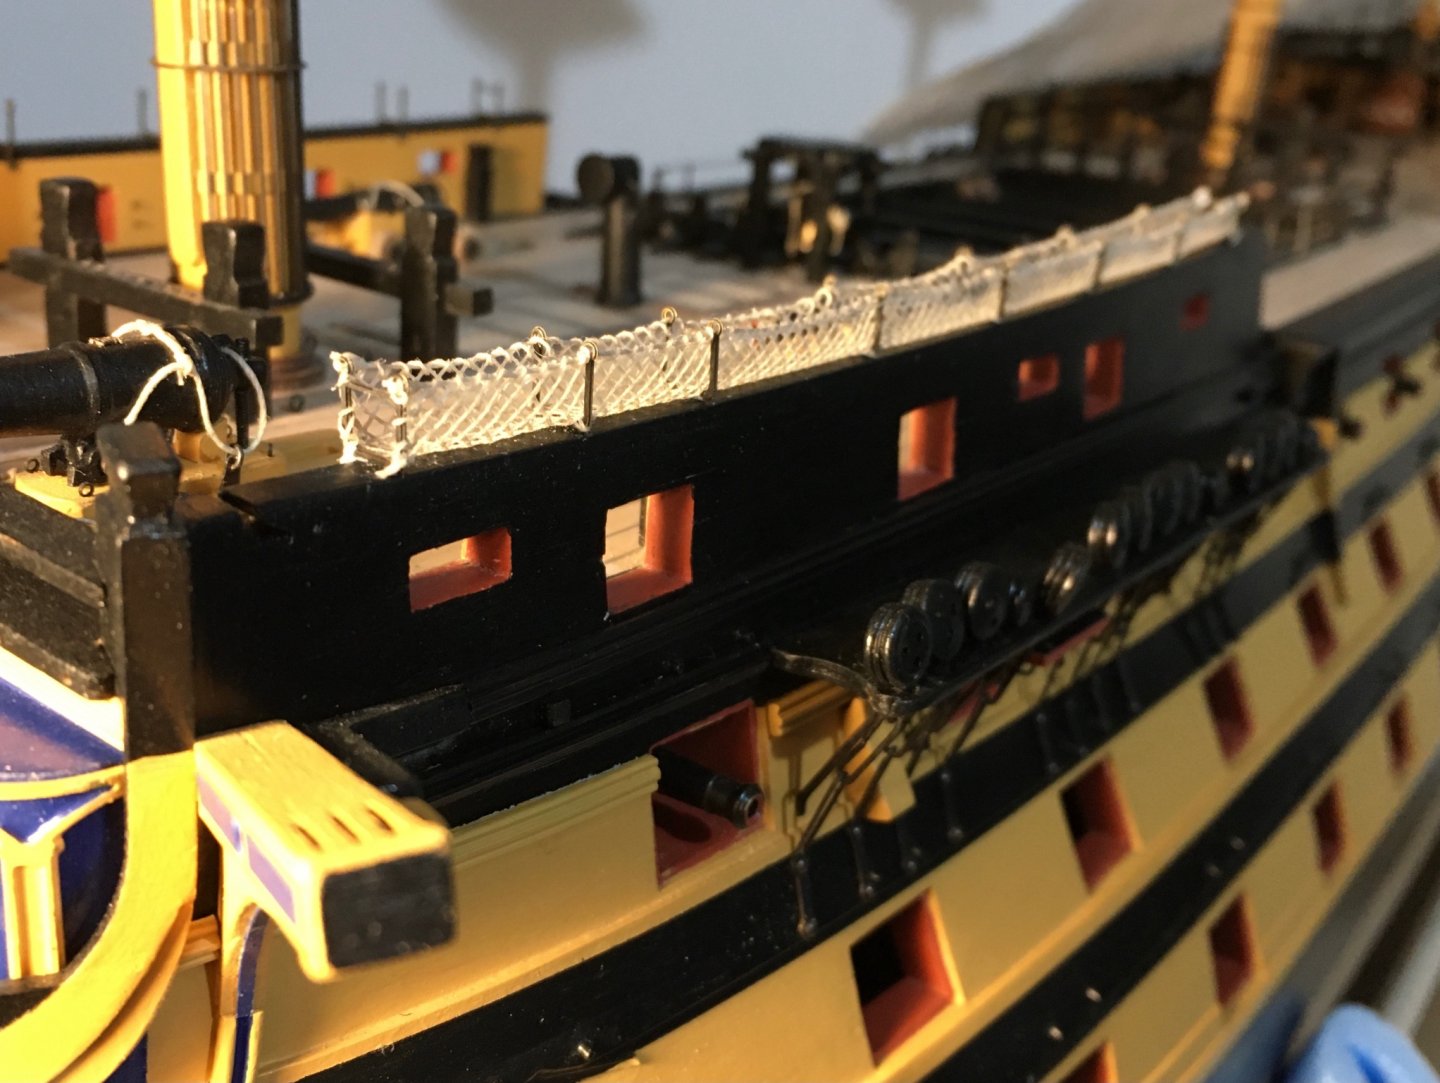
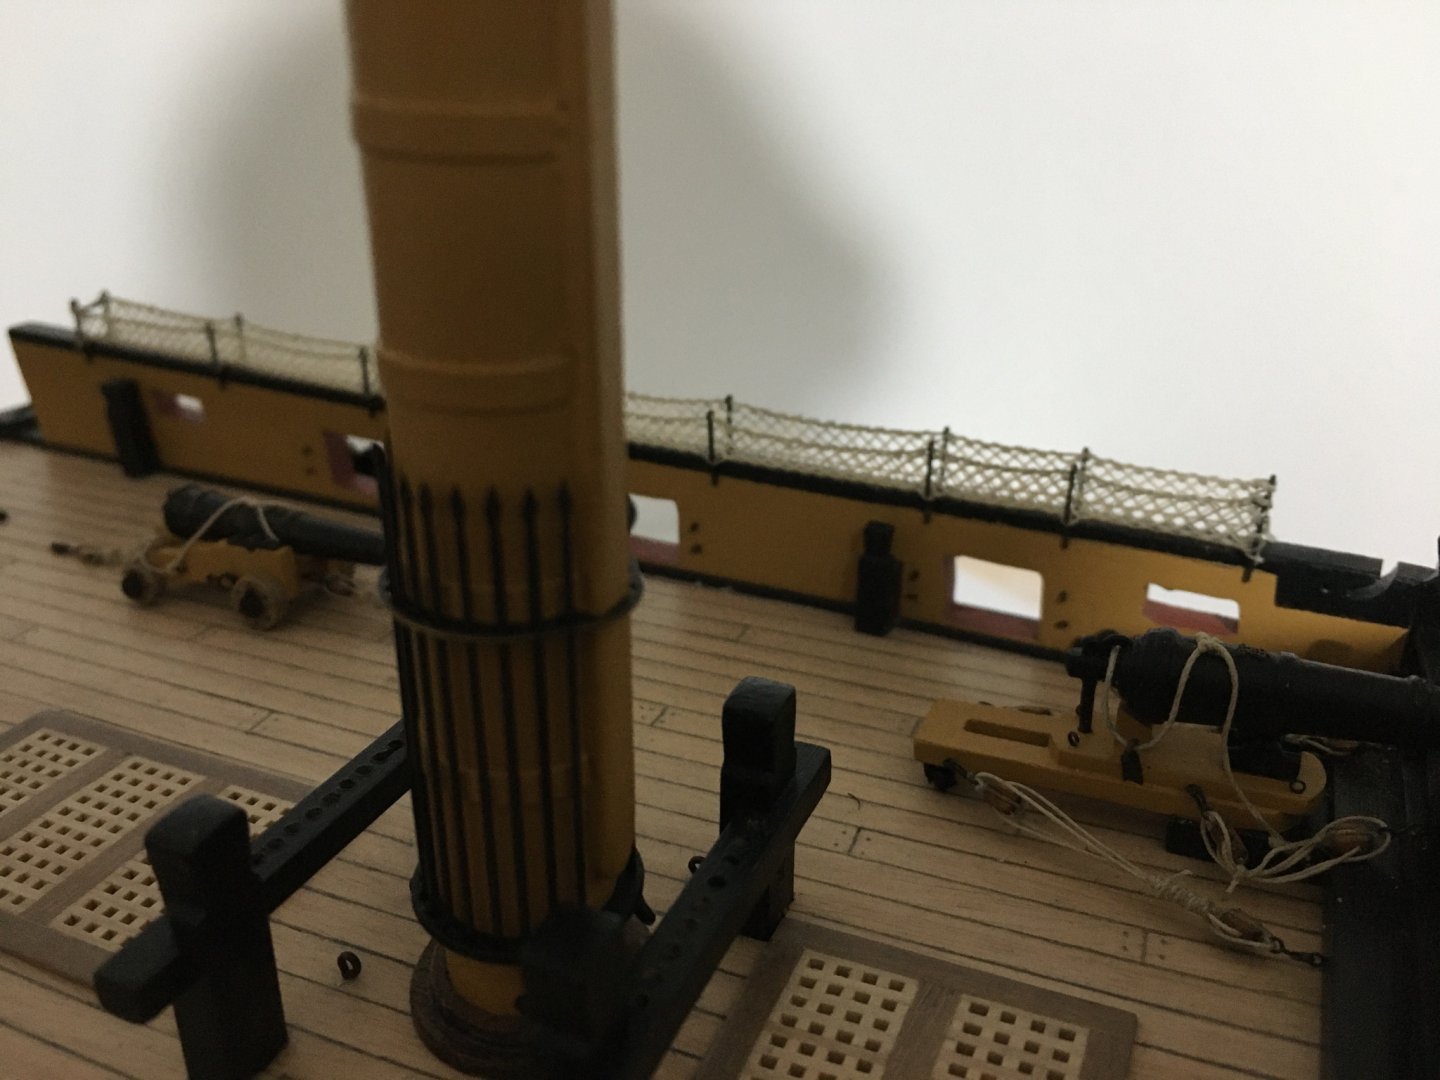
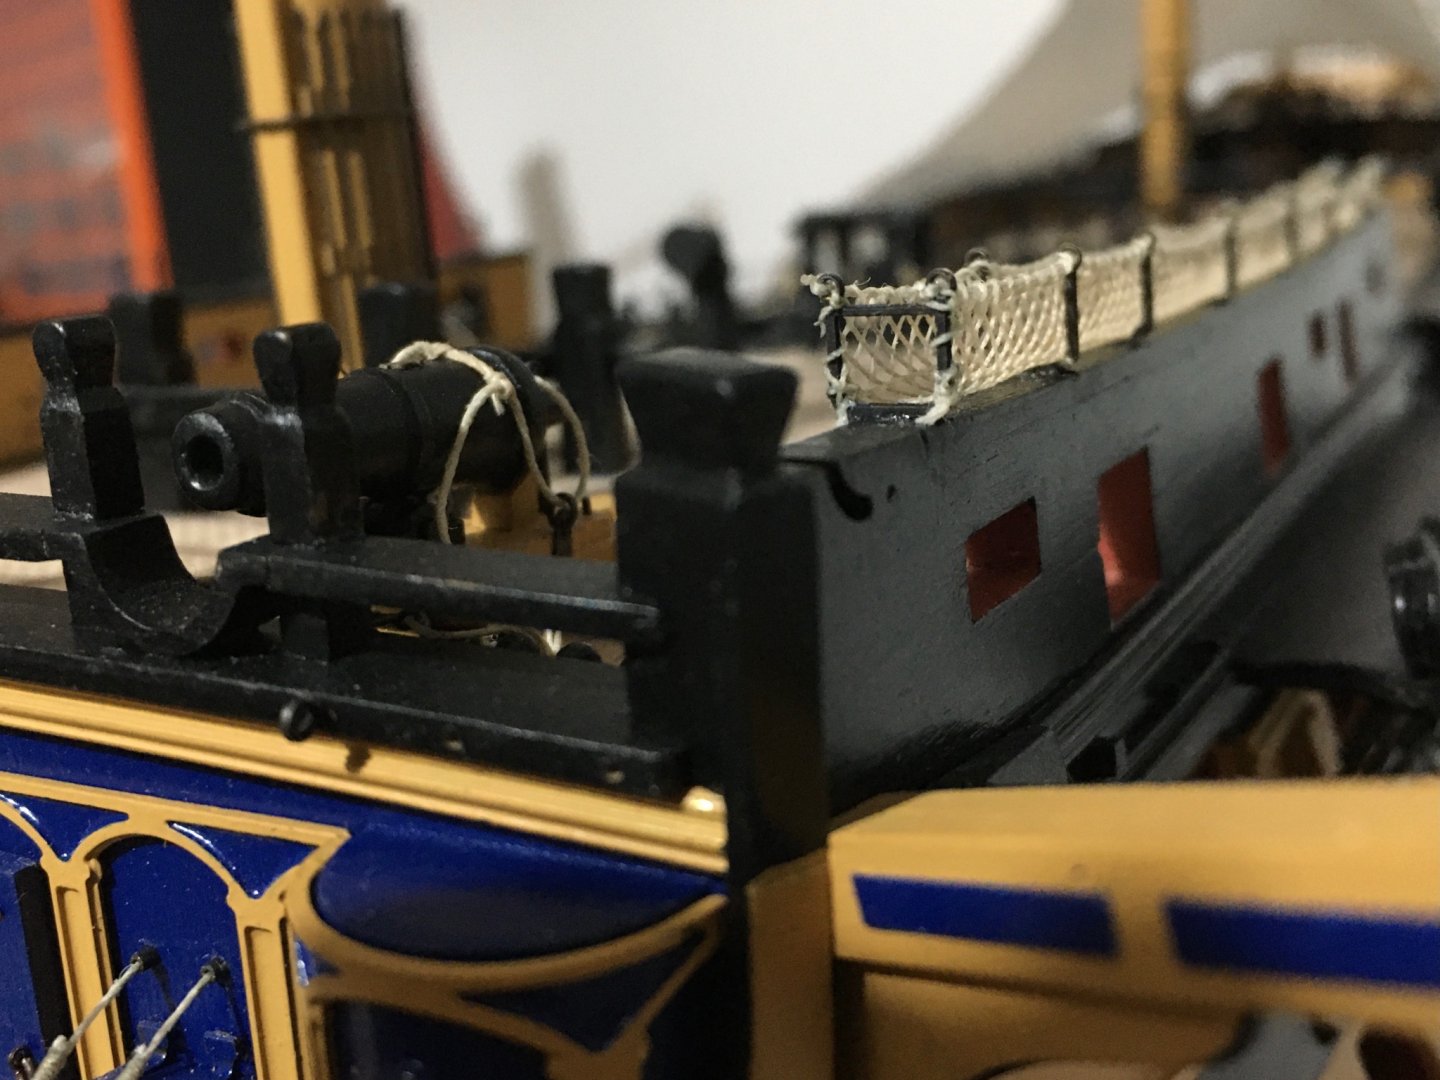
Helli and Heinz, thank you for your kind words. I keep a close follow up on the wonderful work on your Victory. I started work on the hammock cranes, never thought I would spend so much time on them. I spent ages to decide which material to use until I found sort of a netting made of polyester which in my opinion was the nearest to simulate the real net. I would have preferred to try something in cotton, but couldn't find any in local drapery shops. Then again spent a lot of time trying different ways how to do them, most of the time they were not coming out to my satisfaction. In my opinion they have to look realistic as much as possible because they are a feature that is going to show a lot, it goes round all the ship. These photos are my first try. I wanted to fit the net with a diamond pattern position. I cut the material from one corner to another, leaving a bit extra so that the thread of the material does not come apart from each other. It is not like tulle, made from one piece in nylon, the thread across each other is sewn together. First I passed a thread all along the edge of the net, going from one hole to the other, then I sewed it to the line fitted to the cranes. This was the result. As you can see where the net meets the line going along from one crane to the other, did not look good at all, the edge of the net protruded too much from the top. Did not like at all. I took a different approach. I cut the netting from one corner to the other as close as possible. But the problem was if I tried to tie the netting to the line like that the edge corners of the net will come apart with the slightest tension on them. So after cutting them I went over all the edge corners with a dab of CA glue to keep them together. After that I put the net for a few hours in a tea solution to darken it a bit. Even though the net is made of polyester it still darkened a bit, it became more or less the same colour of the supplied thread with the kit. Instead of 0.1mm thread (as suggested in the instruction manual) for the rope along the cranes, I used the 0.25mm so as to be able to hide the edge of the net as much as possible. I tied the line securely from one end to the crane but the other end I left tied loosely so that while sewing the net to it, it will be able to pull back a bit to form that saging look. Then sewed the net in to the line going through the cranes with the thinnest thread I had available. I don't know the size, but it is less then 0.1mm, this time passing the sewing thread directly through the glued corners and round the line across the cranes. I also passed a line along the inside lower corners of the net, tying it with every crane so that the net will keep its shape. In the end I went over with diluted white glue all along the edge, where the line going across the cranes and the net are sewed together. I think it looks much better then my first try. Now I will continue doing the rest of them the same way. I know it is going to take me a while to do them all but I think the result is worth the trouble. Robert


- 527 replies
-
- 13
-
-
- caldercraft
- victory
- (and 1 more)
-
Just came across your build, you've got some fine work going there Bossman. Excellent work, very detailed. As John has already told you, you are being too critical to your work. I know how it feels sometimes when you are doing something and it doesn't come out to your own expectations, and in some way it is good because you go for that little more extra effort for detail in your work which in my opinion makes a difference. But I also think that sometimes we overdo it. Keep up your beautiful work Bossman. Robert
- 127 replies
-
- 2
-
-
- confederacy
- model shipways
- (and 1 more)