rafine
-
Posts
2,932 -
Joined
-
Last visited
Content Type
Profiles
Forums
Gallery
Events
Everything posted by rafine
-
 I spent a good deal of time trying to decide what to do for my next project. The choices ranged through scratch builds and modified kits, cross sections and full ships, and even some thought about doing a plastic or resin warship. In the end, I quickly rejected the modern ships because I just don't think that at my age (76) with arthritic hands and diminishing eyesight, I could do justice to anything in those very small scales. A framed scratch build had strong appeal, but ,as I've explained in other logs, after doing the Triton cross section, I concluded that without power tools (I have nothing but a Dremel) a full framed model was just more than I wished to take on. That left the possibility of another cross section. I was drawn to the Admiralty Models Echo project and the Granado cross section project. The Granado held particular appeal, both because of it's unique subject and the wonderful models that had been turned out by Rusty, Grant and Mobbsie. I was almost set to do this when I realized, while doing the Cheerful rigging, just how much I enjoy rigging and would miss doing it on a cross section. All of that led me to look at the build logs and great models of Granado done by Joe V. and Timmo. I was really impressed at what could be done with the kit with some modifications. Thus, the choice was made. I now have the kit and the AOTS Granado book and I'm trying to figure out just what I'm going to do. I've not done a Caldercraft kit before or any kit with the ply gunport strips. Nor have I done any model with double planking in many years. Some things are clear: I will replace the kit wood with boxwood for the second upper hull planking and holly for the deck planking, as I've done on my recent builds. I'm still undecided as to what to do for the second lower hull planking. I'm inclined to use holly as I did on Fair American, rather than painting some other wood white, but this would also involve replacing the kit's stem, keel and sternpost parts with scratch built holly parts at the outset of the build. A quick decision is in order. I'm looking forward to getting started, and hope that you'll follow along with me. Bob
- 563 replies
-
- 31
-

-
Cutter Cheerful 1806 by rafine - FINISHED
rafine replied to rafine's topic in - Build logs for subjects built 1801 - 1850
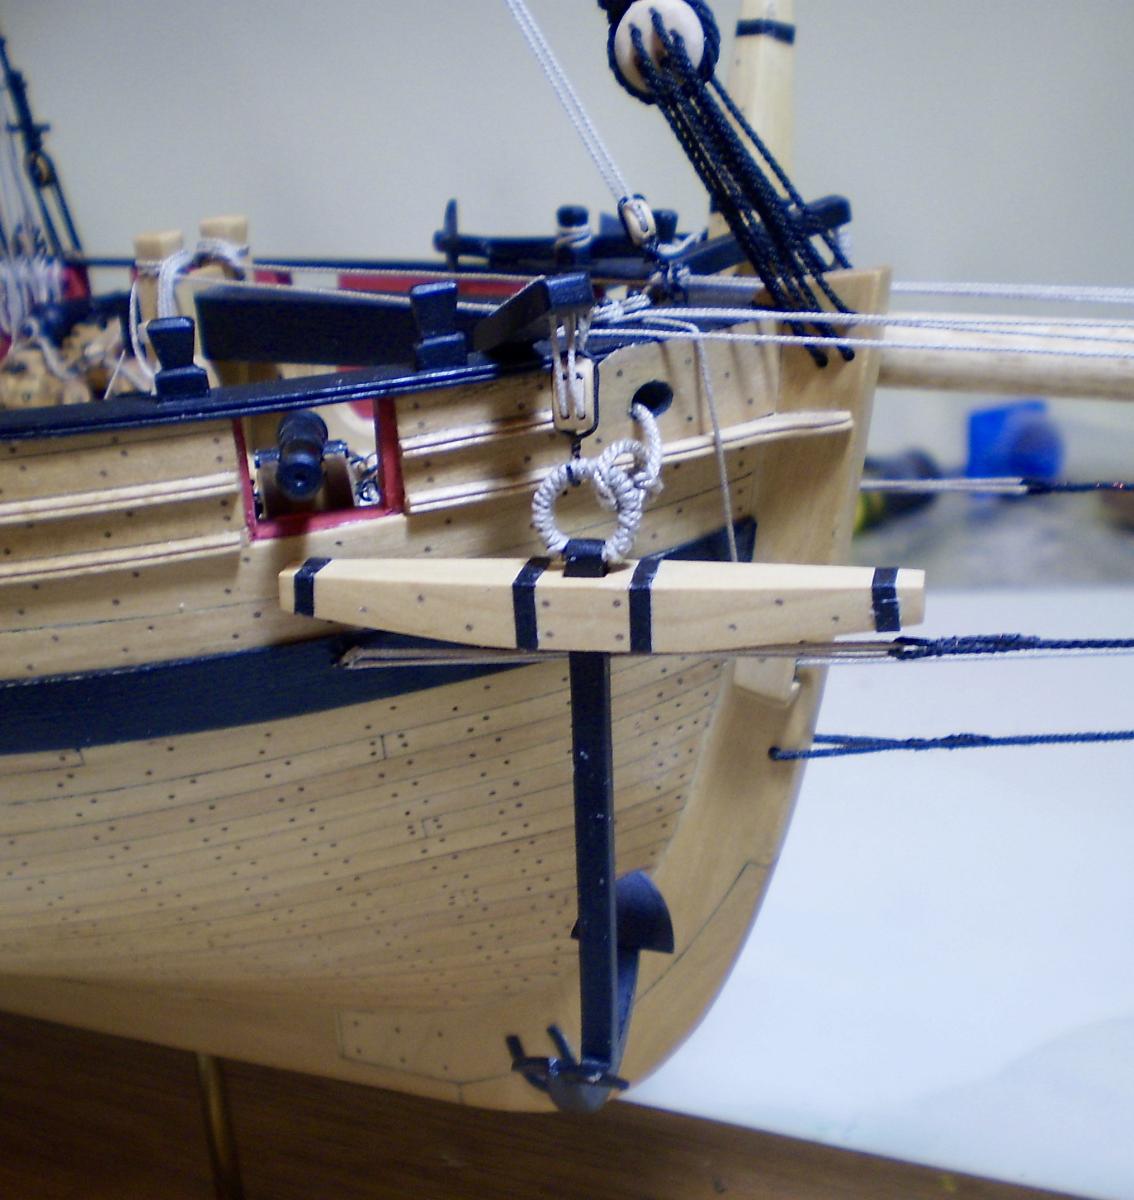
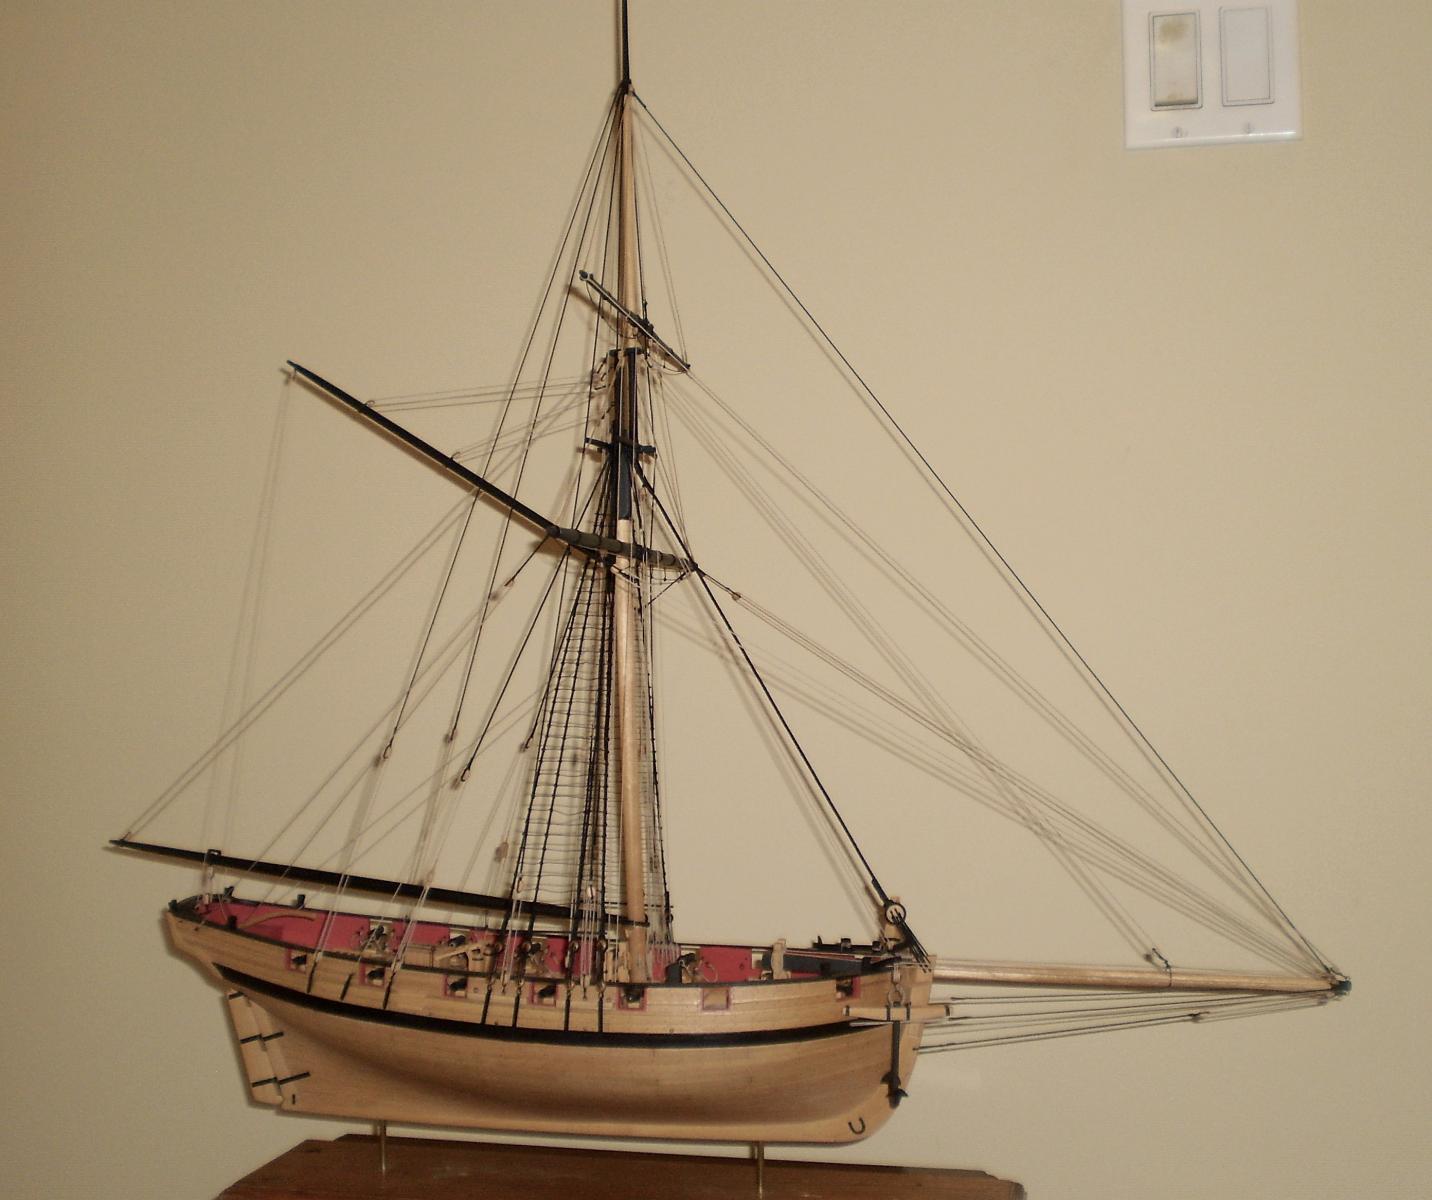
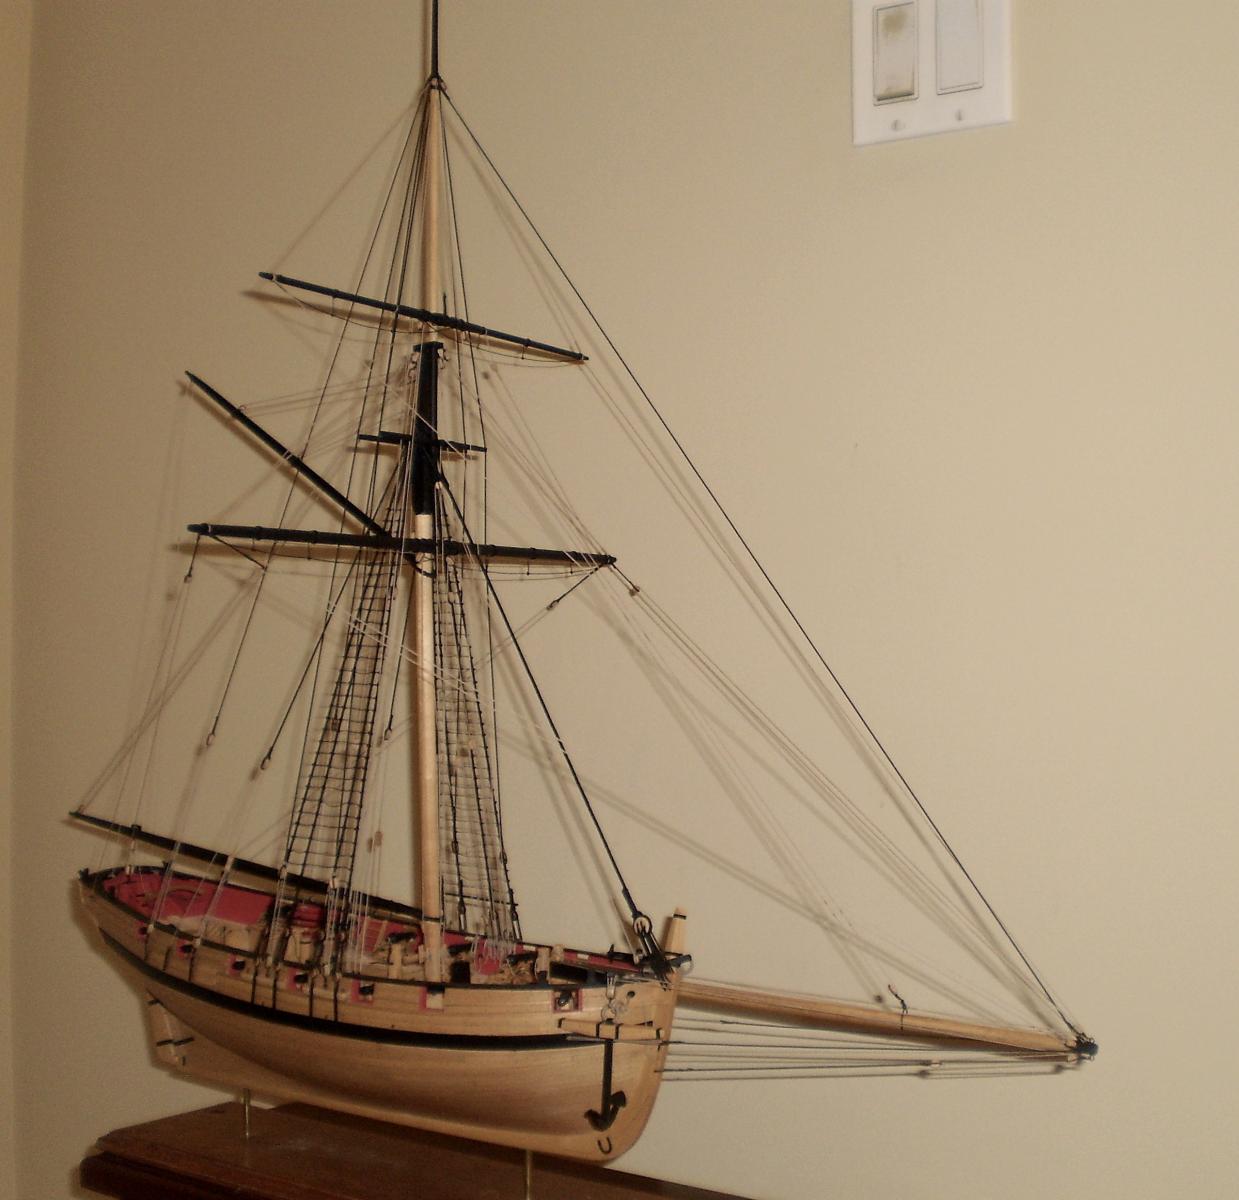
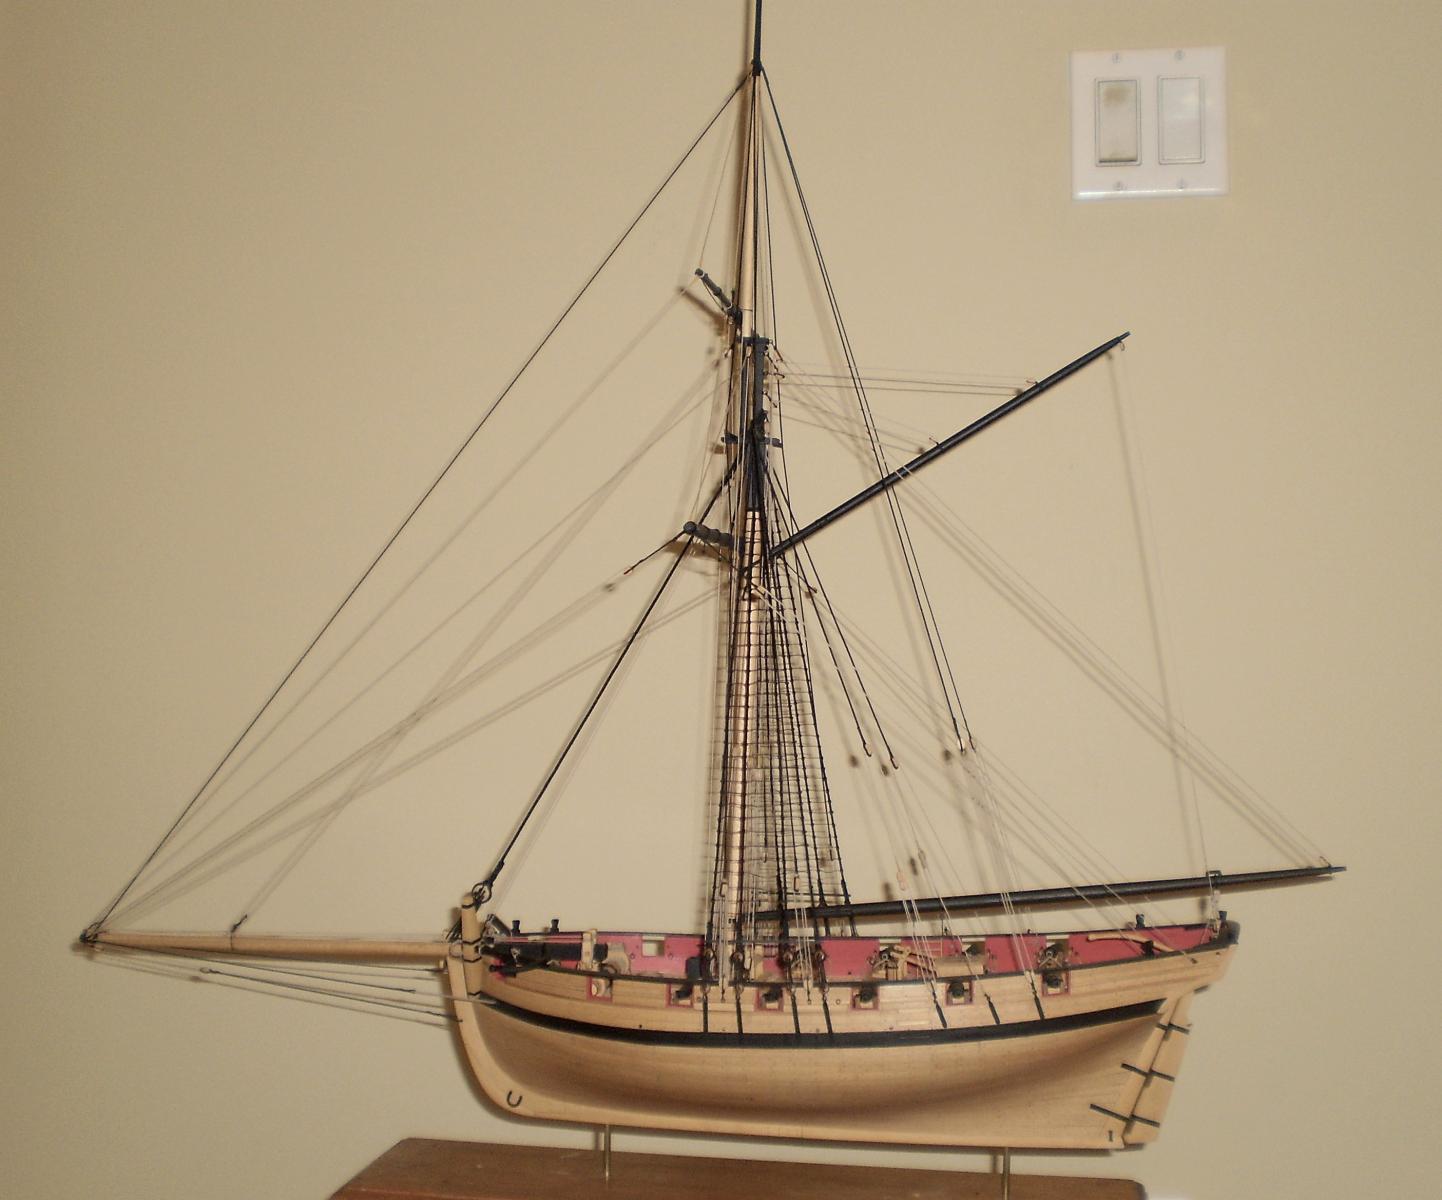
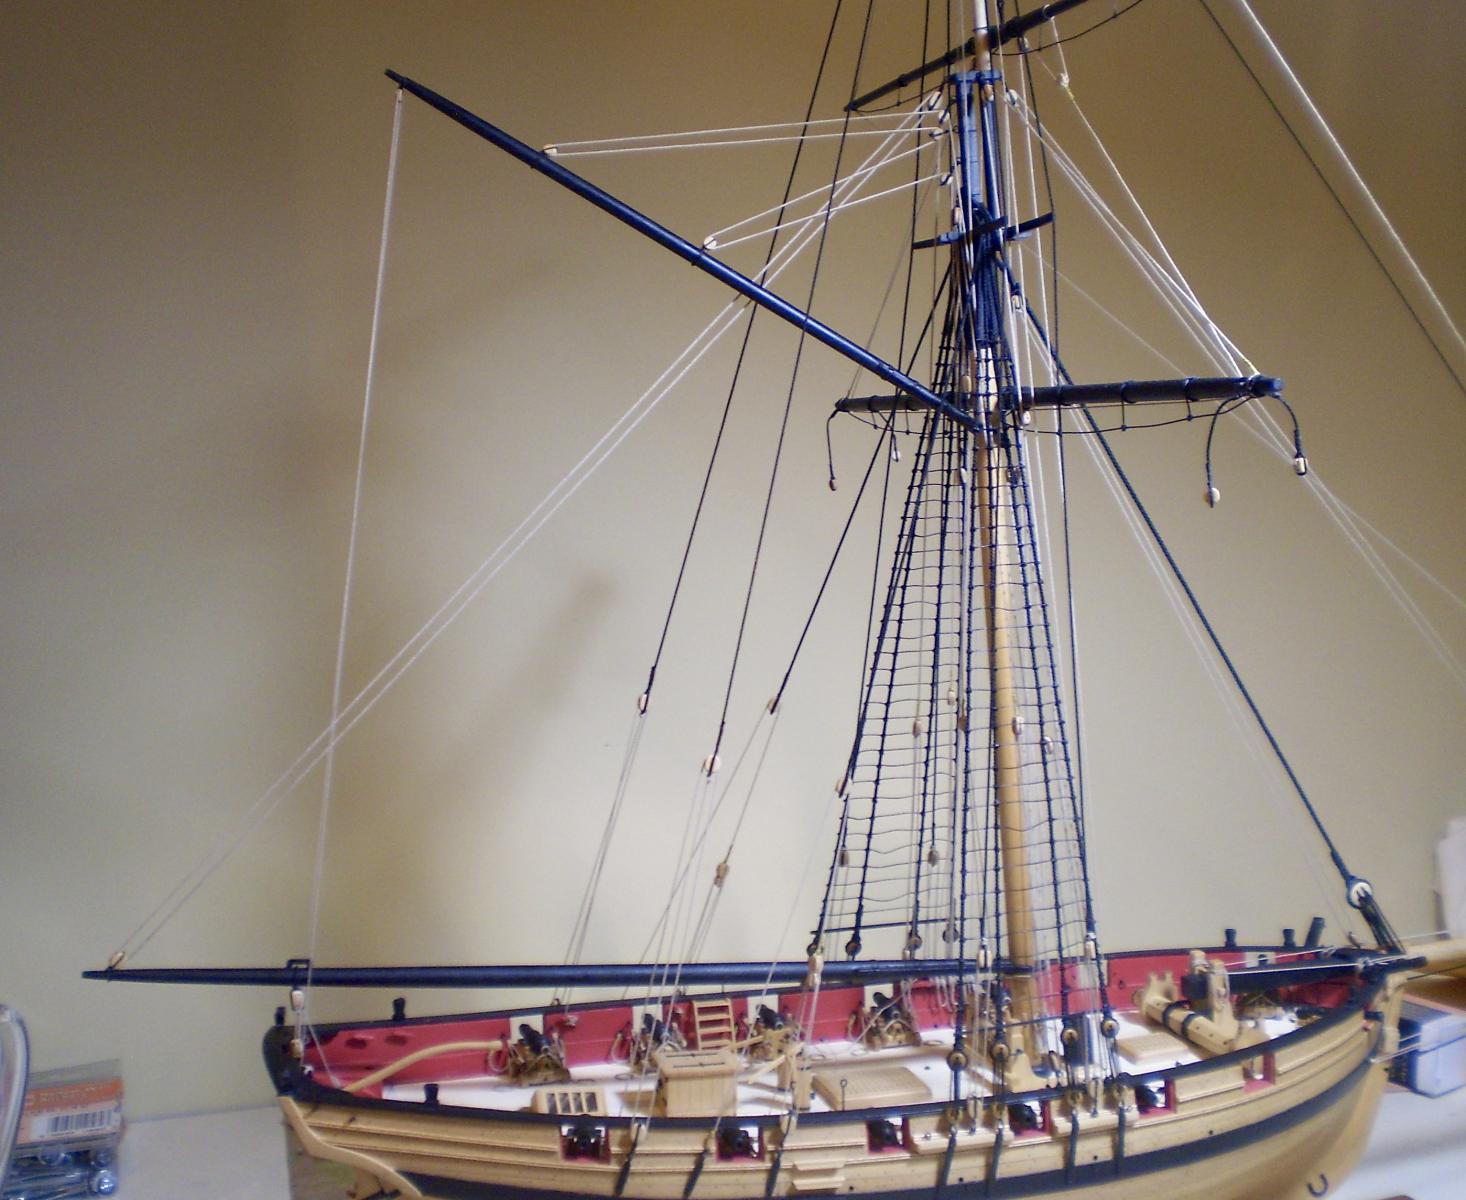
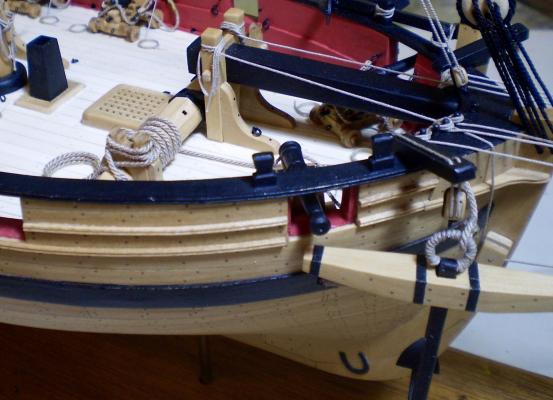
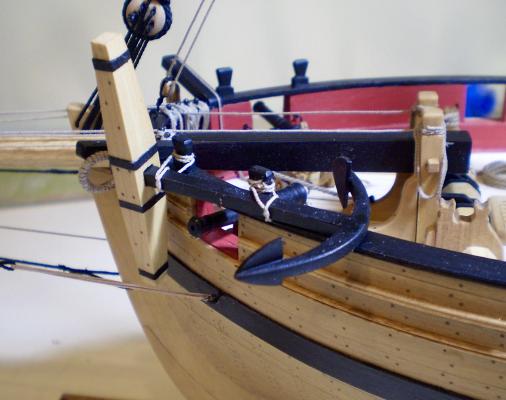
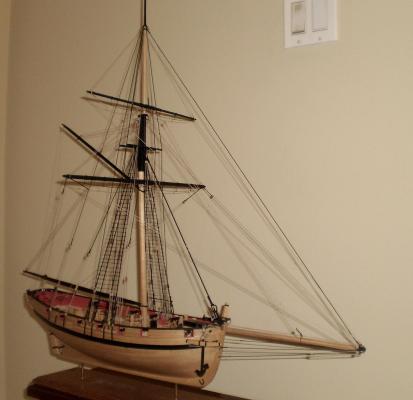
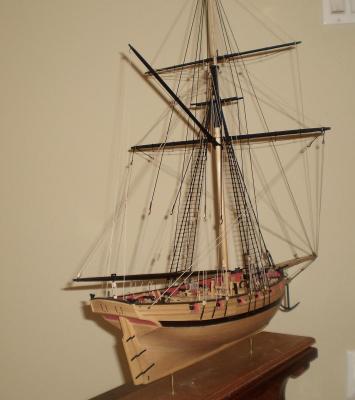
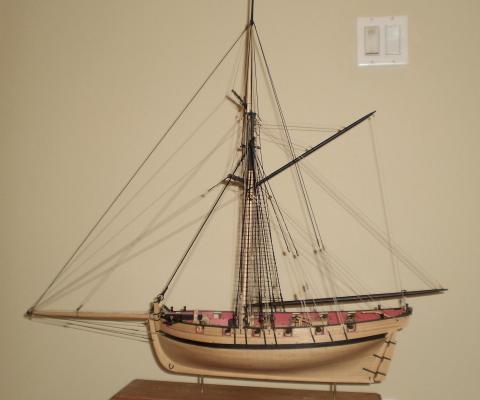
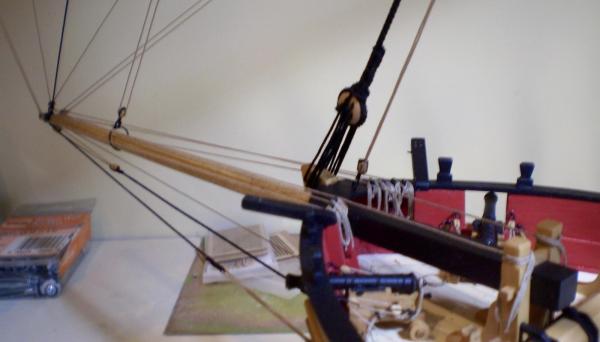
My Cheerful is now complete. I have mounted the anchors, which was the last remaining work to be done. As I indicated earlier, I was having trouble coming up with a mounting plan with which I was happy. My solution, after reviewing photos of contemporary models, and trying out various configurations, was to mount the two anchors differently. On the congested port side, I chose to go with lashing the anchor to two timberheads, without a cable or cat block. On the more open starboard side, I went with the anchor hanging from the cat block, with a cable leading back to the windlass and being tied off to it, as shown on the Rogers collection model. I would like to take this opportunity to thank all of you on MSW who have followed this build and provided the kind of support, encouragement and friendship that we have come to expect from the members of this site. I also want to thank Chuck for coming up with this project and the products to support it. It has been one of the most enjoyable builds that I have done. Attached are photos of the anchor installation and the model's completion portraits. For those interested, my next build will be the Caldercraft Granado. A full description of the reasons for the choice and my plans for the build will be set out in the log that I will be starting today in the kit build section ( how's that for a cheap ploy to get all of you to look at the new log ). Bob

- 525 replies
-
- 38
-
-
- cheerful
- Syren Ship Model Company
- (and 1 more)
-
Sjors, I'm really glad to see that you were able to overcome the problems. Now you're back on track and it's looking great. Bob
- 1,616 replies
-
- 6
-
-
- caldercraft
- agamemnon
- (and 1 more)
-
I was delighted to see all of the great progress you've made, but sad to see that you'll be out of commission for a while. I guess that a new home and workshop is worth it. Bob
- 310 replies
-
- 3
-
-
- cheerful
- Syren Ship Model Company
- (and 1 more)
-
Cutter Cheerful 1806 by rafine - FINISHED
rafine replied to rafine's topic in - Build logs for subjects built 1801 - 1850
Thanks so much B.E. and Paul. I would love to see what you would do with her, B.E. Bob- 525 replies
-
- 4
-
-
- cheerful
- Syren Ship Model Company
- (and 1 more)
-
Cutter Cheerful 1806 by rafine - FINISHED
rafine replied to rafine's topic in - Build logs for subjects built 1801 - 1850
Thanks so much Nils, druxey, Mark, Rusty, Richard, Fam and Sal for the generous comments and also the "likes". It's true what they say about necessity being the mother of invention. Over the years, I've found all sorts of ways not to do things with metal. Anchors have been one of them, and it's nice to see that they've worked out here. Bob- 525 replies
-
- 5
-
-
- cheerful
- Syren Ship Model Company
- (and 1 more)
-
Cutter Cheerful 1806 by rafine - FINISHED
rafine replied to rafine's topic in - Build logs for subjects built 1801 - 1850
Thanks so much George, Ken, Ken, Albert and the "likes". Ken, the puddening was done by hand. Bob- 525 replies
-
- 5
-
-
- cheerful
- Syren Ship Model Company
- (and 1 more)
-
Cutter Cheerful 1806 by rafine - FINISHED
rafine replied to rafine's topic in - Build logs for subjects built 1801 - 1850
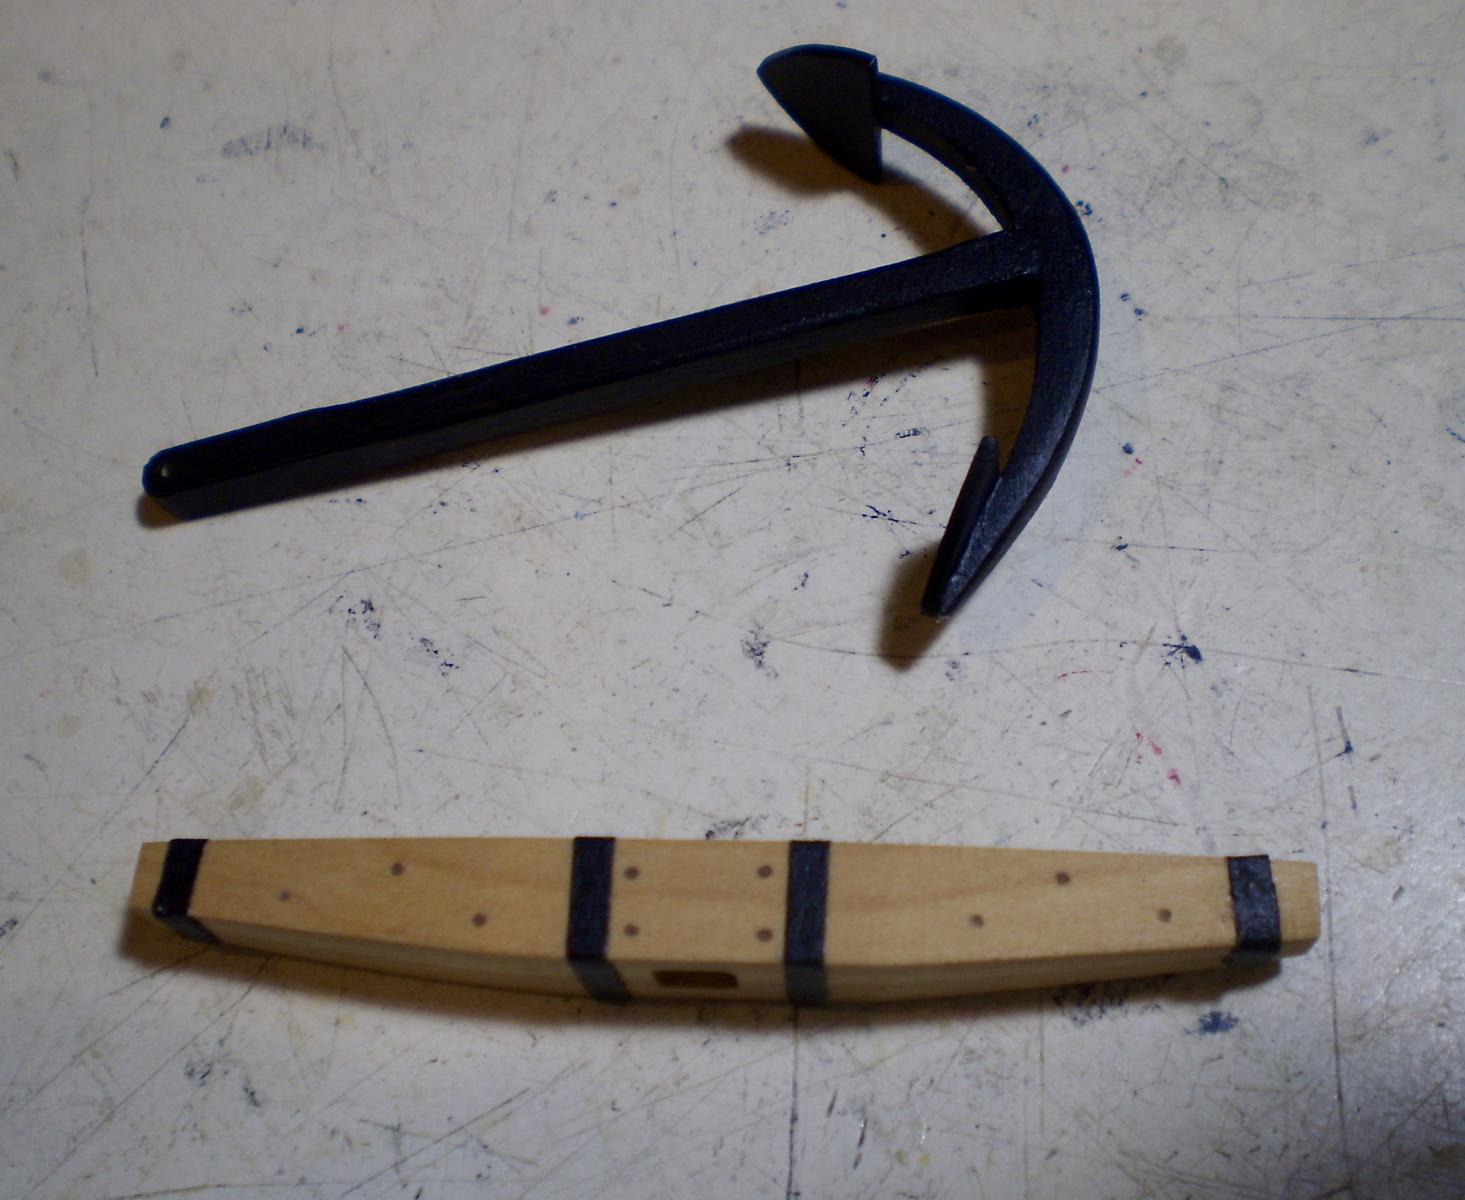
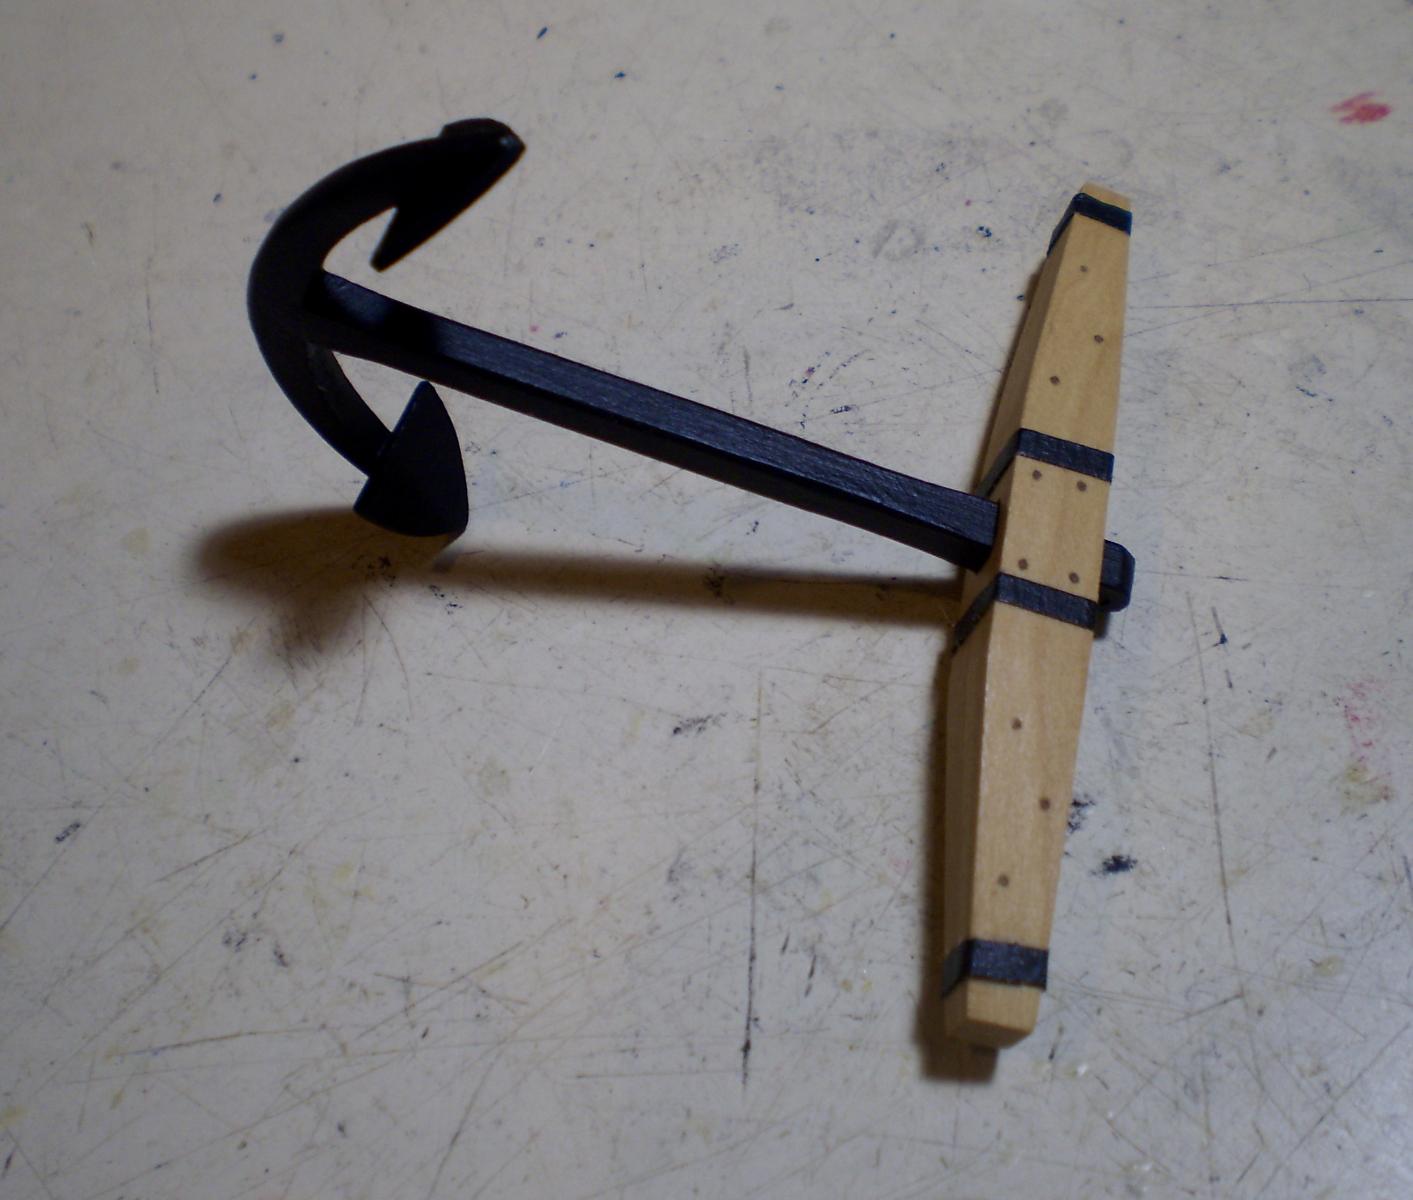
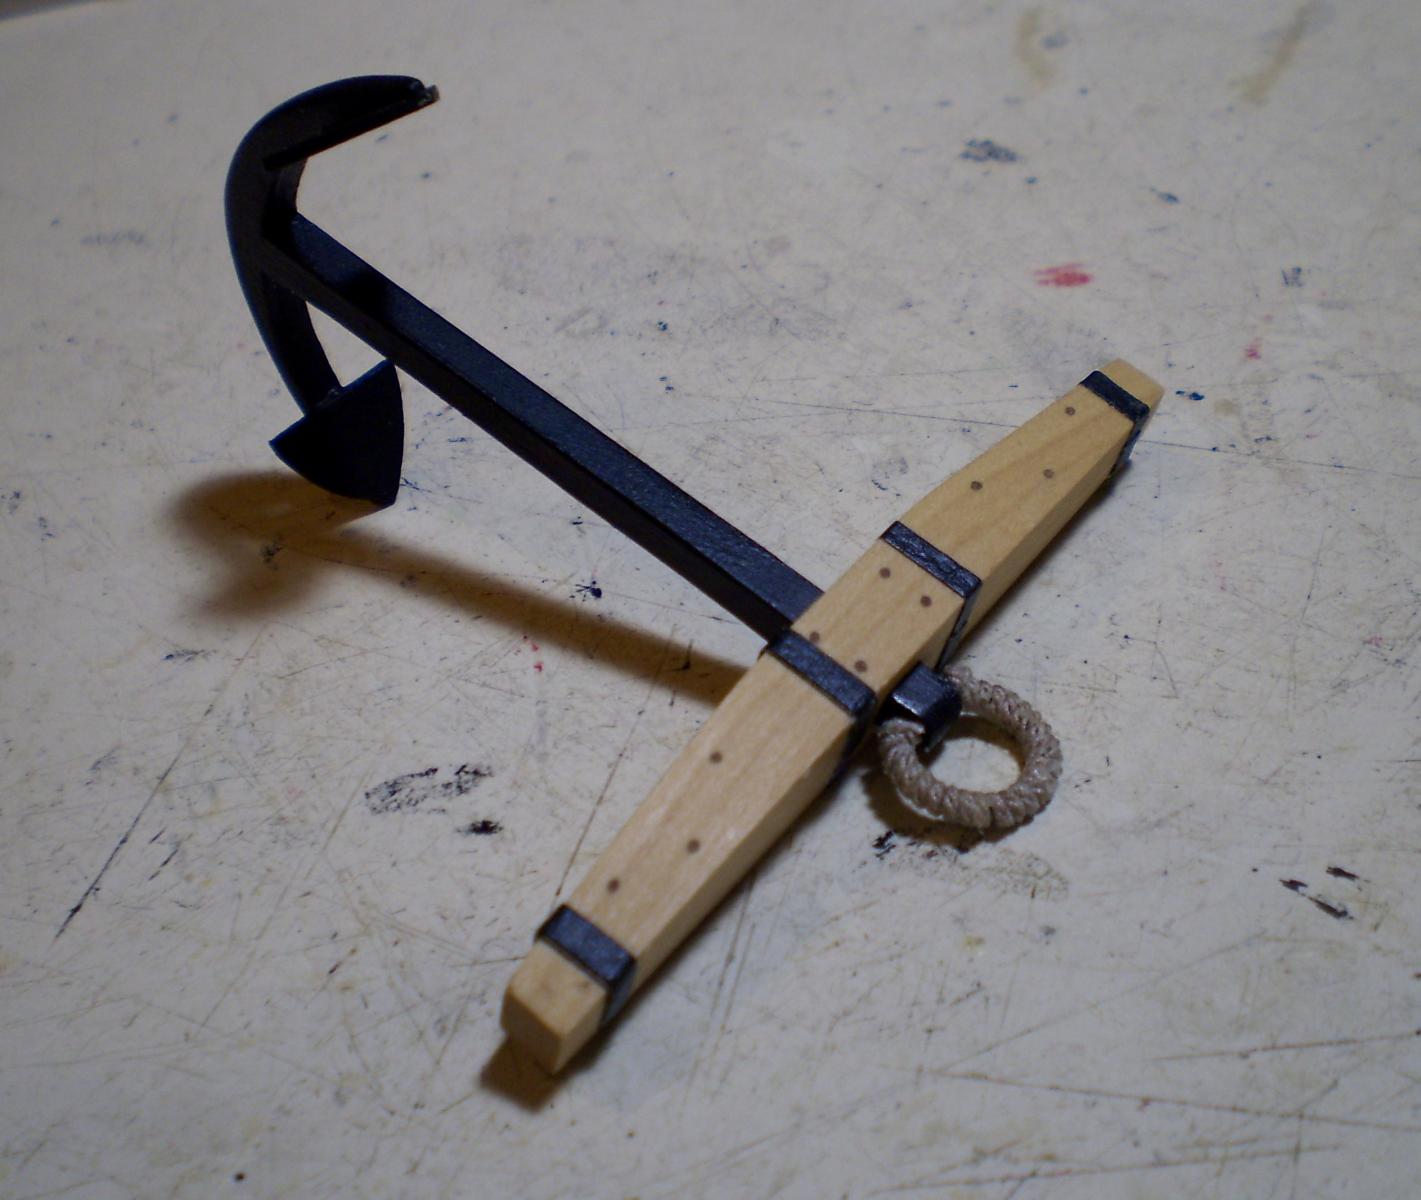
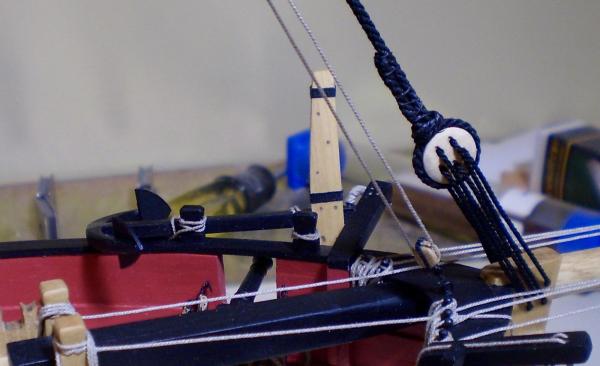
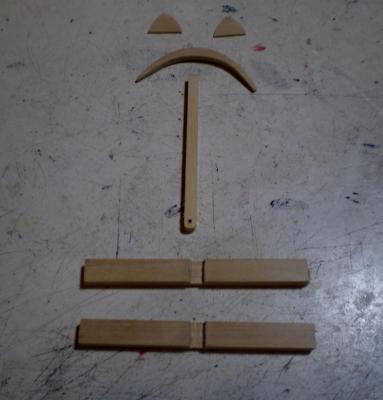
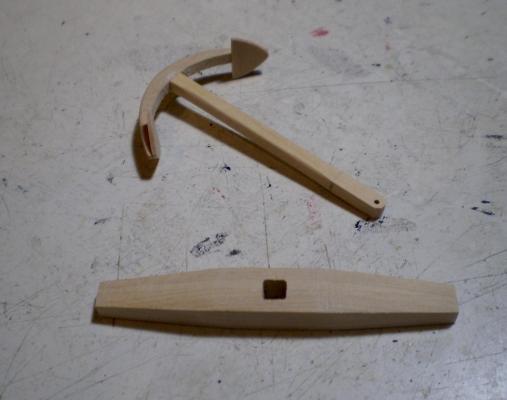
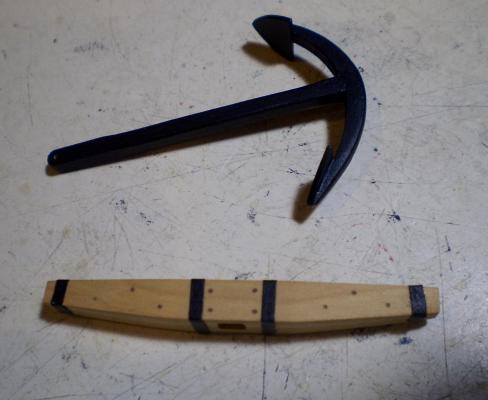
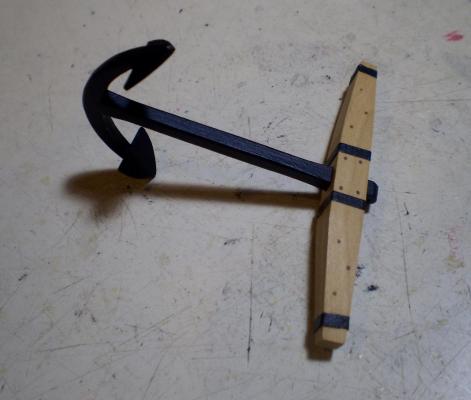
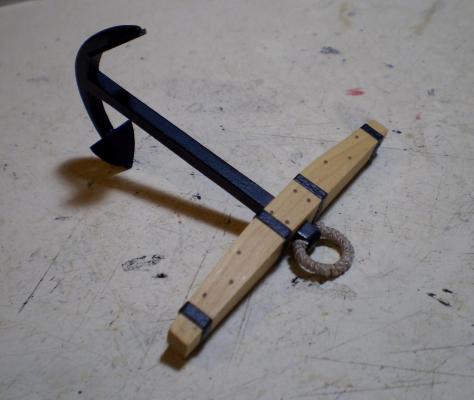
Well, I finally made up my mind on the braces. Let's just say that my heart overcame my head (the purists can line up over here and start beating me around the head ). This completes the rigging. While I was agonizing on the brace issue, I made up the two anchors. Given my longtime aversion to metal work, the anchors are made entirely of sheet and strip boxwood. The bands on the stocks are black painted paper. The rings are wire bent to shape, with .025" line wrapped around them for the puddening. I'm still at a loss, even after consulting with Chuck and reviewing photos of contemporary models, as to how to mount the anchors. I've tried a few ways and nothing seems quite right. Bob
- 525 replies
-
- 38
-
-
- cheerful
- Syren Ship Model Company
- (and 1 more)
-
Great to see you back at it Nils, even if slowly. The winches are remarkable. Bob
- 2,625 replies
-
- 3
-
-
- kaiser wilhelm der grosse
- passenger steamer
- (and 1 more)
-
Cutter Cheerful 1806 by rafine - FINISHED
rafine replied to rafine's topic in - Build logs for subjects built 1801 - 1850
Thanks so much Nigel. Just when I had almost made up my mind to be historically accurate, you've gone and made me rethink it again. Bob- 525 replies
-
- 7
-
-
- cheerful
- Syren Ship Model Company
- (and 1 more)
-
Cutter Cheerful 1806 by rafine - FINISHED
rafine replied to rafine's topic in - Build logs for subjects built 1801 - 1850
Thanks so much Erik and Thomas for not only the nice comments, but the support and encouragement. Bob- 525 replies
-
- 3
-
-
- cheerful
- Syren Ship Model Company
- (and 1 more)
-
Cutter Cheerful 1806 by rafine - FINISHED
rafine replied to rafine's topic in - Build logs for subjects built 1801 - 1850
Thanks so much Nils, druxey, Mobbsie, Sal, Grant and Spyglass for the very kind words and thanks also to all of the "likes". I'm still torn about what to with the braces. My historically accurate side says to go with only the forward braces. My artistic license side says to do the fore and aft. In my usual fashion of putting such decisions off, I have done the forward braces, but will delay the final decision for a day or two. Bob- 525 replies
-
- 9
-
-
- cheerful
- Syren Ship Model Company
- (and 1 more)
-
Very nicely done on the crowfeet Sjors. I've always found them be a nasty job. Bob
- 1,616 replies
-
- 6
-
-
- caldercraft
- agamemnon
- (and 1 more)
-
Cutter Cheerful 1806 by rafine - FINISHED
rafine replied to rafine's topic in - Build logs for subjects built 1801 - 1850
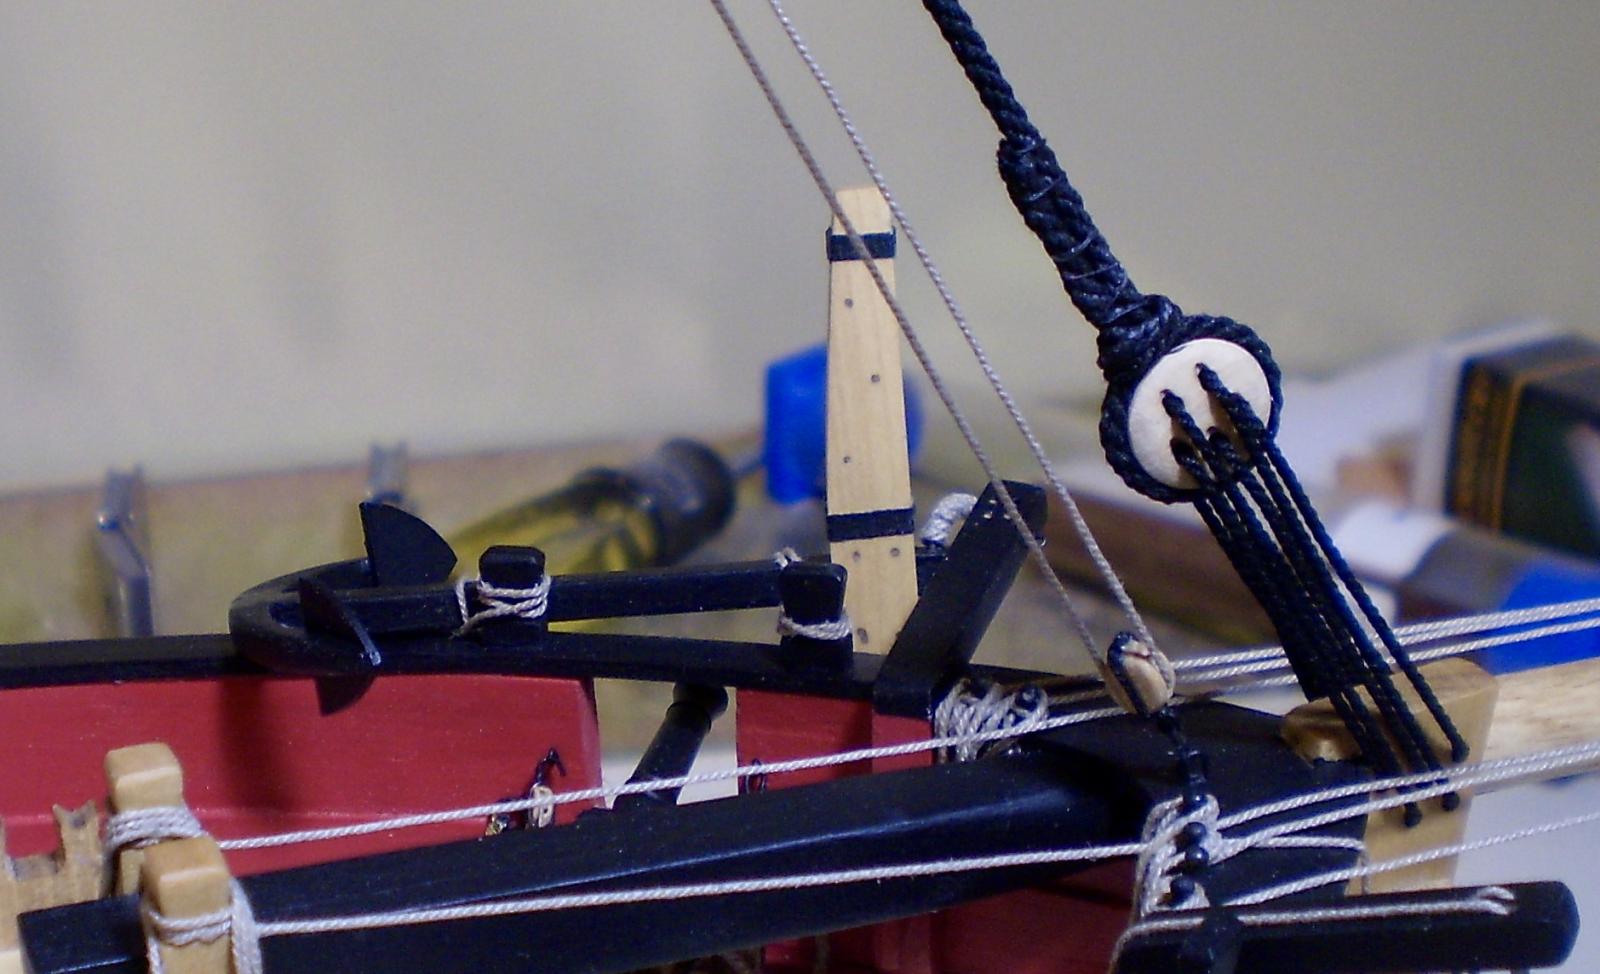
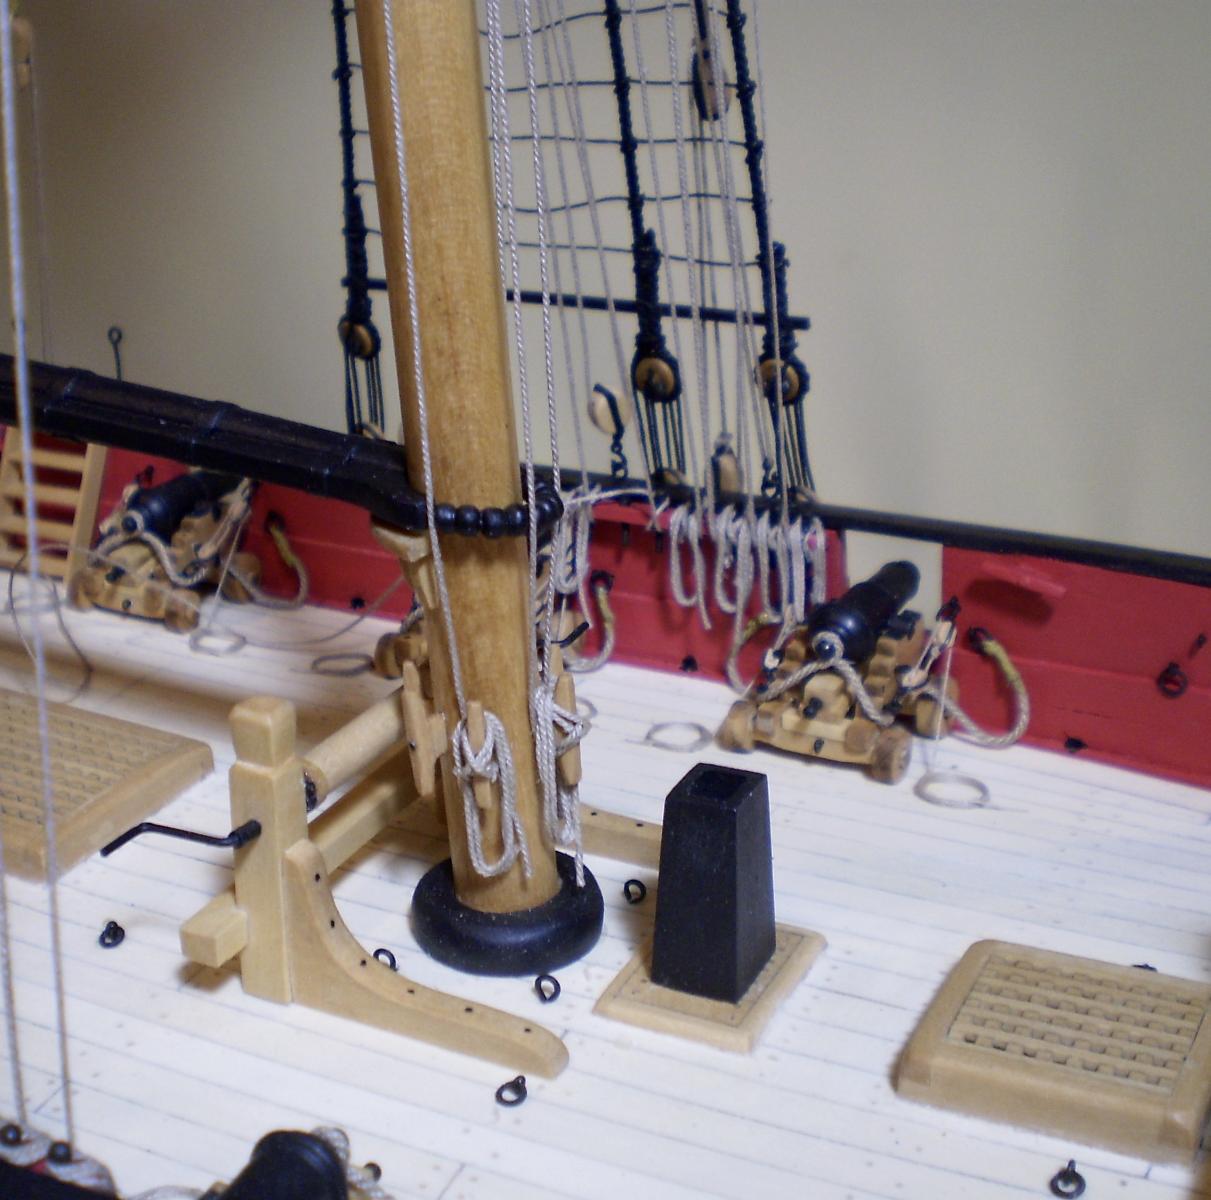
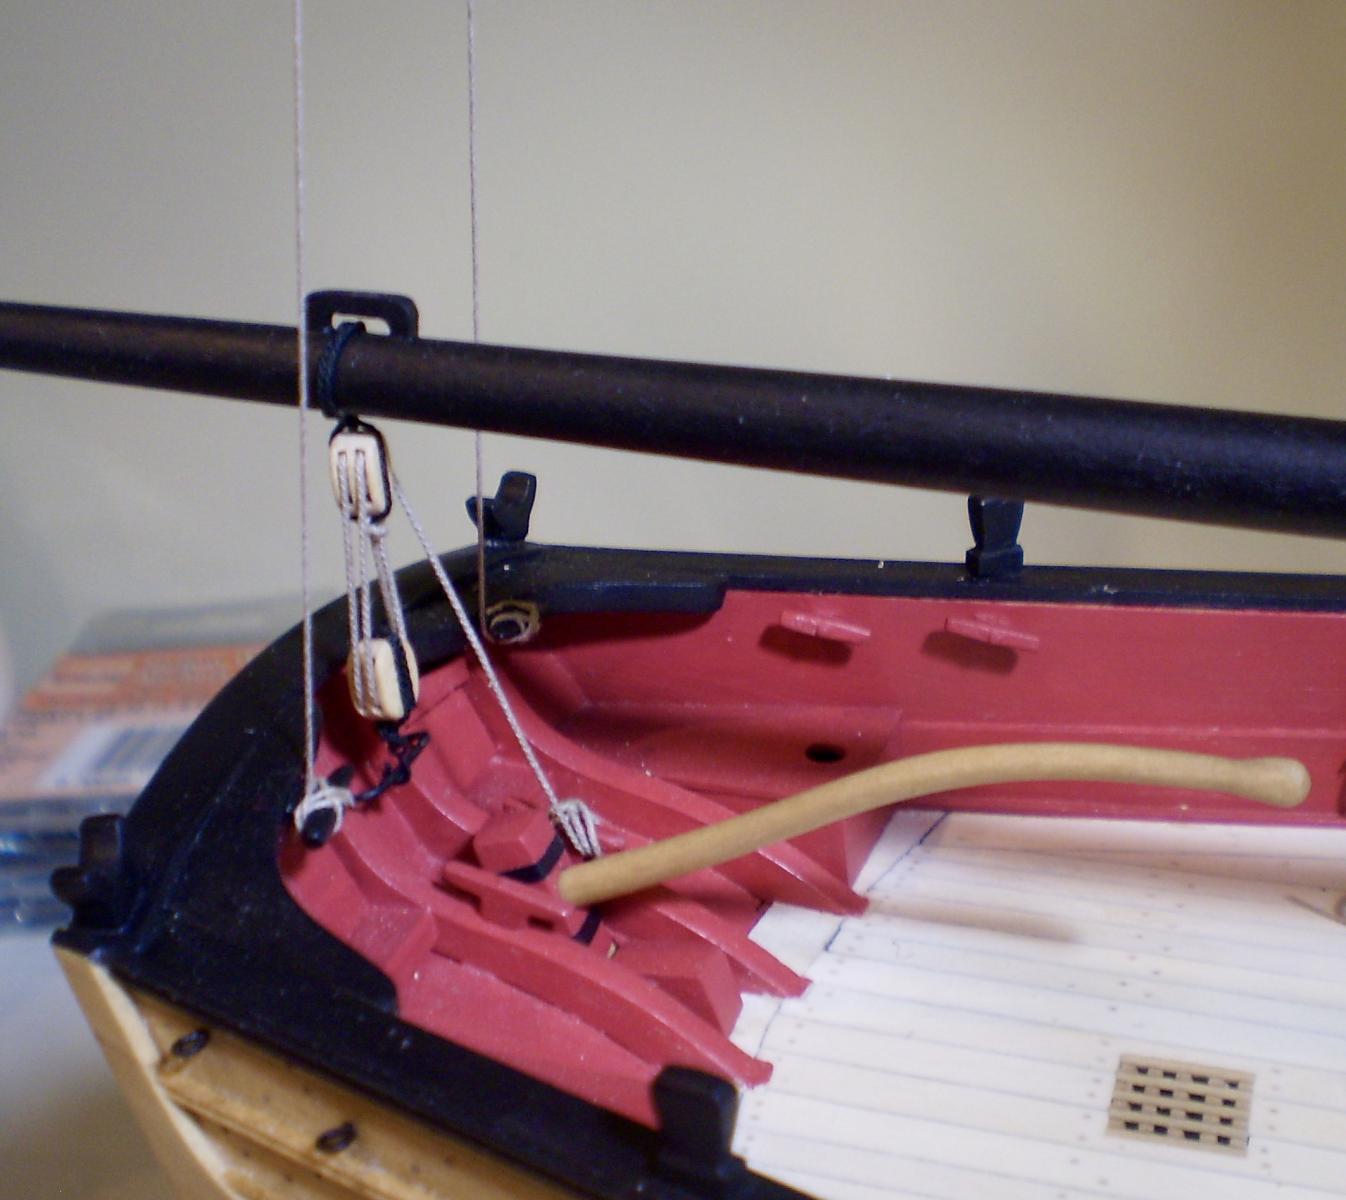
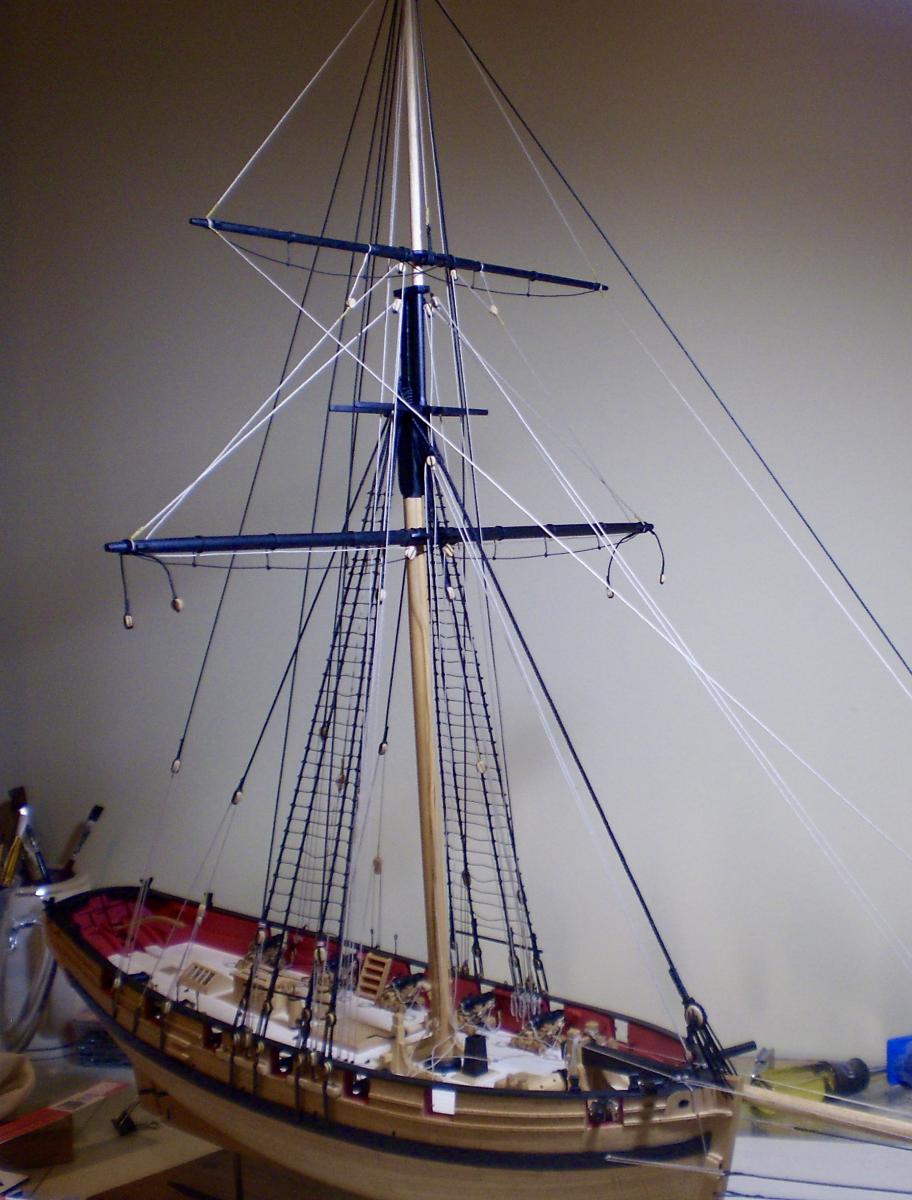
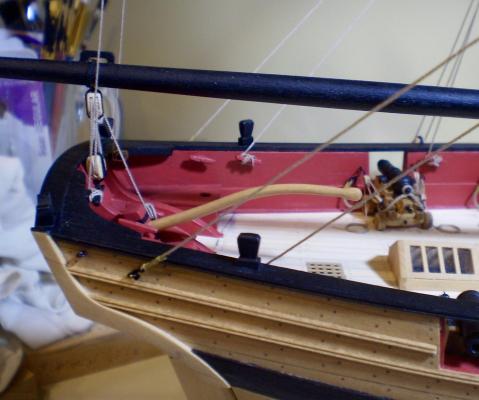
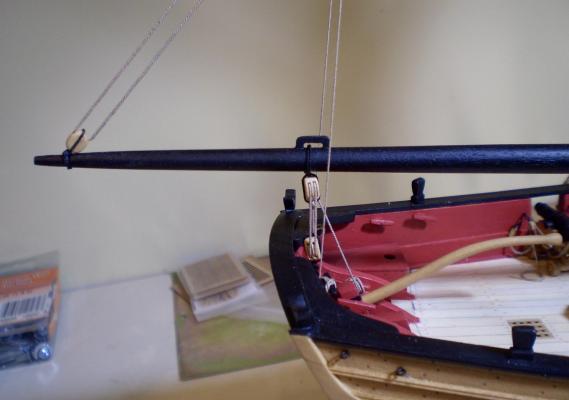
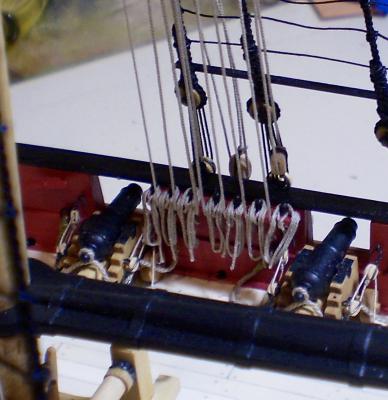
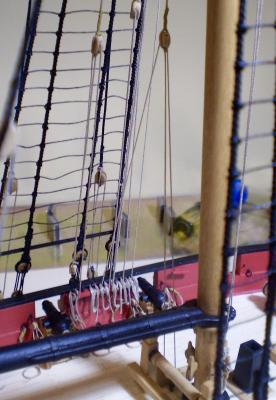
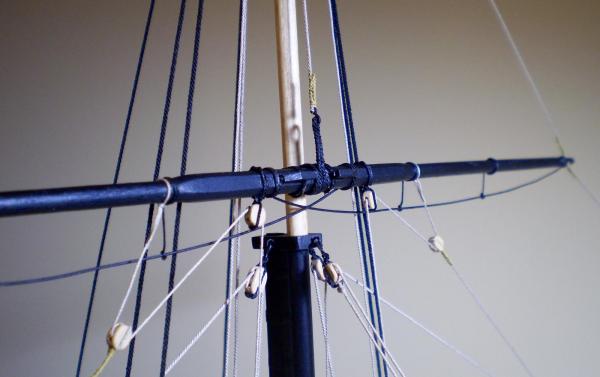
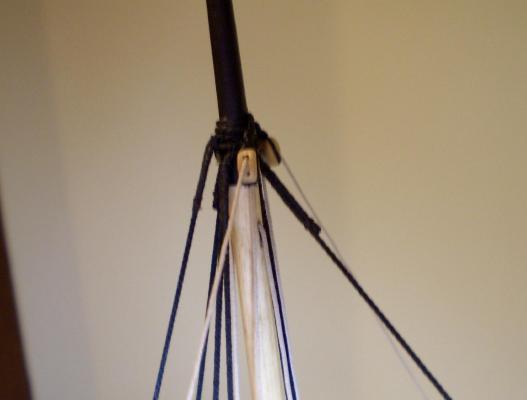
I've now mounted and rigged the boom and gaff. Before describing that work, I present a cautionary tale. This about not thinking far enough ahead and simply following plans without research or thought. I had chosen to mount and rig the yards before the boom and gaff. In the past, I have done this both ways without much difference. In mounting the yards, I decided to use simplified trusses, as shown on the plans with a note that many cutters did not use them and they are optional. I chose to use them because they help to hold the yard to the mast securely during rigging. Not until all of the work on the yards was complete did I notice on the the plans that the gaff is shown as being above the lower yard on the mast. Since the gaff slides up and down on the mast, this seemed an odd and improbable situation. At this point, I contacted Chuck to get his input on this. He agreed with my conclusion, but provided persuasive evidence from contemporary models that this was, in fact, the way it was done on many cutters, particularly those that did not employ trusses on the lower yard. I was going to try to remove the truss and mount the gaff above the yard, when it became apparent that the only way to accomplish this would be to remove virtually all of the rigging to the yards that was now in the way. I chose not to do this, but go with mounting the gaff below the yard, as shown on some models with trusses. It also seems, from my exchange with Chuck, that if a truss was employed and the gaff shown below the yard, the fore and aft braces on the lower yard, one of the most visually interesting features of the cutter rig, would not be used, but only the forward brace. In any event, the boom and gaff are now in place and rigged. Mounting involved making parrels for each from black beads. The boom rigging consists of a topping lift and the boom sheet. The gaff rigging involved the peak and throat halliards and the flag halliard. All of the blocks had been attached to the boom and gaff and the masthead before mounting the boom and gaff. After completing this work, I permanently tied off a number of lines that had previously been only temporarily done and added rope coils. This completes the rigging except for the lower yard braces. While I understand that it is probably accurate to use only the forward braces, given what I've done, I really like the look of the double braces. What should I do? Bob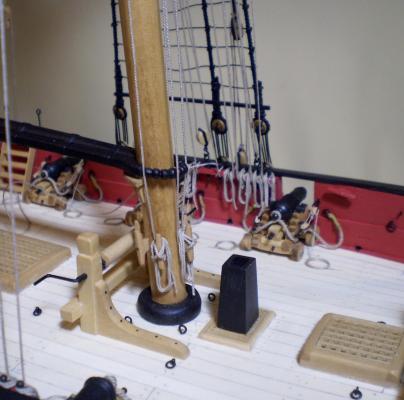


- 525 replies
-
- 36
-
-
- cheerful
- Syren Ship Model Company
- (and 1 more)
-
Cutter Cheerful 1806 by rafine - FINISHED
rafine replied to rafine's topic in - Build logs for subjects built 1801 - 1850
Thanks so much Tom, Al and Mobbsie for the generous comments and also the "likes". Always appreciated. Nothing mysterious about the next project -- just haven't quite made up my mind. Very soon. Bob- 525 replies
-
- 4
-
-
- cheerful
- Syren Ship Model Company
- (and 1 more)
-
Cutter Cheerful 1806 by rafine - FINISHED
rafine replied to rafine's topic in - Build logs for subjects built 1801 - 1850
Thanks so much Lami for the kind words. As to your question, I followed Chuck's rigging plan, without any independent research on this. I know that Chuck did extensive research and probably would have an answer for you. Bob- 525 replies
-
- 4
-
-
- cheerful
- Syren Ship Model Company
- (and 1 more)
-
Yes, it's been a while since your last post, but you've accomplished a lot of great looking work. Bob
- 129 replies
-
- 5
-
-
- armed launch
- panart
- (and 1 more)
-
Good to see you moving forward again -- and beautifully done. Bob
- 1,616 replies
-
- 6
-
-
- caldercraft
- agamemnon
- (and 1 more)
-
Cutter Cheerful 1806 by rafine - FINISHED
rafine replied to rafine's topic in - Build logs for subjects built 1801 - 1850
Thanks so much George, Grant, John and druxey for the nice comments and also the "likes". Yes, the end is in sight and I am considering what to do next. I'll be back to you soon on that. Bob- 525 replies
-
- 4
-
-
- cheerful
- Syren Ship Model Company
- (and 1 more)
-
Cutter Cheerful 1806 by rafine - FINISHED
rafine replied to rafine's topic in - Build logs for subjects built 1801 - 1850
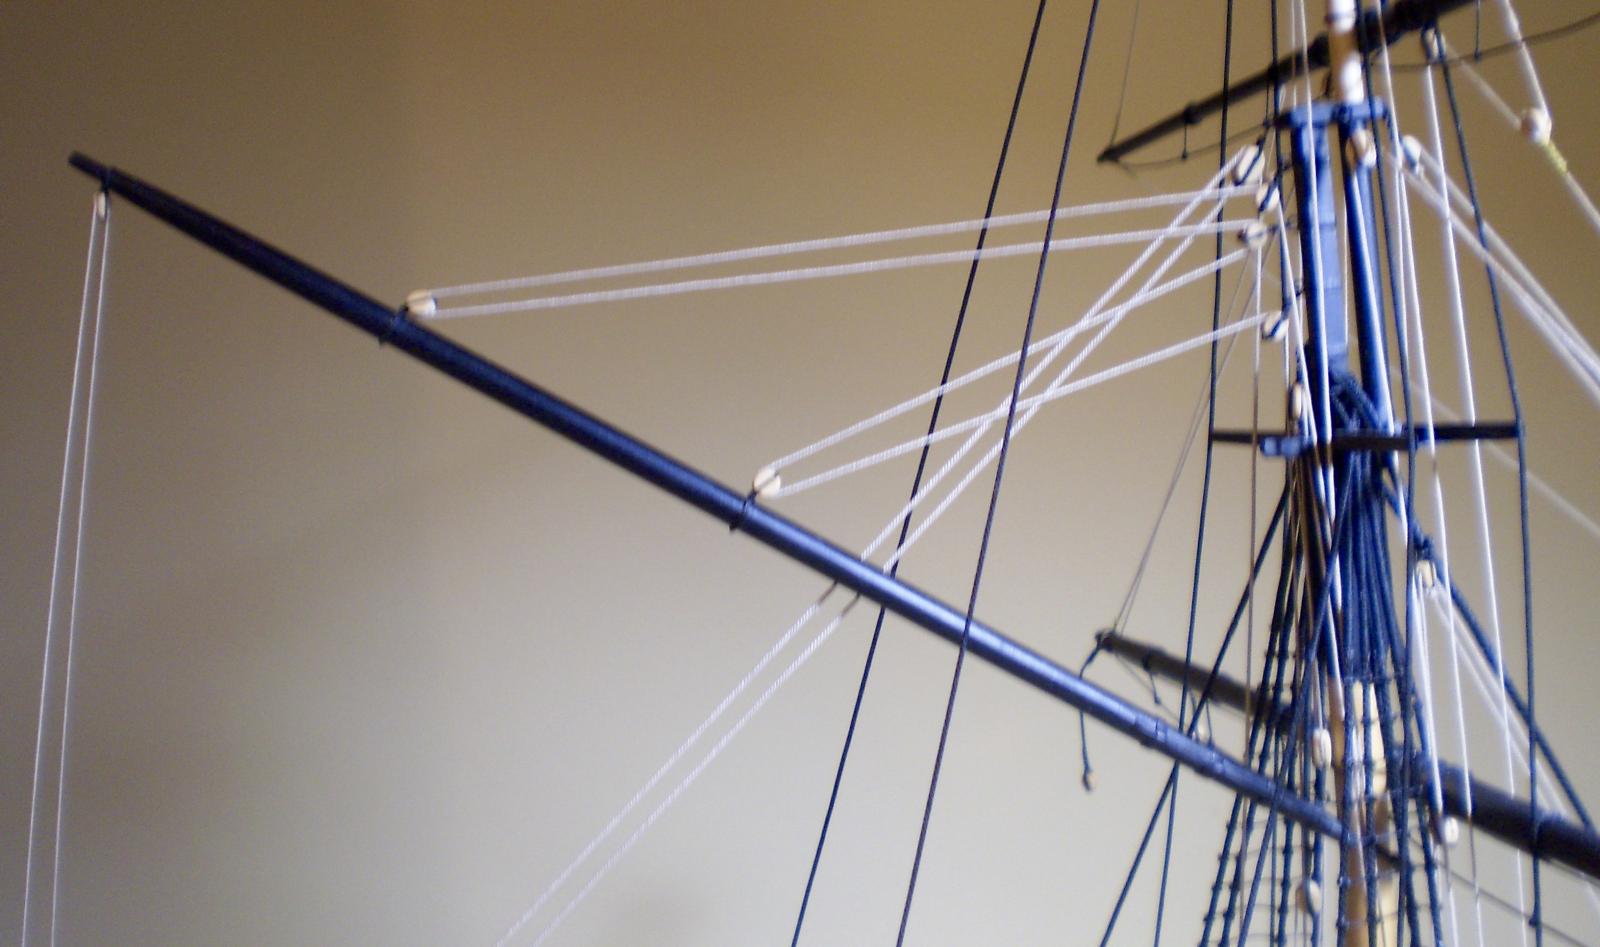
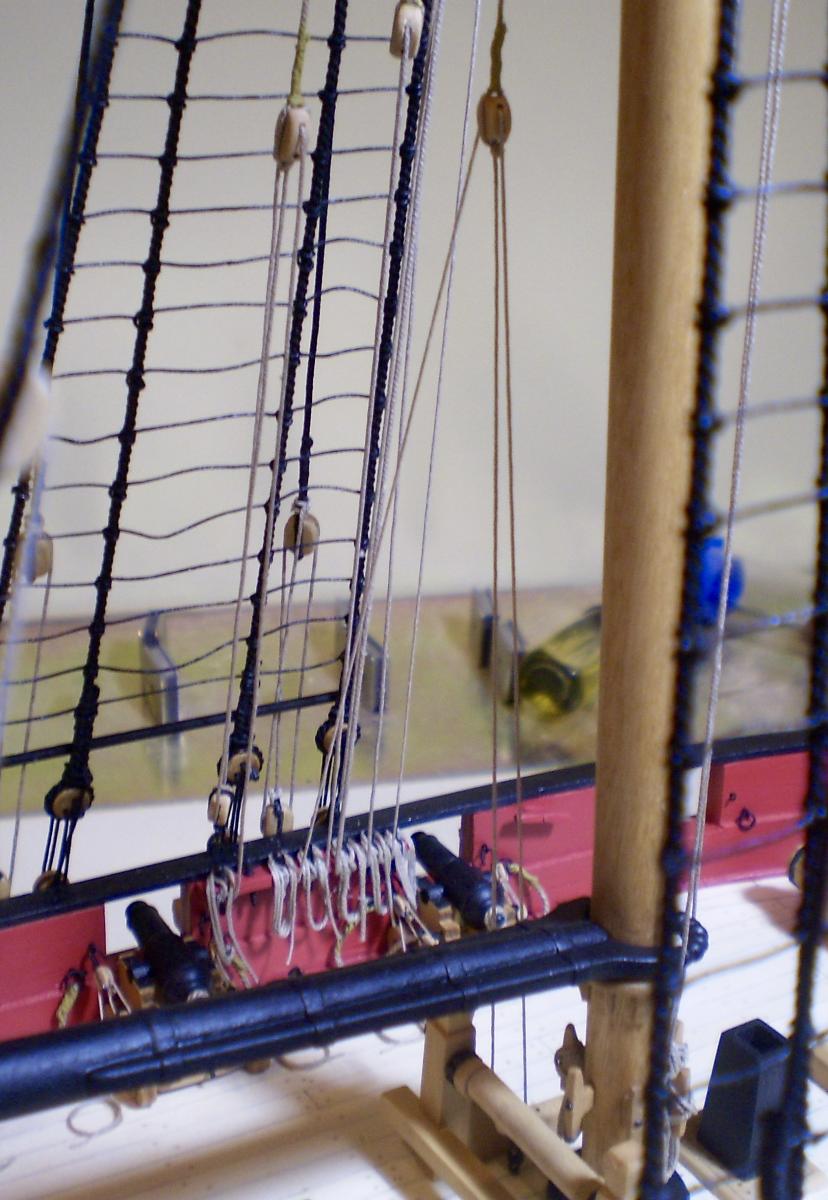
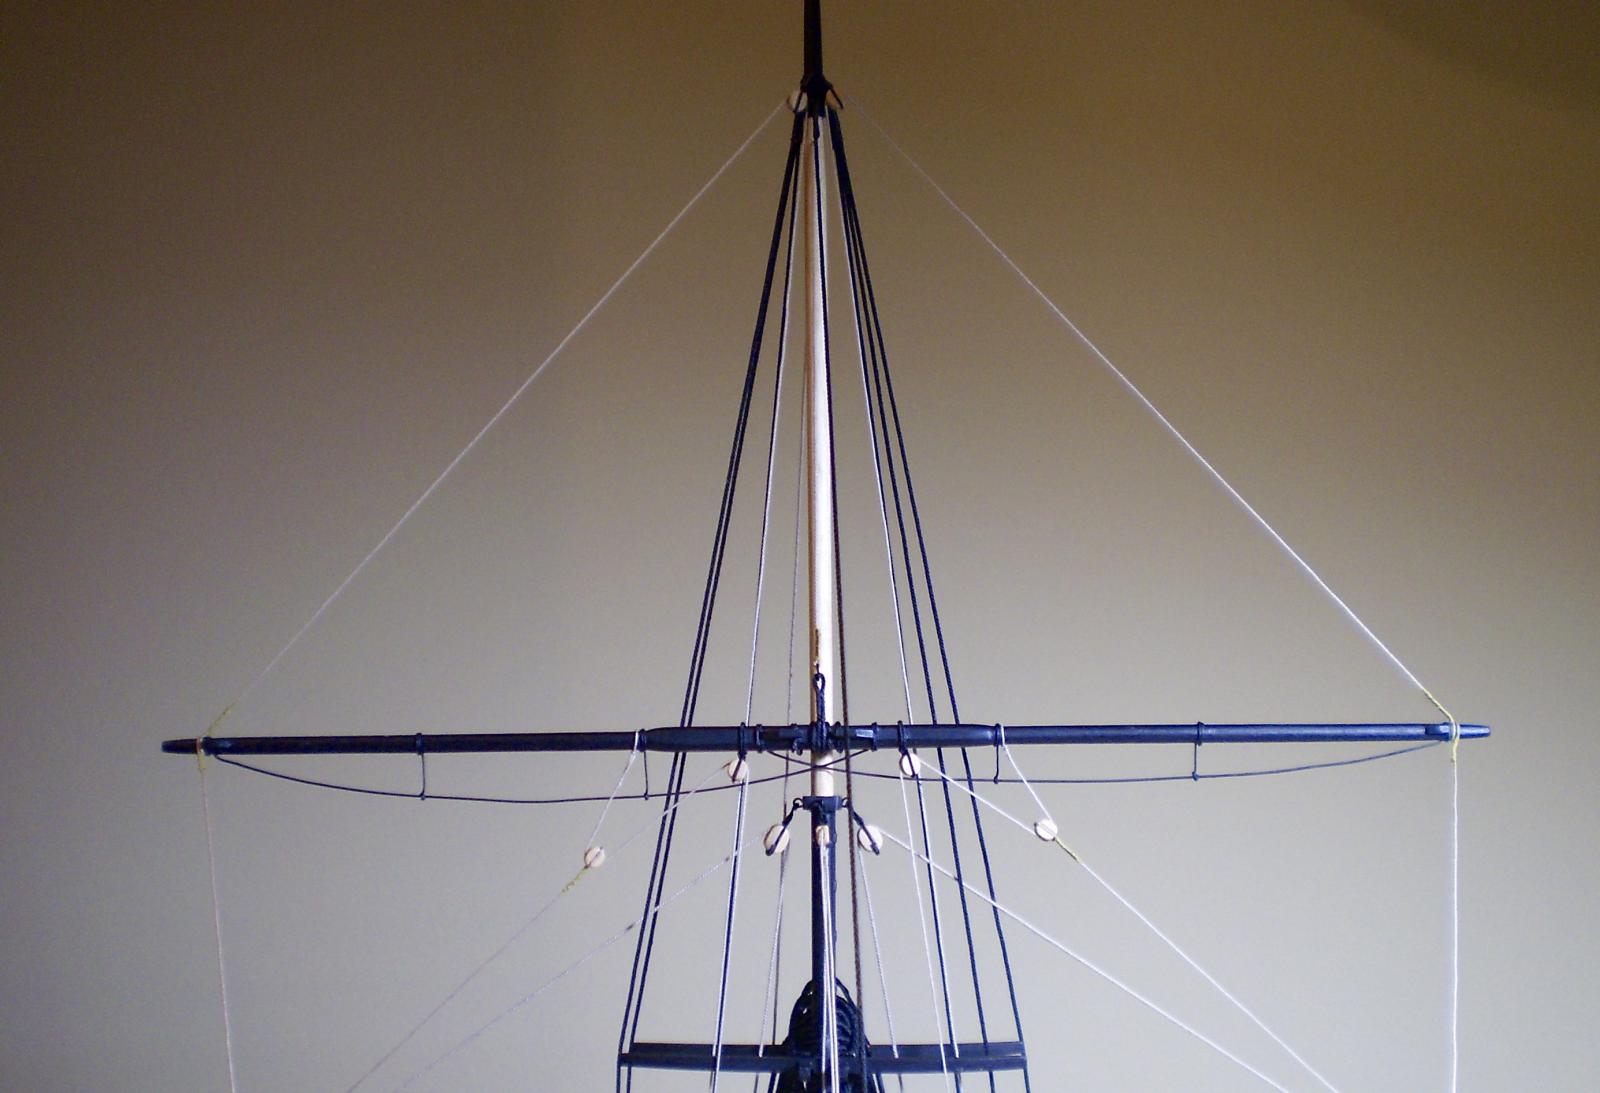
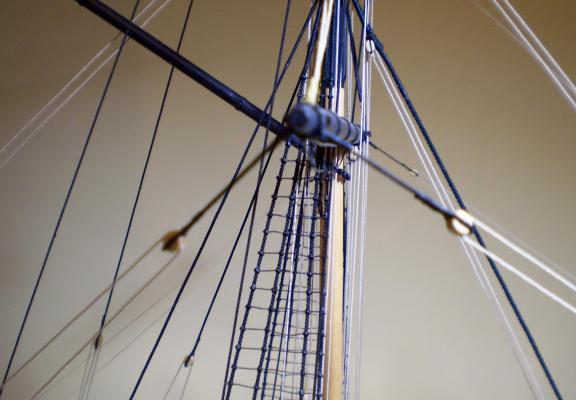
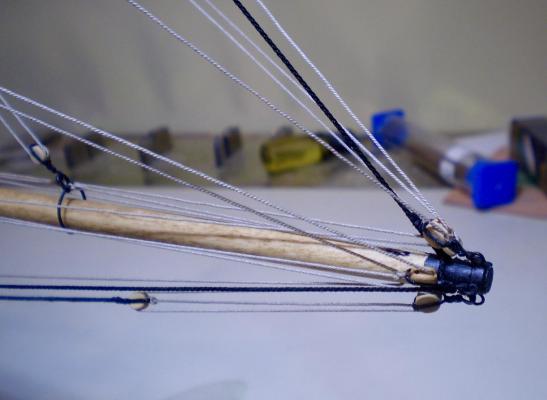
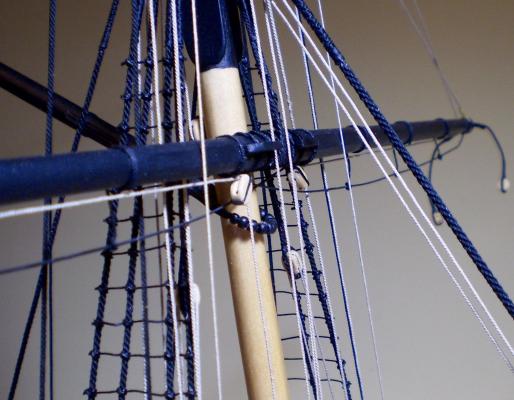
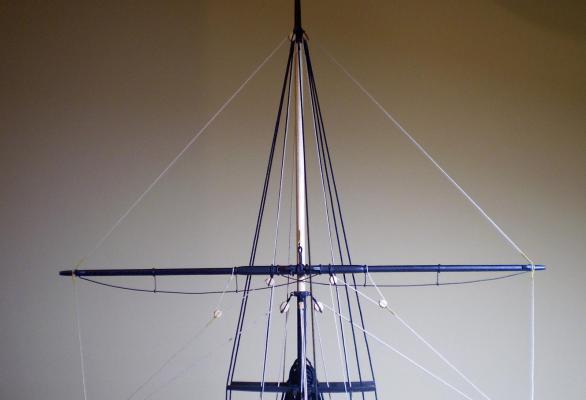
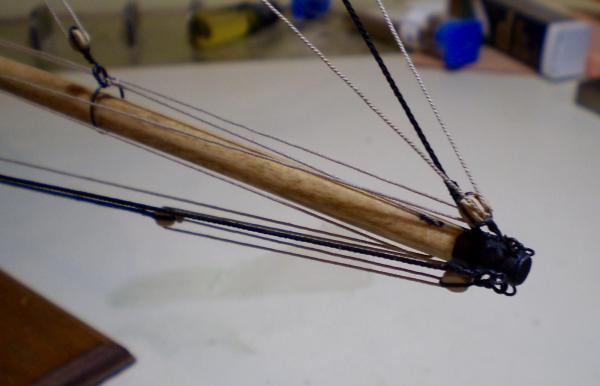
I'm a little behind in my posting, because I've had some computer issues that have kept me from accessing or using my photos. Hopefully, all is resolved now. The topsail yard has now been fitted out, mounted and rigged. As with the lower yard, the fitting out included adding the foot ropes, blocks, the yard portion of the halliard, the lifts, the clews and the braces. With all of that completed , I mounted the yard to a pin on the topmast and completed the rigging. This involved running the halliard through the masthead sheave and then adding it's tackle, running the lifts through blocks seized to the masthead, completing the clews and adding the sheets which were then run down through the sheaves in the lower yard and running the braces through a block hooked to an eye at the bowsprit tip. From here, it is on to the gaff and boom. Bob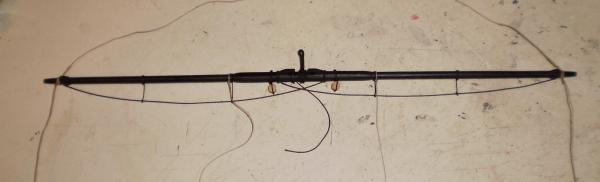

- 525 replies
-
- 30
-
-
- cheerful
- Syren Ship Model Company
- (and 1 more)
-
Beautiful work on the planking and tree nailing Rusty. Bob
- 310 replies
-
- 3
-
-
- cheerful
- Syren Ship Model Company
- (and 1 more)
-
US Brig Syren by Gahm - Model Shipways
rafine replied to Gahm's topic in - Kit build logs for subjects built from 1801 - 1850
That is fantastic work on the cannons Thomas, particularly at that scale. Bob