


ken3335
-
Posts
314 -
Joined
-
Last visited
Content Type
Profiles
Forums
Gallery
Events
Posts posted by ken3335
-
-
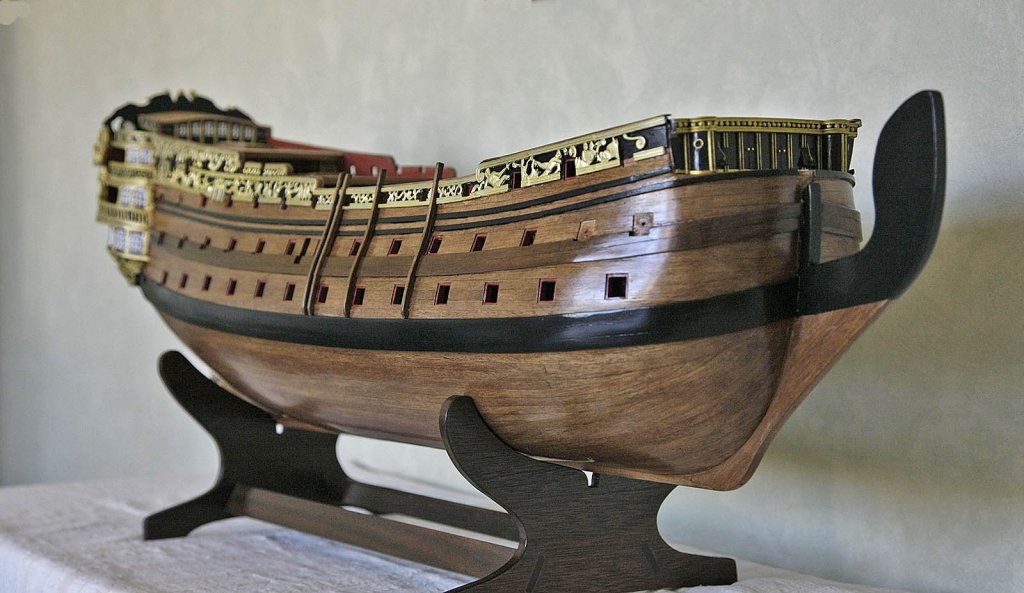
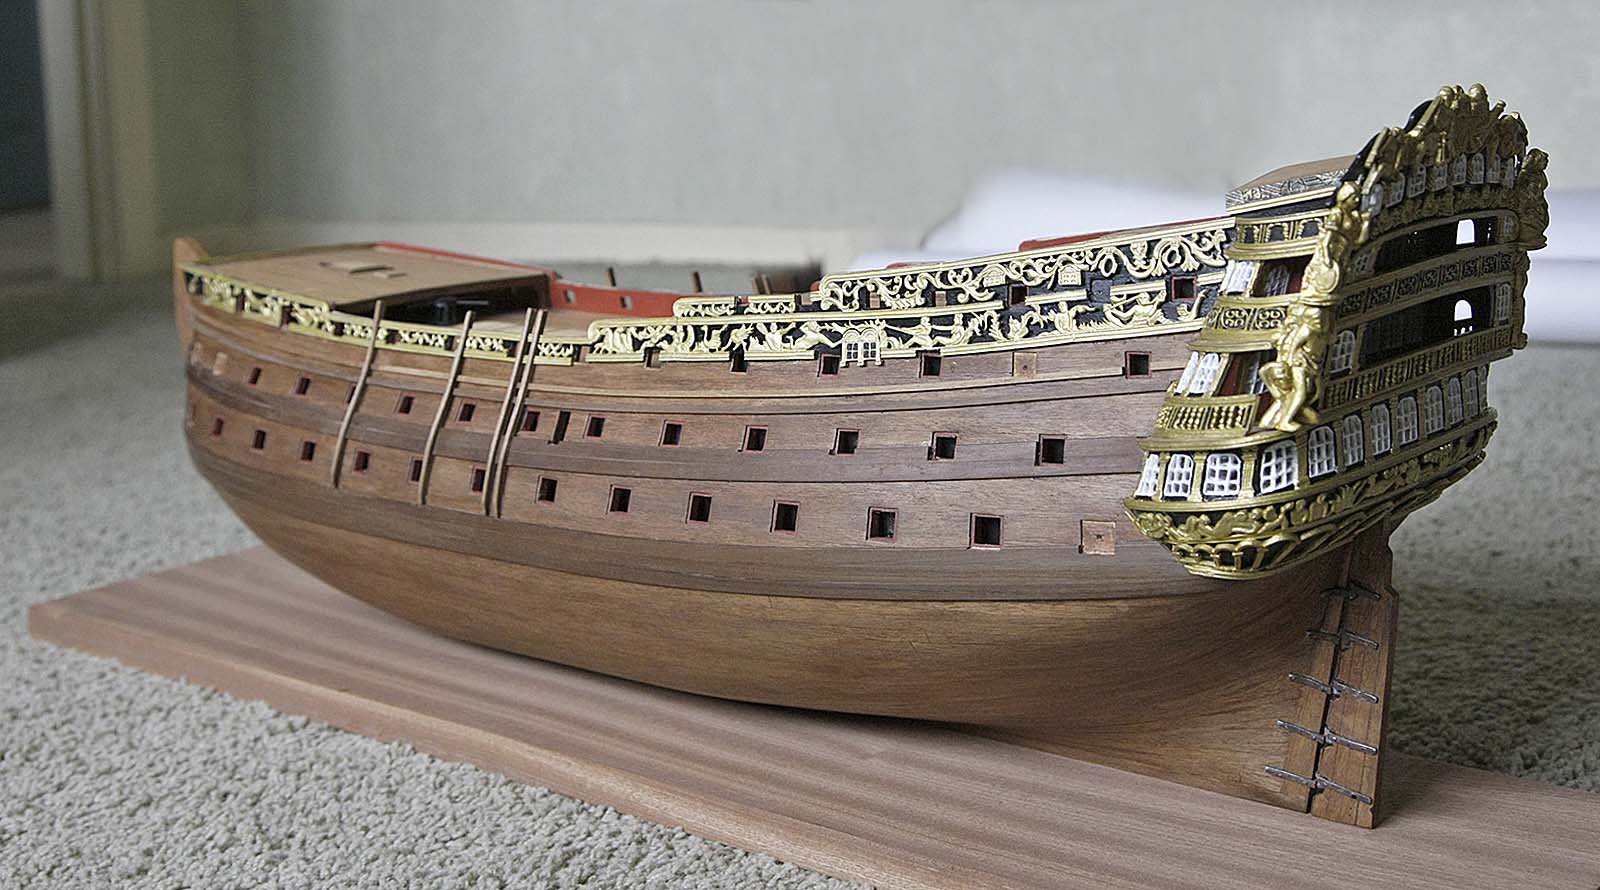
Hello Again, A few snaps of todays work, painted wales and upper strakes.
Ken

- Shipyard sid, Steve 12345, kier and 8 others
-
 11
11
-
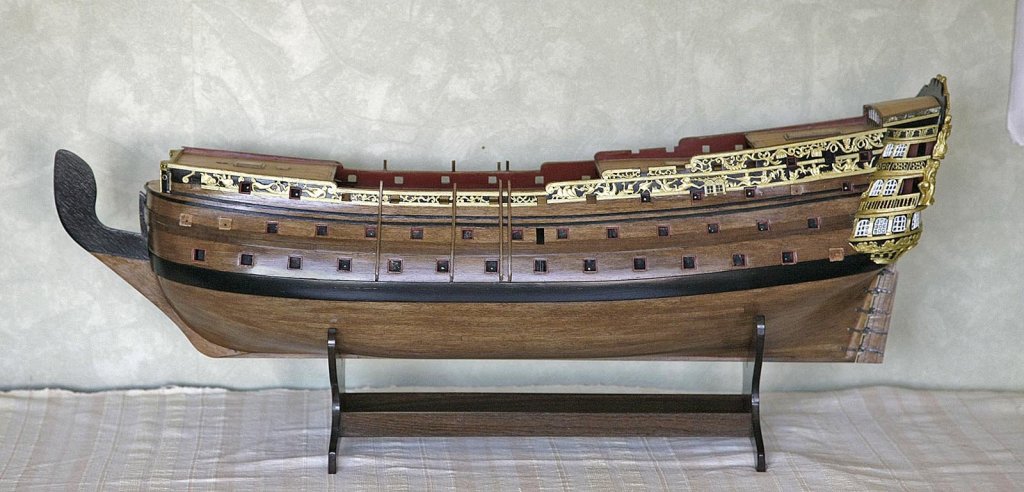
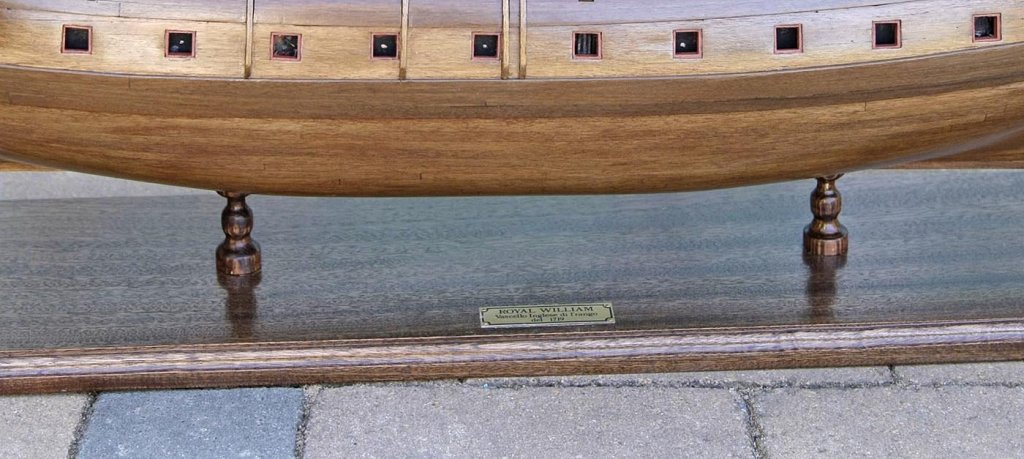
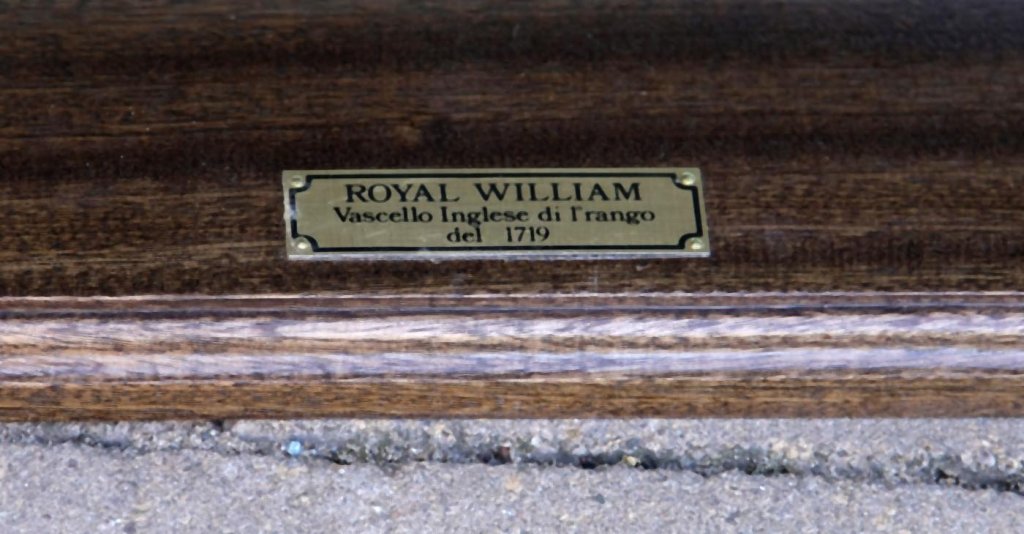
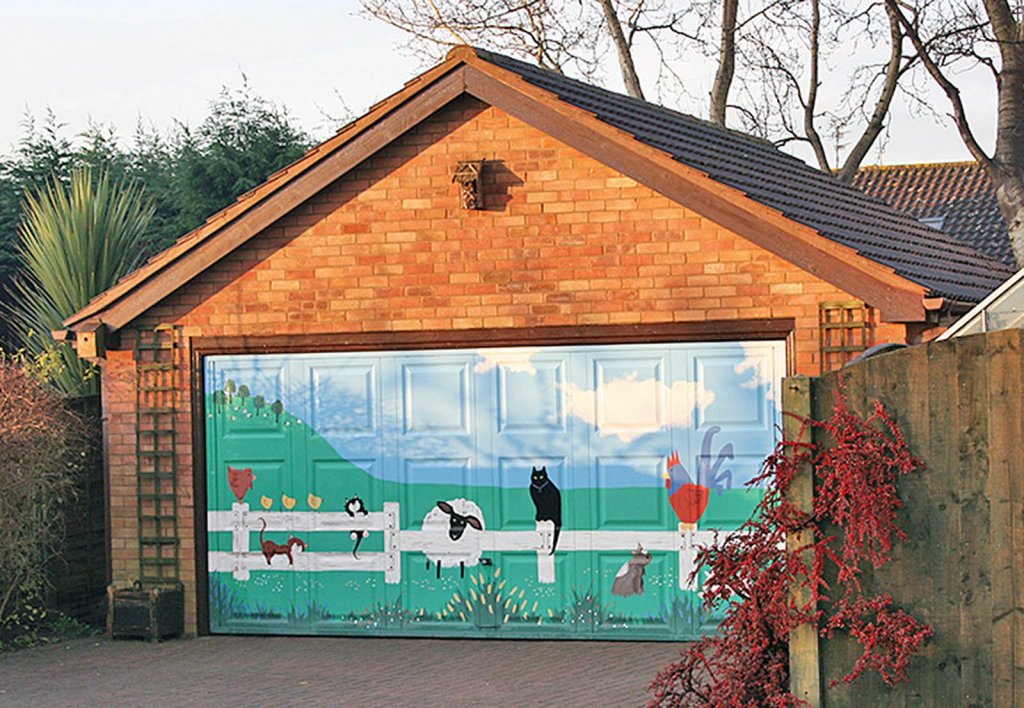
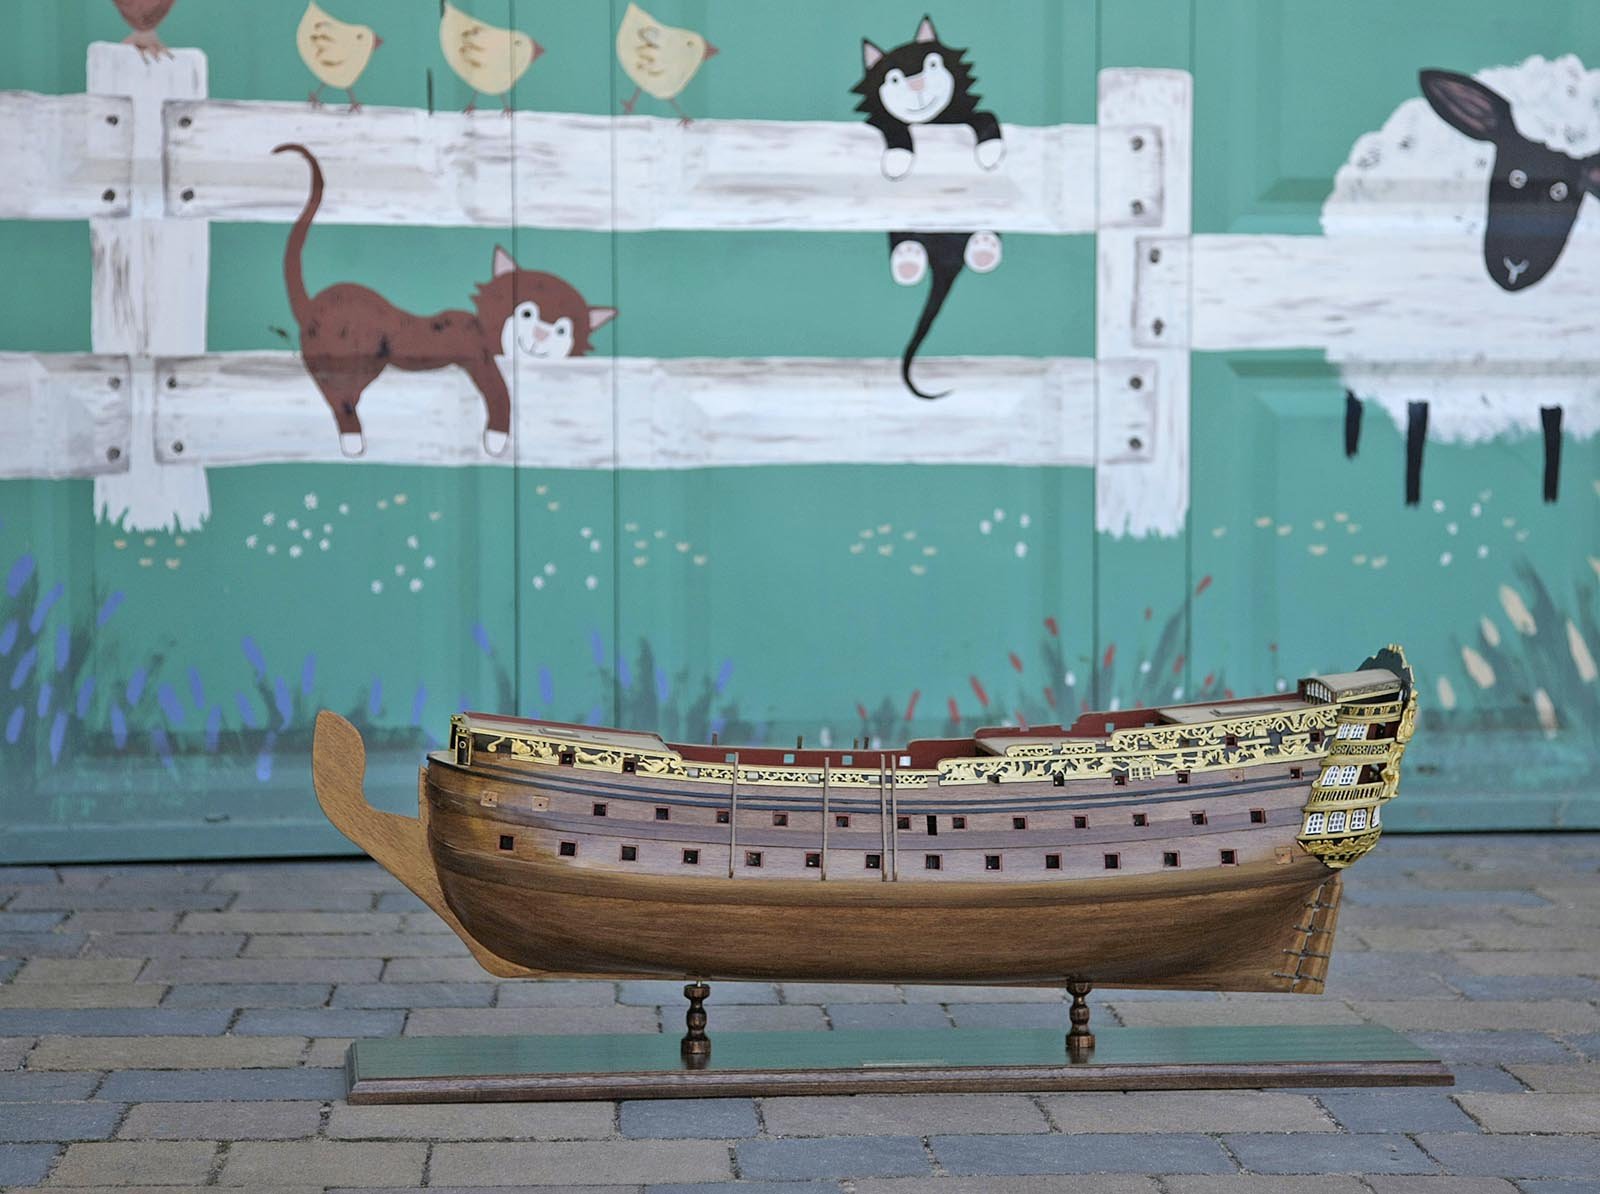
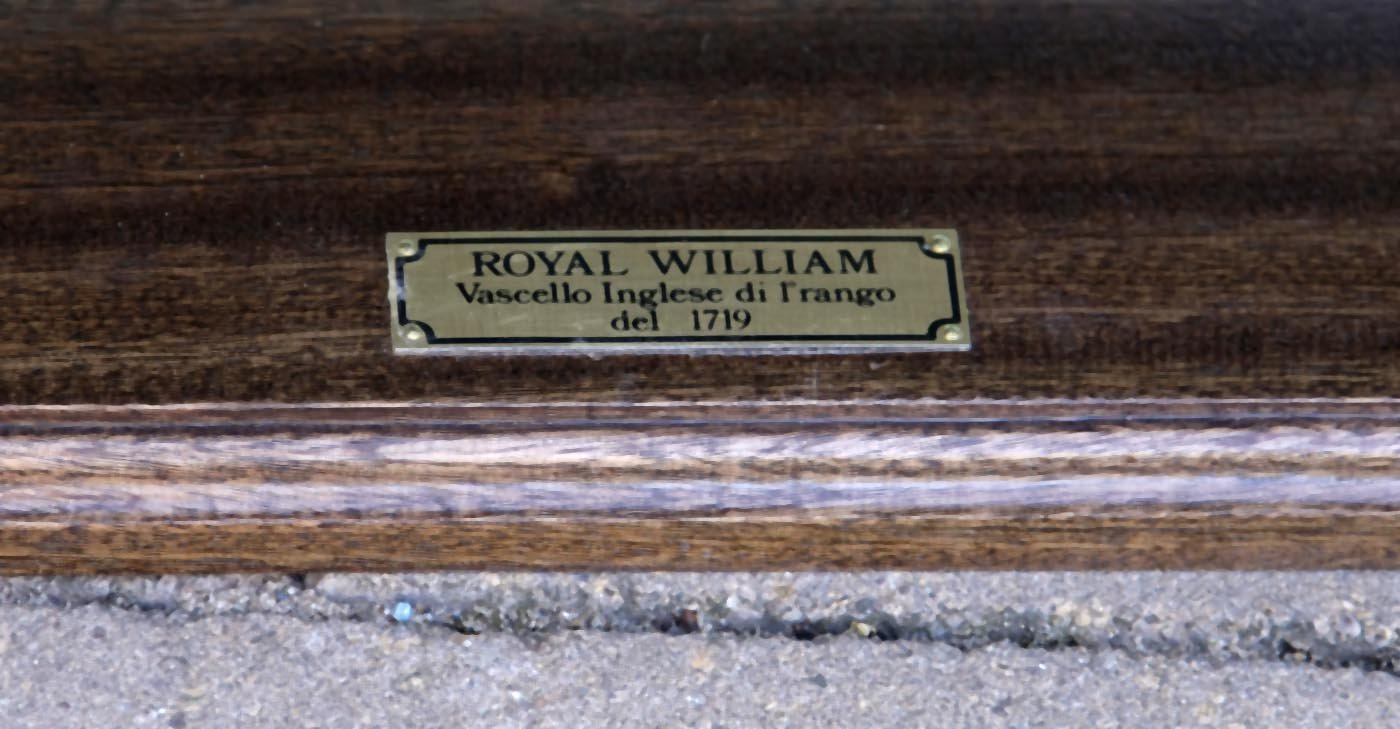
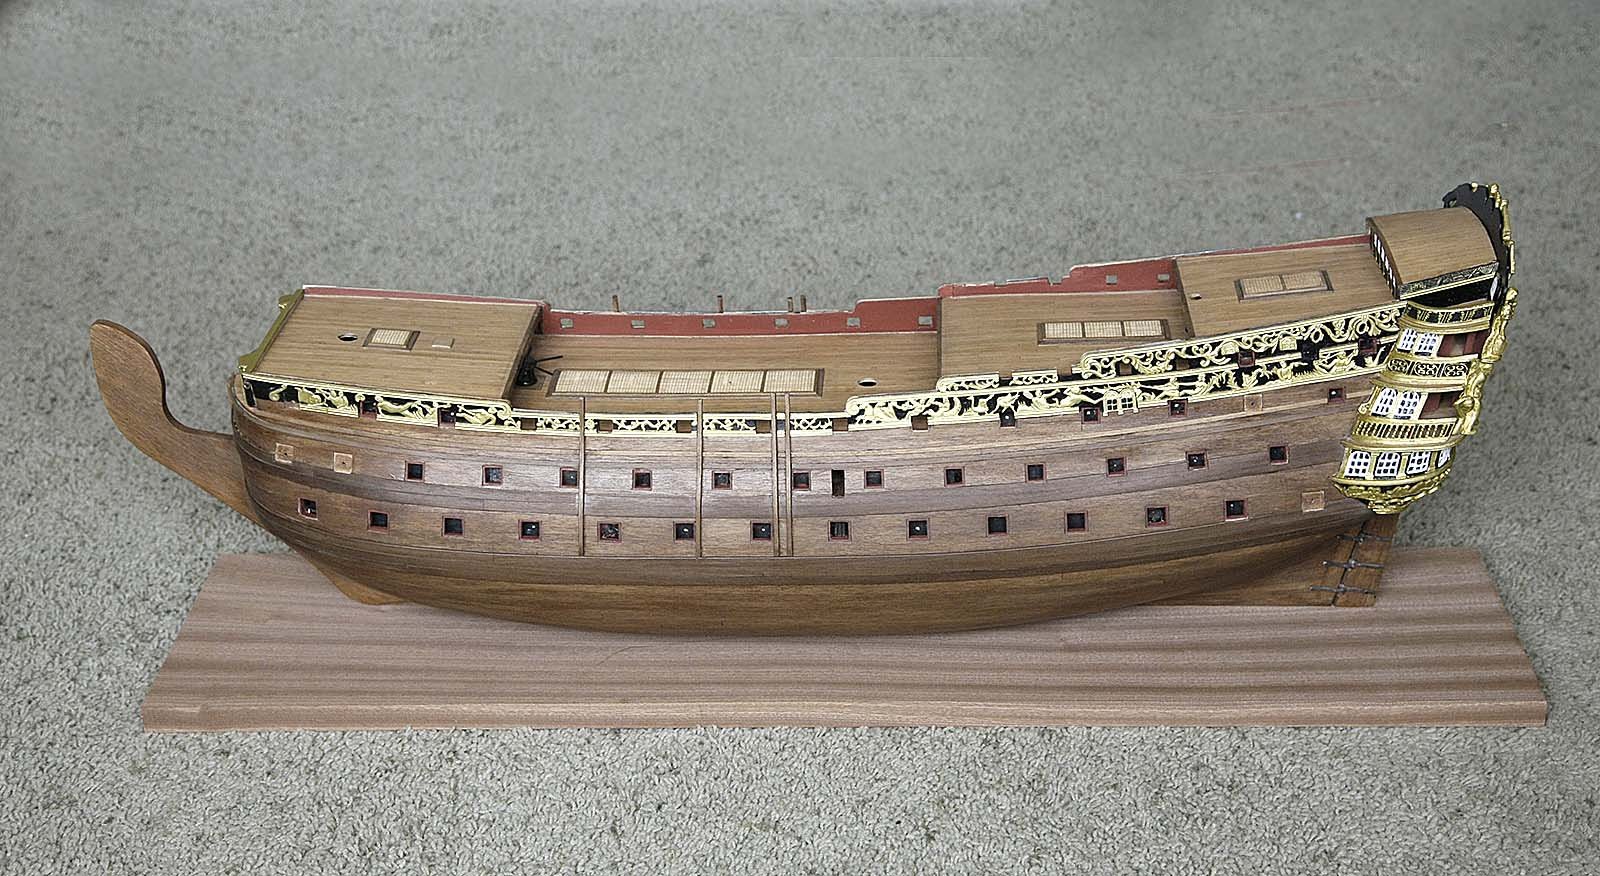
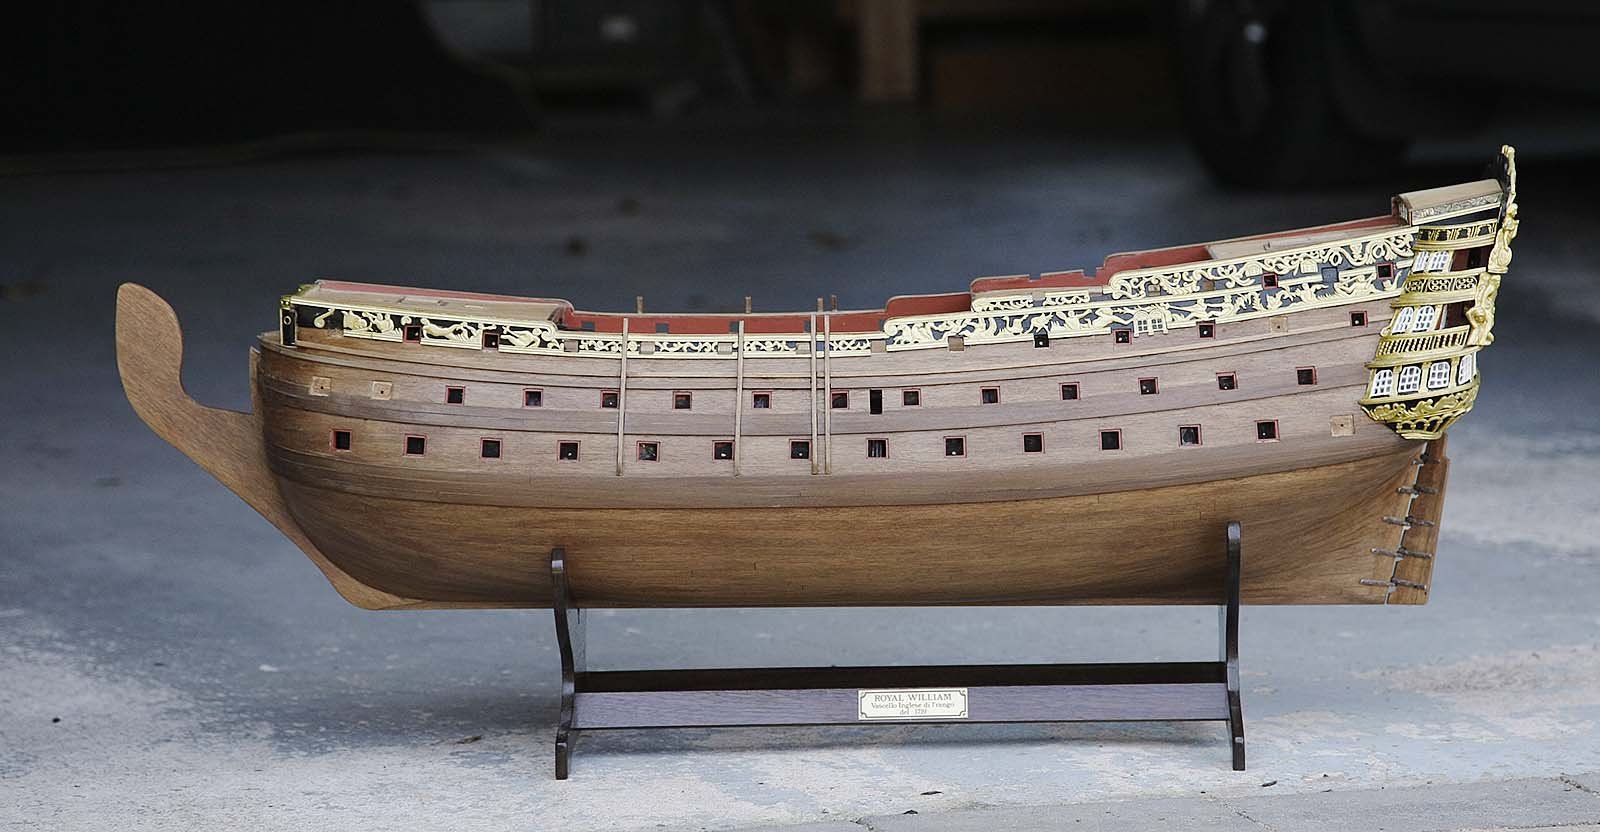
Hello All, The finished mount worked out perfect, the pillars and rods were epoxied in and everything feels very solid, the final touch was the brass nameplate.
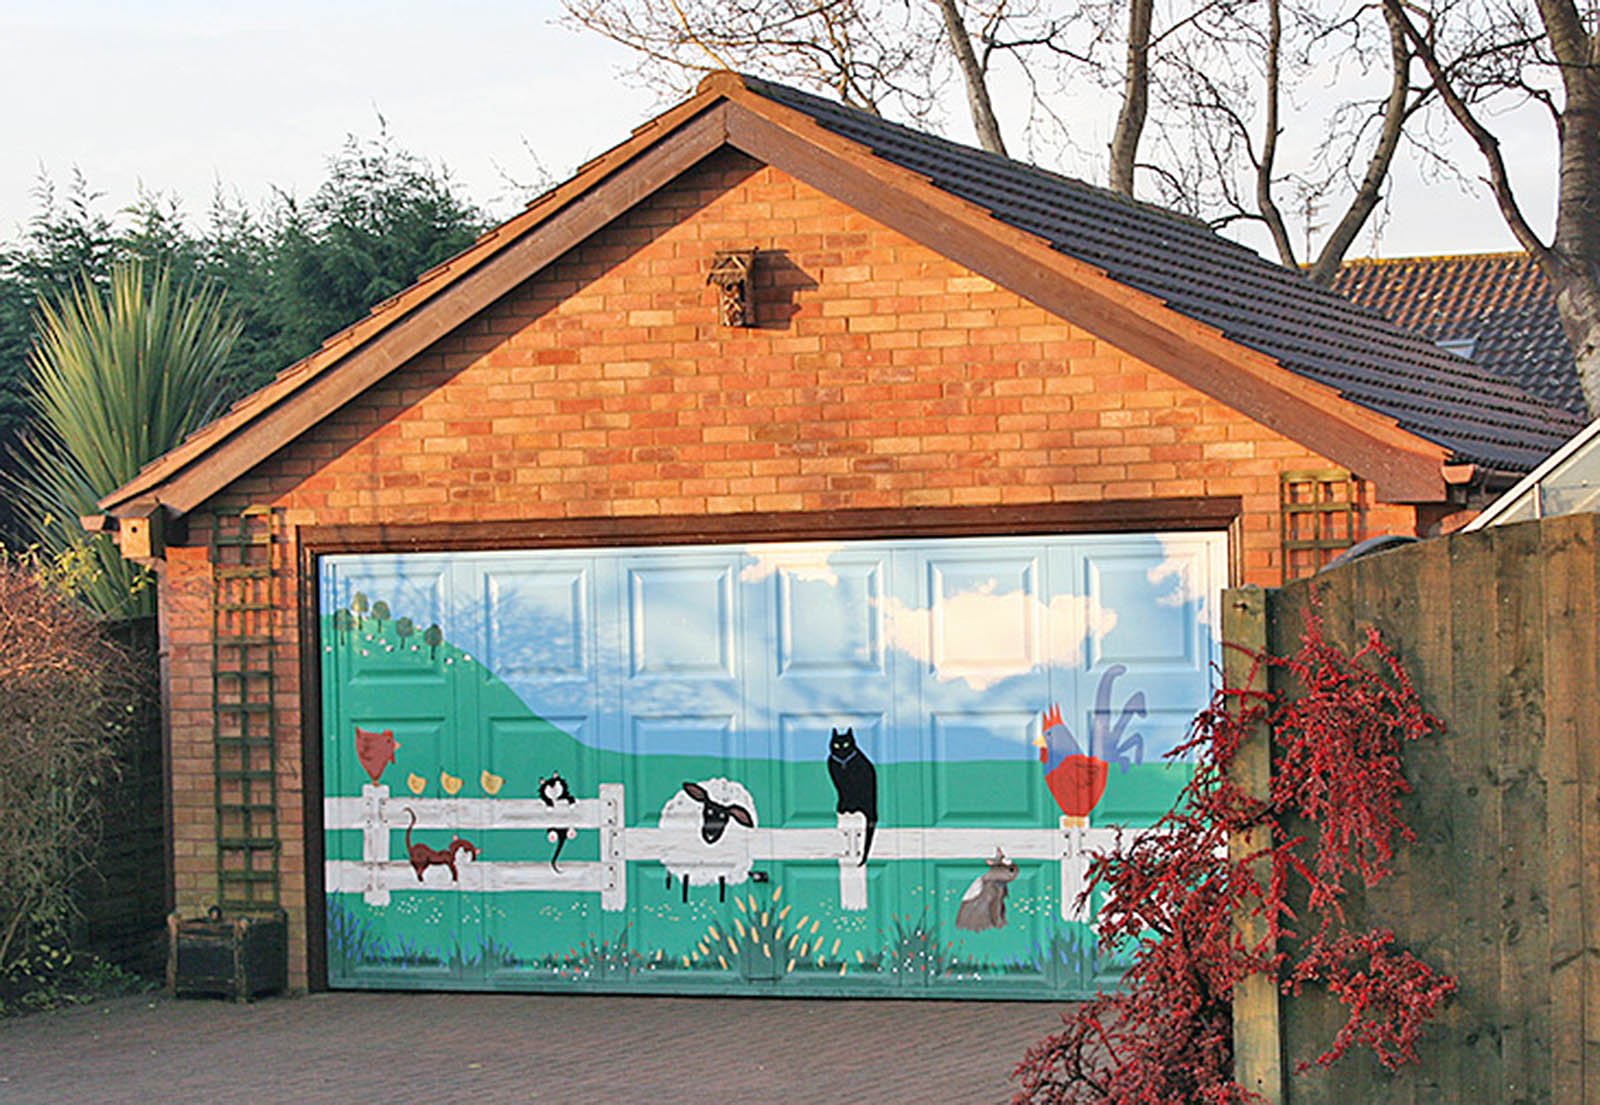
You'll notice that I photographed it in front of my garage, I painted the door a few years ago when after a few beers I felt in an artistic mood. As you'd expect it causes quite a few comments.
Ken

-
Hello Everyone, Thanks all for continuing to show an interest in my log and for the many likes. Only a little progress but even the smallest amount keeps me moving forward.
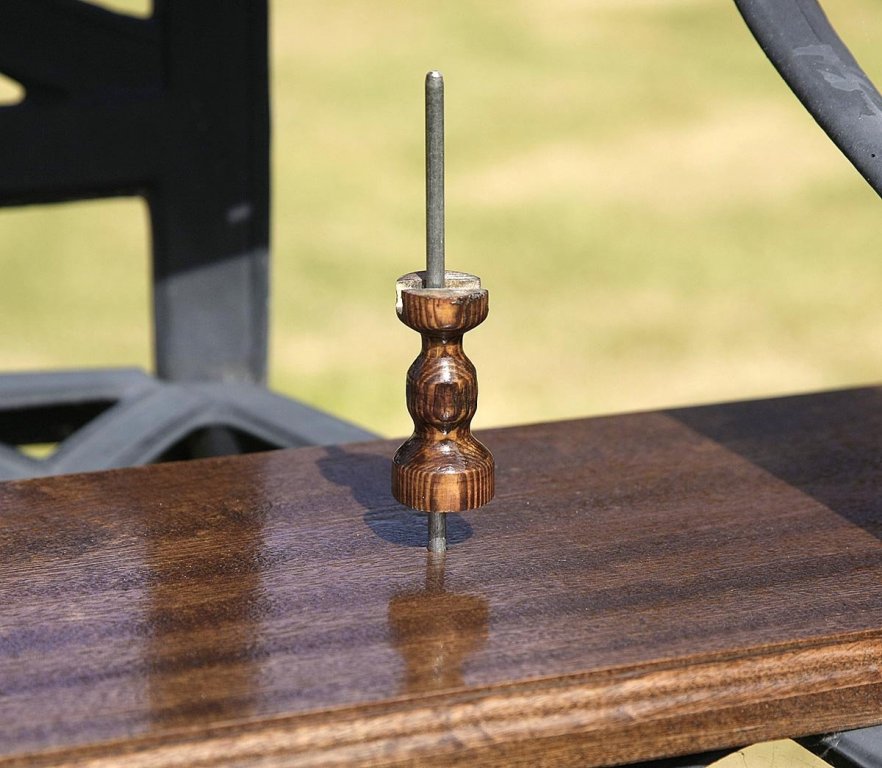
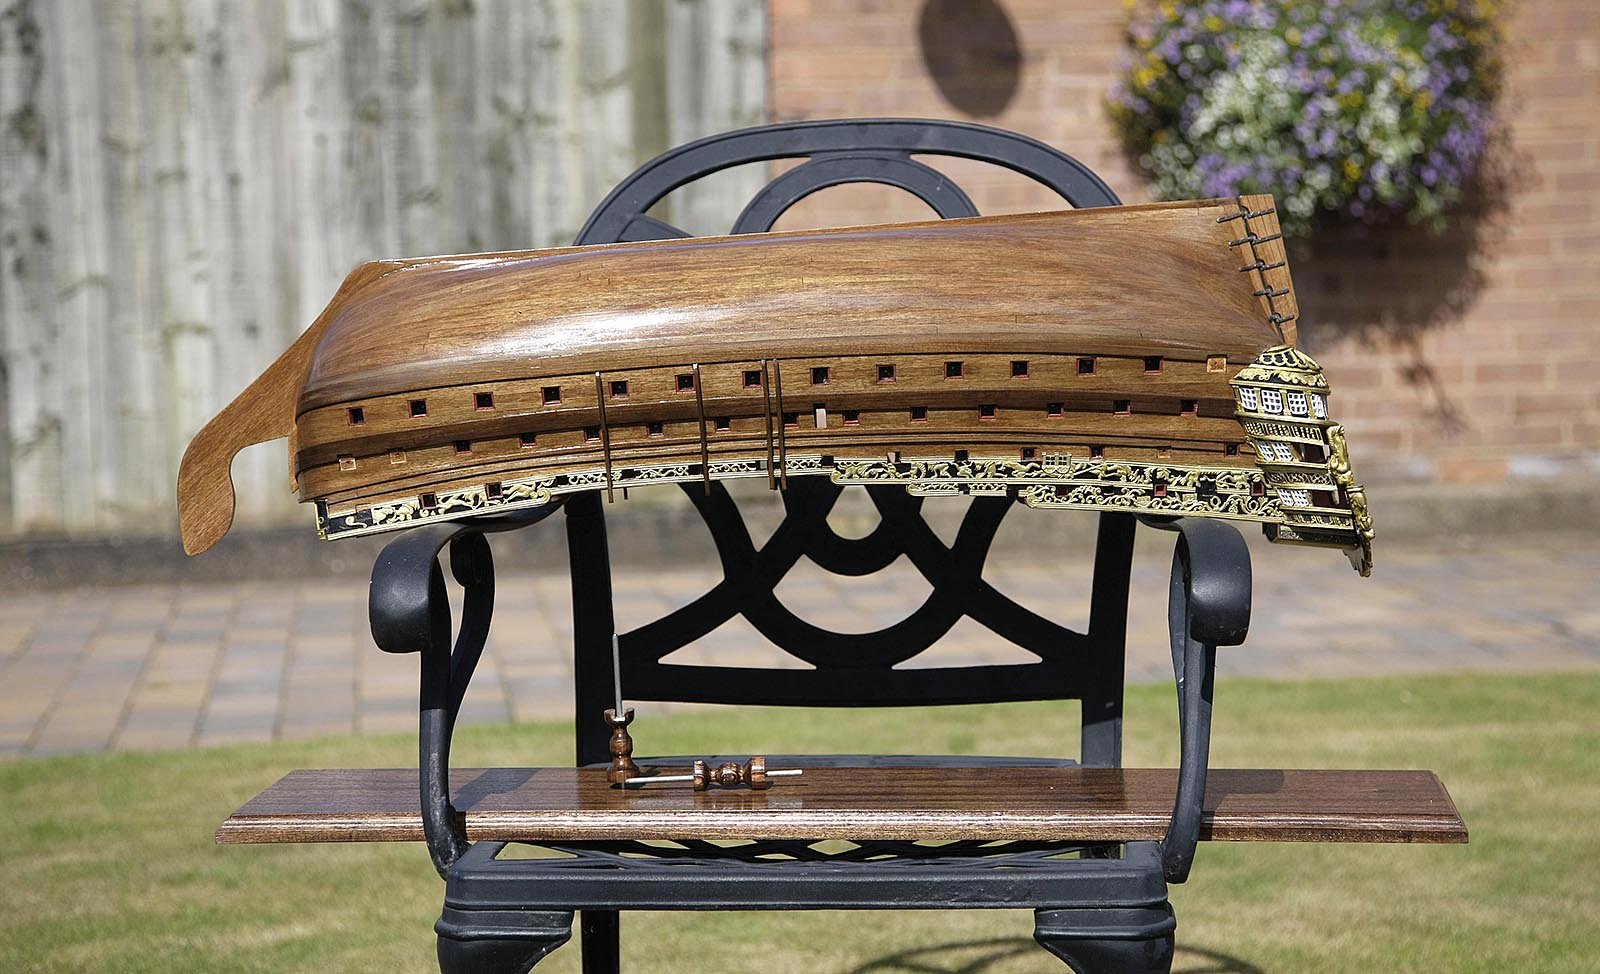
I have more or less completed the stand it just needs the pillars fixing in place. I routed the edge and made the pillars on my little lathe, I'm sure you can see what I've done, I think that it came out ok for a late decision alternative mount. The picture shows it and the hull having just been varnished, satin poly, and is outside to dry. Next I'm going to paint the lower wales and top strakes black before tackling the head rails.
Ken

- KingDavid, Shipyard sid, Dilbert55 and 6 others
-
9
-
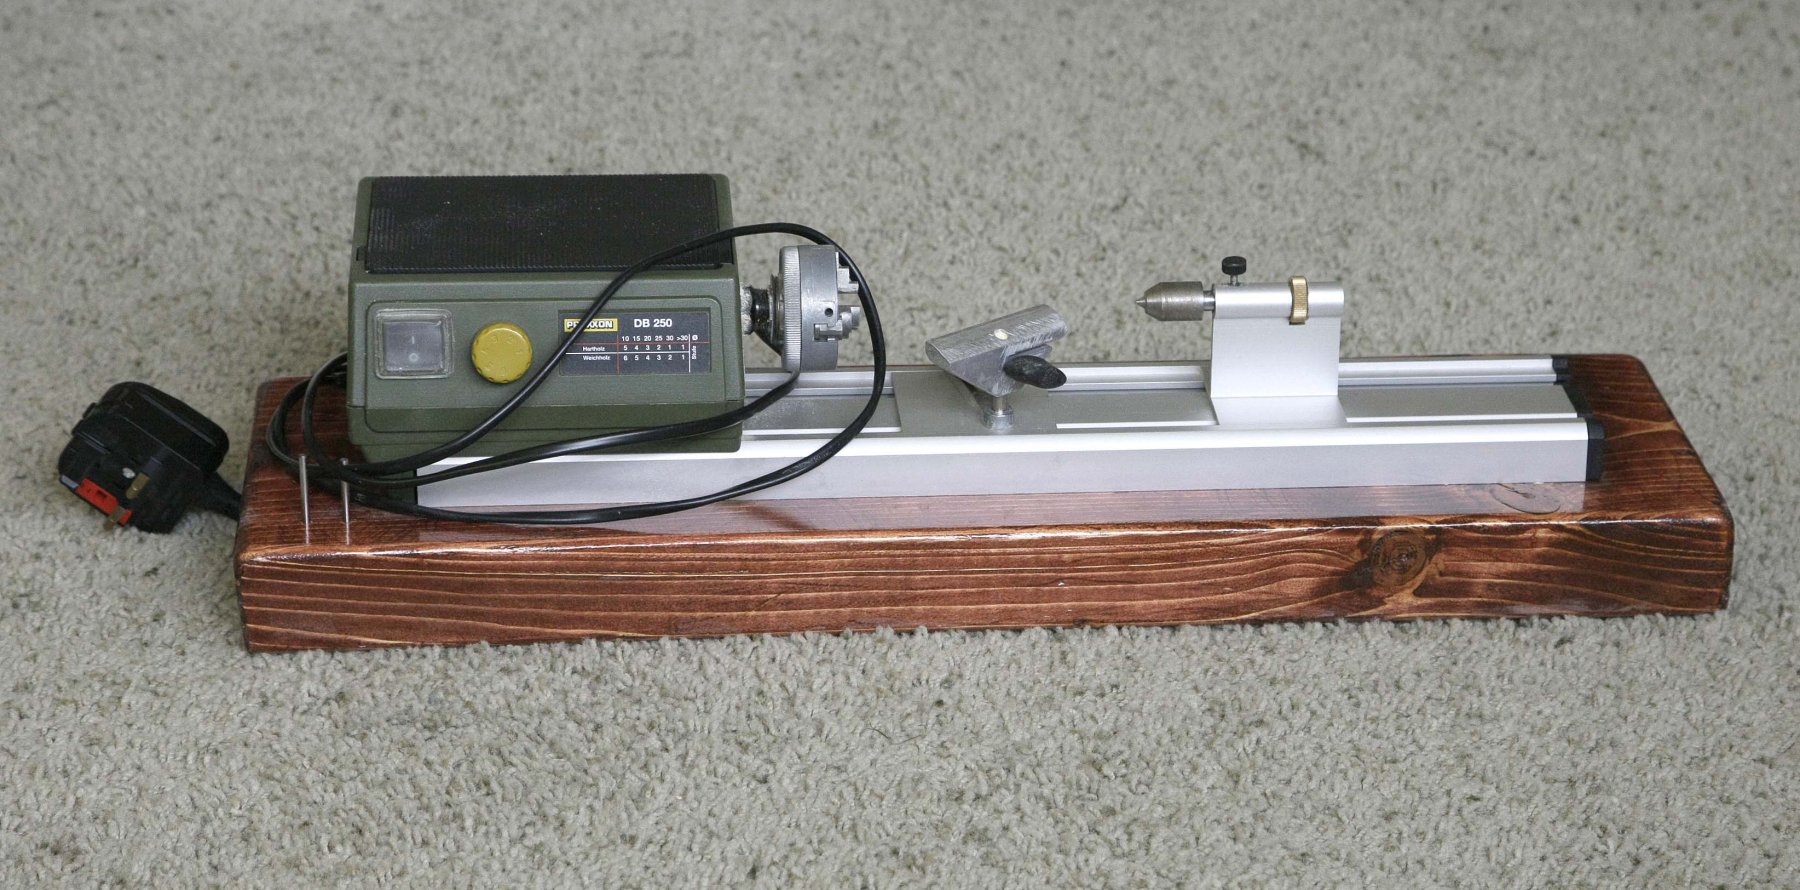
Hi Rony, Welcome to my log. I paid £80 on EBay for this, it is a Proxxon mini lathe, it's almost new and has the addition of the metal three jaw chuck not just the standard collets.
Ken
-
Hello Everyone,
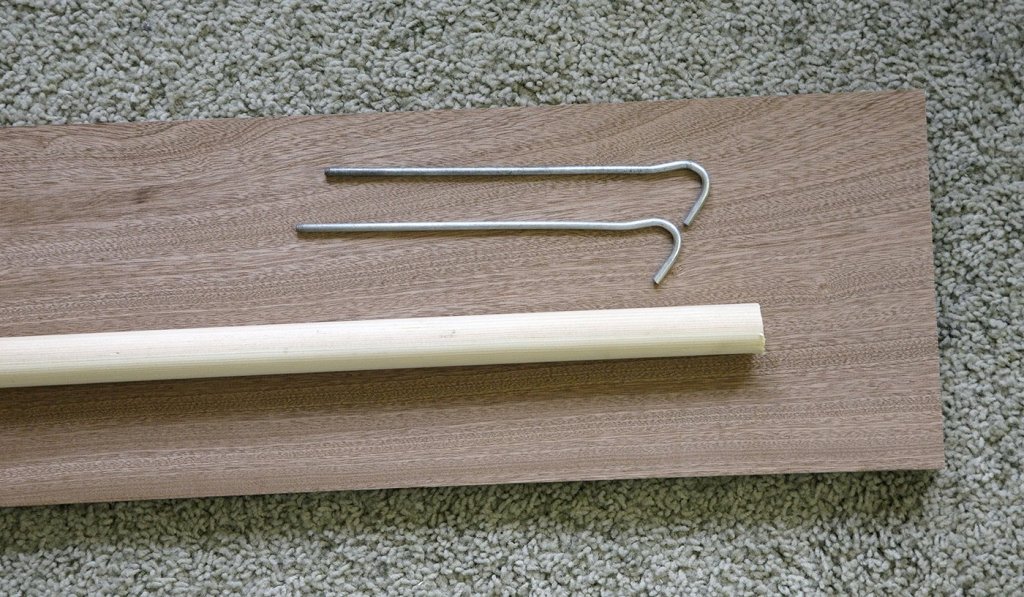
Not really an update but look what's just arrived. I found it going for a good price on EBay and of course I needed a new toy.
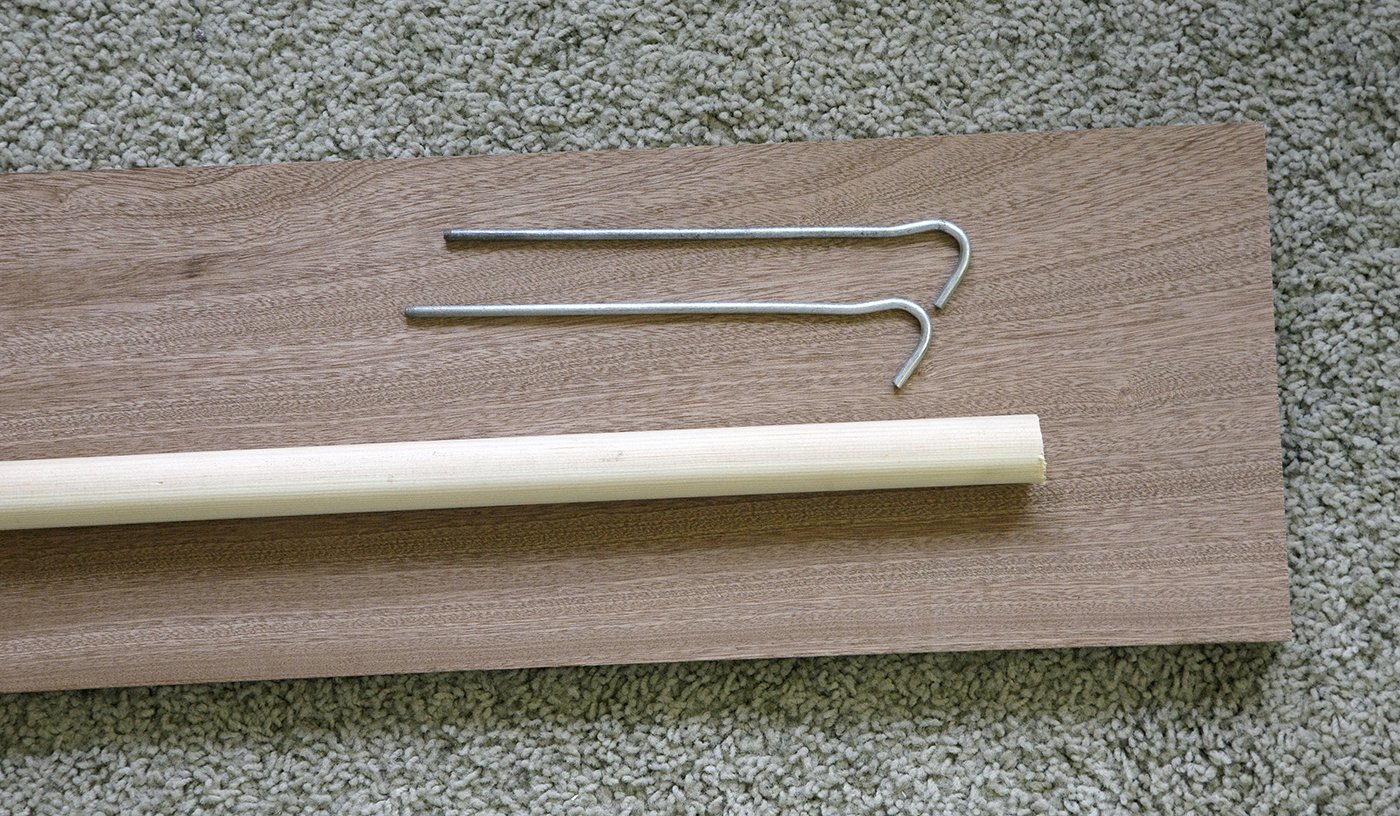
The first thing that I'm going to make are two columns for mounting RW to a plinth. I'm going to make them from a broom handle, I'll drill out the centre and pass a tent peg through both these and the base, these are quite long and will go about four inches into the keel. The keel is 7mm thick and is good quality ply so should be plenty strong enough. I have a friend who will loan me his router for putting a nice edge on.
He who dies with the most toys, WINS!
ken

- Sjors, coxswain, marktiedens and 2 others
-
5
-
Hello Everyone,
I've managed to squeeze in some building time whilst watching the Tour so here's the latest progress report.
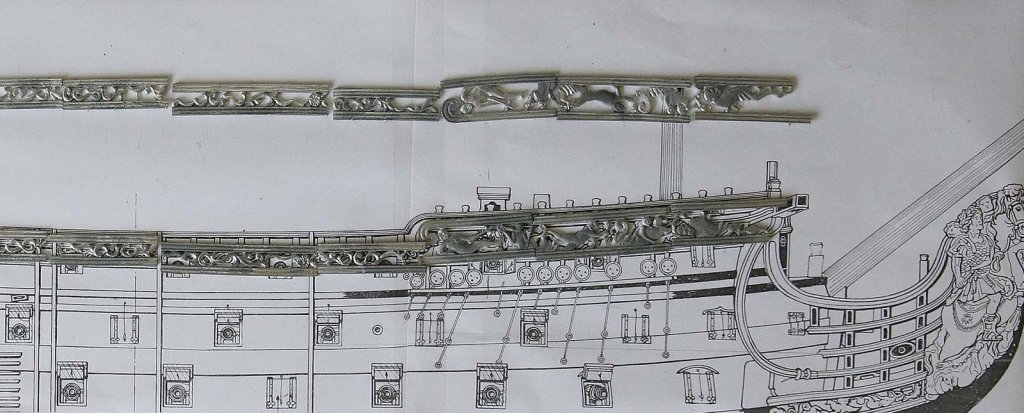
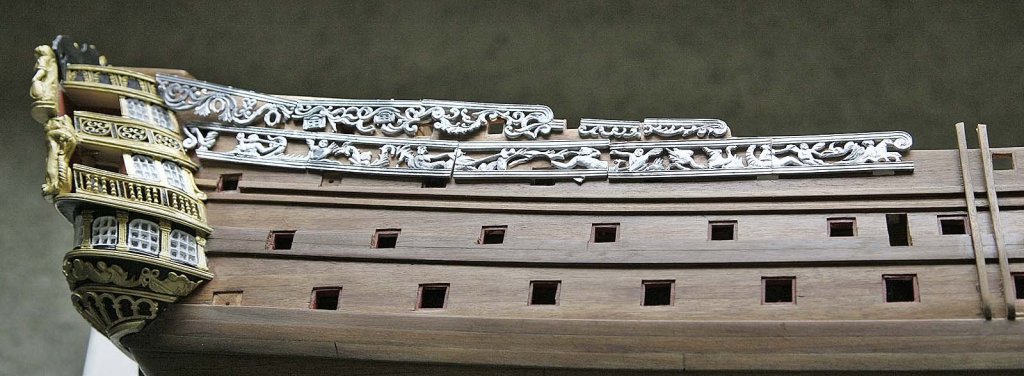
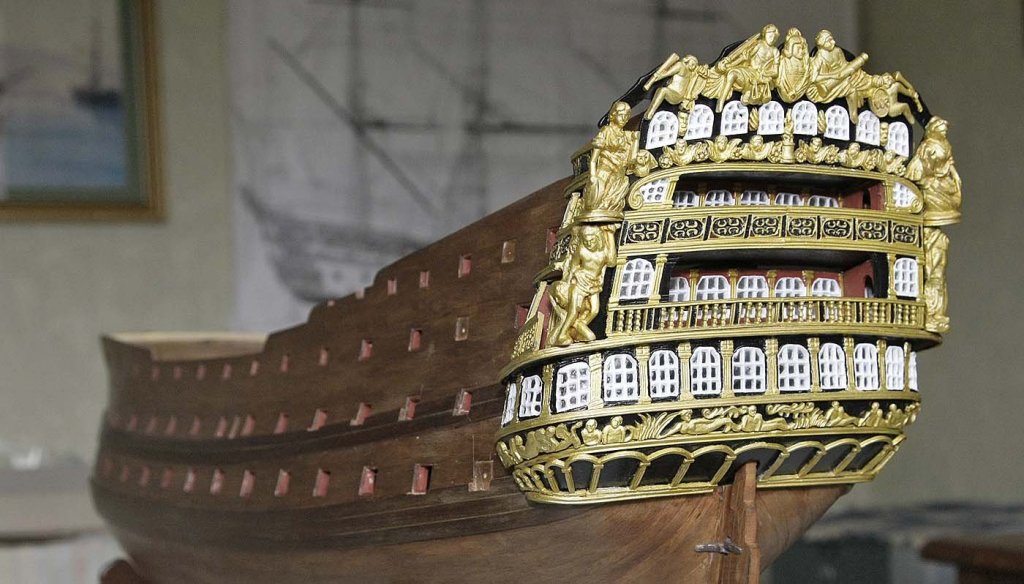
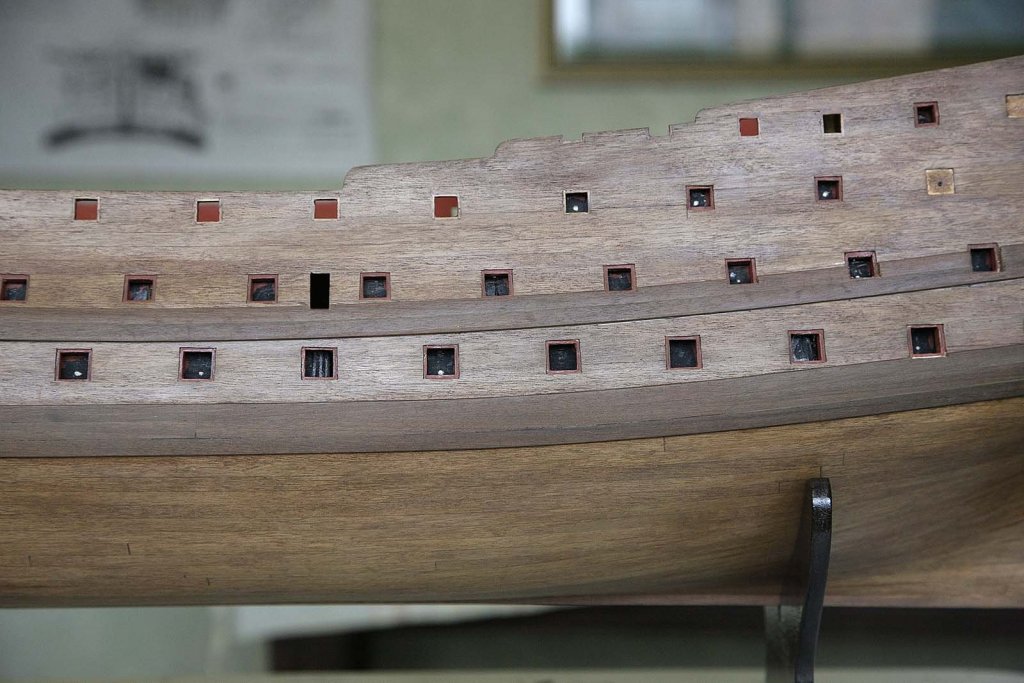
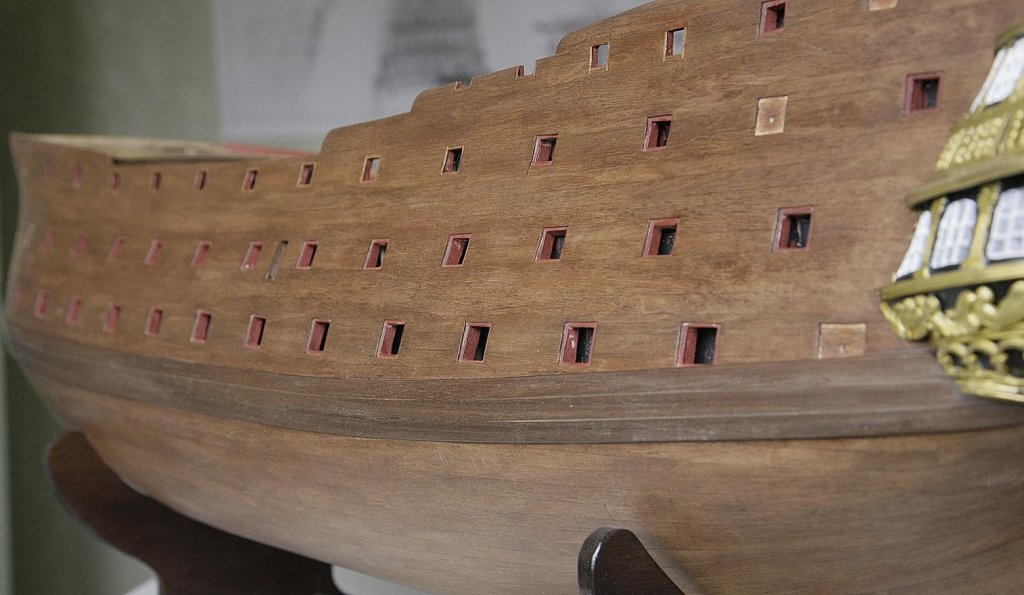
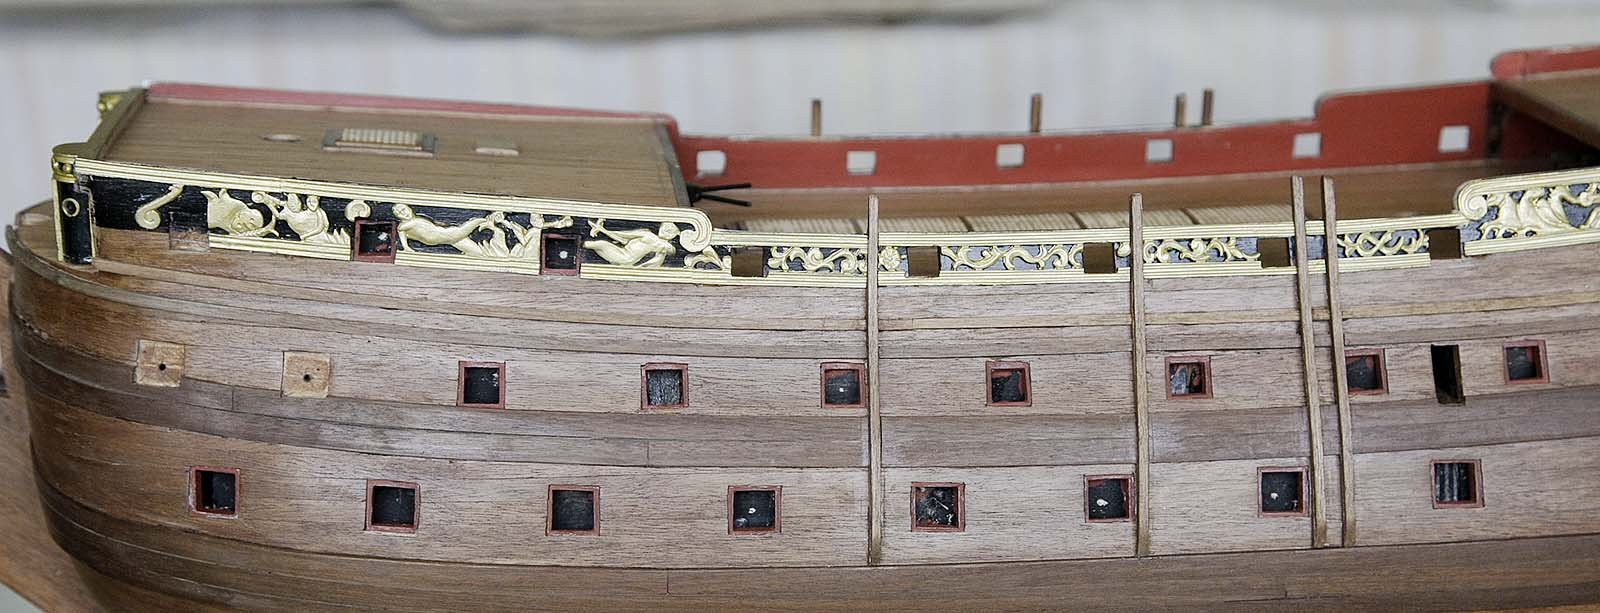
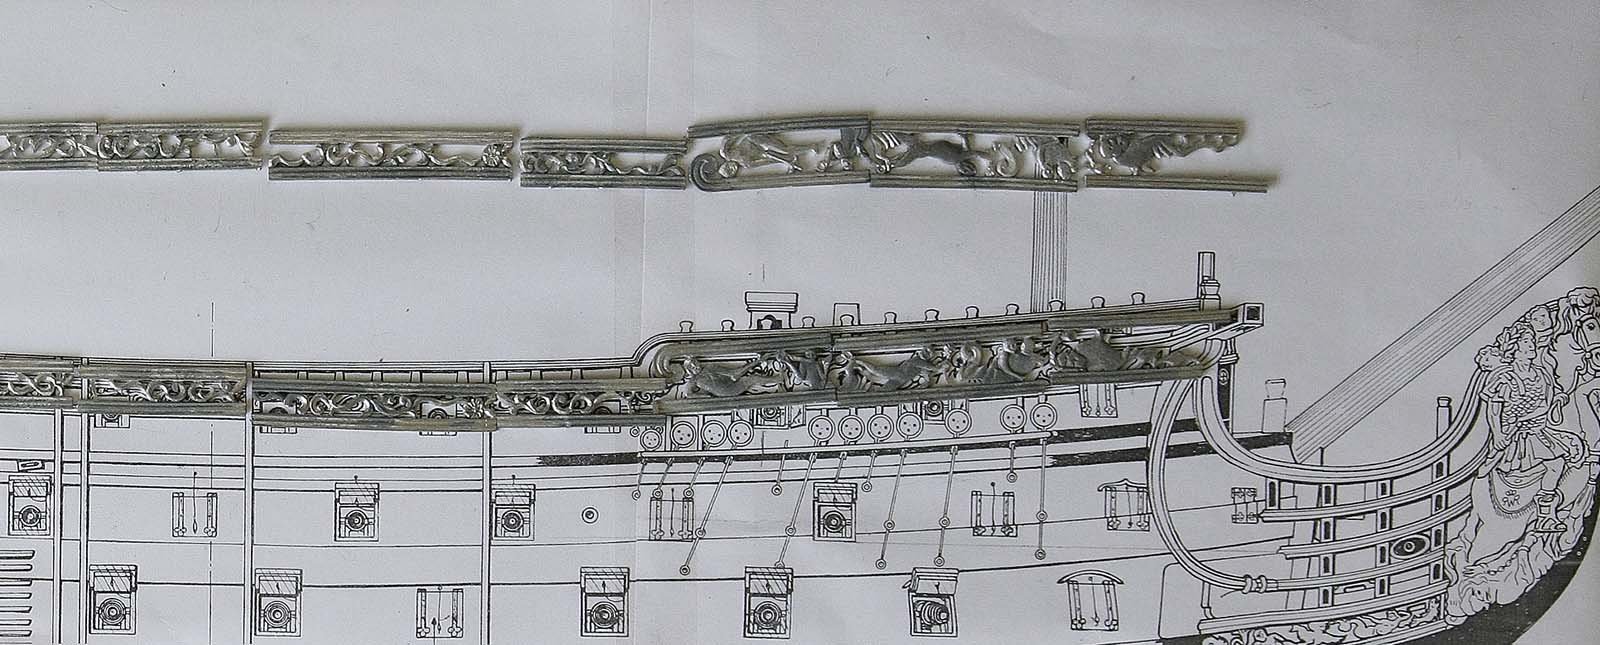
This part is about my experience with the castings along the side of the hull. They ended up looking very impressive, better than I had first expected and once again I'm pleased with what Euromodel had done here especially with old technology.
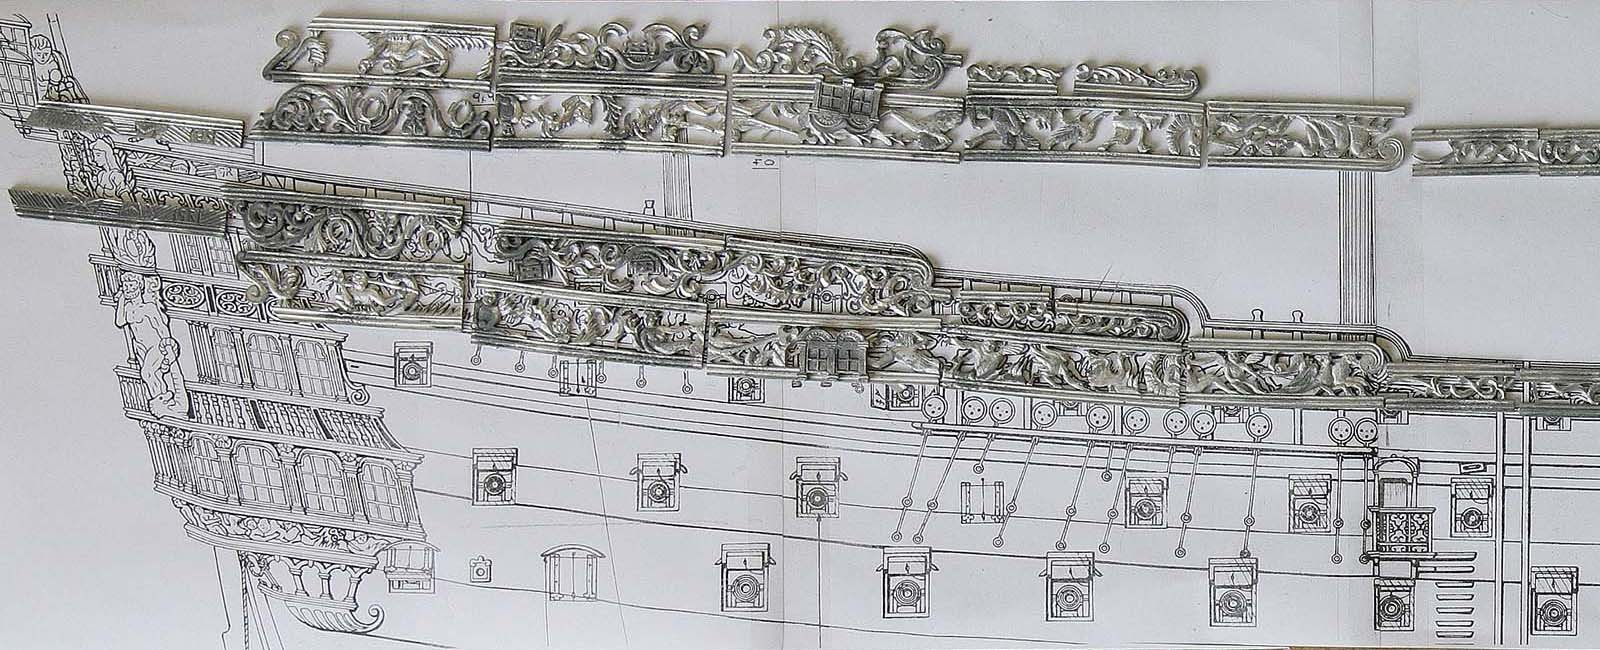
I first copied the relevant part of the plans to help identify and make sense of the many cast parts. The casting was crisp and very good indeed needing little cleaning. Most of the pieces needed adjusting to make them a good fit, on some I cut out the figures themselves and fixed them into position separately. Once the fit was established I cut out the gun ports in them. I found doing all this difficult as the many parts needed to be accurately held in place without glue so that the cutting and filing resulted in a good fit.
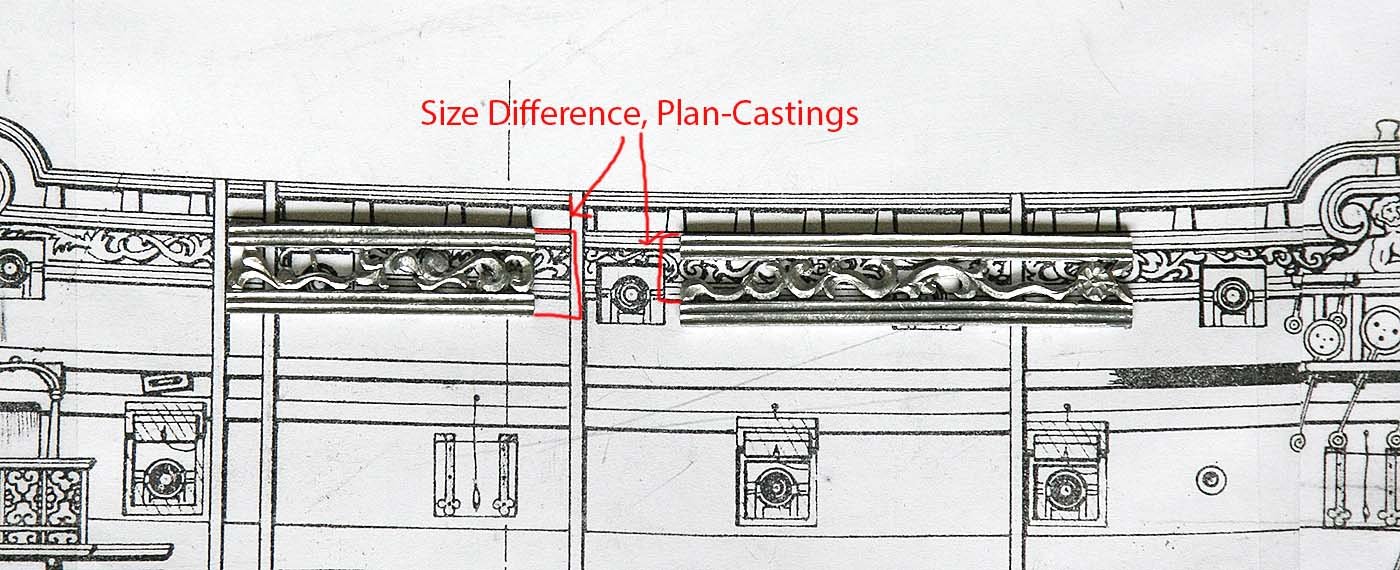
That's the good part, now the not so good. I had made the hull as near to the plan as possible thinking that was the right thing to do, however when I offered up the castings along the waist I saw that they did not match up with the plan by a fair amount! The lower trim of the casting should have lined up with the centre of the gun ports, my castings were not the same as the plans but were too deep by about 5mm and ended up level with the lower edge of the gun ports. It was not possible to reduce their height, I had the choice of putting them on as they were or adding to the height of the sides. Not knowing how raising the height would effect the rest of the castings I mounted them as they were. With that wonderful thing called hindsight I should have, when building the hull made the planking higher then, after putting on the castings sanded it level with them. I can live with it as they look good and only those that are in the know will notice anything wrong.
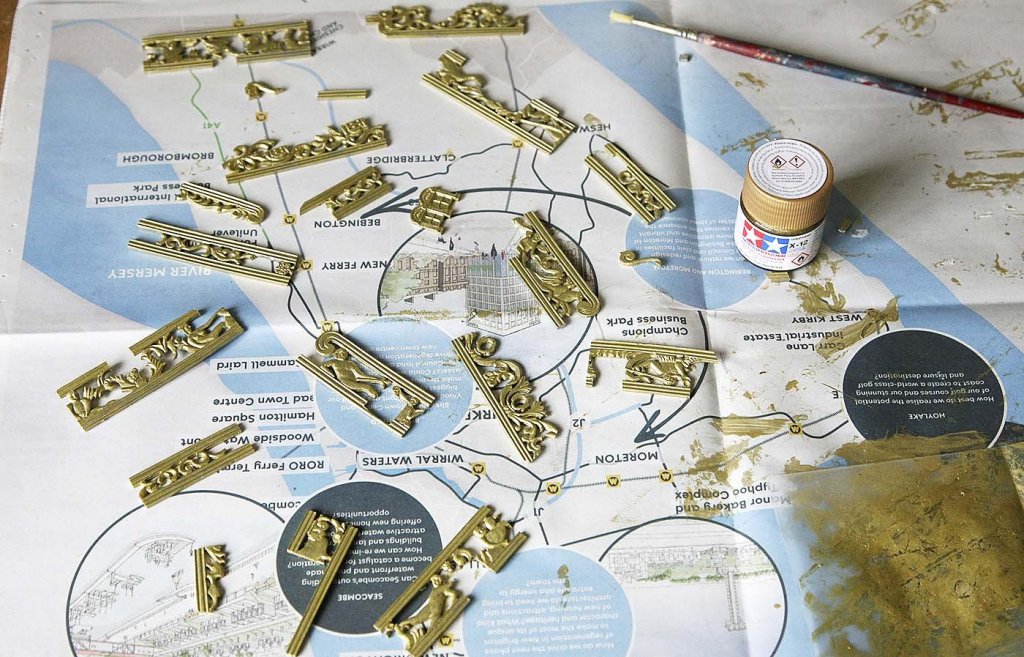
I painted all the castings gold and painted the hull behind them black before fixing them into place. I scraped the paint away from the glue contact surfaces so that a good bond would be made. After they were fitted I rubbed a little filler into the joints then touched up the paintwork.
I fitted the rail capping using 4 x 1 mm strip, using my soldering iron to get the curved ends, again it worked well.
I also touched up the red port linings as they were looking a bit jaded and cleaned up the hull. I also couldn't resist putting on a first coat of diluted poly. I wanted to see how it would take after all the glue that had been spilt on it before deciding whether to paint bellow the water line or not. The good news is that it went on perfectly with no staining issues, just a lovely even colour of the wood, looks great so the decision is made, natural wood finish. There are no pictures of this stage yet, I'm waiting until it's properly dry before I handle it.
I have decided not to use the stand provided so got I nice piece of mahogany to use as a plinth, I'll sort out some columns as well to stand it on. I know I should have arranged a fastening in the keel for this at an early stage but I'm sure that I can come up with something pretty secure. Watch this space.
Ken


- zappto, BillLib, marktiedens and 8 others
-
11
-
Hi Mark, Lovely work, I think that your camera is your friend, it shows not the faults but your excellent detailed work.
Ken
- marktiedens and md1400cs
-
2
-
Hello Everyone,
The tour isn't on for another hour so I've got a little time with the build.
I copied the plans again, This time to try and sort out the cast ornamentation. I managed to identify and place it on both the plan and the hull. I realize that it's not a simple task, it's again pretty nice casting but nothing will fit together without quite a bit of work, again I'm unsure of the best way to tackle this part but I'll chip away at it.
Nice picture Dilbert, looks like a great place to stop for lunch, boats and bikes what's not to like.
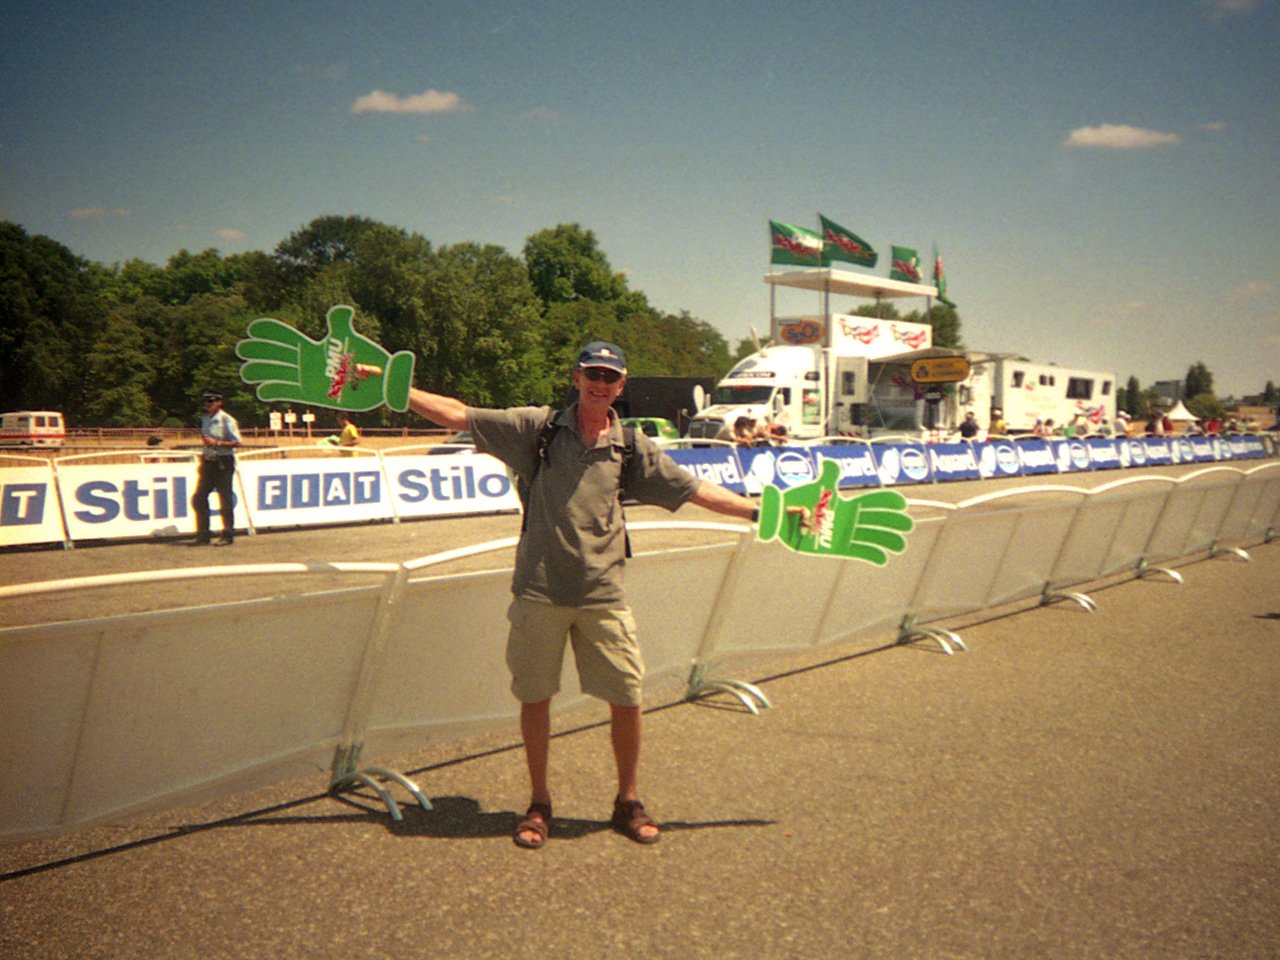
A couple of bike pictures as I'm in that mood. I'm usually one of the idiots waving big green hands at stage finishes and one of me crossing the Alps to get to the race, but I have to carry my own luggage.
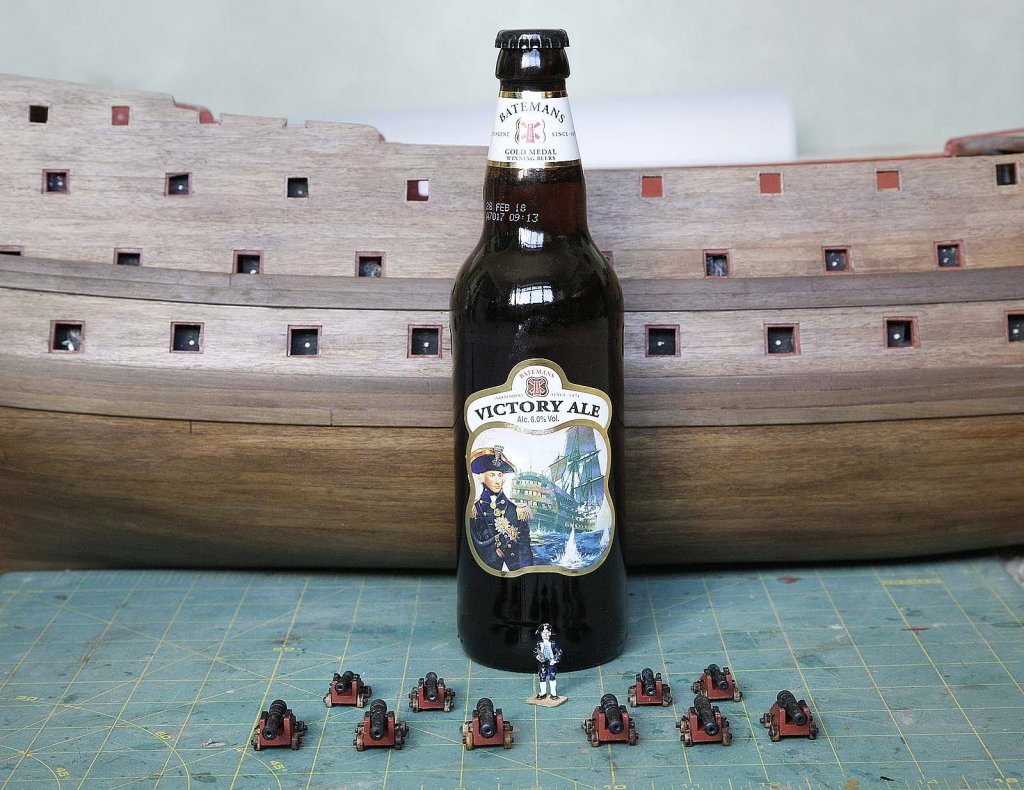
Sjors, I'll put a Victory beer on ice for you.
Ken


- Jack12477, coxswain, Steve 12345 and 2 others
-
5
-
Hello Everyone,
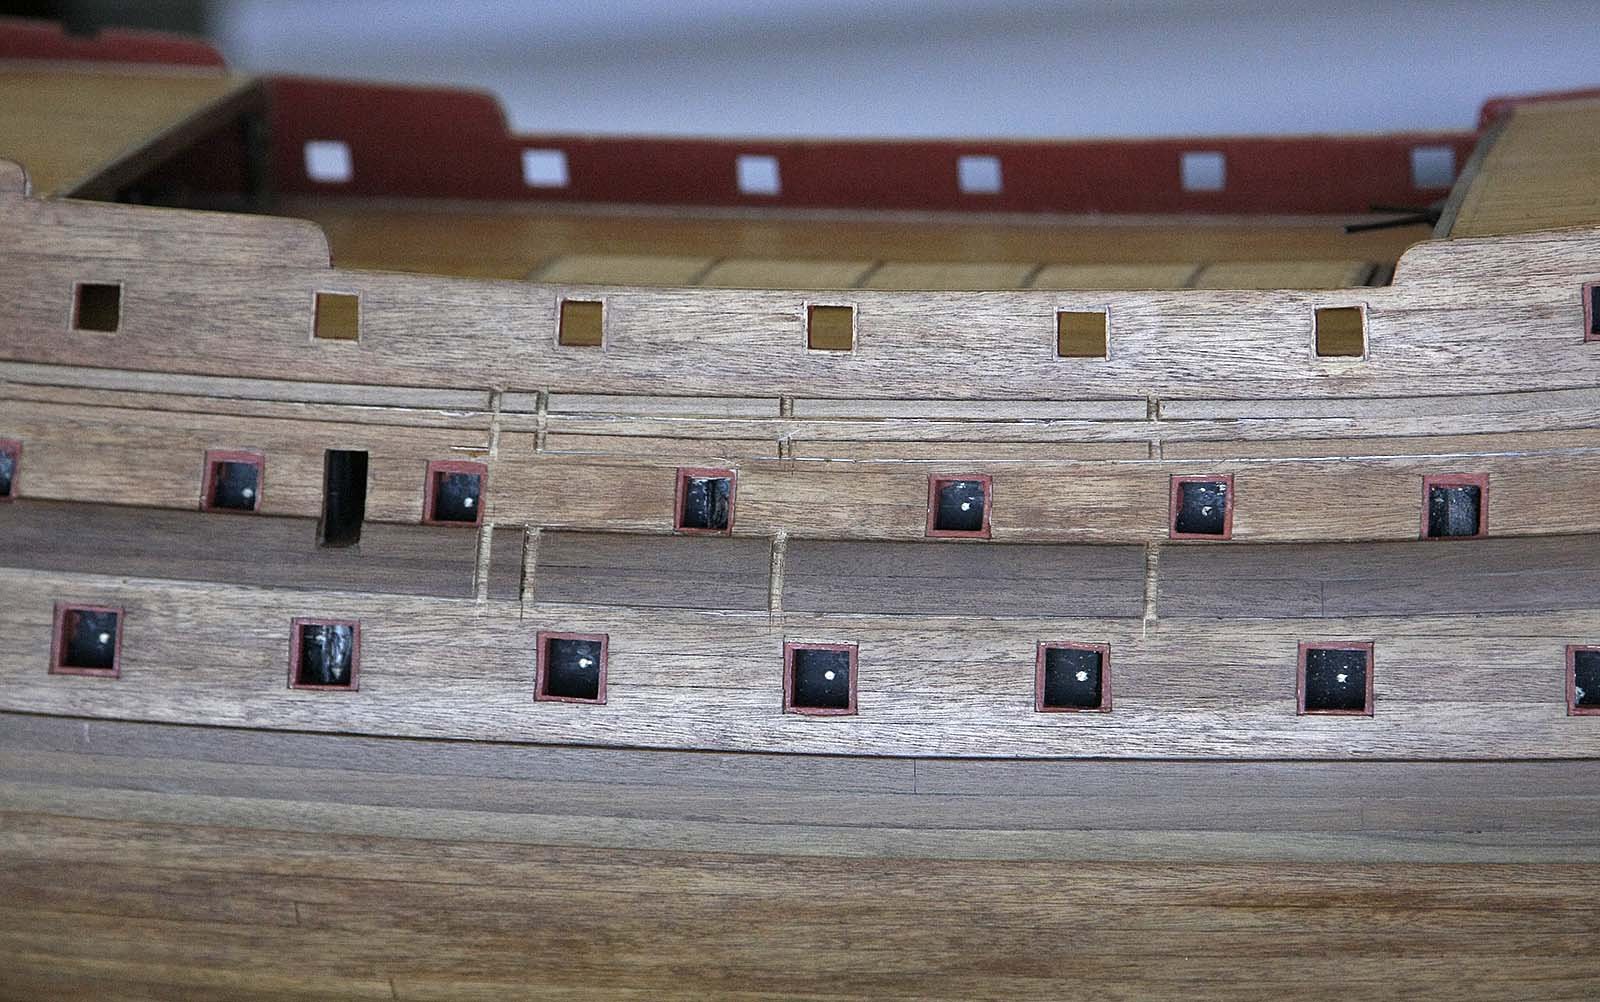
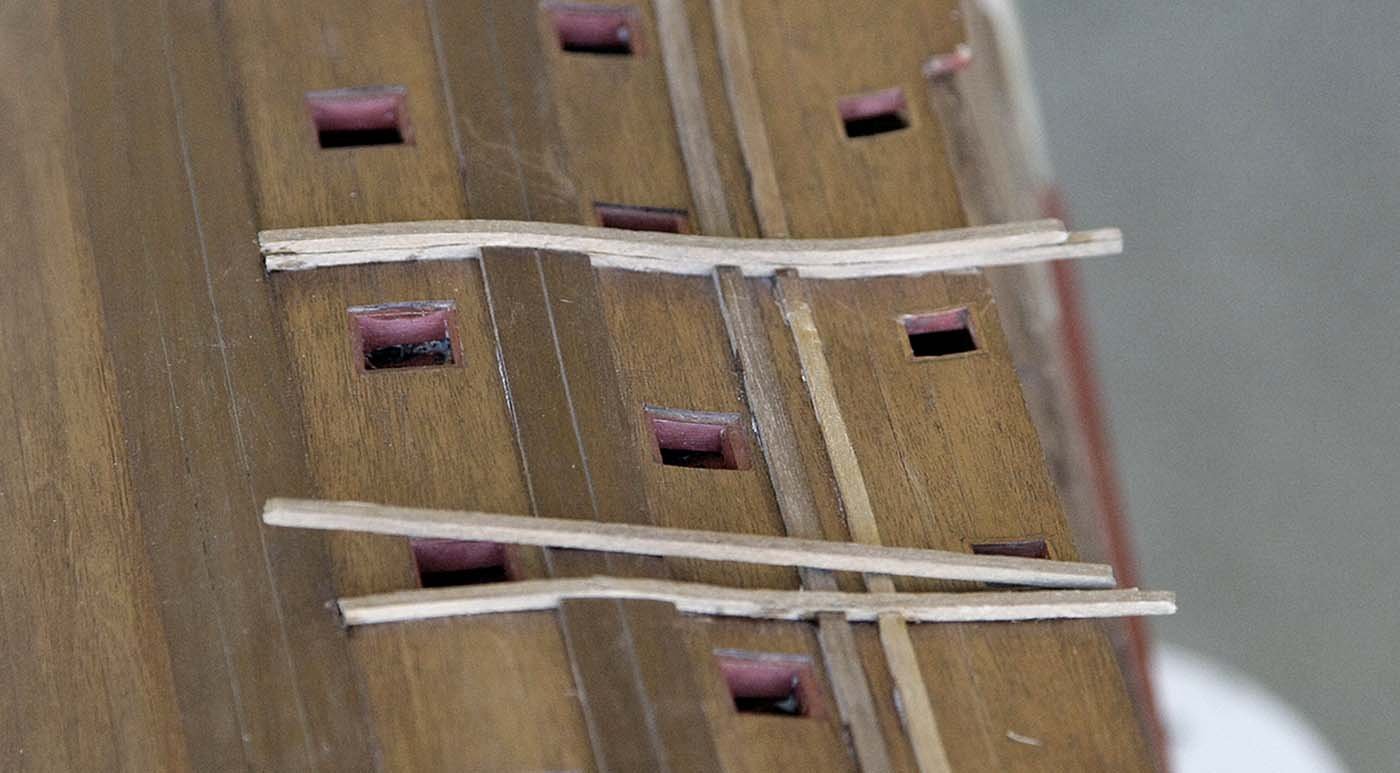
Just a little more progress, bit by bit it's getting done.
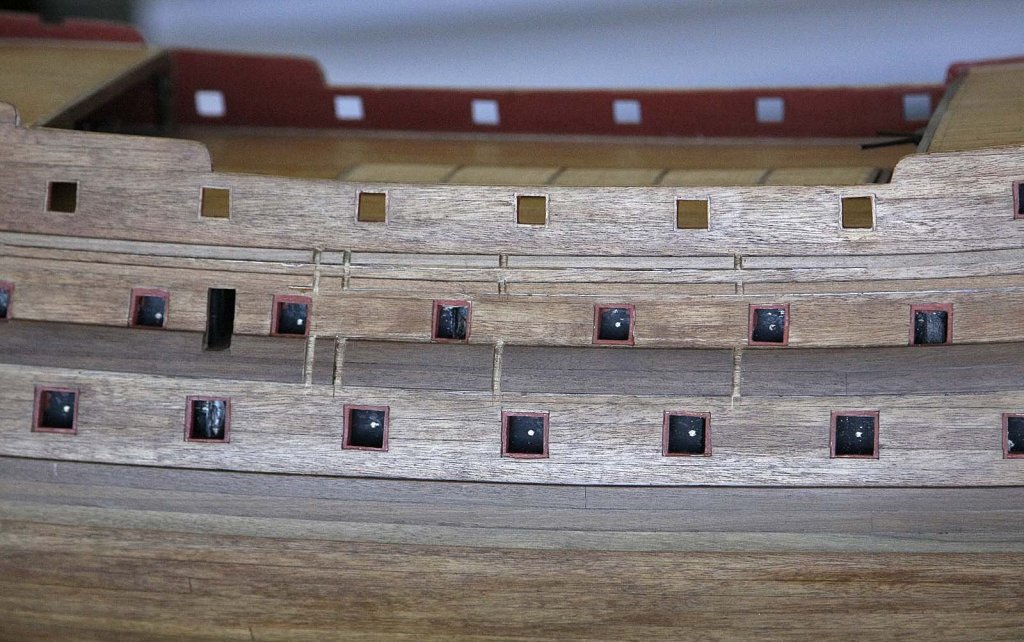
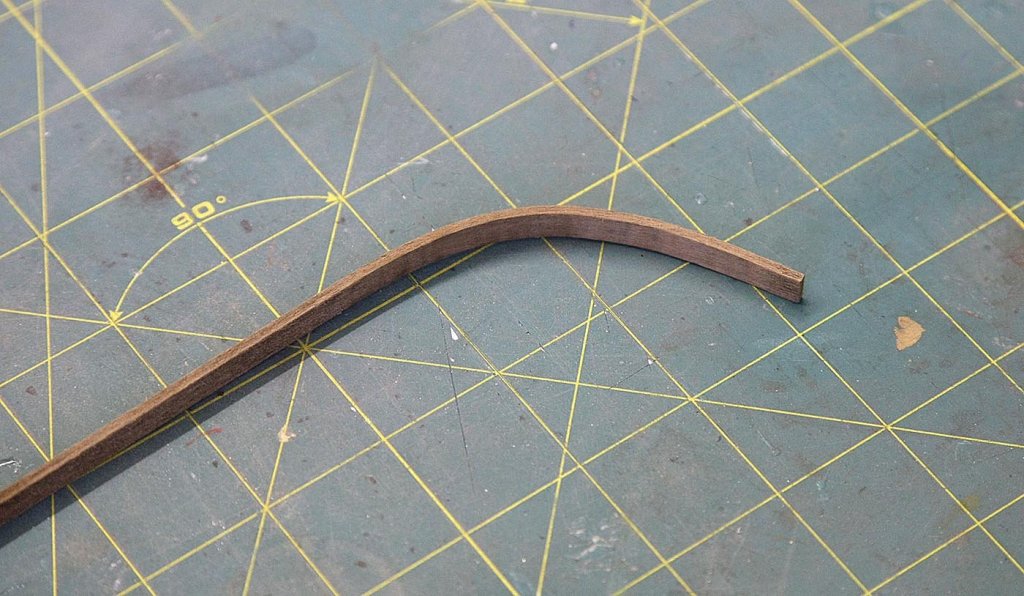
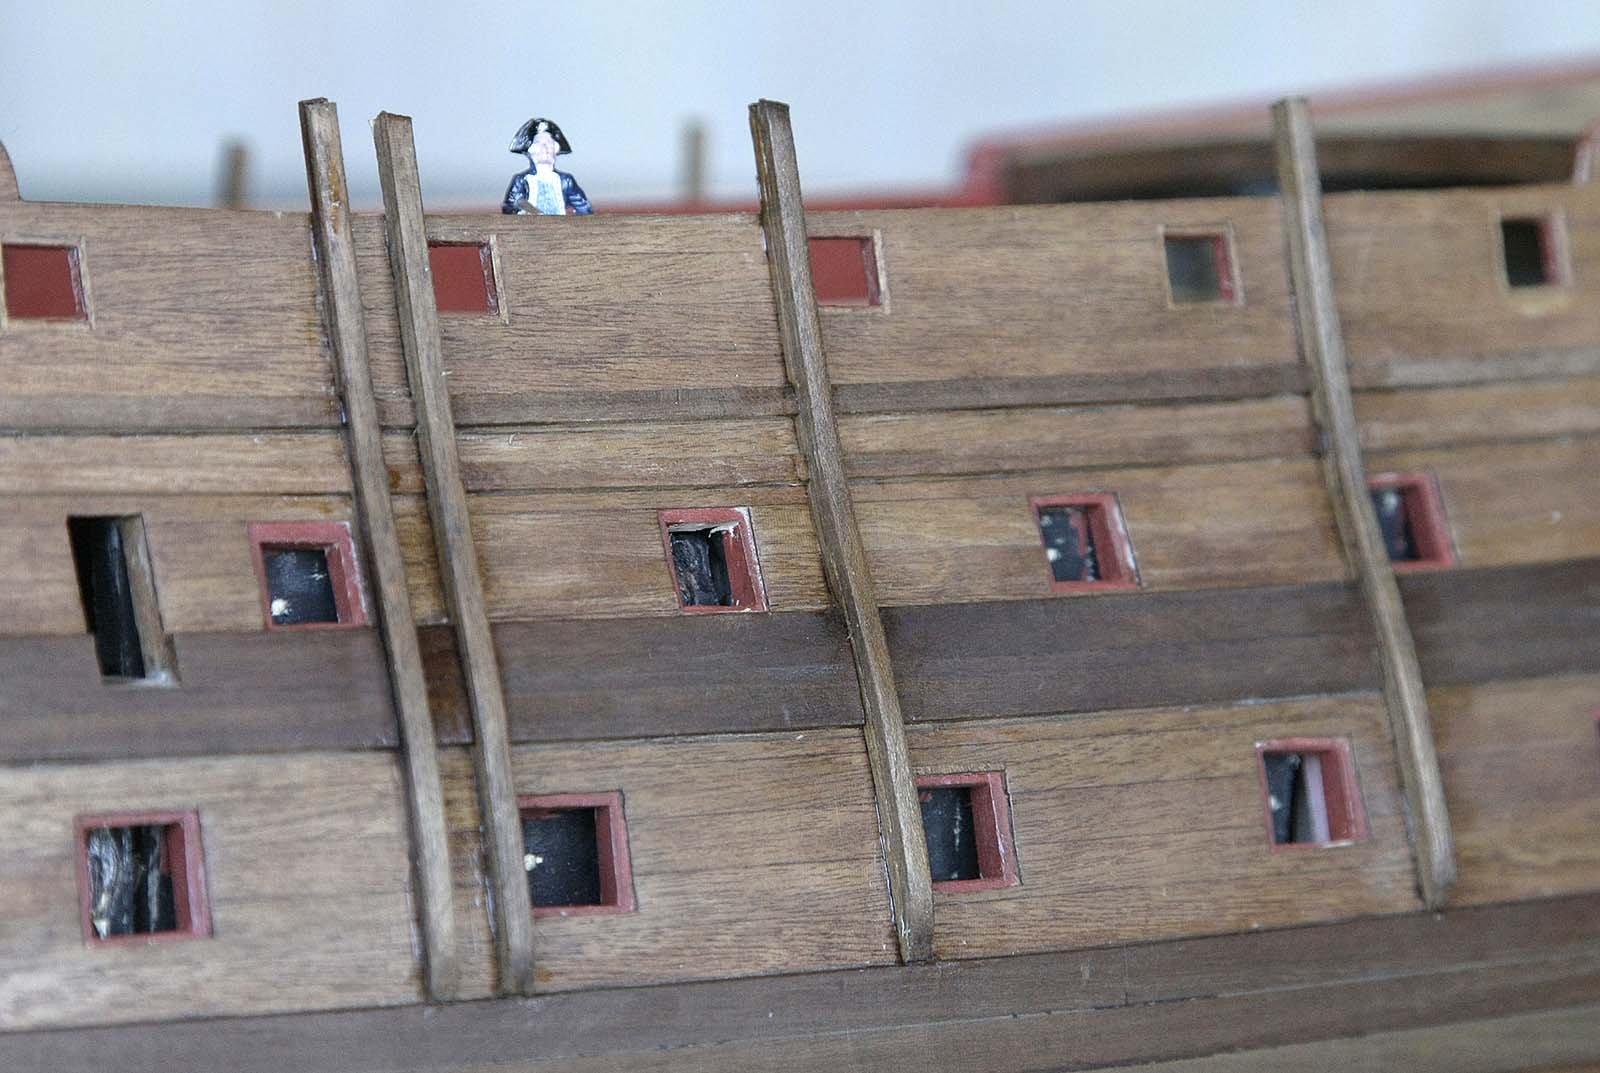
I have now finished the upper strakes, nothing of interest to report there. I then did the side fenders, I always try and find an easy way to do things and the fenders were no exception. They are made from 3x5mm walnut, I felt that these would be extremely difficult to bend to the shape of the hull, some builders make up templates and cut them from larger stock to shape, most soak them for a long time, but that would still be difficult to bend. I decided to use 3x2mm strip instead, using two, layered for each fender, sticking one down and then the other on top. Being much thinner they were easy to bend to shape without any soaking or aids and when done and sanded you would be hard pressed to tell that they weren't one piece, it was simple. I stained them a dark oak again for the contrast.
Photos shows the results.
I'm sorry to say that I'll be doing much less building for a few weeks so there'll be fewer posts. I'm a keen club cyclist and until recently still raced as an amateur so you will understand that whilst the Tour de France is on I will be giving that my full attention.
Ken


-
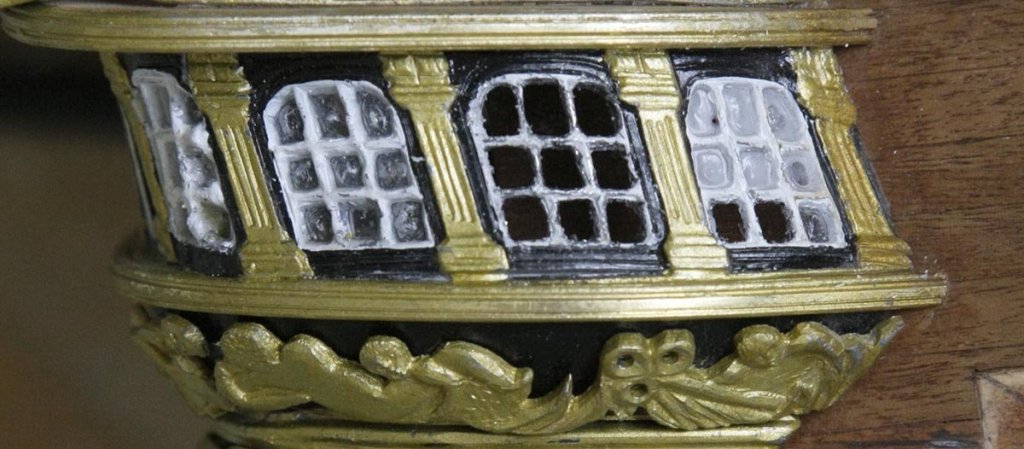
Hello Everyone,
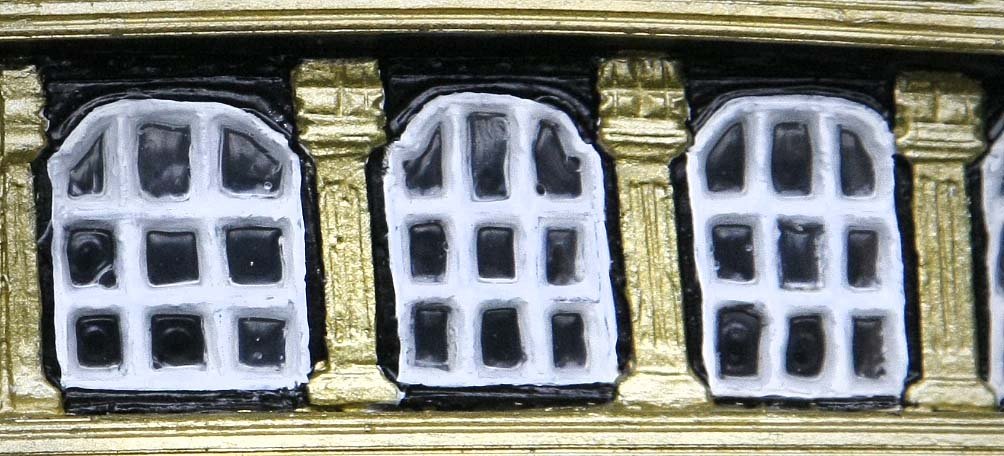
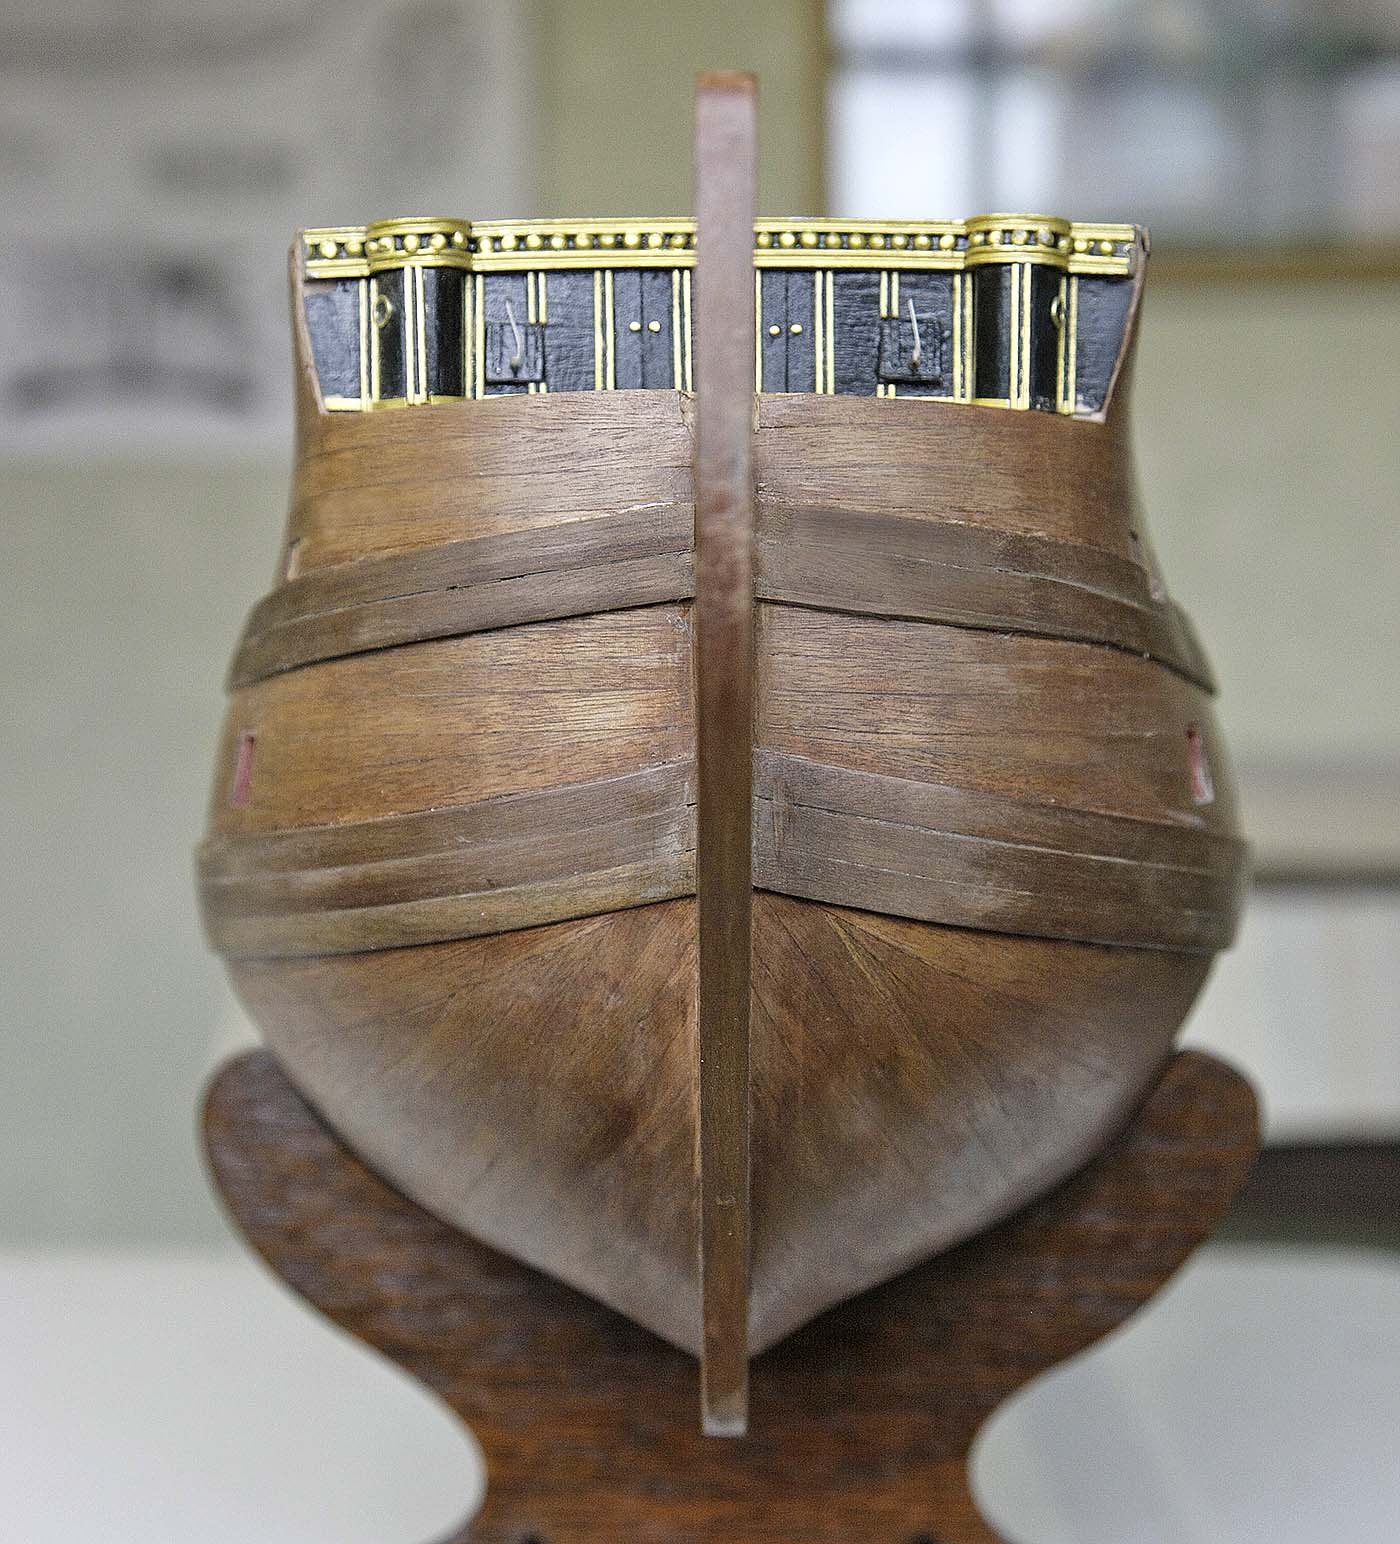
Here's the result of the refurb. You know what I was doing so this is just checking out through pictures how it turned out. The glazing in the windows I did the way Bill suggested, a blob of glue on a cocktail stick and twirled it about inside the frame, it worked well and will be how I do it in the future. The painting was not too difficult, just awkward but the stern has regained its lustre and I reckon I've got it pretty close to how it was before the incident, I recon Nelson couldn't tell the difference.
Just so that I feel I've made progress with the build I've also put on the middle wales. I stained these dark oak to give them contrast against the hull. I'll paint the main wales black and put in blackened dome headed nails in both wales.
The finish on the hull has come out pretty good and at the moment I'm leaning towards just a poly finish, showing the wood.
Ken

- Jack12477, Steve 12345, Dilbert55 and 8 others
-
11
-
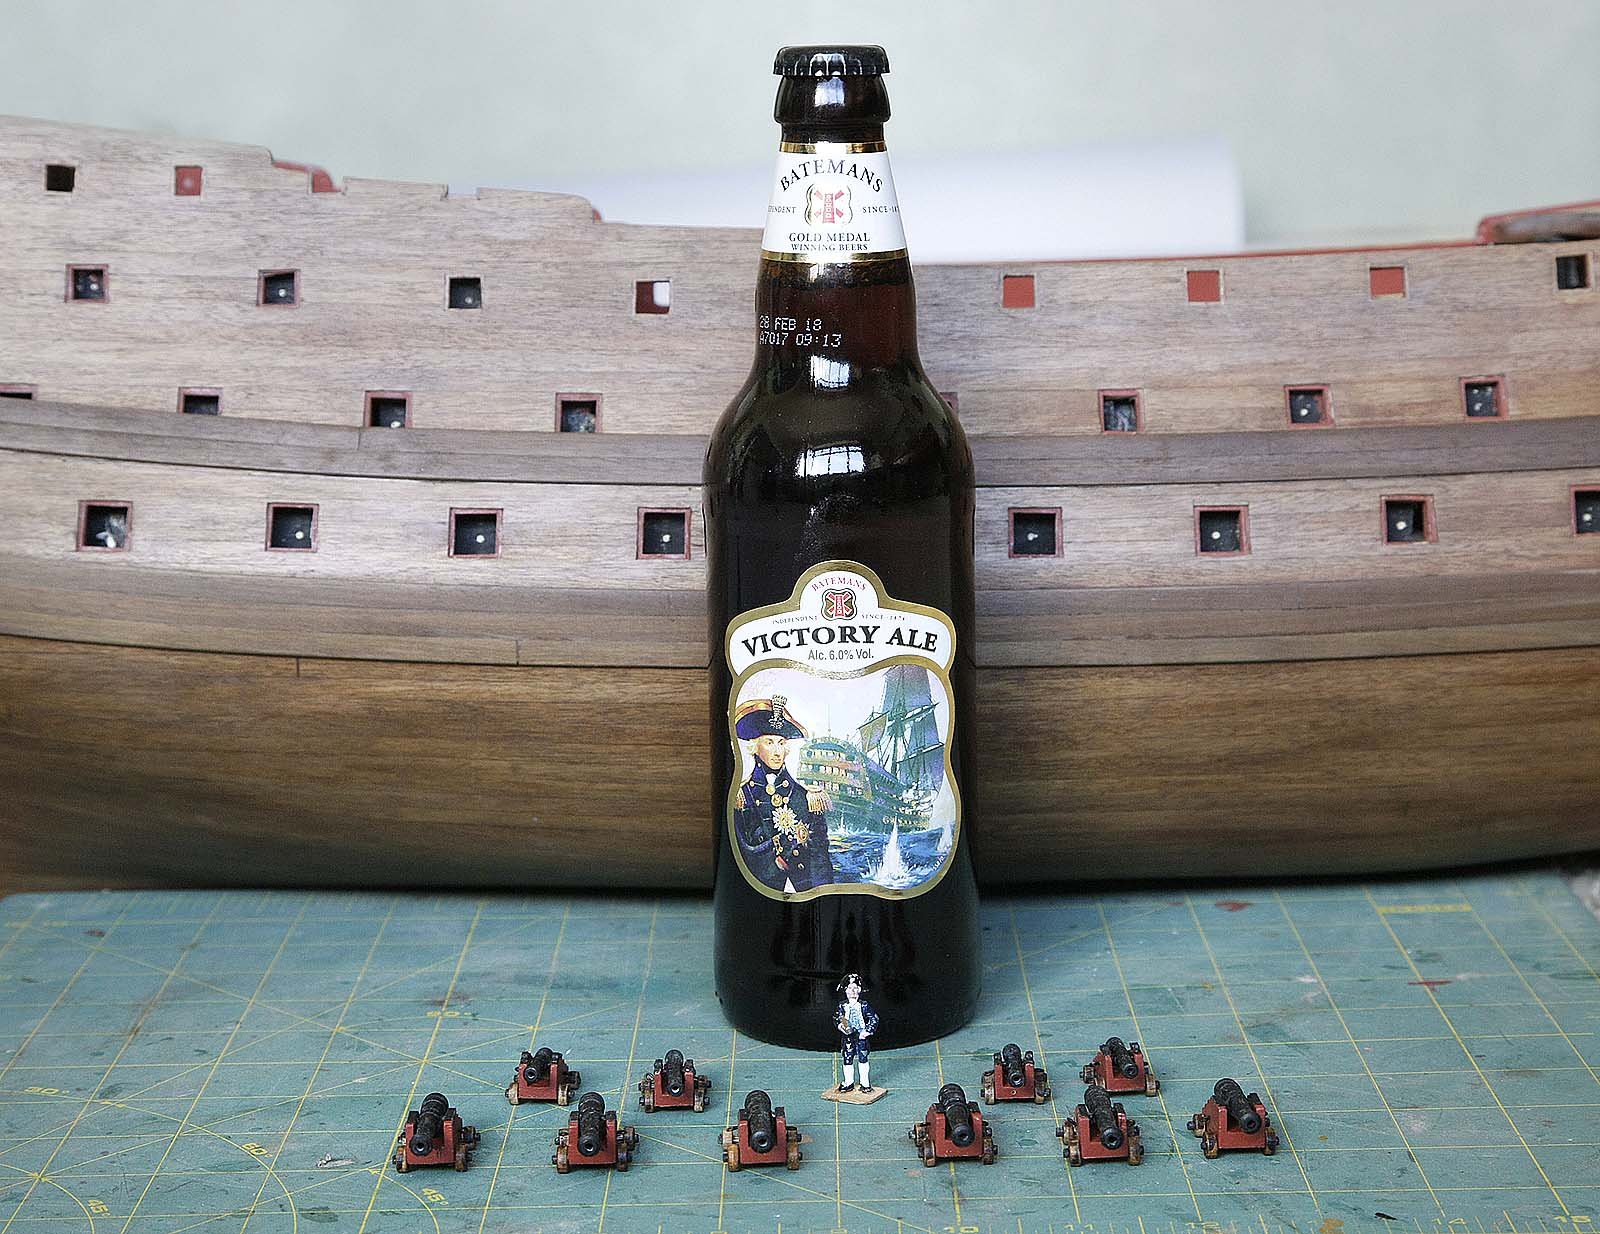
Hello Everyone,
I've just finished the refurbishment of the stern, I'm delighted with the result and will follow up with pictures and report today when I get the chance.
I was so pleased with the result that I gave myself this reward, and yes Greg it tasted great even though it was WARM.
Ken
-
Hi Dilbert, Nice one. Here's a starter for you, Never in the field of modelling.......................
Ken
-
Hi Greg, Thanks foe your comments. No I'm not a restrained Pommie, the laws on blasphemy precluded me from putting in print what I actually said at the time and I don't think it would have got past the moderator. I'm surprised that you didn't hear me in Oz. I'd prefer a beer.
Looked in on your Royal Caroline project, you've certainly given yourself a task there, good luck with it.
Ken
-
Hello Everyone,
Bill it's good knowing that I'm not the only one, honestly you've recovered very well on that one.
Greg that's a lot of likes, thanks and welcome aboard.
Now on to the renovation of the stern.
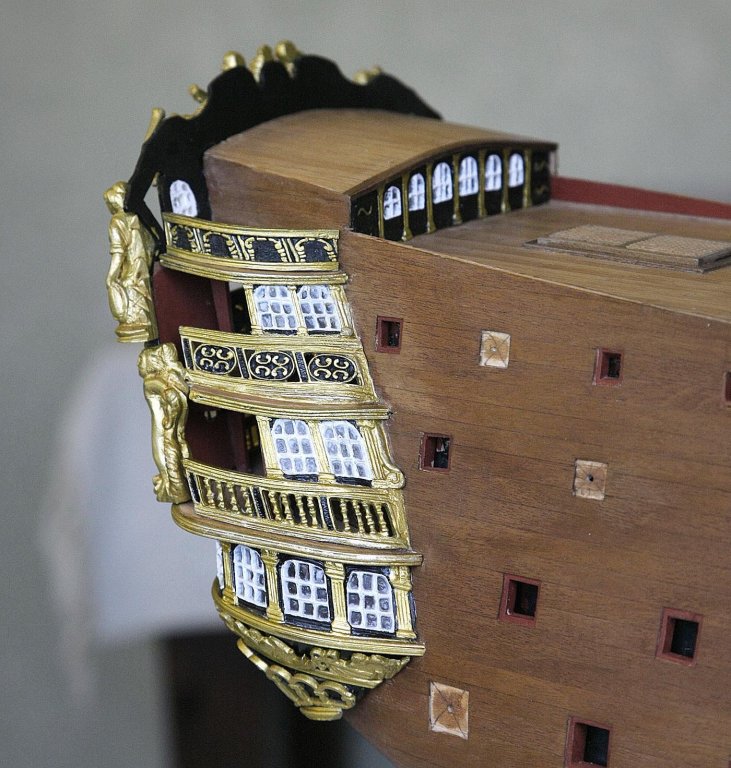
I went through a variety of thoughts about this often changing my mind on what needed doing for me to be satisfied. On first assessing the damage I saw other than the hull, the black area underside of the transom support was stained and would need re- painting, the glazing in the side gallery windows both sides had gone white with the heat and fumes, some of the starboard ones had even melted and all the lower windows at the rear had whitened, a sort of opaque appearance. I initially decided that I would re paint the black area and just re-glaze the melted panes, hoping that I could accept opaque windows. I did this, but on working close up with magnifiers on I could see that a lot of the gold had been rubbed away from many of its detailed edges due to rough handling at the time and that the nice newly painted sheen had gone. I decided that all the gold should also be re-painted. I remembered all the effort that I had put into cutting out and glazing those windows and still had the vision of how good it had looked just a couple of days before and couldn't get it out of my mind that I wouldn't be able to settle for less. So biting the bullet I have decided on a compete renovation, a complete re-paint and re-glaze.
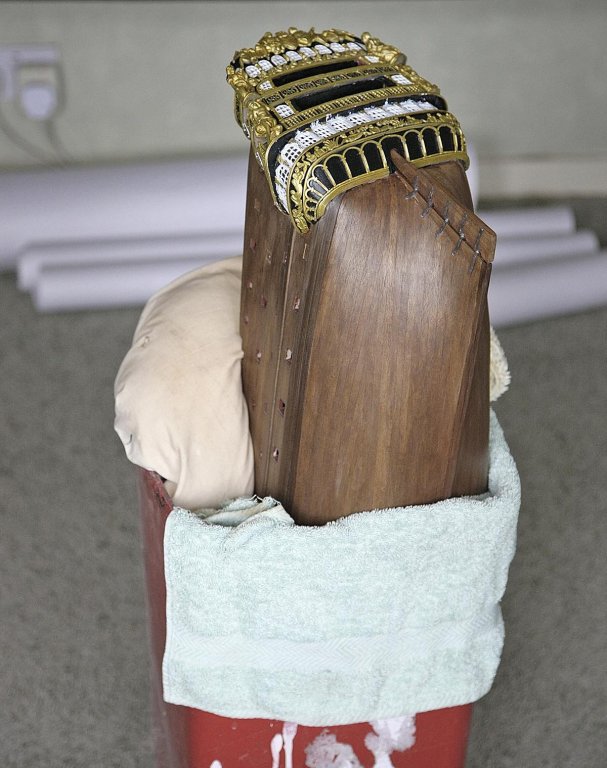
Have you ever worked in an office, having almost, through hard work nearly finish when someone walks in through the door carrying an armful of files and says, " these must be done by tomorrow " Well that's how I feel!
You may remember that I had glazed using glue on the inside of the frames, well because of that it was no simple matter now getting it all out from the front through the small pane area, this glue having set was very tenacious and clung on. I first cut it away with a scalpel, I then made up from wire some small hooks and picks, with the help of fine curved tweezers I managed to eventually remove all the glazing/glue. Some of the windows were damaged in the process but have since been repaired. I cleaned up the area using a fine wire brush and have now started painting.
I had found painting neatly around the windows quite difficult even when it had been in flat sections on the bench so I'm not sure how it will go now that they're all assembled and at awkward angles. I found that because of it's size, shape and weight it was difficult to hold stern up and steady, the picture shows me not binning the RW but my holding solution.
I think that in some previous life I must have offended a modelling God and that in this incarnation I am being punished. What offering can I make?
Ken


-
Hi, I was thinking, so that I don't feel like the only clumsy modeller here would anyone else like to share with me their OH NO! modelling moments. It would be like going to confession and getting it off your conscious. I will absolve you.
Ken
-
Hello Everyone,
Thanks for both your likes and commiserations. Here in the dockyard life goes on so here is a bit of catch up.
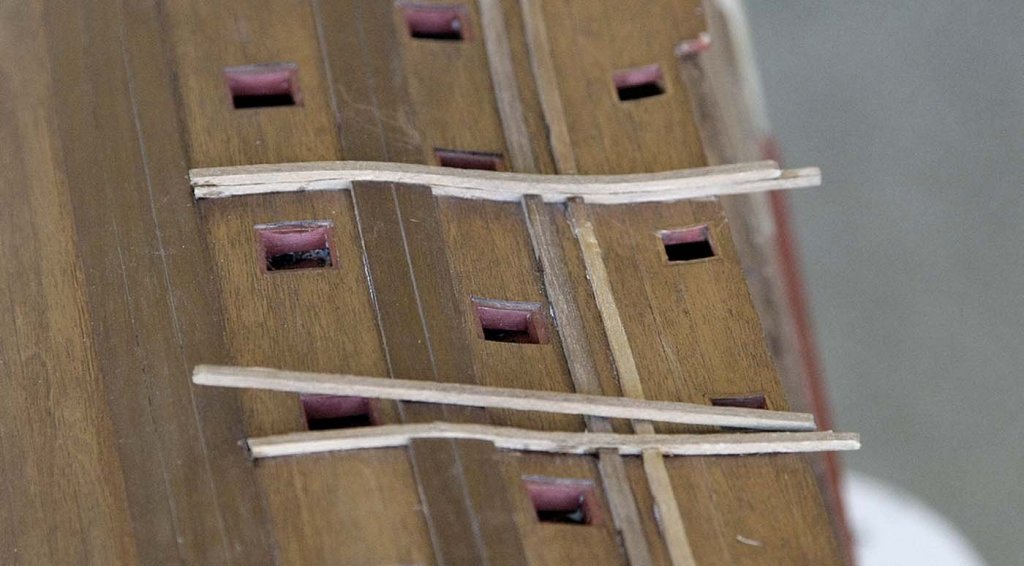
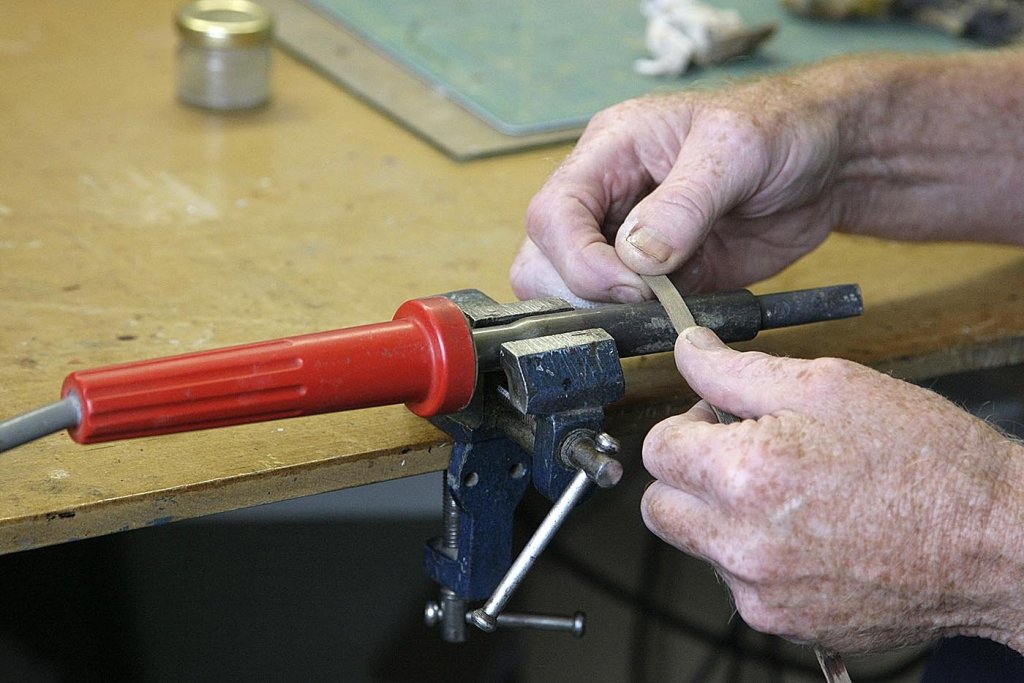
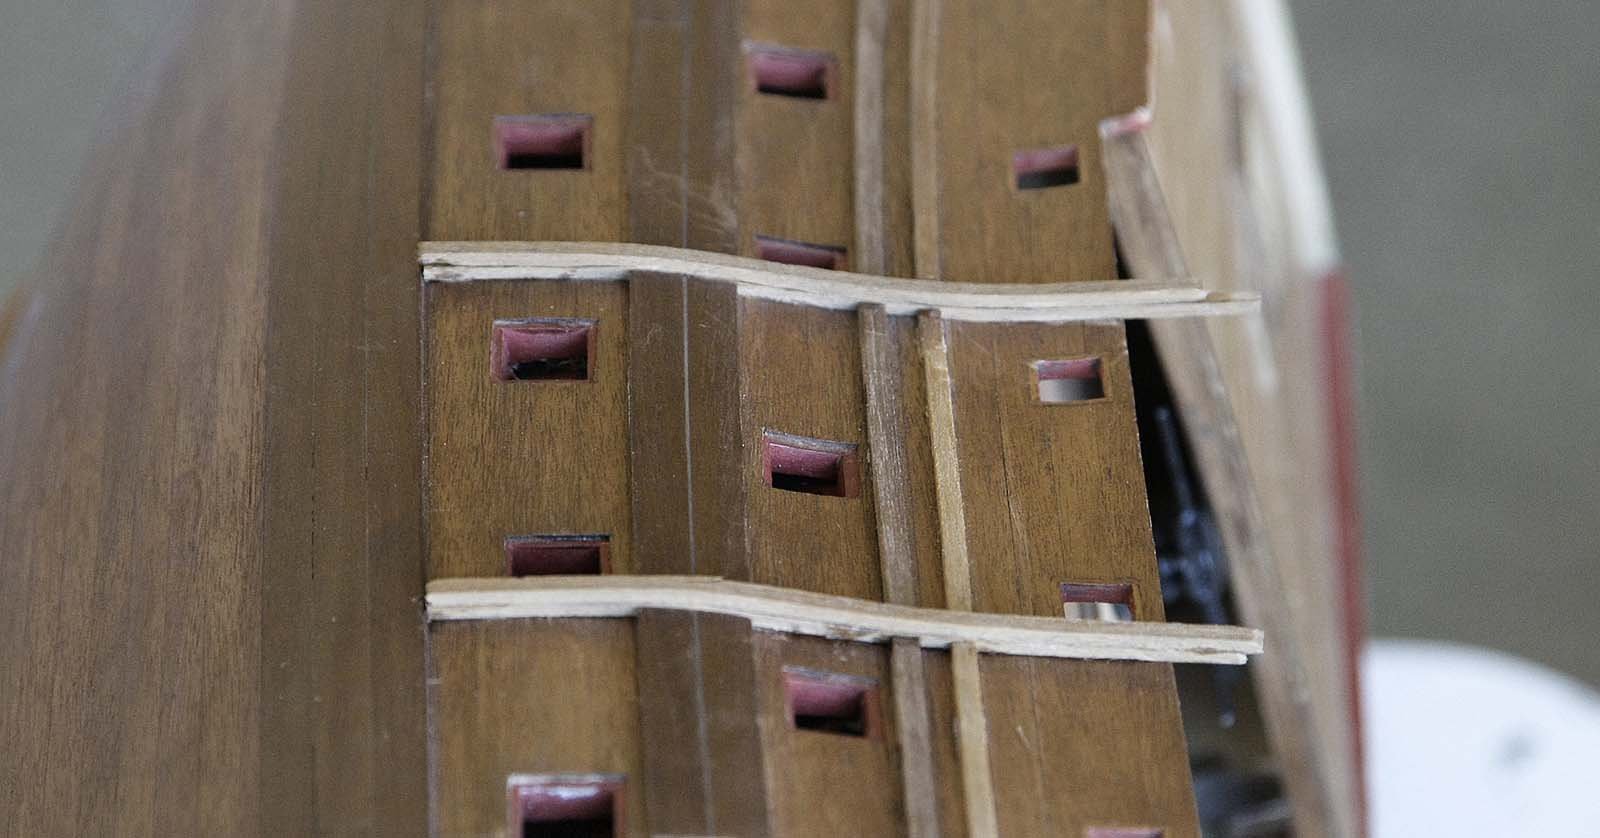
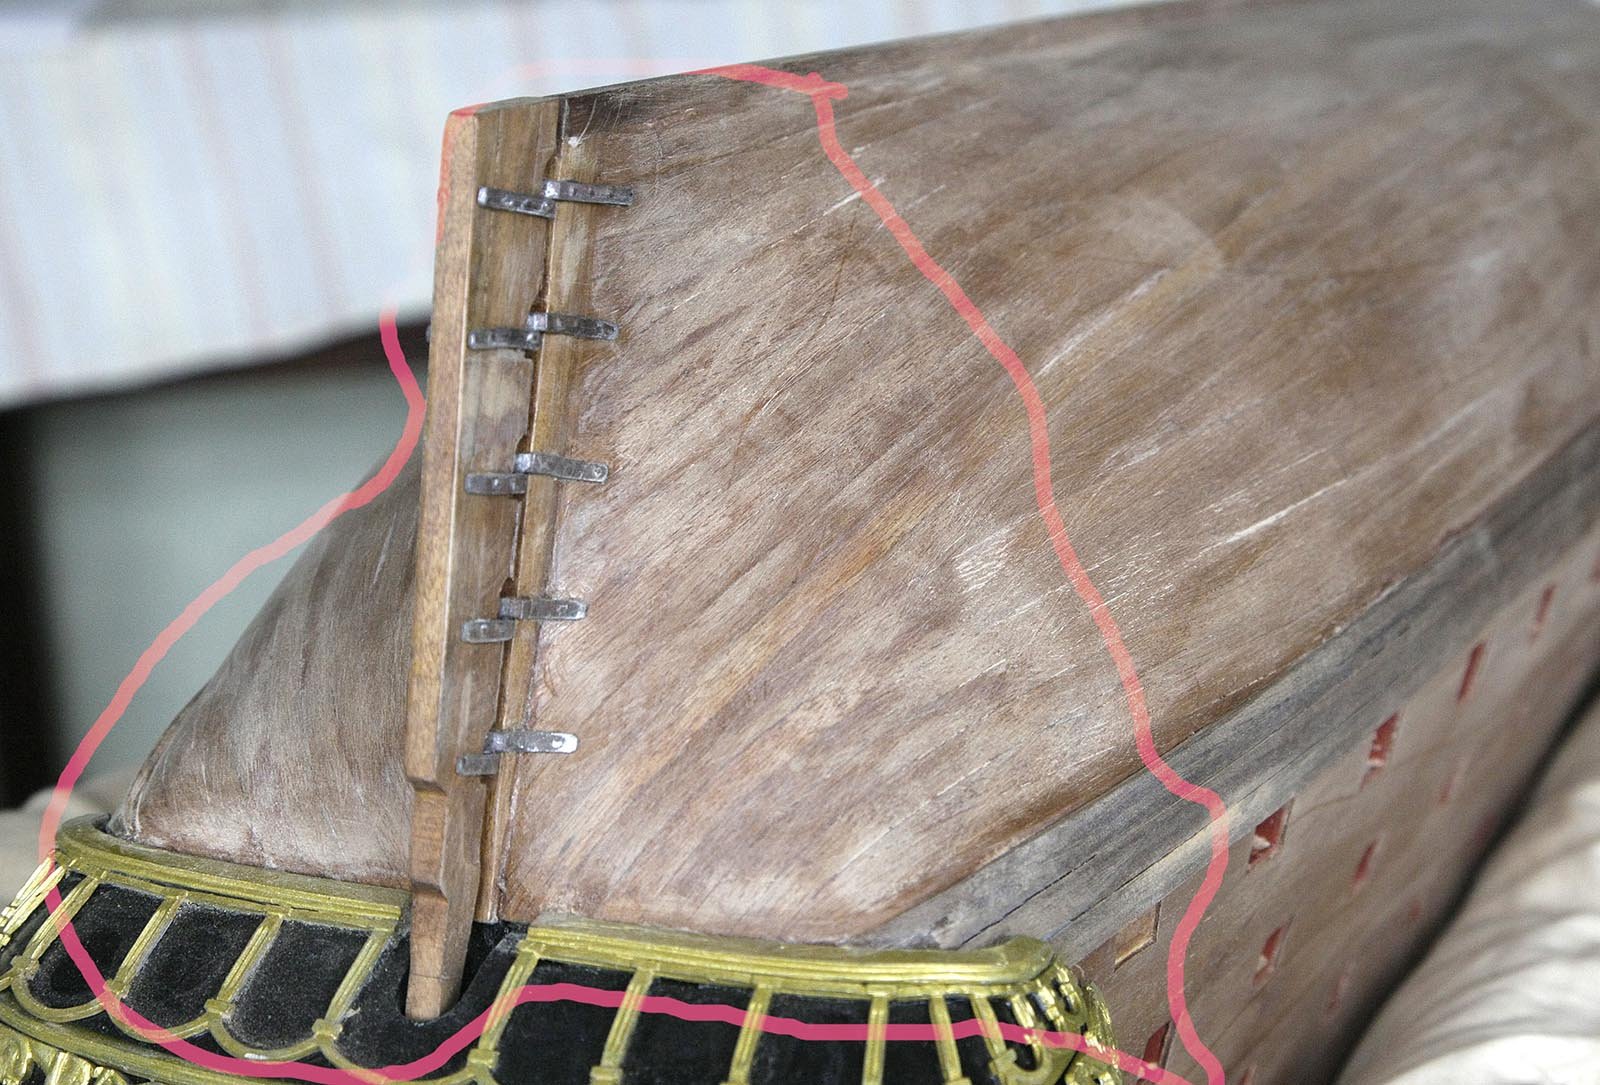
Before the incident I fitted the main wales which were made up from three strips of 2x7mm walnut. I put these into a flask of boiling water to soak for about three hours whilst I went and had a game of bowls. I marked out their position relative to the lower gunports then turned my attention to bending these strips. My preferred method is after soaking I use my heavy duty soldering iron clamped in a vice, I grip the strip between both hands leaving about an inch between. I hold the strip on the shaft of the iron with a little downward pressure, nothing happens initially but there comes a moment when the wood suddenly becomes soft and pliable, it will readily bend or twist to any shape, I think that it's as the internal moisture turns to steam and the resins soften. This state only lasts about a second before the wood dries, leaving it in place any longer doesn't help and there is a chance of charring the wood, lift it off whilst it is still moist. I then move it along about 1/2" and continue the bend. I have the hull to hand and keep checking that I'm getting the bend correct. I have tried using a curved block the Amati way but I found that this dried and charred the wood, as you can see in my picture my method gives a good clean curve with no charring and it is quick and easy. Using this method the wales on both sides took less than an hour to fit using my Cyno planking method, but do make sure the top is secure!
Now to the recovery of the hull. I sanded off what I believe is all the hardened Cyno from the hull and went as deep as I dared, to get a uniform finish I then sanded the rest of the hull, as I had previously stained it I needed to take enough off to get to just plain wood. The area effected had different colour streaks in the grain so to try and get some colour consistency I tested some stains and found that light oak gave the best result, so used this giving the hull a couple of well rubbed in coats. It came out much better than expected. I rounded the upper and lower edge of the wales then gave the hull a coat of sanding sealer. HA, HA! I now prefer the colour and finished look over my previous one, there are very, very slight variations in shade as you would have expected and the grain is showing up more, it looks like very subtle well done ageing.
The grin is coming back.
I've decided that the galleries will need major work done to bring them back to their former glory and I'm not going to shy away from doing what's needed, but that's another story.
Ken


-
Hi Joachim, I haven't commented on your build so far but I must now say that it is a superb build and does you great credit, well done.
Ken
-
Hello Everyone. Thanks very much for your comments on my RW.
Yes Sjors I do eat and sleep sometimes. Remember I'm one of the lucky ones to have retired and I sort of treat building like doing a job, it motivates me. You get through quite a bit of building yourself though.
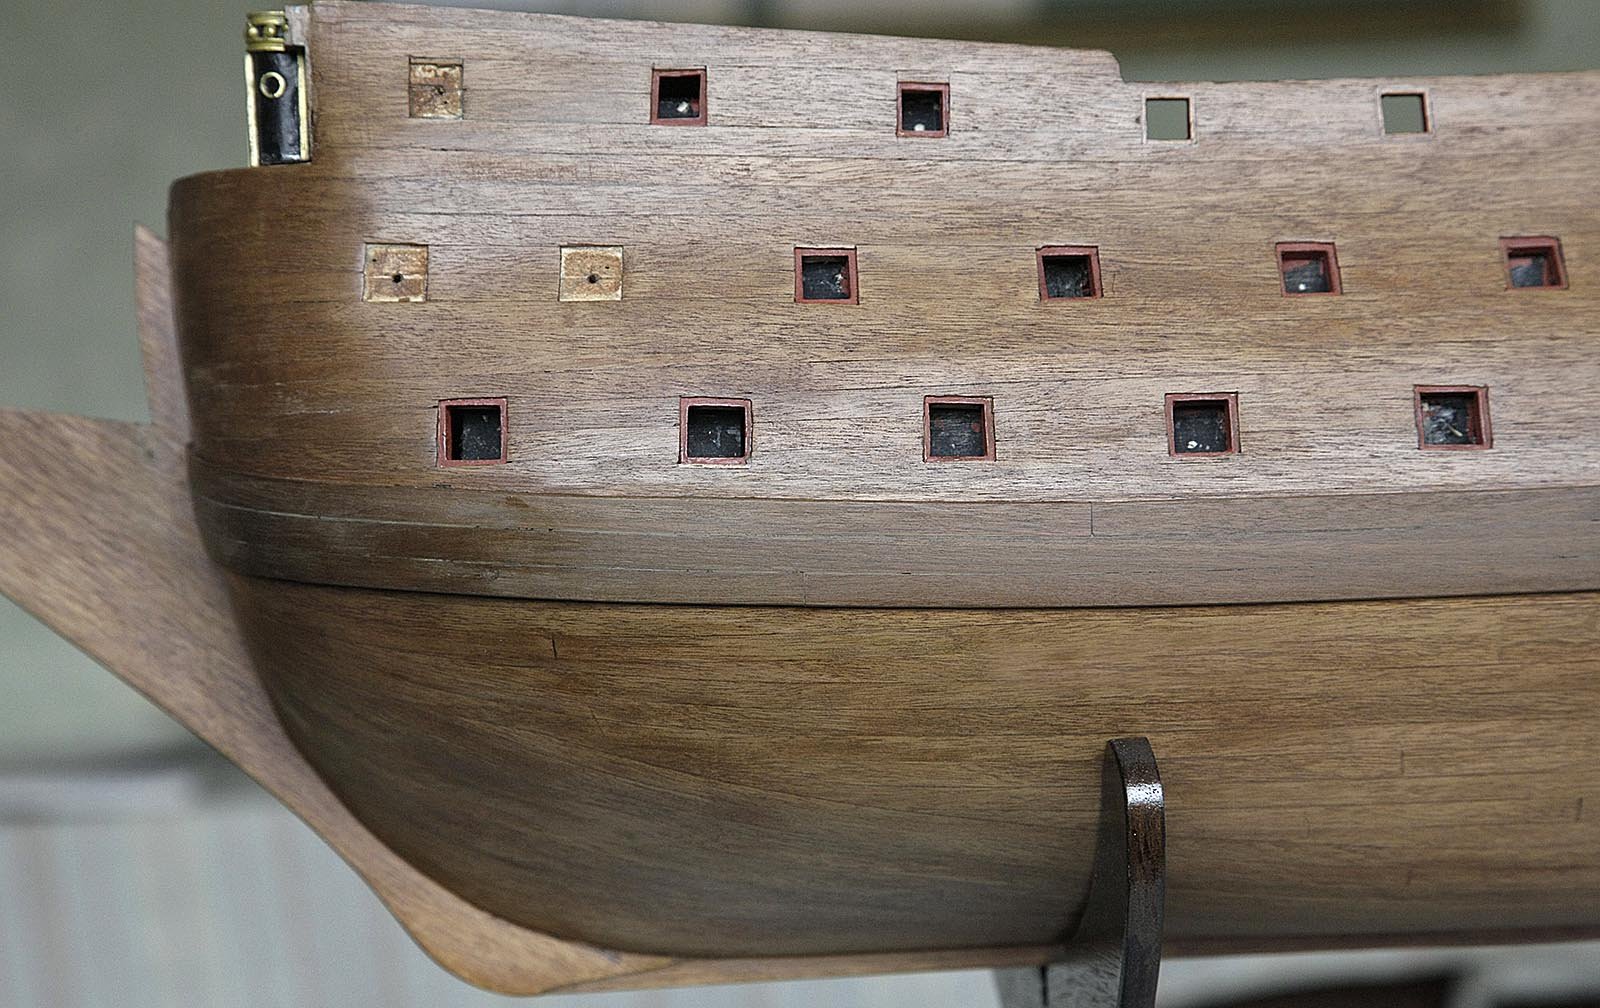
Now after my high of finishing the stern came quite a low that I'm just recovering from, a mini disaster. I'll explain.
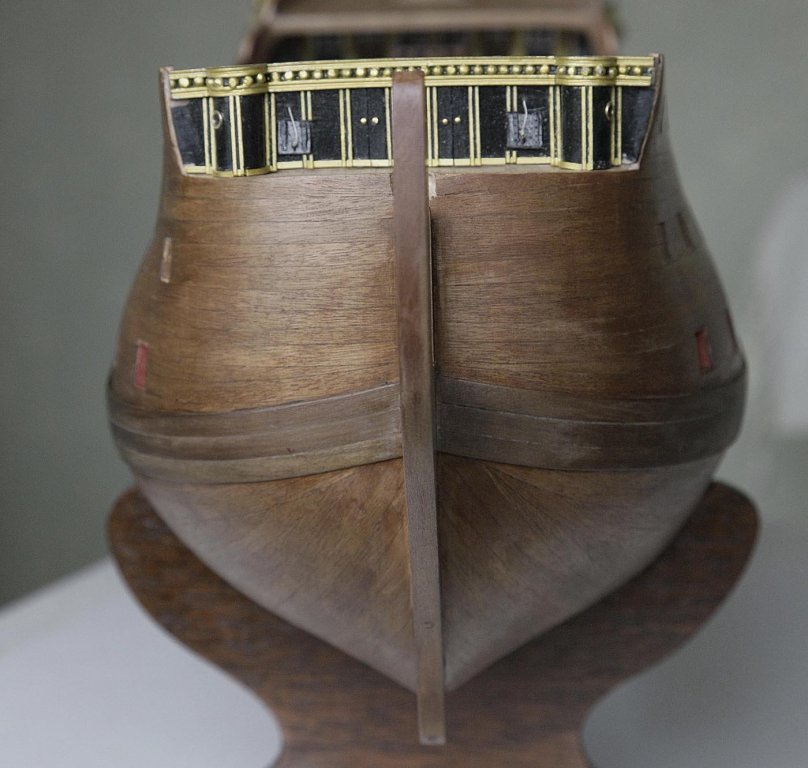
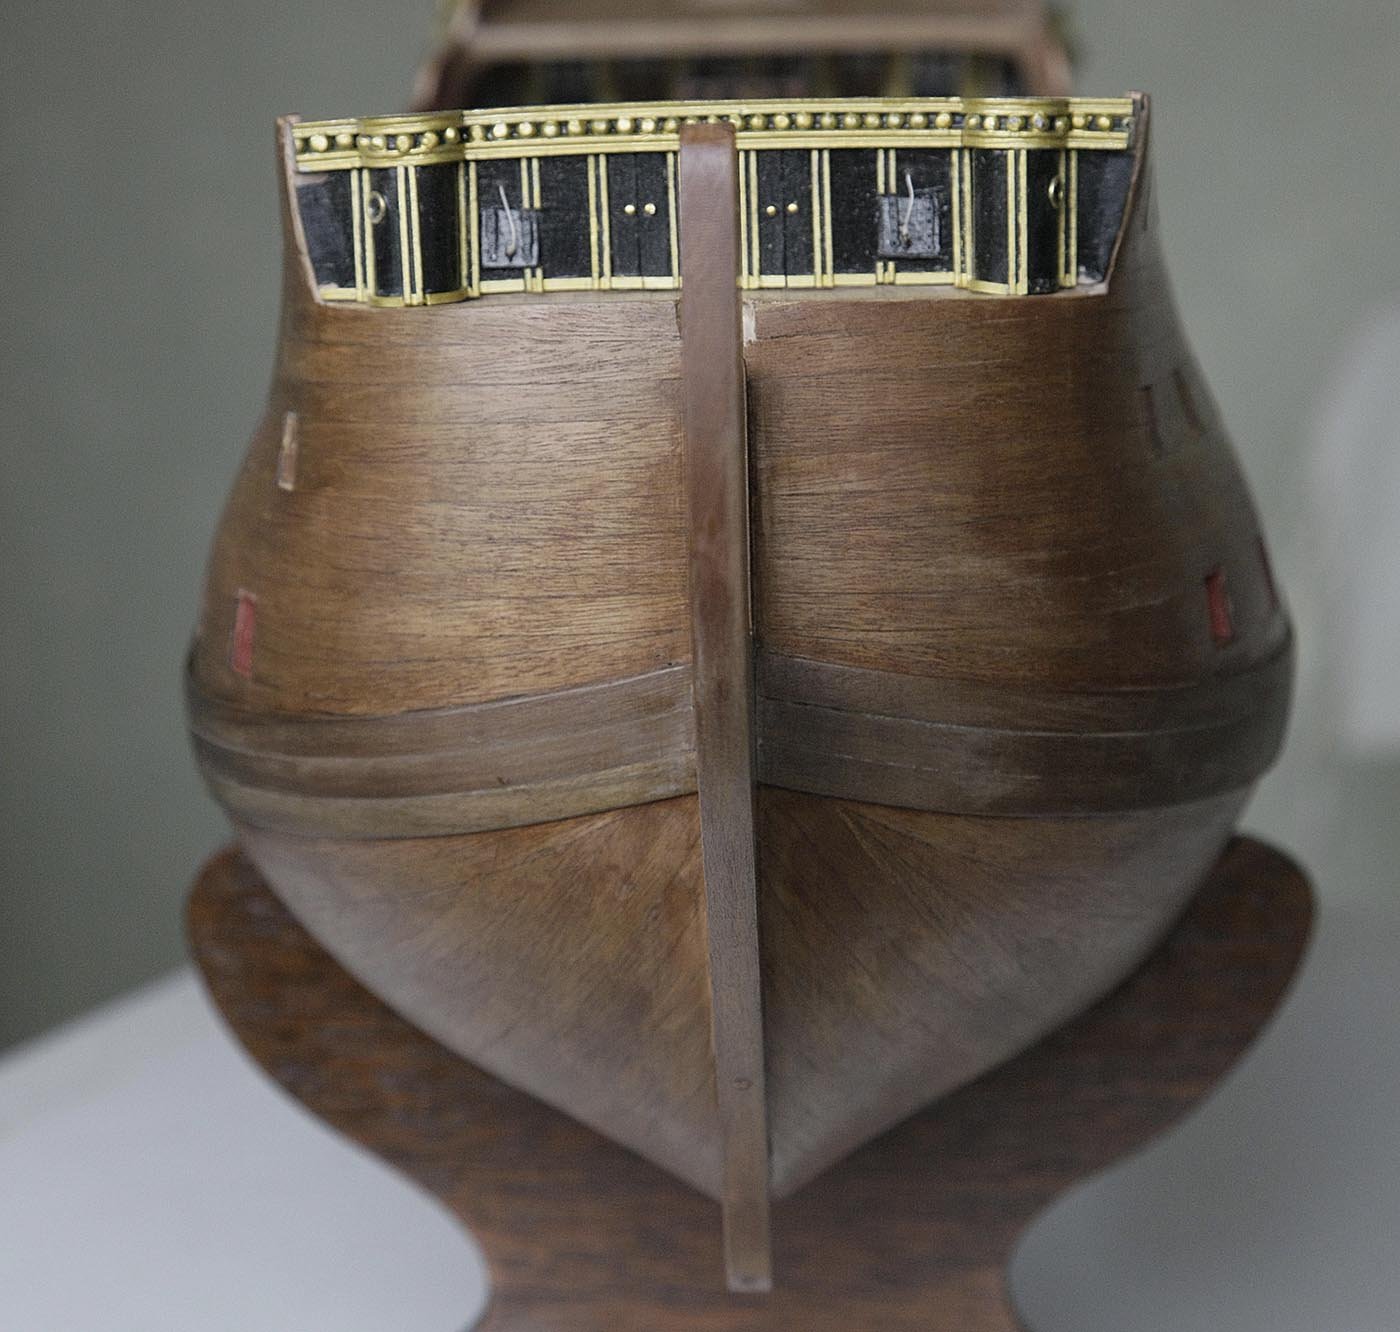
I had just fitted the lower wales, I noticed that at the stern one of the planks had not stuck down fully. I positioned the hull almost upside down at an angle so that I could trickle some cyno under it. Using my needle nozzle under the plank I inserted a little glue but on taking it away the needle got trapped and as I pulled the whole top came off the container and the entire contents, about half a bottle of cyno poured over the hull, rudder and lower underside of the transom support. I quickly wiped away as much as I could before it started to set, the fumes were hard to stand and this amount when drying became too hot to touch. My mind was screaming, NO!
As you may imagine it left quite a mess. It took me a while to get the stuff off my hands and even longer to repair the damage. Fortunately the side and upper transom hadn't been effected except some of the glazing in the windows had melted and will need re doing. I got out my electric sander and used it to sand away the hardened cyno, I then had to re sand the entire hull to try and get a uniform finish. I'll try using a light stain to get an even colour in the hull, not sure now how the effected area will take stain or varnish but we'll see. I'll need to re paint the lower transom support and re glaze some windows, I initially thought that it was going to be much worse so I'm sort of ok with it. Do you ever want to say, WHY ME.

The picture shows the effected area and the recovery in progress.
Ken

-
Hello Everyone,
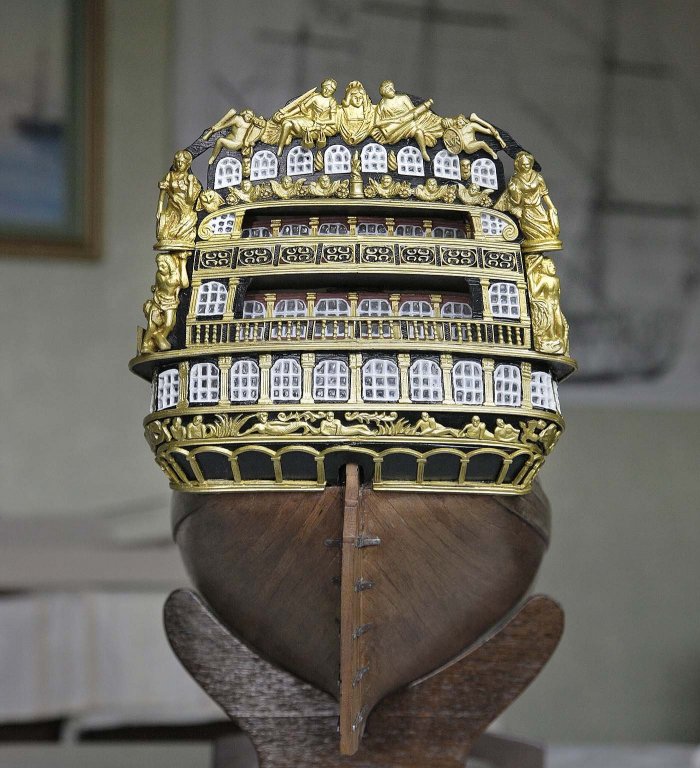
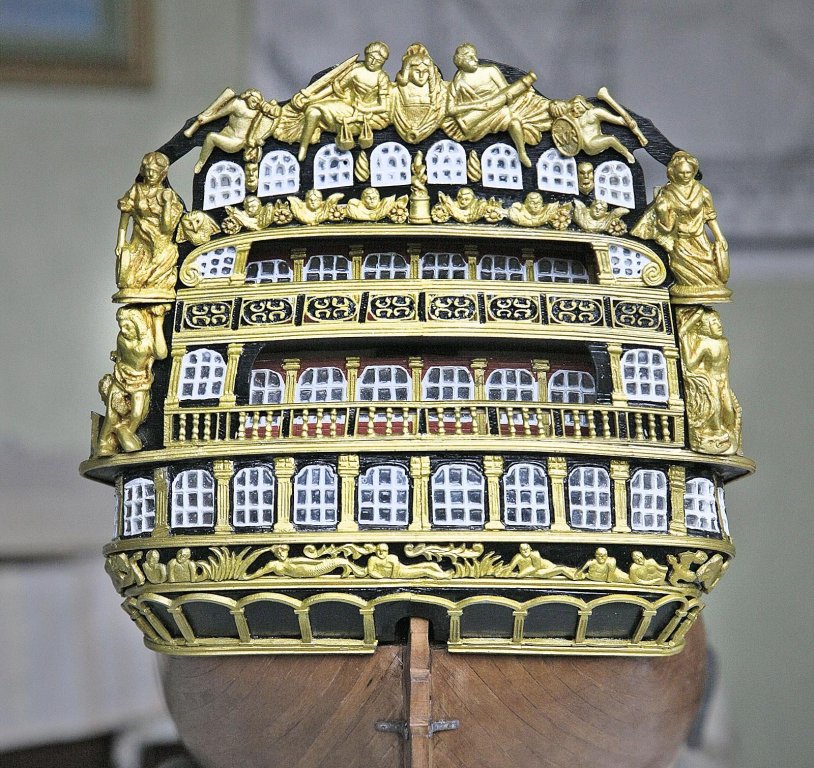
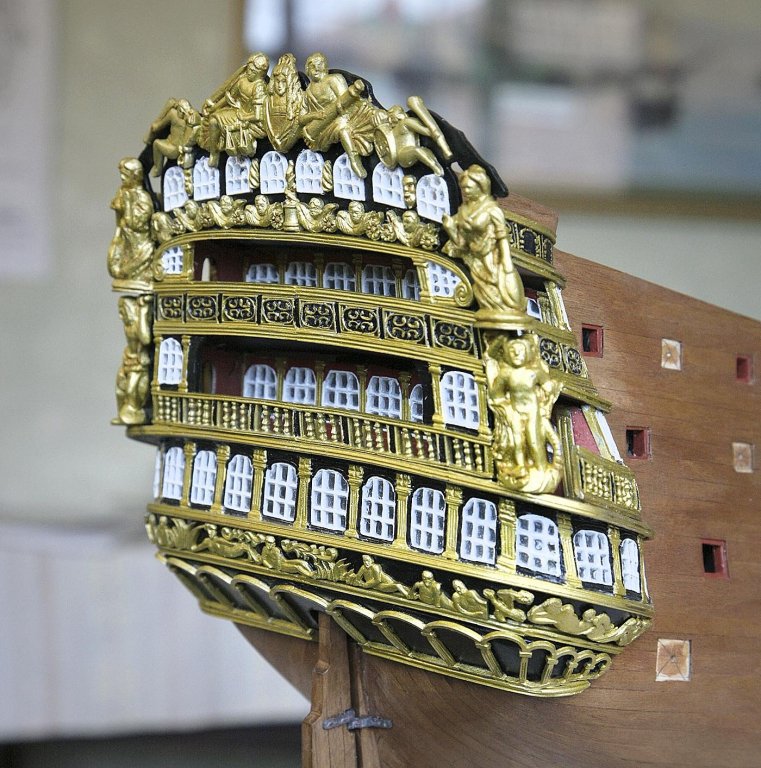
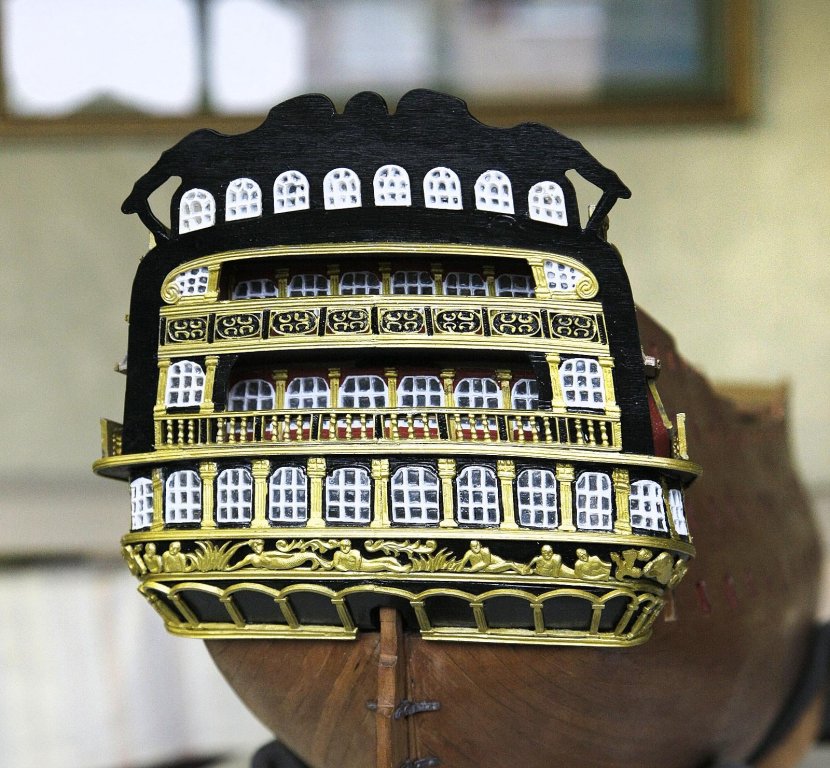
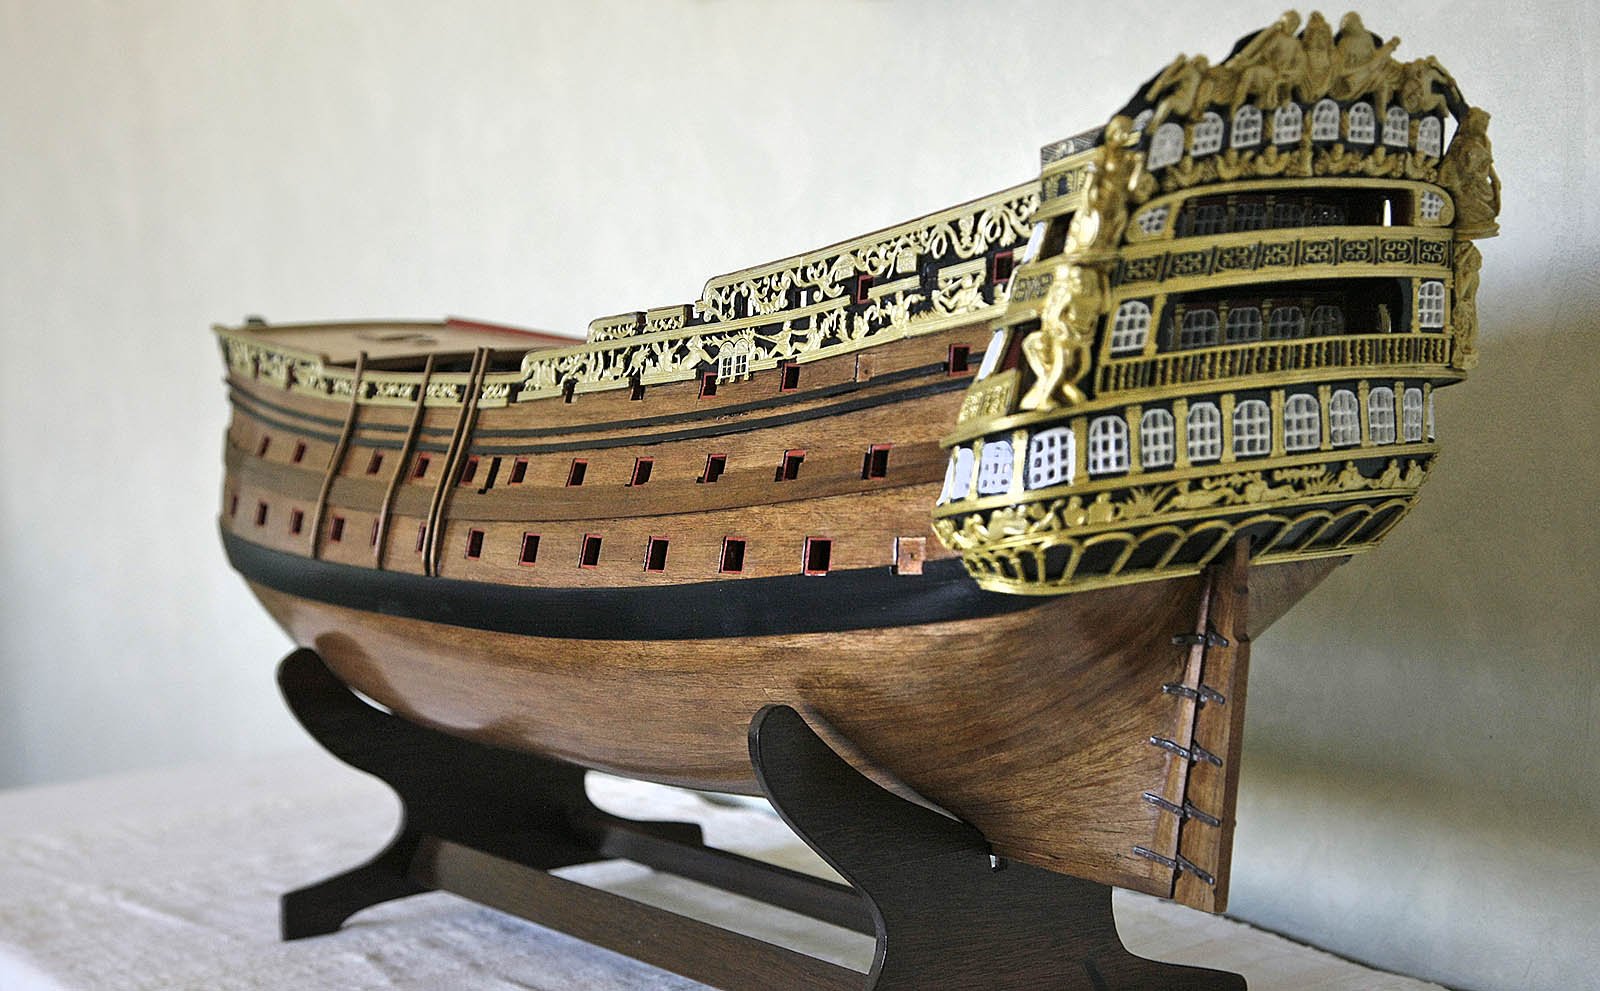
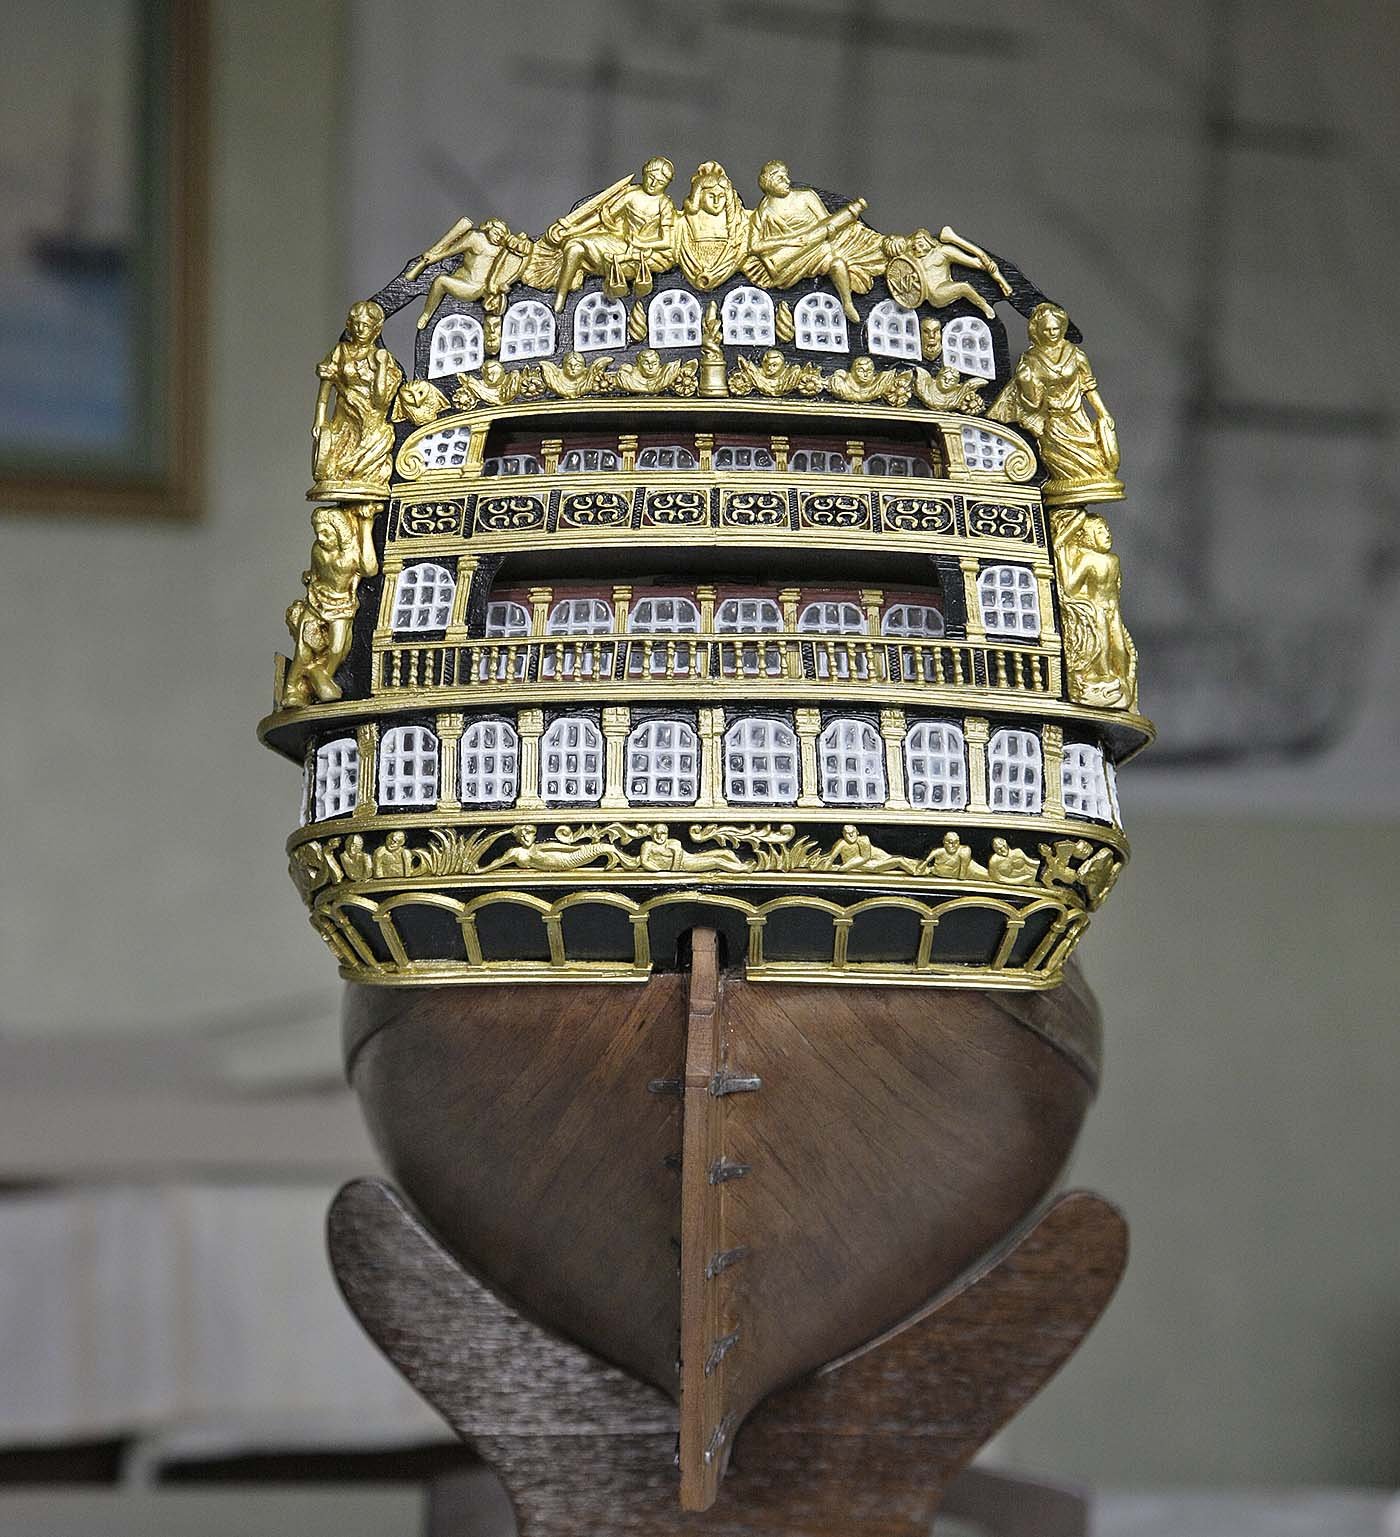
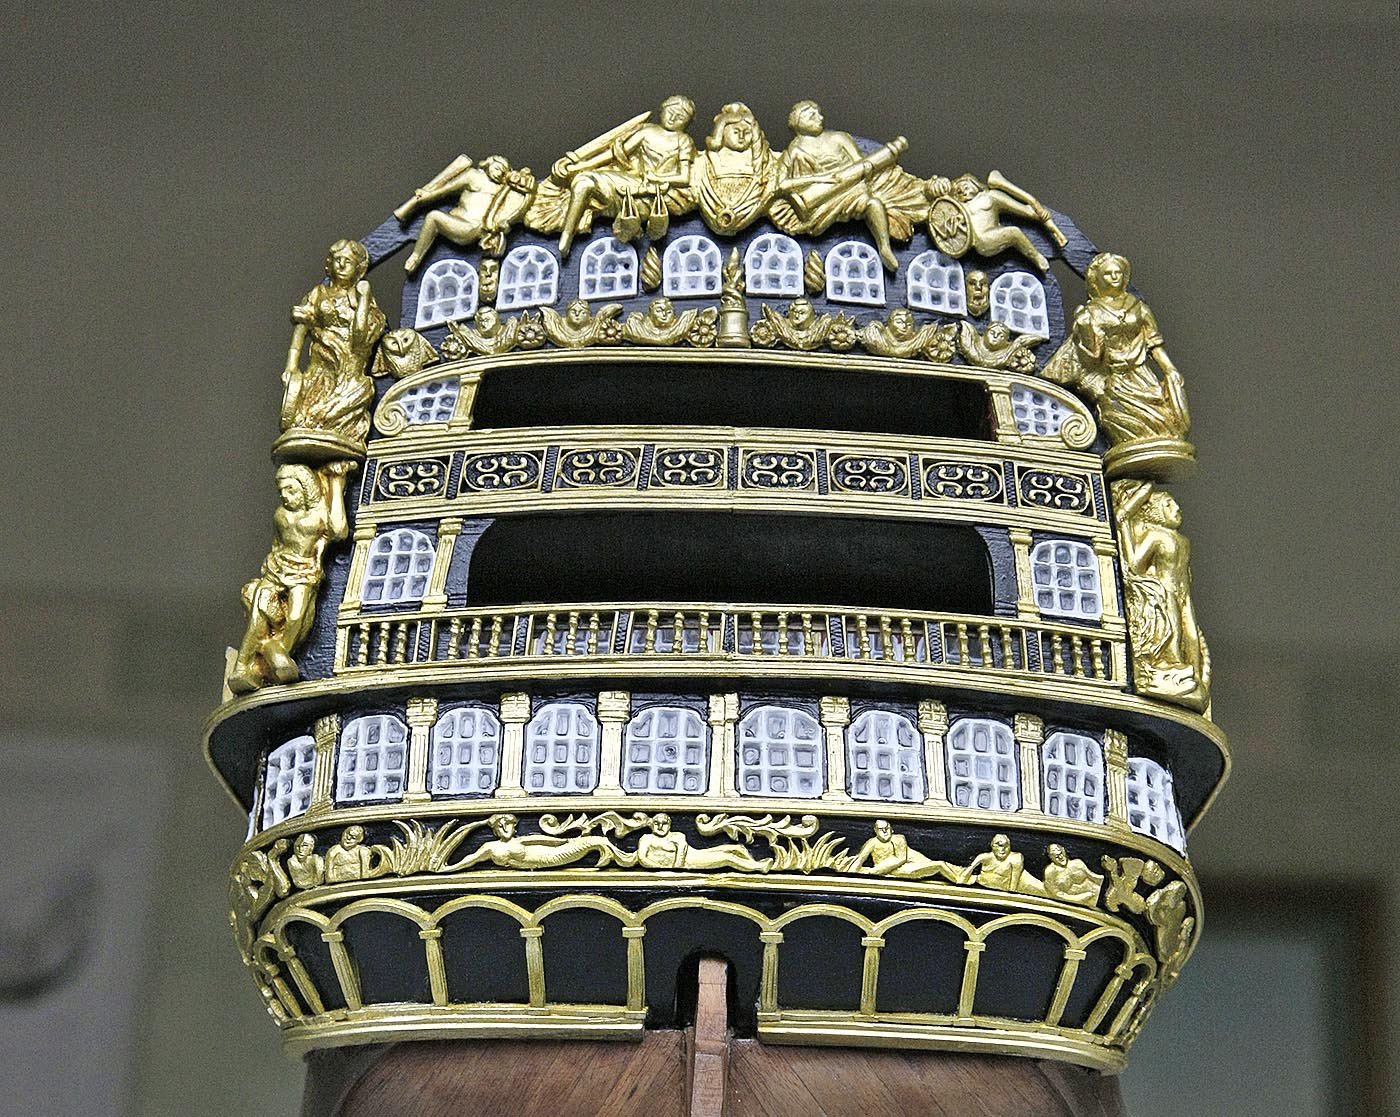
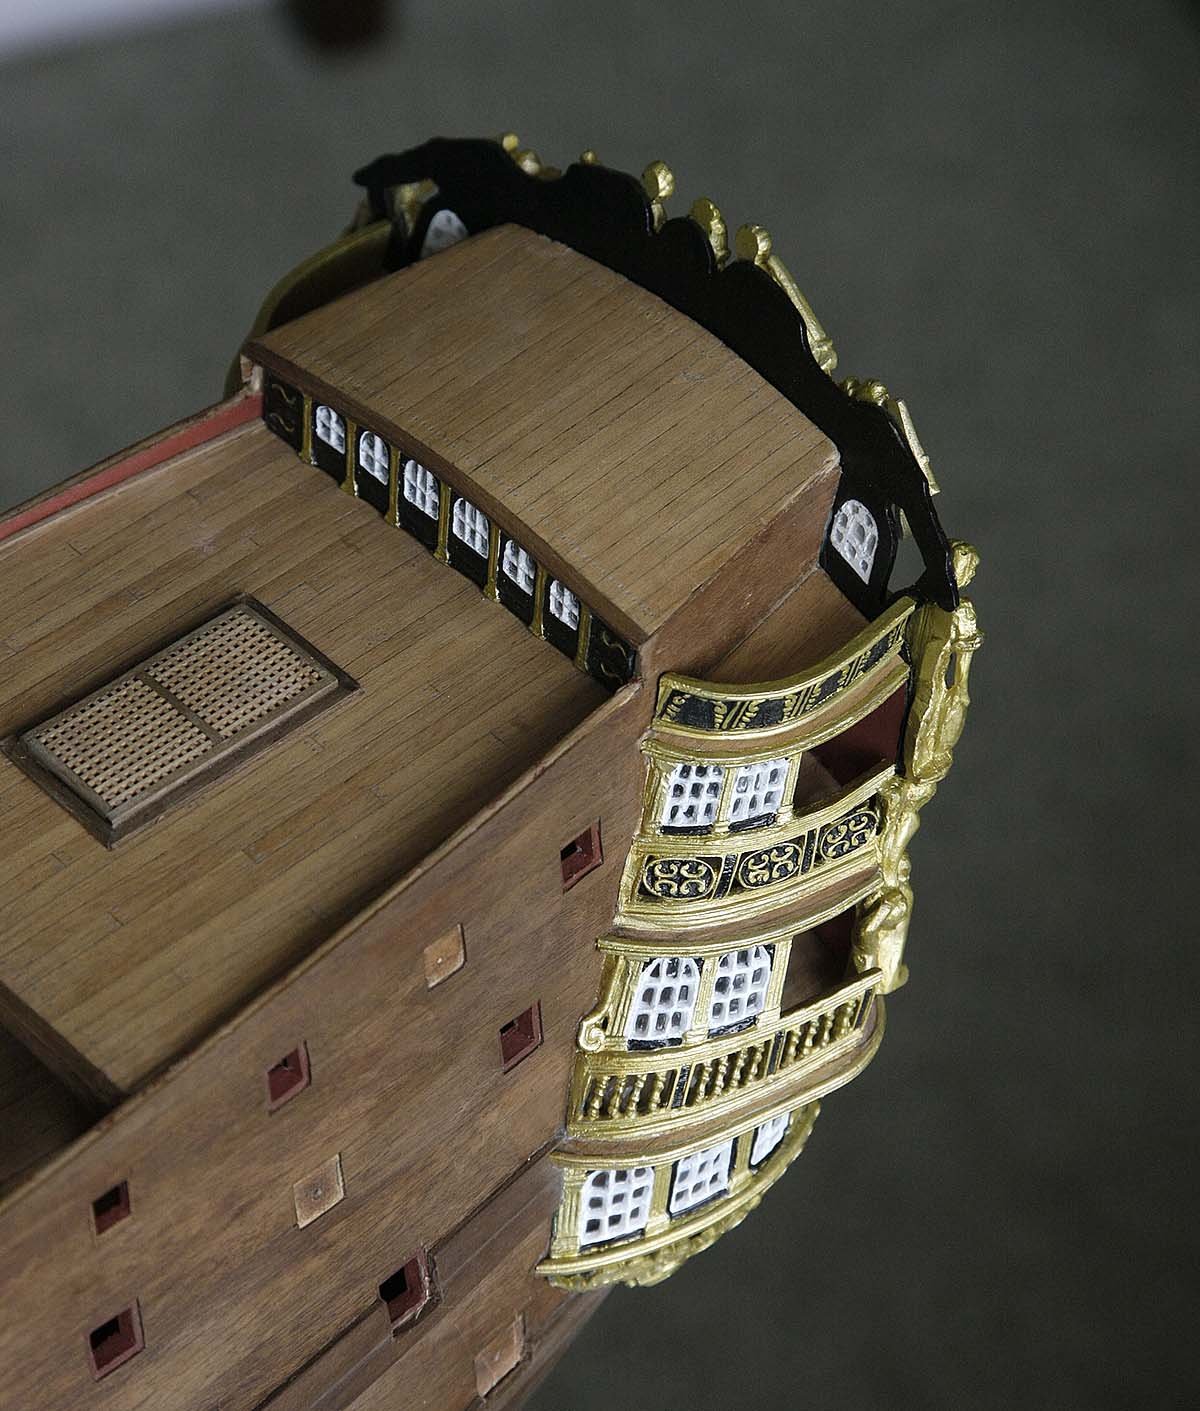
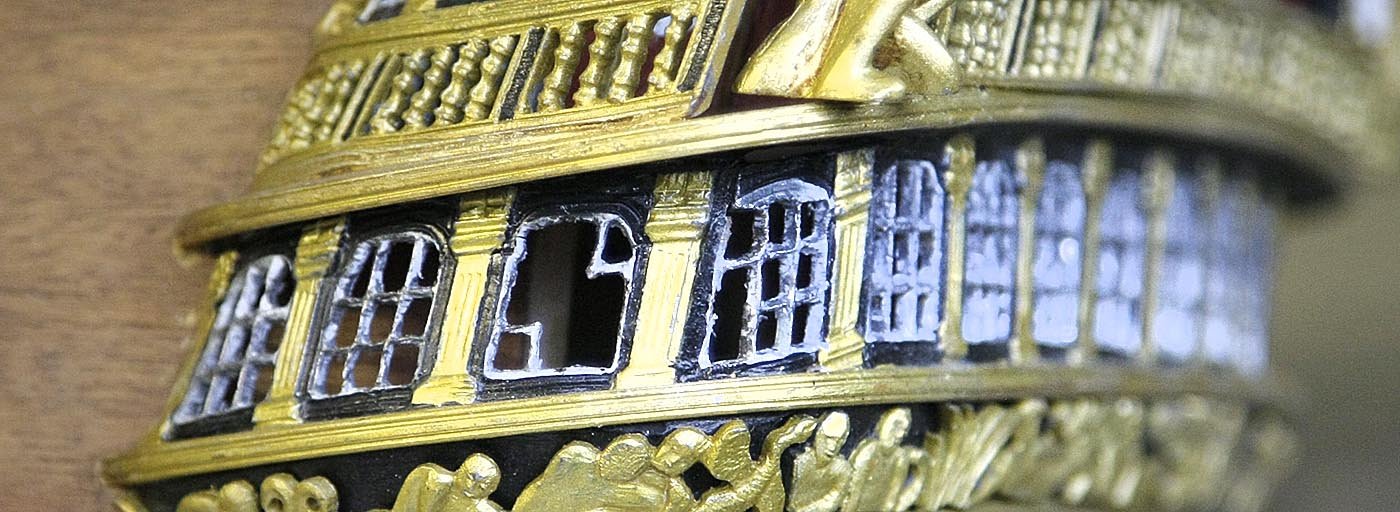
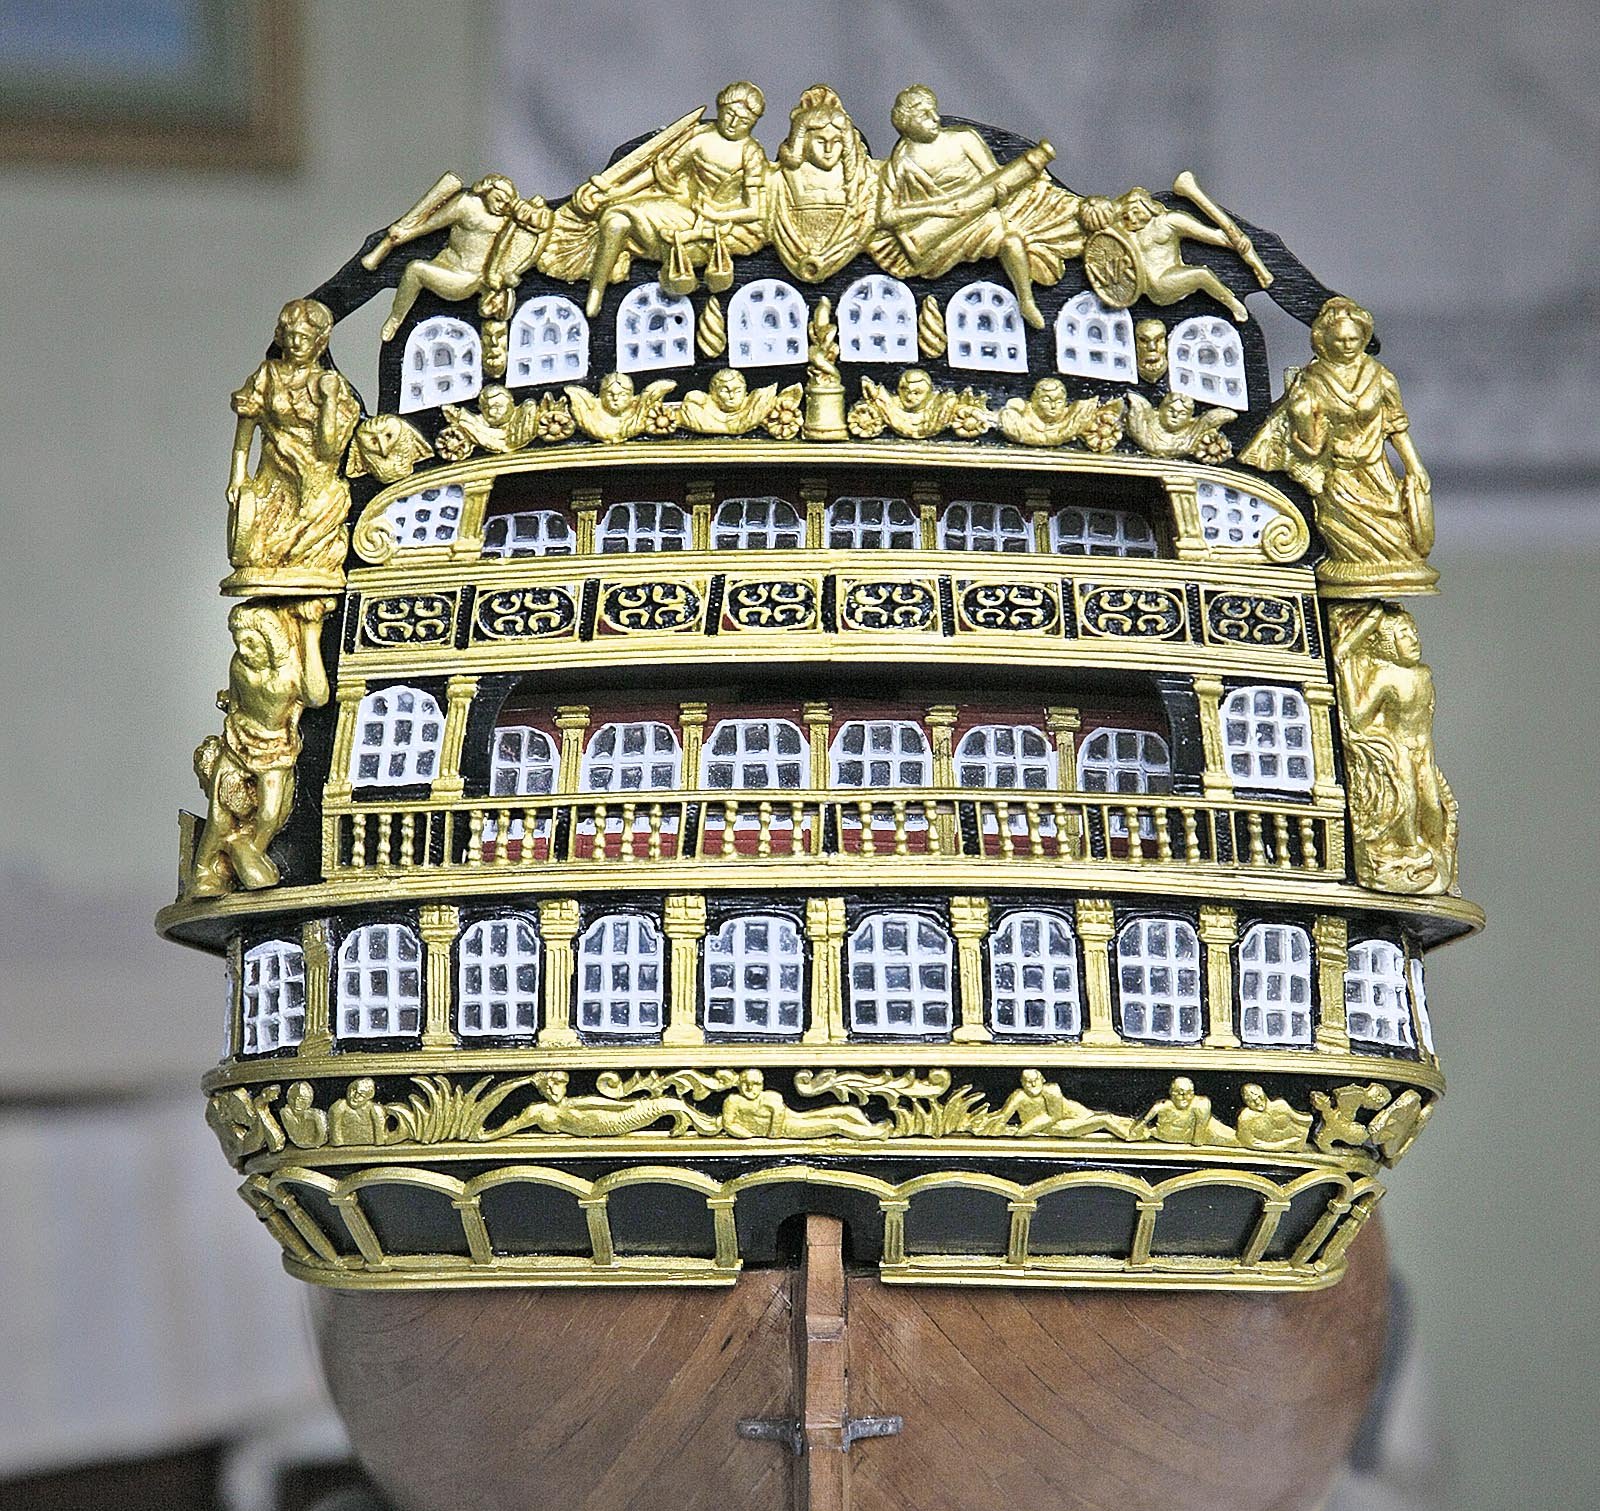
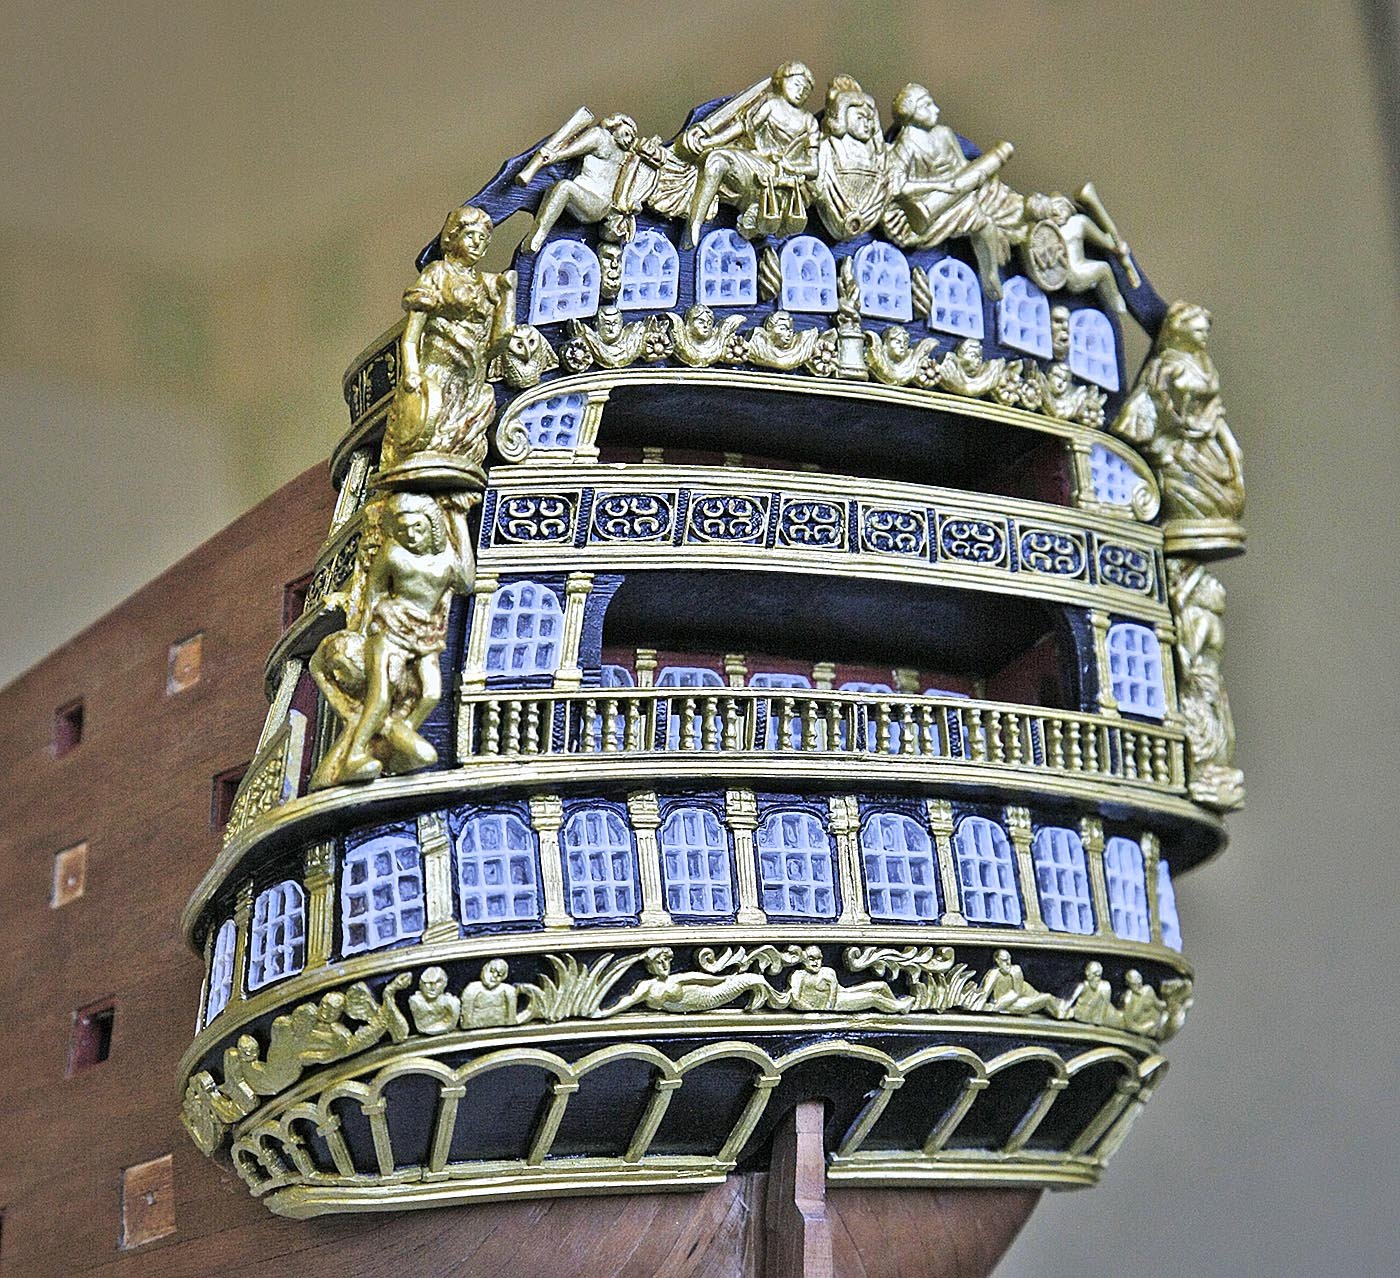
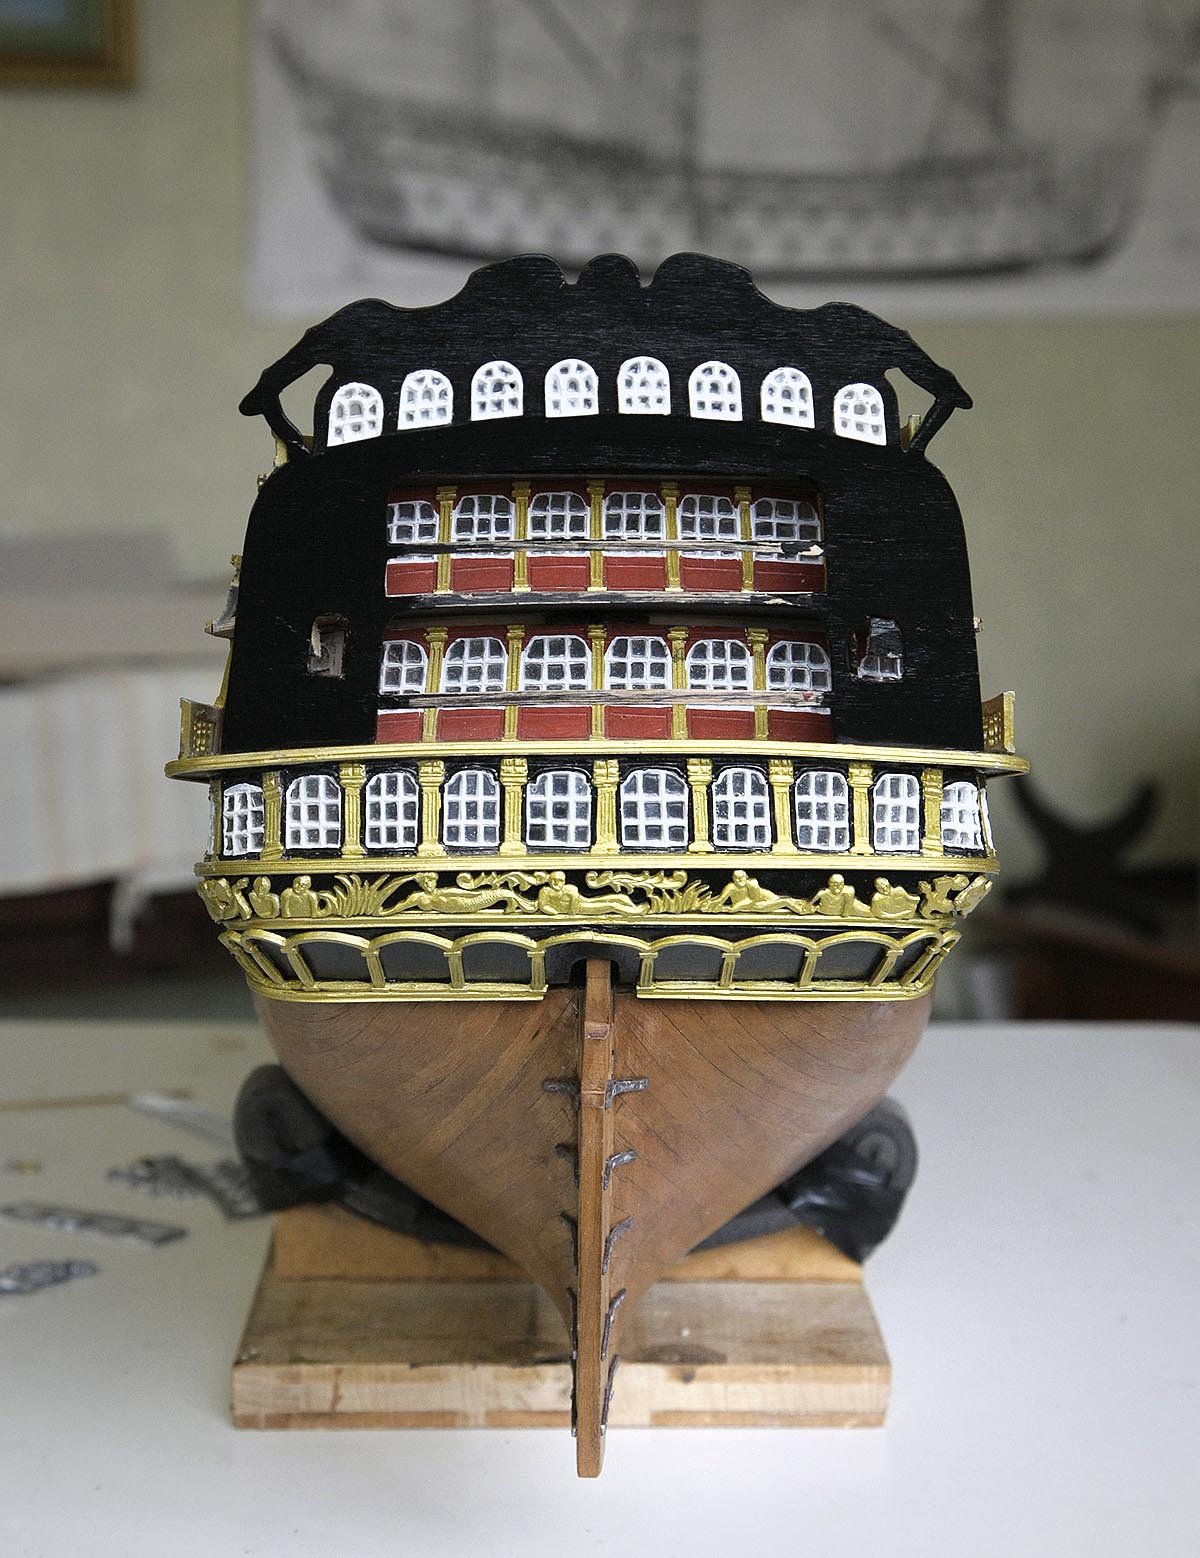
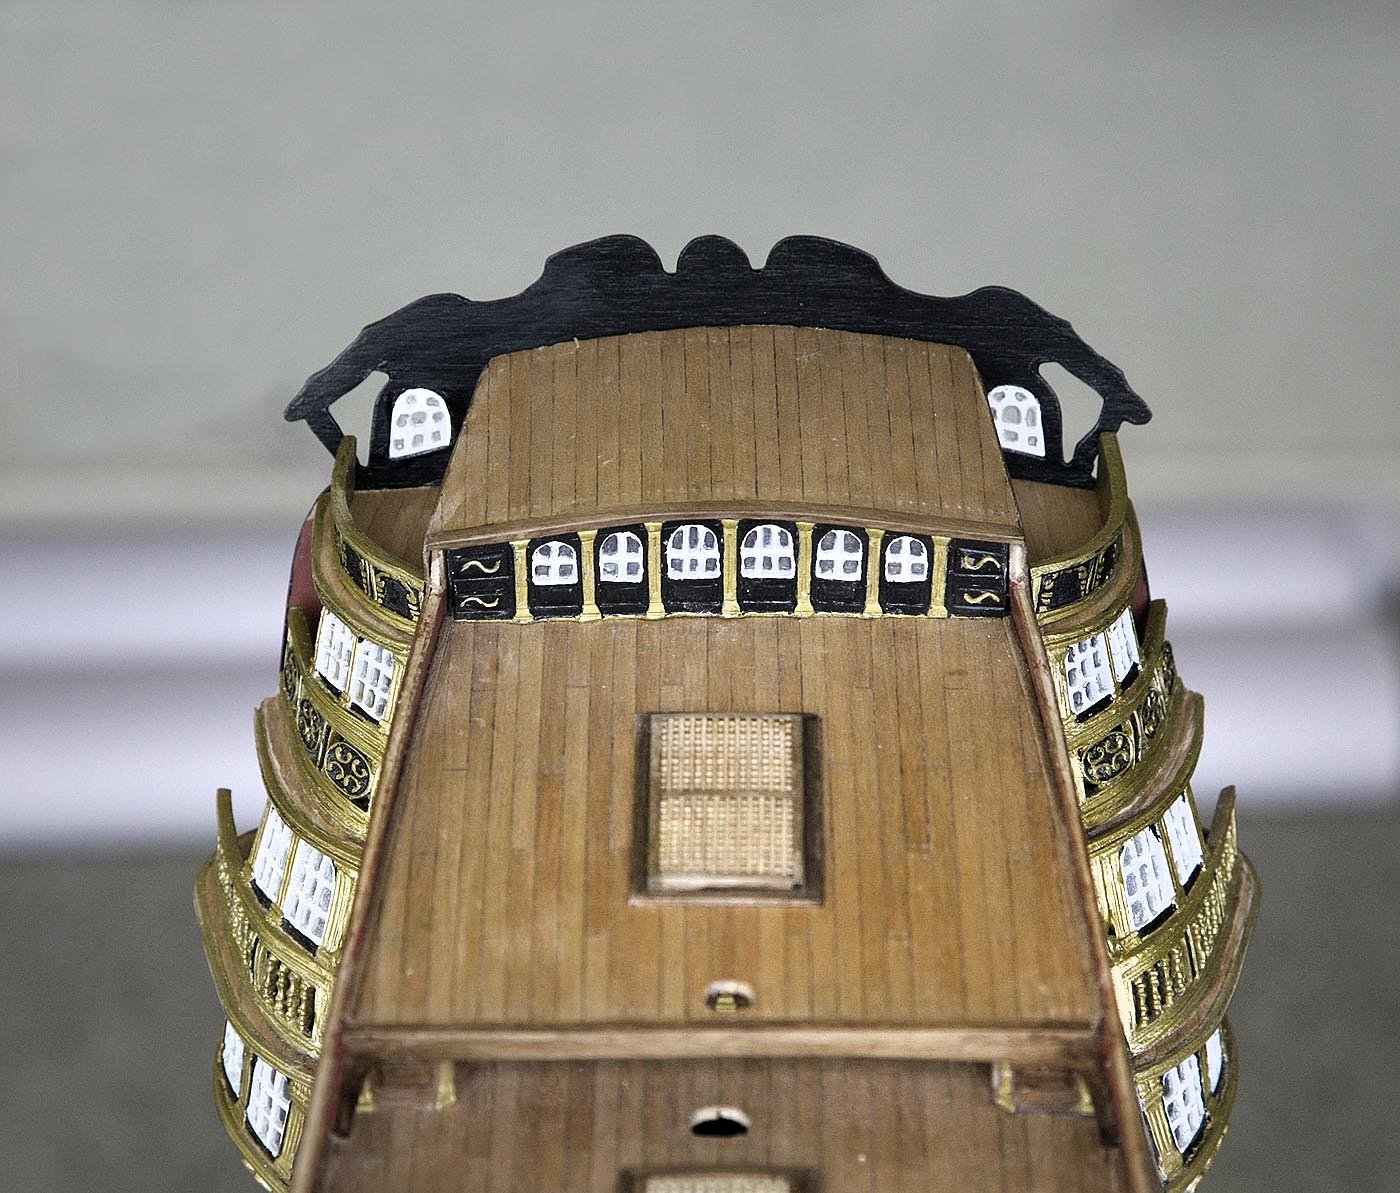
You are reading a post from a modeller with a huge grin on his face, the RW is next to me as I type and I can't stop looking at it, with ornamentation like this it should be in the Sistine Chapel.
As you may have guessed I've now completed the stern decorations, those that have made this model will know how I feel. 2D photographs don't do it justice, it needs to be seen in the flesh to appreciate it fully. Here's some pictures anyway.
And it's now getting very heavy.
Thanks to everyone who has given me help and encouragement in getting this far.
Next I will tackle the wales.
Ken
")


- piratepete007, kier, Dilbert55 and 7 others
-
10
-
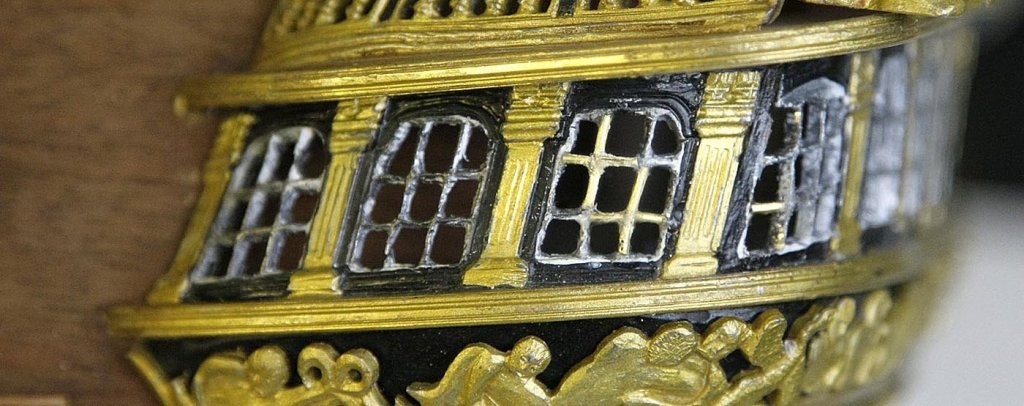
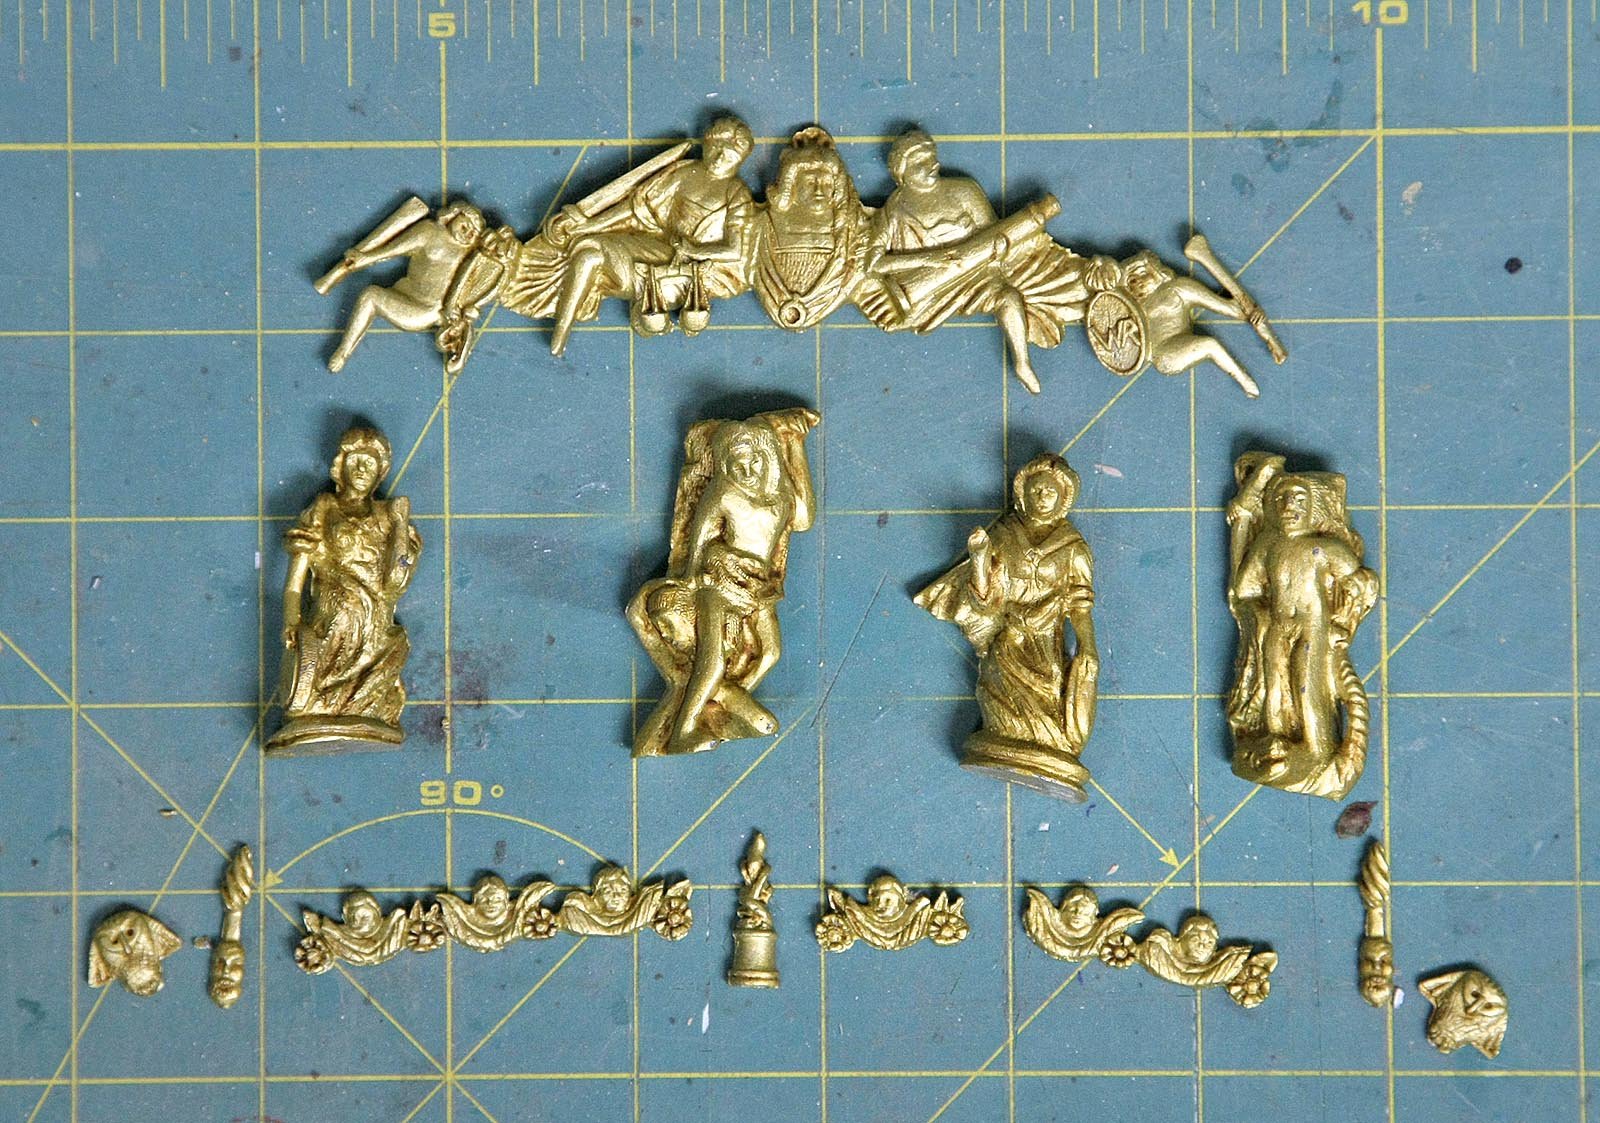
Hi, This was the first time that I'd used this technique so I'm not an expert at it but I did find it very easy to get good results. I read about it somewhere a while ago and when I started the RW. I intended to try it out.
The wash that I used was Vallego Game Color Wash, Sepia shade.
I put a small drop in a bottle top, I used a very fine brush, I wet the brush so that when it picked up the wash it then just ran like water, it was probably a 50/50 mix. I ran this puddle like into the recesses then before it dried I used a second slightly larger brush which was damp to wipe away any excess that I had got on the raised portions.
It's so easy to get the effect that you want as you could darken certain areas with a second coat and areas that you didn't want stained could be lightly painted over.
Each figure only took about a minute to do and I only used about five small droplets of wash to do all the castings shown.
Ken
-
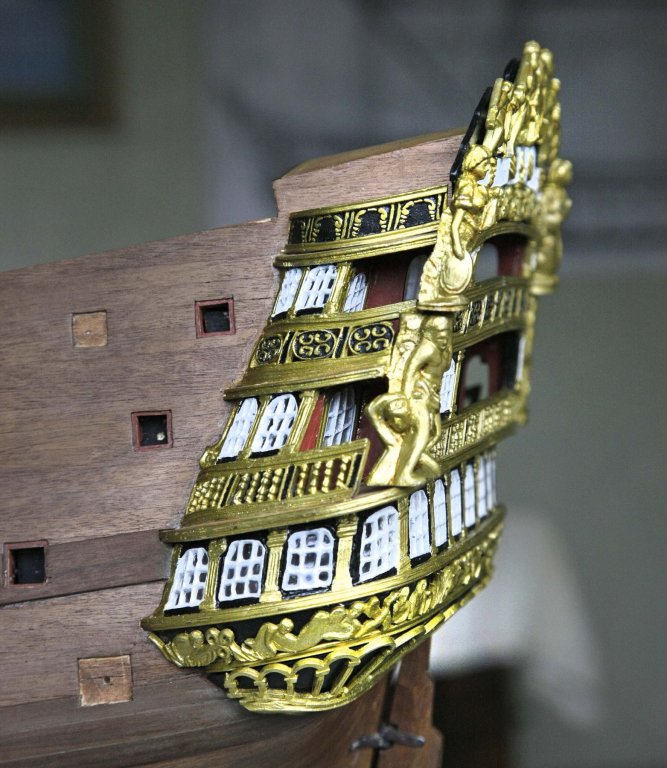
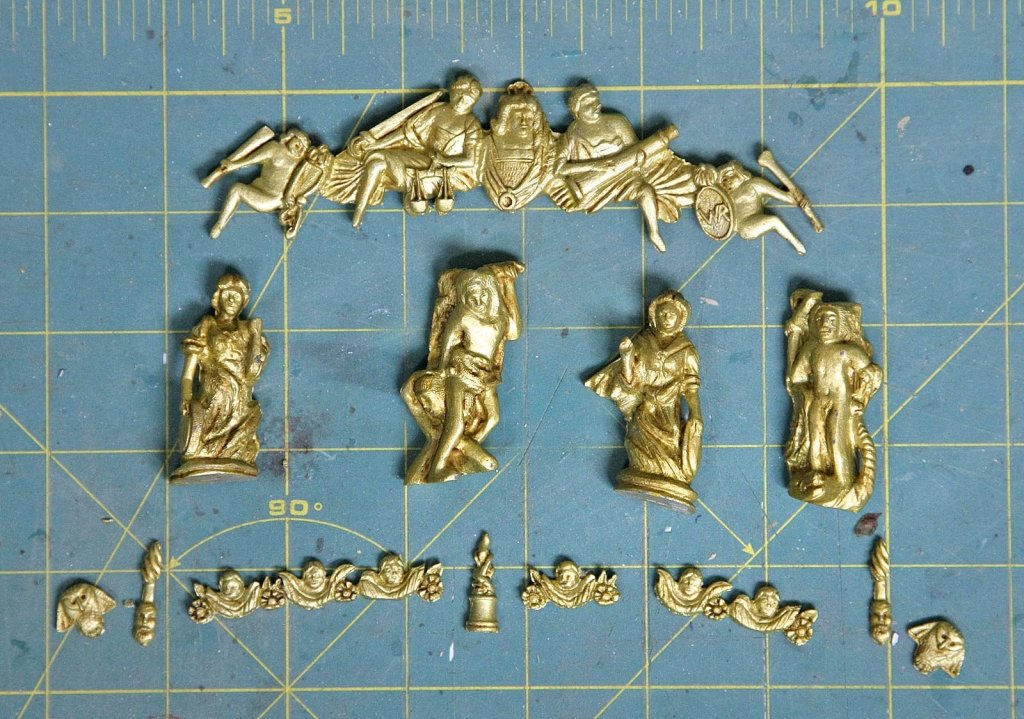
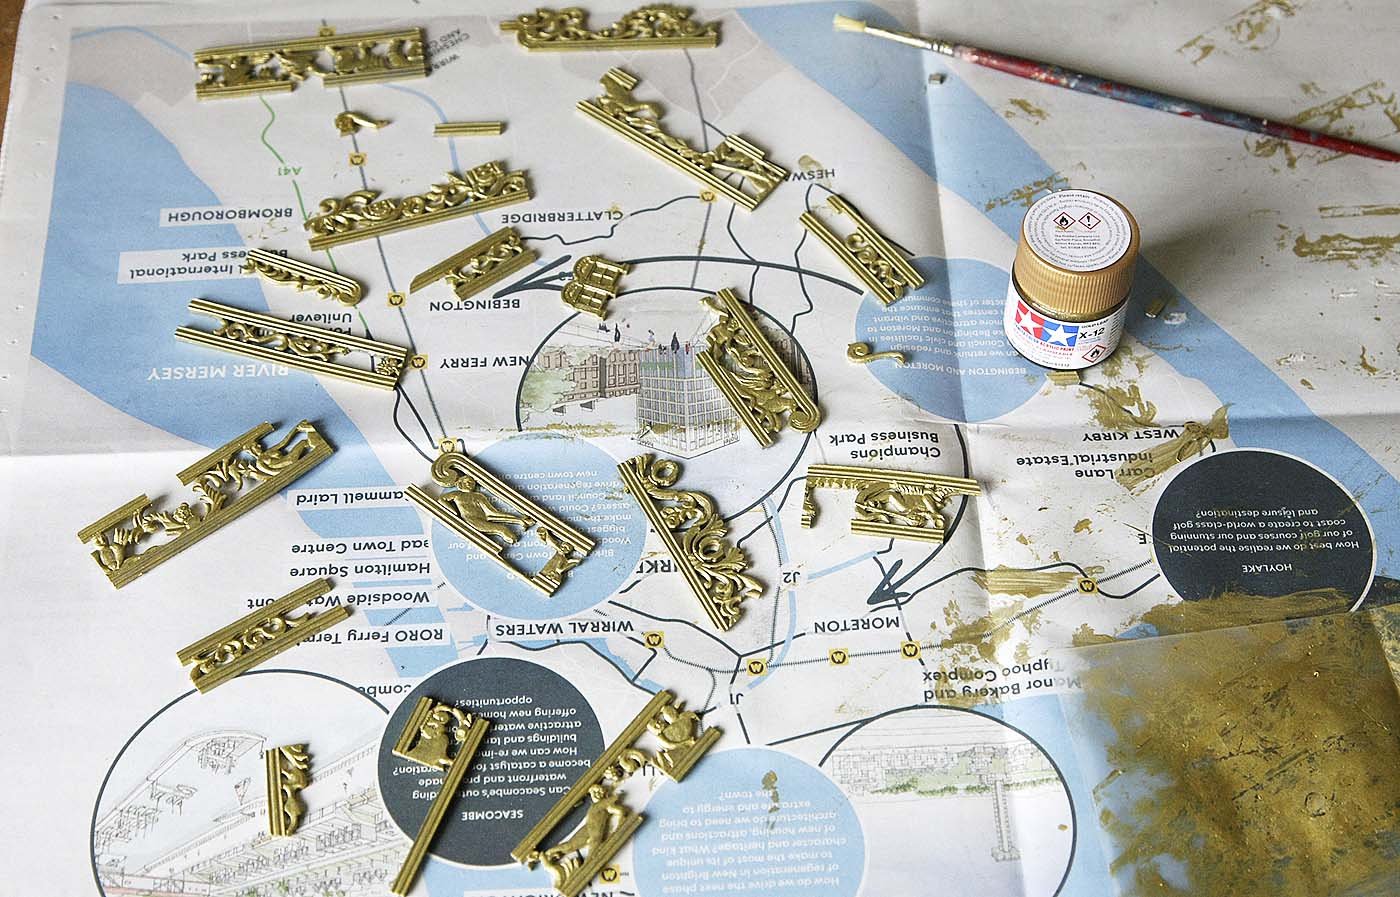
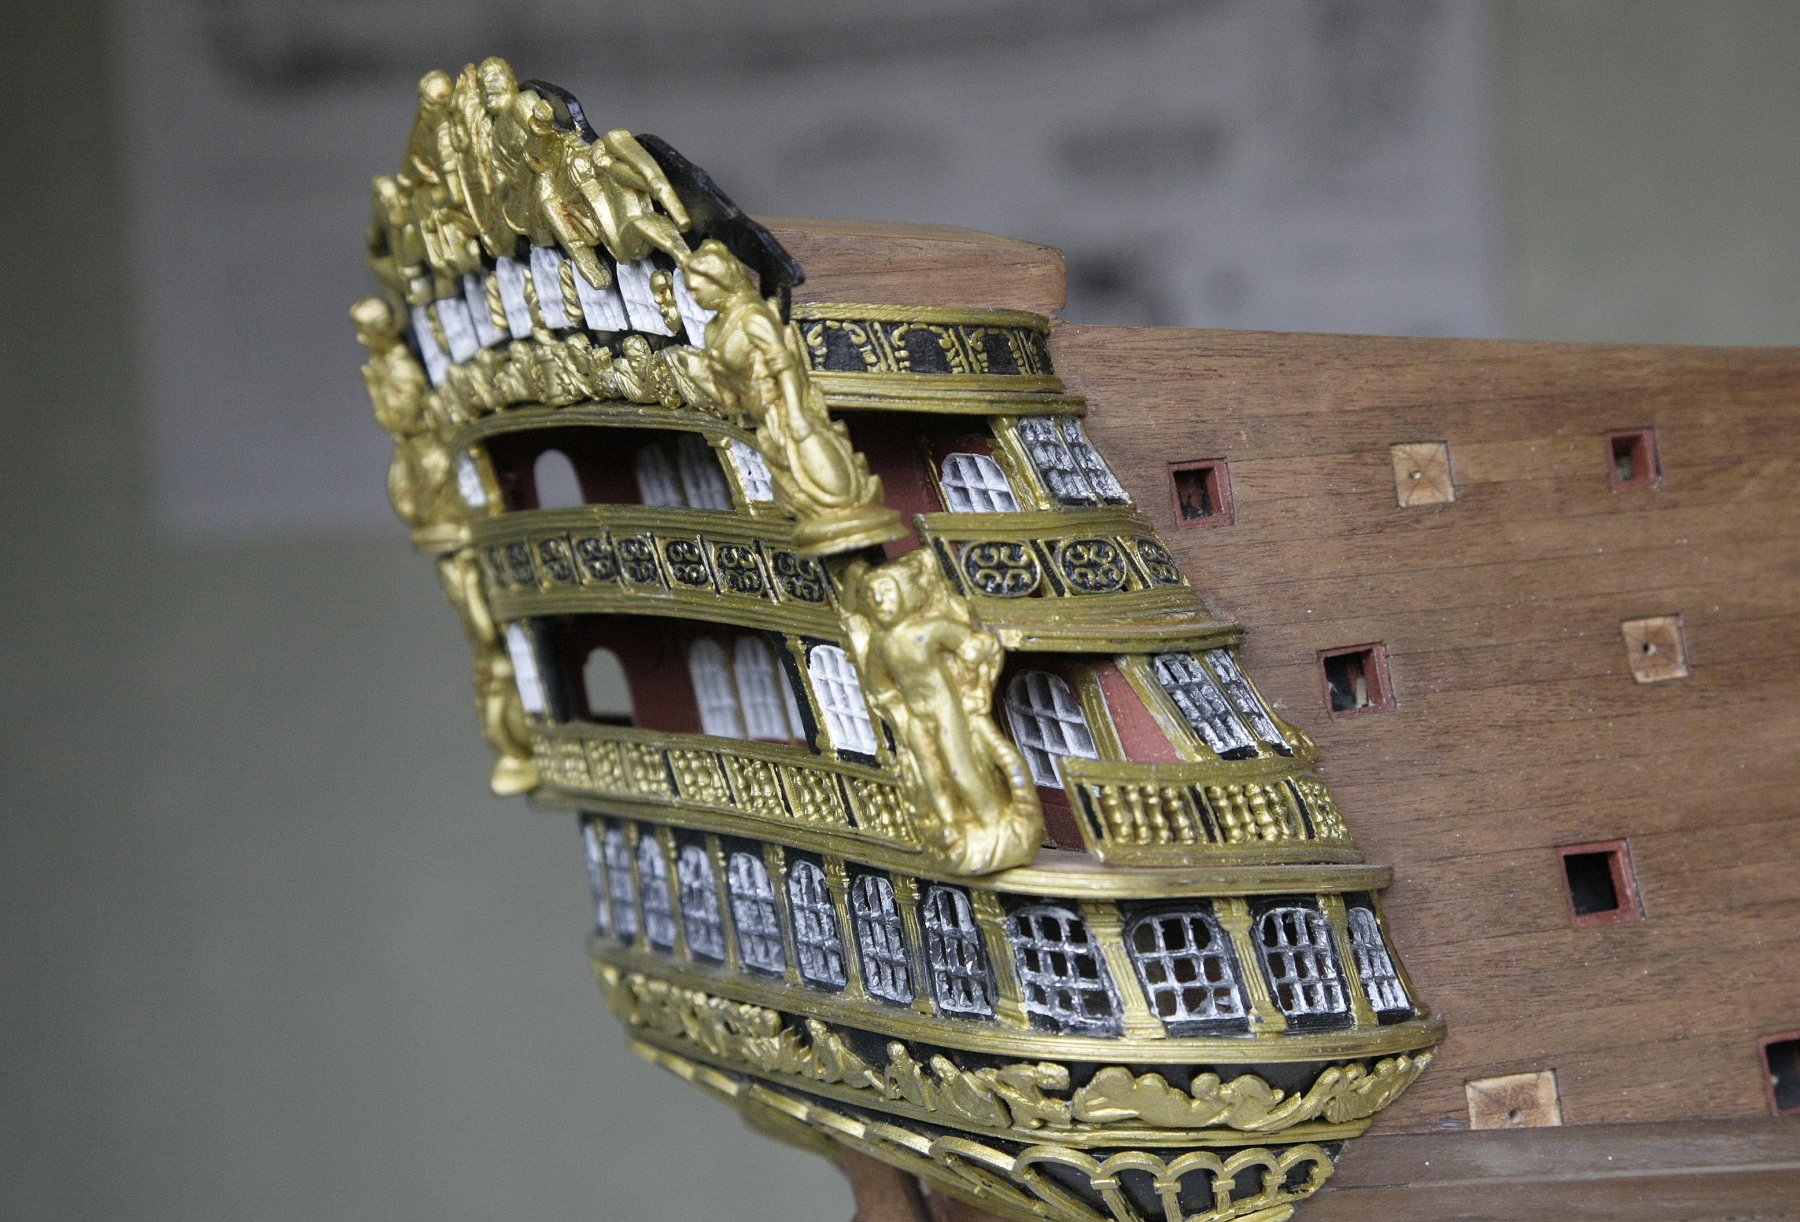
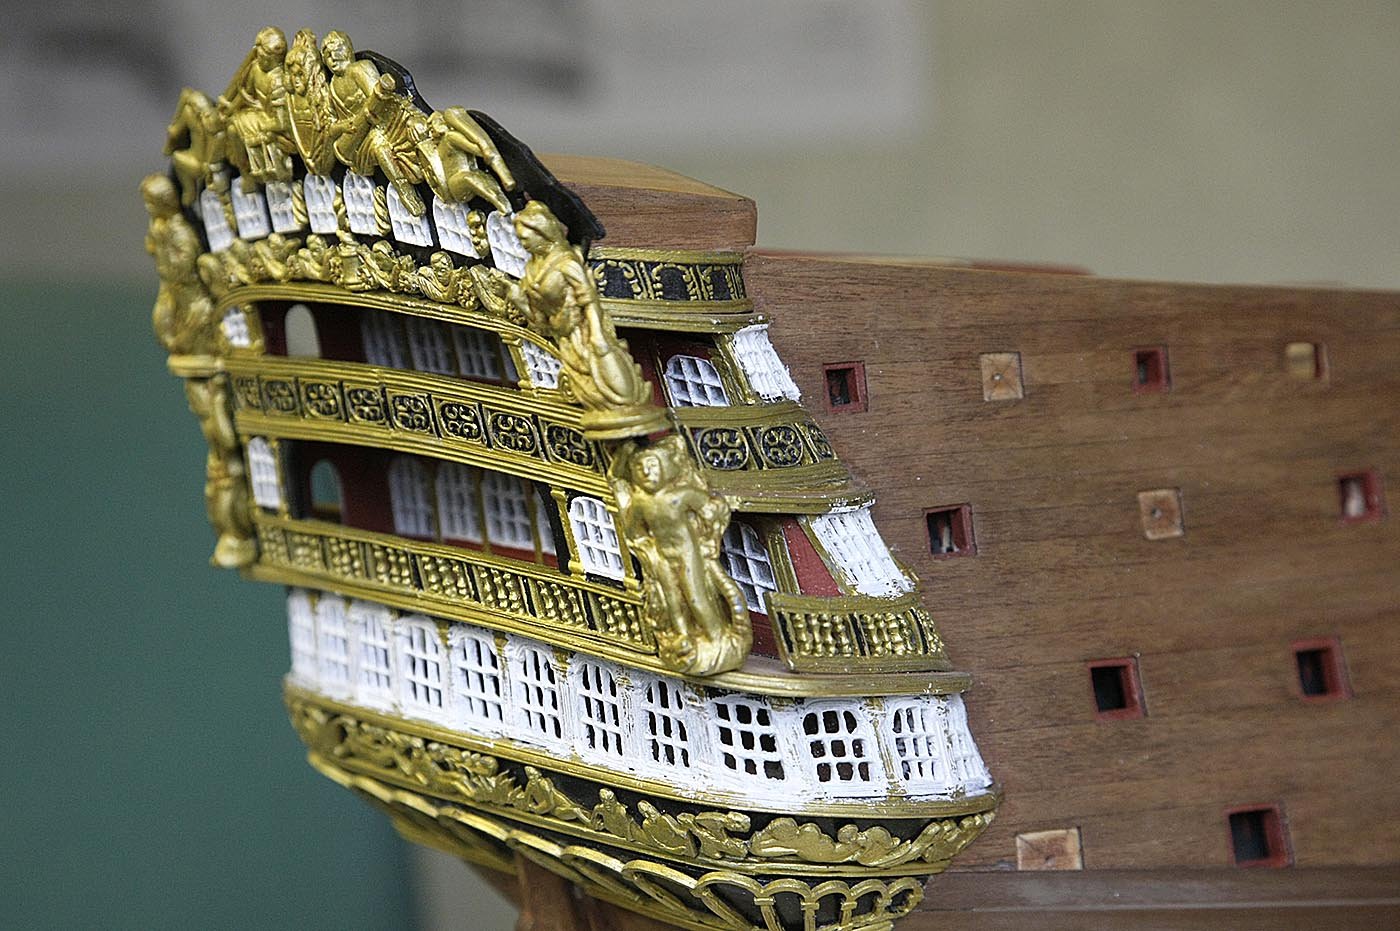
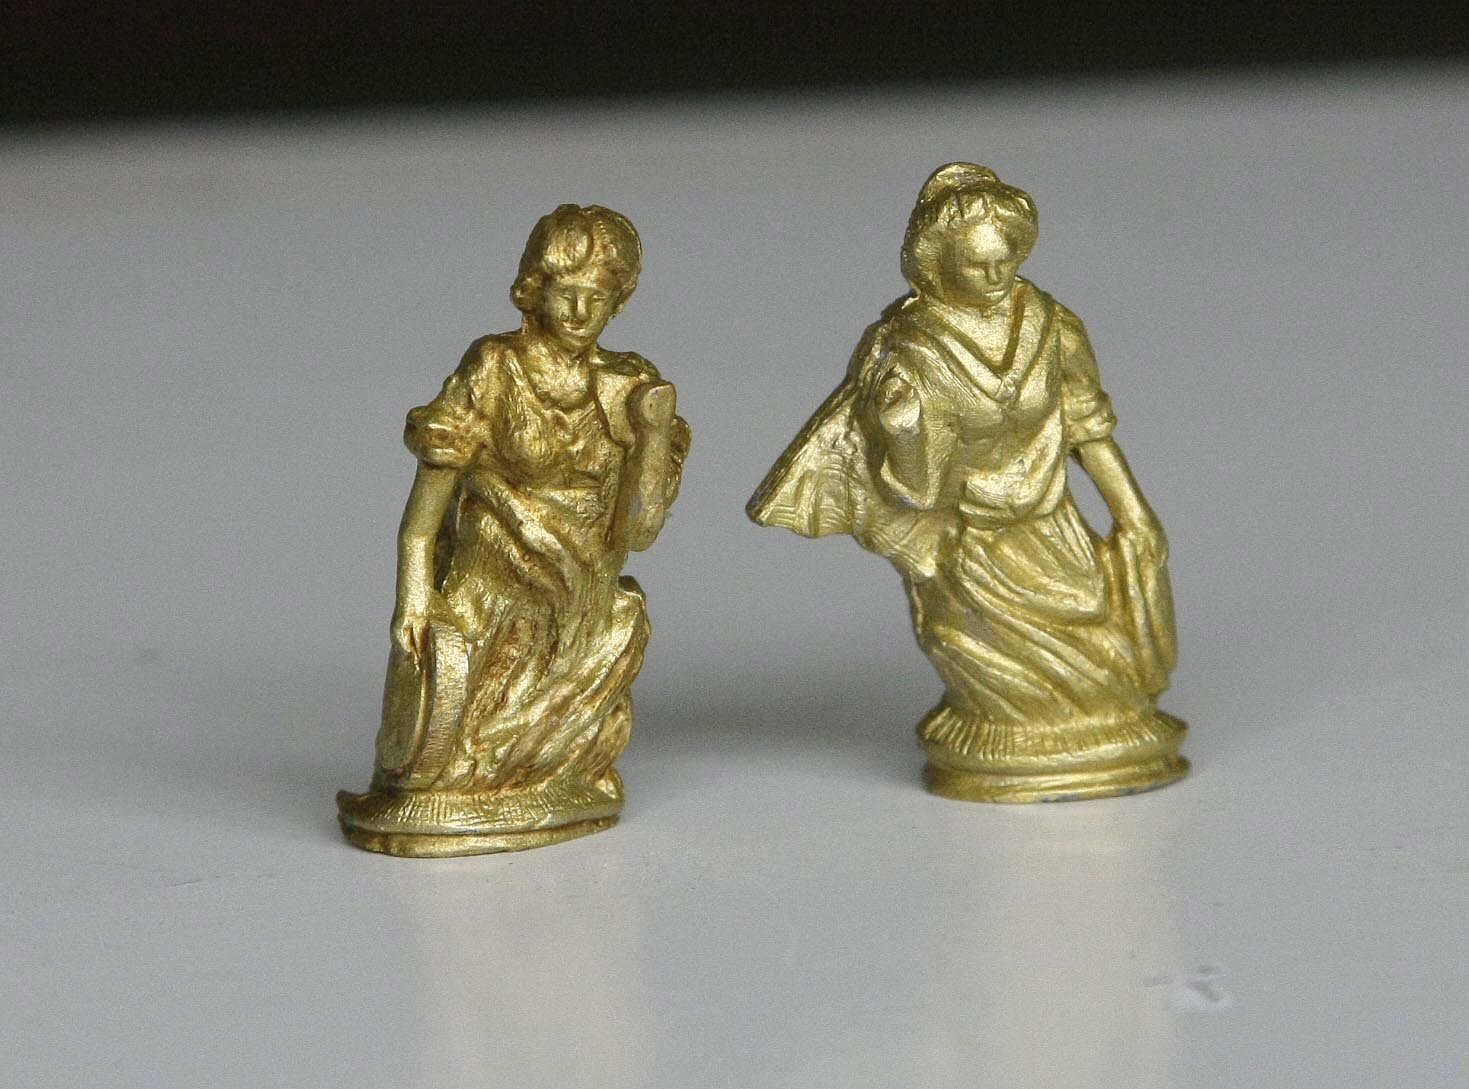
Hello, You lucky guys out there are getting a second post today. I'm having a short pause in the build but I'm so pleased with the the way that the castings are coming out I wanted to show you all.
As you know the castings on this kit are beautiful and I wanted to show them off at there best. I cleaned them up and painted them with Tamiya gold leaf acrylic, when done they looked good but somehow a little flat in their colour so I then tried a wash, a little well diluted sepia painted into the recesses to give it some shadow type look to show their depth. I did one figure first and was very pleased with the result so continued and did all the castings. The first picture shows a comparison, with and without, the second shows the remaining stern castings done.
Ken

-
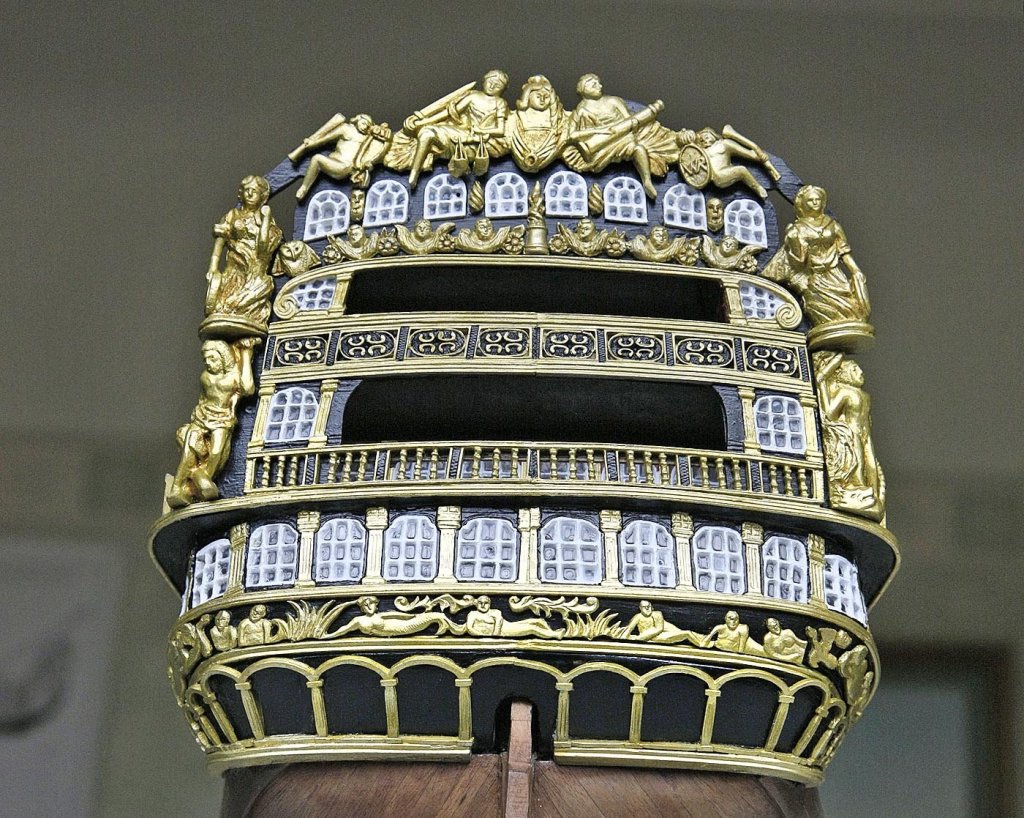
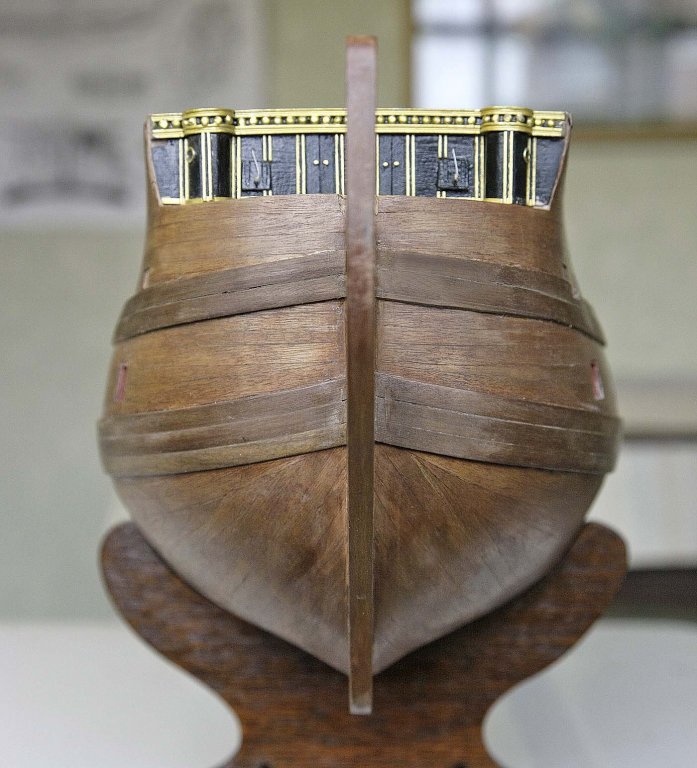
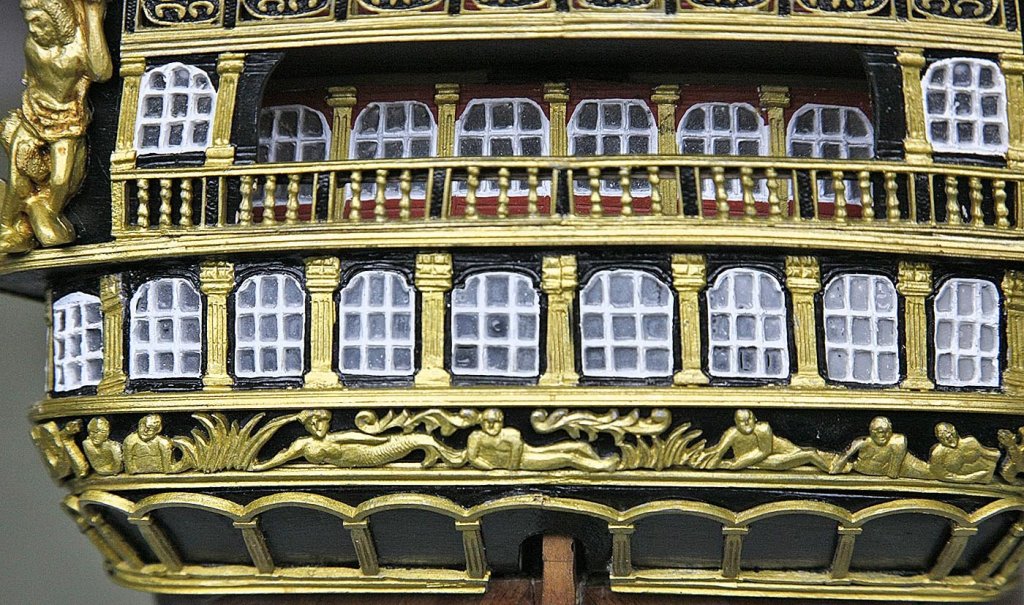
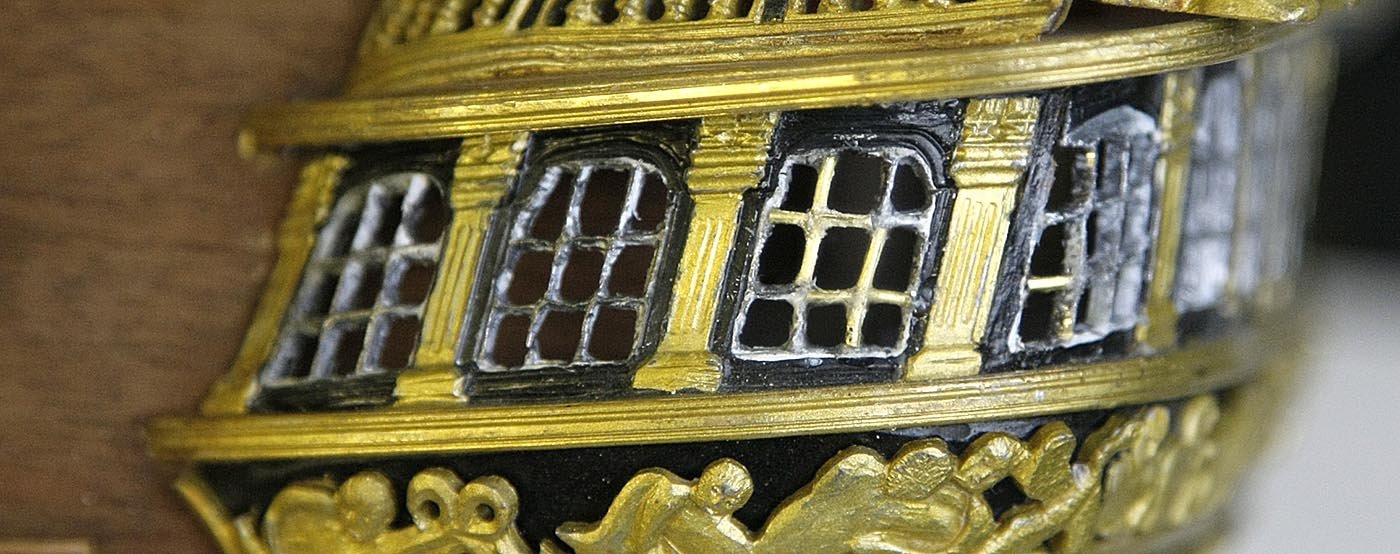
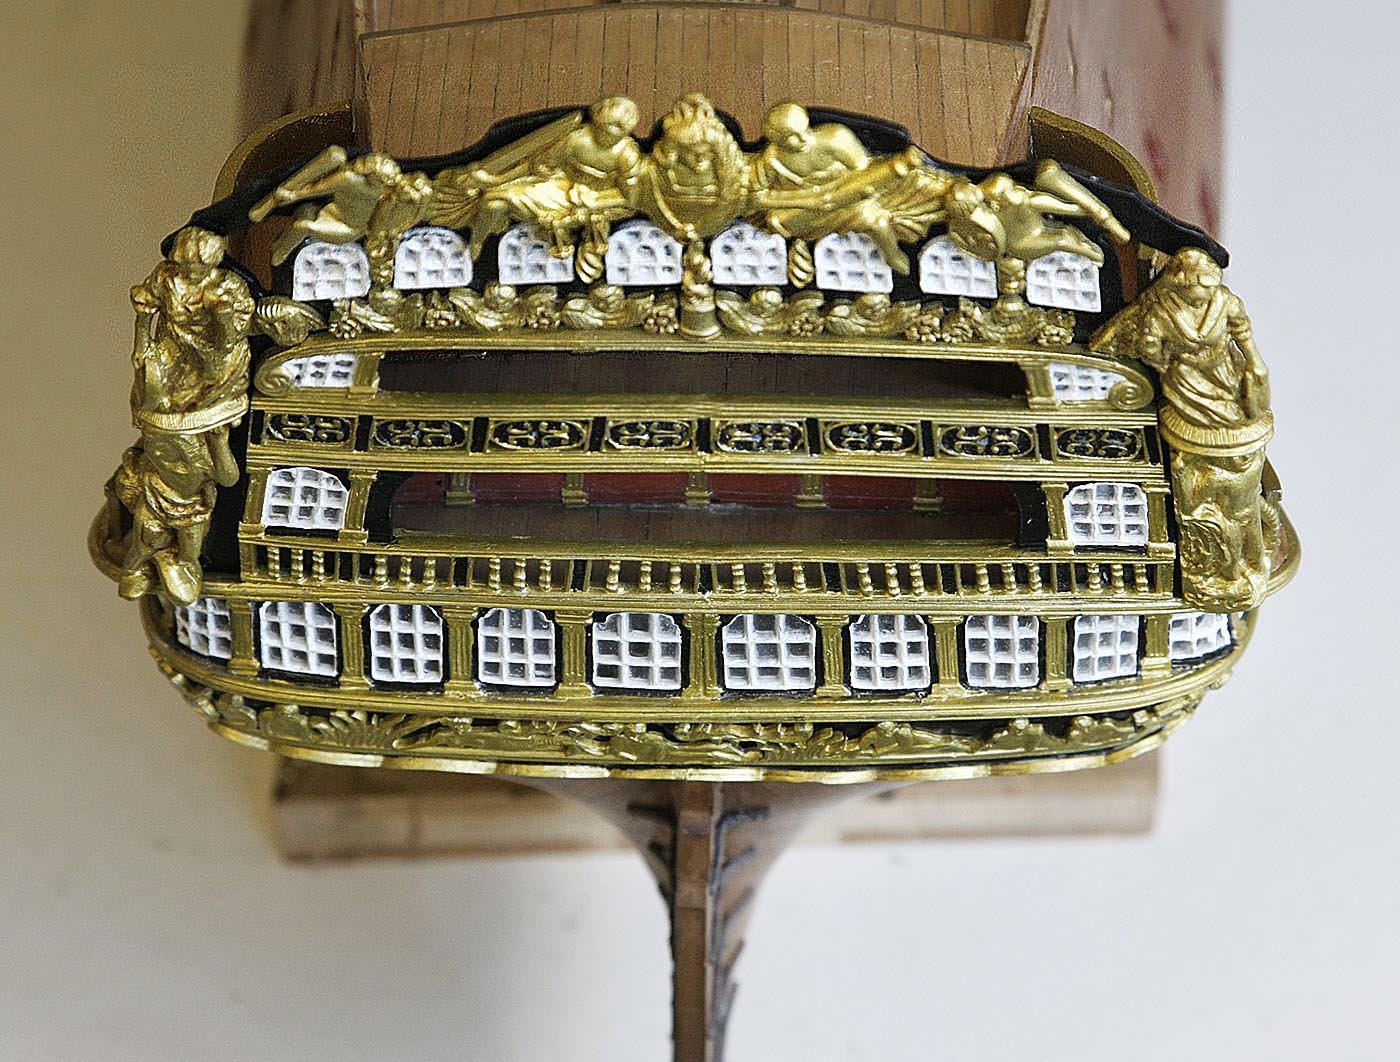
Hello Everyone, Everything is going well with the stern, here's the latest.
I assembled the first level of balustrade from the cast parts supplied, they went together the same as the earlier ones that I'd made, easy but fiddly. I painted and fitted them into place, the two halves when in place fitted well. I had already glazed the side windows, these were now painted and fitted, they to were a good fit. I'd earlier decided to keep the colour scheme very simple, for the outer just black and gold, even though it probably isn't correct I prefer the aesthetics of simple colour contrasts and for me it works.
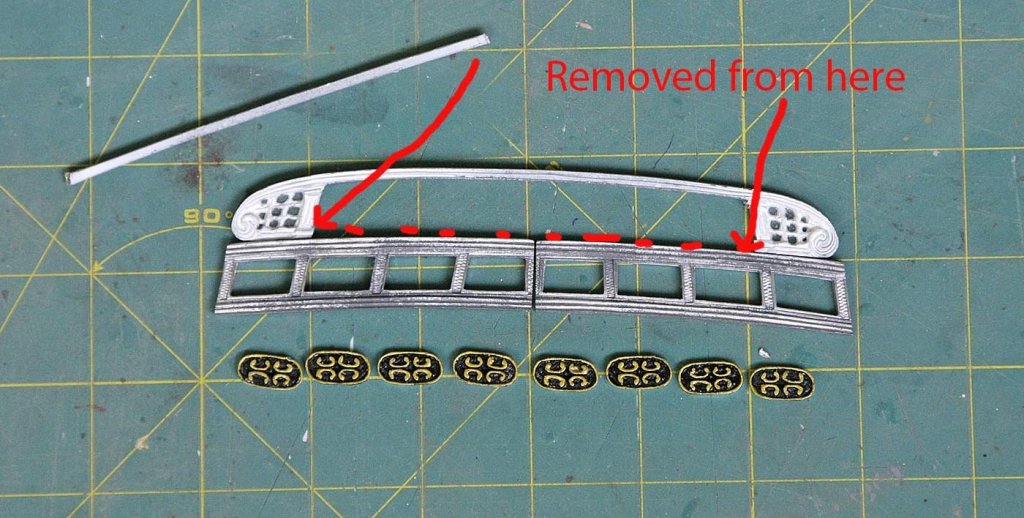
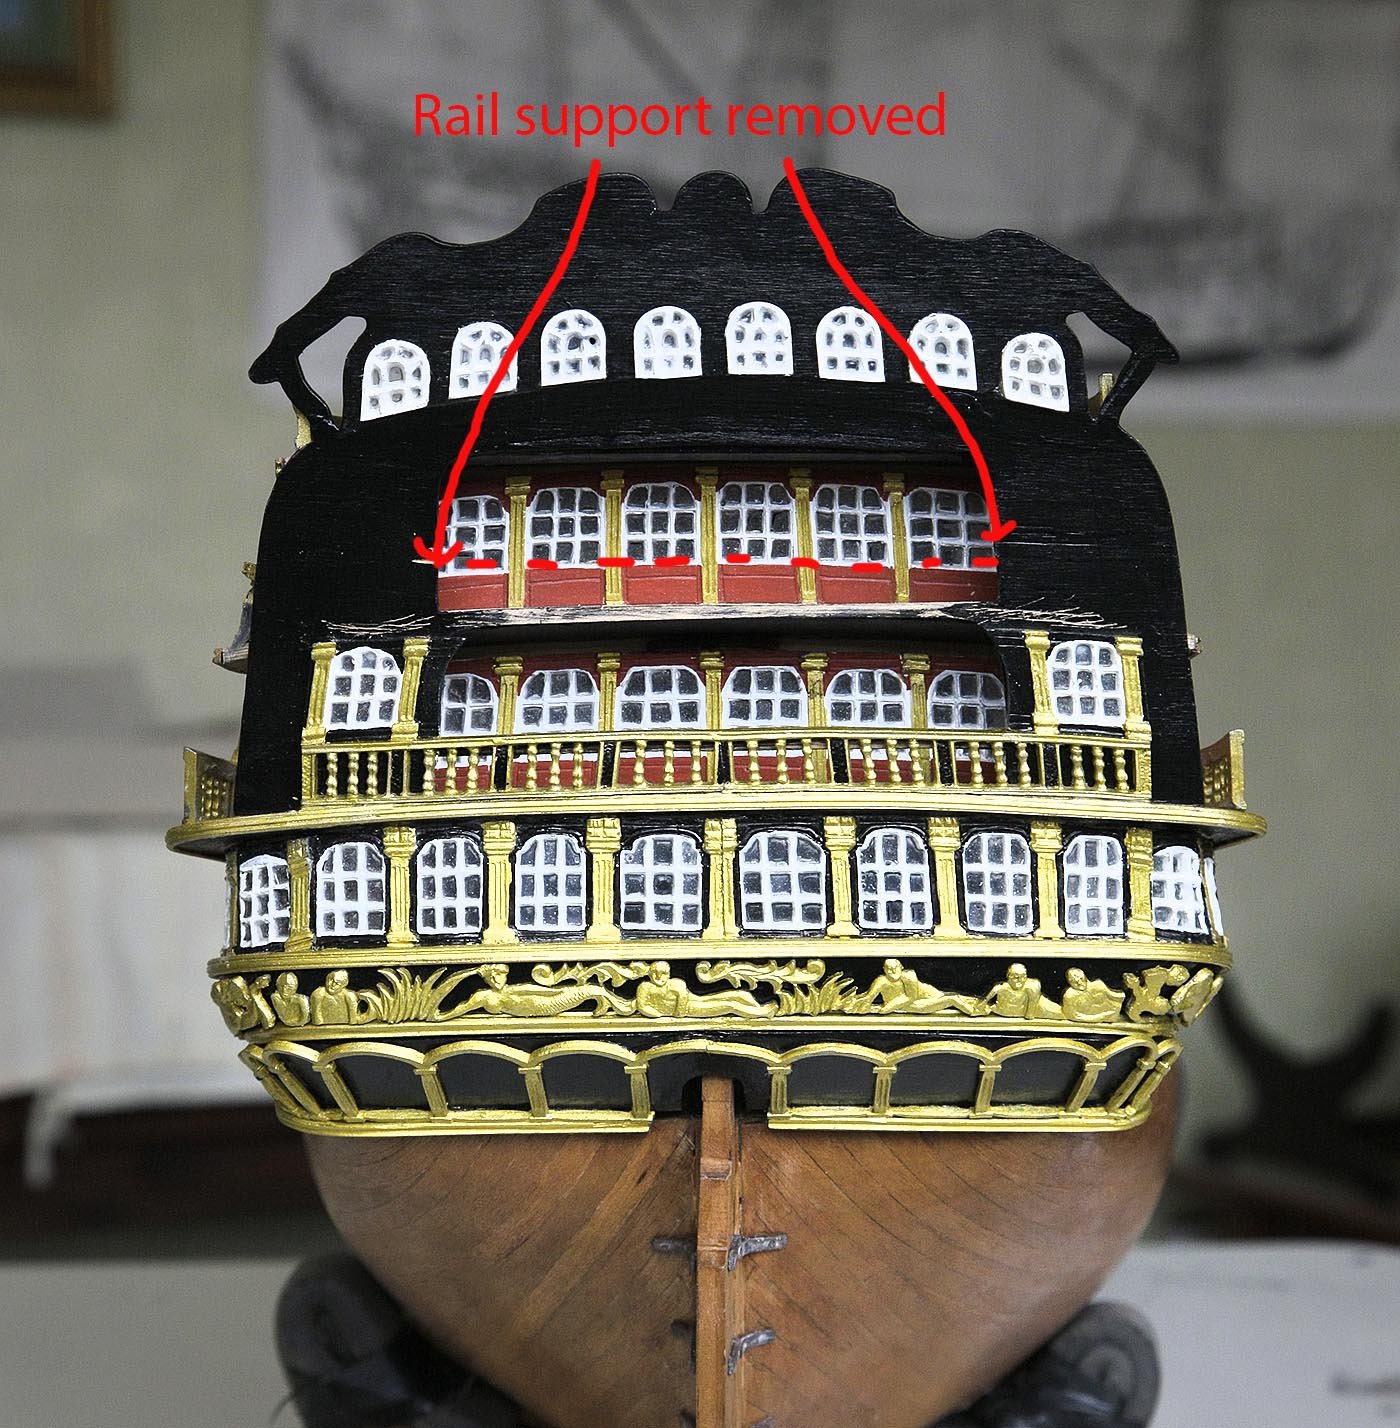
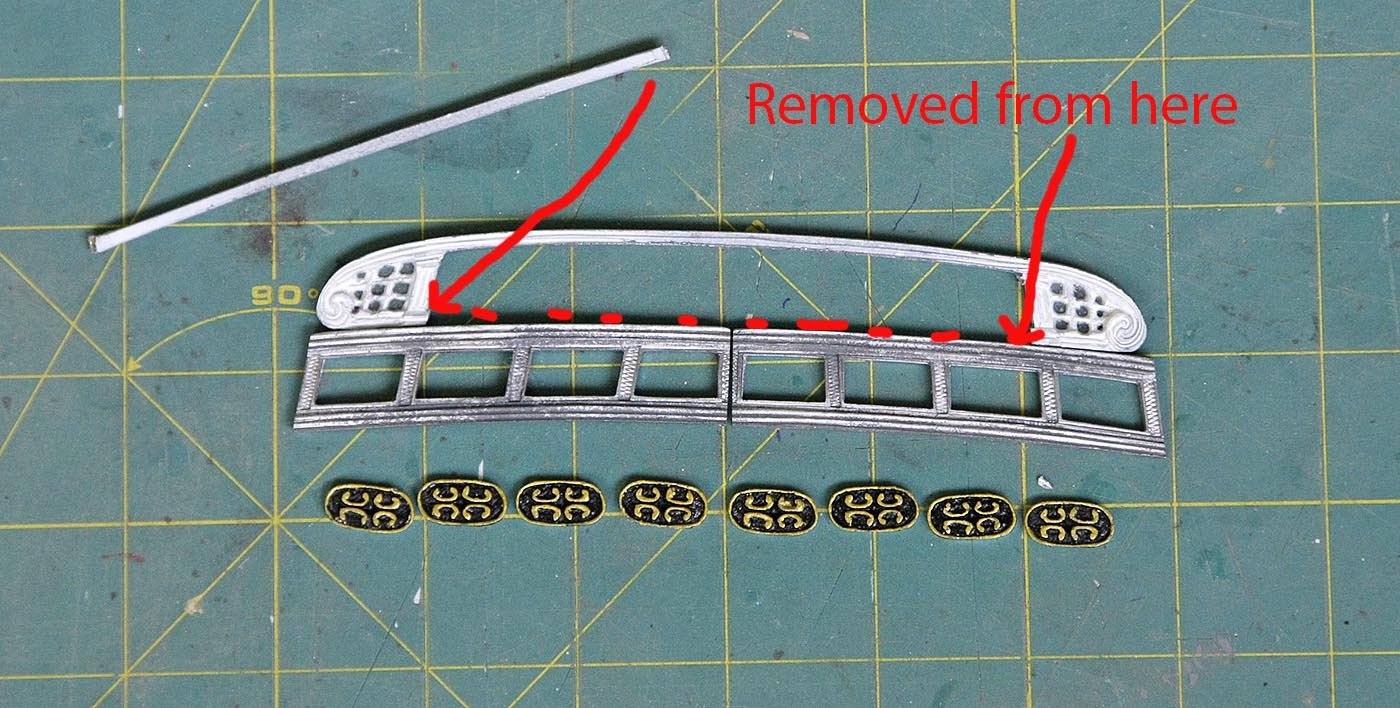
I assembled the next level of balustrade, I painted the small decorative inserts first before putting them in then painted the rest. There were two cross members in the ply for support but when I offered the piece up the top one made the handrail look too thick and was not really needed as with the lower support and the side area there was plenty of contact for strength.
The next piece was a decorative strip with two small side windows, this casting had a bar at both the top and bottom. When I offered it up the lower bar which rested on the handrail below looked unusual, checking it against the plan I saw that this bottom part of the casting was not wanted, I think that it was there for the casting process and left for support when handling I cut this bar away it then fitted in well and looked ok as per plan. Once I was sure I painted and fitted this piece.
Next will be the cherry on the cake, lots of decorative figurines, big heavy and quite impressive.
Ken.

- Sjors, catopower, piratepete007 and 8 others
-
11
-
2 hours ago, Steve 12345 said:
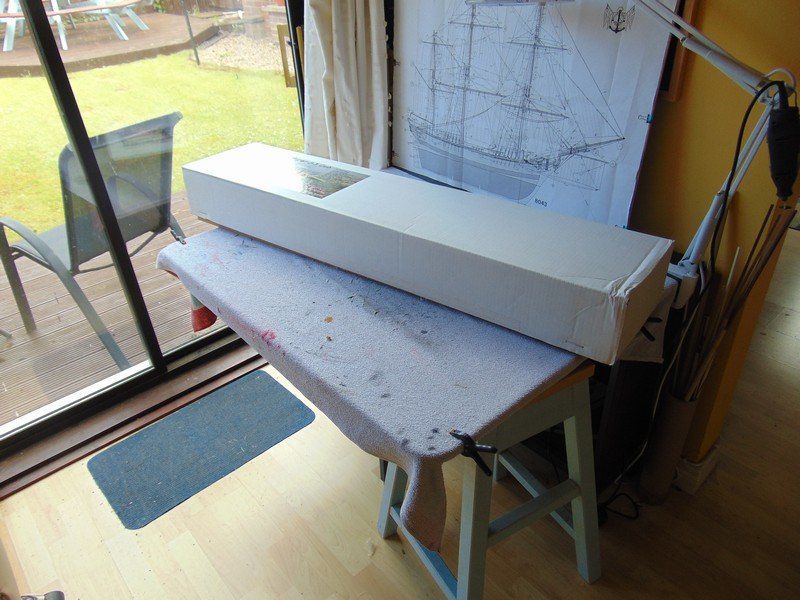
Hello all some of you may be wondering why I haven't posted in a few days that's because I have been spending most of my free time researching ,sourcing and planning my next build ive been contemplating my next build for some time now and have finally pulled the trigger on it the box arrived today
CUATION SOME VIEWERS MAY FIND THE NEXT IMAGE OFFENSIVE SCROLL DOWN AT OWN DISCRETION
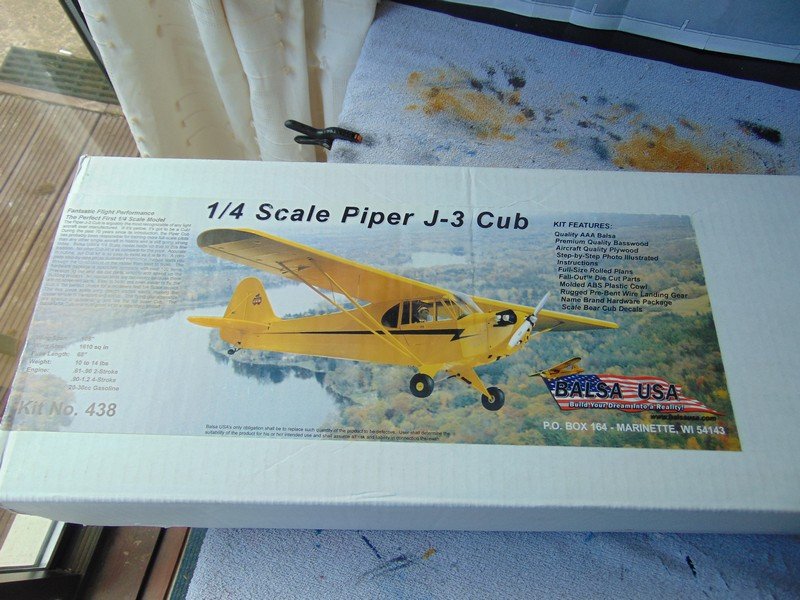
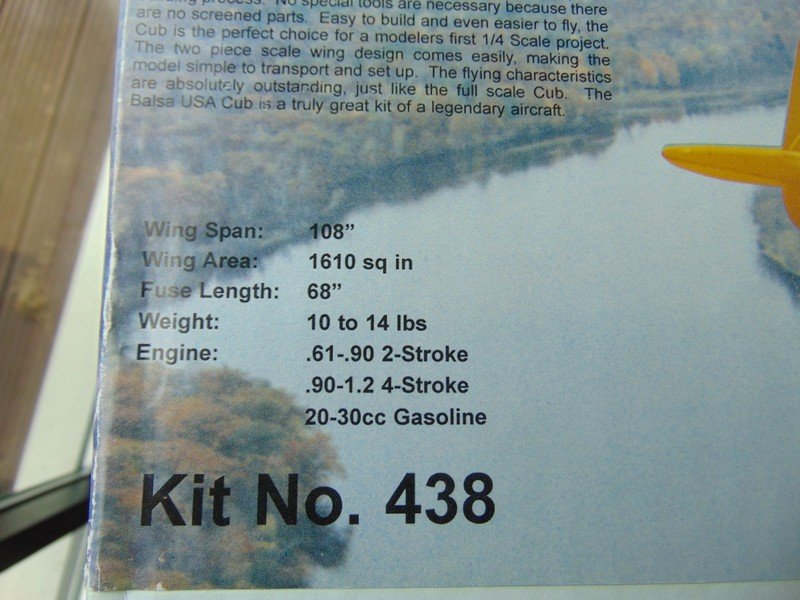
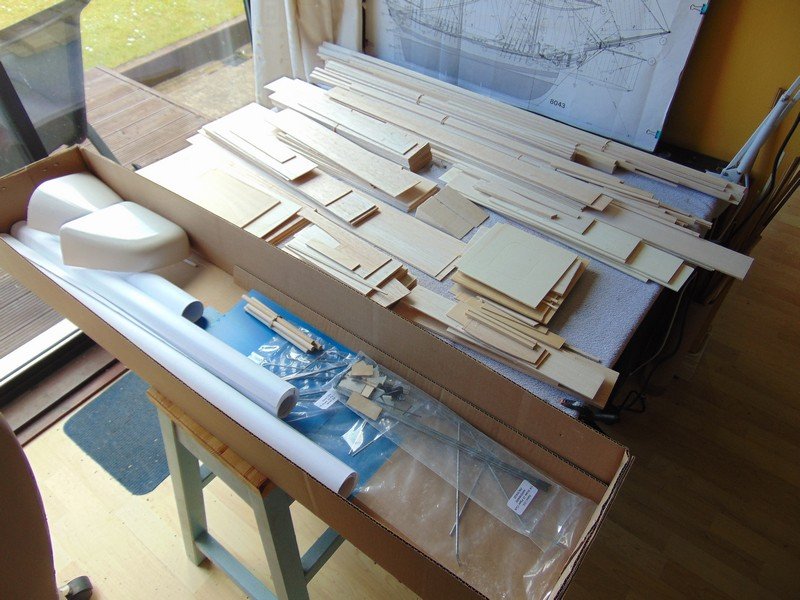
She sure is a large kit and I have zero experience in the rc or aircraft world so wish me luck
I will ofcourse not be starting this until completion of the bounty its just the first step towards my next build there is much research to do and lots of other items required to build
heres a vid of the same kit completed
I will continue on with the bounty and try to keep further posts ship related

Hi Steve, Building them is the easy part, learning to fly and keeping them in one piece until you do is the challenge. If you haven't thought about it yet I strongly suggest that you join a club, they will teach and guide you, you'll get much more from the hobby as without help early on it will not only get frustrating but become expensive.
Best of luck, Ken
- Charter33, Steve 12345, EJ_L and 2 others
-
5
-
Hello Everyone,
Again thanks to you all for your likes and kind comments.
Yes Scott those castings are quite heavy, they feel as if there's a large lead content. I checked into your Freisland log and agree with you that it's a very attractive ship, it's coming along nicely and at what a speed.
My latest working was fitting the top level of windows into the transom, I had already painted and glazed them and wanted them fitted before I attached the transom. I had visions of me pushing them in too far and loosing them forever if I had put them in later. I glue and screwed the transom into place, it's very secure and isn't going to fall off ever. I finished painting the transom using a none shiny black. I am now making up the balustrades, again from the kit parts. It's really coming together nicely now, this is like the icing on the cake to me and the trials of the side galleries was worth the effort.
Ken


- BillLib, marktiedens, Sjors and 5 others
-
8


Royal William by ken3335 - FINISHED - Euromodel - Scale 1:72
in - Kit build logs for subjects built from 1751 - 1800
Posted
Hello Everyone, Another small update. Today I nailed the wales to simulate bolts. I used Amati 7mm dome head nails which I first blackened. I think that it adds a bit more character to the hull sides, not that it needs it.
I followed Mark's example and got the bronze mast bases that he used, as Mark said he couldn't make them any better. They were from the Amati fittings range and all three together only cost just under £1 from Cornwall Model Boats.
Ken