


Drazen
-
Posts
389 -
Joined
-
Last visited
Content Type
Profiles
Forums
Gallery
Events
Posts posted by Drazen
-
-
No, no! Not CNC here. Please, go to the date March 6th 2013. You will find the whole process of making gunports.
Drazen
-
... and the gunport lids have been made in the same step too. When closed, they fit now nicely to the outer surface. The gunports on the lower deck will be mostly closed (port) or just slightly opened (starboard). The upper decks will have most of the gunports opened.
Drazen
.thumb.jpg.6874da98c9f4b718b6b4de24c4130d39.jpg)
.thumb.jpg.a44268ed51d91e36144f807a534afd7d.jpg)
.thumb.jpg.a3e9c129cd27d4dd783aef2d7dca54e2.jpg)
.thumb.jpg.a1e851bb111f5abbafdefe03647eaa36.jpg)
.thumb.jpg.115f40041cf7b43b22e8023c2315c032.jpg)
.thumb.jpg.9606cab7f02c06e2e0c44d389187f93c.jpg)
.thumb.jpg.94f6a6335d7672936e007c147f673188.jpg)
- DORIS, GrandpaPhil, Piet and 21 others
-
 24
24
-
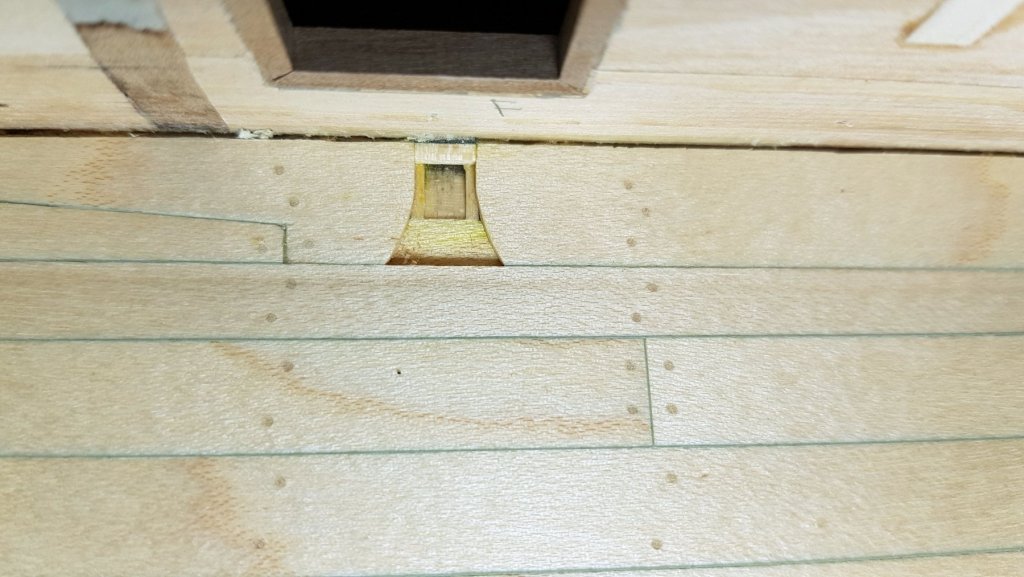
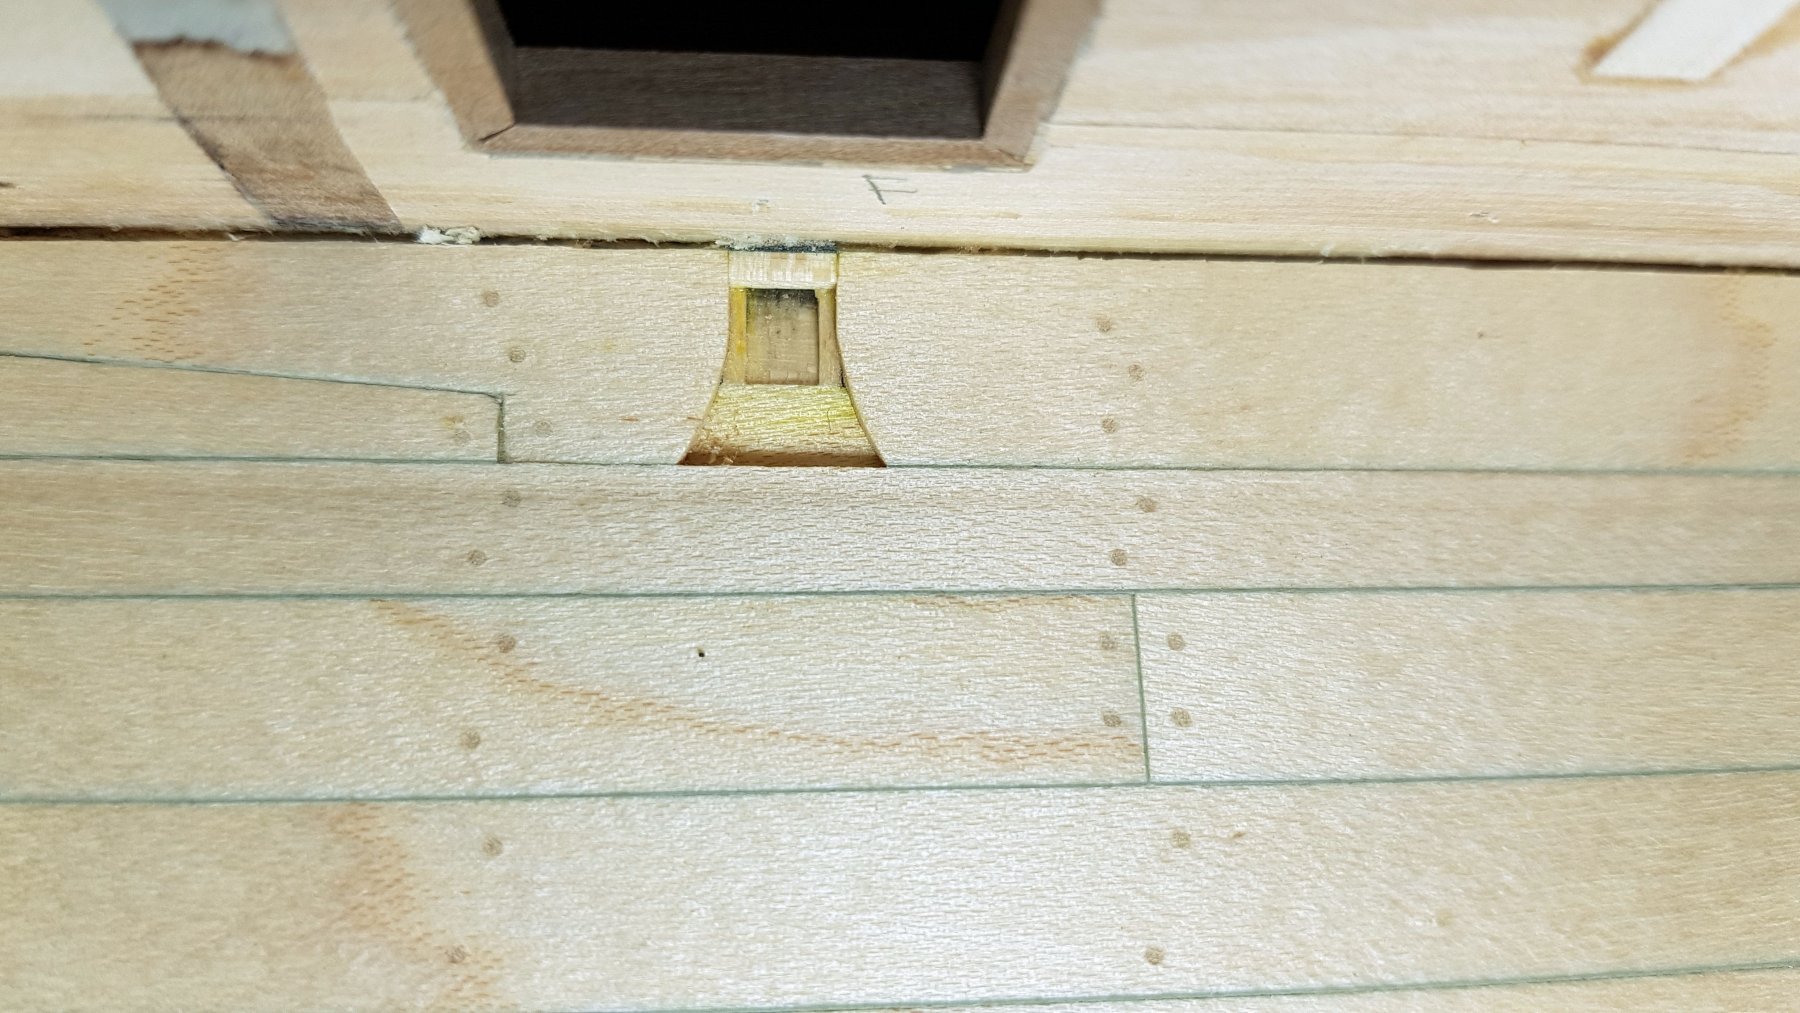
The wales are now installed on the ship.
I needed to make a slope on the upper side of the wale, so water does not collect there. You see the masking tape against damaging the planks and the small grinding blocks I had been using.
Drazen
.thumb.jpg.b03e7830b4cdb019601f19e8c271ae3d.jpg)
.thumb.jpg.caf9df8397912fcbf512e12946c08284.jpg)
.thumb.jpg.6102b0943869333100302a825b5cda97.jpg)
-
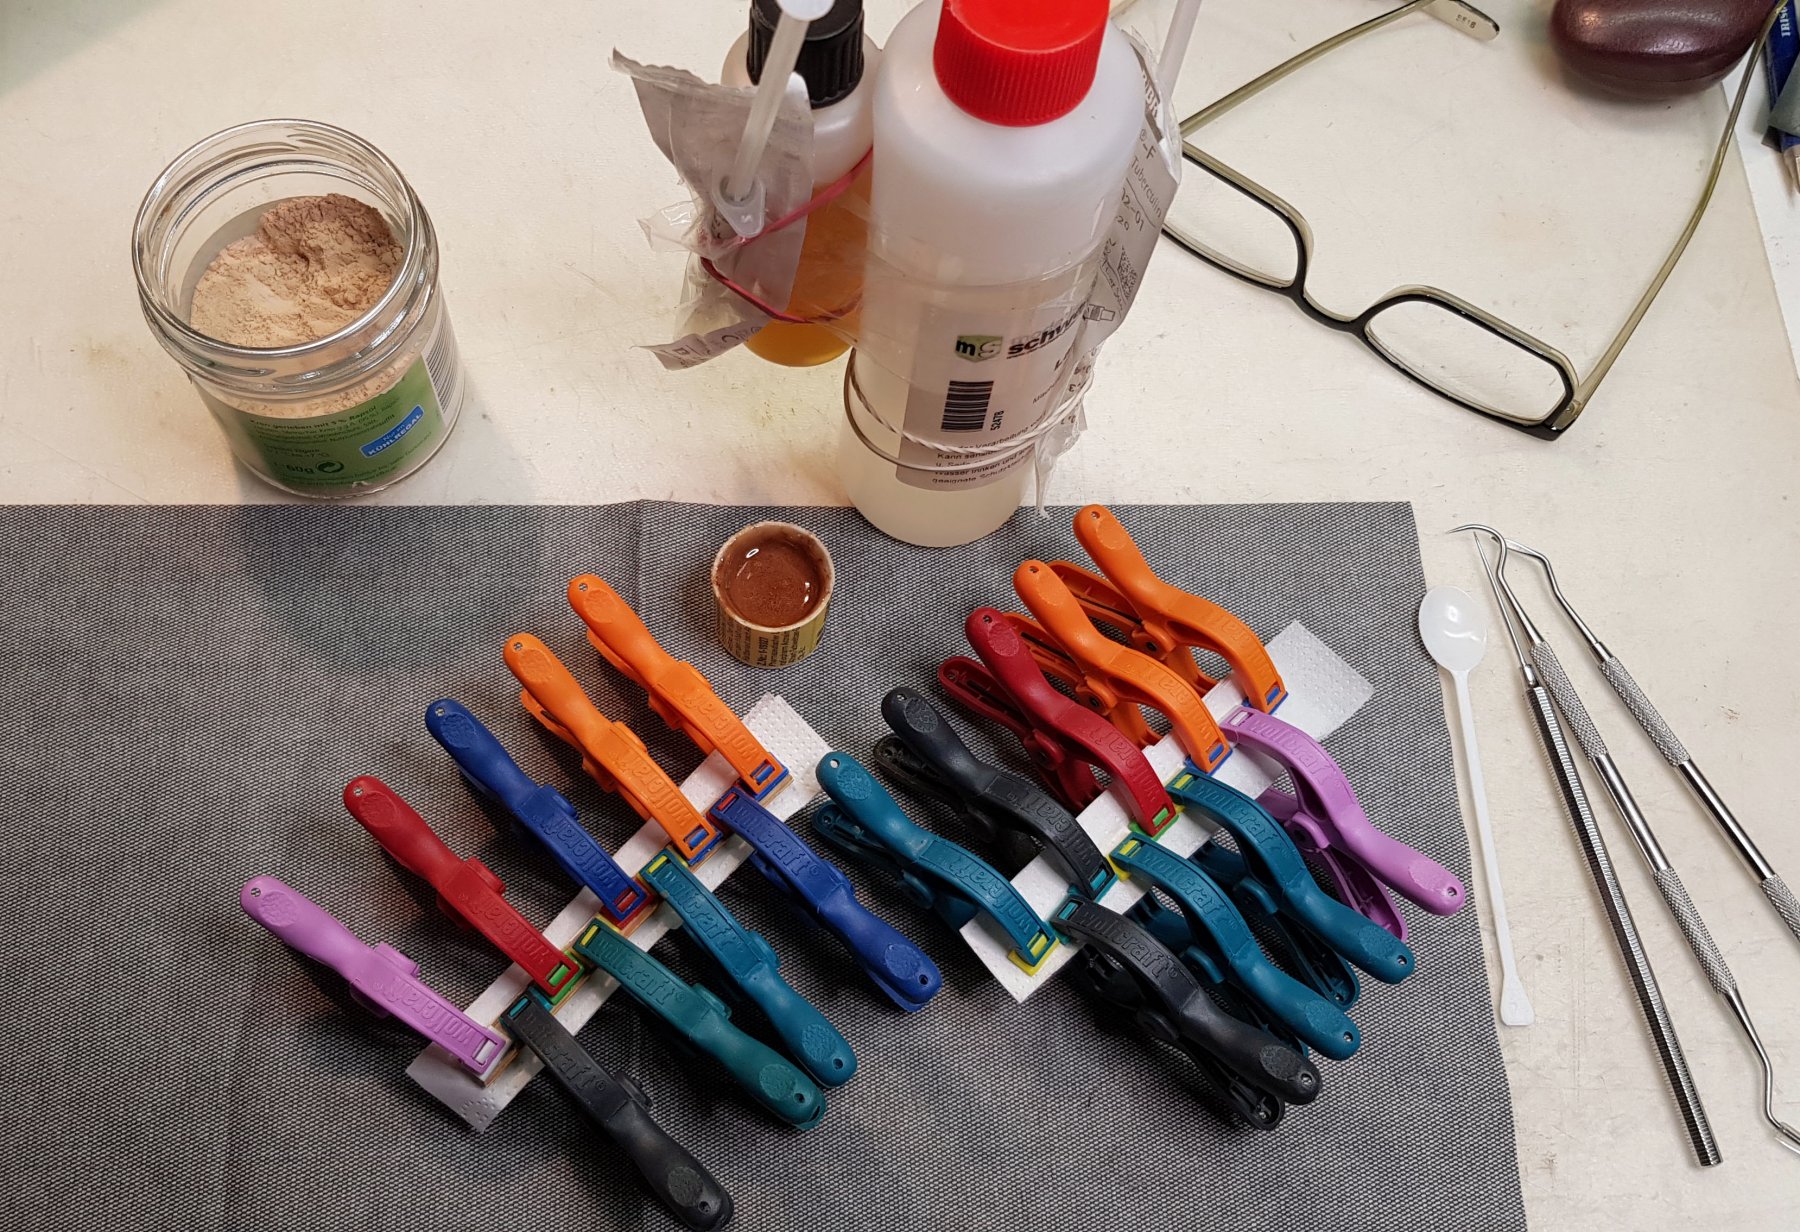
OK, I think I know which glue you mean. I am using the D3 glue for professional and industry use, not the one which can be both in common building supplies stores. It is water resistant, but not meant for outside being left in the rain. There are wood glues from D1 as the lowest resistance, up to D4 with complete resistance on water. Since my model is not meant to swim, the D3 is more than enough.
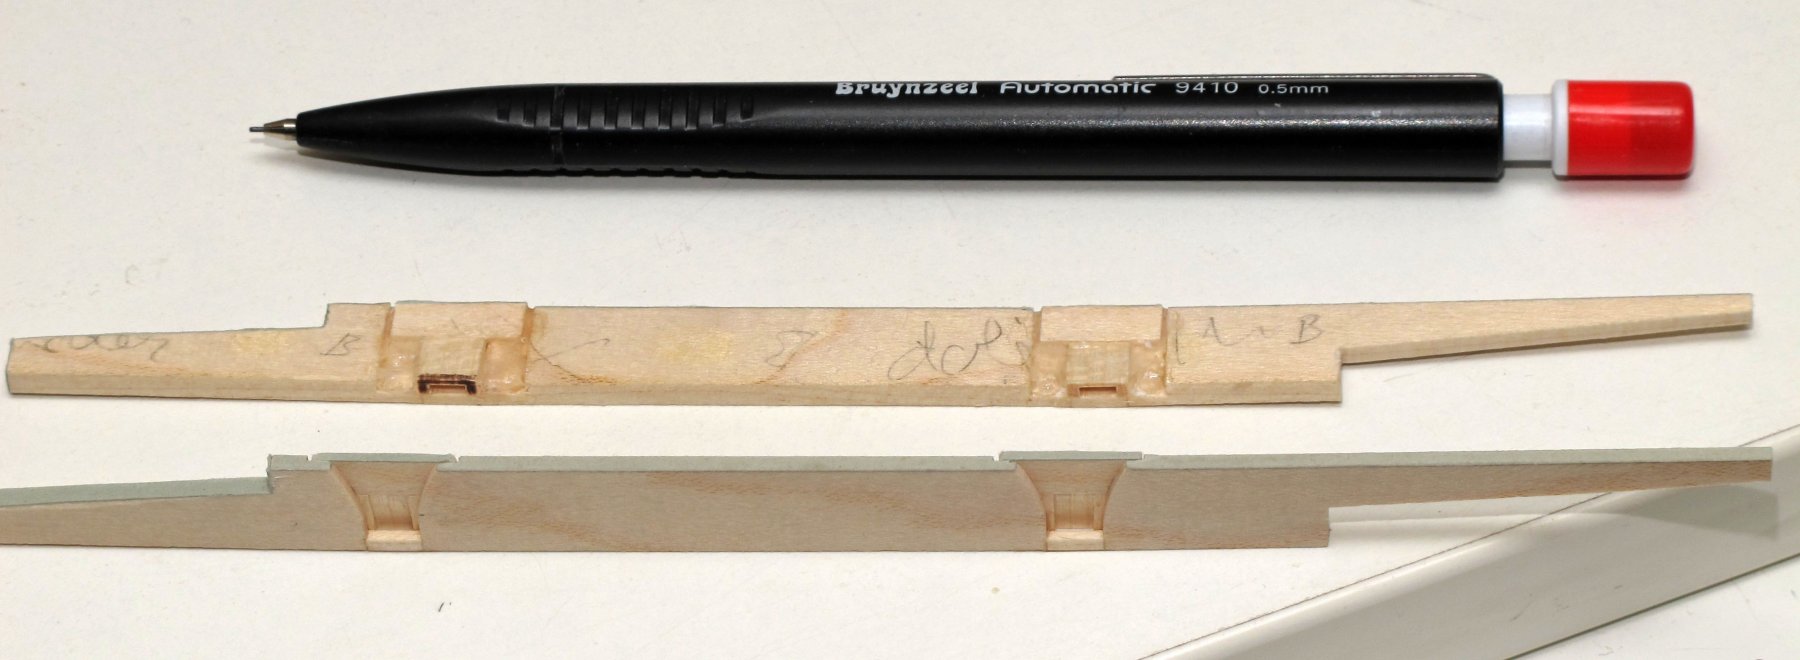
Concerning CA: Please, please see the photos. A single water spout has been made here of 8 pieces and glued with CA gel glue from the back side. No glue on the visible side. I guess the fumes did the yellowing effect. CA fumes are strong and can ruin for instance a canopy on the plastic plane model. I have had many of this on gratings and got it away by letting them behind the window glass. To remove the effect here, I will try with an UV-lamp.
Drazen


- Keith Black, druxey and Canute
-
3
-
On 2/10/2019 at 9:50 PM, vossiewulf said:
Agree. luthiers use epoxy resin all the time as their grain-filler, but they spread it squeegee-style with plastic spreaders, I've never heard of anyone trying to spray it.
Also Bob is correct that you need to account for the relative flexibility of the glue, epoxy once fully cured is very rigid and replacement of the wood is a better idea. If it's not possible, use yellow glue as it remains flexible to a degree after curing. There are also some (apparently) good newer CA glues that remain flexible after curing, but they don't have much of a track record yet, and that's important in a model intended to last for decades at least.
What is a "yellow glue"? I know the "white glue" should be PVA-glue what carpenter are commonly using.
We have in Europe some sometimes other names and brands.
Just a note: Be careful with CA-glue + maple! It will leave a yellow film/shade near the bonds, which may only be removed by leaving the model staying on the sun for several weeks (something like letting plastic models near the window after the decals got a yellow shade). Wit e.g. pear wood, this is not the problem - no yellowing.
Drazen
- mtaylor and Keith Black
-
2
-
On 2/10/2019 at 11:18 PM, druxey said:
The bottom line to all this discussion is, WOOD WILL MOVE. All you can do is minimize this by humidity control and not making any part too large. As suggested, painful as the thought may be, it is now a matter of re-doing some of the work by replacing the fractured pieces.
Yup! The humidity control, i already do.
Drazen
-
On 2/10/2019 at 5:24 AM, Bob Cleek said:
Filling cracks with anything that is as inflexible as epoxy resin isn't a good idea. If and when the wood swells up again, it will be pressing against that inflexible cured epoxy and cause greater cracking further down the crack. You'd be much better off to replace the cracked piece entirely, if at all possible, with properly dried wood of the same species.
As you seem to realize, atomizing epoxy resin isn't a good idea. Inhaling it isn't at all recommended. (And this advice is coming from a guy that isn't a sissy about such things.) Epoxy isn't going to make things much more solid unless you build up a rather thick coating and standard cured epoxy resin is quite brittle. (WEST Systems epoxy markets a brand of epoxy known as "G-flex" which cures to a somewhat flexible state. It's now being used as an adhesive in full-sized wooden boatbuilding, but I don't think would do you any good in this instance. As a structural material, epoxy has to be used in a matrix of stronger material, such as glass or carbon fiber fabric or matting. Again, I'm afraid a "do over" of the damaged parts is what is required to restore your model in this case.
Most epoxies can be thinned with alcohol or acetone, but I shudder to think what gunked up epoxy would do to an airbrush!
When I was a student, a very good friend and me were restoring an old small sailing boat (Finn class). It was wooden and I can remember, we have had a diluting/cleaning medium for epoxy and for cleaning our tools. However, we did not use airbrush, but manual tools to apply epoxy. The whole ship hull was soaked with epoxy to prevent water coming in and to stiffen the structure. When sailing regattas (what we did), it was very important to have a very stiff hull which does not flex. We did not have money to buy a new boat made of new materials, but had to be innovative. 🙂
I think, I will protect inside of the hull with shellac than.
Drazen
-
On 2/10/2019 at 12:41 AM, Y.T. said:
Hi Drazen , is there a way you could thin the bulkiness of wood off the hull through ports? Like making your structure more as POB (planks on bulkheads) instead of solid hull you currently have? My belief is that removing material from the structure, making it weigh less, reducing the structure to only a skeleton of a hull - same as real ship hulls were made - this makes the structure less susceptible to humidity variations. Imagine a real ship made in the ship yard. They made it in dry air environment and when ready they dropped whole thing in the water. I think main trick is making ships of THIN wood as real ships were made. Protecting with chemicals may help but .... for this- there is no proven theory.
I am afraid this is in that stage no more possible. Please, check my build log. Changing basic structure would mean starting building from the beginning. But, please see my build process and if you have any ideas, maybe you see it from another perspective.
The solid hull was meant to get a solid ground base for the planking. This showed to be of great benefit. Still, it brings some drawbacks with it, as you see - the sensitivity to humidity. The idea of solid hull was not mine and not new. Some top builders are using it for their ships all the time. It seems that several "small" differences did accumulated and made the system to "tip over": I definitely have extreme variations in my work room, the hull is relatively large, I did not protect inside of the hull during building the hull, De 7 Provincien has in the middle a large area with gratings (so, there is an "U-shape" which means that the upper part wants to widen when the wood contracts)... Just some aspects.
Drazen
-
Let me now explain my strategy how to deal with my problem.
1..Get the humidity to approx 50% and keep it there by humidifier in winter and dehumidifier in summer.
2. After the wood has been acclimatised (e.g. 2 months), I am going to spray few very thinned layers shellac through the gunports. For this, I will probably close all, other openings to get the area filled well. I want to get shellac also in the corners inside of the hull.
3. Than, depending on how much the cracks went back/recovered, I am going to pour epoxy into the gaps where wood cracked.
4. Repairing of the decks if needed. I have some vital parts on the decks damaged (frames of the gratings) which are not so easy to be made again. Better would be not to need to repair this. Let us see.
What I am still unsure is if it makes sense to spray thinned epoxy instead of shellac inside of the hull. Epoxy would make the whole thing very solid, but I must check if there are good thinner in order to be able to clean the airbrush afterwards. Also, the toxicity of epoxy is an issue. But, for this I have a very good mask which has a very good filter build in.
Any comments on this?
Drazen
-
Bob,
I do also apply shellac by brush on the areas which are accessible to the hand-brush.
The whole idea on airbrushing shellac was to protect the inner areas of the ship by airbrushing through gunports. The wood has not been protected from inside, but only from outside (this by hand brushing shellac or Golden GAC100). Still, the ship hull is getting or loosing moisture from inside and this happens for instance through the gunports. I think the most of the harm has been happened by non-protected inside and exchange through gunports.
I cannot reach every corner of the inside of the ship by brush - by airbrush probably better.
Please, check the previous photos of the ship in different stages in order to understand what I mean. Here again also the link to my build:
Drazen
-
Well, spraying very thinned shellac is possible with my airbrush(es). I can do several thin layers after the first one has been set and soaked into the wood, the next one comes to make the sealing more tight.
What actually is the problem with airbrushing, is that you have an airflow which must hit the surface in order to leave paint there. The areas, where the spray is not circulating (e.g. corners) will be covered not so well. But, I must try with a stronger amount of medium. I can make a big mess inside my gunports since they are more or less closed on the lover decks.
I will leave the 50% humidity till spring and when it starts to go over the 50% by itself, I will take my gun (airbrush-gun I mean) and do this job.
Bob, a very nice explanation., Thank you!
Drazen
-
For me as a guy who studied mechanical engineering, these terms are fine. Still, thank you a lot for sharing this book chapter. I will go through it thoroughly.
I see now, that this topic is educative for many and for me especially.
The question is for my case now:
- What to do to stop the process on the top of keeping the moisture between e.g. 40% and 60%?
- After I have solved the first problem: what to do with the damages I have got?
@1.
As you can see on the basic construction of the hull and later on the ship how it looks now (please, try to visit previous stages of building process), the hull is opened on many places (gunports, gratings, but also the planking itself does not seal 100% since there are fine cracks everywhere). My idea was to seal the inner part of the hull. It does not help to seal the decks and planks when the humidity has the chance to "free exchange" through these openings.
Well, an idea is to shoot a big amount of shellac through the gunports by closing at the same time the other gunports in order not to get the spray out where I do not want. I have several very good airbrush guns and a good compressor and this may help sealing the ship from inside. Through gratings, it may not be possible, since the area below is closed and painted dull black.
Maybe this is one of the possibilities to lower the stress and minimise the moving process since the "entrance areas" would be much smaller. Still, I am not sure how good an airbrush mist would reach areas like inner corners, but many areas will be shot and covered.
Inserting long screws through the gunports would be nearly not possible and also would not solve the problem. It may hold only in one direction. This would not be enough.
@2.
One possibility is to do some planks again. I was hoping the cracks will go beck with increasing of moisture, but, as it had been said here. this is an irreversible process. Previous to this, I may pour some thin epoxy into the gaps to close them and additionally plank on this solid base.
If you have any ideas, please, be free to post them.
Drazen
-
1 hour ago, vossiewulf said:
Sounds like you're on the road to recovery Drazen, congrats. Unfortunately although after a couple weeks of more humidity chances are the cracking will stop, it won't fix the damage that has been done.
What a pity...
I am wondering if this effect occurred with expanding or drying the wood... ??
Drazen
- Canute, Keith Black and mtaylor
-
3
-
7 hours ago, paulsutcliffe said:
Beautiful work, although you missed out how you actually carved the scroll and acanthus leaves, the nail router is a great idea also
Regards
Paul
Paul,
please, scroll back to the 13. April 2018. You will find there and after this date many hints and photos on how I did the ribbon and the single letters.
I was using mostly the dentist's drill and only seldom the manual self-made carving knives. Here, with this decoration, I think, I did not use manual tools at all.
Painting of the ribbon and letters after 16. September 2018.
Drazen
- Piet, Keith Black, paulsutcliffe and 2 others
-
5
-
8 hours ago, Hubac's Historian said:
Stunning carved work, Drazen! Also an excellent tutorial on prep and paint for wood surfaces.
Is another purpose of the gesso to sort of smooth any irregularities in the carved surface?
Well, the gesso did actually add some imperfection in the already smooth surfaces of the carving. It is also very hard to grind gesso. So, once you get a surface, that is it. More "smoothing" has been done by GAC100. Still, this medium did close some very fine details, but not a big problem as you see on the photos. That is also the reason why I will try to go on with shellac.
With this said, no positive effect of these layers, but you need to apply them with oil paint. Otherwise you get other severe problems. The "only" extremely positive effect of gesso is the brilliance you get out of the oil paint. It is so shining, so alive, that I was very surprised of the difference between the direct painting on the wood and on the white primed surface.
Drazen
- Piet and Keith Black
-
2
-
... and this is the final result on the ship.
The ribbon and small windows have been assembled too.
I will need to correct the paint on some small areas. This has been peeled due to the pressure when glueing, but this is no problem.
Finally, I want to mention, that the benefit of beautiful colour of oil paint has to be taken relative in comparison with a very difficult procedure, very long drying time and low resistance to mechanical stress. Still, I will proceed with oil paints.
Drazen
.thumb.jpg.fe2e90390ef38e498de601d263dd33b7.jpg)
.thumb.jpg.eb90d178c883623de6b2aa07c8009be2.jpg)
- Captain Poison, cog, Valeriy V and 18 others
-
21
-
Final protection by varnish (also by Royal Talens)
After several months drying, I apply
- Talens picture varnish matt 003 for all surfaces
and
- mixture of 1:1 picture varnish matt 003 with picture varnish glossy 002 on all decorations. In the reality, the decorations have been painted glossy in order to simulate gold, but on the model, the 100% glossy does not look real. So, a semi-matt shade looks much better and more realistic.
I apply final coat by airbrush. This removes partly the brush strokes or imperfections, by at the same time keeping the surface real (because of previous hand-brush application).
Drazen
.thumb.jpg.c3920ffc25221f2664b428cbd88d5cea.jpg)
.thumb.jpg.82a6da4cf50306d2c5e2d40ef3d37104.jpg)
- Archi, paulsutcliffe, Piet and 3 others
-
6
-
... and how it looks...
Note, this is the length of exact 90 mm. So, try to look at the real size on the screen to get the real impression.
Drazen
.thumb.jpg.aa0a0145830db6af7cef293ef5055019.jpg)
-
... glueing with epoxy.
Protect the oil paint when applying pressure! A big drawback of oil paint is the low resistance to the mechanical influence.
Drazen

-
Now: again make a copy f the form, and cut out the paper stripes. Put the stripes into the frames and remove paint on the frame on some areas - so the glue can get to the wood. On paint, it will nit hold well.
Drazen
.thumb.jpg.b7e3070eec0456690a38b349b3d79691.jpg)
.thumb.jpg.7a7e9b612c5a3298463dd65e59f17aab.jpg)
- Captain Poison, paulsutcliffe, Piet and 4 others
-
7
-
... than:
1) 4 very thin layers of Old Holland "yellow ochre light" (probably best oil paint brand existing - Old Holland). Always brushing the excessive outer surfaces to increase the 3D effect and depth of the structure.
2) Than finally only one thin layer of the "old Holland ochre" (Old Holland brand again). This one is of darker nuance then the first 4 layers.
You must imagine a very thin paint staying in the recessed areas slightly thicker and on the exposed areas nearly totally brushed away.
Let the layers dry thoroughly before moving to the next layer!!
Drazen
.thumb.jpg.dc0bb21018fe8262a17265d0165d133d.jpg)
.thumb.jpg.6785d85c8a8b74081bae1754c93edb0b.jpg)
- paulsutcliffe, mtaylor, Keith Black and 3 others
-
6
-
Painting...
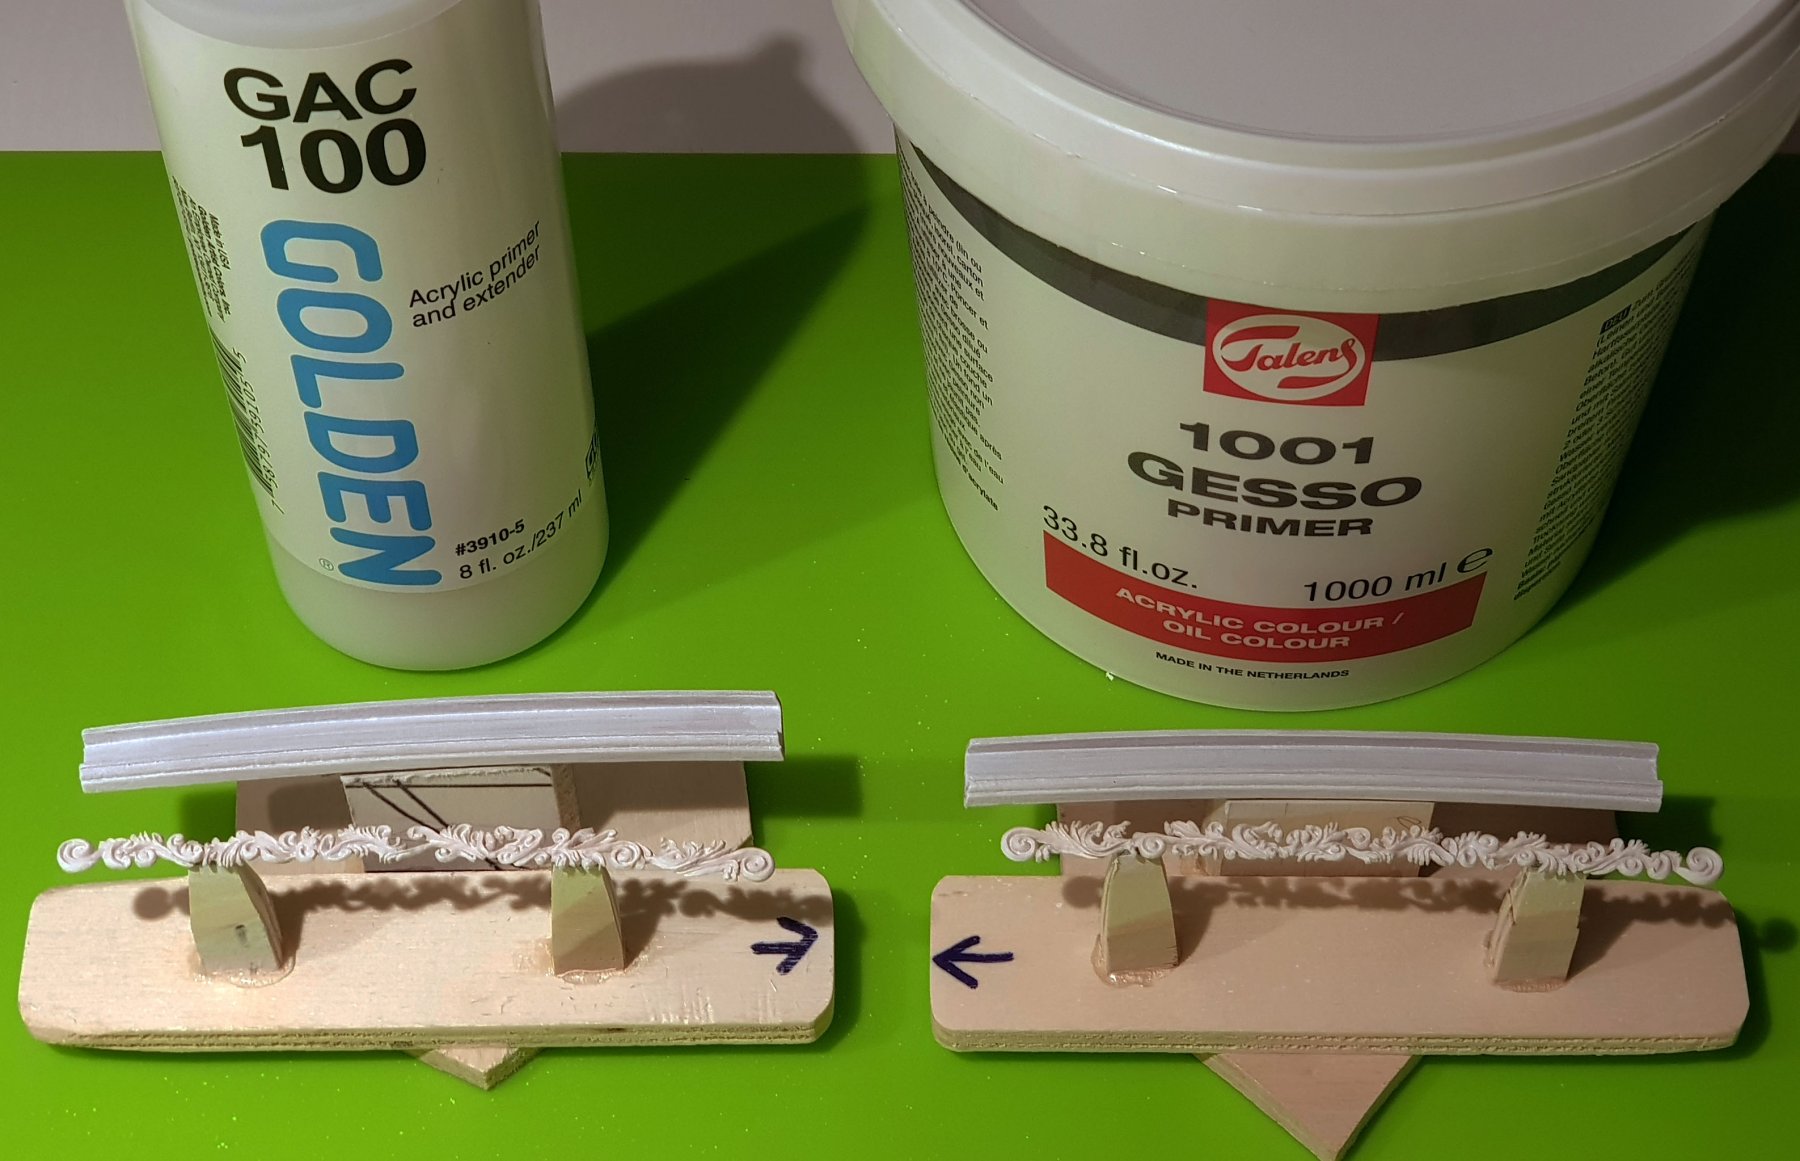
1st. : priming
It was difficult to get the best primer for wood. I finally decided on Golden GAC 100. This shall save the wood from decay and protect getting oil paint into the wood (bad for wood and bad for the surface effect). I think, in my next parts, I will use several thin layers of shellac to protect instead GAC100 beacause GAC100 makes the surface not so smooth and is difficult to grind and correct.
After GAC100, I apply Gesso primer by Royal Talens. This one is very nice and has acceptable price. Gesso is needed to get a solid grip for the oil paint.
All this in thin coats not to "destroy" the pattern. I am using high quality brushes
Drazen

- Hubac's Historian, Piet, oneslim and 4 others
-
7
-
After refining the shape to get more 3D-effect and "contents behind the surface", I am ready with my decoration pattern.
Drazen
.thumb.JPG.4e8616424f55a651eb865c968ed0ca94.JPG)
.thumb.jpg.d36ede6817757371d78a4fd2d9e7d891.jpg)
- GrandpaPhil, Katsumoto, mtaylor and 12 others
-
15
-
The other side ready and checked on fit into the frame. I still have the coarse prototypes.
Drazen
.thumb.jpg.368e35db182ac1b3a505b31ca0a746f7.jpg)
.thumb.jpg.cc732252a361fb64284de6410394a4d5.jpg)
.jpg.519bb6e8925f17c938931880c327fc05.jpg)
.jpg.621176310dea9b6a3023292677d84163.jpg)
.jpg.0ad0379f6a76bc87f5cca4192c9b0b05.jpg)
.jpg.879b53f3ee3f1e2d6b610e9d770cb403.jpg)
.jpg.2d9706f5a3be1b194a112639298c9fd3.jpg)
.jpg.69ffde2a71be84891b5dddda5a66896e.jpg)
.jpg.11f8624914f69affb41ffa60668df377.jpg)
.jpg.d0bec98c0b4111e5e0d2147076439ef4.jpg)
.jpg.ffef43c77335024ca186abe07bac61a8.jpg)
.jpg.5654093c258ebf225722644735f461fd.jpg)


.jpg.3aef59f17f8b049f91606654afacb46d.jpg)
.jpg.6dd2440650baf6ca020c2eb2487984f2.jpg)
.jpg.fb85c46f6bf232958868c273150784d1.jpg)
.jpg.daf3765e0bc15a52595879b18d7e4787.jpg)
.jpg.311349f82e3c1b53ef42c0f08d689429.jpg)

.jpg.ca745323d47c3444b5225ca71487ffc8.jpg)
.jpg.299f21a0d255140cff0169fa8093b275.jpg)
.jpg.71950f88450227779d1eef75767f38a1.jpg)
.jpg.2d36166d73002e87c212d3ec46f06e5b.jpg)
.JPG.c62ae2d2d61ef3f6eb25adc08484f74e.JPG)
.jpg.037e921b13fe189f23e4feb55b1c49ba.jpg)
.jpg.c6bdbb553c2a1a097dcae9804ed4829b.jpg)
.jpg.28f159e89ef6dd44c95e85b3eb60026d.jpg)
De Zeven Provinciën 1665 by Dražen - Scale 1:45
in - Build logs for subjects built 1501 - 1750
Posted
... actually, the gunports have been made not so different as on the real ship. I think also the 1:10 model in Lelystad was using the templates to get the same size of the gunports.
You may study my photos from 2013 to understand how I got the same angle, parallelism, etc.
Drazen