Seventynet
-
Posts
797 -
Joined
-
Last visited
Content Type
Profiles
Forums
Gallery
Events
Everything posted by Seventynet
-
 Thanks Bruce, Kevin, Jean-Paul and John. Your comments are greatly appreciated. And thanks for all the likes! Ian
 -
Hi Jim, thanks a lot. I am going to tackle David and Greg’s Speedwell scaled up to 1:32, the same scale as Chuck’s but fully framed. I am hopeful that I can make use of some of Chuck’s add-ons but I’ll have to keep an eye on my build and his to maximize the potential for that option to work. Anyway, the building board today. Ian
-
Thanks all for your praise: Chuck: thanks but I’ll say it again, building your models was no small influence on my ability to get where I did! Yves: thanks so much. Greg: thank you kindly. Now I will be held to your and David’s standard again as I start the Speedwell. VTHokiEE: And I continue to enjoy your Echo build! Keith: thanks for following my build and all the likes and comments. They really make a difference. Paul: Many thanks and keep up the superb craftsmanship. Chris: thanks a lot, much appreciated! Captain Hook: thanks for saying so! Mike: thanks! jpalmer: Thanks again! Vladimir: thanks and thanks for following along! David, yes I will have to get a case down the road. Ian Ben: thanks indeed!
-
Good Day, I am calling this build finished. Thanks to everyone’s comments and likes! Special thanks to David of course for envisioning this project and for his help in working through it. Here are my final photos: Ian


-
This is beautiful! I assume you used your mill for the lights? I’m interested in your next steps to finalize them (my own attempts frustrated me!). thanks, Ian
-
Thanks giampieroricci. Keep up your magnificent log! Ian
-
Thank you kindly jpalmer. I truly hope to see your build log in the near future and possibly provide some tips as you go. Don’t forget to look at stuntflyer Mike’s log to get started here. Ian
-
La Palme by Tobias - 1:36 - POF
Seventynet replied to Tobias's topic in - Build logs for subjects built 1501 - 1750
Beautiful work Tobias. I’m really enjoying your build. ian -
Thanks Tonphil, it was my labour of love. I’m one step closer.

-
Hi Alan, thanks a lot. That headboard has come in handy for I don’t know how many projects. It just keeps giving. Paul thanks, it is but a shadow of your work. Thanks for following. Hi billocrates, keep at her. It’s nice to hear that I’m not the only one building this beautiful ship and look forward to seeing yours soon. Thanks Jim, good luck with your Mayflower. I appreciate it Tobias and I will continue to follow your superb build. Thank you of course druxey. I have a very specific idea of what’s next but will need your advice before I finalize my plans. You’ll see a pm soon. Ian
-
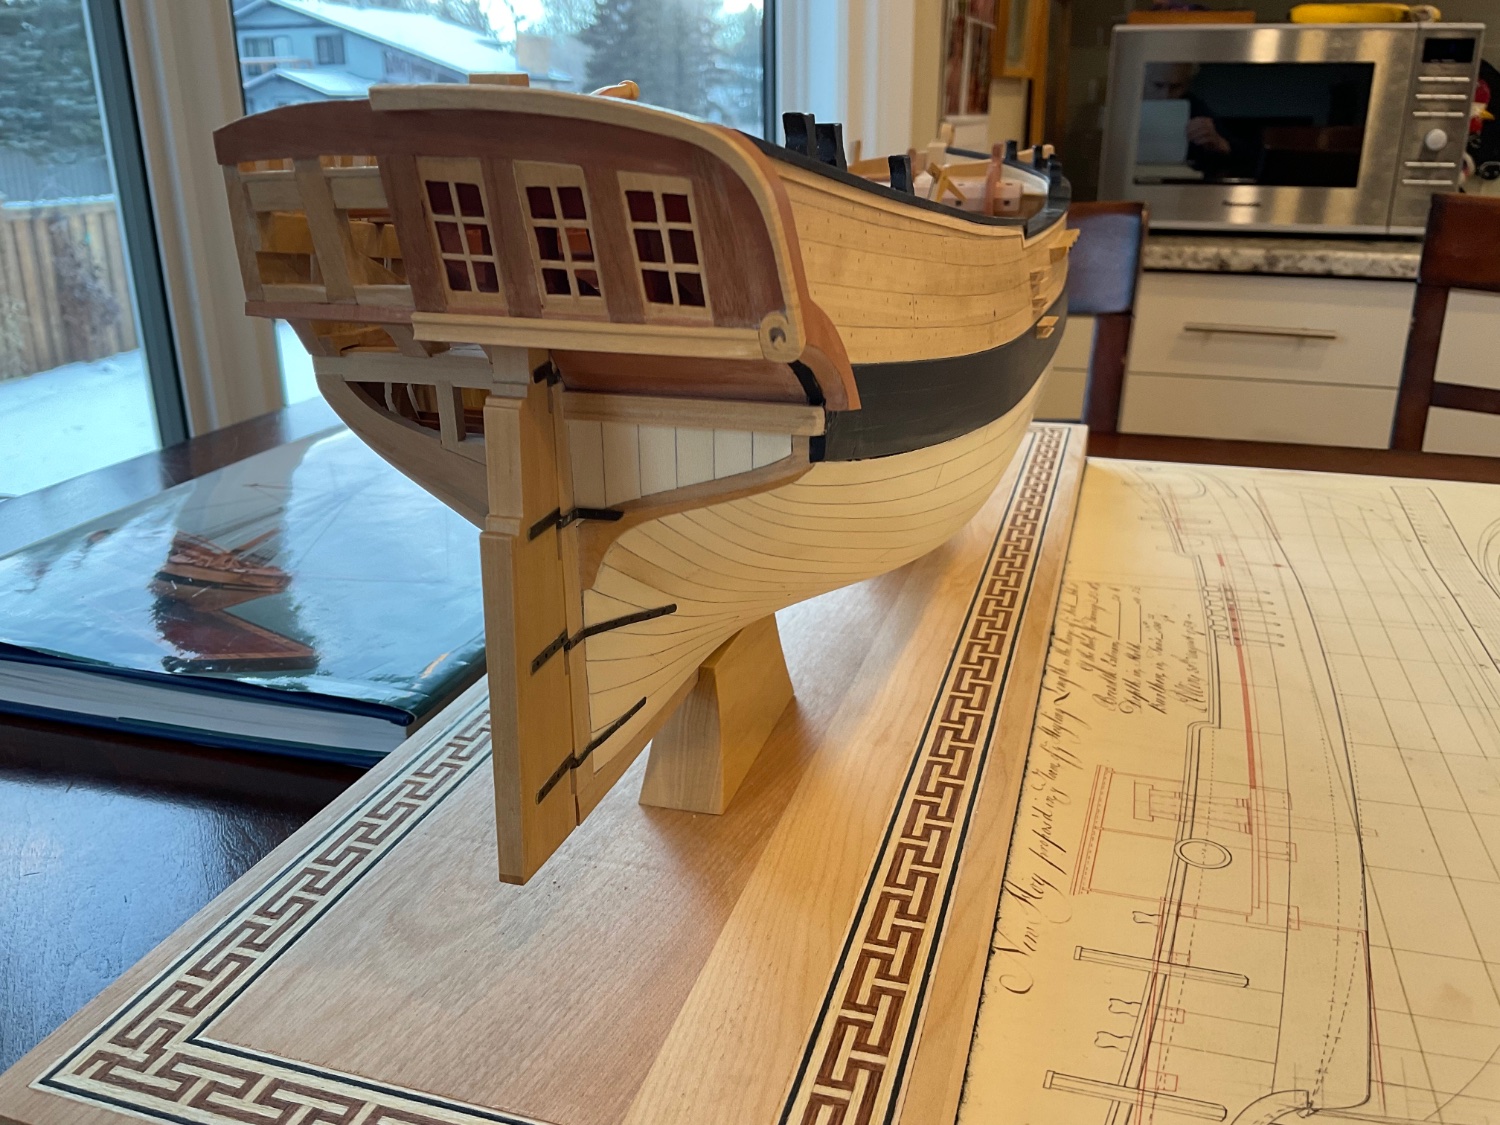
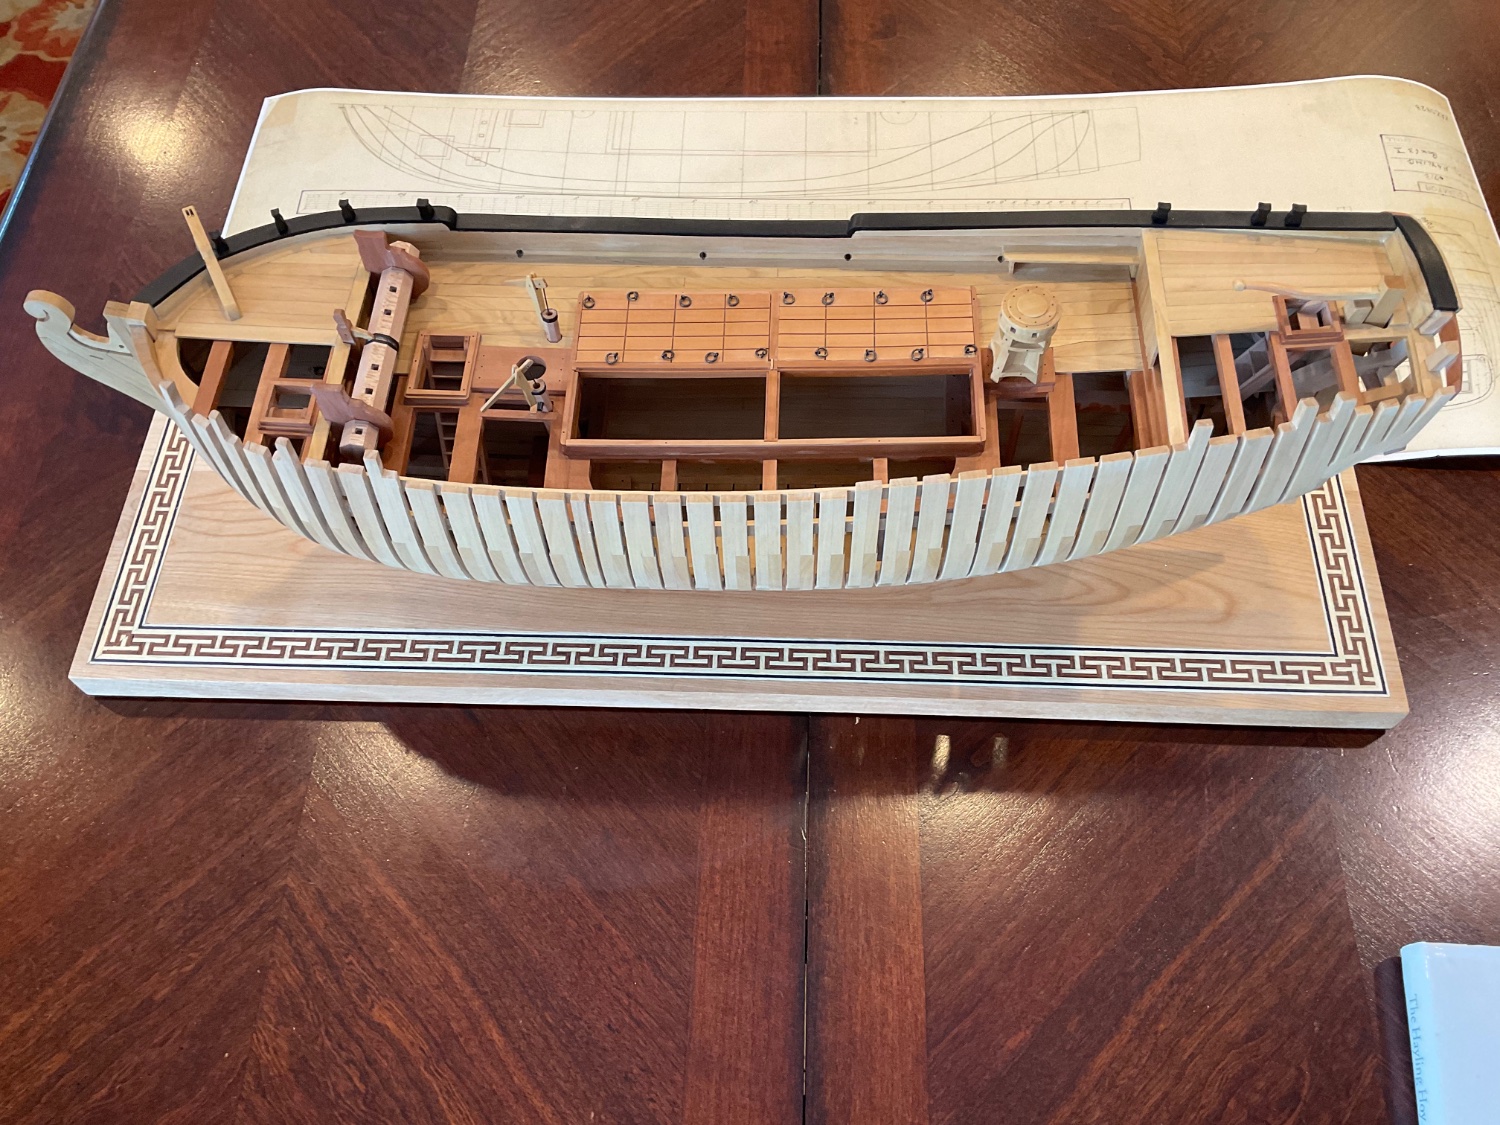
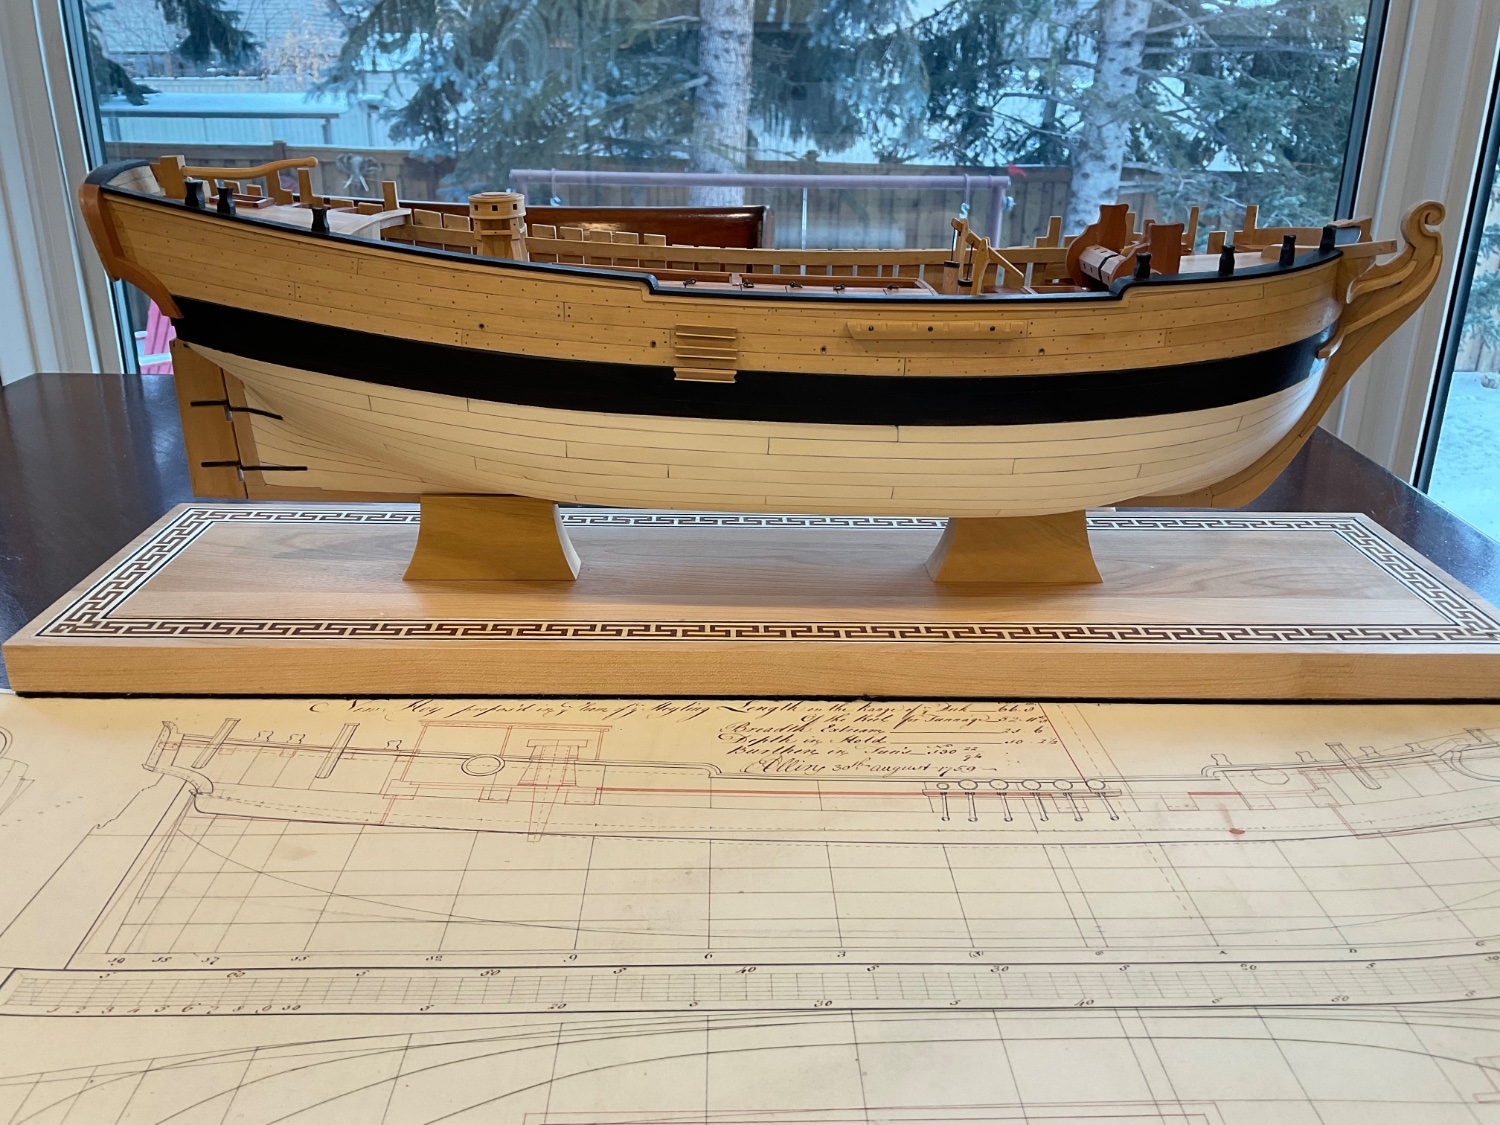
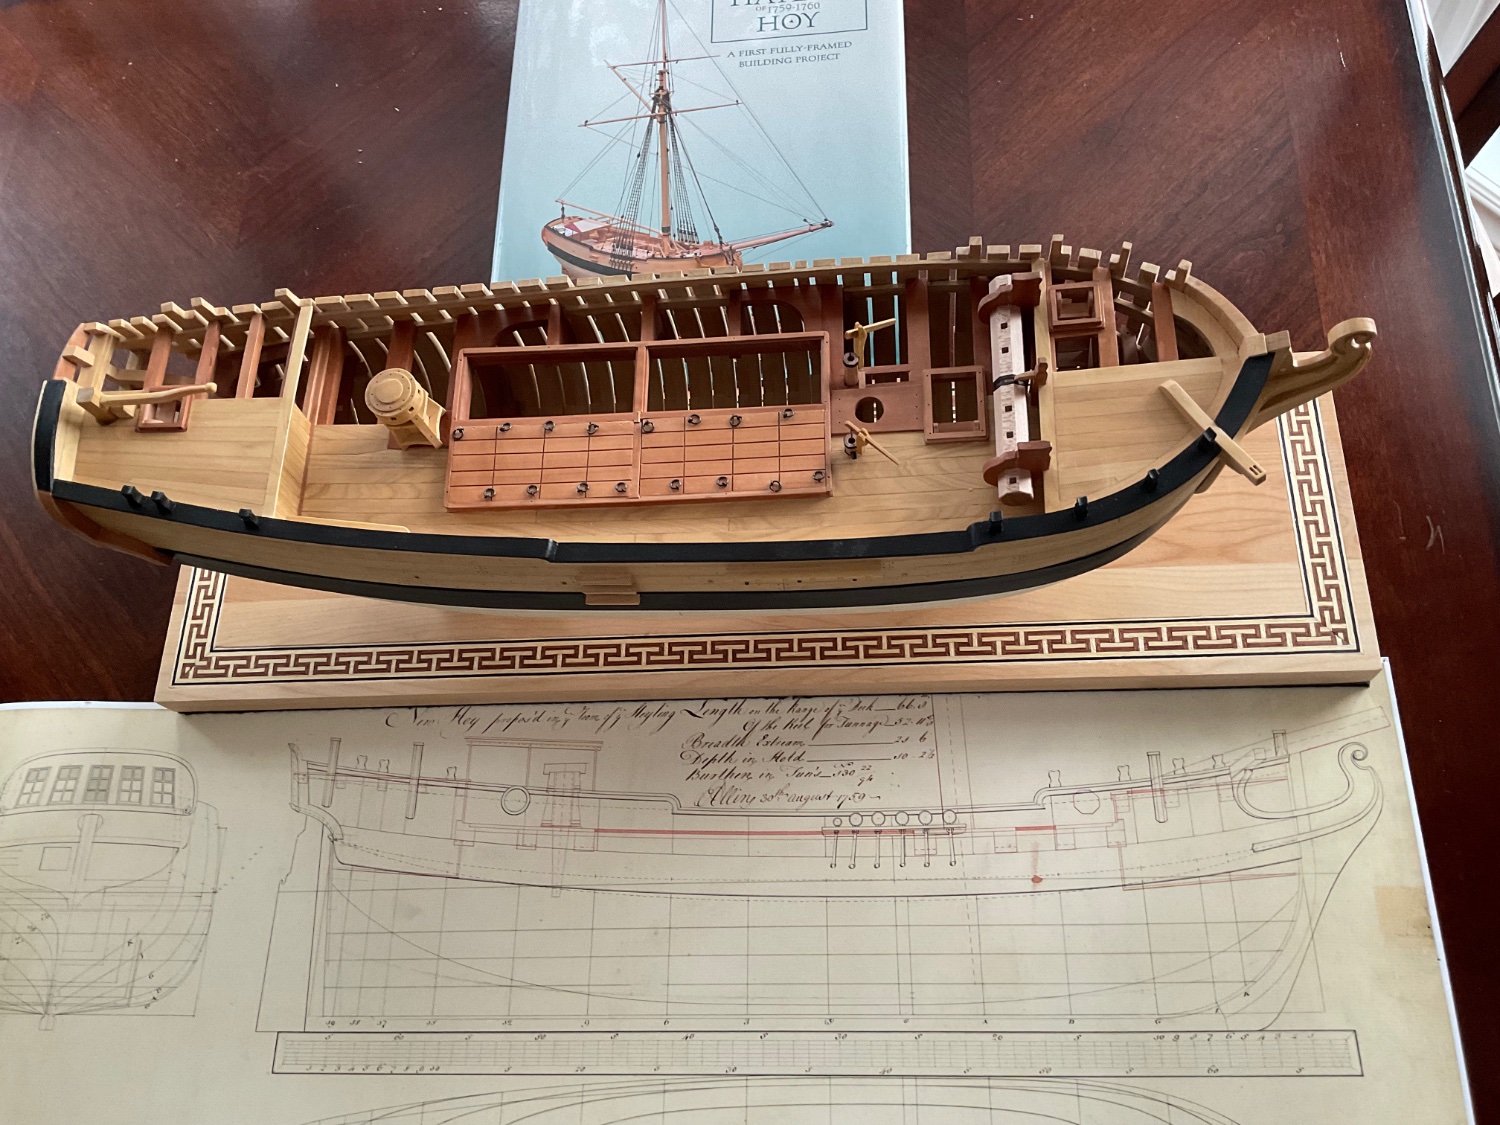
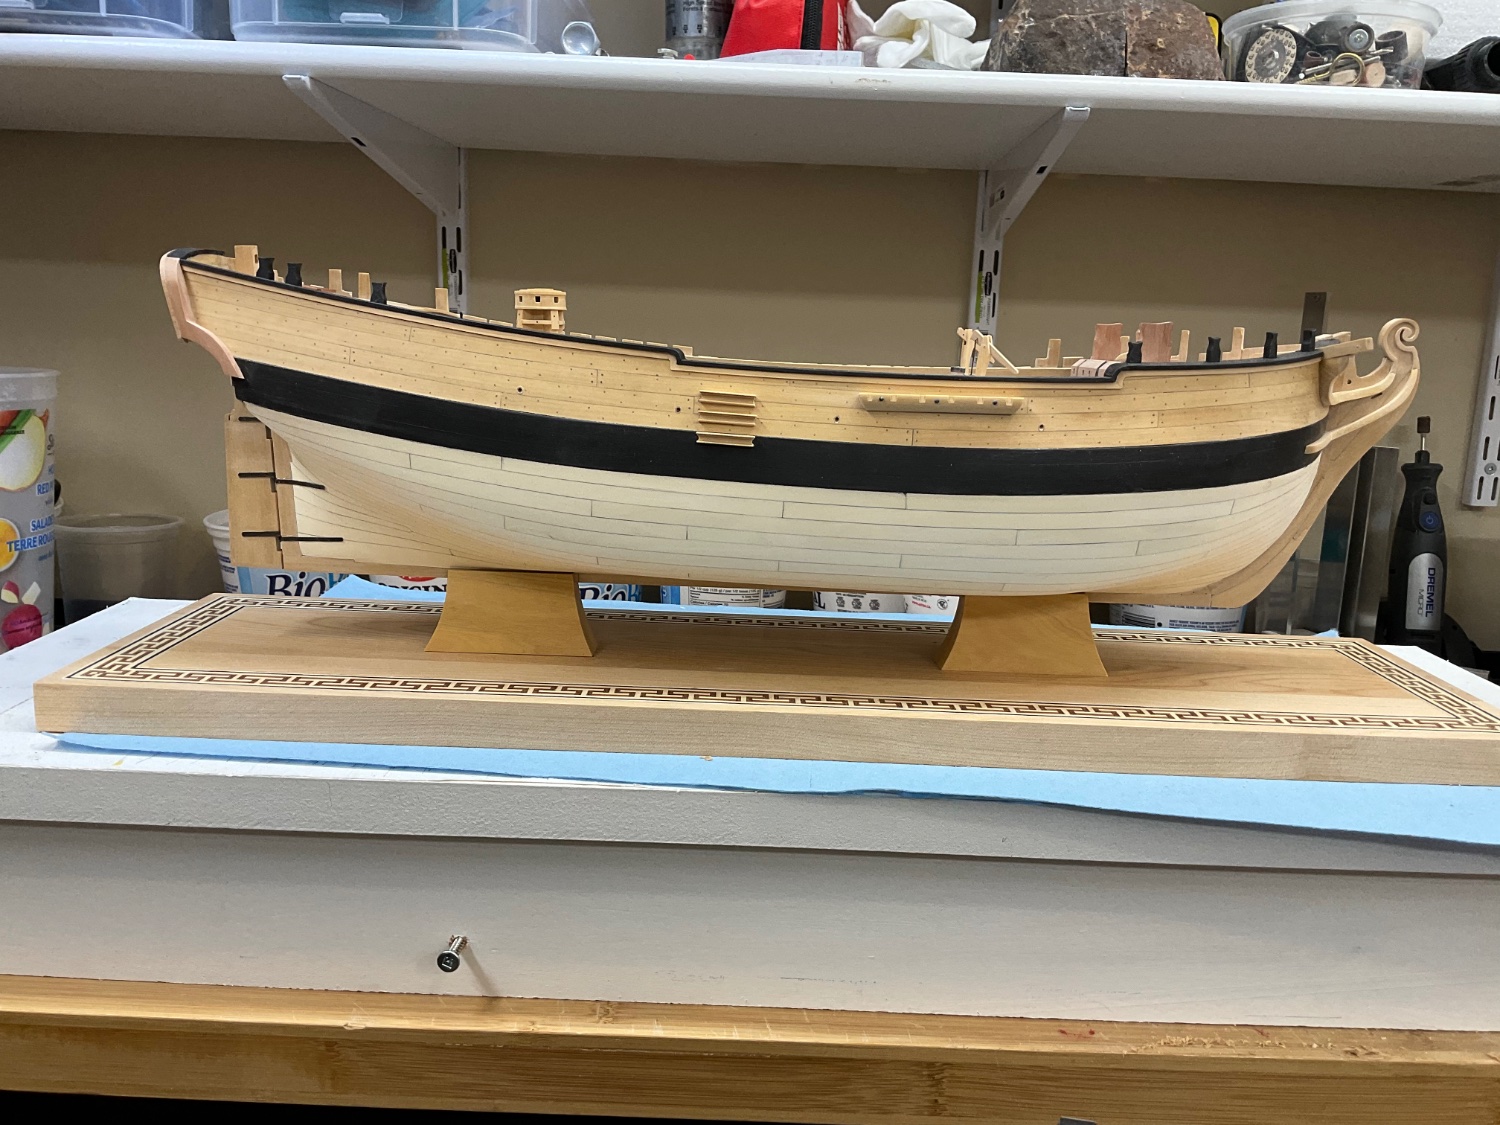
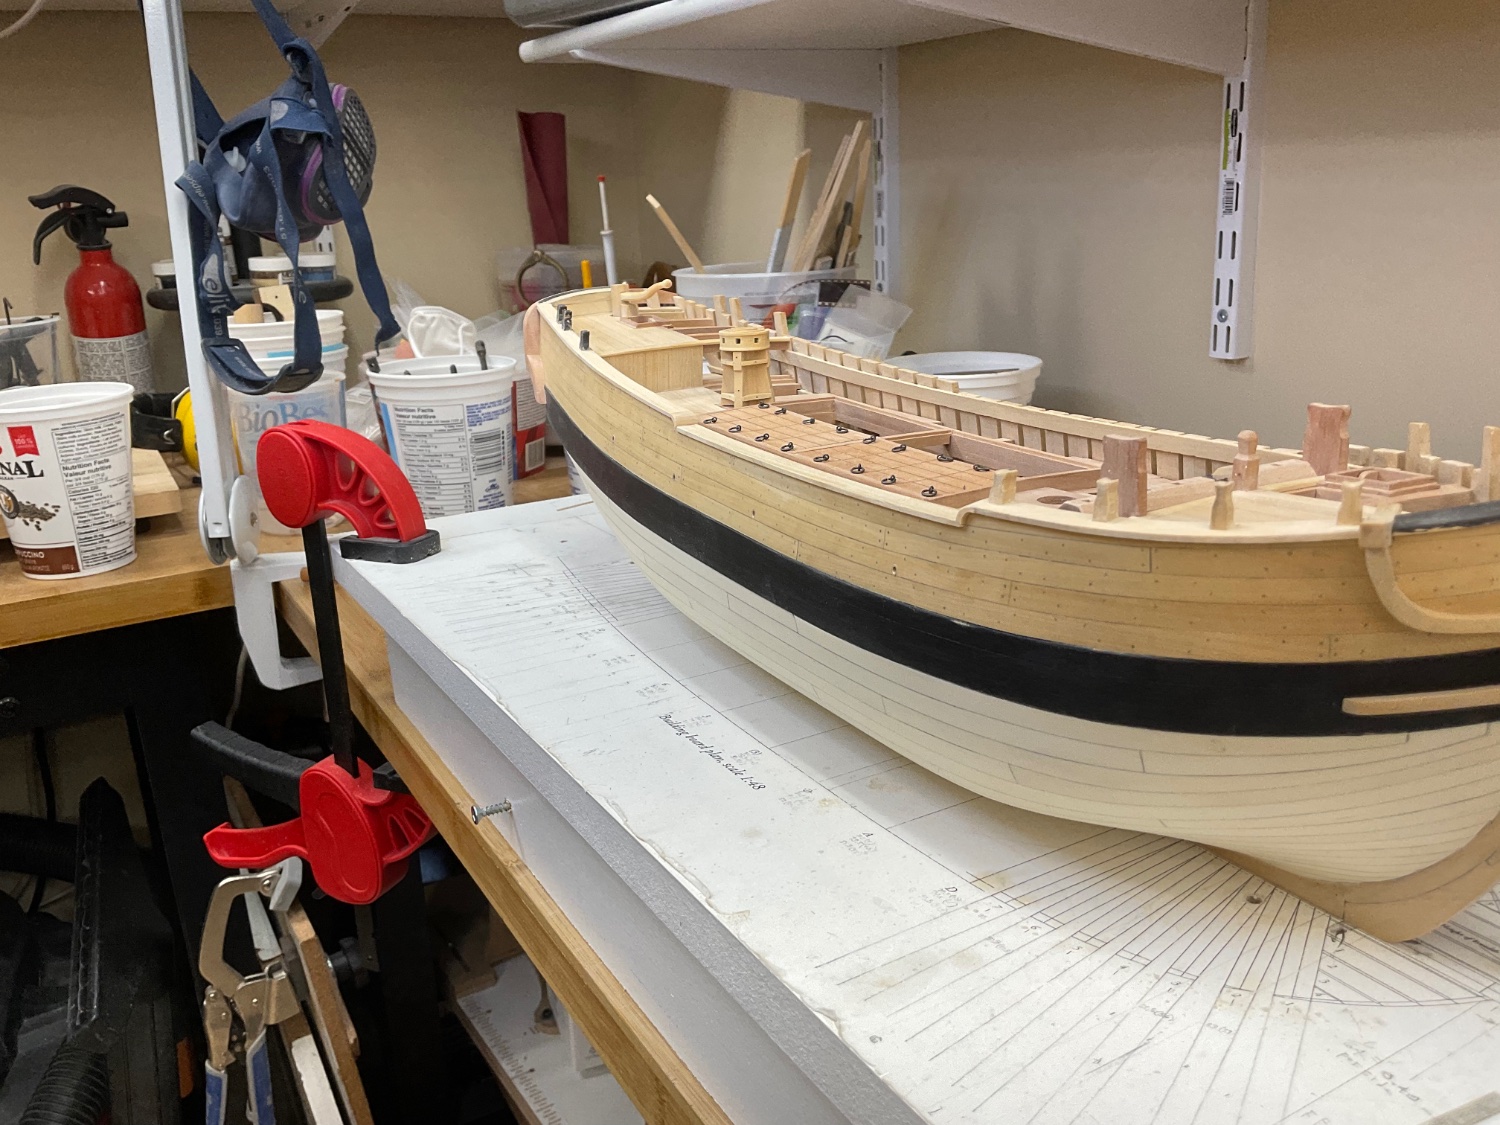
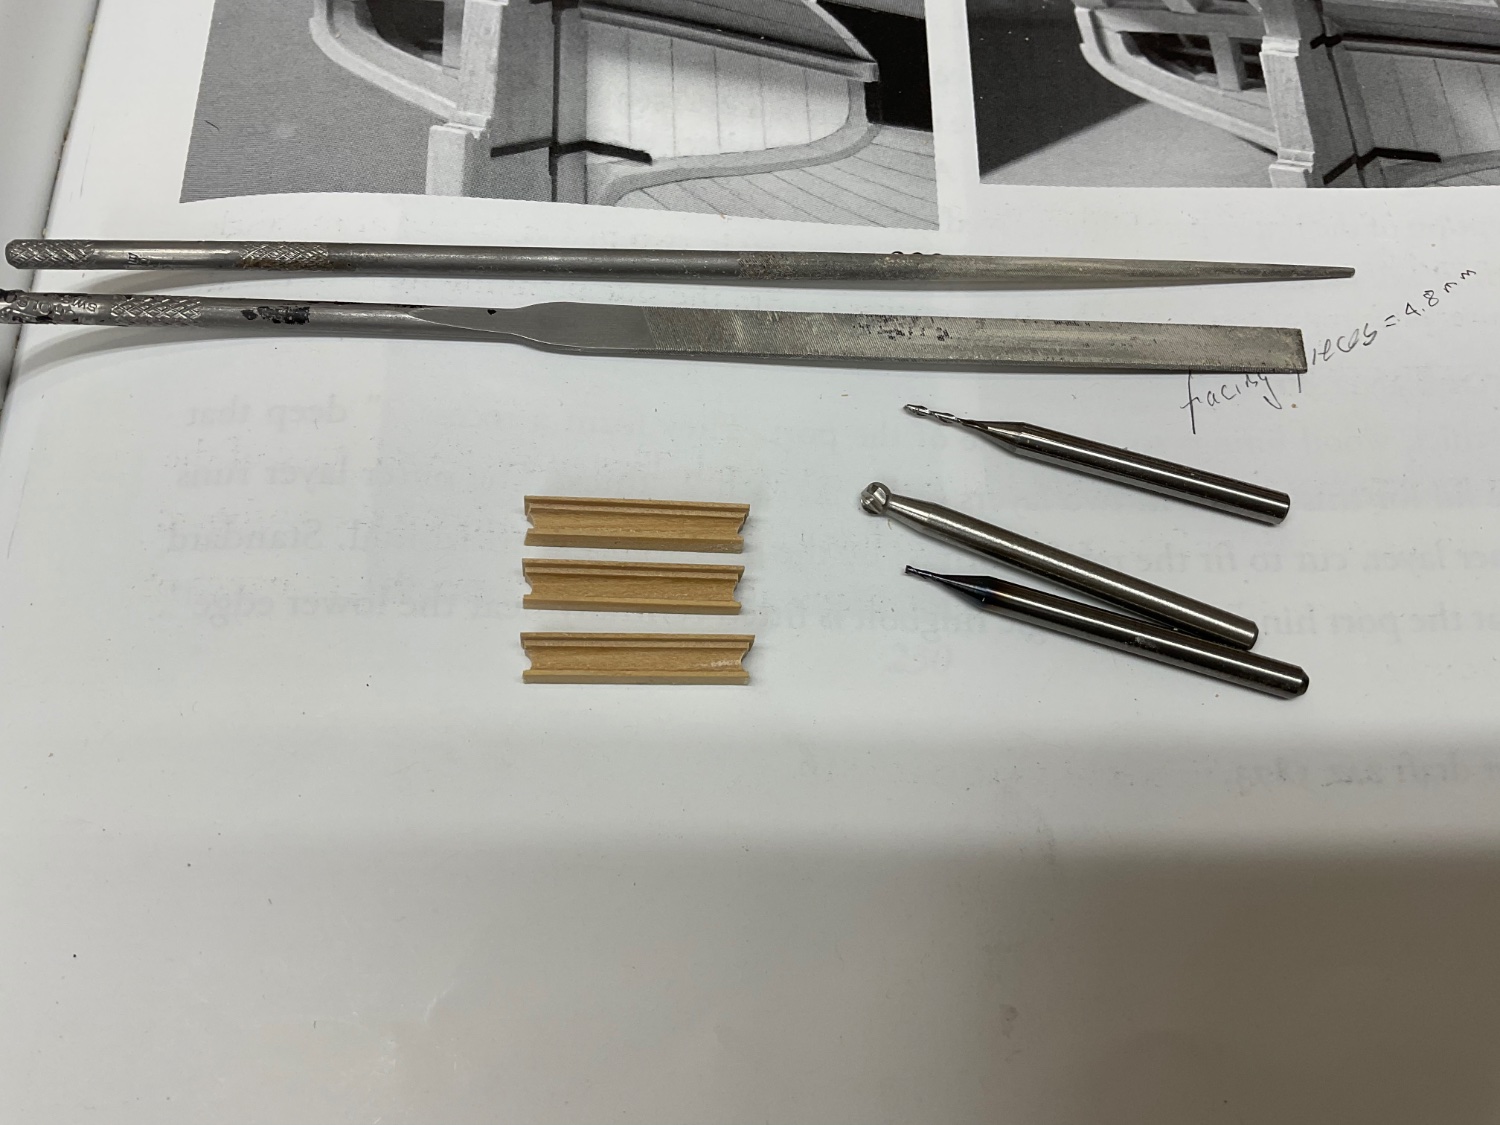
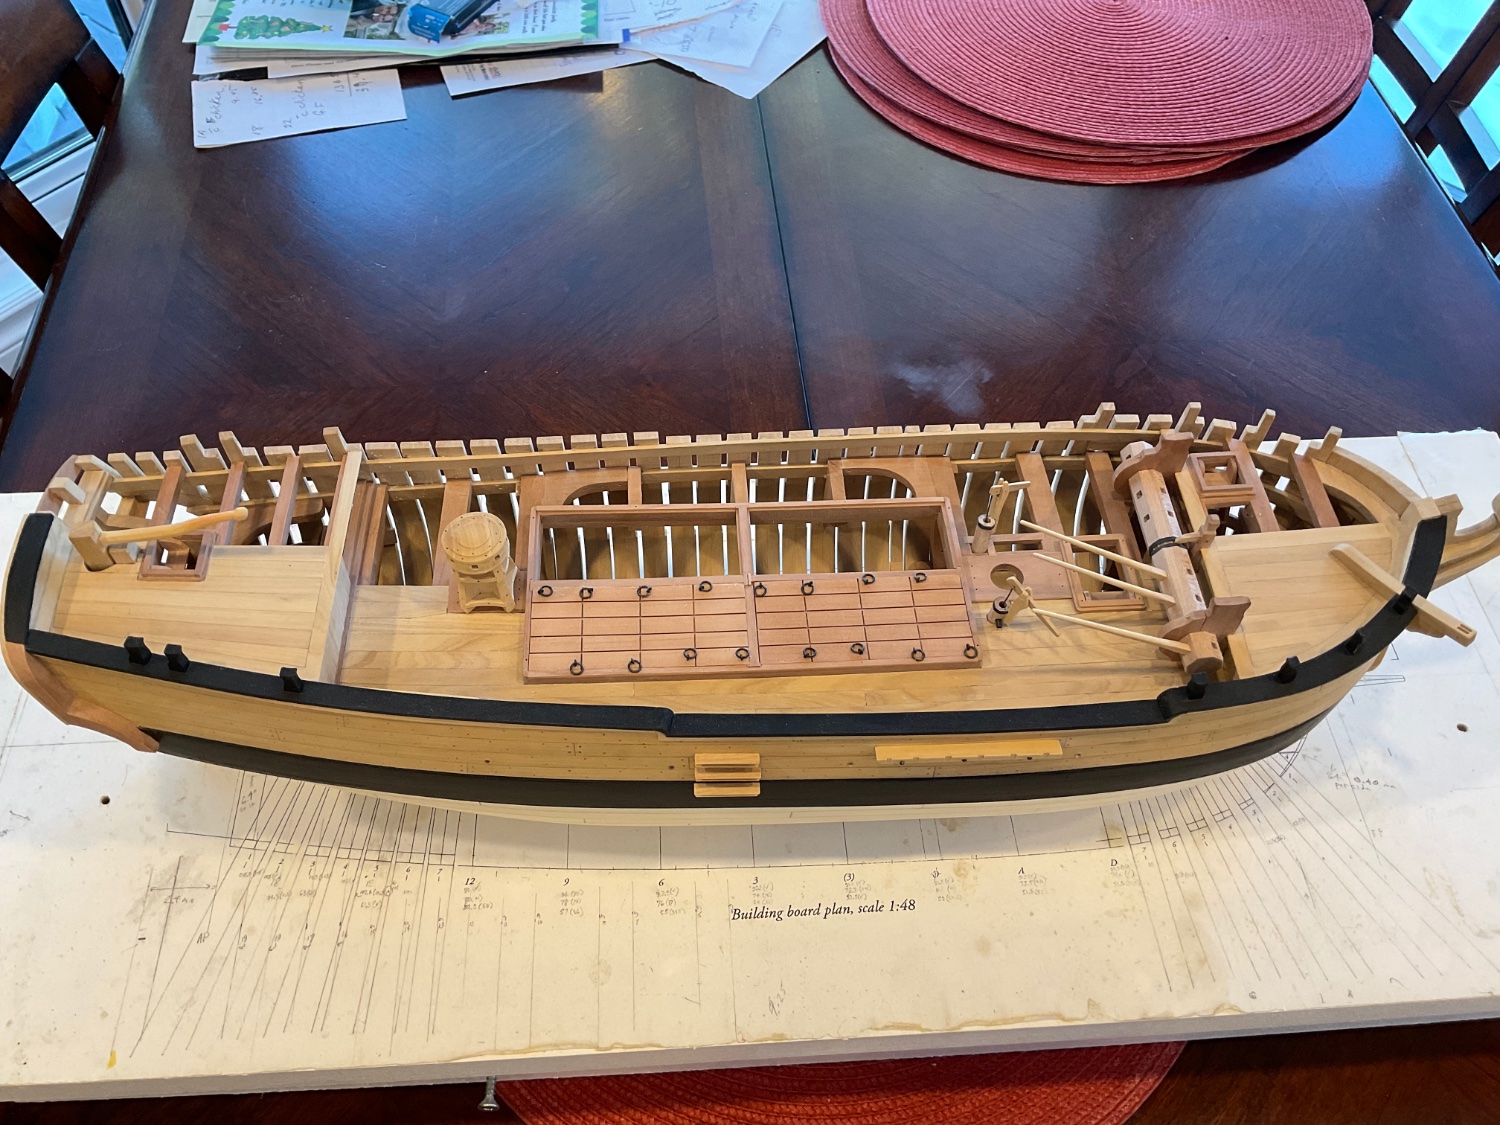
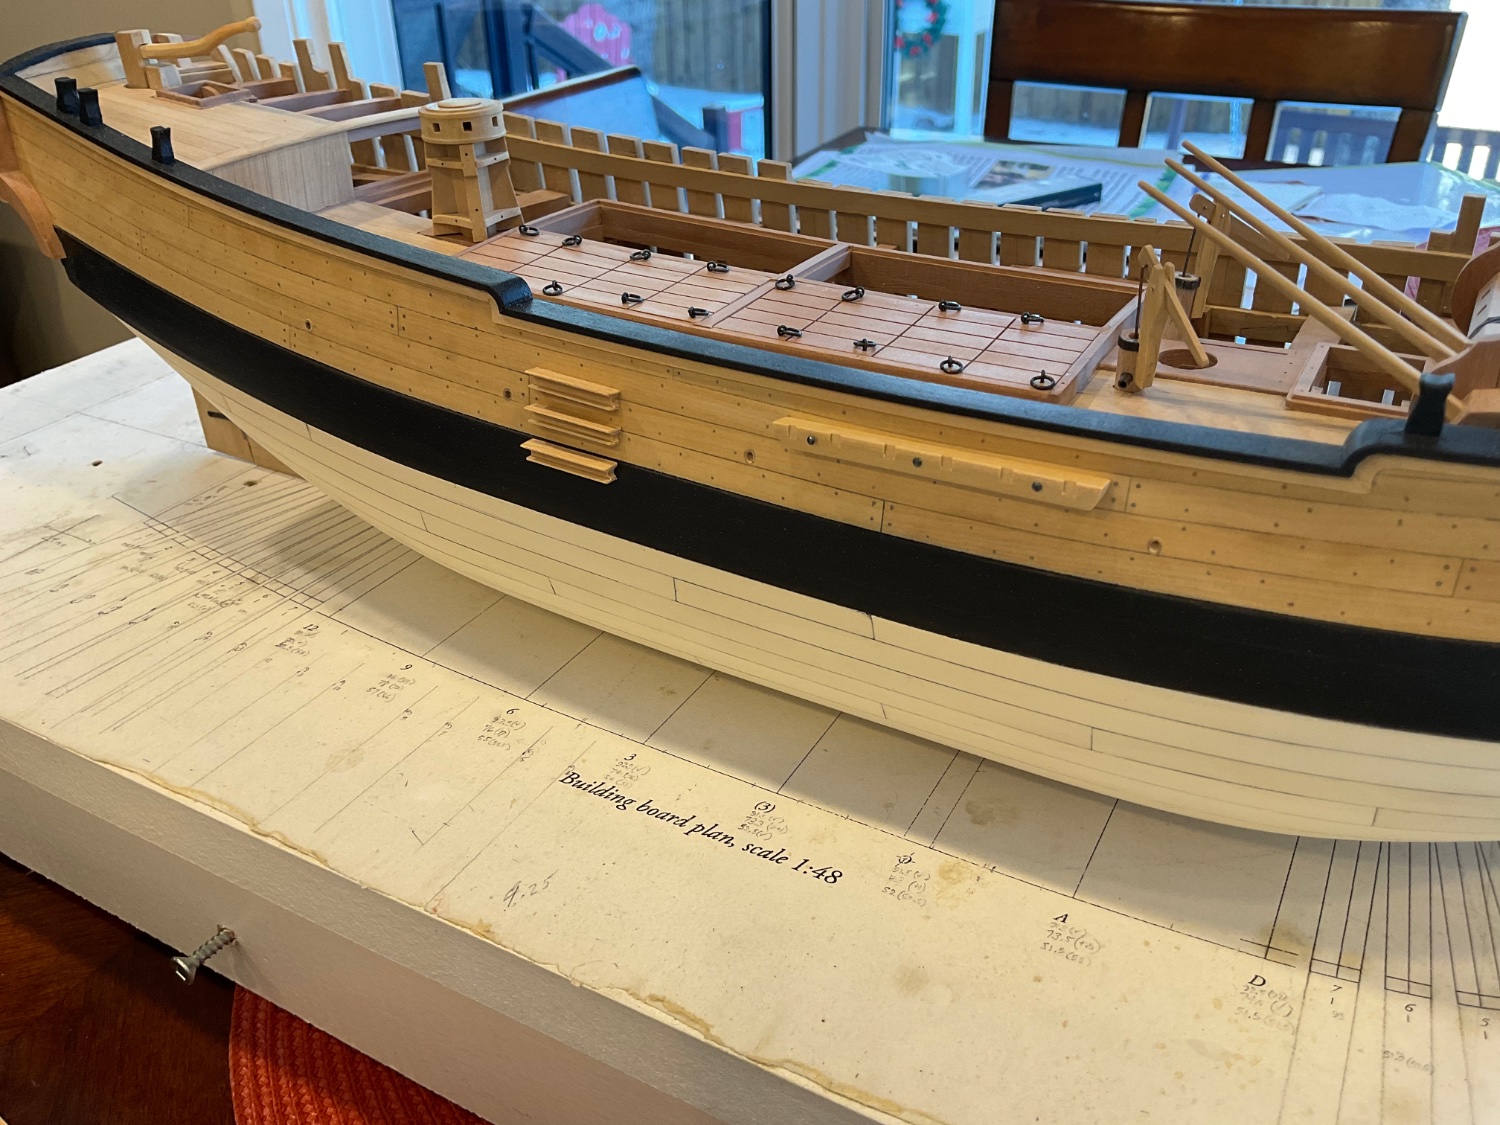
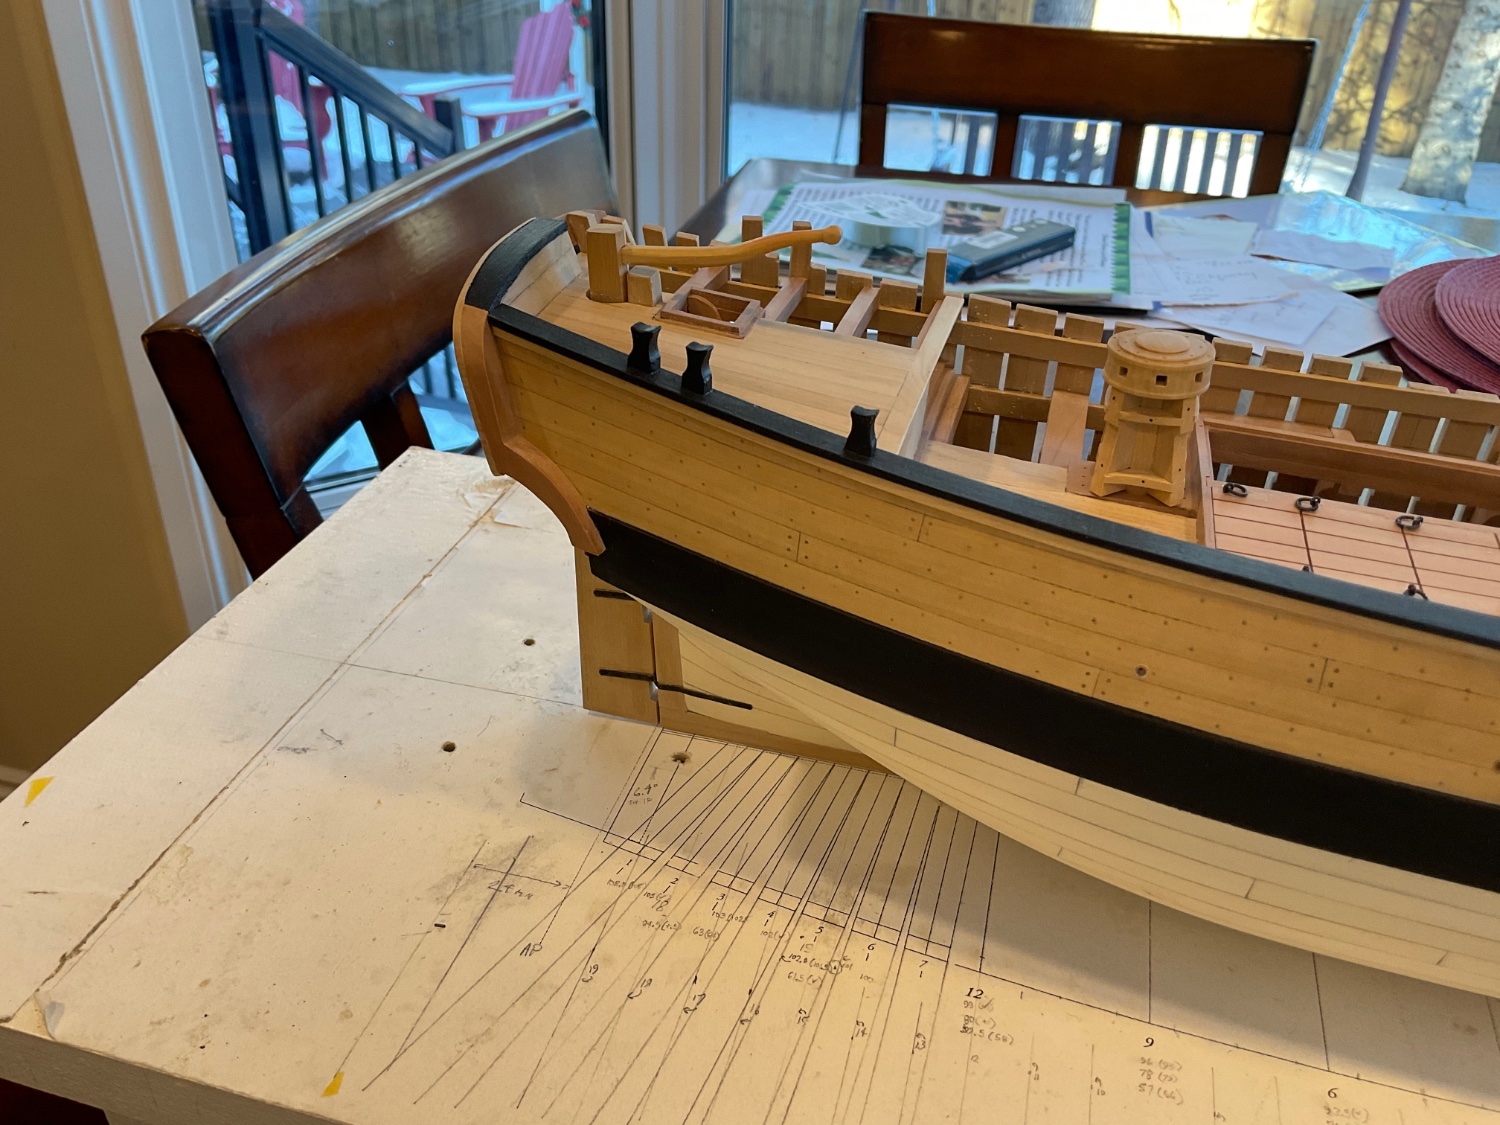
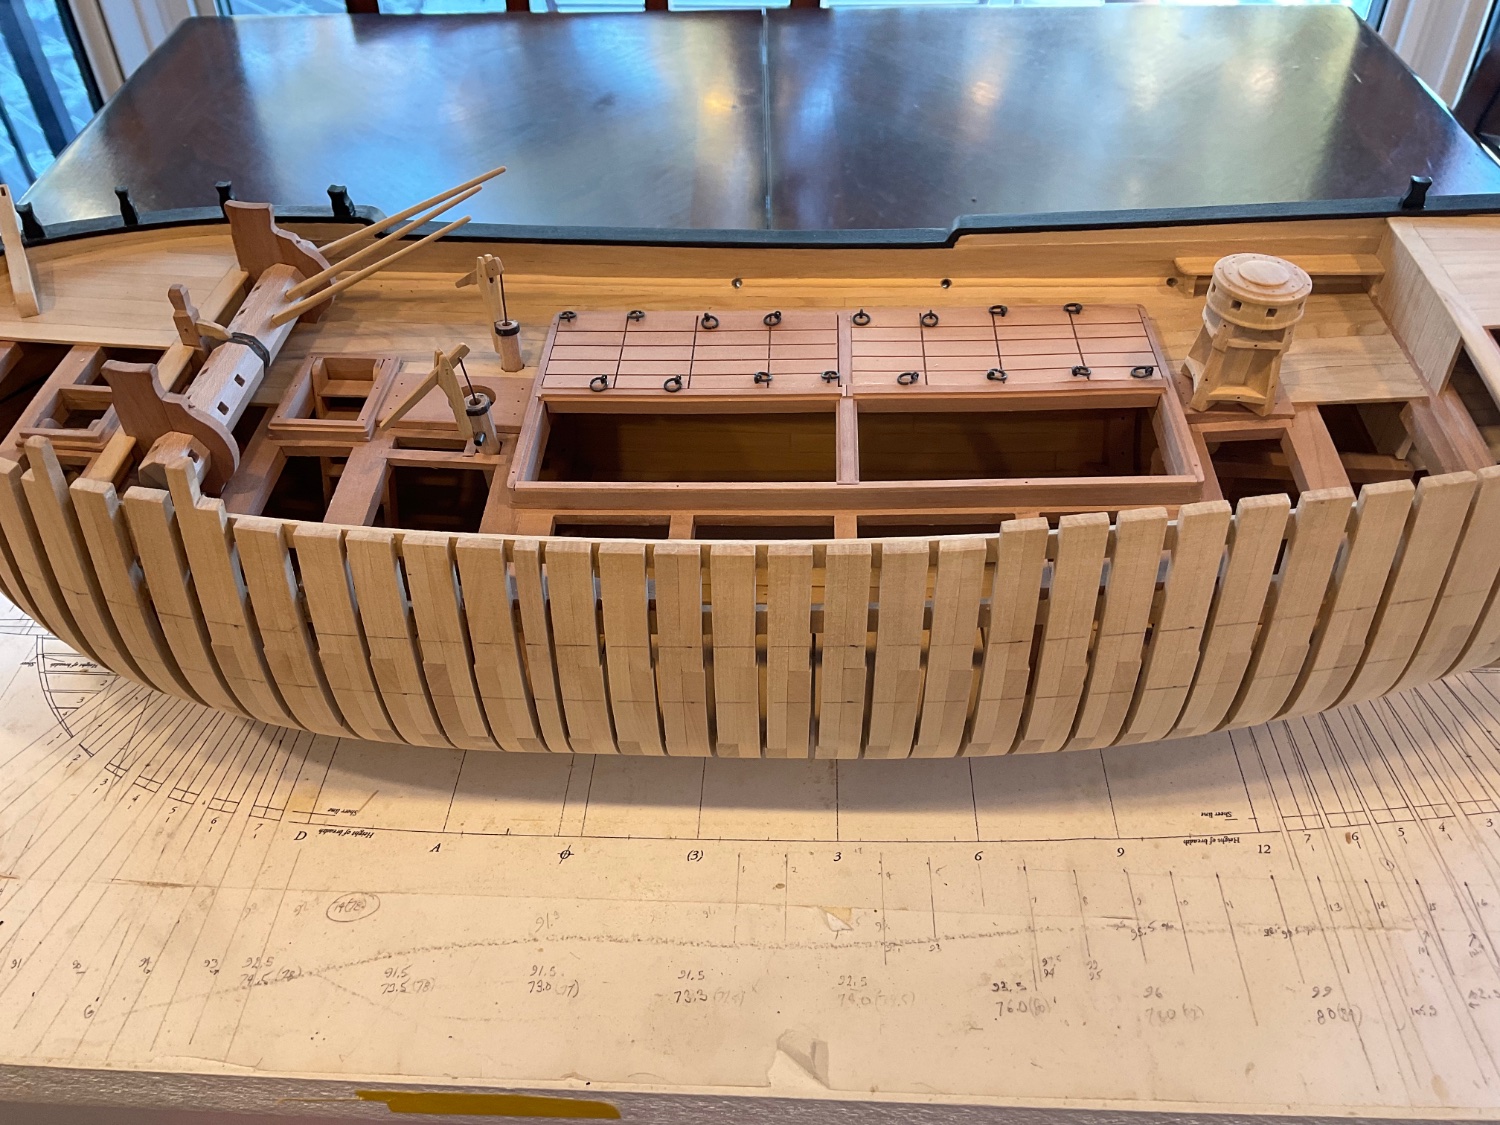
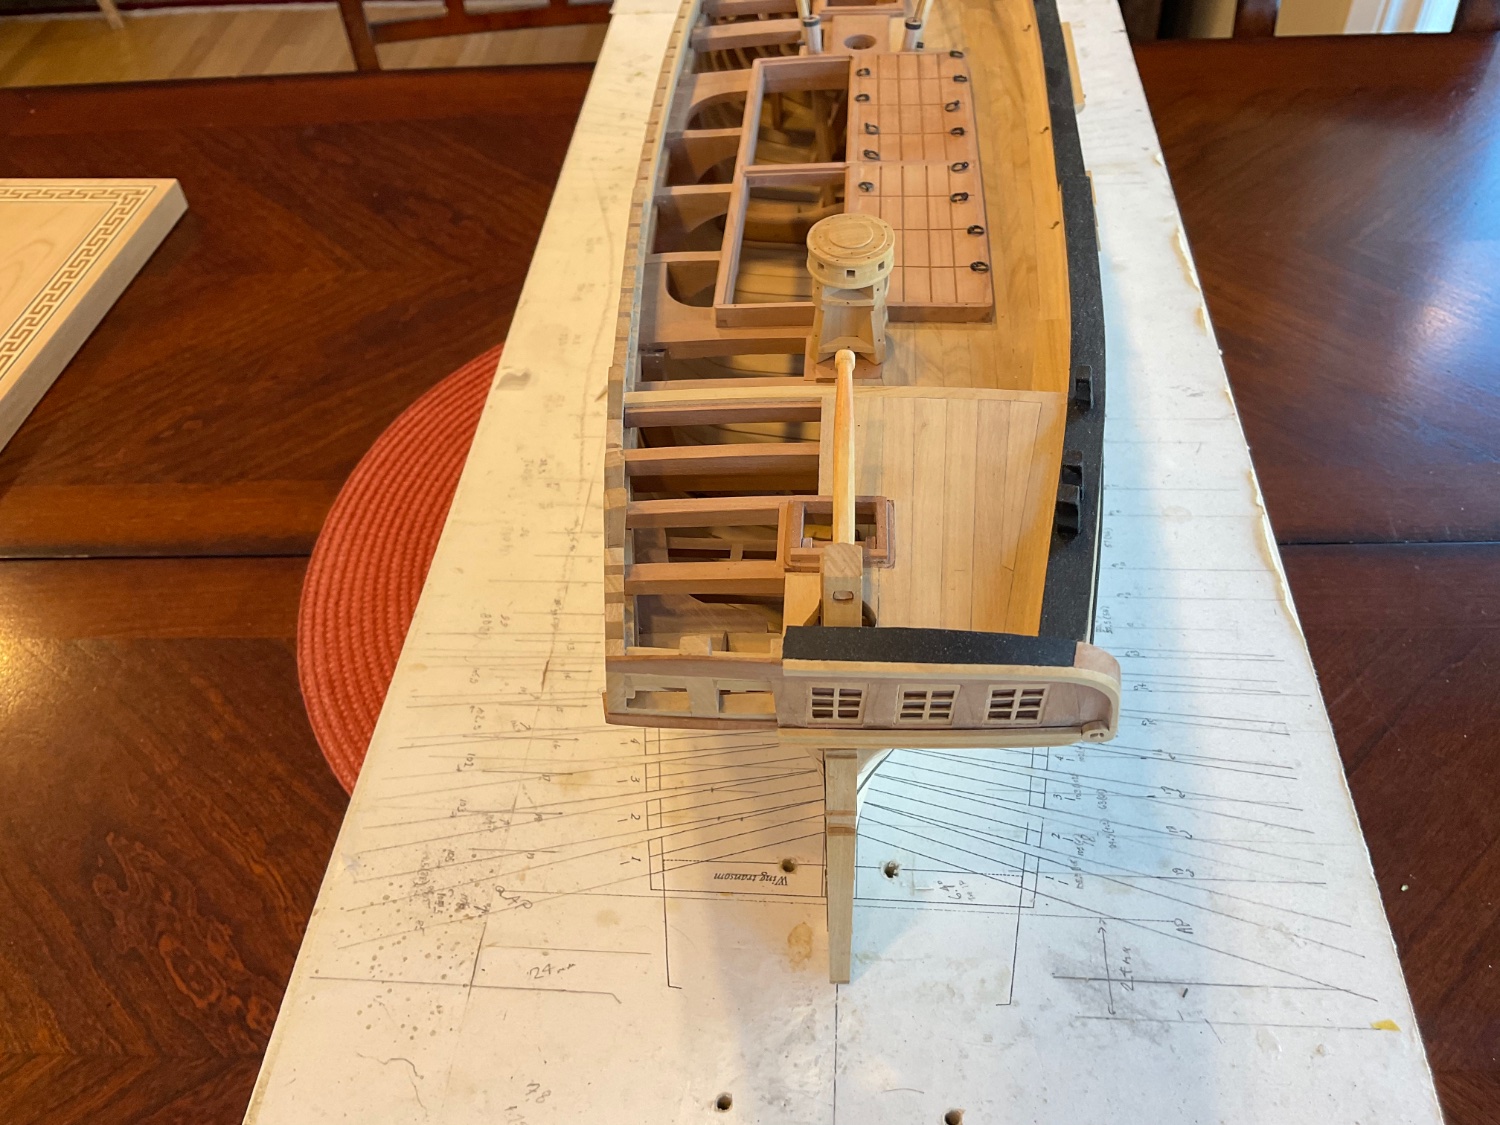
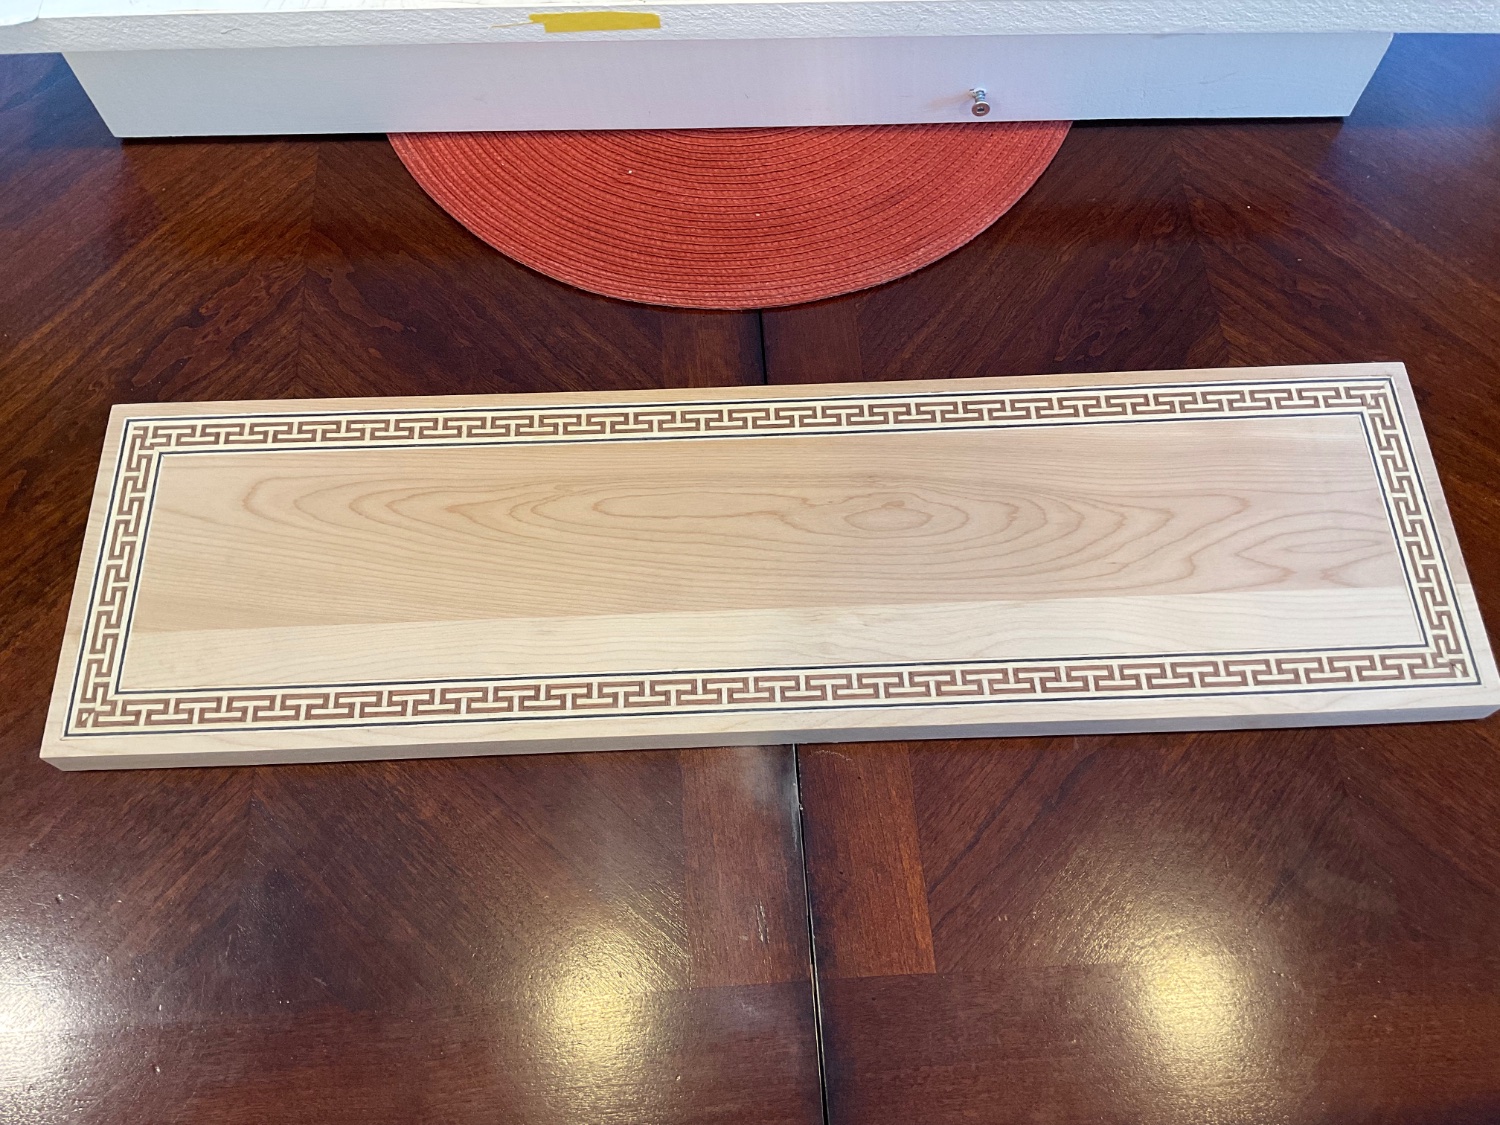
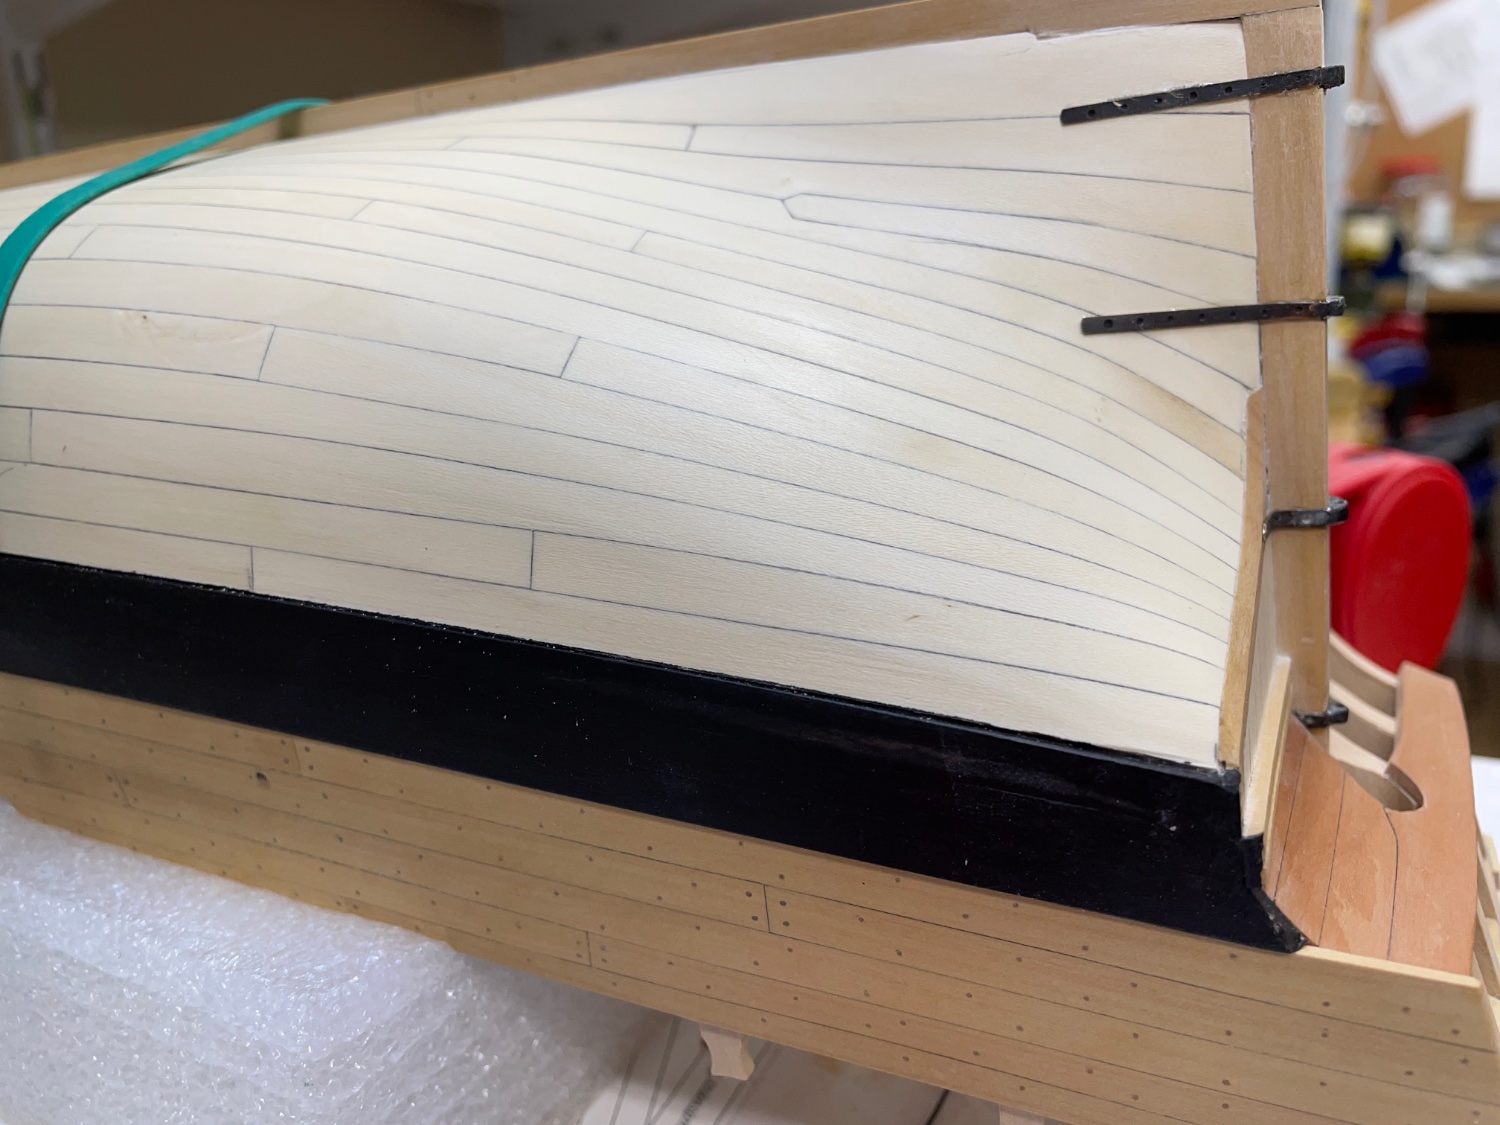
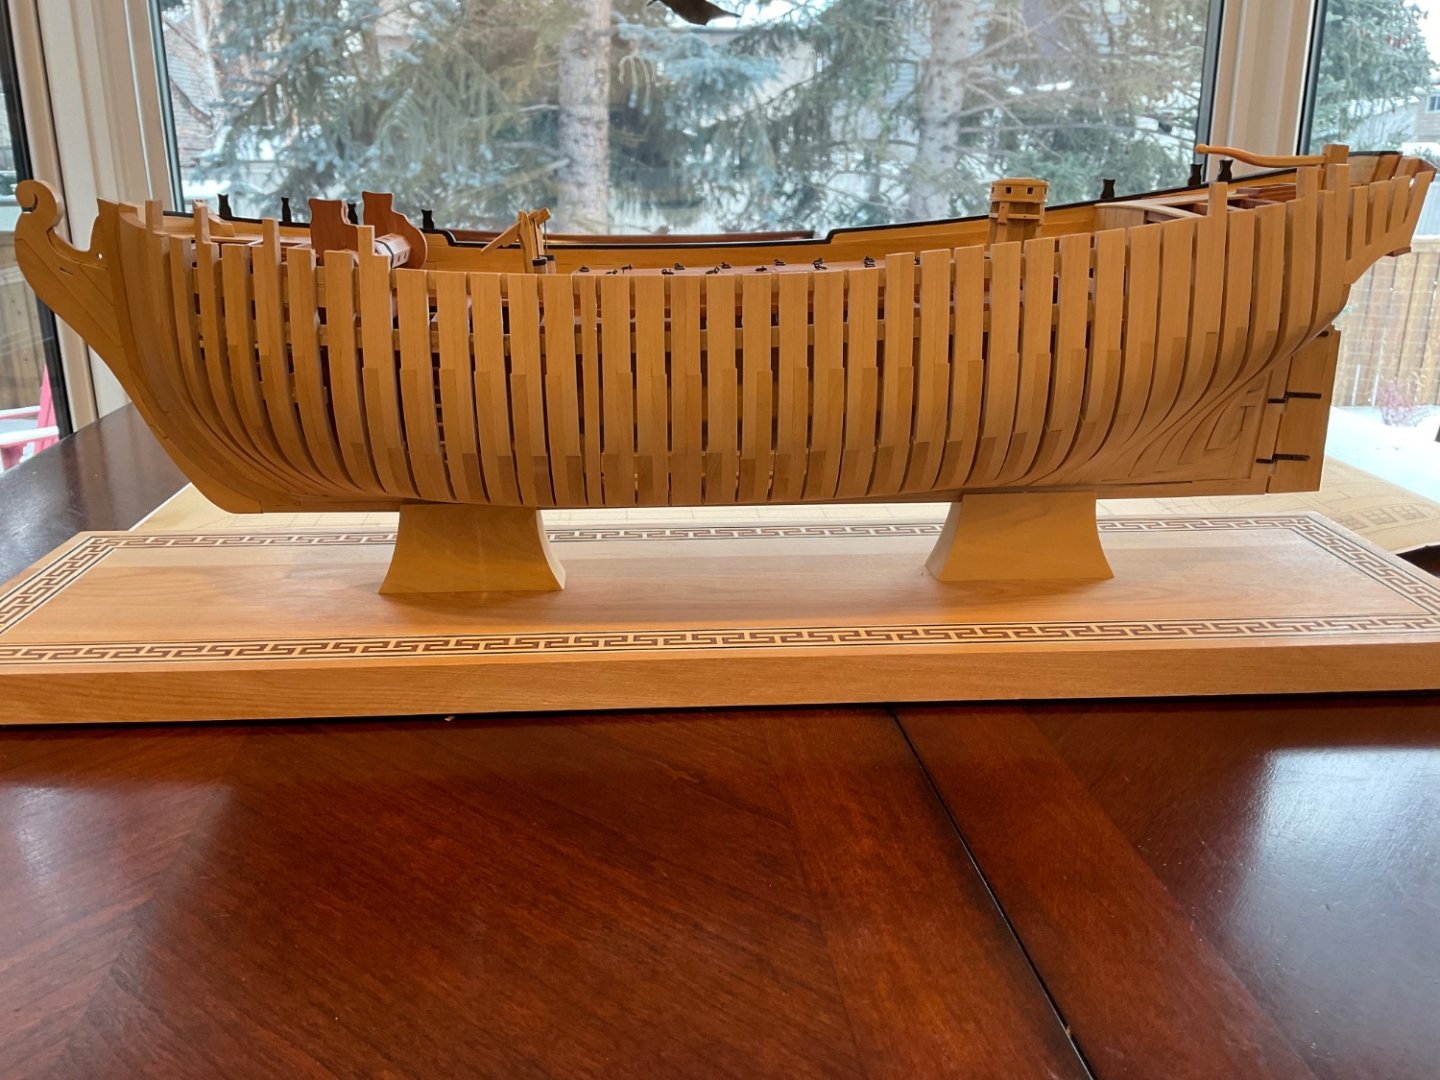
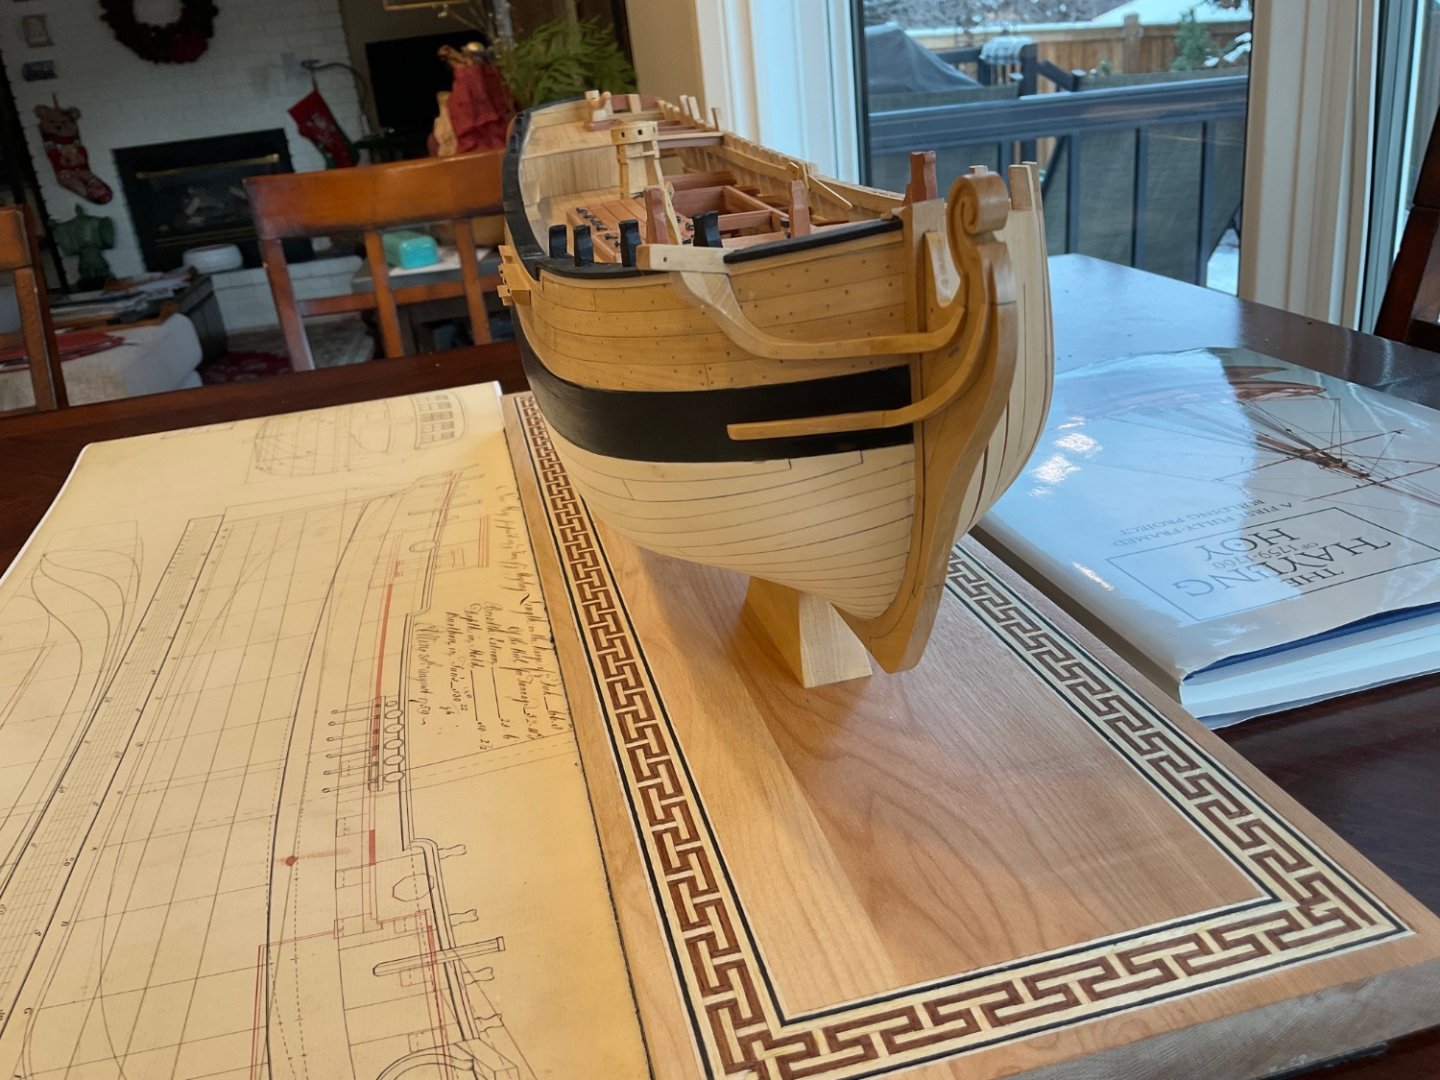
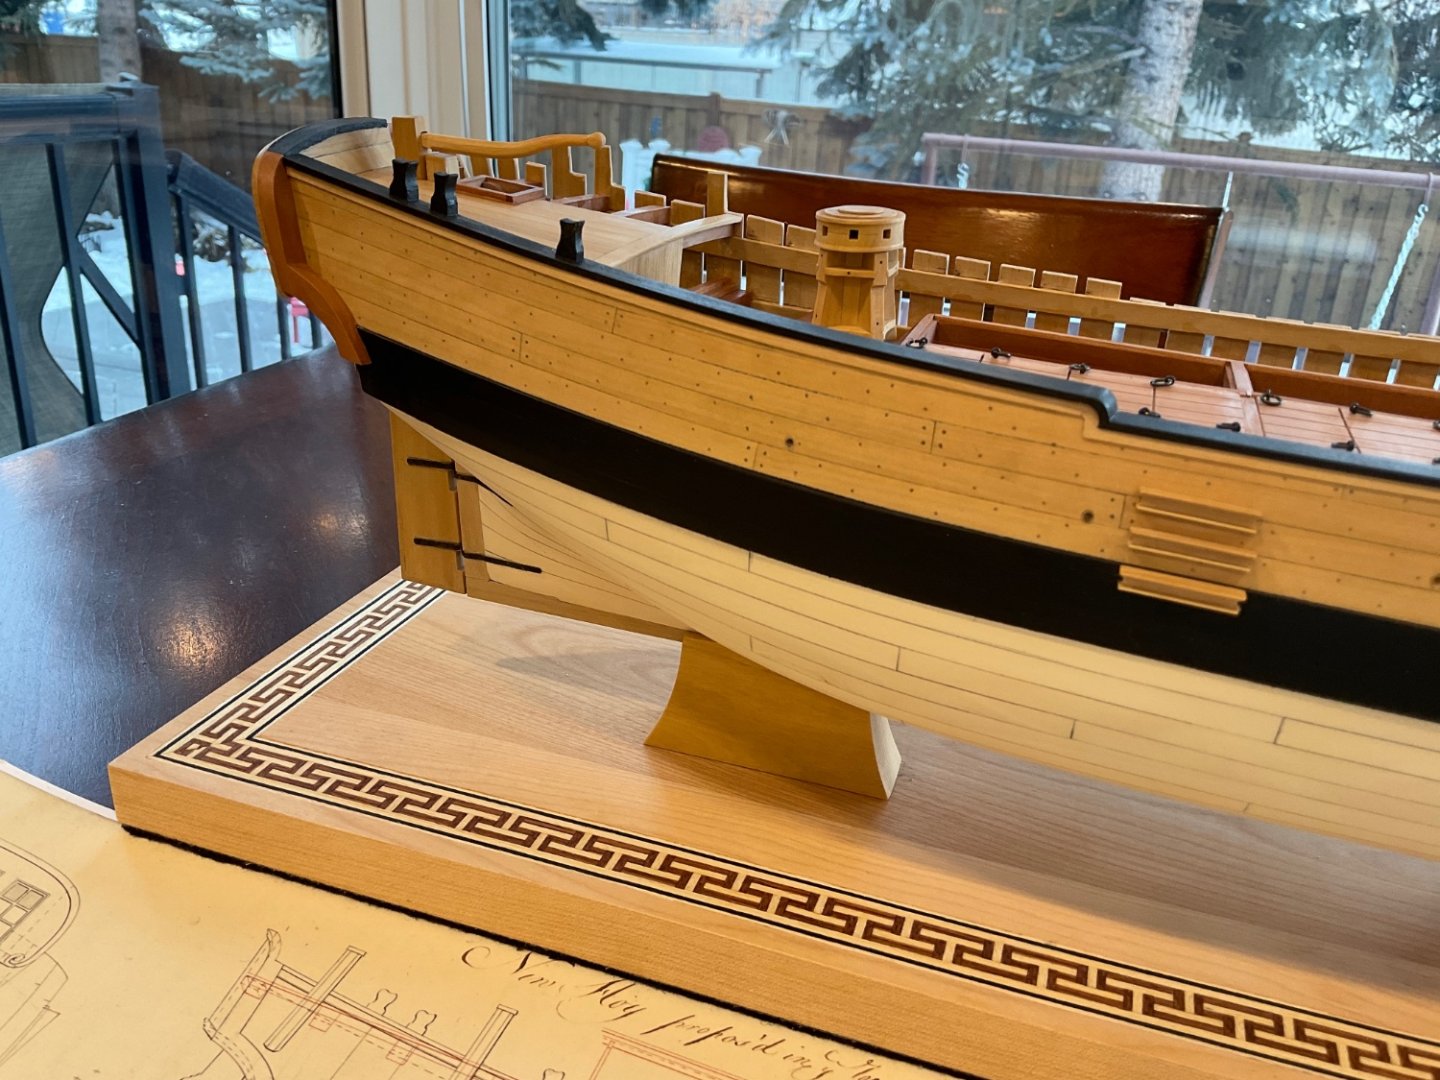
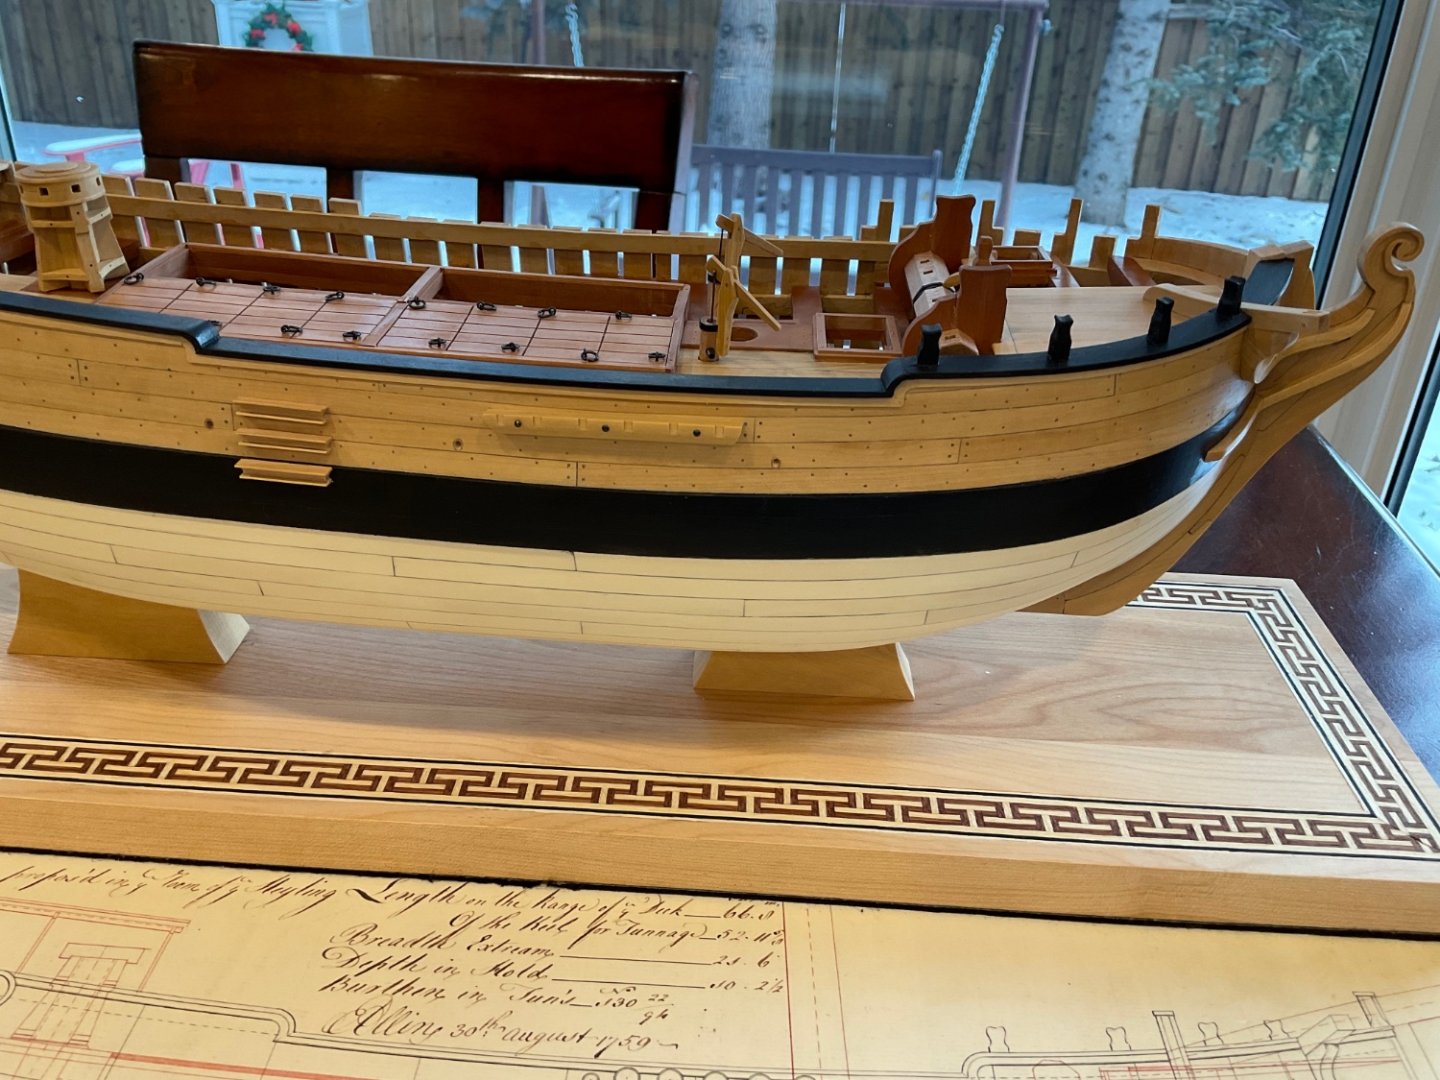
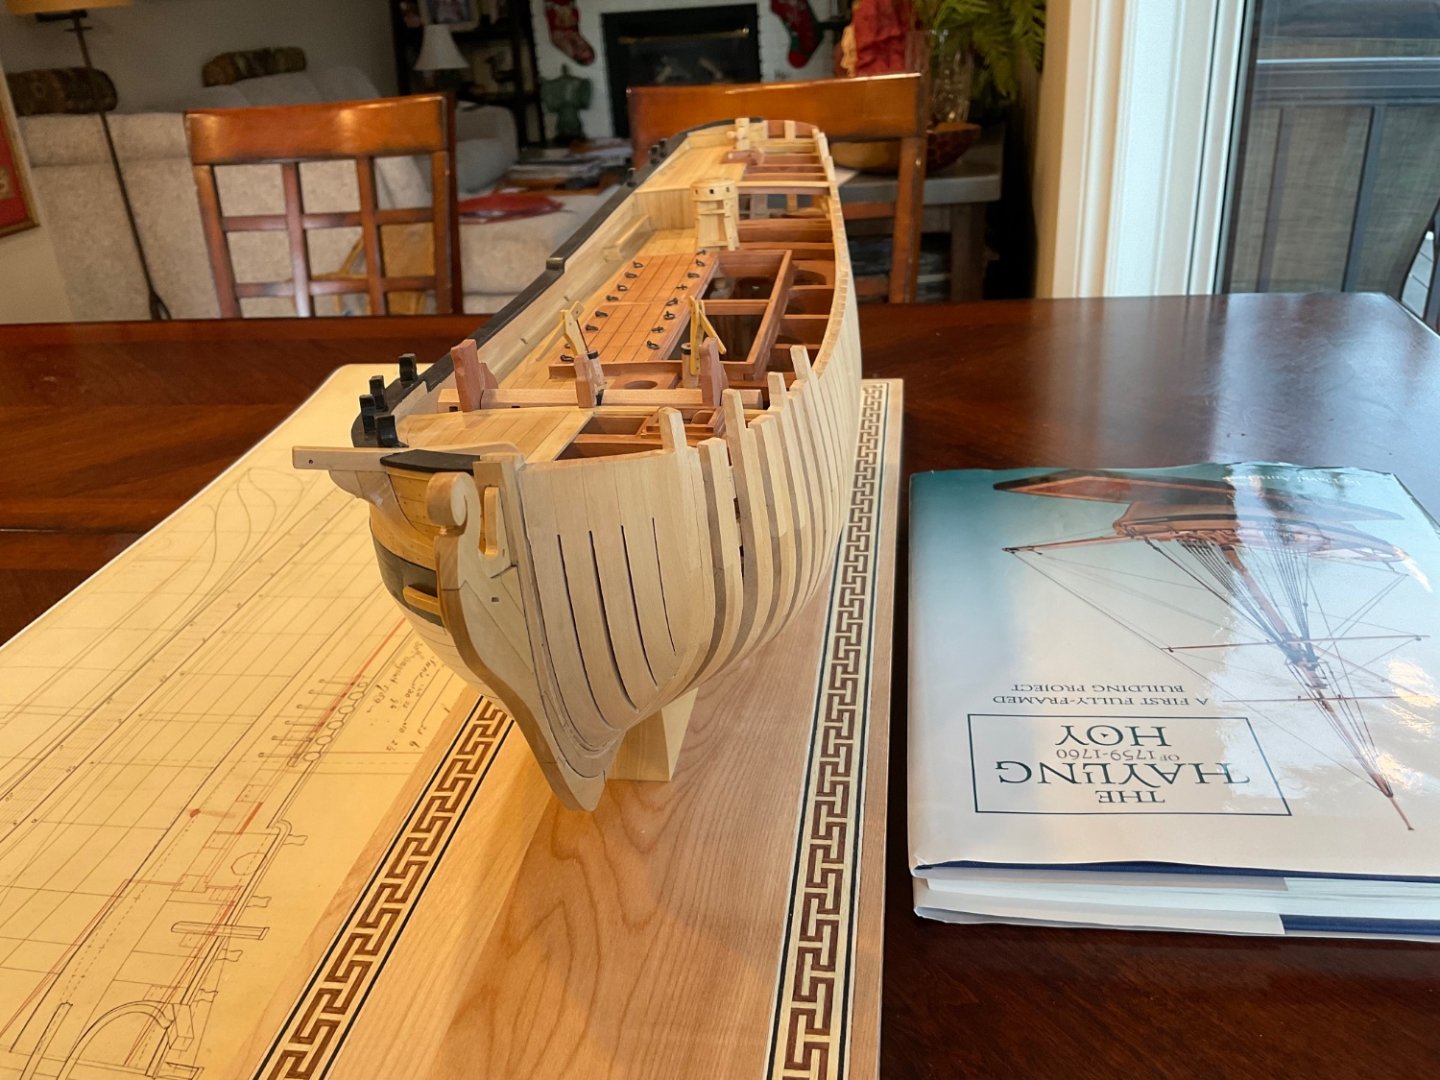
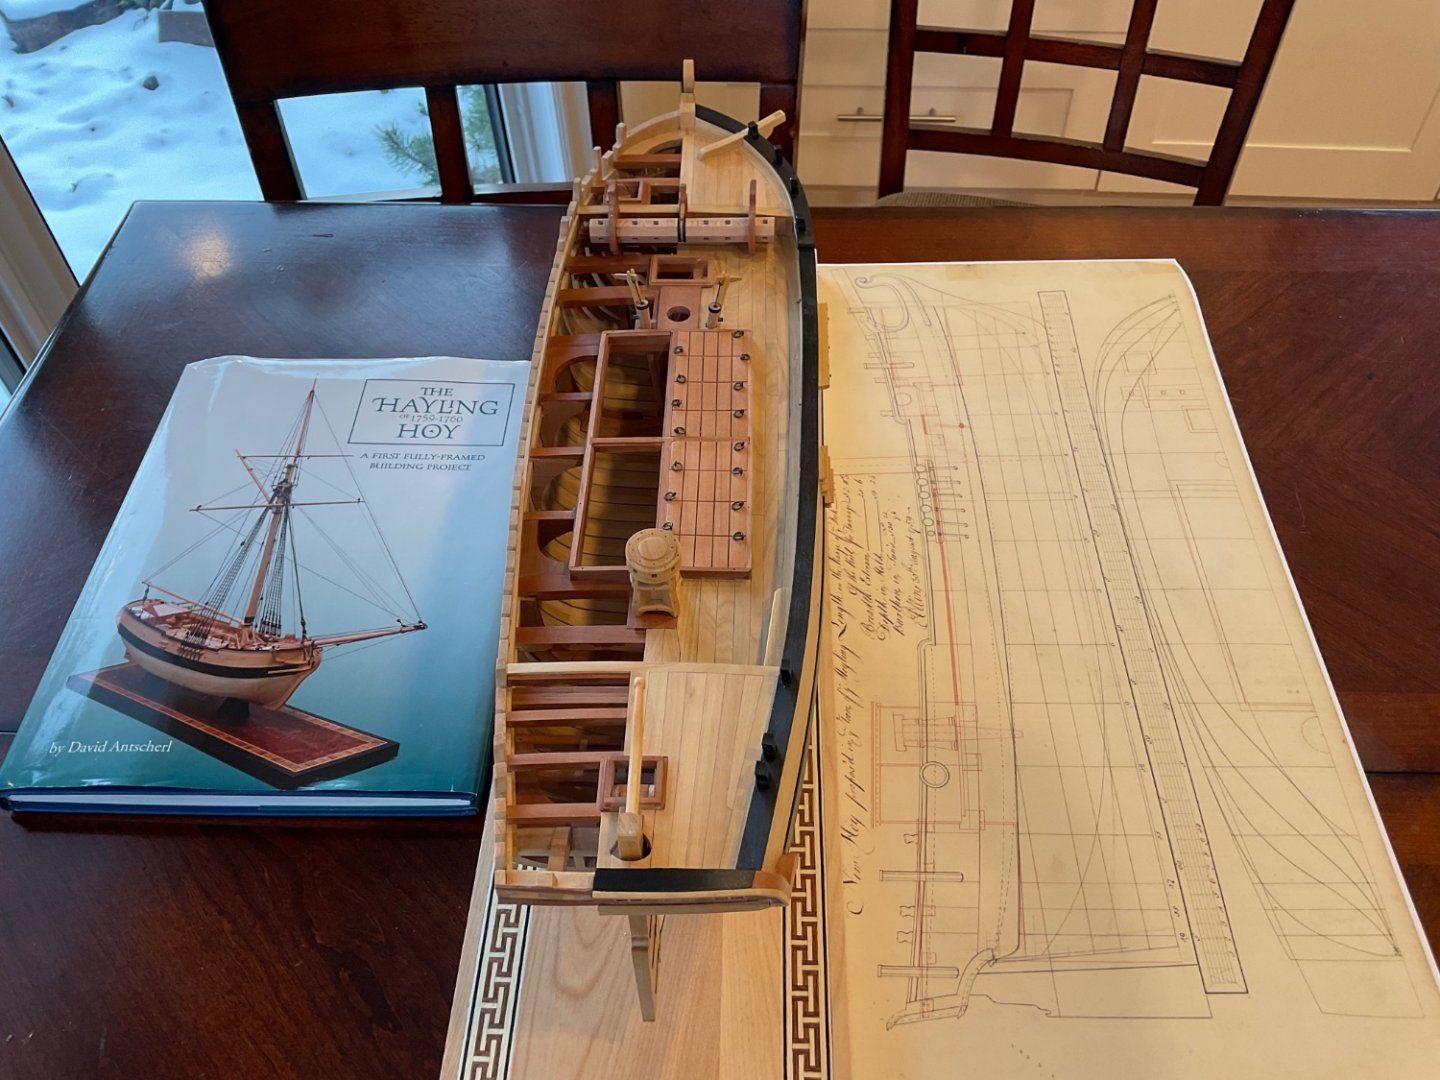
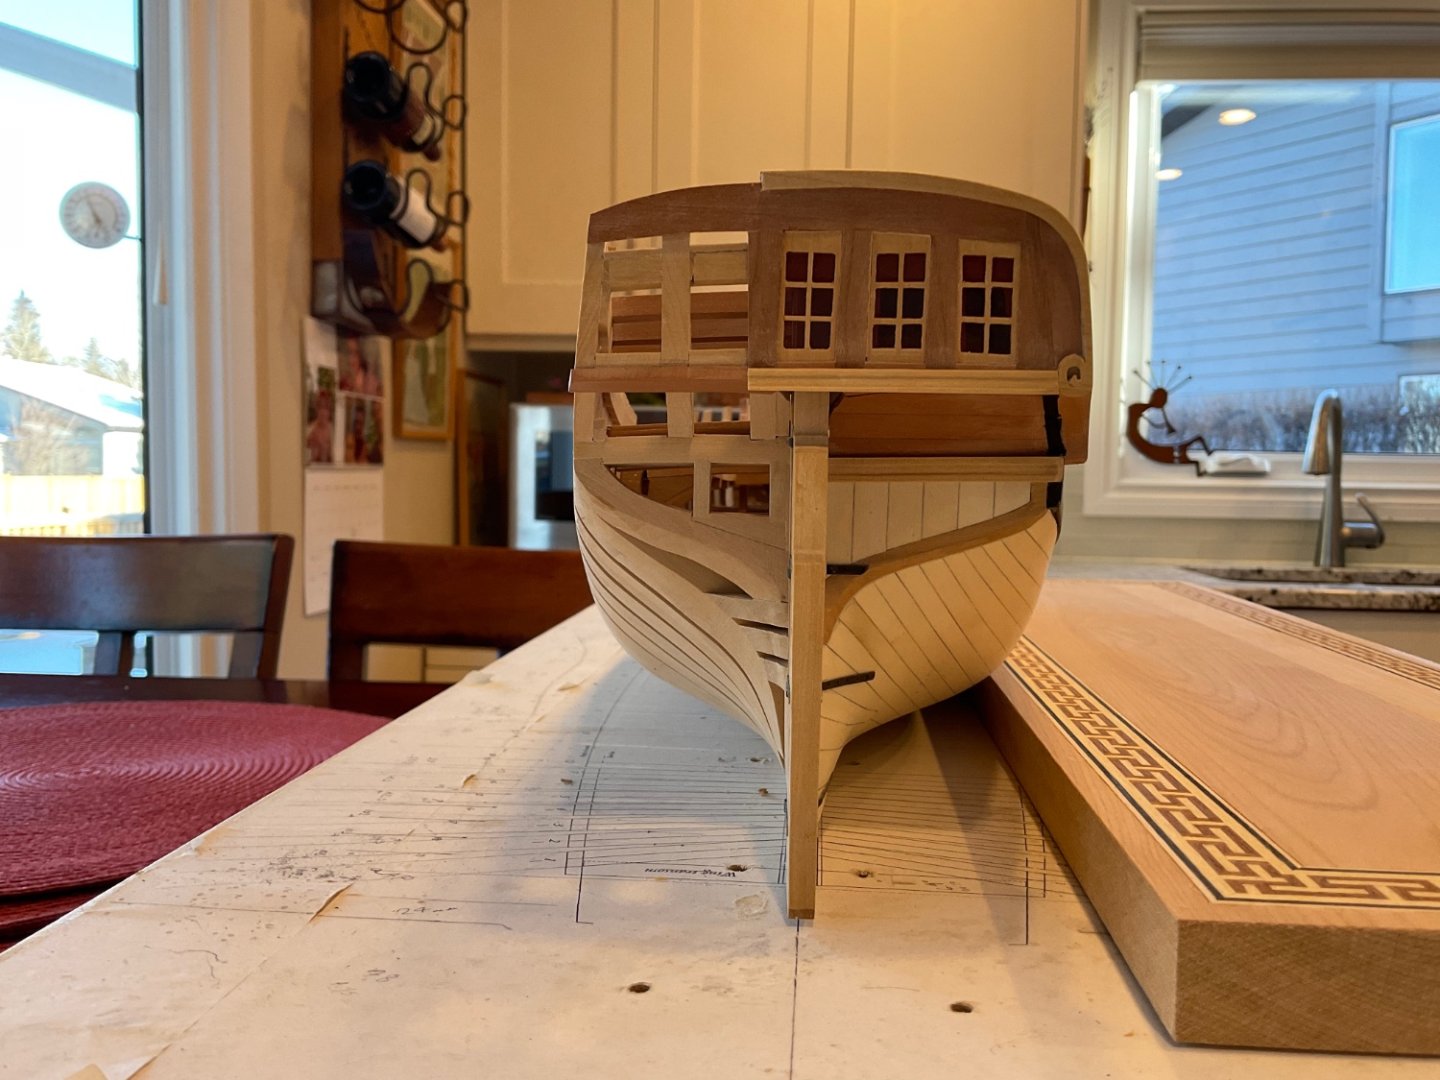
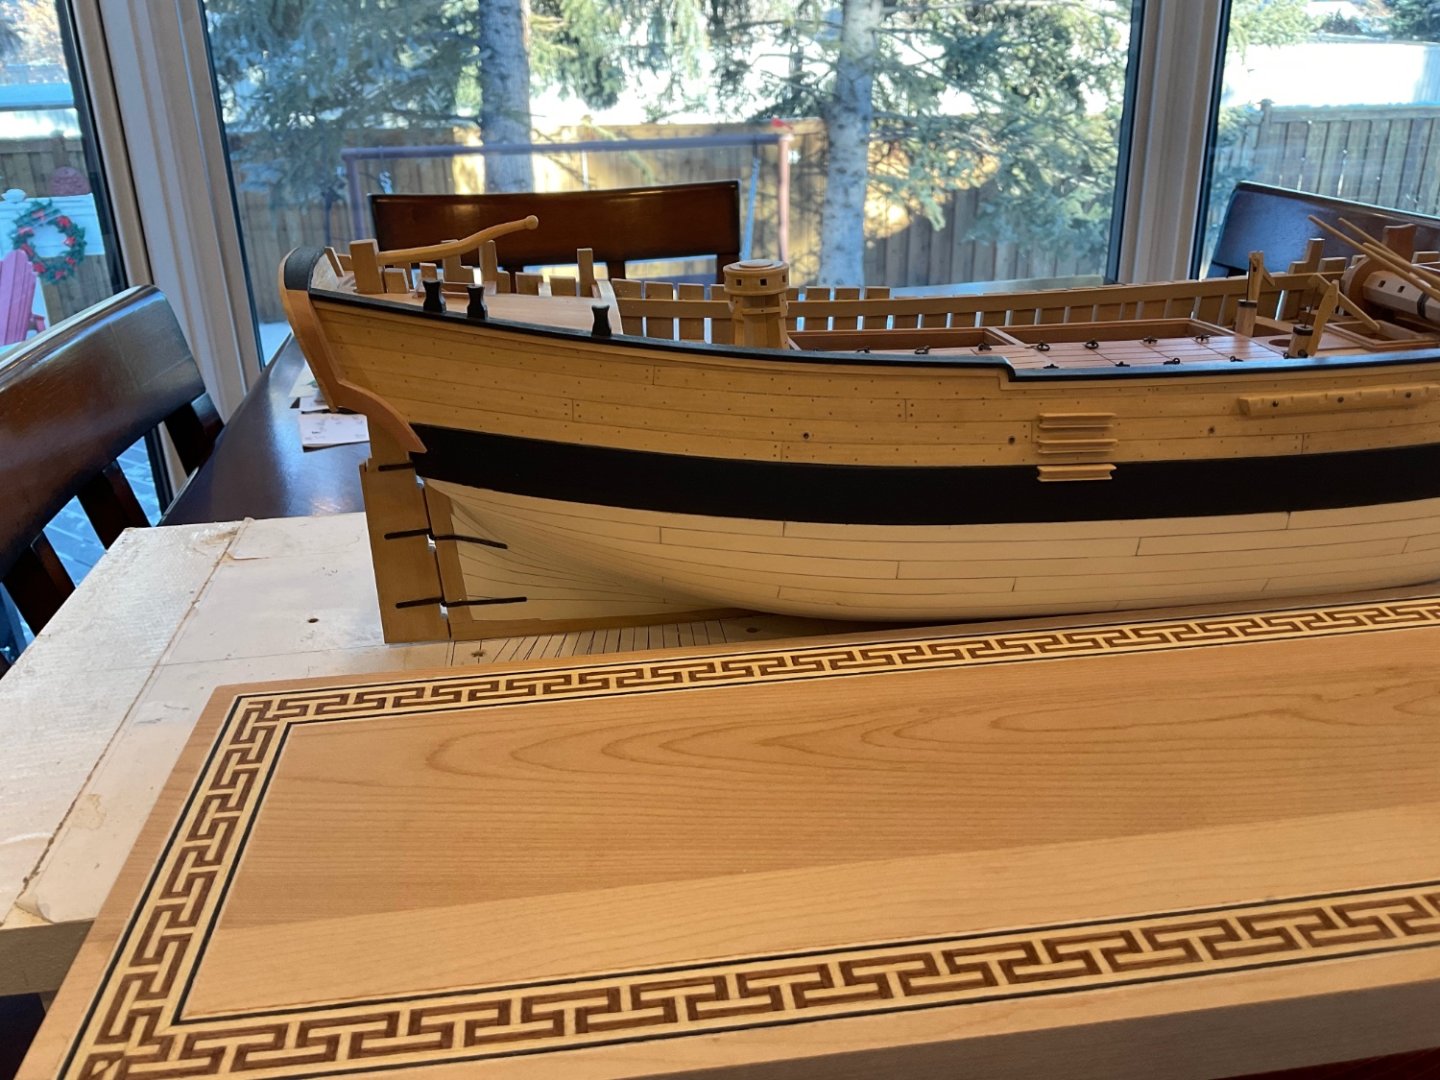
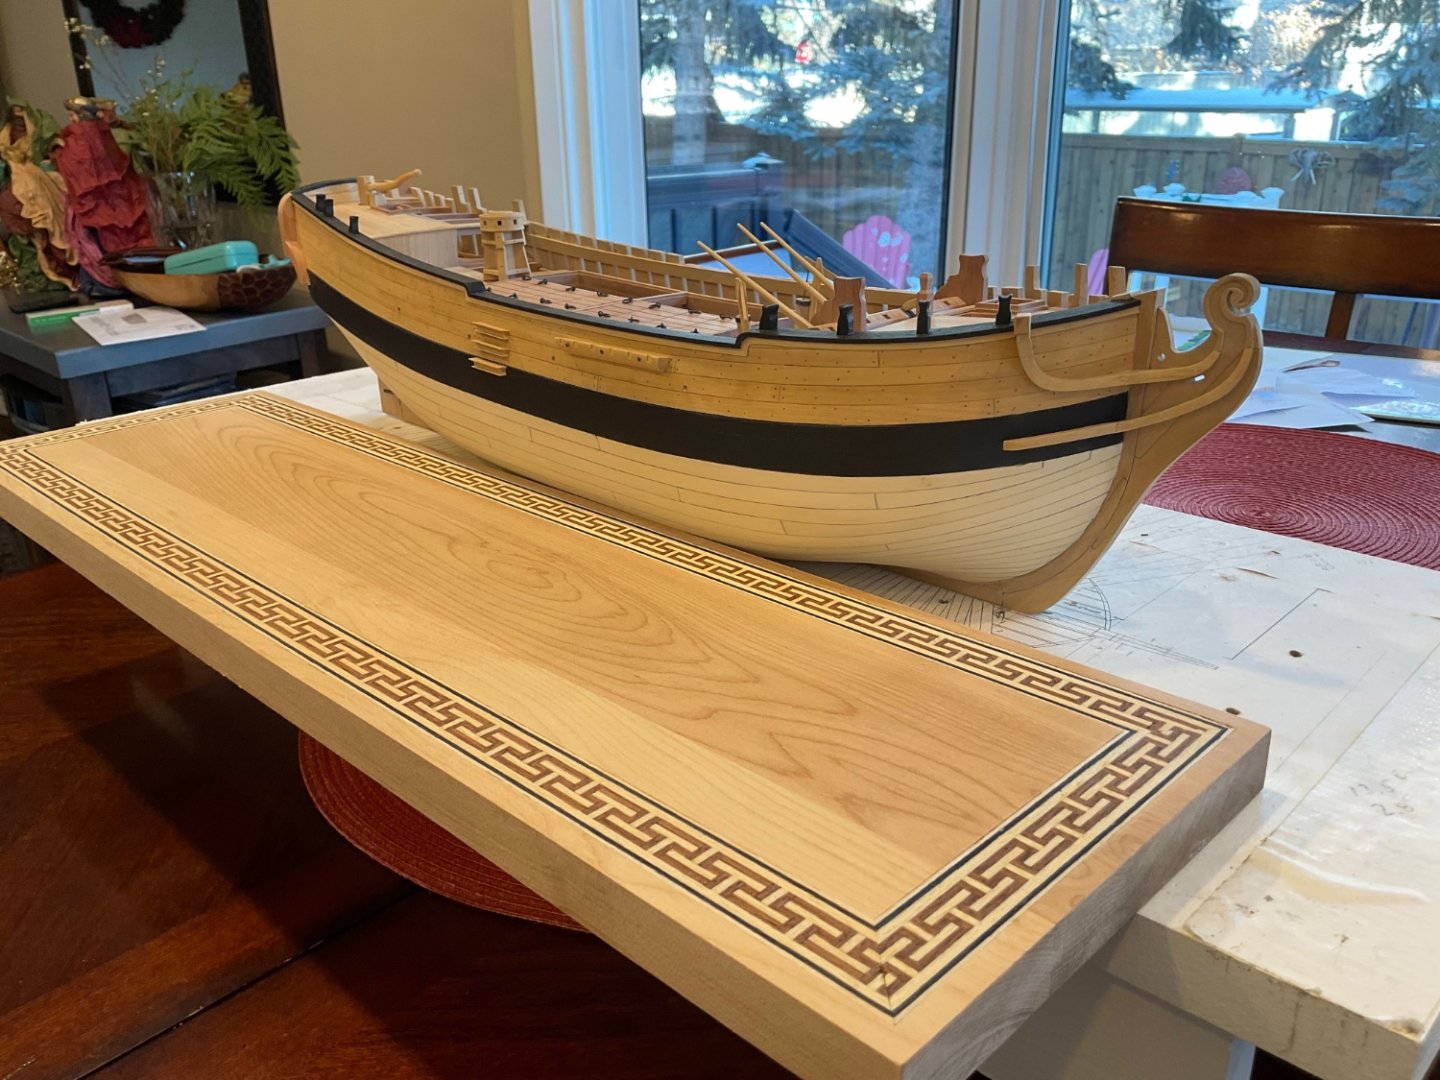
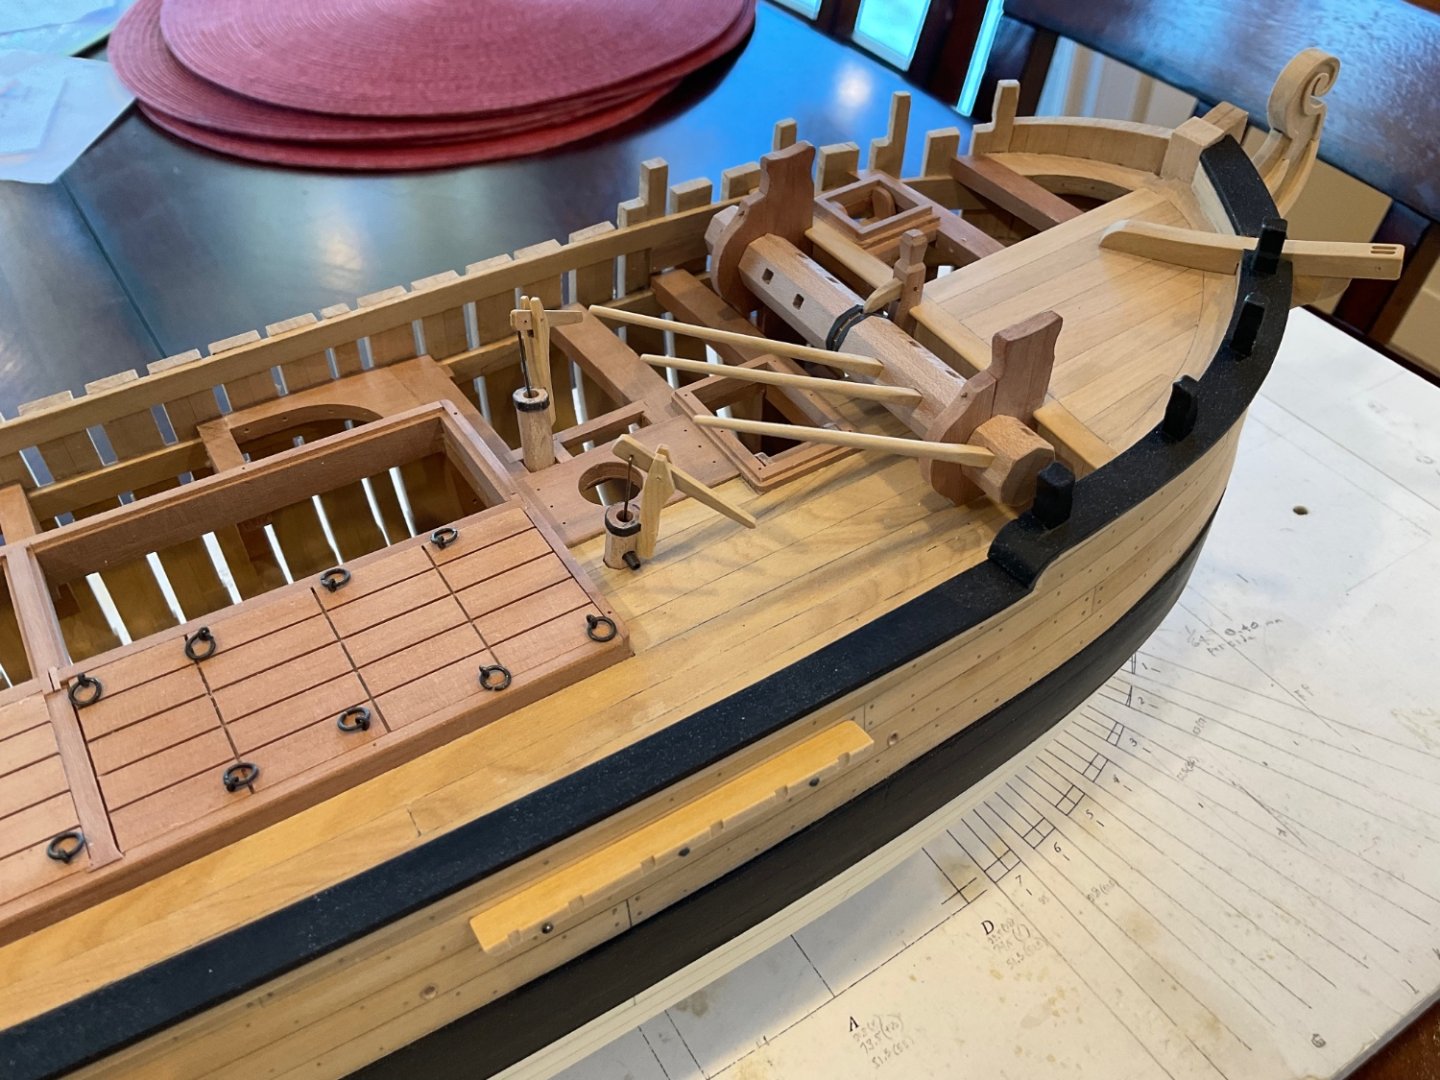
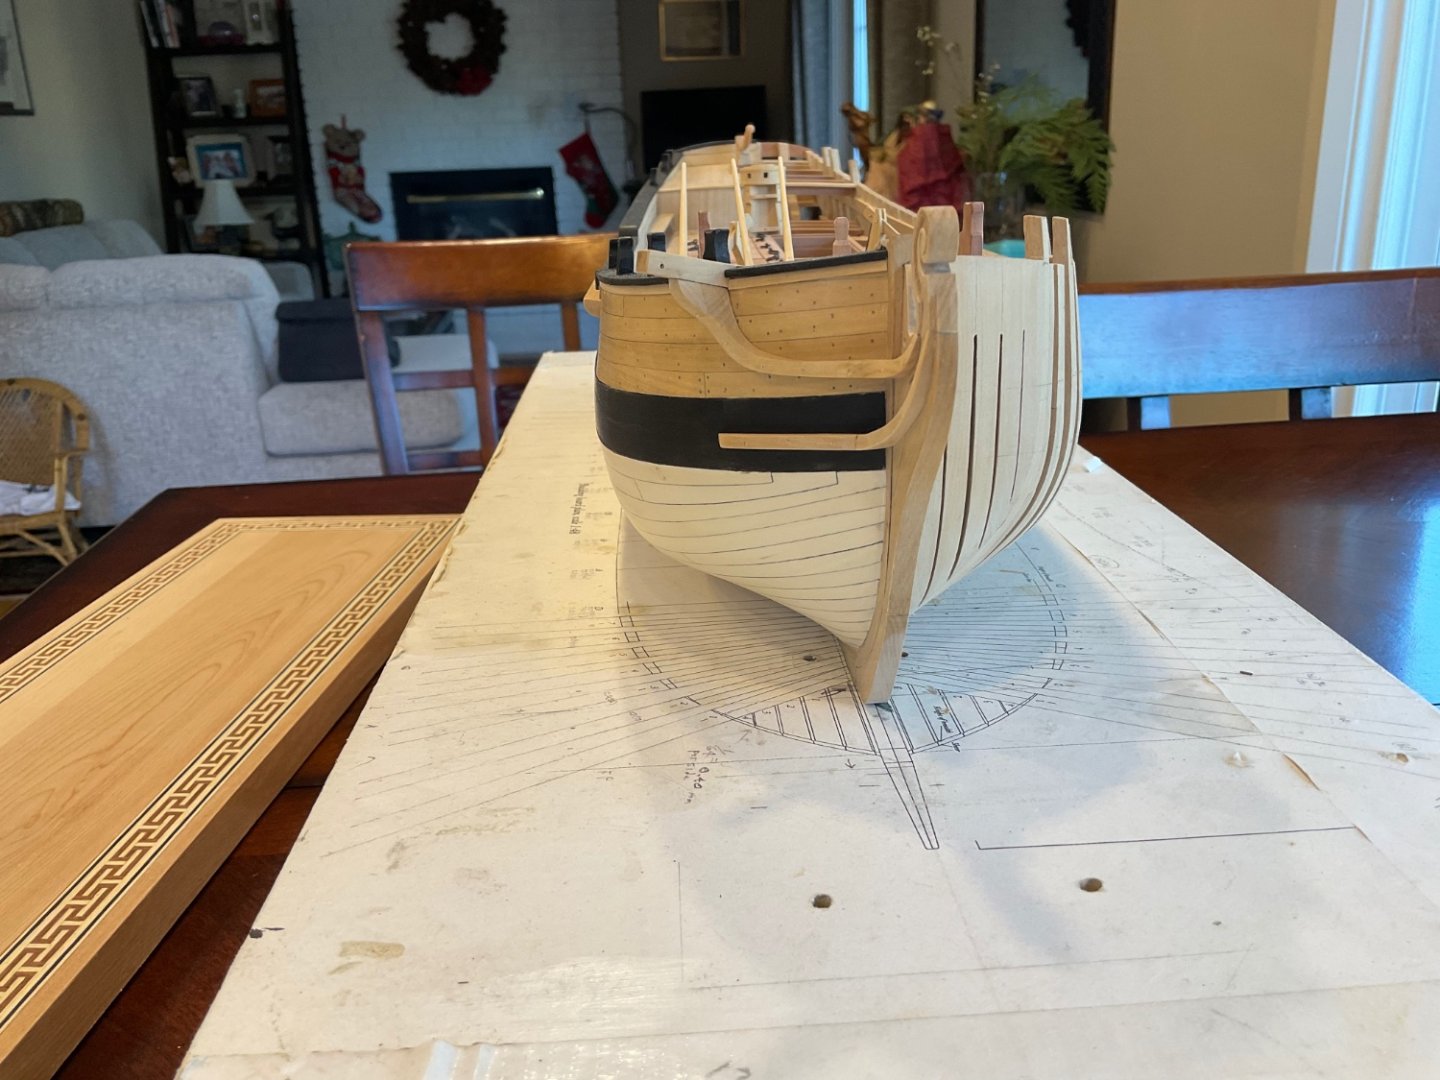
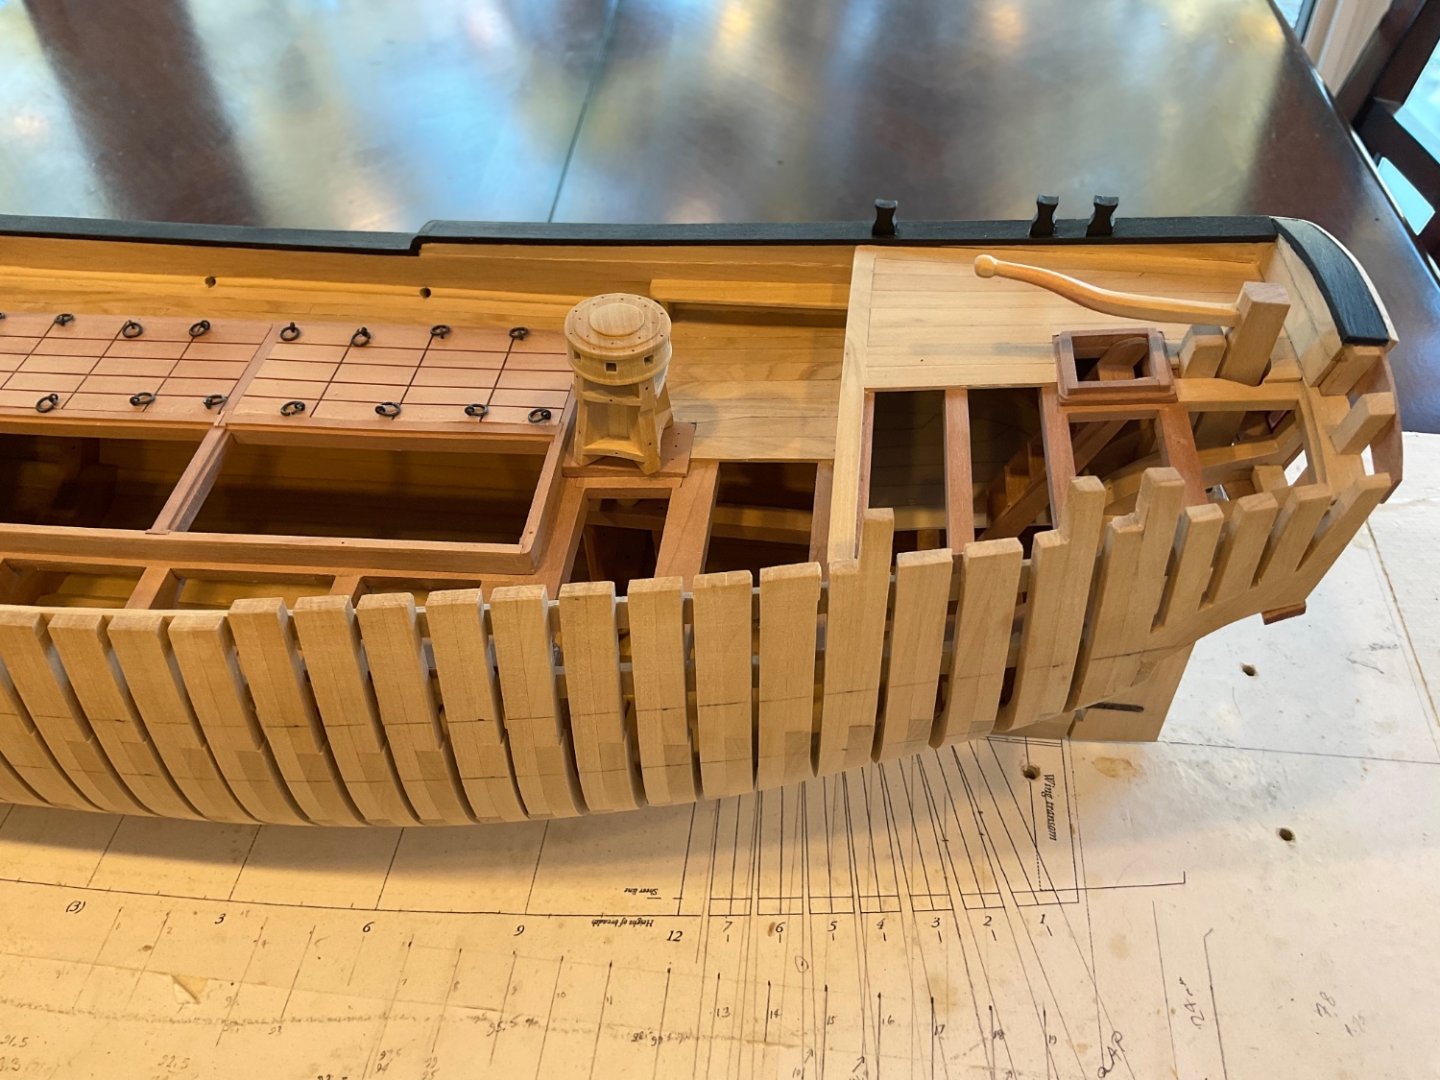
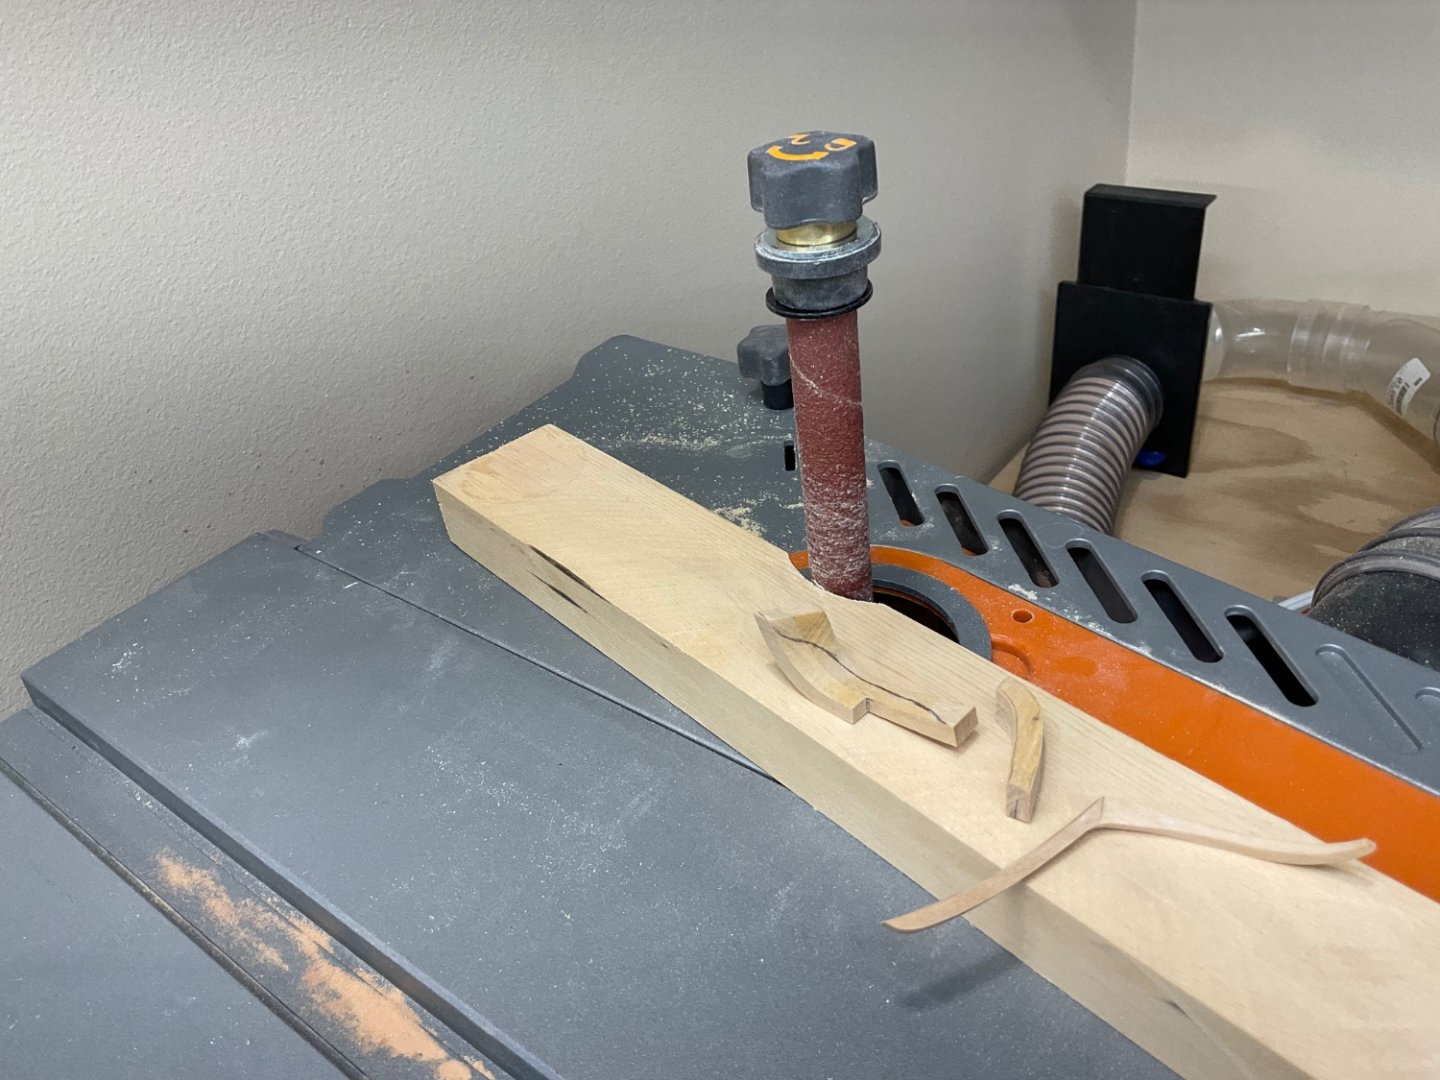
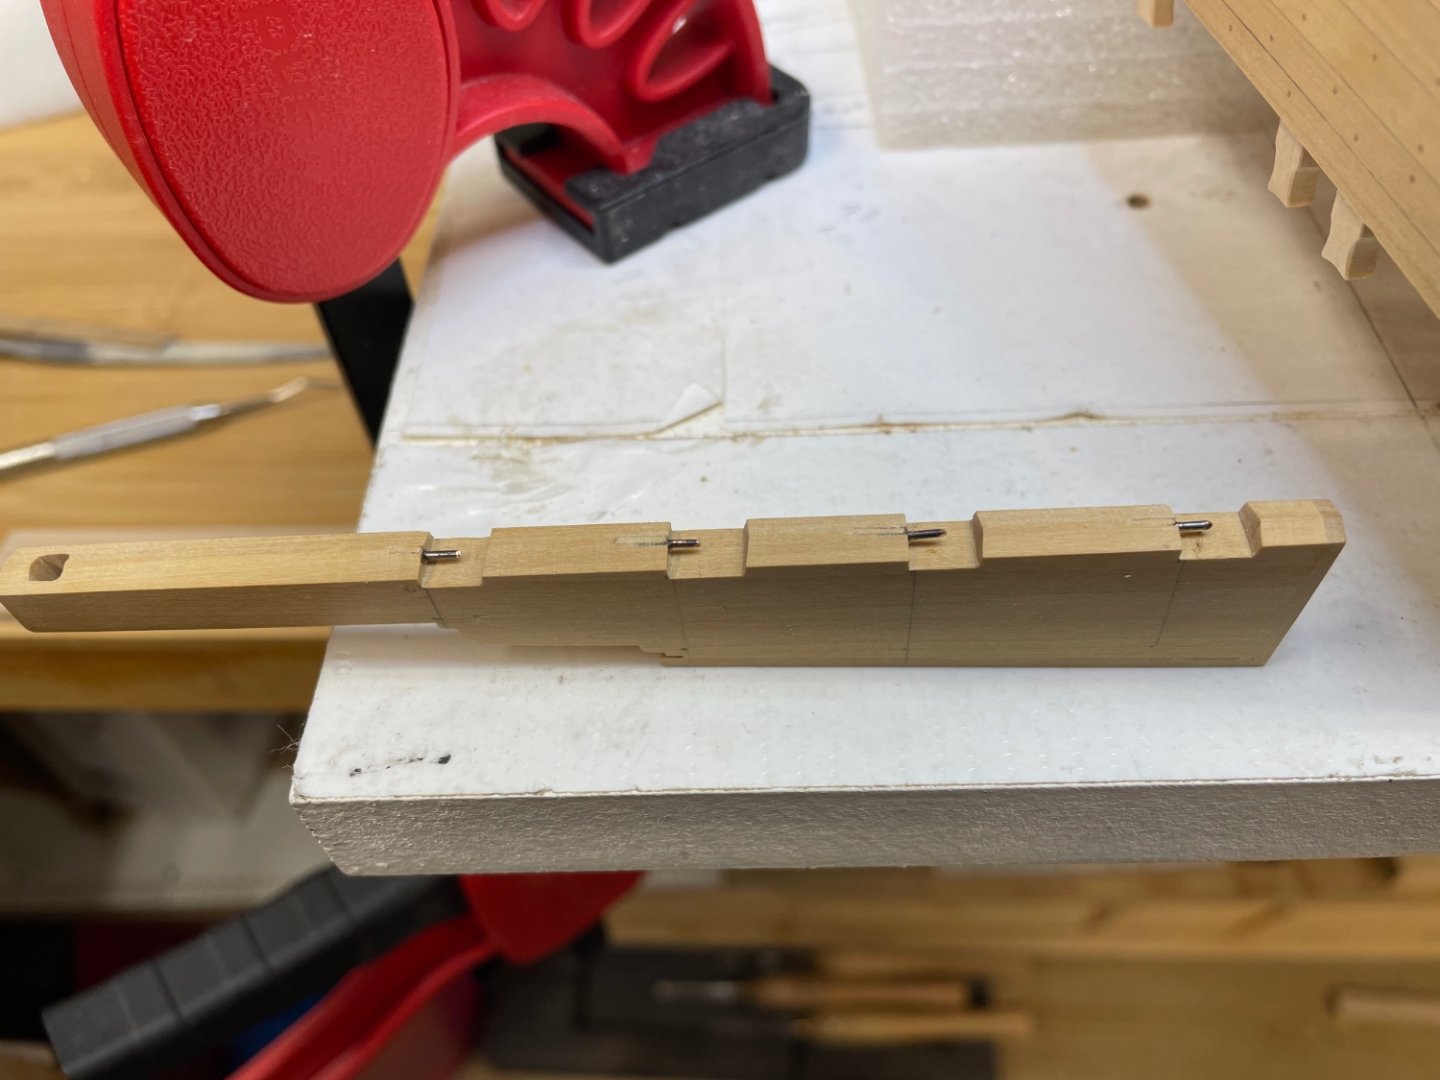
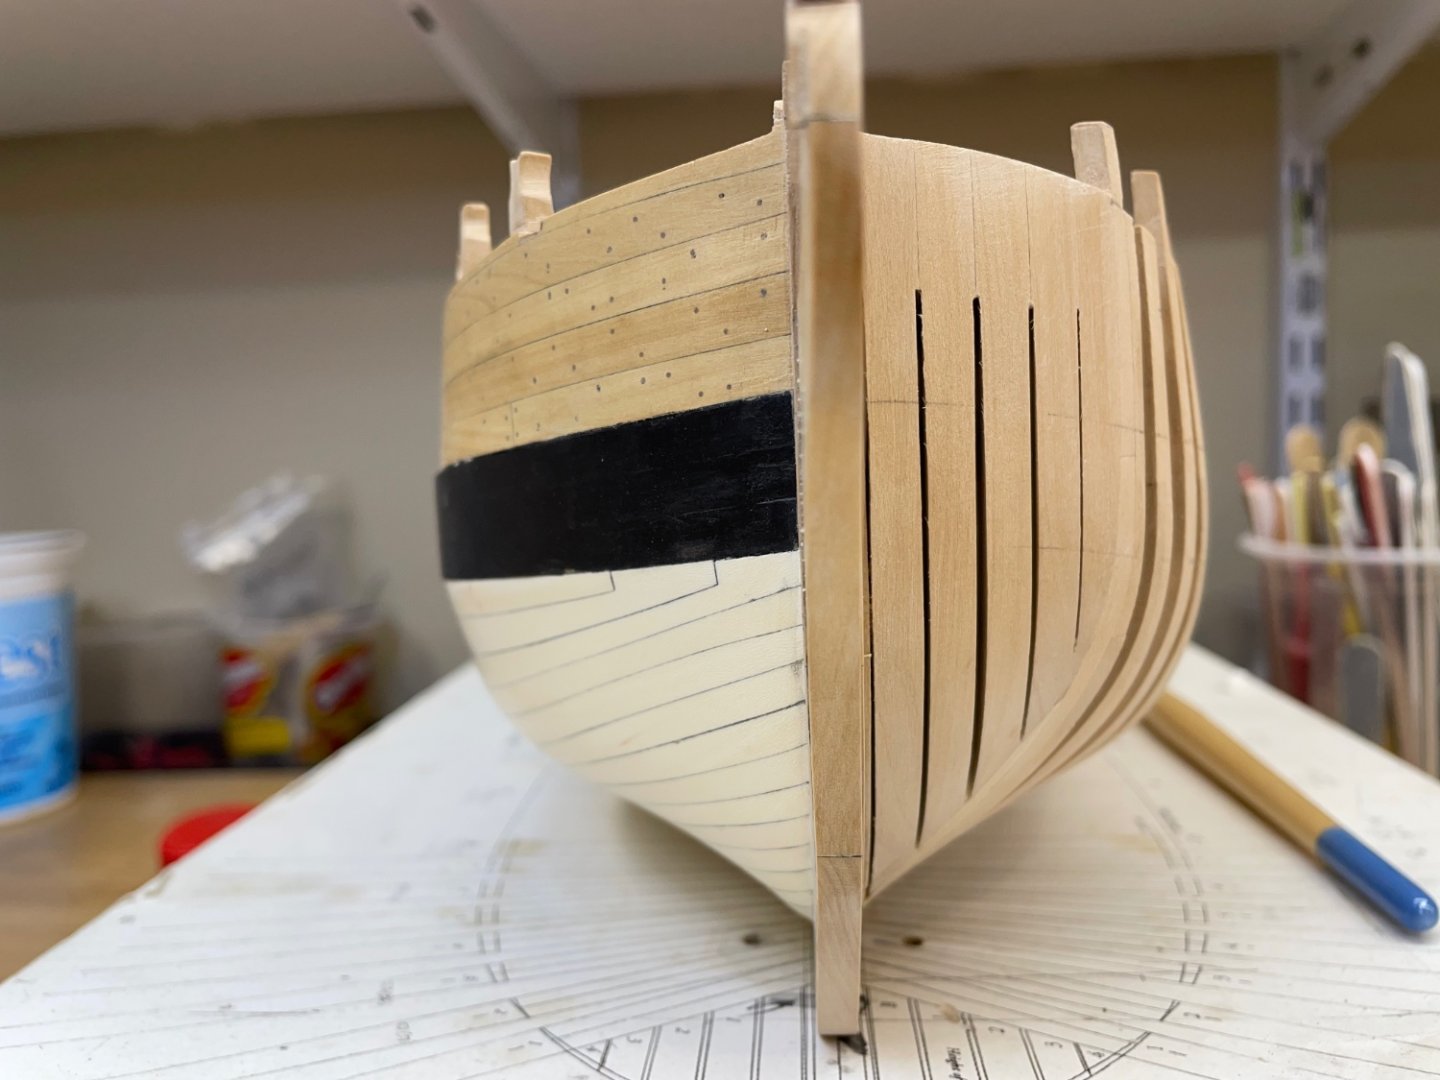
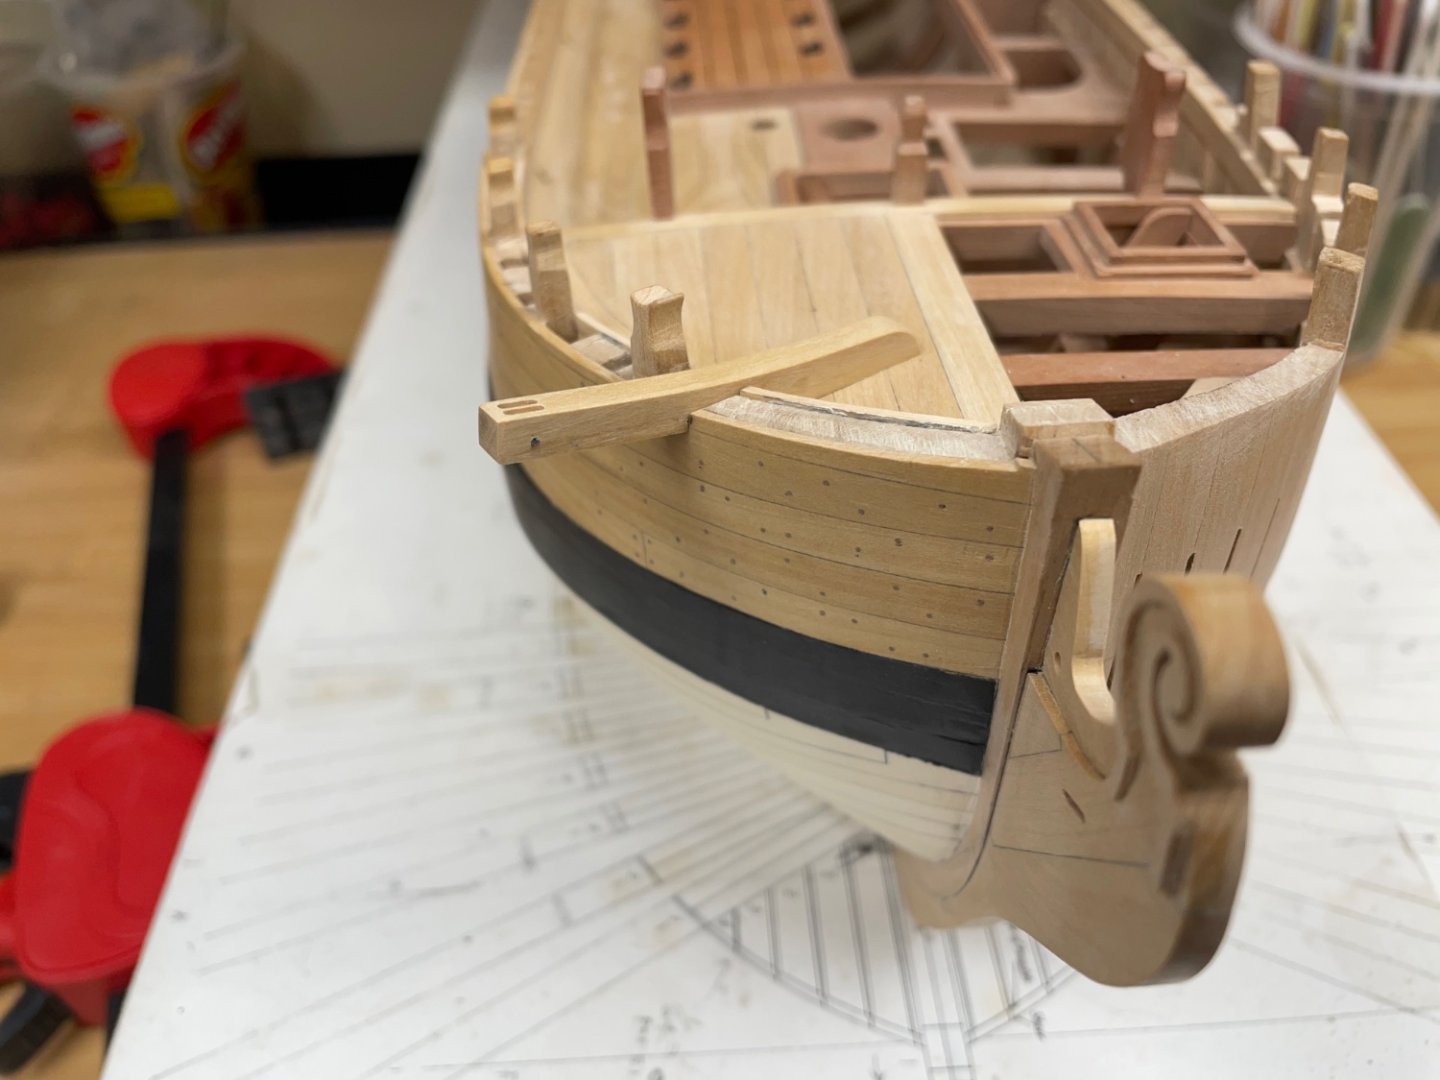
Good Day, and thank you very much for the comments and likes. I am just about finished this project. I don’t plan to rig it, I just don’t have room. Let me start by giving a short review of what I did since last time. I have very little in the way of photo documenting the steps I took for each operation because for the most part they are unremarkable and probably of little interest…with one exception. That is the stern lights. I struggled mightily with those and after at least three tries using different approaches for each light I succumbed to frustration and plugged in my last pathetic version. The one positive thing I will share is discovering that old negative film (my wife’s idea) works great as windows. It readily glues to the wood with CA and the edges actually sand well. Now I will confess I actually made a single light that was close to perfect with the exception that I constructed it backwards so it wouldn’t fit. That was the last straw. The method I used for this last successful but abandoned attempt was to trace the outside of the opening insitu onto a piece of scotch tape, then trace the location of the borders and mullions. I lay the tape upside down sticky side up on the bench, fixed it in place with tape. I added the required impossibly narrow frames (0.4mm as I recall) directly onto the sticky tape marked out lines, progressively re-dimensioning the pieces until they were a perfect fit ready for glue. The sticky surface made offering up and fixing the pieces much more feasible. The stern work started with the taffrail covering board of Holly. I cut a curved single piece which sufficed. Facing pieces of pear were placed between the lights to make the aft face of the outer counter flush. A quarter piece was made to conform to the top of the wale and the edge of the stern. While guidance suggests doing it in two pieces and I can see why that may hold some advantages I decided to start with a single piece. That worked out ok. Once those were finished and the lights installed, I added small pear strips to the lights base to round out the pear framing. I then added an ornamental rail (drip rail) to run along the knuckle of the counter. I see I still need to add treenails to it. The ornamental scroll was made to fit the external curve of the stern. Big head scratch for how and where the timber port stops and lid are to go…? The planksheer was more challenging than I initially anticipated but it’s all about patience. The first step is to card shape the curve (I cut all pieces to curve; no edge bending) and the holes for the timberheads. Incremental filing is the name of the game here. There just doesn’t seem to be any point in painting the timberheads beforehand as the paint will just be scraped off after the thousandth fitting. The rest of the effort is to get a flush fit to the interior plank and to the top of the frames and planking. I painted the interior edge before installing. The thin finishing strip of Castello underneath the cap rail, the planksheer rail, was straight forward and glued on after I finished painting the planksheer and timberheads. The channel for the chains and deadeyes was made from a quarter round cut from a lathed piece of Castello, notches milled and a very slight round up sanded in to conform to the hull line. Three bolts were installed. The entry steps were milled using an end mill and a burr as shown. The bottom piece was glued on and the the length cut for the three steps and the ends filed. A tiny round up was necessary. The break pumps were fashioned as described in TFFM. I still need to file home the brass ends and blacken. I made the stand out of an old maple headboard and routed in the inlay which I got from Lee Valley. What’s next and final? Basically a lot of cleaning up, varnishing, some trenailing, make the pedestals and mount the Hayling Hoy. Sorry, no real sequence to the pictures. See you next time.


-
Perfect job as usual. Makes me want to build this beauty. Ian
- 72 replies
-
- 2
-

-

-
- Glad Tidings
- Model Shipways
- (and 1 more)
-
Similar to Mike I used my mill and chisels (mainly to square out corners) to make the deadwood on the Hayling Hoy. I think I achieved quite clean cuts. Ian
-
Thanks Tobias but it doesn’t look like it is available in Canada, although I only had a quick look. I’ll try the Liver of Sulfur and see how that works. Ian
-
Thanks Alan. I should have also mentioned that my approach of doing almost all of the shaping and gluing together of the cheeks before fitting them onto the bow and knee is not the preferred way as David pointed out to me. I had almost finished the pieces when I got this sage advice. However I was able to make it work (sort of) in the end anyway. Ian
-
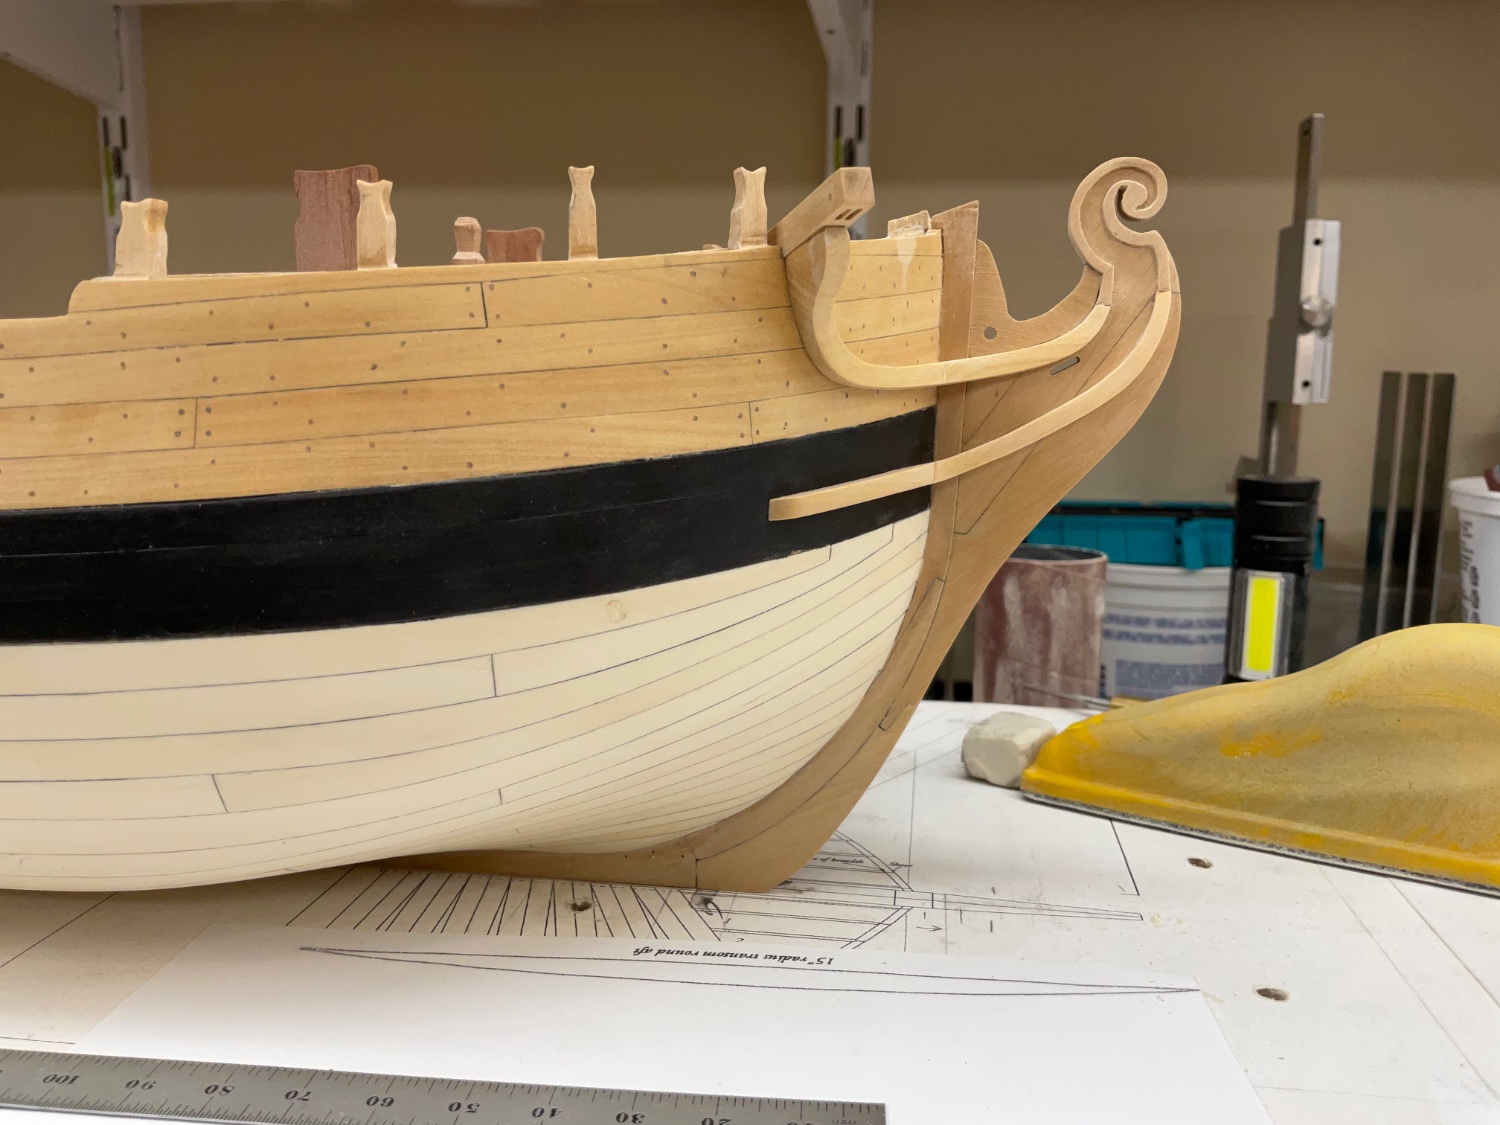
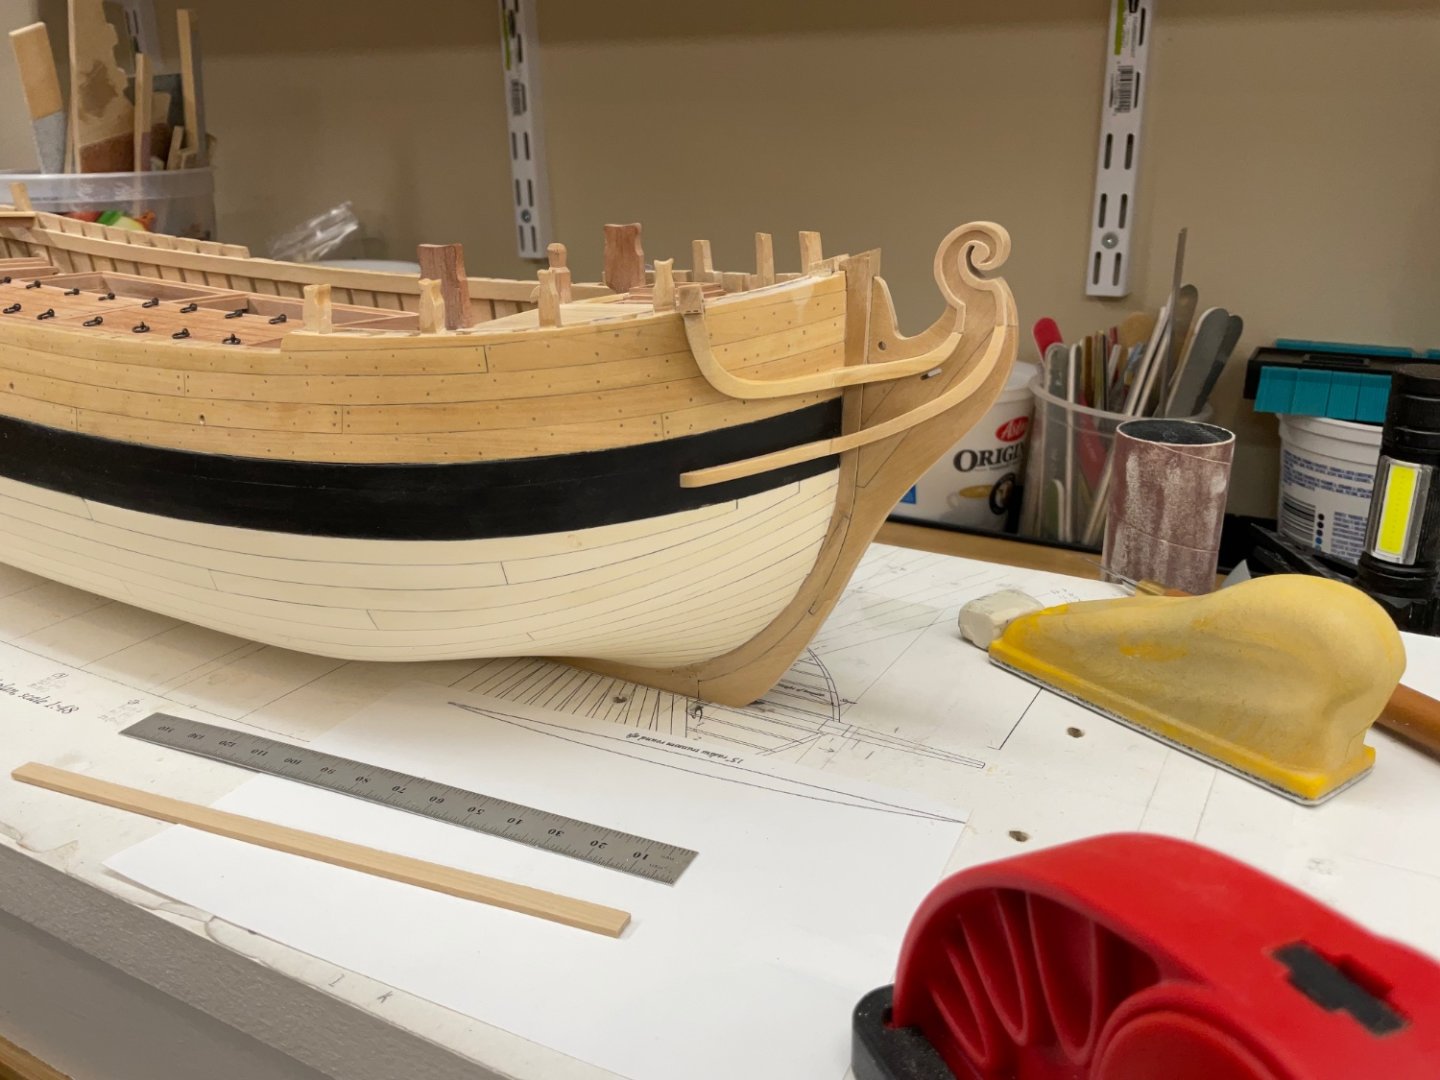
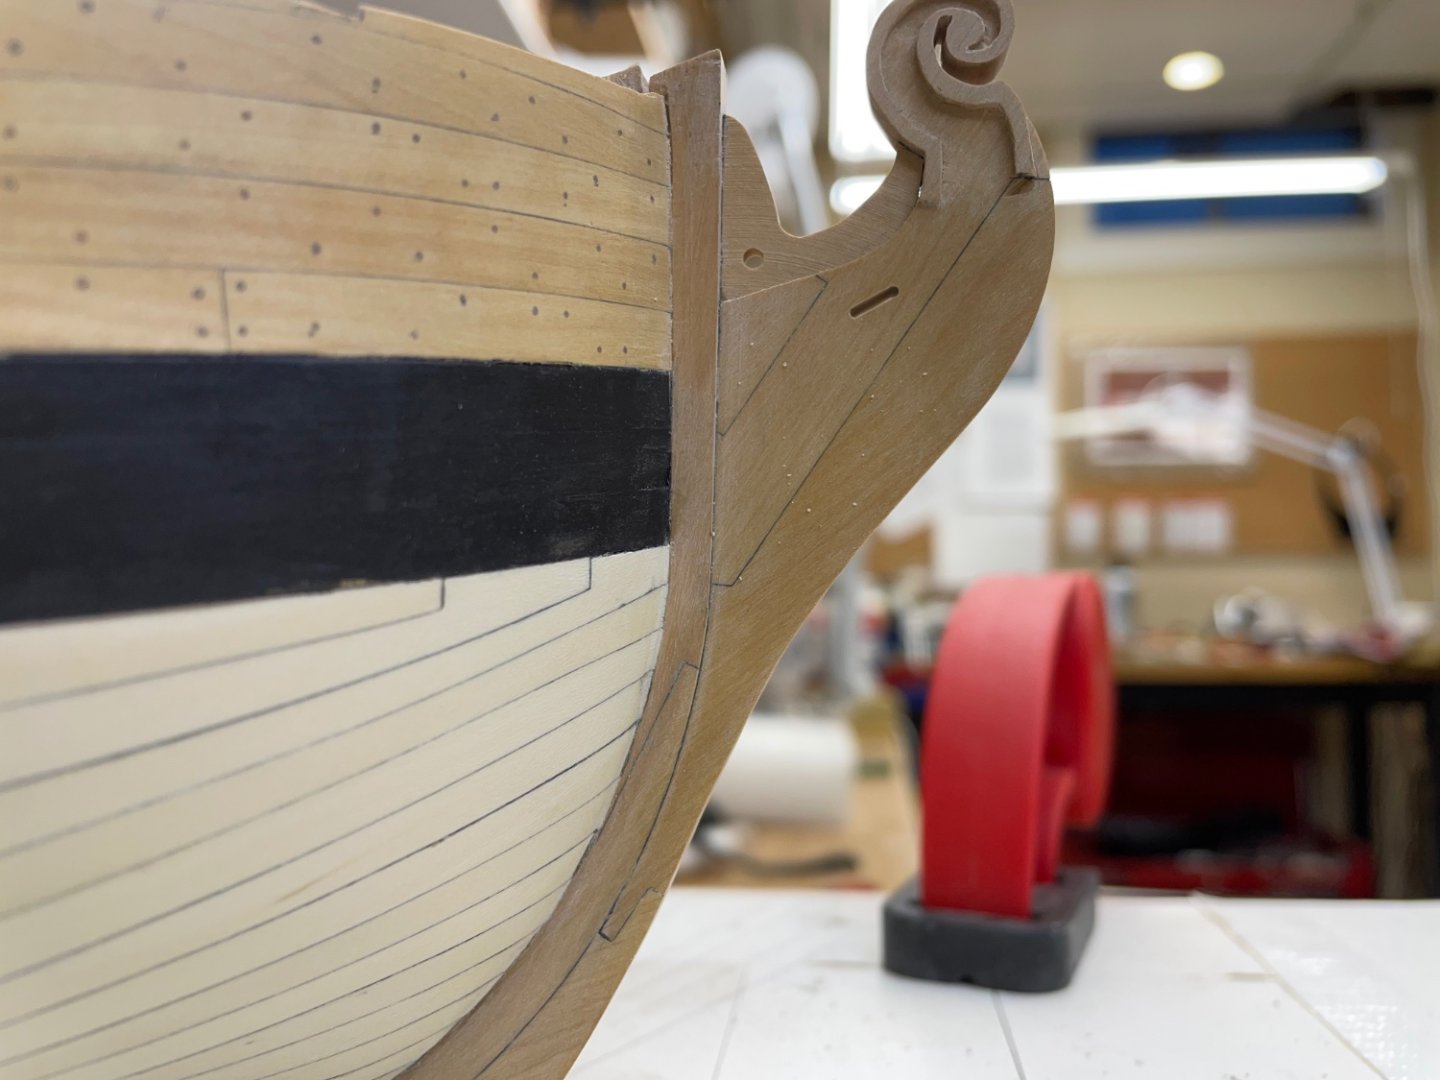
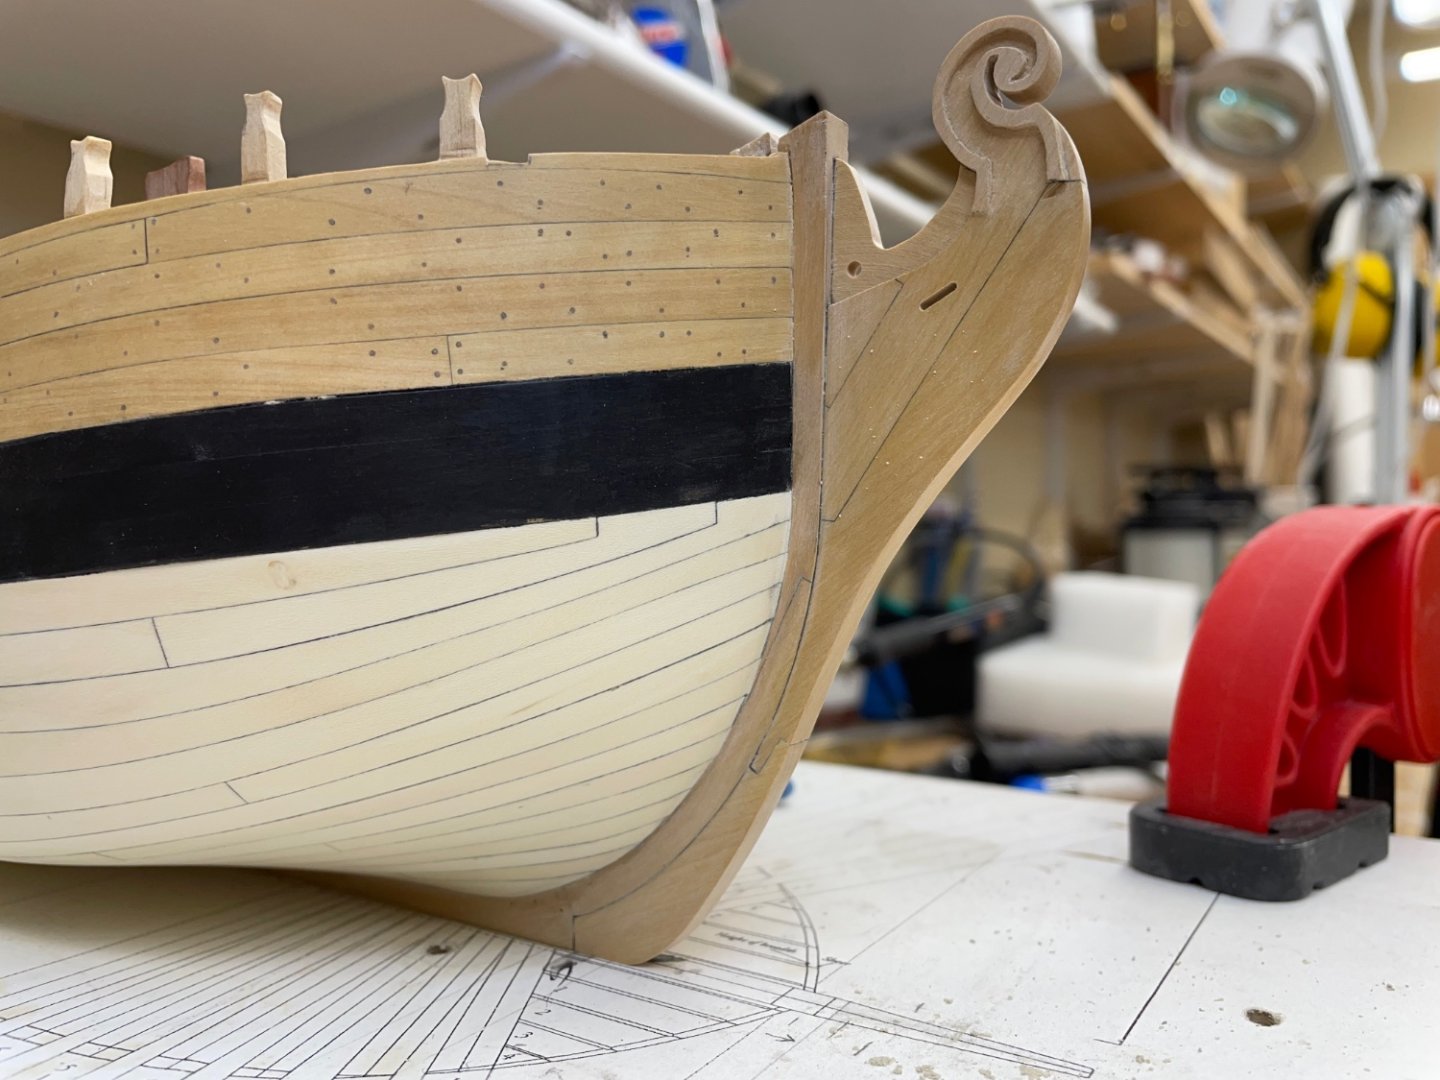
Good morning shipmates, Thanks again for the comments and the likes. I have finished fashioning the cheeks to the headworks. They are not perfect. It is remarkable how I can roll along right up to gluing the pieces in place before I realize after looking at the photos that something is not right. But this is a case where I am not going for a redo. The first problem I noticed was that the angle of the arm supporting the cathead was not vertical enough directly below it. The second probably more serious mistake is that the slot in the gammoning piece (the one with the scroll in it) was not milled low enough. I’ve decided that neither error is worth ripping the whole thing apart and starting over. I confess these problems so that anyone that might follow me can avoid the same result. The one question I have is a question that I’ve had for years. And that is with the installation of bolts, which I need to do along the cheeks. How does one install copper bolts and blacken the ends in situ. I seems beyond my skills to insert an already blackened bolt without the head (of the wire) either losing its blackened patina because of pounding it in or from the action of sanding it flush. Is there a way of doing this in situ without staining the surrounding wood? The same goes for brass or copper fittings. Anyway, thanks for looking in and for any advice. Ian


-
Loving your beautiful work, Fred! Regards, Ian
- 113 replies
-
- 2
-
-
- Cheerful
- Syren Ship Model Company
- (and 1 more)
-
So much incredibly precise work. A pleasure to behold! Ian
-
Thanks Tobias, Christian and Jim. Your good words encourage my current challenge of shaping the cheeks and fashion pieces. Compound angles, curves, tapers and bevels. My head is exploding! Ian
-
Thank you kindly Vladimir, much appreciated. Ian
-
Thank you so much Phil, much appreciated. Ian
-
Thank you Chuck! Credit to you by learning from building my Cheerful! Ian
-
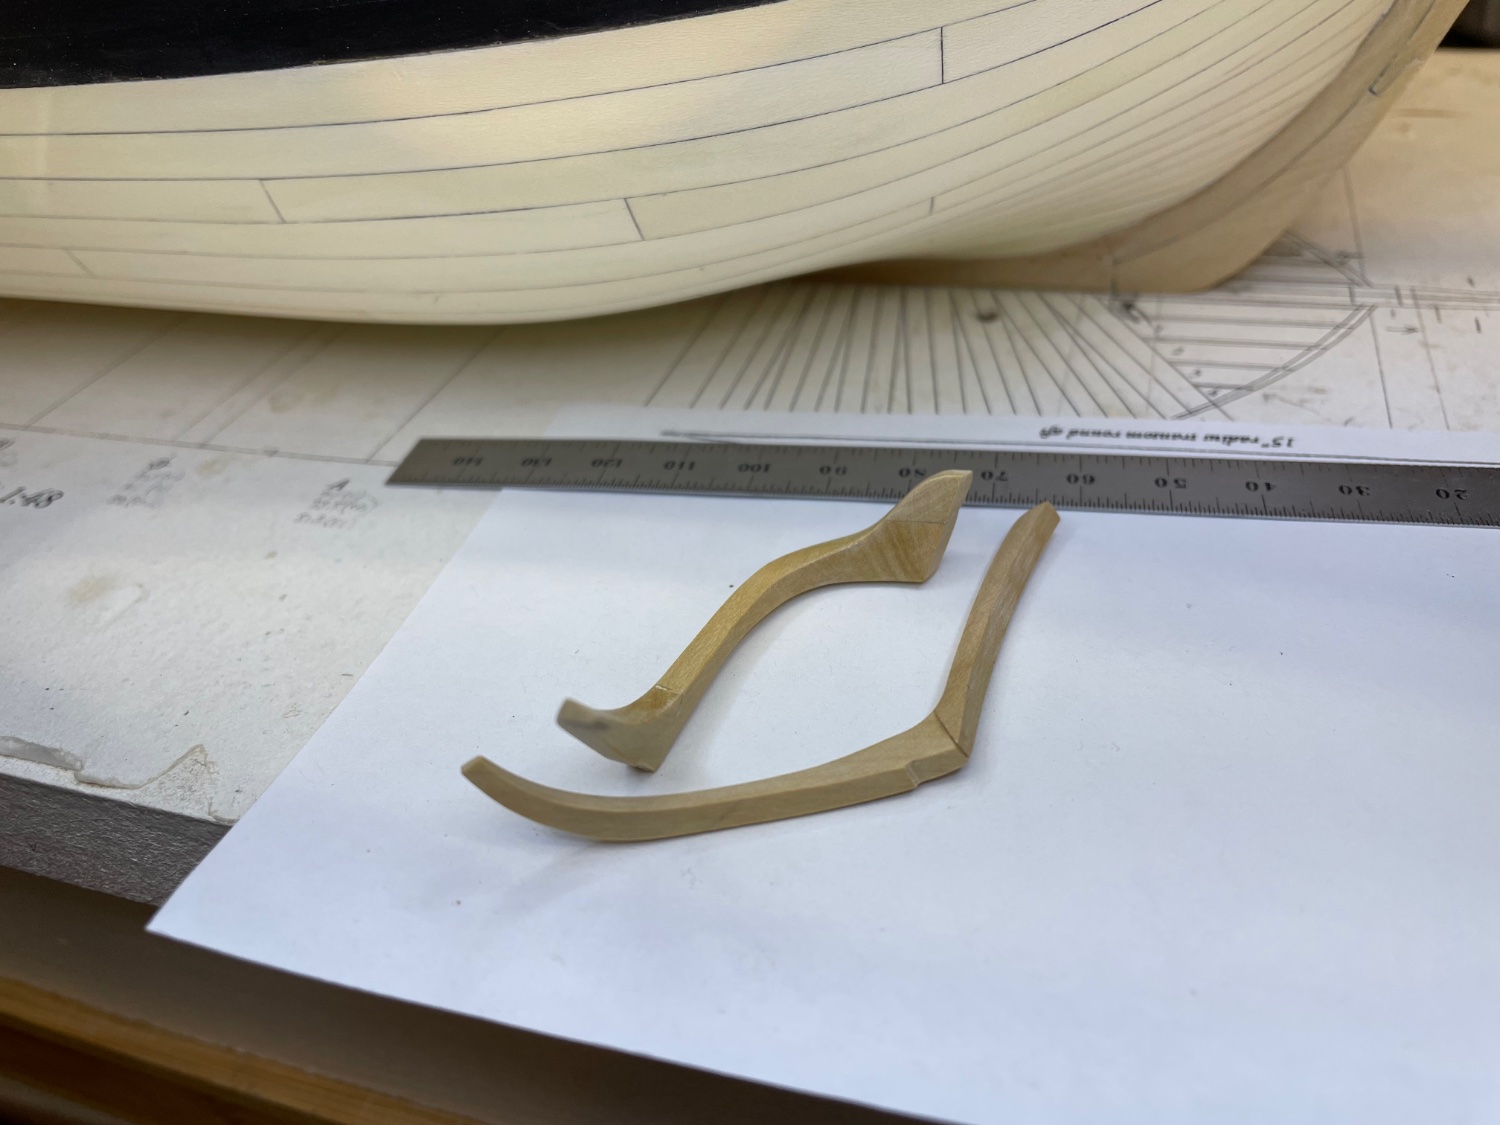
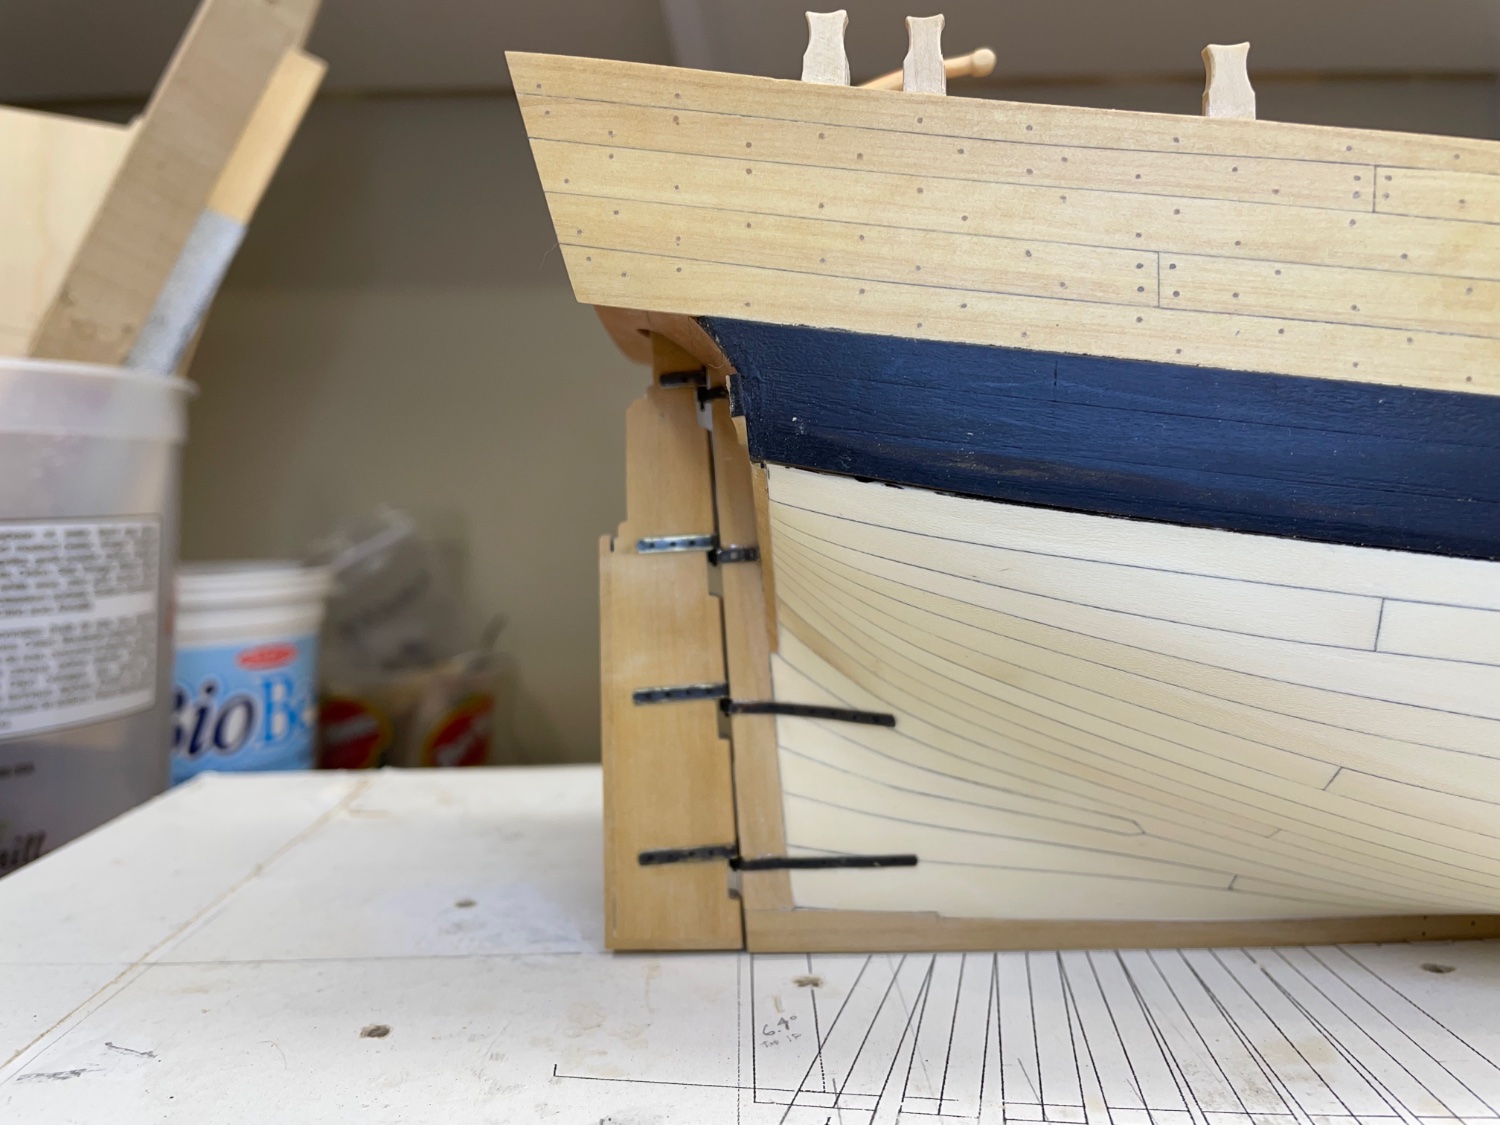
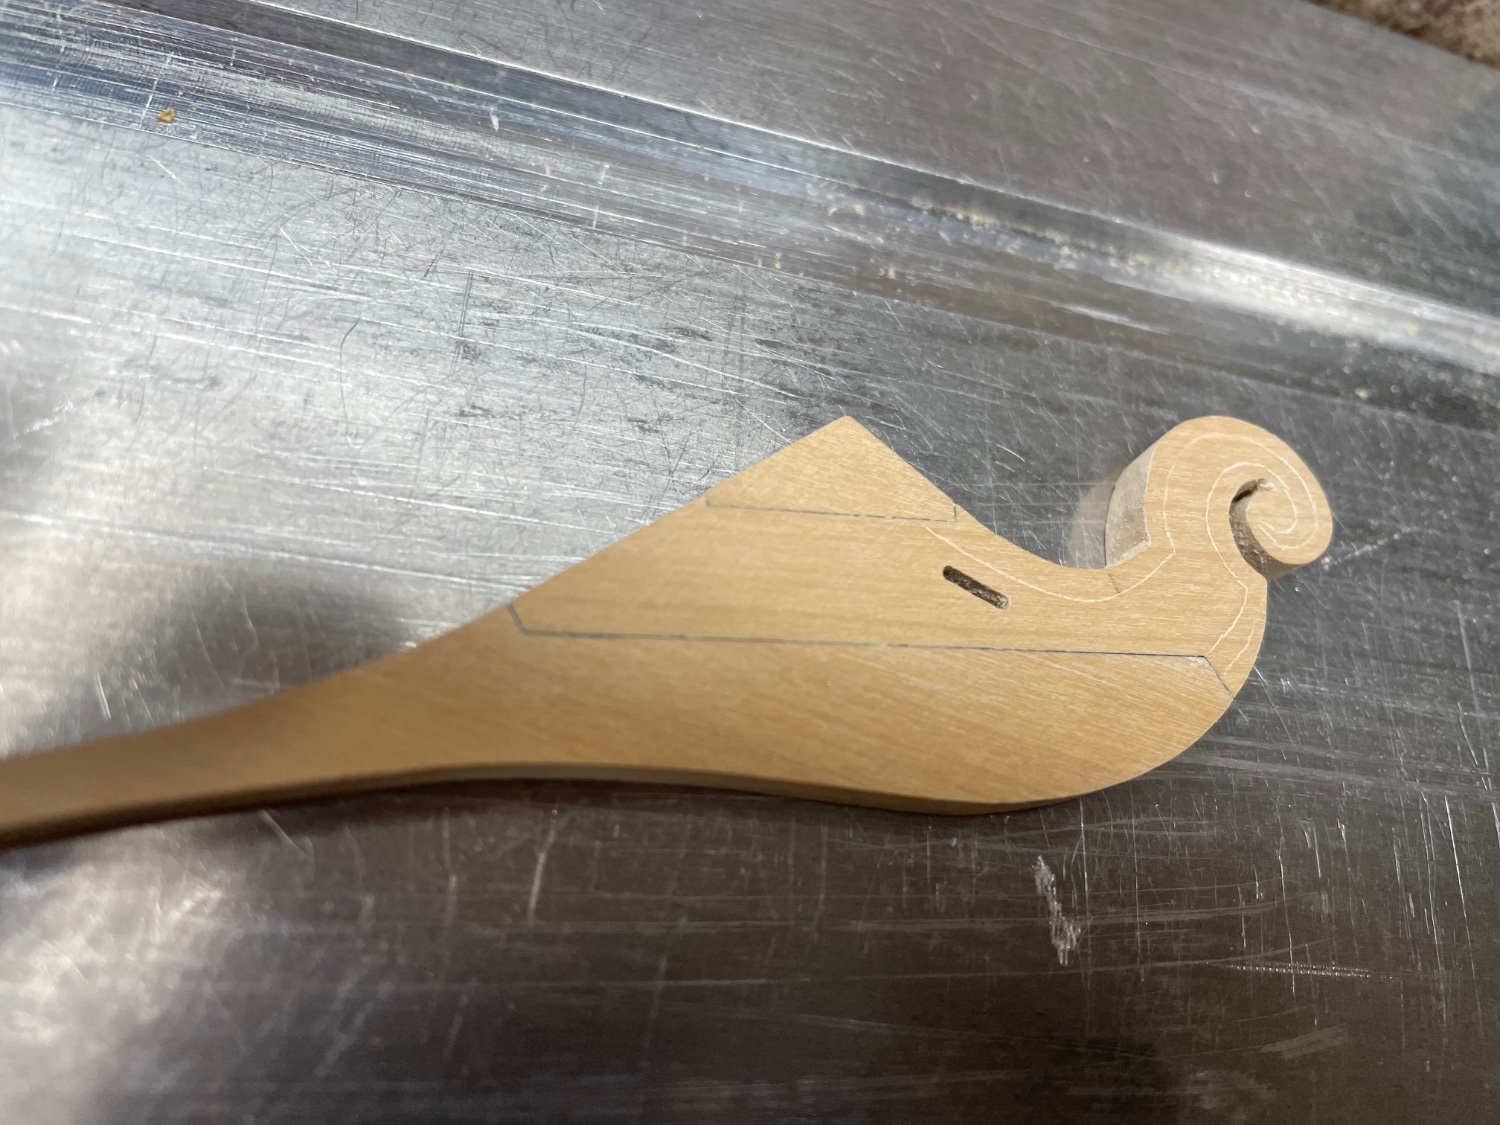
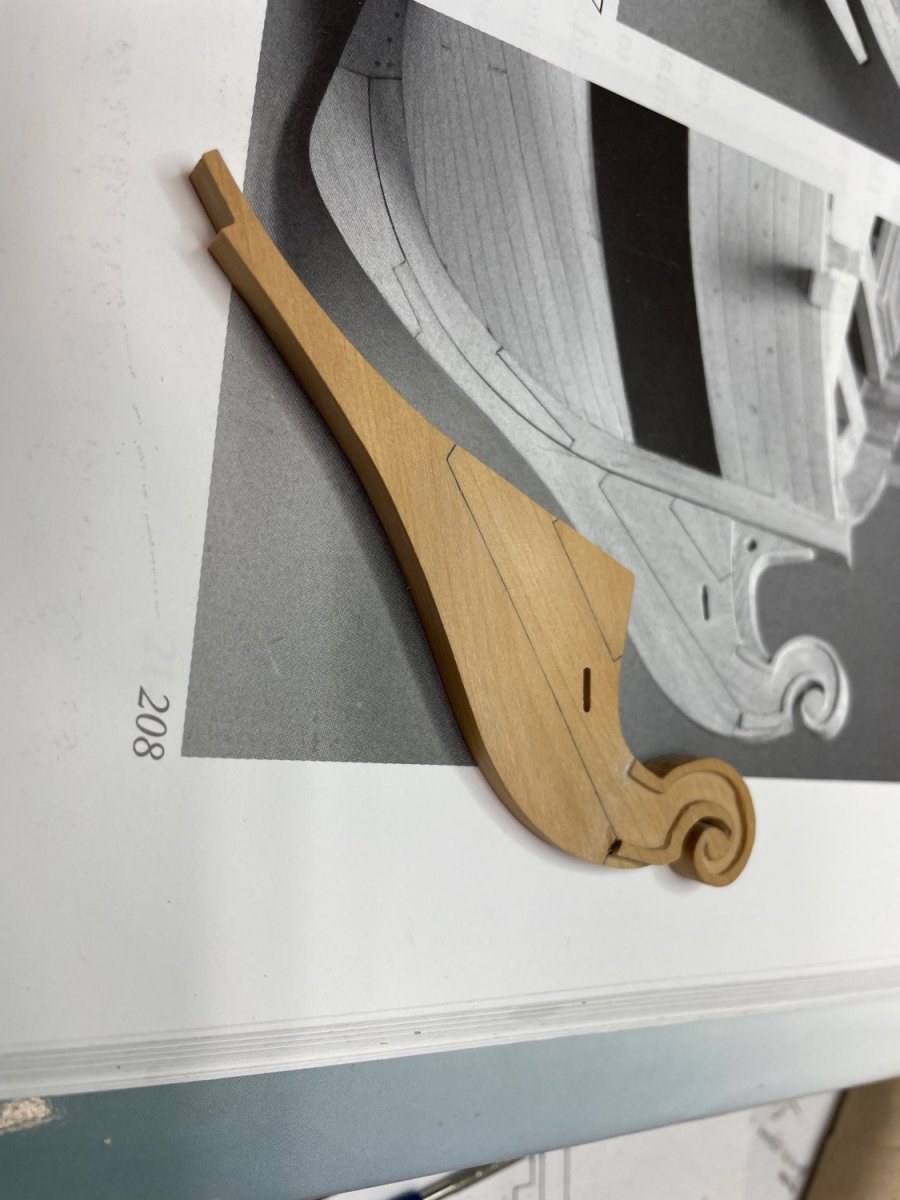
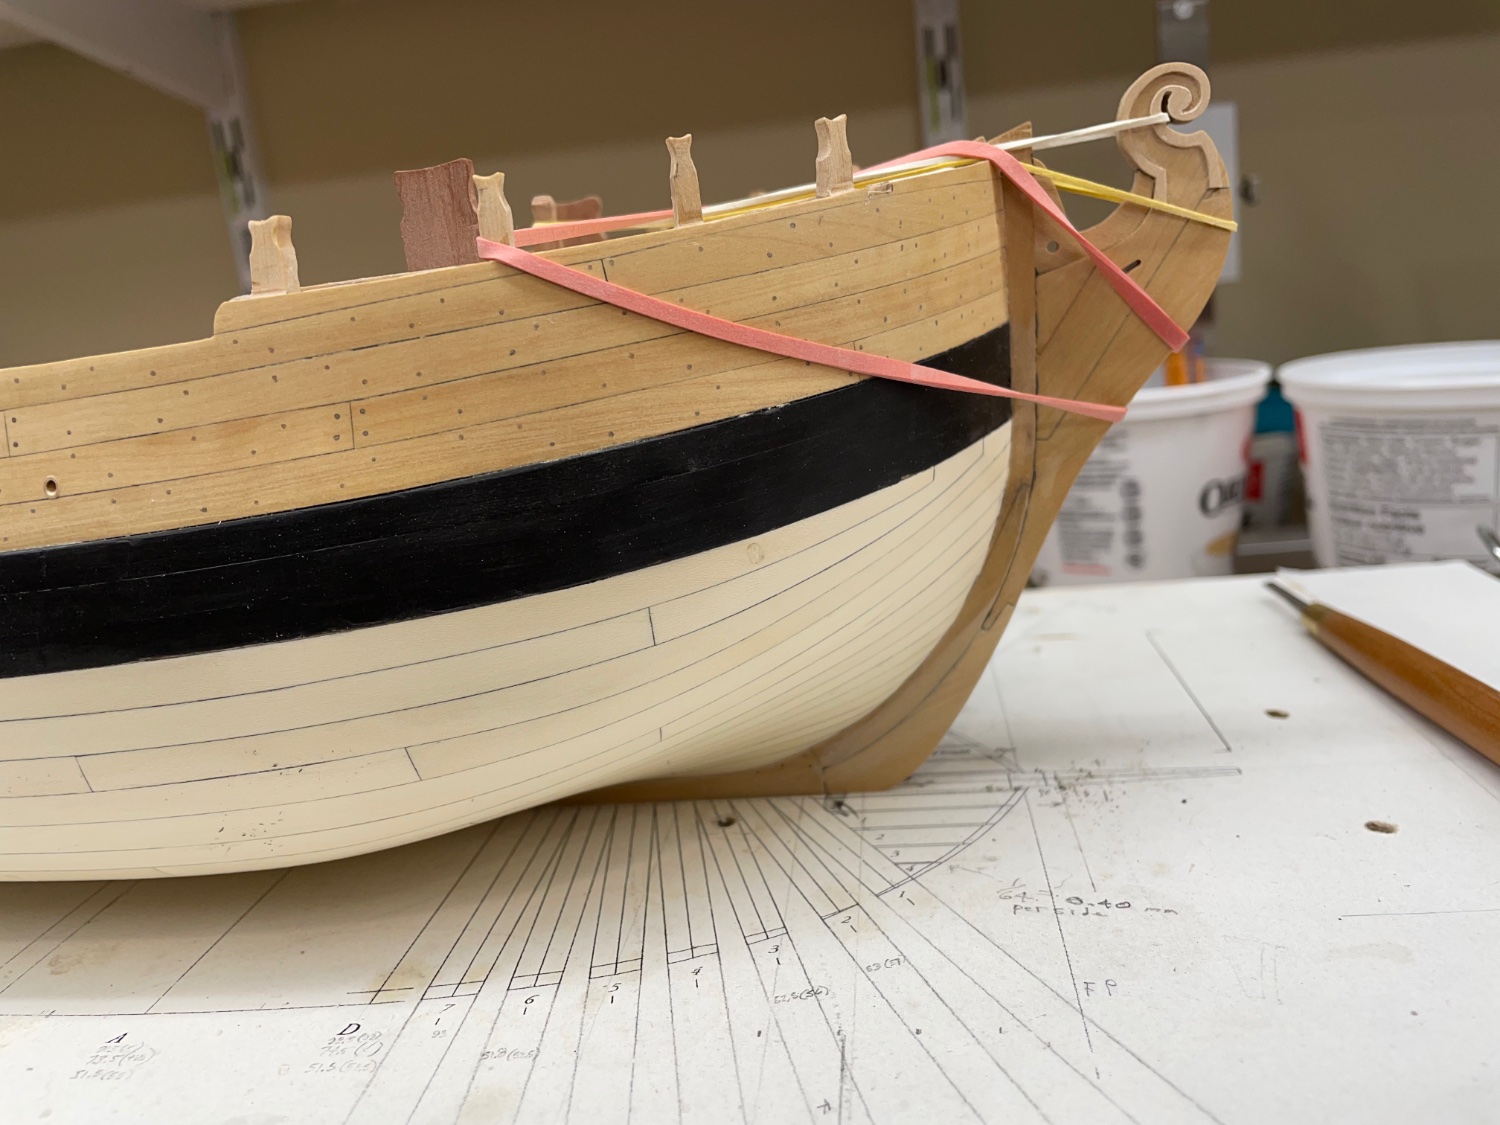
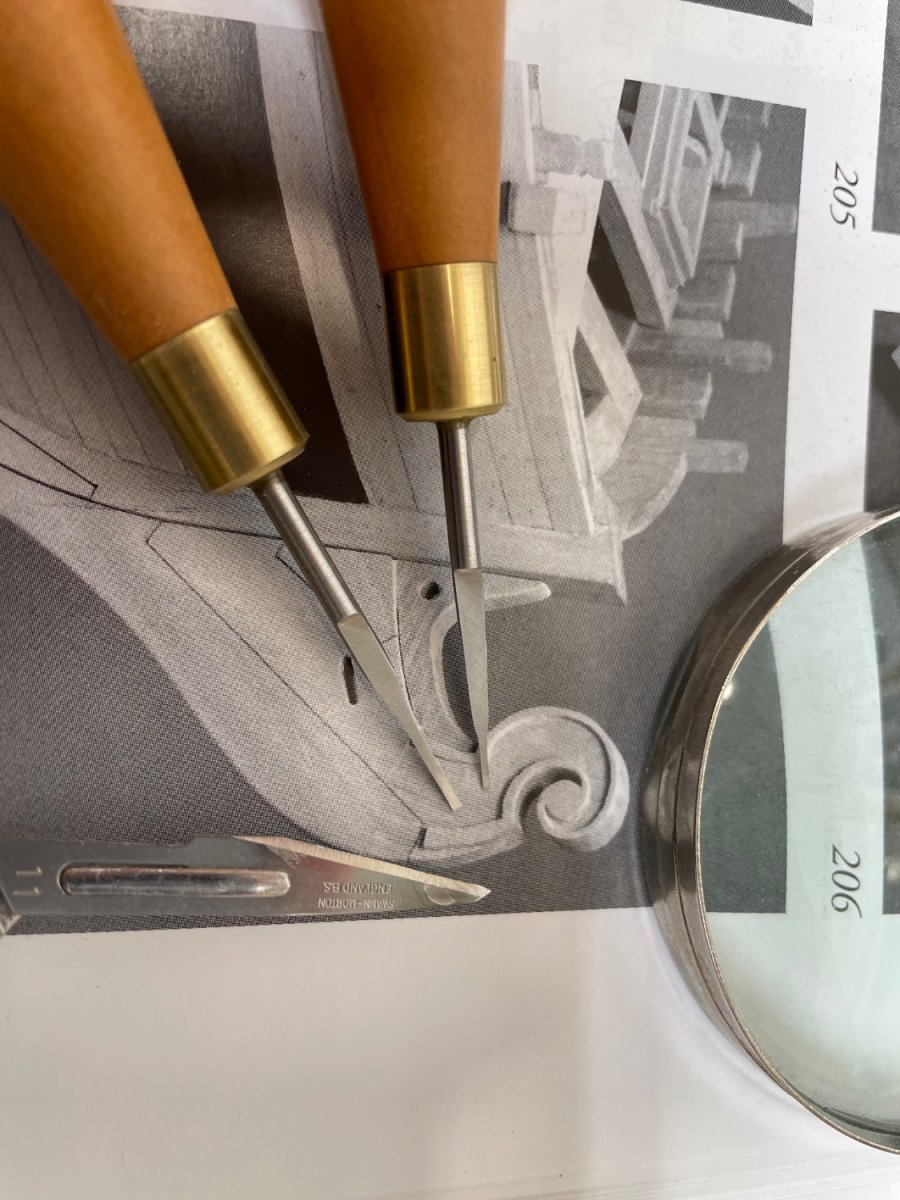
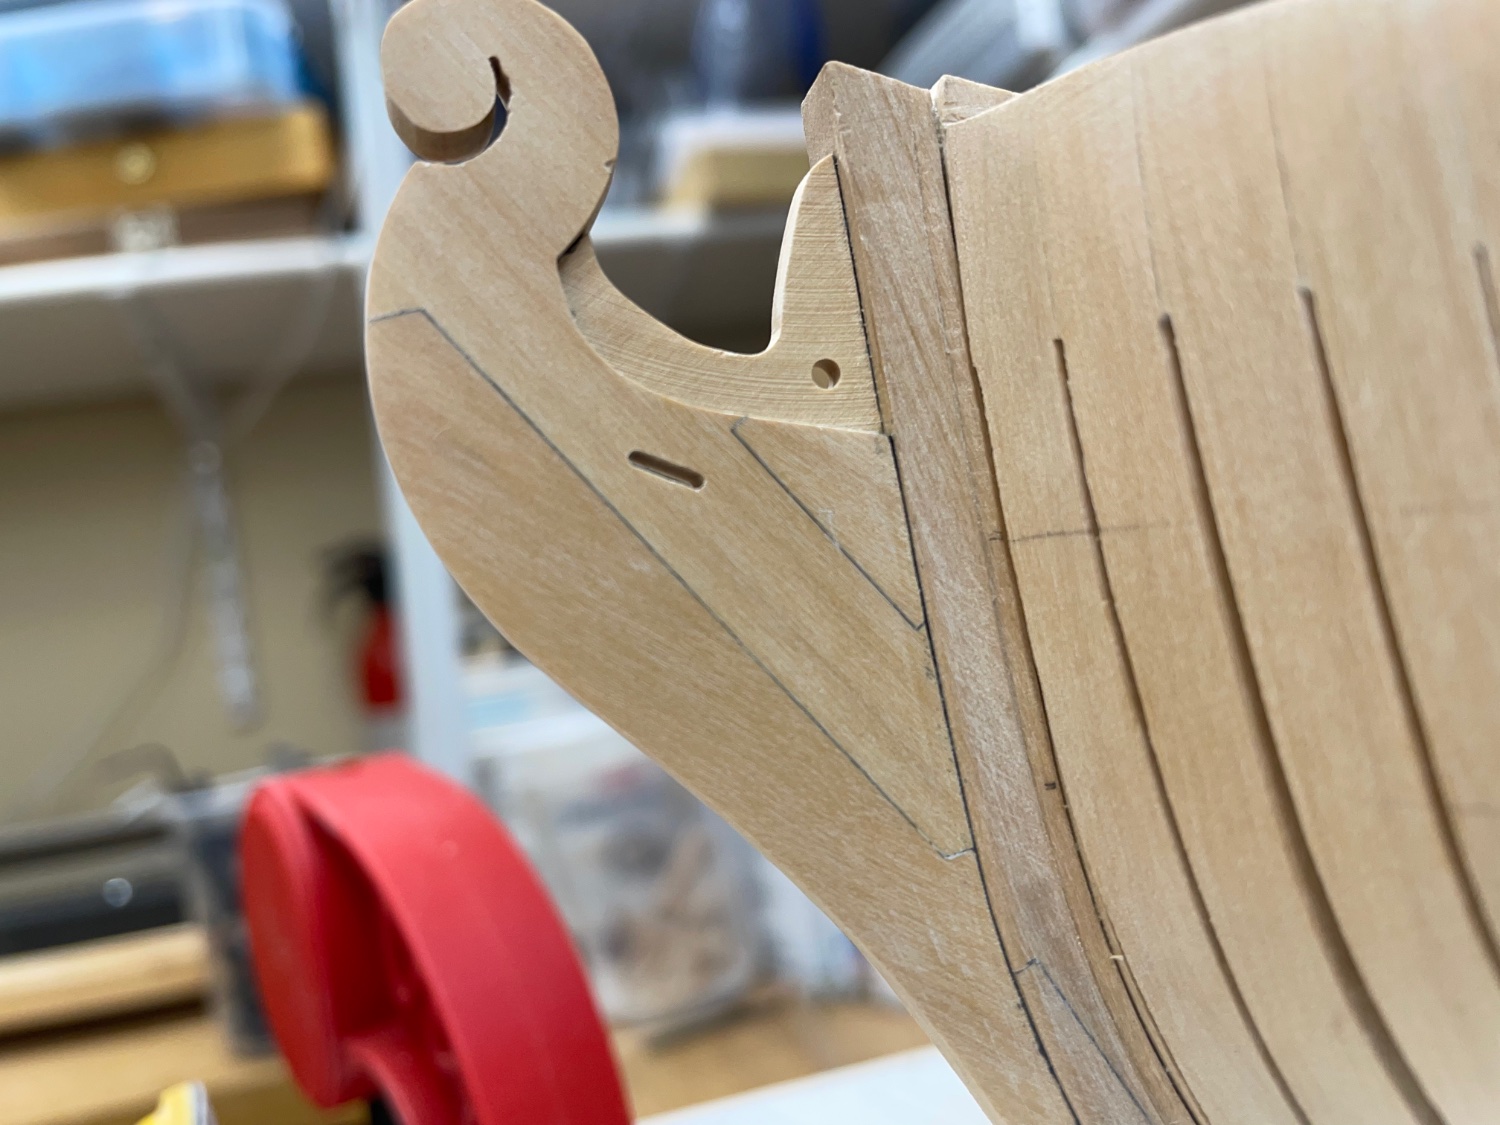
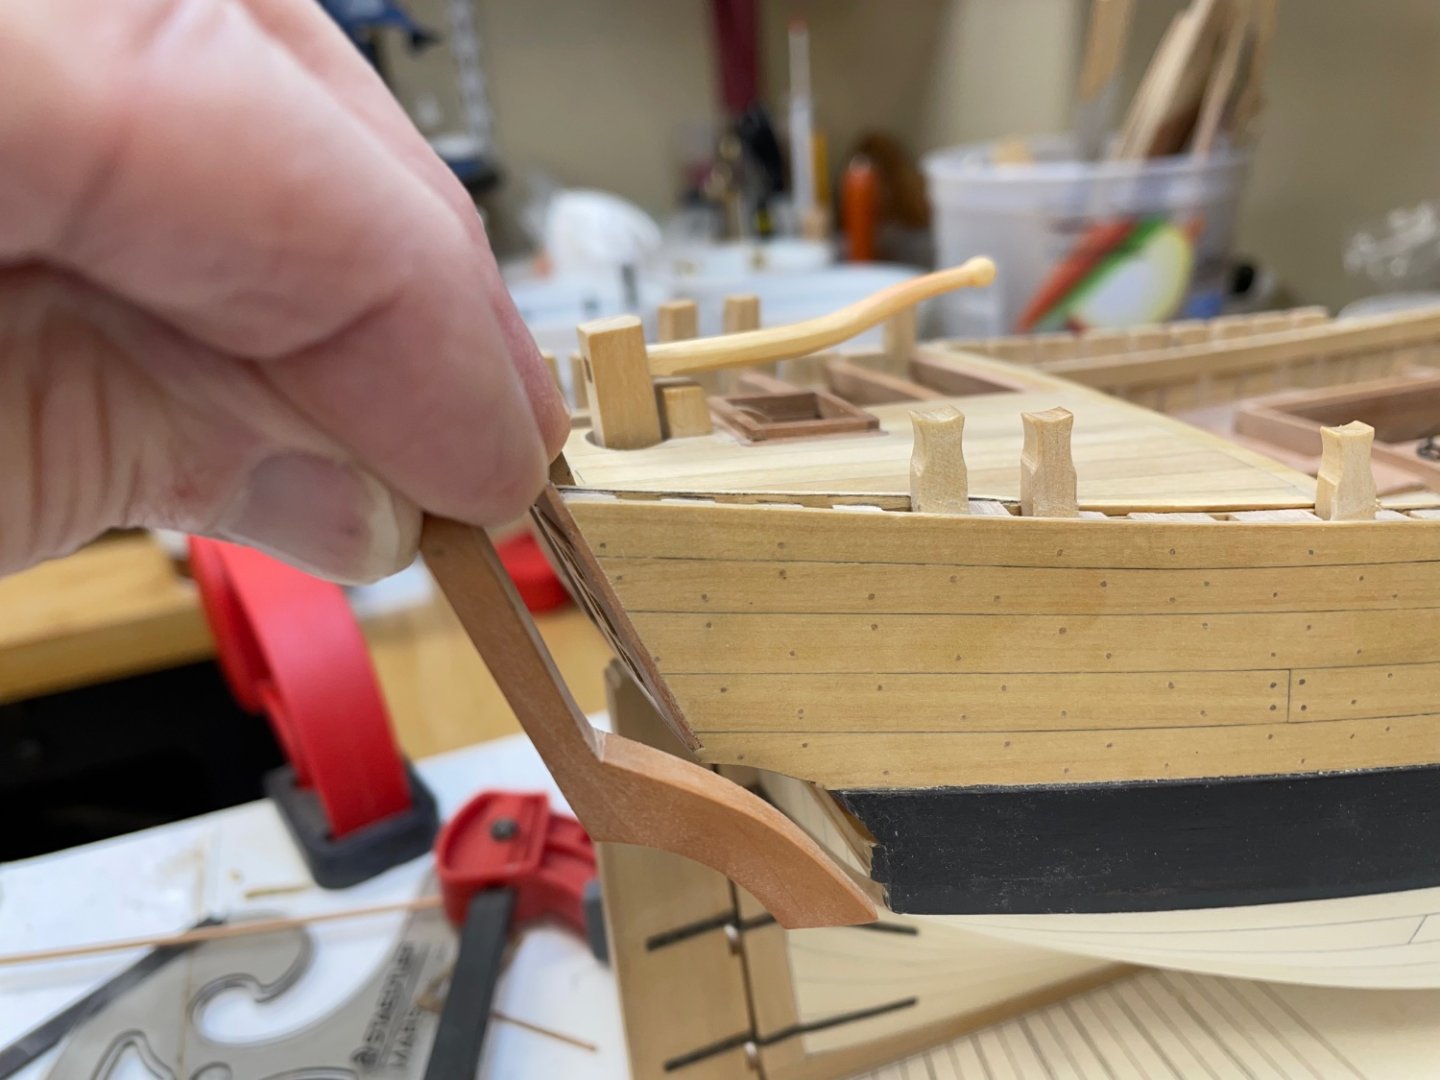
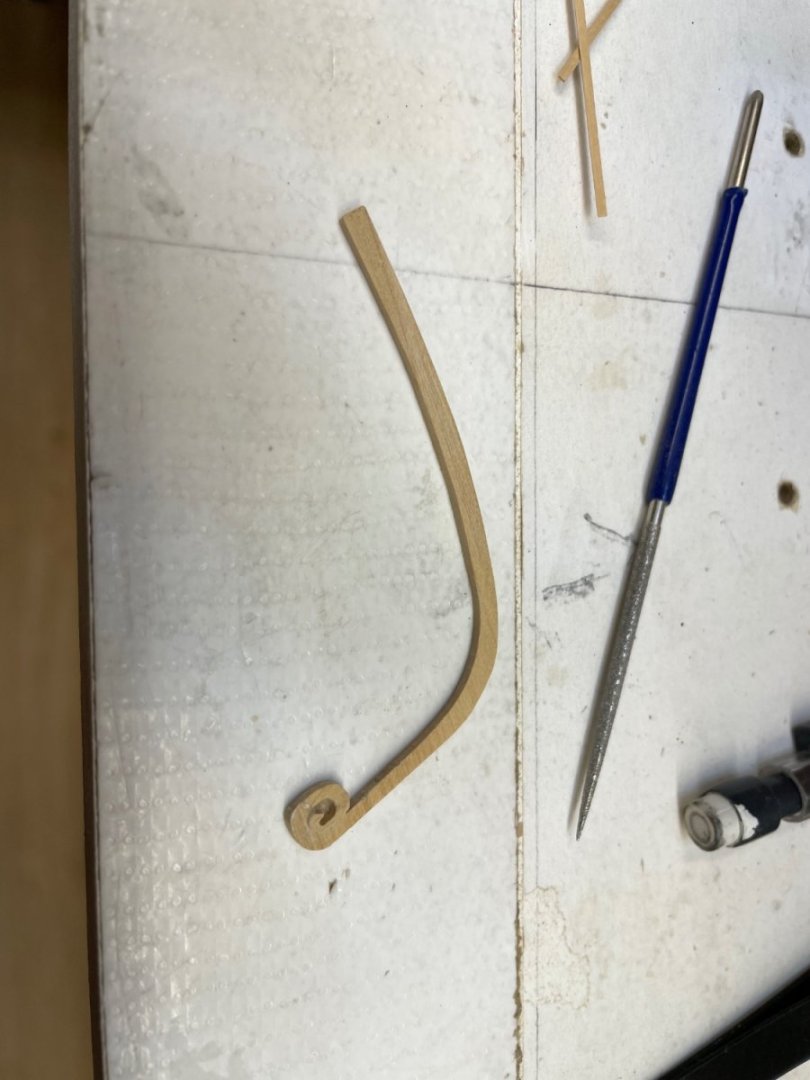
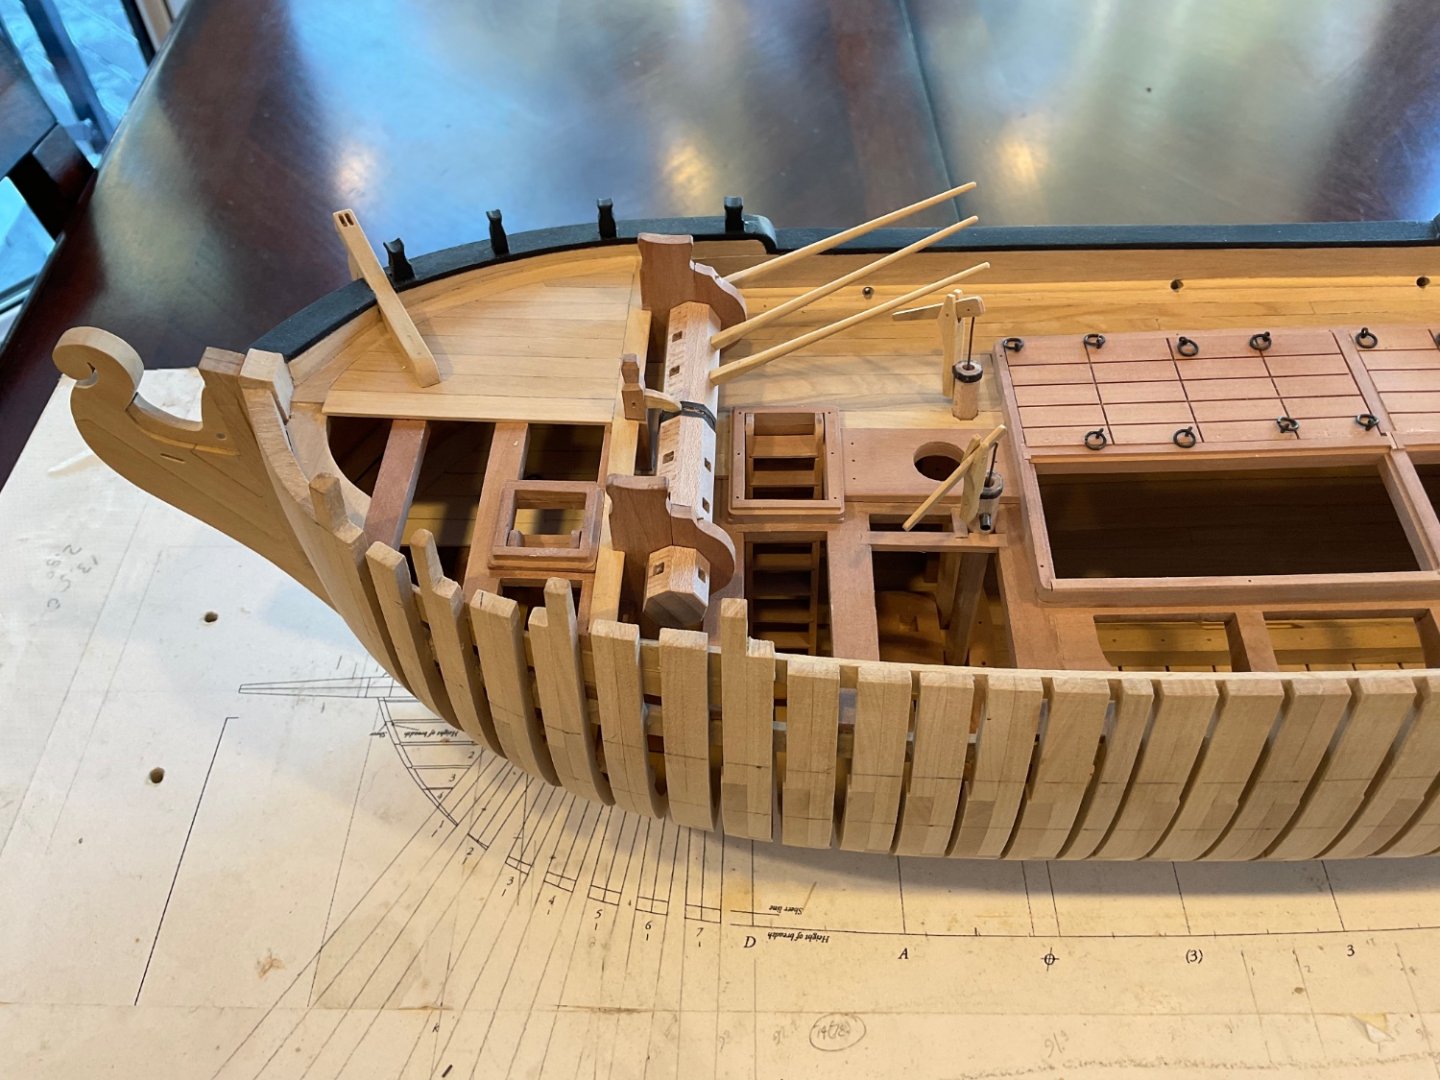
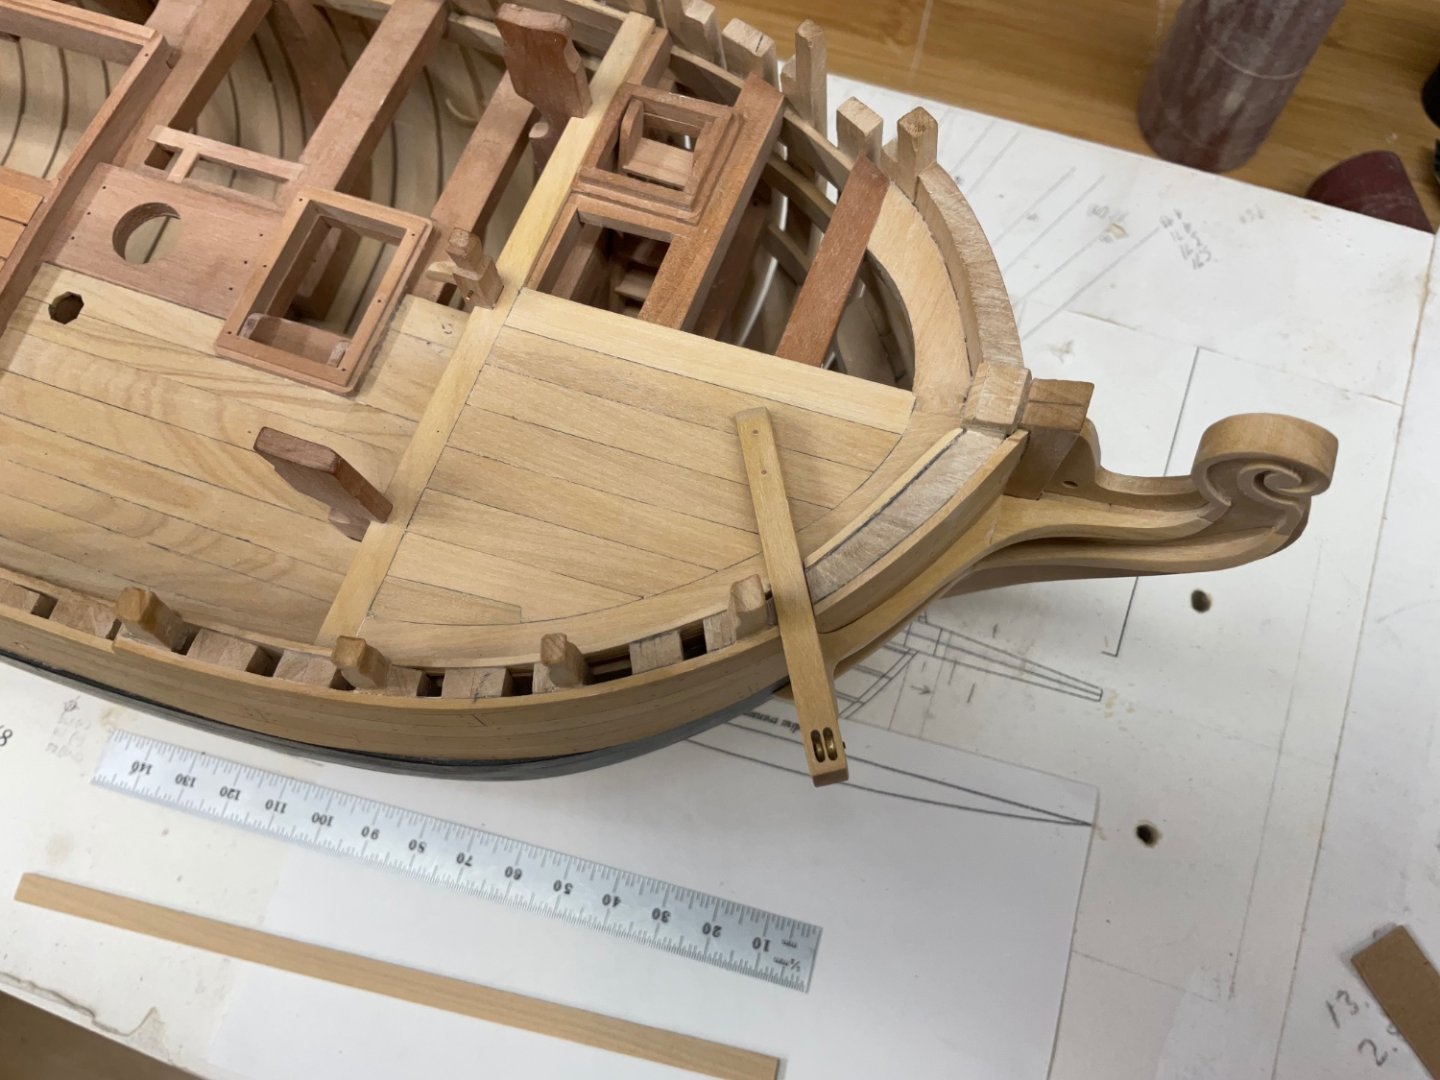
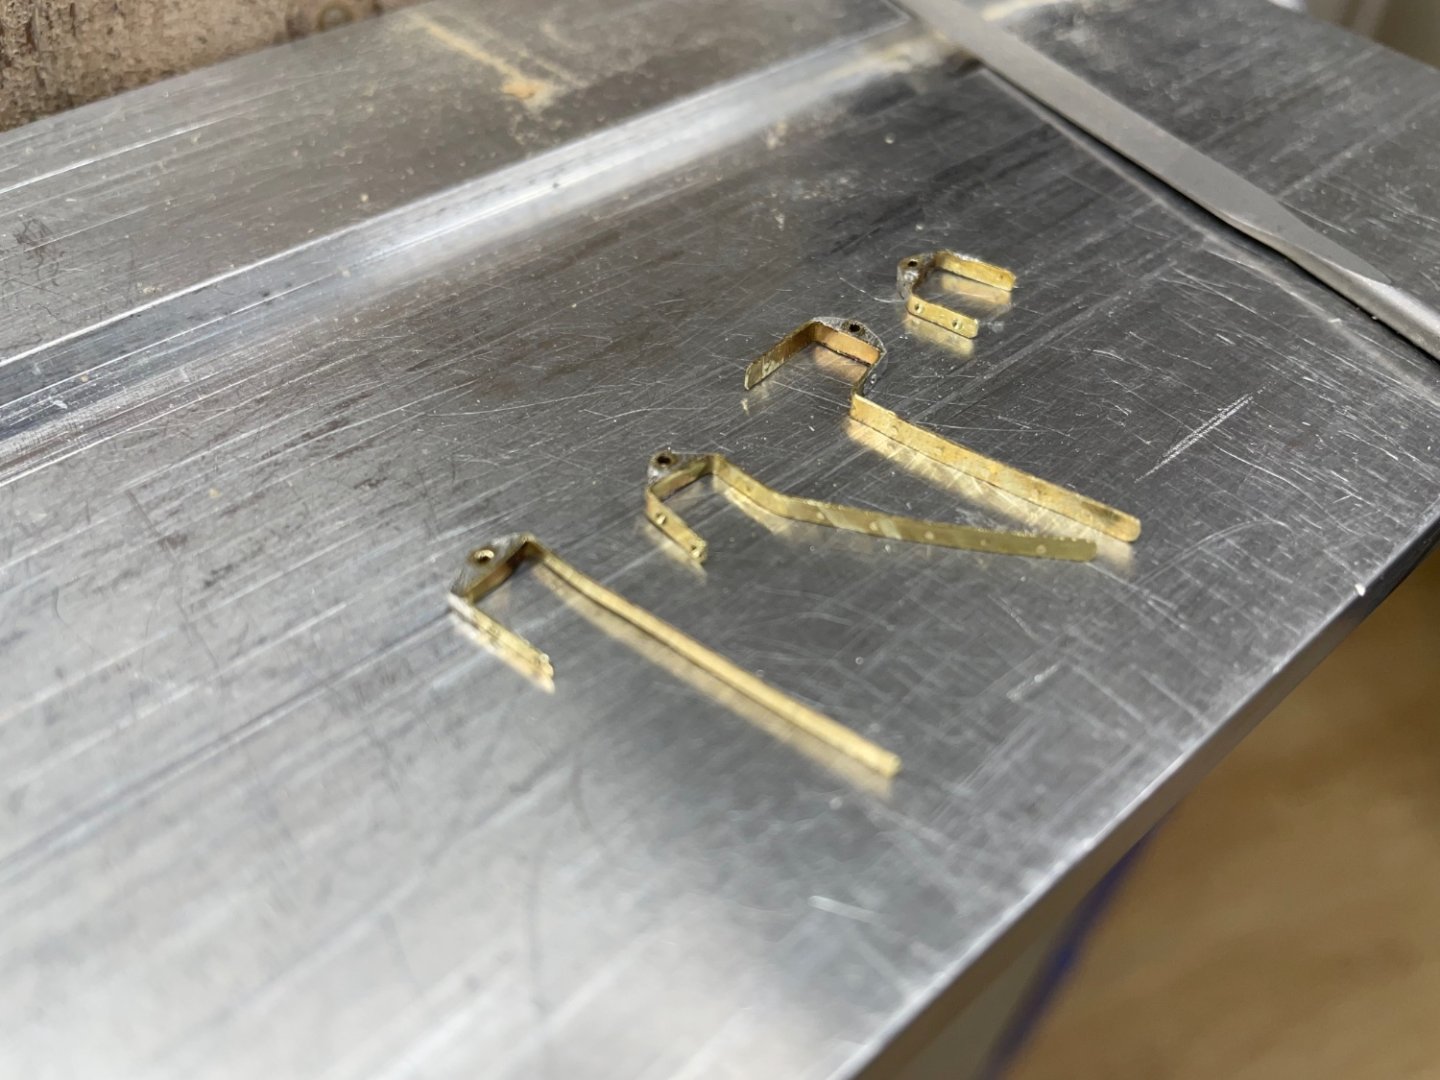
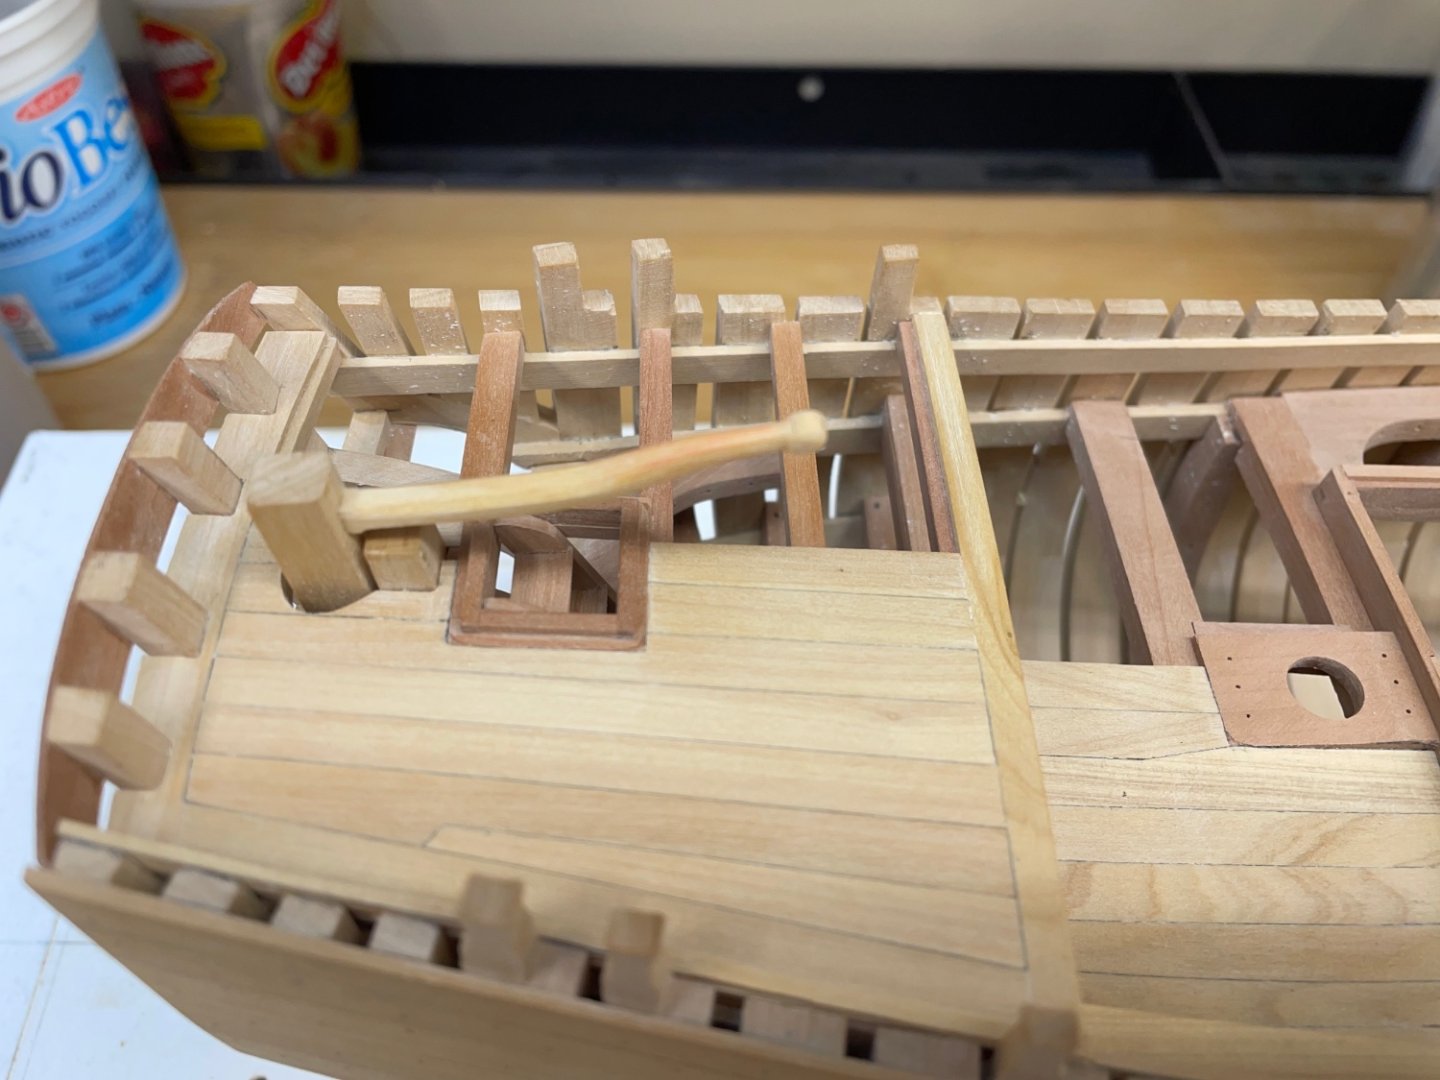
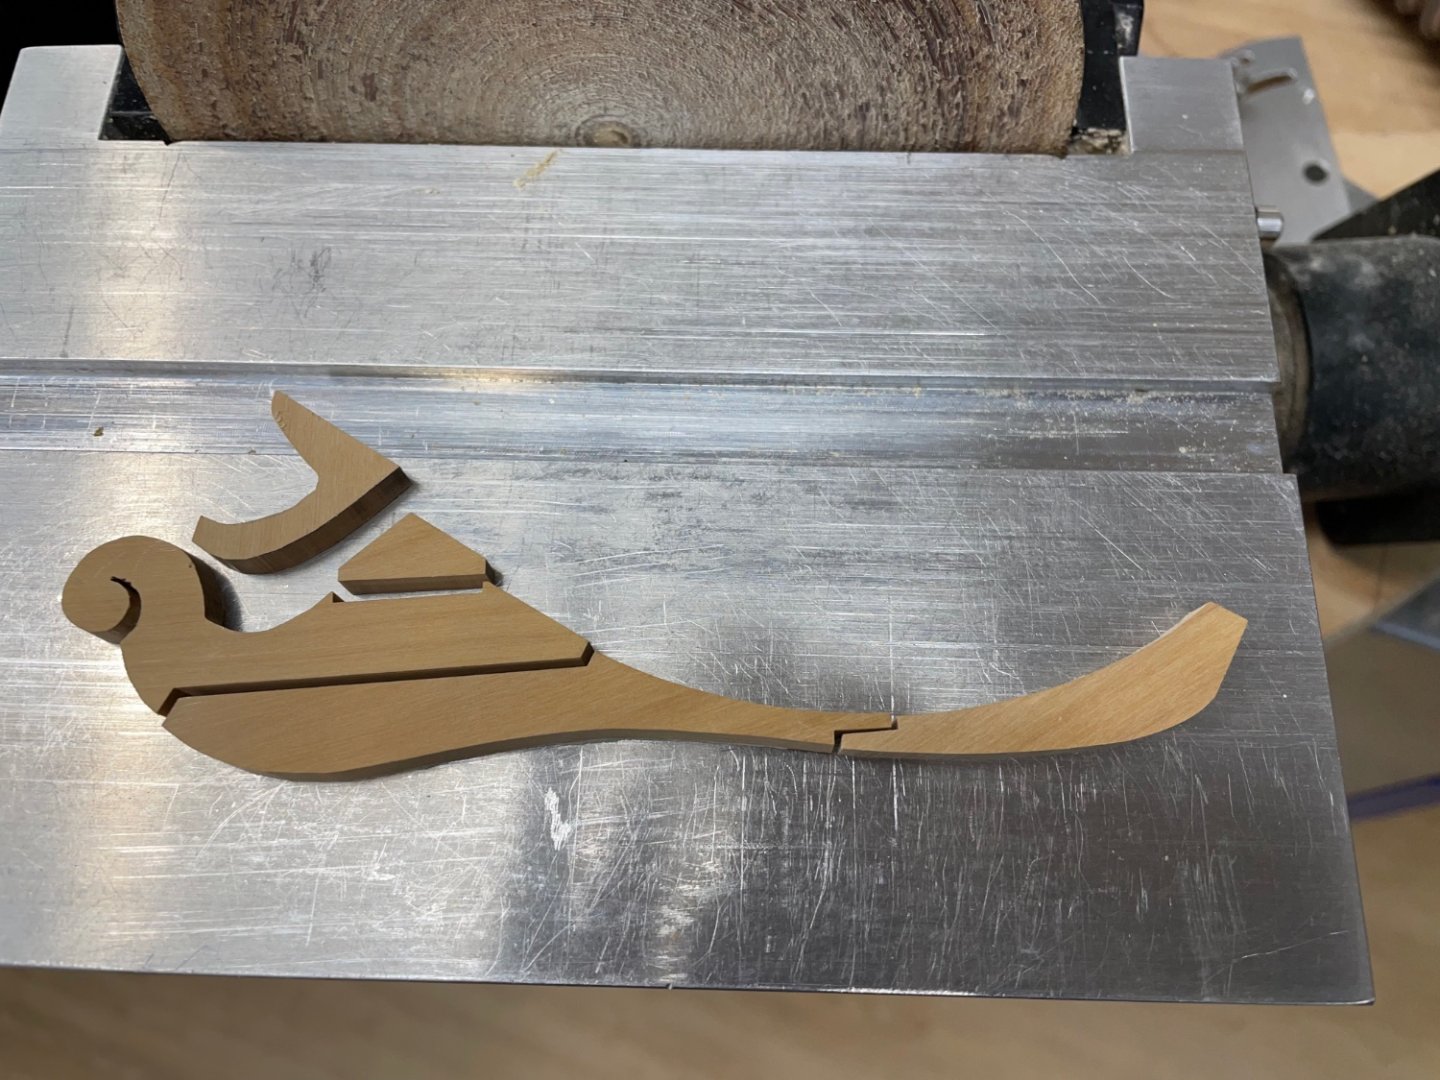
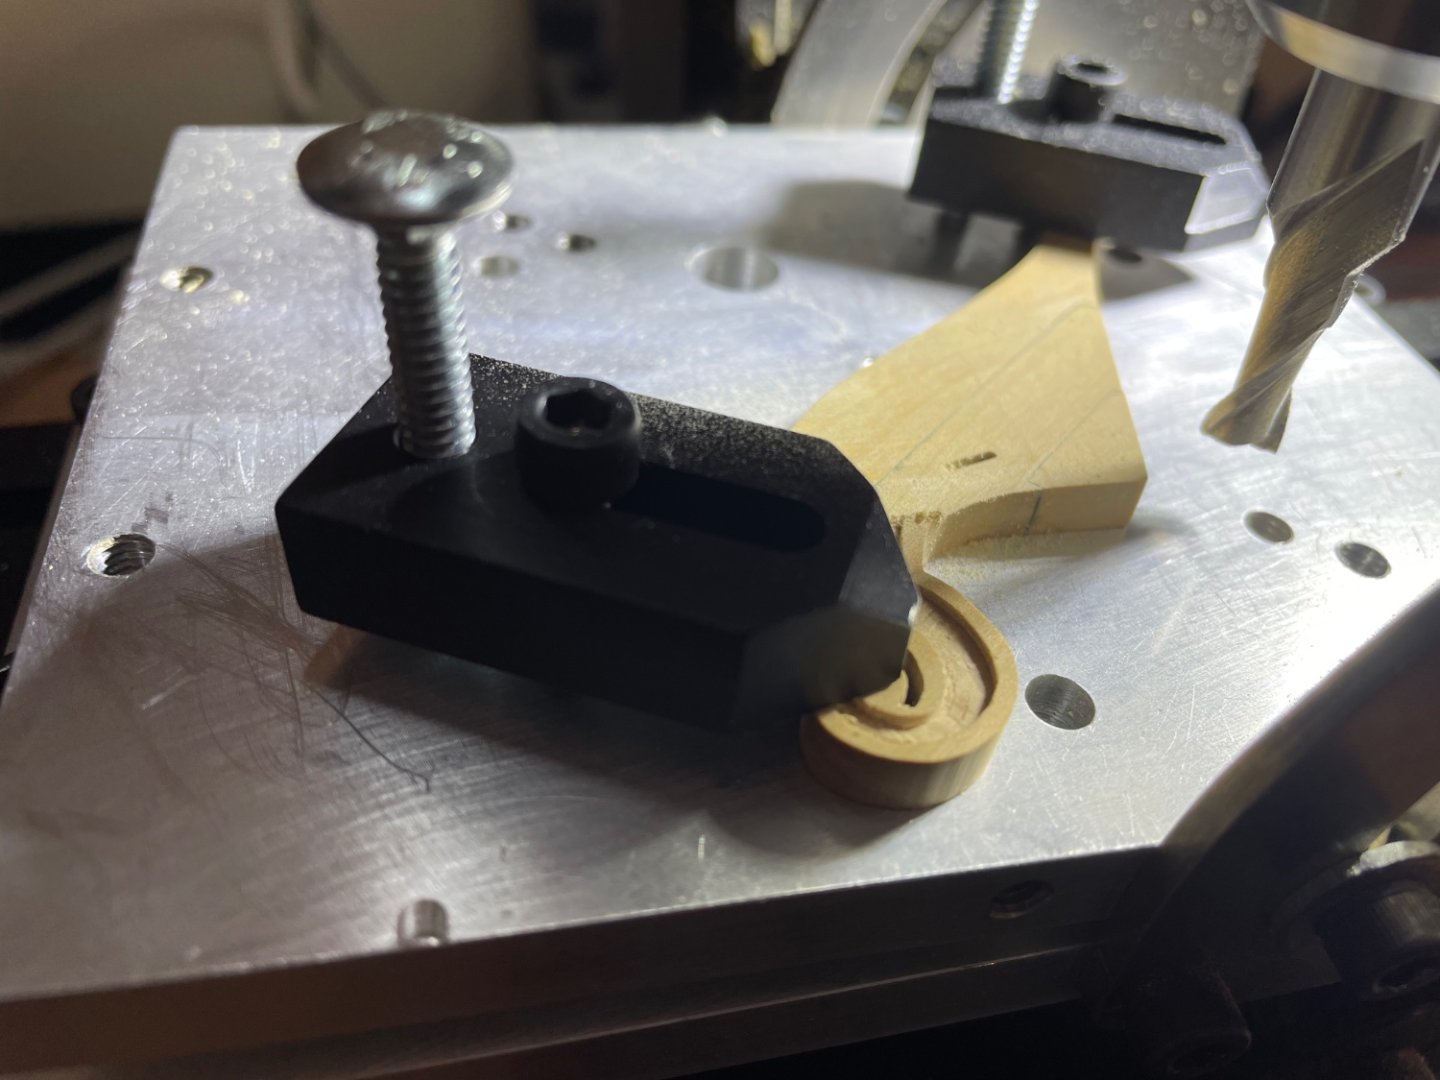
Hello again shipmates, Thank you for your comments and likes. I start off with the rudder assembly. The gudgeons: Hull straps: Pintles and rudder: Installed: Tiller: Gripe and knee: Tools used to carve scroll: Stabbing lines in preparation for carving: Finished knee (already beveled as per next photo); cheeks (not started yet) meet the scroll: The knee is tapered outwards and upwards so I diagonally seated the assembly on a tilting table and milled in the taper up to the scroll. Assembly glued in place after adding standard (between the stem and scroll): After some clean-up: Bow shot with starboard taper: Port view without scroll carved (not doing it: protecting my luck 😉😞 And finally the cathead: Thanks for looking in and see you next time, Ian


-
La Palme by Tobias - 1:36 - POF
Seventynet replied to Tobias's topic in - Build logs for subjects built 1501 - 1750
Great work, Tobias! You take your time to get every step just right and that will in turn pay dividends as you progress. Beautiful model. Ian