HOLIDAY DONATION DRIVE - SUPPORT MSW - DO YOUR PART TO KEEP THIS GREAT FORUM GOING! (Only 13 donations so far - C'mon guys!)
×


Seventynet
-
Posts
797 -
Joined
-
Last visited
Content Type
Profiles
Forums
Gallery
Events
Everything posted by Seventynet
-
 Thank you Al. I just had a look at your Halifax. Now that's an inspiration. Ian
- 51 replies
-
- 1
-

-
- cheerful
- Syren Ship Model Company
- (and 1 more)
-
Al this is one ambitious project. You are doing a fine job! Ian
-
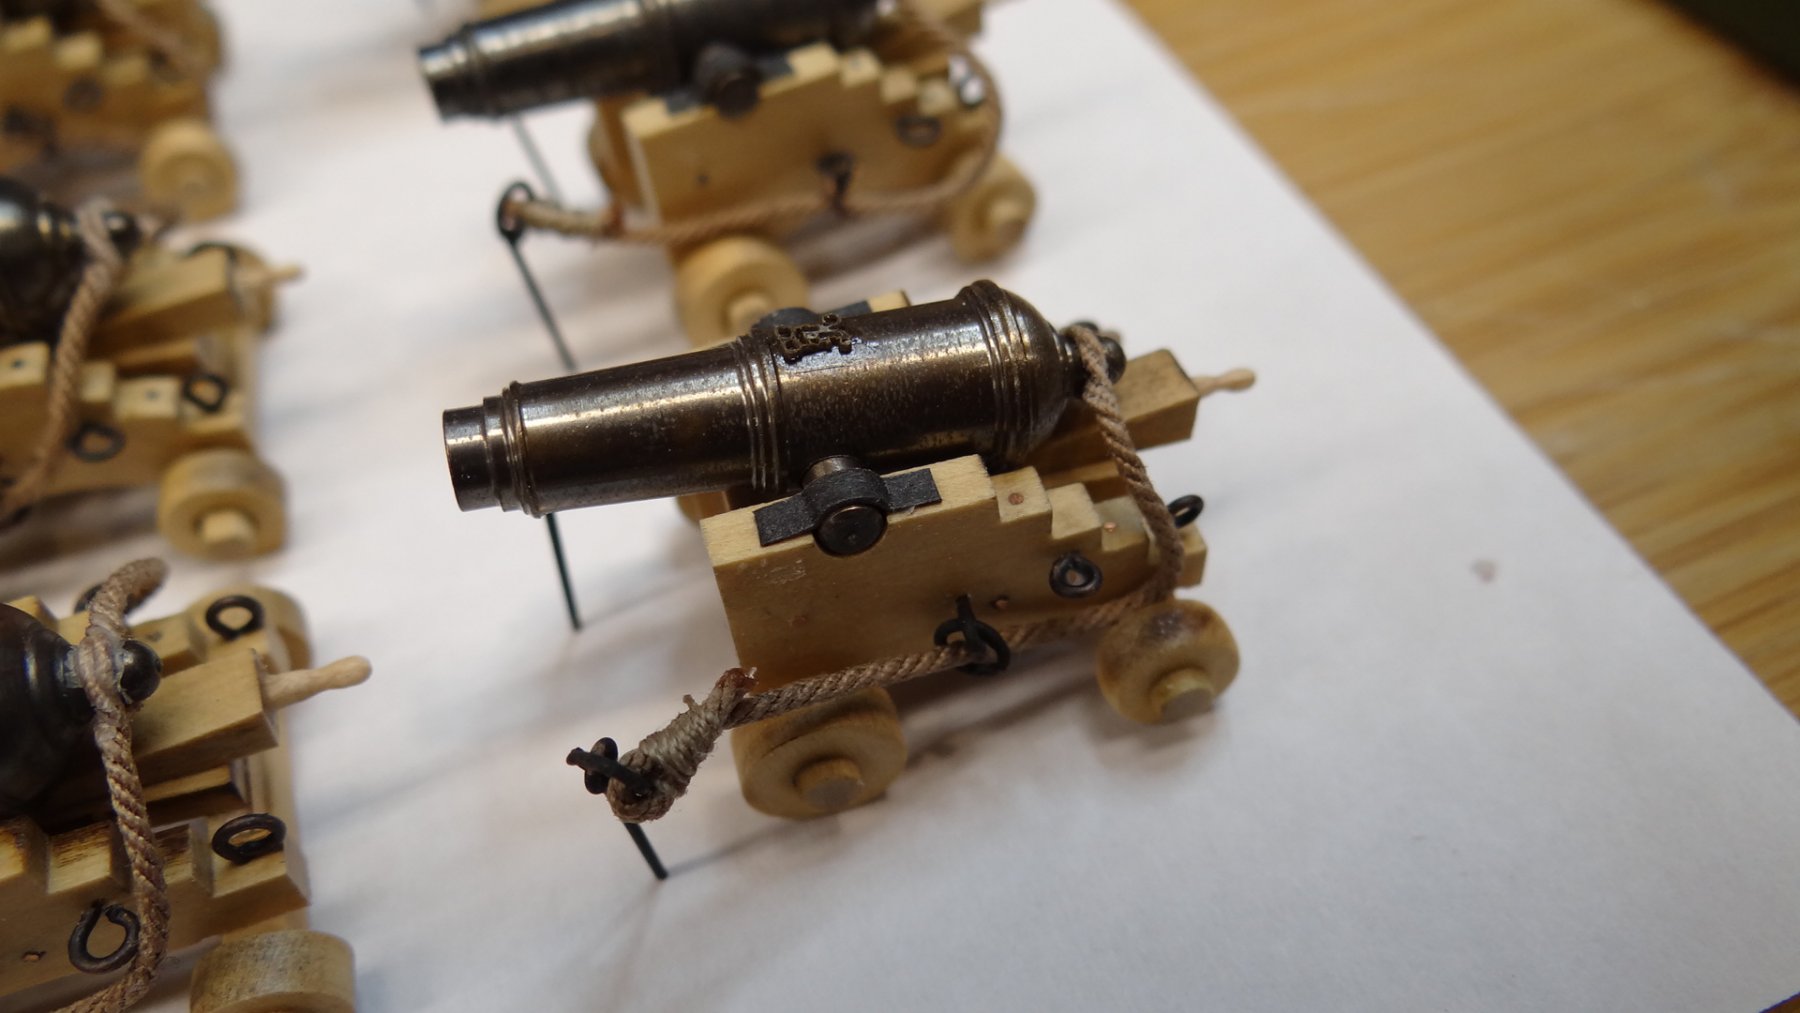
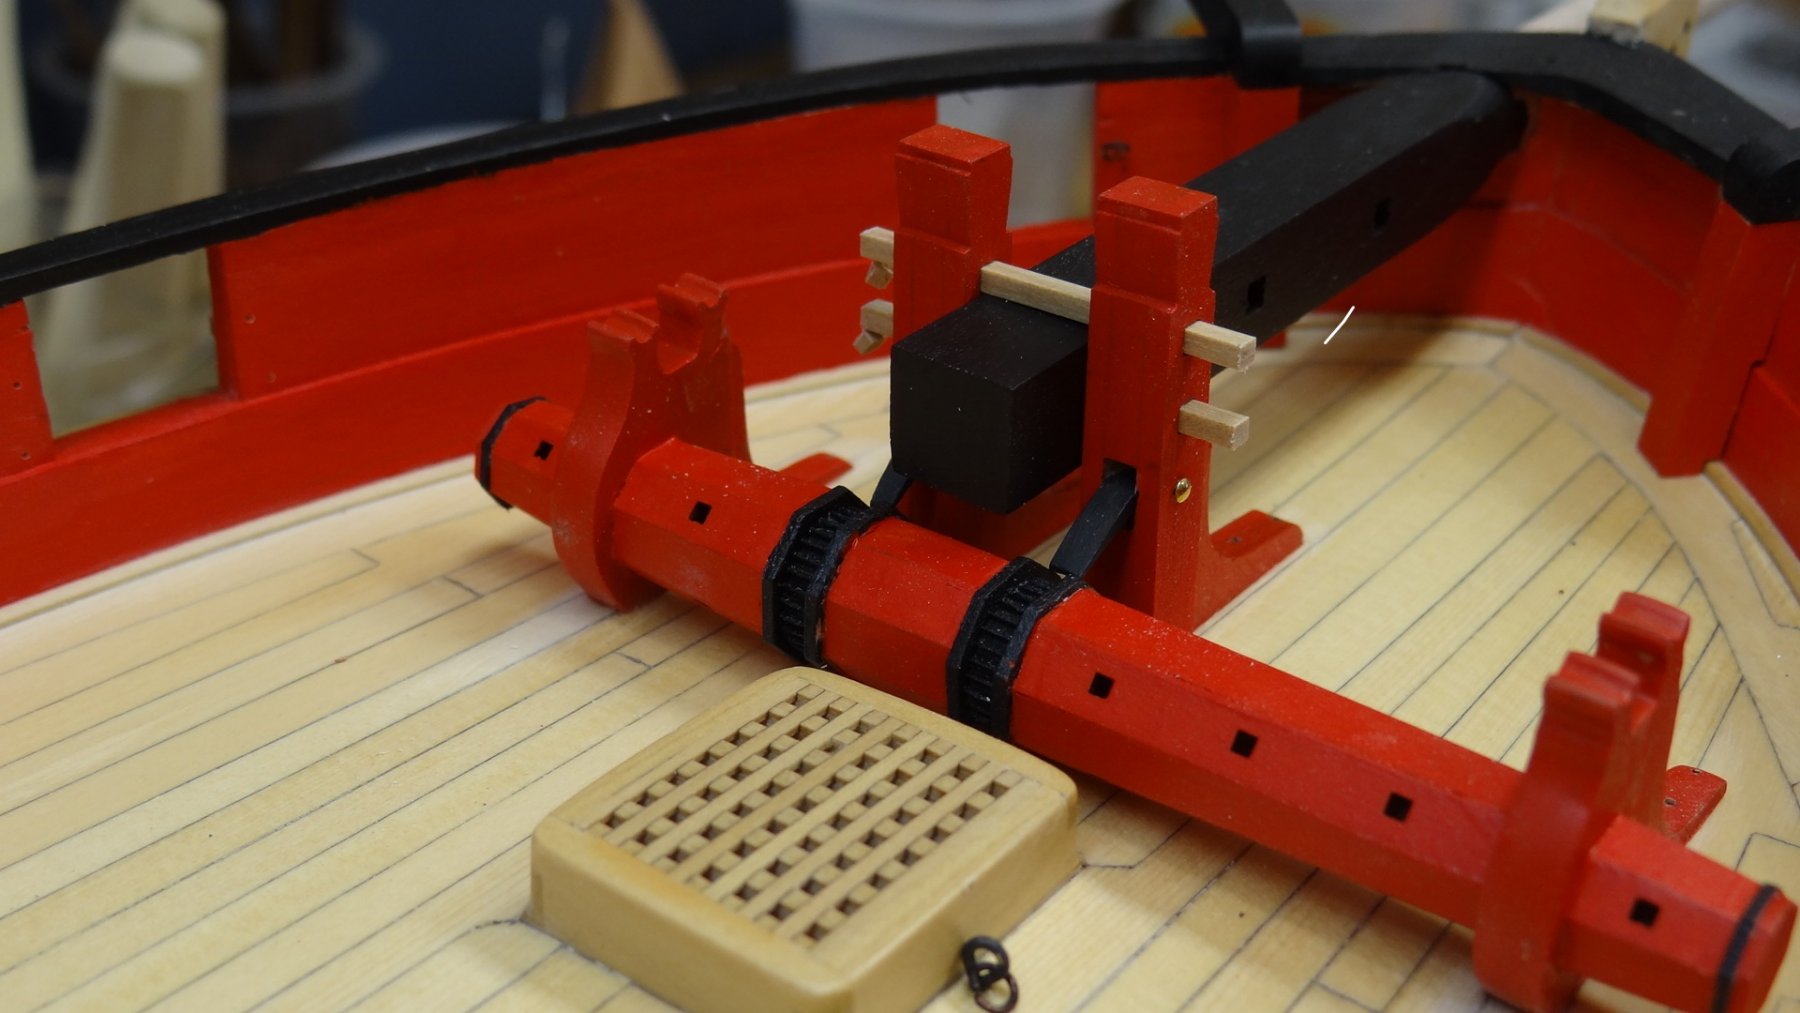
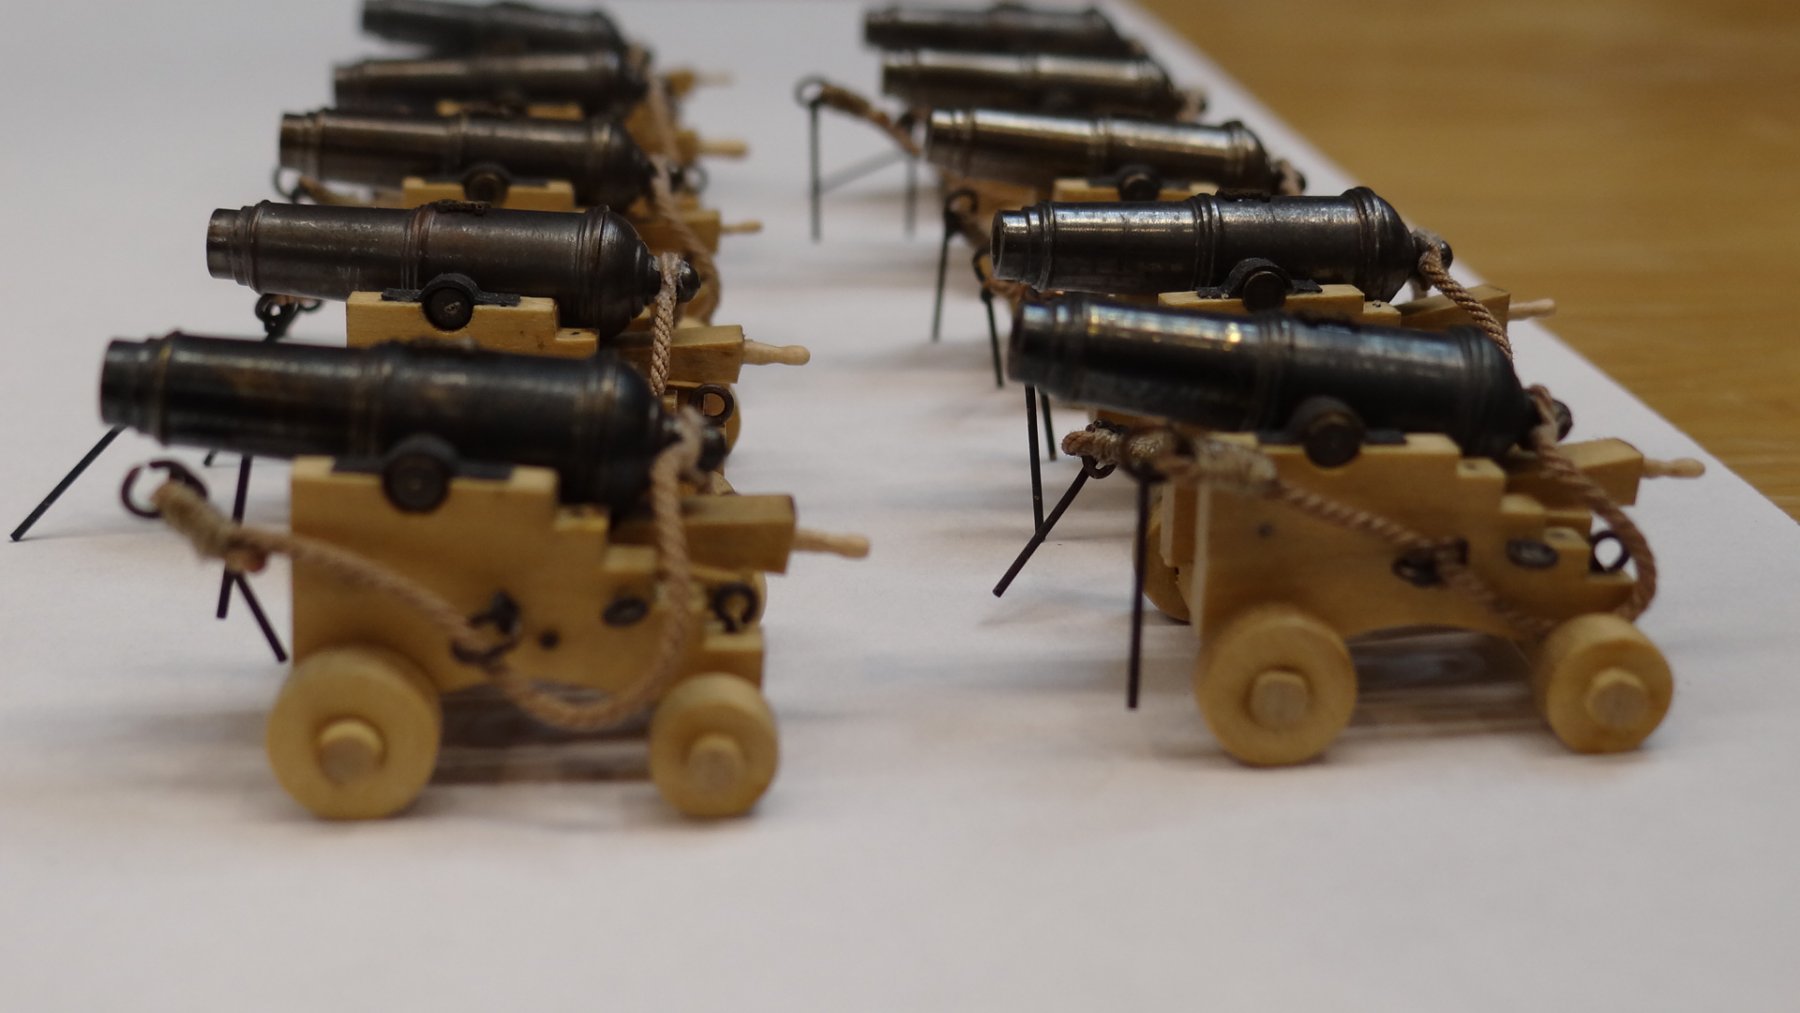
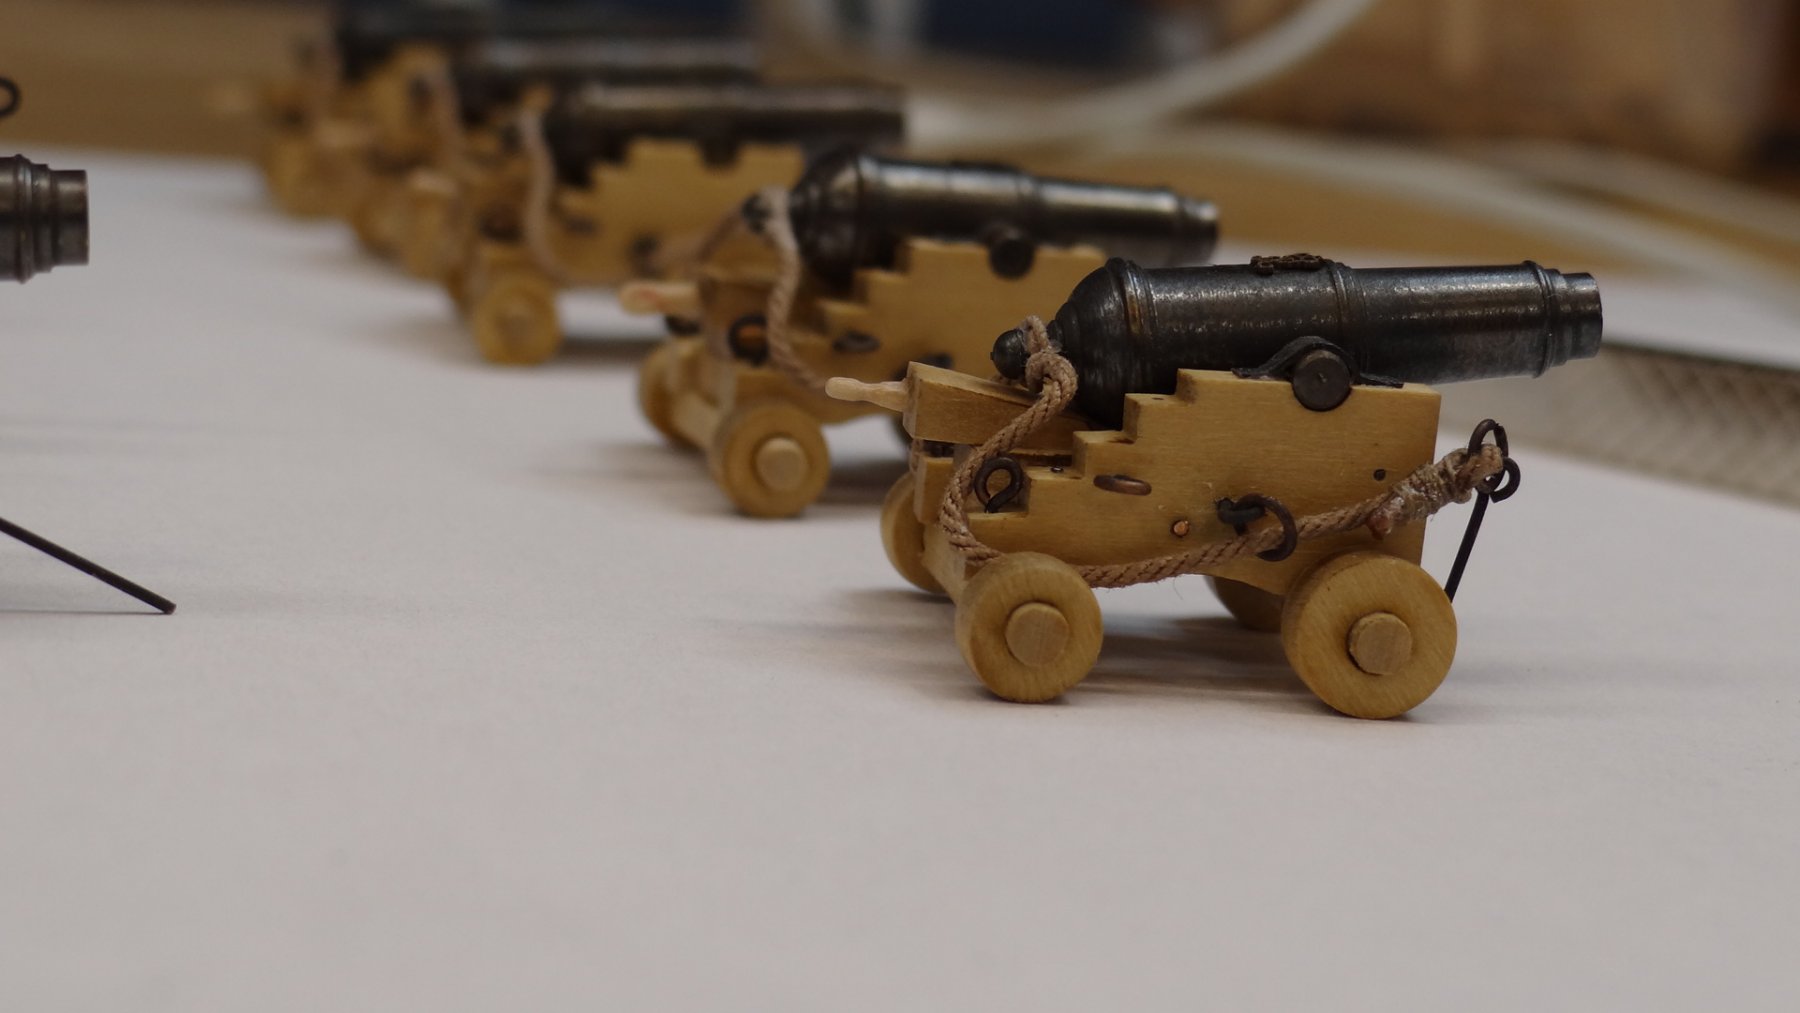
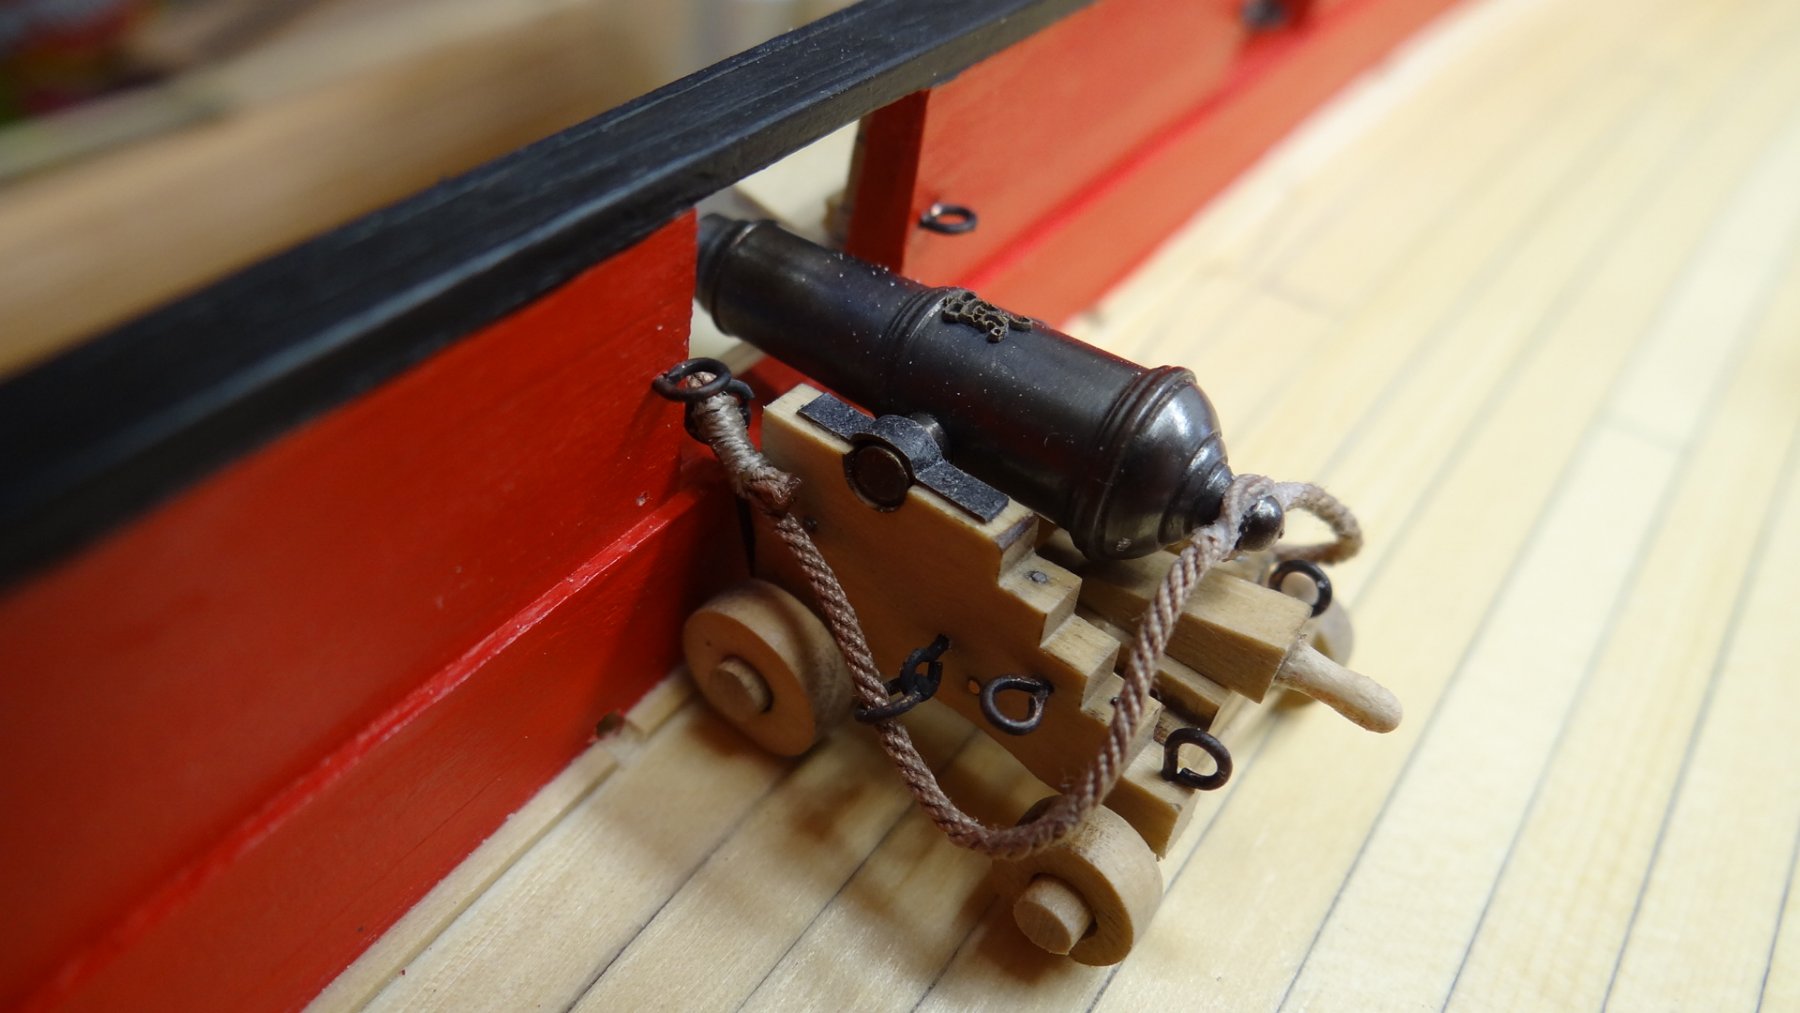
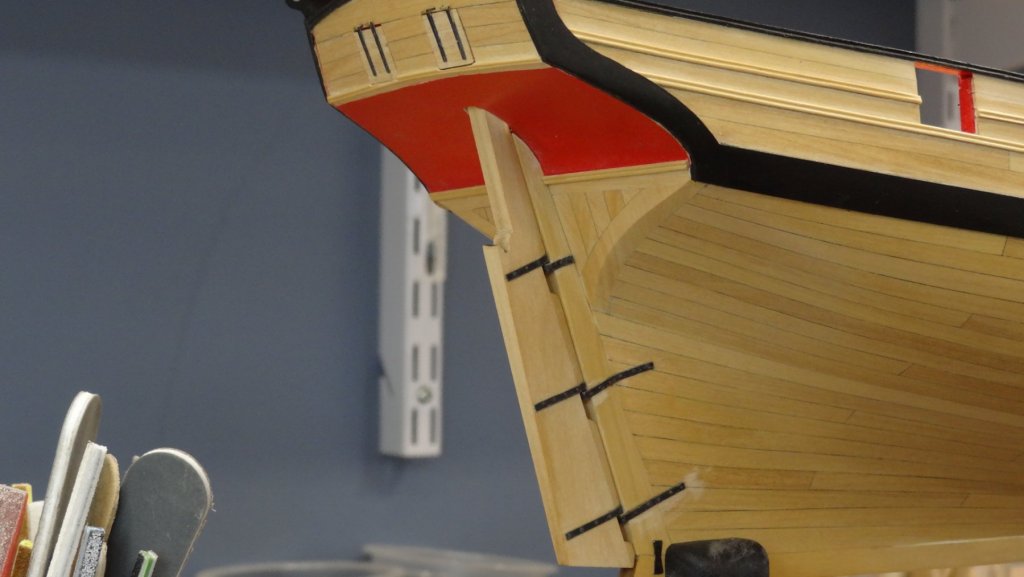
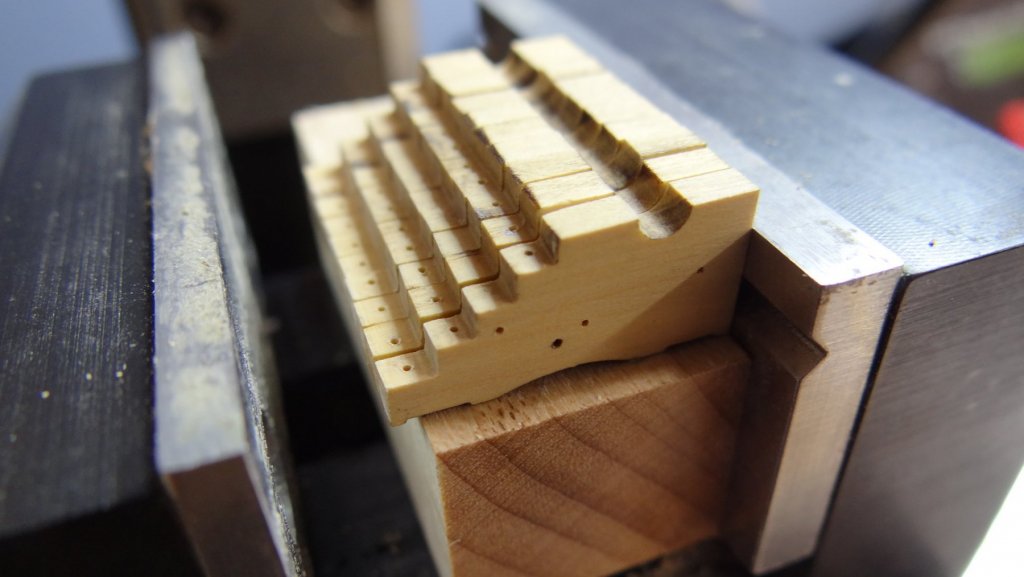
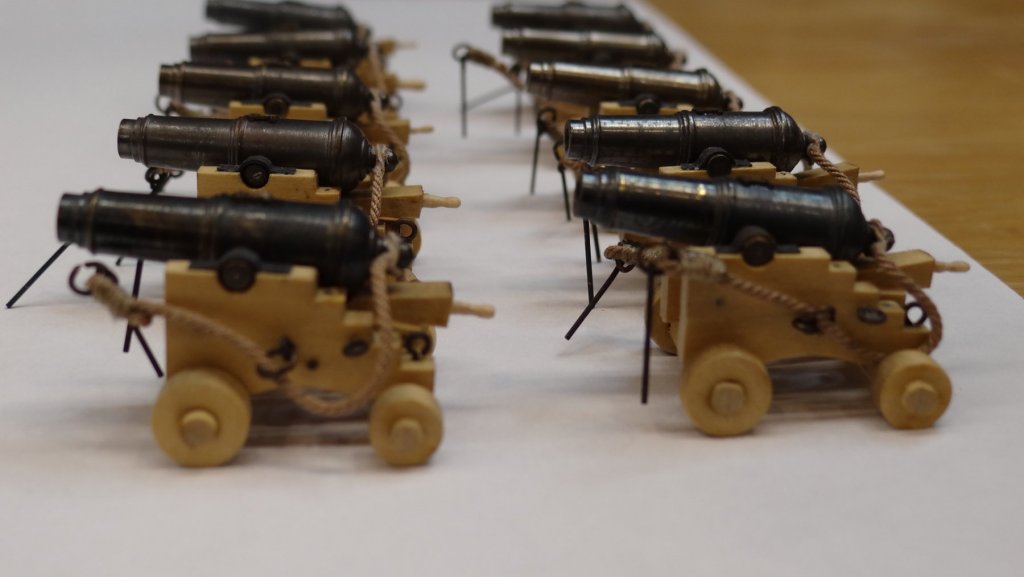
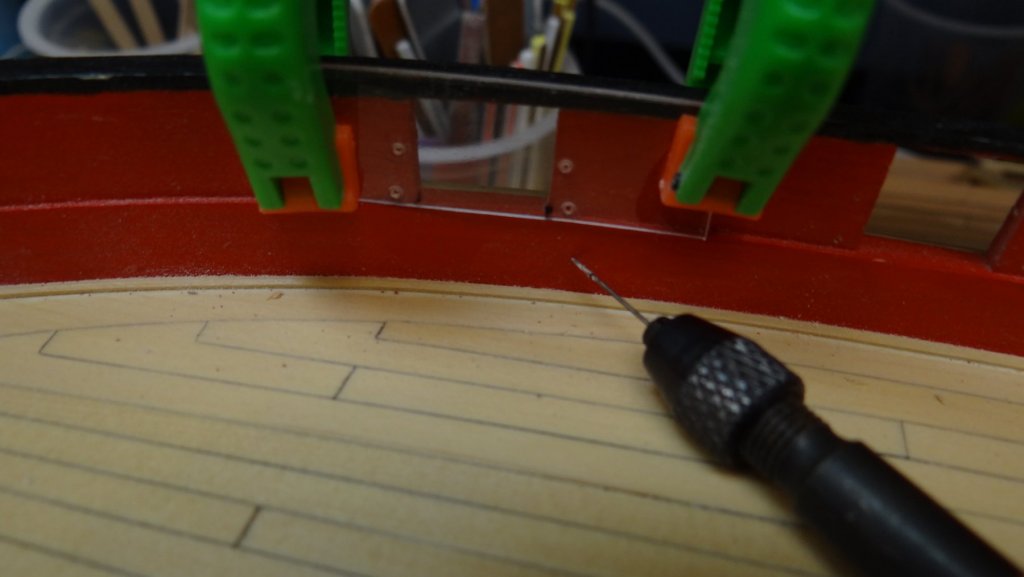
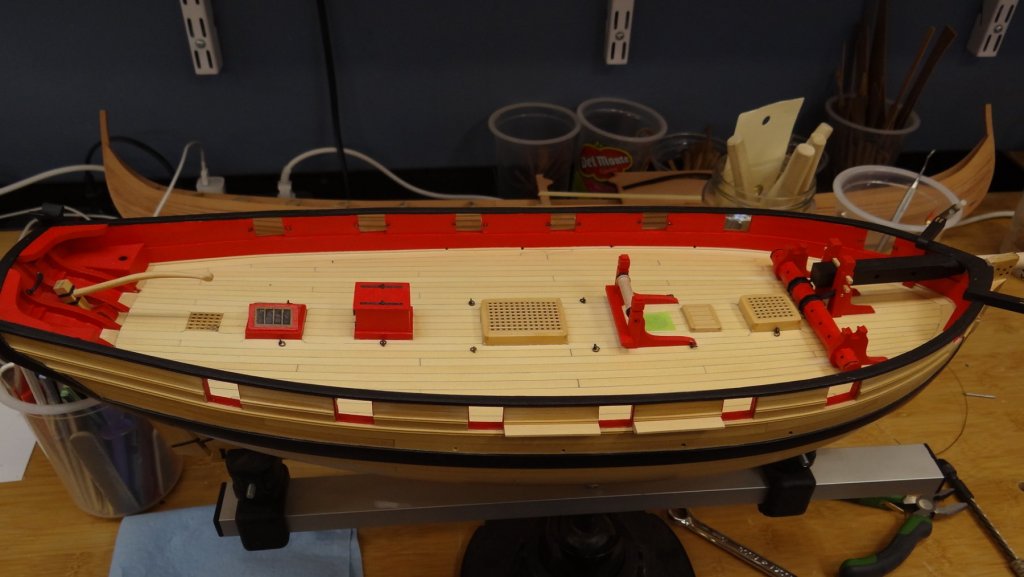
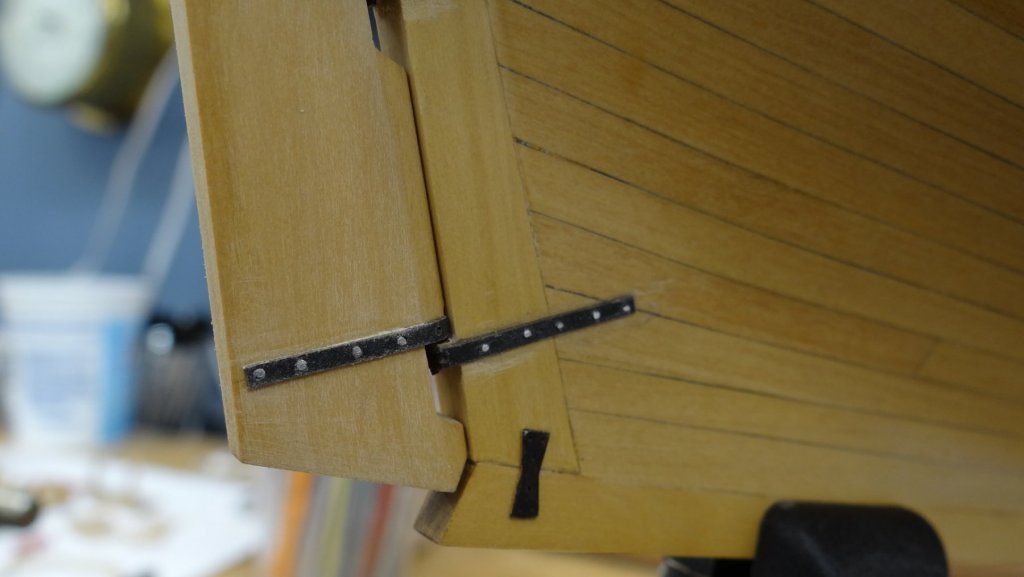
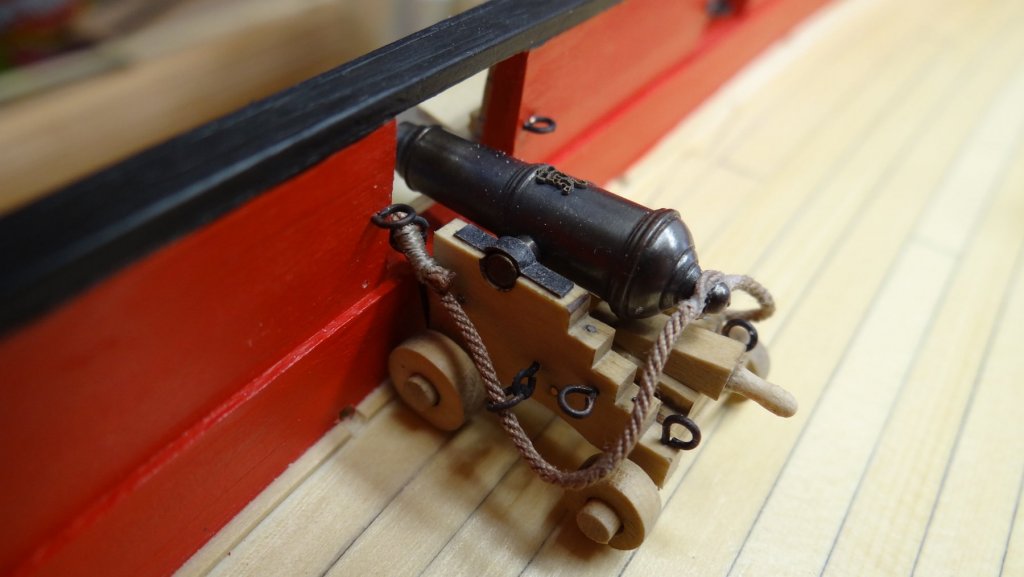
Greetings shipmates, thanks for looking in. I'm getting closer! Lots of fiddly bits: transom boom holders, chainplates, posts, channels and boarding ladders, only some of which have been installed. Unassembled catheads Jib outhaul block: Carronade carriage assembly line: Carronade factory: Trunion cap jig: Eye-bolt jig: Uninstalled carronade: Rudder works: Bowsprit assembly: Current state of progress:


- 51 replies
-
- 14
-
-
- cheerful
- Syren Ship Model Company
- (and 1 more)
-
Gorgeous Don! Good to see you back in the shipyard. Ian
-
Love this Mike. Great work as usual! ian
- 607 replies
-
- 4
-
-
- winchelsea
- Syren Ship Model Company
- (and 1 more)
-
Derek, this is beautiful work. I am not sure what deliberate mistake you are referring to. I am not at this stage yet but it appears to me that your upper counter is less prominent than it might otherwise be - you know the place where the "Victory" is written? Or is it just the camera angle?
-
Good job B.E.! I think it looks great. I’m sure you will feel a tremendous sense of accomplishment when you’re done. Keep the faith. ian
- 574 replies
-
- 3
-
-
- cheerful
- Syren Ship Model Company
- (and 1 more)
-
Great job B.E., it will look even sweeter with a sanding and finish.
- 574 replies
-
- 2
-
-
- cheerful
- Syren Ship Model Company
- (and 1 more)
-
Steve that is an absolutly beautiful job. A pleasure to behold. Ian
-
Well this thing has been gathering moss hasn’t it! Hi Ronald. It’s been a while but I think I used masking tape, cut to measure after laying it over the bulkhead edges and then spray painted (can) the interior. I sort of wonder why I would even have done that but I may have completed the fairing process beforehand. thanks for looking in. Ian
- 191 replies
-
- 1
-
-
- victory
- caldercraft
- (and 1 more)
-
It’s hard to turn away once you are hooked. Best Regards, Ian
-
Beautiful work Robert and ingenious solutions, methods that I am sure to employ myself. Ian
-
Very nice job! The wood type really seems to suit the type and age of the boat. What kind of wood is that? regards, Ian
-
Terrific job Steve! Such nice crisp work. regards, Ian
- 190 replies
-
- 2
-
-
- pinnace
- model shipways
- (and 1 more)
-
Thanks a lot Jim. I used a flat black acrylic. I think, but not positive it is what Chuck originally recommended. However I painted over it with satin wipe on poly which makes it shine a bit more than I like. Regards, Ian

- 51 replies
-
- 2
-
-
- cheerful
- Syren Ship Model Company
- (and 1 more)
-
Thanks B.E., honestly your build is absolutely beautiful and there has been more than one occasion where I had wished I was behind you so that I could have followed your lead. I have said to myself many times that I have to build another Cheerful so that I can do a better job next time. Al thanks for the compliment. I know your work and you will do a splendid job on it. You will also enjoy it as much as I do. Chuck has put together a beauty. Ian
- 51 replies
-
- 1
-
-
- cheerful
- Syren Ship Model Company
- (and 1 more)
-
DIY Workbench Mini Vac Cleaner with Trap
Seventynet replied to Tecko's topic in Modeling tools and Workshop Equipment
Very clever, nicely done! -
Thanks for the encouragement Kurt and Don. I really would like to see more of your build Kurt. Don I wonder what you’ve been cooking up in that shipyard of yours? Any undocumented projects you’ve been holding back? I cleared the Cheerful deck for action this morning . It feels good to be back at it. Best Regards, Ian
- 51 replies
-
- 1
-
-
- cheerful
- Syren Ship Model Company
- (and 1 more)
-
That is so sweet looking Rusty! ian
- 120 replies
-
- 2
-
-
- queen anne barge
- Syren Ship Model Company
- (and 1 more)
-
Nice work B.E. I actually miss the hull planking part. It reminds me how much I liked working with boxwood. Cheers
- 574 replies
-
- 3
-
-
- cheerful
- Syren Ship Model Company
- (and 1 more)
-
Thanks so much for the (overly) kind words and for hitting the like button. Jim: Thanks for the encouragement. I am intrigued by the picture of your yellow cedar deck. Where can I find your beautiful model? Antony: Thank you. I have come up with a pretty reliable approach to removing planks by first treating the area with rubbing alcohol and then heating up the area with a heat gun (after the fumes have cleared!). The planks come off with ease. And clean up is easier too. Much appreciated Joe. I found your Atlantis restoration project the other day. Wow is all I can say! Thanks so much for following Niles. Love your work! Regards, Ian
- 51 replies
-
- 3
-
-
- cheerful
- Syren Ship Model Company
- (and 1 more)
-
Atlantis by Thistle17 - FINISHED - Robbe
Seventynet replied to Thistle17's topic in RC Kits & Scratch building
Beautiful model and exceptional work Joe. It is going to be hard to part with this. I am sure the client must be happy! regards, ian -
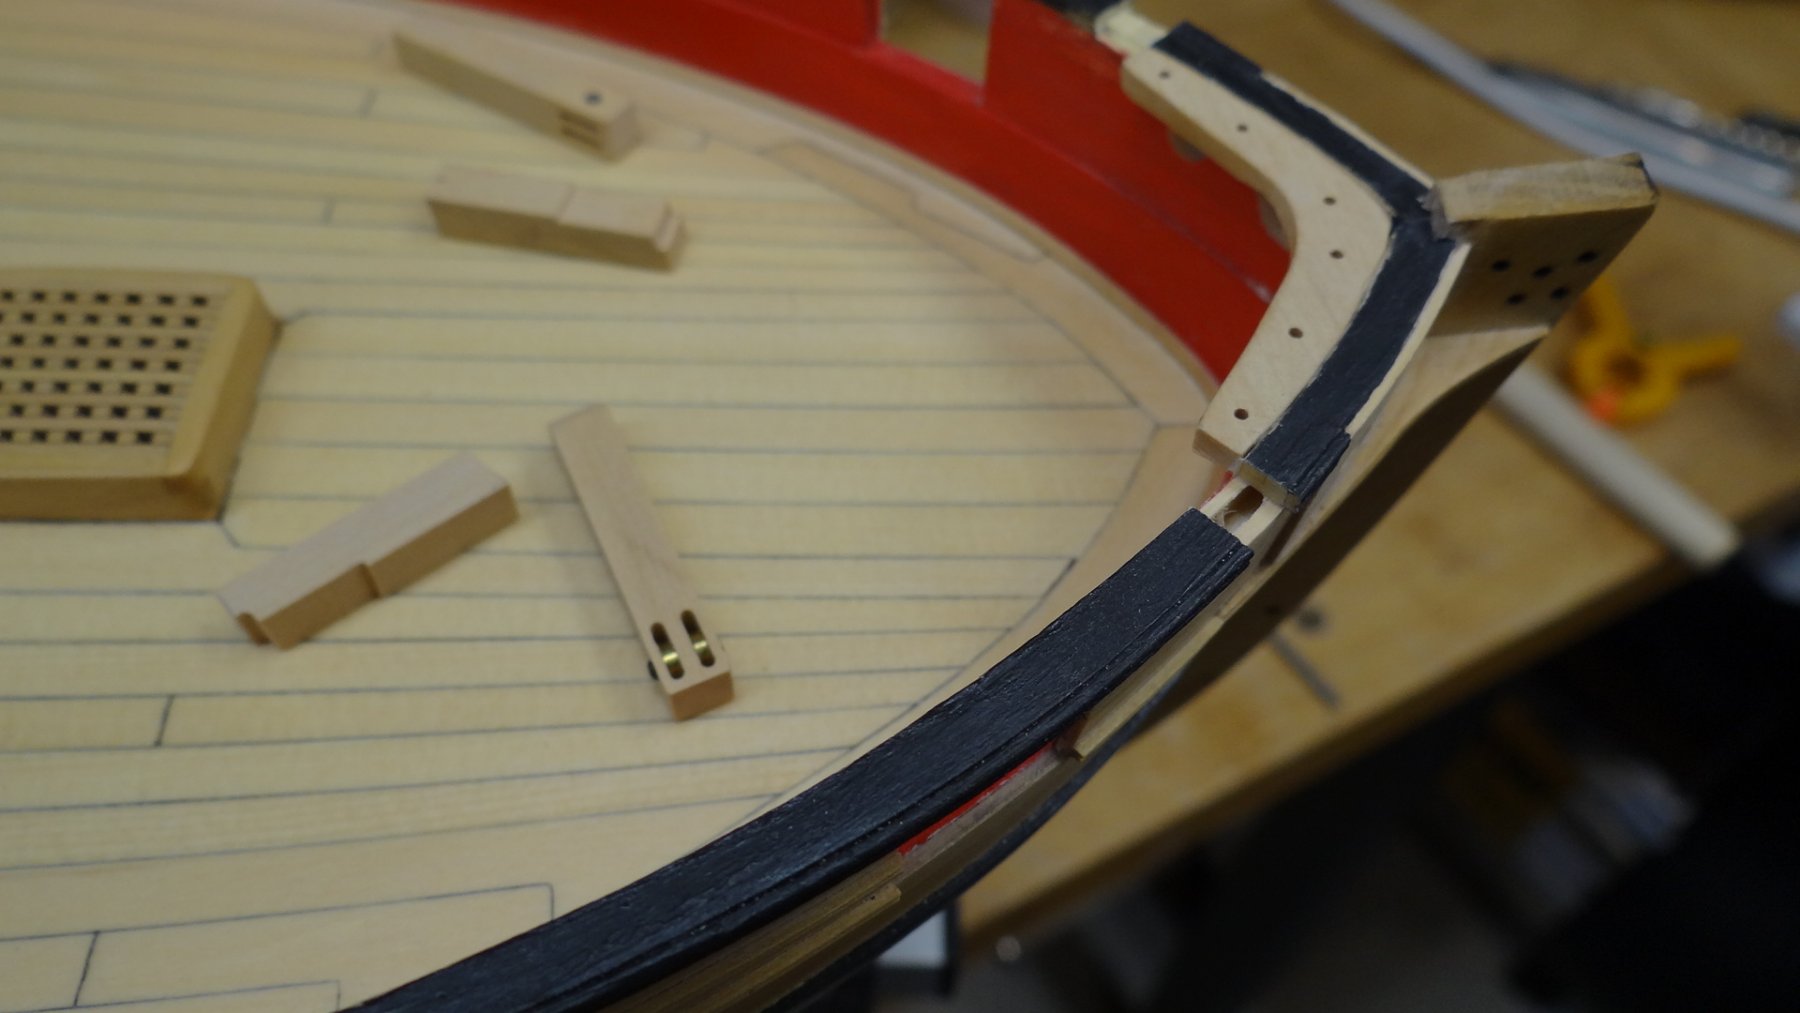
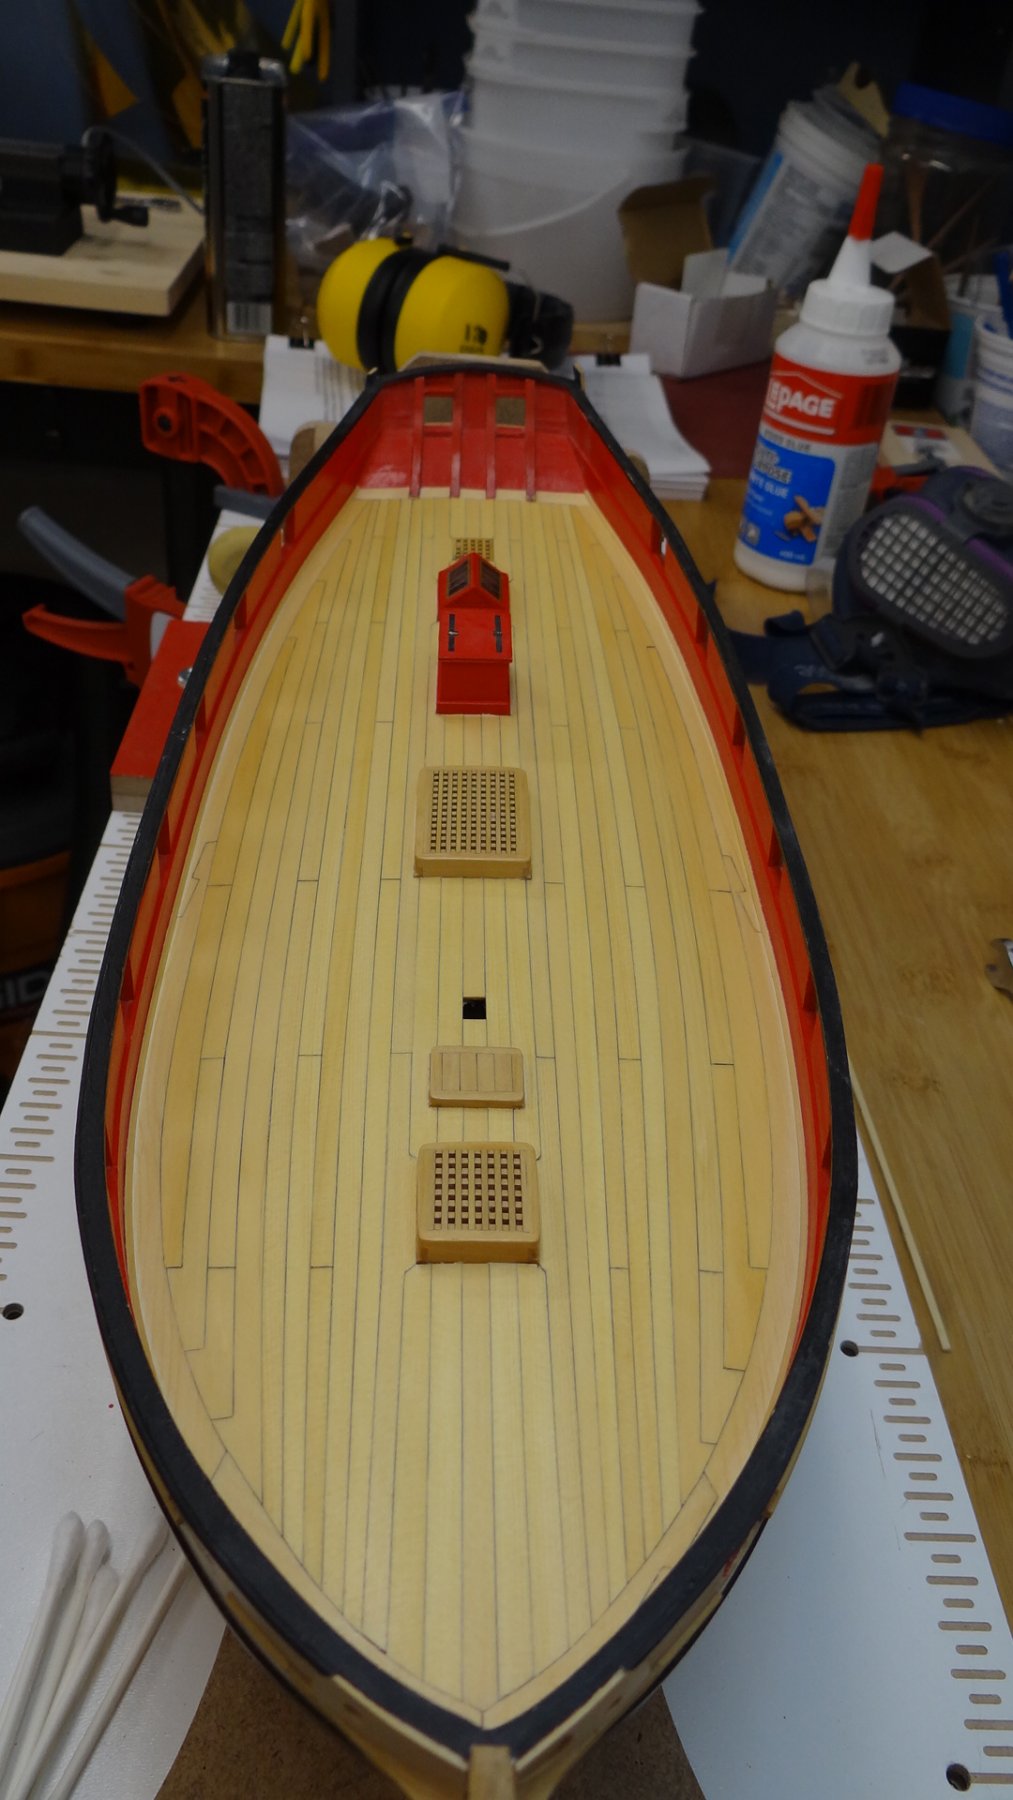
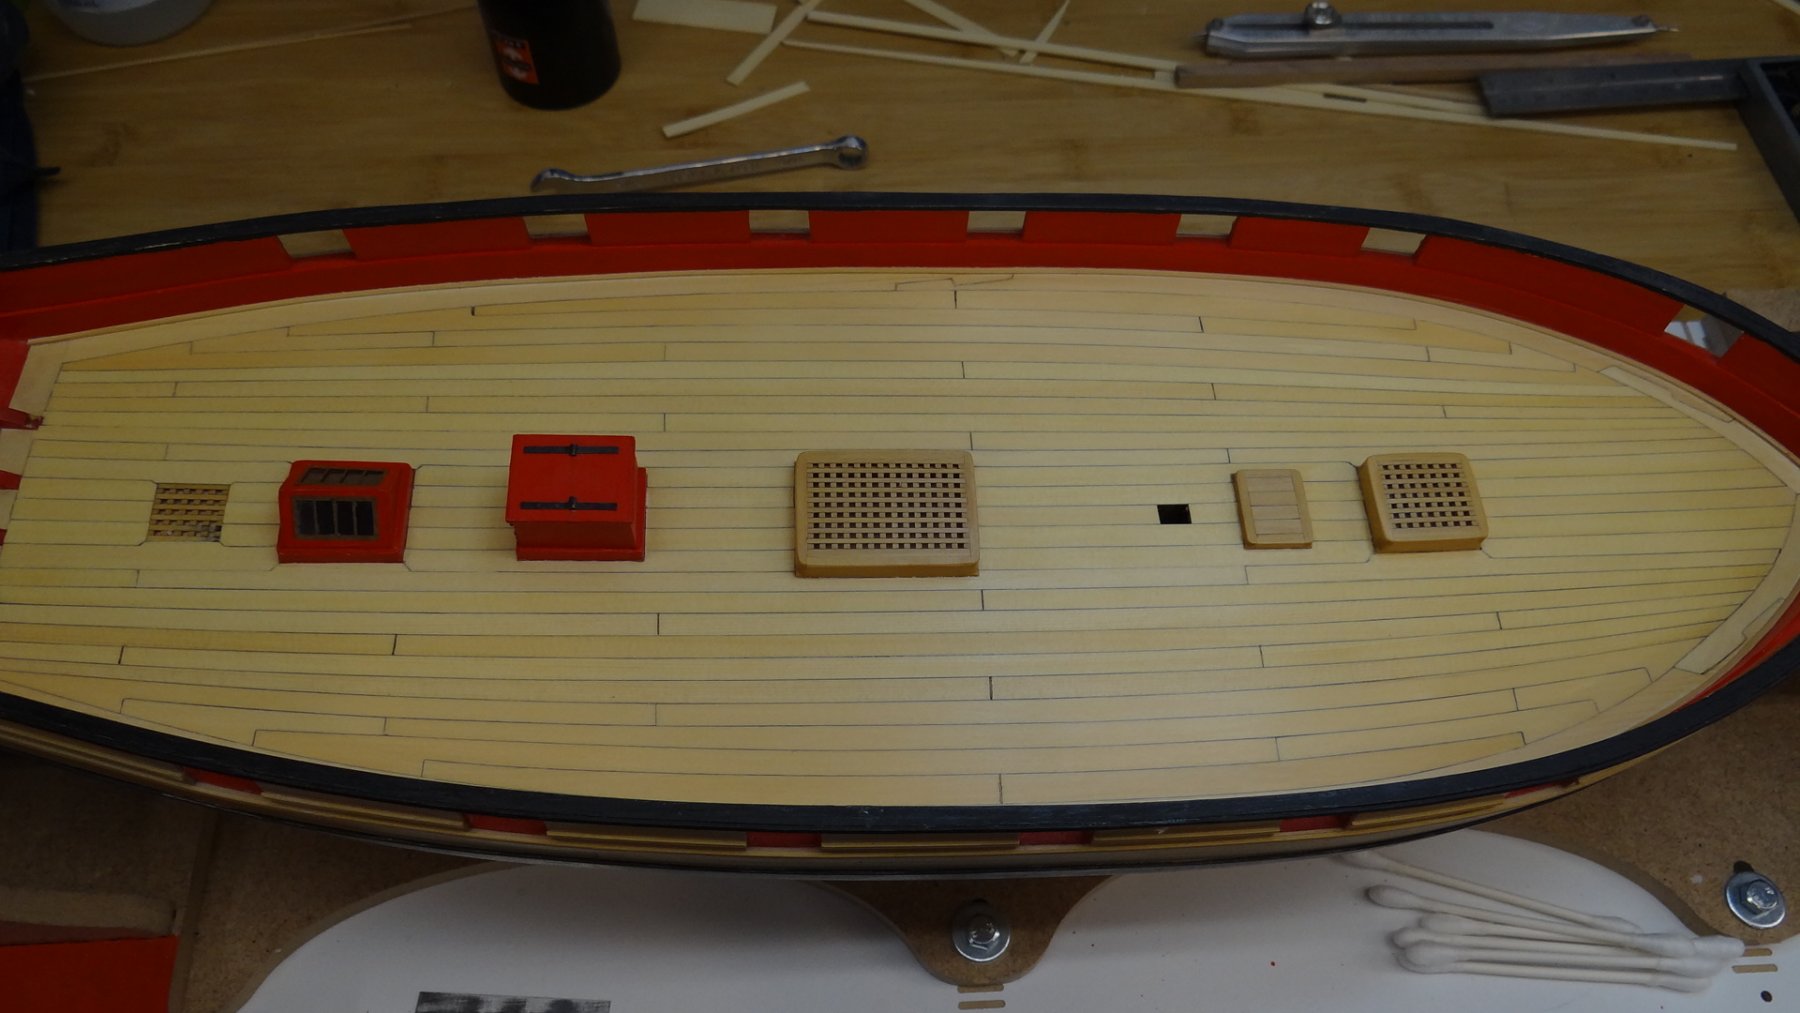
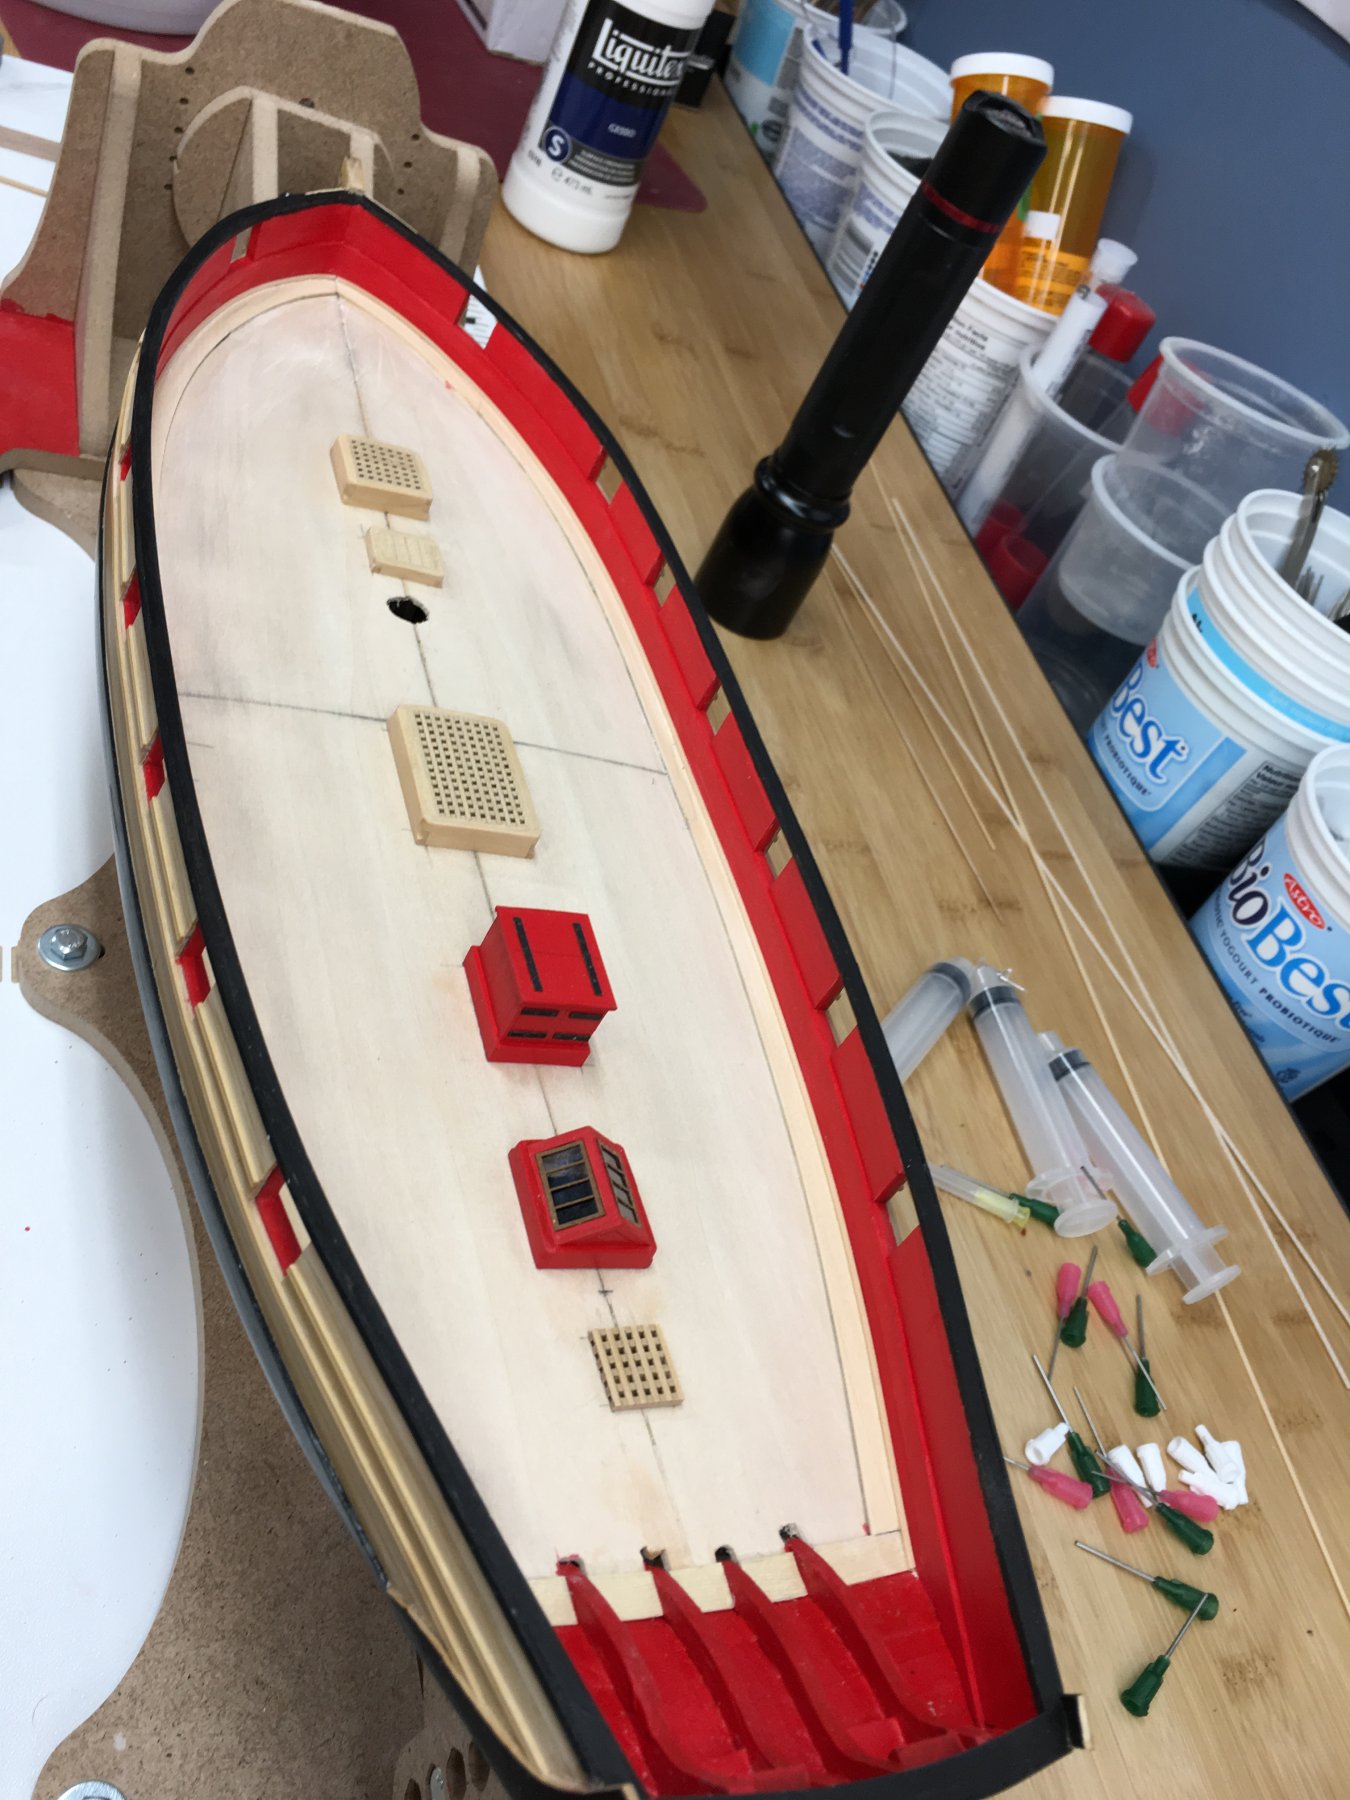
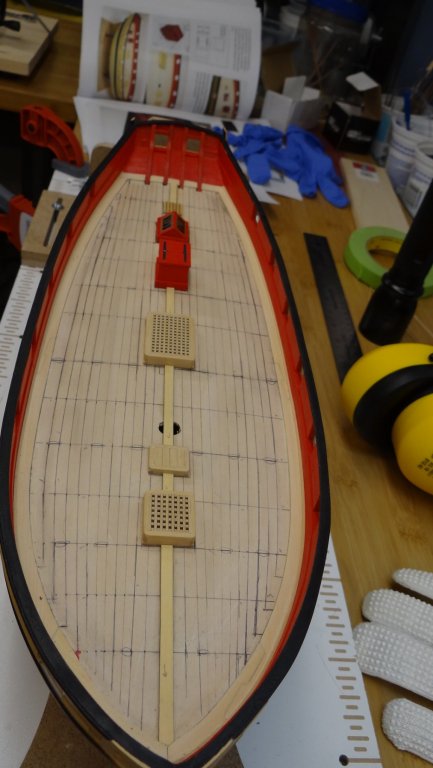
Decking 1. I used Alaskan yellow cedar for the deck. I’d also used it for the deck on my Brazzera. It is perfect for this application. 2. Decking layout. I would do it slightly different next time. I would let some of the bow planks close to the center plank taper so that I could end up with all of the planks except the center plank being the same width at the bow. I could have been more careful to achieve the same objective at the stern as well. This is where I am at today. It may be a few weeks before I have any updates. I hope these are of some interest and value to those starting out. Best Regards, Ian

- 51 replies
-
- 22
-
-
- cheerful
- Syren Ship Model Company
- (and 1 more)
-
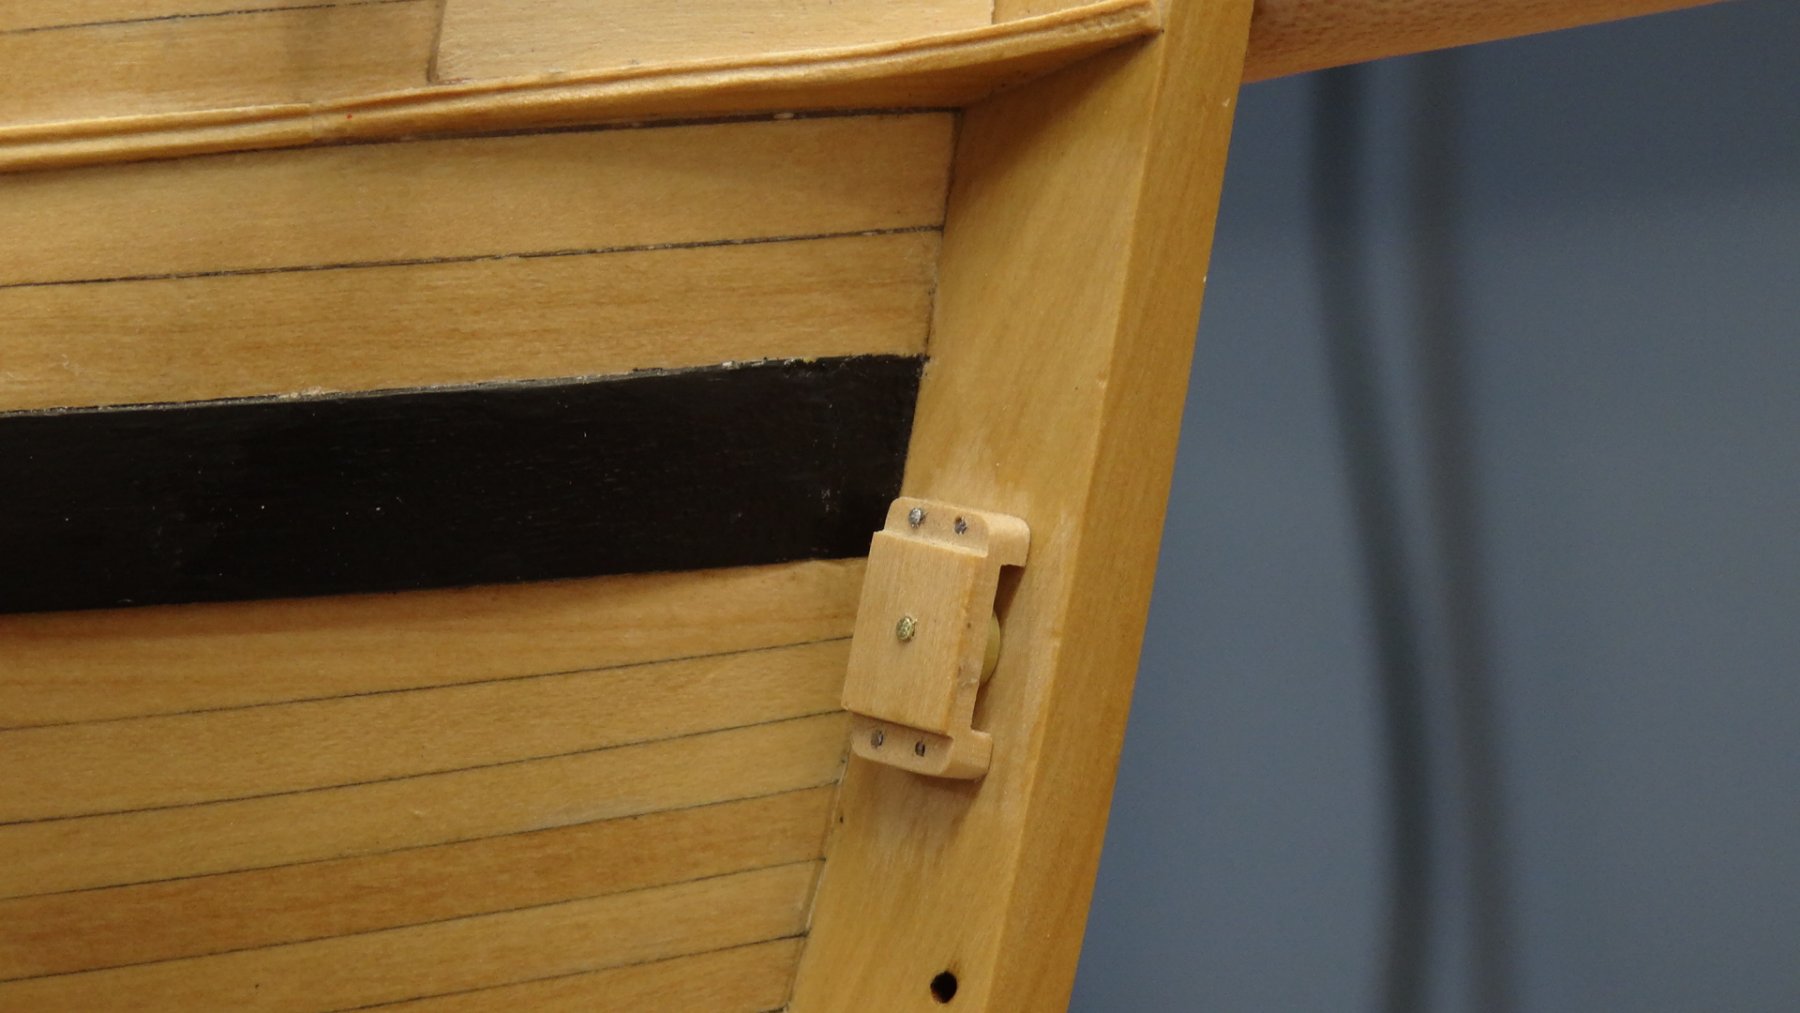
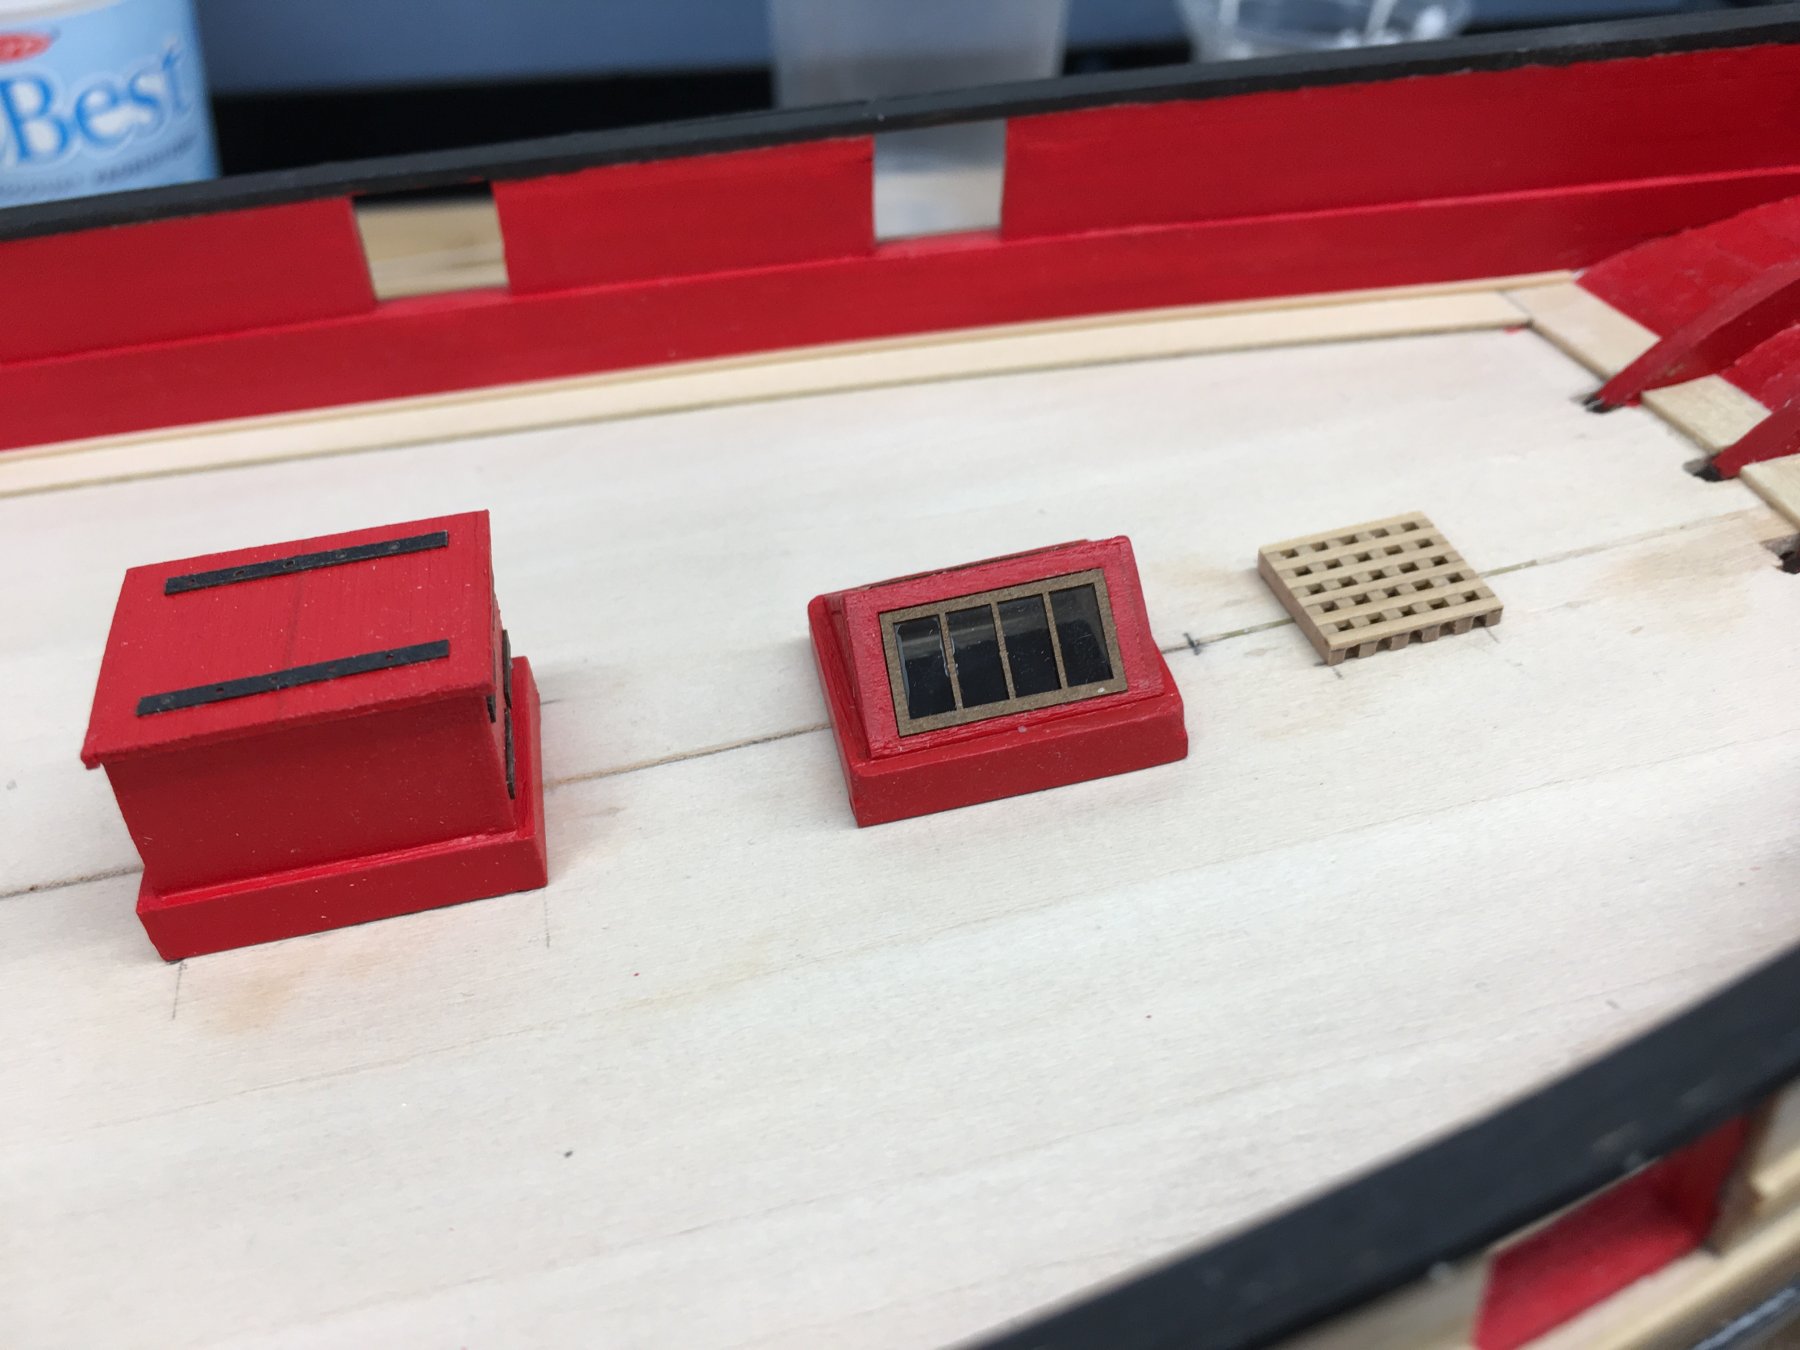
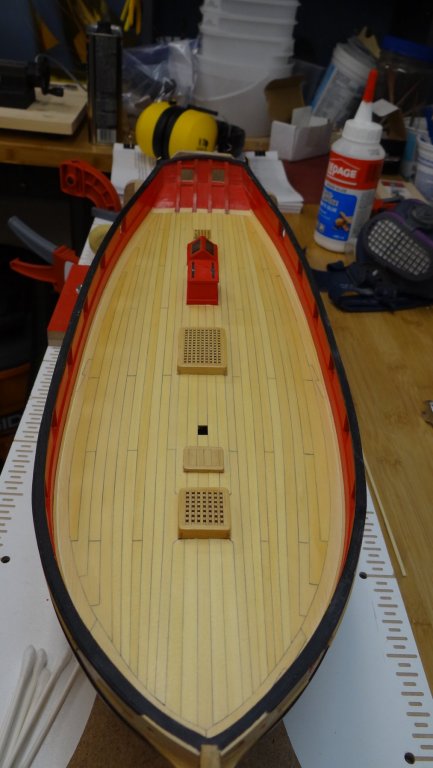
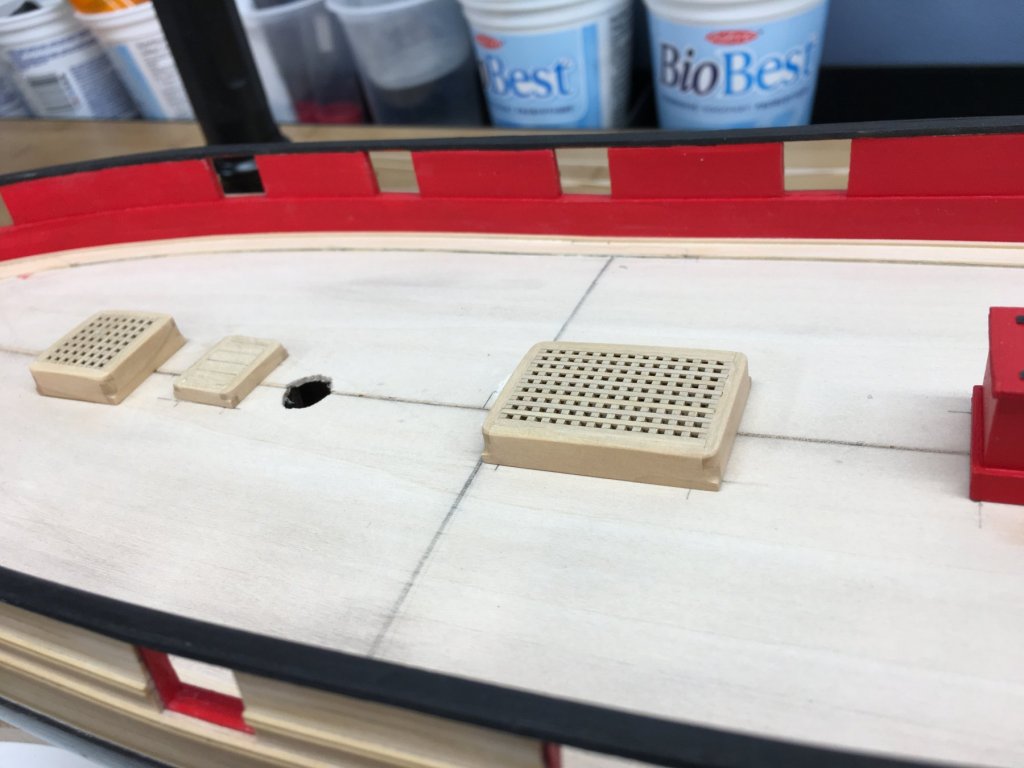
Deck Structures I bought and assembled all of Chuck’s kits. They are well worth it. Even the windlass which I built but can only conclude was eaten by my shop vac and dumped in the garbage after my semi-annual filter clean. Sigh, I guess I’ll have to order another one from Chuck.


- 51 replies
-
- 13
-
-
- cheerful
- Syren Ship Model Company
- (and 1 more)