HOLIDAY DONATION DRIVE - SUPPORT MSW - DO YOUR PART TO KEEP THIS GREAT FORUM GOING! (Only 13 donations so far - C'mon guys!)
×


Seventynet
-
Posts
797 -
Joined
-
Last visited
Content Type
Profiles
Forums
Gallery
Events
Everything posted by Seventynet
-
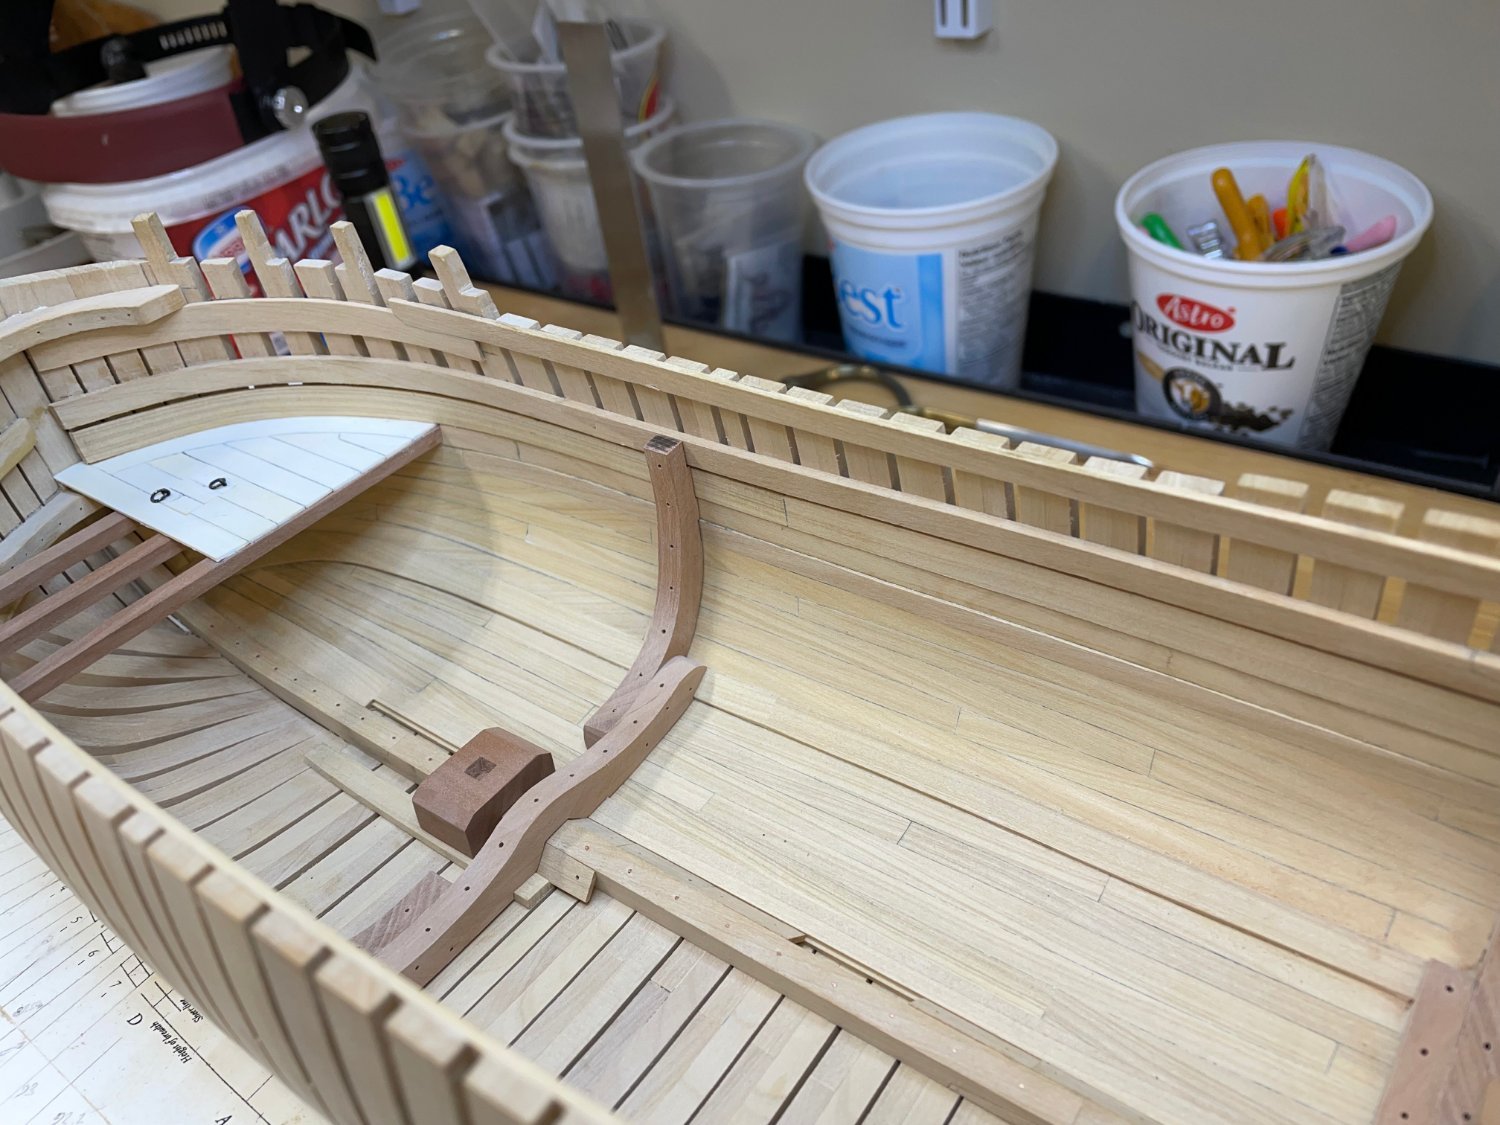
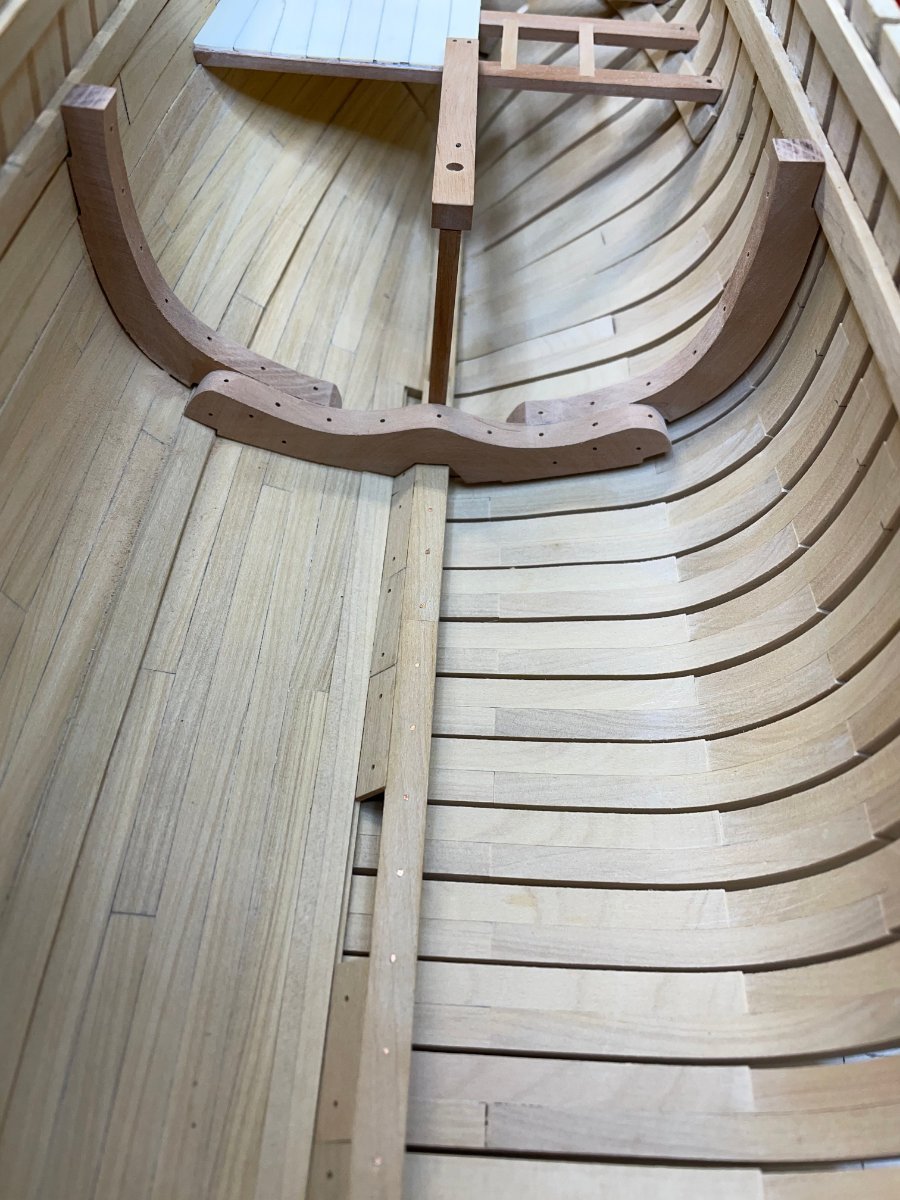
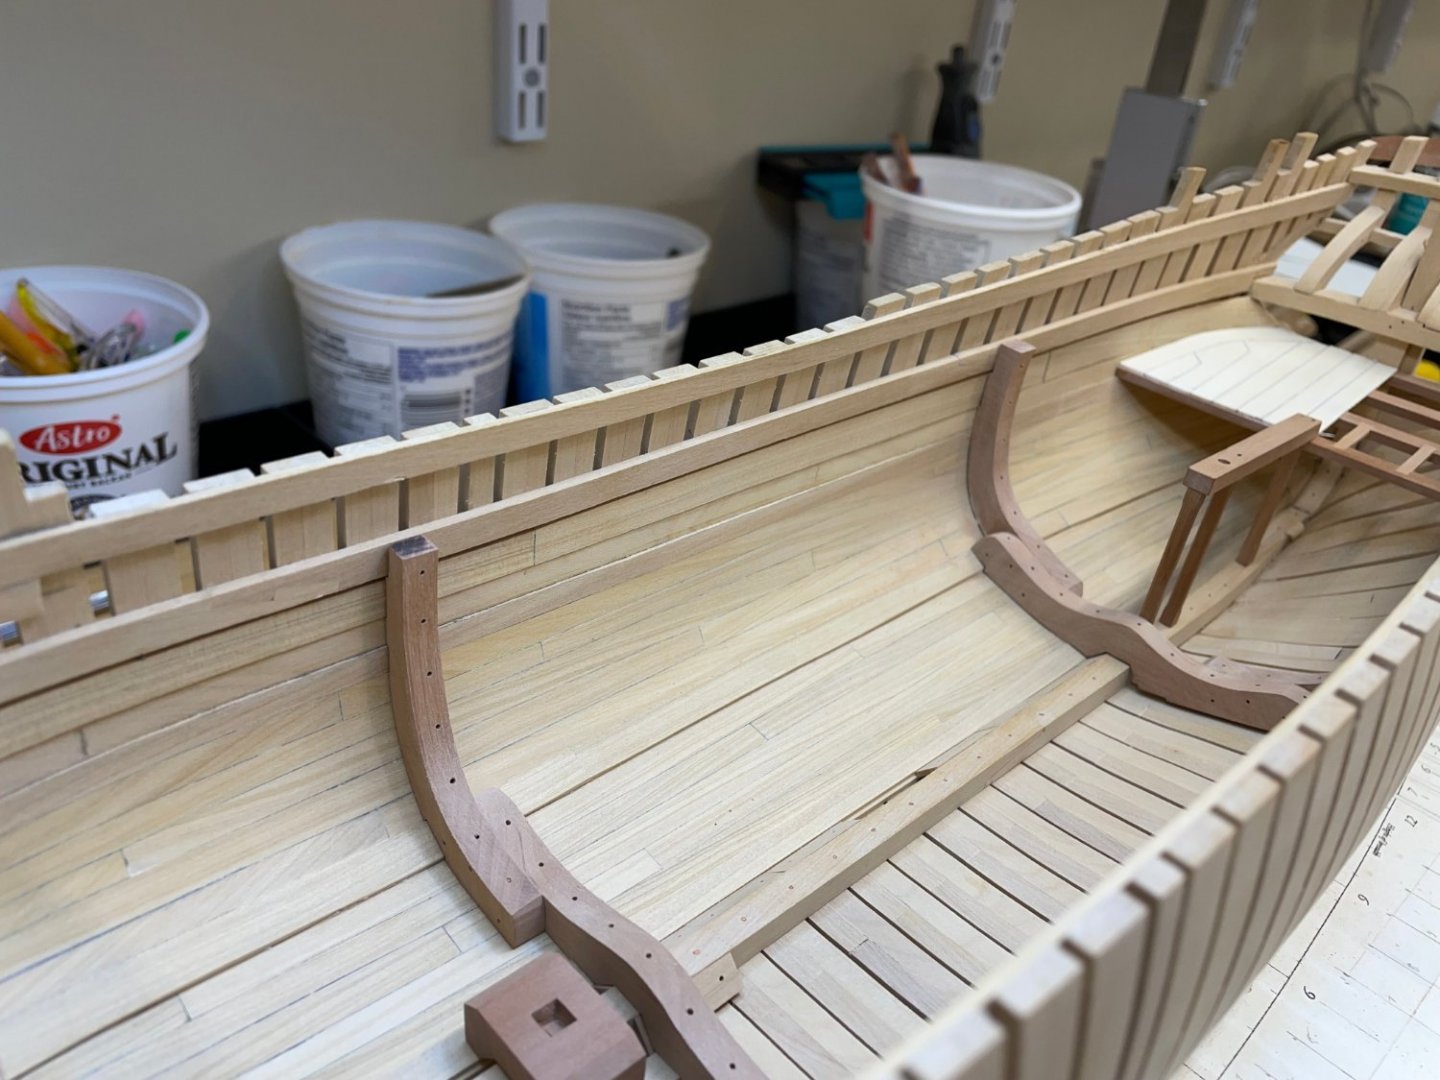
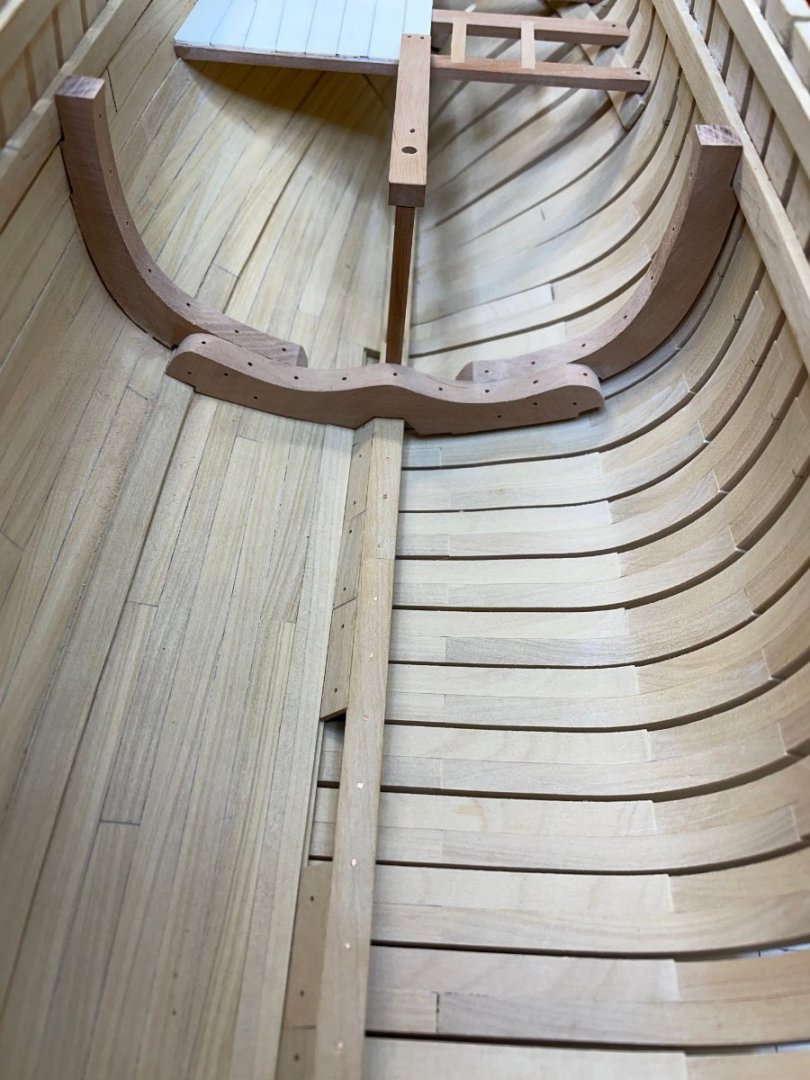
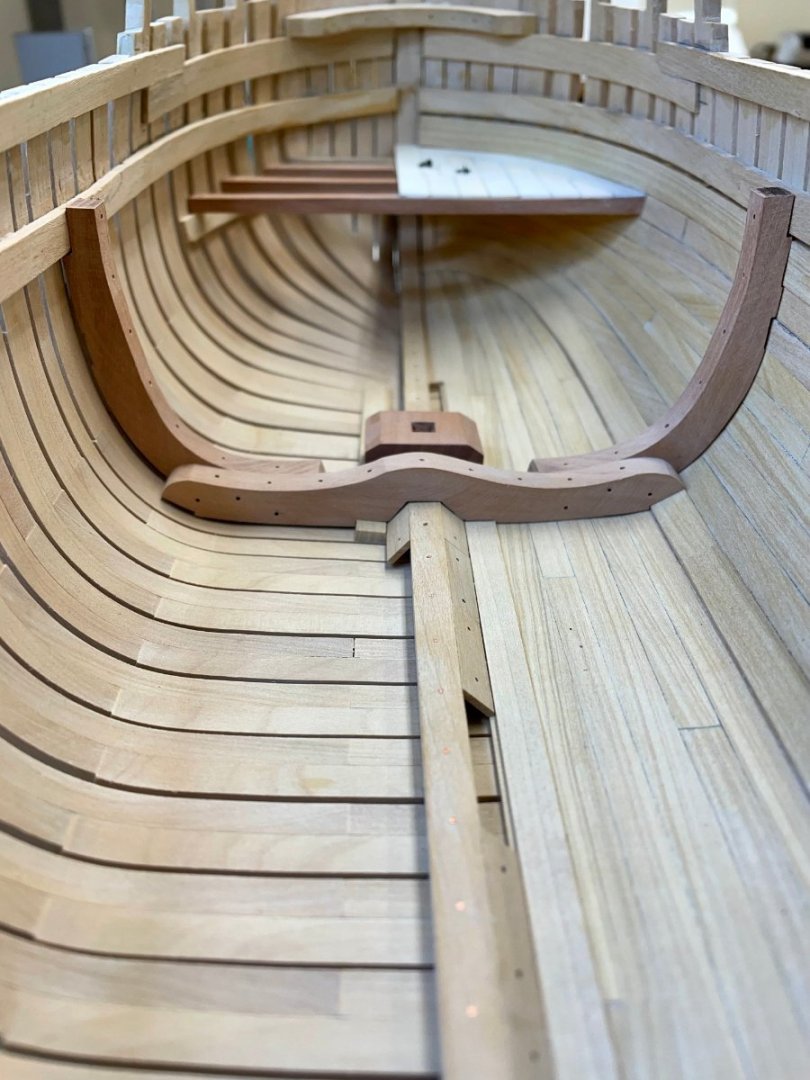
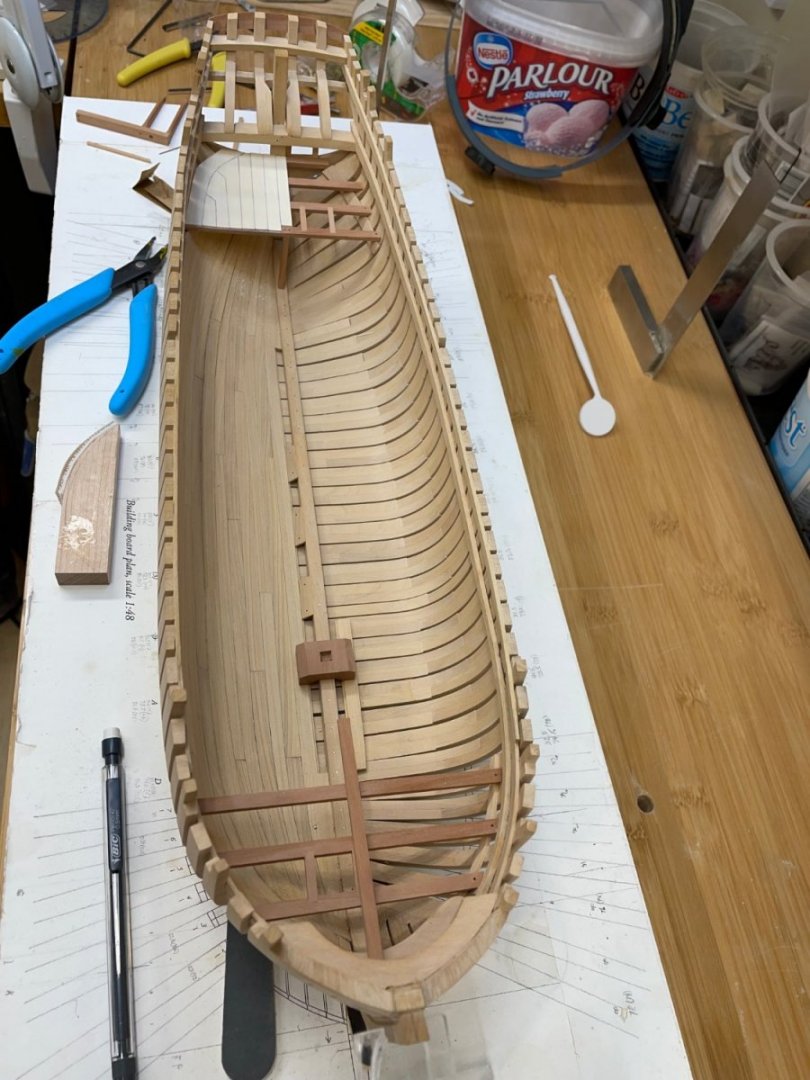
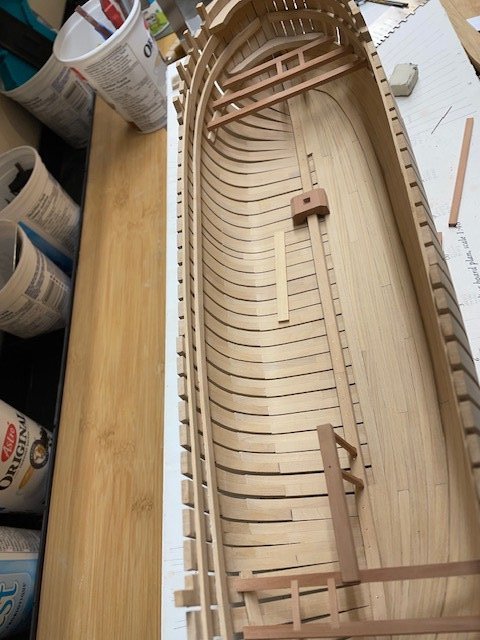
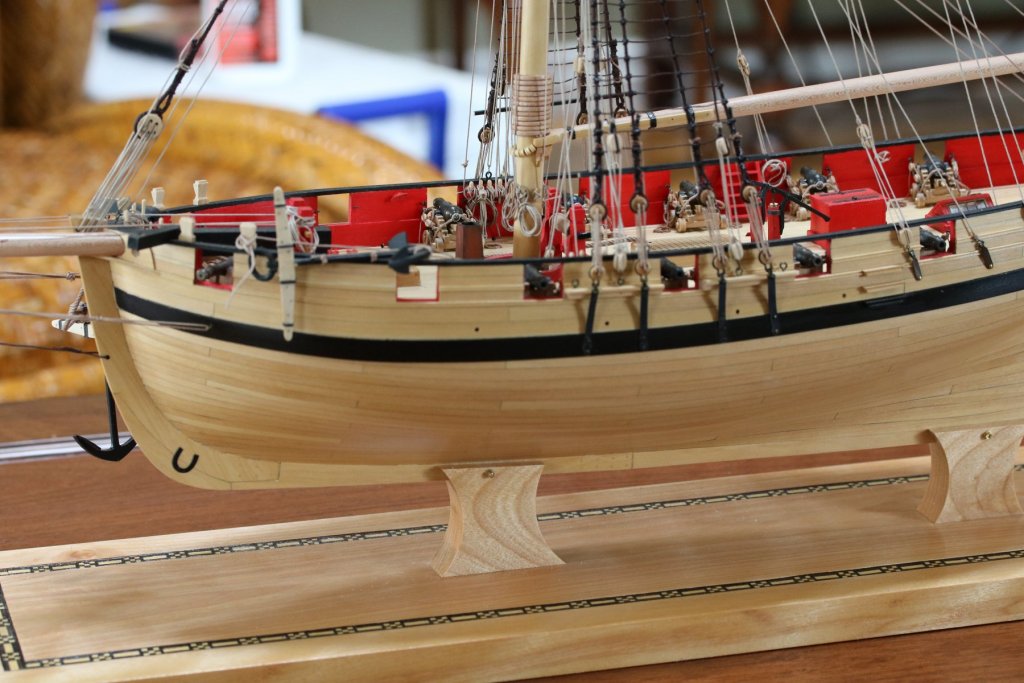
 Greetings, This update seems minor but it took quite a bit of time to complete the planking to the ceiling and then to shape and install the floor and futtock riders. Now I need to determine whether I can poly the floor planks and riders without compromising future gluing operations. Comments, criticisms welcome. Ian
-
Paul, this is an absolutely beautiful, meticulous build! I wish you had beaten me to my build because I would have picked up a ton of techniques. Ian
-
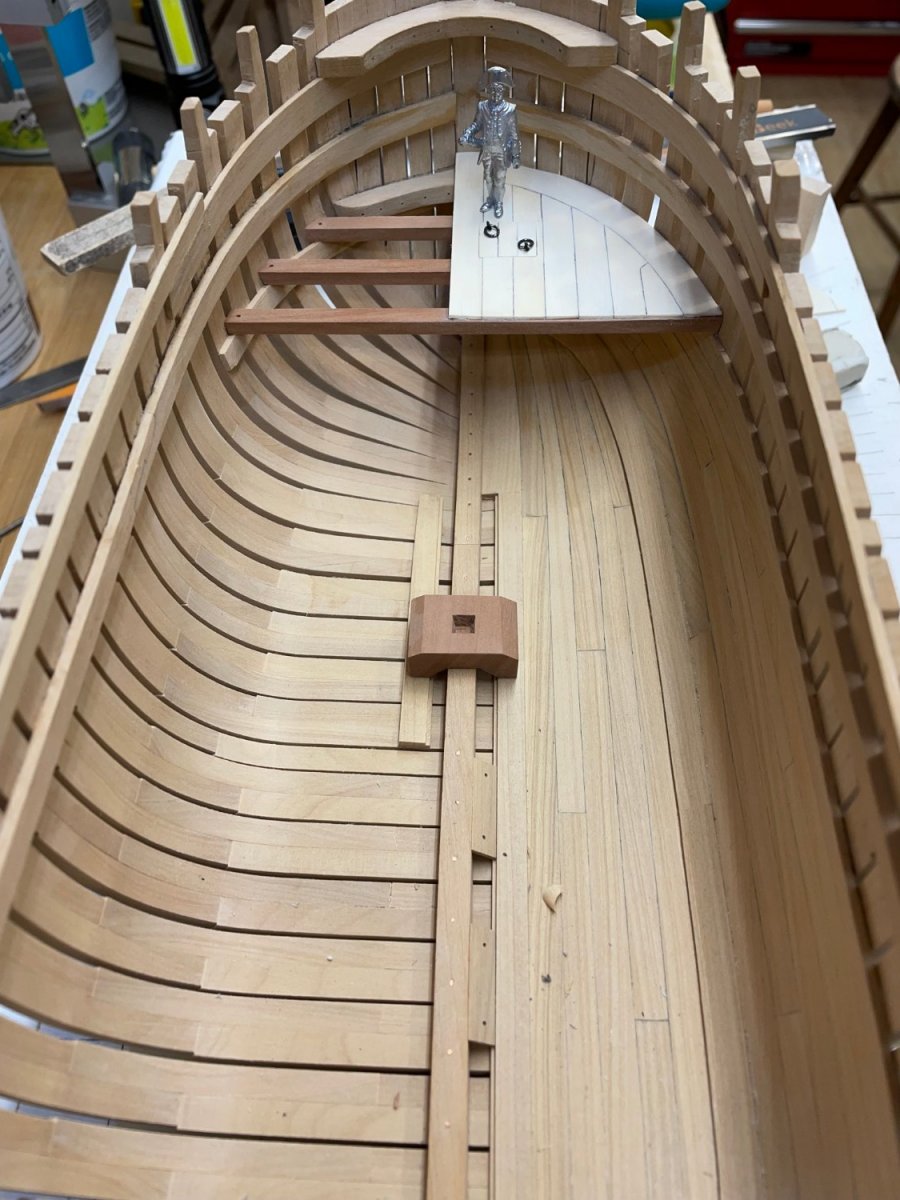
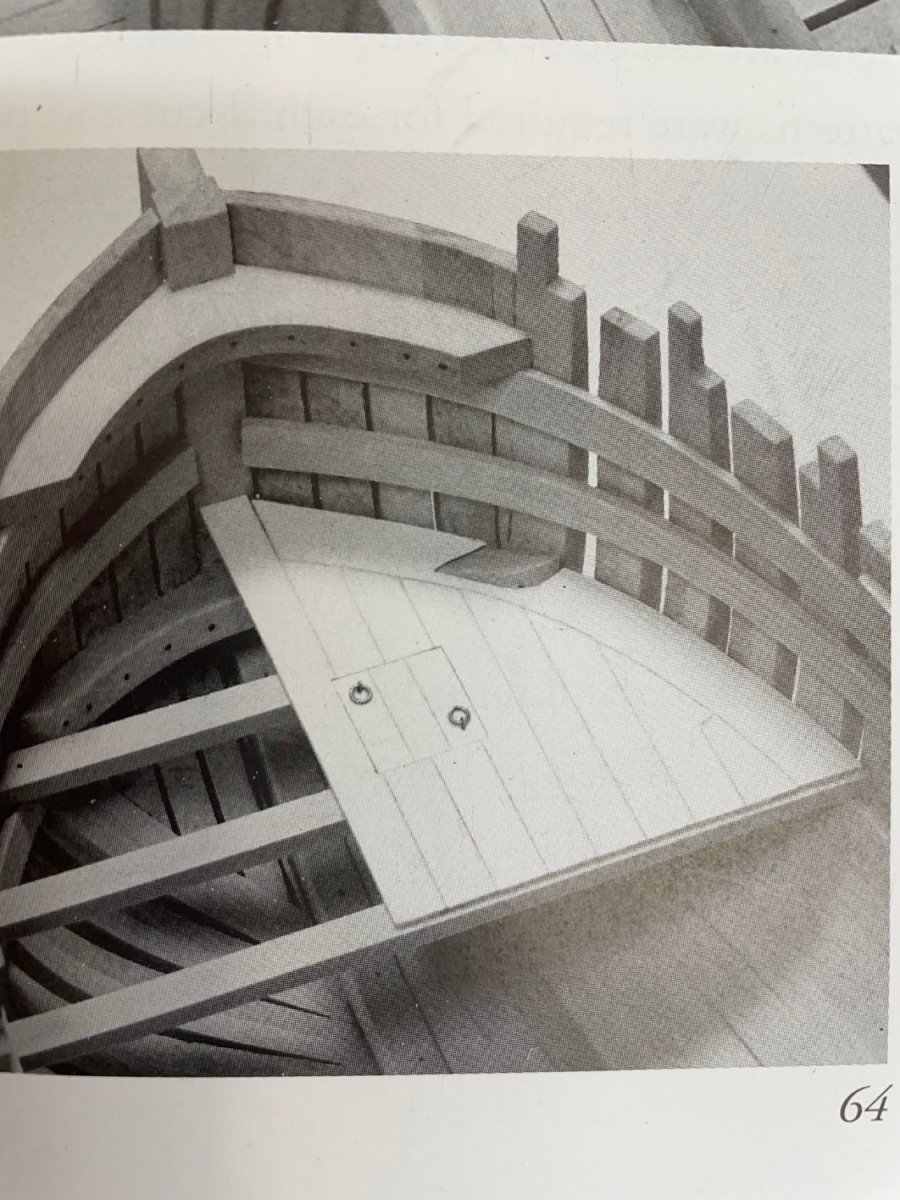
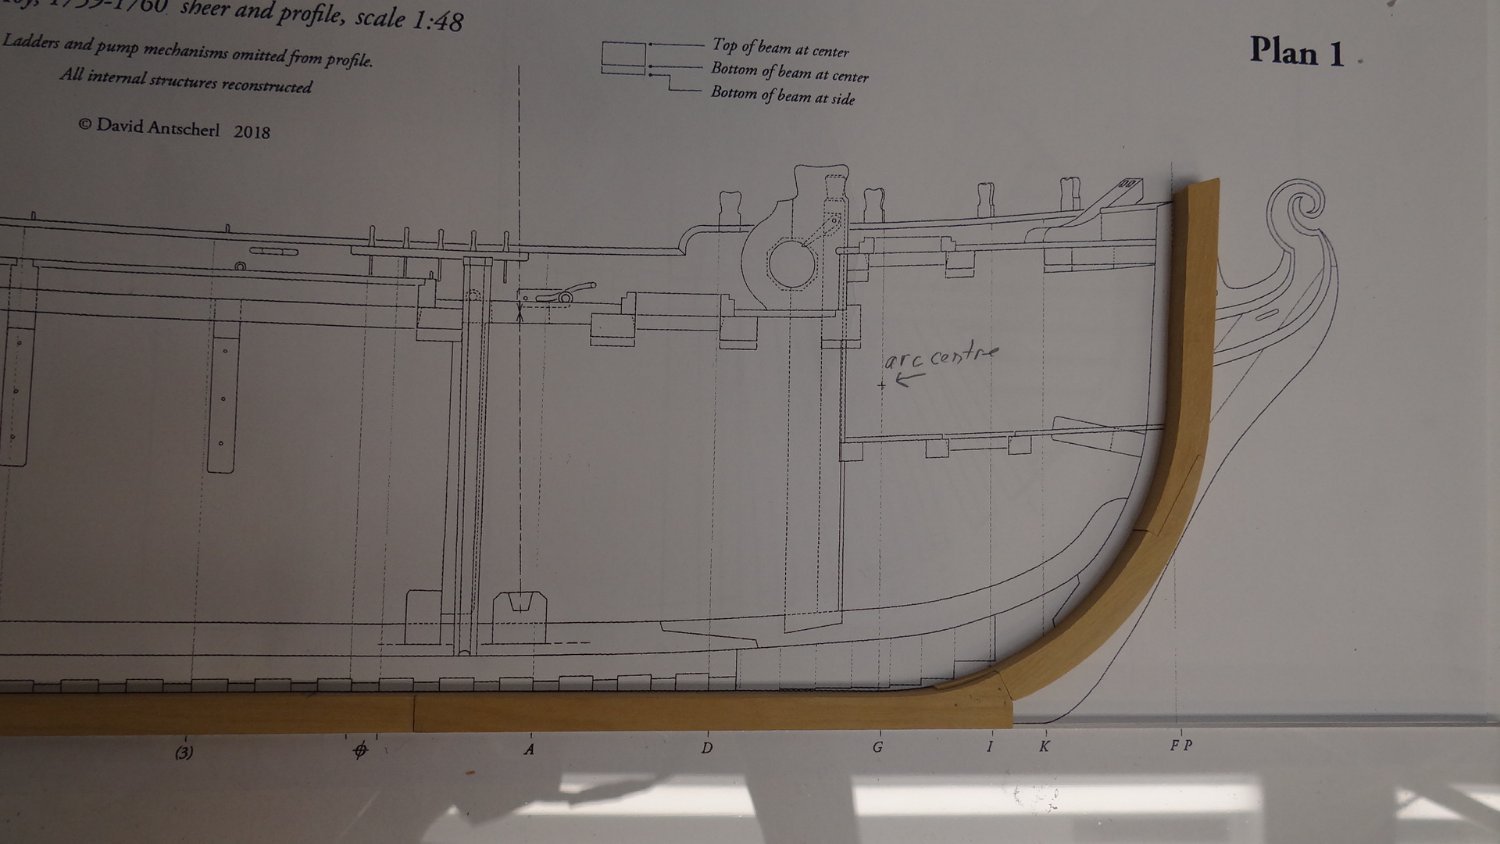
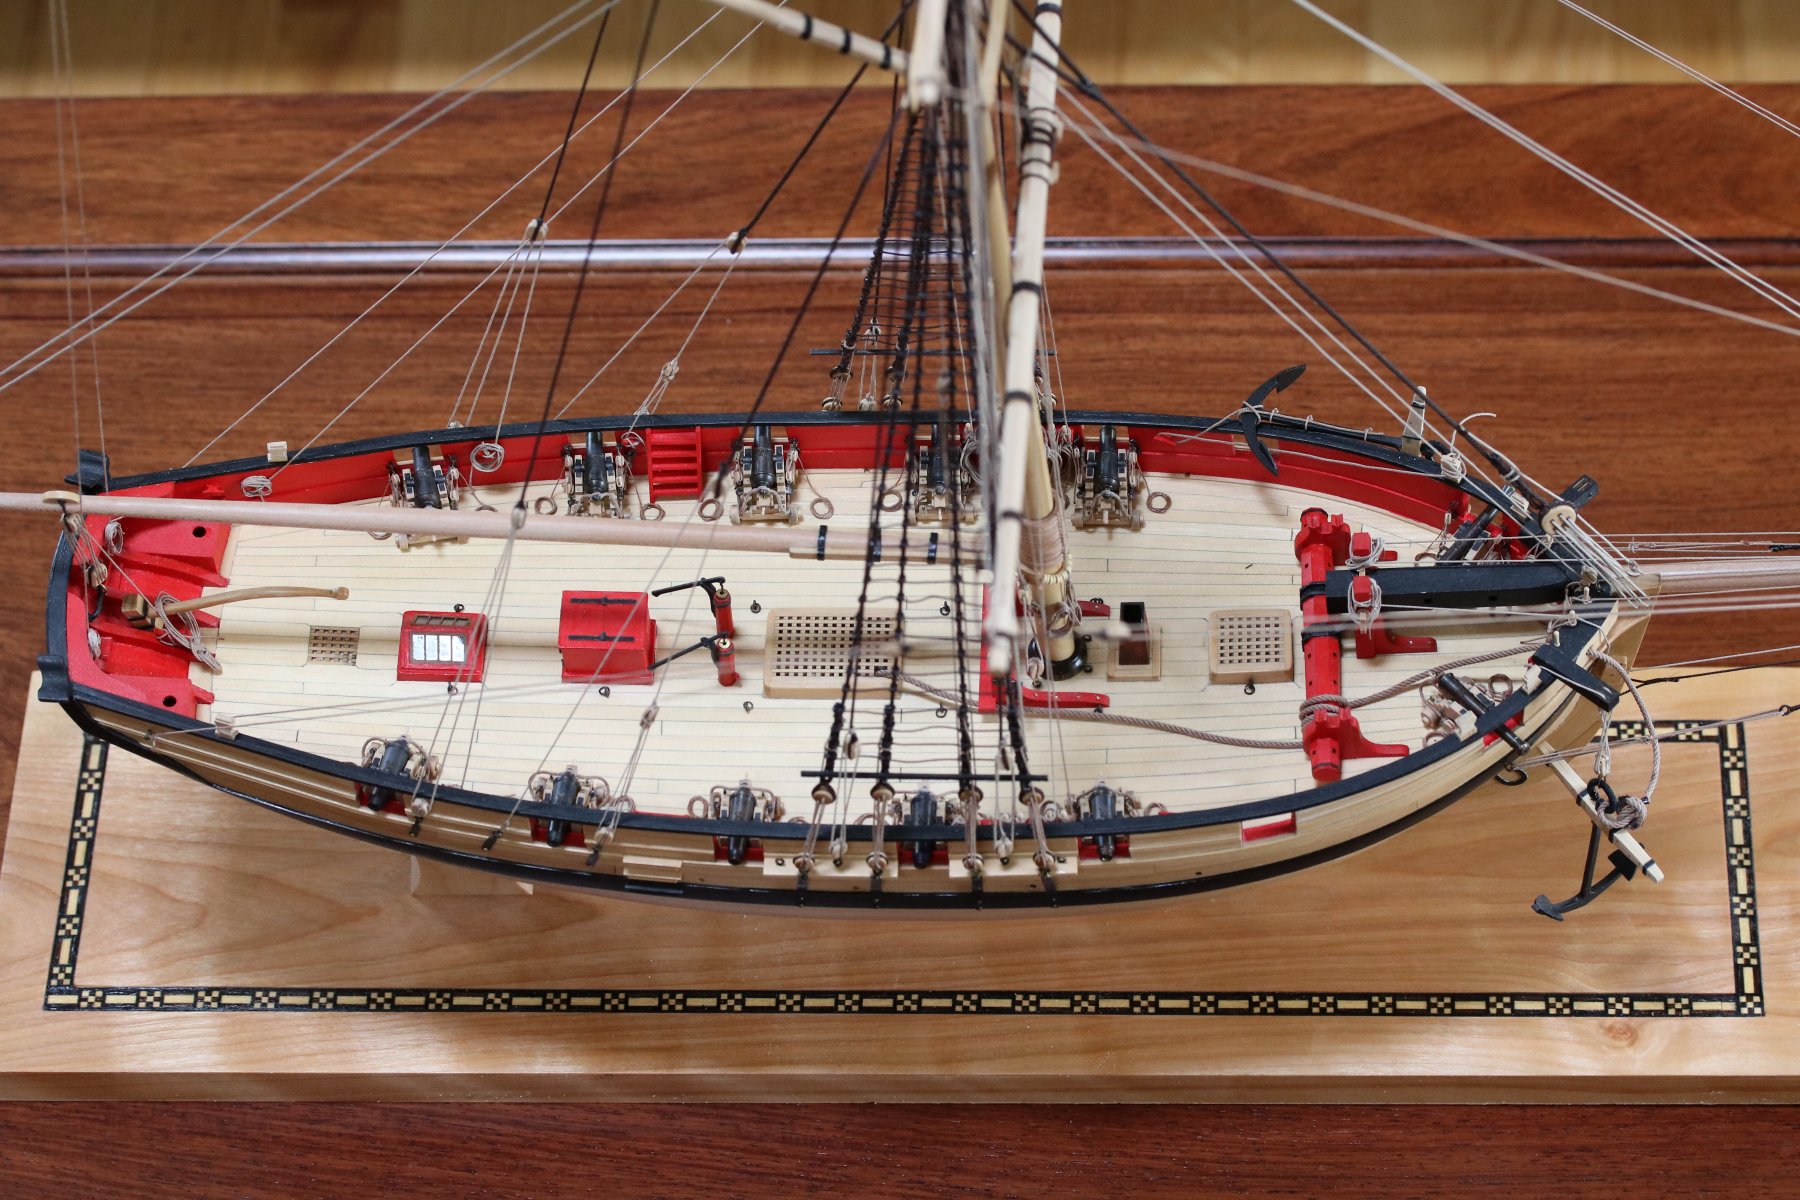
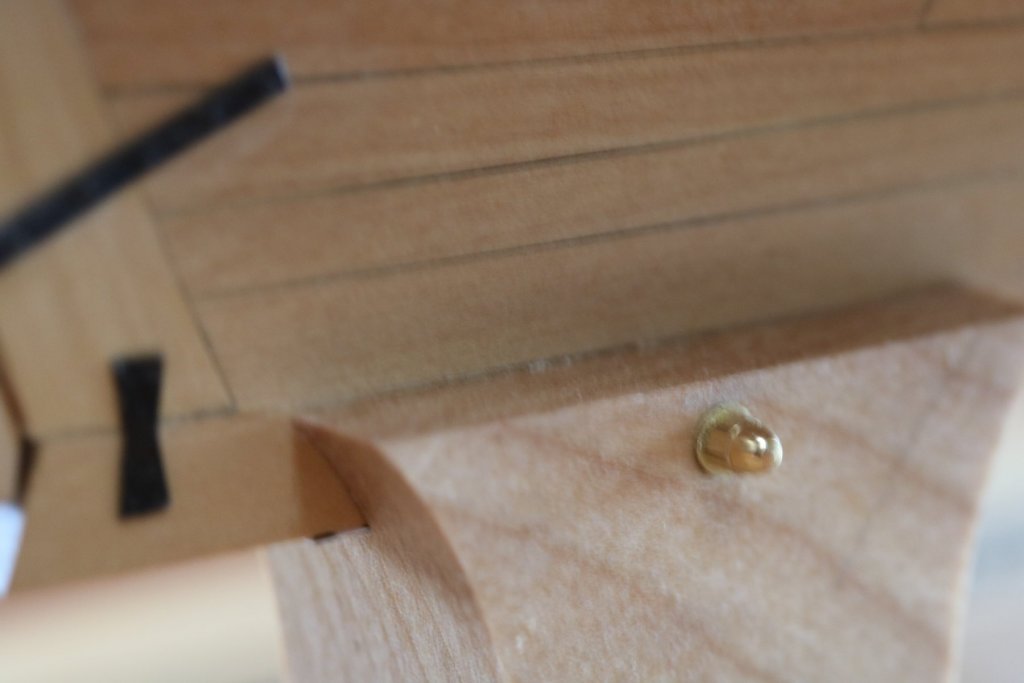
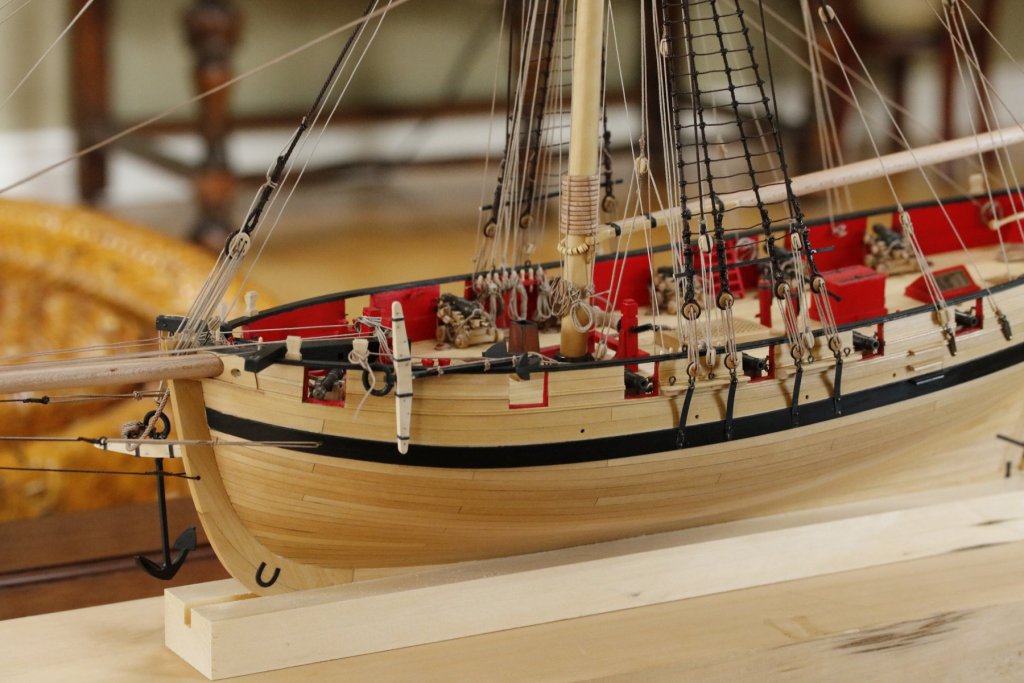
A quick update folks. I have planked the fore platform and installed the scuttle. One notable departure from the plan is that I decided to chisel the breast hook corner flush so that the margin plank fitted over it. As is explained in the book, the reason it was left intact was for strength in this critical area of the hull. I actually tried the other way first but concluded that it didn't look similar enough to David Antscherl's version (see B&W photo - I hope it is ok to reproduce the occasional photo from the book David, please let me know if not) that protruded a bit higher. So the shipwright decided that this would allow more deck space. 😁 Ian


-
Thanks so much for the likes, encouragement and overly generous praise Allan, David, dvm27, giampieroricci and VTHokiEE; and thanks mtaylor for moving this log to the correct area. Very much appreciated. Ian
-
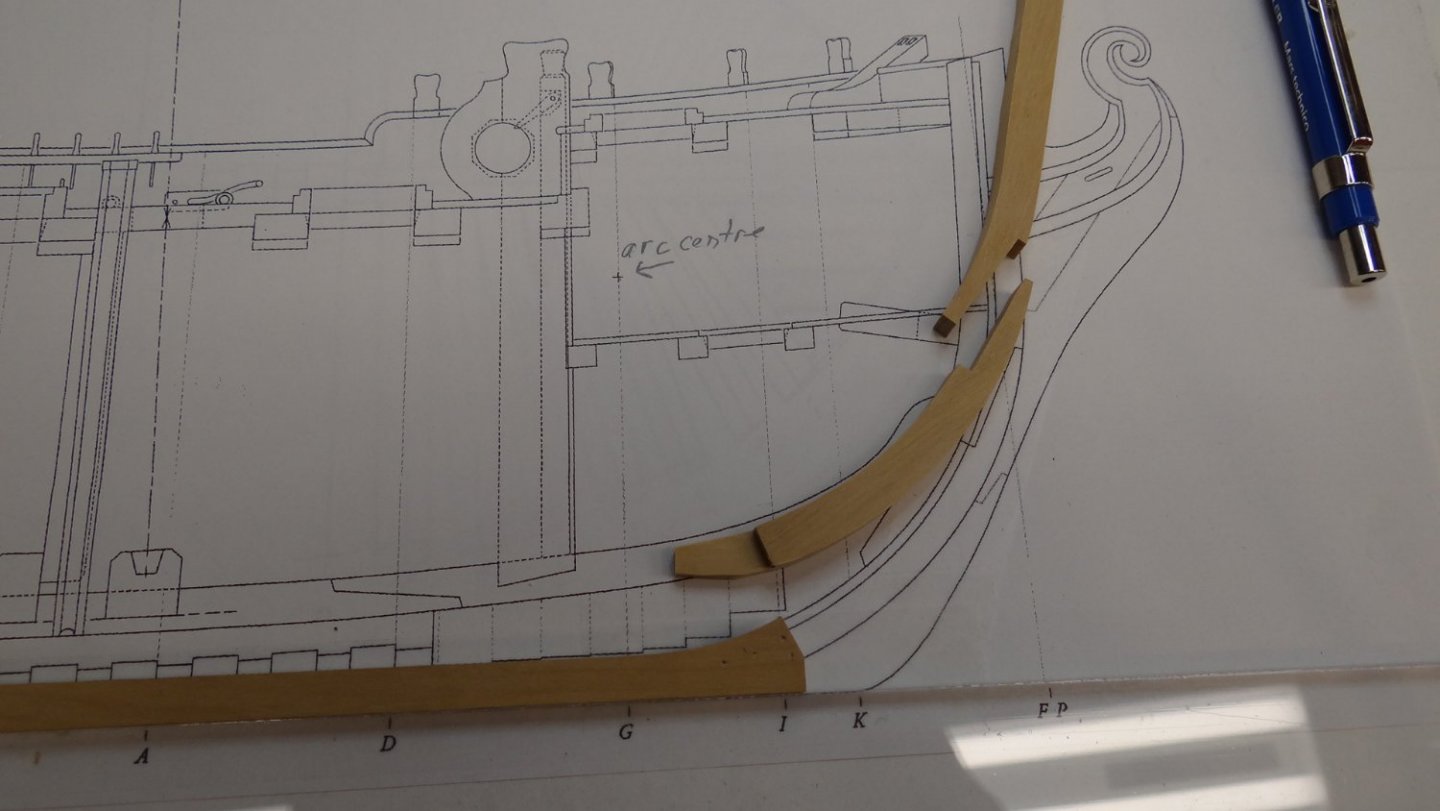
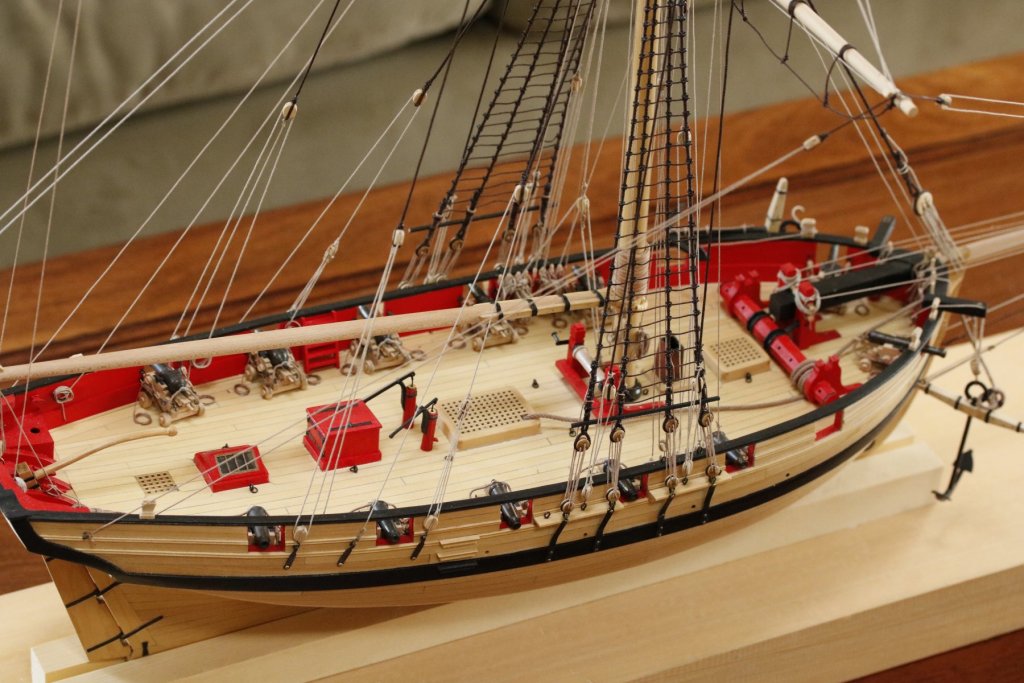
And here is where I am at the moment. I have used pear to contrast with the Castello Boxwood and holly for the decking. I am not sure I'll use holly for the starboard exterior planking but will likely start with that and see how it is to work with for hull planking. I am not clear on how to lay the forward ends of the planks onto the breast hook because obviously there is downward angle as it approaches the stem that will not allow one to achieve a flush situation. I am going to fashion some kind of angled piece that the planks can lie on. No big deal, it is likely just a typical thing a scratch builder has to deal with. Cheers, Ian
-
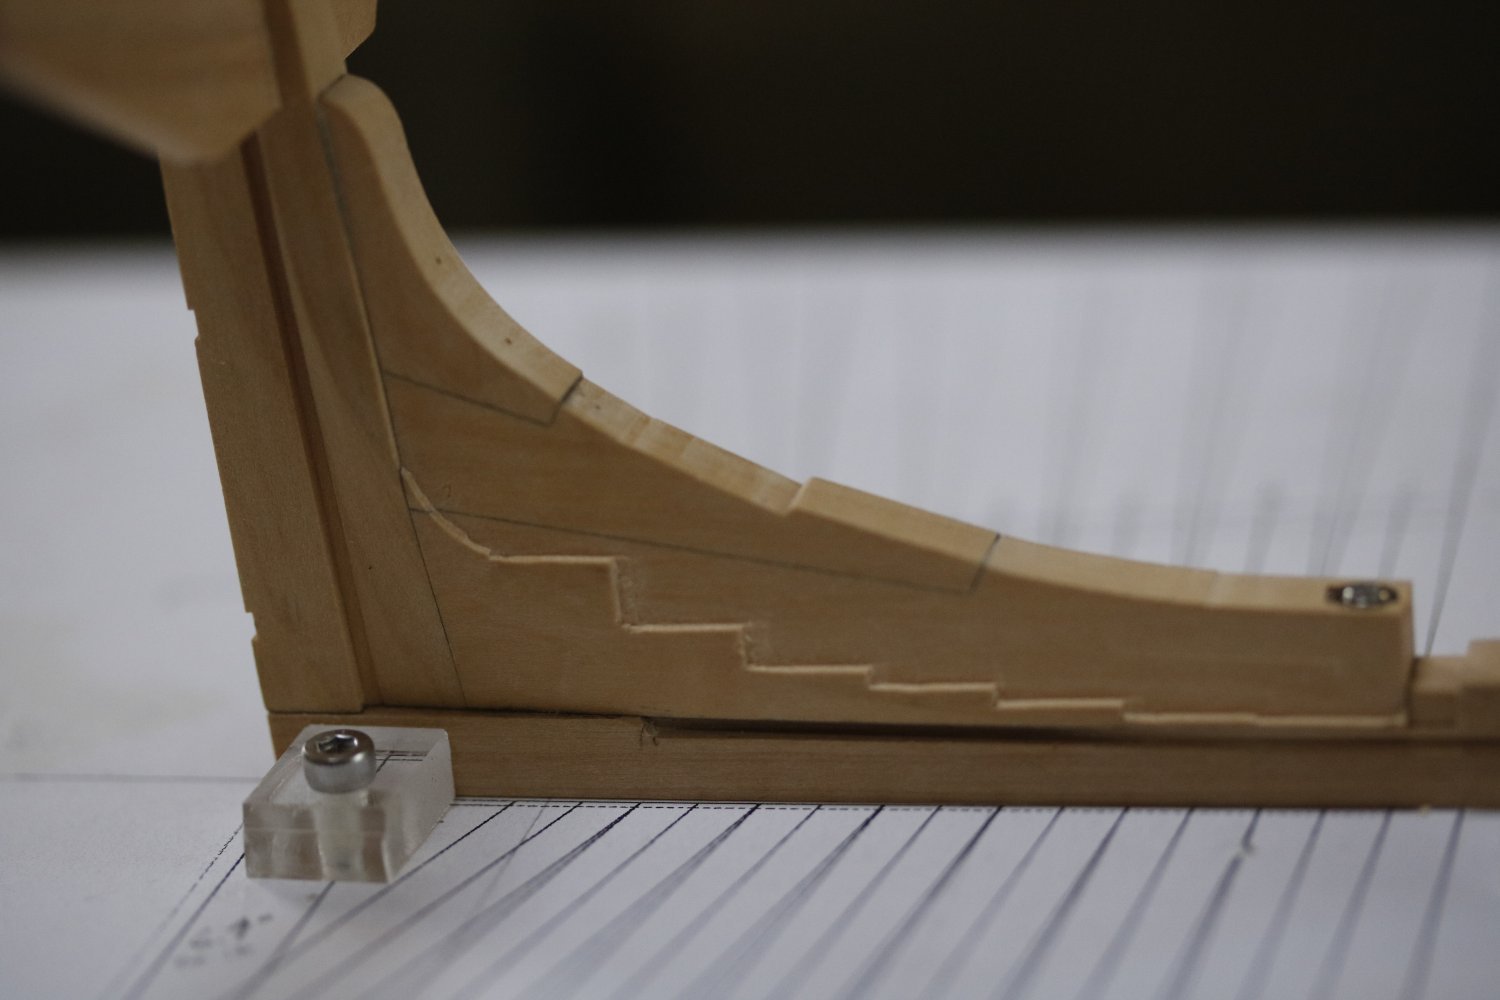
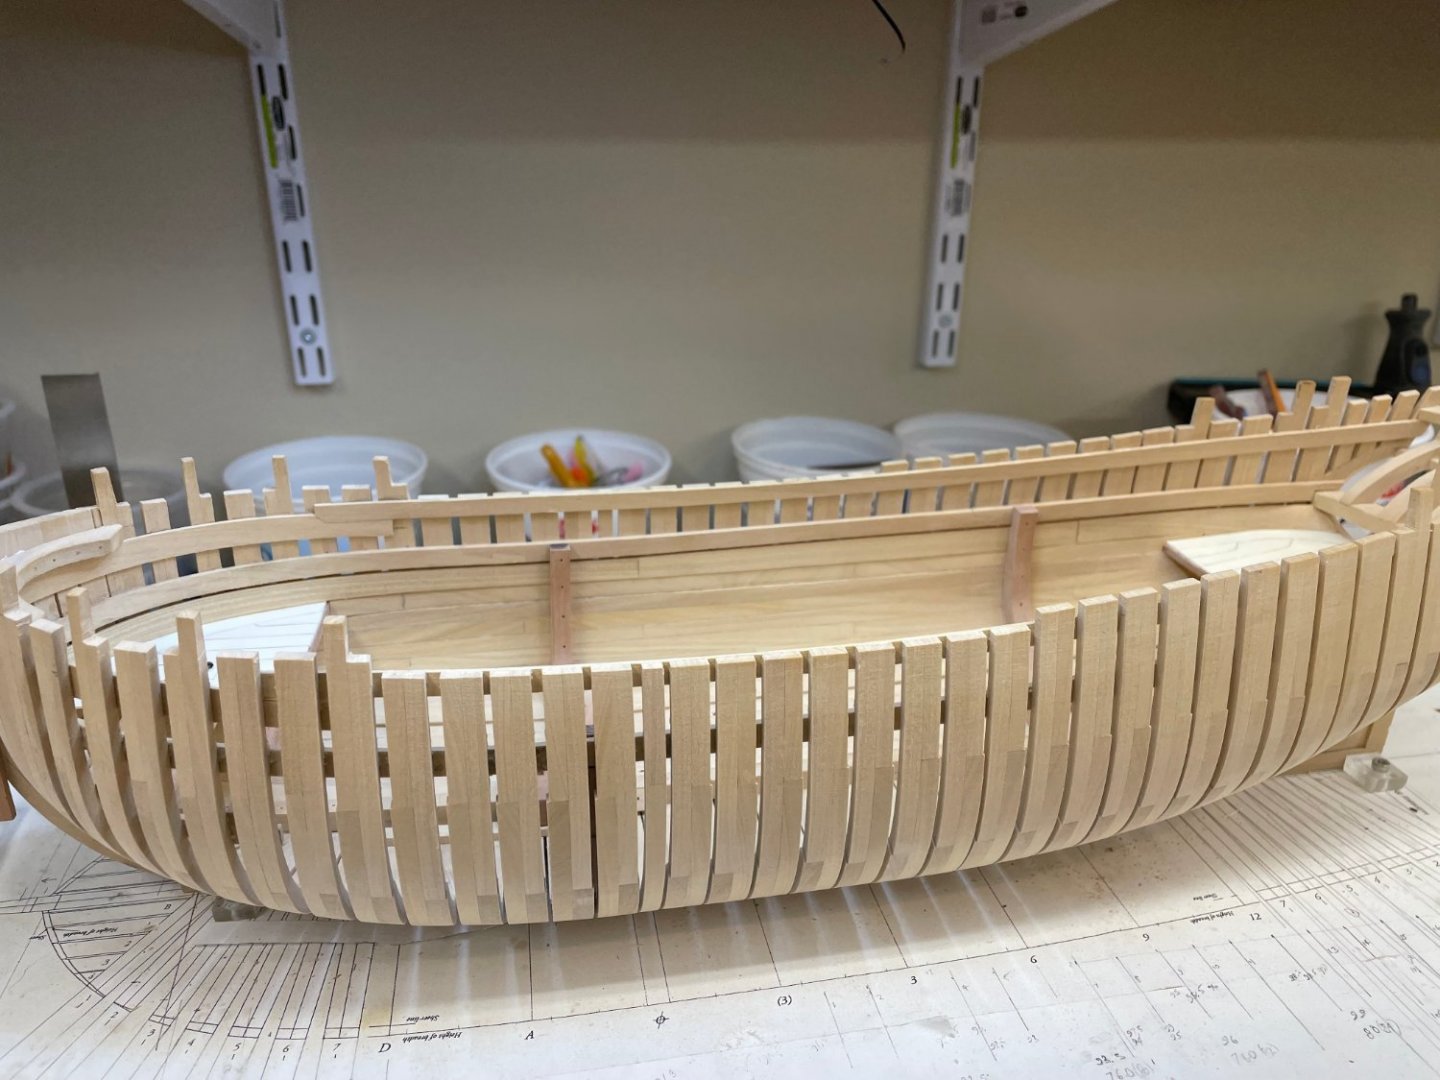
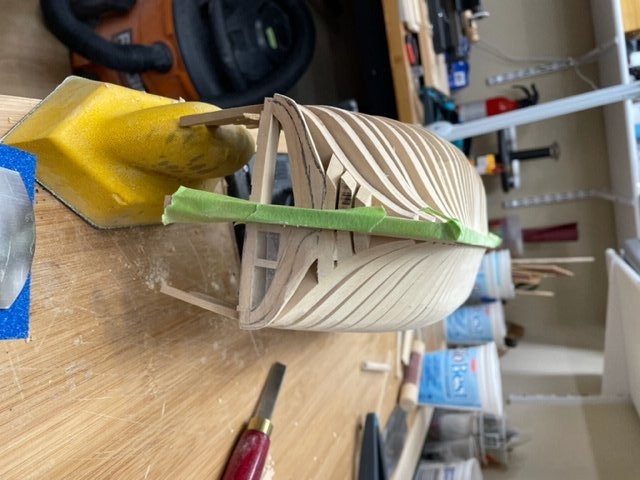
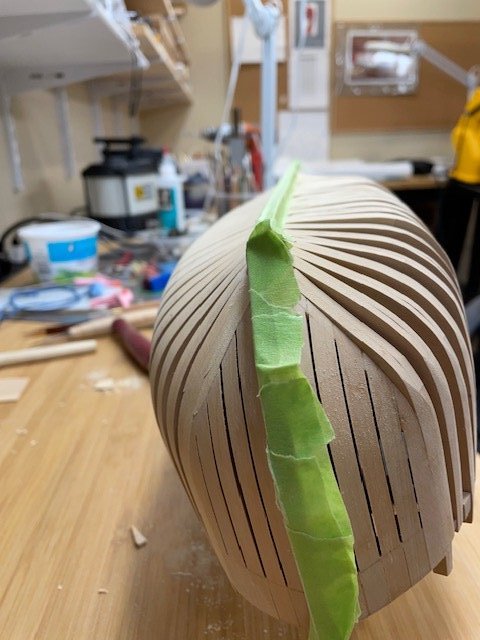
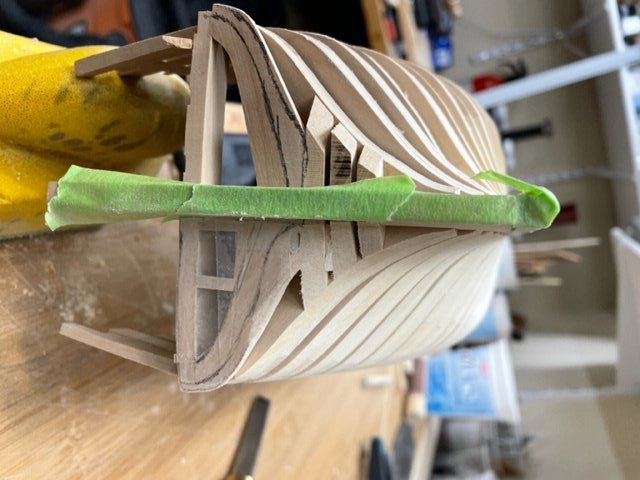
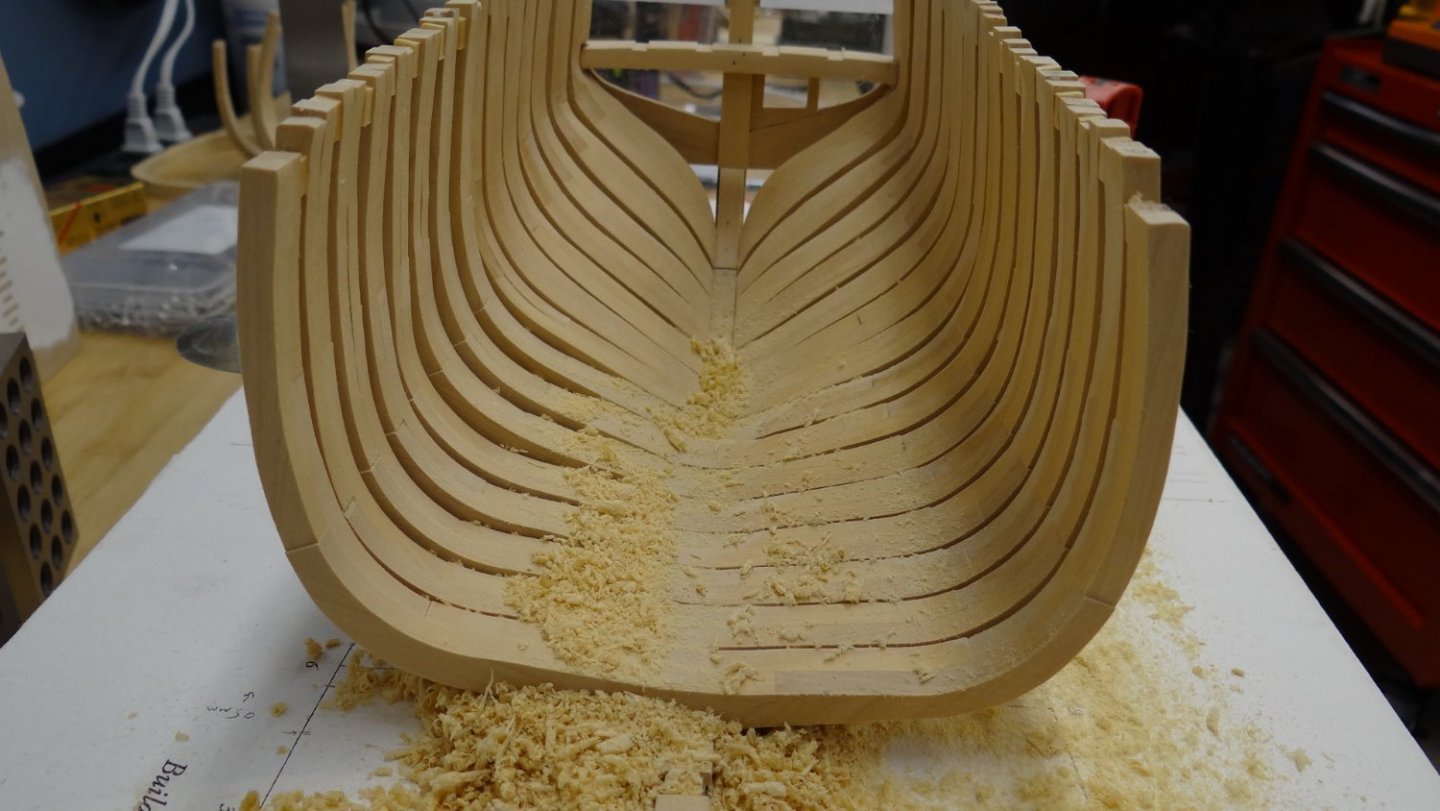
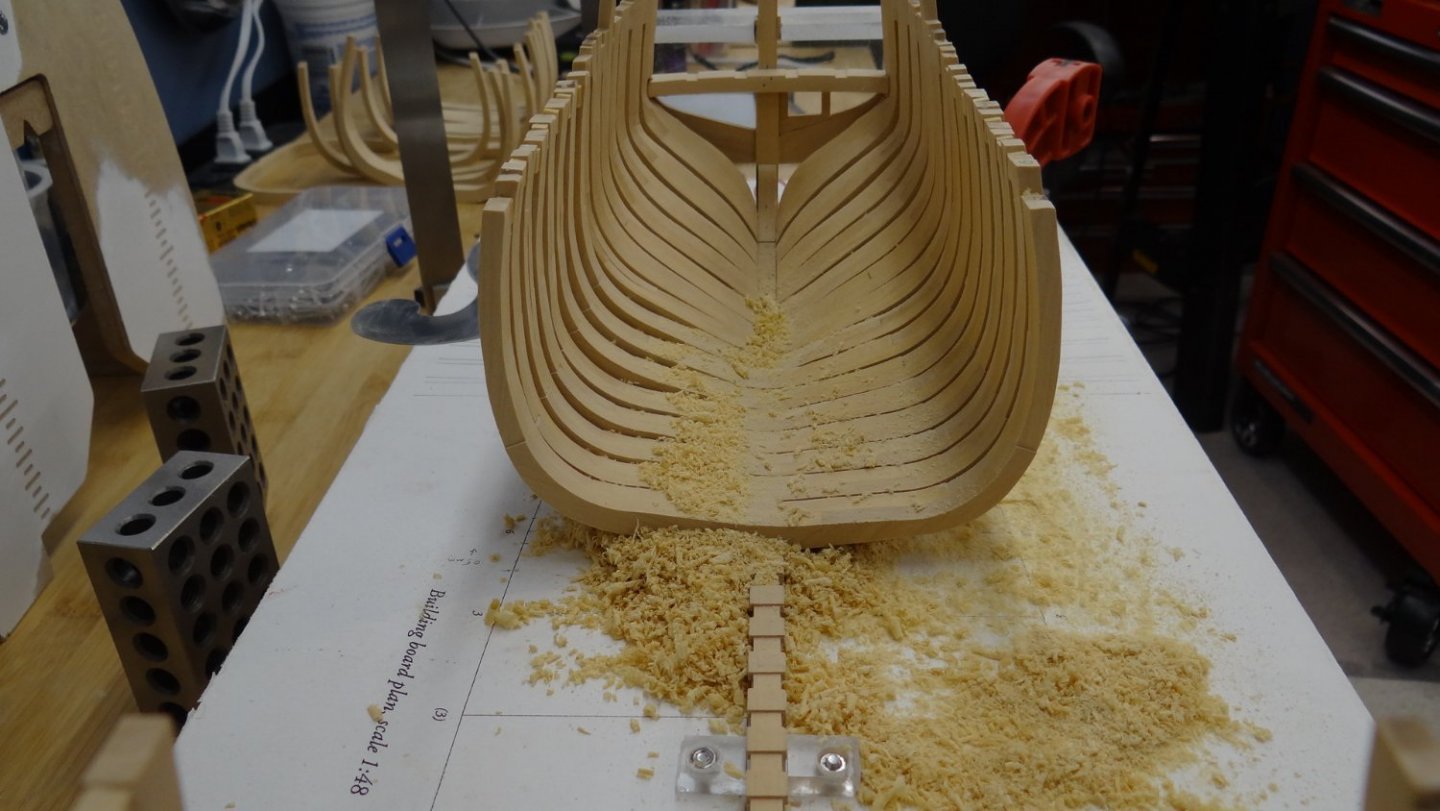
This last tranche brings me just about to where I am today but I will post a separate one marking that situation. Couple of things worth noting. First, not everything has gone smoothly by any means resulting in several re-dos especially with the clamps and breast hook locations. My failing was not appreciating how important it is to find a way to clamp these structures while the glue is setting. So I had to re-do many of them more than once. On the other hand I think I can be considered an expert de-gluer now. Whereas I used to rely heavily on water and alcohol I now exclusively use heat with my heat gun. A couple of pictures of the bow and stern that I think illustrates the amount of wood that must be faired. Call me crazy but I actually like that part of the build. What remains to be done is the final fairing at the top timber level and a few places where the external planking will meet the stem and stern.
-
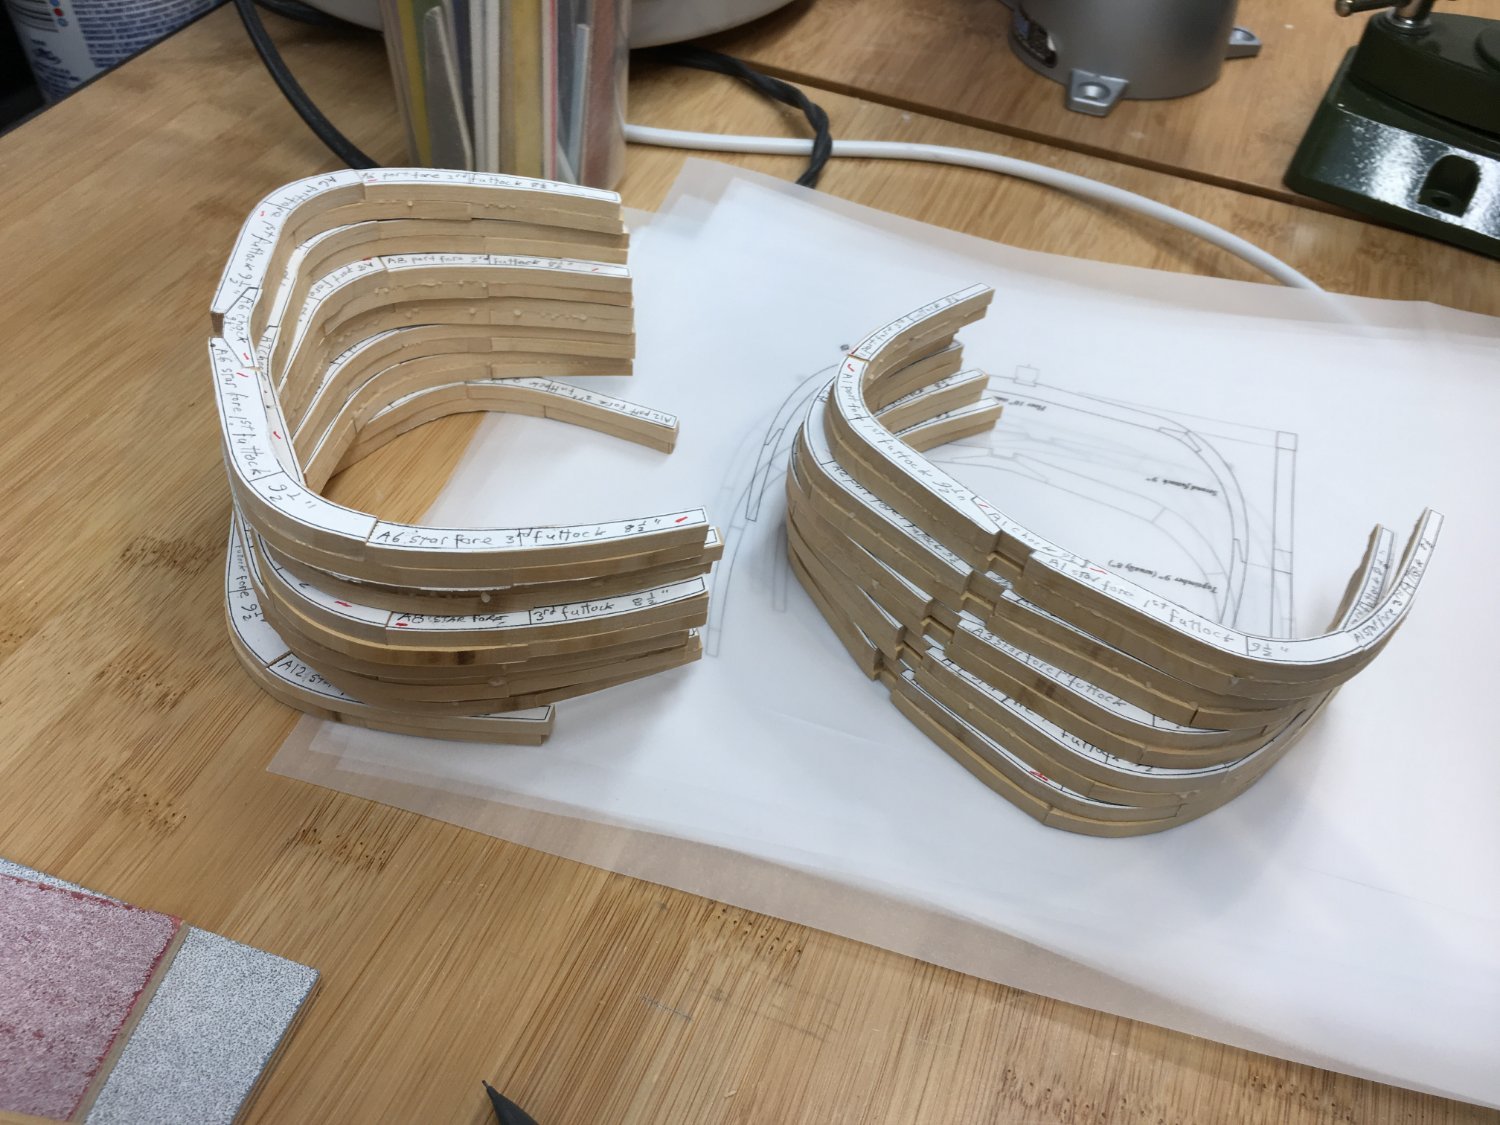
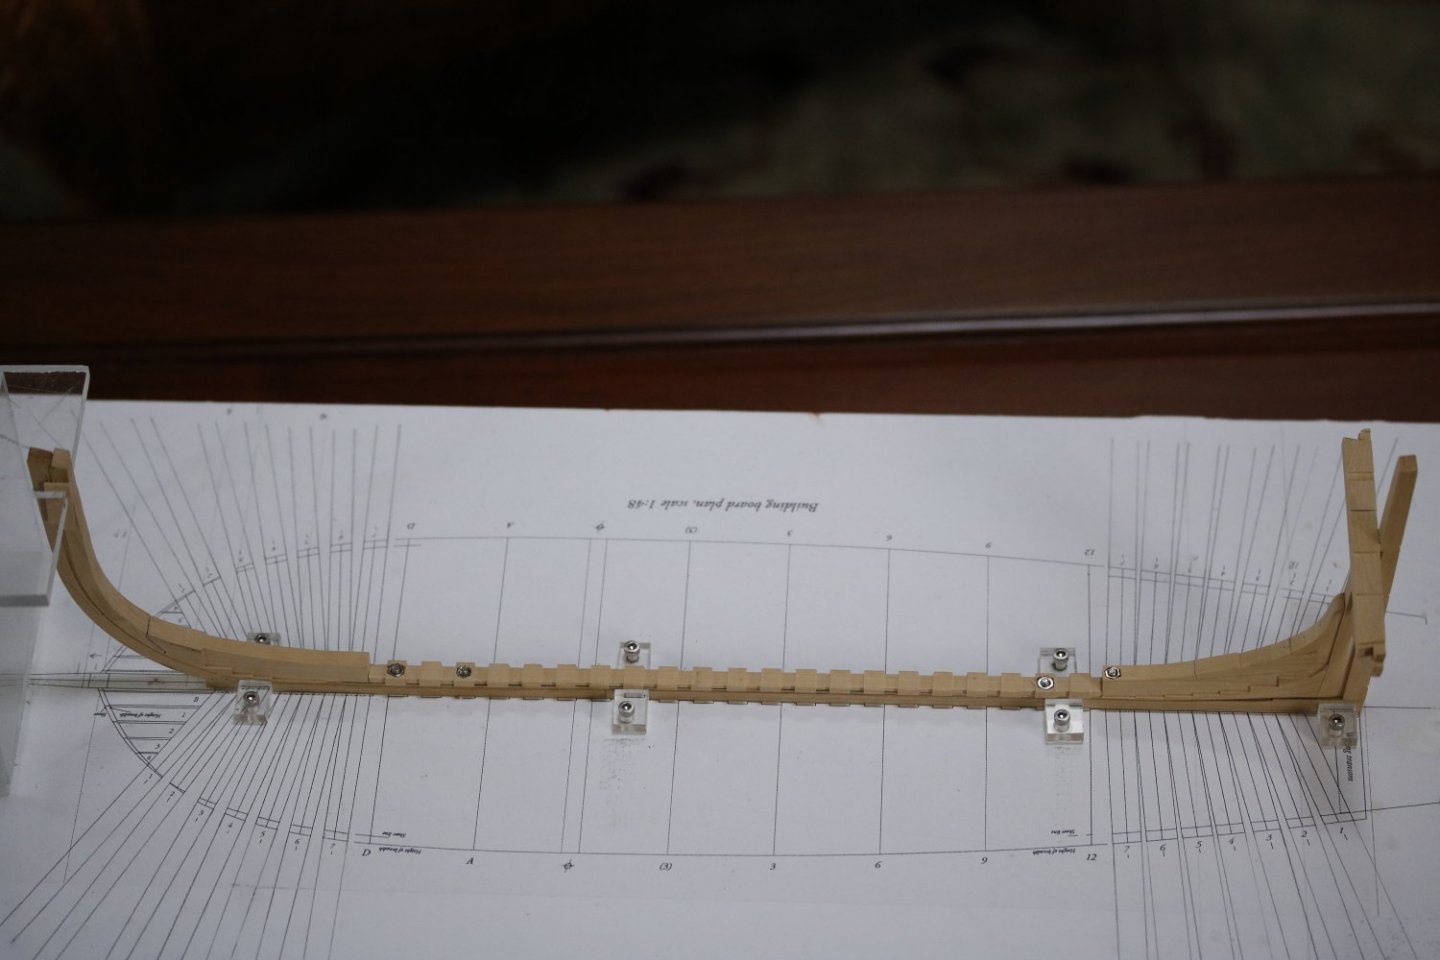
Thanks all. Apologies for the somewhat haphazard collection of photos as I'm drawing from a bunch of different devices from different time periods. Here is a picture of my pile of frames that precedes several of the pictures above. Rather than waste your time with numerous photos that I have little recollection of, i will jump to close to where I am today. The next one is of the transom and filler pieces. This was one of the most challenging tasks so far.


-
Greetings. I debated for some time whether I should start a log given my relative lack of experience with a scratch build. Indeed, I started this build around three years ago and shelved it for two years mainly because of health issues but also because I think I just got lazy. I don't have a lot of pictures and the ones I do have are probably a bit poor but once I get to present day that deficiency will be remedied. The 2 main reasons I am proceeding with this log are that I need to ask questions and get help from the more knowledgeable among you and secondly I have always found that a log inspires some needed motivation. The Hayling Hoy was documented and produced by David Antscherl and presented in 3 plan sheets and a book entitled - The Hayling Hoy - First Fully Framed Model Ian


-
Good to see you back in the bosun’s chair! Lovely work, please keep it up. Ian
- 295 replies
-
- 2
-

-
- victory
- caldercraft
- (and 1 more)
-
Beautiful job B.E.! Congratulations. What’s next? Ian
- 574 replies
-
- 2
-
-
- cheerful
- Syren Ship Model Company
- (and 1 more)
-
Nice work slowhand. Not far to go now. best, Ian
-
Thanks everyone for the likes! Gregory: thanks and good luck! Don: where have you been? I know I’m speaking for many mates when I say I really miss your updates and beautiful work! What’s next? David Antscherl’s Hayling Hoy. Cheers, Ian
- 51 replies
-
- 1
-
-
- cheerful
- Syren Ship Model Company
- (and 1 more)
-
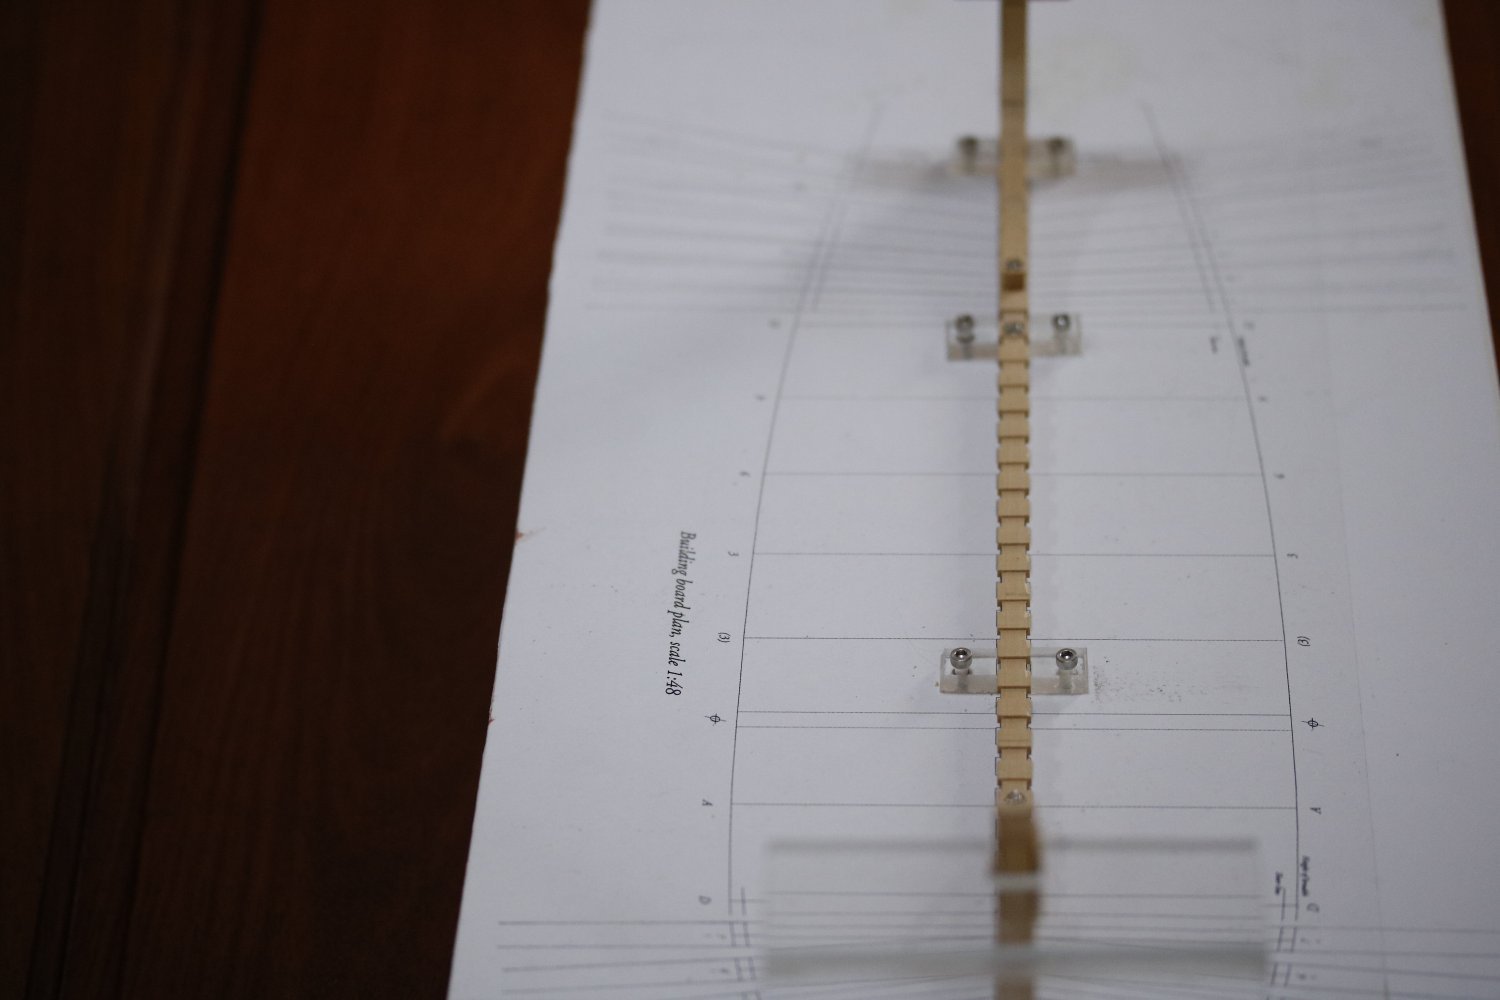
Lastly, I have completed the stand. I routed an inlay into a piece of maple and applied several coats of wipe on poly. Because I didn't have the foresight to install bolt holes into the keel I used some threaded brass rod with acorn nut heads (on starboard side) to secure the assembly. Probably not as strong as the traditional method but the ship will be housed in an acrylic display case and shielded from unfortunate nudges. Best, Ian

- 51 replies
-
- 14
-
-
- cheerful
- Syren Ship Model Company
- (and 1 more)
-
Thank you B.E., Chuck and Rusty! It has been an enjoyable and an educational build that benefitted tremendously from your own Cheerful efforts. Chuck it is a beautiful design and your mini kits were indispensable. Thanks to all of you for the likes and following this build. Ian
- 51 replies
-
- 2
-
-
- cheerful
- Syren Ship Model Company
- (and 1 more)
-
Greetings Shipmates, I have been totally negligent in providing any sort of build log - I am sorry about that. However I'm calling this project done. I will have to figure our a stand down the road. Thanks for following. If there are other pictures you would like me to show I am happy to do that. Best, Ian

- 51 replies
-
- 20
-
-
- cheerful
- Syren Ship Model Company
- (and 1 more)
-
Really nice touch Dave! I guess I’m going to have to steal these ideas as well😉. BTW how did you make the cannon balls, or buy them?
-
Steve, this is a beautiful build! You are so close now. I have Dusek's 1:72 San Martin on my shelf although I don't know when I'm going to get going on it ... but your project gives me added motivation. Ian
-
Nice work BE. Have a great Christmas. Ian
- 574 replies
-
- 2
-
-
- cheerful
- Syren Ship Model Company
- (and 1 more)
-
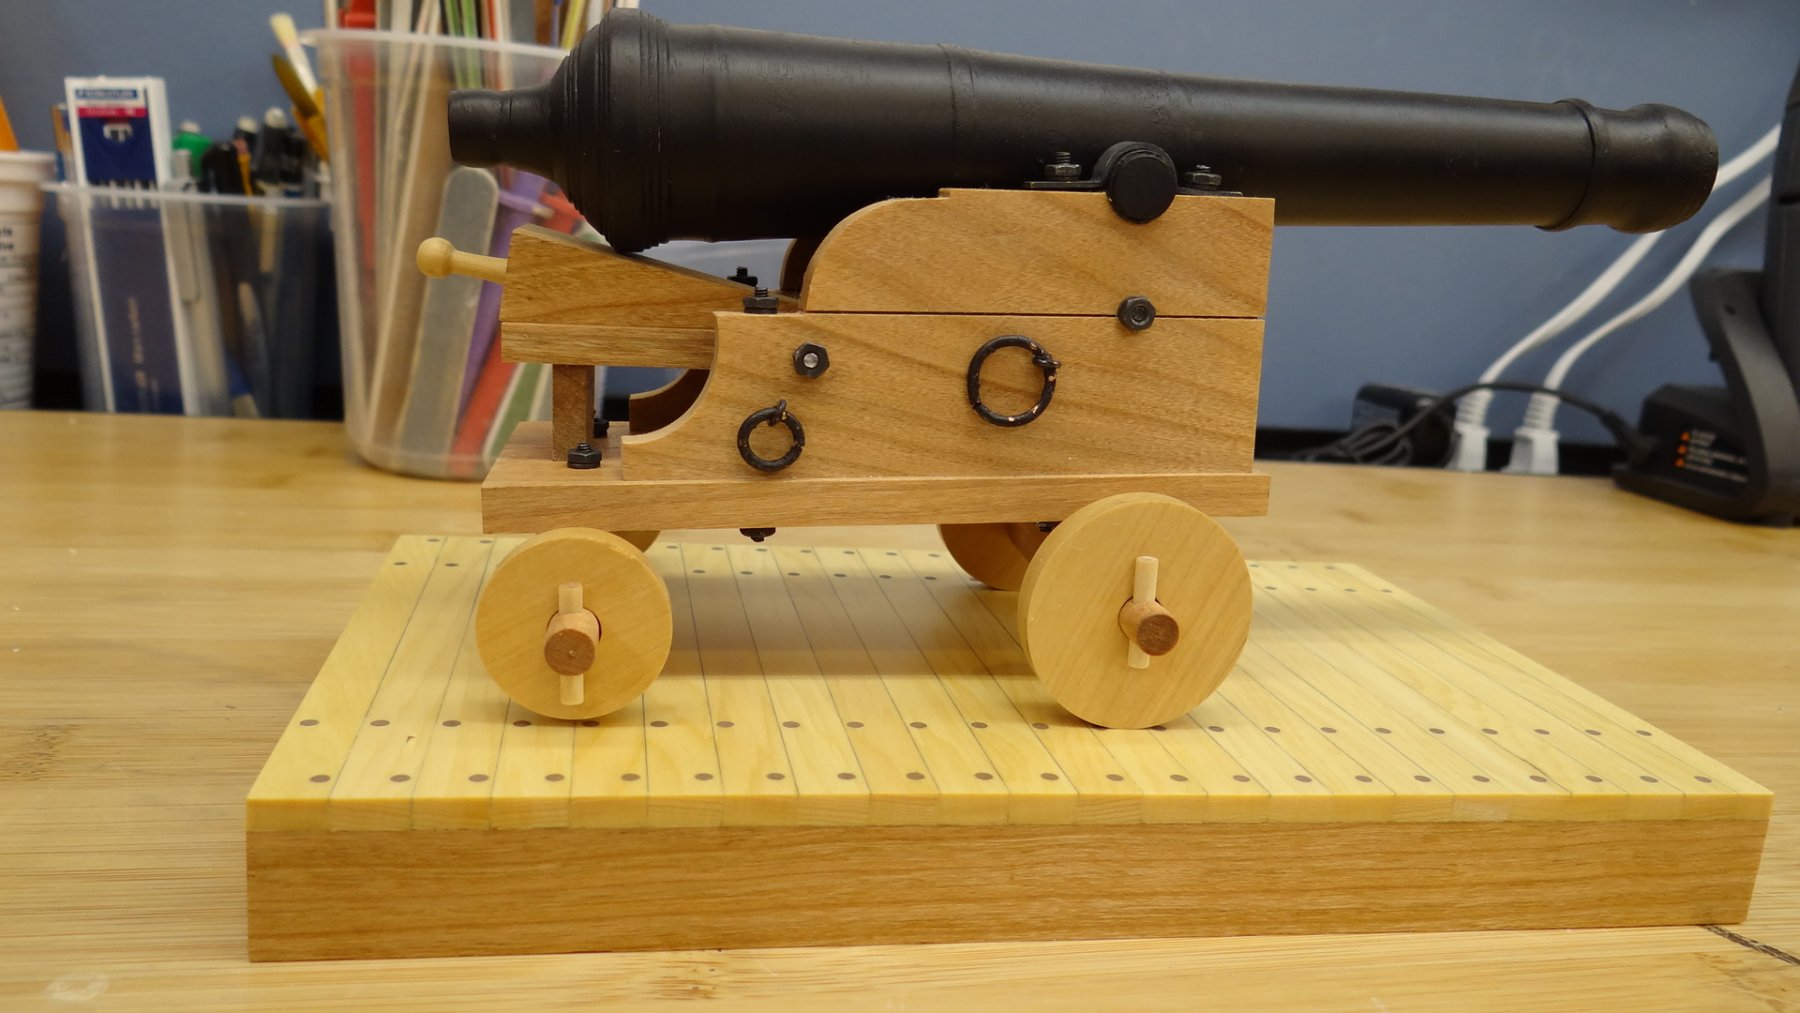
Hi Dave, I really don't want to pollute your log with my poor attempt and I'll delete it later. I followed your build but didn't do a few things you did in particular putting bolts in the trucks. I used hard maple for the cannon, cherry for the carriage, boxwood for the trucks and quoin and yellow cedar for the deck. I may switch out the nuts and bolts when my smaller diameter versions arrive especially with acorn nuts for the trunnions. Anyway it was a fun diversion.

-
Hi Dave, I went ahead and built this cannon and thoroughly enjoyed it. A question, do you have any additional information on this cannon? Was this design actually in service, did it display an insignia? Ian
-
Lovely job Dave. This is a very tempting project. Ian
-
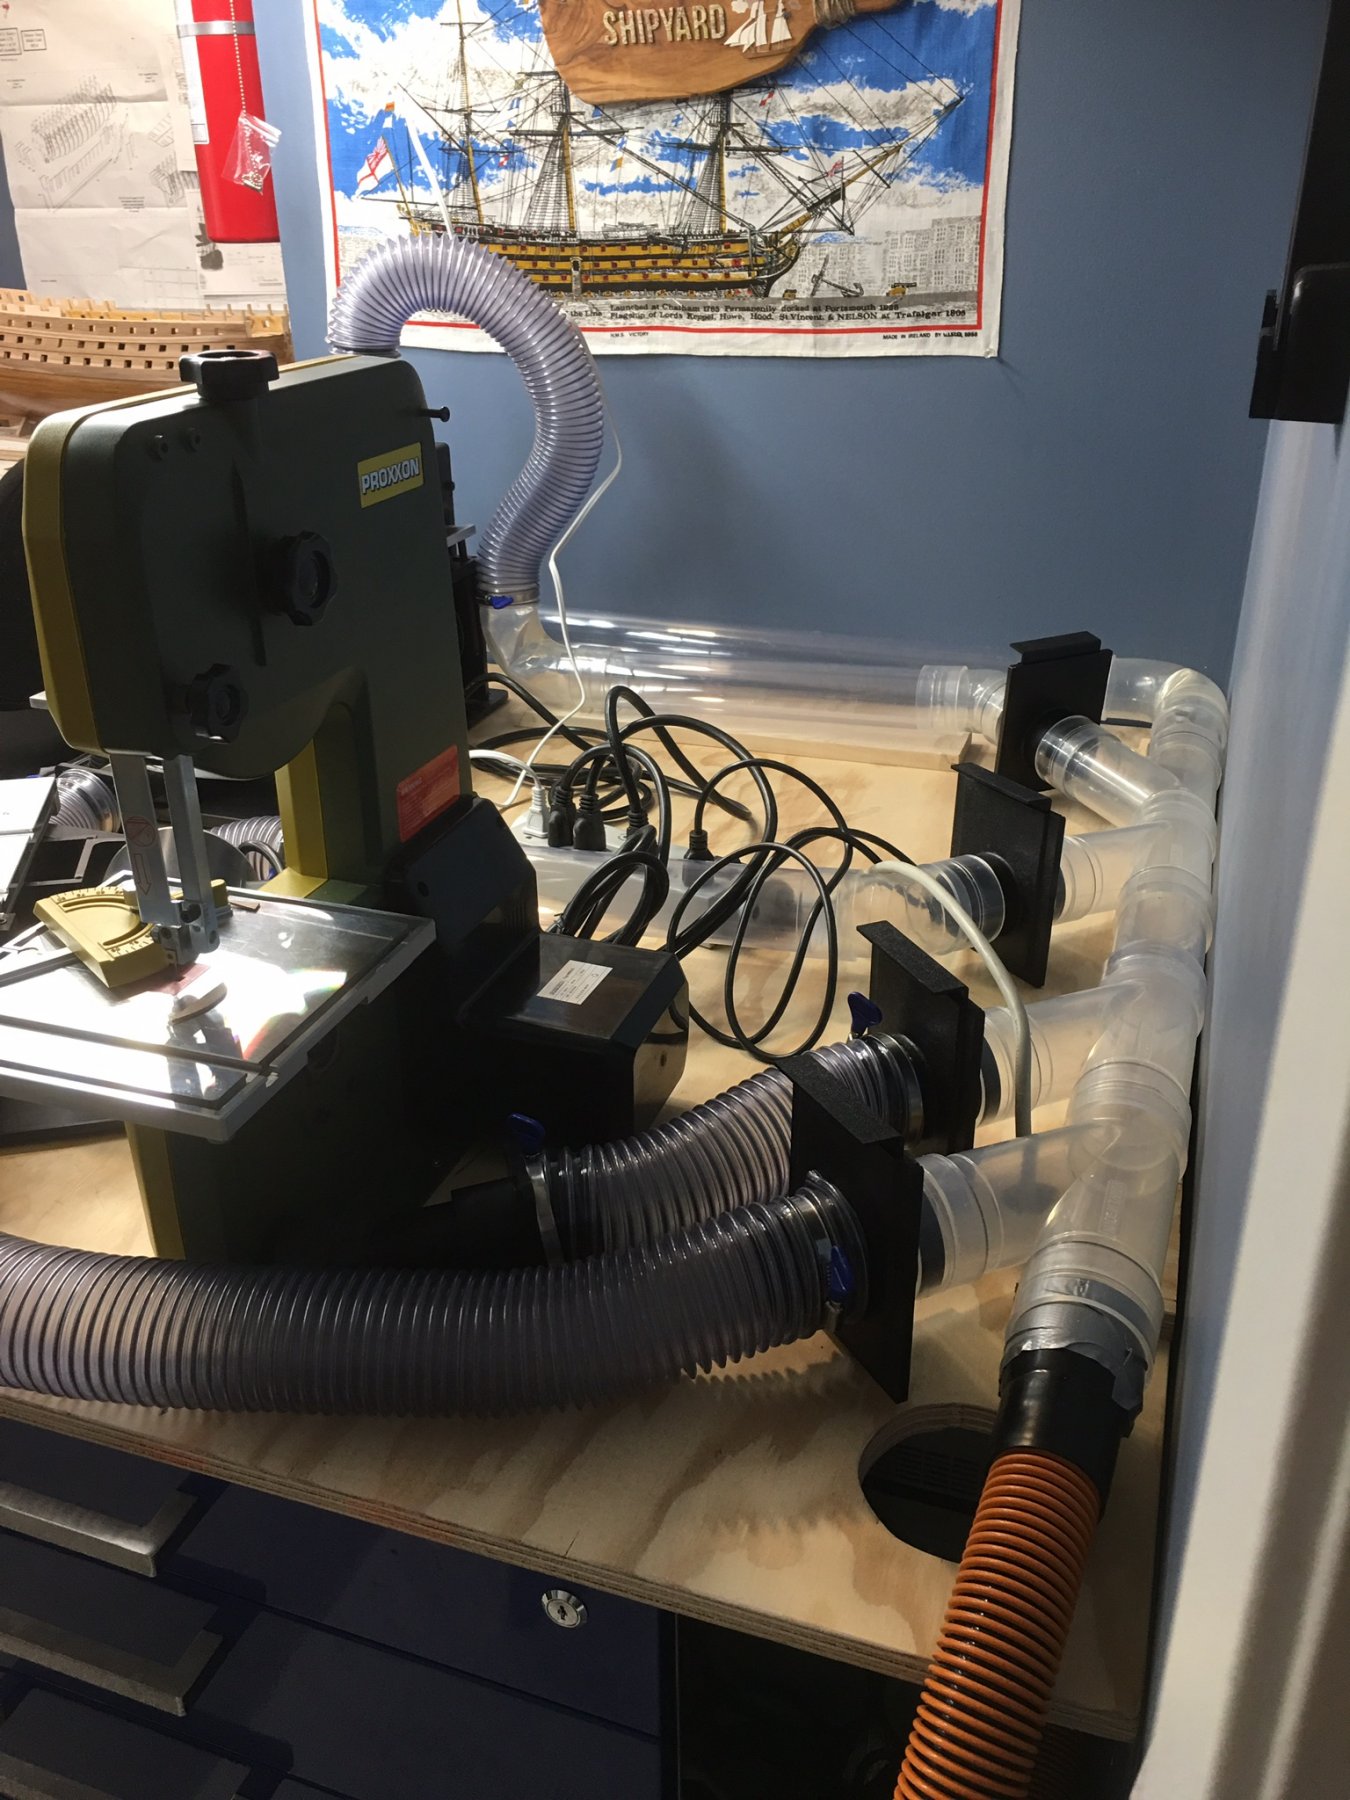
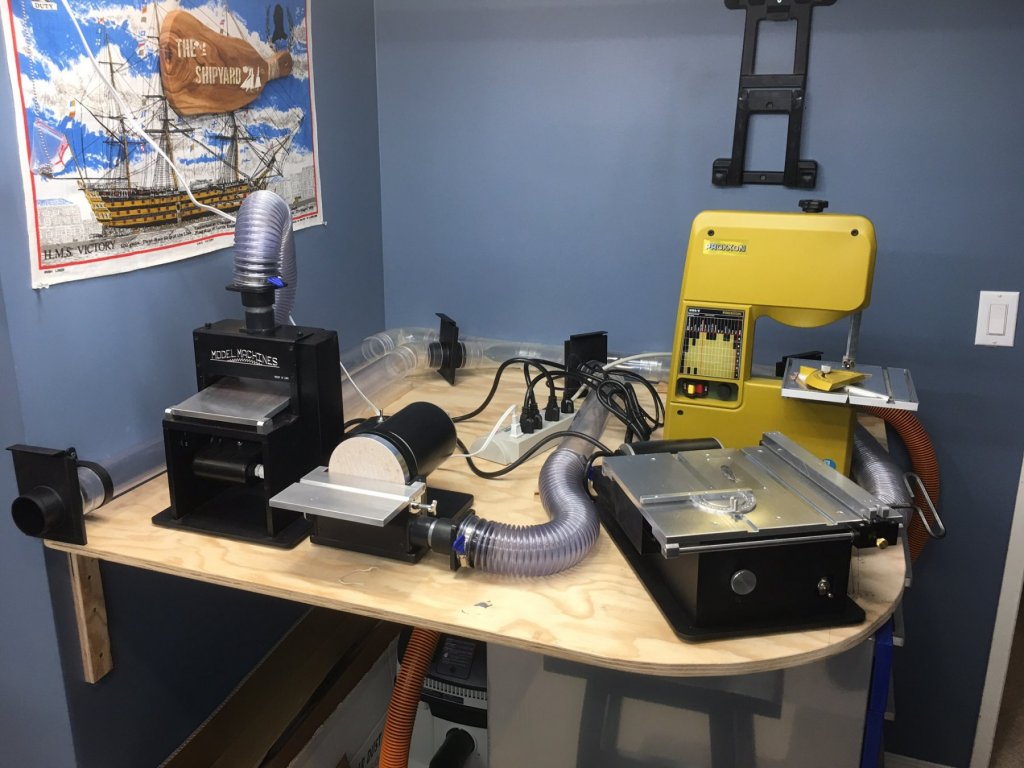
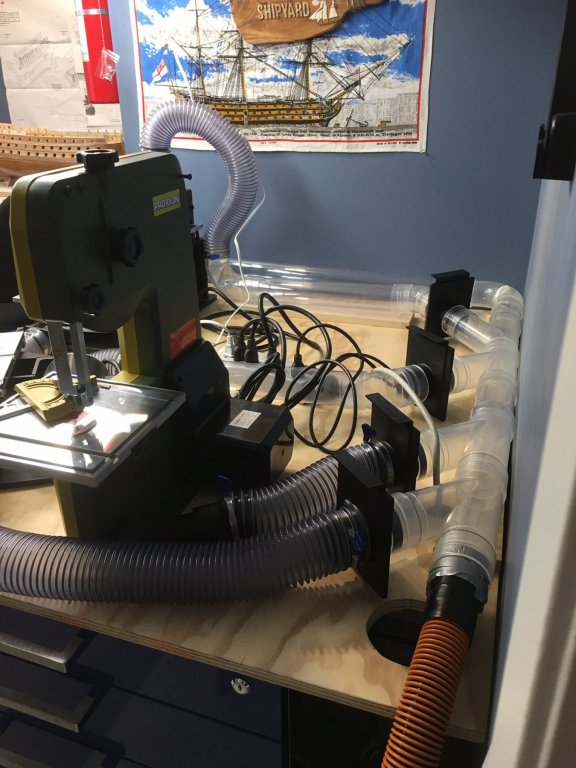
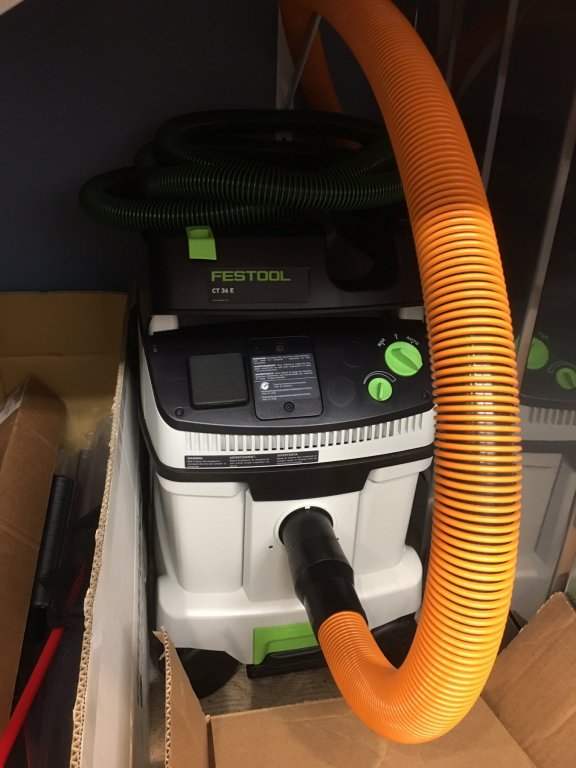
Sitting here in a hotel room on my southern US road trip I can’t stop checking this site and thinking about my favourite hobby. Reviving an old thread about dust extraction I thought I’d post a couple of pictures of my main machines bench extraction system. A Festool vac with hepa filter pulls sawdust through these gated ports. Turning any machine on triggers the Festool. I just have to remember to open and close the correct gate. 😉
- 42 replies
-
- 10
-