


aydingocer
-
Posts
855 -
Joined
-
Last visited
Content Type
Profiles
Forums
Gallery
Events
Posts posted by aydingocer
-
-
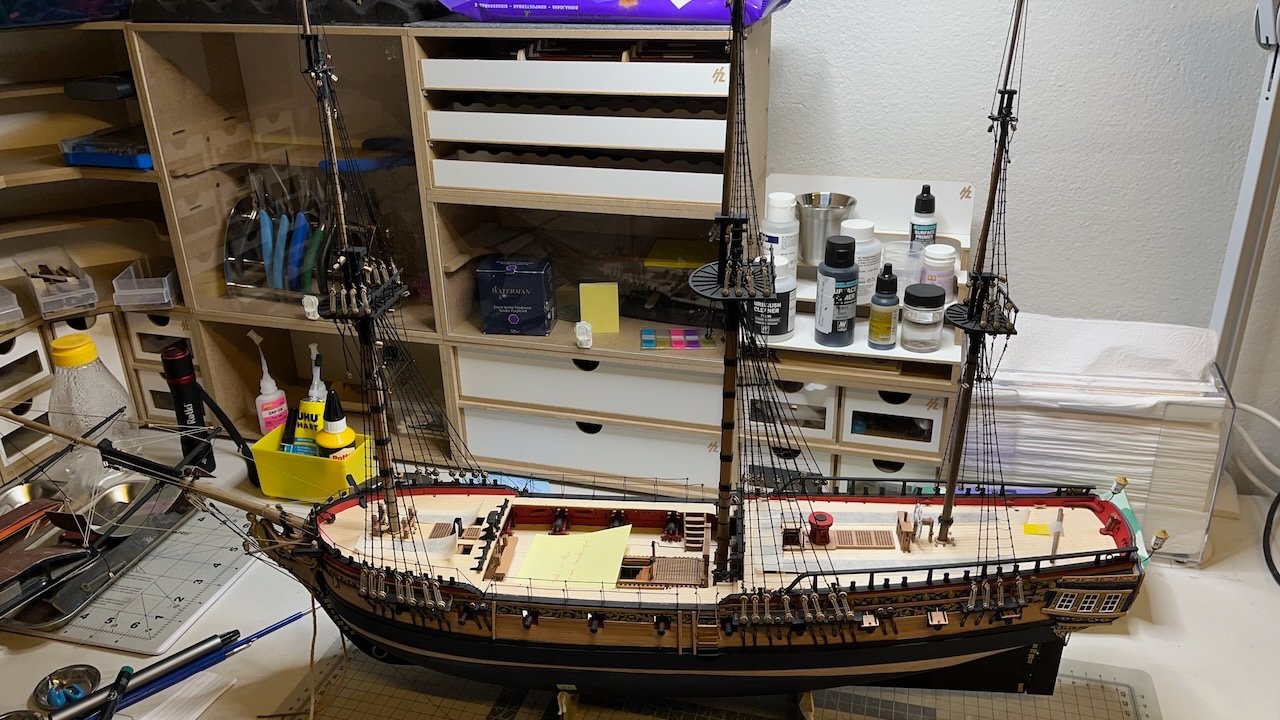
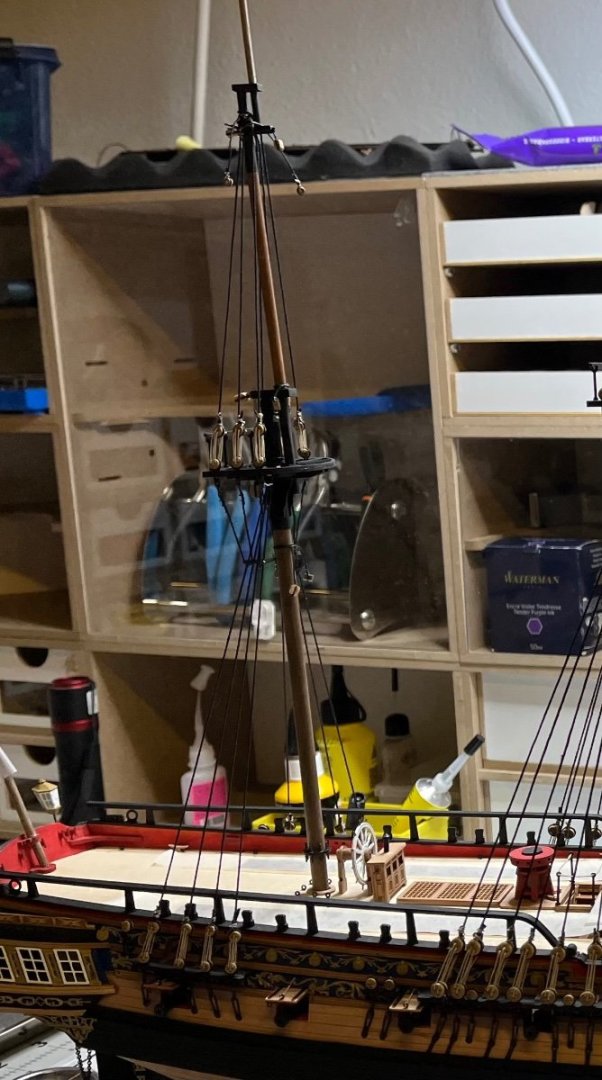
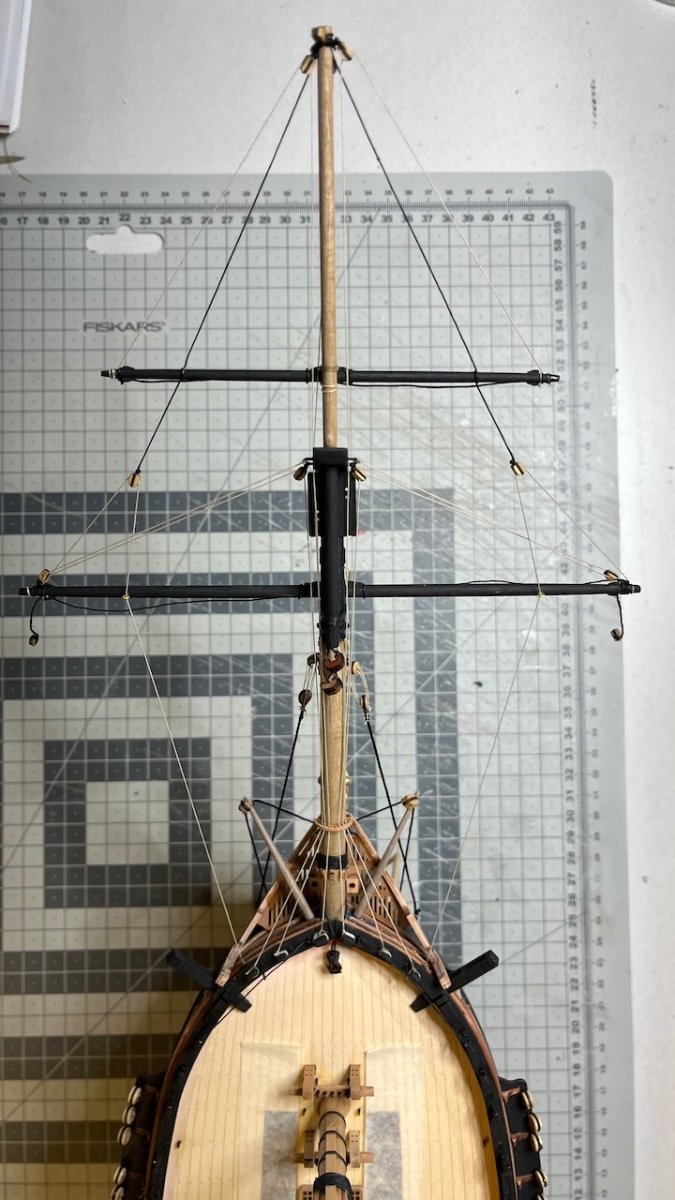
Build day 155: 5 hrs / Total 325 hours
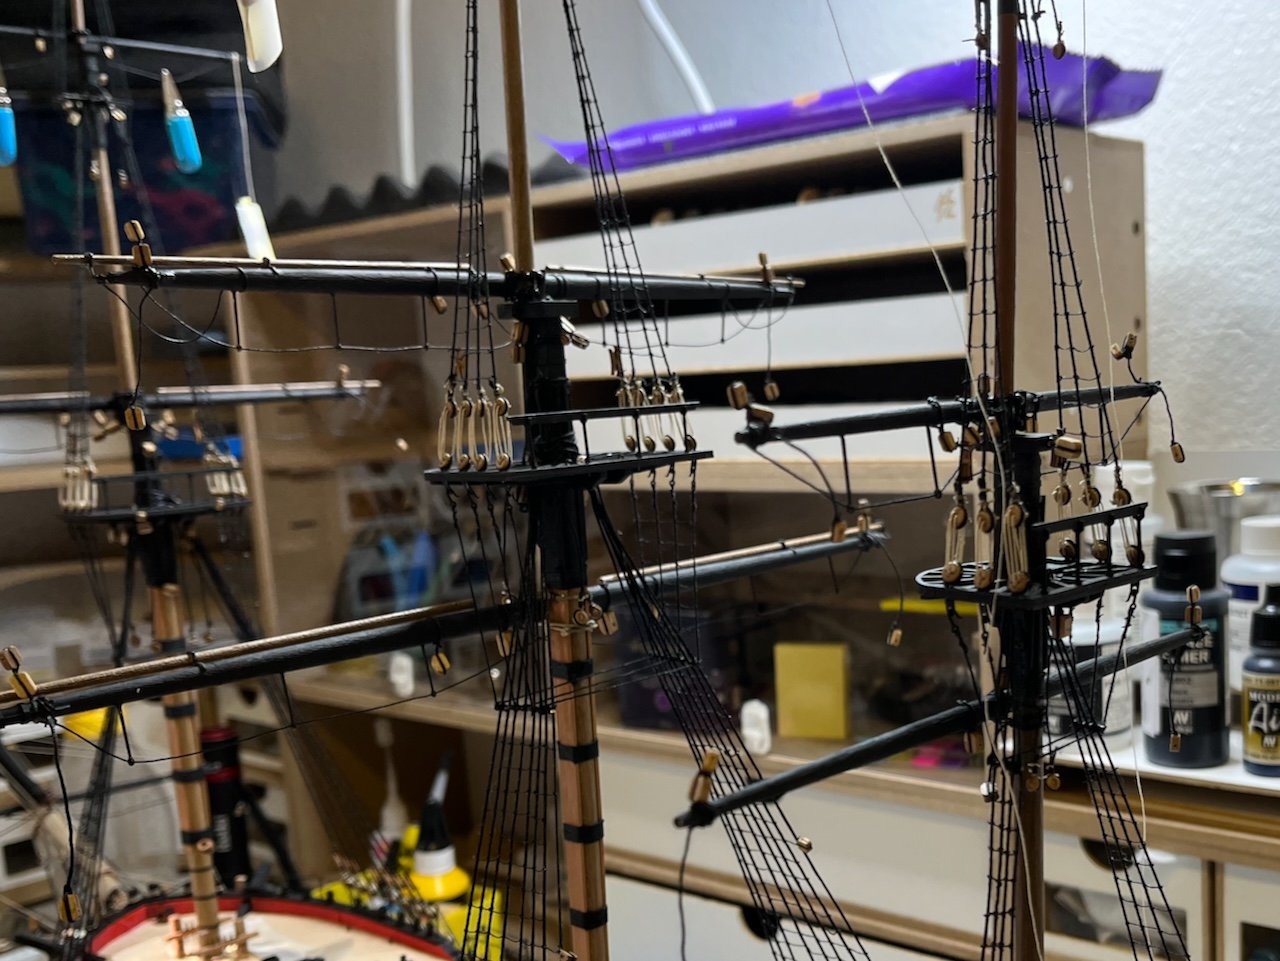
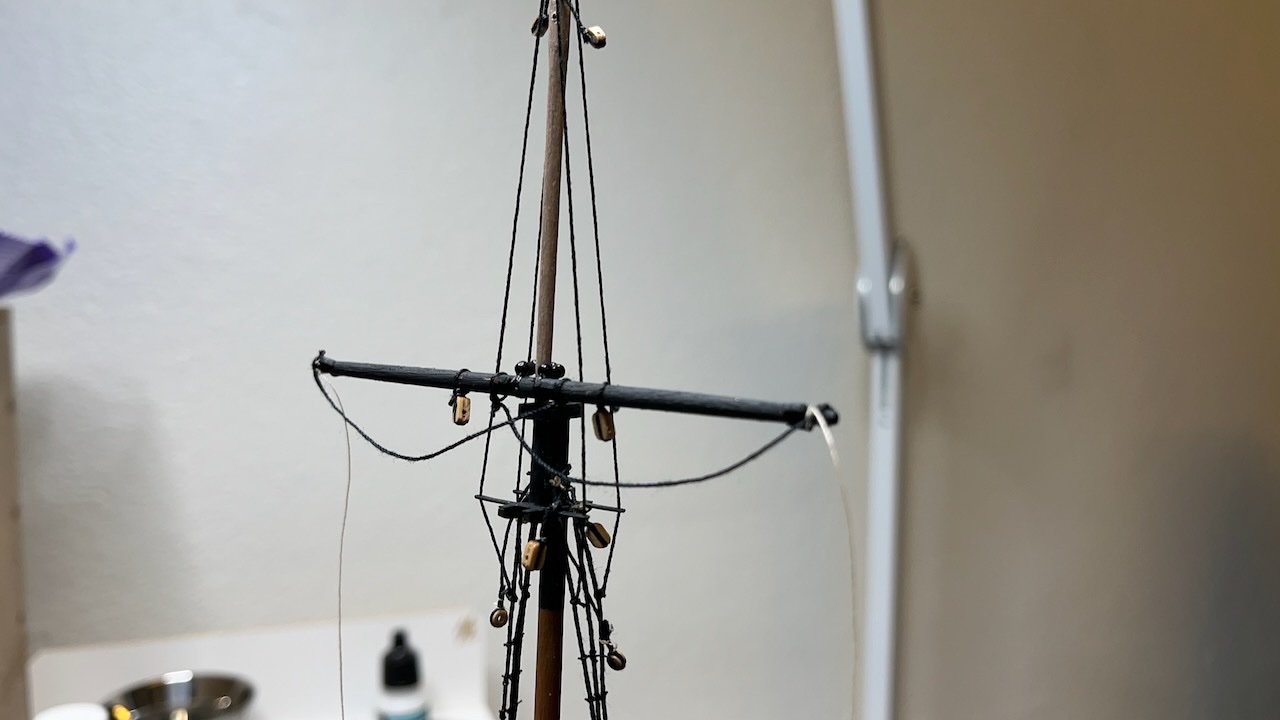
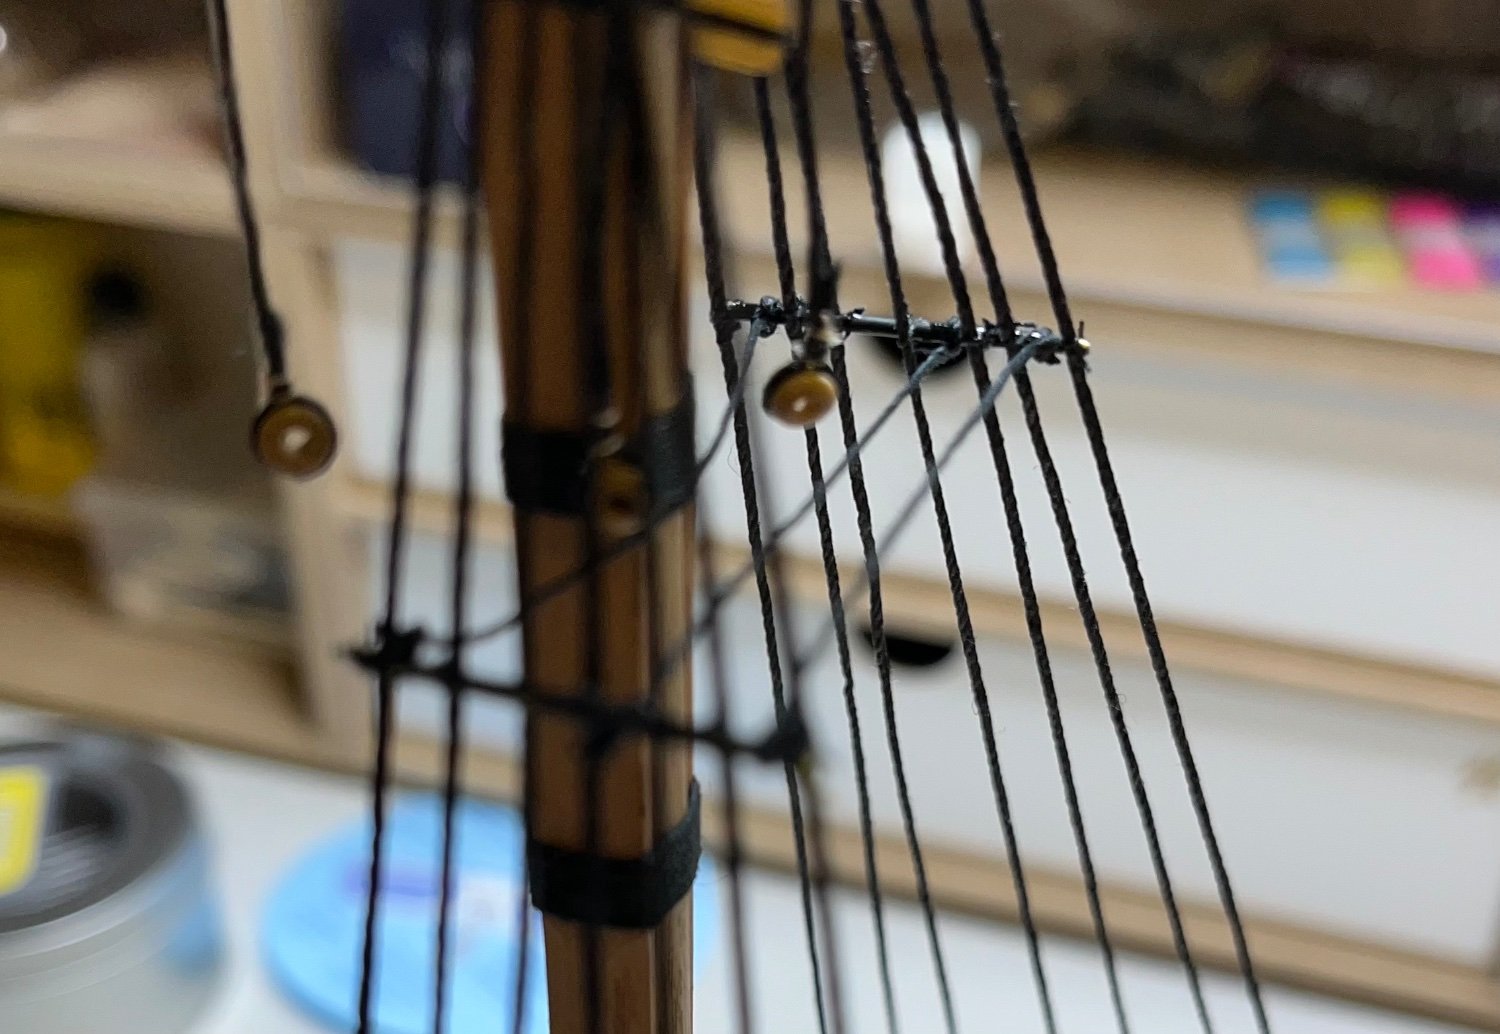
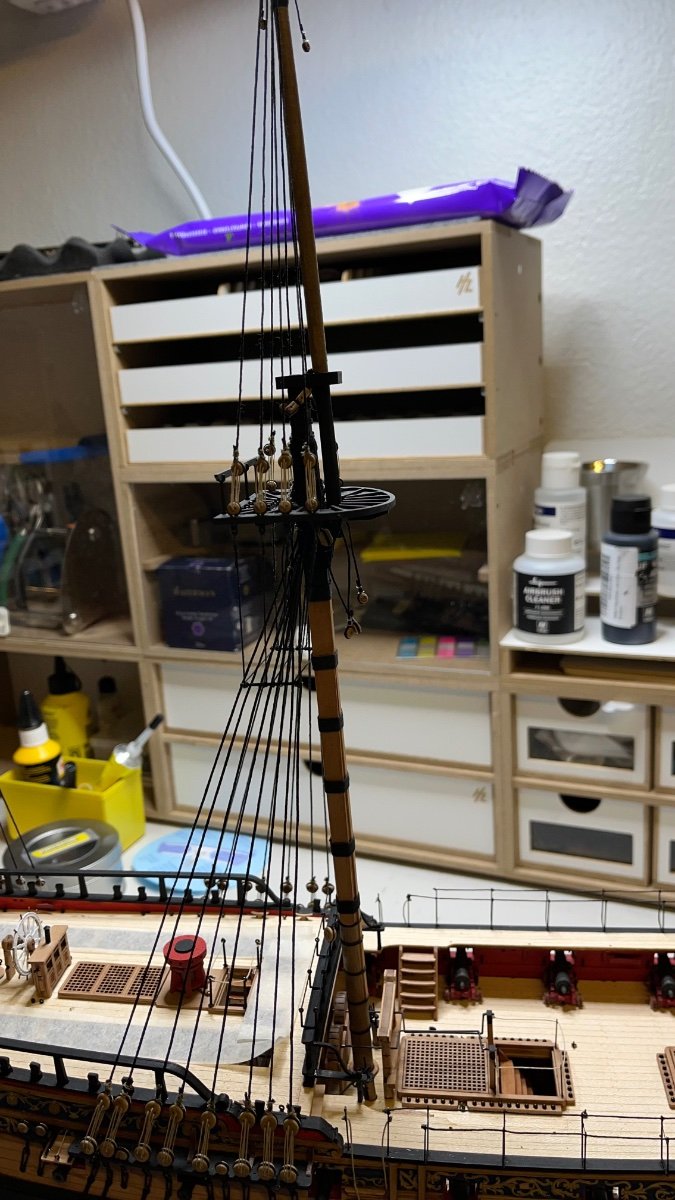
Installing Crossjack Yard and Main Yard. Below I share the process of rigging the thread structure for mounting the Main Yard, as good as I understood from the plans. Last two photos show the yards in place with their thread fittings. I used nails here, too, to mount them strongly in place.
Photos 818-823


- Clark, RossR, chris watton and 4 others
-
 7
7
-
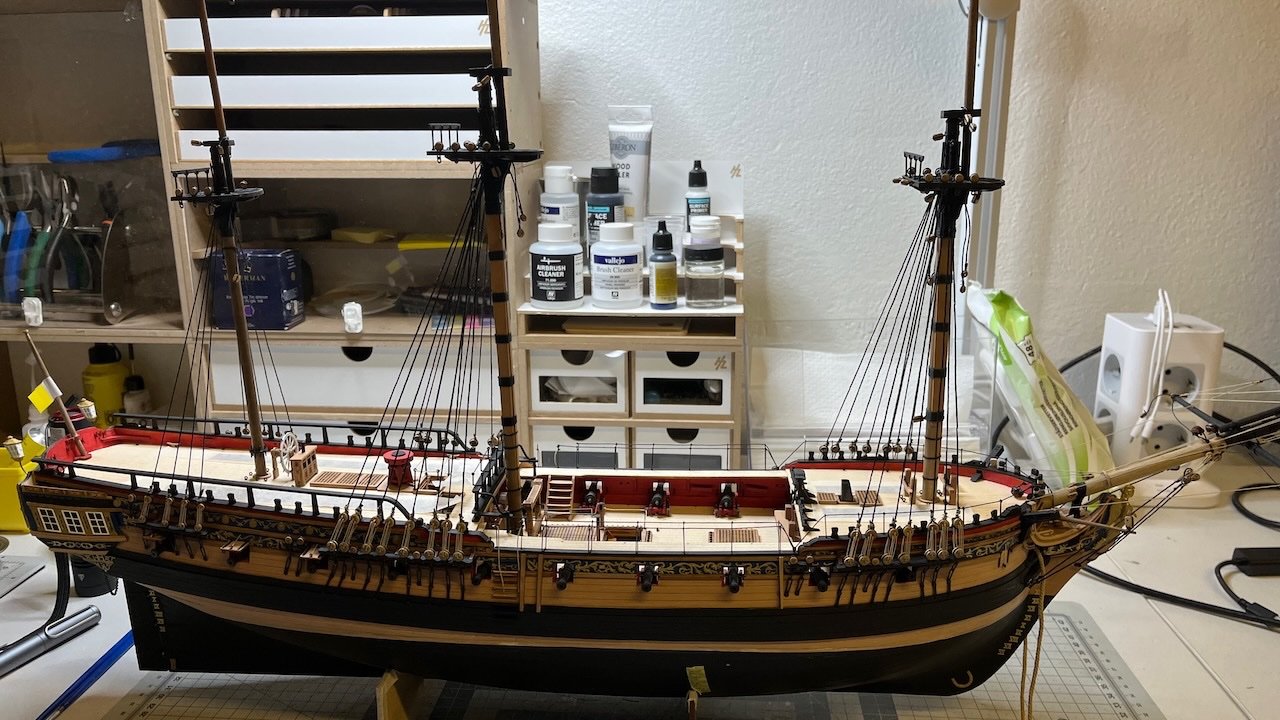
Here is my rigging progress. Not quite done, but getting there!
✅ Fit masts
✅ Rig lower shrouds
✅ Rig upper Shrouds
(IN PROGRESS) Fit the yards (not rigging them yet)
Fit the crossjack sling to the crossjack yard (at this point for accesibility)
Rig the mast stays
(Omit Main Stay Tackle and Fore Hatch Tackle at this stage)
Add the Crowsfeet to the mast tops
Rig the back stays
Rig the yards
Fit Sheets and Tacks
Fit the Main Stay Tackle (but do not lash them yet)
Rig the Yard Braces
Fit the ship's boats
Lash down the Main Stay Tackle and Fore Hatch Tackle -
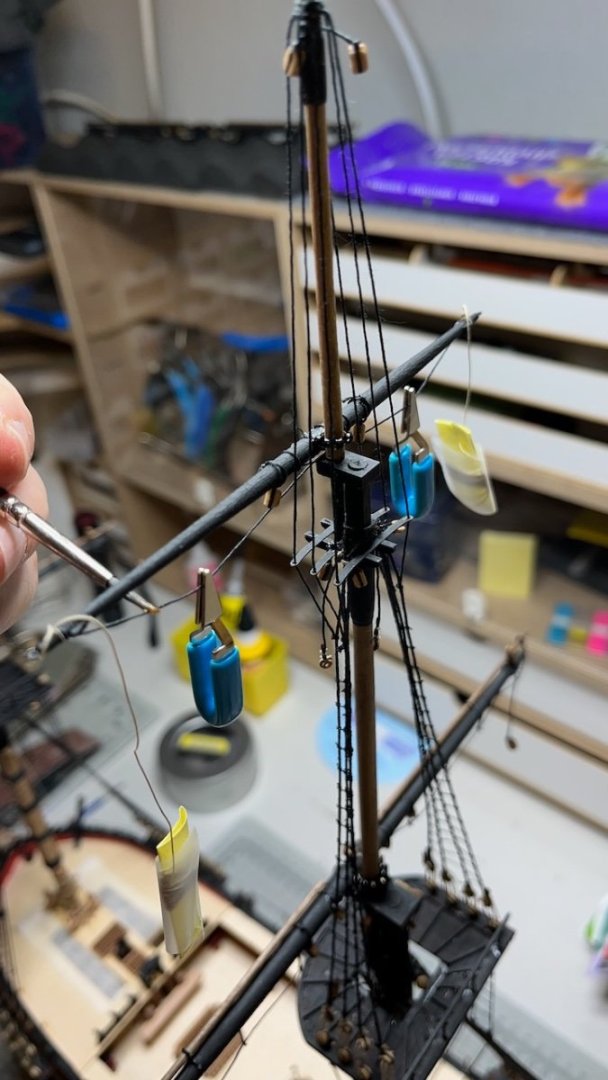
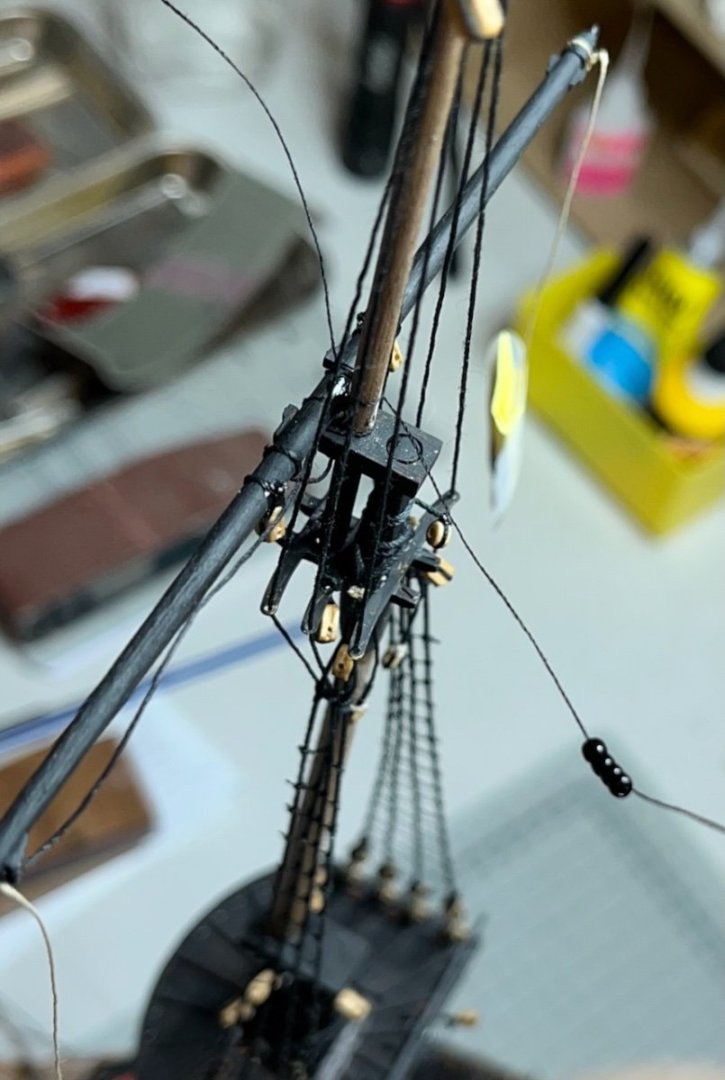
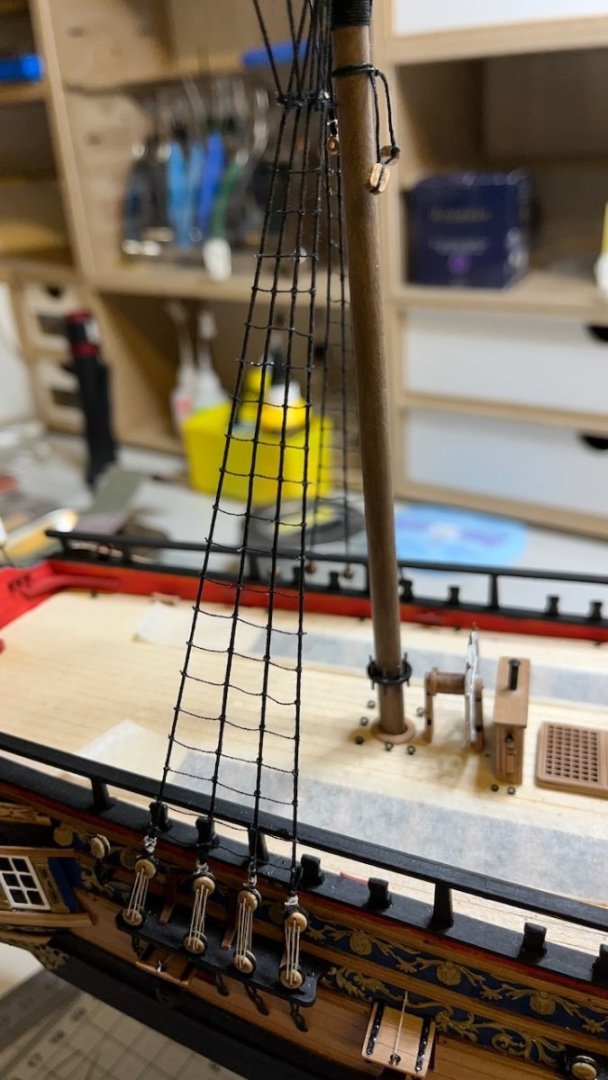
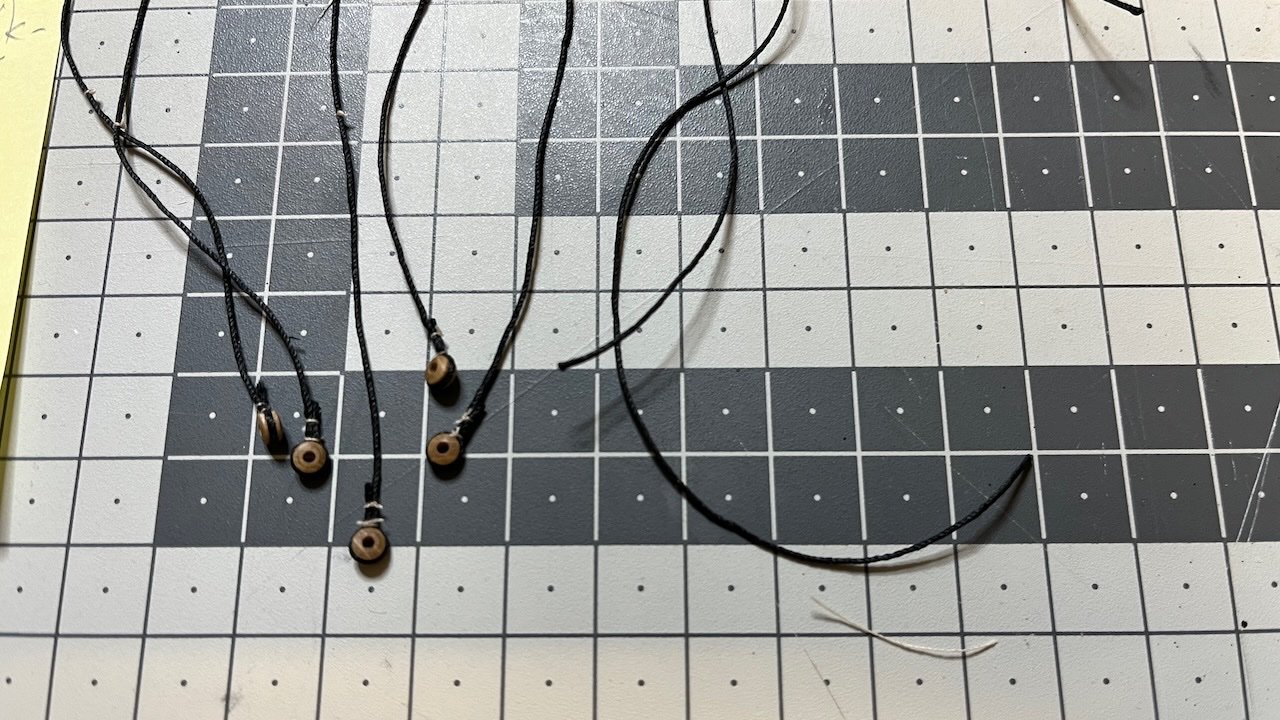
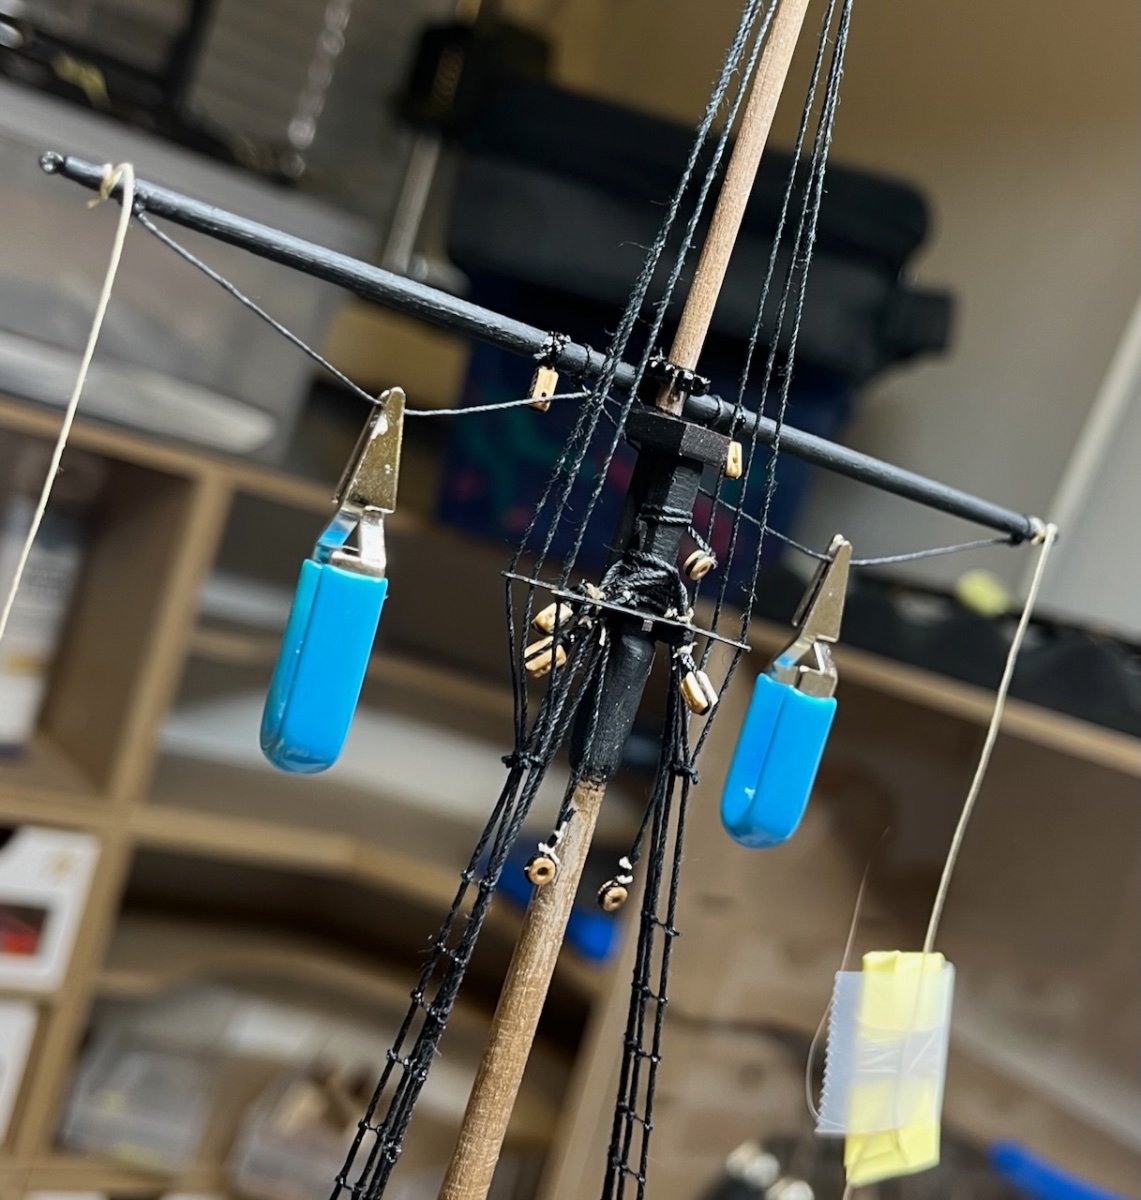
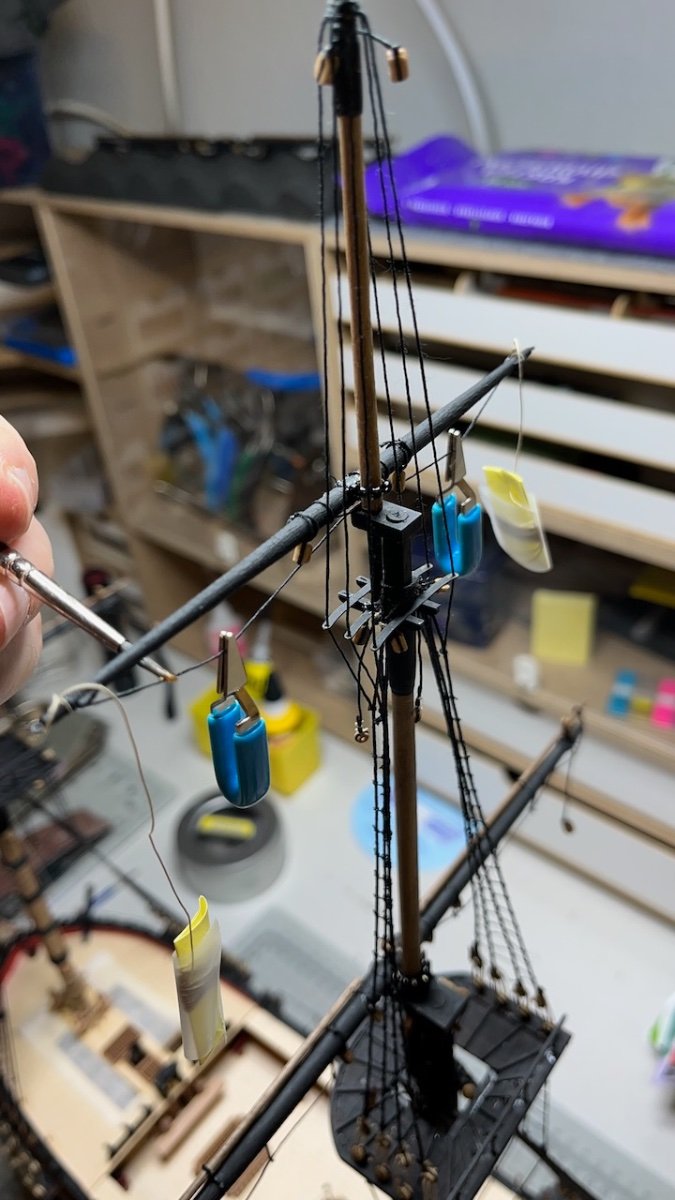
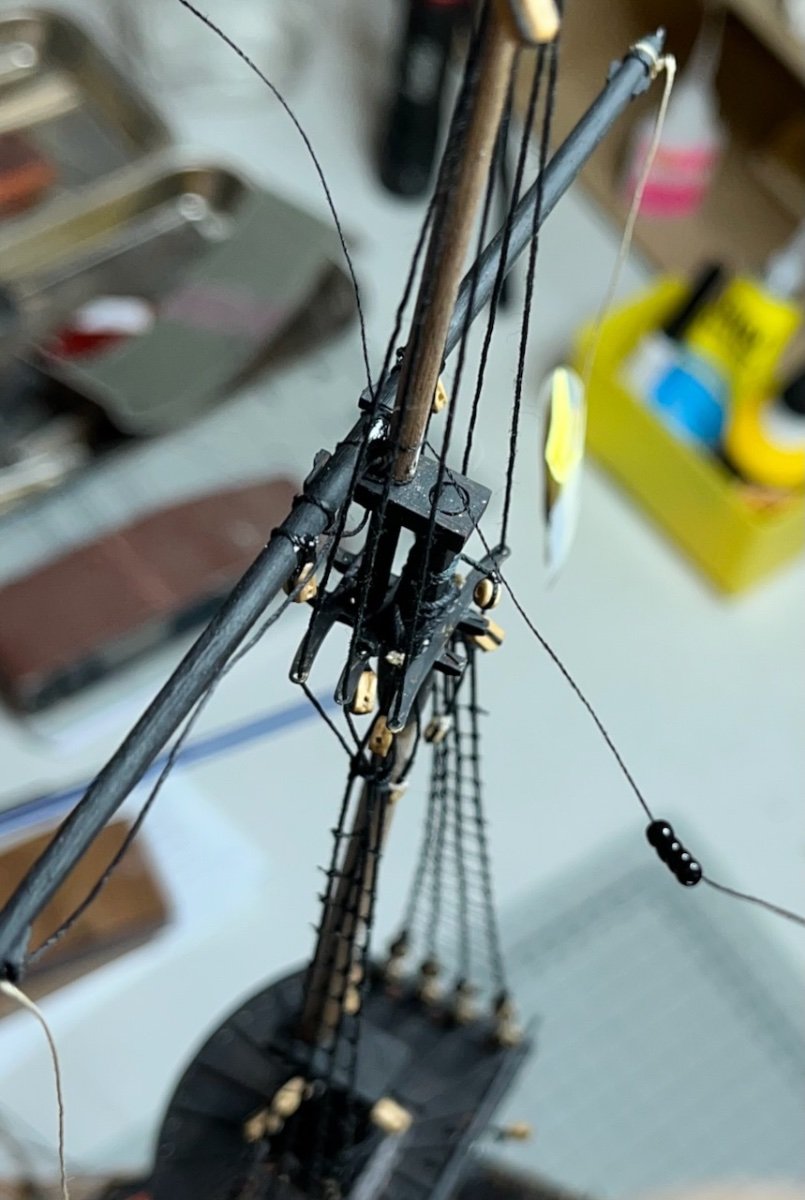
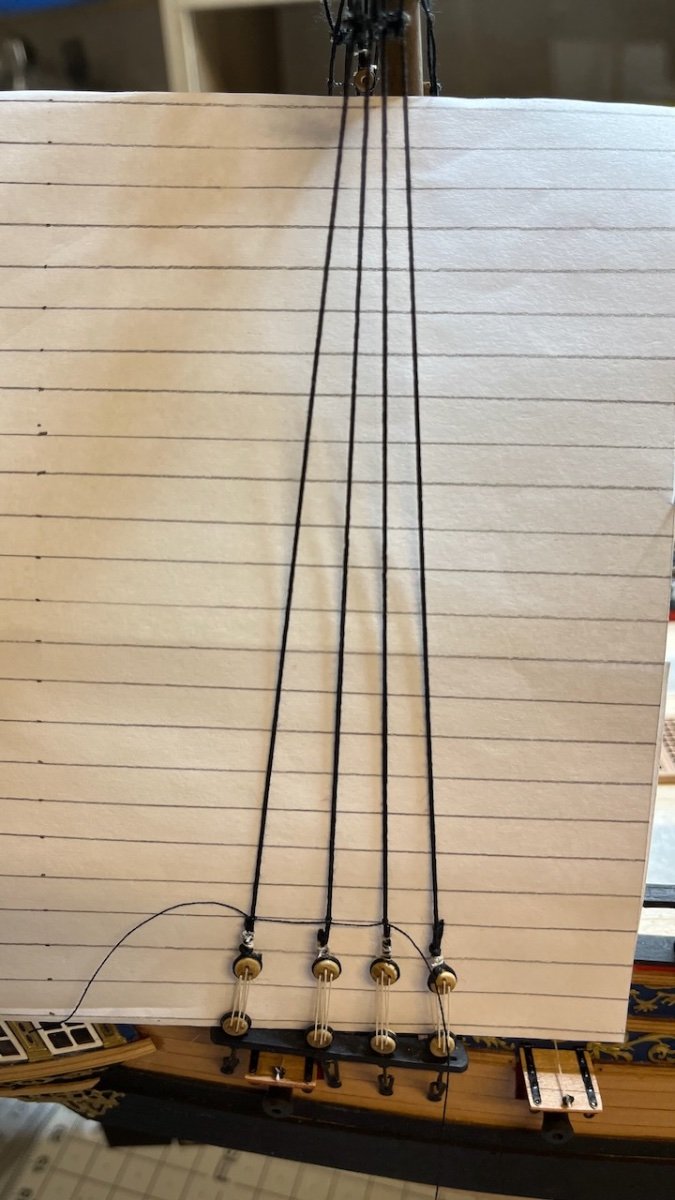
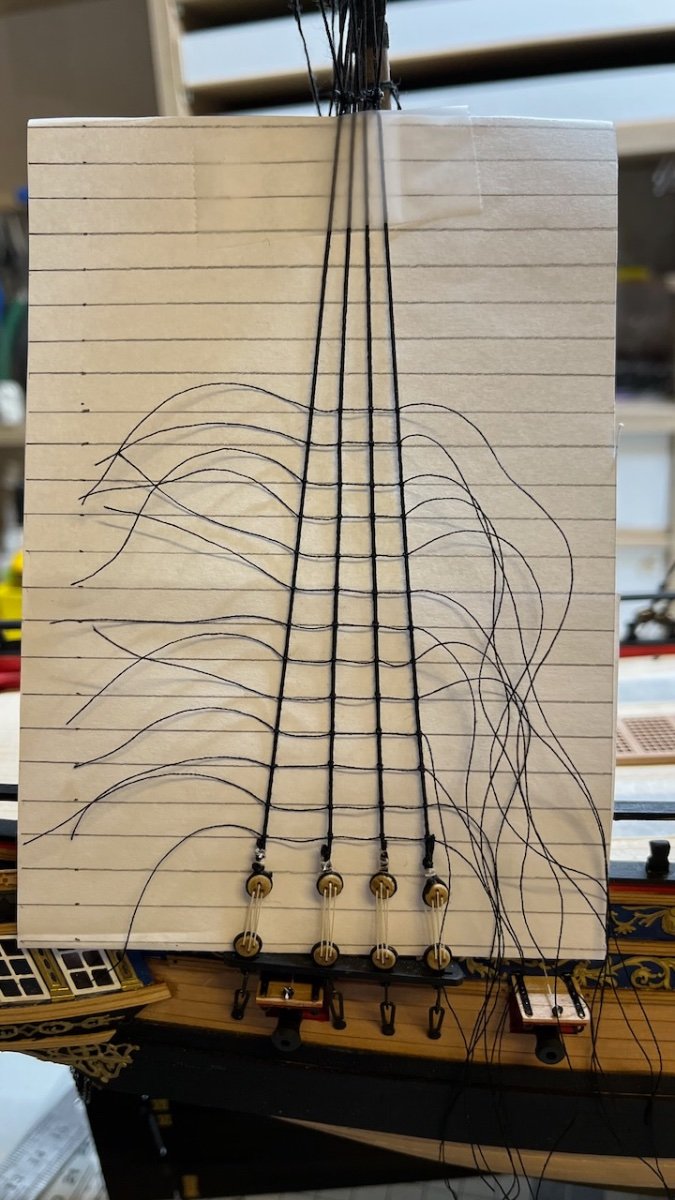
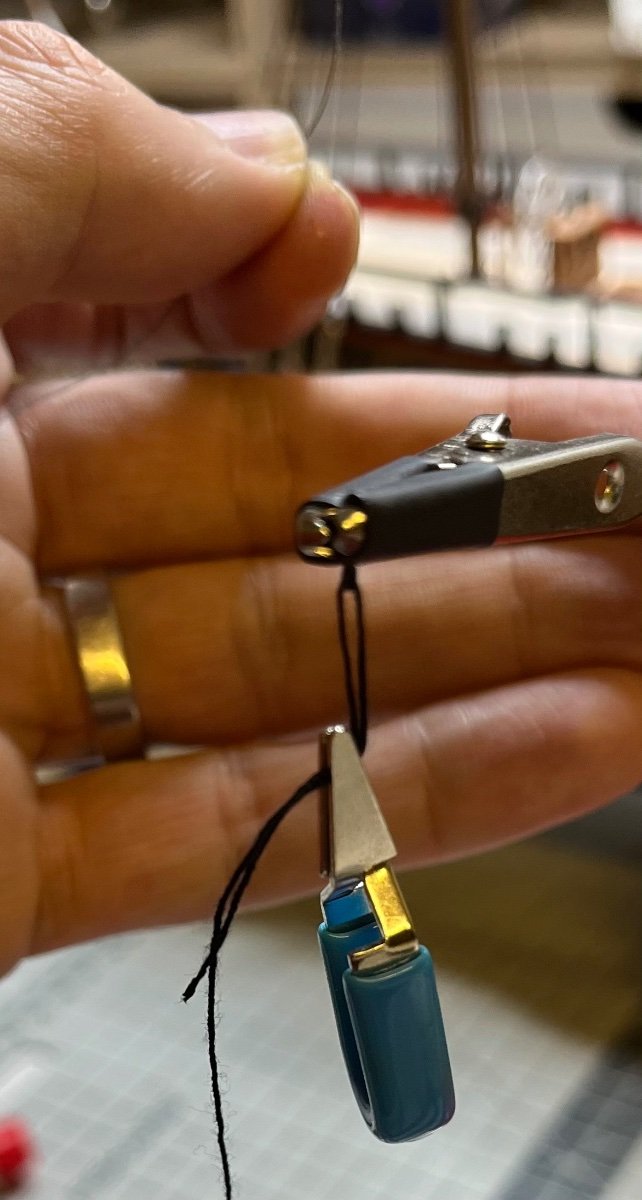
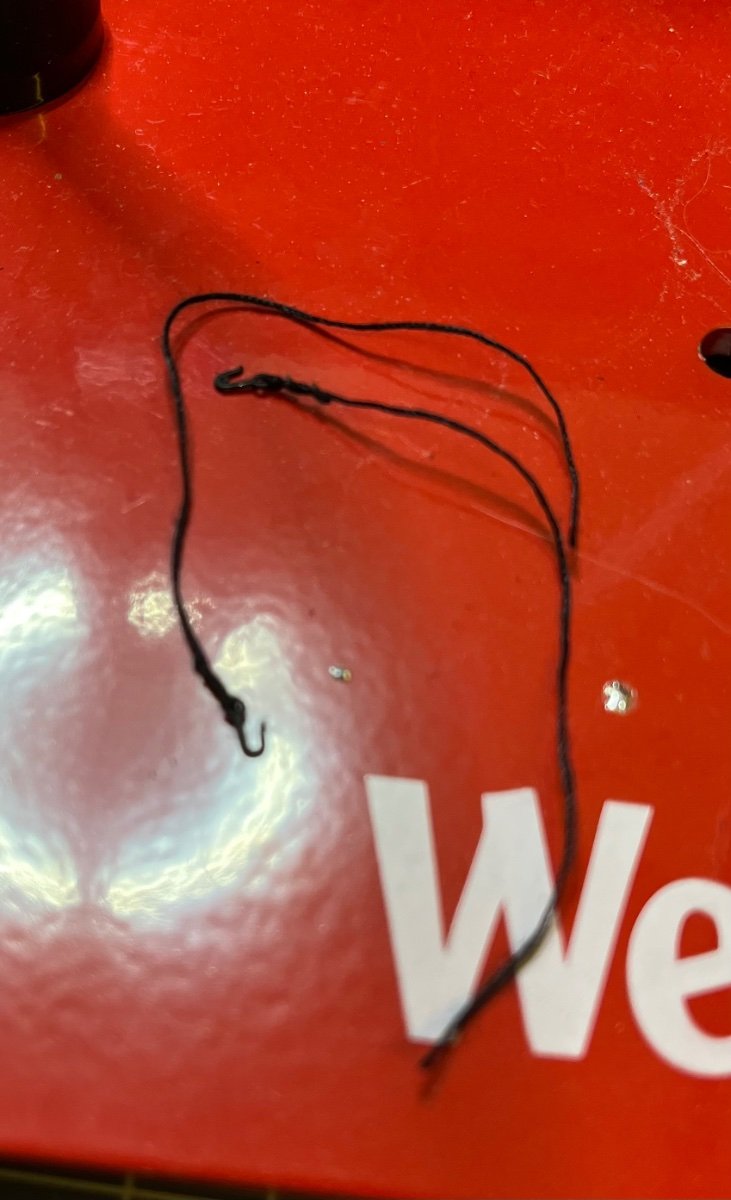
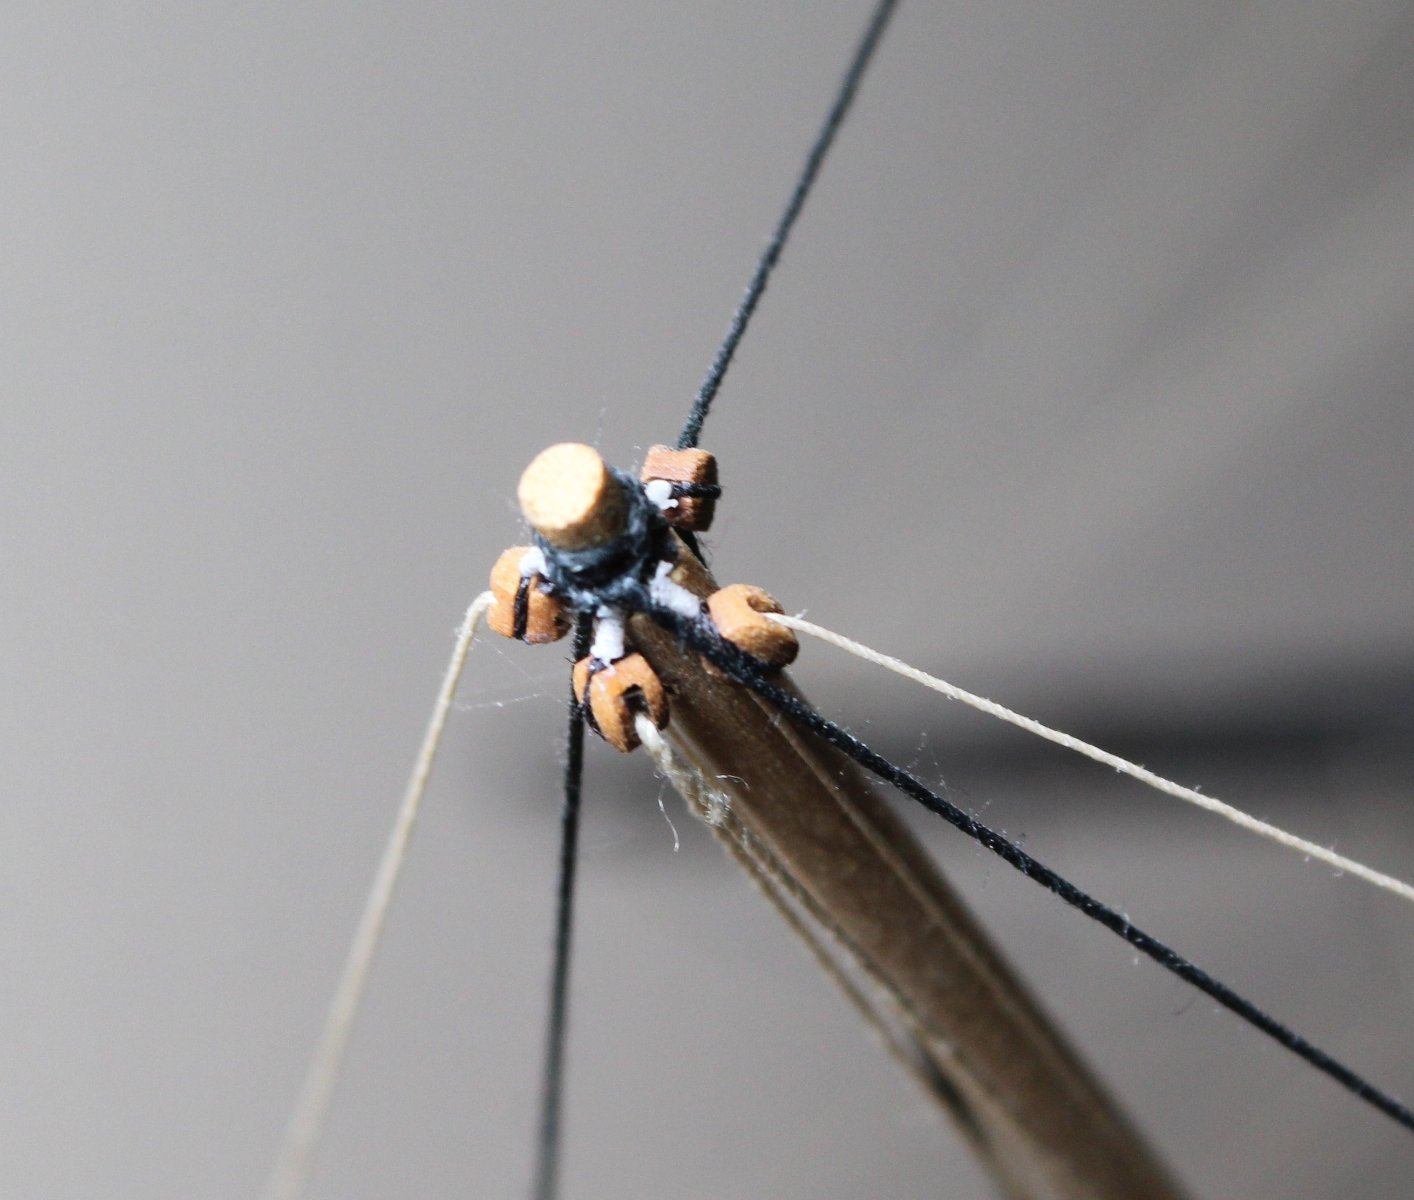
Photos 816-817: I wanted to try hanging weights in the center of these threads to give them a more realistic curved shape. I soaked them with water using a brush to help somewhat maintain their shape once they have dried (the 2nd photo). They will stay there as long as they can. I hope it helps.

That's all for today! Thanks for watching!
- Mr Whippy and chris watton
-
2
-
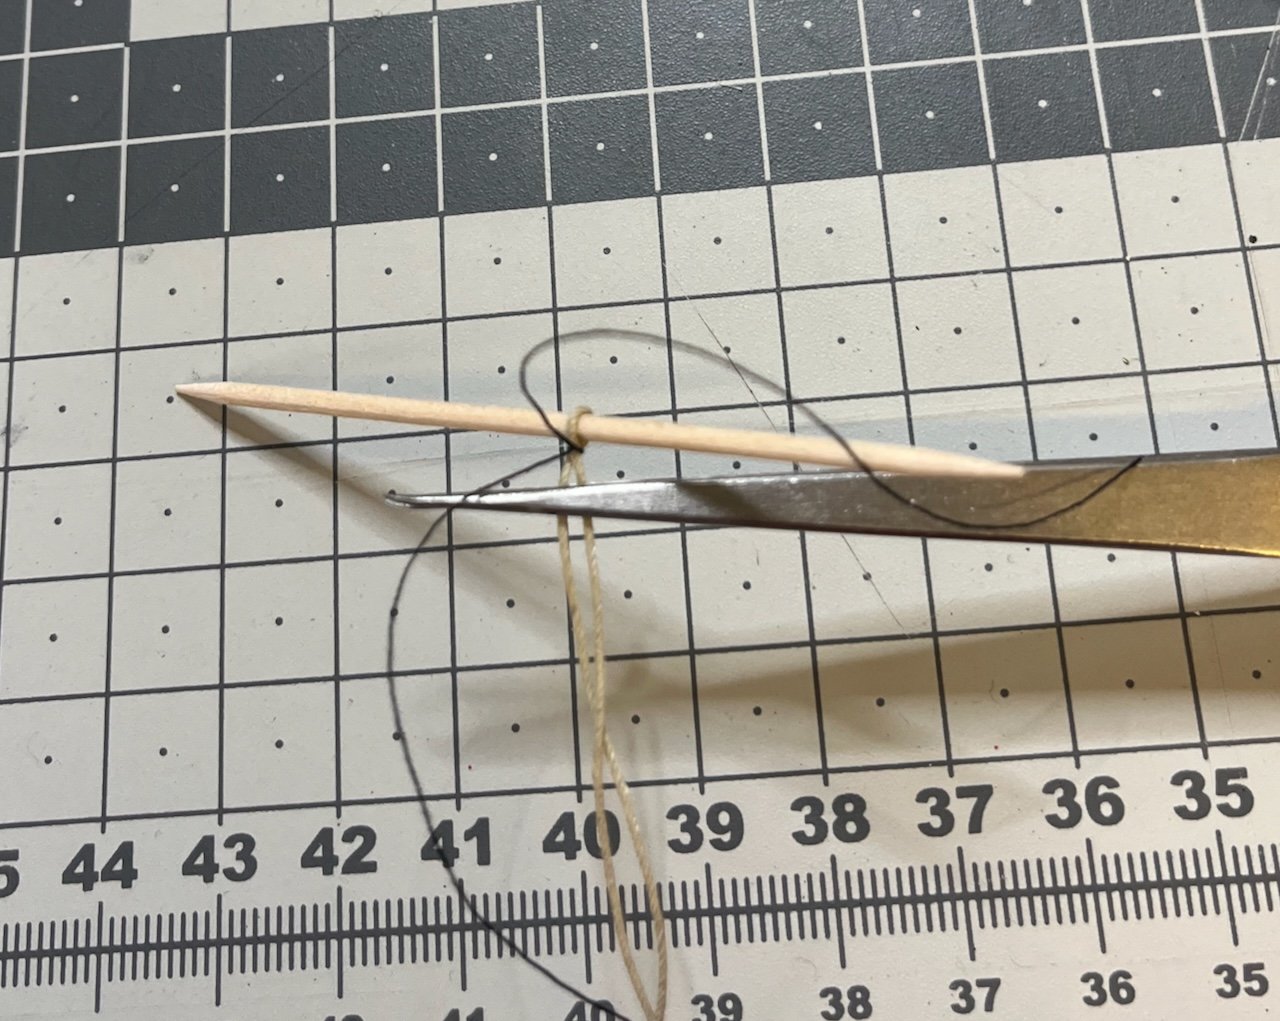
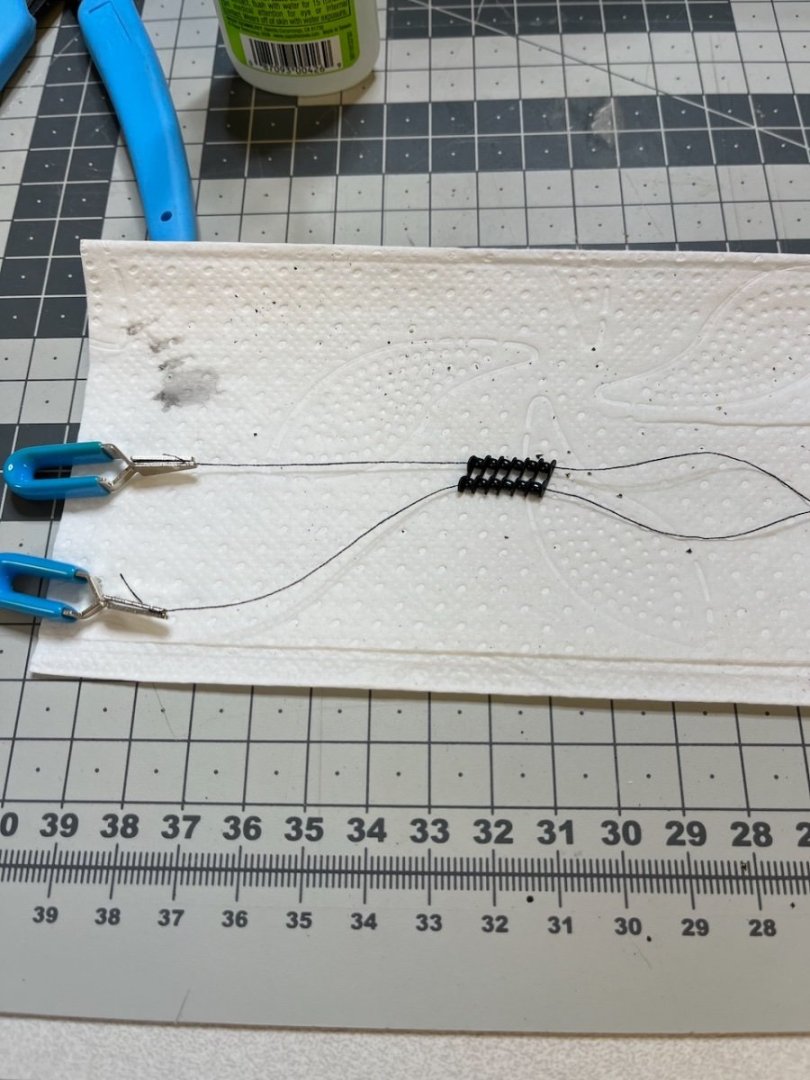
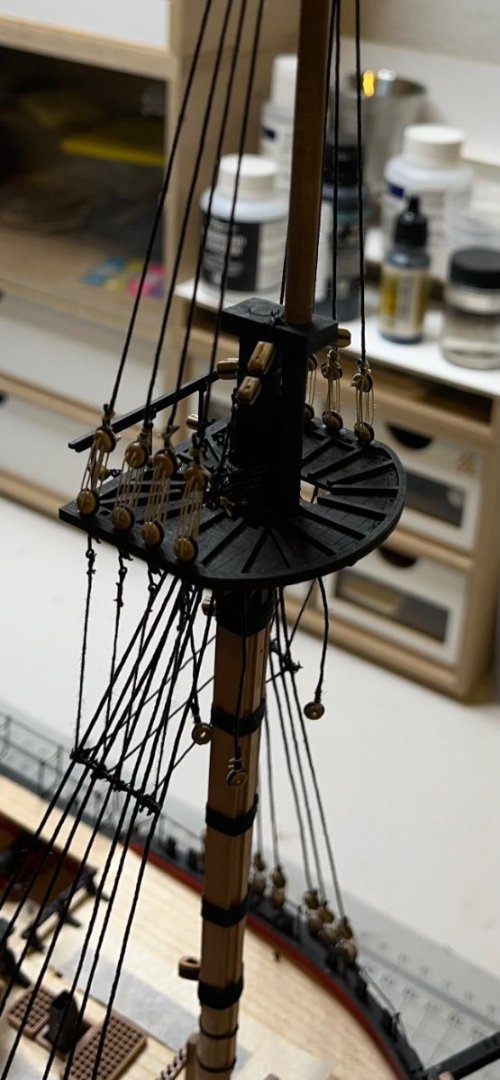
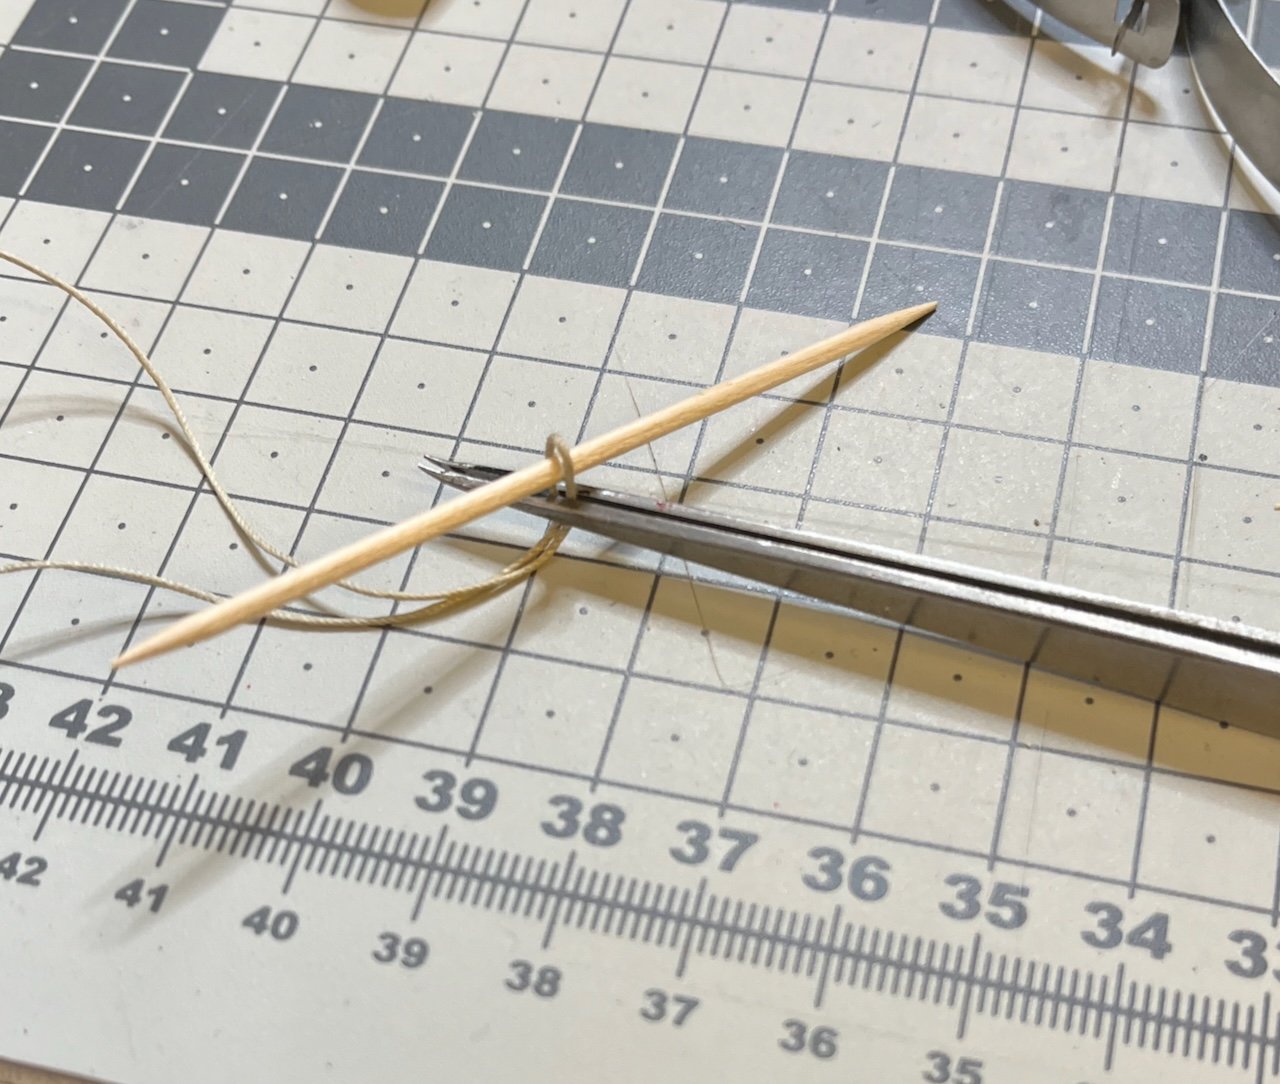
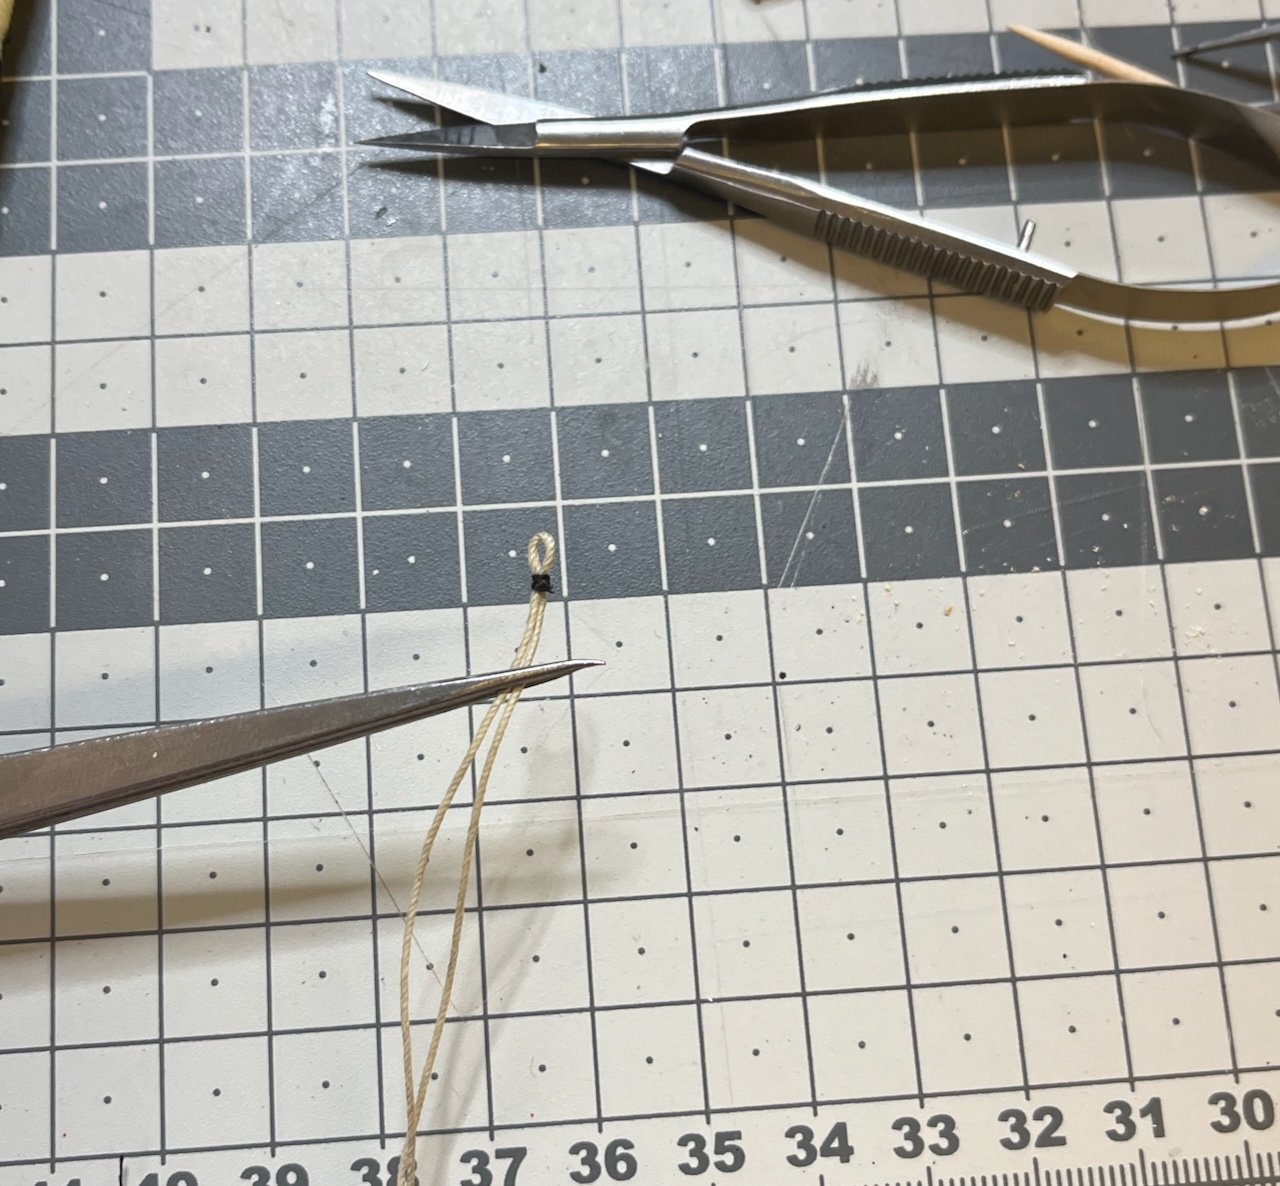
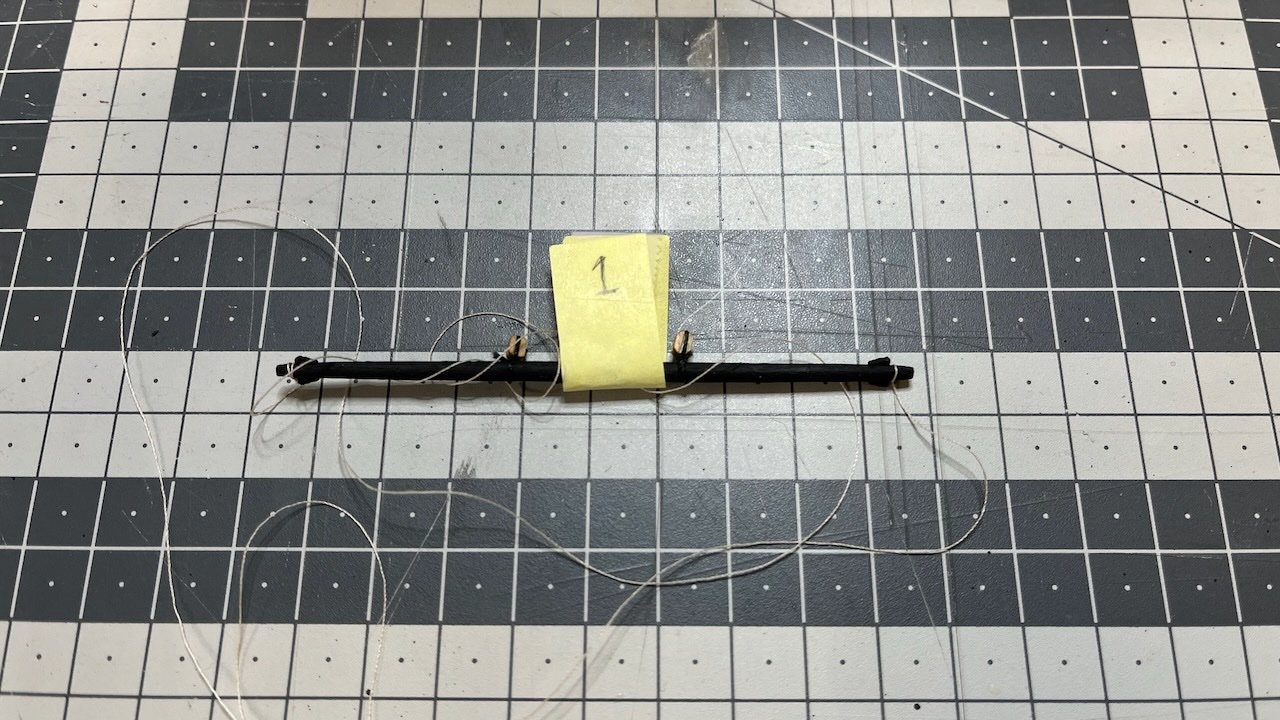
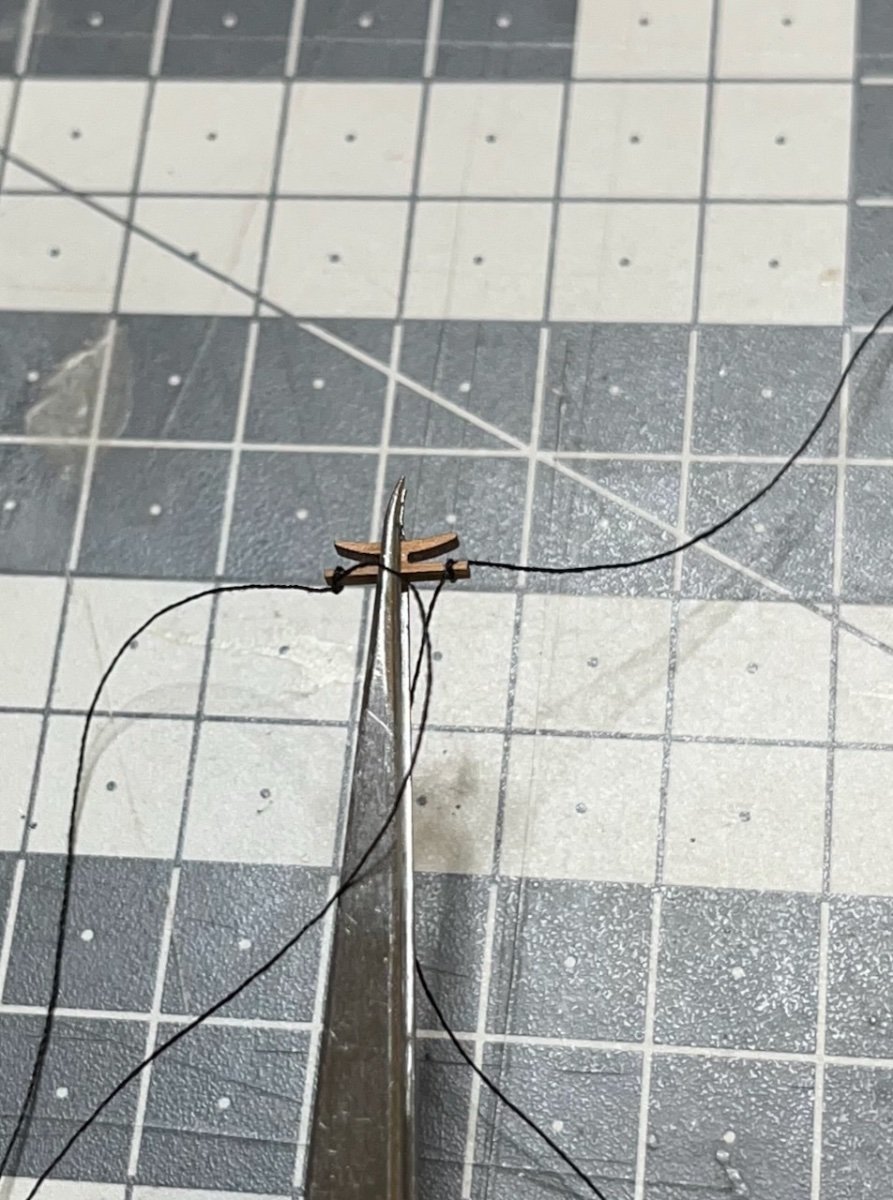
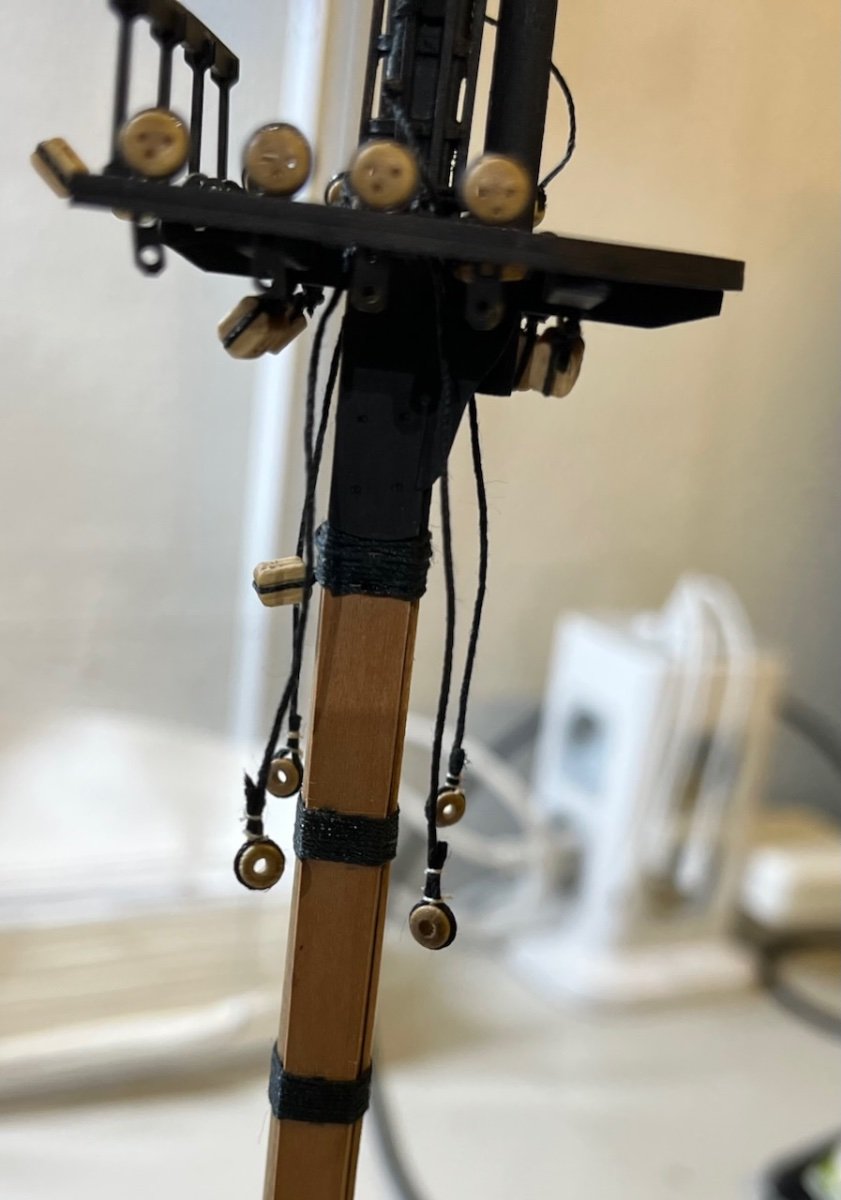
Photos 814-815: Here is how I worked with threads, which use only parrel beads: Fix the thread on the yard in one end and add as many beads as you need from the other end. It was much easier to work this way than installing an already prepared thread with beads, in which case the beads kept dropping while trying to get the thread ends back and forth through intricate spaces.
-
-
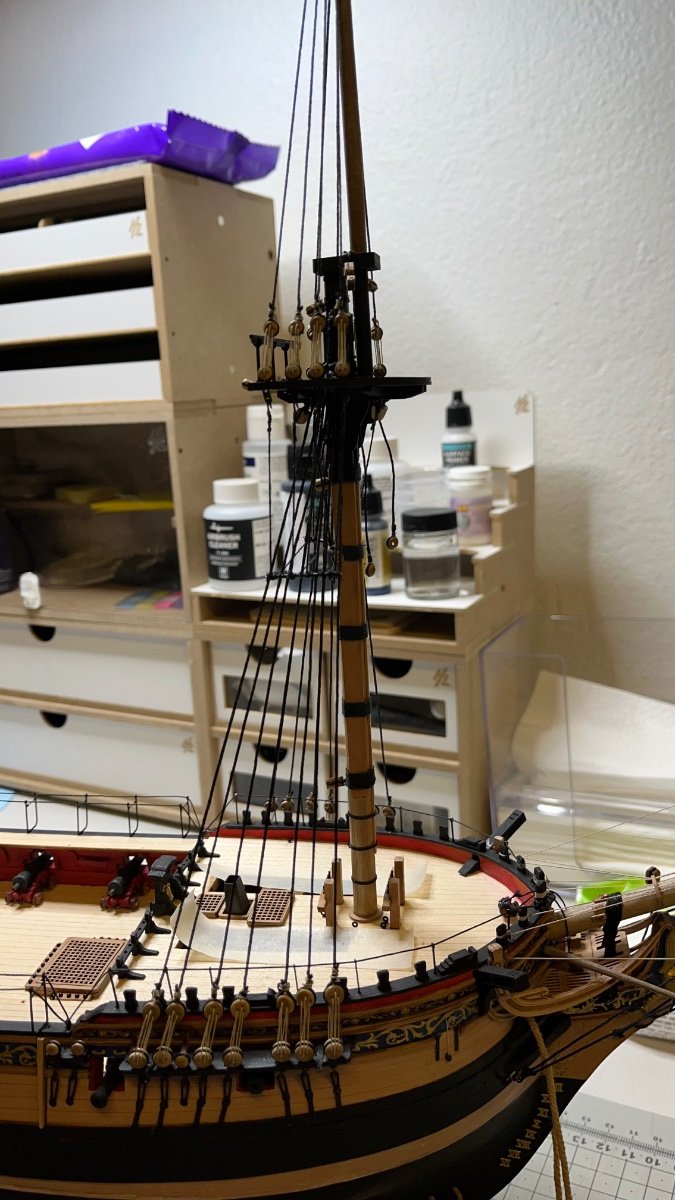
Build day 154: 4 hrs / Total 324 hours
Yard installation continues. Some use just threads, some use parrel beads on thread, and some use parrel beads with parrel ribs on thread in order to tie them to the masts. They are instructed in the plans.
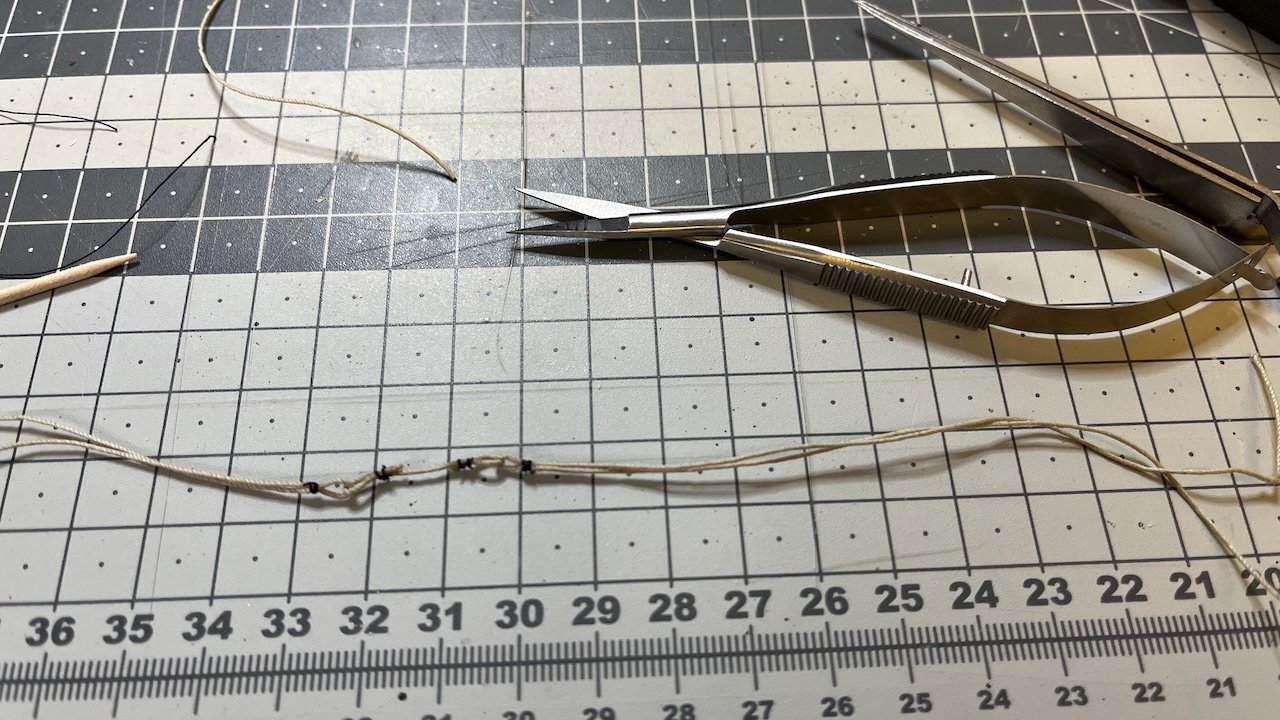
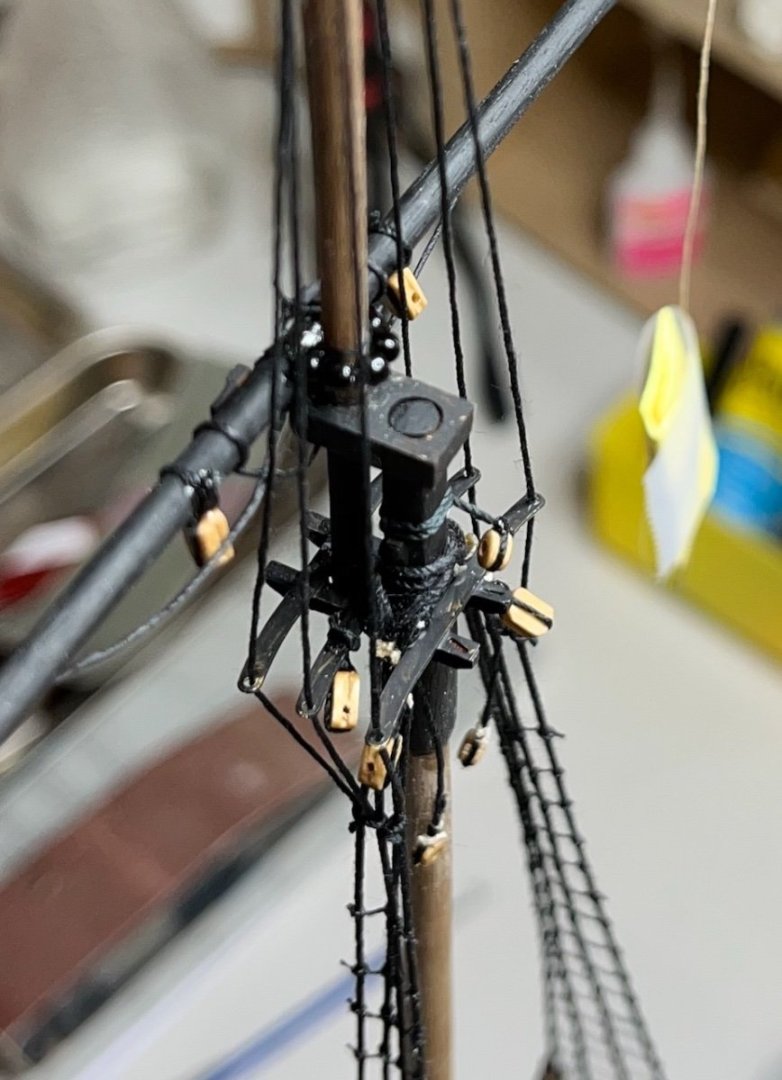
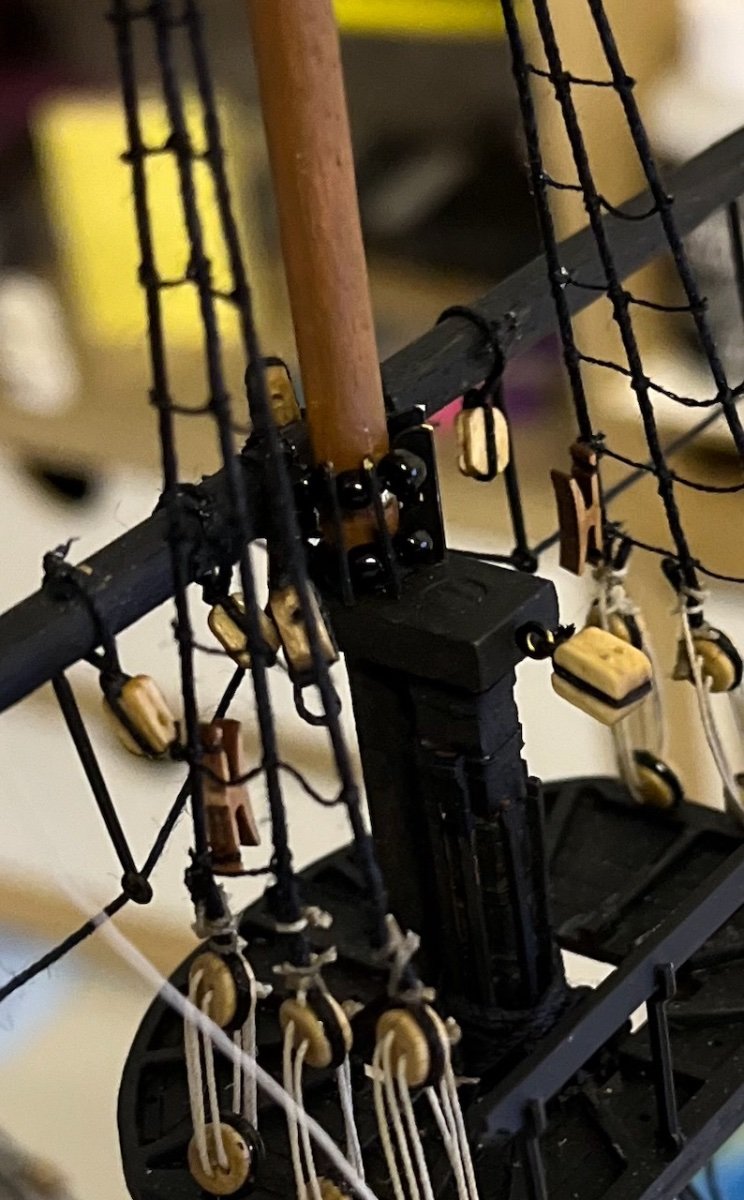
Photos 810-812: The next 3 photos show some details how I installed parrels with parrel ribs and then their place. I have already used nail and glue to mount the yards and reinforced them with a black thread. This makes rigging the thread with parrels to their place much easier as you don't worry about actually holding the yard with them.

-
-
Build day 152: 1 hr / Total 319,5 hours
Photos 803-807: Lower main stunsail booms had been pending for a while. Before moving to yards' installation, I decided to get them out of the way. I tapered them using my hand drill usual way until they dry fit nicely in their places.

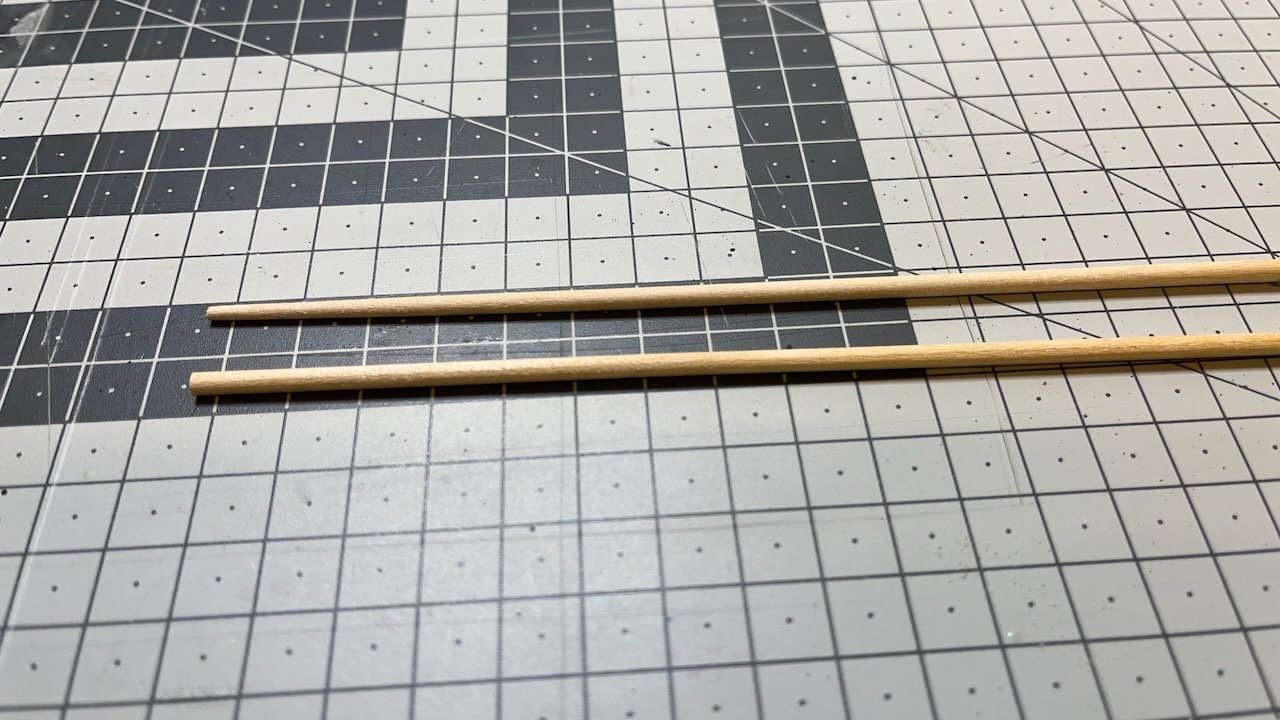
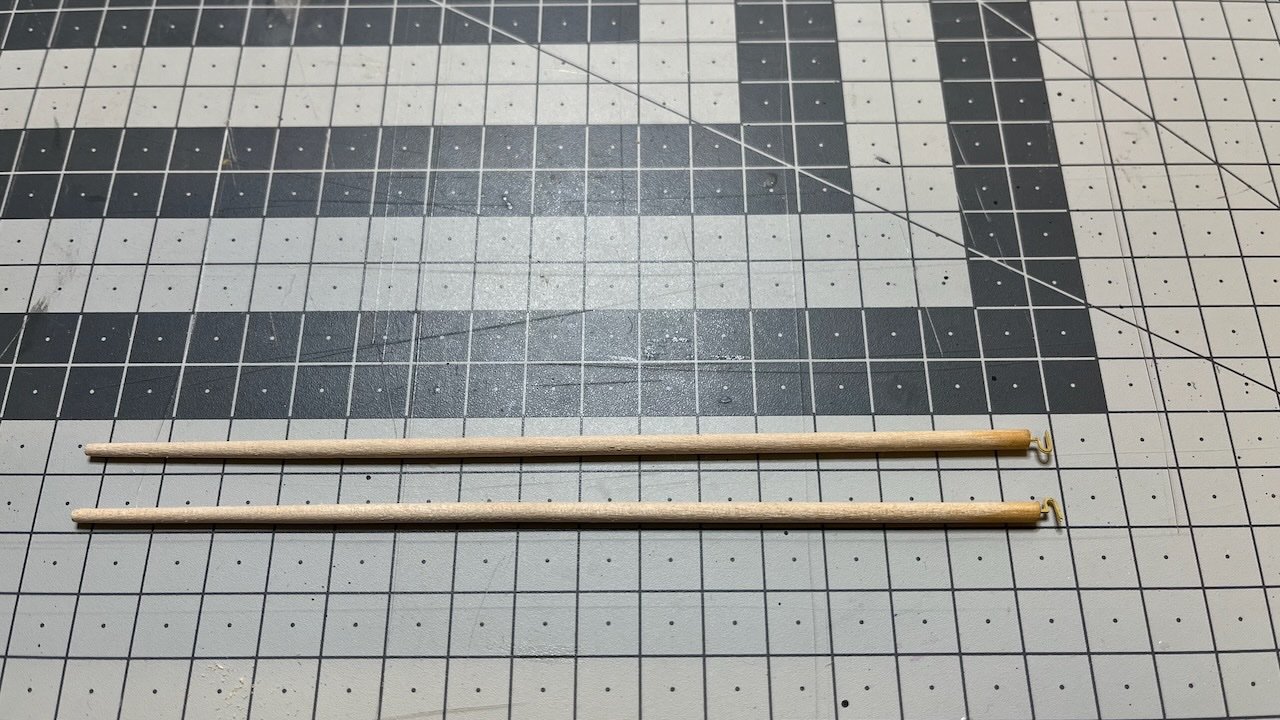
Dry fit:


-
-
-
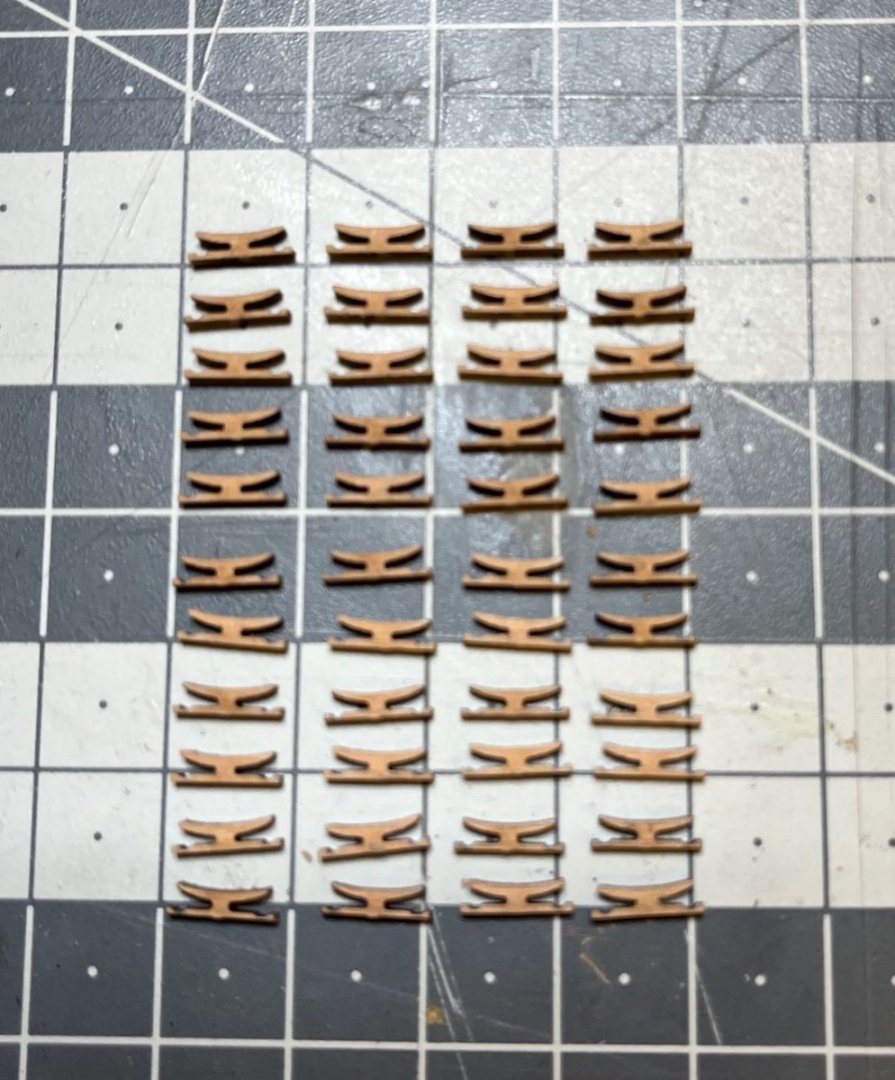
Build day 149: 0,5hr / Total 314 hours
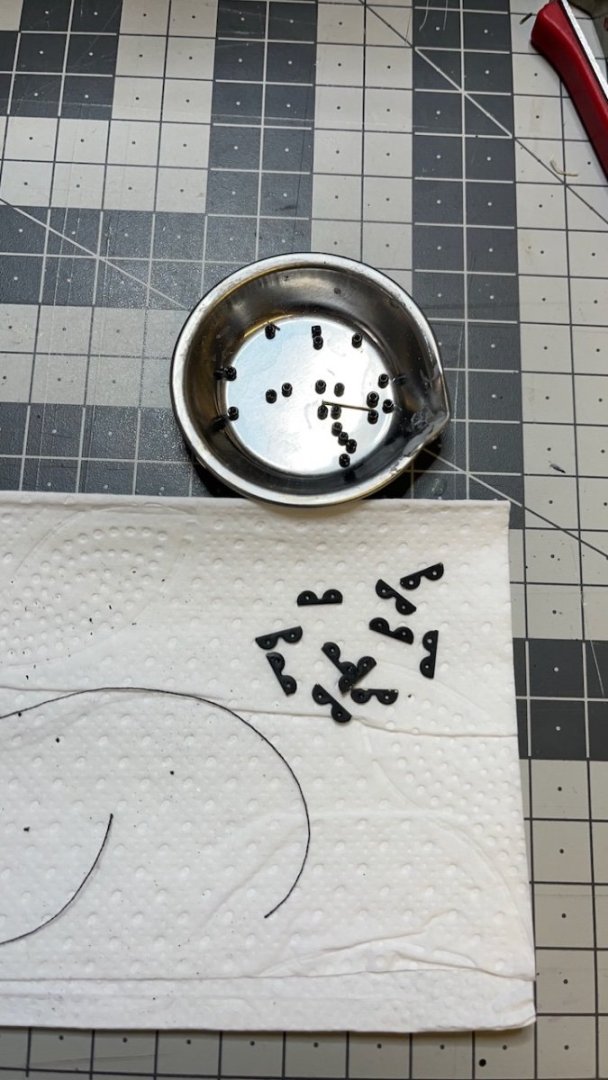
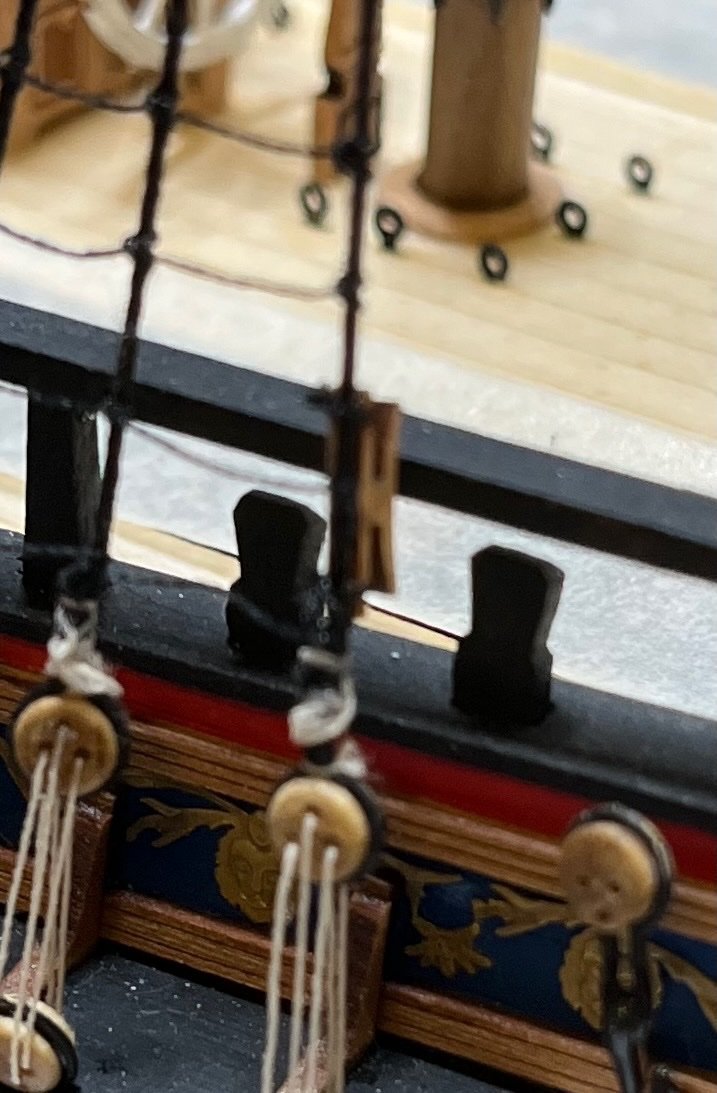
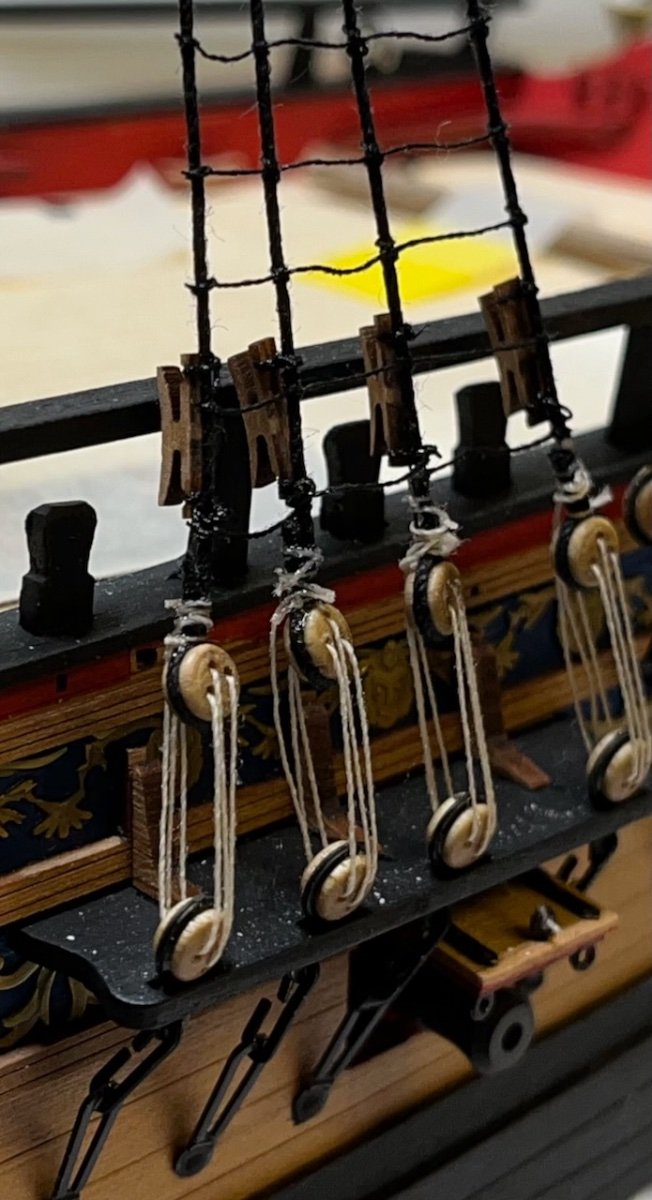
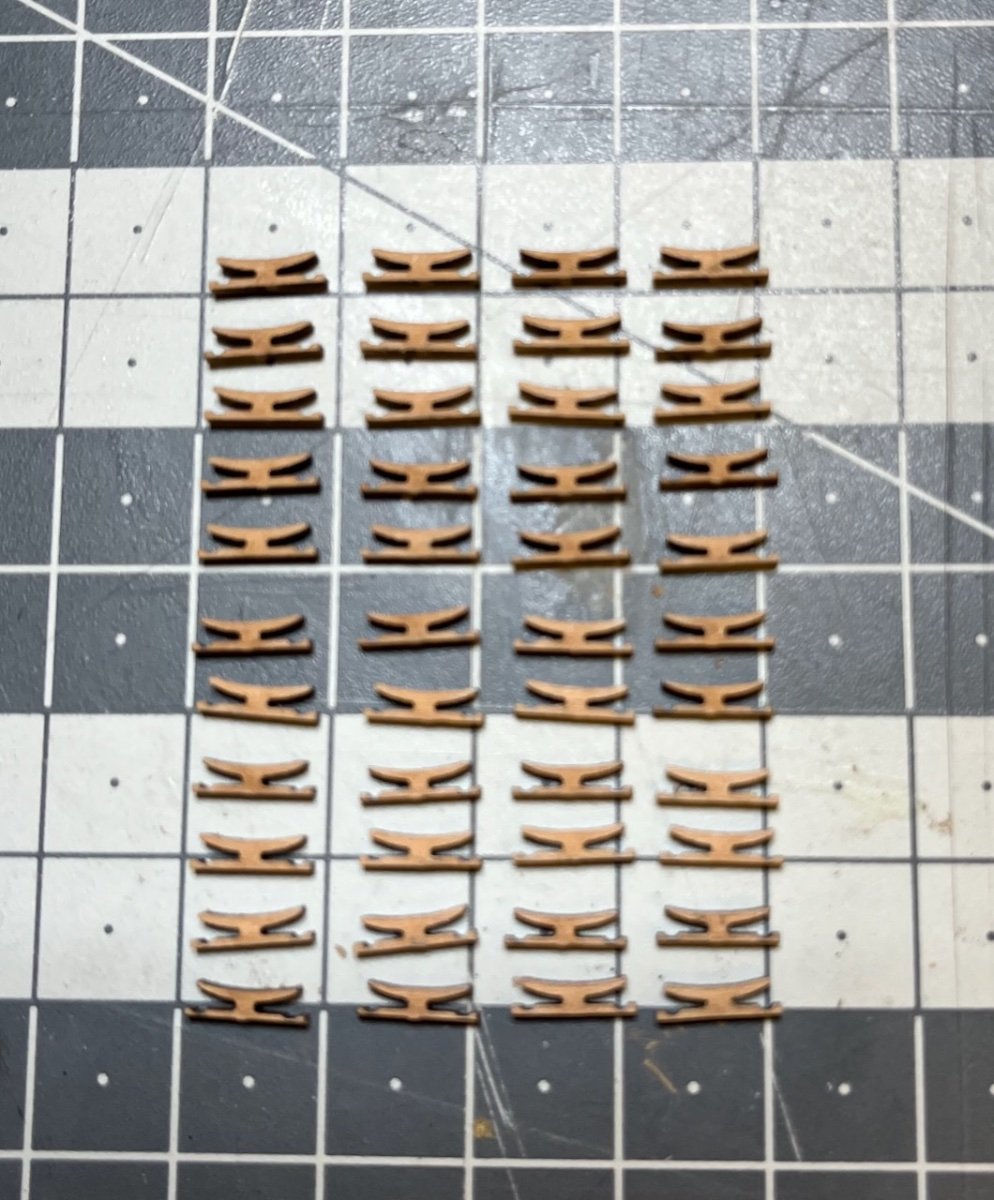
Photo 799: Preparing the shroud cleats for installing on the lower shrouds and some of the top shrouds.
- Theodosius, Glenn-UK, mtaylor and 1 other
-
4
-
Build days 142-148: 13,5hrs / Total 313,5 hours
Working time to time from Jan 17th to Feb 25th, after 13,5 hours spread in to 7 build days, the ratlines are finally ready. Next step is to add the details (shroud cleats etc)
Photos 798: For documentation, one photo showing the status:
- wvdhee, mtaylor, chris watton and 4 others
-
7
-
Build day 139-141: 3,5hrs / Total 300 hours
With the first build days of 2024 I am setting the milestone of 300 hours 🙂.
I know I have not been very active with this build lately but winter time comes with its own busy days - work and holidays.
Photos 793 - 797:
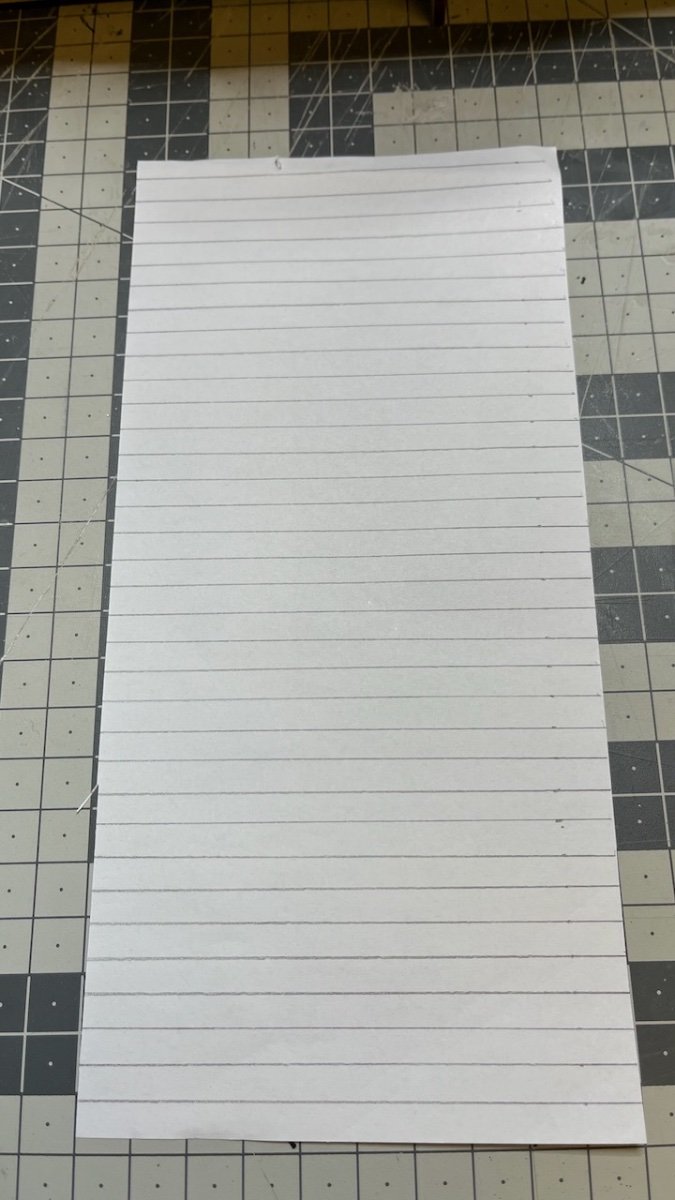
Next job is to rig the ratlines. I made the guidelines on a piece of paper as suggested in the instruction manual, to help with aligning the ratlines at a spacing of 6mm. Then I secured the paper to the shrouds from the top with a tape.

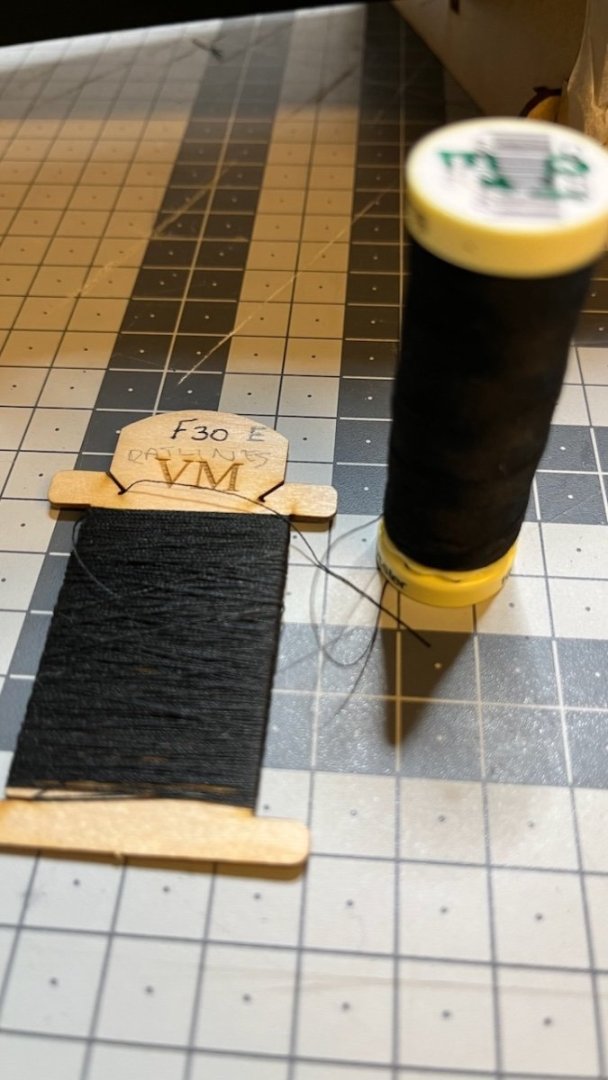
I know I am not an efficient user of threads, I need a lot of slack to work comfortably. I am sure the amount supplied (on the left) will not be enough for me so I bought myself a roll of the same size from the shop.
Some photos of progress. I started from lower mizzen mast. Then I will continue with the lower ratlines of mainmast and foremasts, before moving on to upper ratlines. I made the knots as described in the plan and once all the ratlines are done, I secured the knots by applying a diluted PVA glue with the tip of a tiny paint brush.


Thanks for watching!
-
Build day 133-138: 11hrs / Total 296,5 hours
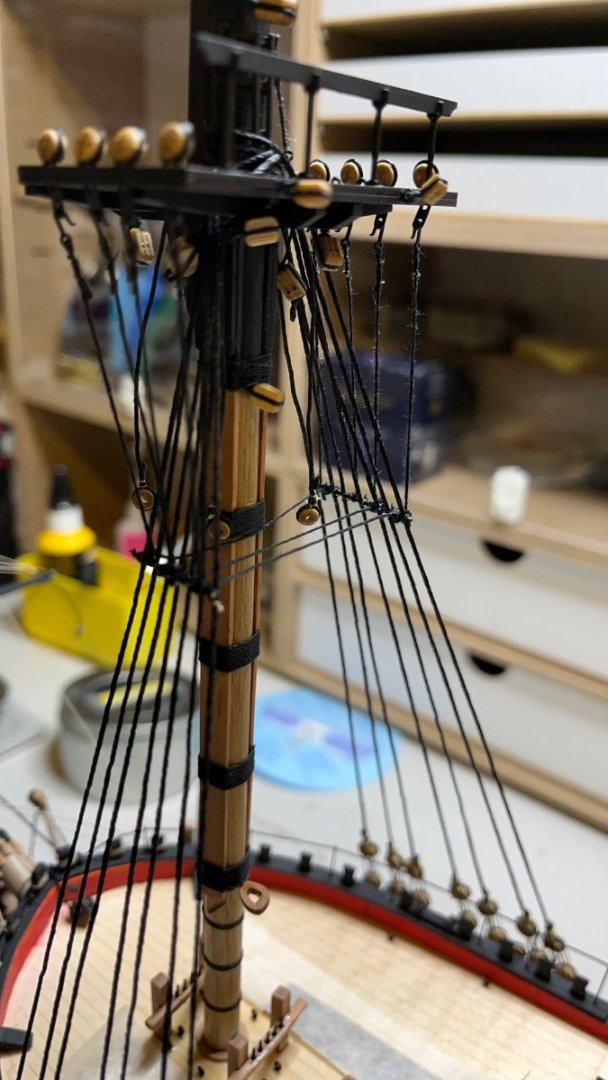
Photos 784-792: More progress after 11 hours of work in 6 build days. With this work I have completed
- Catharpins and futtock shrouds,
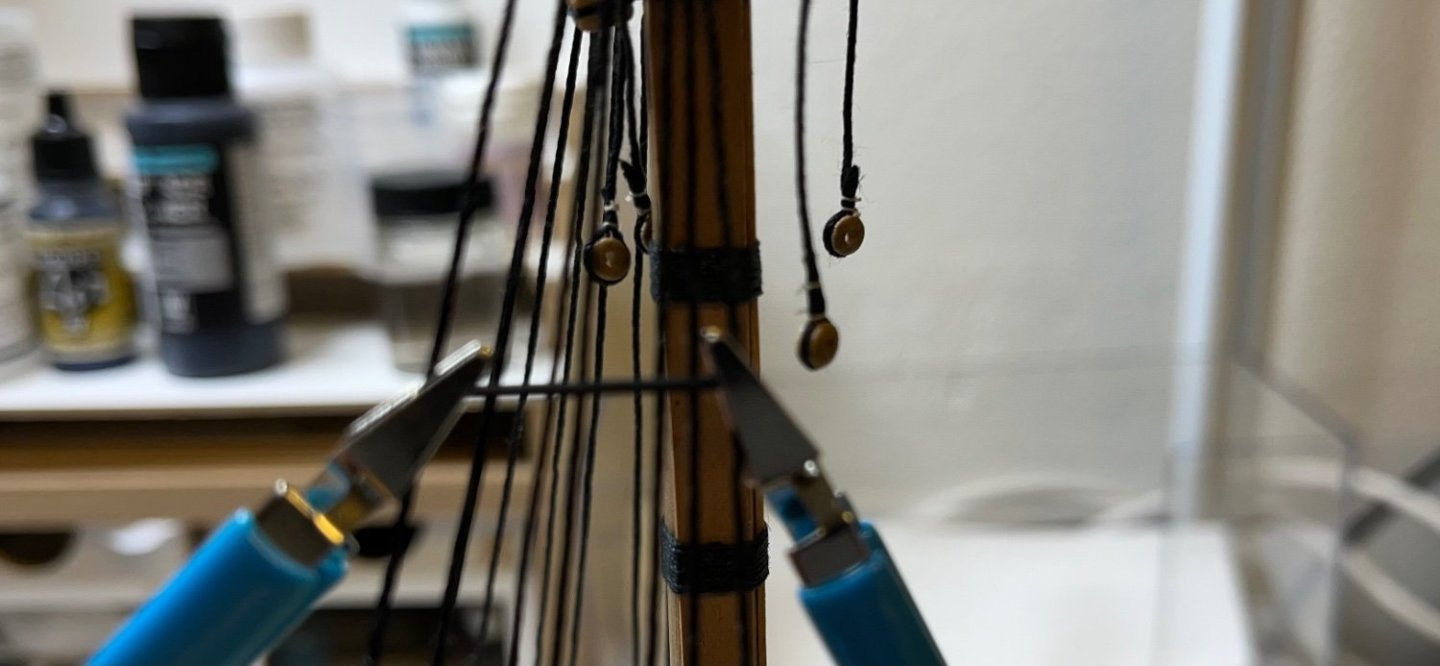
- Upper shrouds.I used mini clamps and crocodile teeth to help align the threads while I am knotting.


-
Build day 129-132: 9hrs hr / Total 285,5 hours
Photo 783: It's been a while since my last post. Continuing with rigging. Lower shrouds complete after 9 hours of work spread into 4 build days.
- Glenn-UK, Theodosius, Clark and 8 others
-
11
-
Build days 126-128: 4,5 hrs / Total 276,5 hours
Photos 781-782: Pendants complete, before starting the shrouds. Spent a total of 4,5 hours spread into three days. Some photos showing their preparation and in place.

- Theodosius, Clark, chris watton and 8 others
-
11
-
14 hours ago, allanyed said:
Thanks for sharing your build, it is nicely done! I have a question about the stay you show in the photos in post #331. The upper most stays did lead through a block at the end of the jib boom as you show and is as described by James Lees in The Masting and Rigging of English Ships of War for your era but would the line be a tarred line (dark) or untarred, (tan)? It seems lines that were tarred did not usually run over sheaves but maybe that is an incorrect statement. I have noticed this on other builds lately and have not been able to find or remember seeing any information on tarred lines running over sheaves in blocks or bees or other instances.
TIA for any contemporary based information anyone can share.
Allan
Thanks, that’s for Glenn to answer I guess.
-
Build day 125: 3 hrs / Total 272 hours
Photos 779-780: Bowsprit rigging complete (from Rigging Plan Sheet #3) before starting with the ratlines.

- Knocklouder, Glenn-UK, mtaylor and 4 others
-
7
-
5 minutes ago, Glenn-UK said:
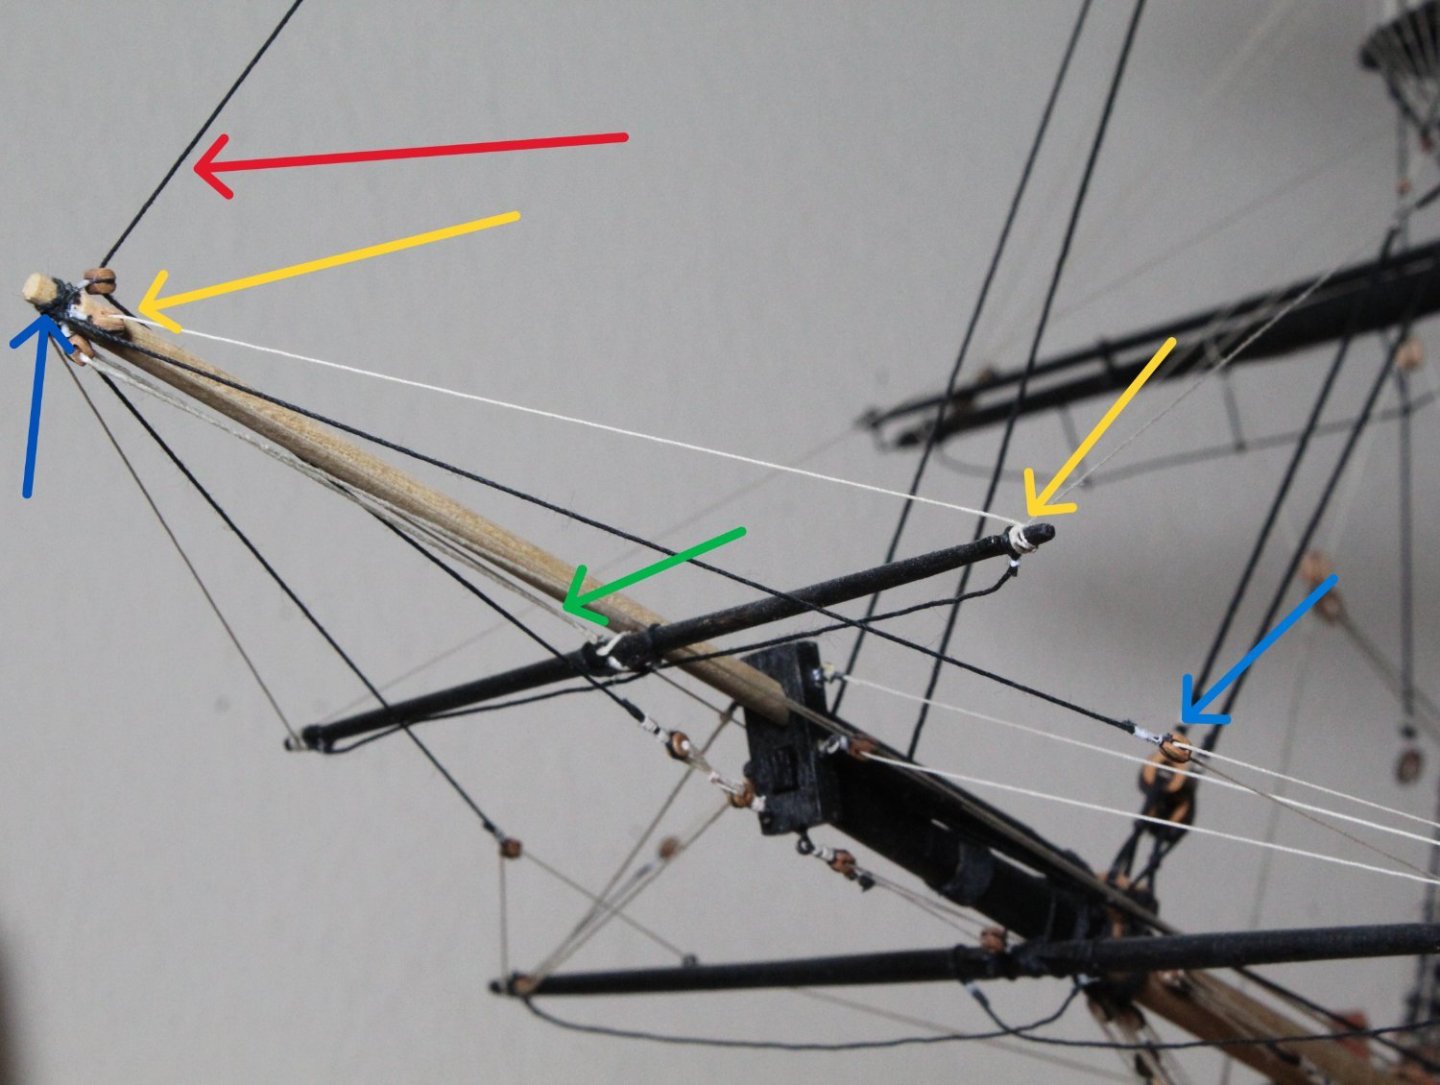
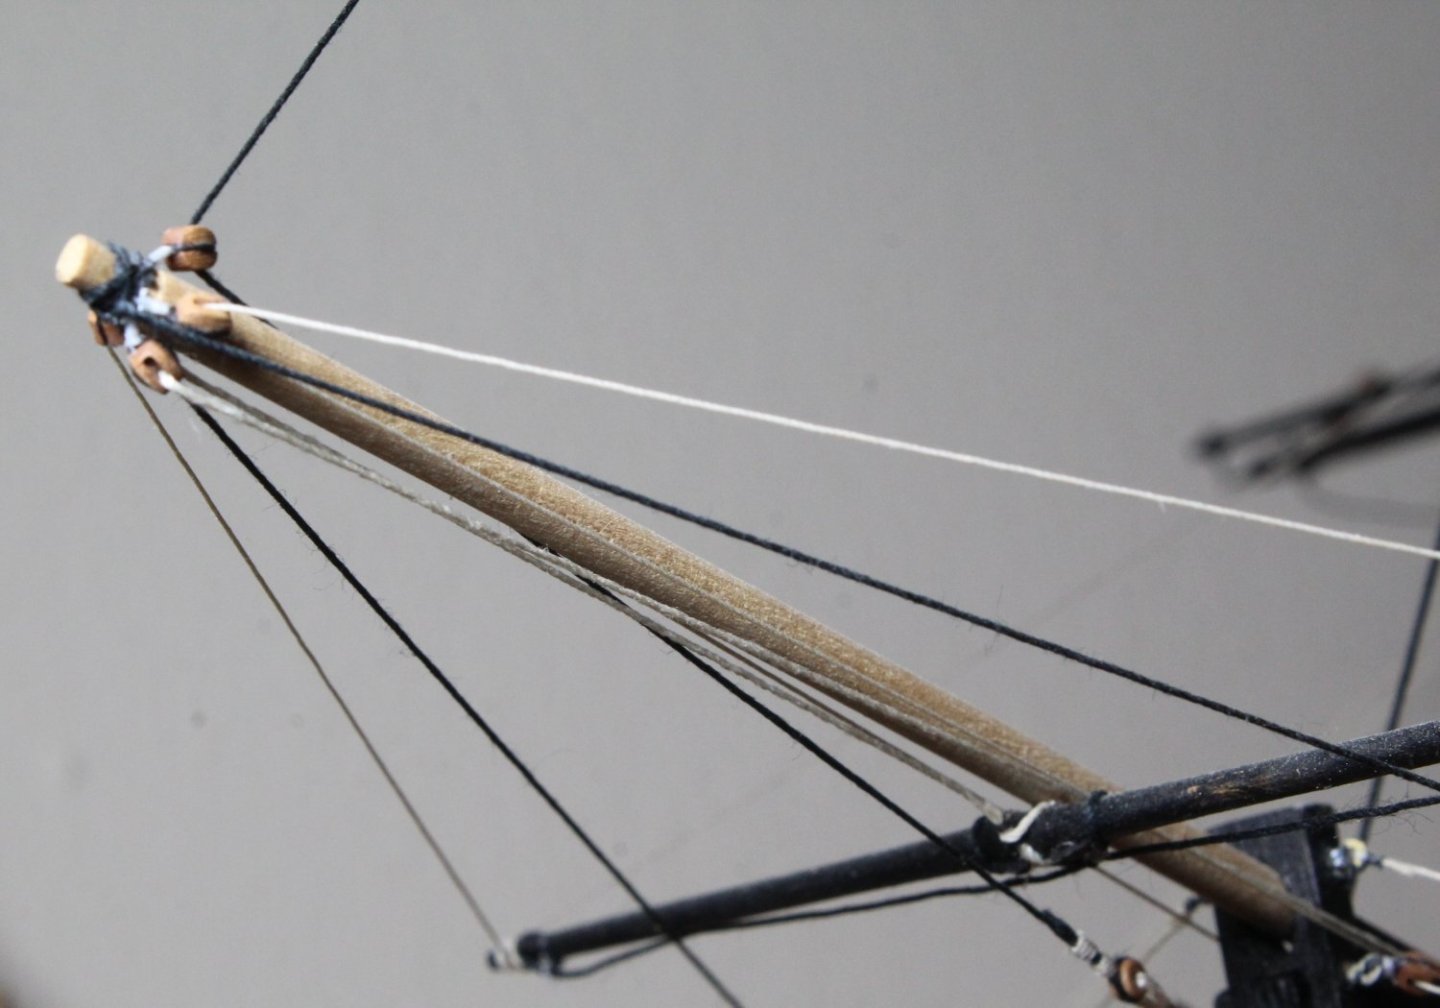
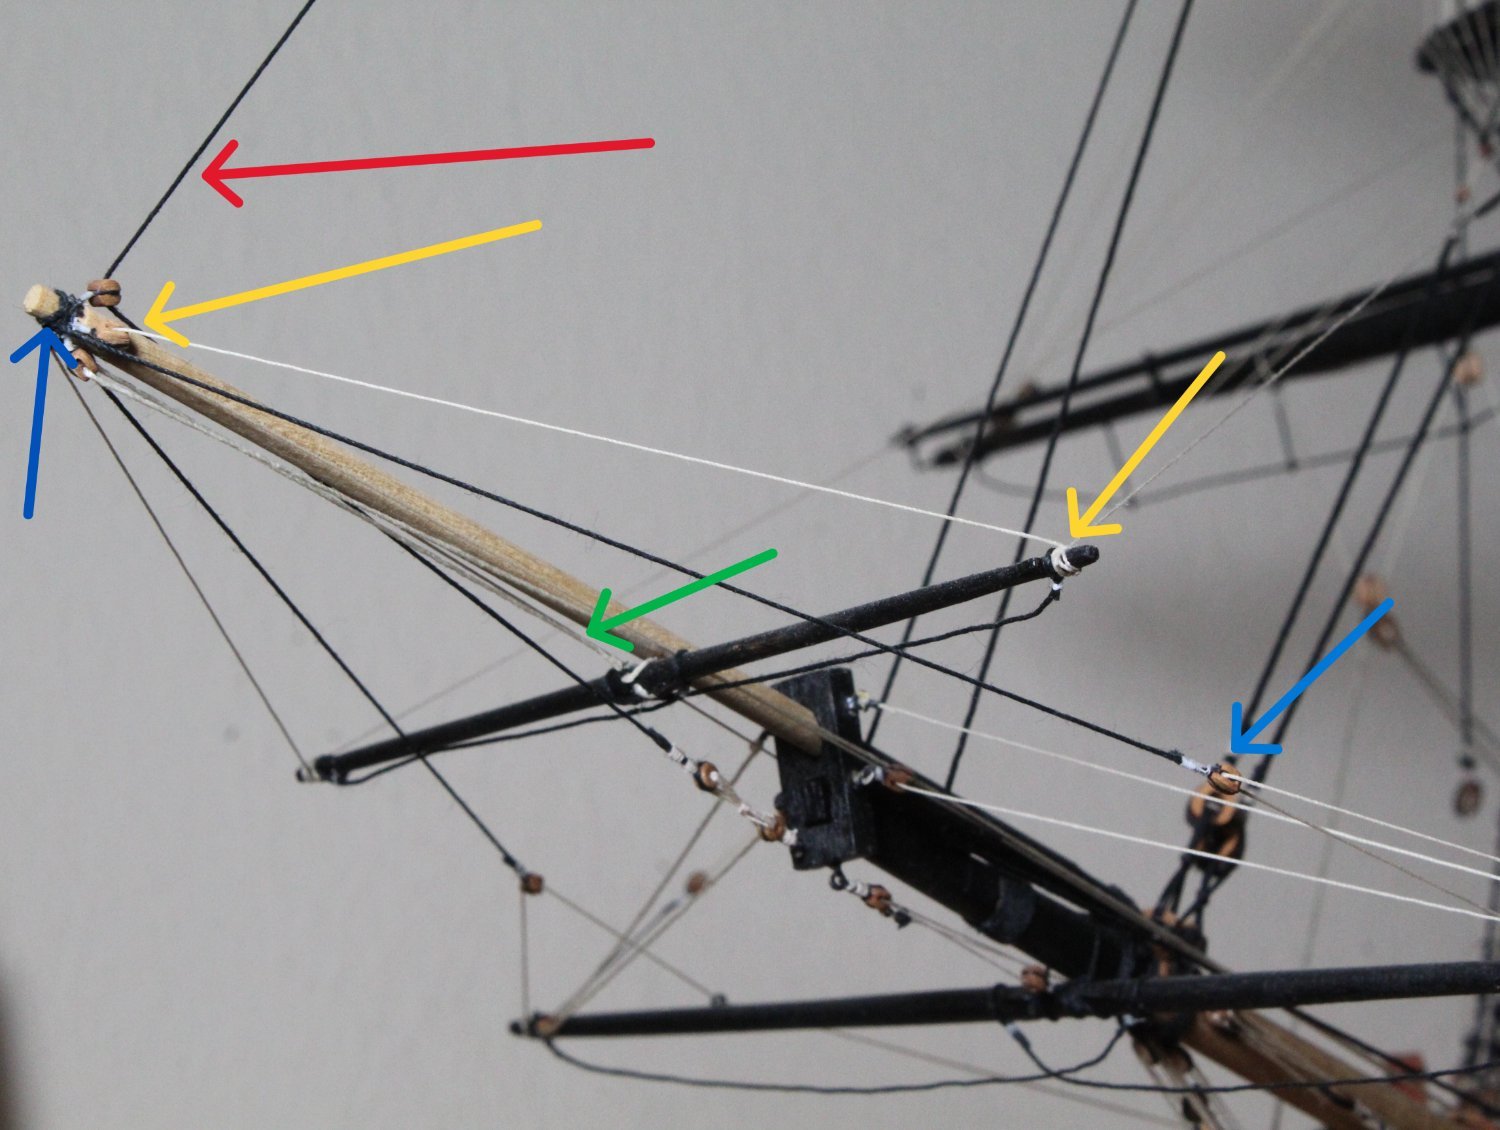
I added 4 blocks to the end of the bowsprit. All the other rigging was looped with a hitch type knot.
The first photo shows the 4 blocks and other rigging at the end of the bowsprit

The next two photos shows the block rigging. The top block was used for the red arrow (stay). The left and right blocks (yellow arrow) were for the braces. The bottom block (green arrow) took the rigging line that sets the position of the yard along the bowsprit. Hope that helps
All clear! Thanks a lot!
/Aydin
-
-
4 minutes ago, Glenn-UK said:
Hello
You need to look at plan sheet 18 (Mizzen and Bowsprit) as these show the rigging threads for the spritsail yard braces.
Hope this helps
Glenn(UK)
Thanks a lot Glenn, that answers my first question, i.e. it is a 0.25mm natural thread . In sheet 18 it says 650mm but now I see I had read it 65mm and installed too short thread, which confused me.
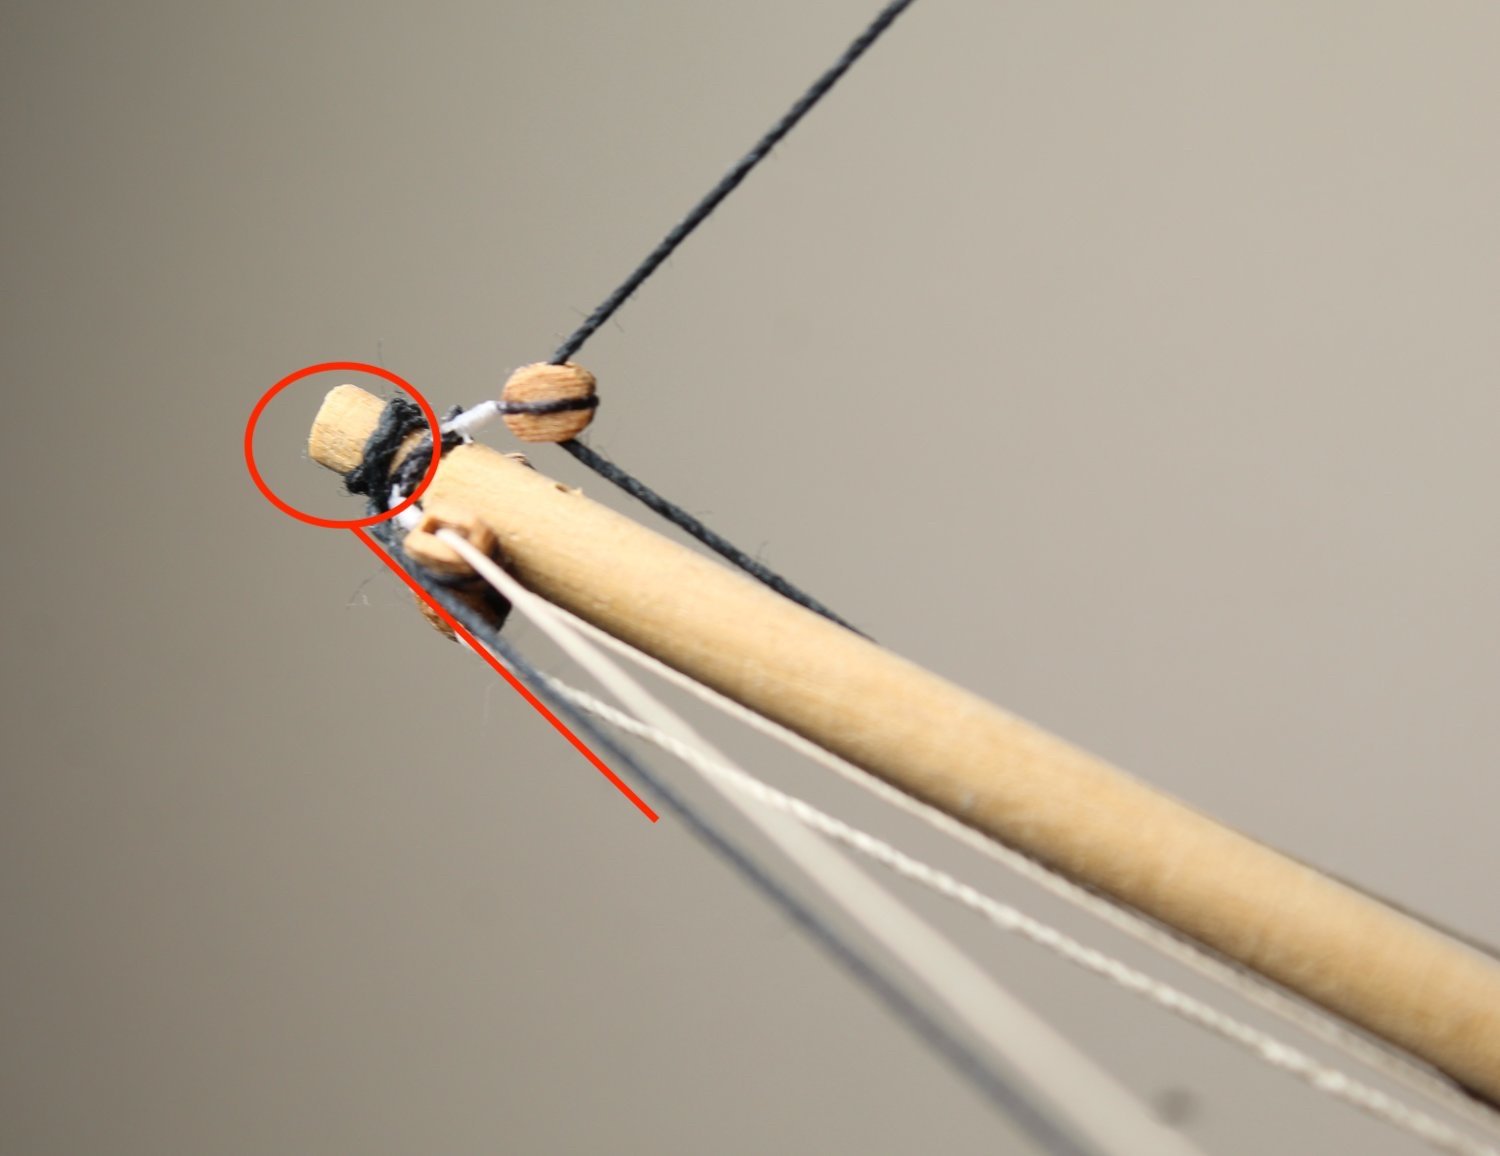
How about my 2nd question about tying the "G" to the block on the tip of the bowsprit? According to the bowsprit plan I did not make any loop to the edge of the block for tying any thread. I wonder if I should just loop the "G" thread around the block. See pictures 1, 3 and 4 above.
-
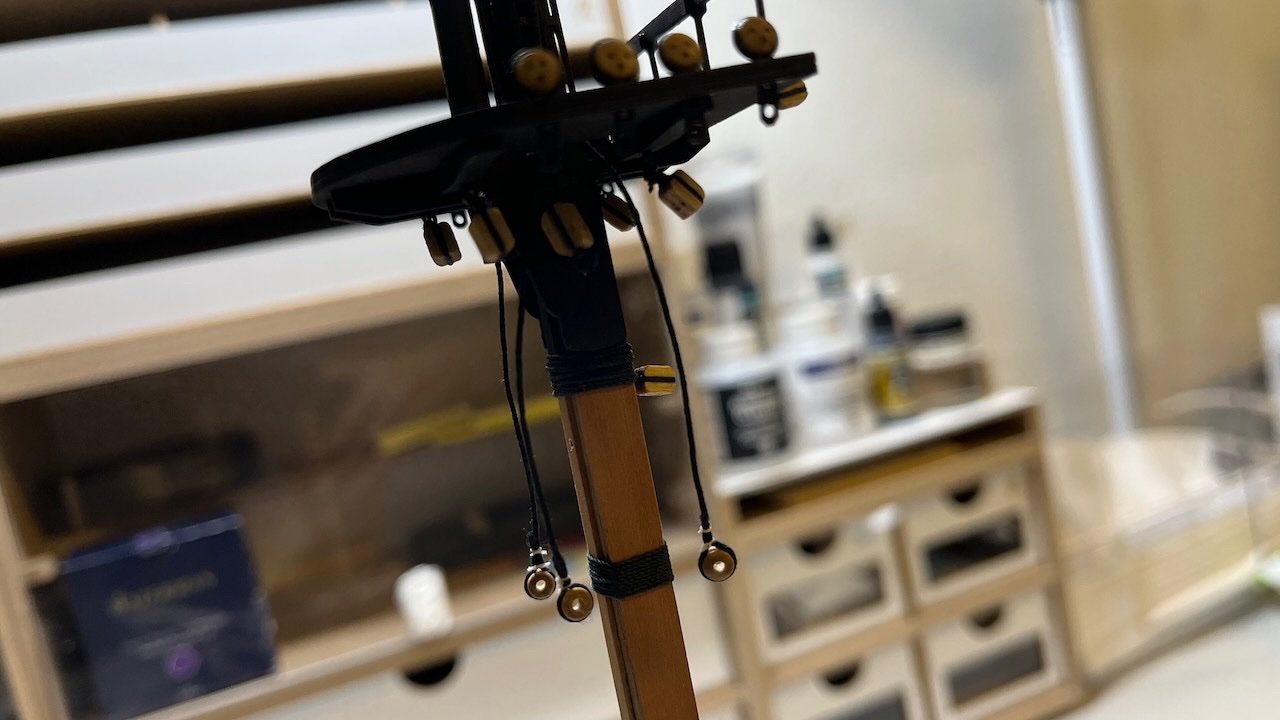
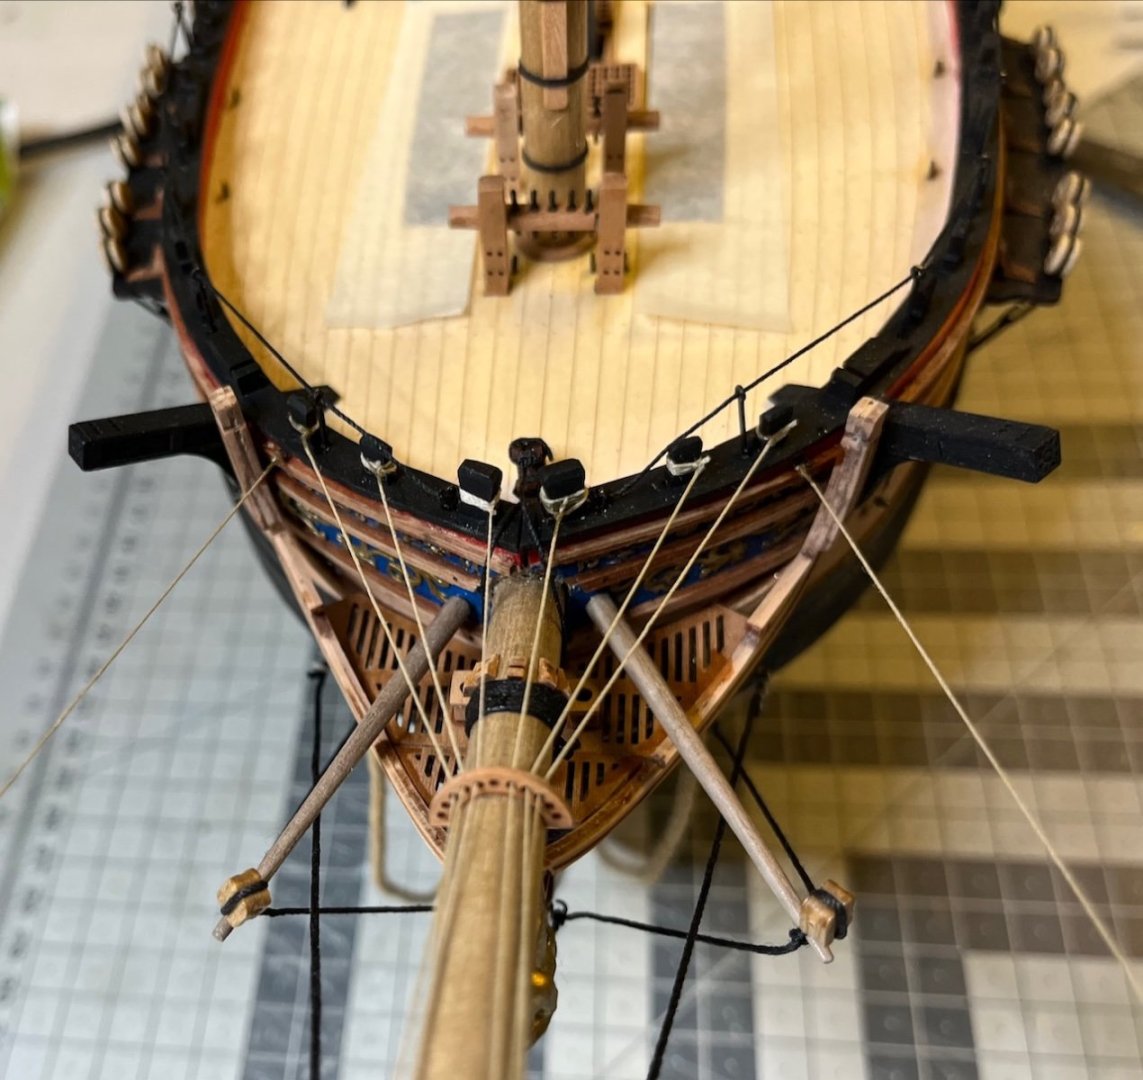
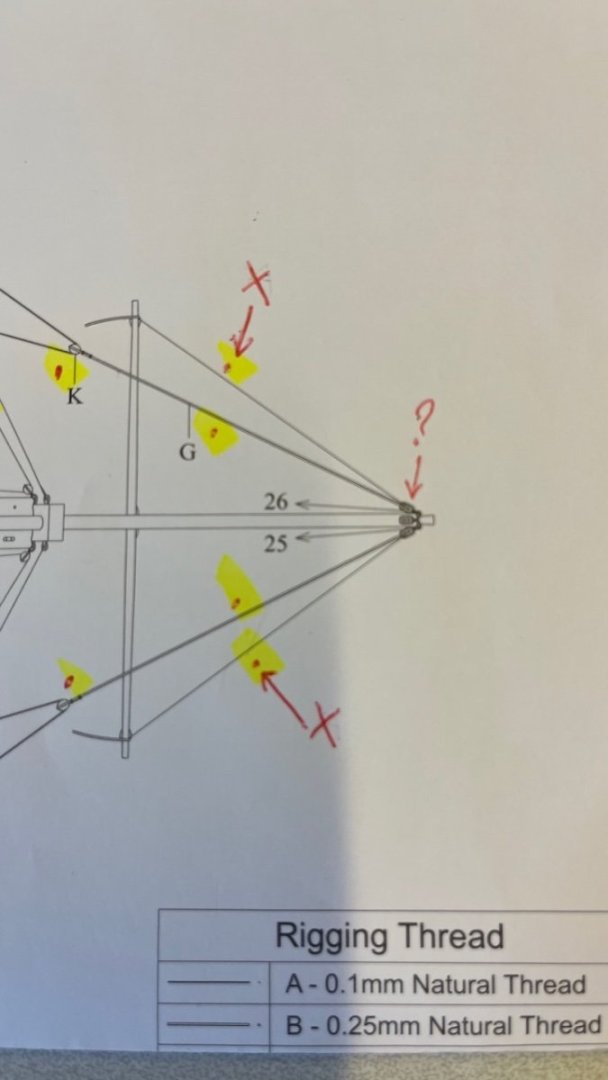
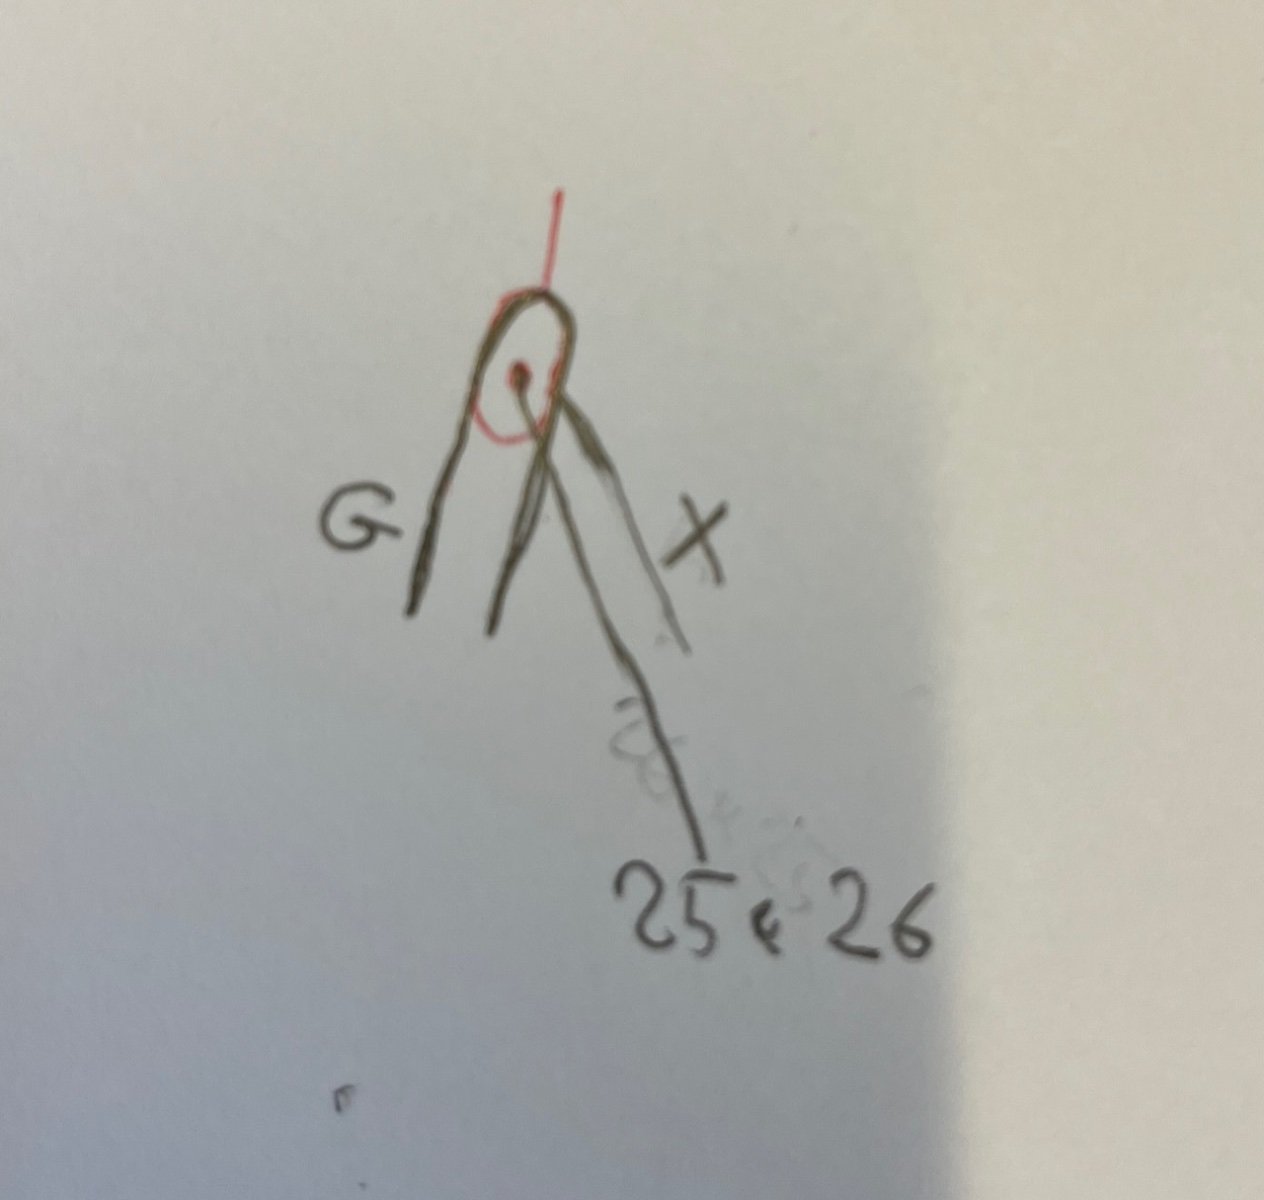
One question about the bowsprit rigging. See the bowsprit rigging plan below. What thread should I use for where I marked with "X"? I didn't find a clue.
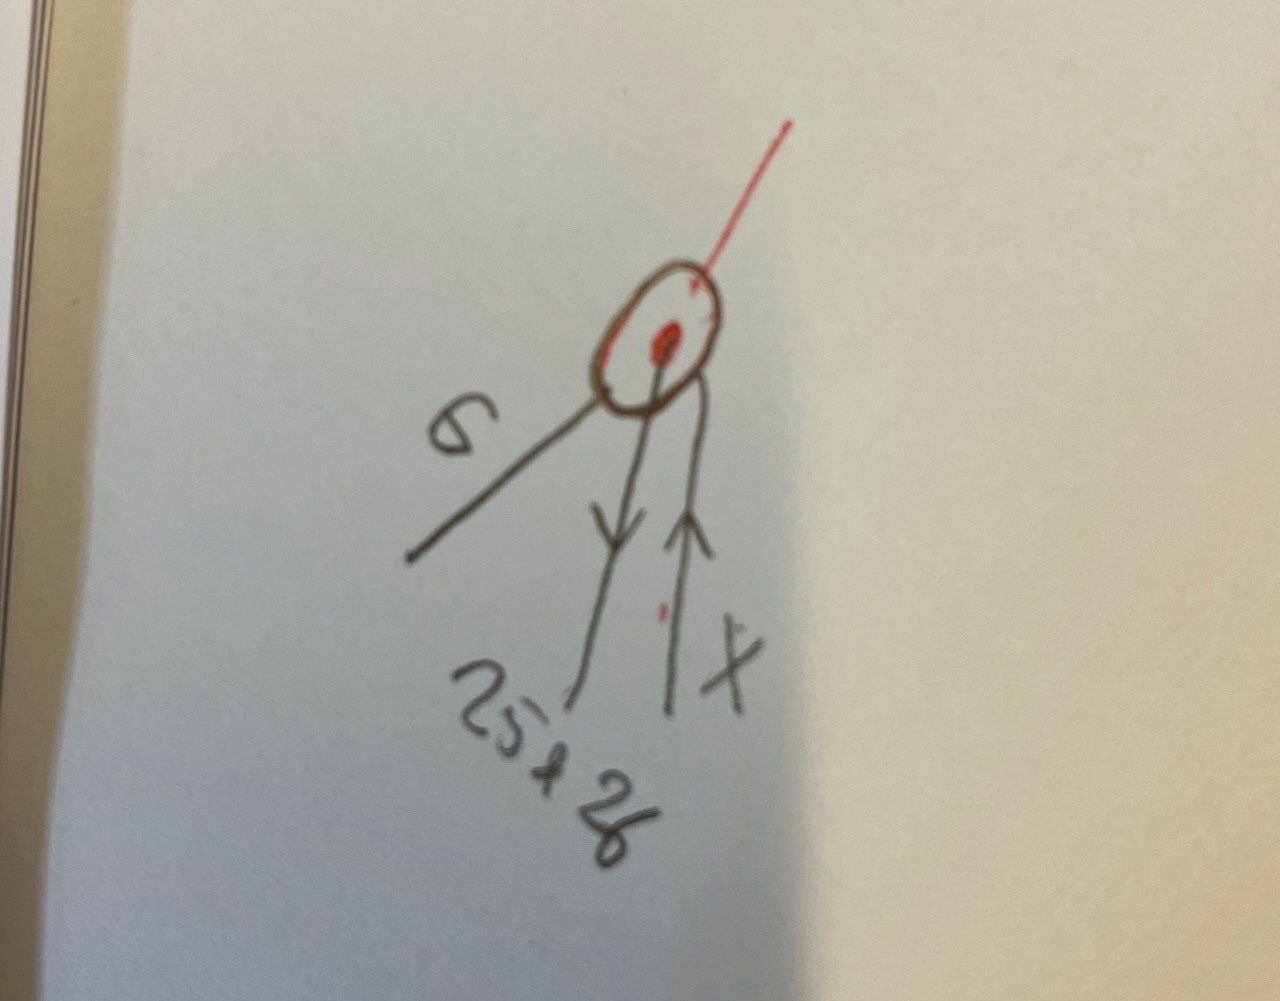
Second. Also check the second picture for the tip of the bowsprit where I marked a "?" in the first picture. That's how I assume, i.e. the "X" thread goes through the hole and the "G" around the block. Did I get it right? I am a bit confused because the G looks like a single thread that starts from the block.Post EDIT: Forget what I asked about the 2nd picture and check the new 3rd and 4th pictures. Is that the correct way? But if "G" is supposed to be tied to the block, in the bowsprit plan (last picture) there is no hook or loop on the blocks to tie it to.
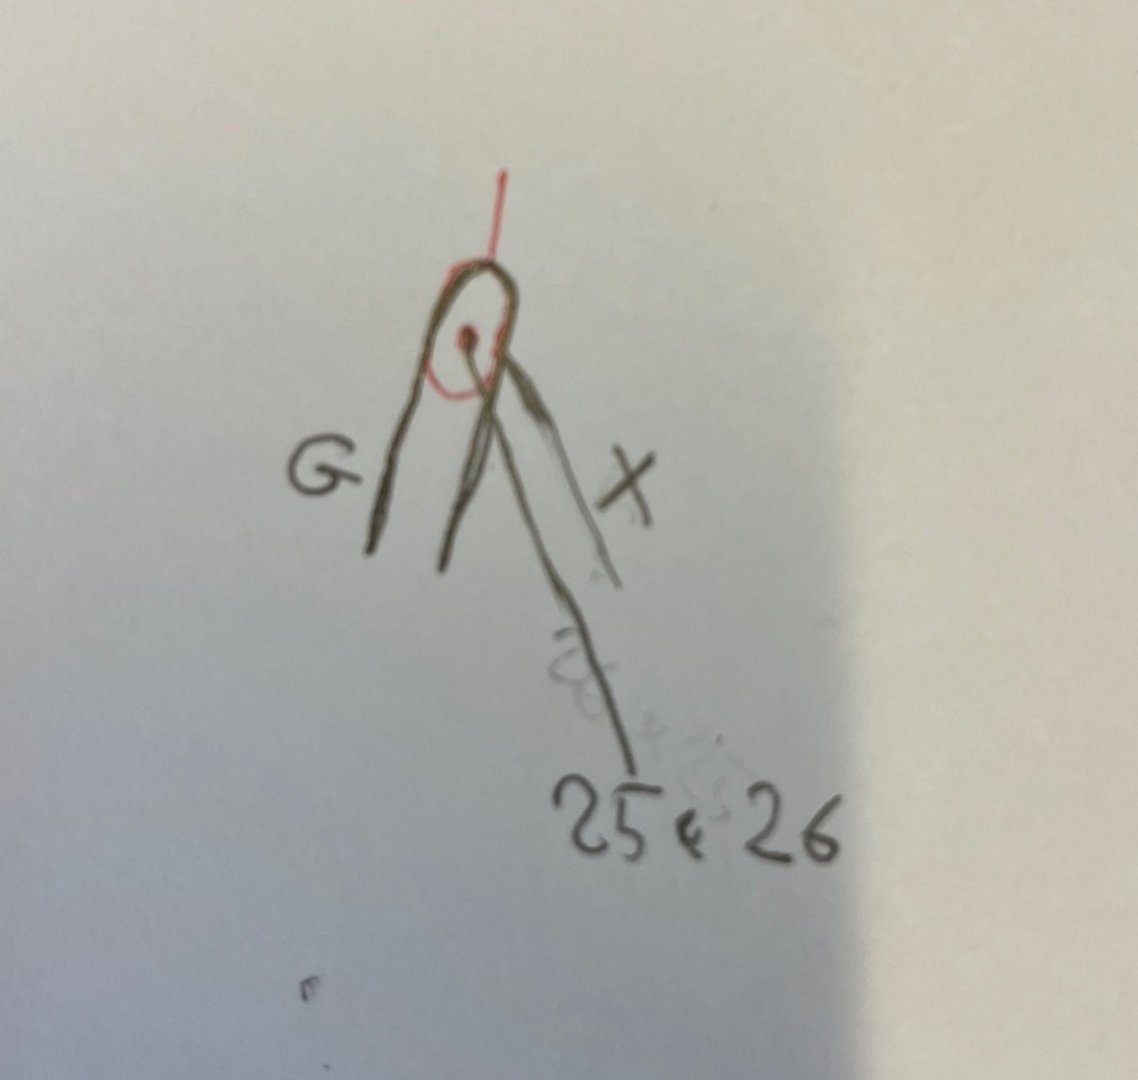
POST EDIT PICTURES:

-
-
Build day 124: 1 hr / Total 269 hours
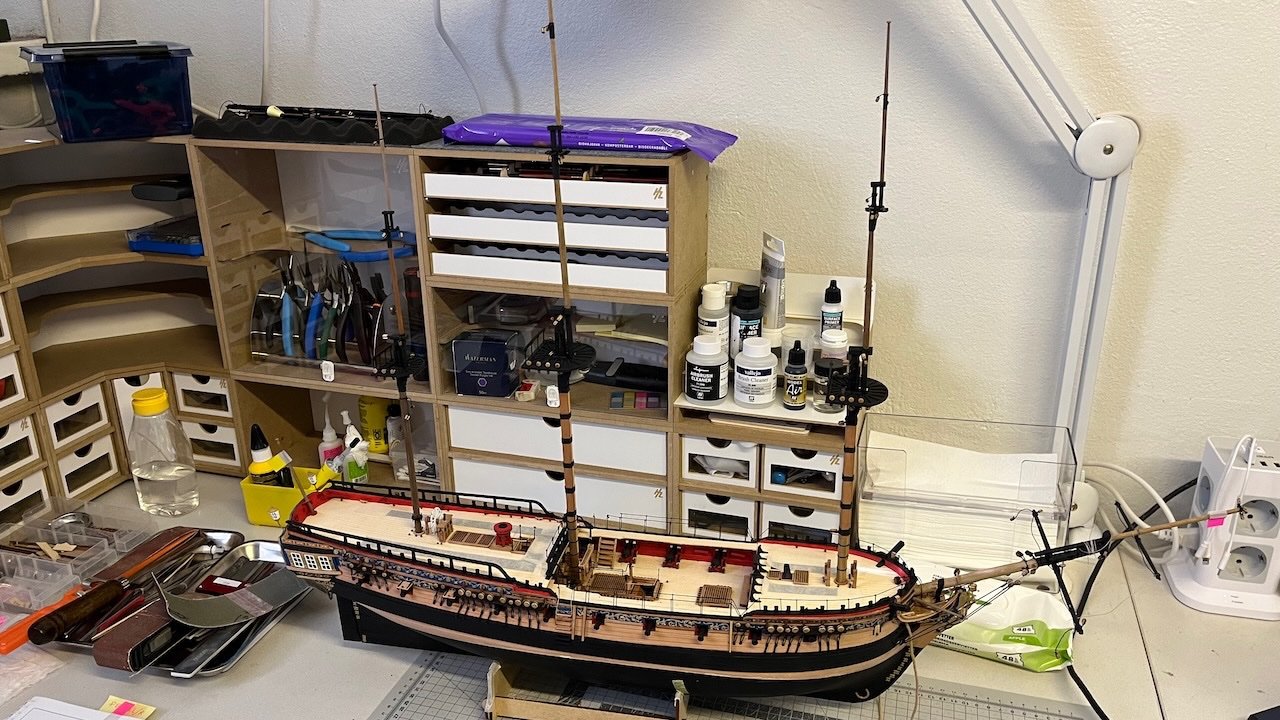
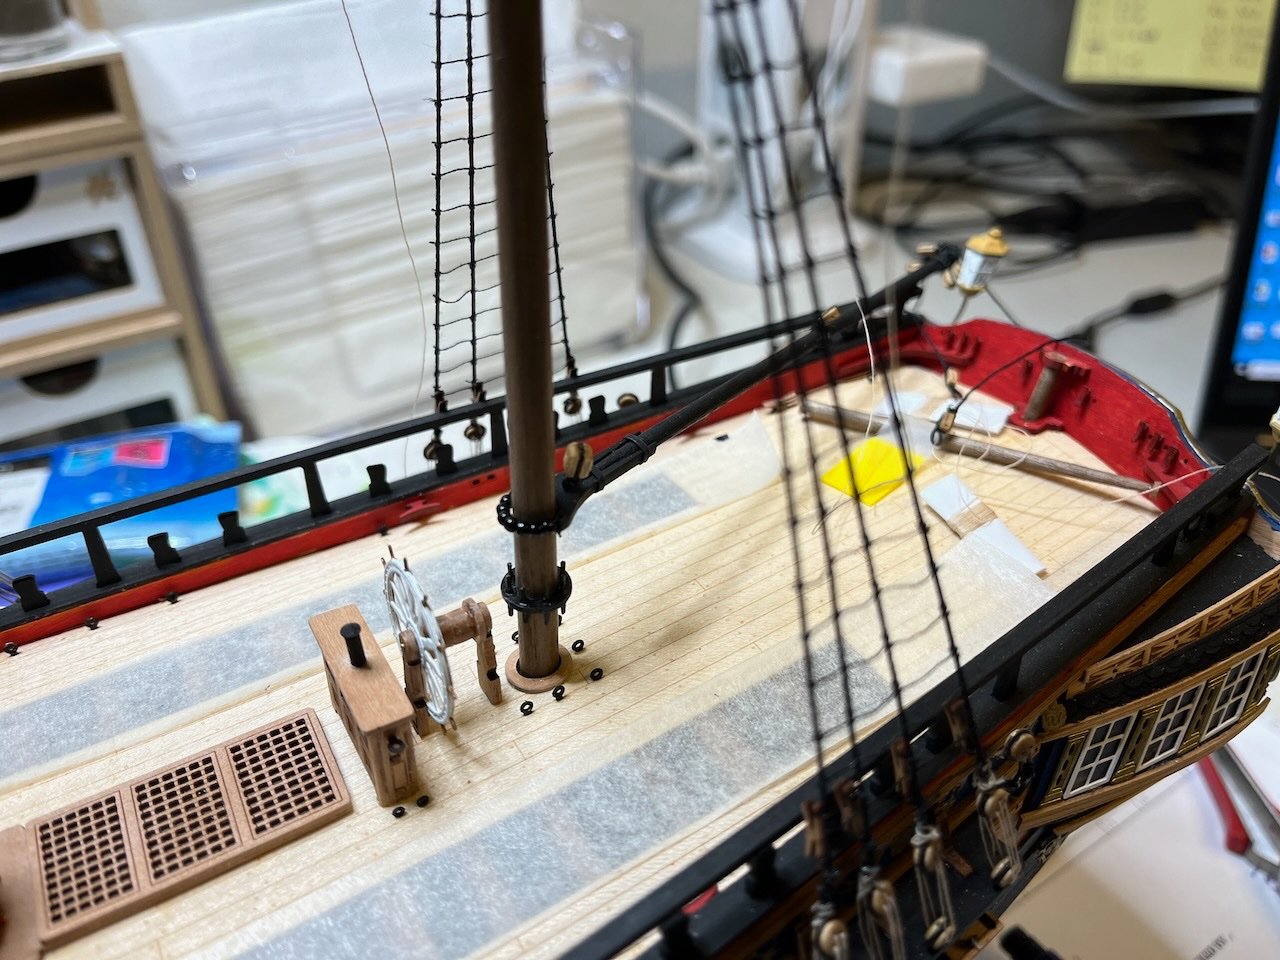
Photo 778: Alright. The masts are carefully in place now. Apologies for the noisy background.
- mtaylor, RossR, Theodosius and 2 others
-
5


HMS Sphinx 1775 by aydingocer - Vanguard Models - 1:64 - Revision #2
in - Kit build logs for subjects built from 1751 - 1800
Posted · Edited by aydingocer
Build day 156-157: 1,5 hrs / Total 326,5 hours
1,5 hours of more work and fitting of the yards are complete. Now I can tick the 4th item in my checklist:
Edit: I have Crossjack Sling also in position. So, 5th item is also ready.
✅ Fit masts
✅ Rig lower shrouds
✅ Rig upper Shrouds
✅ Fit the yards (do not rig them yet)
✅ Fit the crossjack sling to the crossjack yard (at this point for accesibility)
Rig the mast stays
(Omit Main Stay Tackle and Fore Hatch Tackle at this stage)
Add the Crowsfeet to the mast tops
Rig the back stays
Rig the yards
Fit Sheets and Tacks
Fit the Main Stay Tackle (but do not lash them yet)
Rig the Yard Braces
Fit the ship's boats
Lash down the Main Stay Tackle and Fore Hatch Tackle
A photo for the record:
Photo: 824