


aydingocer
-
Posts
857 -
Joined
-
Last visited
Content Type
Profiles
Forums
Gallery
Events
Posts posted by aydingocer
-
-
15 minutes ago, chris watton said:
Trust me, if she had gunports for each gun port, I would have added a lid for each.
No doubt! It is just the curiosity made me learn something new.
- chris watton and mtaylor
-
 2
2
-
2 minutes ago, Oldsalt1950 said:
They aren't really needed on any of the weather deck ports. Their purpose was to keep water from entering the ship through the gun port openings. For the weather deck cannon's tampions were used.
Jim
That explains it well, Jim! Thanks a lot for sharing the information!
-
-
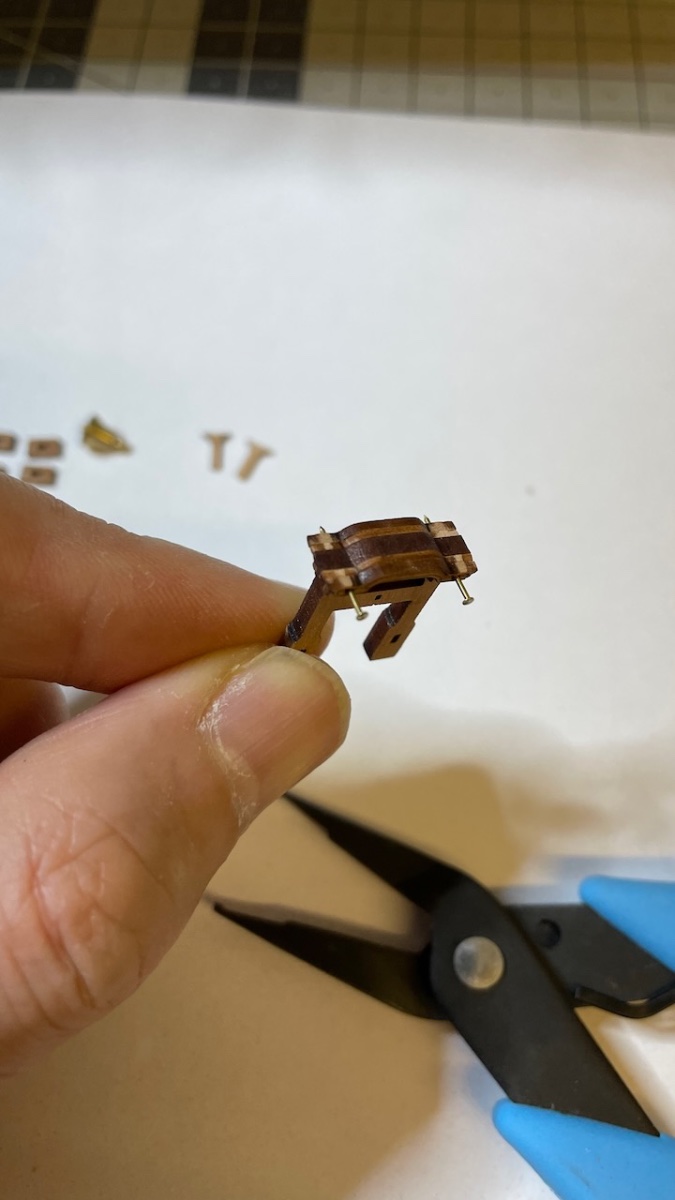
Here is my process:
Photo 597: Apply some CA glue to the tip of the thread and insert it through the hole. The CA will hold it in place.
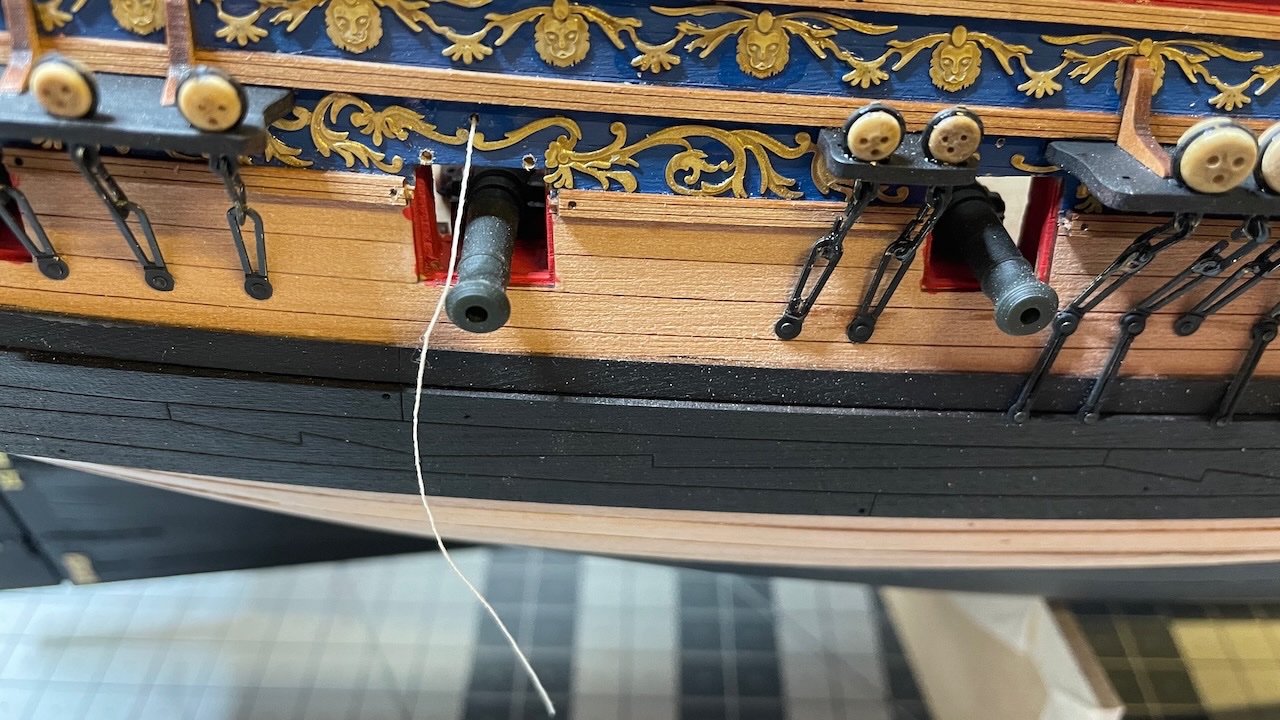
Photo 598: Apply a drop of glue to each hinge end and insert them to their holes.
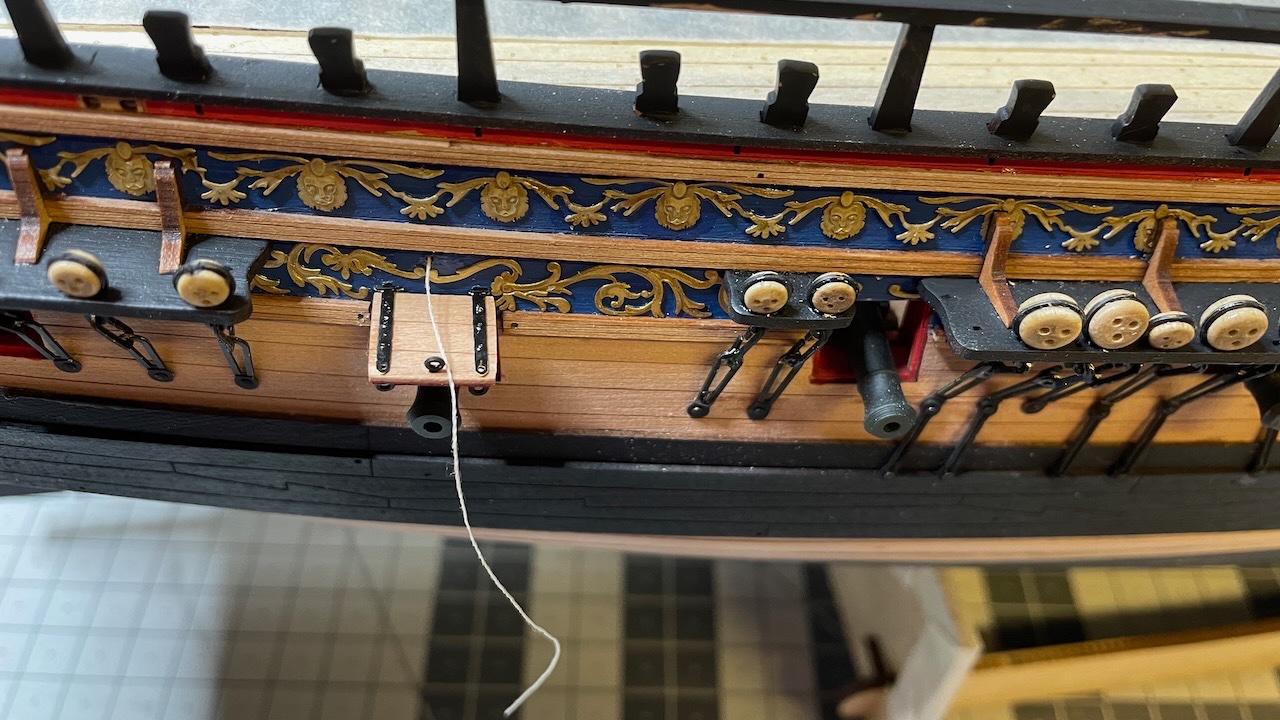
Photo 599: Tie the thread, drop a tiny amount of CA and cut off the excess.
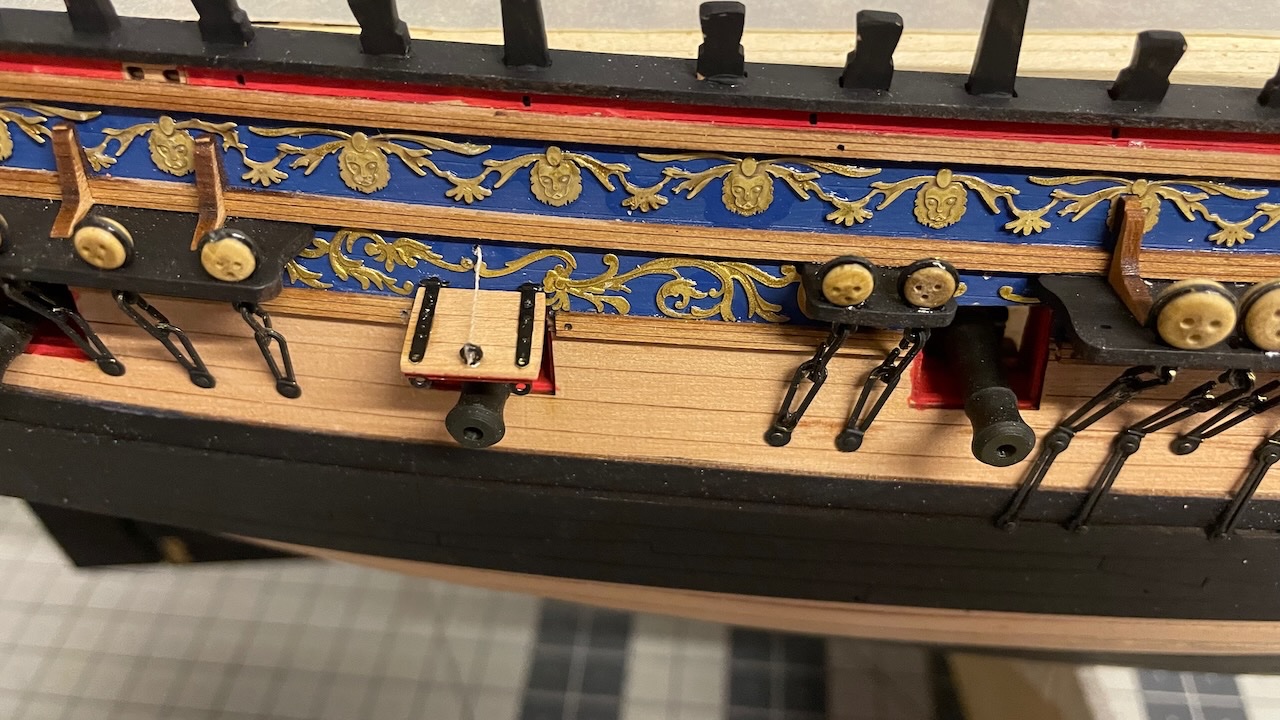
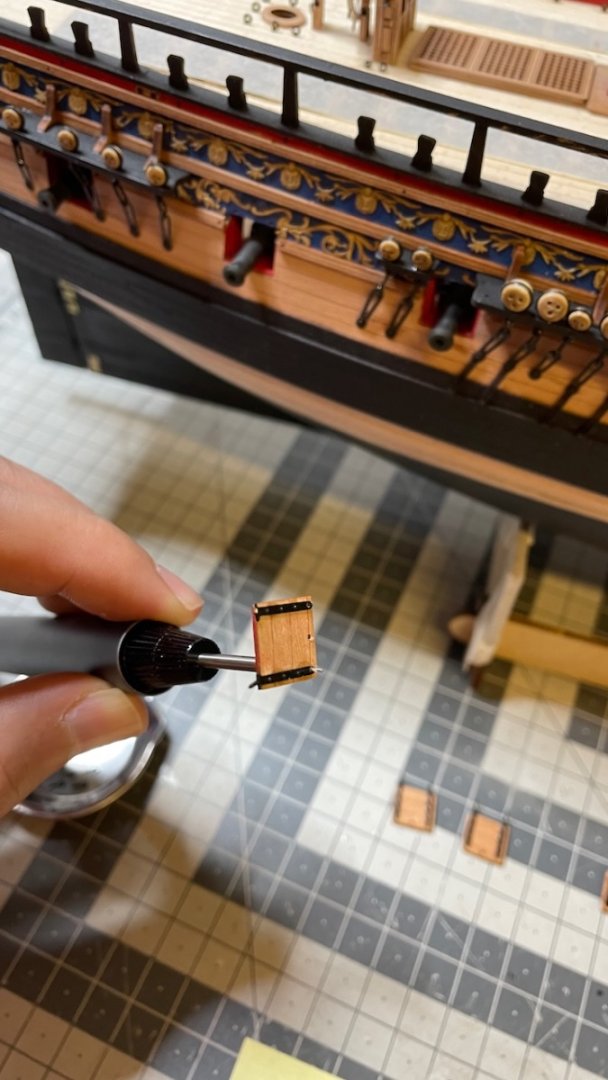
Photo 600: All six lids in place (3 on each side).
That's all for today. Thanks for watching!
- ct mike, ccoyle, Haliburton and 7 others
-
10
-
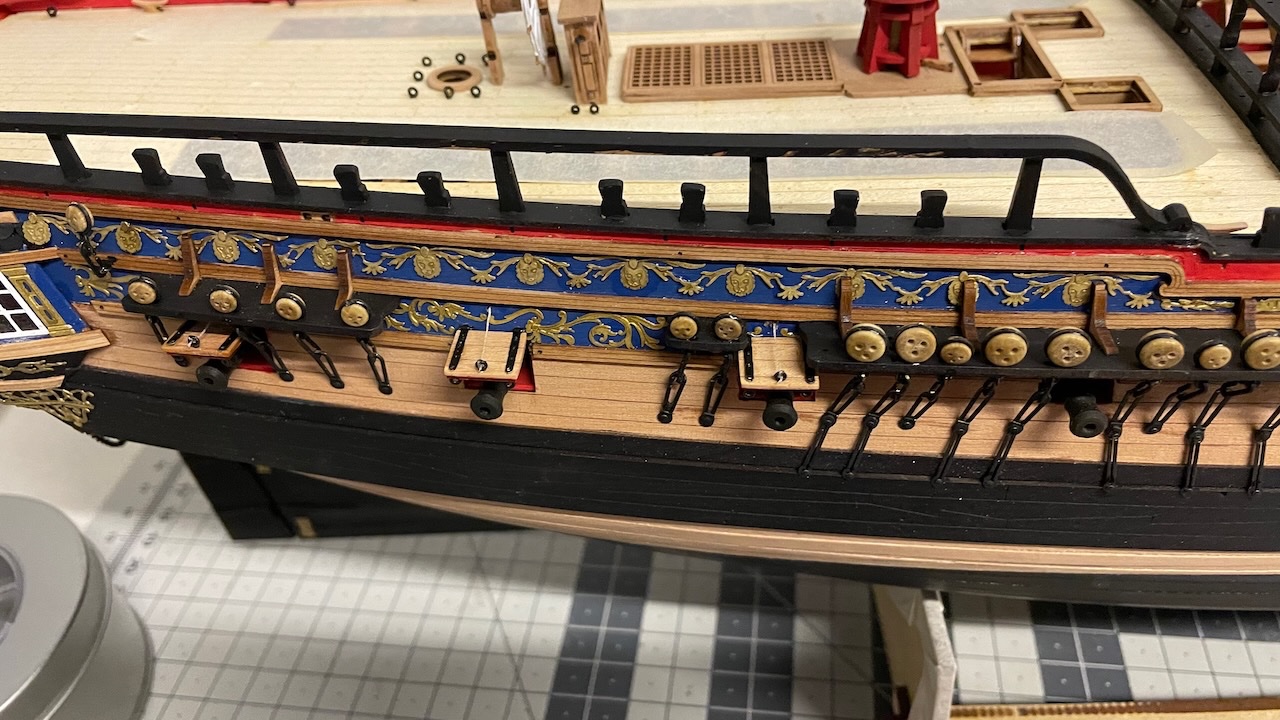
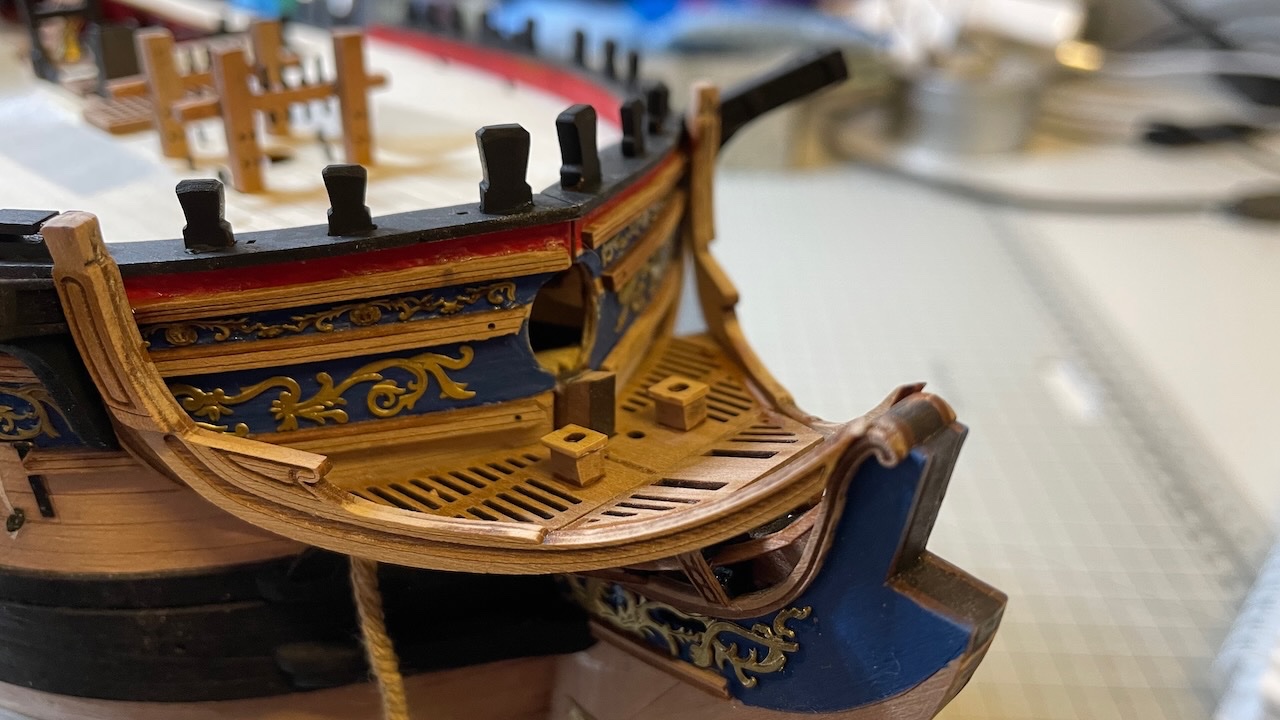
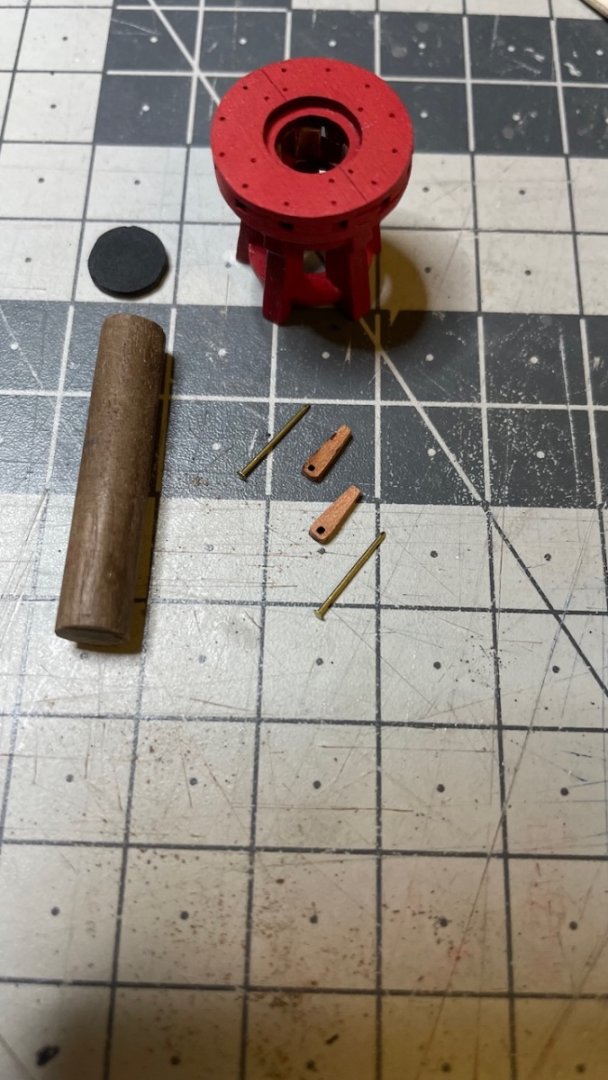
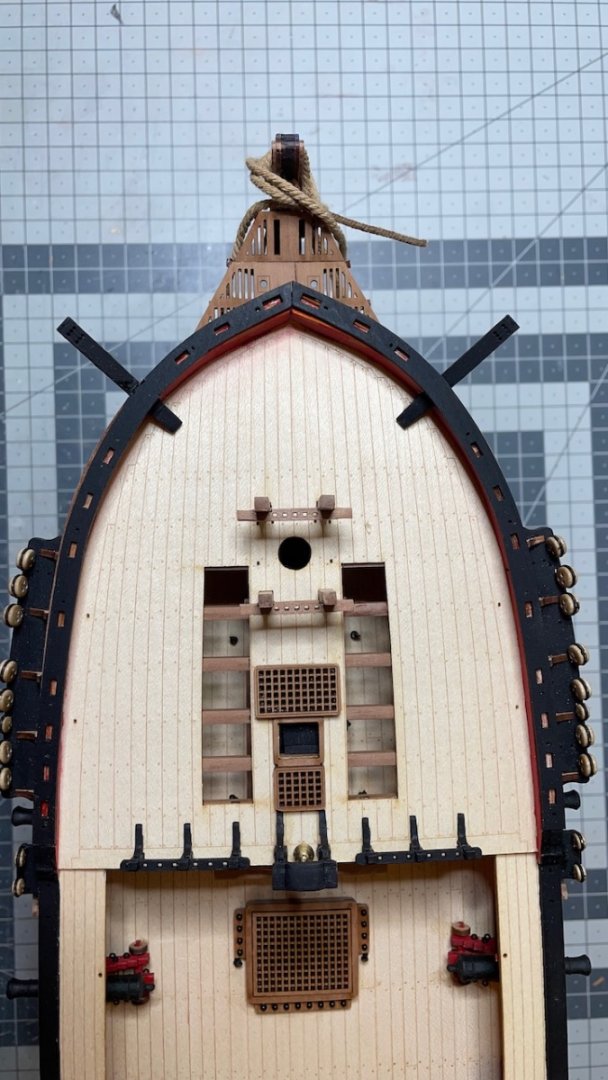
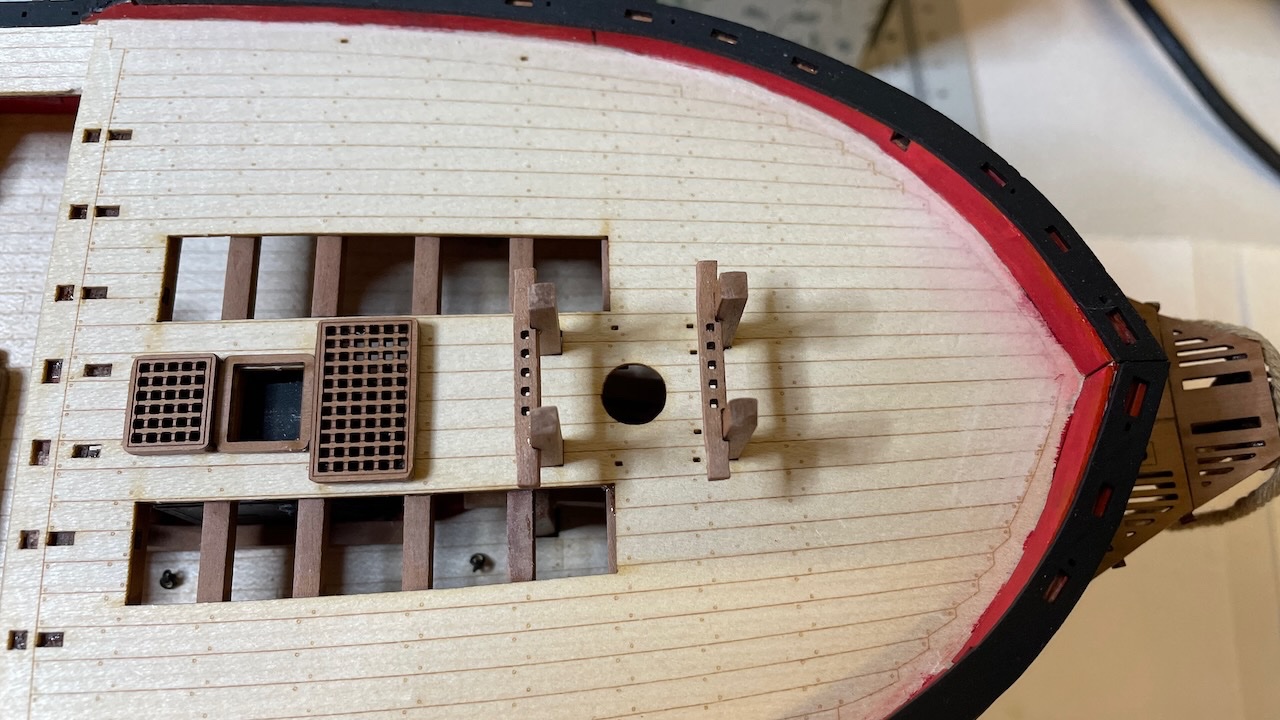
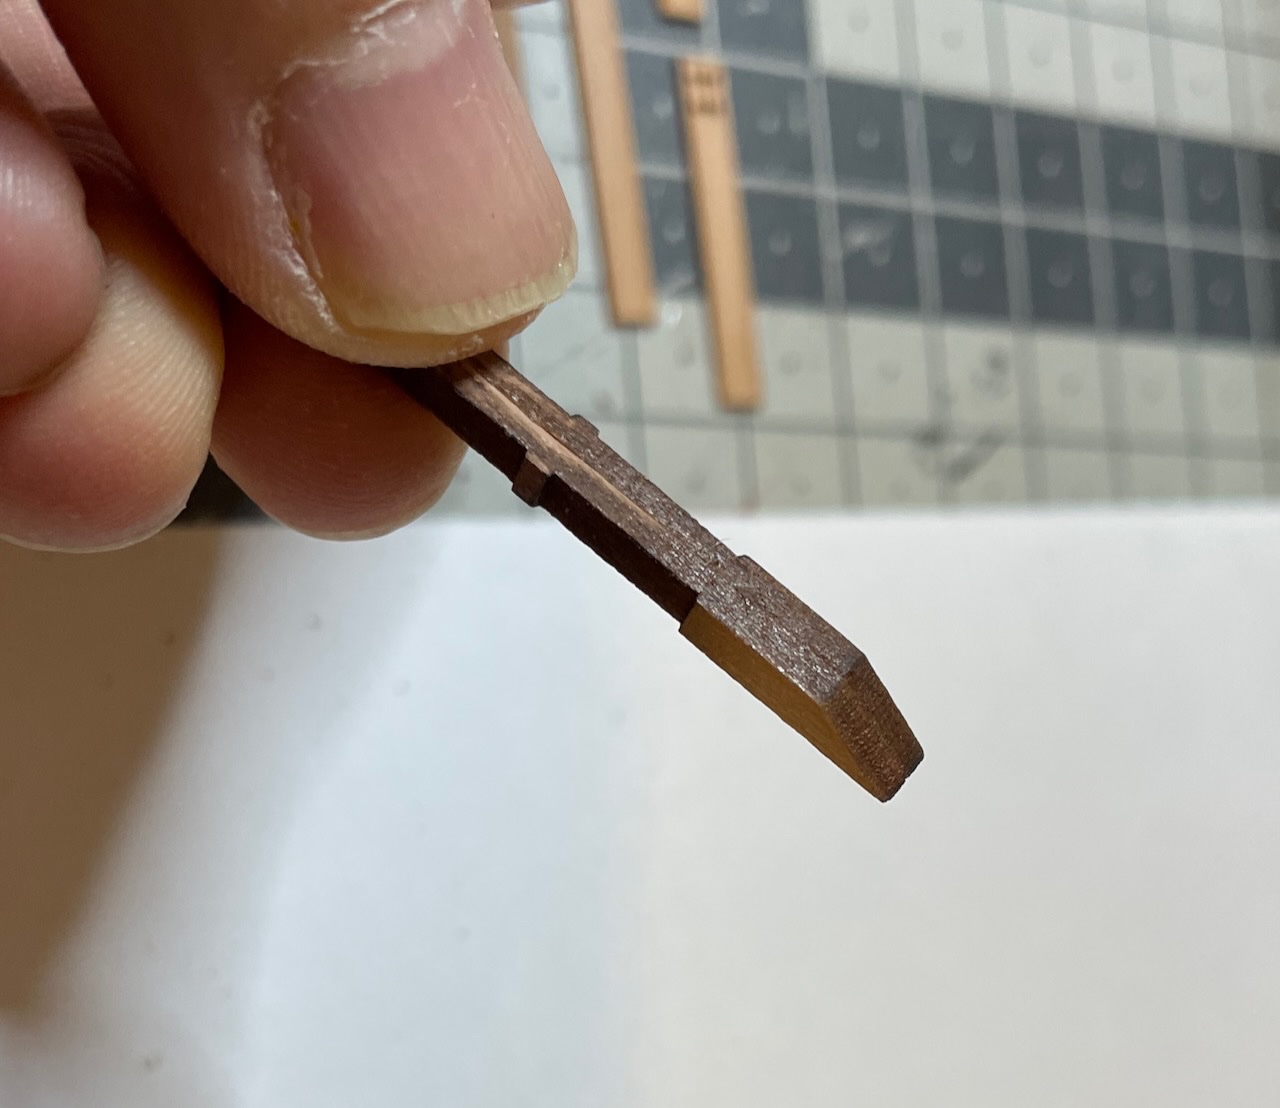
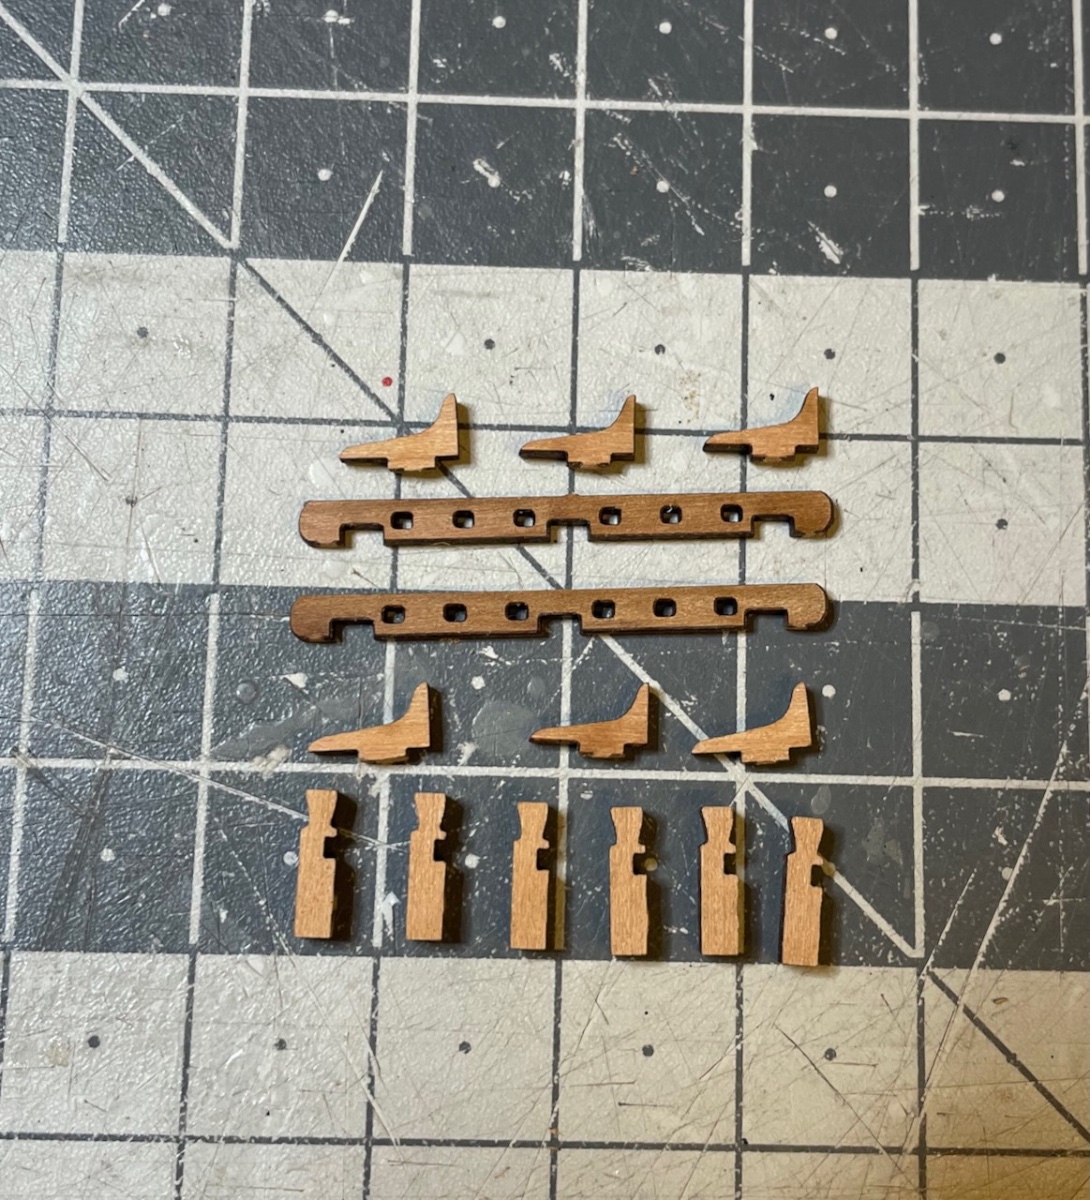
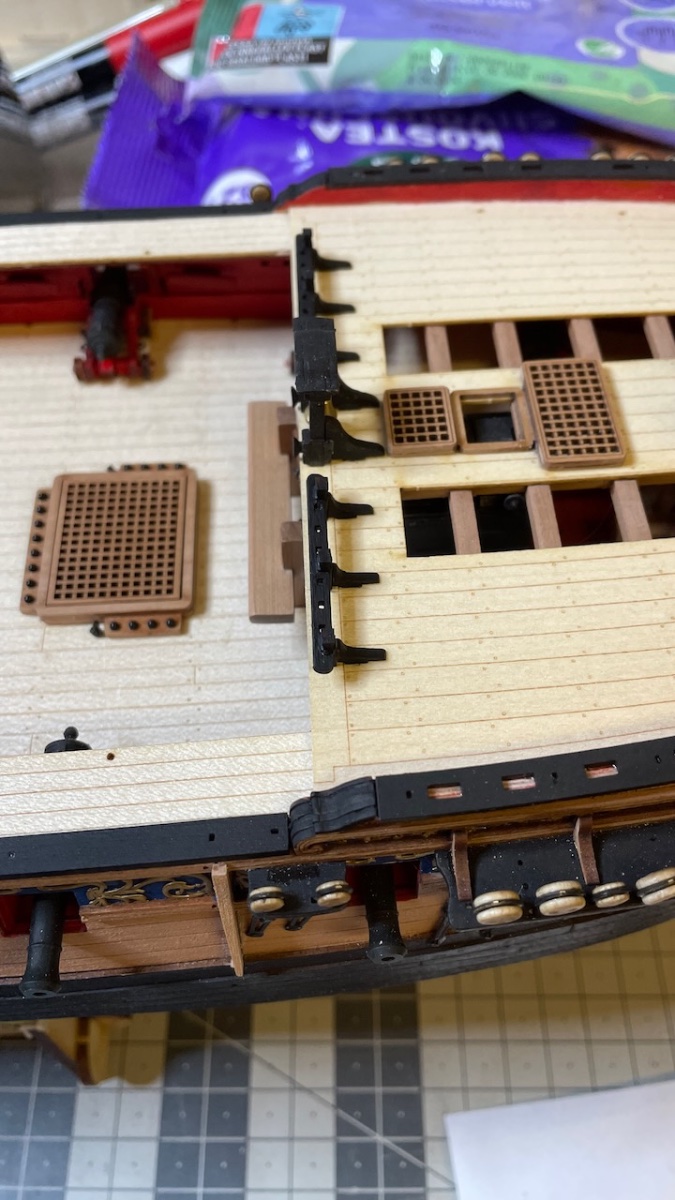
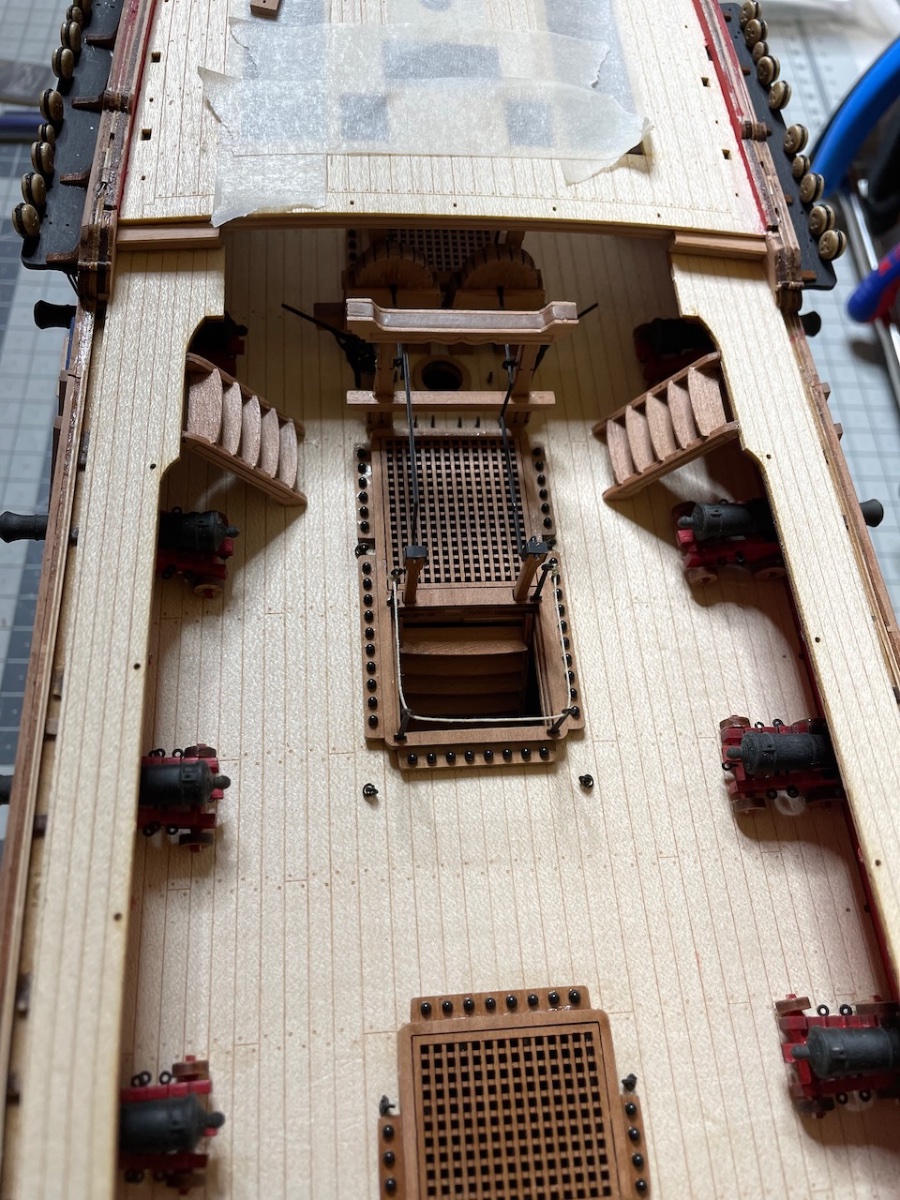
Build Day 69: 3 hours / Total 159.5 hours
Today I prepared and installed the six gun port lids. It took about 3 hours.
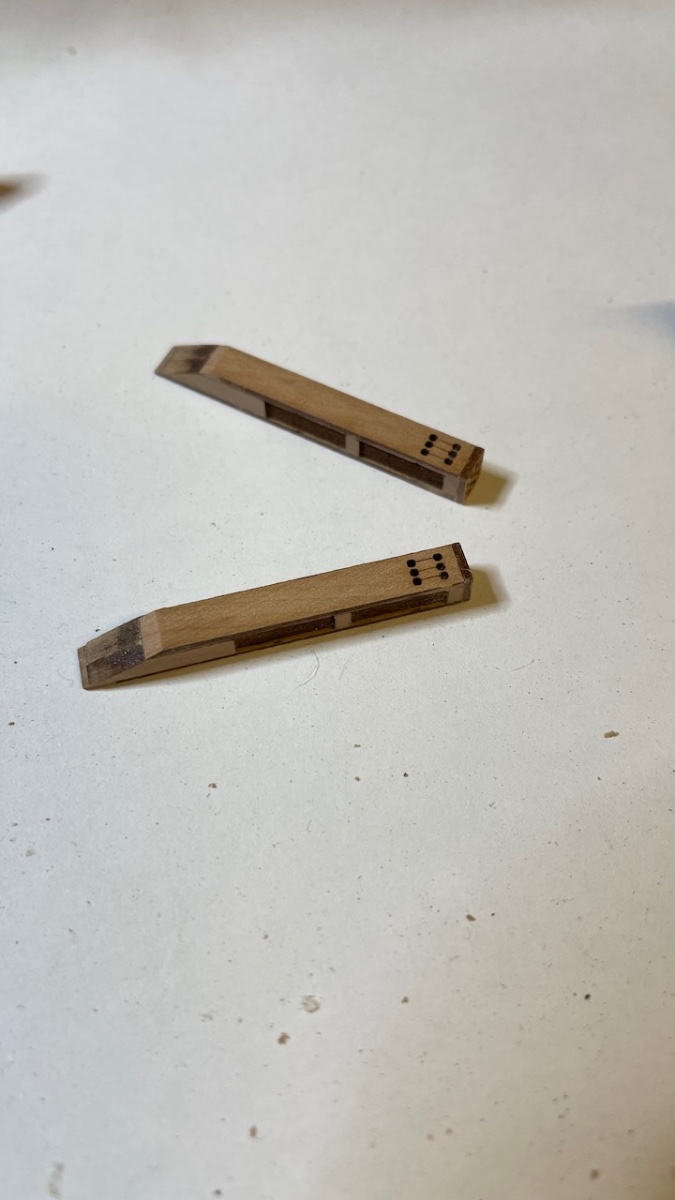
Photo 593: Labelled the part numbers after removing them from the sheet. I paid attention to keep them in the same alignment on the table as they were on the sheet as you should not really mix them. They are each to be glued to their own counterpart and they have their own place on the hull.
I painted the back pieces to red already while they are on the sheet.
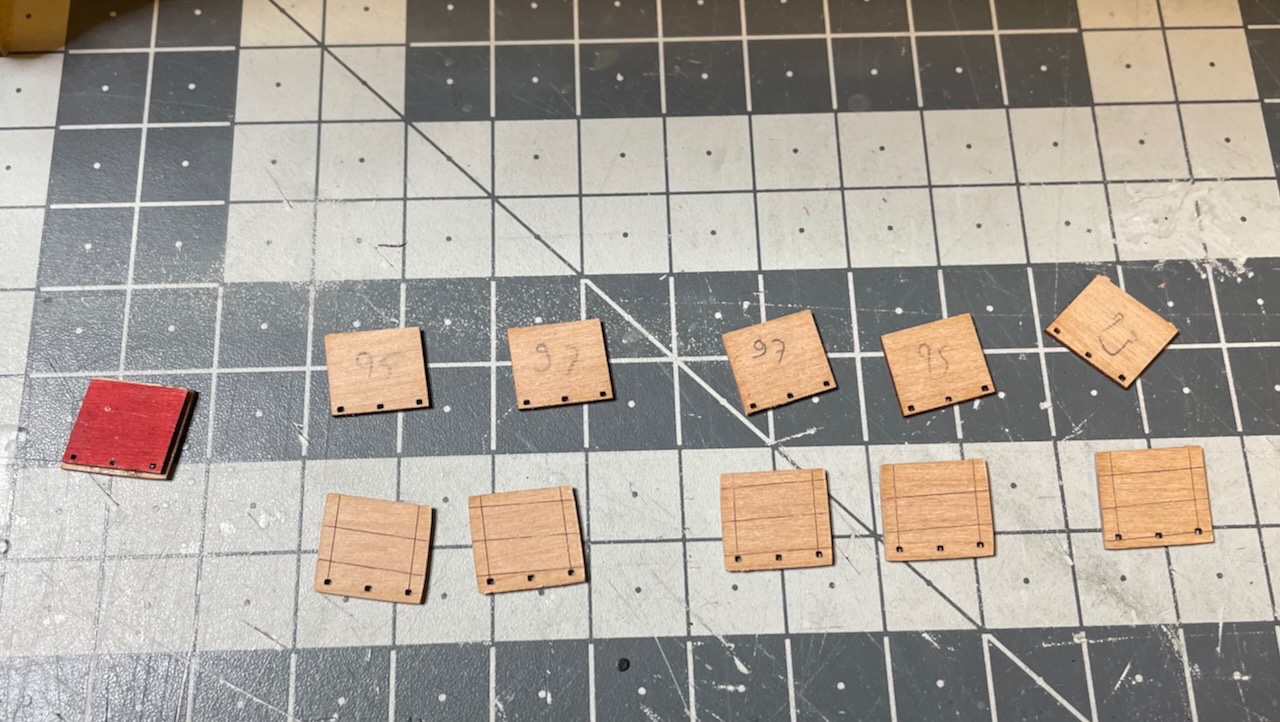
Photo 594: Touching with a Staedtler Lumicolor for finishing the edges (see the piece on the left)
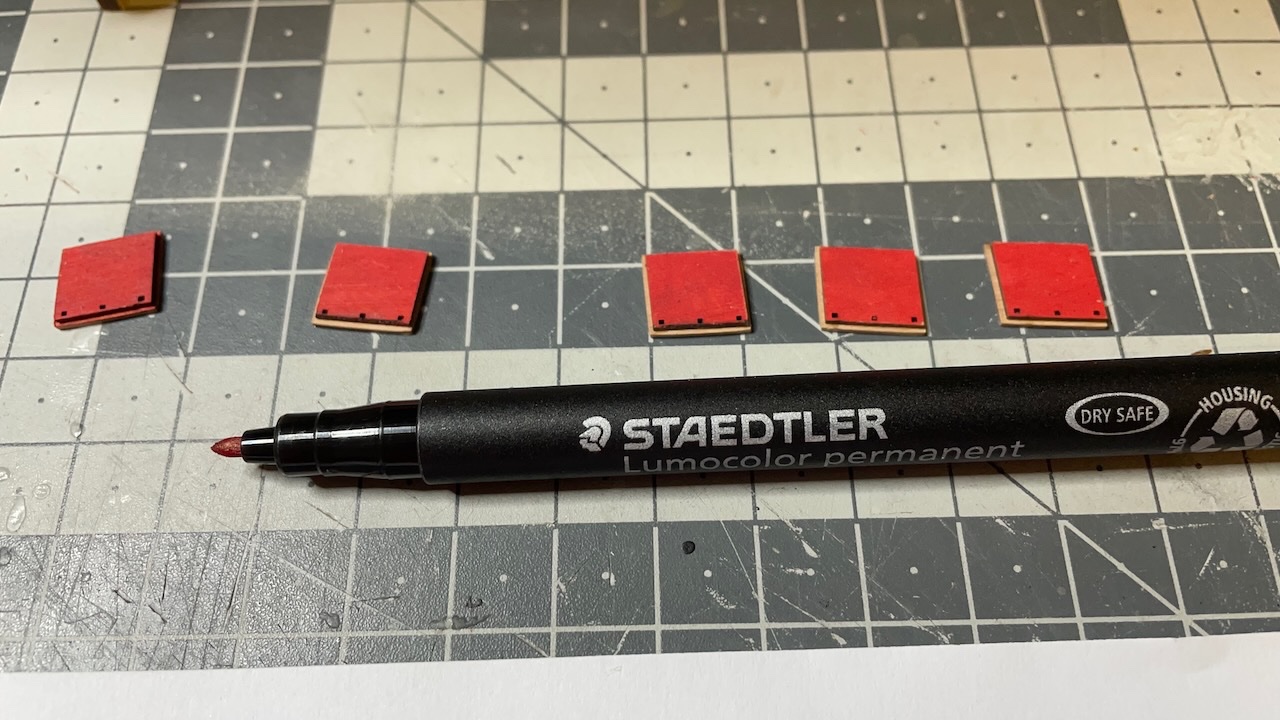
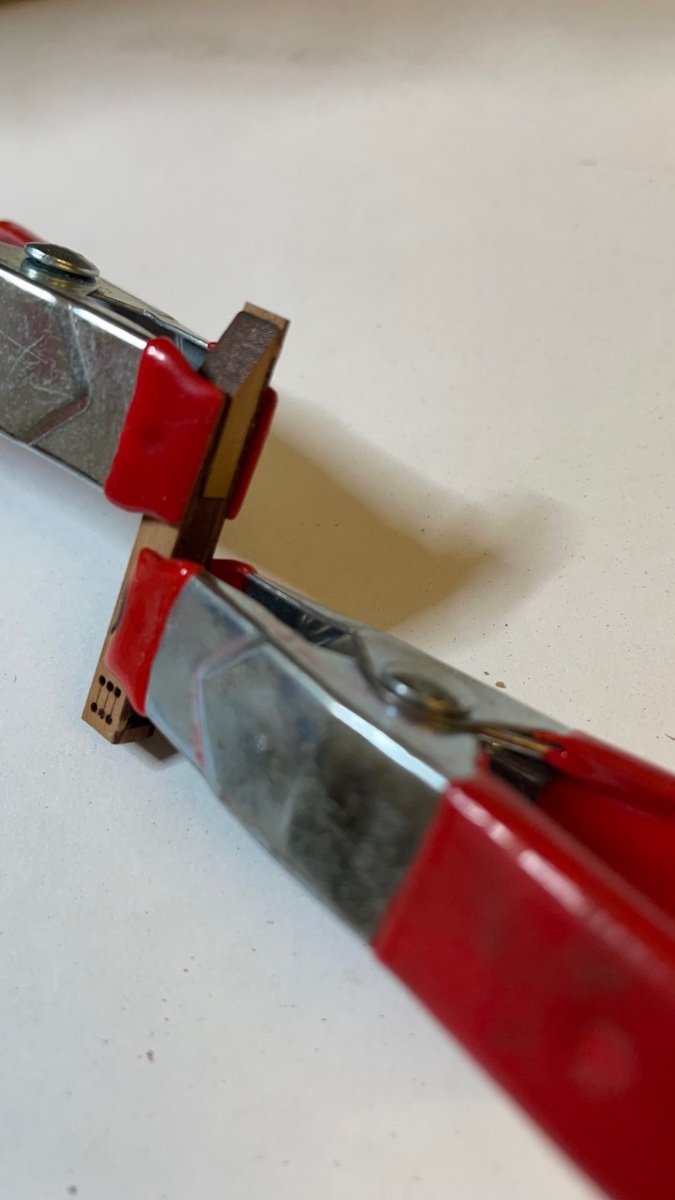
Photo 595: Metal parts painted, fitted and matt varnish applied, waiting to dry.
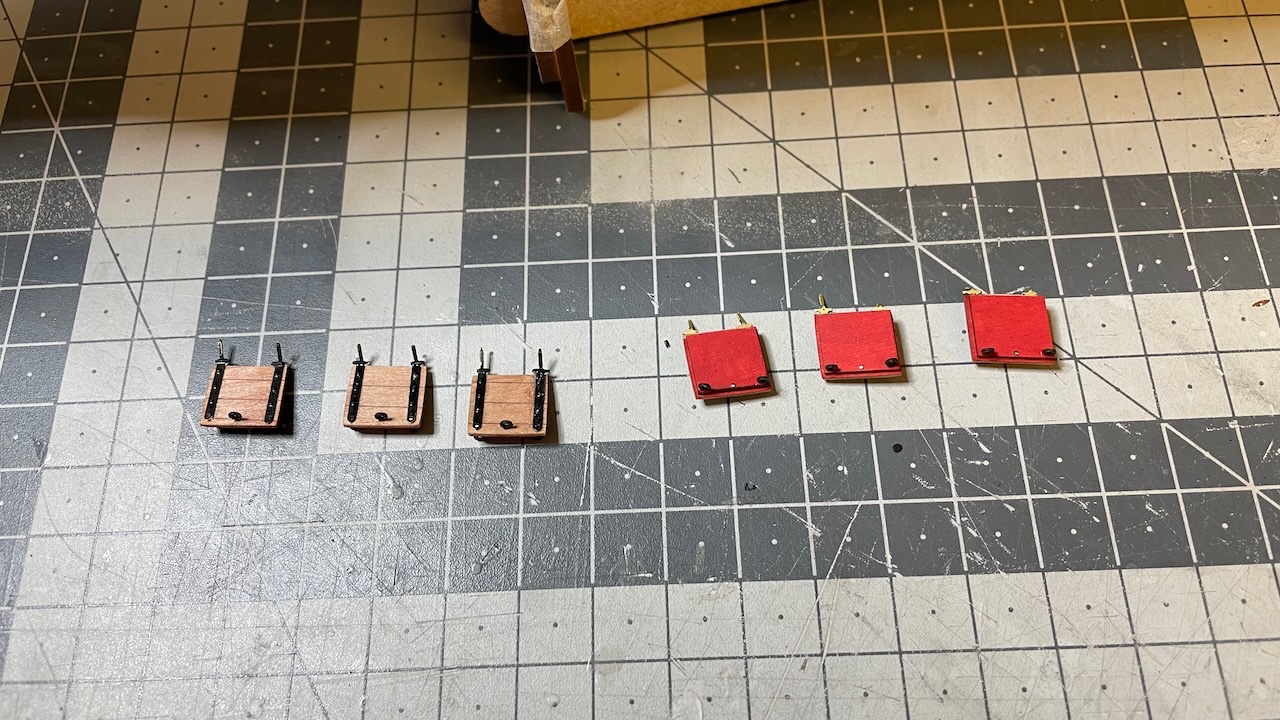
Photo 596: The tiny holes are easily clogged with varnish etc. I reopened them all using 0.5mm drill. That is 6 holes for each lid (3 on the lids and 3 on the hull).
-
Build Day 68: 0.5 hour / Total 156.5 hours
A short resume at build after a few weeks of break.
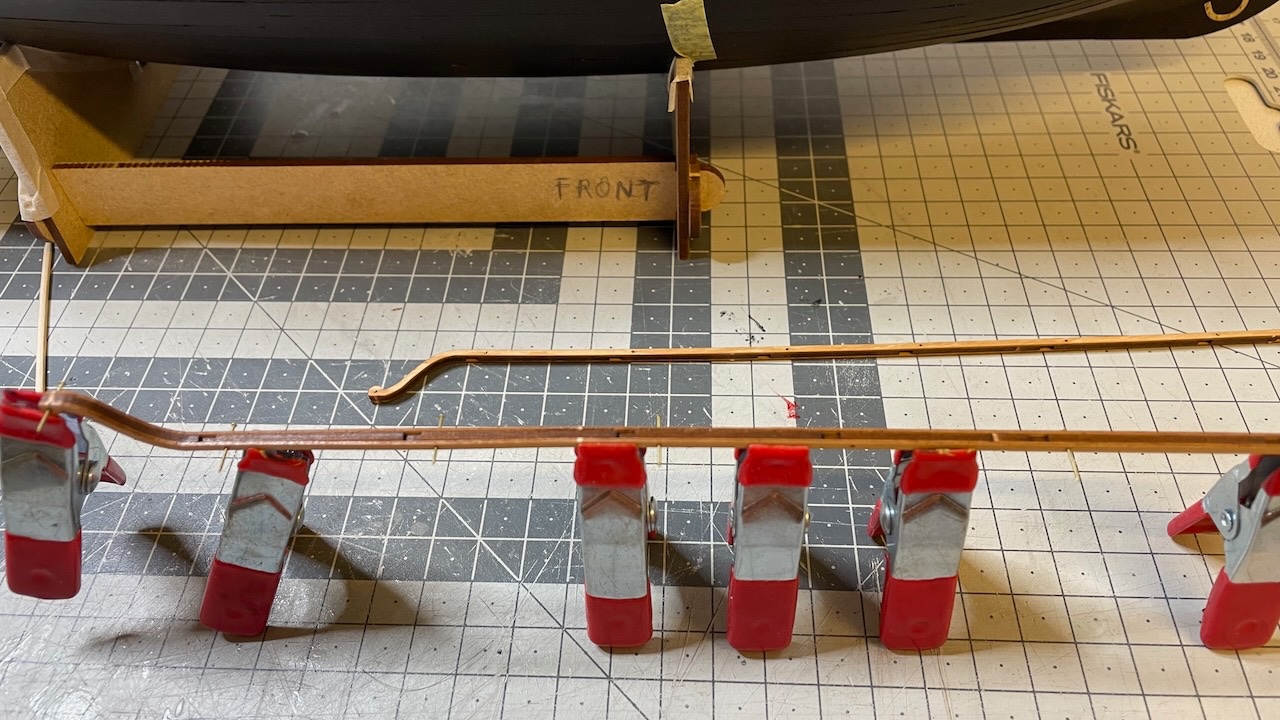
Photo 587: Bow main rails, made of 3 parts each.
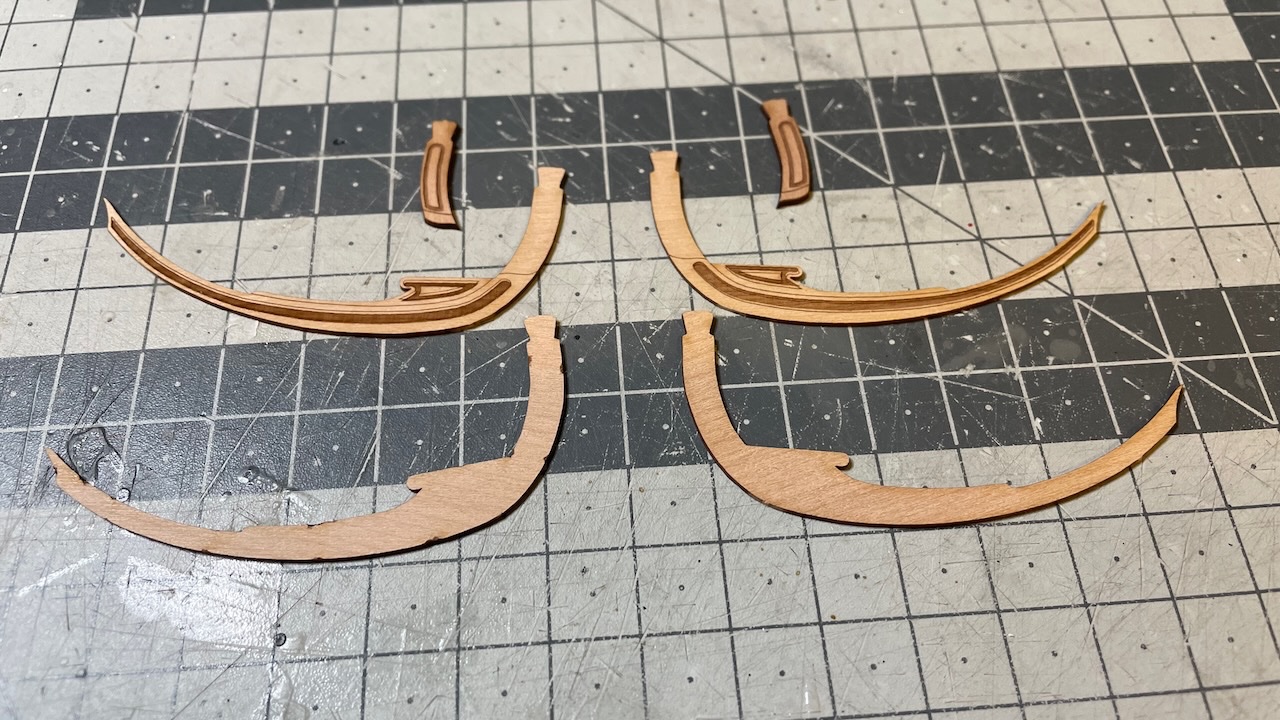
Photo 588: Glued together. They look like wild goats with the clamps
")
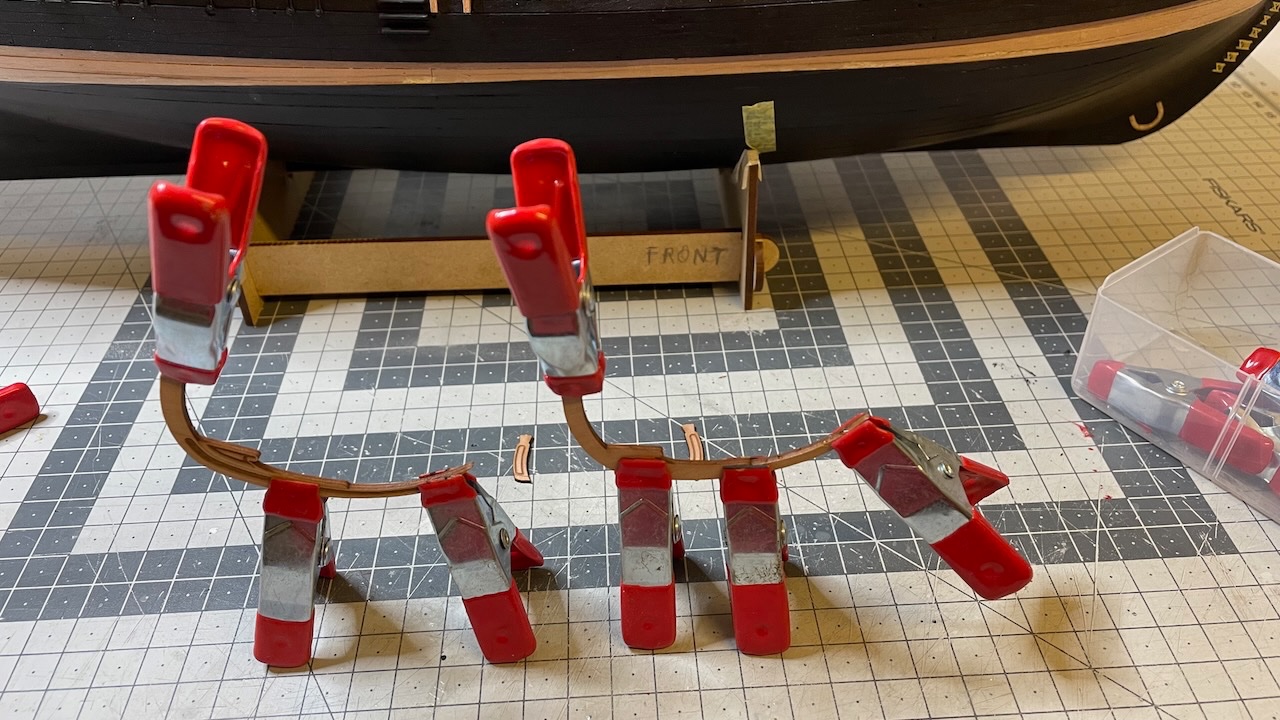
Photo 589: The head rail patterns under the bow gratings (i.e. parts 81,82,83) needed some sanding from the top in order to sit flush with them (Photo is from the manual).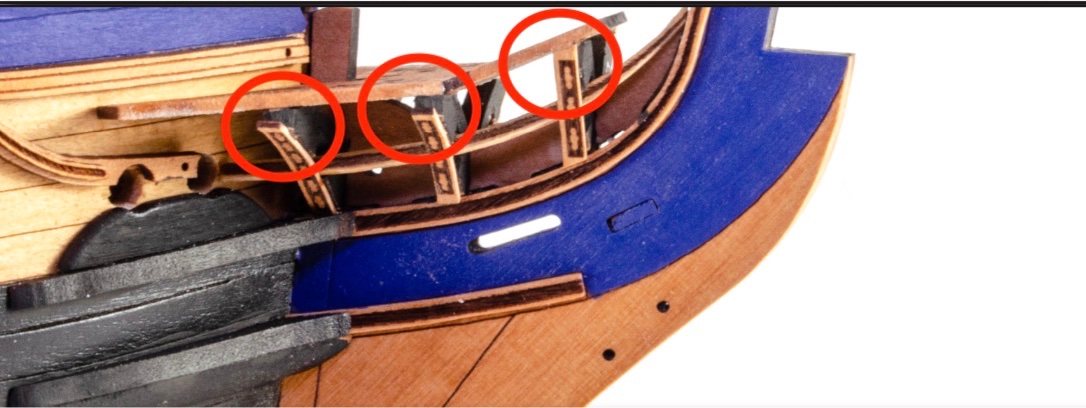
Photos 590-592: Glued in place.
That's all for today. Thanks for watching!
-
-
Build Day 67: 1 hour / Total 156 hours
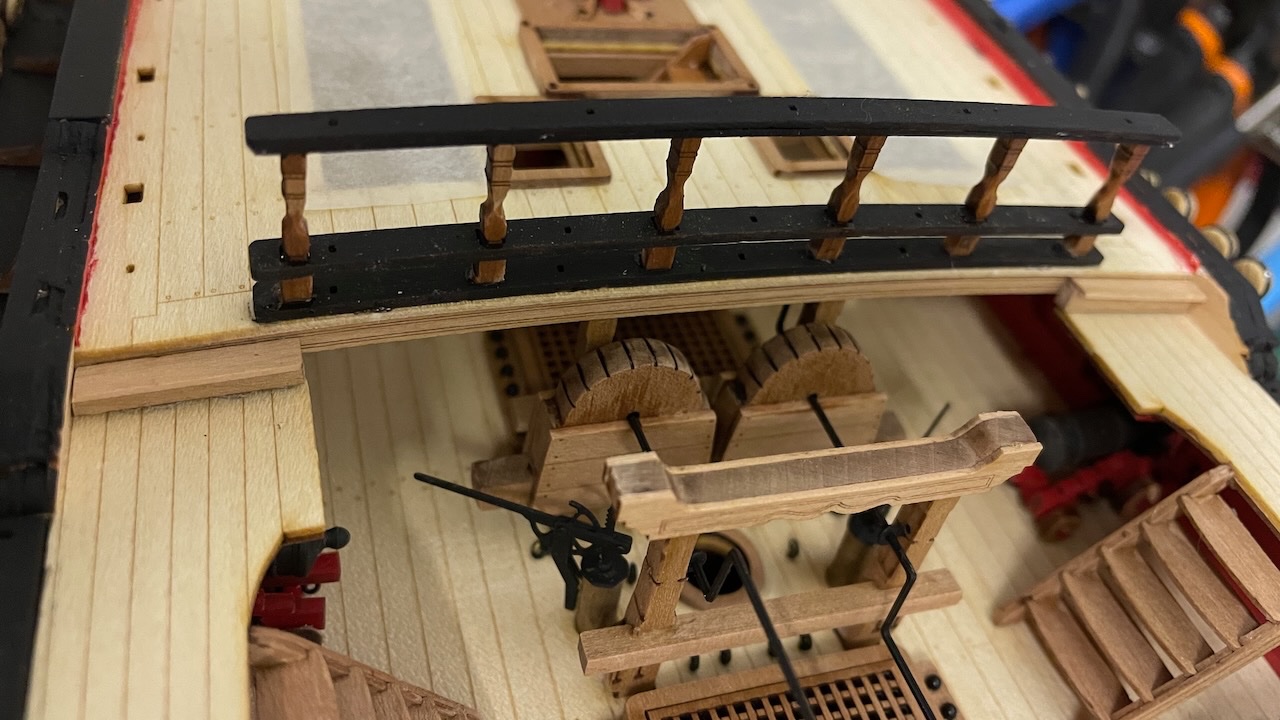
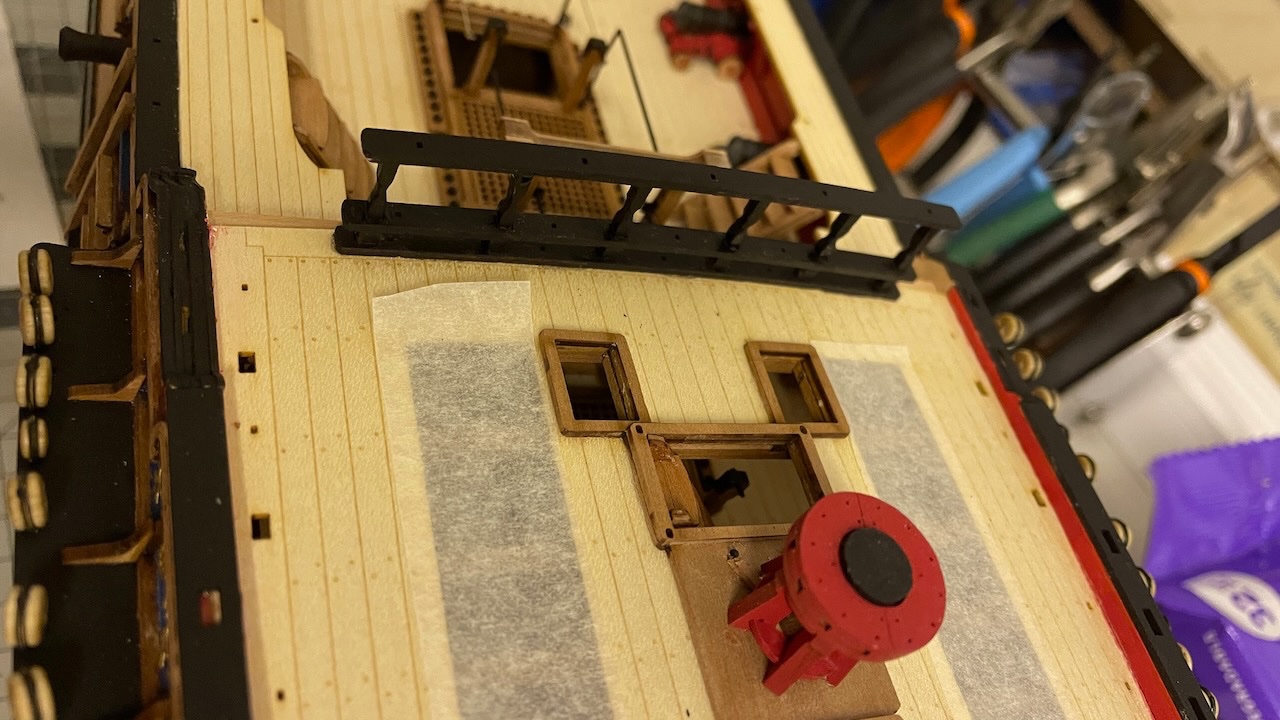
Photos 582-584: Quarterdeck Fife Mail Rails. Nails used for aligning the three parts glued together. Glued by fitting the slots with the stanchions and then painted in black.
- Glenn-UK, Prowler901, DonSangria and 1 other
-
4
-
Build Day 66: 3 hours / Total: 155 hours
Quarterdeck and Forecastle rail foundations. Below are several photos showing the progress with some notes on my experiences along the way.
During the construction some steps are skipped in the manual. You'll need refer to the plan throughout the process and this is mentioned in the manual. Also keep the sheet with parts list close to yourself as the rail parts are so similar you can easily lose track of part numbers. I suggest you keep the parts on the wood sheet until you use them.
Photo 574: Timberheads top section rounded from the inner and outer sides.

Photos 575-577: One thing not in the instructions but shown in the Plan. Glue parts 102 on either side of 339. Also glue PE-151s in their places.
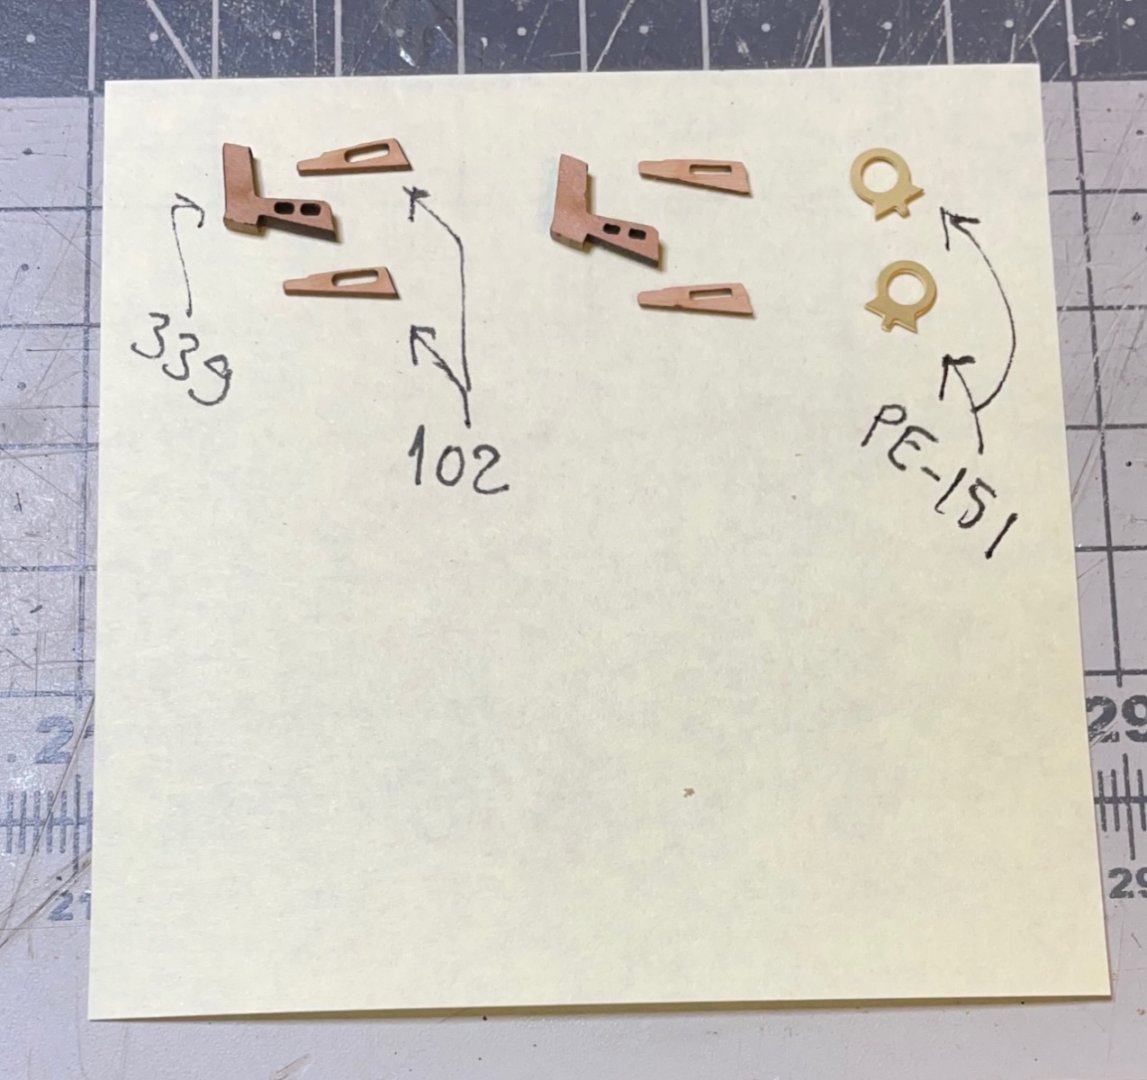
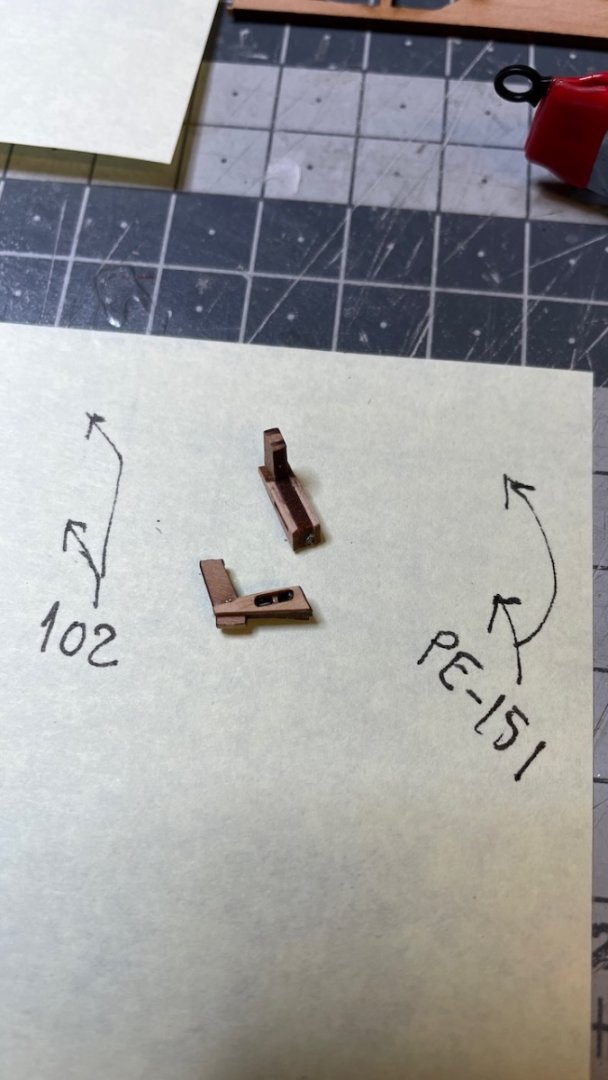
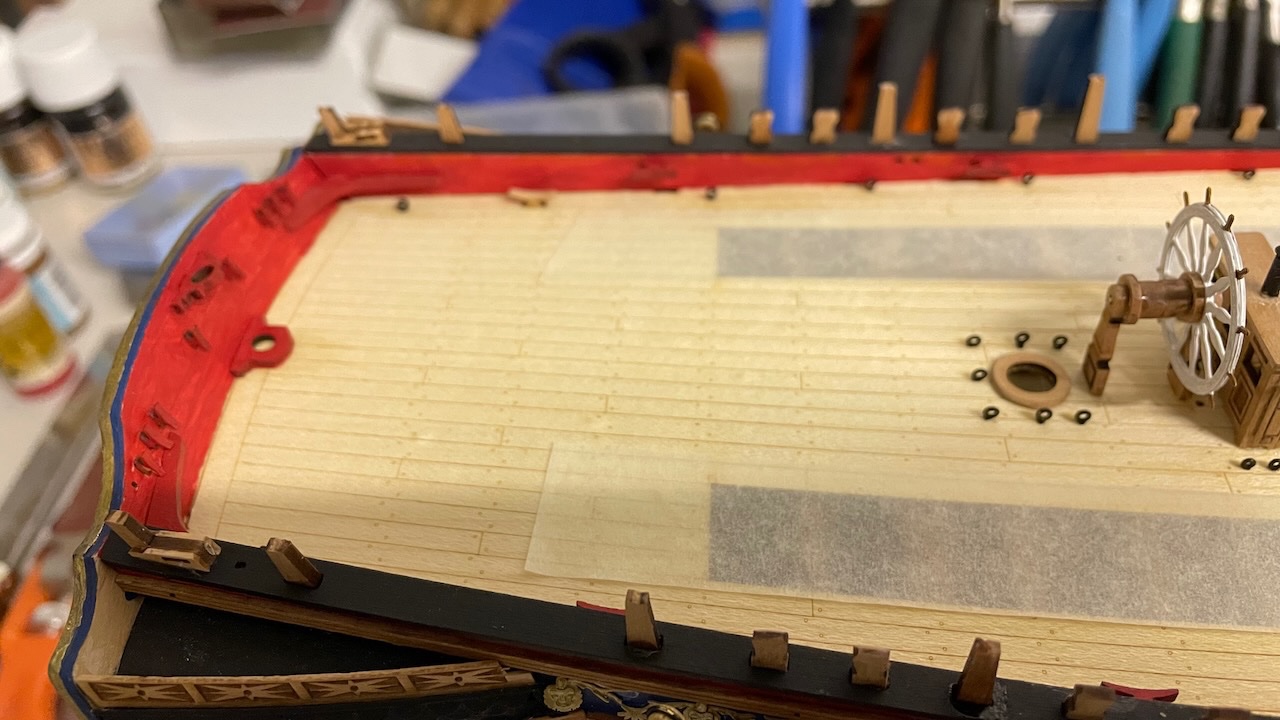
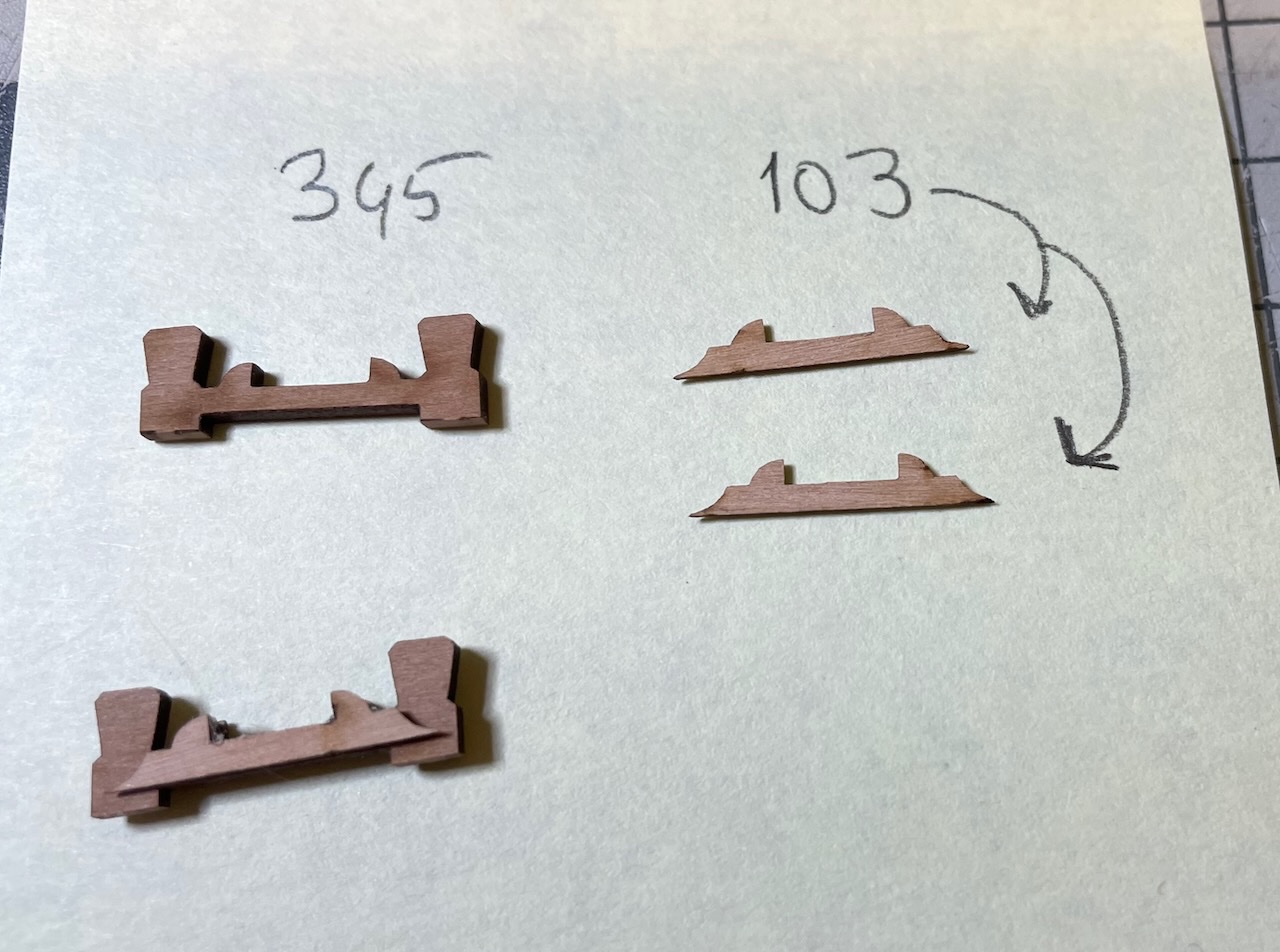
Photo 578: Similarly glue parts 103 on either side of part 345.
Photos 579-581: All rail elements glued and painted to black.
That's all for today. Thanks for watching!- Knocklouder, Glenn-UK, ccoyle and 2 others
-
5
-
Build Day 65: 1 hour / Total 152 hours
Photos 570-571: Remaining Quarterdeck breast rail components.
Photos 572-573: Deck eyelets and cleats in place. These cleats are not painted hence they need laser chars removed. Eyelets will be visible in the future photos.
That's all for today. Thanks for watching!
- ct mike, Glenn-UK, Prowler901 and 4 others
-
7
-
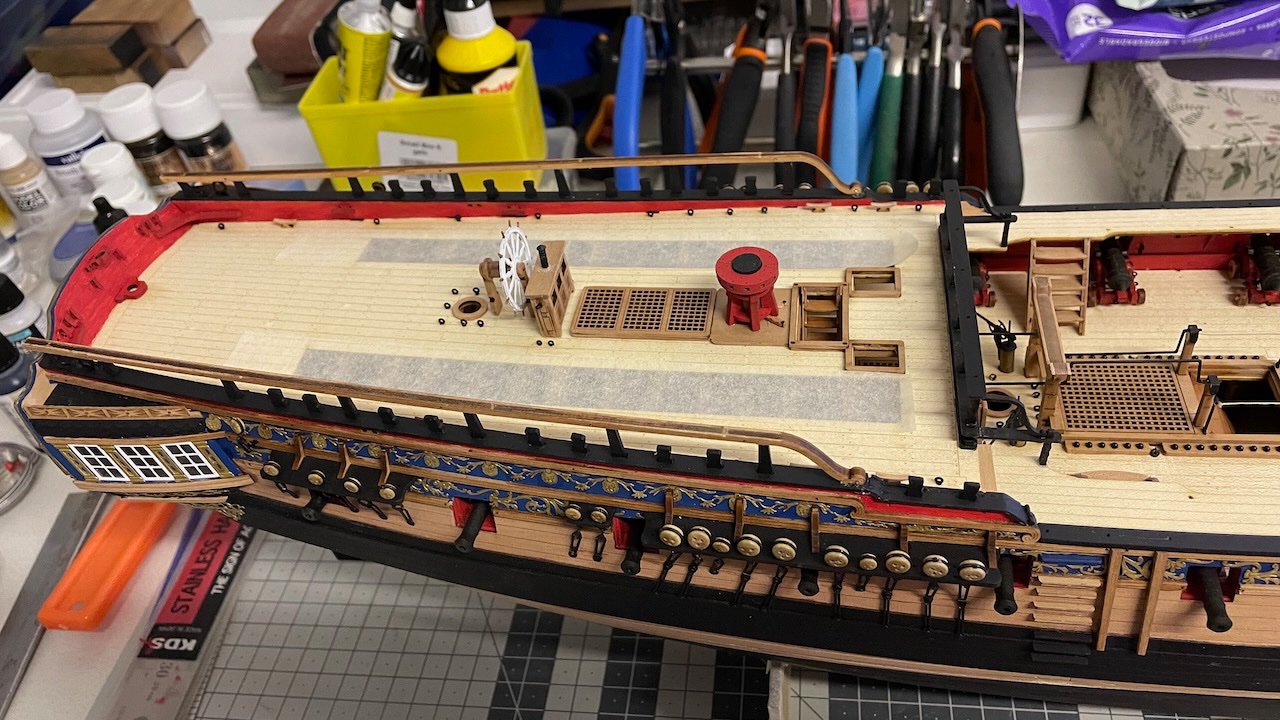
Quarterdeck breast construction.
Photo 654: Parts removed and prepared for paint, labelled to avoid mixing them up.
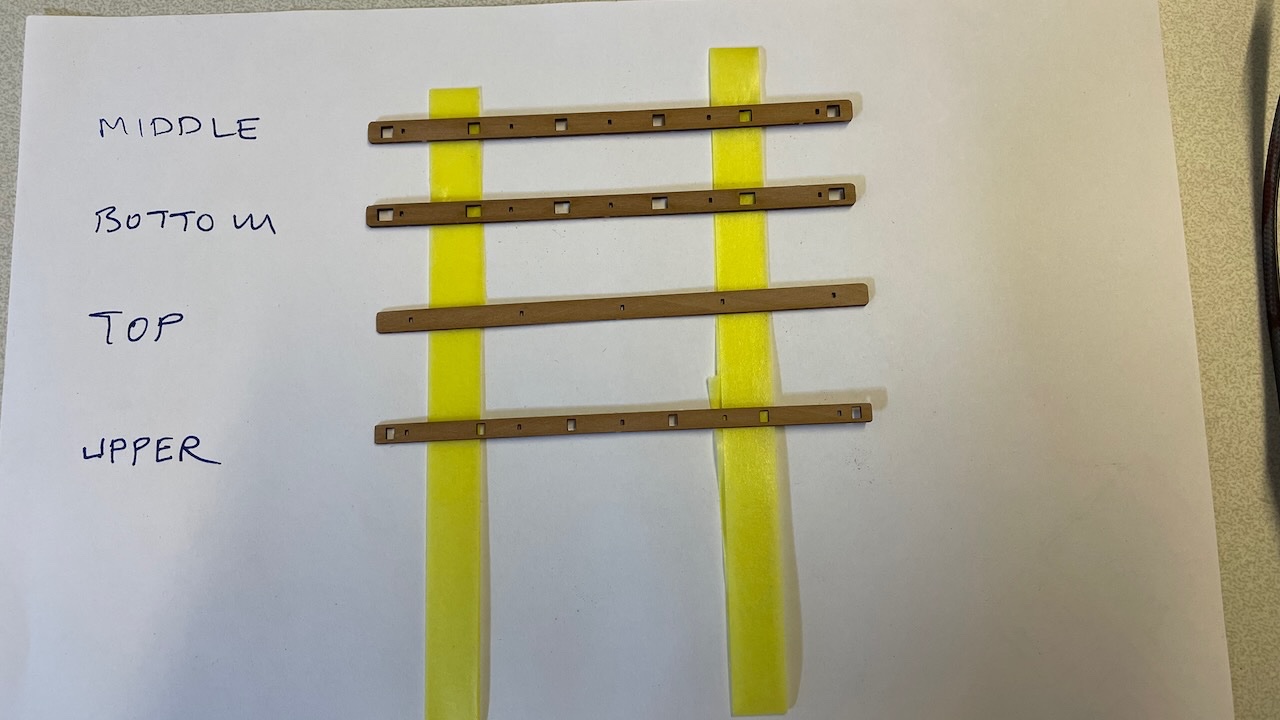
Photo 655: Lower rail in place. I referred to the plan to determine the order of the stanchions and marked with a tape the position of part A.
Photos 656-657: The stanchions go A, B,..F. Though they are almost identical, they differ slightly in the bottom, where they follow the curvature of the deck.
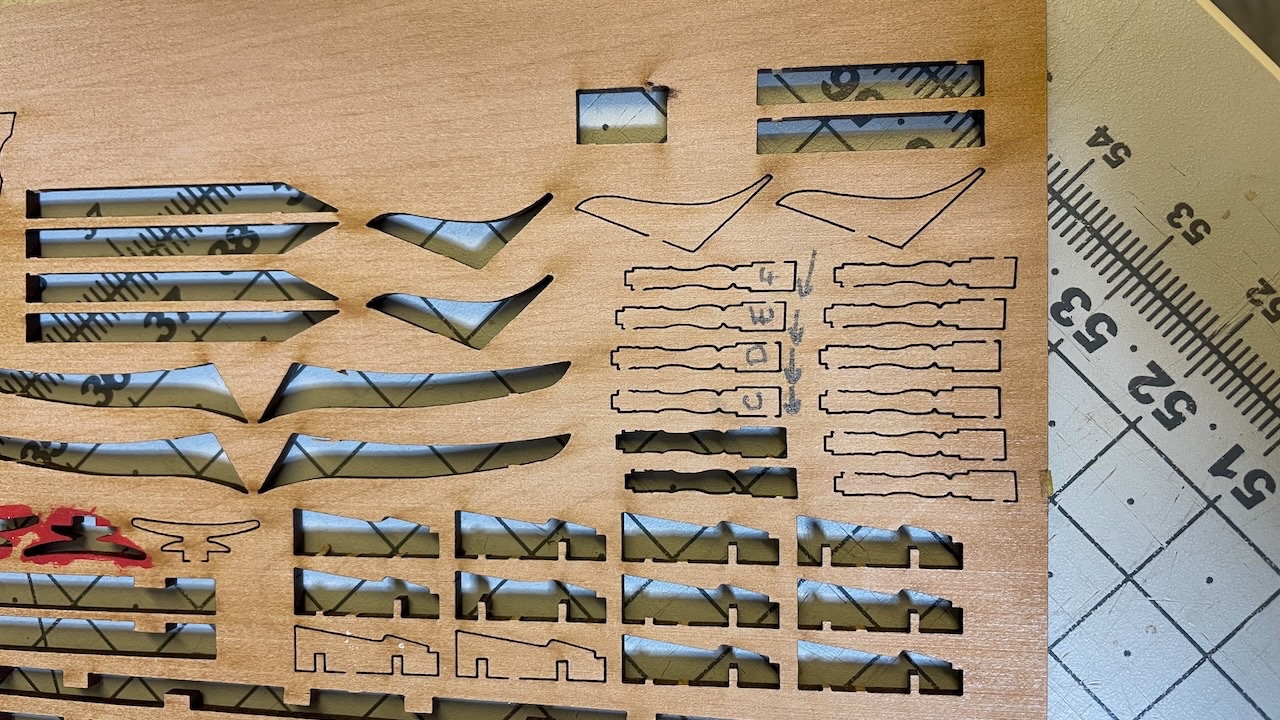
Photo 565: You'll need to round the "belly" of the stanchions in the shape of a round pillar. Here is one done. I used the file in the photo for this.
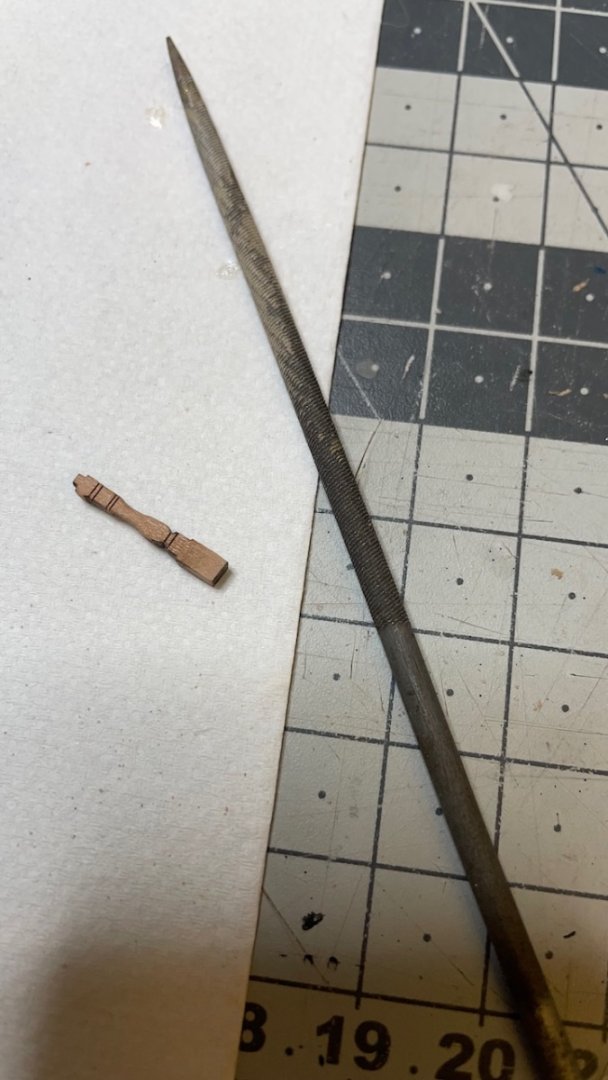
Photo 566: I inserted the stanchions already to the middle rail before glueing them in their places. Note they are not glued to the middle rail yet. They move freely. This will allow me to make alignment adjustments easily.

Photos 567-569: Stanchions and remaining rails are in place. Further, I painted the stanchions in black.
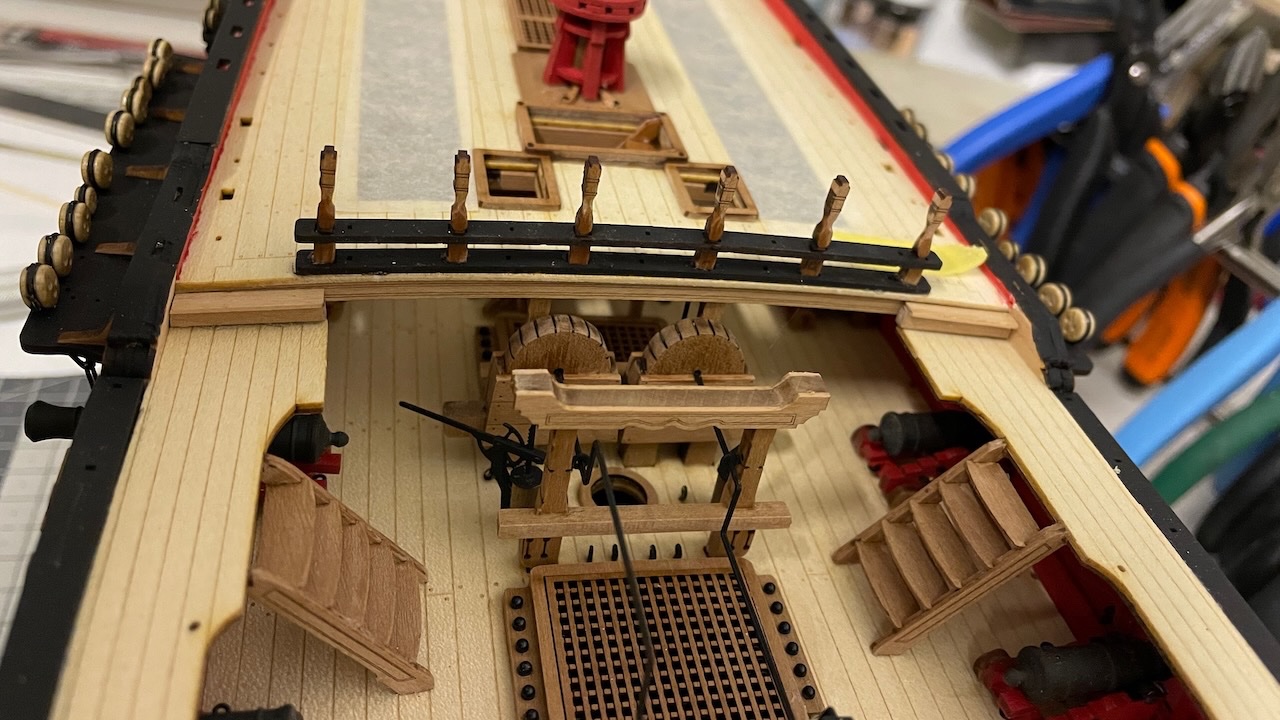
That's all for today. Thanks for watching!
-
Photos 652-653: Binnacle in progress. Photos of the complete structure is missing at the moment.
- Prowler901, Glenn-UK and mtaylor
-
3
-
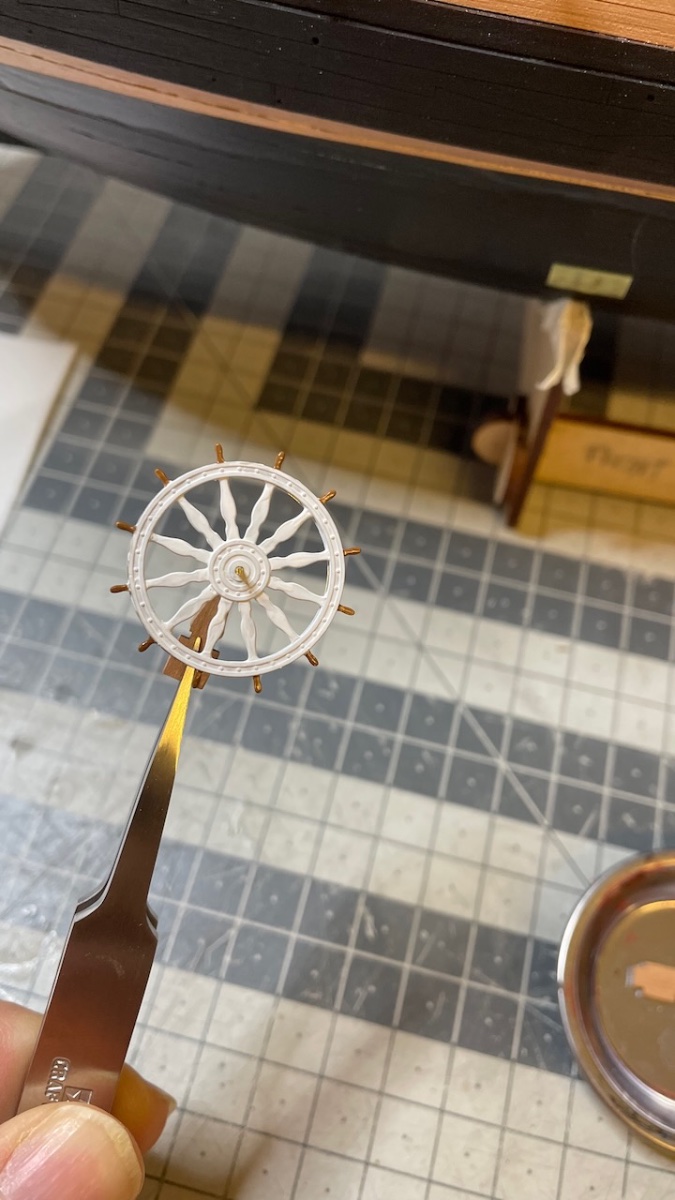
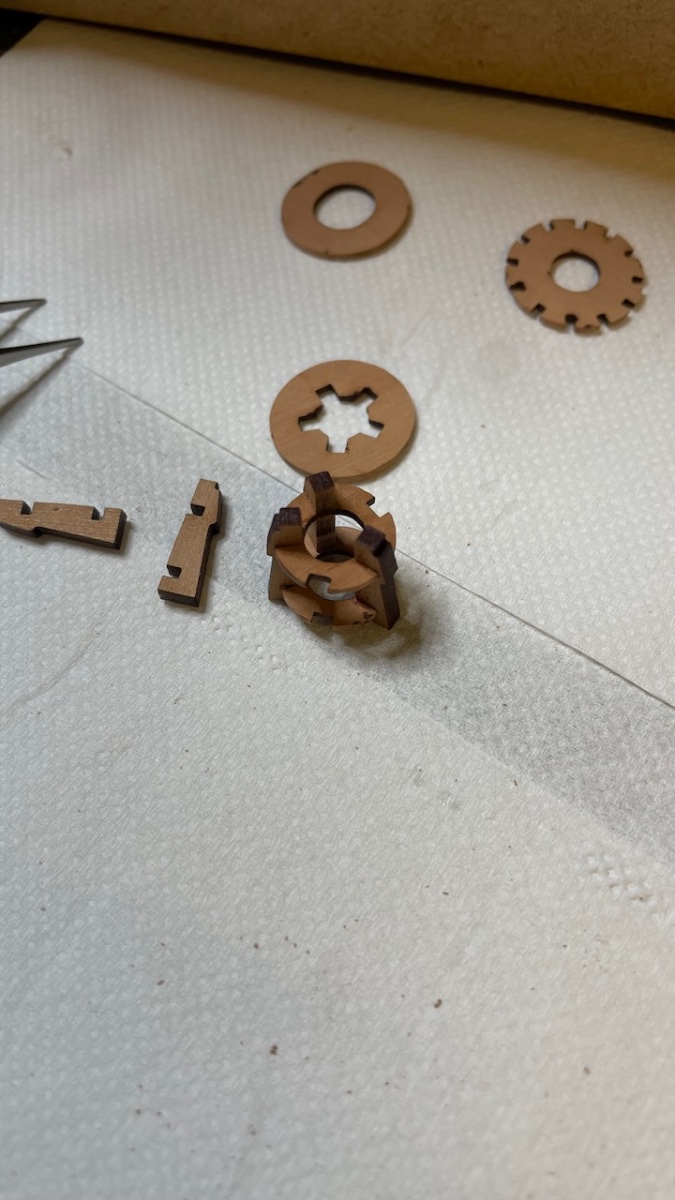
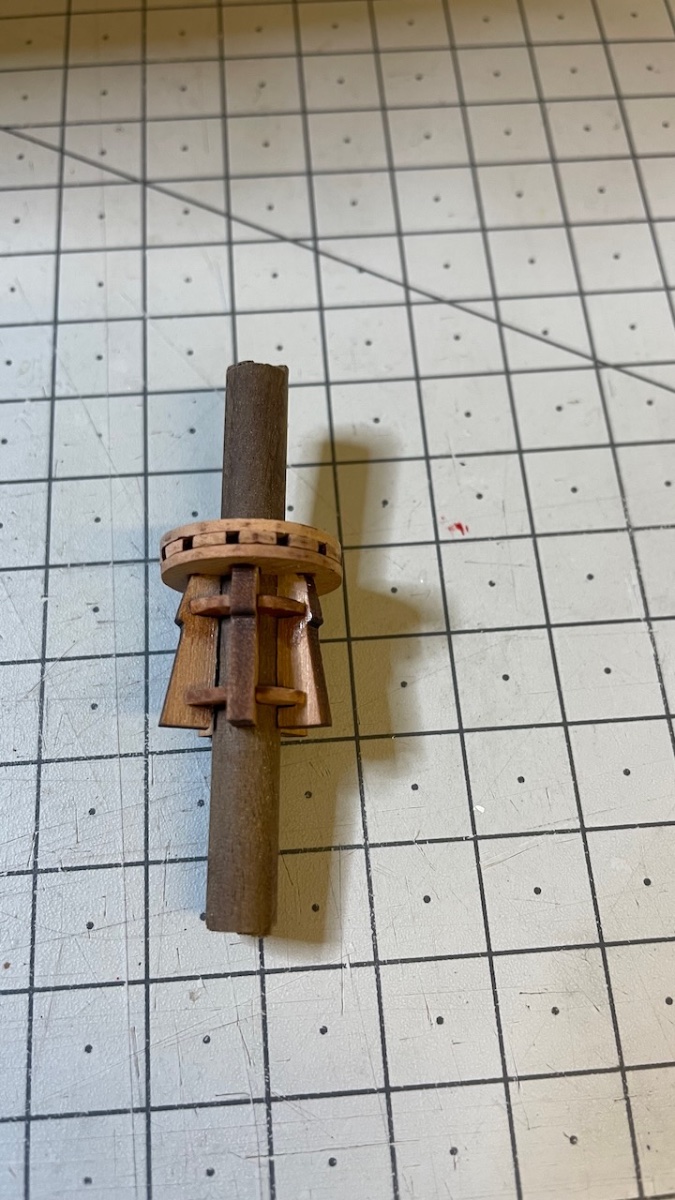
Build Day 64: 4,5 hours / Total 151 hours
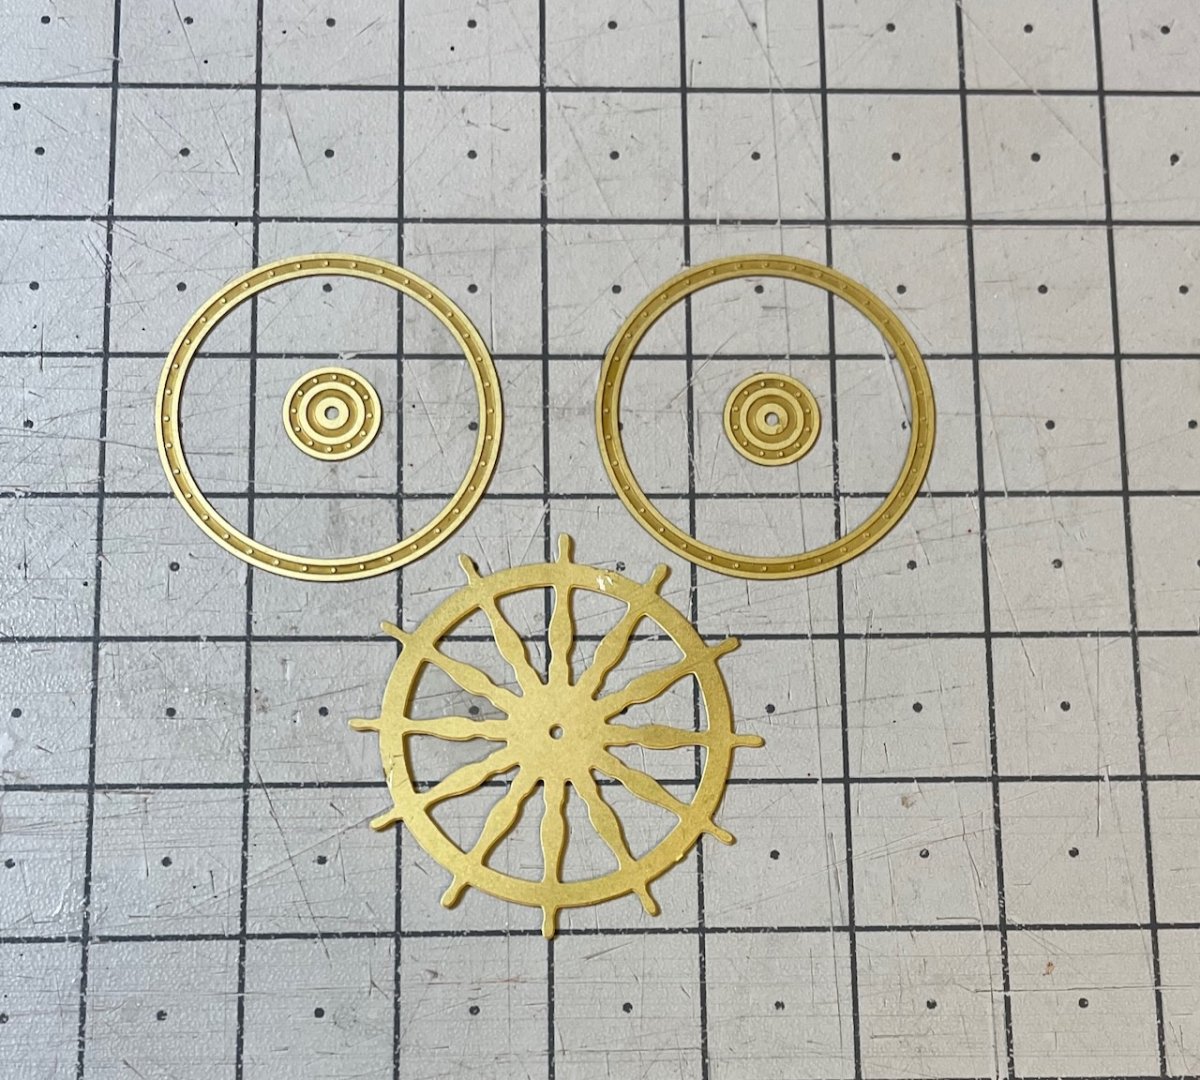
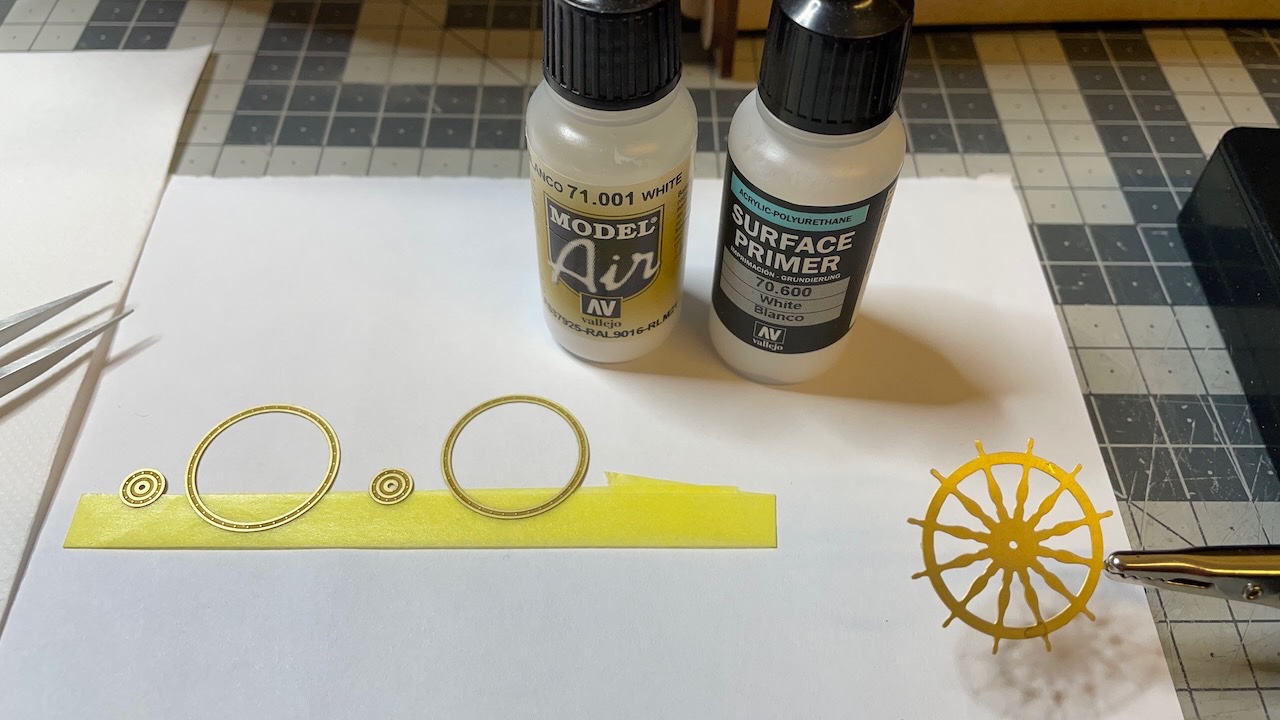
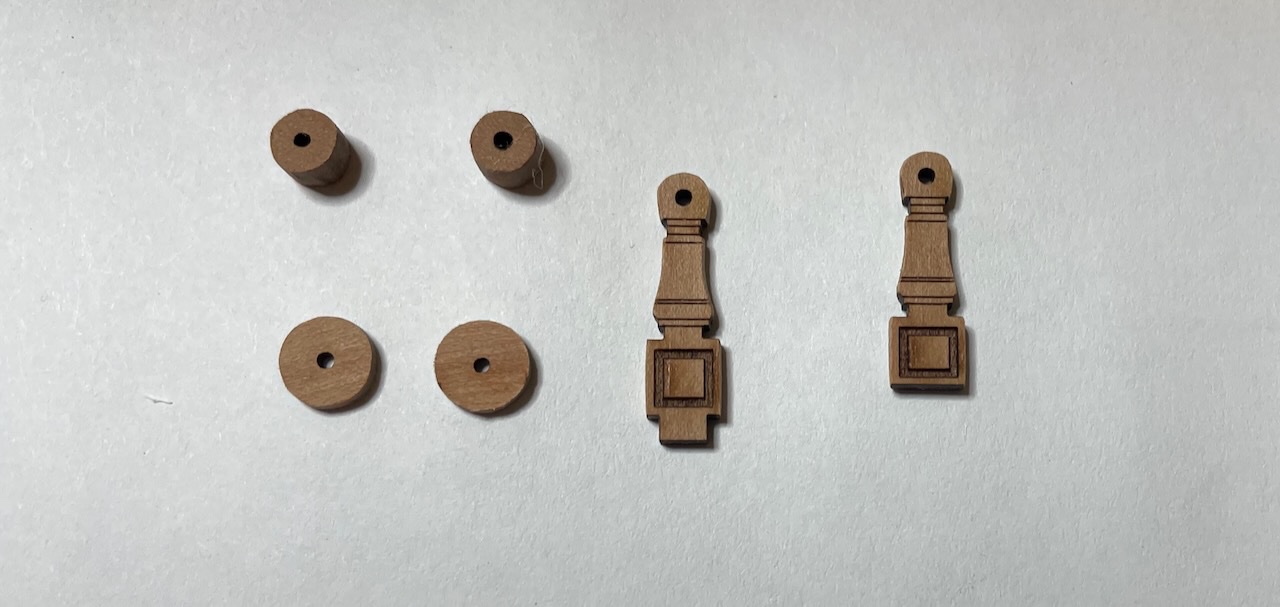
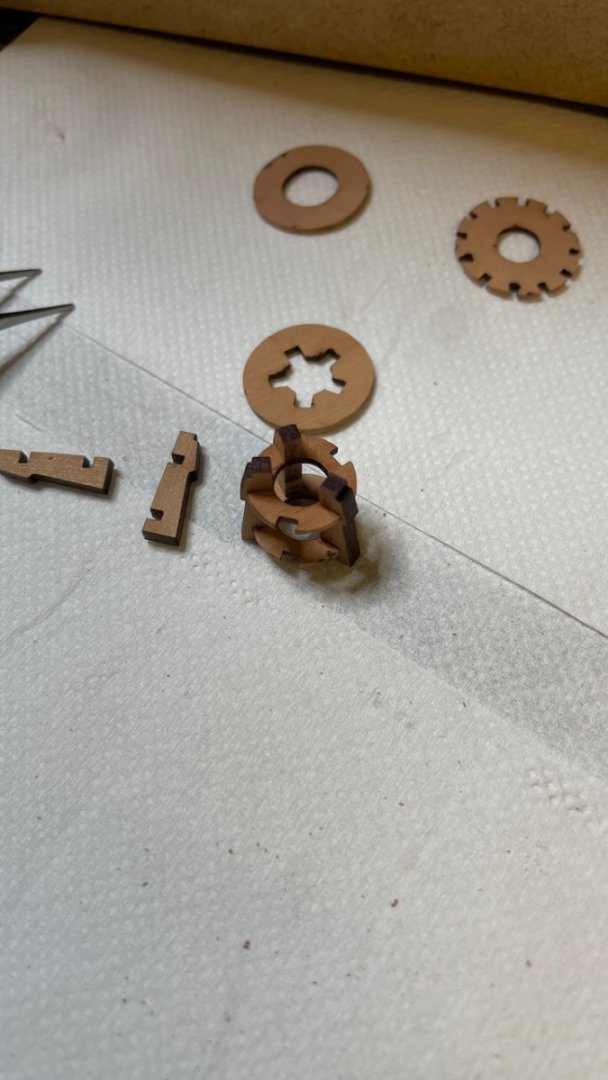
It was a productive Sunday today with 4,5 hours of build. I completed the Ship's Wheel, Binnacle and Quarterdeck Breast.
I am writing this log after I have closed my workbench for the day and covered the model, and I have noticed that I didn't take any photos of the Wheel and Binnacle constructions in their place. I will take and post those photos later.
Photo 648-651: Ship's wheel. I used white primer followed by the white paint. Once dry, I applied walnut color to the handles.

- mtaylor, Prowler901 and Glenn-UK
-
3
-
Build Day 63: 1 hour / Total 146.5 hours
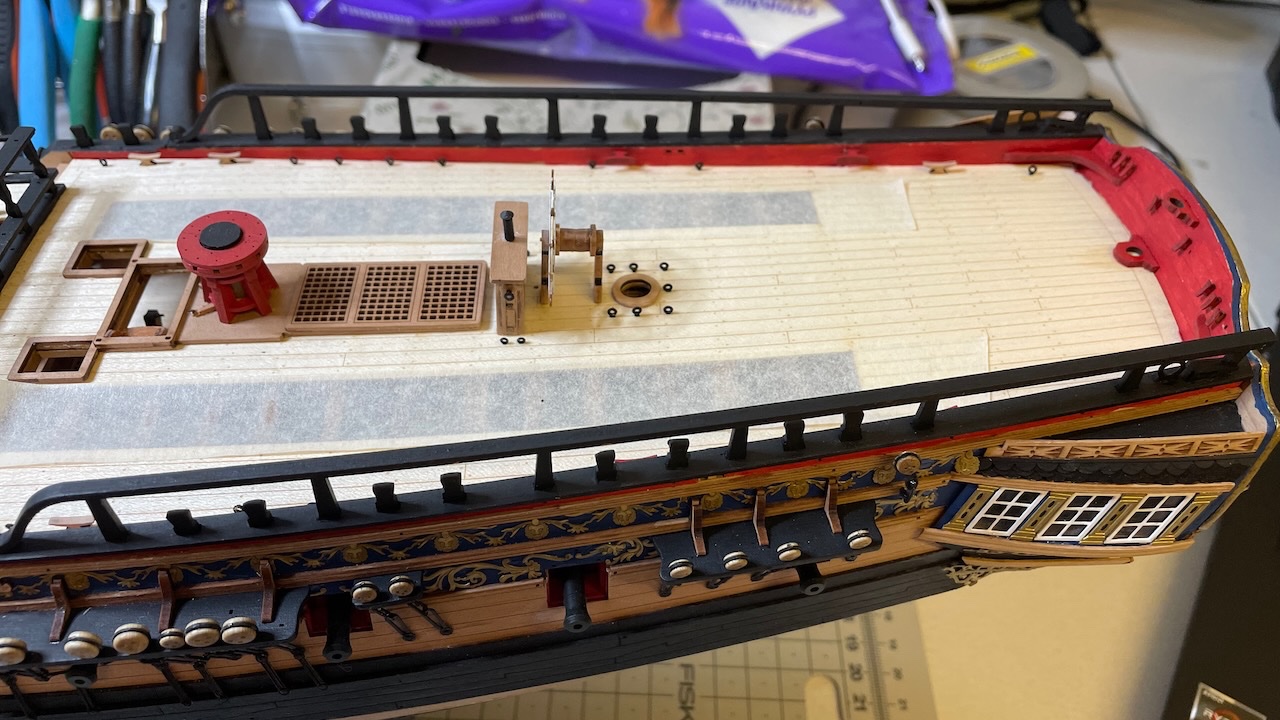
Photos 644-647: Yesterday I spent around one hour building and installing the upper capstan. The steps are similar to the previous one.

- Prowler901, Glenn-UK and mtaylor
-
3
-
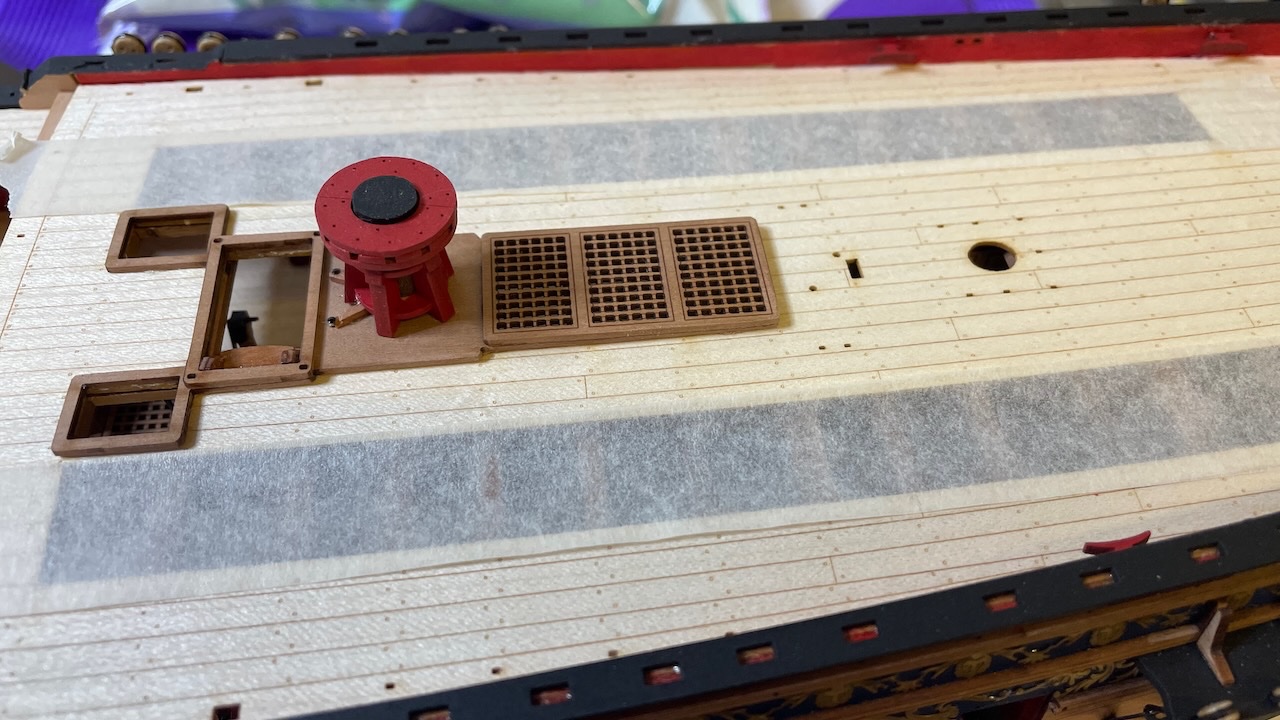
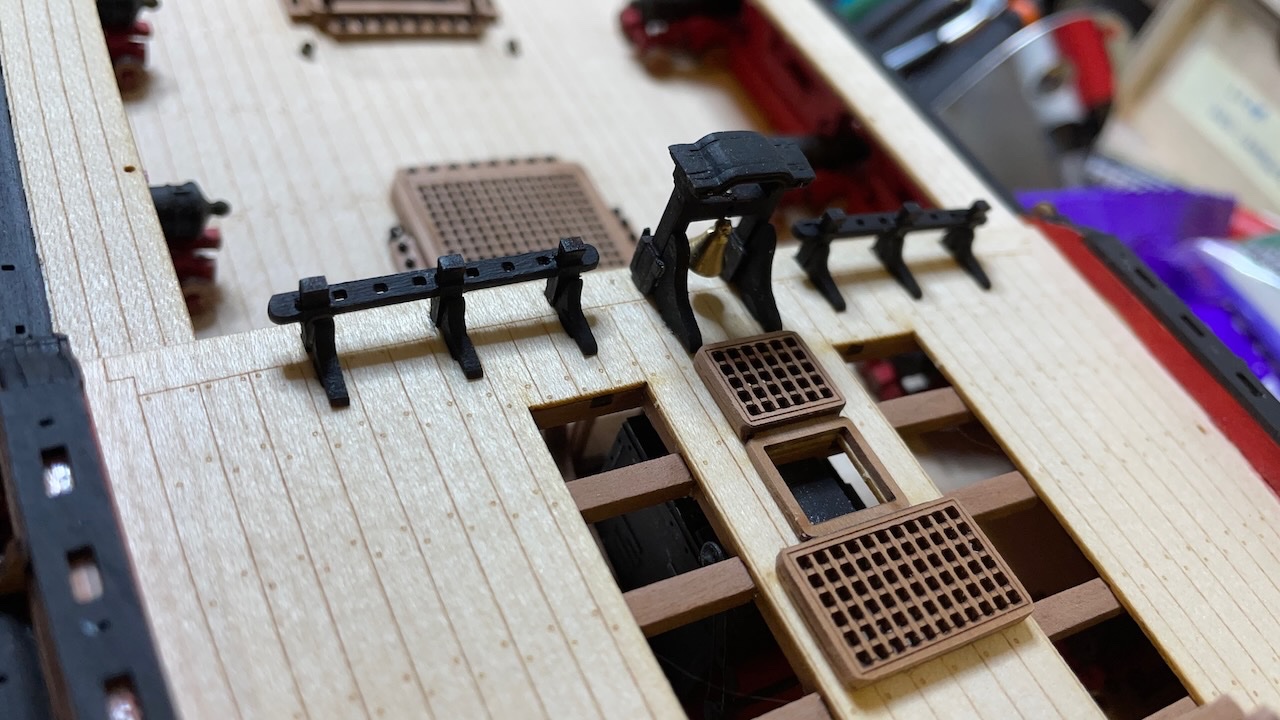
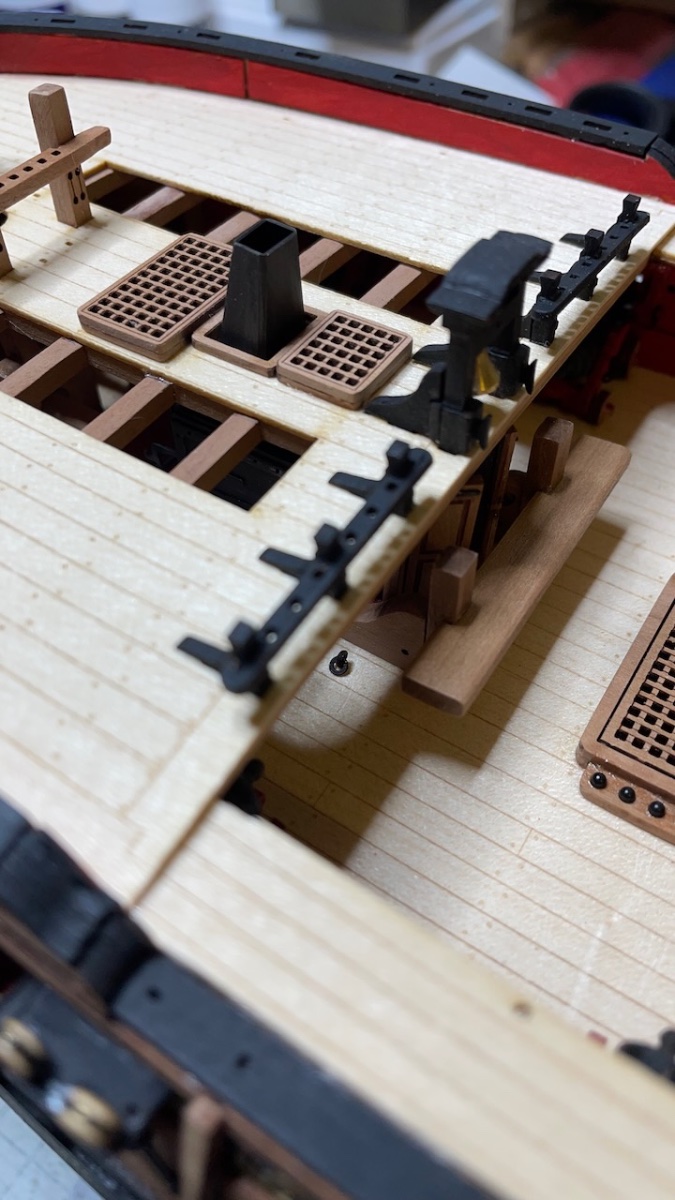
Photos 642-643: Ended the day by gluing the stove flue and Quarter deck gratings in place.
I missed the slot on top of the stove due to some minor alignment errors, but I just removed off the socket on the bottom of the flue and glued it on top of the stove. No issues.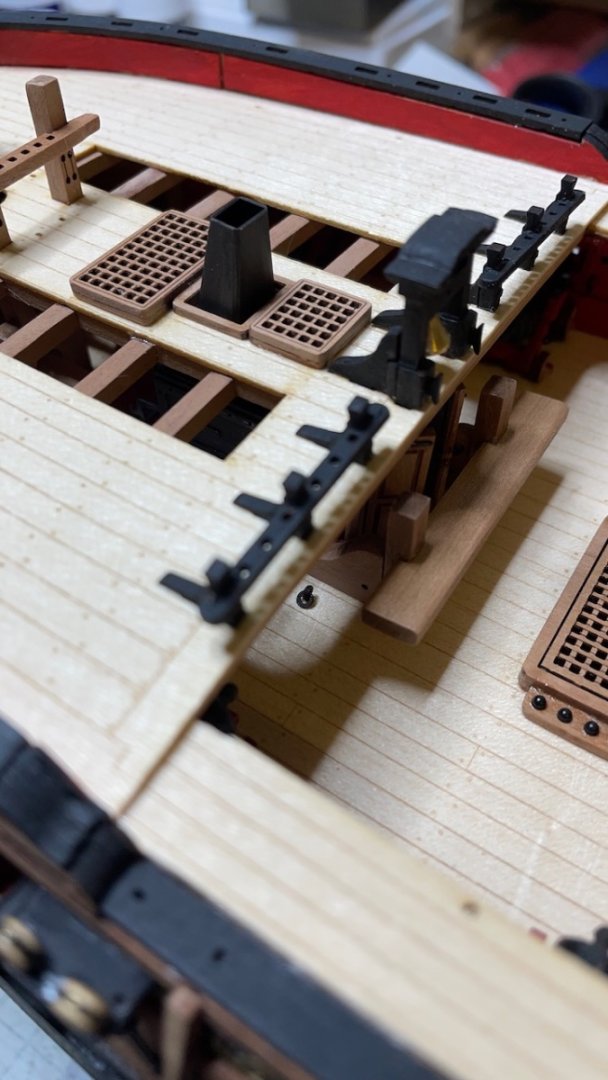
That's all for today. Thanks for watching!
- mtaylor, Prowler901, Glenn-UK and 3 others
-
6
-
Build Day 62: 1,5 hours / Total 145.5 hours
I finished Catheads. In the last few minutes of my session I glued stove flue and Quarter deck gratings, all those I had prepared earlier, in place.
Photo 633: Enlarging up the pre-opened holes for the catheads.
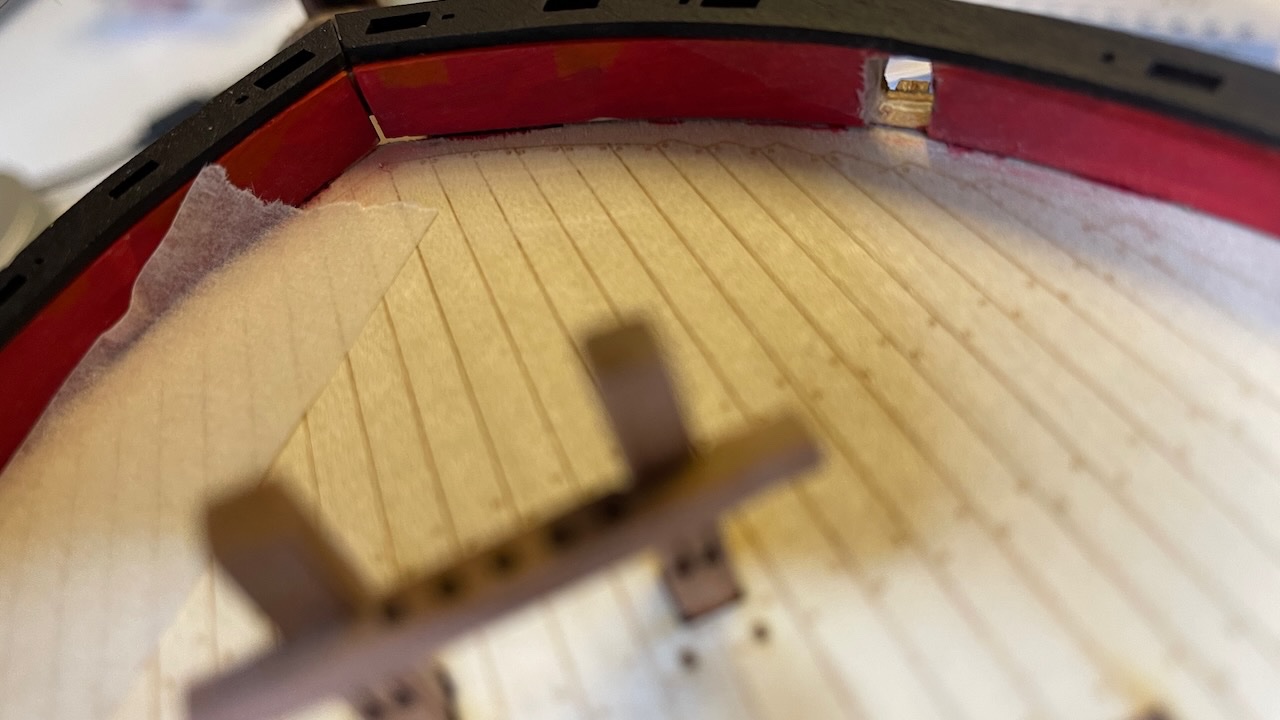
Photo 634: Tools I use for this purpose. The blue file is a micro size file that easily fits the hole. After a few strokes I switch to the bigger square file, time to time scraping with the knife.
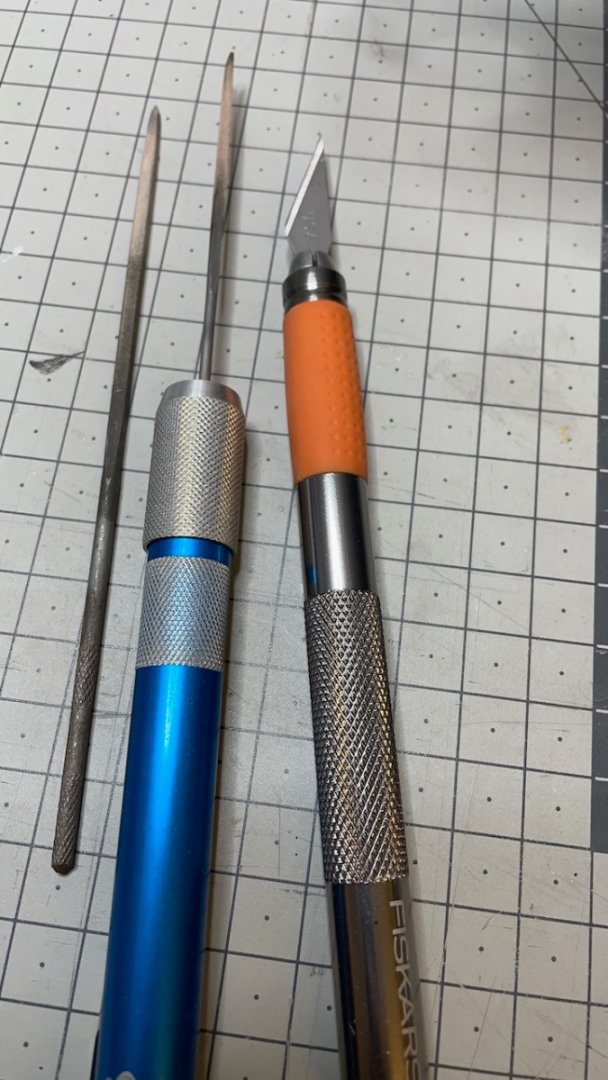
Photo 635: I also used this trick of filing the catheads themselves at points where I did not want to mess with the opening. These sections will be hidden in the Gunwale.

Photo 636: I drew reference lines on the masking tapes to help me while opening the holes to make sure that the Catheads align at correct angle.

Photo 637: You'll need to trim some of the decoration for fitting the support knees.

Photo 638: Parts painted...
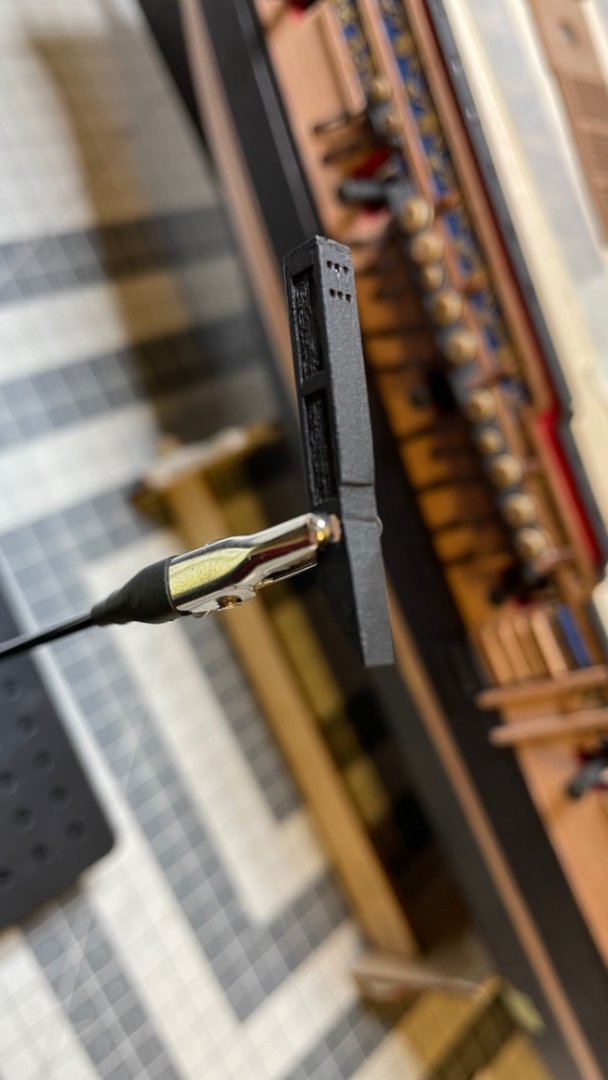
Photos 639-641: ... and glued in place.

-
Catheads.
Photo 627: Parts that form two Catheads... and some more (See next photo)
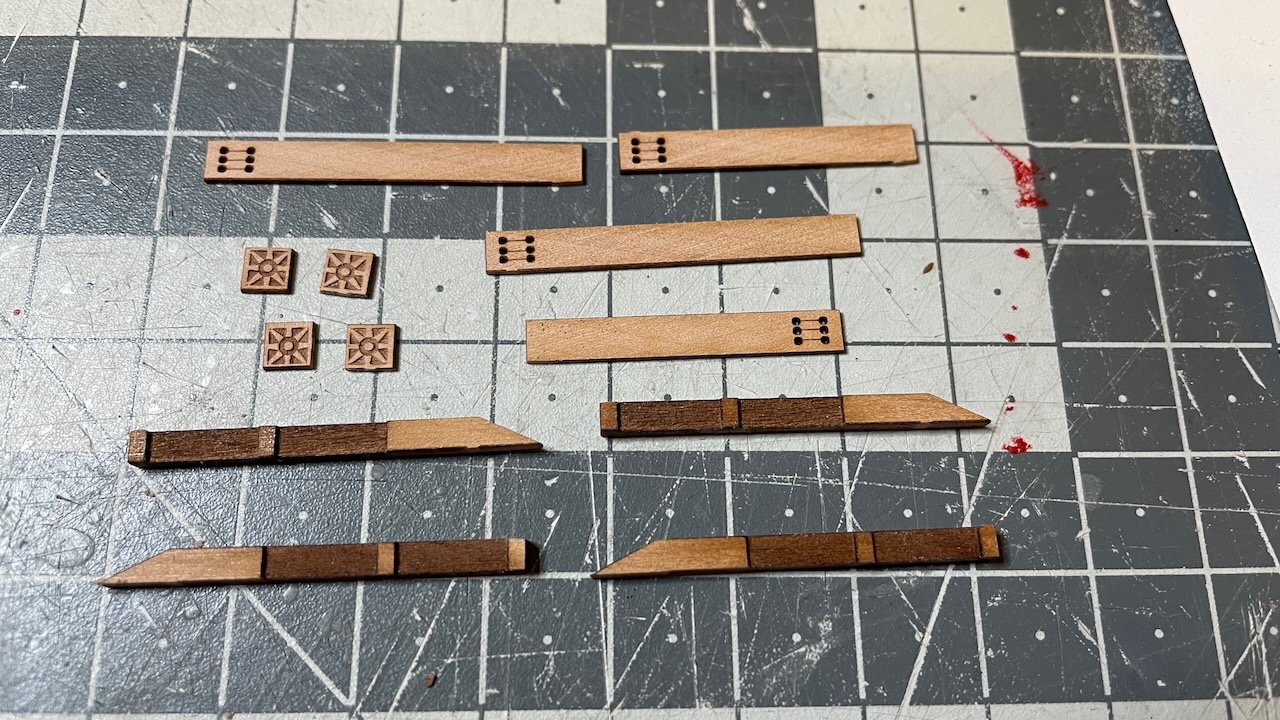
Photo 628: I figured I removed two end mouldings too many (those square ends). I taped them back to the sheet so they won't get lost. I don't know yet if I need them later or if they are just spares. But they are just safely there in case.

Photo 629: First you glue two parts back to back like this...
Photo 630: ... then glue the short and long patterns on their respective matching sides...

Photo 631: ... and glue the end mouldings.
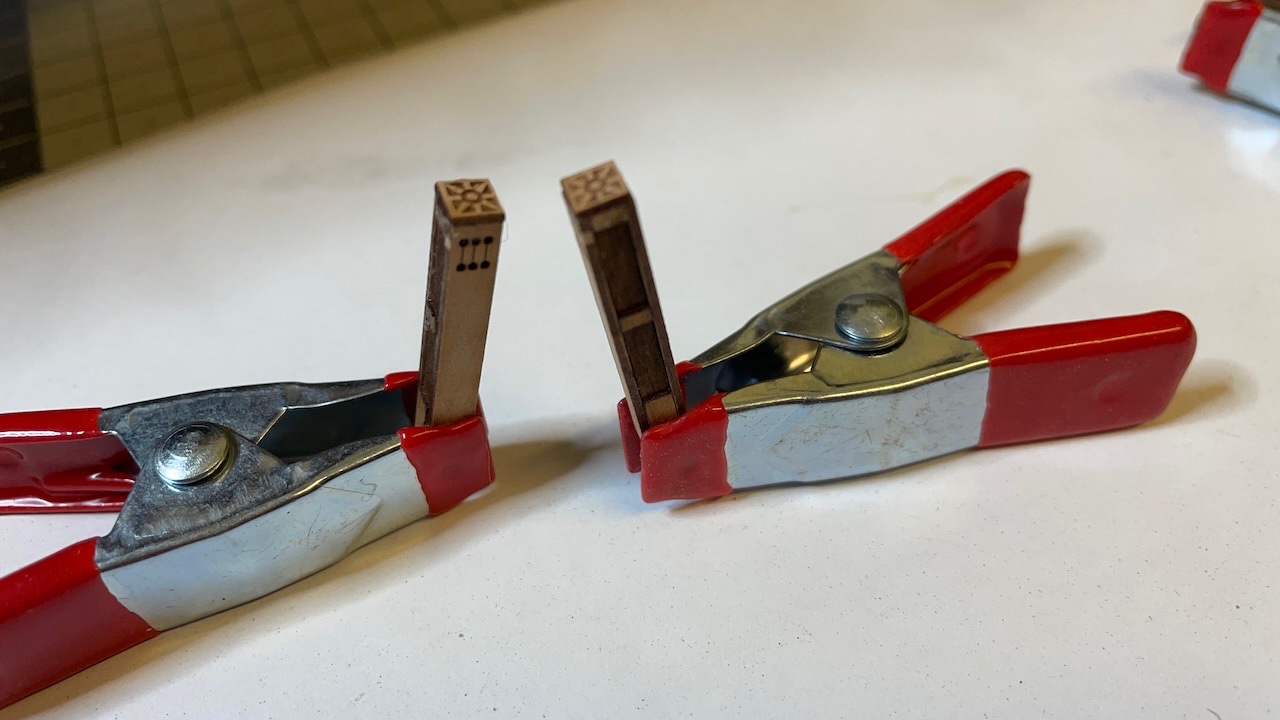
Photo 632: ... and sand the sides to level.

That's all for today. Thanks for watching!
- Prowler901, JeffT, Glenn-UK and 4 others
-
7
-
Build Day 61: 1,5 hours / Total 144 hours
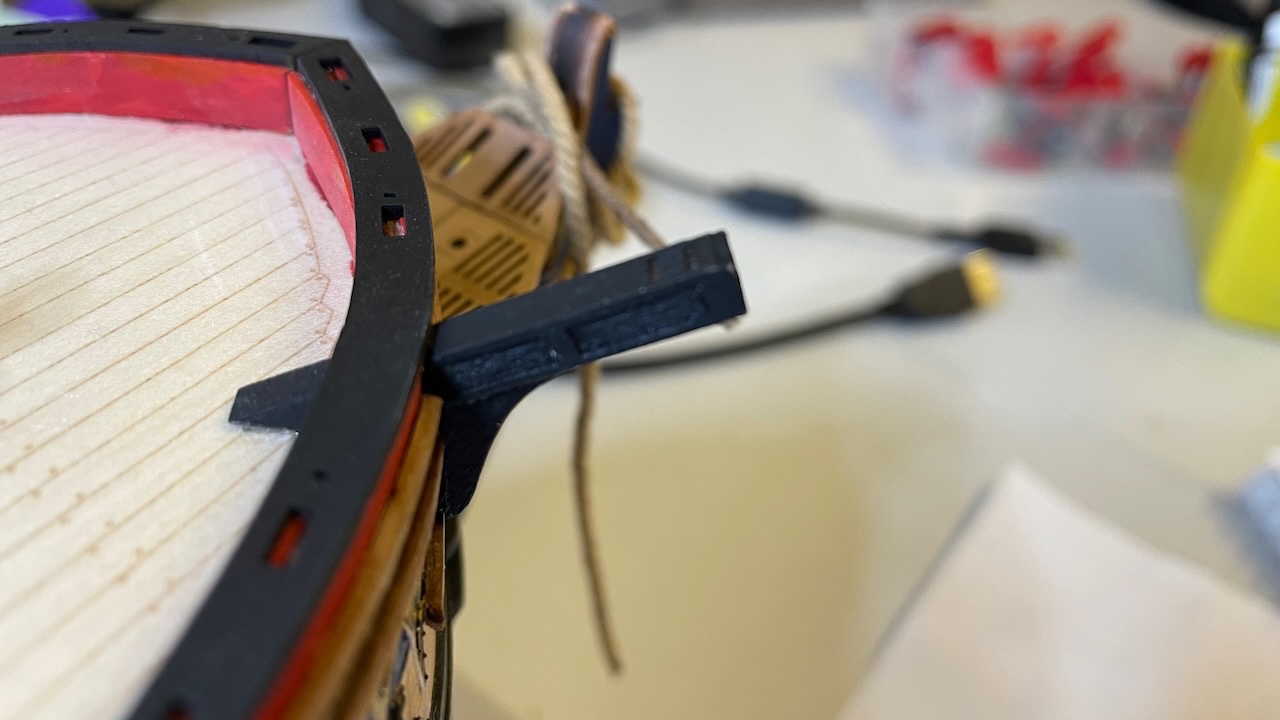
Today I spent 1,5 hours making the Forecastle rails at either side of the Belfry and started Catheads.
Photo 624: Parts that make the Forecastle Rails.

Photos 625-626: The stanchions sit on the rails with a slight angle to comply with the deck curve.
I painted the rail+stanchions construction before installing in place. Same for the supporting knees.

-
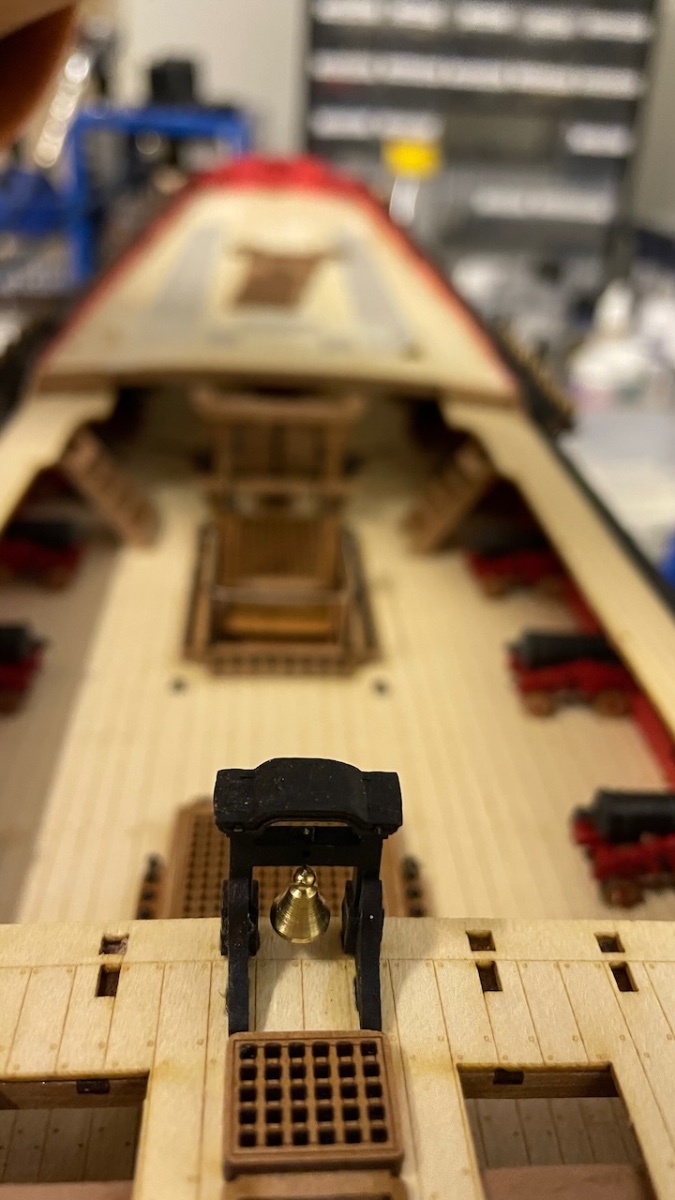
Belfry installation.
Photo 617: Parts. Two nails will be used for alignment of the parts...
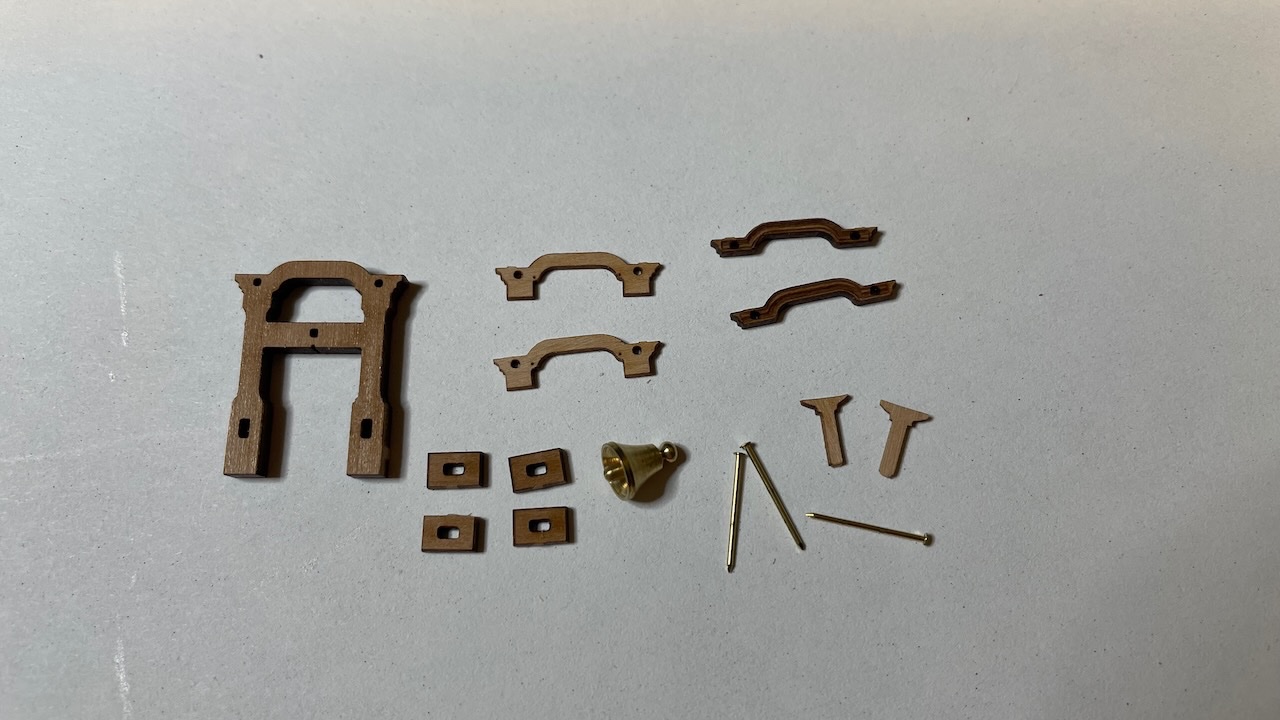
Photos 618-619: .... like this. I just applied a drop of thin CA and left the nails in place and trimmed them flush with the surface.


Photo 620: Bell is hanging by means of the third pin, bent 90 degrees
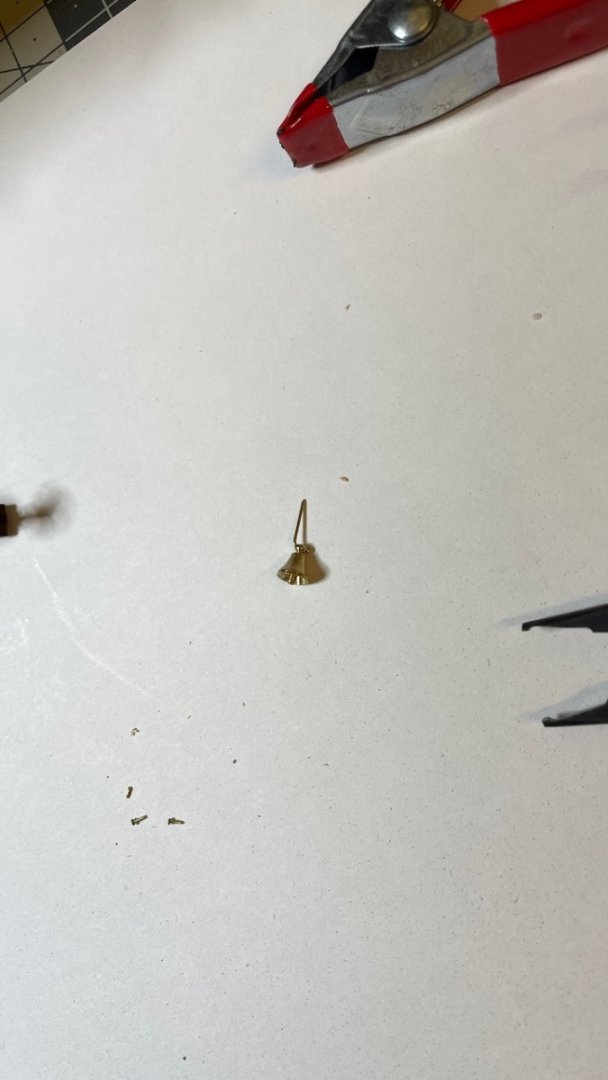
Photo 621: I chose to paint it in black.
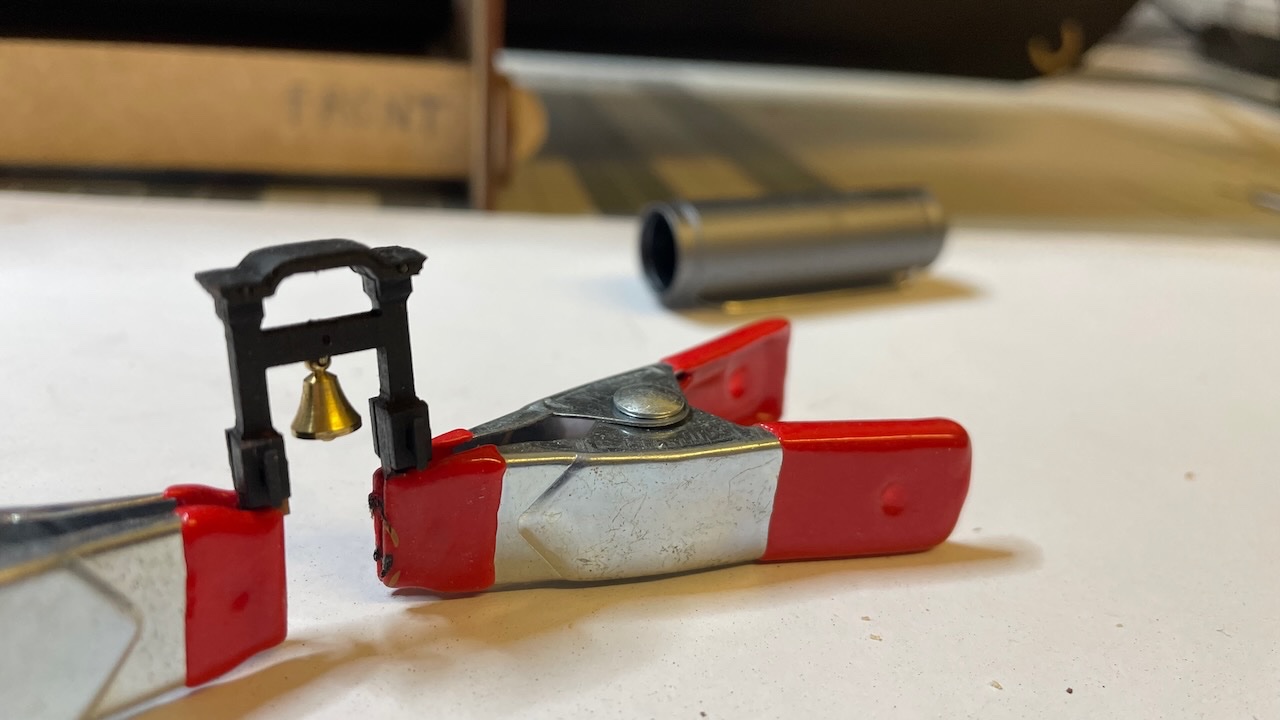
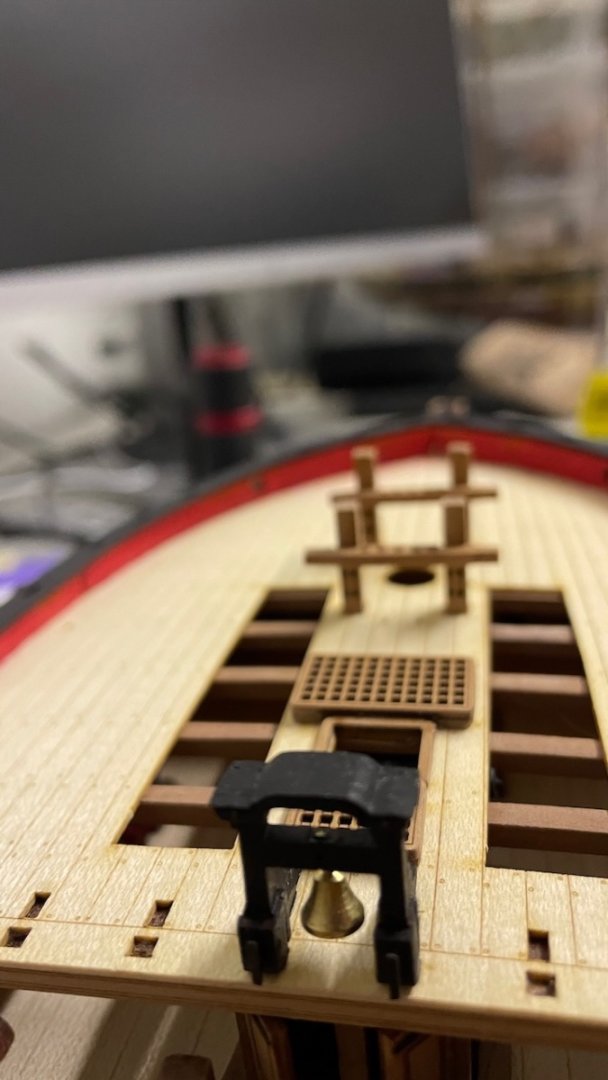
Photos 622-623: Belfry in place together with support knees, also painted in black.

That's all for today. Thanks for watching!
- DonSangria, hollowneck, BobG and 8 others
-
11
-
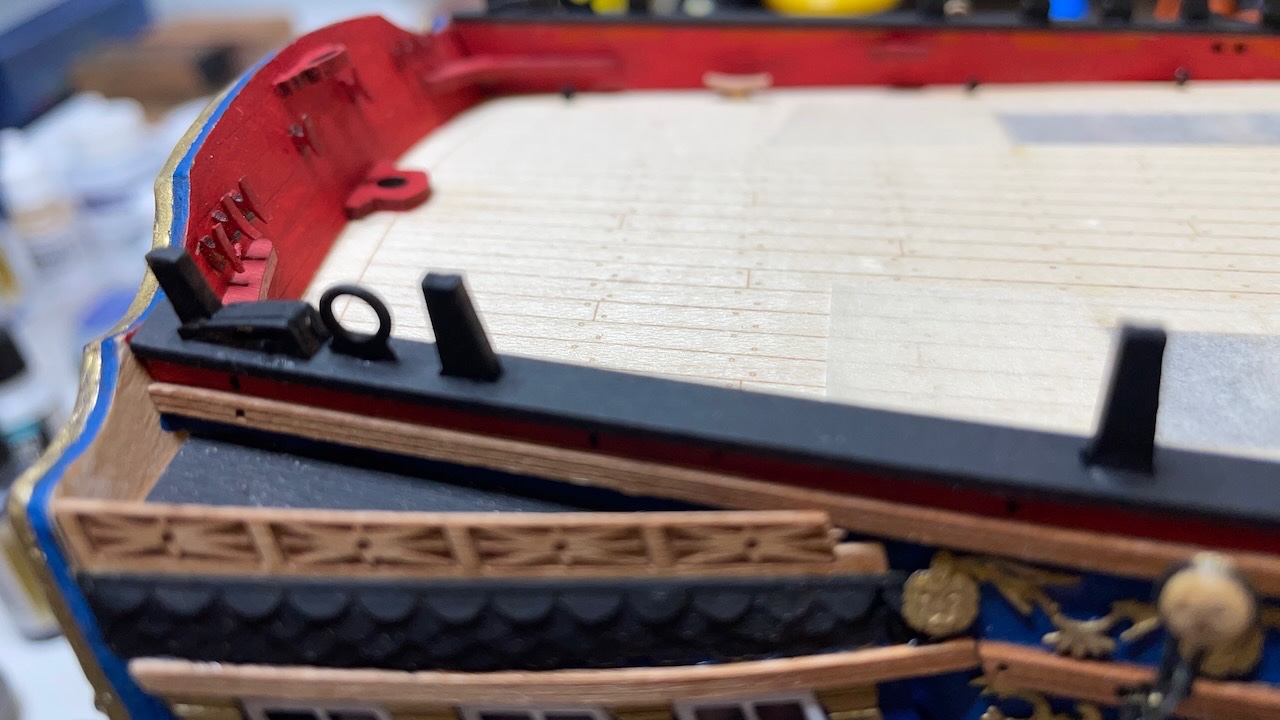
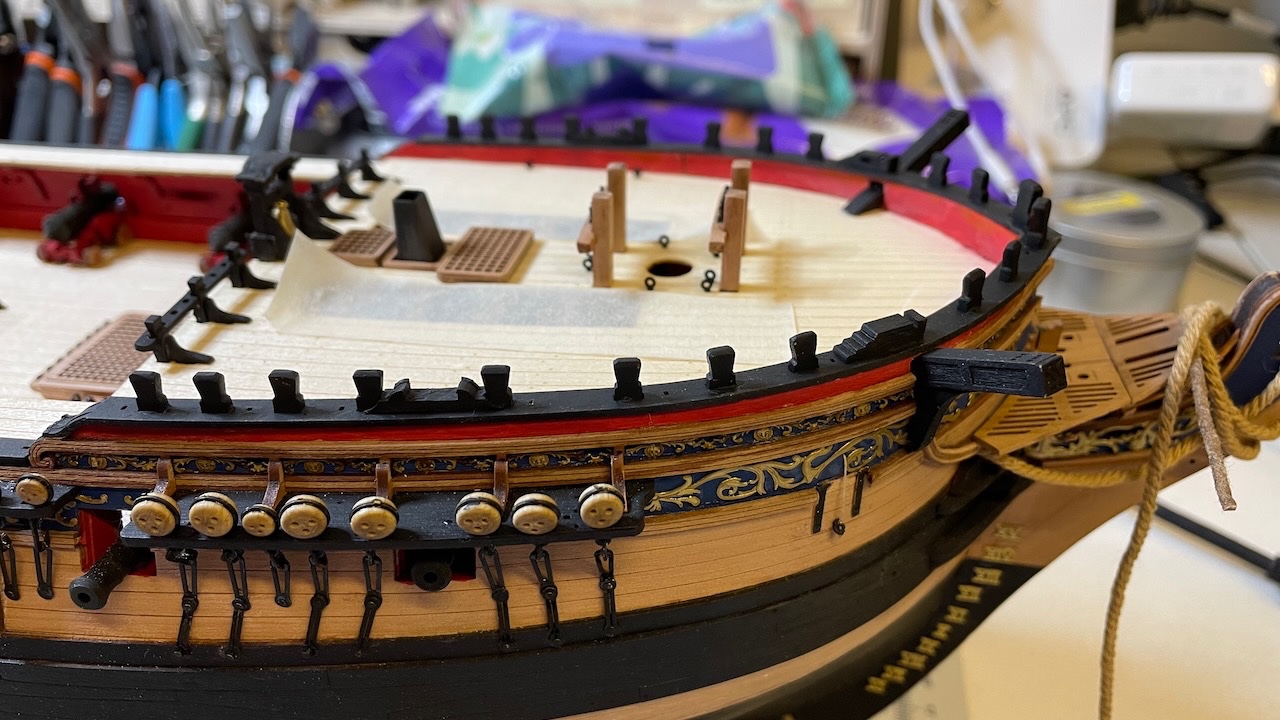
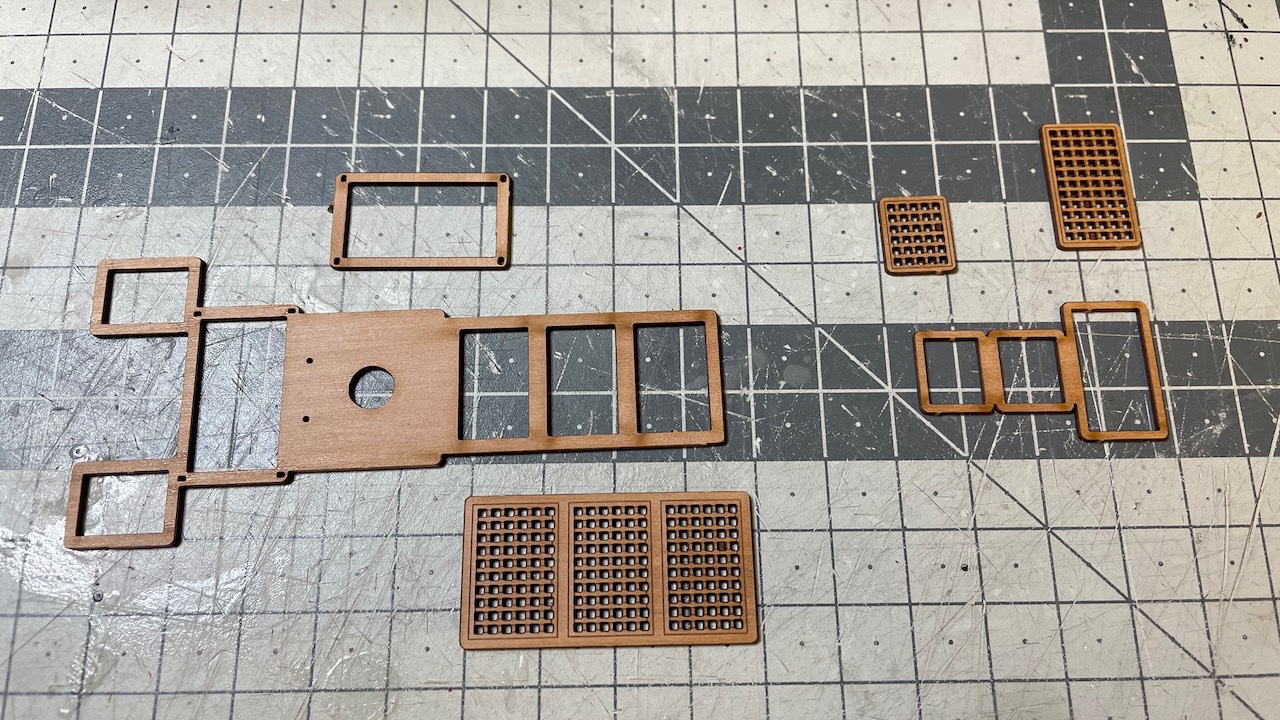
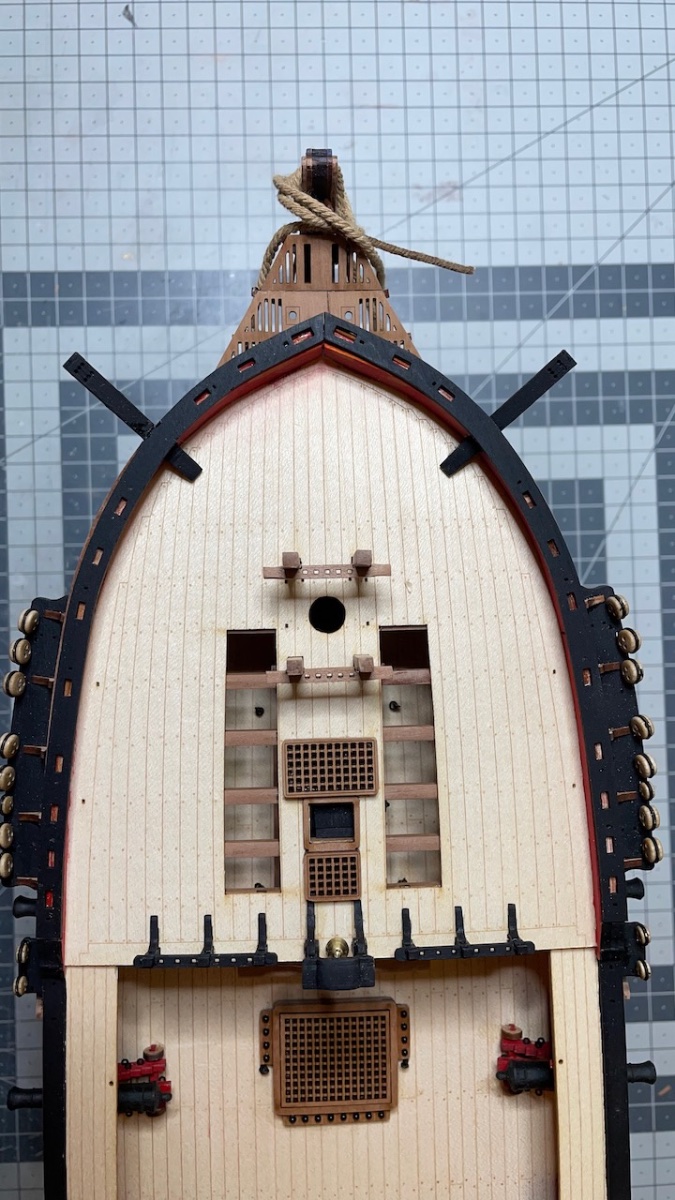
Photos 615-616: Forecastle and Quarterdeck gratings. Forecastle glued in place. According to the instructions the Quarterdeck gratings will be glued later, though I don't think it is critical to follow that order.
Cleaning the laser char on the edges takes most of the time with these.
- Cirdan, Glenn-UK, Prowler901 and 1 other
-
4
-
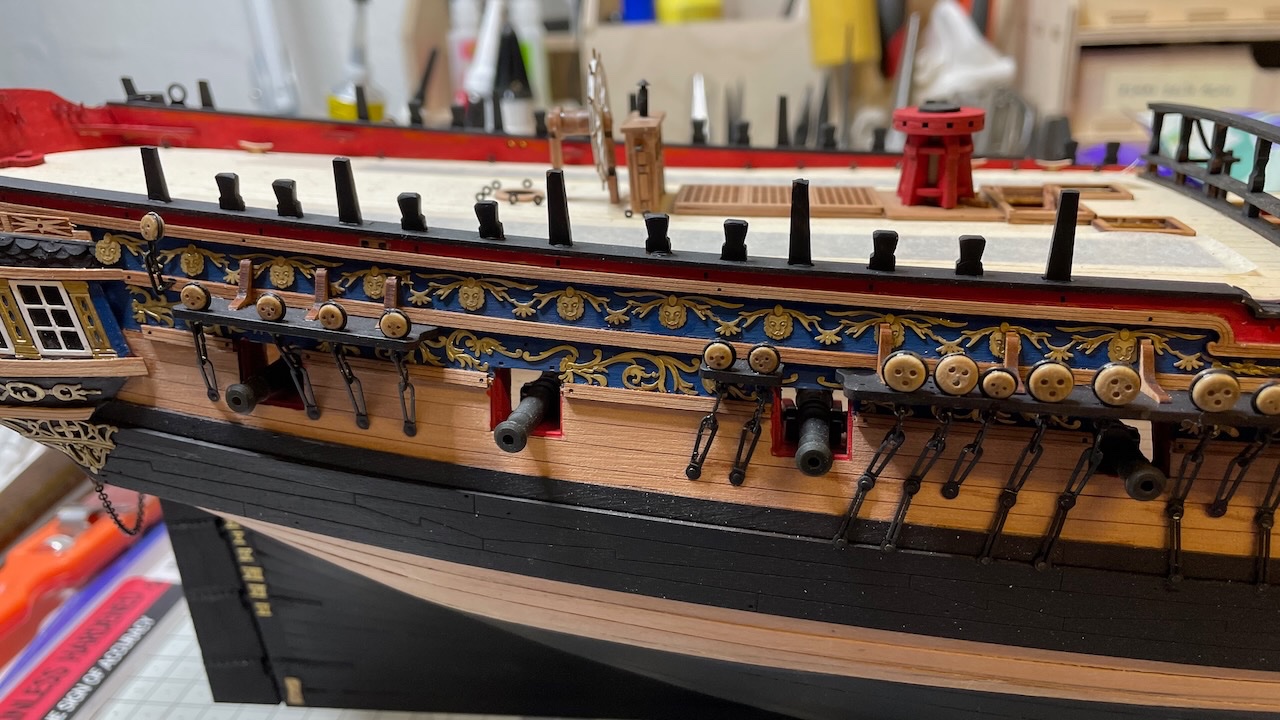
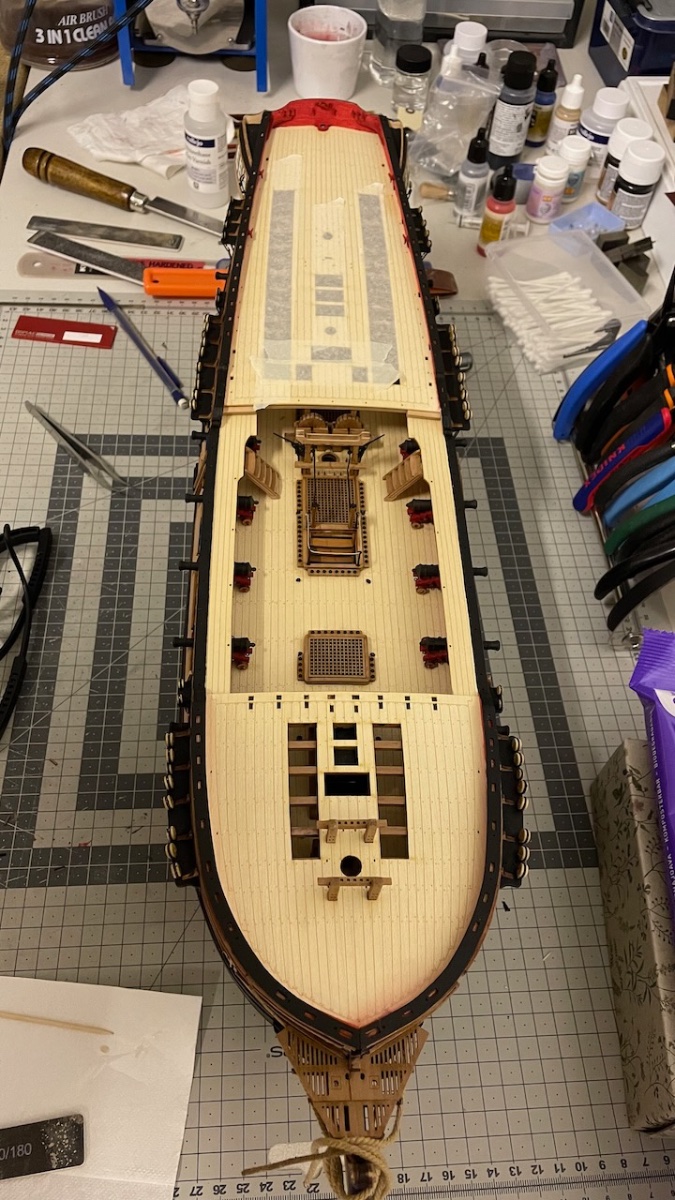
Forecastle, Quarterdeck and Waist gunwales.
Photos 611-612: Parts, painted with airbrush.
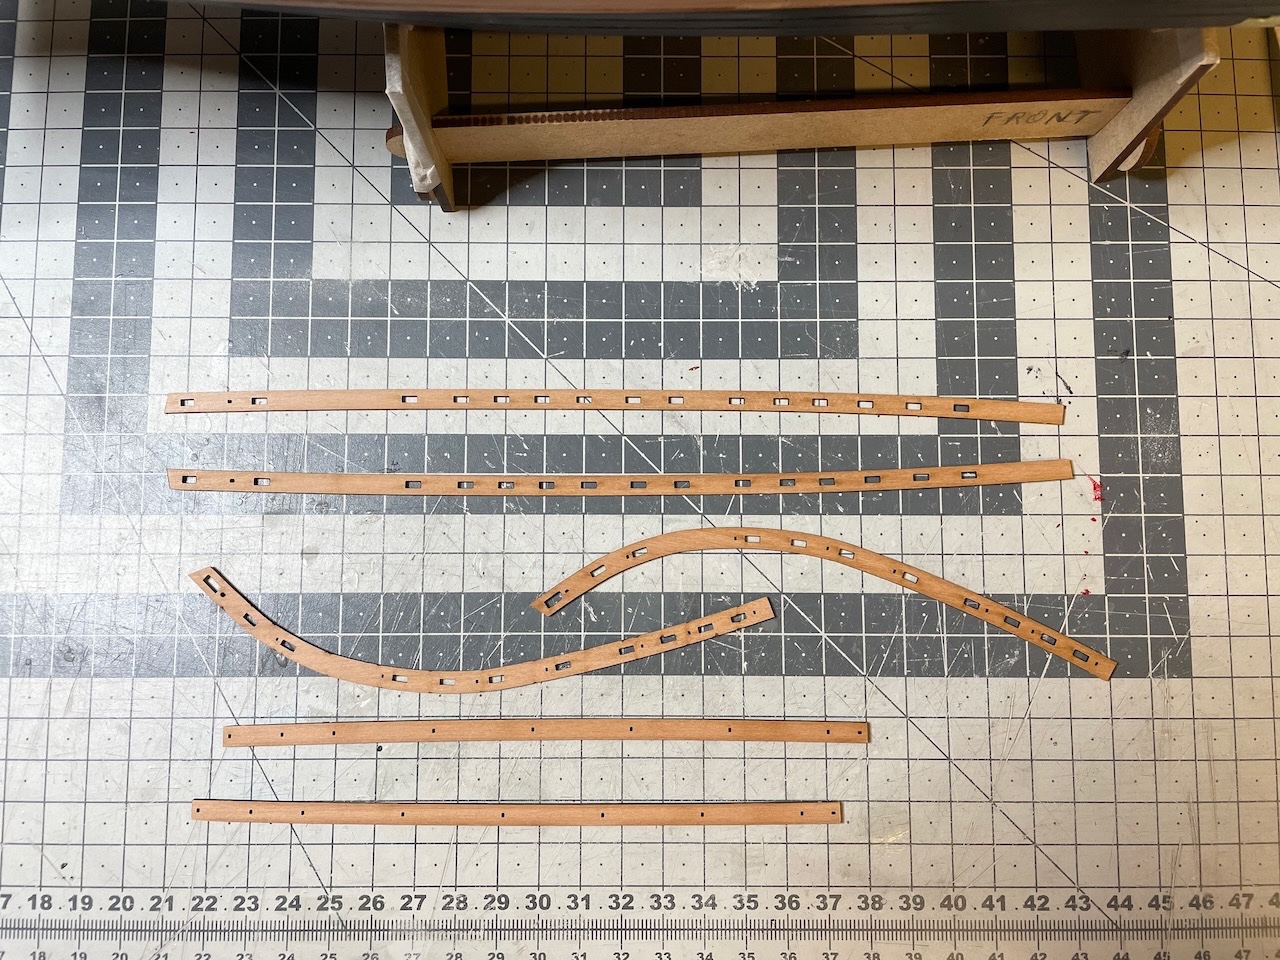
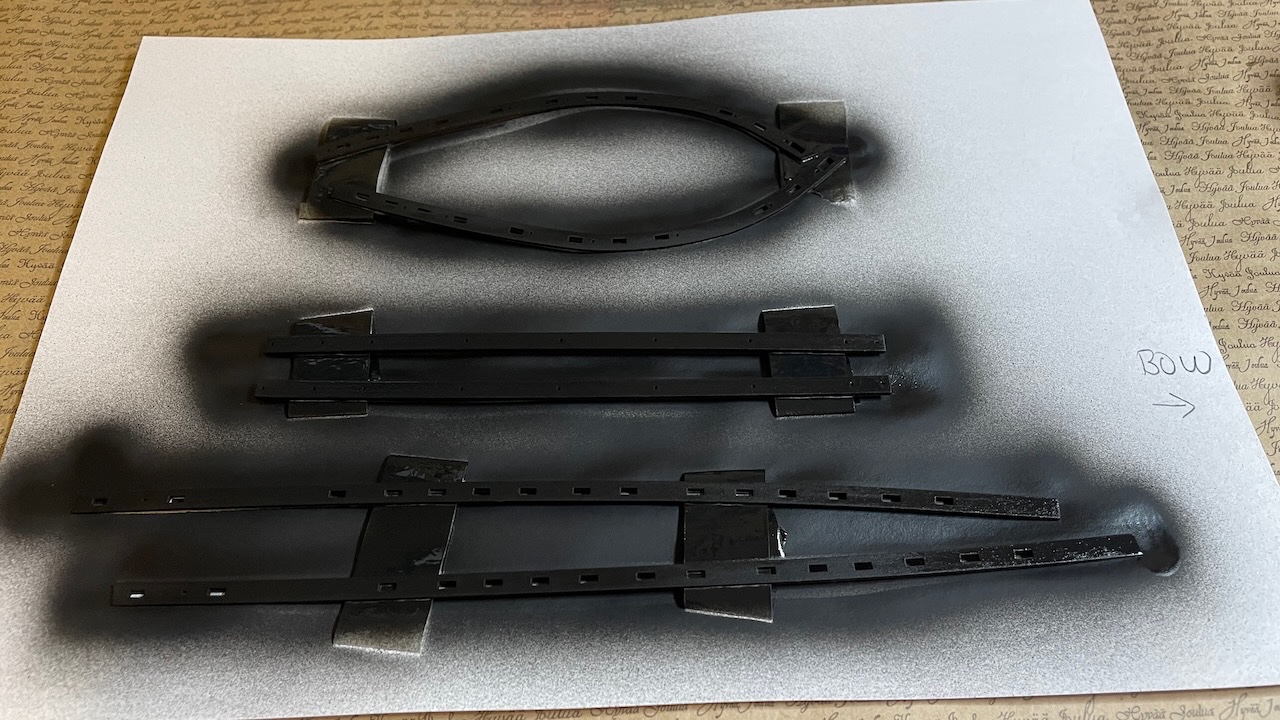
Photo 613: While the paint is drying, I smoothened the scrollwork on the bulwarks, using filler, file and sandblock. This area is to be painted in black, as continuation of the gunwales. Note there are two slots that need to stay, so no filling in them.
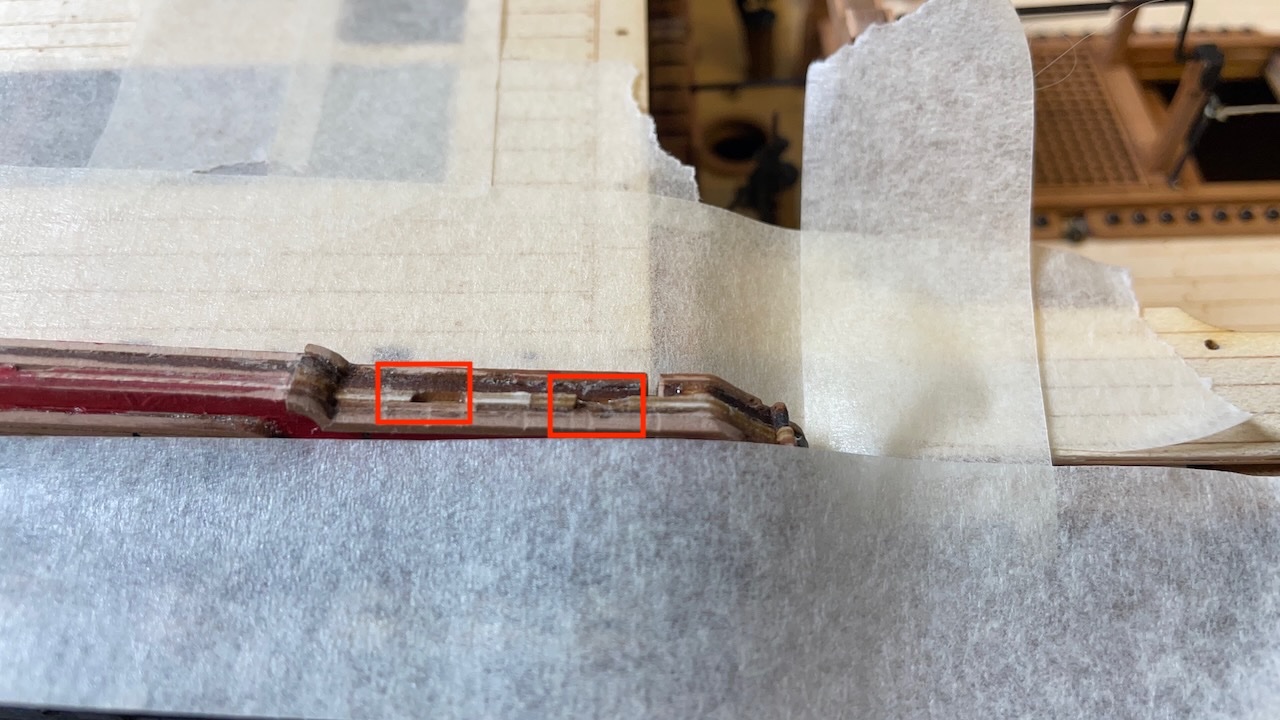
Photo 614: Gunwales glued.
- Prowler901, mtaylor, Glenn-UK and 3 others
-
6
-
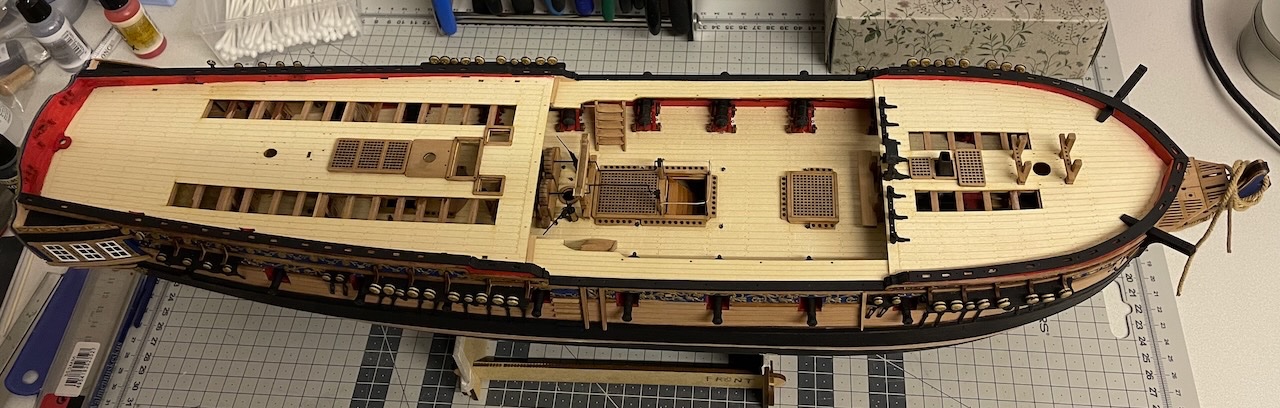
Build Day 60: 4 hours / Total 142,5 hours
Thanks to the rainy Sunday (!), I managed to work quite a many hours today, completing:
- Fore Topsail sheet bitts with their cross beams,
- Forecastle, Quarterdeck and Waist gunwales installation,
- Forecastle and Quarterdeck gratings (only Forecastle grating glued in place at this stage),
- Belfry installation.
Photos 609-610: Fore Topsail sheet bitts with their cross beams. They sit in their slots on the lower deck.
-
-
Build Day 59: 1,5 hours / Total 138,5 hours
Gangway Stairs and Quarterdeck Gangway Steps construction.
Photo 605-606: Construction of the stairs the same way as the previous ones.
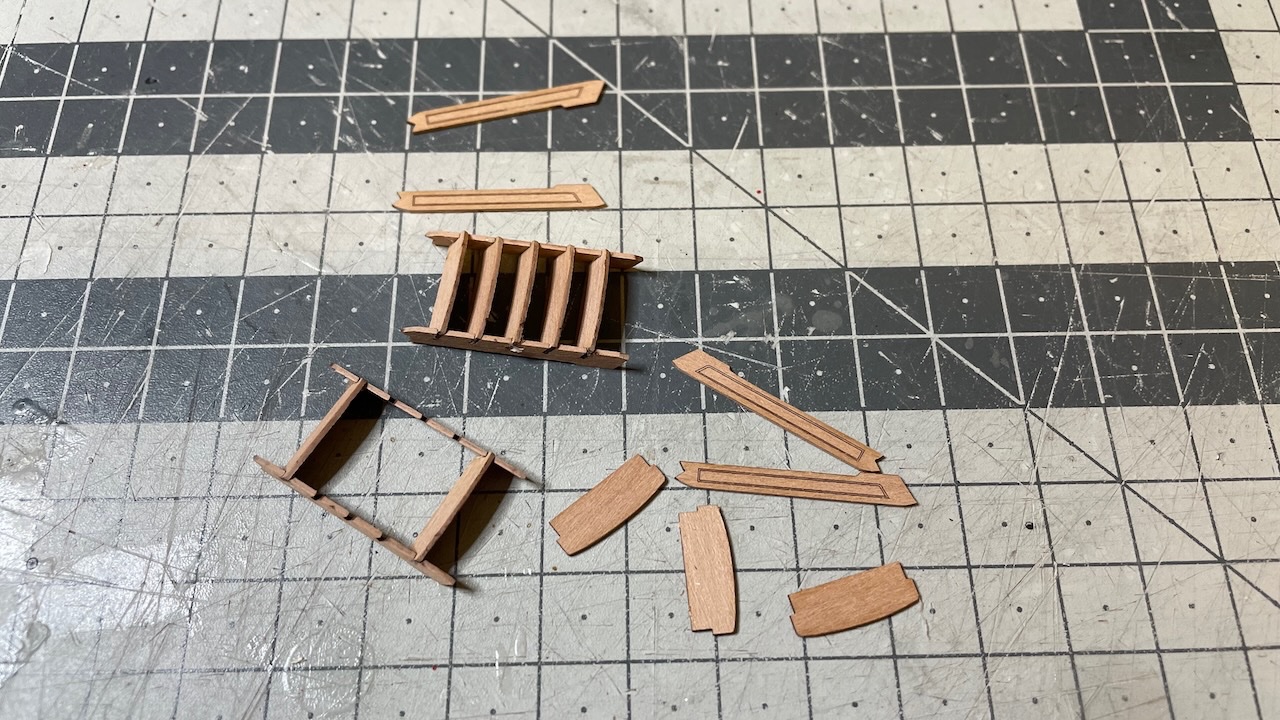
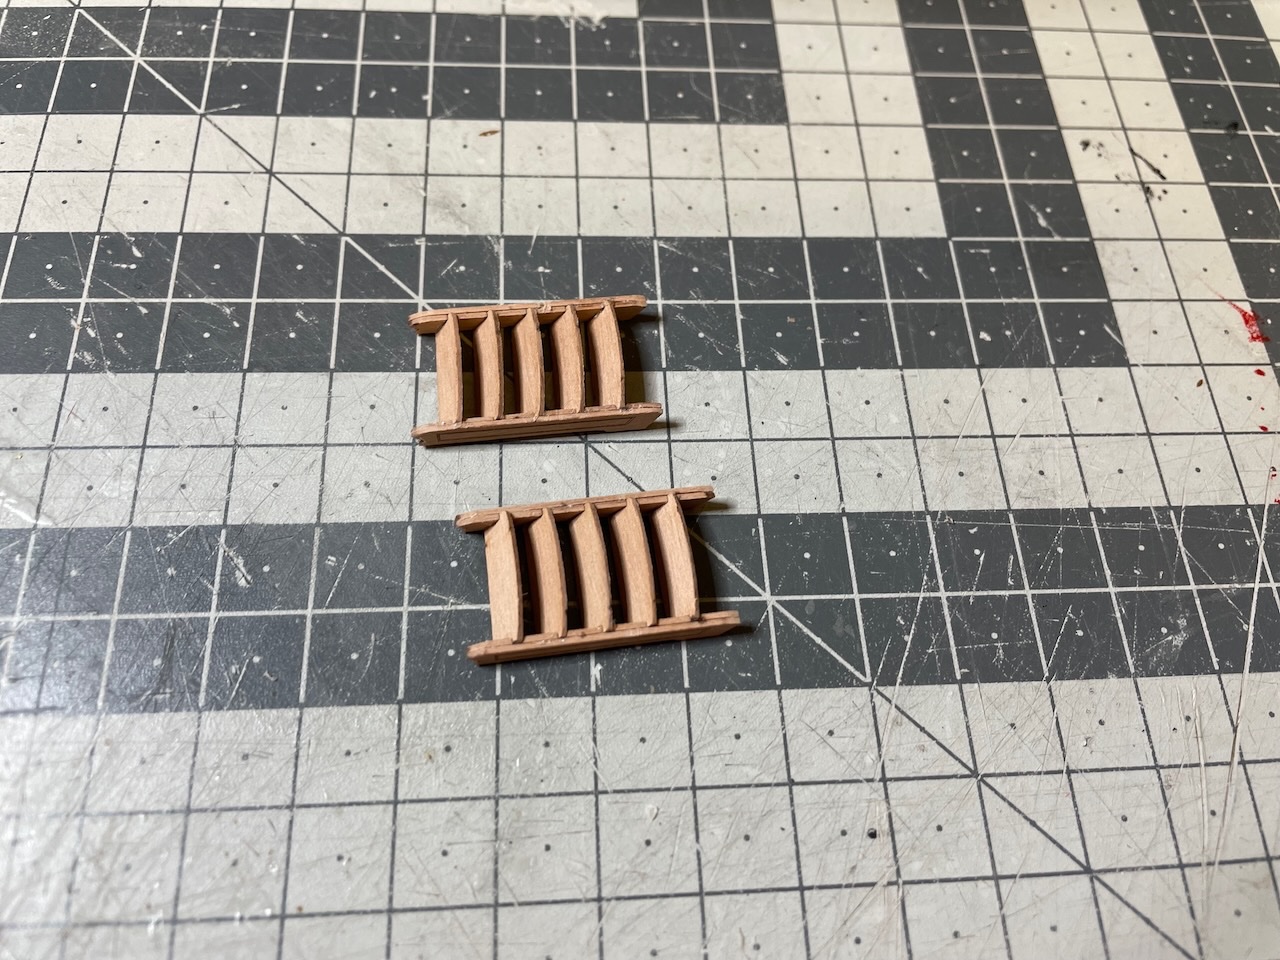
Photo 607: Taking measurements for trimming. I will glue the step on it later, after trimming it to same size with this one. The side resting against the bulwark will need some bewelling.
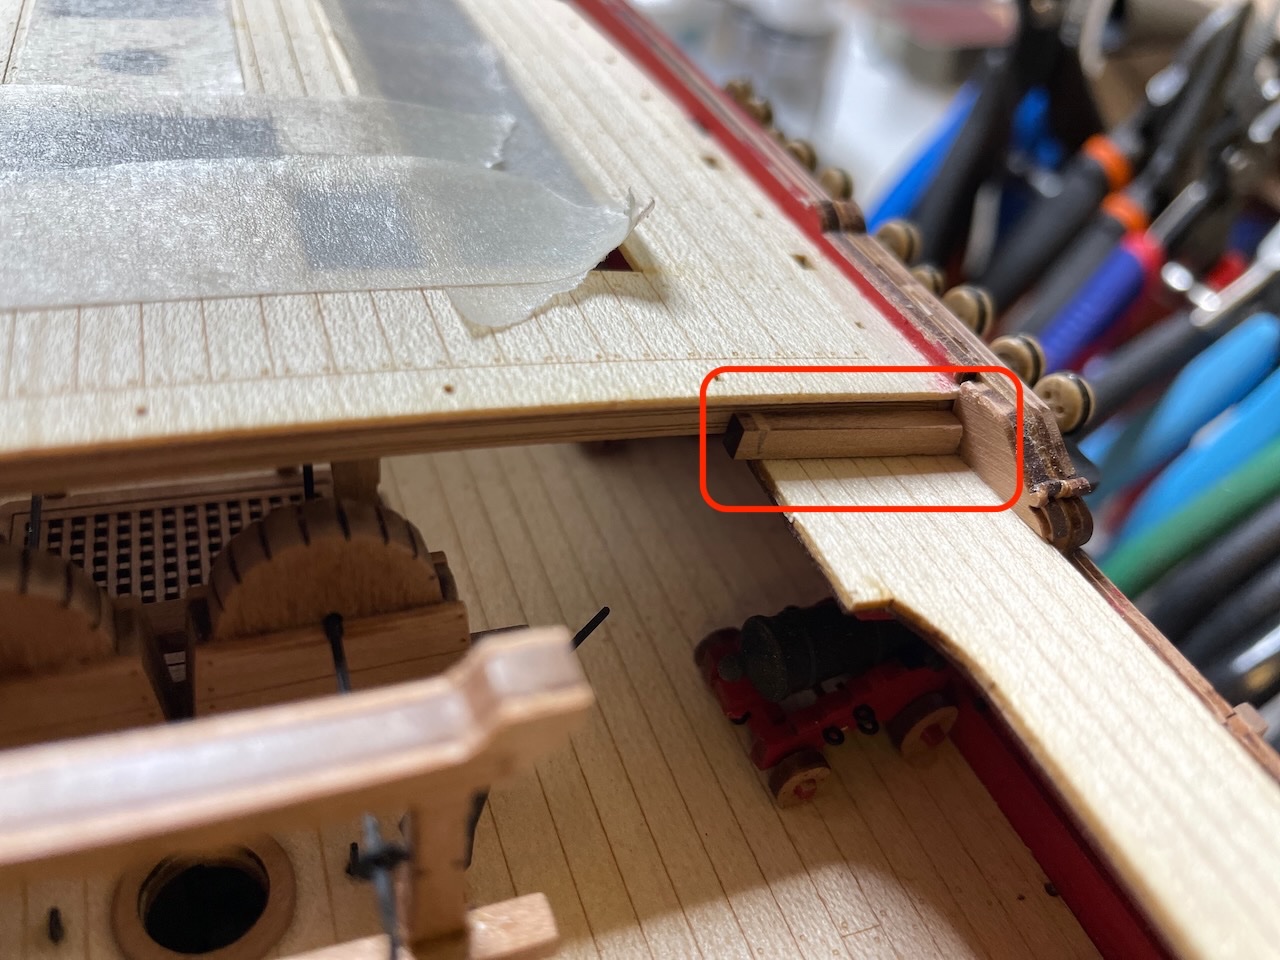
Photo 608: Gangway Stairs and Quarterdeck Gangway Steps in place.

That's all for today. Thanks for watching!


HMS Sphinx 1775 by aydingocer - Vanguard Models - 1:64 - Revision #2
in - Kit build logs for subjects built from 1751 - 1800
Posted · Edited by aydingocer
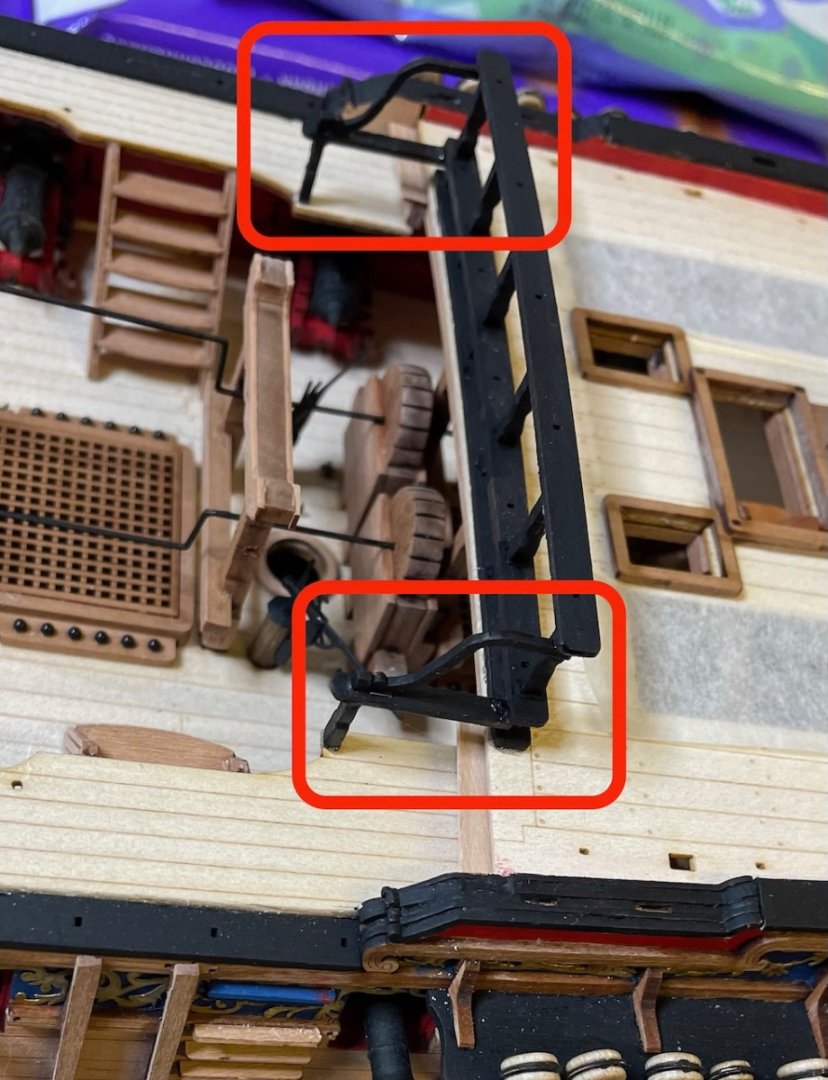
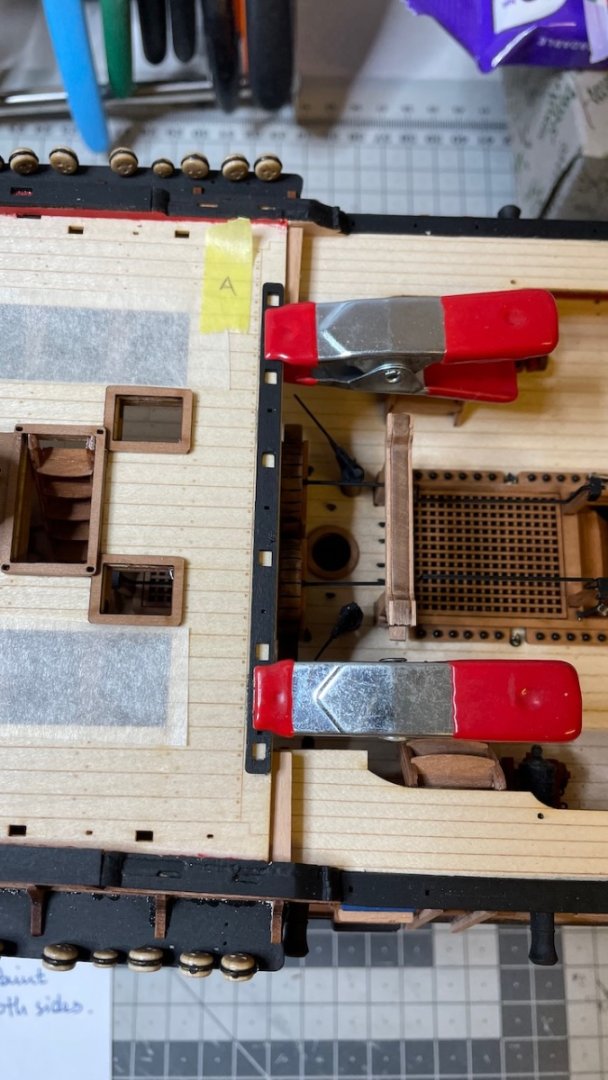
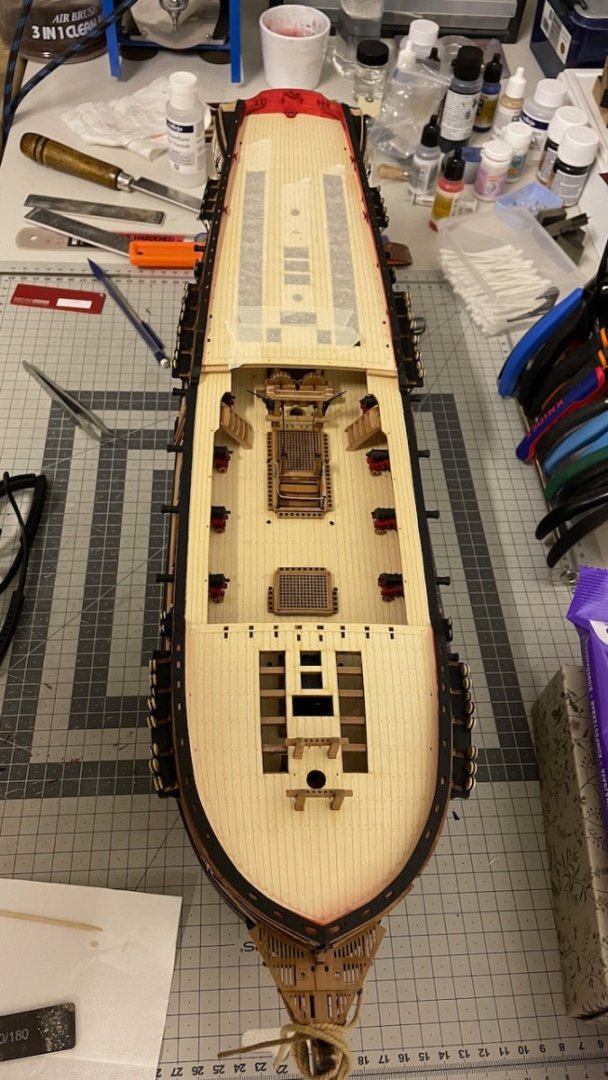
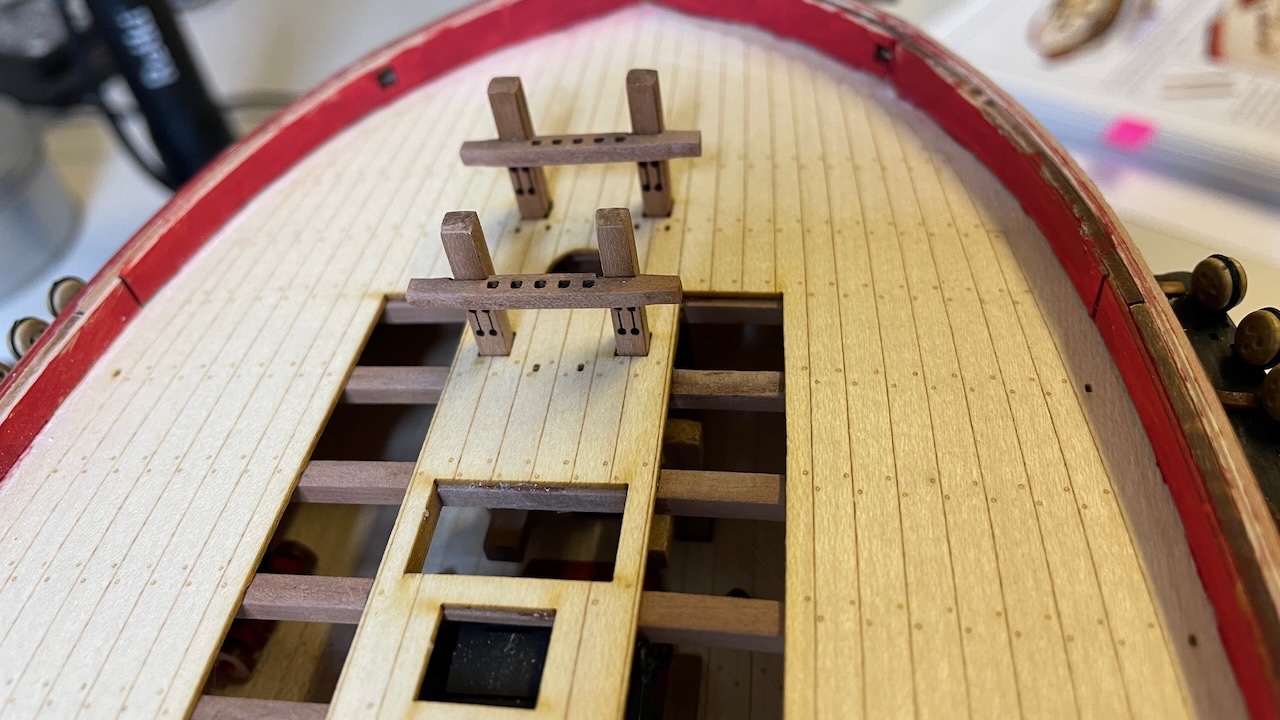
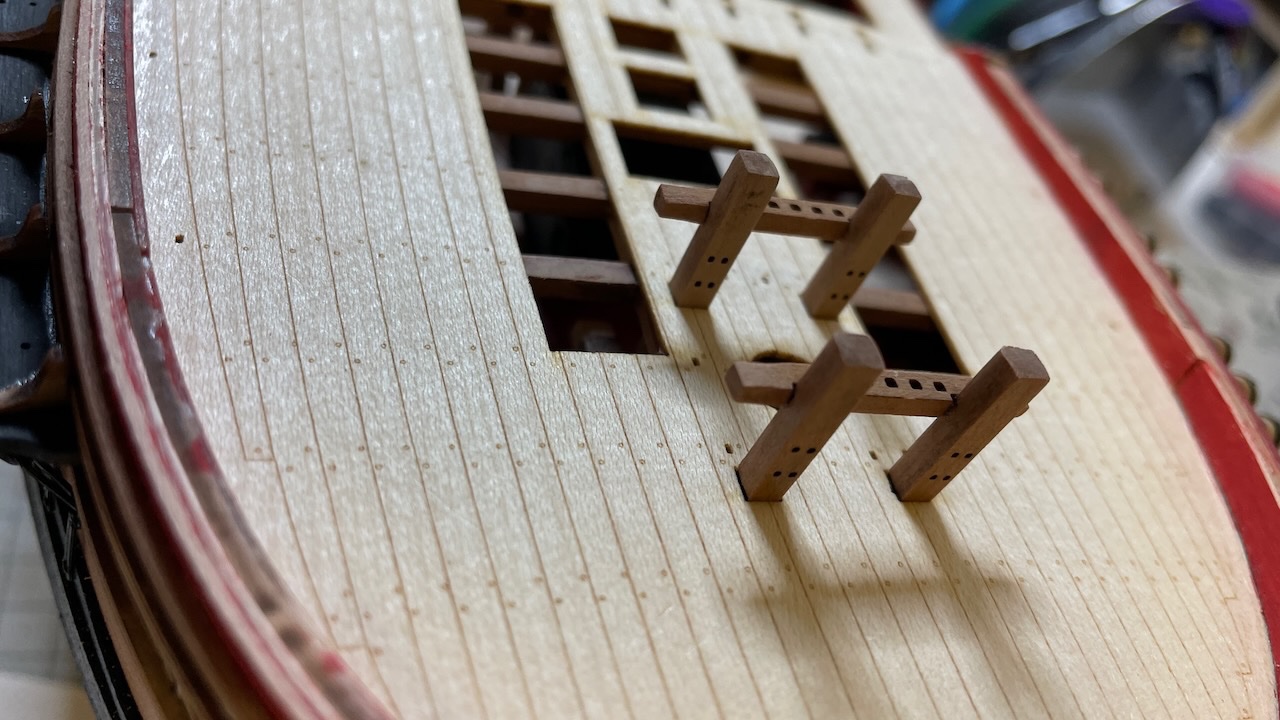
Build Day 70: 2 hours / Total 161.5 hours
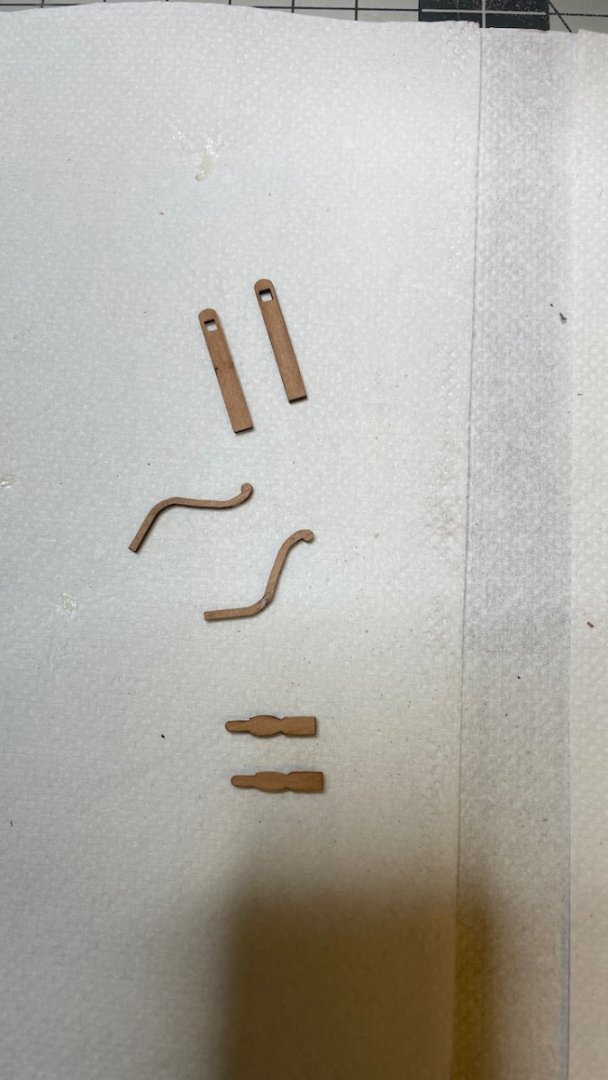
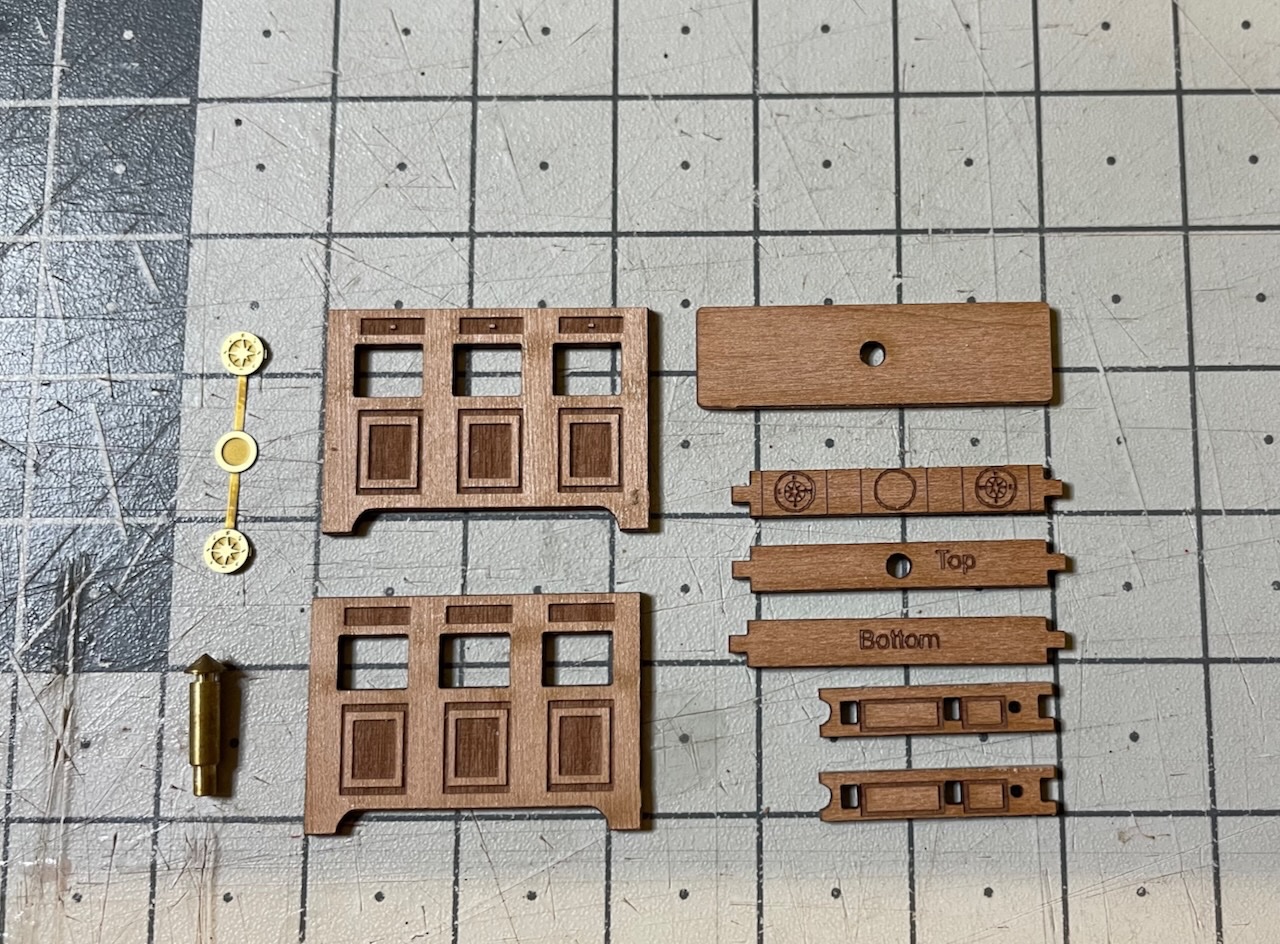
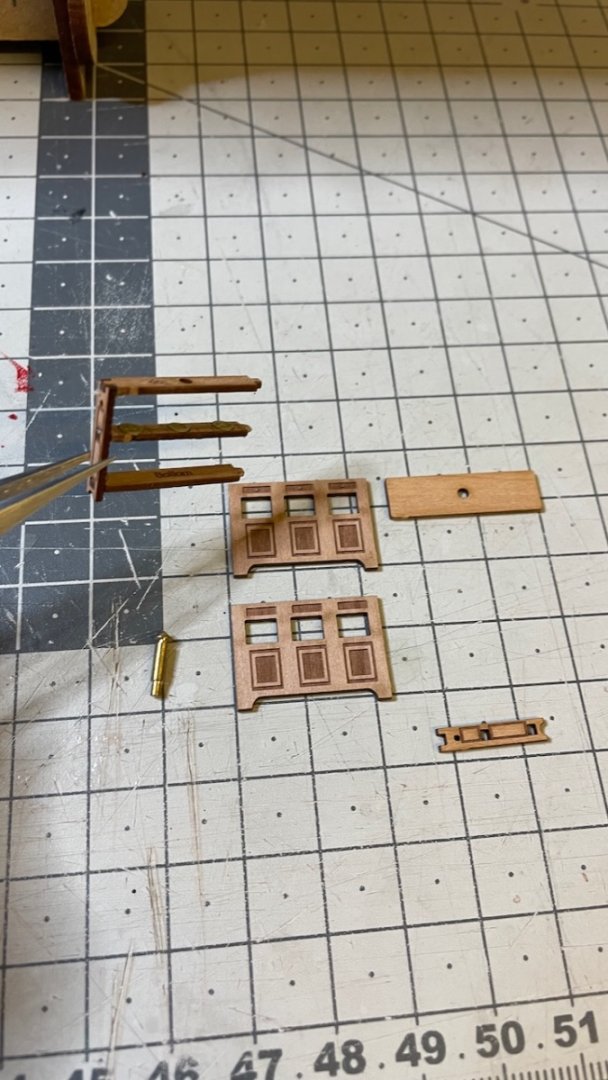
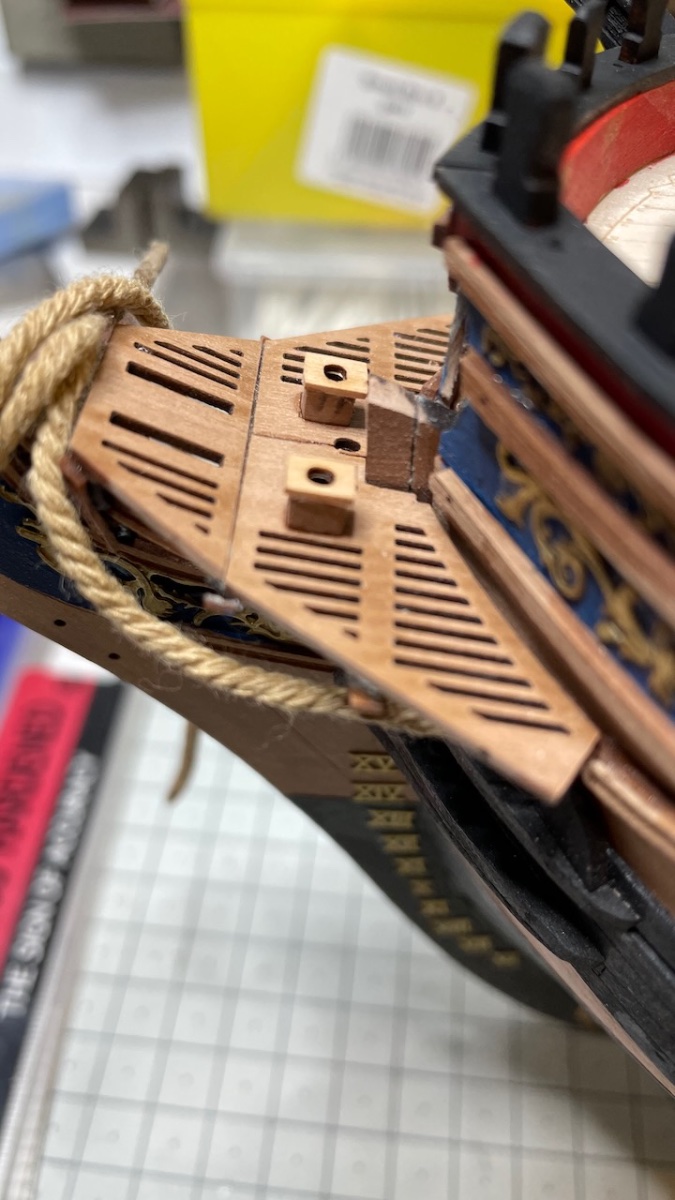
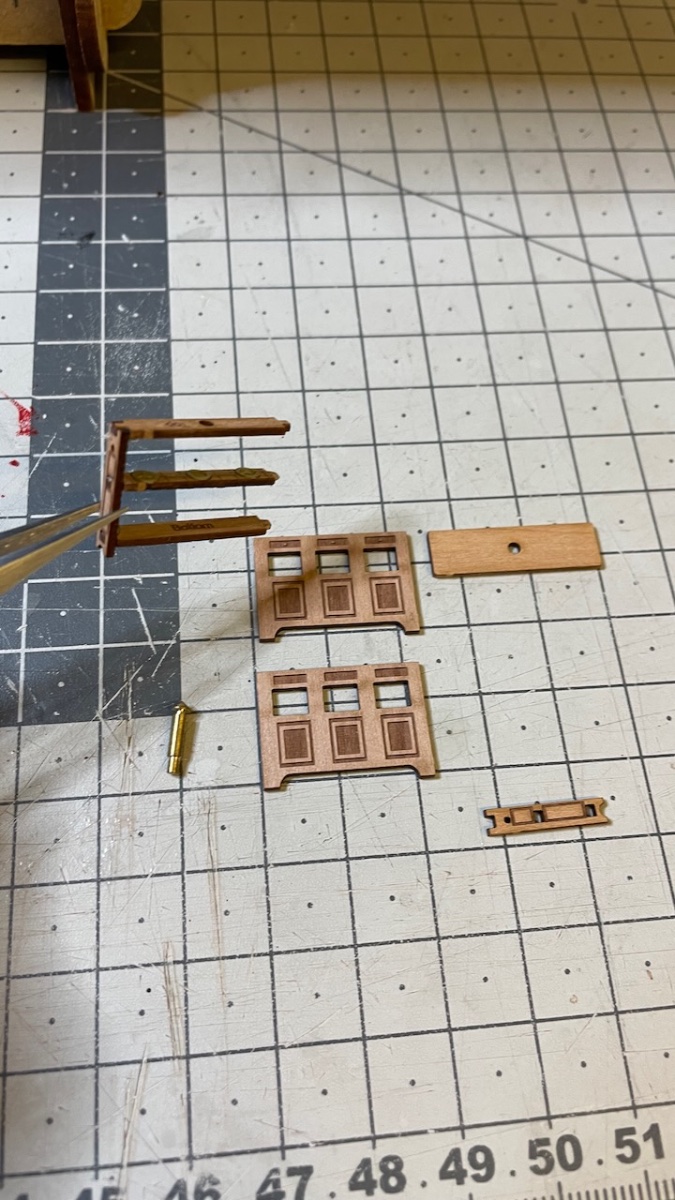
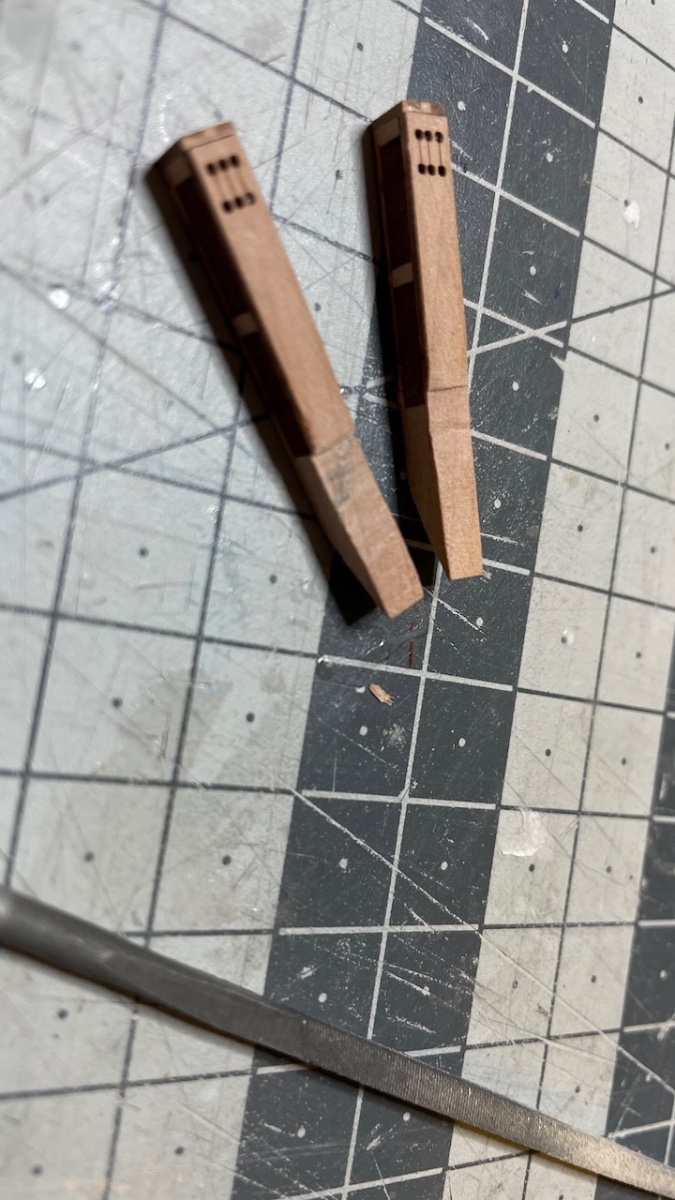
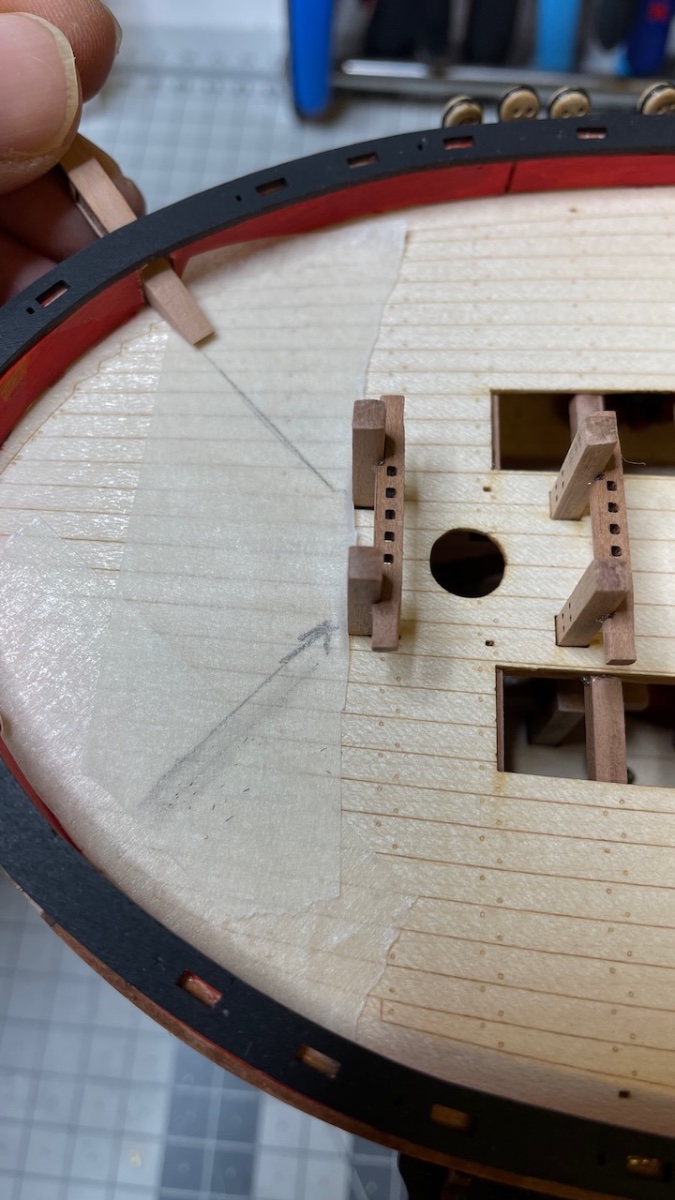
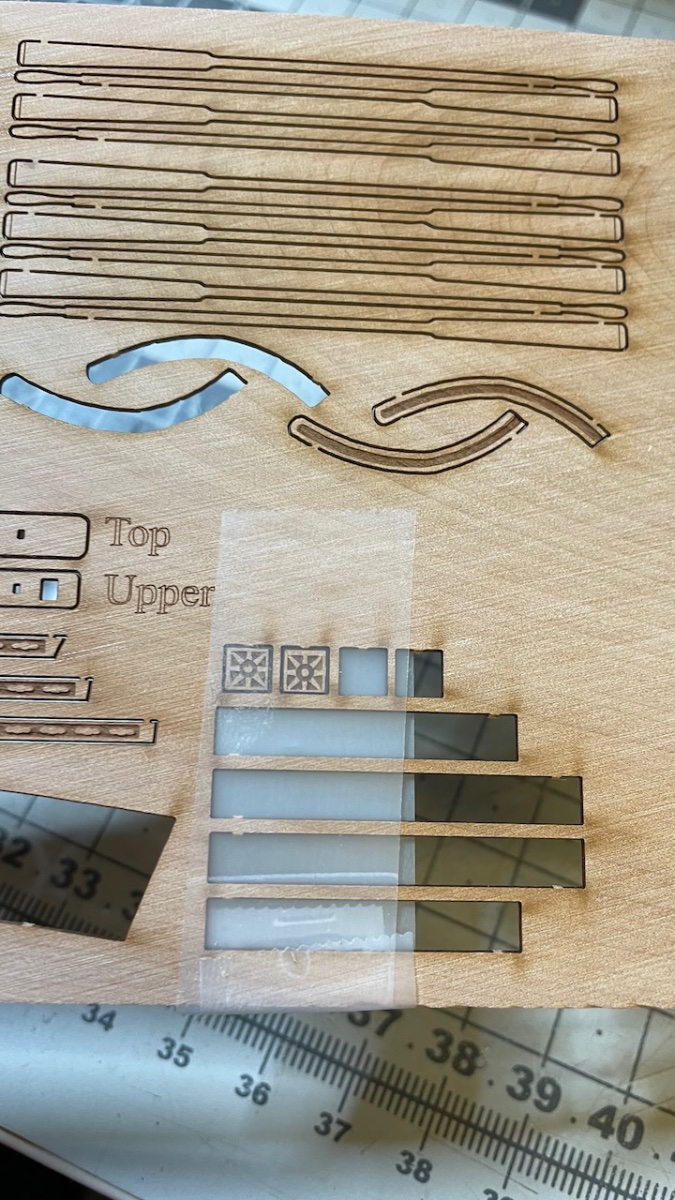
Boat Cross Beams construction. There are four of them. Each one has its own location on gangways and you must not mix. I labelled them with tape as well as on the plan.
Photo 601:
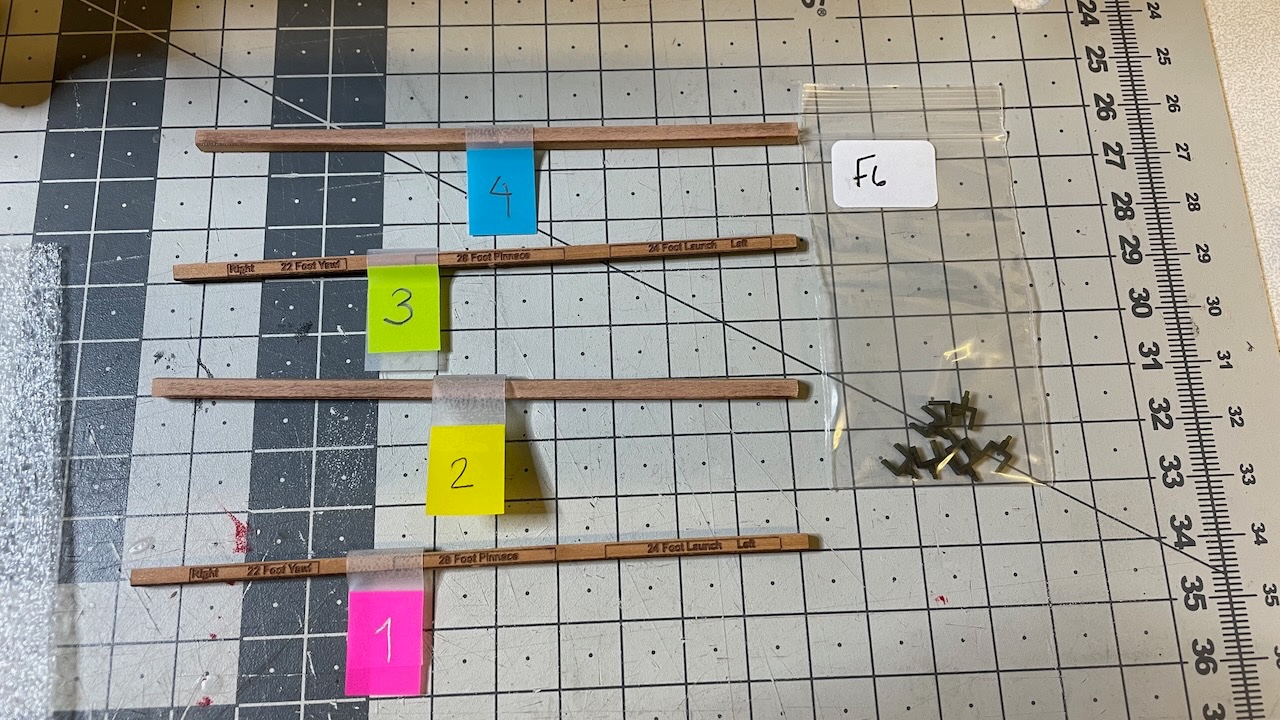
Photo 602: The 4th beam seemed to touch the chain pump handle which I had set in upright position (dry fit). I turned that pump handle a bit lower and also the other one to match with the position of the former.
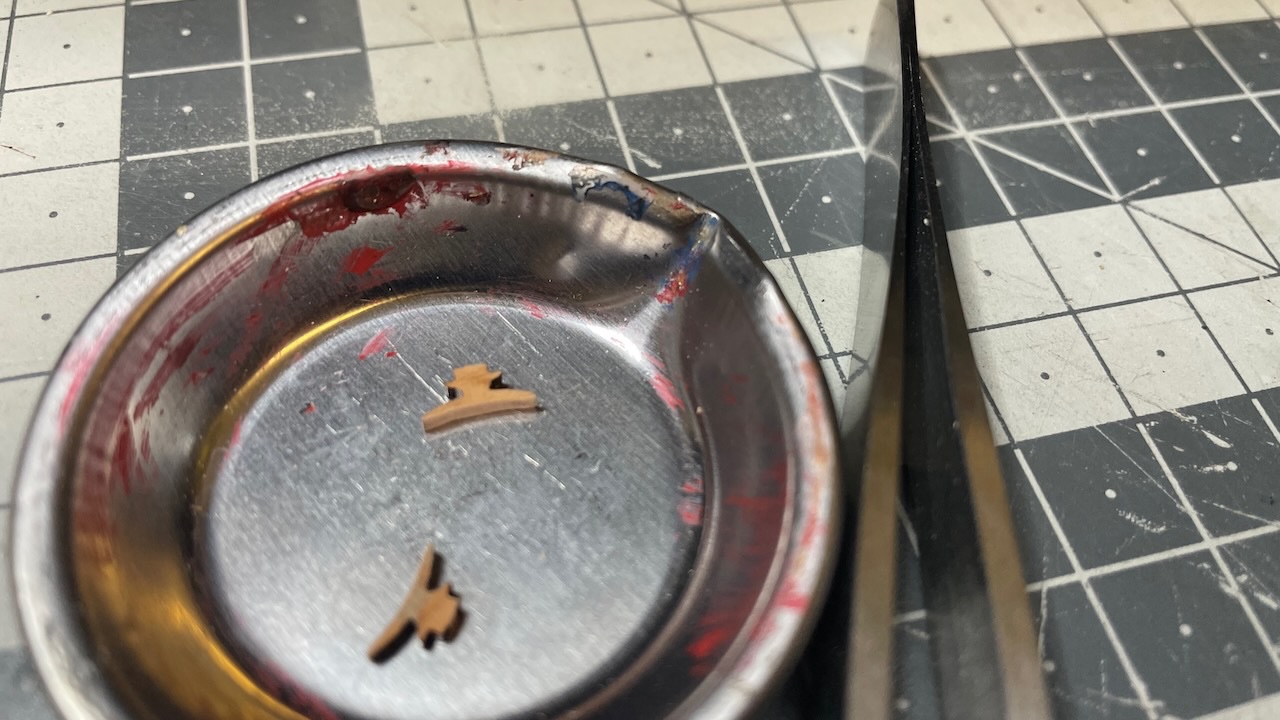
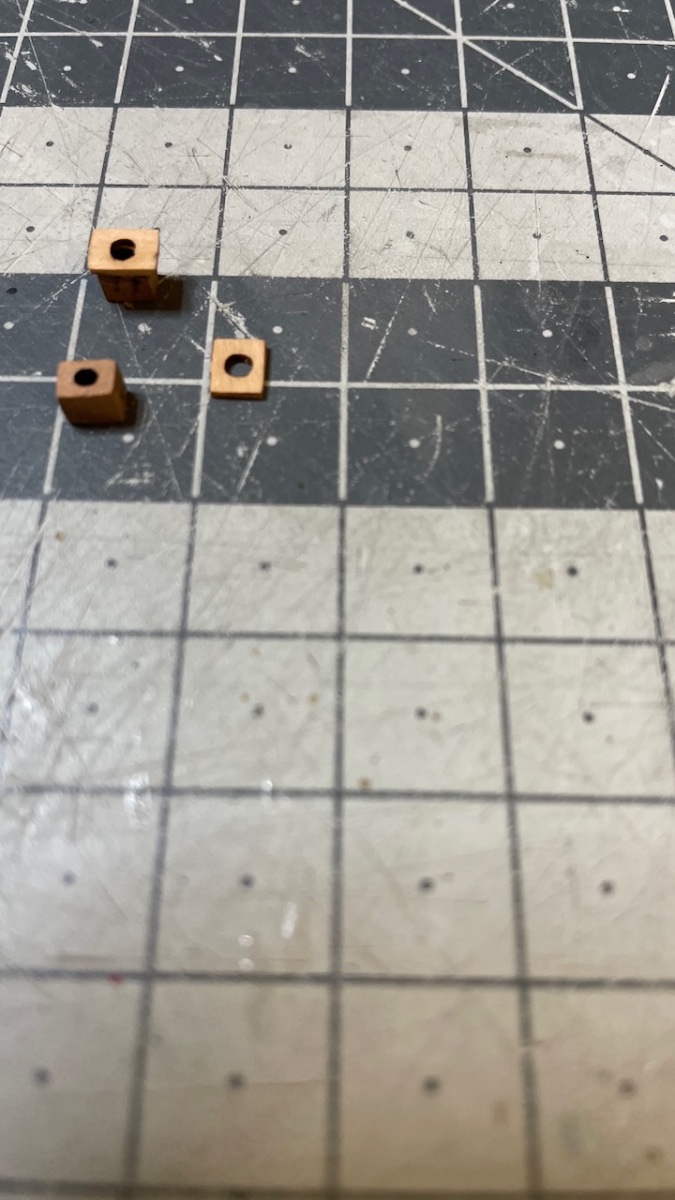
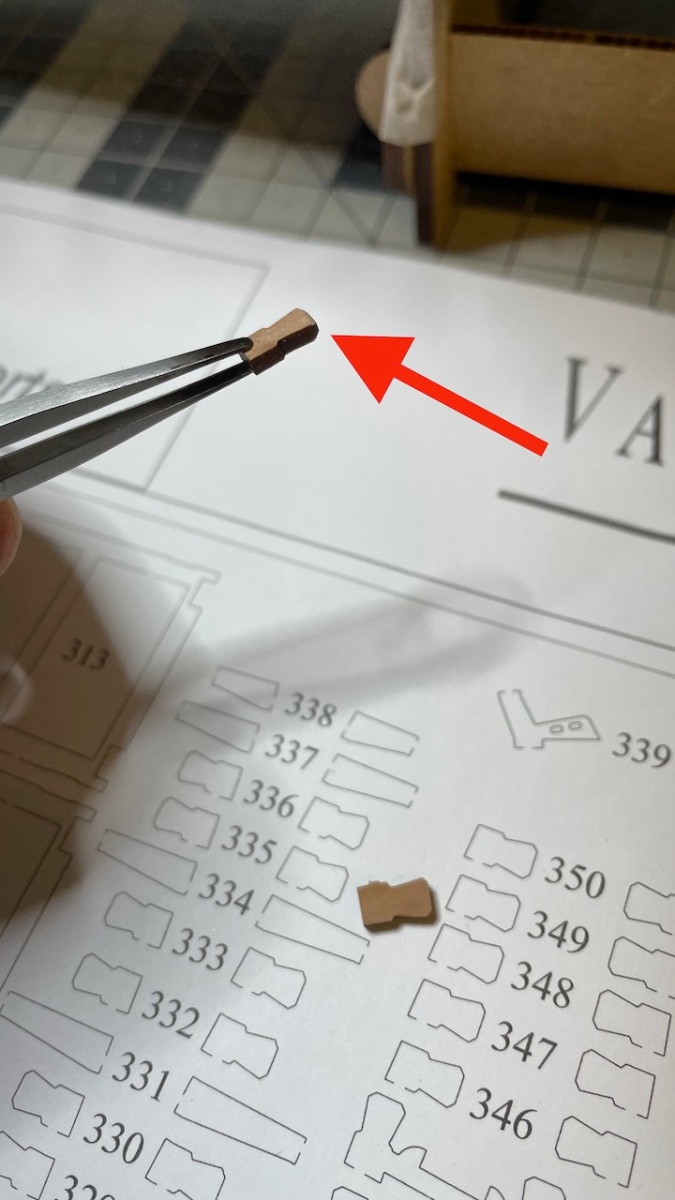
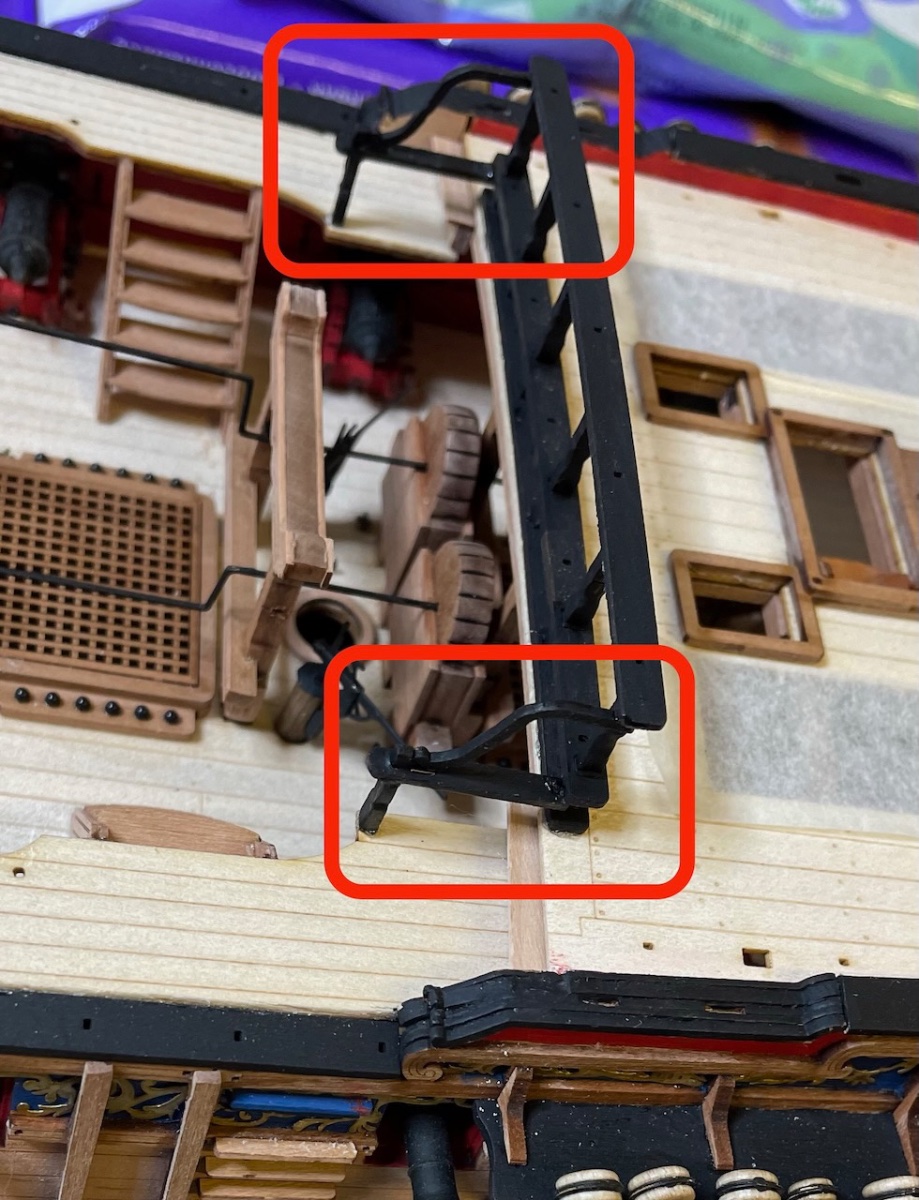
Photos 603-605: You'll need to transfer the holes on the gangways to the beams. These holes on the gangways will host the support brackets. This is how I did it with the help of transparent tape.
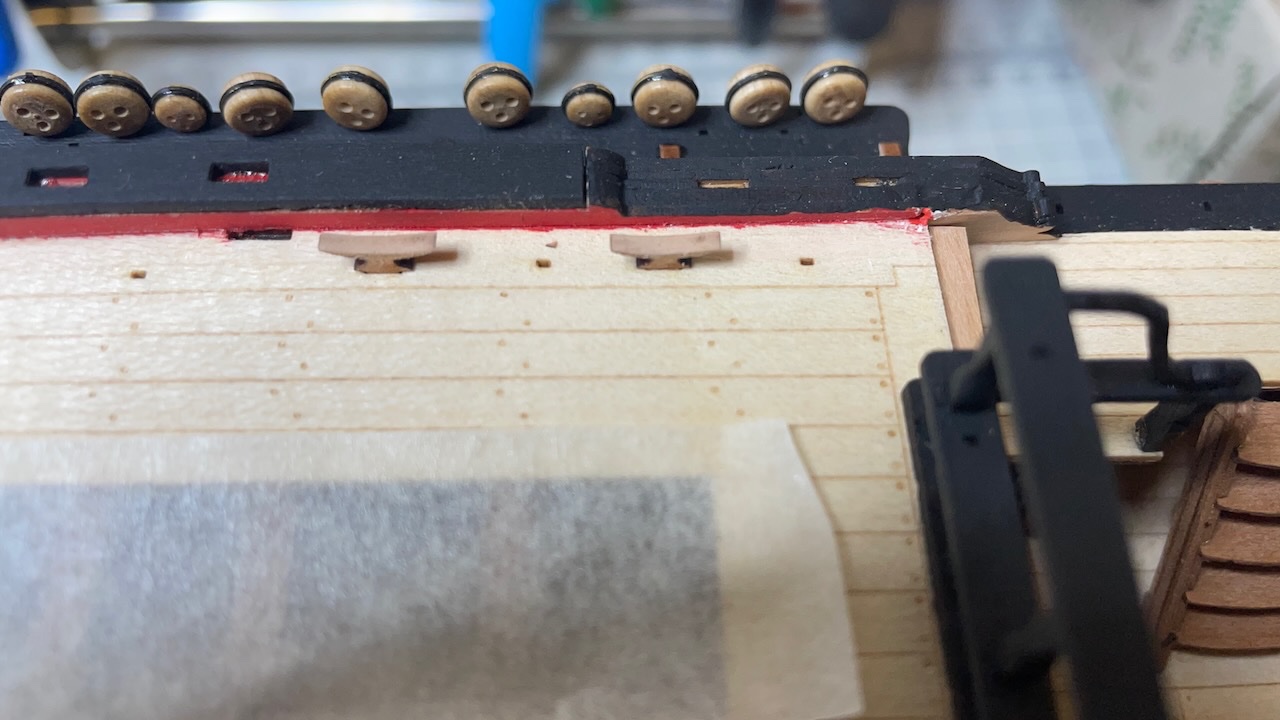
Photo 606: The support brackets are in their places accurately. I still double checked the accuracy before gluing them on the beams.