


Chuck
-
Posts
9,717 -
Joined
-
Last visited
Content Type
Profiles
Forums
Gallery
Events
Everything posted by Chuck
-
 Oh and two more things... I spoke too soon. I cracked the code...1:64 or 3/16" scale belaying pins are now in stock. They are 7.4 mm long or 9/32". In addition...the first batch of chapter 4 parts for Speedwell are also in stock. Dont worry more of these will follow.
-
Extra Large stern lanterns also now available and in stock. Good for those 1/4" scale 3 deckers. They are 33mm tall without a crank. Chuck

-
CA is fine...Its looking great.
-
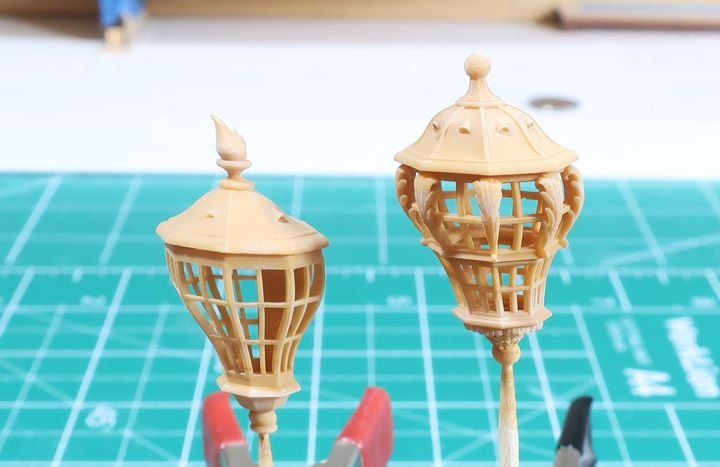
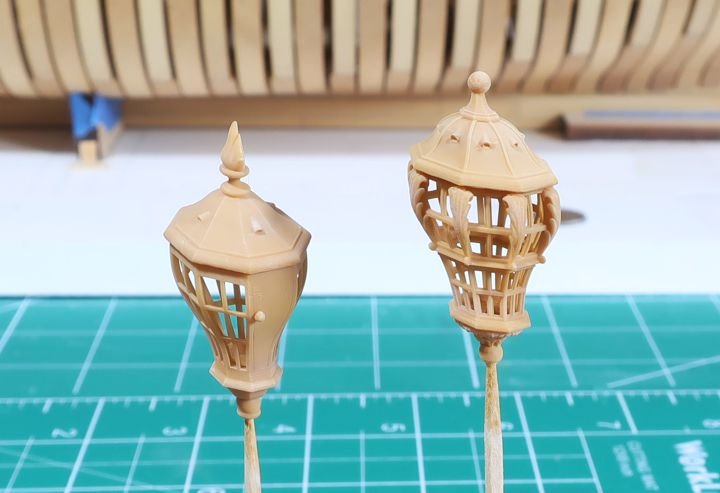
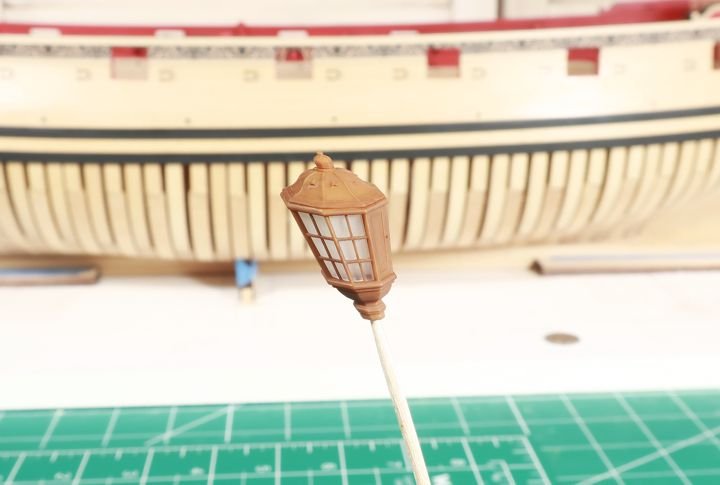
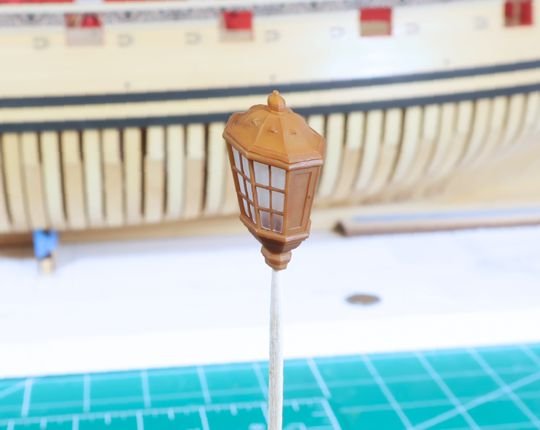
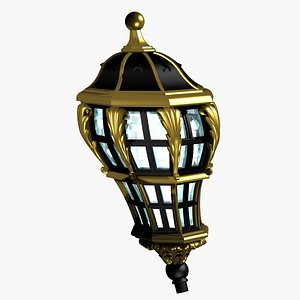
First 3D print test and assembly of two French style lanterns after Boudriot. There is no glazing insert in these....yet. Thats a bit more complex than the other Royal Navy shaped insert.
-
Really nice work. That was a slog indeed. But well worth the effort. Your model looks outstanding.
-
That looks very good...nicely done. Oh and more chapter 3 sets will be done tomorrow and available. Chuck
-
Thanks...So far all tests have failed. At least they failed to meet my standards. I had to put that aside so I can make the other stuff for now. But I havent given up yet. Chuck
-
I have to do some post processing to all my 3d printed stuff so they are always removed from the supports. Its more work for me but better for you guys. I dont see many that offer 3d printed parts with such a routine. Most just print and package. But all of my parts are lightly sanded if possible to remove the support divots and then they are sprayed and misted with a conservators UV protective coating. In other cases they finish is optimizes to make them look less like plastic as well. The color and matte or satin finish. Now yes…it could be expected that the end user/builder should do all this but most dont want to or dont know how. So its an extra service I provide that hopefully makes my parts stand out from all of the many others. Most just sell “straight from the vat” gray 3d prints you have to paint and finish yourself. Folks dont know I do all this pre printing processing and post printing processing but based on the volumes being sold I think you guys appreciate it. As you can see I couldnt possibly feel good not doing all this knowing I could finish all my parts so you can use them straight out of the bag. But it would be a whole lot quicker and easier if I didnt do all this. In fact I have nearly sold out of some thimble sizes already and will be printing more over the coming week. No painting or finishing required. Even these small black thimbles. And certainly my blocks. Counting and packaging just requires some patience. In the big scheme of things a small amount of time considering all that goes into making this stuff. No plastic gray looking blocks and fittings from Syren.
-
Thank You....all 3 Stern Lantern sizes are now in stock. Boxwood color.
-
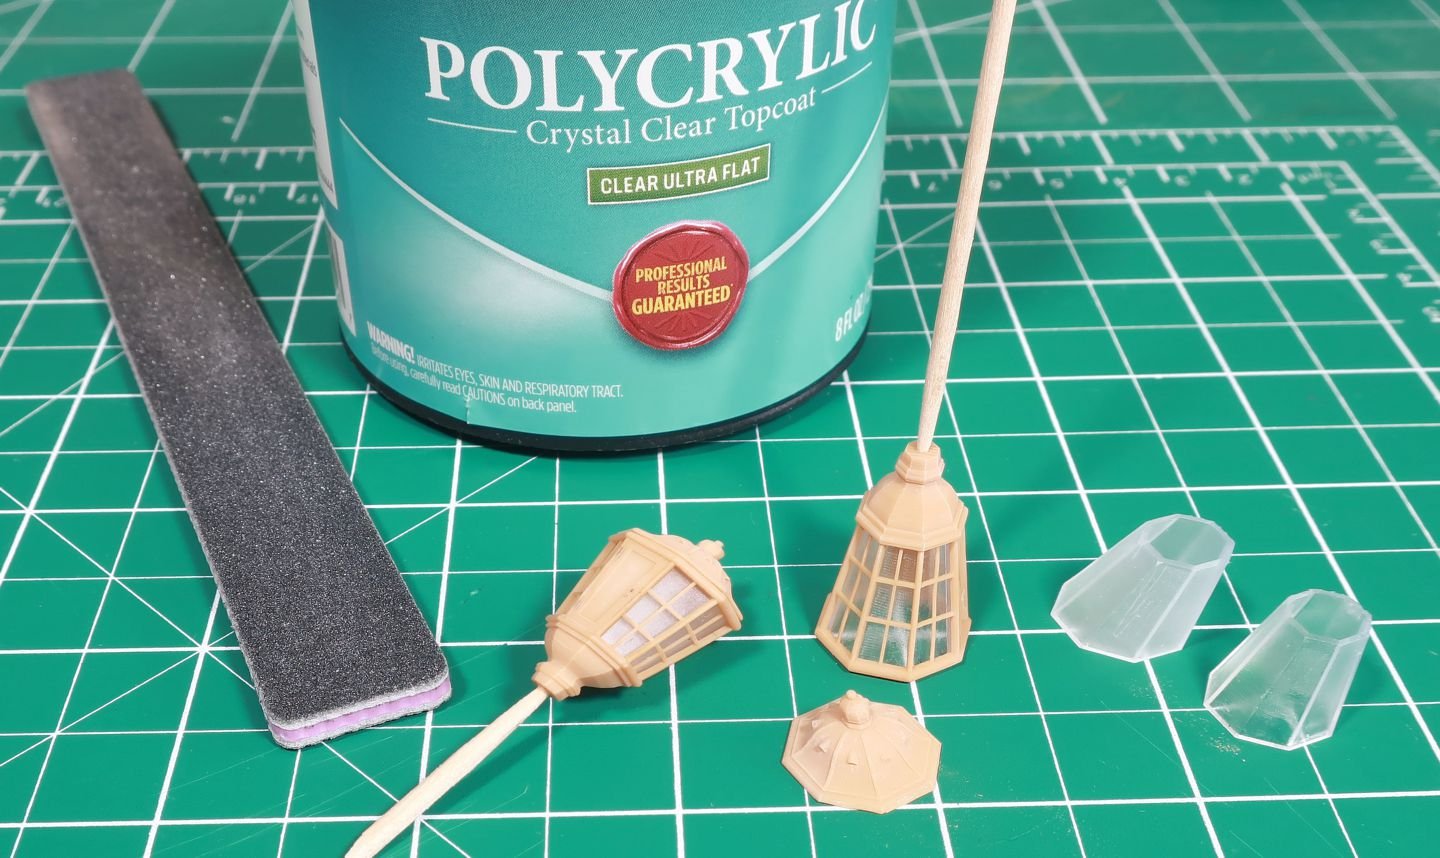
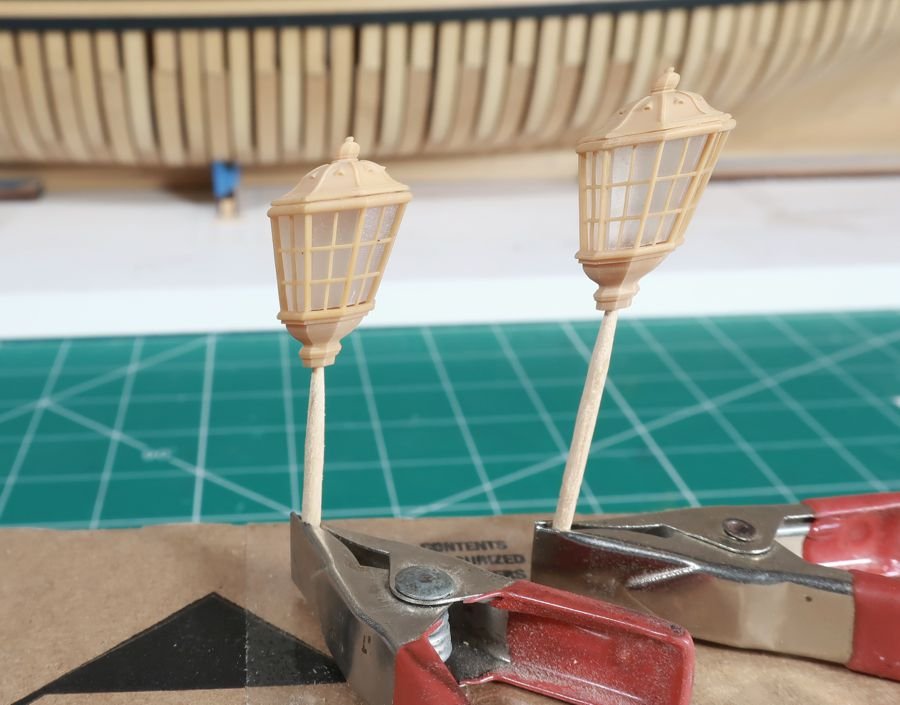
The Lanterns are in production over the next few days. I thought it would take a while to write the instructions but this was the quickest lantern I ever built. Its a three part lantern. You get the bottom/window part 1 The top "Lid" part 2 and the Glass window insert part 3. The photo below shows one finished lantern with frosted glass insert. You can also see a second lantern under construction. This has a clear glass insert. Note the two inserts. One is frosted which is how they all appear when 3d printed. Any of you who have ever tried to 3D print clear resin knows that at best you get this frosted appearance after washing and curing. 1.But if you prefer a clearer glass insert that is easy enough. Behind the lanterns you can see some water-based Polycrylic. You should use gloss or high gloss but all I had was ultra flat and it still worked very well. Just use a very clean brush to coat the glass insert inside and out. I used a helping hands to secure the glass insert and just brush the stuff un. A THIN COAT is all you need. Dont touch it...dont paint a second coat etc. Let it dry fully before touching it. It works like magic and instantly make your piece clear. Now if I used gloss it would have been like clear glass. But honestly, the frosted original looks very good as is also. You can see an original frosted and a varnished insert in the photo. 2. Insert the glass into the lantern body. It can only fit one way...no glue needed. Just do a press fit. Make sure it is seated all the way in there. It is printed to be a snug fit. After you insert the glass part you can flip the lantern upside down and apply gentle pressure if you want to really seat it in there. If the glass still protrudes higher than the lantern ....which it might...just use a sanding stick that is flat to sand it down level and flush with the lantern top. In fact you will absolutely have to do this anyway to get a flat surface in the next step. 3. Take a flat sanding stick or emory board and sand the top of the lantern flat to accept the top..."lid" or roof. There will be some little sprue marks and unevenness because of the 3D printing supports. Sand it all down flat. The hardest part is getting all the dust out and keeping the interior clean. Use one of those "air in a can" sprayers. Then repeat and sand the bottom of the lid flat for the reason. You want a nice tight fit between the two when you glue them together. 4. Glue the roof lid onto the lantern. Dont use a lot of glue. You dont want it squishing out or making the glass dirty. Yes I did use the smallest drops of medium CA. NOW.....this is important, remember to glue the top on facing the right direction. You can see how the lantern is angled so nicely and the top should be easy enough to figure out which way it should go. BUT....it isnt. Take it from me. And its a devil to separate so do a dry run first otherwise you may be buying a new lantern mini kit. Thats it.....you can make and fashion the crank out of heavy square or round wire or rod. Just follow your plans as they may all be a little different. Use a hollow tube if you want to wire up an led flickering thinga ma bob. 5. It is optional but you can paint the inside of your lantern if you wish. A dark gray or even red based on contemporary examples. The exterior can be left natural and as is, or you can paint portions of that as well. Its up to you. Darker Swiss pear maybe?? But a tad lighter than my rigging blocks. I didnt want to go too dark. With a frosted insert.
-
Really nice Al...
-
That looks very good. Well done.
-
Those guys also sell and promote companies from Asia and abroad who steal designs from legit mfgs…and they openly support them. Its a known fact. Luckily I know of a few honest mfgs right here in the USA. Prices are already cheaper and the parts are better and no tariffs or fees. Those same parts bought elsewhere probably would have cost you just $20 …. maybe next time. These tariffs are a bigly bummer.
- 15 replies
-
- 13
-

-
I almost forgot. I have one more Cheerful starter package still on my site for immediate purchase should anyone want it sooner than later. Chuck
-
Very impressive indeed!! Should be a fun build Ben.
-
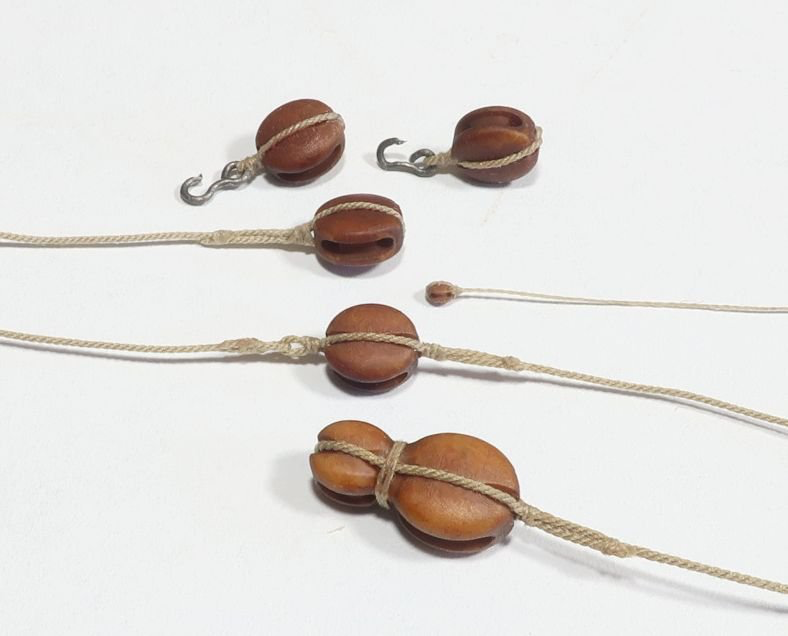
Here is a look at my new 3d printed toggles used on a fighting top to secure the blocks under it. This photo shows I believe 3 sizes of toggles being used and I think they look great. A big thanks to Greg Herbert who is using them on a commission model and sent me his progress photo.

-
6mm is fine. In fact I believe my bulkhead sets are 6mm
-
Not from me but yes you can easily add that. There is plenty of room and a hole through the bottom for wiring. You just have to use a hollow tube for the crank. chuck
-
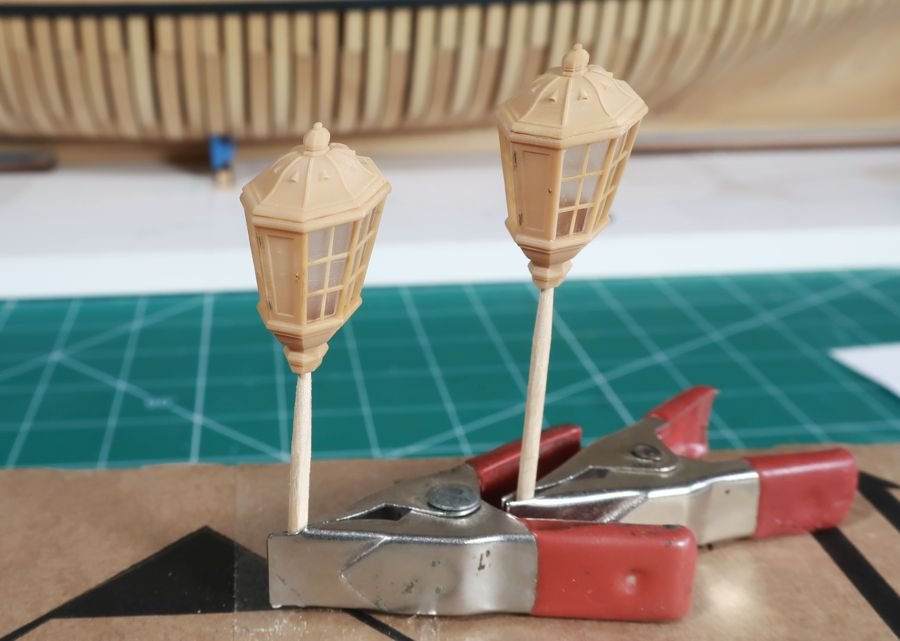
Lantern test in 3 sizes.... 3/16" scale and 1/4" scale and one size in between. 19mm, 23mm and 27 mm tall without any crank. Top to bottom. That isnt a really big dime so you can imagine how thin those individual window frames are on the sides of the lanterns. No clear glass insert yet. But that test is coming.

-
That is first in line after Speedwell is completed. At 67 would be great...but far better at 65 for me and then really wind things down. But who knows. Depends on the Admiral more than me. Chuck
-
I will continue making those as well. Those are no big deal to make. Once Speedwell moves along a bit more I am sure they will be in stock more often. I literally just made 6 more ropewalks two days ago and they sold out in an hour. And only one serving machine left in stock. So it looks like next week I will make a bunch more of those. Chuck
- 11 replies
-
- 10
-
-
As I get close to retirement I am shifting my business plan a bit. I am not retiring yet, but I am starting to create the end game plan. My business is currently really two sep. divisions or production flows. Production of kits and then Production of after market parts, blocks and rope and fittings etc. Both take a huge amount of time and effort. I have mentioned before that I am currently working 7 days a week and 12 hours a day easily. Now that I have moved and enjoy the leisure living in the back country of NJ, my wife has started to use the word "leisure" as a verb. Chuck we need to "leisure" more. You work to much. I want to travel more. You are going to have a heart attack...yada yada yada. Sooo, the Speedwell will be my last physically produced kit. In addition, I have stopped production of all of my kits...Kind-of. I AM NOT GOING OUT OF BUSINESS. Let me make that perfectly clear. In fact my business and sales is now greater than at the height of the pandemic. Lots of rope and blocks being sold. LOL I have many many years left in me. BUT moving forward, I will now be focusing on just fittings and related ship model items...No kit model production. I am retiring all of my kits. This includes Speedwell. I sold the last of 50 Speedwell chapter 1 and 2 sets recently. I will only be selling the remaining chapters to those who bought those 50 chapter one and two sets. So that will be easy enough for me to handle and administer. Its just getting tougher and tougher to source enough wood to make this stuff in the USA and remain profitable. I also dont want keep buying and storing a mountain of wood in my garage. Literally a mountain of it as you can imagine. In addition I just dont have the time or desire to do this in 60's. The good news is that I will be introducing a ton of new fittings. Stuff for French ships too!! I am slowly revamping my website...and you might experience disruptions as I make it easier to find all of the fittings I offer. I have hundreds and hundres already and many more on the drawing board. This is mindless repetitive work and will help pay the bills into retirement and beyond. So no plans to stop making that stuff anytime soon. In fact my wife wont let me fully retire until Im 67 so there is that. God bless her. Now the fun part...just because I am not producing these current kits any longer doesnt mean that someone else wont be MFGing them. All of my kits already available will not just go away...you do know him and love him. I have reached an agreement with Chris at Vanguard who will be taking over the reigns and manufacturing my kits. This will take some time as Chris is finishing up his Surprise model kit. The Winnie group is fine...just not selling any more starter bulkhead sets or chapter one sets. I will continue making later chapter sets available for the group in perpetuity. Its not a big deal until Chris can take over. The longboat group build will also remain because that will probably be the first kit being produced by Chris followed by the barge. So stay tuned and please dont bother Chris about getting any of this stuff. It will be made available as soon as he can get to it. He is busy like me...so keep that in mind. All Winnie parts, and Speedwell Chapter sets and Cheerful parts will continue being sold on MY site for folks currently building them until the hand-off is eventually made. So fear not!!! NOW...this frees me up to build and design Newer projects. These however will be made with the idea that the models will be built using plansets and thus not dependent on kit production. Those will be released here as open source plans or at Seawatch as a new book. Or if Chris wants, he can take them and run with them too. That is my retirement plan. Keep making parts for sale for all of your projects while still building models that interest me and passing those designs on. Now back to making rope!!! Blocks!!! and other stuff.... Lantern mini kits both English and French are next on deck. Then ship's wheels and a whole host of other good stuff for you folks!!! Chuck


- 11 replies
-
- 42
-
-

-
Looking forward to seeing this Ben...

