Chuck
-
Posts
9,718 -
Joined
-
Last visited
Content Type
Profiles
Forums
Gallery
Events
Everything posted by Chuck
-

Yellow Cedar Barrel by TheFace - Syren Ship Model Company
Chuck replied to TheFace's topic in Non-ship/categorised builds
Very nice barrel…well done -
Its coming along nicely!!!
-
Oh you will soon find out…LOL. I can tell stories about some folks that would make your head spin. I had a guy that was so excited to get my blocks that he tore open the package at his mailbox at the end of his driveway. He actually admitted this…the blocks flew all over his front lawn. He couldnt wait to get to his shop or even in his house. What a dummy. So he emailed me and asked if he could replace the two packages….literally $11. I said sure and they were in stock and he could reorder them. He got all mad and wanted me to ship them for free at my expense. He reported me to paypal and everything. Long story short…he did not win that dispute. people are crazy!!! They think every company is Amazon and they will get an immediate refund or new product. LOL Its insane out there as a retailer. I have dozens of stories like this. You will soon find out.
-
No I didnt refund him. But I almost did…i was literally just sticking them back on the shelf when I noticed it.
-
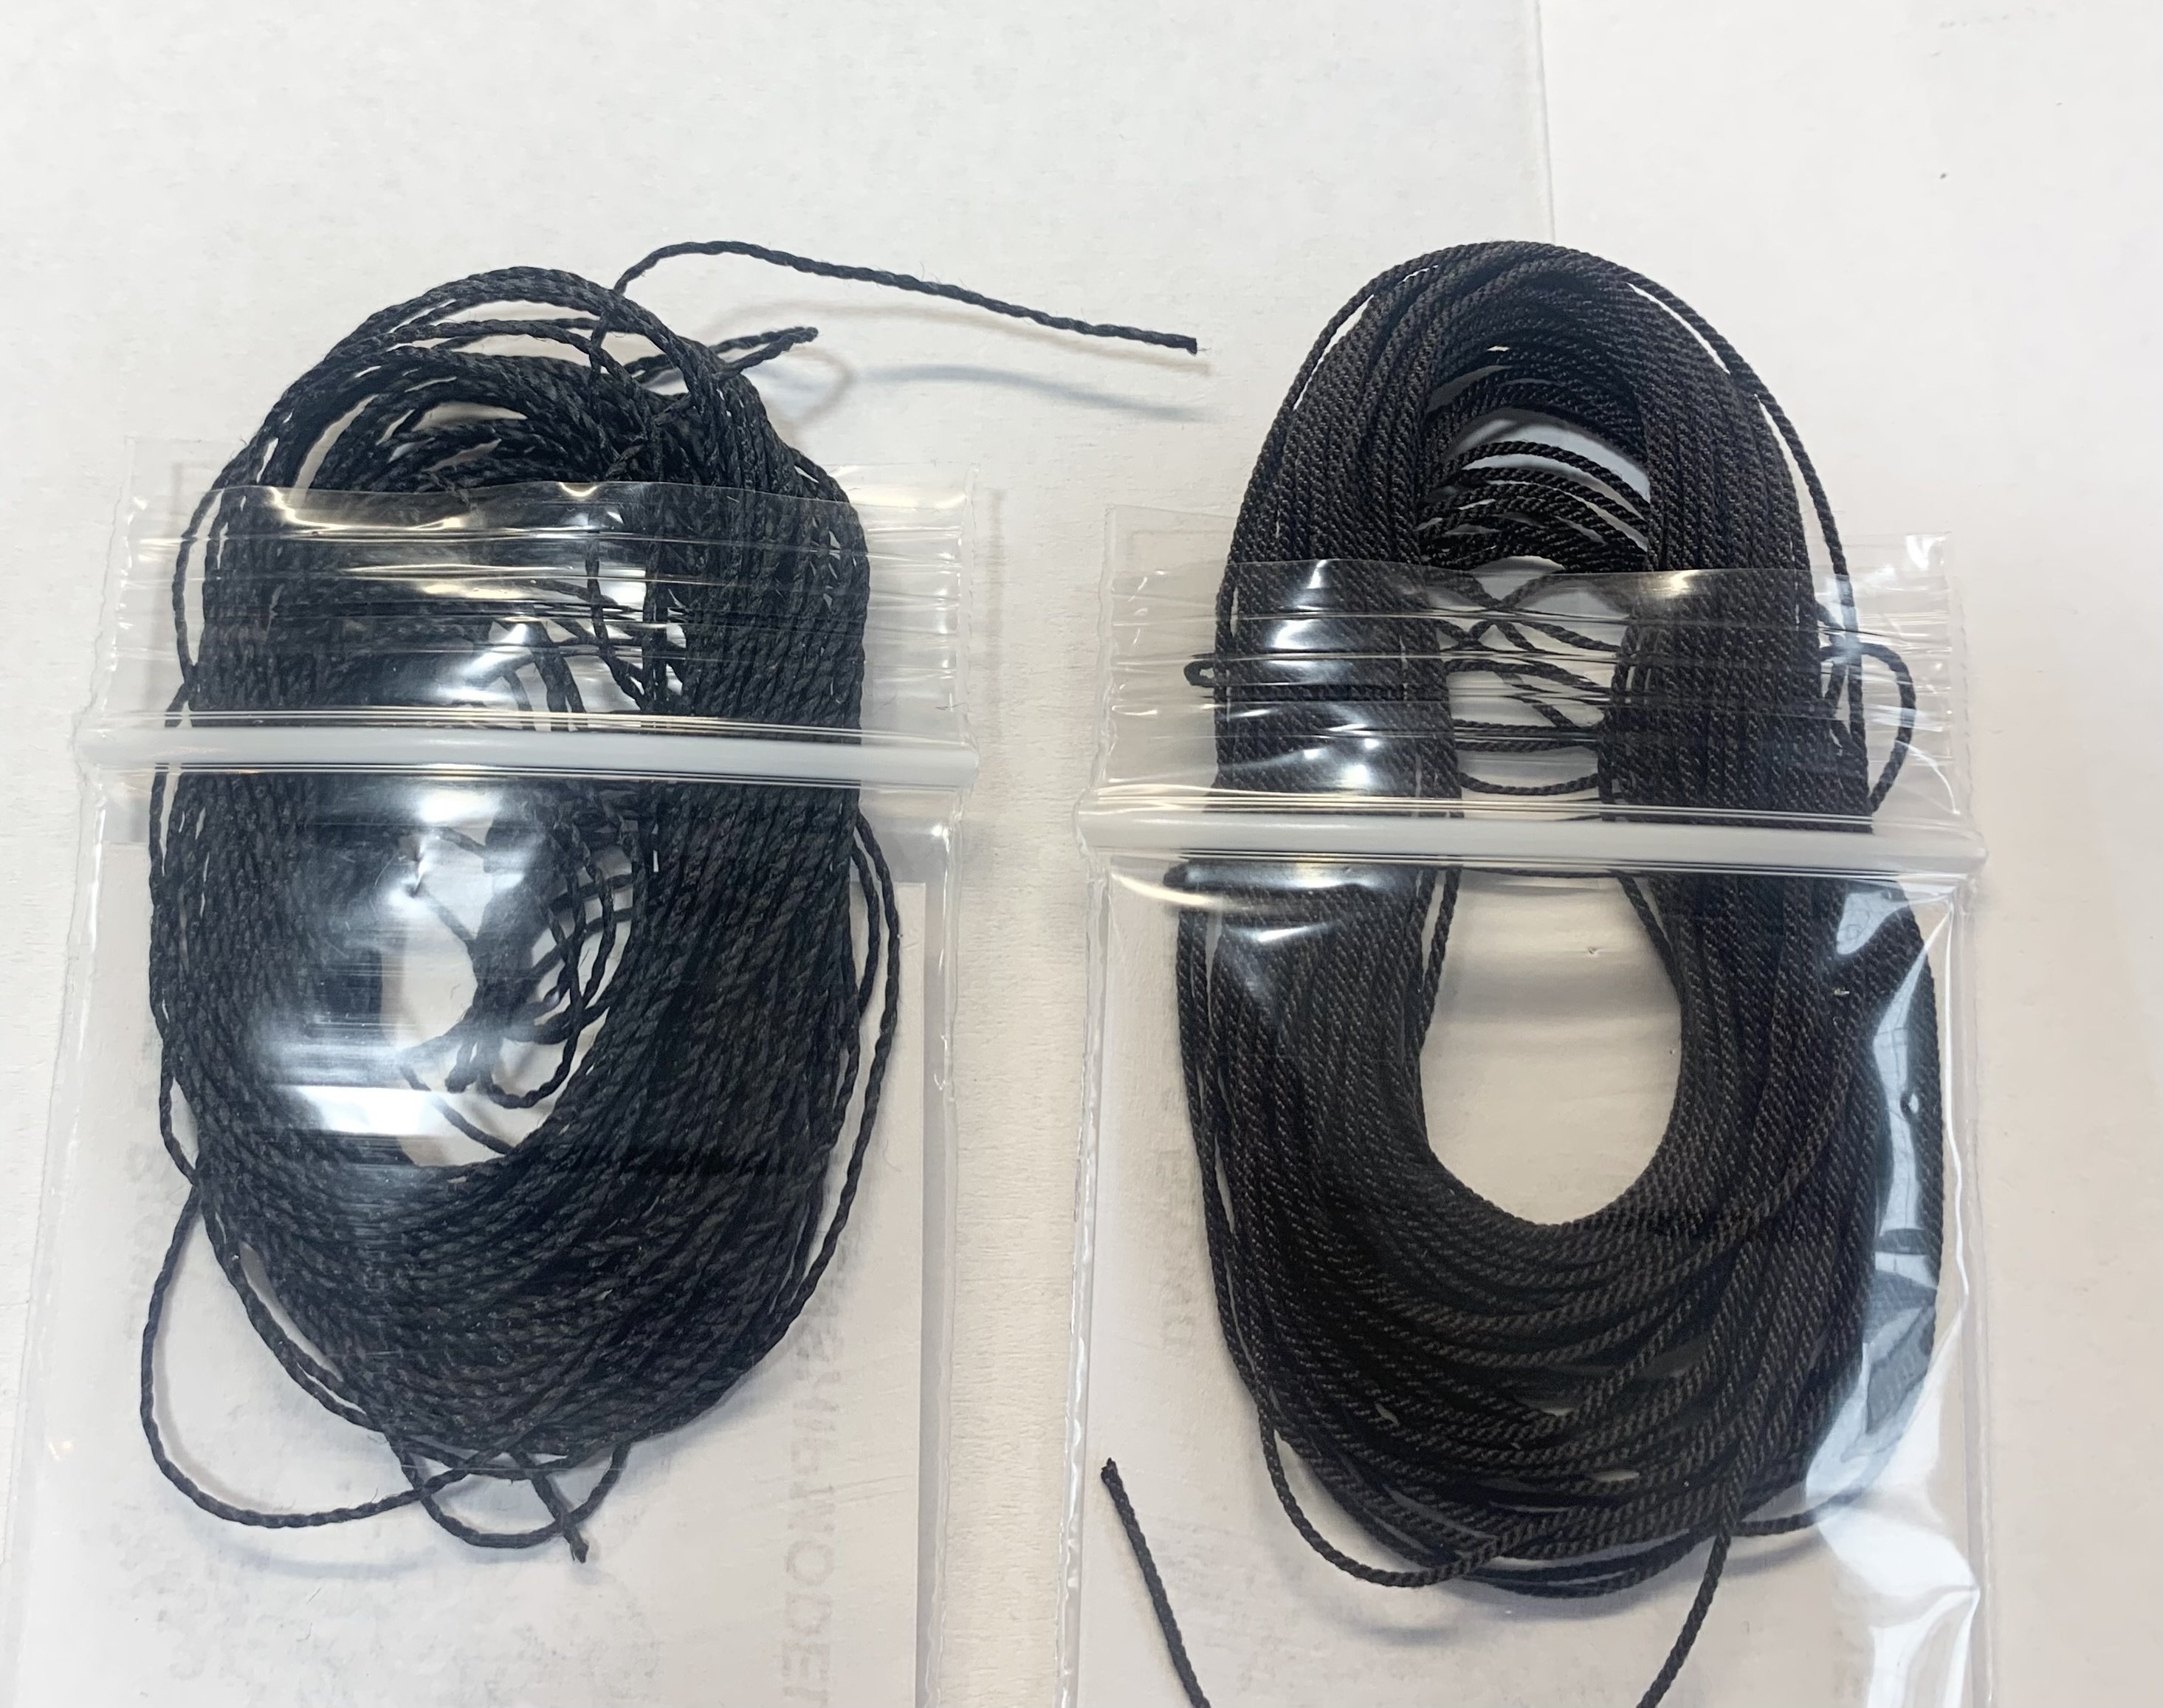
Ok I feel compelled to share this story with all of you. Just when you think you have seen it all… I have had customers who were so cheap and dishonest but this takes the cake. And he WAS a member of this site. This guy bought a crap ton of one size of rope. Literally a hoard of it which I hate. 18 packages of .030 brown rope which takes a long time to make and costs a pretty penny. This Guy is building an Occre kit which I hate as well. They literally put only two sizes of rope in a kit which is garbage. So instead of buying a handful of many more different sizes to rig his model he insists on following the crappy kit…Instead of figuring out what the proper sizes should be. This happens a lot with Occre kits which wipes out my inventory so nobody else can buy that size until I make more which takes time. I had a guy do that yesterday with .012 tan rope. Anyway…I digress. So this guy contacts me and says he bought the wrong size and wants to return it all for the next smaller size. A pain in the butt but OK…no problem. But he insists that I mail him the correct size right away and not wait till I get the return. OK…I will actually do this for folks I know but luckily I said no this time. So today I get his return package of rope. Can you believe that this guy took the time to coil up and switch my rope for what I can only suspect is the crap that came with the Occre kit. He literally restuffed my packages …all 18 of them and thought nobody would notice. look at this…LOL…can you guess which rope is real syren stuff and which is the crap he tried to return? Some people are evil…it was not a good master plan. Its not even a close color to my rope. well…no more soup for him.

-
That looks just perfect...I am so thrilled all those window inserts worked out. Chuck
-
for seizing and serving my rope....use Gutterman Mara 120 threads. BUT If you can find it....better still is their Mara 220. Use the colors 682 and 263....a perfect color match. Its looking good. https://www.wawak.com/thread/thread-by-brand/gutermann/gutermann-mara-120-poly-wrapped-poly-core-thread-tex-25/#sku=gtdx263 https://www.wawak.com/thread/thread-by-brand/gutermann/gutermann-mara-120-poly-wrapped-poly-core-thread-tex-25/#sku=gtdx682
-
yes that looks very good indeed. Well done and kudos to you for taking the time.
-
He is around…send him another email. Probably just slipped through the cracks. Joe and I will actually be picking up a fresh batch of Yellow Cedar on Thursday. chuck
-
That was time well spent! It looks great. chuck
-
You cant bend a strip into that curve. Yes that sheet is there for you to cut the bow cap. Make a card template first....as mentioned in the instructions. Chuck
-
Nicely done. Good to see it progressing.
-
Nicely done.
-
Soon…I have a few other things ahead of making another batch. chuck
-
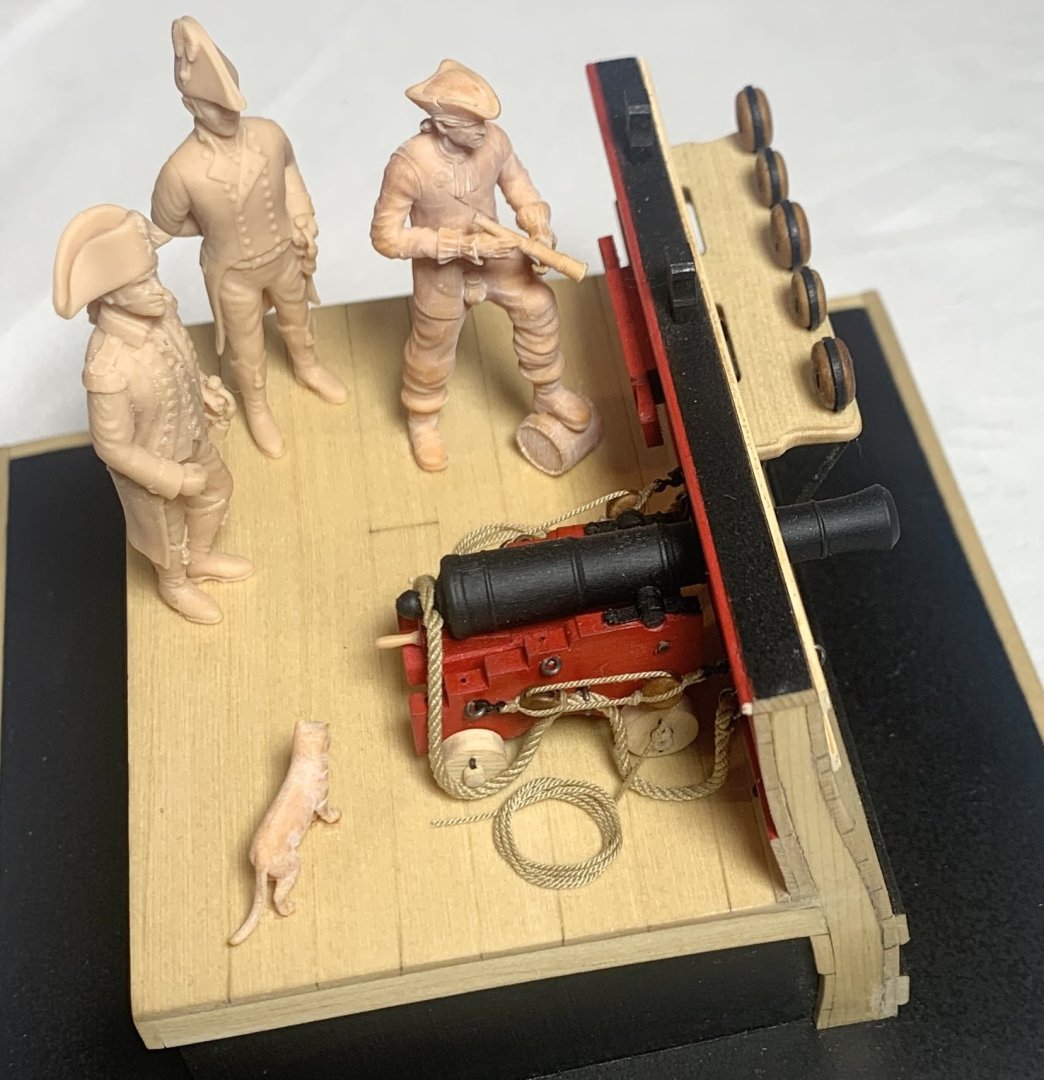
When chapter 5 comes out. All of you guys building the model will get a complimentary figure to show scale. I will randomly select one of these and include it in your order for that chapter.
-
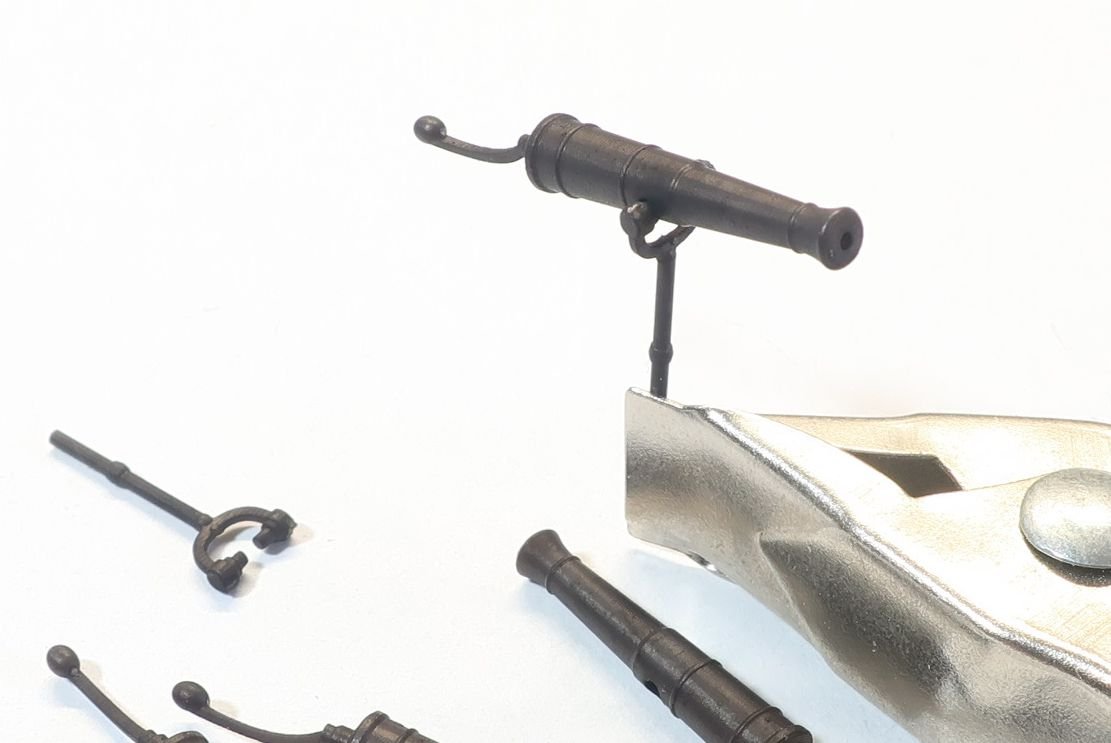
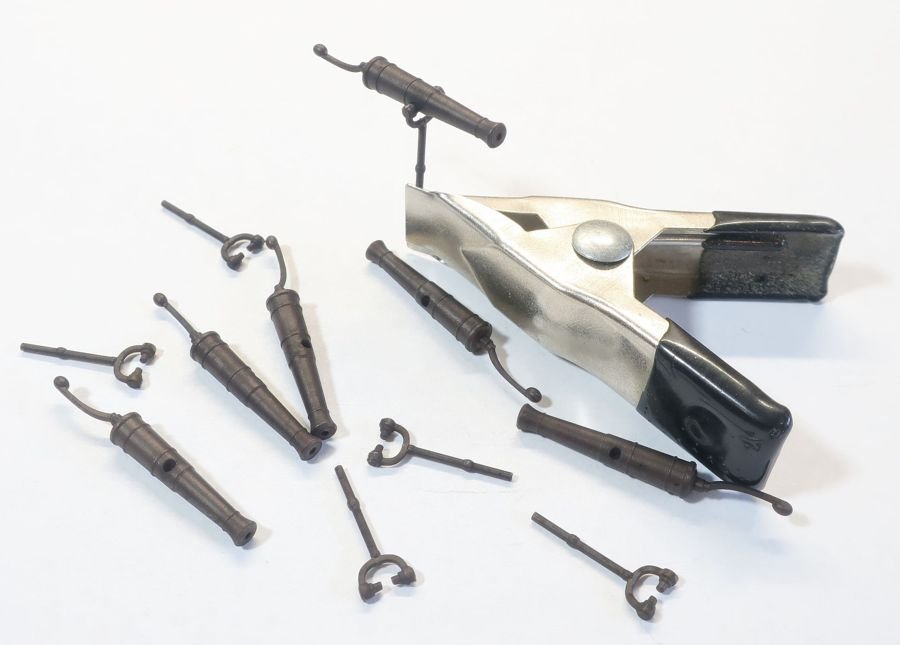
Another new item will soon be in stock. I had run out of my old swivel guns. Those were cast in the traditional way and not 3D printed. They has casting marks etc. So now that I ran out of them I figured I would do a redesign. Here are photos of the new 3D printed swivel guns. Two pieces. The yoke is flexible-ish. This enables some manipulation to just slide the yoke into position from the bottom of the barrel and into the the holes. Once you get one done the others will be easy. I am pretty thrilled with these results because as some of you may be aware, black 3d printing resin is somewhat less than desirable. The results often look too much like plastic or are too shiny and doesnt really show details well. So I have conducted many tests yet again on my resin of choice. The black finish is not to stark a black or but nice and warm and on the touch of a dark warm gray. Very dark. The material is also matte or barely satin. So its a win-win. I tried very hard to make these look like blackened brass or brushed metal which I think I achieved pretty darn close actually. This batch is 13/16" long not including the handle. (What is used for the Winnie). Use these straight out of the bag. I should have some more sizes and these will be fully stocked in a few days.
-
Here you go.... ColonialSchoonerSultana.pdf
-
Yet Another Pandora 3D build
Chuck replied to herask's topic in CAD and 3D Modelling/Drafting Plans with Software
Beautiful...stunning images. -
Beautiful work. A perfect match to the model work.
-
Thank You...they look wonderful. Yes they are a bit on the lighter side...but it is easy enough to go darker with some stain. Just give them a little dip. It is however impossible to go lighter so hence the shade of all my boxwood 3d printed parts. I am glad you find them acceptable and versatile. How are those thimbles working for you? Chuck
- 332 replies
-
- 4
-

-
- Harpy
- Vanguard Models
- (and 1 more)
-
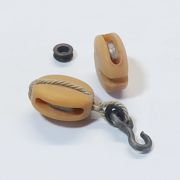
working on larger blocks now... 11/32" singles and doubles now available and I am cooking the 5/16 as I write this. Below is an 11/32" (9mm) single block with 3mm thimble and a hook fashioned from 22 gauge black wire. The sheave was also darkened with a #2 pencil as you can easily do that with these bigger blocks. Once the 5/16" are done I will make 9/32" blocks. I think 9mm or 11/32" blocks are the biggest I will make. I cant see much need for larger blocks? But I may be wrong.
-
Actually the inevitable very fine dust that will settle on your model and rigging should make that barely noticeable. It wont remain shiny at all for long. 😉 Chuck
-
Thank You for saying... French Style Lantern version one is now available in 1/4" scale with glass insert. Assembled just as the last one I showed. These are after Boudriot.