


Chuck
-
Posts
9,455 -
Joined
-
Last visited
Content Type
Profiles
Forums
Gallery
Events
Posts posted by Chuck
-
-
That planking looks excellent. Very nice work. The planks fit very tight against the last strake on the hull. Should look really good when finished.

Chuck
-
See this topic.....its very simple really..I dont think it could be much easier. Its just a matter of using the search feature. Or as Russ indicates....there are only a few pages of scratch logs. Just scroll through them. Then add them to your followed topics for future reference.
http://modelshipworld.com/index.php?/topic/586-how-to-sort-build-logs-using-the-search-features/
Chuck
-
There are at least two or three other topics that discuss this already....they are all pinned topics. have a look around....at the top of each build log forum to learn how to do that.
-
Its very subjective. I prefer different looks on different models. I do believe its something everyone should try at least once.
I am moving this topic into the proper forum as well...

Chuck
-
No dont use a bigger dowel. It will look way out of scale. The opposing tensions on that dowel by the rigging will hold it in place. Wait toil you make the topgallnt masts. Talk about flimsy. You must work on the tensions to make sure the wood doesnt bend the while rigging.
Everything looks great. Fantastic job on the headrails.
Chuck
- Pogy647 and justsayrow
-
 2
2
-
Nice looking rope...a bit fuzzy but I imagine that could be eliminated easily enough.
Chuck
-
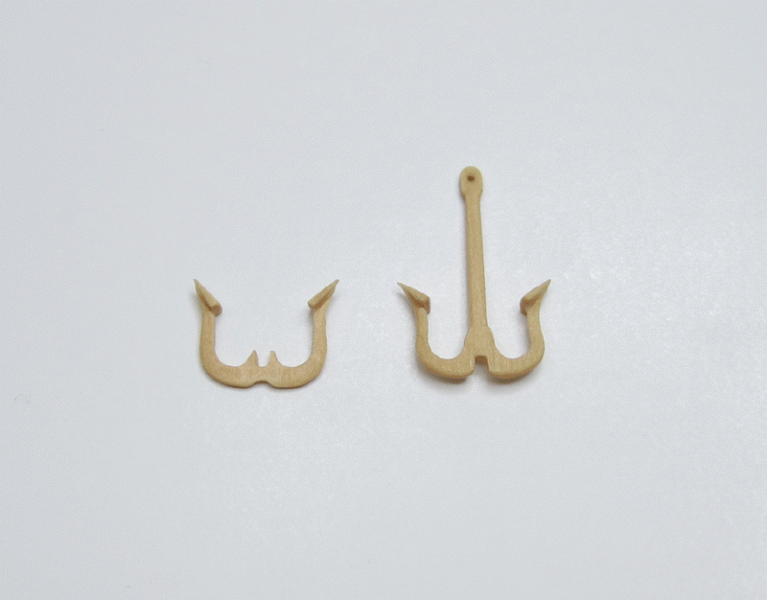
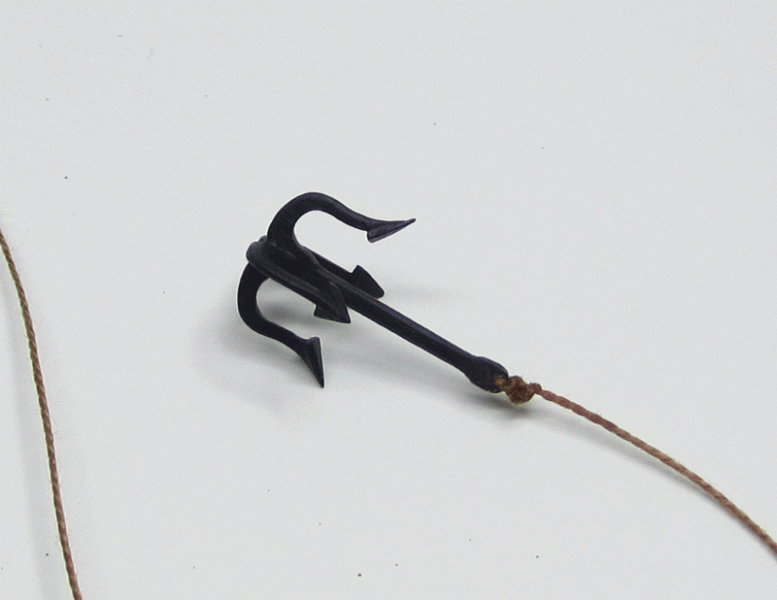
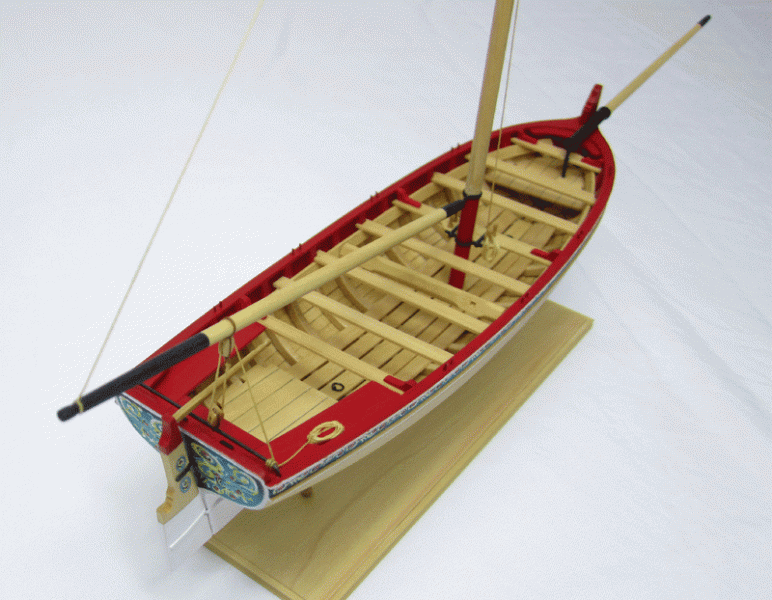
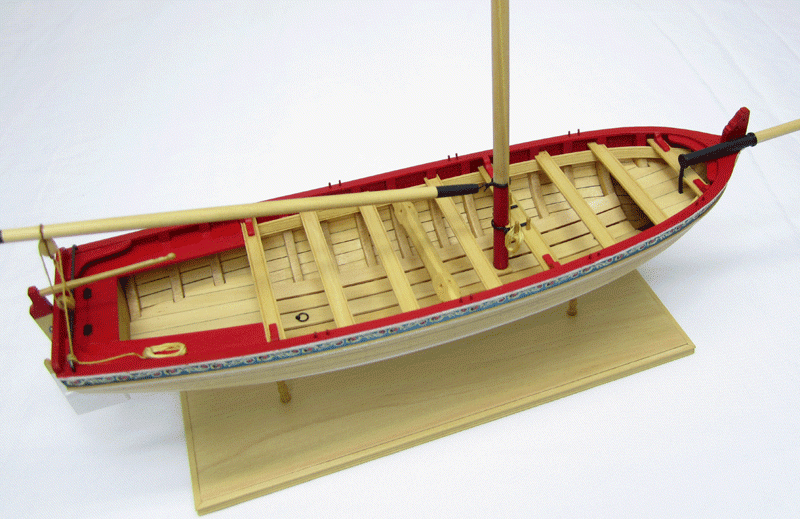
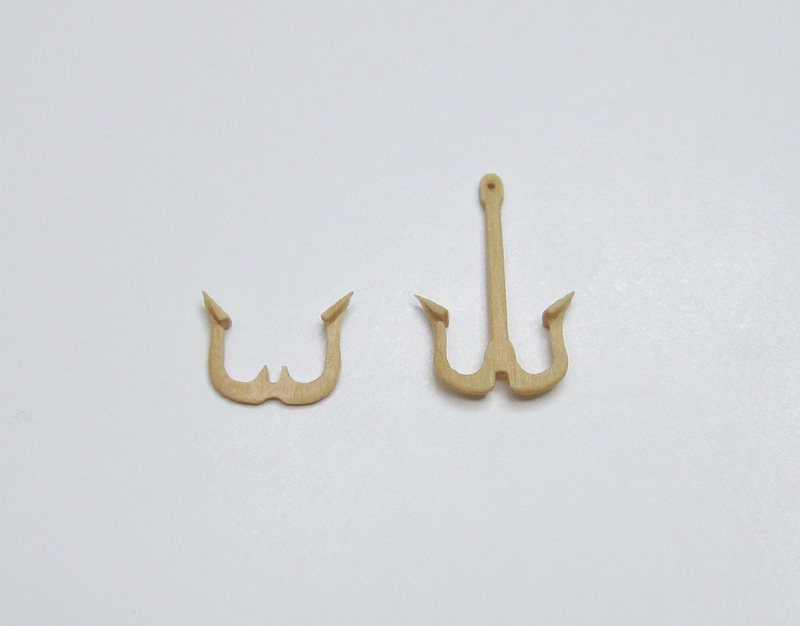
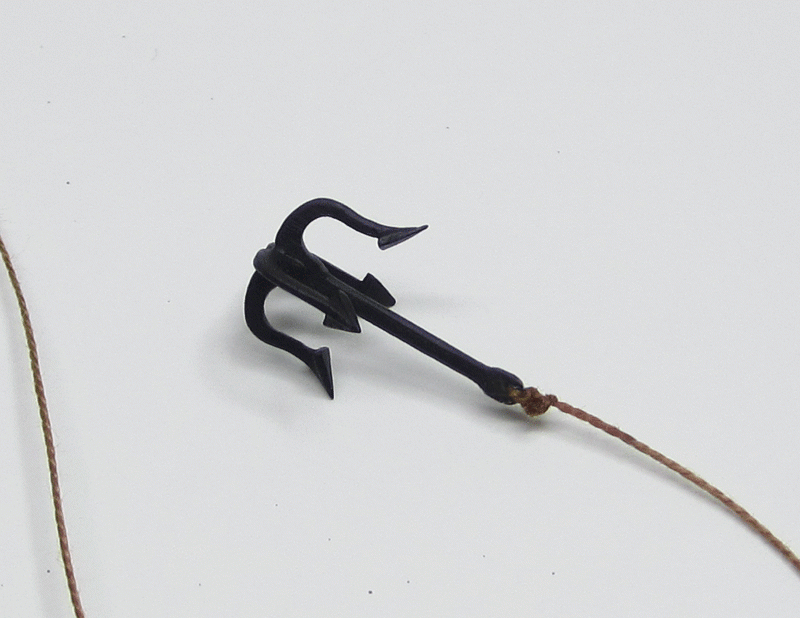
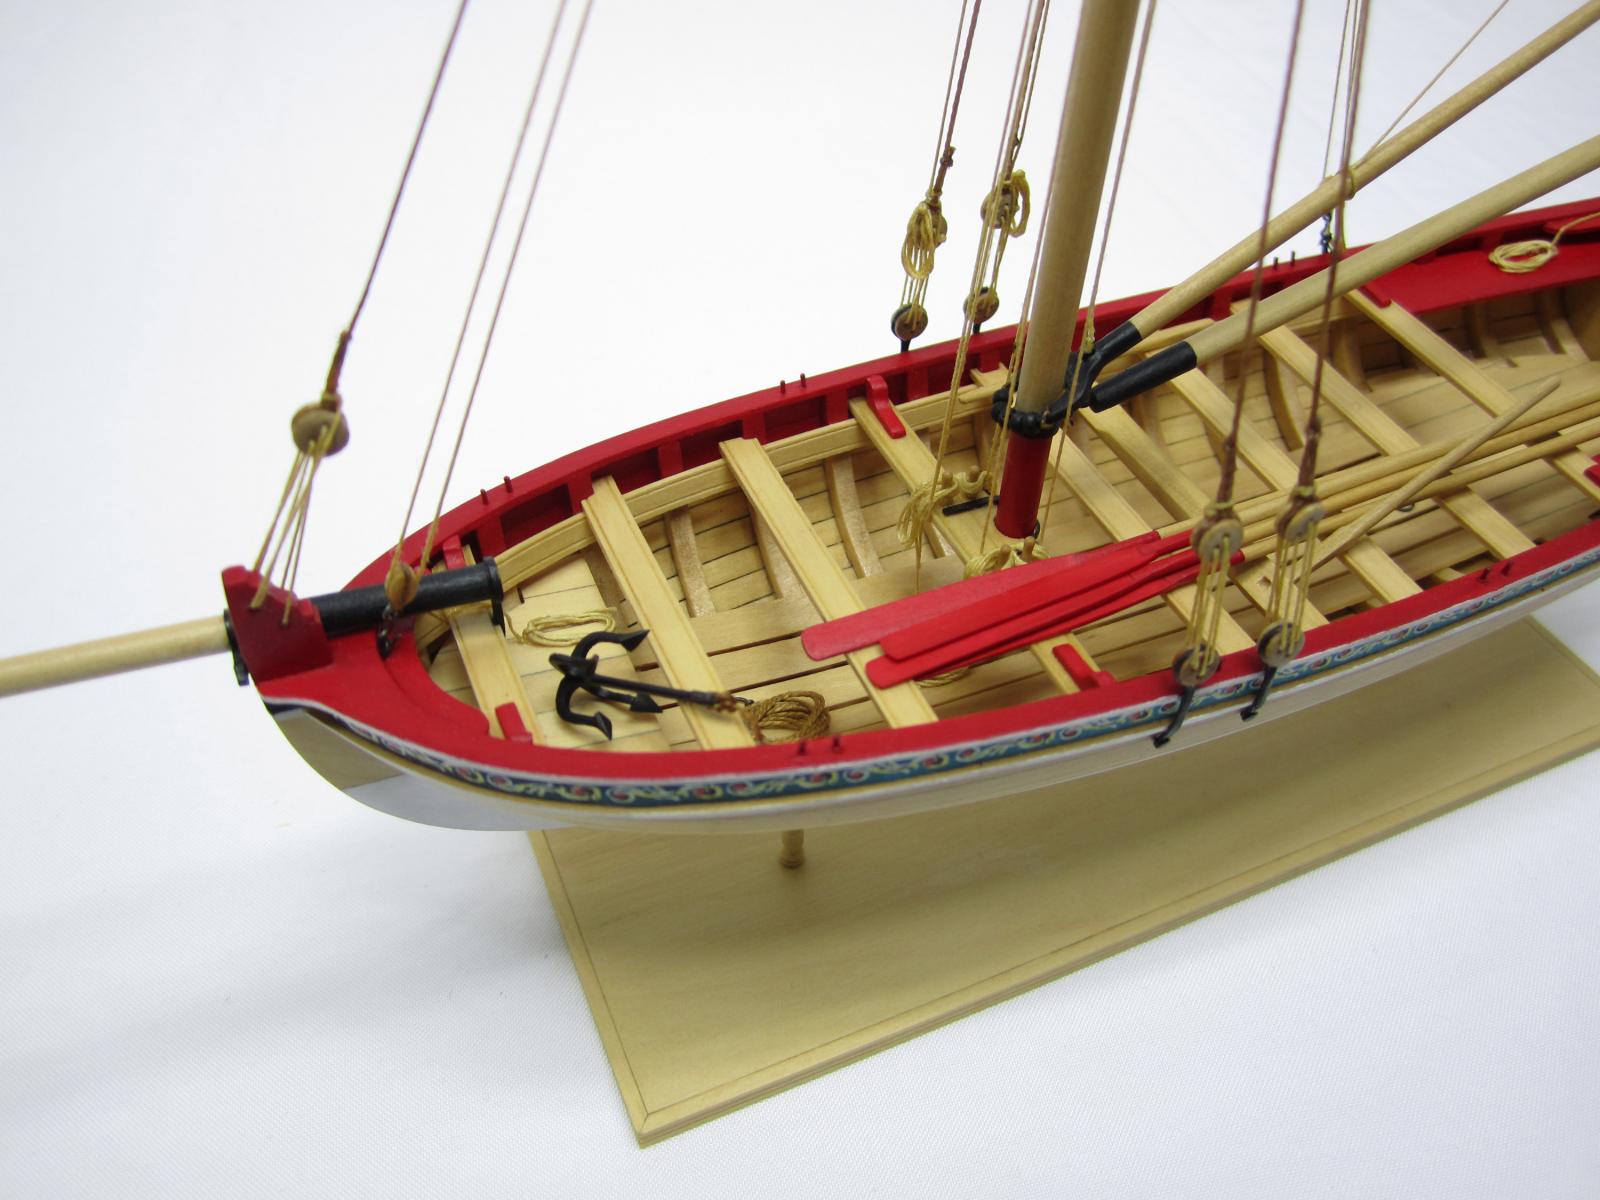
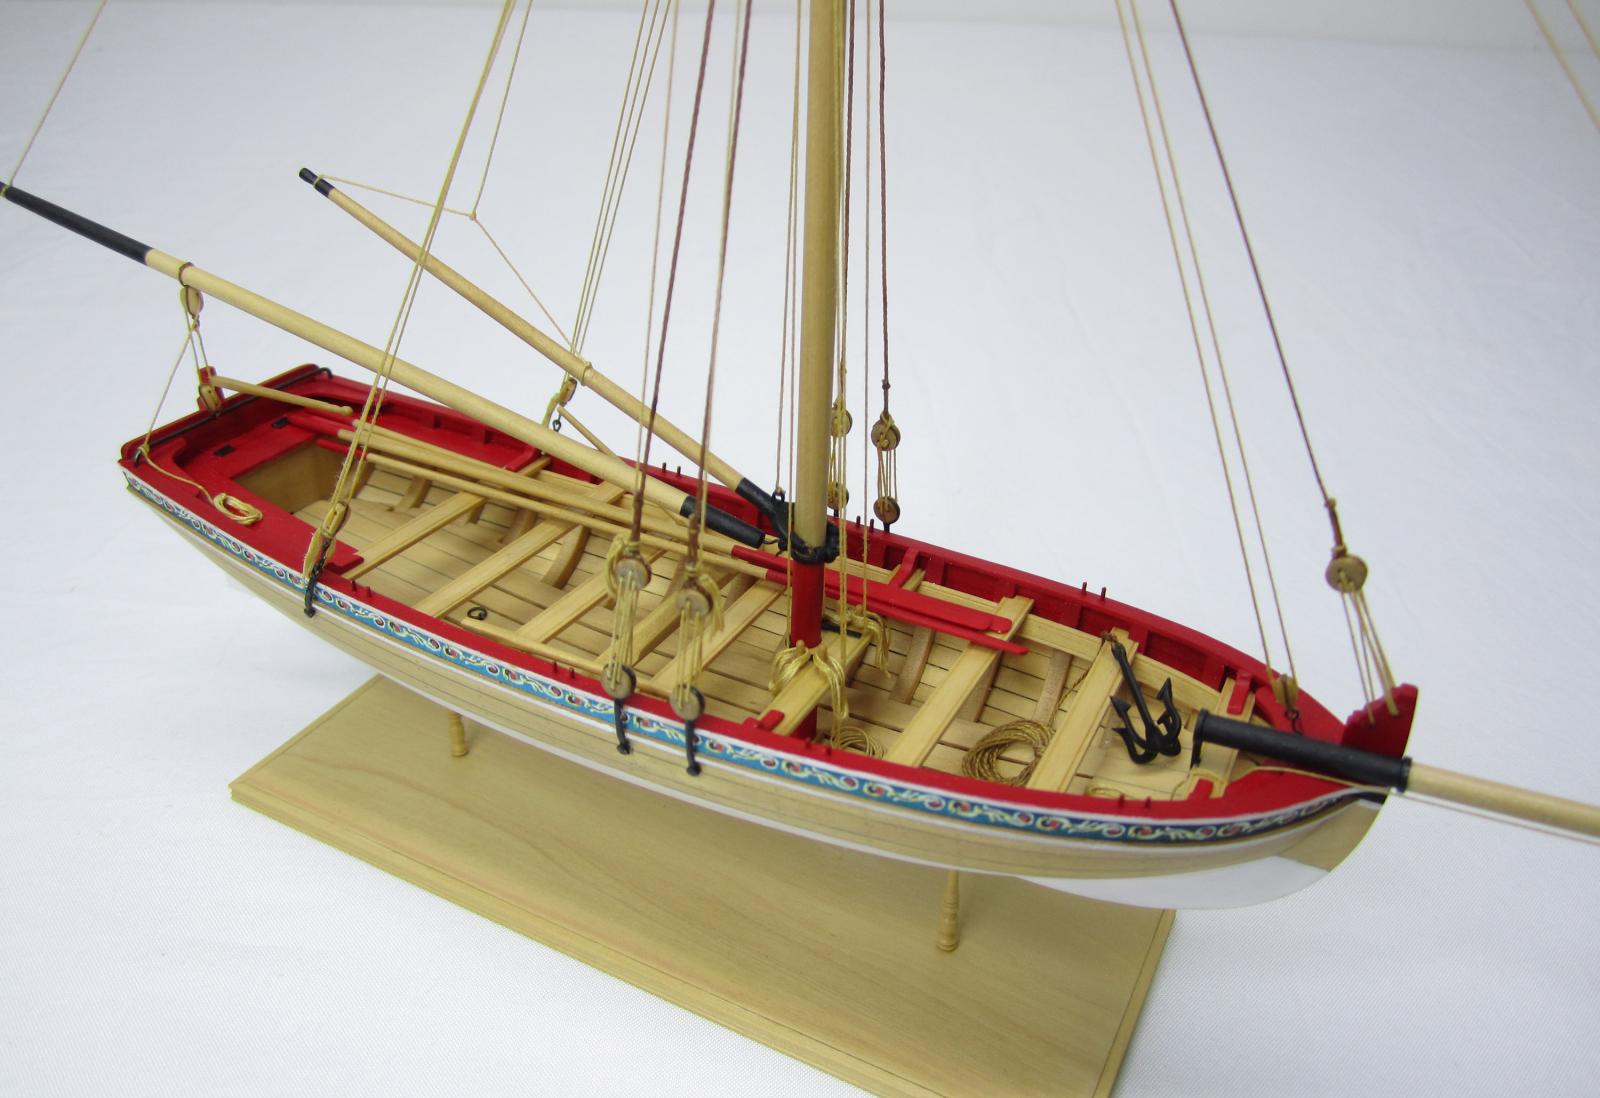
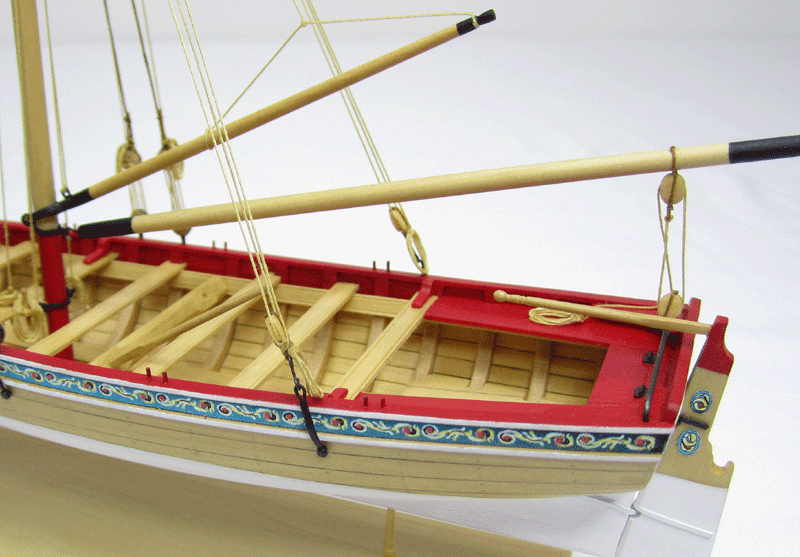
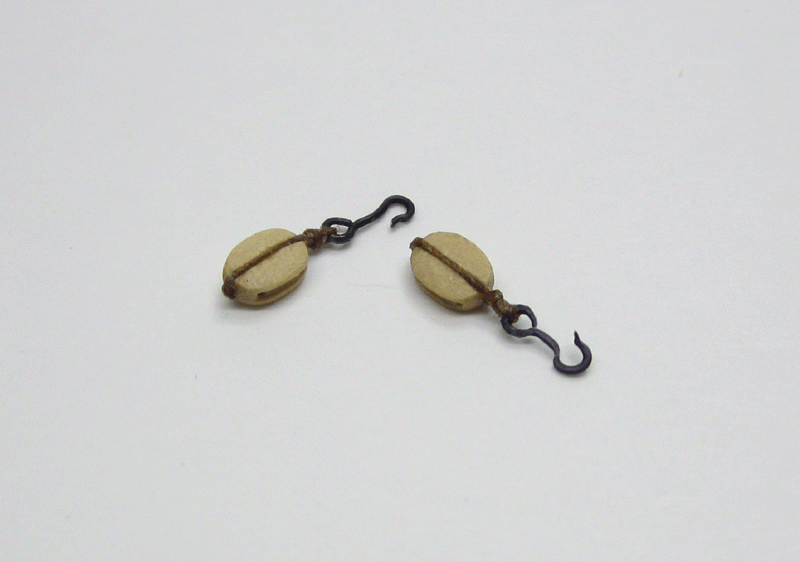
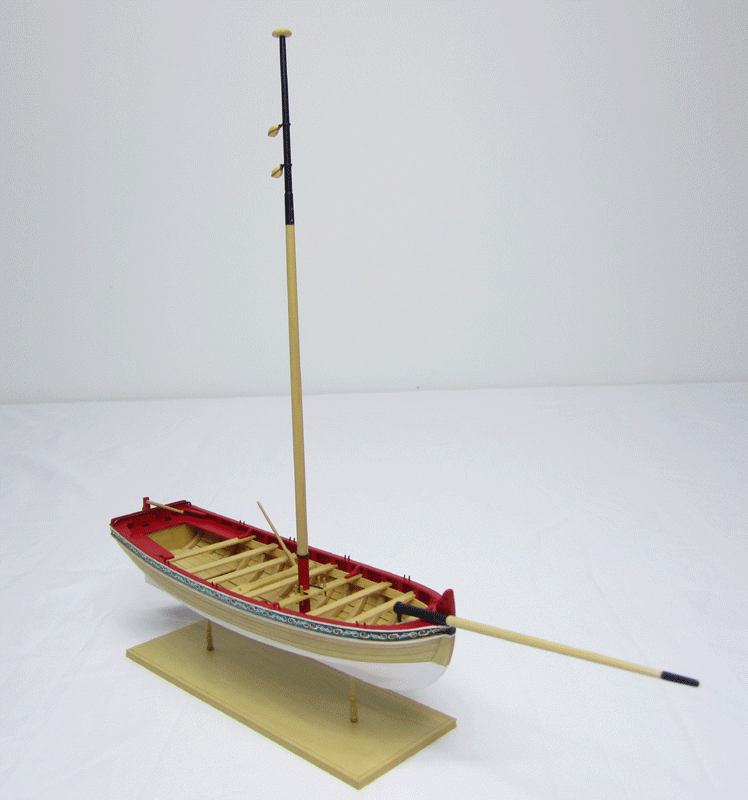
To complete the model...the grapnel was painted and rigged. I made mine from scratch using boxwood. I think they replaced the one in the kit with a cast metal version they had in stock, It was added to the model so the rope looked natural. I made some oars and placed them in there as well. They were just cut from a 1/16" sheet and the handles rounded off. Then they were painted.
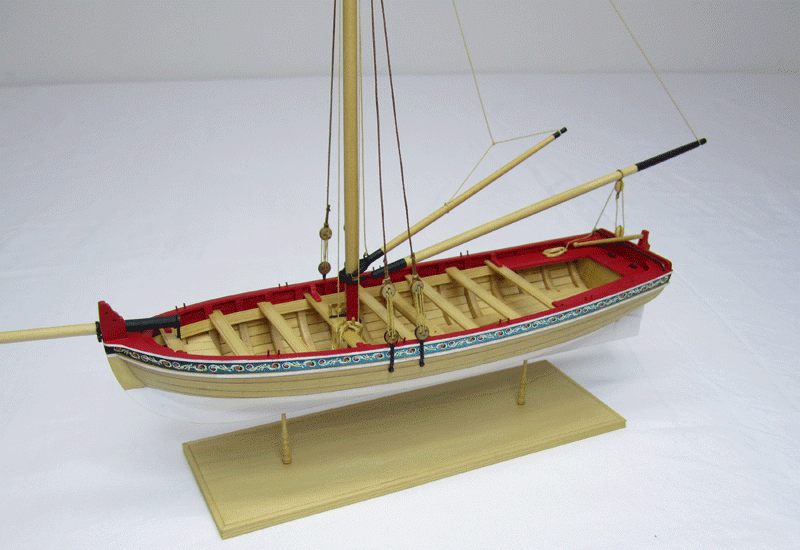
That is essentially the end of the project.
Chuck


- mikeaidanh, CaptainSteve, Etcher and 13 others
-
16
-
-
-
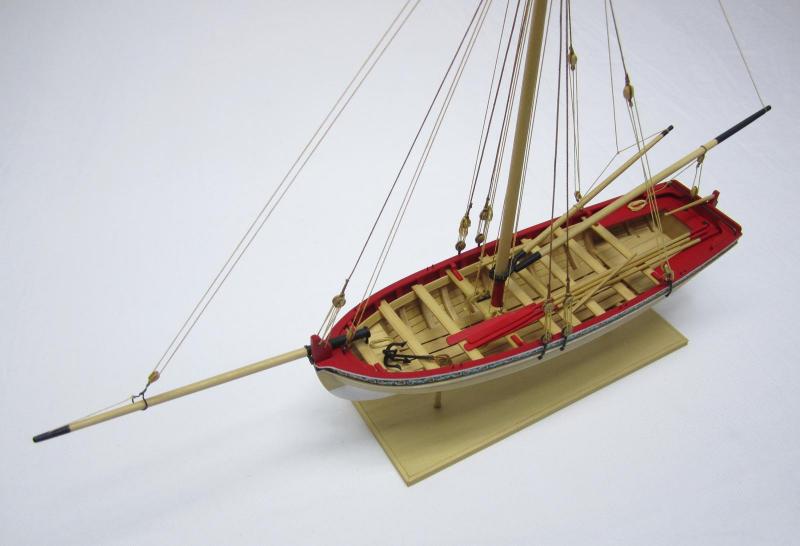
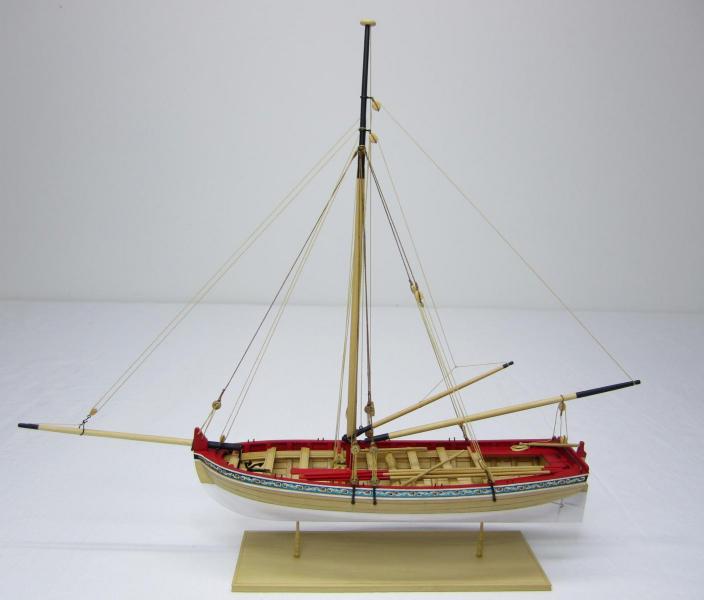
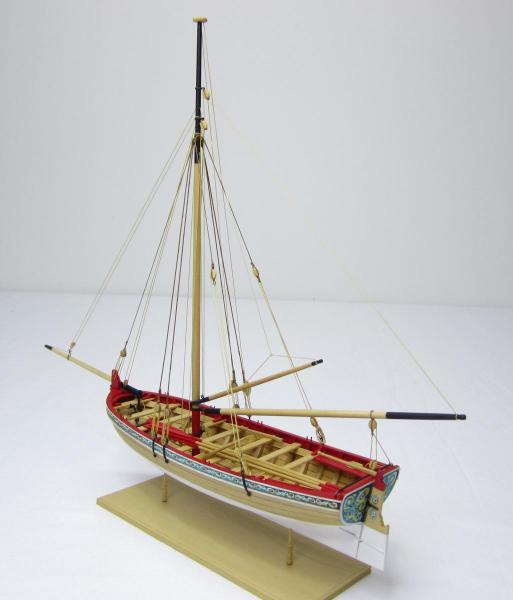
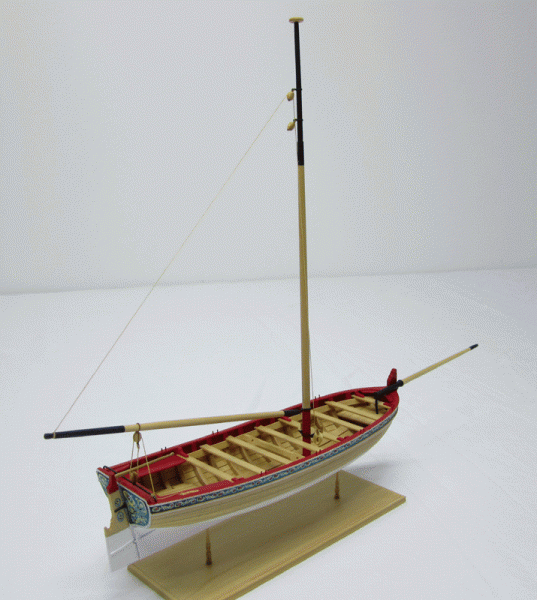
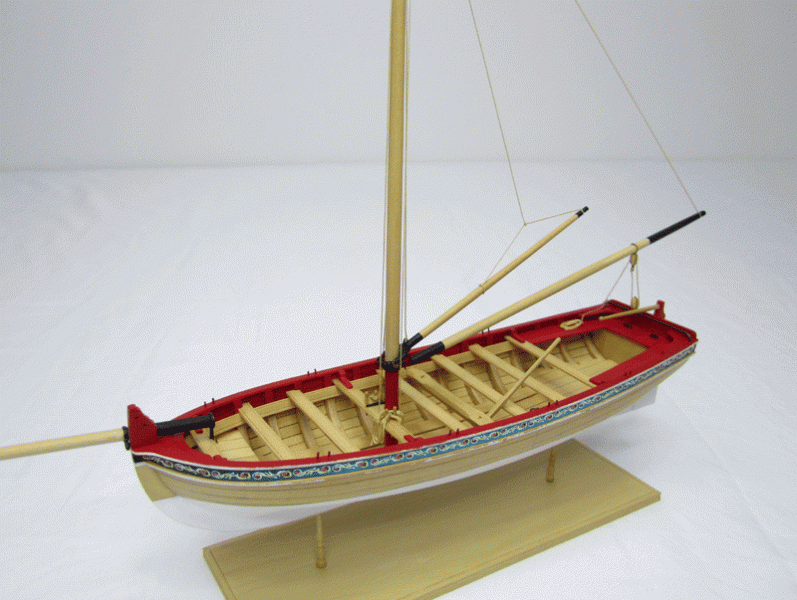
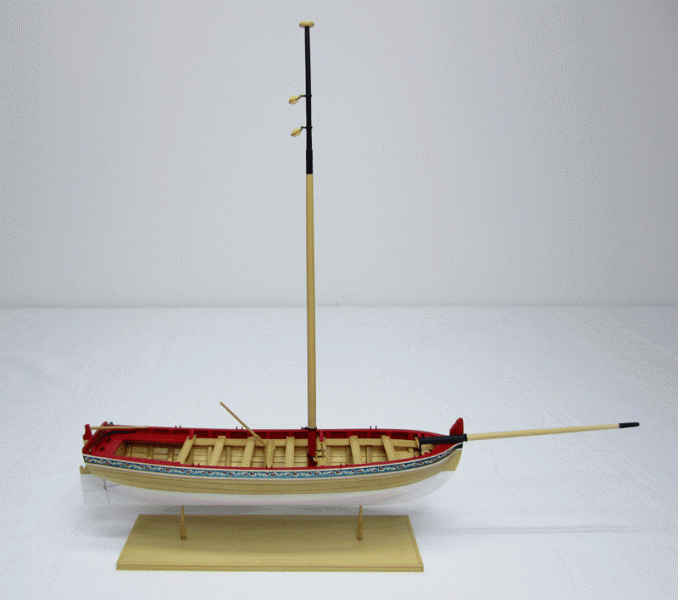
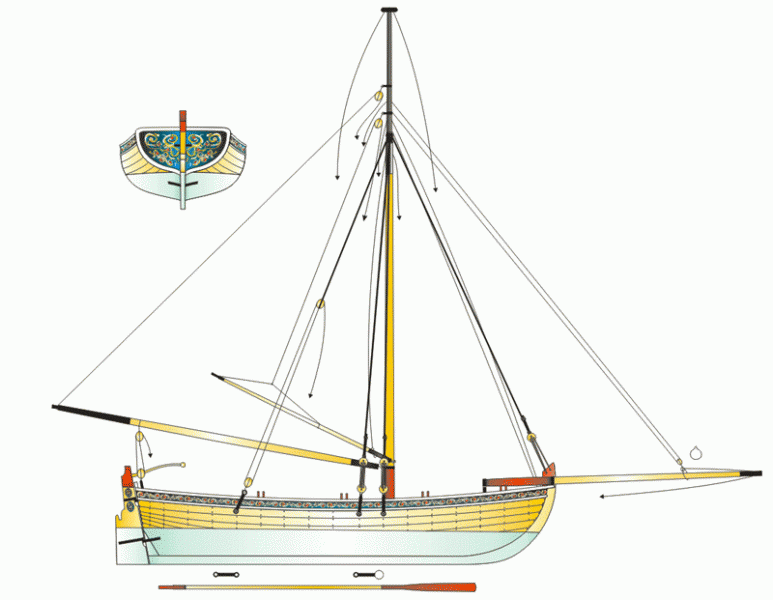
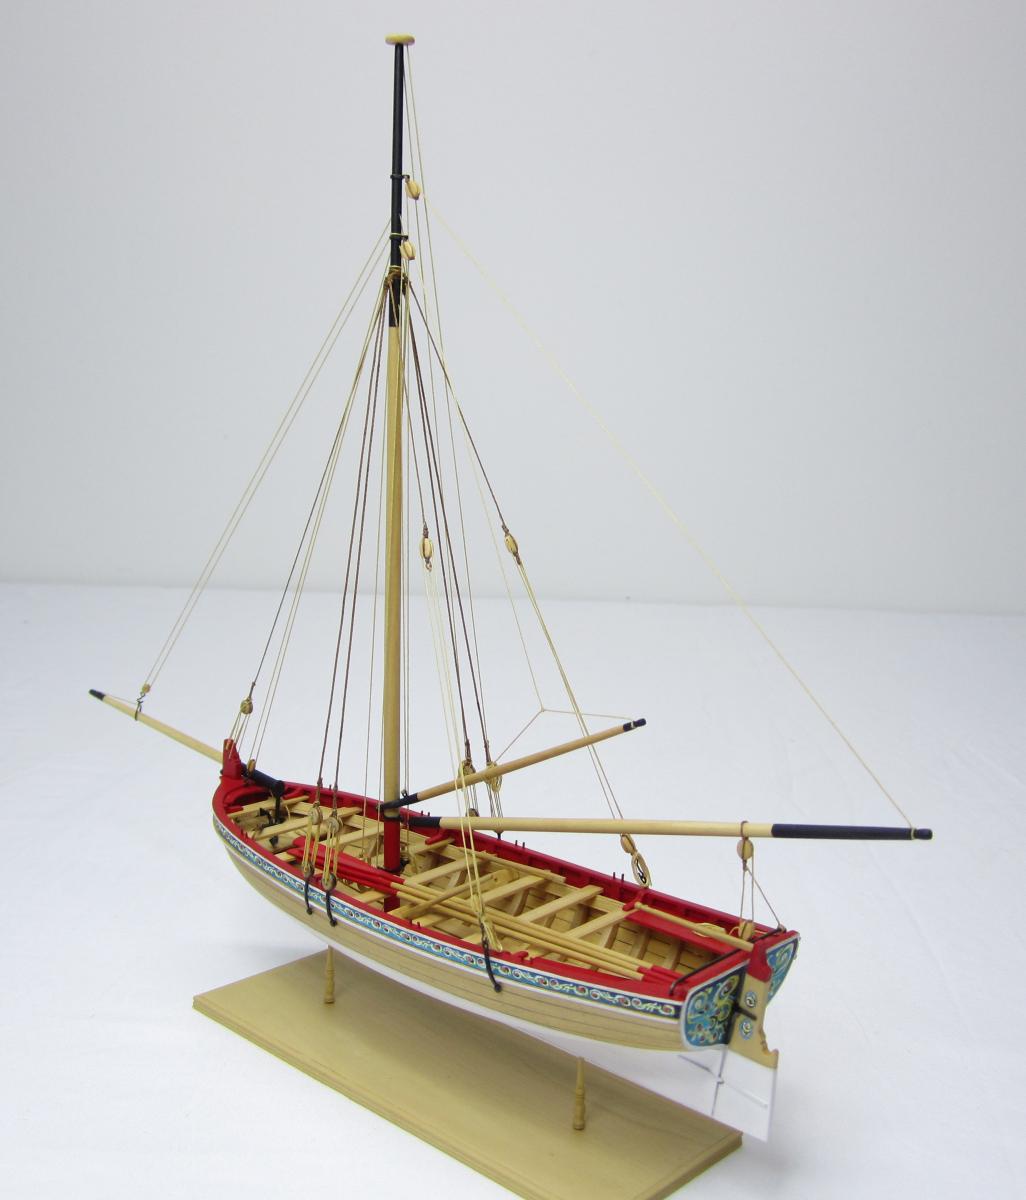
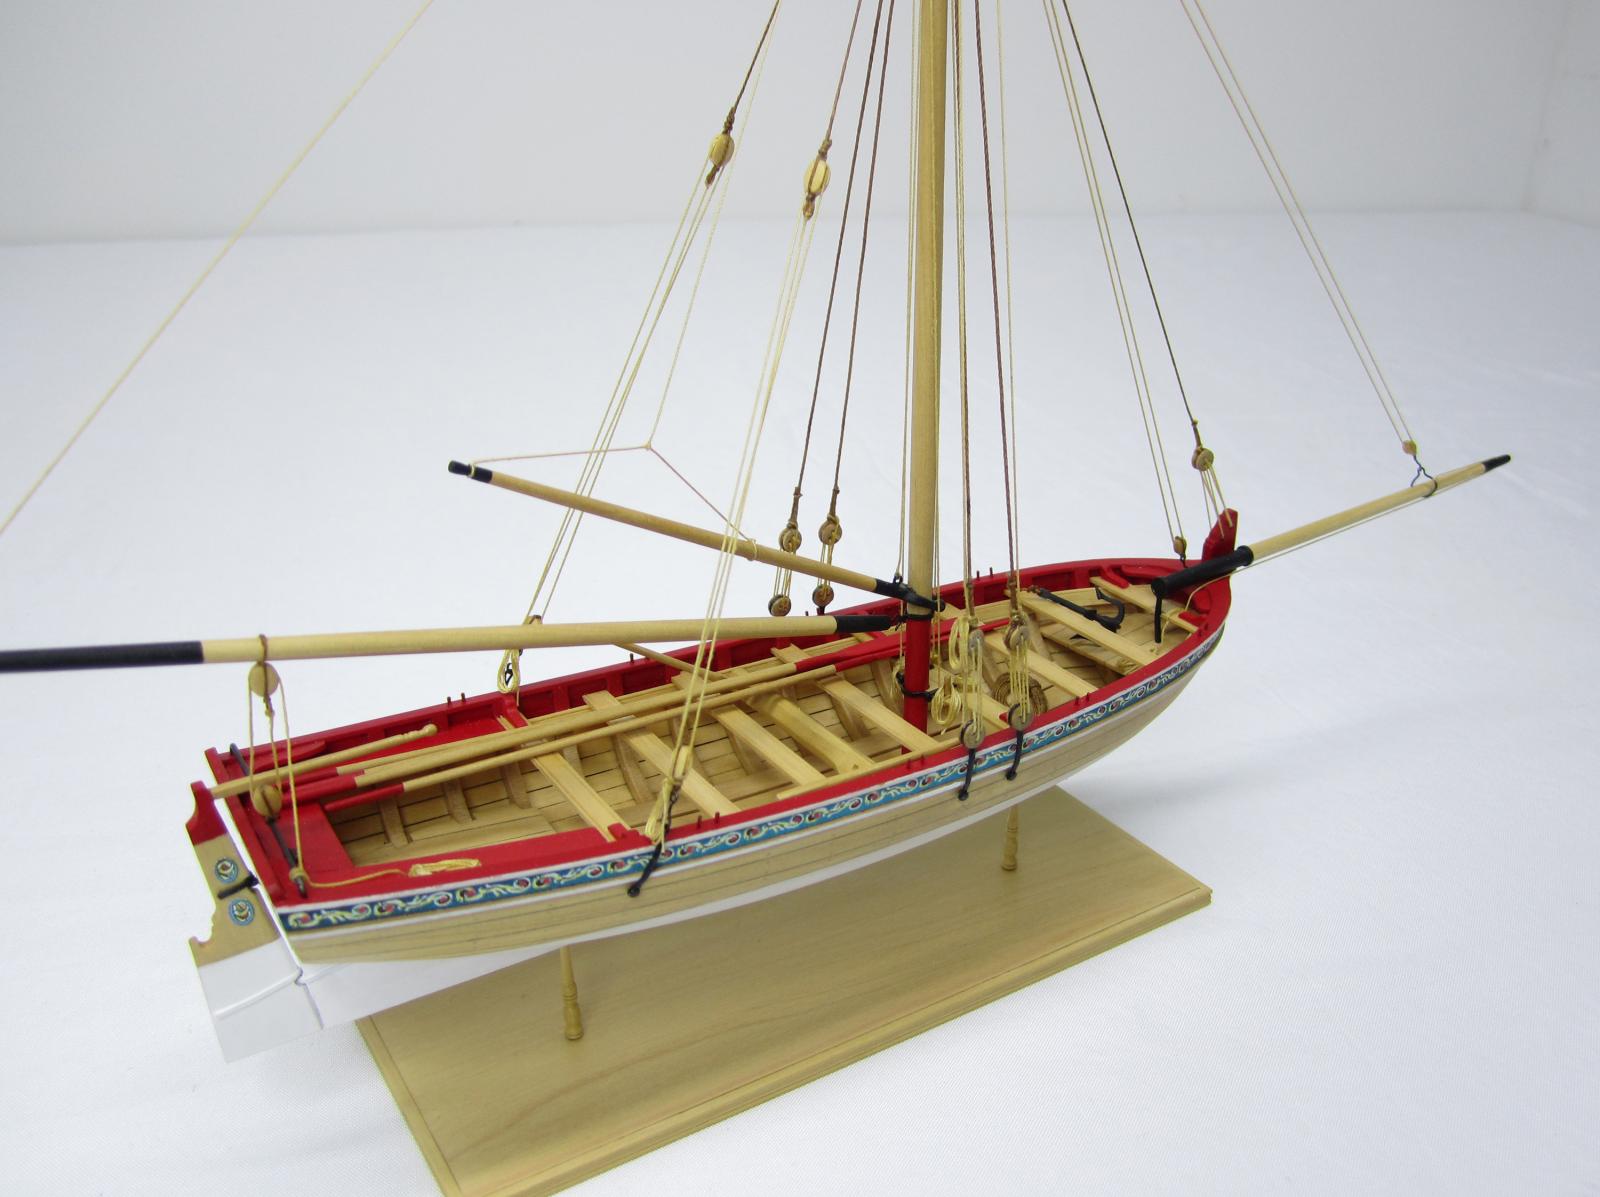
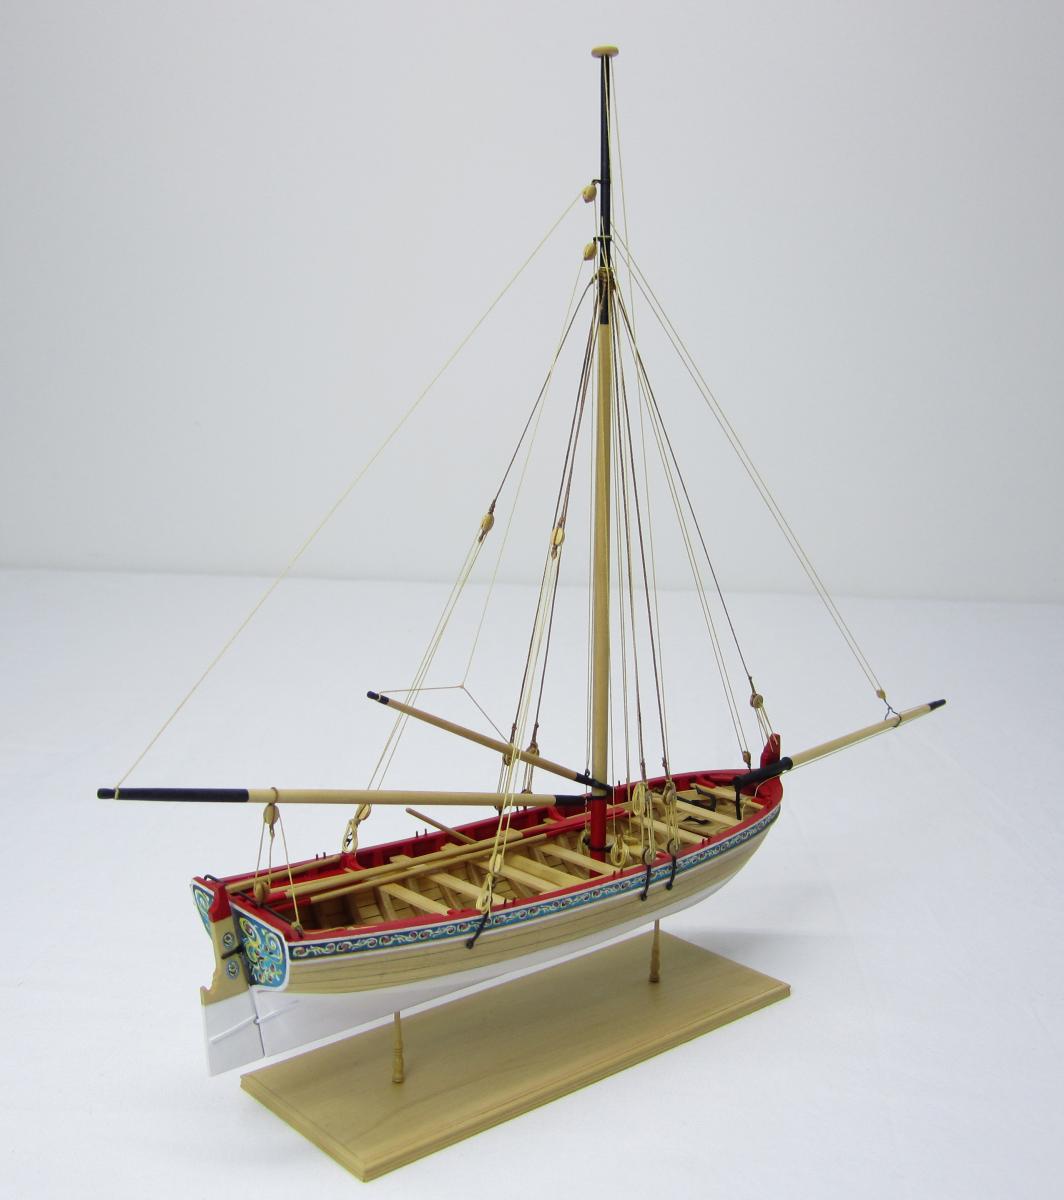
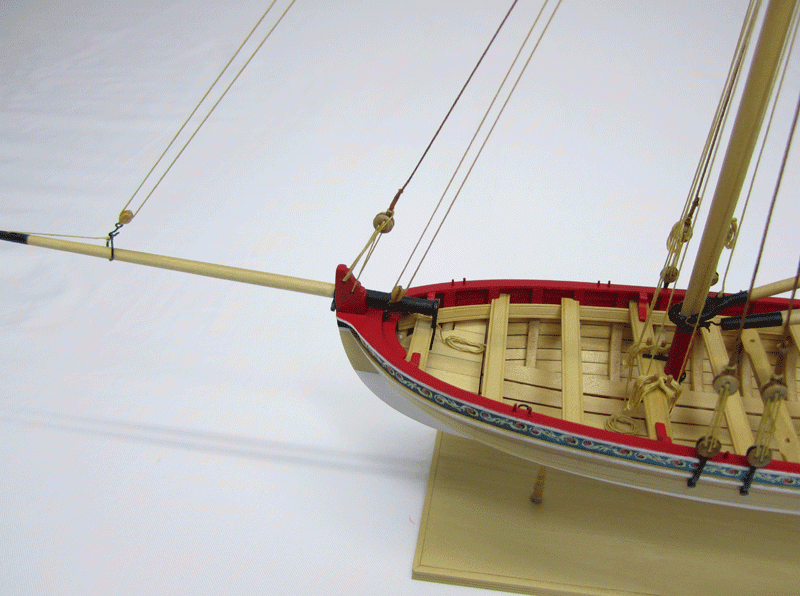
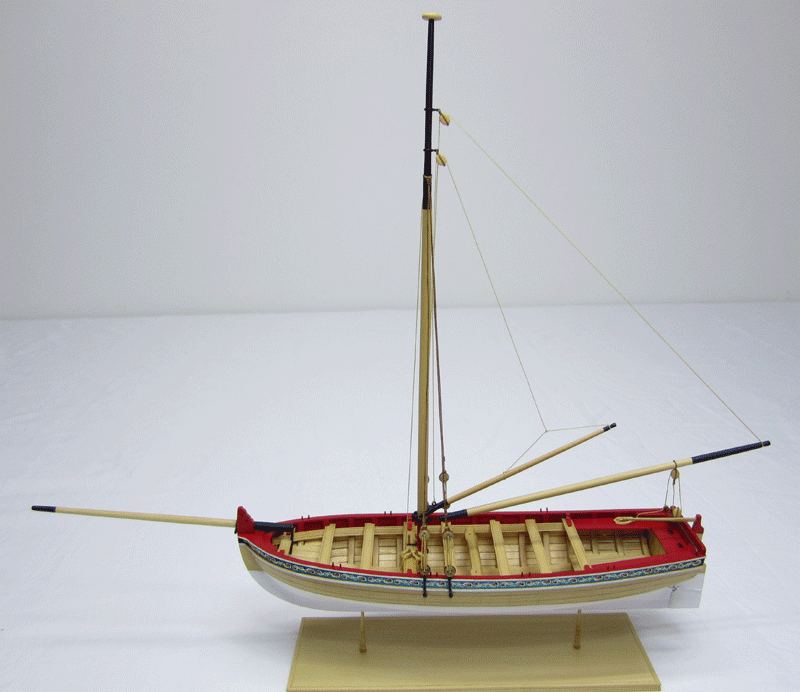
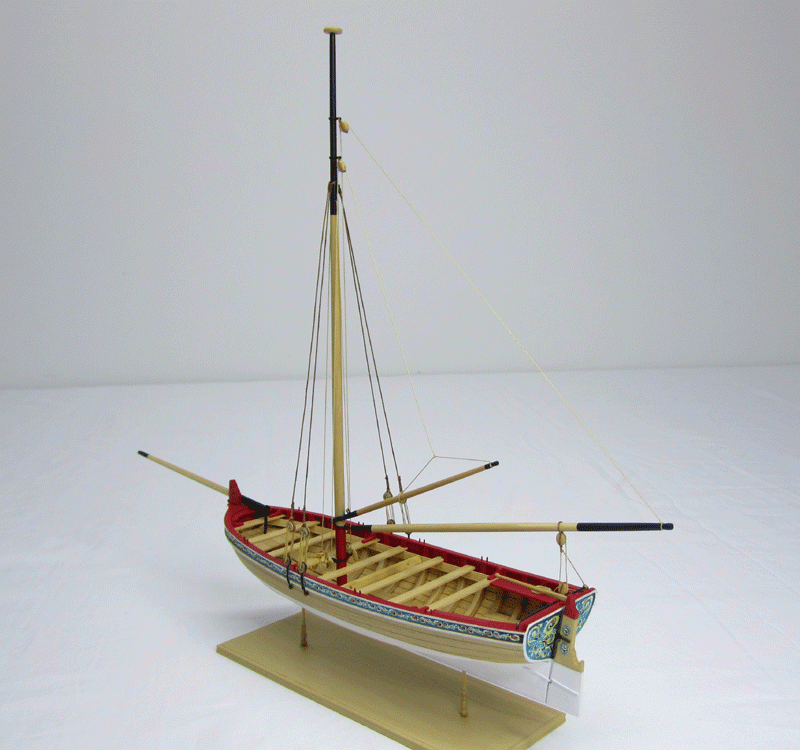
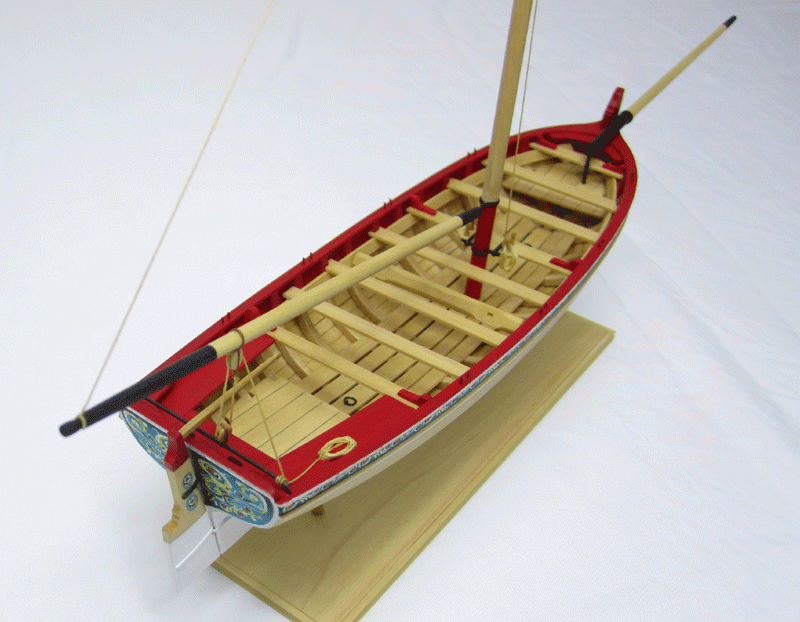
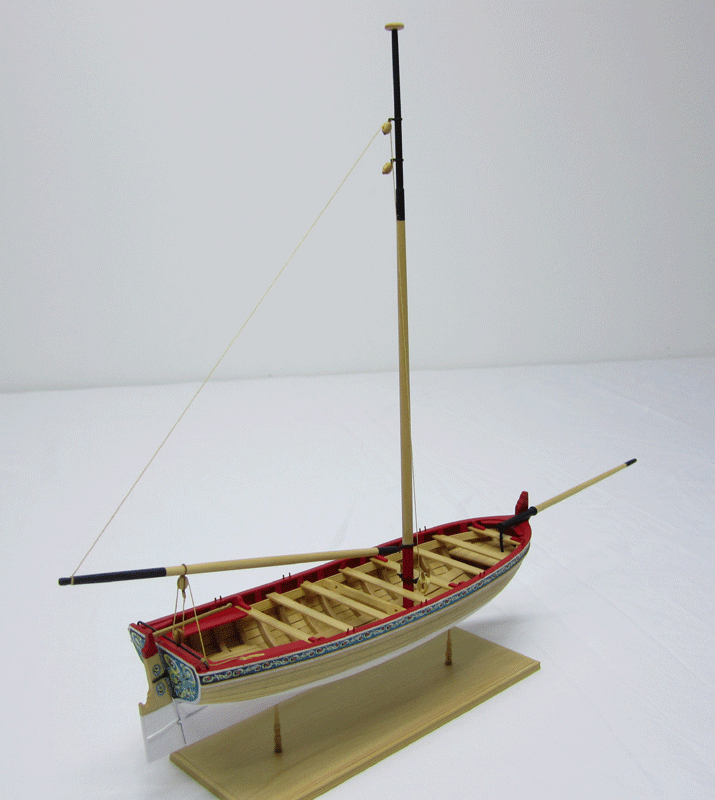
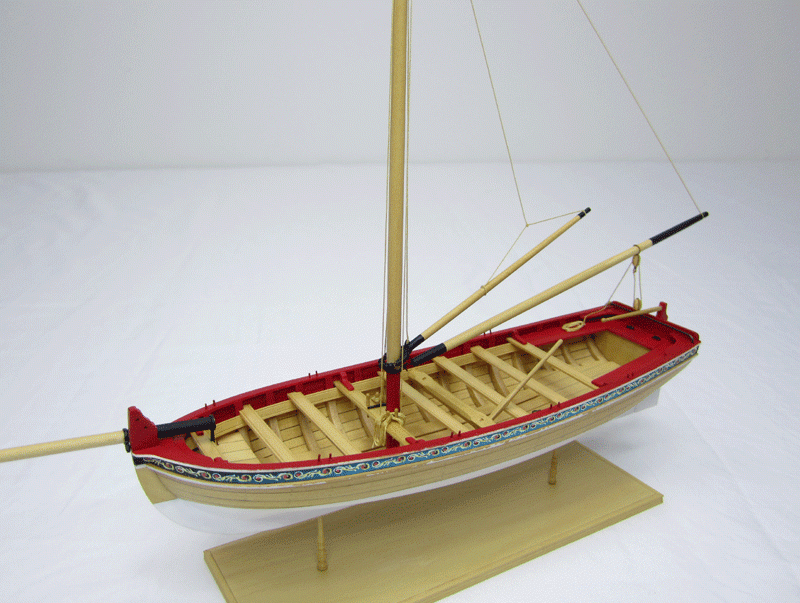
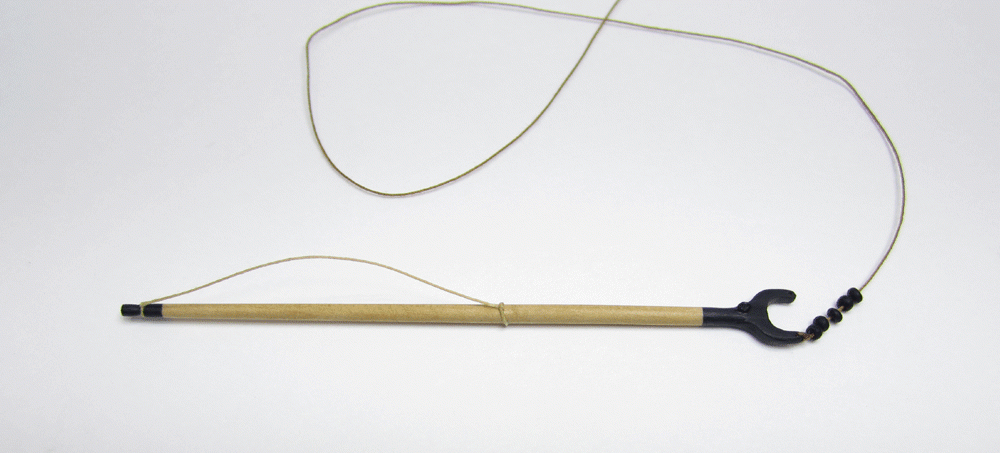
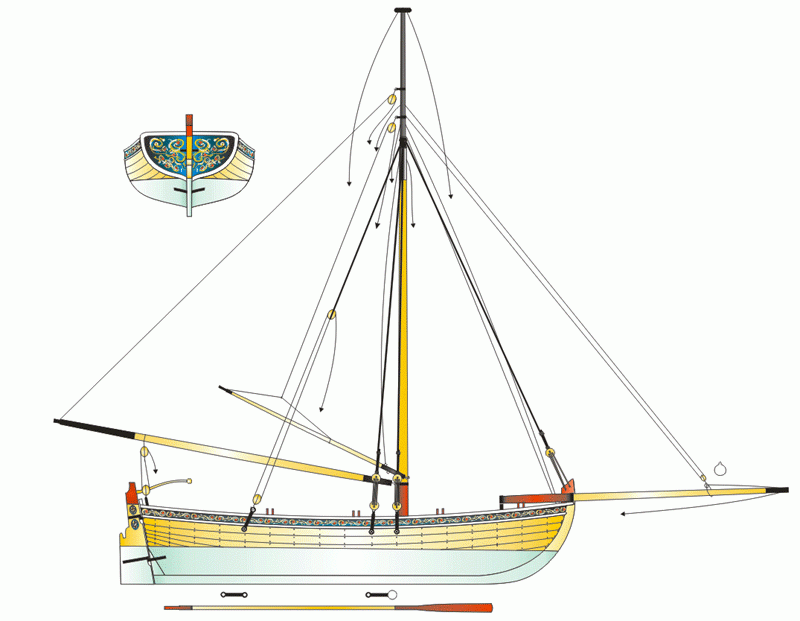
Rigging for the boom and gaff were completed first. The lines were brought up to the blocks on the mast and then down to the belaying pins on the thwart. I am going to run through these images fairly quickly as the instructions are very detailed. This way the larger images may be useful to those building the kit in the future.
-
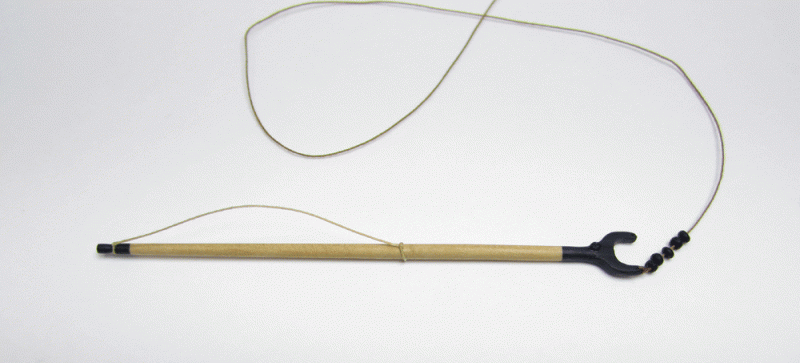
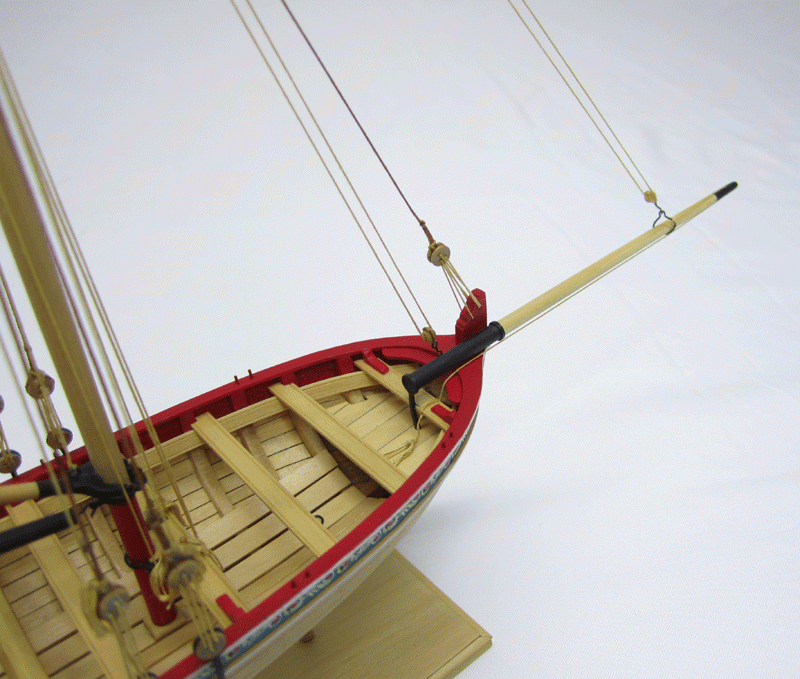
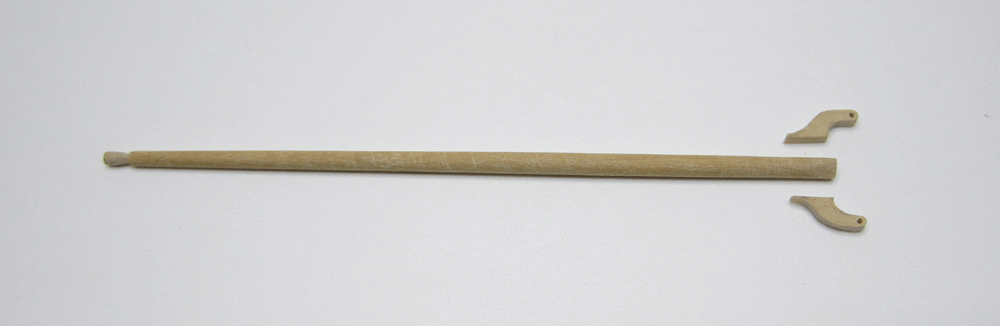
The bowsprit was easy enough to shape. A few iron bands were made in a similar way to the ones on the mast. However, I drilled a hole and added a small length of 22 gauge wire for one this time. See the pics provided. I carefully marked the locations for these two bands and glued them into position. The one supported by the long extension was secured first. I notched out the back of the thwart so it wouldnt wander around. It secured it nicely. Then the other band was secured into the stem once the proper bowsprit angle was found.
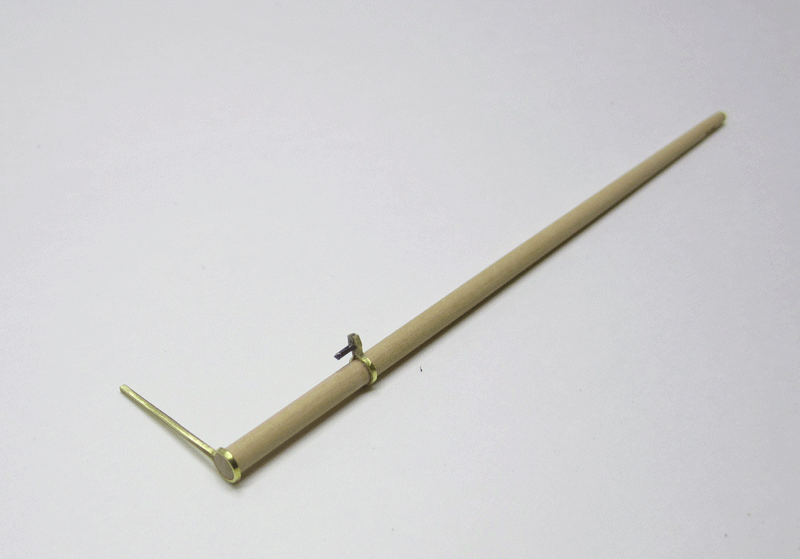
There is a sheave simulated on the end of the bowsprit. It was all painted ahead of time before I secured the bowsprit on the model.

I also made the gaff and boom. These were again pretty straight forward. I made all of these from boxwood too. The jaws for the gaff were added in two pieces. Then the parrel beads were strung onto it.

The boom has a hook in it which is placed in the iron band on the mast. I added the block to the end of the boom and painted it. Now it was time to start rigging....the rig is simple. It follows the NMM model exactly. I had a few examples to research and they all matched the rig shown below.
-
Jason that is a great start. Its always great to see another kit get started. I was wondering if you would like me to move this log to the dedicated group project forum?? Just let me know. It doesnt matter to me but I figure it would be easier for folks to look at everyones progress and share tips.
Chuck
-
Ryland...based on your "liking" of my post about this group build. I have moved your log here. I must now contact Ben to see if he wants to do the same. I figure it will increase activity and the more the merrier.
-
Here is a PDF of the friezes. I reduced some of the transom images further and it should be good to go. Remember...if anyone needs a further resizing let me via PM. All of the six transoms are different sizes so hopefully out of those posted you will find one you like. Download it below.
Chuck
- fnkershner, MWerth and Blue Ensign
-
3
-
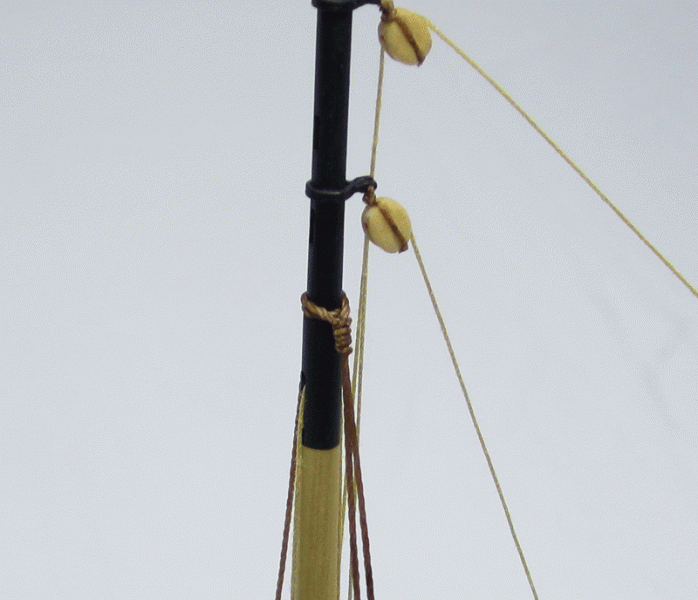
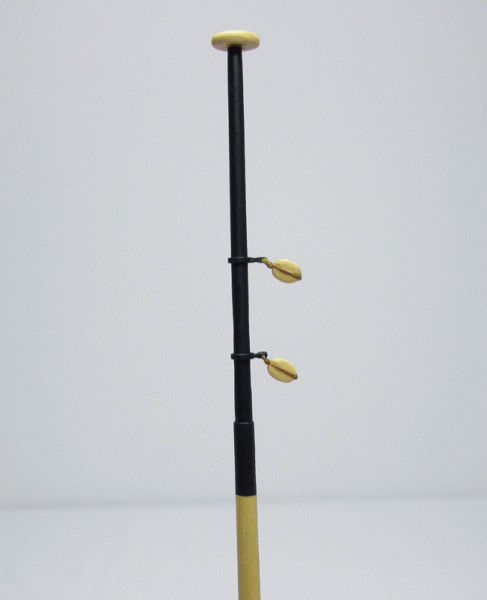
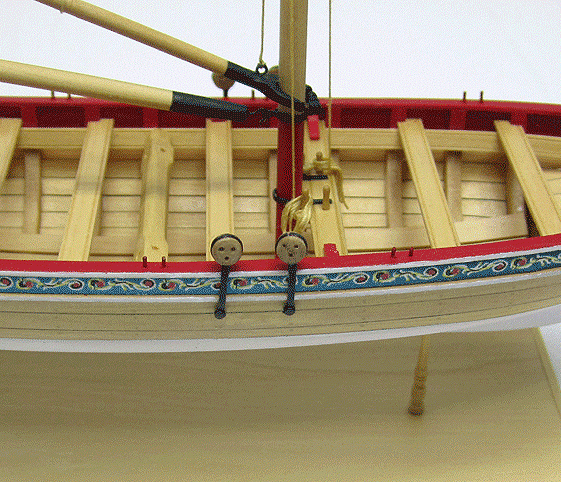
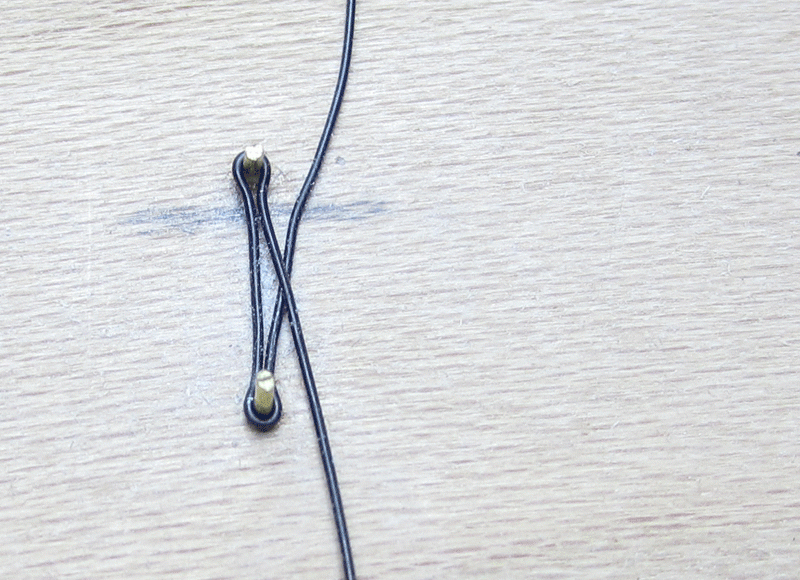
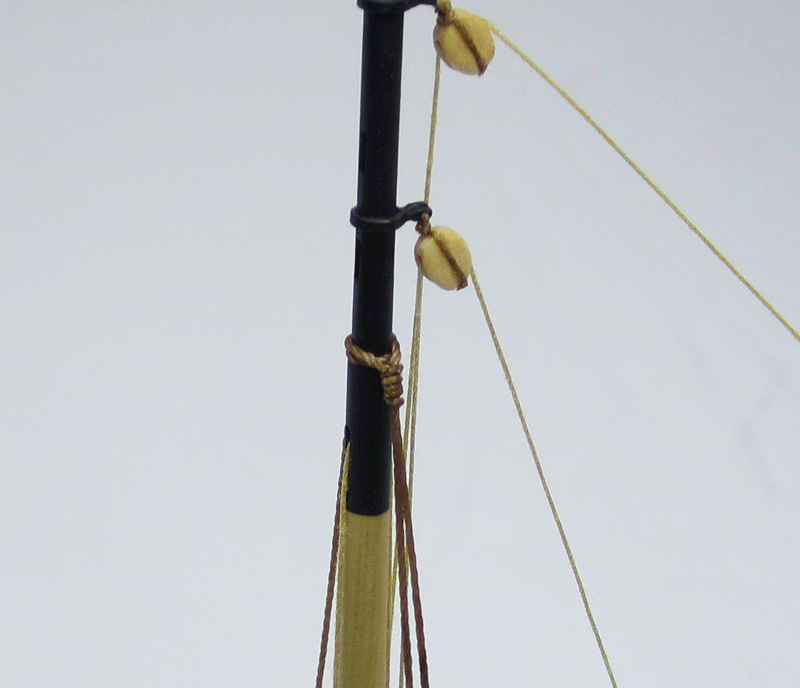
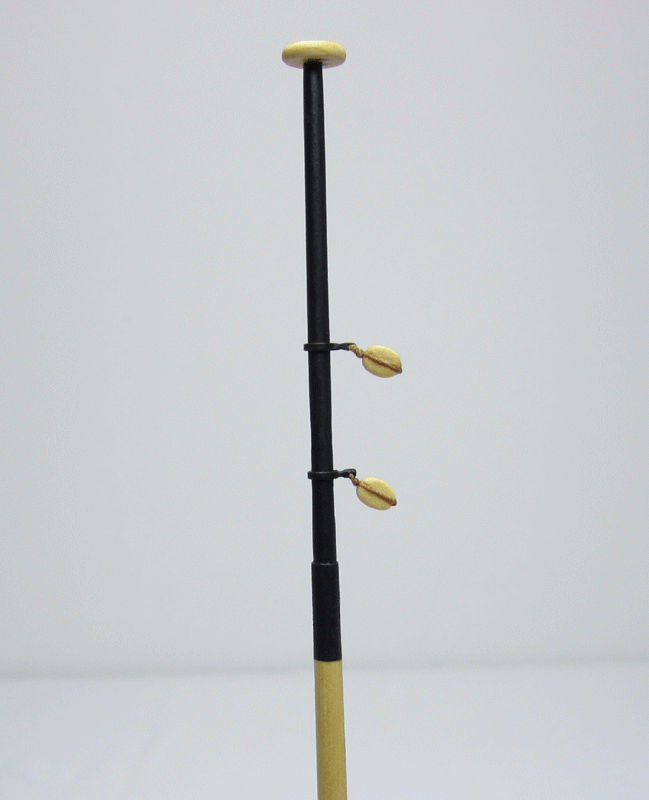
I started the main mast first. This was made from boxwood on my prototype but the kit has a supplied dowel. The shape was matched to the plans. The ball truck at the top of the mast was left off until the mast bands were completed first.
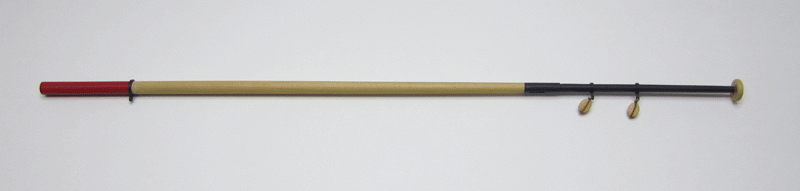
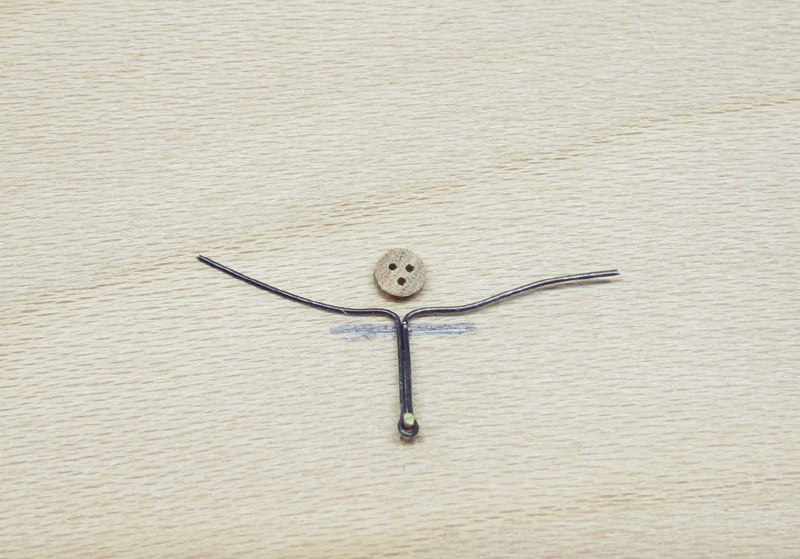
There were three of them. The two that were used for the blocks were pretty straight forward. I used a brass strip as shown in the photos. The one for the boom was very similar but the small extension was twisted so the holes were on top and bottom. I didnt bother soldering the ends together. I just used CA. It was filed smooth and painted. Works just fine.
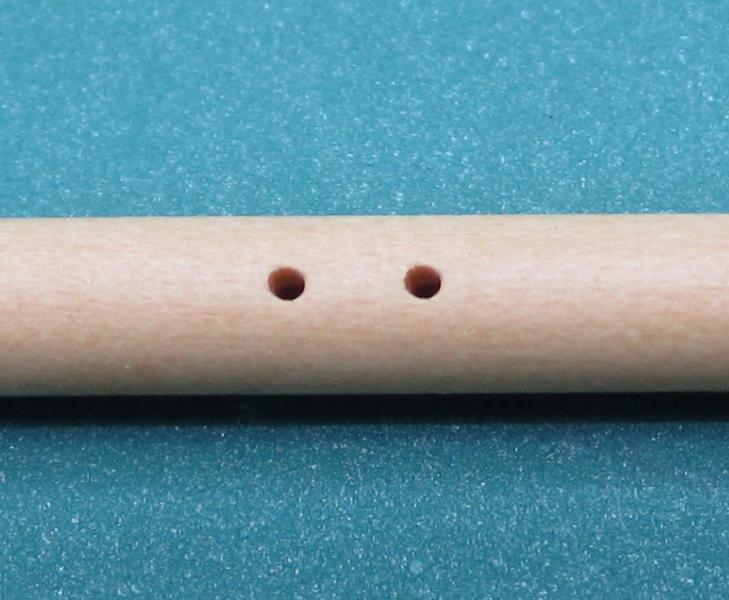
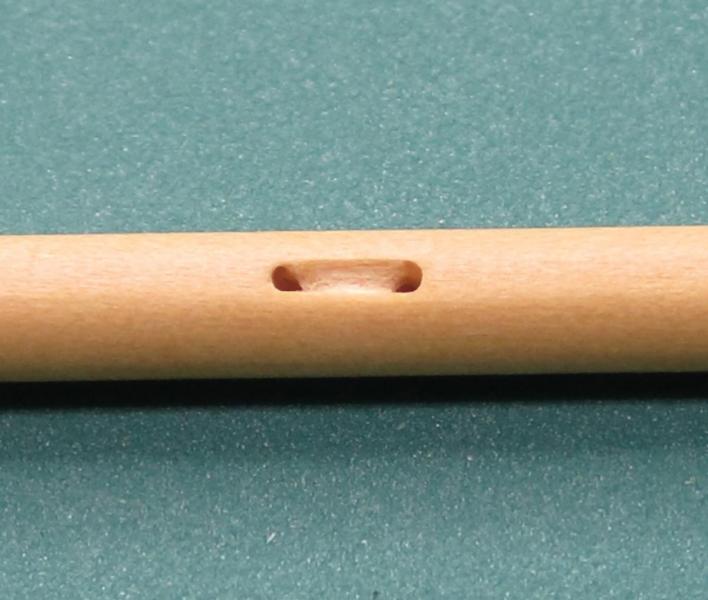
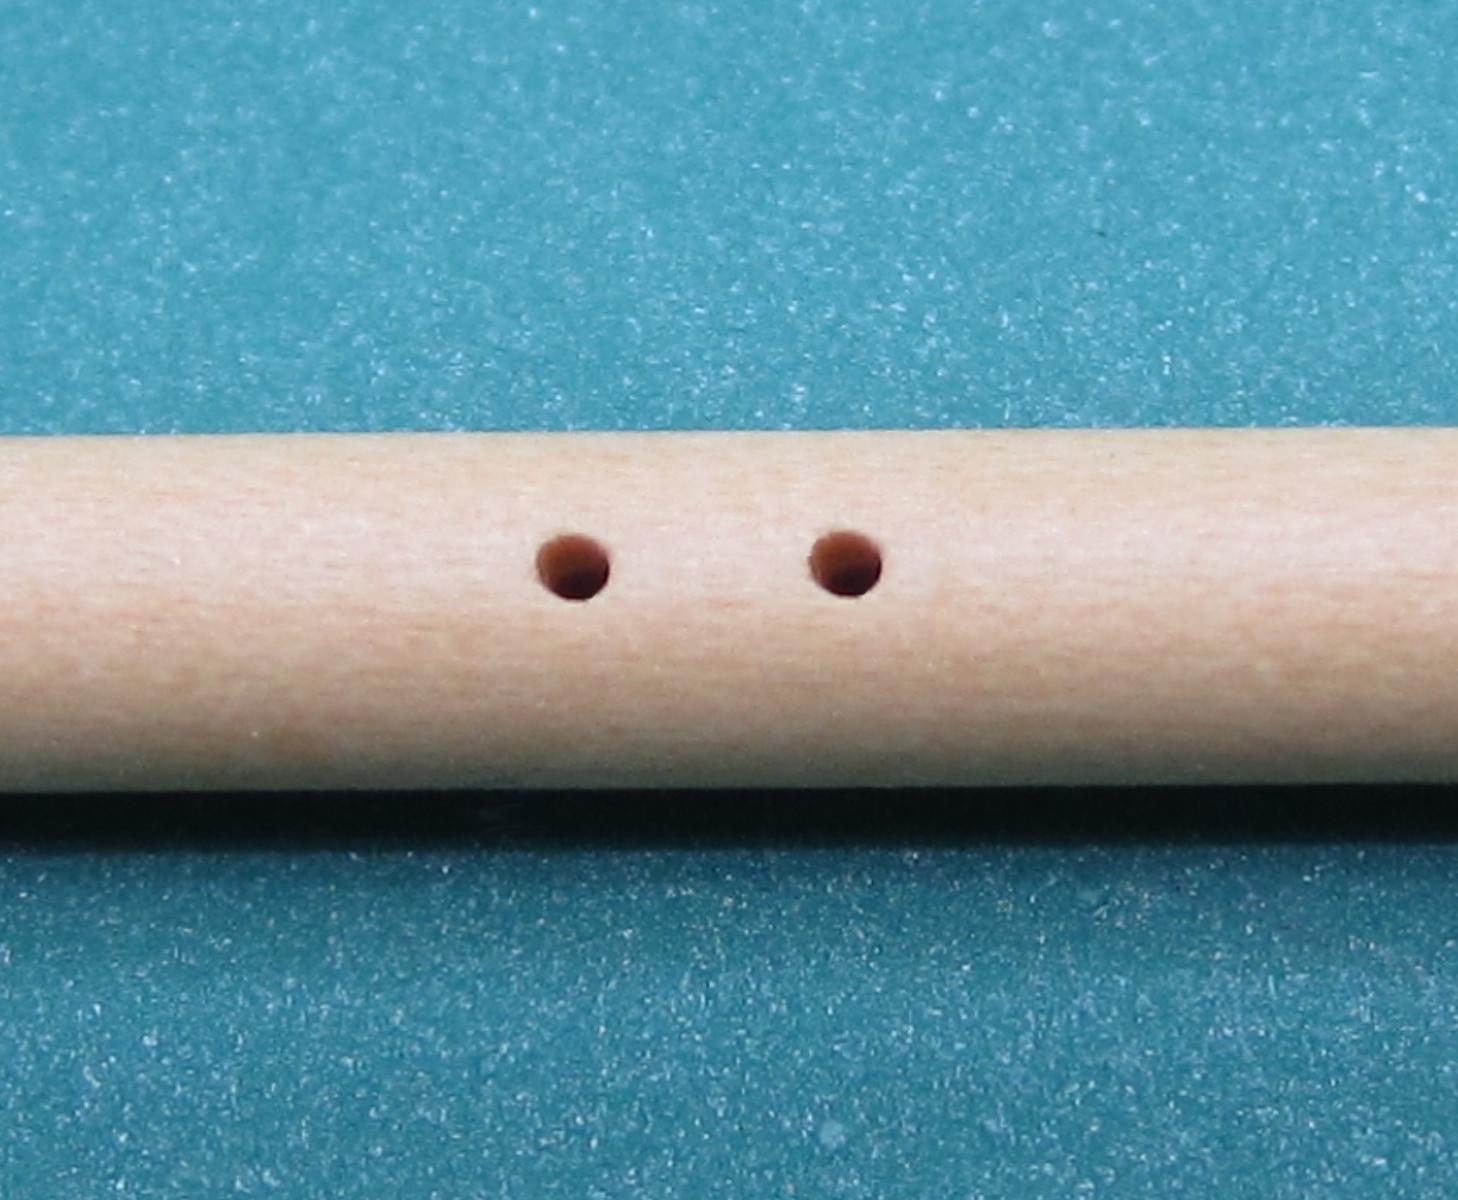
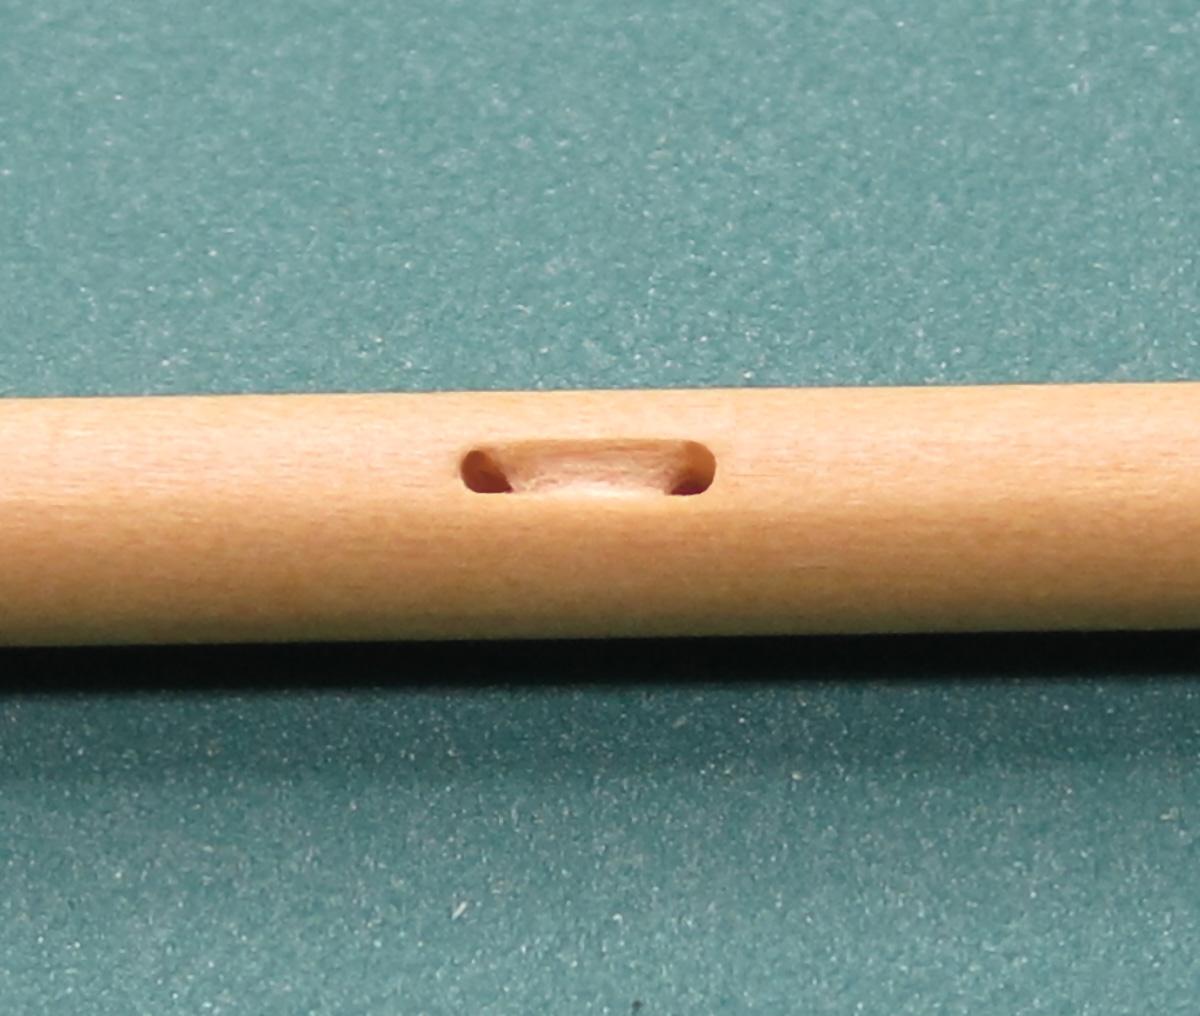
The Sheaves through the mast were simulated by drilling two small holes first and then carving the material out between them. I usually create a stop-cut first with the point of the blade by just cutting a line on both sides from hole to hole. The material between the two lines is carefully removed and filed afterwards.
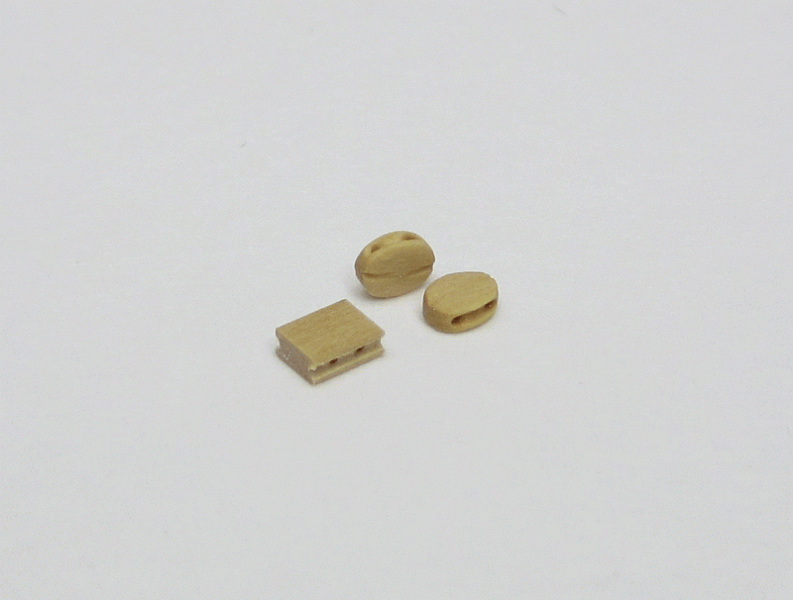
The iron bands were slipped on the mast and painted black. Then the ball truck was shaped and two sheaves simulated on top. Only one will be used and it will be for the flag halliard. Before stepping the mast the two blocks were attached to the two mast bands. The kit does come with blocks but they are the usual crappy ones. I highly recommend that you scratch these. Boxwood is preferred but any wood will do and they will no doubt be leaps and bounds better than the ones supplied. Only a handful are needed for the entire model. Here is a pic of the blocks being made. Because you only need a few...take your time and there is no need to create an assembly line. When they get done- they get done.
-
Ryland...it is so great to see the log and your progress. I will be following closely. You have achieved a nice finish on the keel and it will look just great when completed...
Thanks for sharing.
Chuck
-
Nope, not me. I have since seen pics of the new ones in position. They actually fit quite well even though there was some shrinkage.
Chuck
-
-
-
No thanks....I prefer to use my Uncle Pauly....
If someone posts something that is copyright...we are really good about that. We almost immediately remove it. I am not worried about that. Most folks are reasonable and after talking to the original author we would certainly remove it. Its folks stealing stuff that hard to deal with...But my uncle said its real easy....he starts with the pinkies.
Chuck
-
Thats not needed...most folks are good people. They wouldnt do those things. Those that would.....these types of agreements wouldnt matter. If you post anything on the internet...beware of where it may end up. Its really simple. There is no way to protect yourself from crooks and evil people. If you post any documents make sure you list your name and copyright. Other then that...posting is open for all that "suck" to do their selfish deeds. I have seen so many people ripped off (including myself) it is painful. But those that are caught will be banned immediately from this site.
Chuck
- trippwj, justsayrow, mtaylor and 2 others
-
5
-
Thank you and yes...link away. I shall be adding more today.
Chuck
-
Nope...I can only do so much.
Chuck
-
So your saying that they are not the ones I pictures above??? Those are a perfect fit. Perfect scale and match what a carronade for that period should look like. They are not 42 pounders. they were real tiny 24's. But to each is their own. There was never a screw in the casting...you have to make that part of the carronade assembly. But there could have been shrinkage when they spin cast it. Sorry...but they matched my plans perfectly when I cast them in resin. Send it back
Chuck


18th Century Longboat by trussben - FINISHED - Model Shipways - 1:48 ( 1/4 )
in - Kit build logs for subjects built from 1751 - 1800
Posted
Guilty as charged...this way if anyone is looking for a longboat build they are all in one place. Cant wait to see her all rigged up. That was fun.
Chuck