
HOLIDAY DONATION DRIVE - SUPPORT MSW - DO YOUR PART TO KEEP THIS GREAT FORUM GOING! (Only 72 donations so far out of 49,000 members - Can we at least get 100? C'mon guys!)
×


Chuck
-
Posts
9,670 -
Joined
-
Last visited
Content Type
Profiles
Forums
Gallery
Events
Everything posted by Chuck
-
 Before you do give up…you might consider just sanding all of those little steps down smooth and planking without them. It may prove to be easier. Or almost remove them all but leave just a faint visible reminder of each strake to help you keep the planking run on track. Then just plank it clinker style on smooth frames. you may not end up with the same amount of planks but its the easier solution. just sand the top edge of each finished row of planking down flush to the frames and overlap the next row. Make the ends going i nto the rabbets not clinker…slowly even those out.
 -
Beautifully done!!! You are getting close to the finish line now.
-
Lovely!!!
-
That is looking excellent.
-
That looks very good. Like Mike mentioned, be sure to check the run with the ship right side up. Thats the most important part.
-
Band Saw Recommendations
Chuck replied to ChrisLBren's topic in Modeling tools and Workshop Equipment
I have a lot of blades...I usually stick to the laguna pricey blades but do use the wood slicer for soft stuff like the cedar. But the Laguna resaw king blades are wonderful. But you do get stuck with the occasional badly made blade that breaks along the weld. But they do take them back with no questions asked. I will certainly try the blade you recommended also. I prefer the 1/2" blade. Slow and steady...let the blade cut and dont push to fast. If you rush and push the wood through to force it quicker, especially on wide boards you are looking for trouble. I usually cut all my sheets and sand them the next day. This is what Joe does at modelers sawmill as well. In fact he has a laguna too....same one. It all depends if you like the ceramic guides vs. the steel wheels. I dont mind the ceramic guides. They are a pain to change, but I havent had any issues. Guide set-up is key....getting them the correct distance from the blade and not a large gap is the key....just touching them almost.... You will know once you start using one. Chuck -
Band Saw Recommendations
Chuck replied to ChrisLBren's topic in Modeling tools and Workshop Equipment
I can highly recommend the Laguna 14/BX. Its more than 2HP which makes it easy to cut through hardwoods at even 6" wide. I have used it without fail to resaw sheets from billets of wood. Yes its pricey but everything good is a bit more expensive. I have had mine for over 5 years if not more. https://lagunatools.com/classic/bandsaws/14bx-bandsaw/ There are lesser models with slightly less HP which would be fine if you are only cutting for yourself. The more HP was used to resaw sheets for sale and is used and abused. Chuck -
Beautiful work...just lovely. Merry Christmas.
-
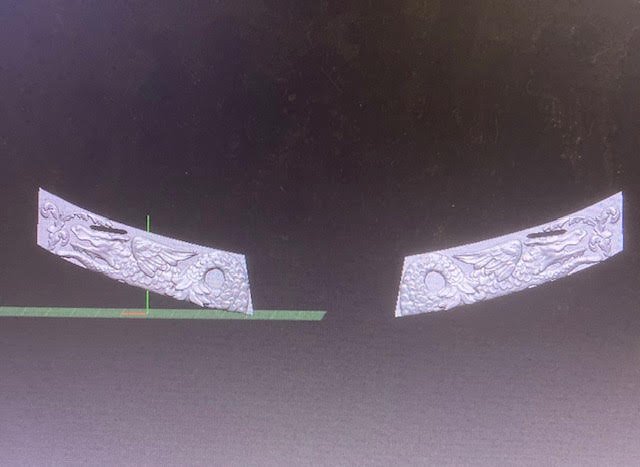
Nicely done. That frieze looks awfully washed out though. That was a test print hopefully. Chuck
-
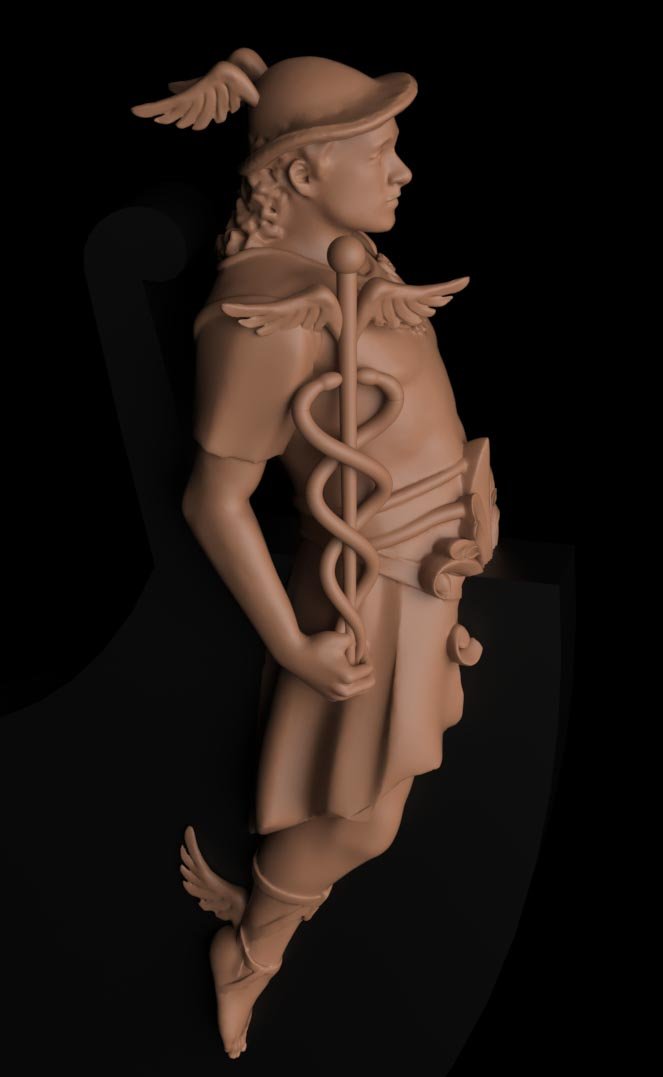
Some work on the figurehead...
-
Very very nice Mike. They look perfect. I know how hard these can be. You did a fantastic job on those headrails. The grating and remaining headwork will be a breeze by comparison.
- 607 replies
-
- 1
-

-
- winchelsea
- Syren Ship Model Company
- (and 1 more)
-
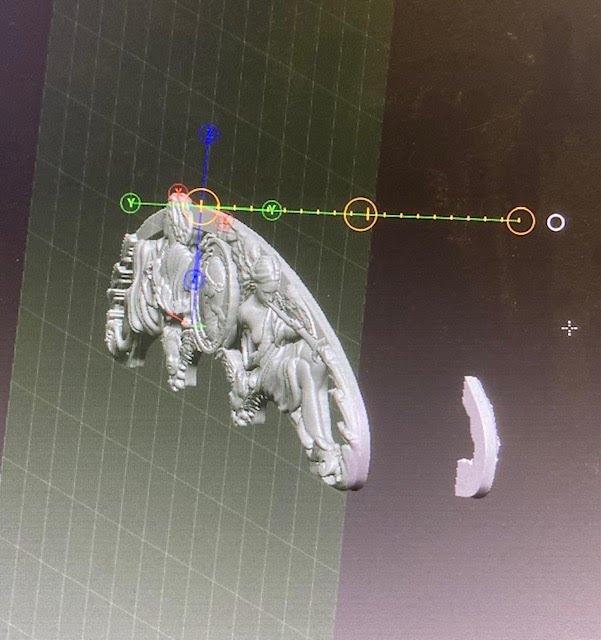
Work continues on the square frames....the assembly line is in full swing. Almost done with the Cad work on the carvings...I should have an update on my my frame progress soon.
-
nicely done. That is a tricky part for sure.
- 642 replies
-
- 3
-
-
- winchelsea
- Syren Ship Model Company
- (and 1 more)
-
Looking really good!!! So nice when you get this stage. Each bit of progress makes a huge difference visually which helps keep you going.
- 840 replies
-
- 3
-
-
- winchelsea
- Syren Ship Model Company
- (and 1 more)
-
Seriously Greg. That will be a hard act to follow. You need to post so many more photos. Be sure to add them to the gallery as well. I am still plugging away on square frames for my Speedwell. I have photos of yours all around my shop for inspiration. Just a lovely model.
-
Just sand the fuller down so it fits leaving a little lip. Even if you only have the slightest point of an edge it will be fine. You can also sand or chisel the planking a bit thinner too so you have even more area to work with. no big deal here…very workable
- 389 replies
-
- 1
-
-
- winchelsea
- Syren Ship Model Company
- (and 1 more)
-
Not unless you already know it. If you have been there before you can click on the post number to go to just that post. Then you can save it to your favorites.
-
She really does look nice. Well done.
- 389 replies
-
- 1
-
-
- winchelsea
- Syren Ship Model Company
- (and 1 more)
-
Absolutely beautiful. It was such a pleasure to follow your progress on this one. Such a nice model you have built there!!!
-
Nope...that is entirely wrong for Winnie...no sweep ports or extra wide wales. Please disregard that for Winchelsea. Yes the Southhampton has sweeps and was very different. It even had the old beakhead bulkhead at the bow. There are some beautiful drafts of that class available. But sadly no contemporary models. Check out the width of the wales. Chuck
- 389 replies
-
- 3
-
-
- winchelsea
- Syren Ship Model Company
- (and 1 more)
-
That looks pretty darned good. Well done and worth the time and effort.
- 389 replies
-
- 2
-
-
- winchelsea
- Syren Ship Model Company
- (and 1 more)
-
That looks so good. Superb. That is the perfect image to start off my day. Thank You for that.

