-
Posts
9,660 -
Joined
-
Last visited
Content Type
Profiles
Forums
Gallery
Events
Everything posted by Chuck
-
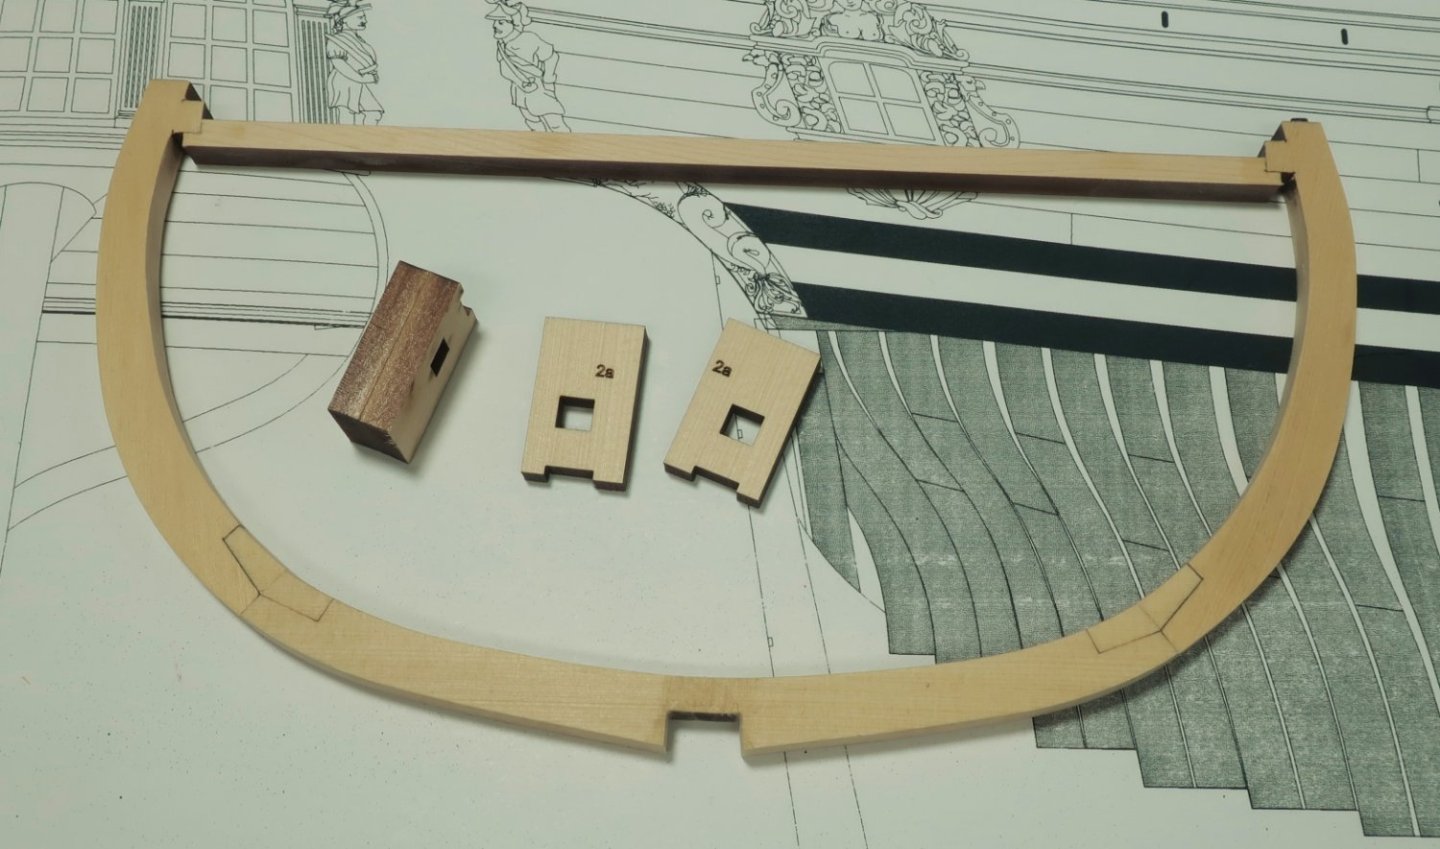
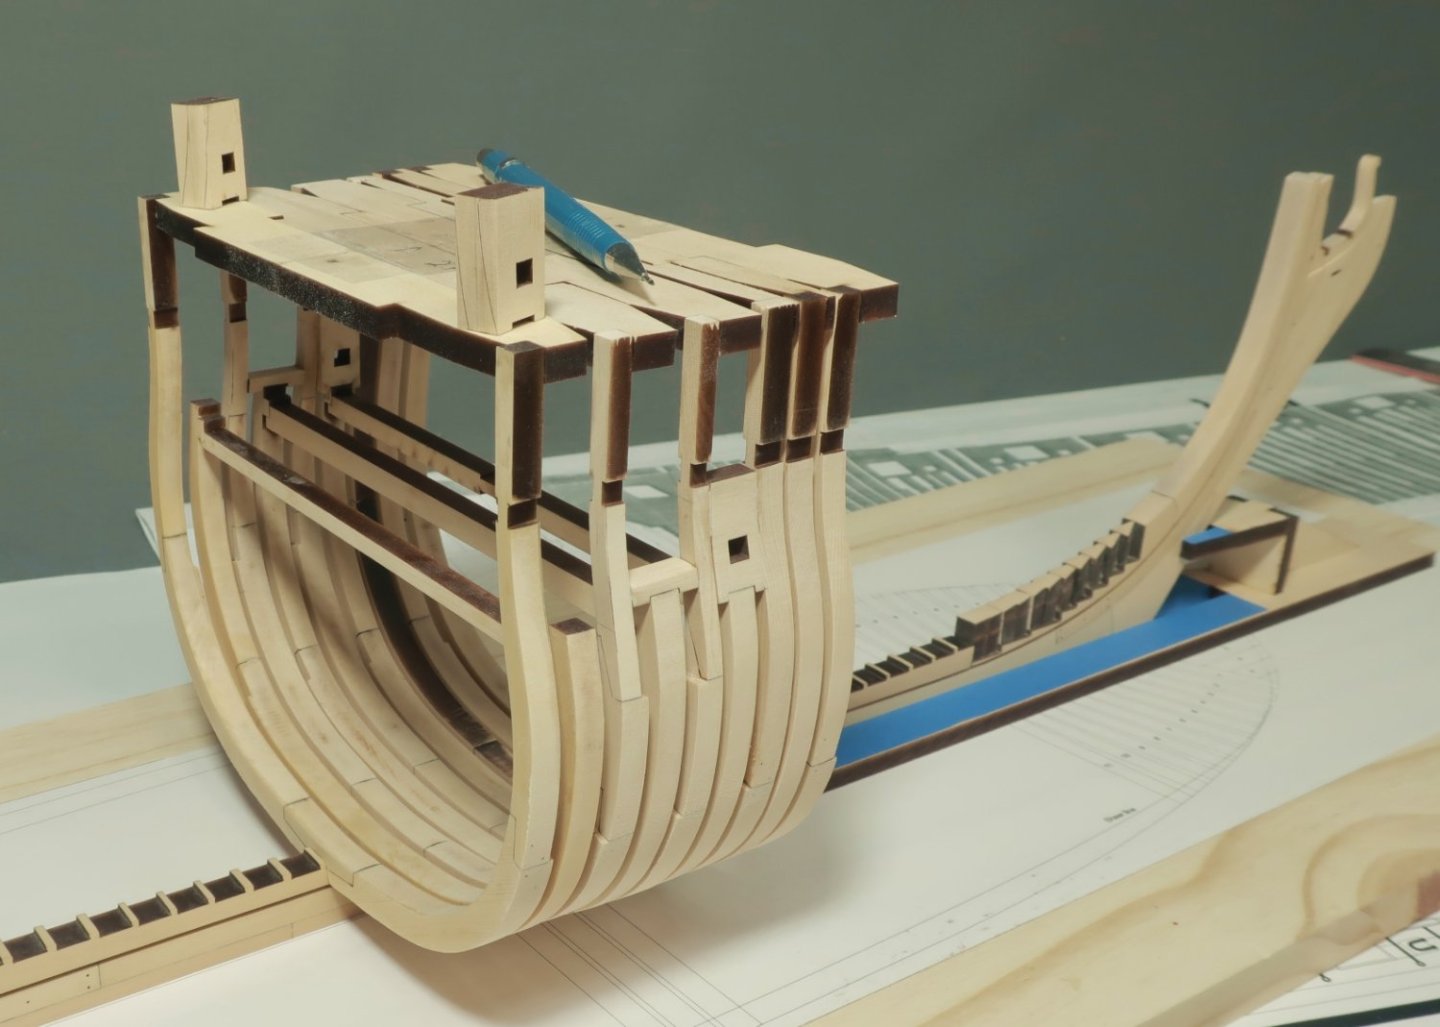
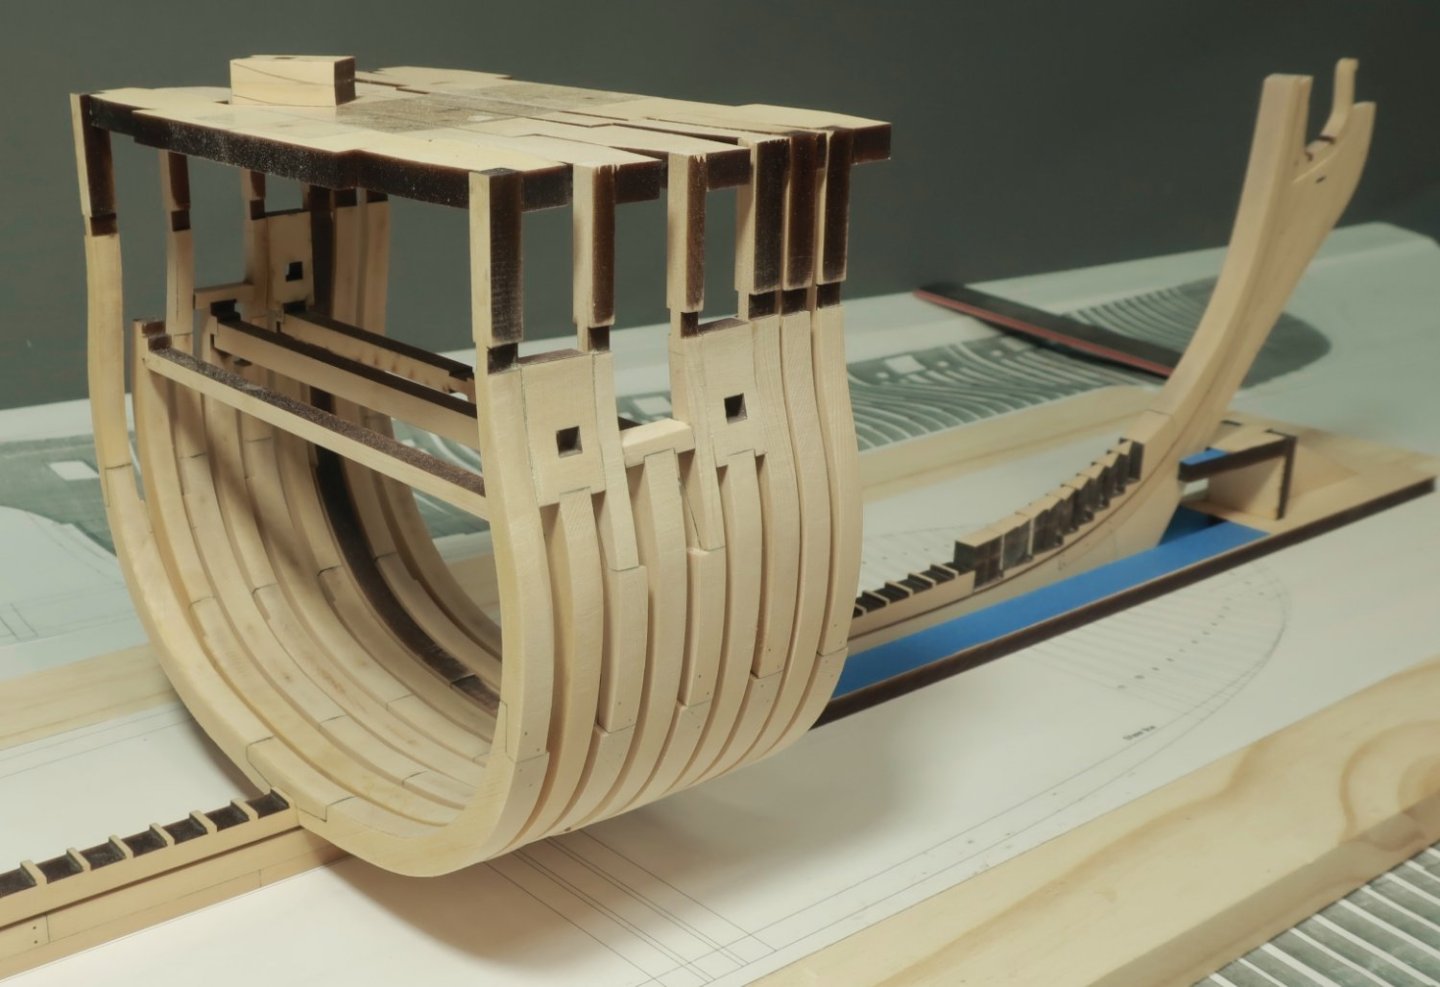
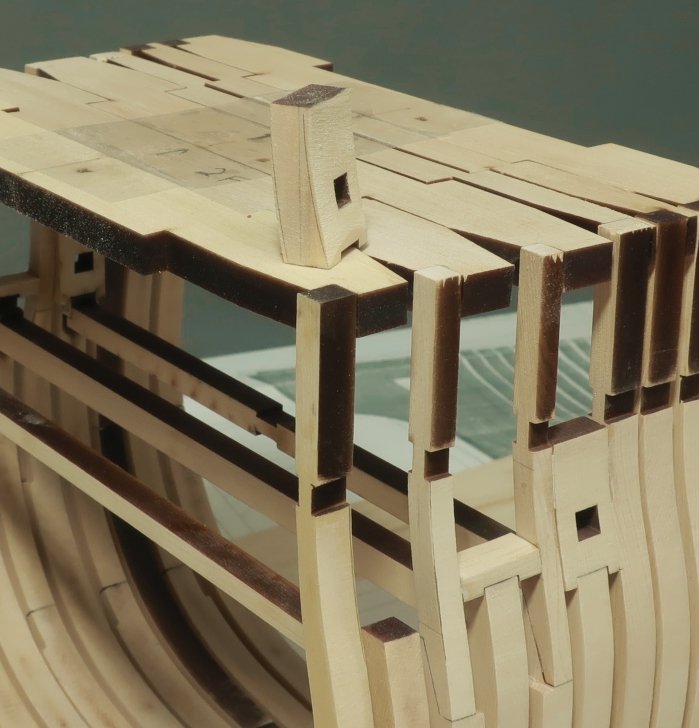
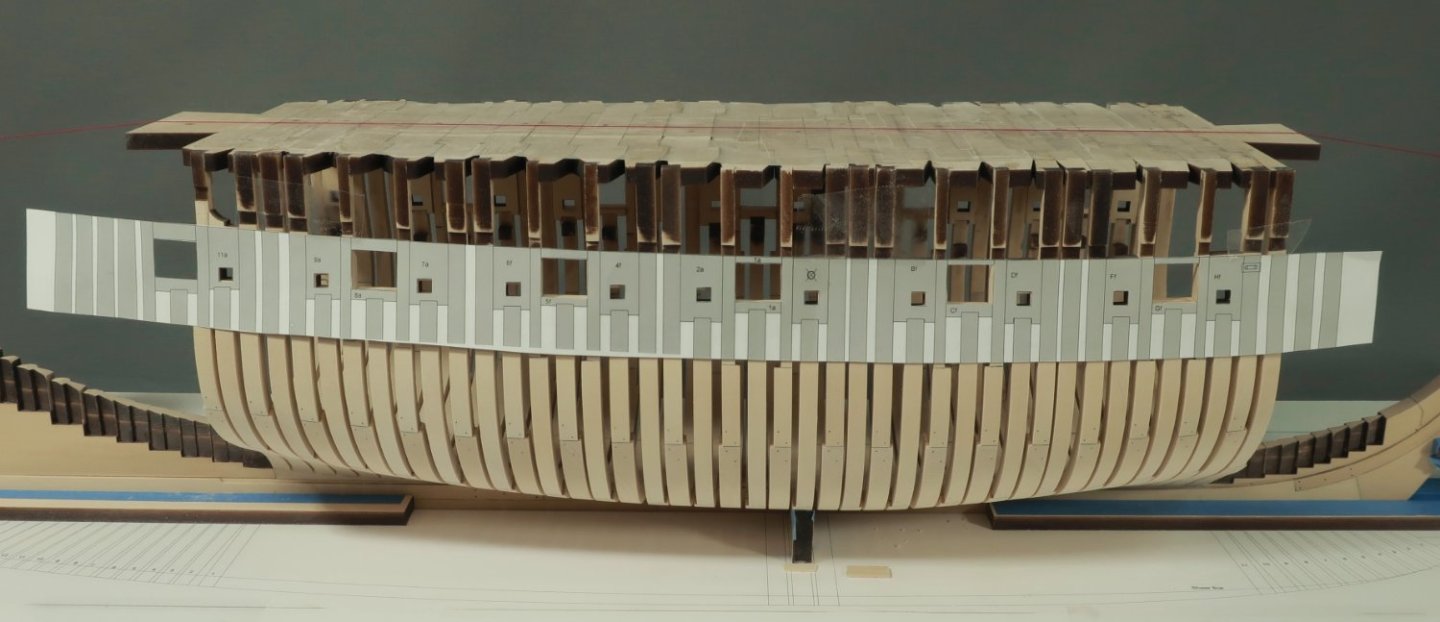
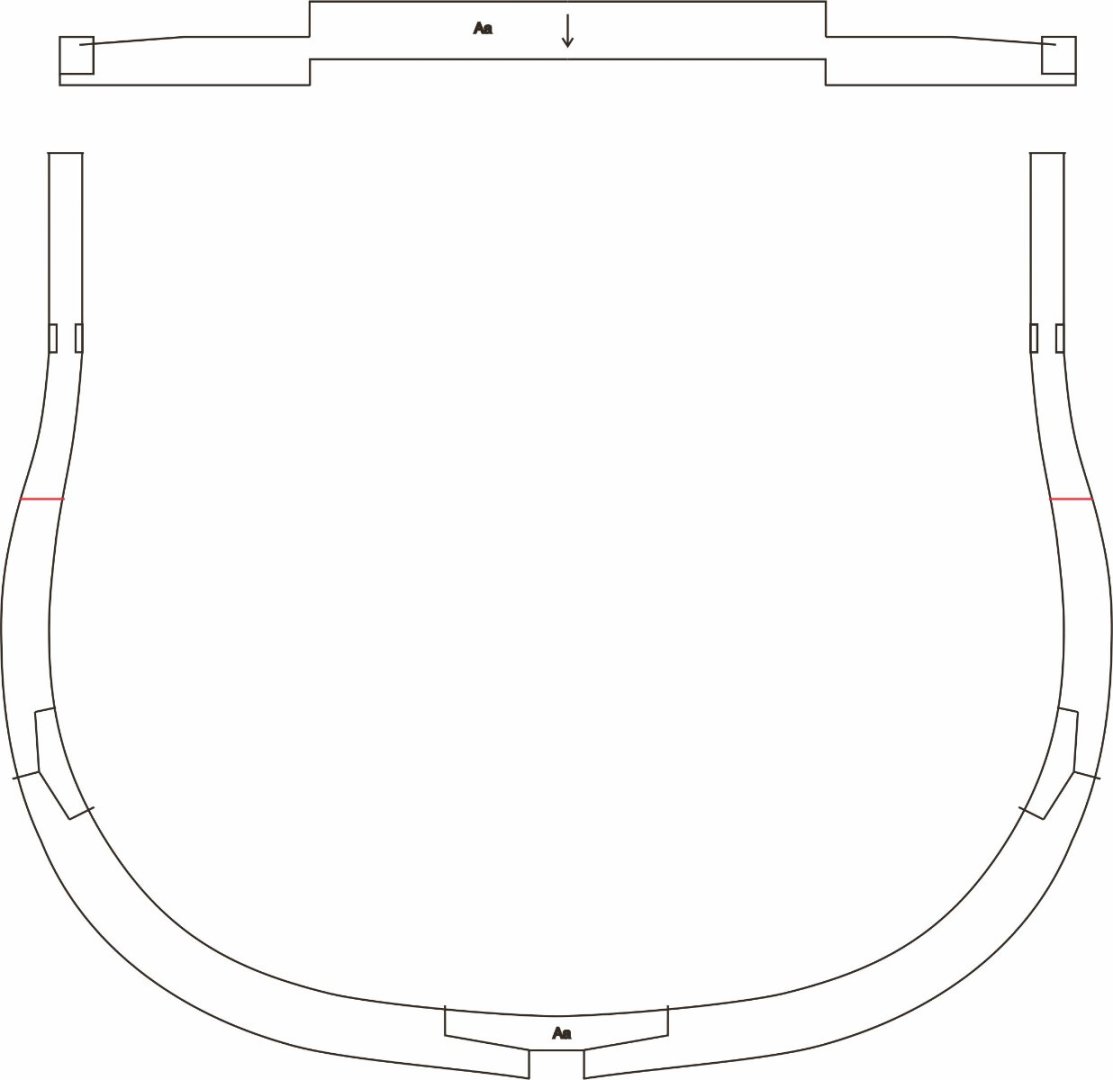
The "SHORT SQUARE FRAMES"..... Basically these are built the same way as the taller square frames. They just dont extend all the way to the "jig" top that helps position the tall frames. These are the frames that fall where a gun port or sweep port are located. The "short frame" 2a is shown below. It does have a cross beam of sorts. This is used to help stabilize it and give it the correct shape. Notice how it is glued onto the bottom of little square protrusions on the inboard side of the frame. All of the short frames will have this cross piece. It will be removed after we plank the exterior of the hull much later in the project. You can build these as shown just like the other frames. Just make sure the stepped futtocks appear on the correct side of the frame when you glue them onto the keel. NOTE the blocks for the sweep port labelled 2a. These are made by gluing two laser cut layers together. Glue them together so the etched reference letters face each other. Dont glue these onto the frames yet. Just keep them ready to go once you glue the short frame onto the keel first. Dont forget to finalize the chocks by shaving off half of it....and when you glue them onto the keel make sure the "step" is facing the correct way....either fore or aft based on the plans. If you recall, we installed a bunch of the tall frames earlier. This left a bunch of open spots where the shorter frames will be installed. In this photo you can see a coupe of short frames I completed on the forward side so far. One has a sweep port and another has the lower gun port sill. There is another short frame which has been glued into position. It is frame 2a shown earlier. It was glued into the final spot I had ready for it between the two tall frames. Sitting on the top of the model you can see the two sweep port pieces which I will add next. I have already dry fit them in position. I had to sand a little off both sides to make it fit really nice without spreading the two frames apart on either side of it. You will notice some pencil lines that I drew on both sides of the sweep port blanks. While they were being test fit, I traced the shape of the frames on both sides of it so I have a reference. It makes sense to remove your test fitting of these and sand them close to those lines now before you glue them in position. It will save a lot of sanding when it comes time to fair the hull later. You dont have to get it perfect but try and chisel or sand these close to there finished shapes. You can see my pre shaped sweep port block for the starboard side. Once sanded...I glued them in position permanently. Be careful to check your framing plan. Make sure you have these oriented correctly and dont flip them. You want your sweep ports in the correct position after all. Use the provided templates to make sure all of the gun ports and sweep ports are in the correct position..at the correct height and spaced properly. These templates will be provided on the plans. This in combination with other means of measurement will really help ensure that your ports all end up where they are supposed to. The top of the template aligns with the sheer. The bottom of the template actually aligns with the top edge of the wales. The heights are most important for the ports and dont go nuts if your openings are a 1/64" to the left or right. It will all work out in the end. You can always fix slight issues before you start planking if you have to do some shifting. But I highly recommend that you use this template from the start of your framing to check the port positions as you progress. If you do this before you glue the actual sweep port fillers into position permanently (and the gun port sills), you can adjust them at that time to ensure the opening are in the correct spots. Then after you get them to match the template, glue them in permanently. Using the template is really the key to successfully and easily taking the guess-work out of positioning the ports. NOTE: With any POF project there is a lot going on and a lot of parts. It is inevitable that some frames may not end up where you want them exactly. Thats OK and certainly it happened to me. You may get a slight bend in your frame etc. Your wood thickness might be a little over or under with your frames. Maybe a frame isnt perfectly perpendicular to the keel after it settles once glued in. Creep can be an issue after 20 frames etc. But regardless of where you frames end up you can easily manipulate the sweep port fillers and sills using the templates to get them exactly where you want them. As you can see the framing looks perfect to the naked eye but I can assure you they are not...the template is your salvation!!! The photo below shows all of the square frames complete with a template I used to ensure all of the ports are positioned correctly. I did use my steel squares to line all of this stuff up as well. I used the square as a height gauge to make sure the sweep port was the correct height off of the build board. I have yet to do the port side and this will be done soon. This is where the model stands at the moment. Things will slow down now as I try and repeat this process until all of the square frames have been completed. There are over 40 square frames. Resist the urge to incrementally fair the hull until you have quite a few frames glued into position. In fact it is best to wait until they are all in position but I do realize it is hard to resist. I have lightly sanded the exterior a bit but I am careful not to over do it. I dont want to screw up the correct shape for the hull which is tough to see with only a few frames on the keel like this. When there is a lower gun port sill instead of a sweep port block, they are handled in the exact same way. They come in two layers as well....follow the same procedure.
-
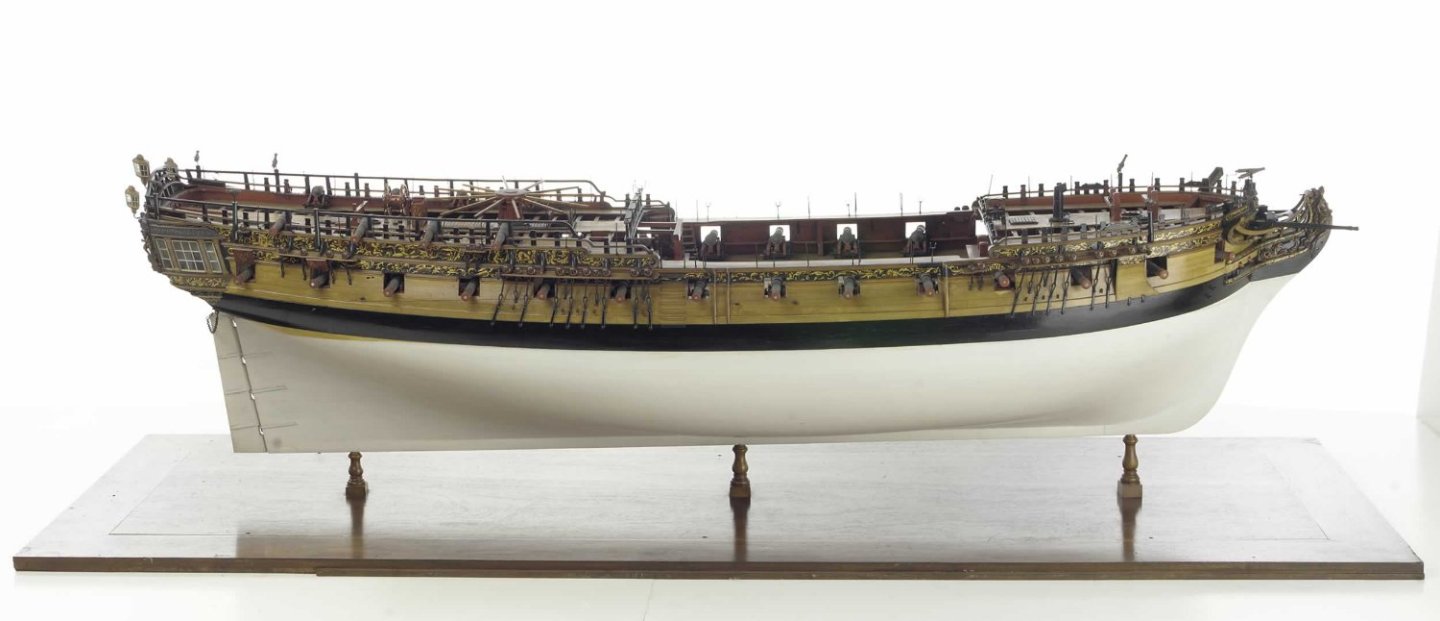
I didnt have any plans to make those for the Winnie. Strictly speaking in terms of following a typical contemporary model. No rope and no anchors or rigged guns etc. But yes all of that can be added to make each of your own models unique. Except for a possibly ships barge this project is completed. As an homage to those contemporary models....like this one. Chuck
- 1,784 replies
-
- winchelsea
- Syren Ship Model Company
-
(and 1 more)
Tagged with:
-

HM Cutter Cheerful 1806 by JpR62 - 1:48 scale
Chuck replied to JpR62's topic in - Build logs for subjects built 1801 - 1850
That is awful news but I am so happy you had a full recovery. I am looking forward to you making more progress. Stay well!!! -
Absolutely beautiful....lovely little model.
- 106 replies
-
- Admirals Barge
- Vanguard Models
-
(and 1 more)
Tagged with:
-
Quite a feeling when you get that done....really nice work. It was a huge task. Chuck
- 389 replies
-
- winchelsea
- Syren Ship Model Company
-
(and 1 more)
Tagged with:
-
That looks so good. Chapter twelve in cherry is also now available Rusty.
- 642 replies
-
- winchelsea
- Syren Ship Model Company
-
(and 1 more)
Tagged with:
-
Patience...but no seriously. If the wood is thick, say 3/32"and above, I scrape the char first with a straight razor. Its quick and painless. I dont remove it all by any means this way. Then I switch to sandpaper. But not just any sandpaper. The grit is super important. I mainly use 320 grit. The motion or technique is important and I just cant describe it. I may have to film it some day. But at a minimum I probably use more sandpaper than most. Yes sandpaper can be expensive. But the real trick is switching to a clean piece often. The moment you see the sandpaper get brown and compacted with char you need to switch. Otherwise you are just rubbing dirty wood with dirty sandpaper and pushing the char into the grain. Thats the issue with most people. So after a few passes, I slap the sandpaper on the edge of the table to remove as much dirty char dust as possible. The moment it stops becoming reasonably clean it gets tossed. The edges clean up pretty quickly this way. But sometimes with such large pieces like the keel and the frame components it will just take a lot of time no matter how you look at it. For thinner or more delicate pieces I will use 400 grit...no scraping. It just all comes off for me. I dont know why it is a problem for some. I really do think its in the technique. I sand with a light touch. Not a lot of pressure as that just rubs/pushes the char and dirt into the wood. For small areas like corners a very sharp blade....I just slice it away in the corners. Very thin almost tissue paper thin slices. Thats pretty much it. It does suck removing a lot of char from many pieces and it does take time. But I do spend that amount of time on every piece. If I dont want to take the time then its impossible to get it all off. It wont get removed quickly but it will eventually get done. I think the technique of a light touch and clean sandpaper is the trick. On the end grain however I find it just easier to slice it off if its in an area that will be seen. Usually after scraping if its a thick board. Its too easy to push the char into the end grain when using sandpaper. I am talking razor thin tissue paper thickness of a slice removed. Once shaved then I just use some clean 320 grit to even it out. Now I dont build other manufactures kits any longer...but on all of my laser cut pieces there is enough meat on them so a micro layer of char can be removed or sliced away without causing the part to not fit anymore. Sadly, other kit makers dont do this and if you actually removed the char from parts they end up too small. That is a problem I dont know how to solve. But on my kits its the opposite...you have an issue if you dont remove the char...The parts will be slightly oversized. So in order for my kits to fit together as intended, people must remove it...no choice but to take the time to do it.
-
Happy to see the model back on the workbench.
- 7 replies
-
- Prince De Neufchatel
- Model Shipways
-
(and 1 more)
Tagged with:
-
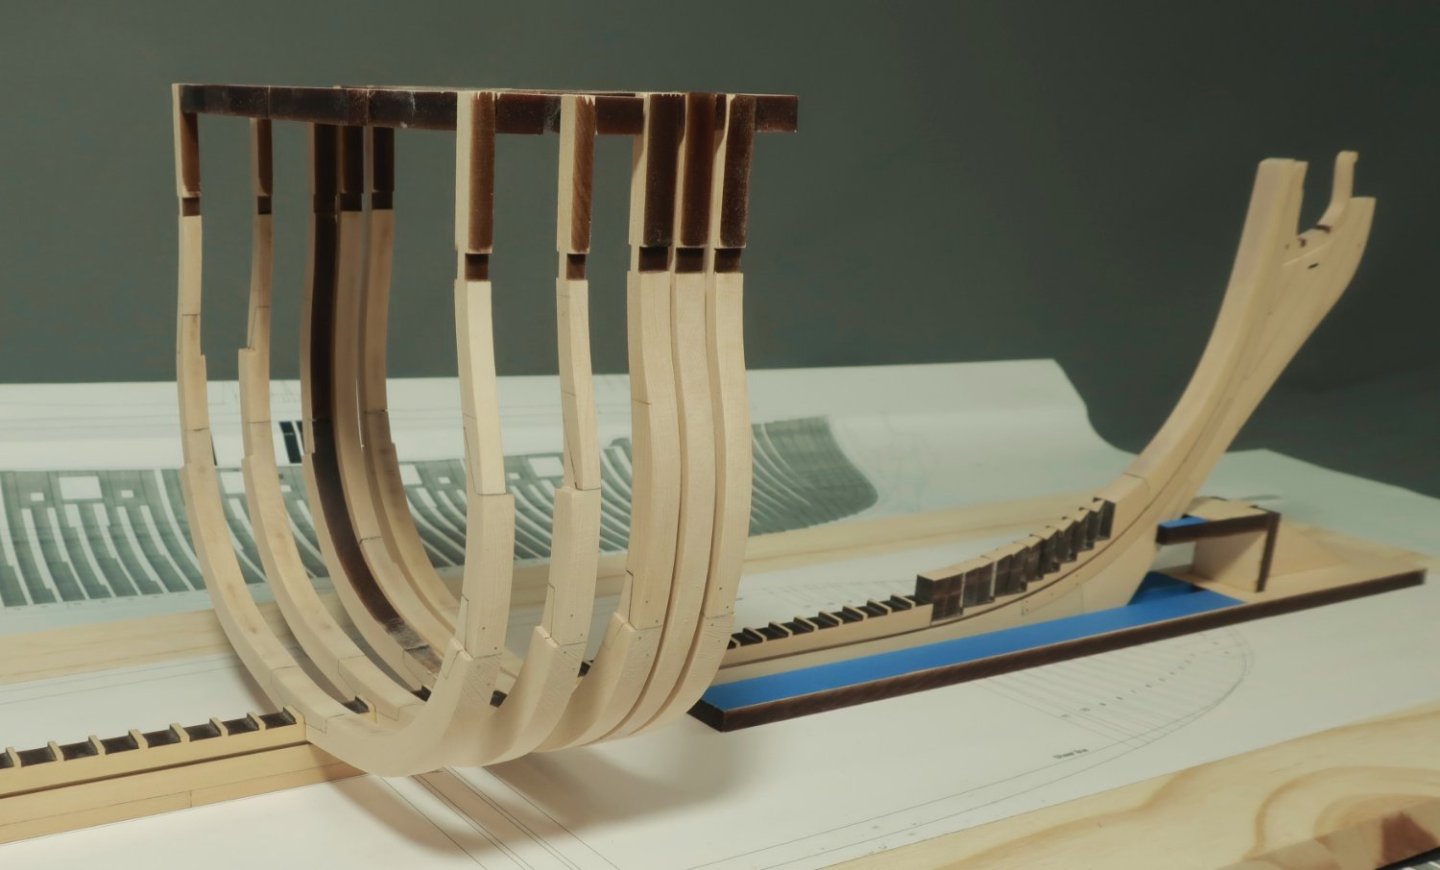
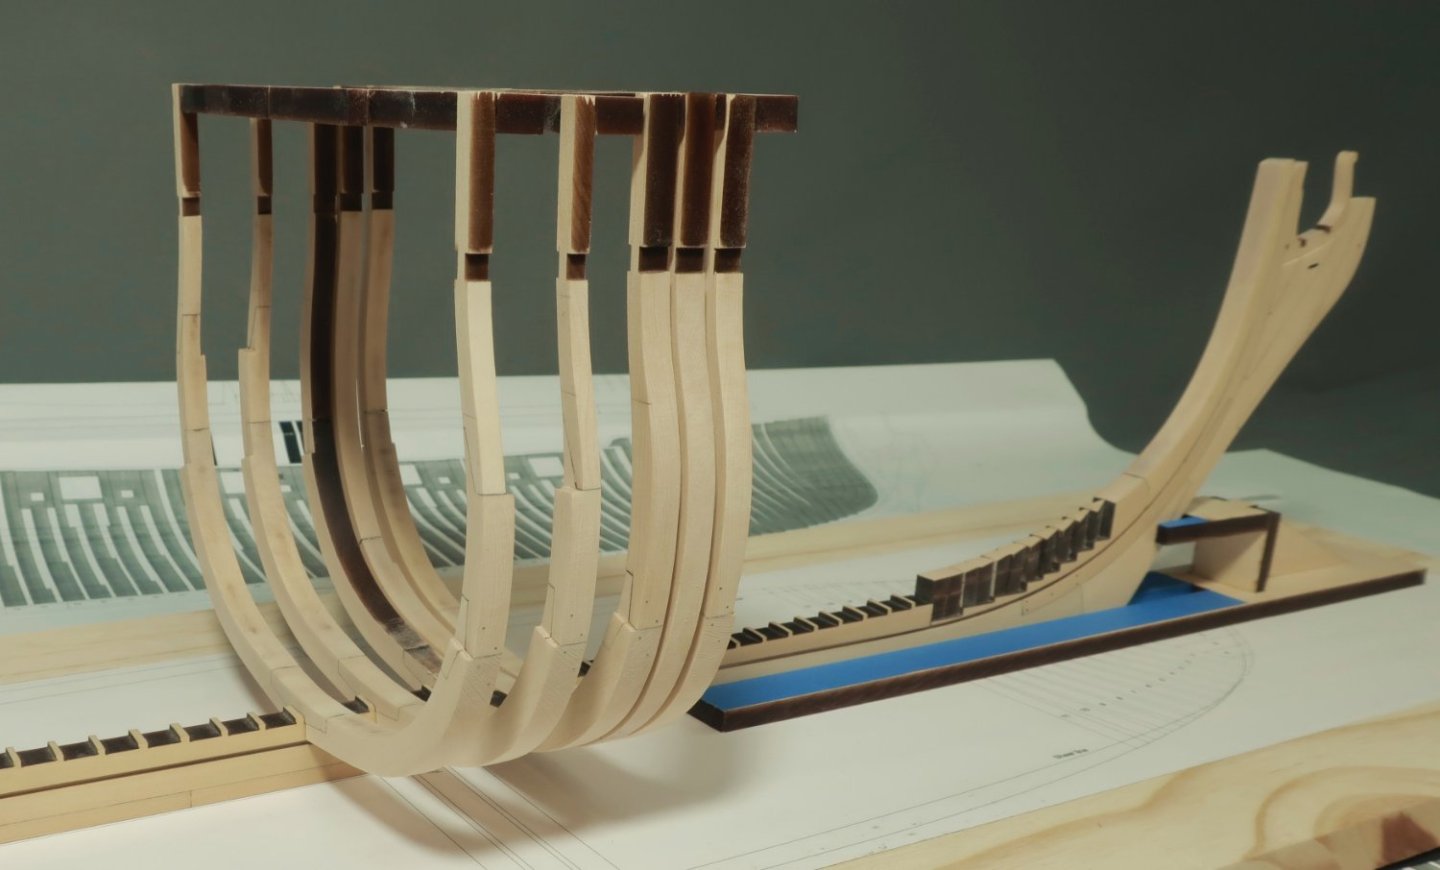
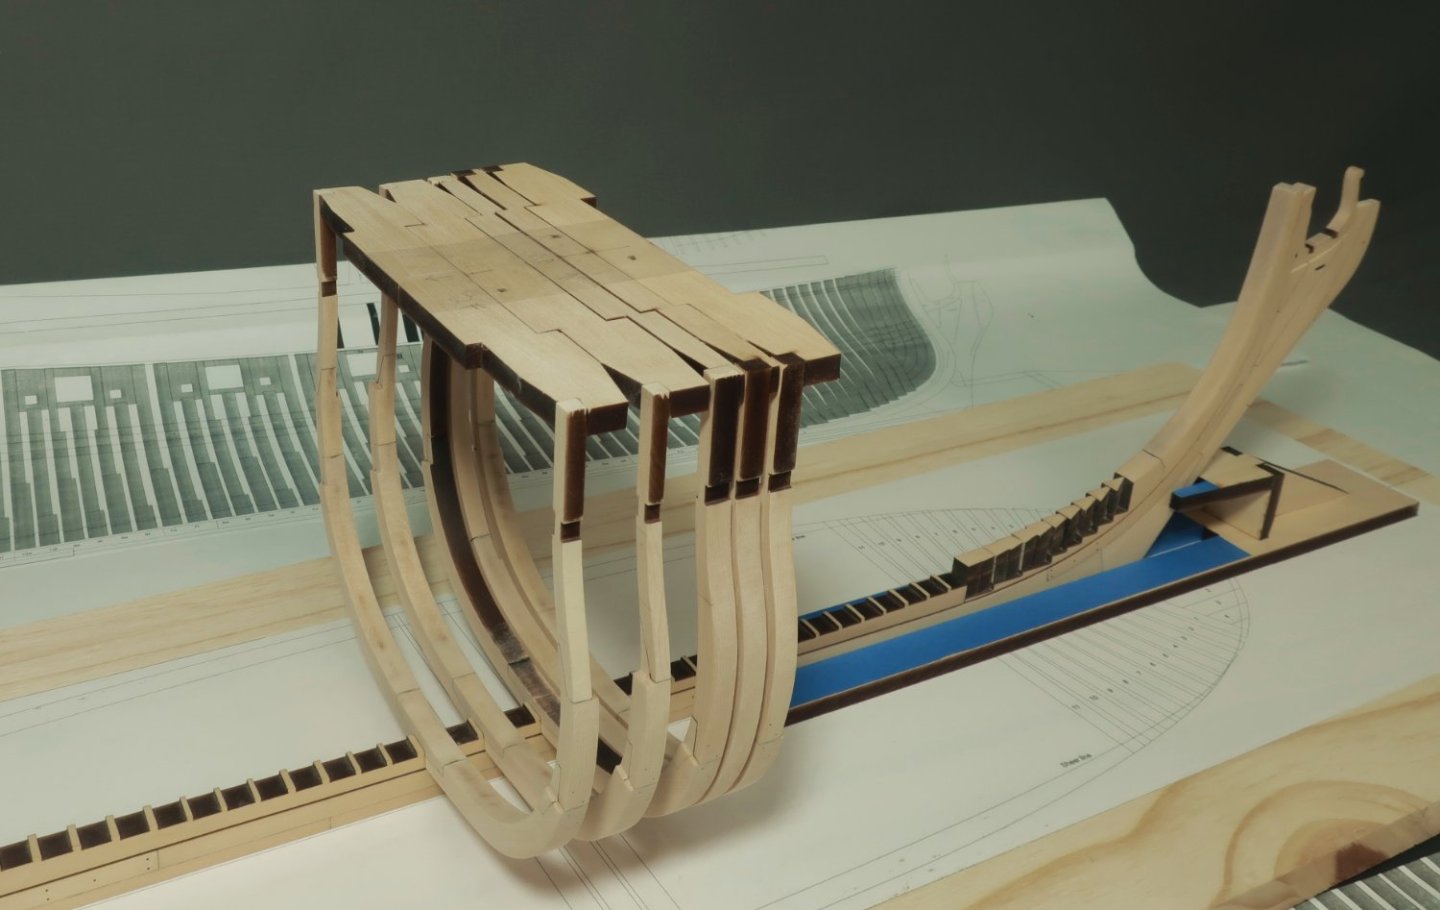
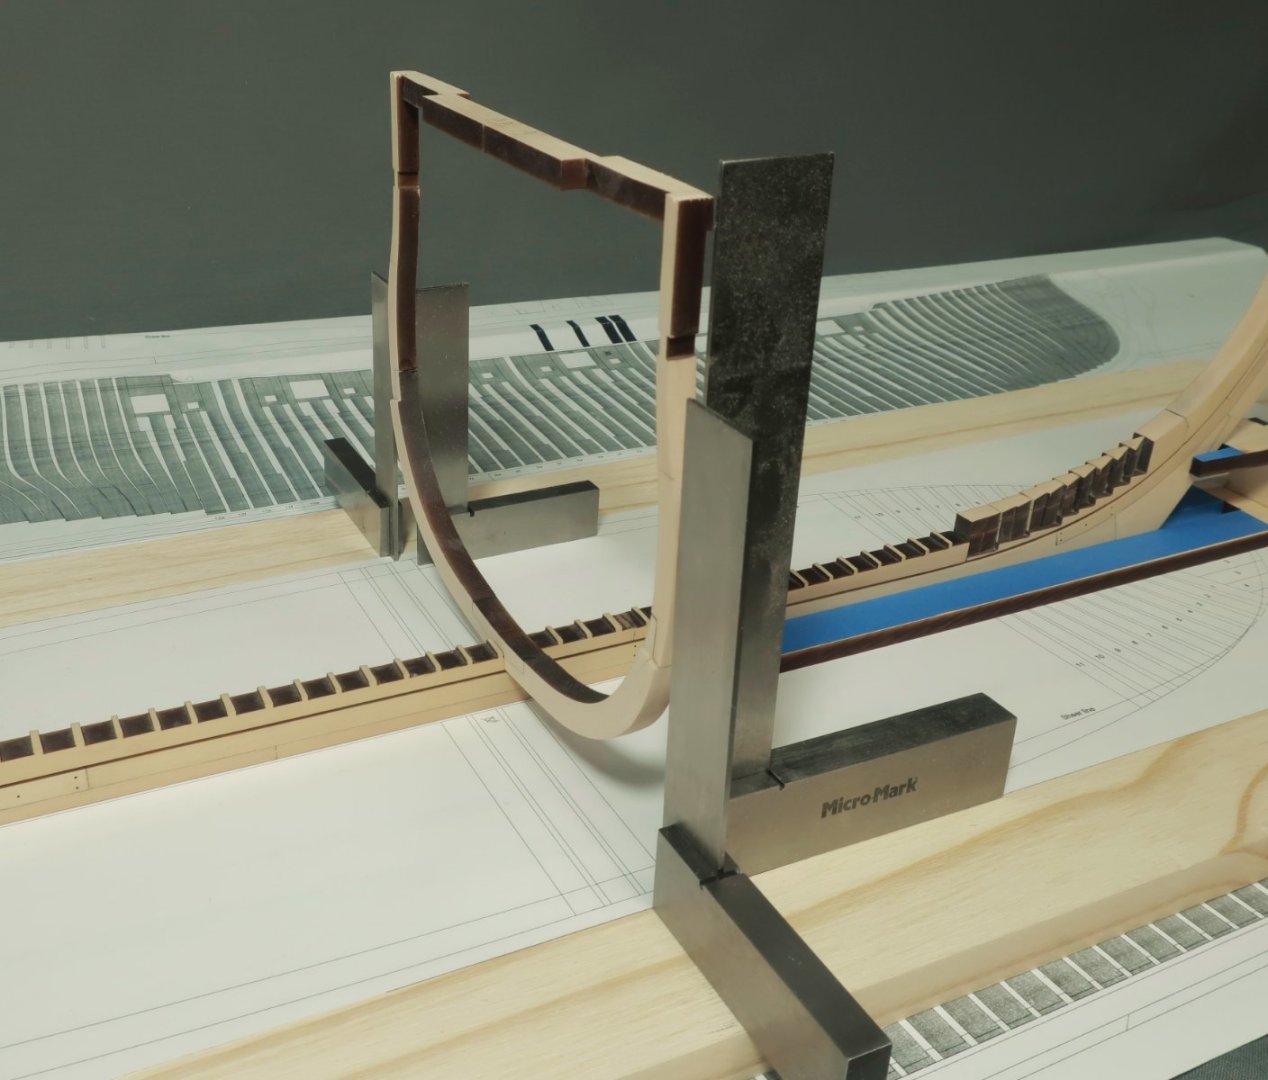
Good Morning folks... I had previously made a bunch of frames as a test that can now be placed on the keel. But before I do that, let me show you the plan for two "Tall" full height frames. I just want to show you guys the differences you will encounter between some of these. Primarily the fact that some of the frames will have a full floor section across the keel with futtocks on either side. like the one below... Others will will have a FLOOR Chock that sits on the keel with the futtocks following on either side up to the sheer. This is typical so when you are searching for the parts on the frames you are building, beware of the two variations. This type of square frame construction will alternate every other frame on the keel. With this in mind, it is time to place the very first "TALL" frame on your model. I strongly urge you to start with frame "Aa". This frame is shown on the build board template so you will be able to ensure that it is centered and perfectly vertical. This is so crucial. This first frame you place on the keel is crucial that you glue it on perfect vertical and centered port and starboard. The reason is that all subsequent frames will "Lock" into each other across the the jig cross bar. Before you begin...Make sure the three center keel notches line up with those shown on the build board template. Adjust your keel on the build board before gluing in the first frame. So a few notes: You will absolutely need many good quality metal squares. I have about 7 of these in various sizes. They are heavy steel squares. I used four of them to align this first frame "Aa" on the keel. Remember to have it facing the right direction. The arrow on the jig cross piece always faces forward. In the photo above you can see a square placed against the outside of the frame on both sides. It is basically at the frames widest part or maximum unfaired width. This should line up with the outside hull line on the build board template. This marks the Maximum breadth or width of the hull. Now it may not fall exactly on the line because you havent faired the hull frames yet, but it will be very close. I left a lot of meat on those frames for fairing. The important thing to remember is to make sure that it is equal distance from the "maximum breadth line". In addition you can see one more square on each side of the frame. These are used to ensure that the frame is perfectly vertical. They sit against the fore side of the frame. The metal squares are quite heavy with a flat block on the bottom. So they stay where you place them. I applied some yellow glue to the notch and seated it on the keel. Moving the heavy squares before the glue set, the frame was adjusted so it was in the correct position. I left the squares where they were until the glue fully dried. From this point on you can start adding the remaining "Tall" full height frames next to it. They should fit perfectly needing only minor adjustment as the cross bar jig on each frame act like puzzle pieces. Concentrate on building and installing several tall full height frames first. See below. I have installed 5 of them. They are glued directly to the keel...BUT, I have yet to glue the cross jig bars together. I am not really sure you need to do so. I have simply used a length of tape to secure them to one another. This will be advantageous when we cut them free after planking. We will be able to remove one jig cross bar at a time rather than the whole top which would be more cumbersome to do. See the tops all fit together like a puzzle piece below. The tape holds them tightly together and it is quite sturdy. ALSO...note the spaces left between these full height frames. These spaces are for the "Short" frames I mentioned. With the spaces fore them now defined, we can start adding those. The "short" frames fall where there are gunports and sweep ports. They have a port sill or sweep port designed into the tops of the frames. We will cover there construction and mounting next. Any questions...there is a lot to cover but since this will be a kit and possible group build I want to make sure my descriptions are thorough and understandable. DRAT...notice that one frame where I forgot to sand the laser char from the inside edge....That will leave a dirty mess of dust when I fair the interior. I will try and clean that up ahead of time. Its important to try and get the majority of laser char off of the inside and outside edges before you make up each frame. That dirt char dust will get everywhere and make your frames look dirty later when you fair the hull. If you examine the framing plan you will notice that above the wales...the framing get interesting and unique. Since this will be covered with planking it does NOT follow actual framing practices. It was designed with ease of construction in mind. Here is an early draft of the framing...showing the first few frames I have drafted and built in this post. It will help put into perspective what I am describing. WHAT A TREAT!!! No big box of scaffolding all around your frames and hull so you cant see what you are building. Its a very different concept than all of those POF kits folks are buying on EBAY and ALI EXPRESS.
-
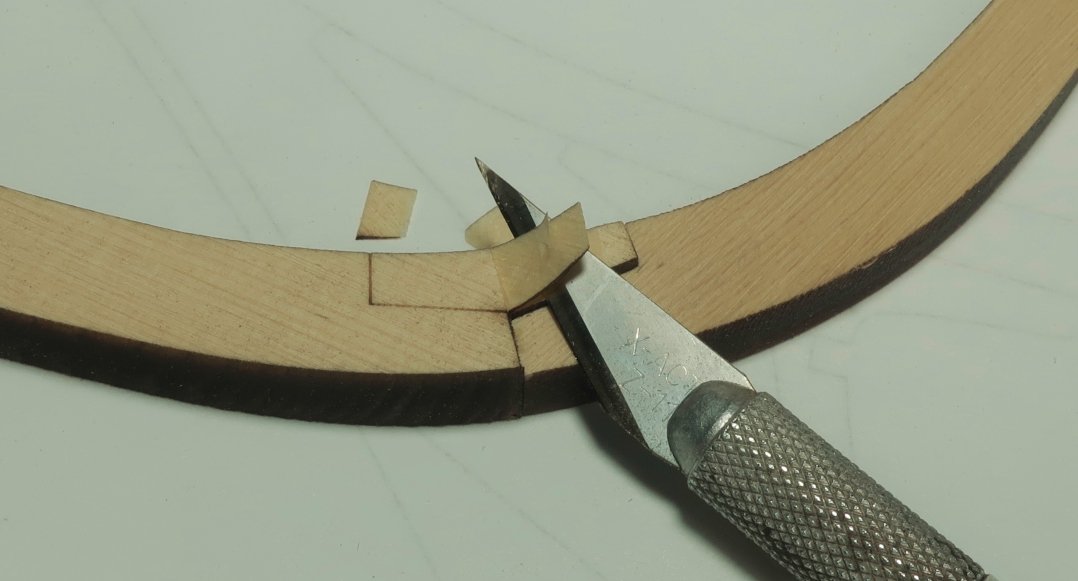
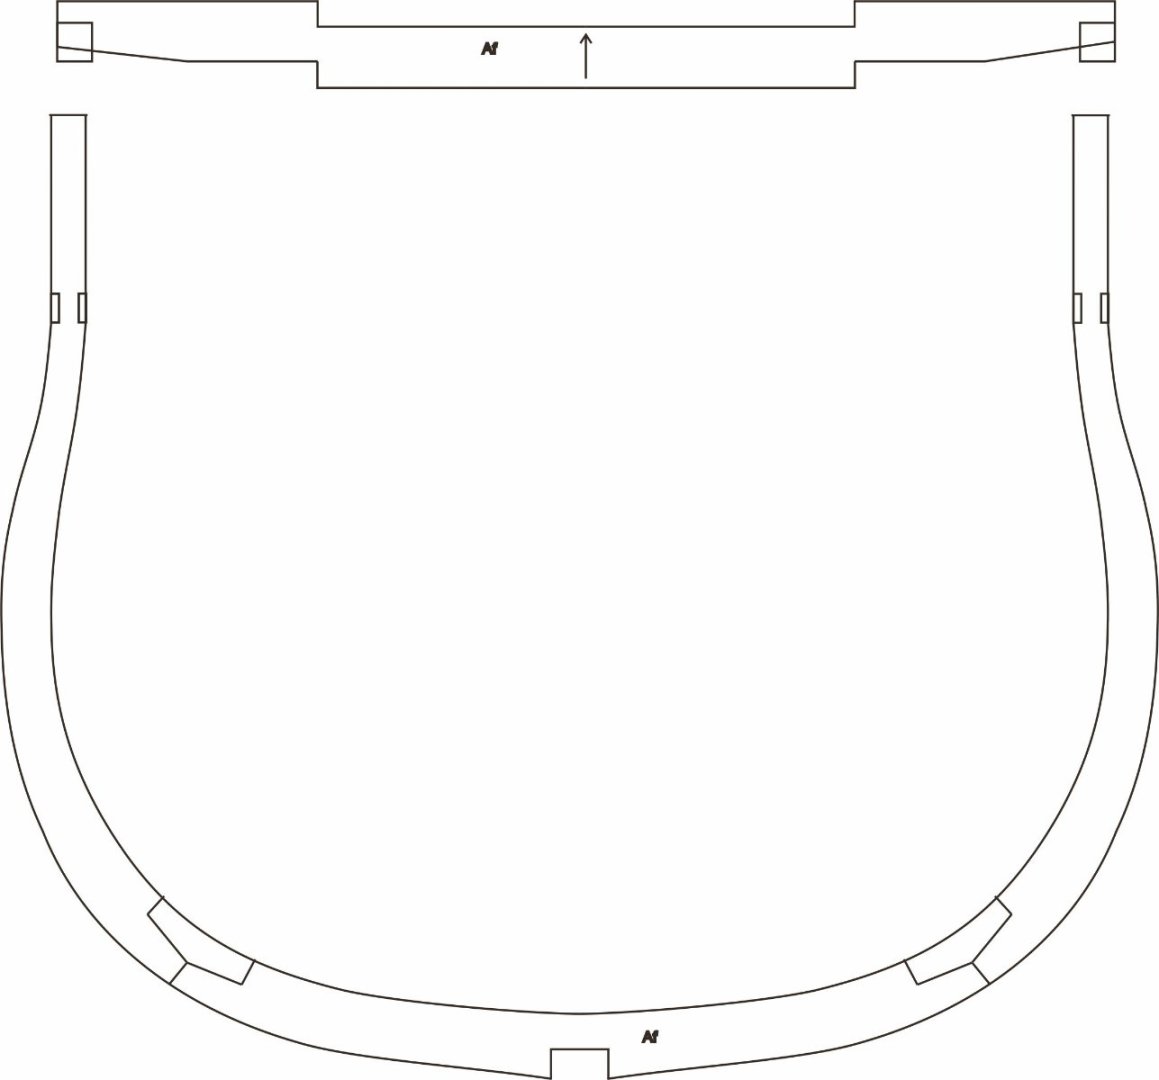
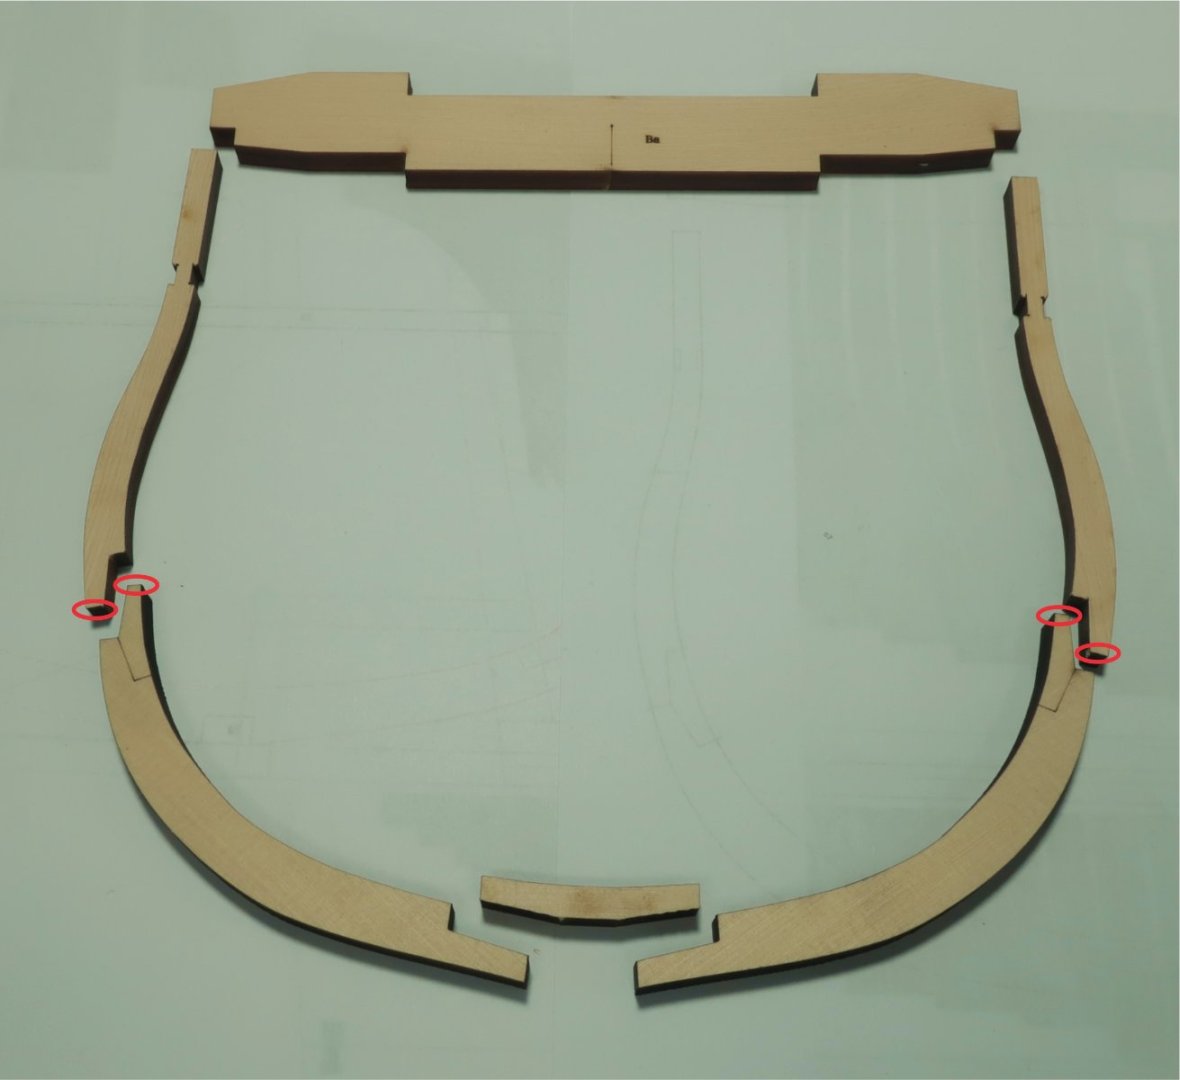
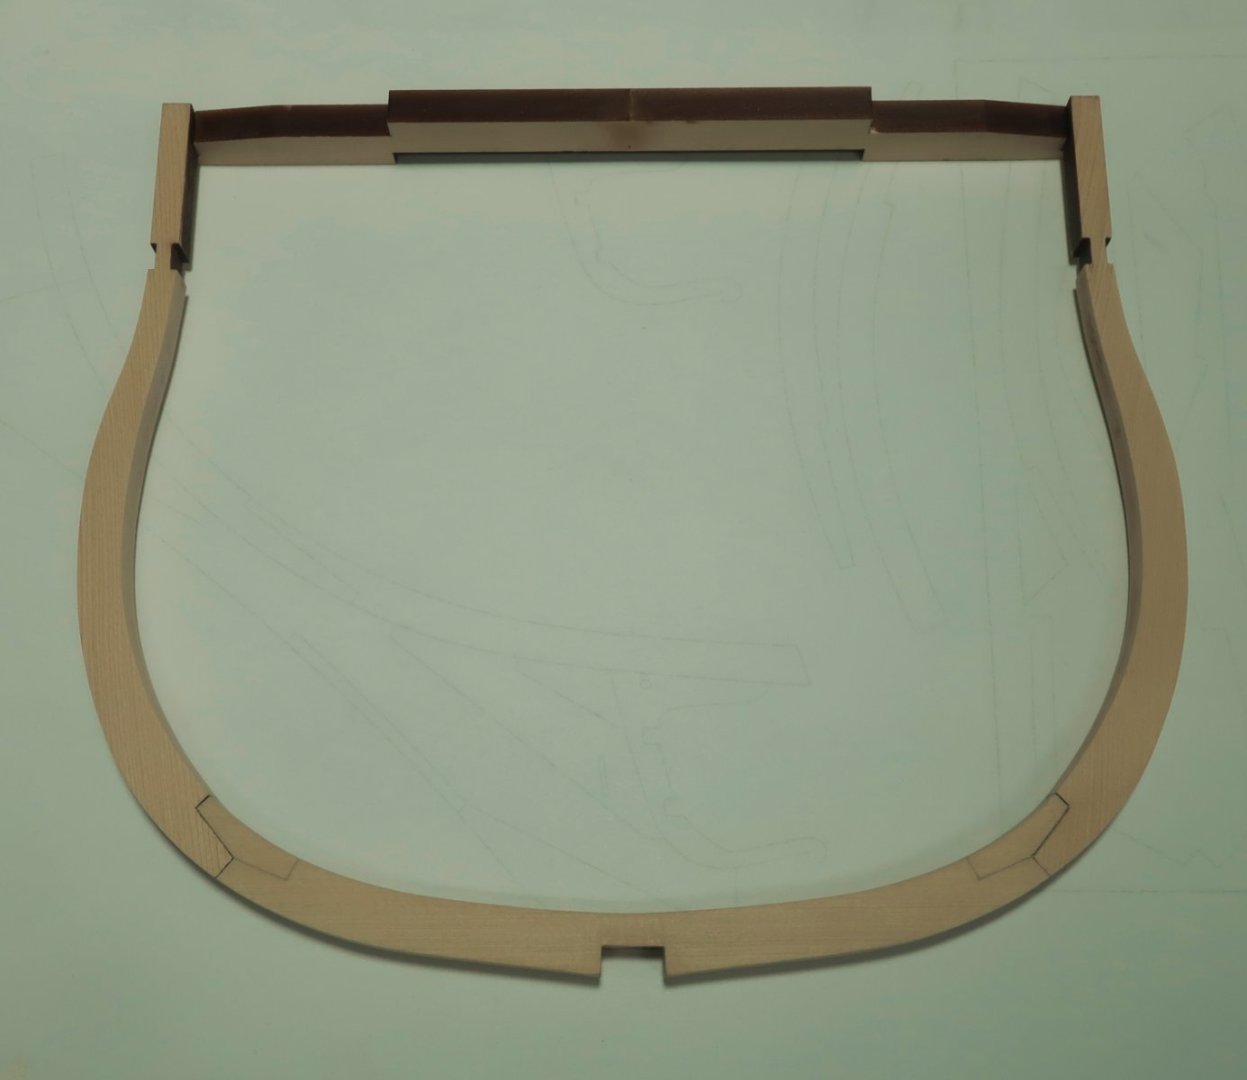
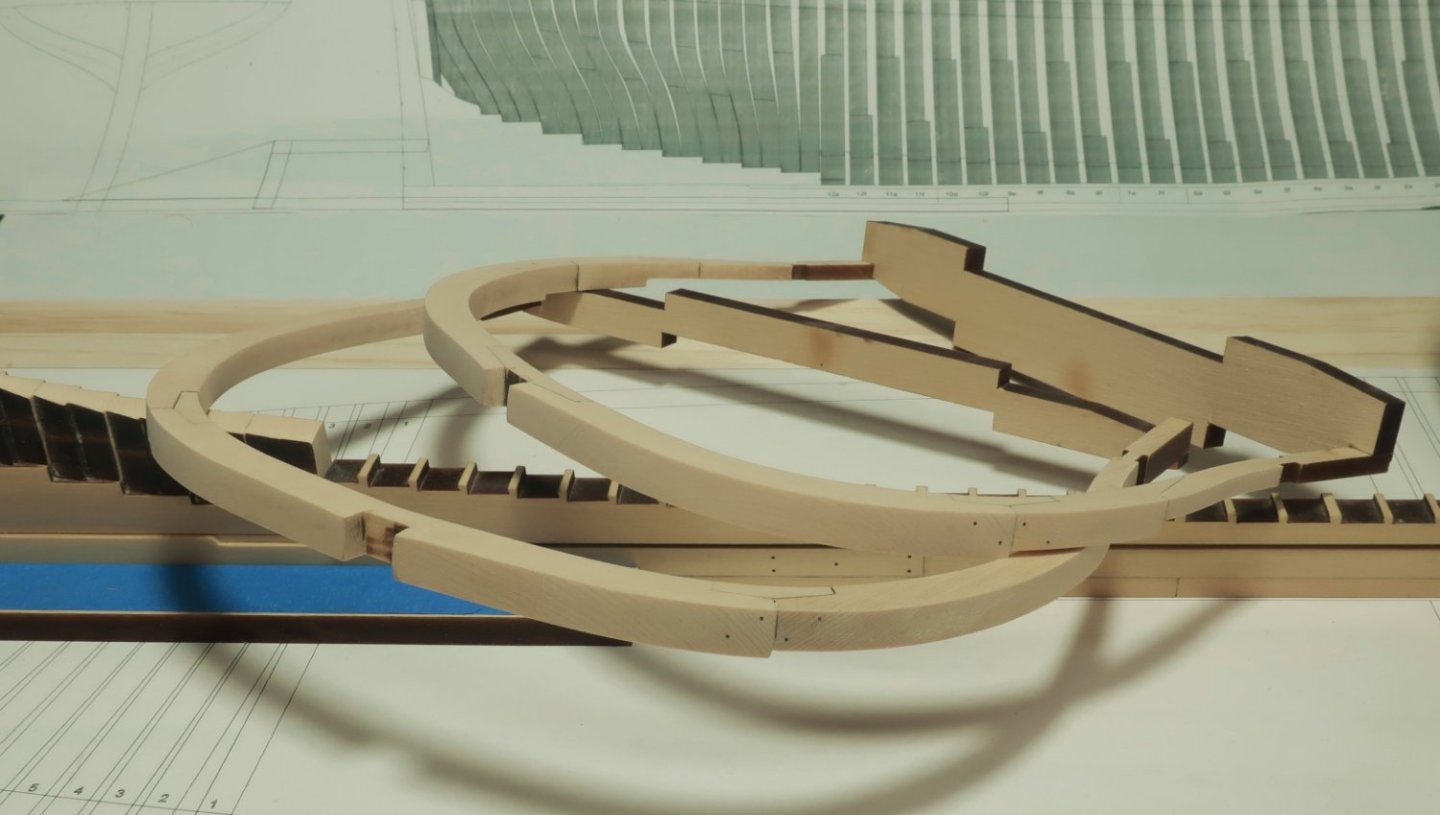
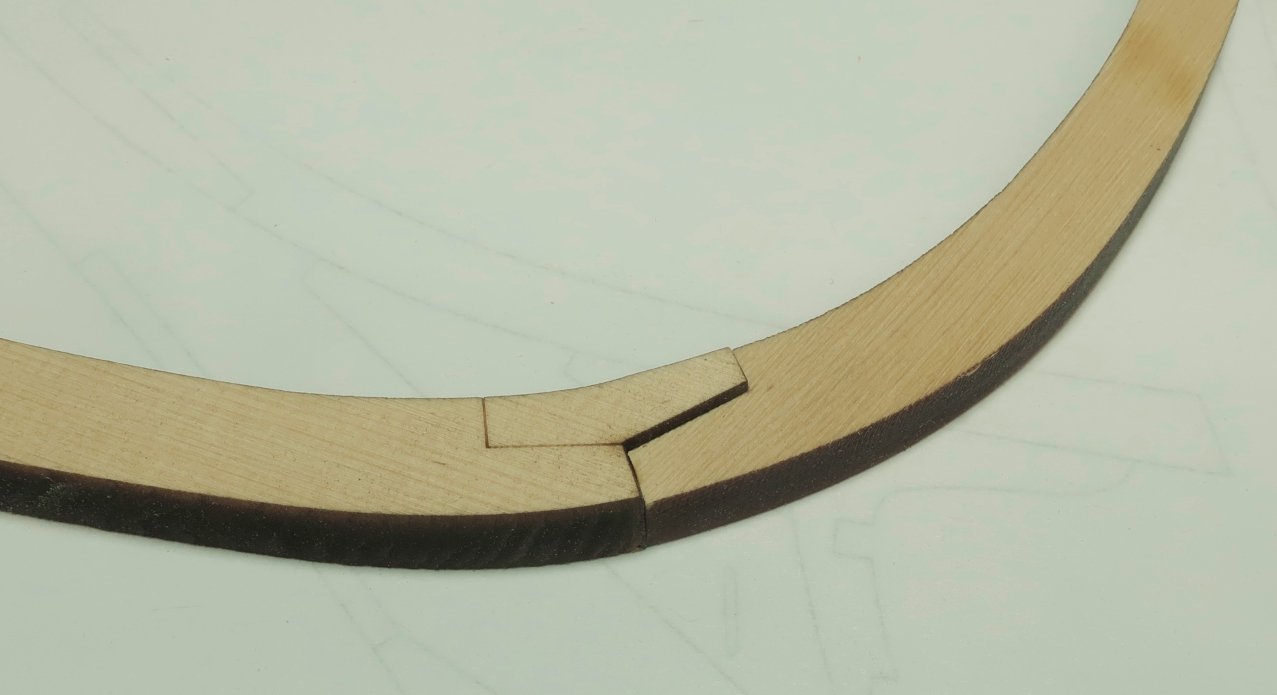
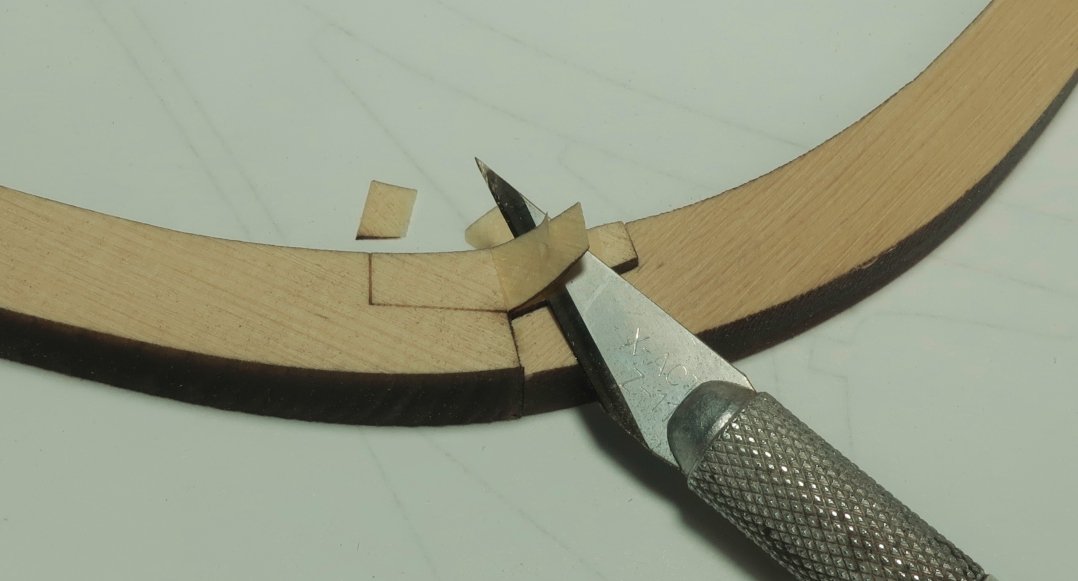
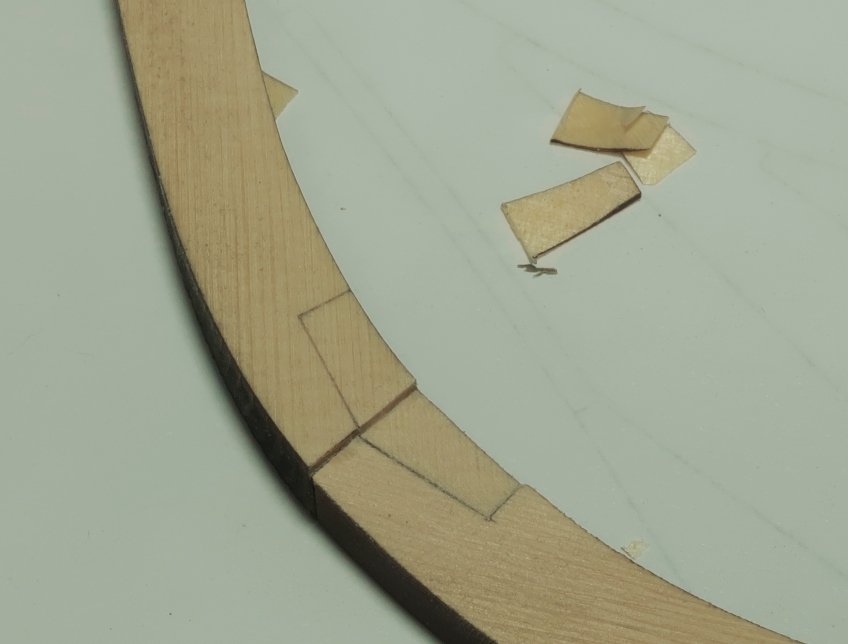
There will be for lack of better terminology, two styles of frames. There will be "TALL", full height frames, and "Short" frames. The taller frames extend up to the sheer line and beyond, terminating at the top with the cross jig piece. The cross jig piece is crucial to the entire build concept. It assures the frame is the correct width and shape when you build it. There is no need to build these on top of a plan of the frame. They will all come out the same size when finished, if you don't over sand any scarf joints. The joints between the frame sections are precision laser cut. BUT I left them slightly longer. Most of the frames we will be building are of the tall variety and all need to made first and placed onto the keel. They need to be on the keel so the "short" frames can be added in the remaining open spots for them. More on those later. But lets build our first TALL full length square frame. We will be building them in groups. The first group of square frames will contain about 12 or 14 frames. Here is a look at the first full length frame unbuilt. I highly recommend that you remove the laser char from the outside edges and inside edges before assembling each frame. In this case it is frame "Ba". But dont tough or remove the chare from any of the scarf joints that connect each section. They are precision cut and wont be the correct shape if you monkey around with the char on those. The will almost glue up perfectly as is. But I show circled in red the two sides on each scarf joint you will need to sand. These were intentionally left a bit longer. You need to test fit each segment together first and then sand a bit from one end of the scarf joint. Test it again. If needed tweak the circled ends only to close up the scarf joint so it fits tightly. A few NOTES... The floors and futtocks are different thicknesses. See the books for details. This creates a stepped edge on the frames. MAKE SURE...you check the framing plan to see which side of the frame should have that stepped edge. It could be on the fore or on the aft side. In some cases where you have three thicknesses you might actually have to steps. Each frame is different and some frames could even show this stepped joint on both sides of the frames. So carefully examine the framing plan. On all the square frames the floors and floor chocks are always 5/16" thick. The square frames will always alternate with one solid floor that spans across the keel in one piece, followed by the next frame which will have the 5/16" thick floor built up with a "floor chock" in the center. You will see this detail in the Seawatch books clearly and this proper framing structure is followed for the kit. The futtocks and top timbers are 1/4" thick in most cases. But in order to simplify the building process it was sometimes necessary to use a third thickness for the top timbers that fall next to a gun port or sweep port. In some cases these were made using 3/16" and 5/32" thick Cedar. Whenever this happens I have made note of it on the framing plan so you can better find those parts on the appropriate laser cut sheet. Remember that no drawings of each frame are provided as built or as individual parts because we must do our very best to prevent unscrupulous Chinese manufacturers among others from copying the kit illegally. So check the framing plan for the number of parts for each frame and their thicknesses. You should only work on one frame at a time and only remove those parts from the sheets for that frame to avoid mixing them up. They are all labelled. So working one frame at a time, first check the plans for the number of parts in that frame. Then look for them on the laser cut sheets. Finished frame assembled... Note the top cross piece which acts as a jig. Each frame added to the keel extends the jig and keeps the whole hull its proper shape and perfectly aligned. Make sure you have the cross piece facing the correct direction. There is a laser etched arrow down the center of the cross piece which always points forward. Double and triple check that your frame and cross piece are facing the right way before you glue this cross piece in position. The cross piece should always be the very last segment you glue in position. Dont sand any char from this cross piece at all. Measurements are precise and very important. None of it will show anyway and these jig tops will be cut free once we plank the hull. They are basically going to end up in the trash. so no need to clean up the cross pieces. When sanding the char off the other frame pieces inboard and out you will notice that I left the char above the tiny notches on each frame. Those notches indicate the sheer of the hull. Any surface above the notches and sheer line do not have to have any char removed at all. More finished tall frames with the cross jig piece. The Frame Chocks... These are just simulated. We dont have to mess around with actual tiny chocks. The joints between frame segments are actually simple scarf joints. There is a laser etched line to help simulate the full chock on one side of the frame. You can if you like, scribe the same on the other side or even just use a pencil. But truthfully these frames are so close together you wont actually see the lines anyway. I am not going to simulate the chock lines on the unetched side. BUT...you will notice after you glue up your frame that the chocks look off.... The step in the frame should actually be straight across the center of the chock. I have strategically made the chock full thickness. This needs to be addressed on all frames. It will initially look like this. It has a full thickness chock and half of it needs to be thinned down to complete the step. Use a sharp #11 blade to place a stop cut down the center of the chock as if it extends across the entire frame. Then slowly and carefully shave that thicker half of the chock down flush with the next segment (the futtock) of the frame. See below. Until it looks like this....nice and cleaned up. Then the char can be removed from the inside and outside edges of the frame. Or better yet clean those before you even glue up all the frame segments. This needs to be done to every joint and really does look like it should with proper chocks. Nobody will ever know. You might have also noticed that each joint is treenailed at the chocks. This is optional. You can follow the framing plan for the placement of those. This is finicky to say the least. If they arent all uniform in distance within a group from frame to frame it wont look good at all. I have seen wooden treenails used here. I decided to show them but I am not using wooden treenails. If not done properly and all of the same size, again they would look really bad. Better to leave these off the model than risk that. So I am just using more black fishing line. They are always the same size. I am using 25 pound line for these. Wooden treenails turn black anyway because of the end grain. We shall see later after the hull is all framed up if this was a mistake. You will have to make a decision about this for your model. Tomorrow I start gluing frames onto the keel....
-
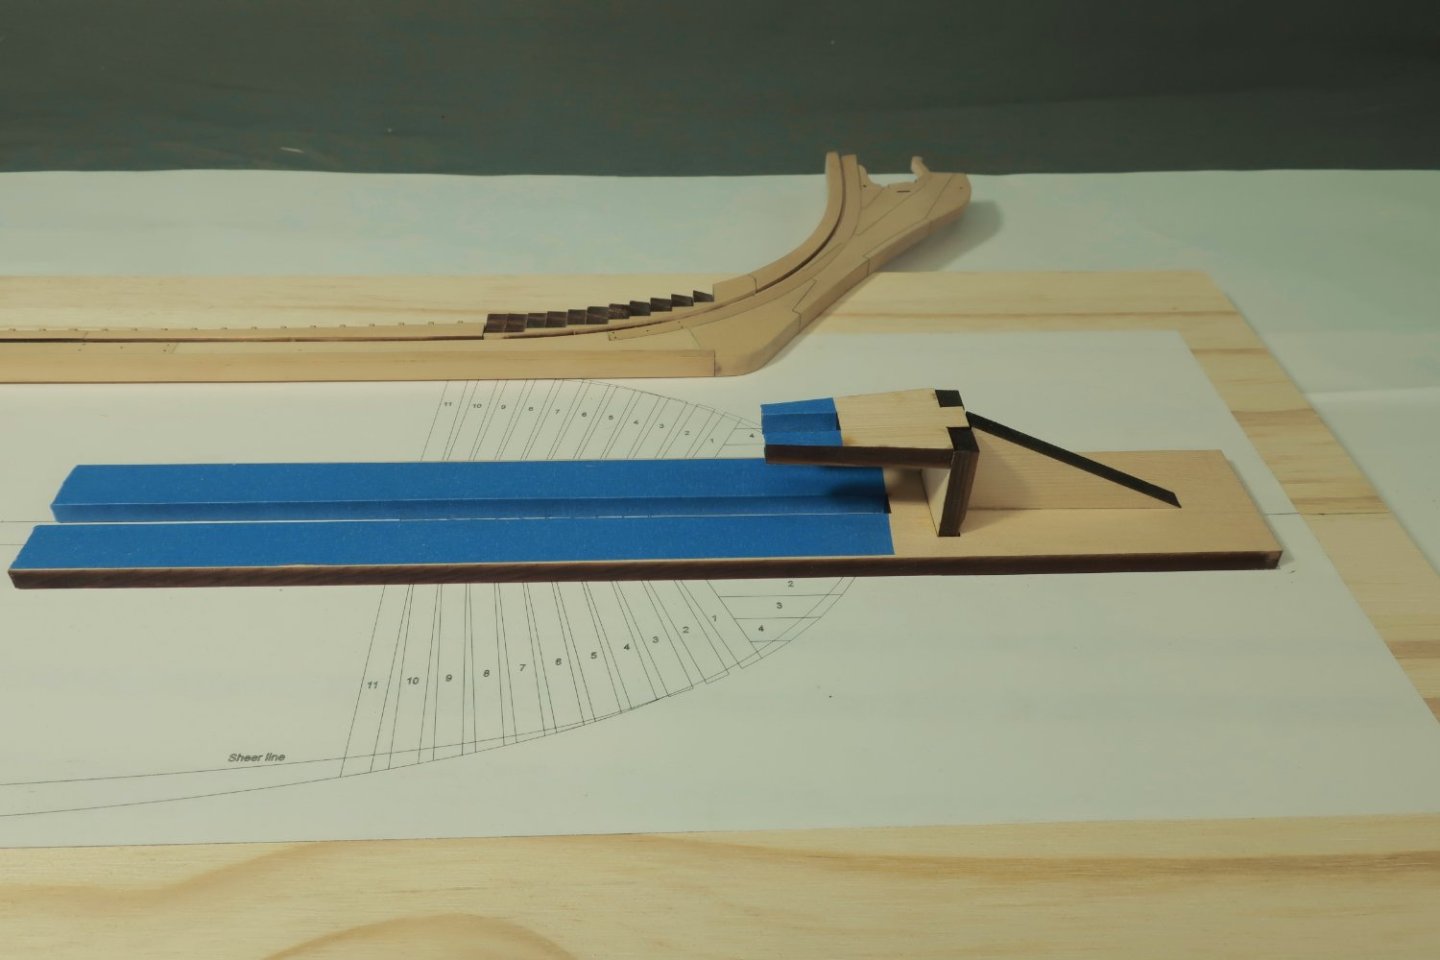
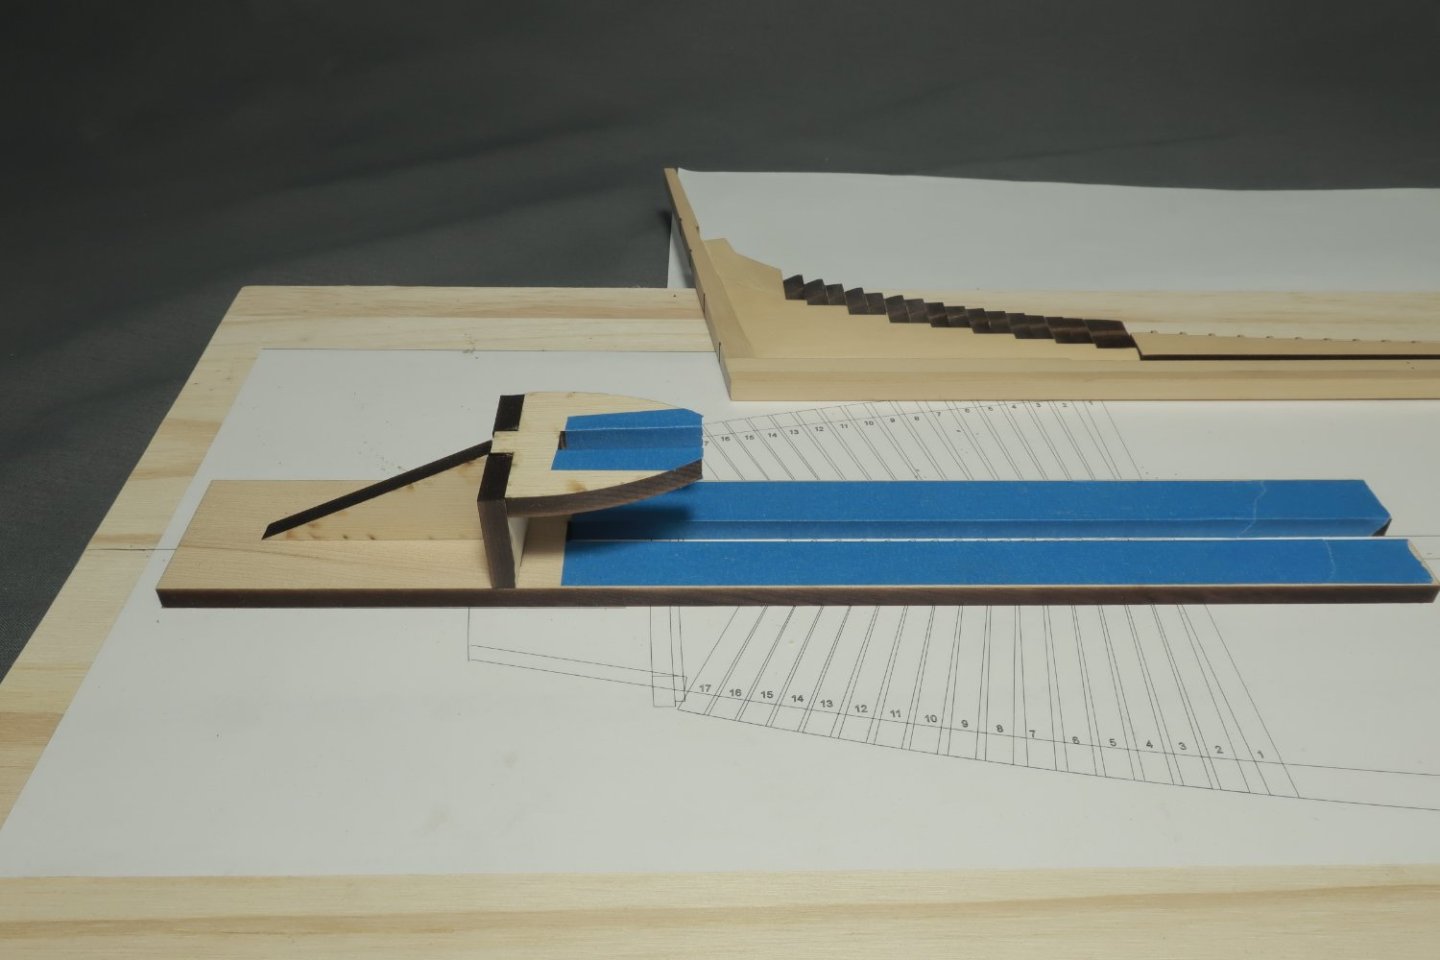
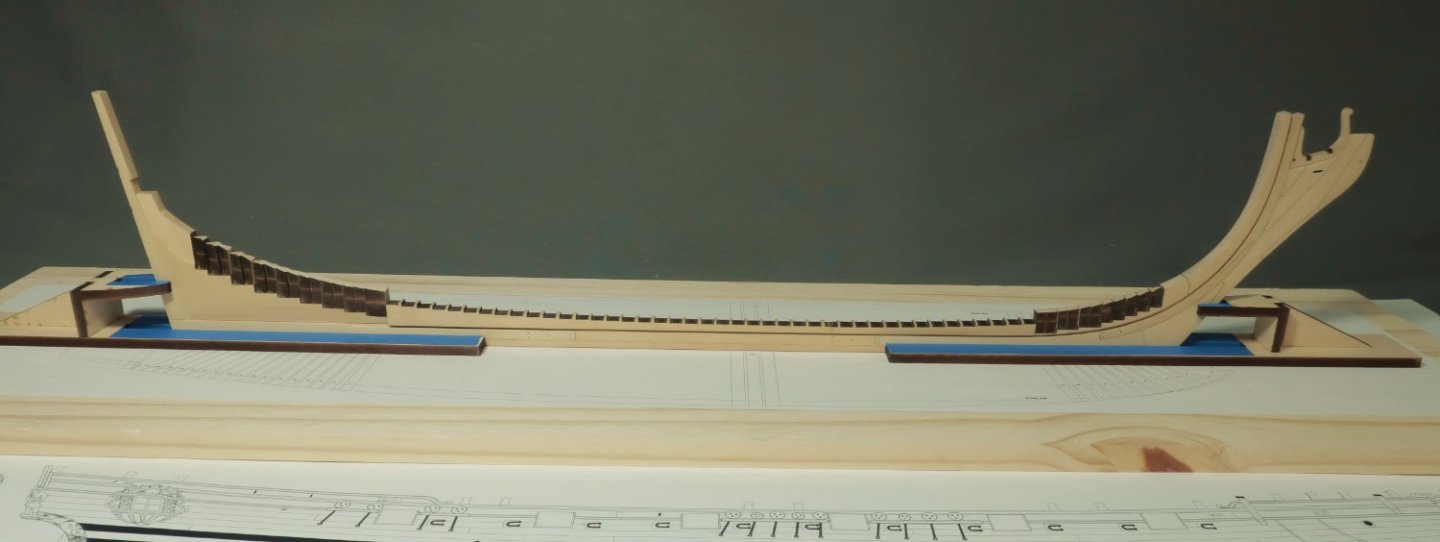
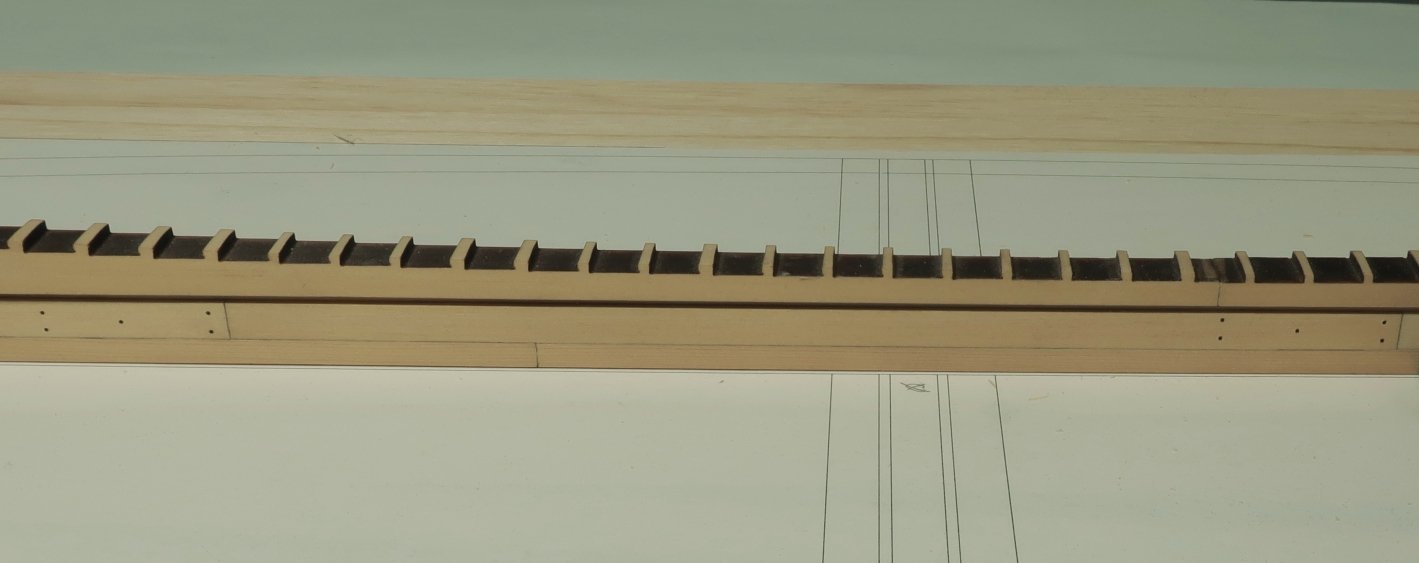
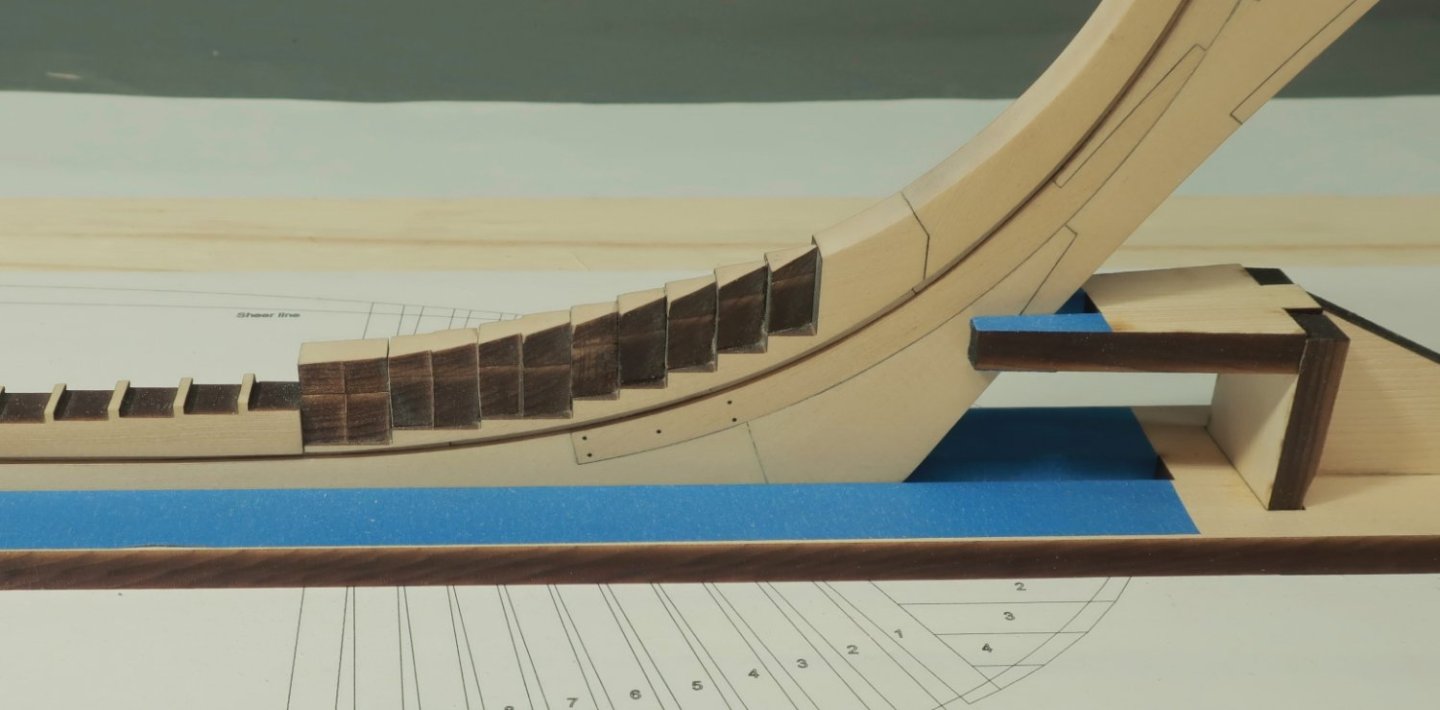
Several people have stepped up to beta test...we shall see how far I can get before I start spreading parts around. I added the keel bolts. These were 30 pound black fishing line. I drilled with a 71 drill bit and inserted the line. Then I cut it flush with a sharp razor blade. Bolts were added in the same way at the boxing joint. I also finally got around to making the buildboard. I bought a 48 x 12 flat bard that didnt have any cupping or warps. I picked the flattest board available. At 48" it was a bit to long so I cut to 42" long. I cut the plan sheet which had lines for the frames and build board. I used spray mount to glue it on top of the board. I centered it and kept it straight. No wrinkles. I realize that a lot of folks screw their keel into the build board. I dont like to do that at all. I prefer to make a jig on top of the build board that holds everything straight and vertical. Its a nice snug fit. There are two assemblies that need to be built. On on each end. There are registration lines on the plan thats glued on the board for these. Here is a close up of the stern... And a close up of the bow jig that holds the keel assembly very snug. Yet there is enough flexibility to slide the keel fore and aft so you can line up the notches on the keel with the template on the build board. The important thing it to line up the center three frames on the template with those that correspond to the actual keel. Its nice and tight. I used some painters tape on the inside and top of these jig pieces to make it a perfect fit. The slot is initially laser cut wider than needed. The tape not only protects the wood of the keel but it creates a nice snug fit. The same thing was done with the two forks that engage the stern post and stem. I also prefer a lower profile to these forks that hold the stem and stern post vertical. Otherwise it keeps getting in my way. But you guys can easily create your own if you prefer to go the "screwed in keel" route. Same is true if you rather prefer taller forked pieces for the stem and stern post. Time to start making frames.
-
Straight to begin with is fine …but after your frames are all in position and you fair the hull, the deadwood should be faired into the general shape of the hull that you are familiar with. It should have a curved shape following the contours of the hull. Picture a curved “V” shape when viewing the stern dead on. Not very drastic at all but its there. You dont want to guess initially at this stage. At least I prefer not to. So while fairing the frames and hull, care will be taken to achieve the proper curved shape. its easier for me to visualize the shape at this time.
-
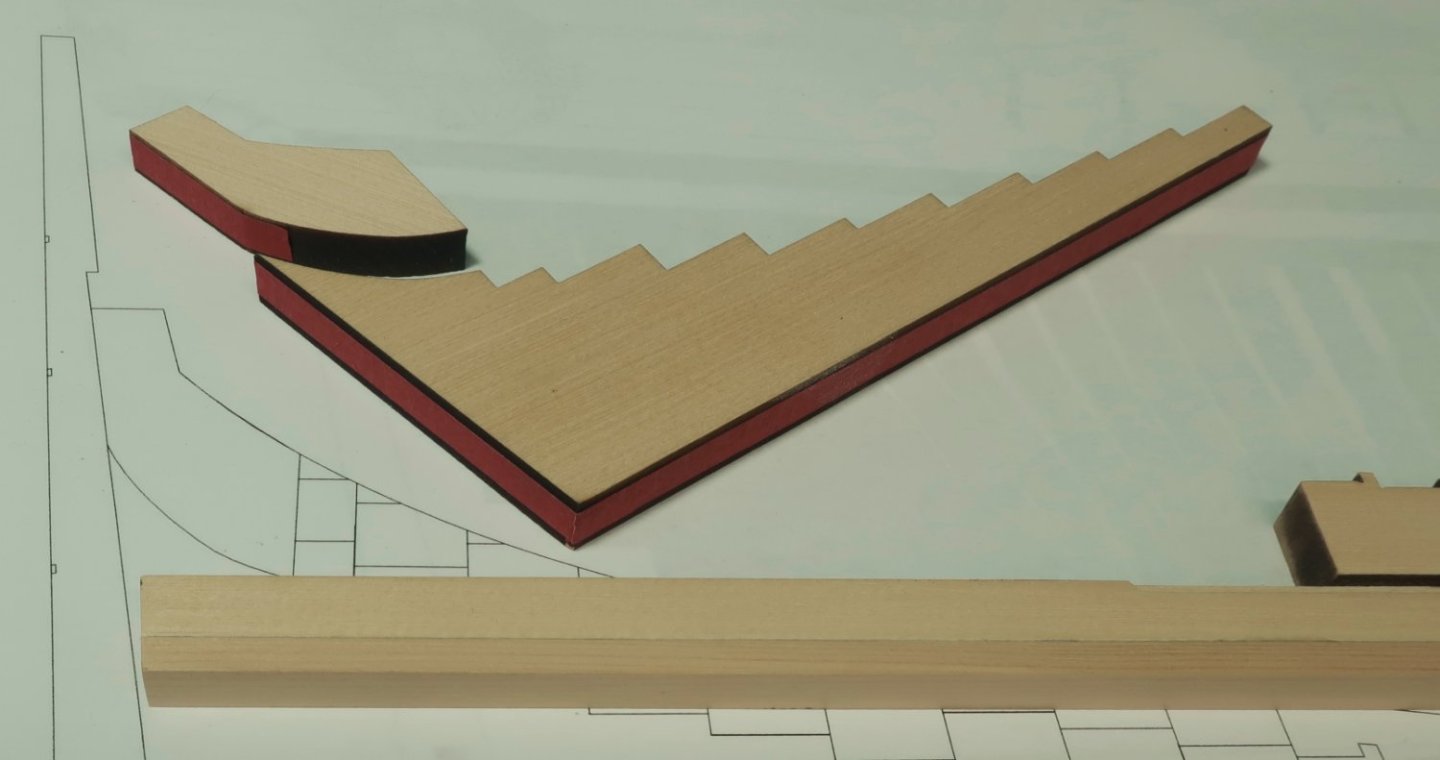
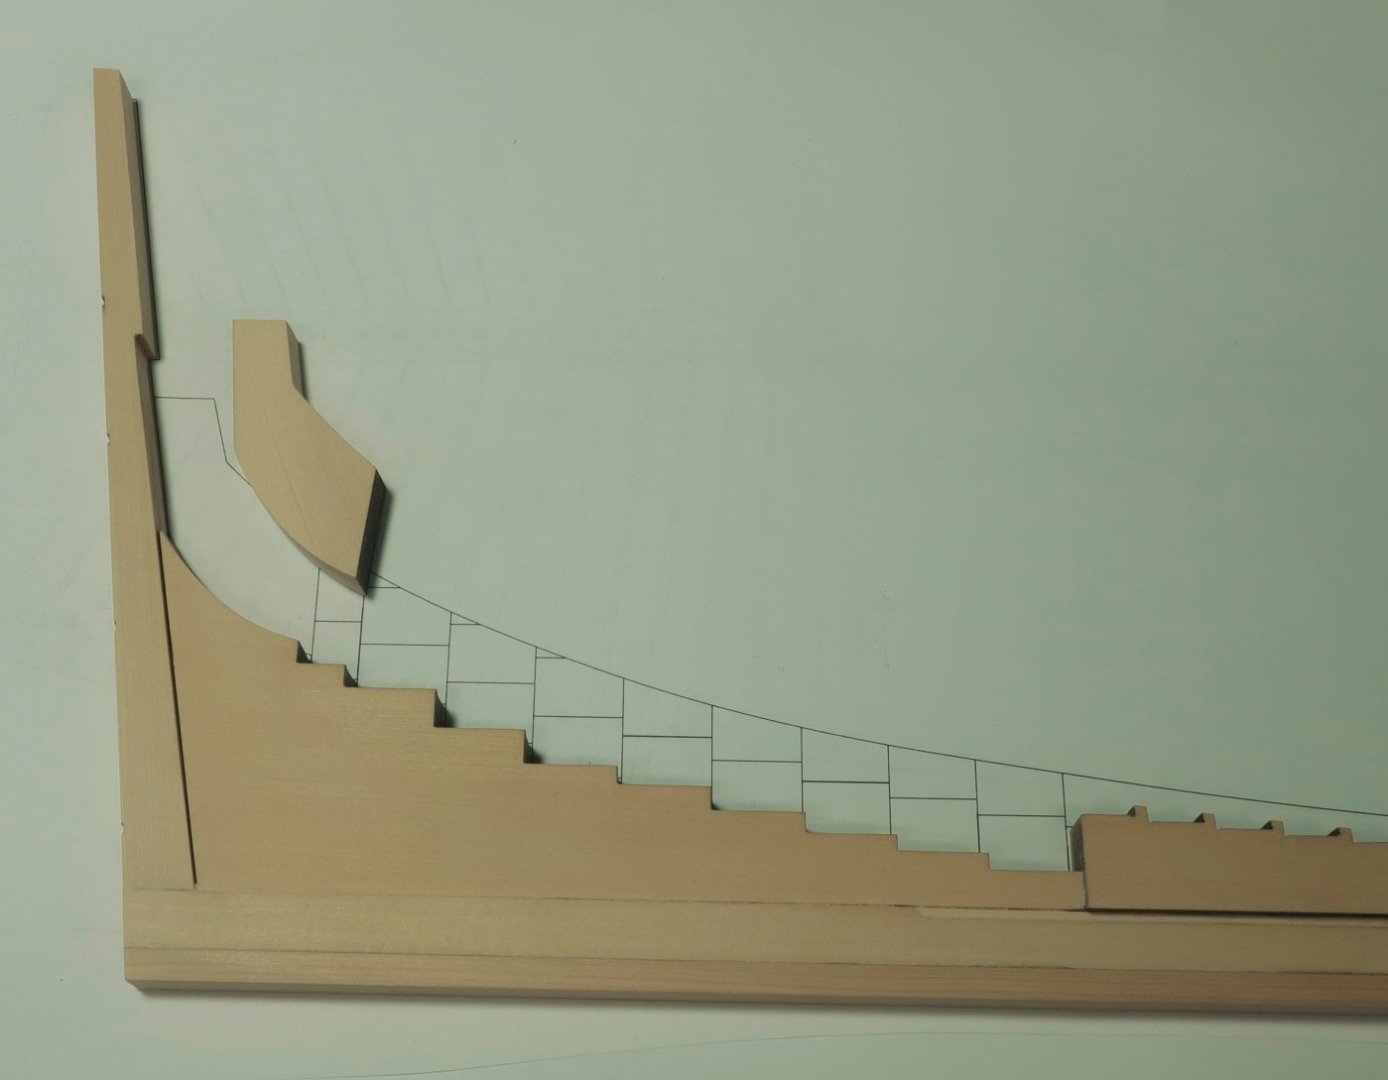
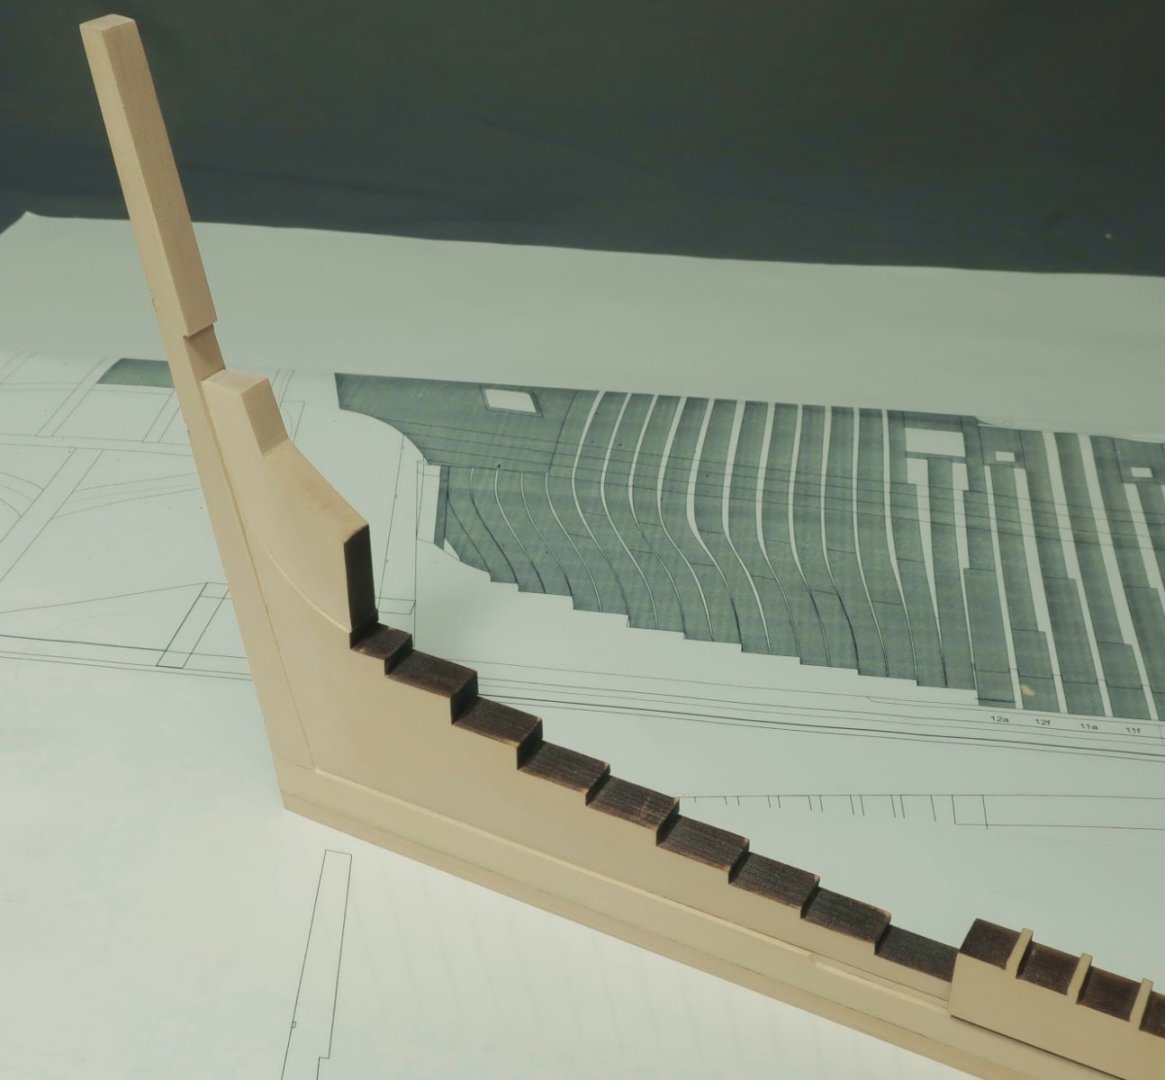
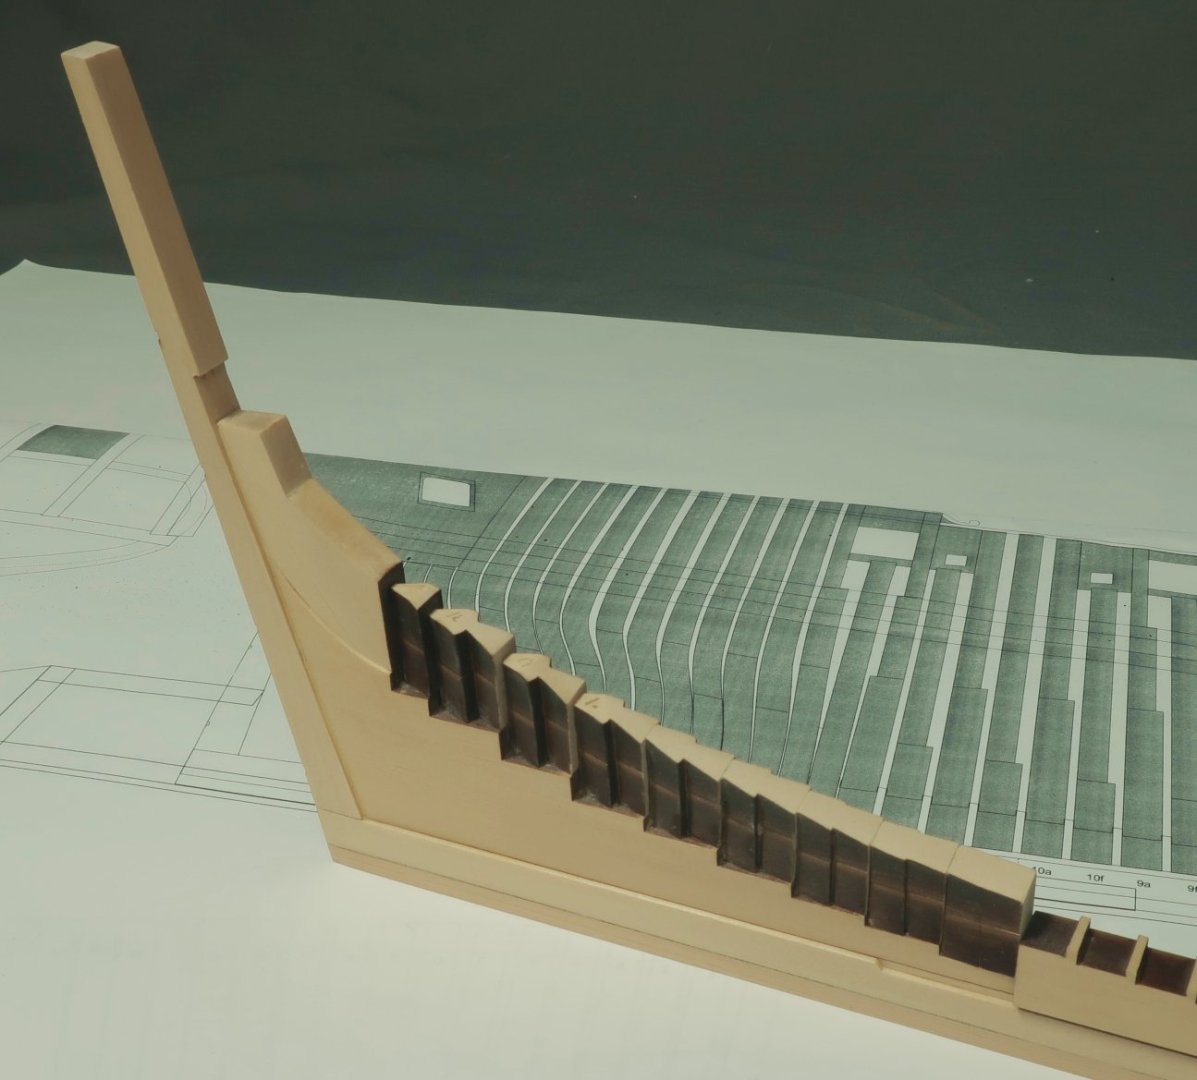
Happy Thanksgiving guys. The deadwood is laser cut in two pieces. These two pieces need to be tapered to 7/32" thick along the edges that sit against the keel and sternpost. To make this easier, I cut some masking tape to a 7/32" wide strip. In this case it was red tape. I then centered it down the edges that needed to be tapered. Then I proceeded to taper them gradually from the other side to the edges of the tape. One that was finished I glued the larger, lower deadwood piece into position first. This was followed by the stern post which had its laser char removed. You must be careful when gluing both of these. They must be centered on the keel to leave a consistent ledge all around and the sternpost needs to be perfectly vertical. You want it vertical and in line with the stem at the forward end. This only left the smaller section to be added which was then glued into position. The aft end of the keel was intentionally left a bit longer and this was sanded flush with the aft edge of the sternpost. The only parts still remaining were the many wedges for the aft cant frames. These are done exactly like those on the lower apron. They are laser cut from thicker pieces of cedar so check that they were cut all the way through the sheet before removing them. They were also cut slightly longer than needed. Because they are so thick, you will notice the irregular cut on the forward and aft edges of each wedge after you glue the two layers together. You must sand them flat and straight evenly on the forward and aft edges before fitting them on top of the deadwood steps. Dont sand too much...only a bit of cleaning on both sides is needed. Dont sand the char off of the angled sides to preserve the correct angles. Center them atop the deadwood slots so you have a consistent notch on both sides of the deadwood for the aft cant frames. That finished up the keel/stem assembly. I only need to add the bolts along the keel scarf joints. Then it will be time to construct the build board and start making frames. Again ...Happy Thanksgiving!!!
About us
Modelshipworld - Advancing Ship Modeling through Research
SSL Secured
Your security is important for us so this Website is SSL-Secured
NRG Mailing Address
Nautical Research Guild
237 South Lincoln Street
Westmont IL, 60559-1917
Model Ship World ® and the MSW logo are Registered Trademarks, and belong to the Nautical Research Guild (United States Patent and Trademark Office: No. 6,929,264 & No. 6,929,274, registered Dec. 20, 2022)
Helpful Links
About the NRG
If you enjoy building ship models that are historically accurate as well as beautiful, then The Nautical Research Guild (NRG) is just right for you.
The Guild is a non-profit educational organization whose mission is to “Advance Ship Modeling Through Research”. We provide support to our members in their efforts to raise the quality of their model ships.
The Nautical Research Guild has published our world-renowned quarterly magazine, The Nautical Research Journal, since 1955. The pages of the Journal are full of articles by accomplished ship modelers who show you how they create those exquisite details on their models, and by maritime historians who show you the correct details to build. The Journal is available in both print and digital editions. Go to the NRG web site (www.thenrg.org) to download a complimentary digital copy of the Journal. The NRG also publishes plan sets, books and compilations of back issues of the Journal and the former Ships in Scale and Model Ship Builder magazines.


