HOLIDAY DONATION DRIVE - SUPPORT MSW - DO YOUR PART TO KEEP THIS GREAT FORUM GOING! (Only 13 donations so far - C'mon guys!)
×


Chuck
-
Posts
9,660 -
Joined
-
Last visited
Content Type
Profiles
Forums
Gallery
Events
Everything posted by Chuck
-
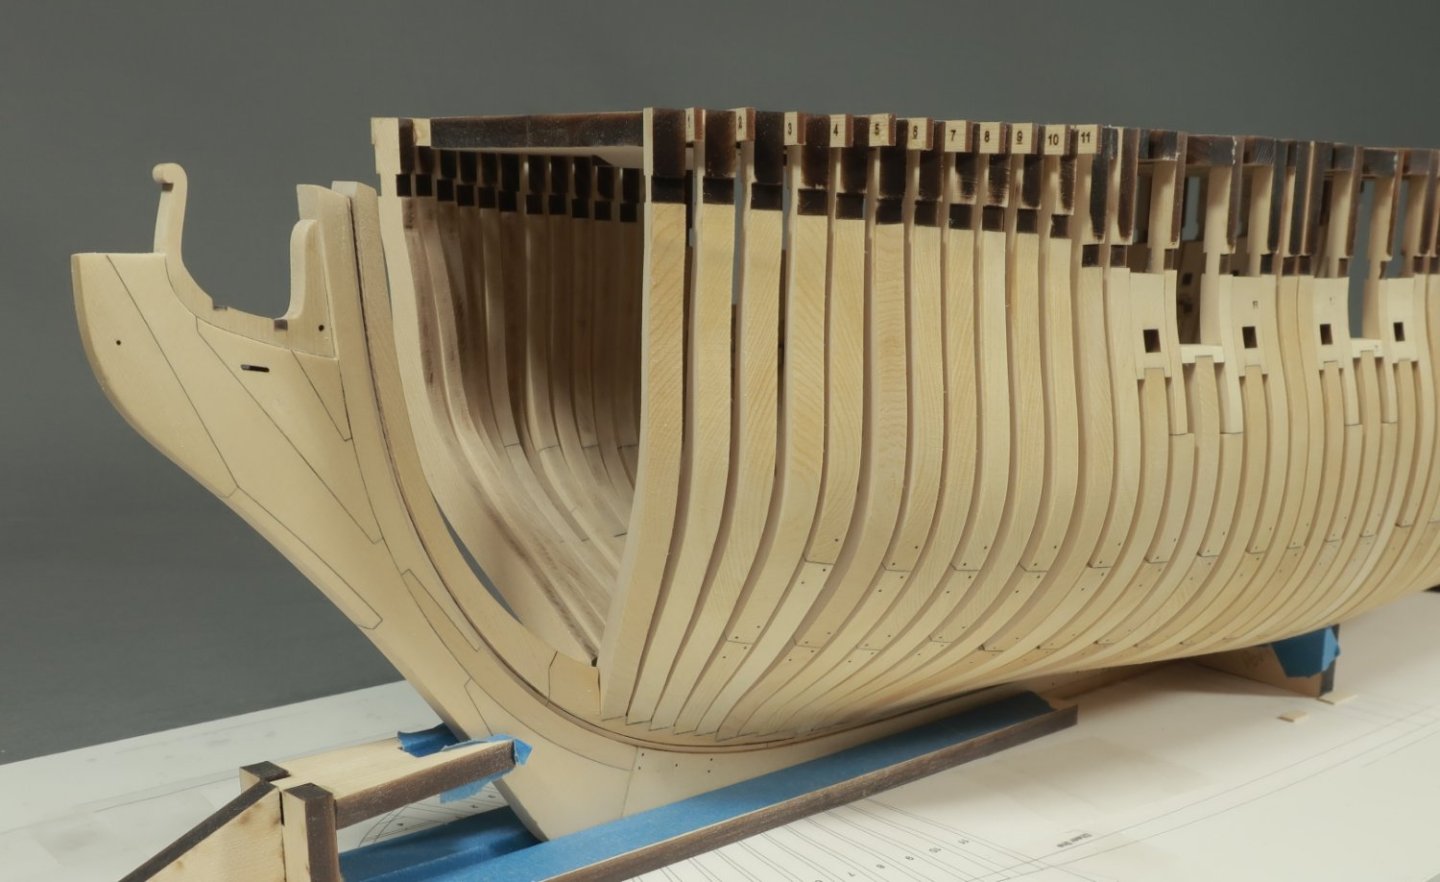
 Here is another quick angle with some Photoshop. I added some reference to where the wales would be. I needed to check some angles and this was the perfect tool for the job. This is of course just an estimate to where they will be. I just eye-balled the placement of the wales best I could in photoshop. I wanted to see what the framing would eventually look like after planking. How much would be exposed. Also, Just a note to say it would be great to have a disc sander for the bow timbers, but I know that many of you who will be building this do not have one. So I have been working all of these parts on this project only by hand just like all of you will have to. It is quite possible to get fairly tight joints just using a sharp chisel and #11 blade along with some sanding sticks. Its just a matter of going slow and being very careful.
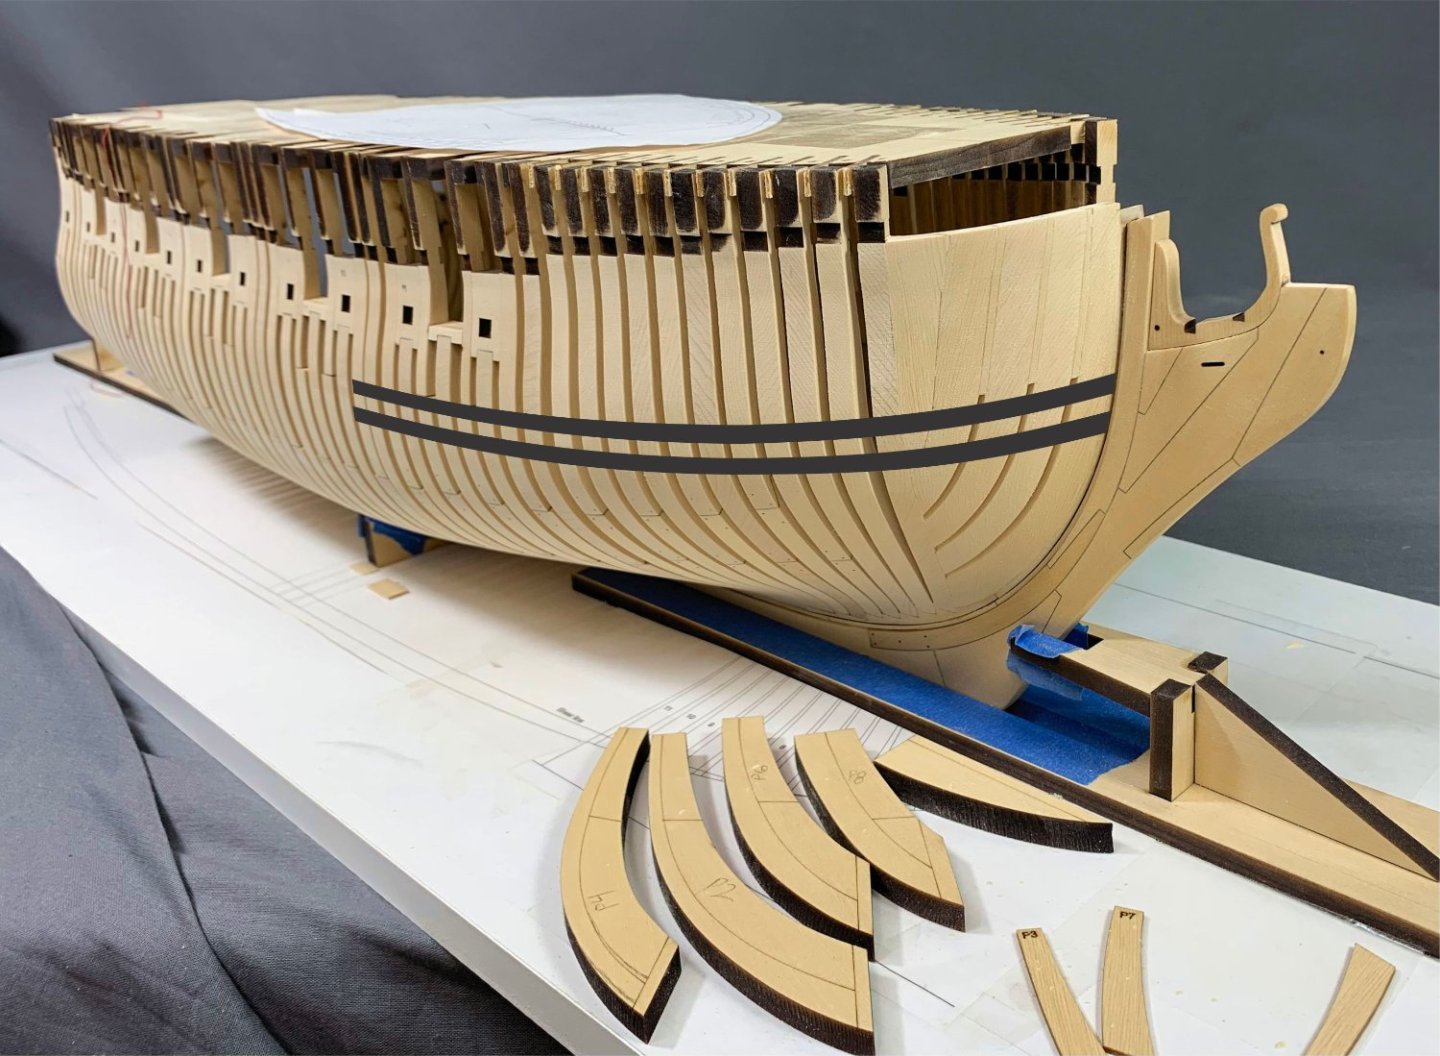
-
Yes every six or seven frames but there are times where it was smart not to do any progressive fairing. For example…not until all the cant frames were done. Same is true for these bow timbers. I waited until all of them were finished and then faired them. What you see above is about 95% done. when all the framing is complete I will break out some battens and test the smooth run all over. To remove any dips and small imperfections.
-
This Medway longboat is 1:24 The Model Shipways version is 1:48….a tiny little thing. Two different models.
- 217 replies
-
- 1
-

-
- medway longboat
- Syren Ship Model Company
- (and 1 more)
-
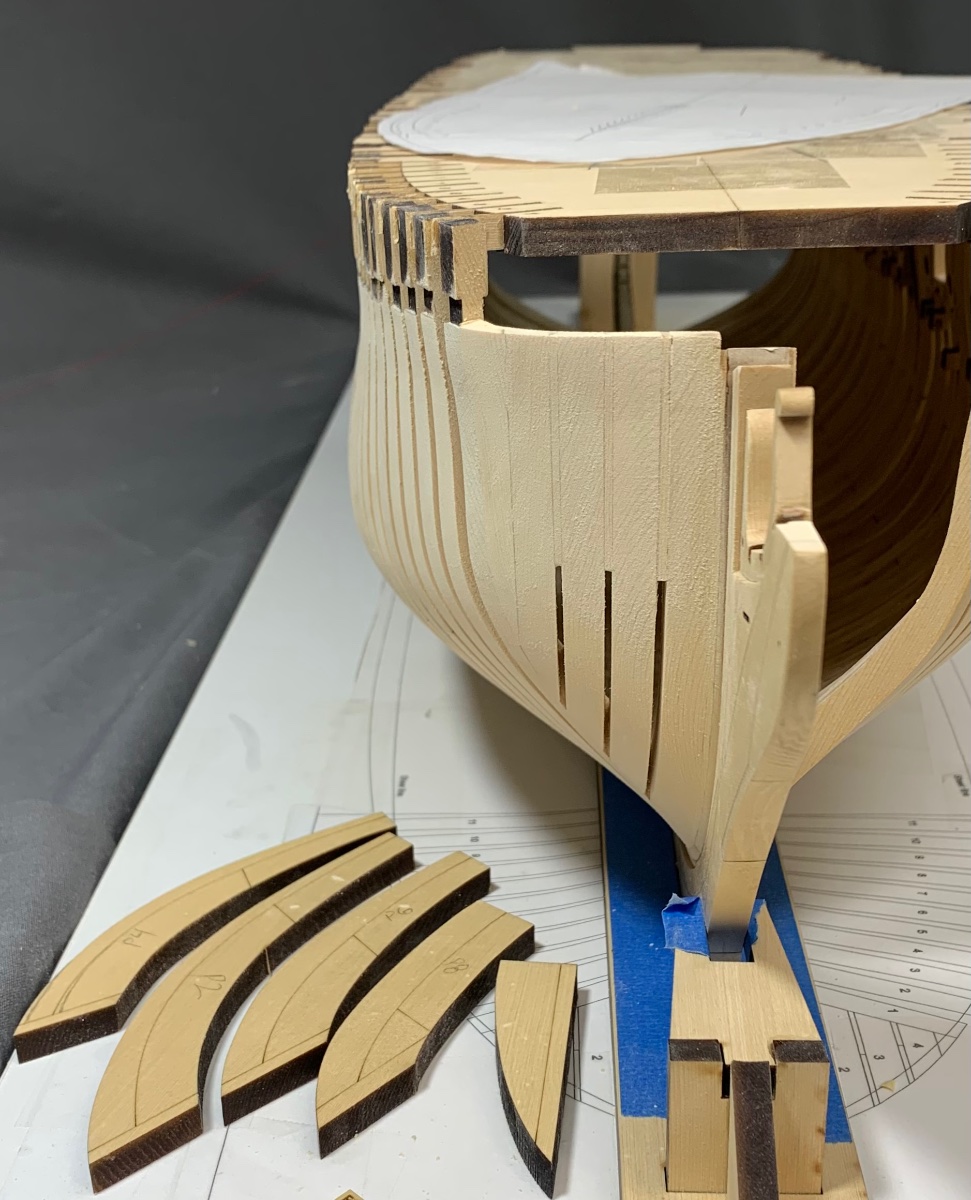
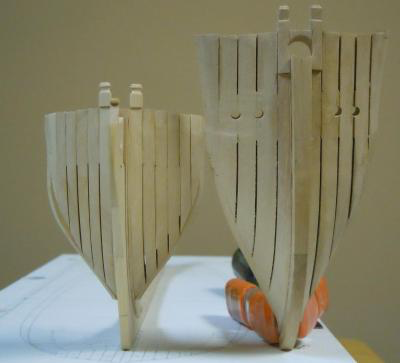
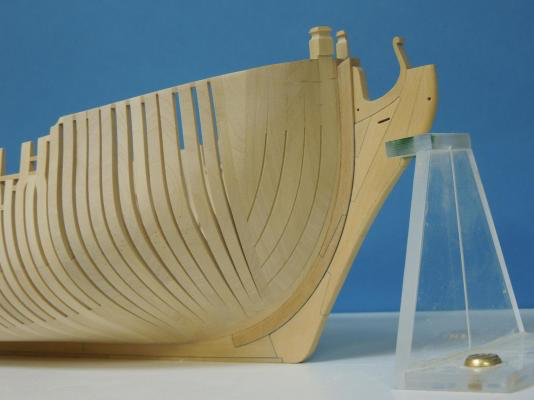
A quick test of the bow timbers. I simplified them as I know how difficult they can be. Increased the air spaces in width and the width slightly on each bow timber. I did this to reduce the number of timbers. Much like the Pegasus model in the picture posted by Greg. Note the comparison between Speedwell and Pegasus bow timbers. Pegasus has fewer bow timbers and 3 air spaces. That is what I wanted to replicate on my Speedwell for simplicity sake. Because we are planking from the wales up this will have no effect on the overall look of the model. But it will make this tricky area a little easier. There is one less timber to worry about and I combined the little filler with the outer-most timber so it was one piece. It will be covered up anyway. This also makes life much easier. No crazy jigs for these or shortcuts really. In my opinion that would make the whole process more difficult. All of the crazy jigs that I have seen on those Asian kits look over-engineered. And the finished results are less than satisfactory. It actually went very quickly just being careful and deliberate with each timber. You can see the timbers for the port side ready to go. They are laser cut with etched reference lines on both sides. I will of course take tons of pictures and do a step by step when I do the other side.

-
Wow a really spectacular planking job and hull. I am enjoying your progress.
-
Very nice gary…That is a great looking hull.
-
Nice progress…
-
Thats a good start Mike. Mike will be following all of the framing plans and jigs you currently see on my build. He is basically recutting to my plans out of Boxwood as he prefers that over yellow cedar. He also enjoys the challenge of cutting all of those frames from scratch which is very rewarding. However Mike will be using all of my laser cut cedar jigs and parts that wont be visible on the final model. In essence it will still be the same project. It will be interesting to see if the build concepts will work when parts are scratch made and how difficult it will be to replicate without a laser cutter. It will be the only such version of my interpretation of Speedwell. Plans containing all of my frame drawings will not be available on the final set of plans for the Syren Ship Model Company project. There is no need for them since all frame parts are already laser cut…as a deterrent against kit piracy. Having said this…a fully scratch version can be made using the frame drawings and plans developed by David Antscherl in the Seawatch two-volume book set. I am looking forward to seeing how it progresses.
-
Very nice progress...
-
You could do that if you choose. I have not however but I am applying a sanding sealer to the frames. And yes the fore and aft sides were finished before assembling them on the keel. The outboard side will be finished after final fairing. Many folks dont apply any finish and that is another option as well. You are less likely to highlight any color differences in the wood used throughout if you dont apply any finish at all. Its perfectly fine to do so. In fact I dont think Greg applied any poly or sanding sealer on his model at all. He can confirm this of course.
-
Thats very nice but the bow timbers on Speedwell will be do e in the traditional sense individually with air spaces between them. hopefully sometime this week. Here is what it will look like …this is Gregs showing comparison with Pegasus in 1/4” scale. Speedwell on the left.
-
You are correct. That has been fixed for everyone elses model. But I noticed it too late on mine. Dont want to risk damaging the mode at this point. You can only see it when the hull is upside down anyway. So I am not worried about it on my model.
-
Using a serving Machine. ( Syren Serv o matic)
Chuck replied to DaveBaxt's topic in Masting, rigging and sails
You may just be holding the thread too tightly as you serve. Just guide it onto the rope. I have never seen this happen to anyone before. Its definitely in your technique or the thread you are using to serve with. -
With a group build that is up to you guys. If enough folks buy the kit and want a group I will start one. We need at least 6 to 10 people for that. As far as a limited run…It all depends really. It depends on demand and on how easily I can get milled Cedar sheets. There is a lot of wood in the kit. And yes unfortunately that means it will be expensive. I will make that decision after its launched. If I can manage to get enough wood and enough time to laser the parts I wont limit production. But yes that will absolutely mean that there would be a long wait between batches while Joe mills more Cedar sheets for me. For framing alone this kit will need over 25 sheets of 1/4” Cedar. I will need over 250 sheets just to make 10 kits… The same is true for the other thicknesses. Its really just a problem with having enough lumber to make them. The supply chain is a real bitch. Not to mention I also need wood to continue making all of my other products. For any mfg..if you use a wood other than basswood its problematic getting enough material. There are literally only two people in the entire world that are milling Alaskan Yellow sheets. Only one in the USA. Think about that.
-
It will be a while yet until the first chapter is released. I want to get much further with the prototype. In fact I wont be giving parts to a beta tester until all the framing is done on mine. Then he will hopefully be able to build it just as easily as I have. If that goes well I will star selling chapters. Both Mike and Rusty will be beta building. It probably wont be until Summer if not later when they are for sale. I am not rushing this to market and will be taking my time with it. Mike has started building already. Rusty hasnt. But I will be getting parts to him very soon. I want to make sure to get it right. Lets see how those bollard timbers and hawse frames go next!!!
-
It is a safe place to sell MODEL SHIPWAYS in Amazon
Chuck replied to Gus M's topic in Wood ship model kits
Gus…honestly only Model Expo can tell you that. They are both selling a legit kit. One is very overpriced. Buy the cheaper one!!! -
Too funny Greg. Yes I saw that too about the treenail. But you didn't catch them all. There was another missing in that same photo. Both have been added and all is now right with the universe.
-
No easy way I suspect. Just go slow and try not to catch the edge of the sandpaper on any frames. There are far better pof builders out there who could prob give you a better answer. Its looking ver good.
- 61 replies
-
- 3
-
-
- ancre
- Santa Caterina
- (and 1 more)
-
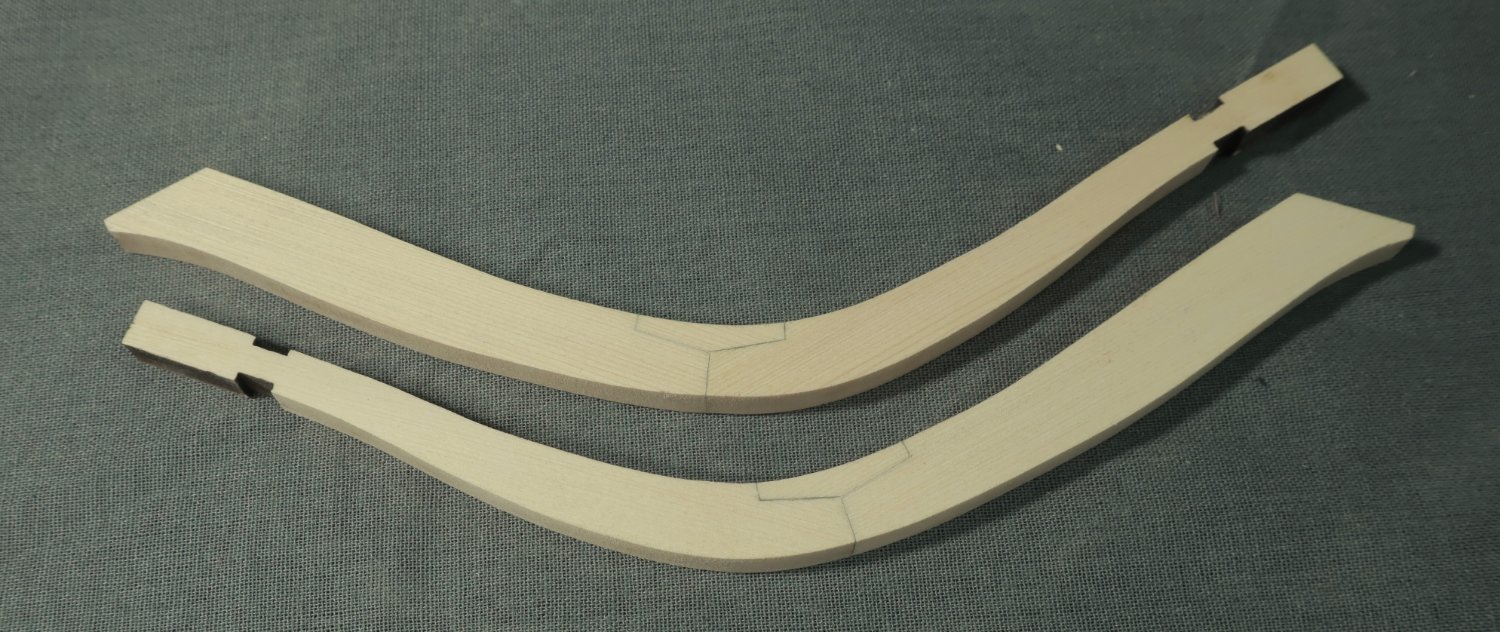
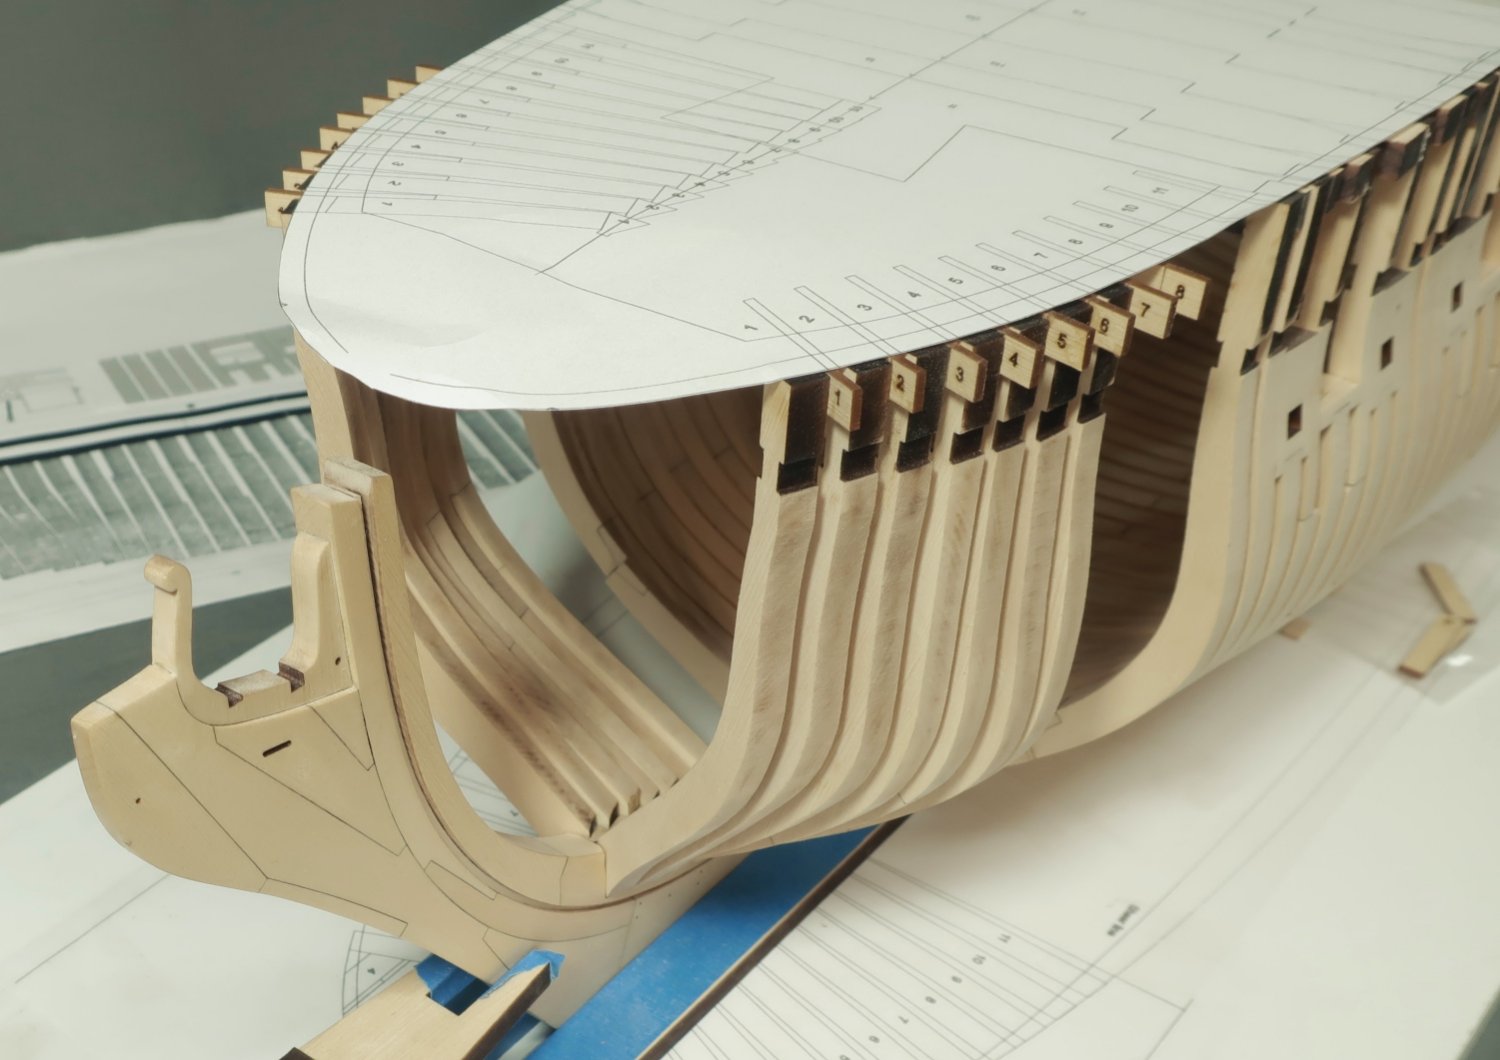
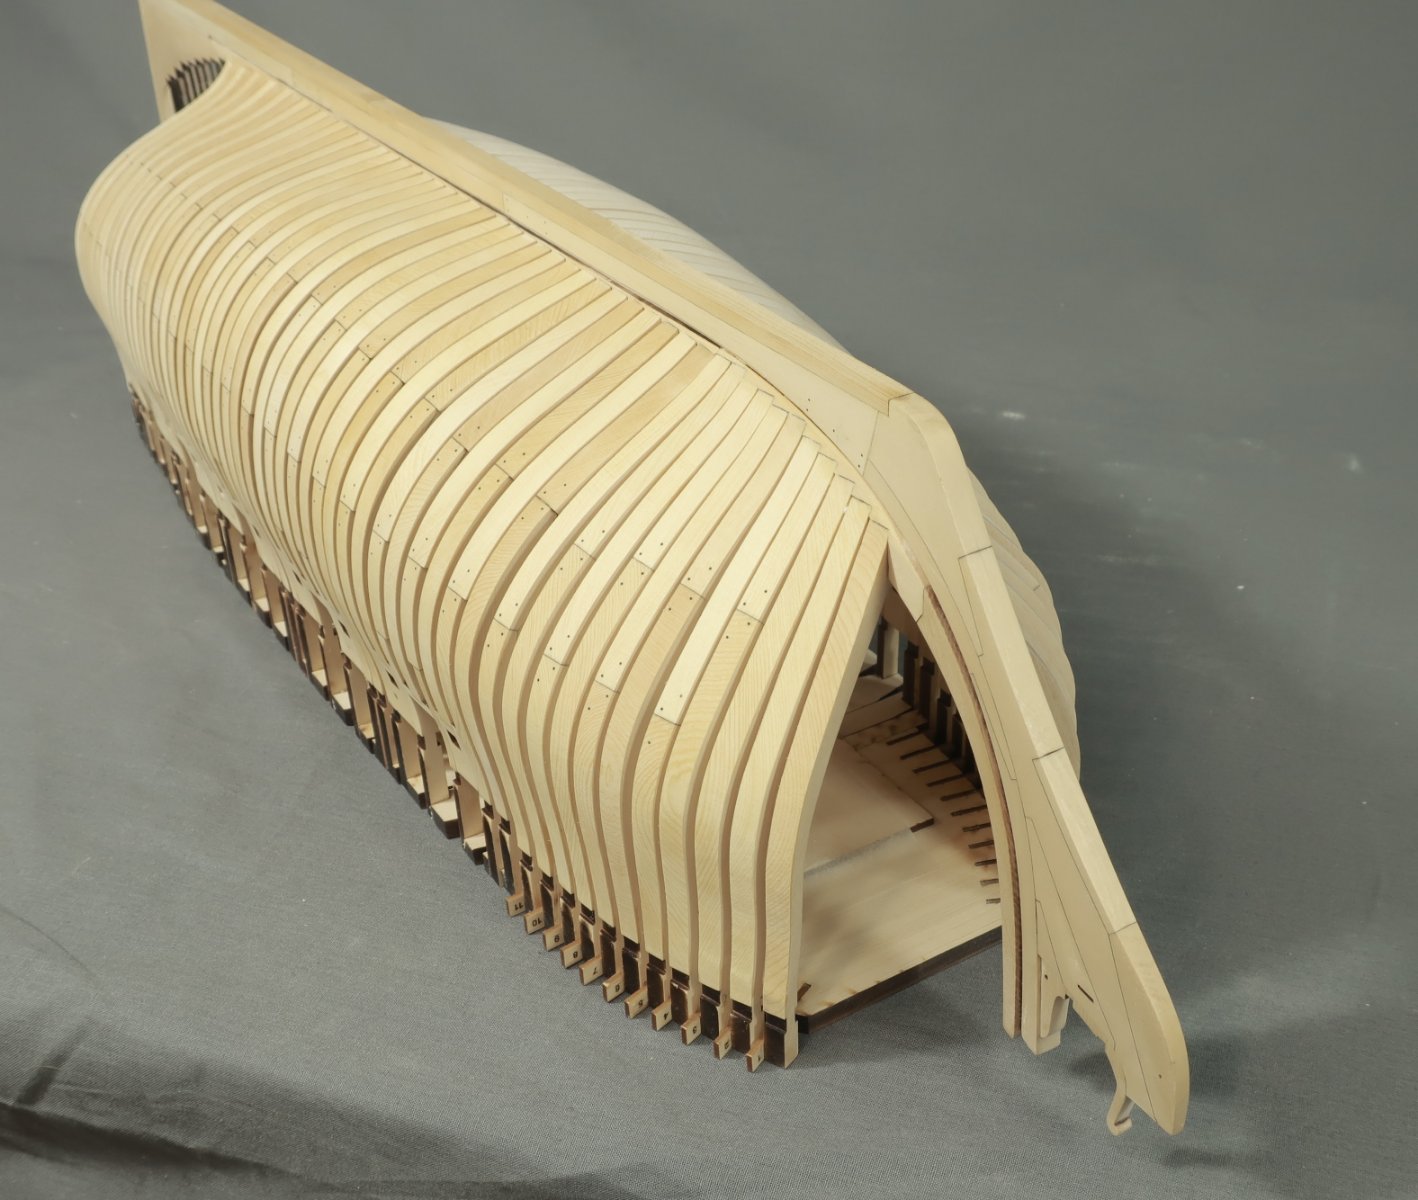
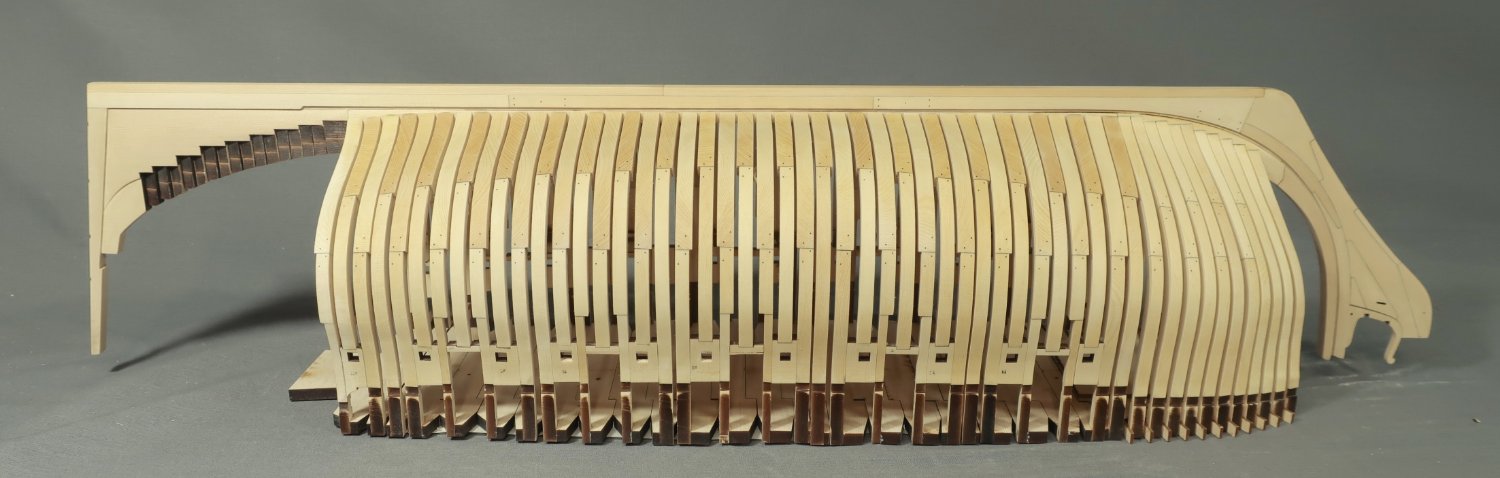
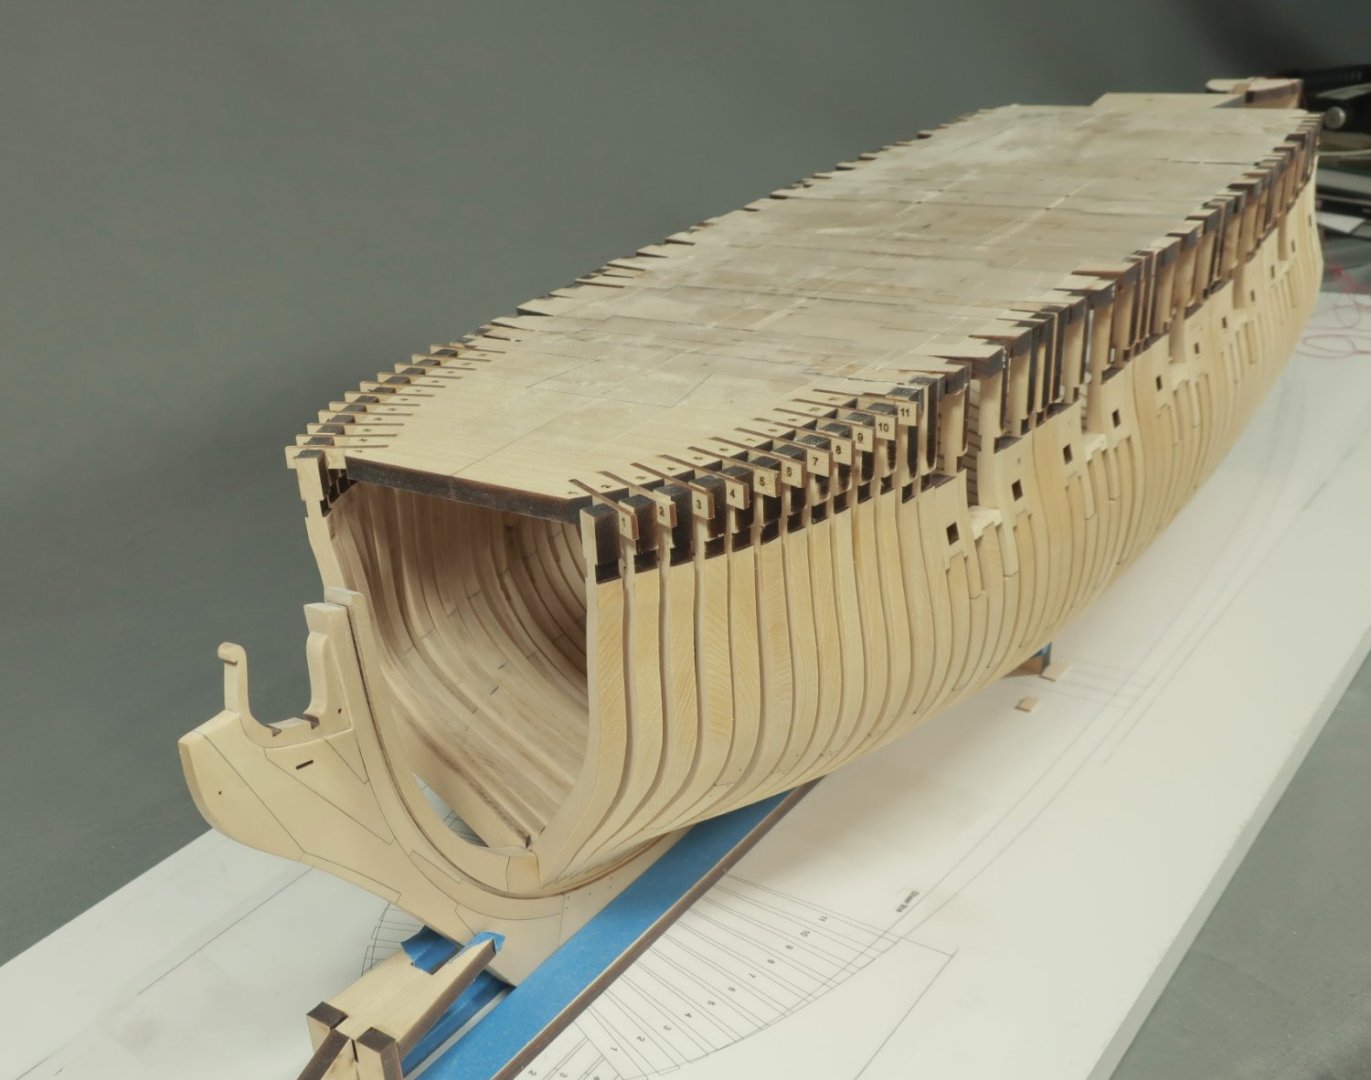
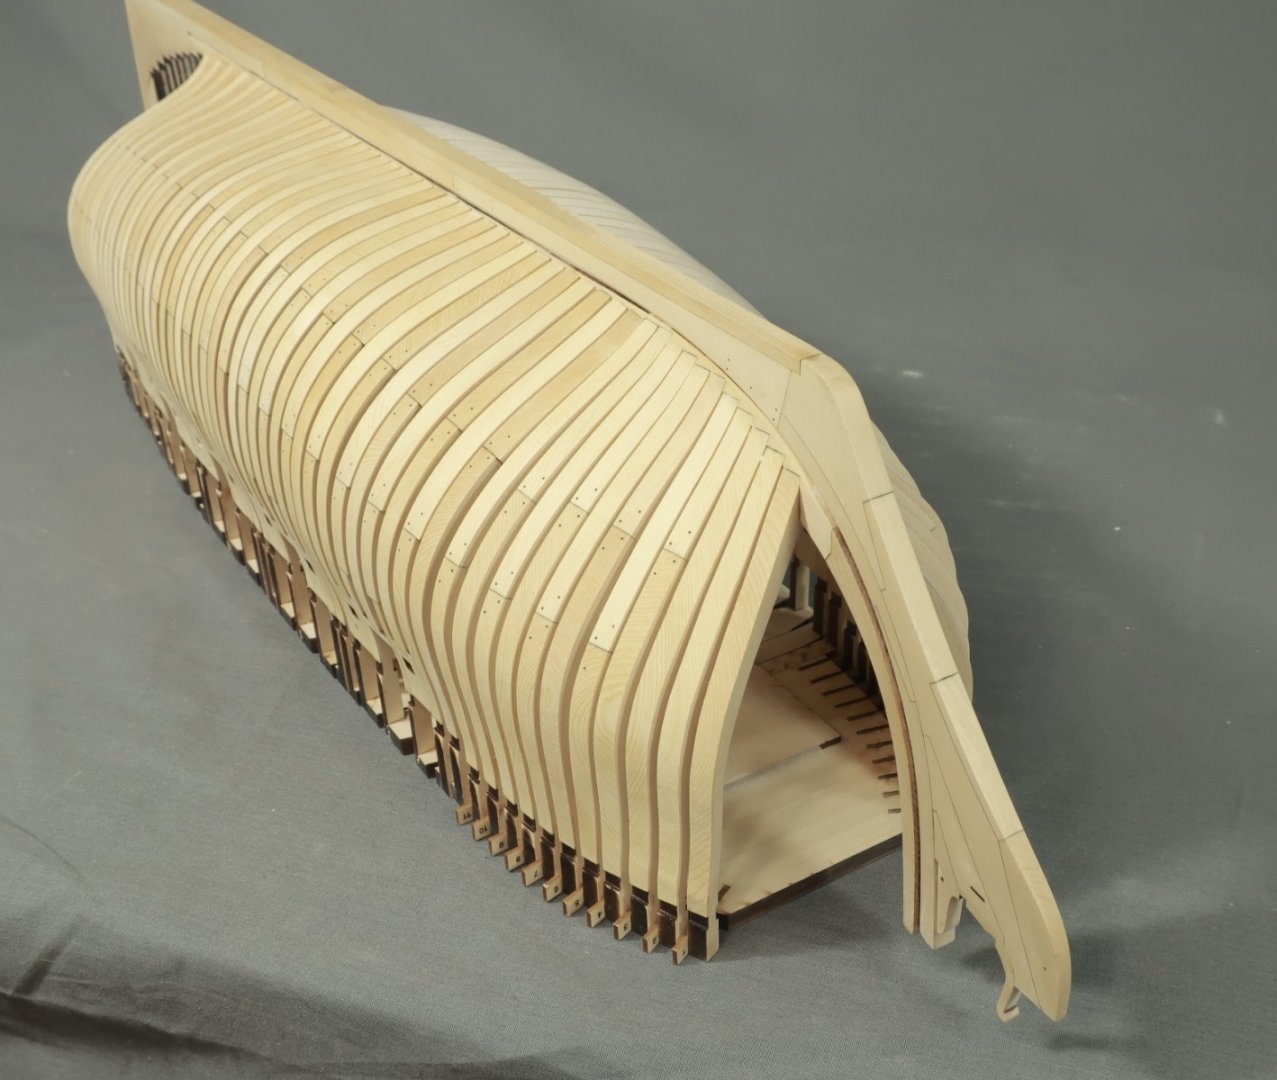
Work continues on the fore cant frames.... The forward 3 cant frames are in one piece. They were sanded and glued in position as mentioned earlier. The remaining 8 cant frames are built up from two pieces as shown. They are all 1/4" thick. But they are the same as assembling the square frames. Just sand the simulated chock joint for a tight fit as before. Then remove the char and glue them in. I proceeded to install them working my aft. All is going well. The outside edge of each cant frame is lined up with a laser etched line on each lettered strip in the jig. As mentioned earlier, the top of each frame is also flush with the top of the strip but this isnt as important. If while putting the two halves of a frame together you over sand the scarf joint, It will become shorter. That is perfectly fine if not excessive. Any small differenced like that will be corrected while fairing the hull. So dont get worried if thats the case. I did not do any progressive fairing of these. I wanted to wait until all of the forward cant frames were installed. In hindsight...after completing all of them, I thought it probably would have been better to work from aft towards the bow. At least after those three "one-piece" cants were added up front. It doesnt matter in the end but getting the last two cant frames in was a bit fussy between the existing square frames. I couldnt get my fingers inside the hull and that far back to position it too easily. It would have been easier to work my way forward towards the first three. But in the end it wasnt too bad. In fact it went pretty quickly. Once they were all added I could do some fairing. This took a while as one would expect. I only finished the port side. I will do the other side this weekend. It came out very well indeed and the bow is shaping up. I am quite happy with the shape these cant frames created. This is a long and narrow hull. It has a very interesting shape. Here is a picture with the hull upside down. You can see how I faired the cant frames as they sat on the apron notches. They were faired carefully into the rabbet. This meant also sanding and fairing the sides of the apron to match the run of the frames into the keel. Treenails were added to the cant frames just like the square frames using the black monofilament. Once I fair the other side, I will start on the bollard and hawse timbers. That will complete the framing at the bow rather than do the aft cant frames first. It will be good to finish up all of the hull framing on the forward half of the hull. Questions and comments are always appreciated.


-
Really nice. That is perfectly executed. Nice and clean.
- 217 replies
-
- 1
-
-
- medway longboat
- Syren Ship Model Company
- (and 1 more)
-
Yes its looking very good indeed. Well done.
-
Looking good so far. Maybe a bit more fairing until all laser char is gone from the bulkheads. That is usually the key and a big help. Chuck
-
At a loss for words Mike....She is a beautiful model. So sweet. And it was fun getting in the trenches with you on it for so many years. Chuck
- 607 replies
-
- 3
-
-
- winchelsea
- Syren Ship Model Company
- (and 1 more)