-
Posts
9,717 -
Joined
-
Last visited
Content Type
Profiles
Forums
Gallery
Events
Everything posted by Chuck
-
Brings back memories. Lovely.
- 131 replies
-
- Medway Longboat
- Syren Ship Model Company
-
(and 1 more)
Tagged with:
-
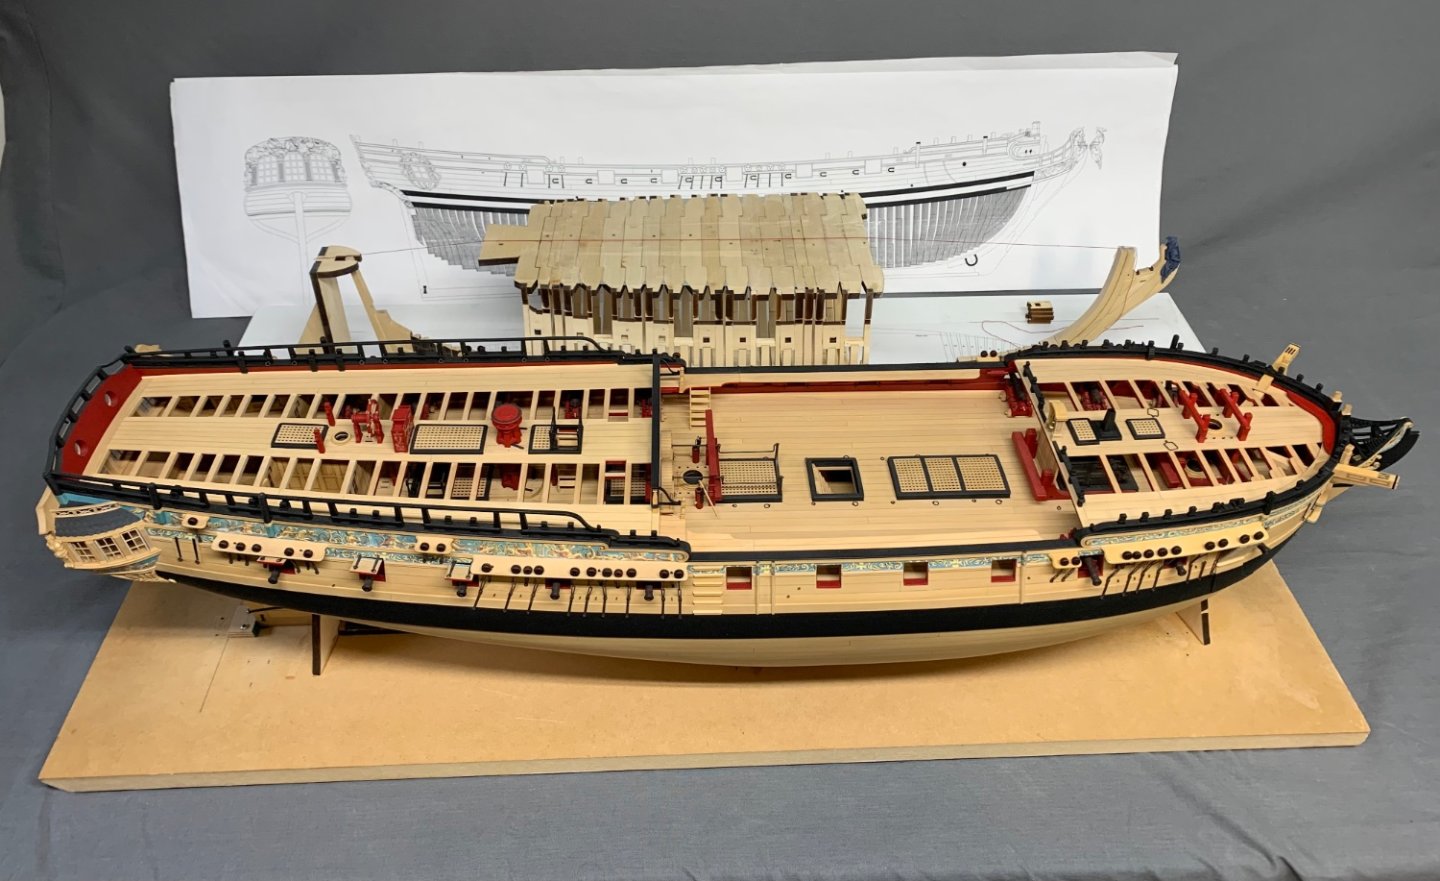
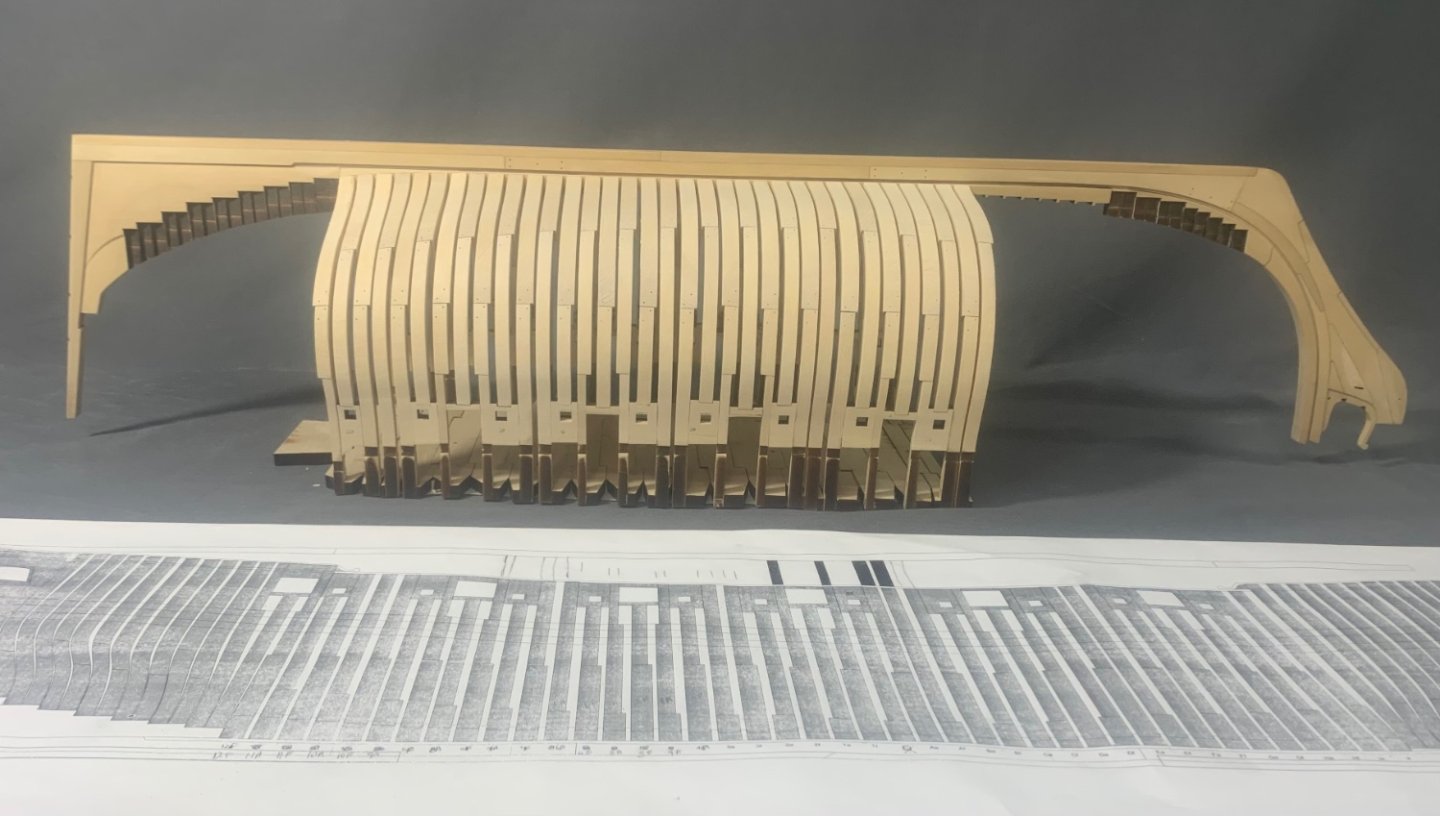
There is a lot of distortion but here is a picture of Mike’s Winnie next to the speedwell for a size comparison. The Speedwell is about 7” shorter at 3/8” scale even though the picture makes it seem like more. That is after all the framing is done. Only 8 more square frames to go…since this picture was taken.
-
Sixth time was a charm! That looks pretty darned good to me. Chuck
- 217 replies
-
- medway longboat
- Syren Ship Model Company
-
(and 1 more)
Tagged with:
-
Very nice. That looks fantastic. Patience pays off. The rest of the deck planking is a piece of cake!
- 840 replies
-
- winchelsea
- Syren Ship Model Company
-
(and 1 more)
Tagged with:
-
For deck planking on top of a base false deck it would be fine. Being just a hair thinner shouldnt effect the gun height too much. But it wouldnt work for hull planking unless you plank two layers. They are too thin for use on a single planked hull. Hull planking on a pob hull with thin 1/32 planks is not a good idea unless you fill all the spaces between bulkheads with balsa to make it solid.
-
It doesnt mater really. The two halves were designed so you can cut the top of the “striped barrel” down as much as you need. As long as you leave just the tiniest bit above the deck beams you are good so you can position the partners. Then the top capstan can just fit i nto the remaining space on the partner. If there is a small gap it doesnt matter…nobody will see it.
-
So close to the finish line. It looks great.
- 607 replies
-
- winchelsea
- Syren Ship Model Company
-
(and 1 more)
Tagged with:
-
Either way would work. Mine ended up more parallel. But its more important to just keep them neat. It really all depends on how far apart your main rails ended up and what the angle into the stem ended up like on your model. It will probably be different on everyones model…. all be it slightly. The more you have to tweak the angle on those notched knees to match the angles…the more different the angles of the battens will be. Its a very complex area.
- 1,784 replies
-
- winchelsea
- Syren Ship Model Company
-
(and 1 more)
Tagged with:
-
Really nice. Those channels look really good. Chuck
- 642 replies
-
- winchelsea
- Syren Ship Model Company
-
(and 1 more)
Tagged with:
-
They will make several master molds from the masters I send them. But at some point I will need to send them more masters. I have plenty. But I am only tweaking one set for now. It depends on the shapes and how deeply the undercuts and stuff are for how many good castings they can get at a time. The guys I use also suggest injection molding which they can do but that is a huge cost for initial set up. So it would easily double the cost of the retail price of the sets. Unless I plan on making thousands of sets its not really worth the money for the set up. Its better suited for stuff like cannon where I easily sell thousands.
-
Very nice....moving right along.
- 389 replies
-
- winchelsea
- Syren Ship Model Company
-
(and 1 more)
Tagged with:
-
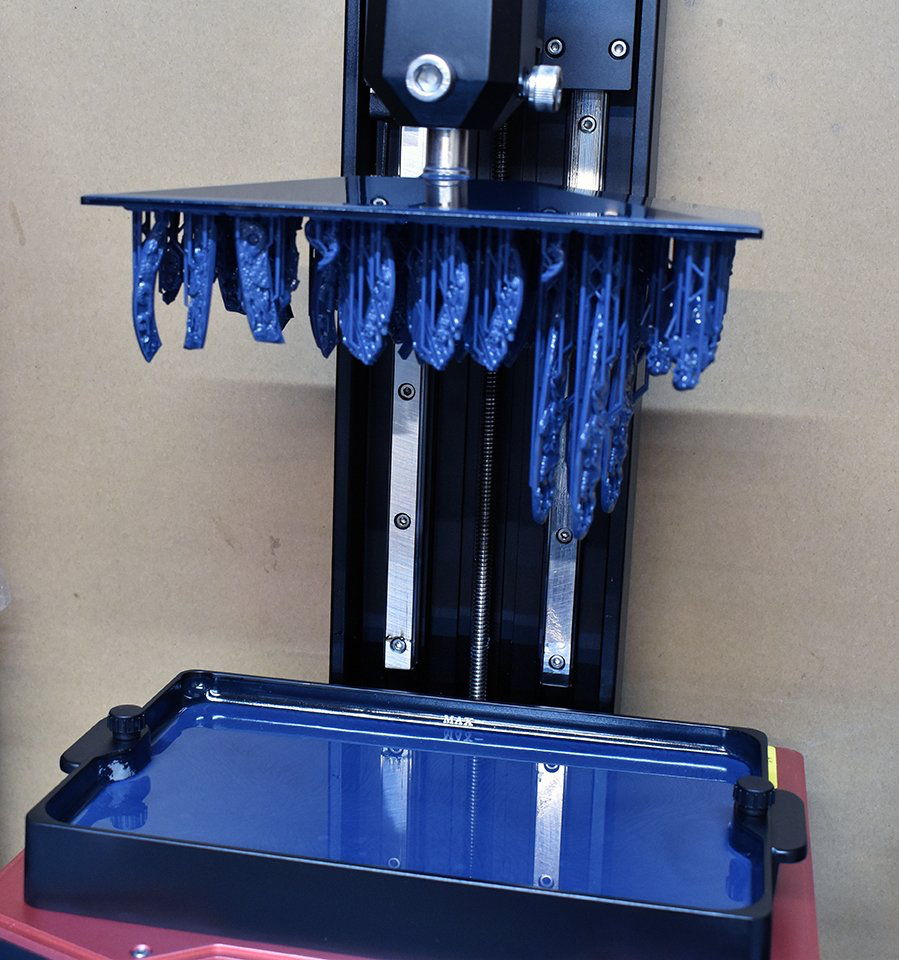
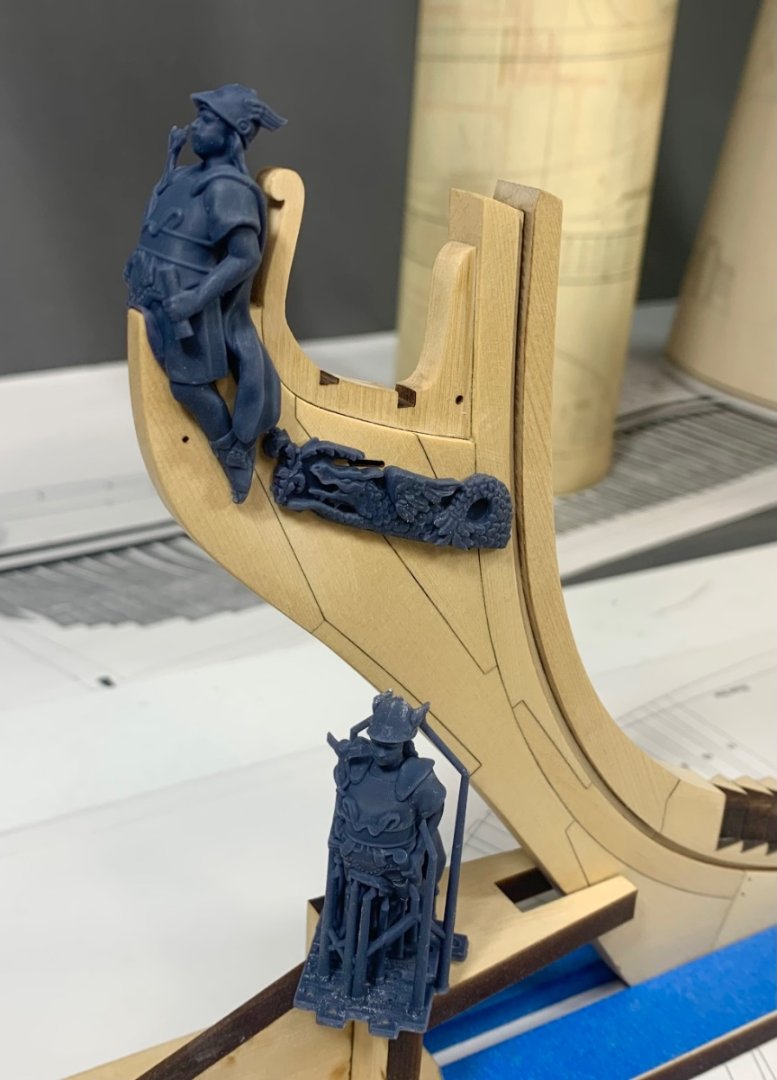
Its a new type of resin printer…you can get them for home use but as with everything else the ones worthwhile are expensive. I think Chris posted the i nfo on which one he got sometime ago. I literally am consciously trying to not learn another new technology…my brain cant absorb any more. CAD proficiency and new tech which is improving every couple of months. Its too much for me. So I will leave that aspect to others and gladly pay them what they deserve. It prints upside down….how cool is that. These are my parts being printed. When I get them I work on them extensively…sharpening and carving more details by hand. It may be hard to tell but just adding a few details with your own hand makes them look less polished and machine made. Then I use them as masters for traditional casting. I really should introduce even more evident hand carving but these are quite small. But I may still do more work on them.
-
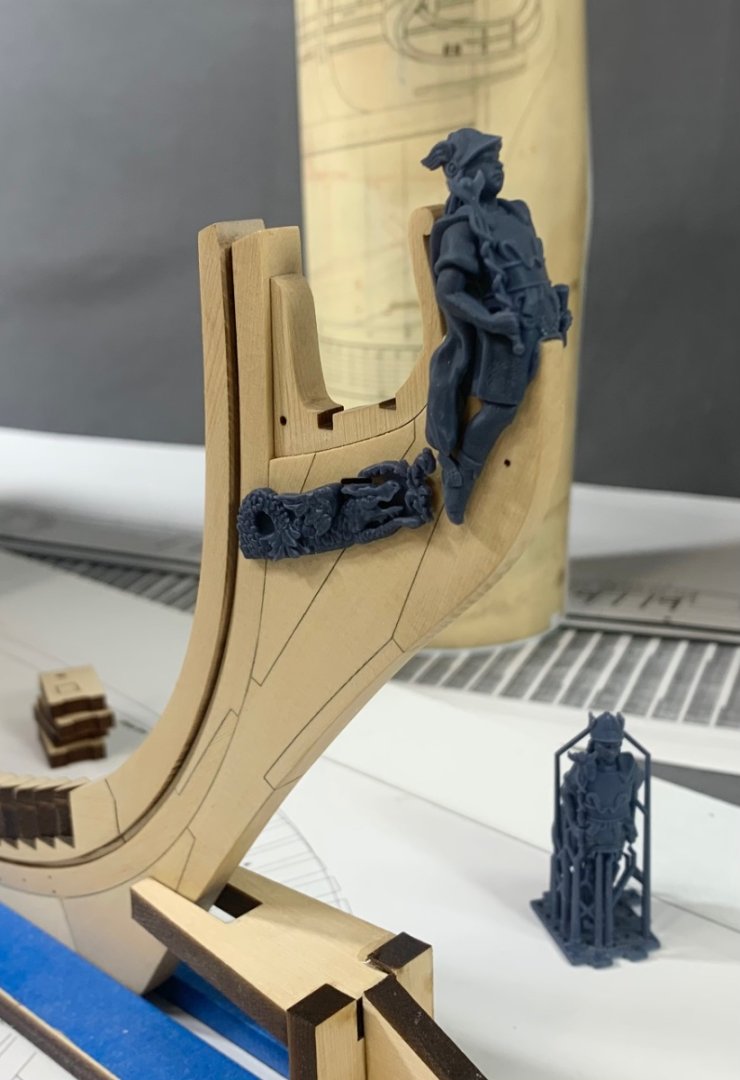
Did some work on the final iteration of the figurehead and trailboards today. The fit is really quite good. If you can imagine the hairbrackets in position…all will fit rather smashingly. Also picture them with a wood finish. With these done I can send the masters for casting in wood colored resin. Note the raw 3d printed example in the photos. Looks very Syfy like before the supports are removed and the figure is cleaned up and tweaked. Its all very interesting the way its done and printed with a high end resin printer. The surface quality is excellent. A big thank you to Chris W. from Vanguard for his help with these. so now its back to frame-making…
-
A really good start. Have fun with the project.
- 131 replies
-
- Medway Longboat
- Syren Ship Model Company
-
(and 1 more)
Tagged with:
About us
Modelshipworld - Advancing Ship Modeling through Research
SSL Secured
Your security is important for us so this Website is SSL-Secured
NRG Mailing Address
Nautical Research Guild
237 South Lincoln Street
Westmont IL, 60559-1917
Model Ship World ® and the MSW logo are Registered Trademarks, and belong to the Nautical Research Guild (United States Patent and Trademark Office: No. 6,929,264 & No. 6,929,274, registered Dec. 20, 2022)
Helpful Links
About the NRG
If you enjoy building ship models that are historically accurate as well as beautiful, then The Nautical Research Guild (NRG) is just right for you.
The Guild is a non-profit educational organization whose mission is to “Advance Ship Modeling Through Research”. We provide support to our members in their efforts to raise the quality of their model ships.
The Nautical Research Guild has published our world-renowned quarterly magazine, The Nautical Research Journal, since 1955. The pages of the Journal are full of articles by accomplished ship modelers who show you how they create those exquisite details on their models, and by maritime historians who show you the correct details to build. The Journal is available in both print and digital editions. Go to the NRG web site (www.thenrg.org) to download a complimentary digital copy of the Journal. The NRG also publishes plan sets, books and compilations of back issues of the Journal and the former Ships in Scale and Model Ship Builder magazines.


