michael mott
-
Posts
5,200 -
Joined
-
Last visited
Content Type
Profiles
Forums
Gallery
Events
Everything posted by michael mott
-
 Glenn outstanding detail and ingenious fabrication, i can see the merits of CNC with the work you are doing. Michael
 -
Having the sanding block the same width as the next strake is brilliant, I wish I had thought of that. Michael
- 641 replies
-
- 12
-

-
- greenwich hospital
- barge
- (and 1 more)
-
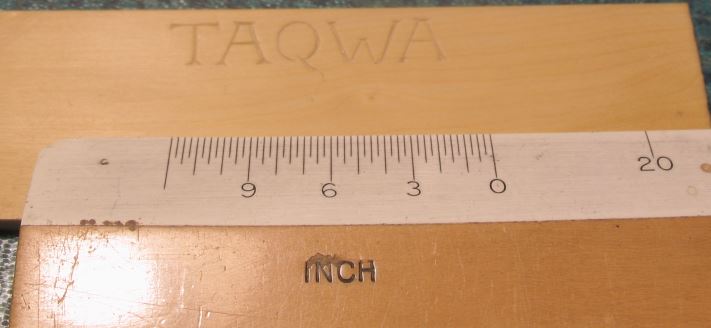
Thank Pete. An interesting thing occurred when I drew the king plank. initially it was 5 inches parallel but looked tapered because of the curved planks. so I kept adjusting it until it look parallel . the forward end is 4 5/32 and the aft end is 5 5/8 but it looks parallel. Michael
-
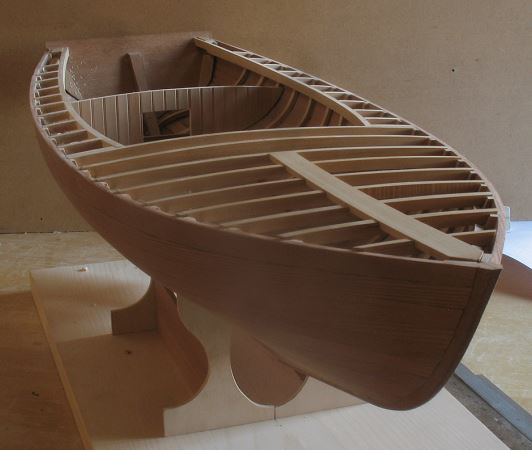
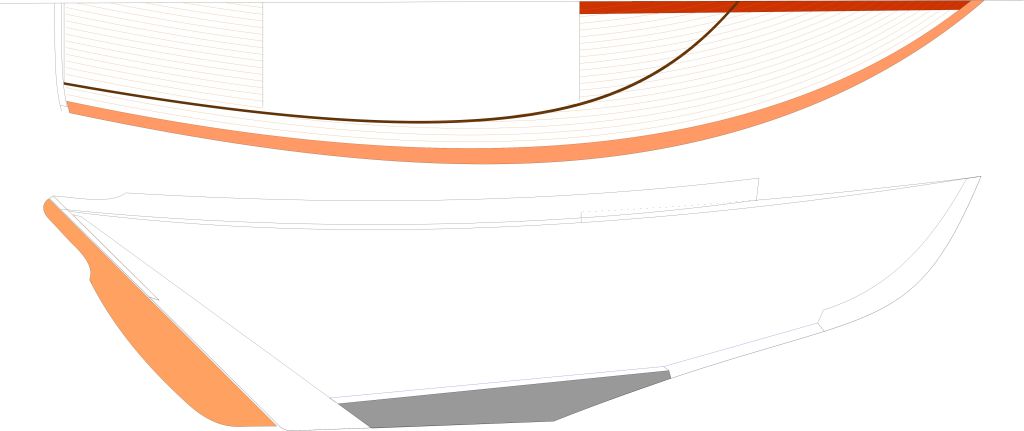
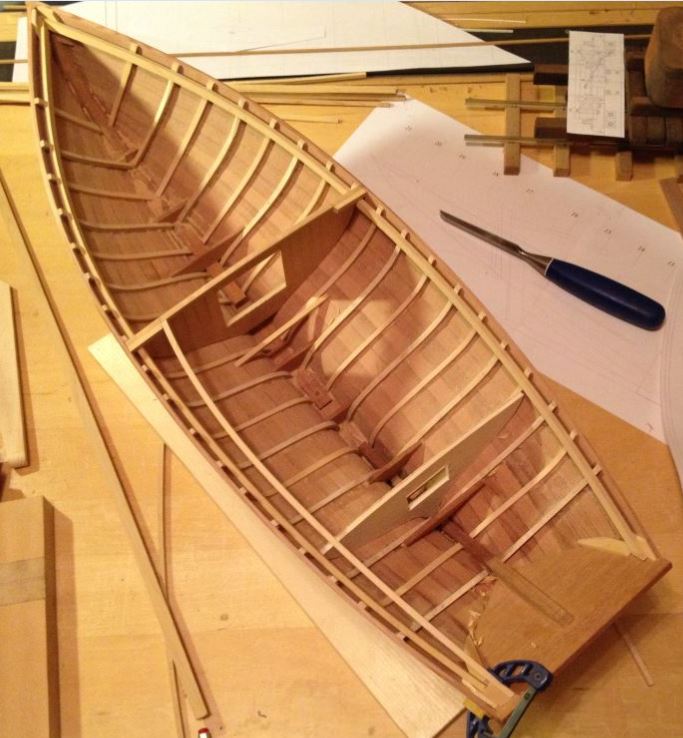
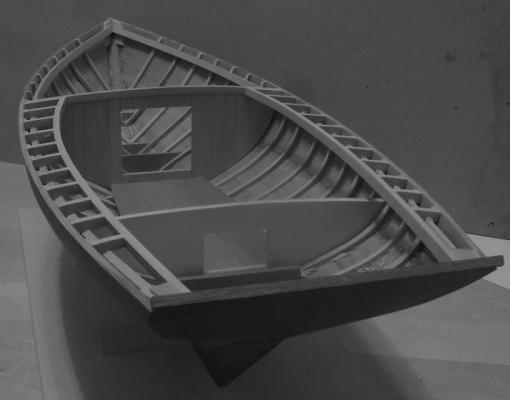
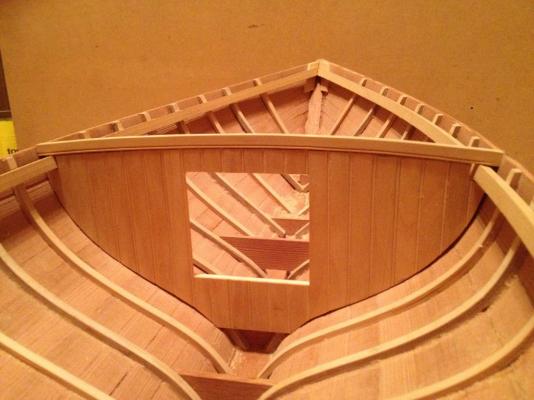
Thanks for all the likes and comments. build part 27 I fitted all the main forward deck beams and half lapped in a centre beam. I will need to finish the inside of the forward compartment and mast step before gluing this all together. following is a plan of the deck planking they are 1 1/2 inches wide and will follow the deck line and but into a king plank Michael
-
I am still getting my head around that fact that these planks are only 1/64th inch thick. How are you preparing the stock, and what size is it before you do the spieling? Michael
- 641 replies
-
- 4
-
-
- greenwich hospital
- barge
- (and 1 more)
-
S.V. Interesting that you call it fantasy. I might call you a shipwright who just designed a good looking ship. Very nice work, and the lion carving looks very nice. Just because it is not a model of a particular ship does not make it any less authentic in my view. Michael
-
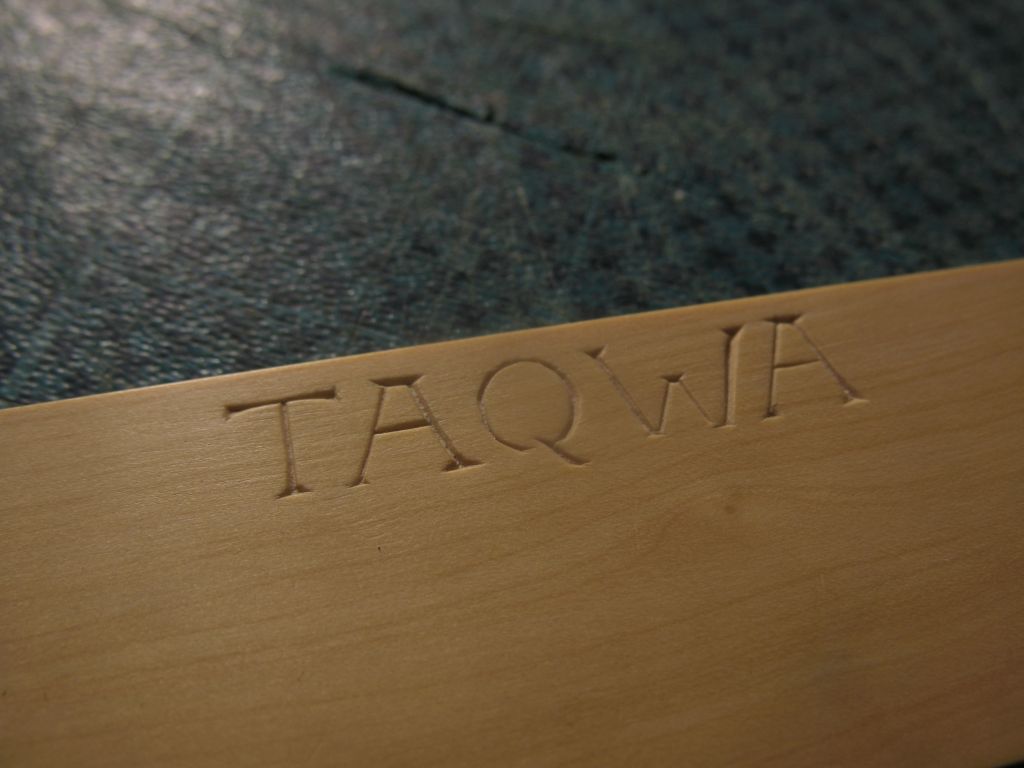
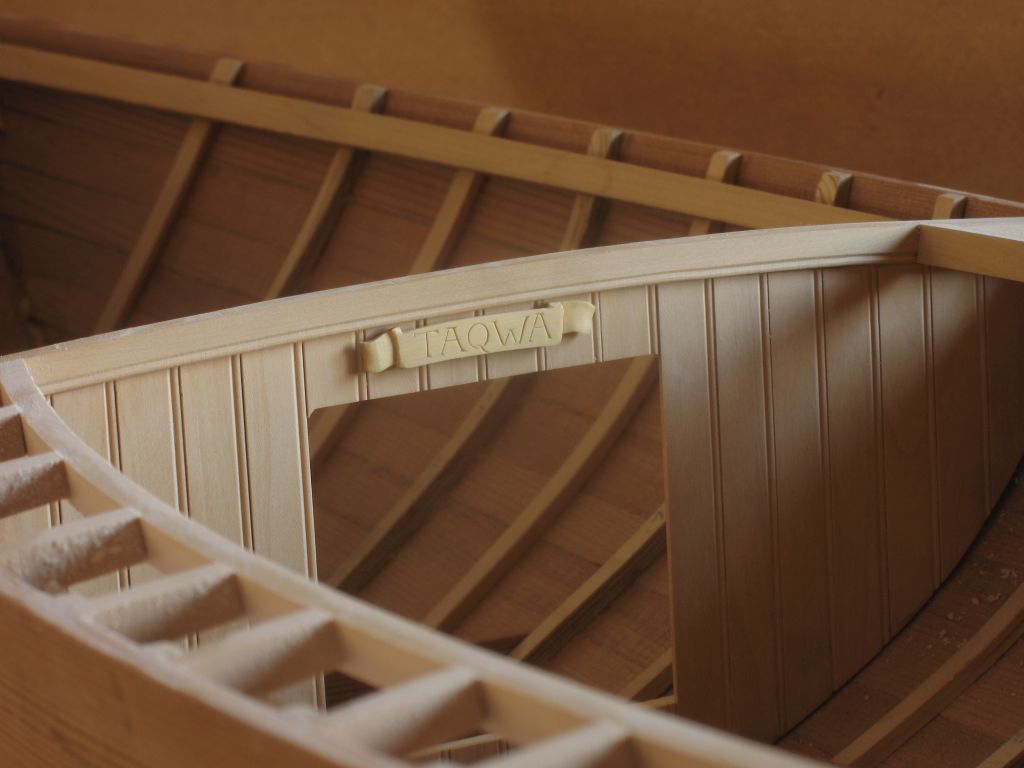
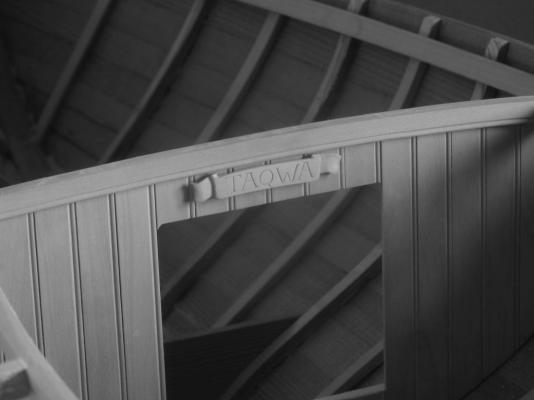
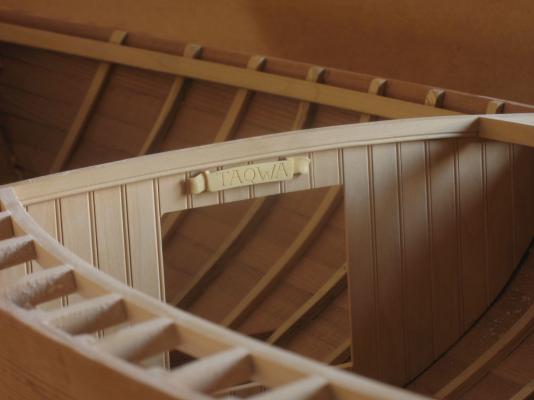
Build part 26 Just to try my hand in something a little different after reading about Dave's wonderful carving work on his Sovereign of the Seas. I realized that a nameplate might be an easy start not having done this sort of work. I used a small piece of my English boxwood as much as anything for the contrast in woods it is also a bit crisper and more dense than the Costello I began with the letters as simple incised ones. it is about an inch long. After what seemed like half a day about 5hours in total I used a bit of double sided tape to see how it looks on the forward bulkhead. I think that I will leave the carving for those more suited to it, it was challenging and I constantly worried about chopping off the end of my thumb. it was all accomplished with a trusty number 11 Exacto blade. michael


-
Hi Bob, Your question is a good one and the honest answer is I don't know. The actual section of the coaming stringer is 11/64 by 1/4, the redwood planking was 5/8 x 5/32 and I have used both methods on both planks. In Chuck's video where he does the tutorial for the planking of the cutter he is using smaller planks but comments about the heat being more important than the water or soaking. Intuitively the steaming of the full size timbers is probably the easiest way to really heat the planks without them drying out. At our scale the sorts of pressures that we get with our own hands would be scales of magnitude greater than the full size if we scaled up our bending and clamping. so the time for applying the heat. When I am steaming it takes longer because my box is not very sealed but the heat of the planks is considerable when I pull them out. the drawback is waiting for them to dry out afterwards. Michael
-
Very nice work on the anchor Piet, sometimes the fine saw like yours is the best tool. I find that I am using mine for a lot of cutting, wood, brass, plastic it is just so convenient and quiet. I have a couple set up with different blades for metal or wood. Michael
-
Pete,I haven't seen any really tight grain Sitka for years, we used to be able to get it locally but that was 35 years ago. I do have some very tight grain white spruce, how long do you need? Michael
- 258 replies
-
- 4
-
-
- buzzards bay
- herreshoff
- (and 1 more)
-
Looks great Denis, the drip edge is a good idea they work very well. Michael
-
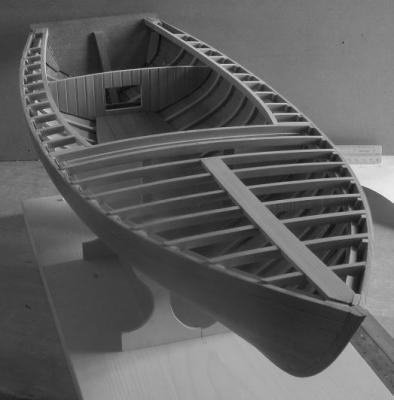
Hi Pete at the transom it is 6 inches and at the forward bulkhead it is 12 inches. Nils thanks, working in this scale is a great deal of fun The only problem is of course the maximum size of prototype, there is one yacht that i would like to build in this scale but it will be 105 inches at the waterline. So I will have to get all of my other work done first. Deon, Thanks, but don't look too closely, there are little areas that I wish were a bit crisper. Michael
-
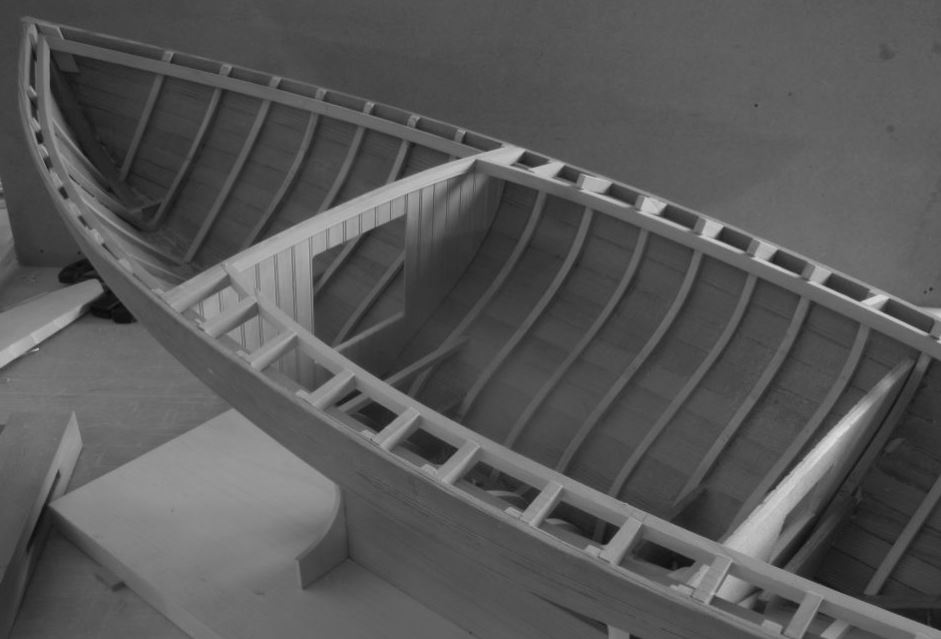
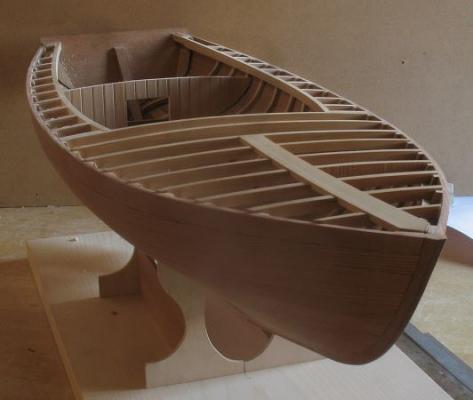
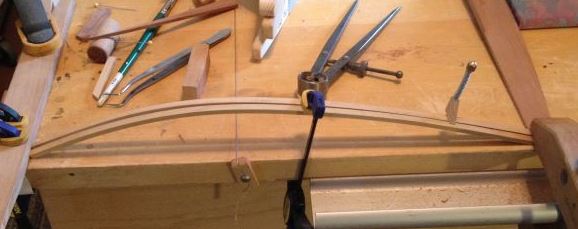
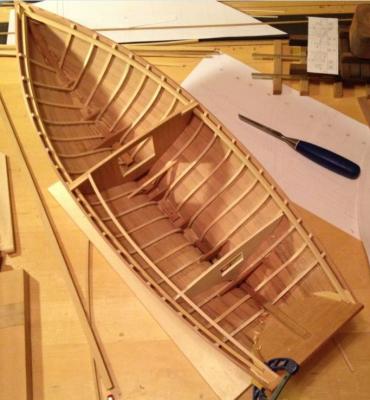
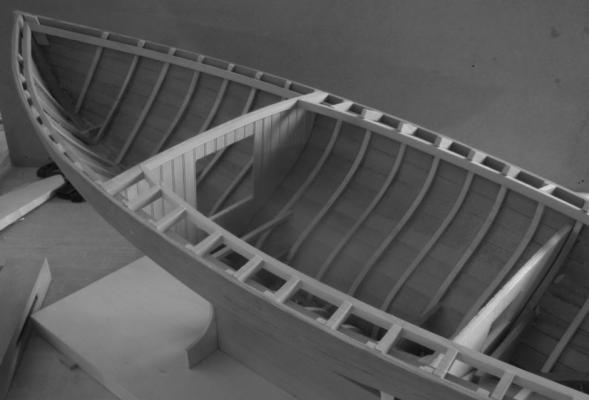
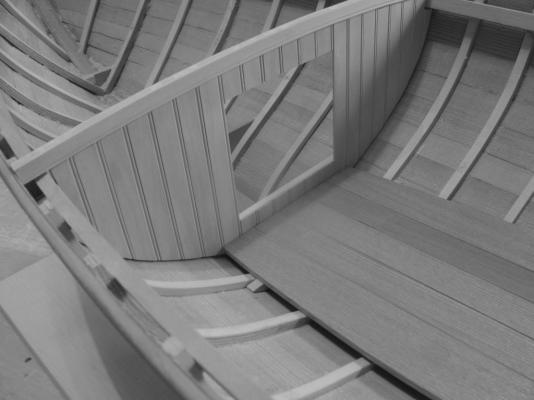
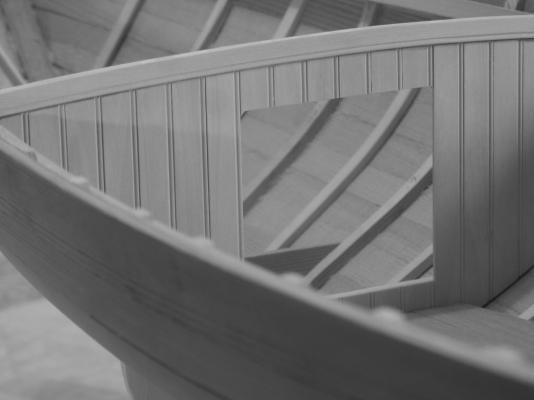
Thanks for the comments and likes. build part 25 The first picture shows the bending of the coaming stringer being, I used the heat gun instead of the steam box for this and it worked quite nicely and was much faster than the steaming. Next the stringer is placed and held with the single clamp there was no spring in the piece and it located as I had hoped. Once this is glued and all the short cross pieces added I will add some dowels to give added strength. The short frames are now glued in place on the port side, and being prepared for fitting on the starboard. Finally they are sanded ready for the dowels, then the deck. Michael
-
ancre La Salamandre by tadheus - 1:24
michael mott replied to tadheus's topic in - Build logs for subjects built 1751 - 1800
Nice work with the chisel Paul Michael -
ancre Le Fleuron 1729 by rekon54 - 1:24
michael mott replied to rekon54's topic in - Build logs for subjects built 1501 - 1750
More excellent eye candy. Michael -
Looks like you have the metalwork sorted Jack, the spars will be up soon enough. Michael
- 203 replies
-
- 3
-
-
- artesania latina
- marie jeanne
- (and 1 more)
-
Piet, pity about the broken drill bit, did it break just as it was about to come through? if that was the case it might have been because the drill has to be modified a little to drill through brass. so that it does not grab. With brass the tip needs to be toughed with a stone to put a tiny flat so that the drill bit is prevented from digging in as it cuts. Also some brass is gummy and does not machine well. Michael
-
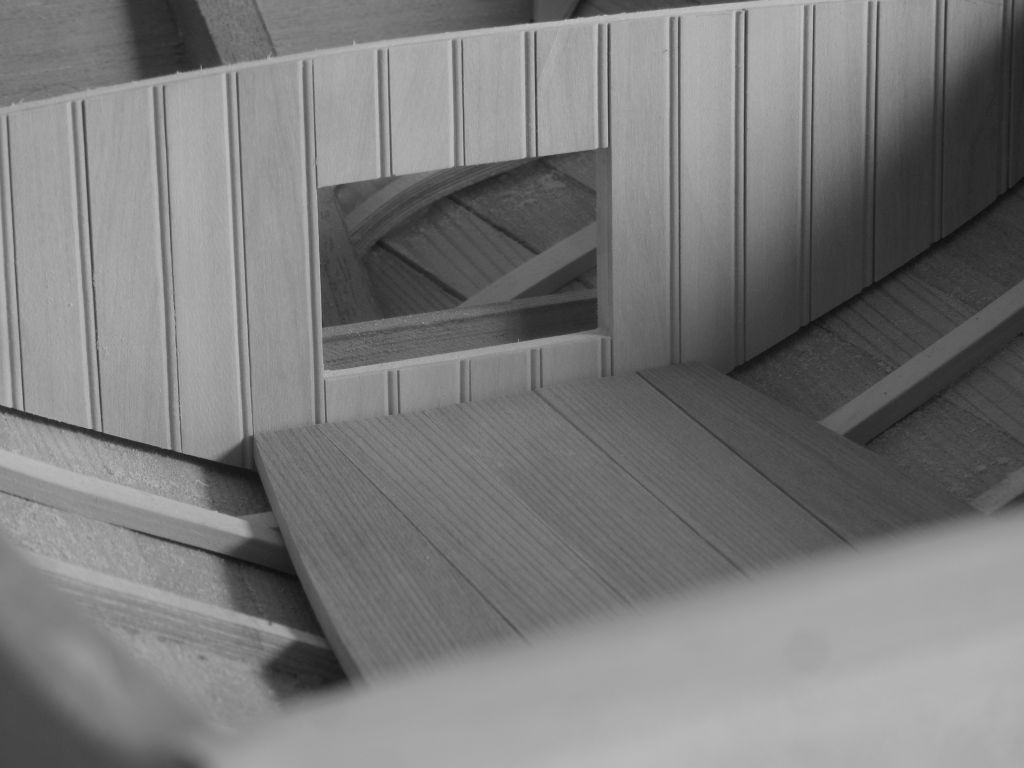
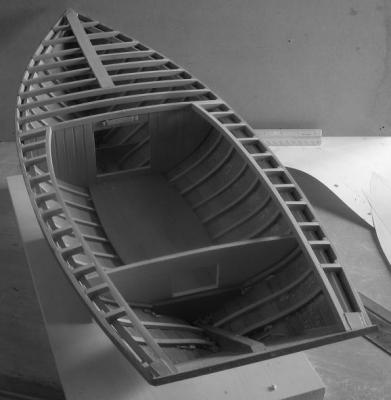
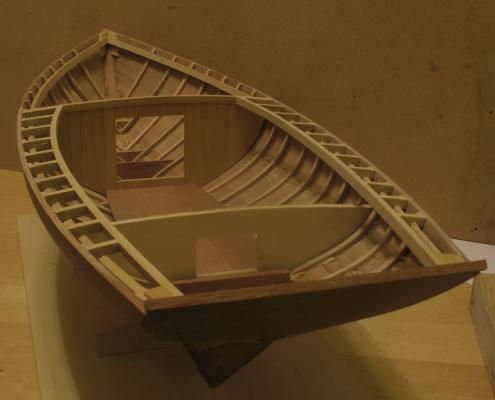
I like what you have done with the floor and seats, I think that a more simple door to the forward compartment might match the rest better. A small grill or louvres perhaps, But that is my thinking and it is your boat you need to be happy with what you build. Michael
- 258 replies
-
- 5
-
-
- buzzards bay
- herreshoff
- (and 1 more)
-
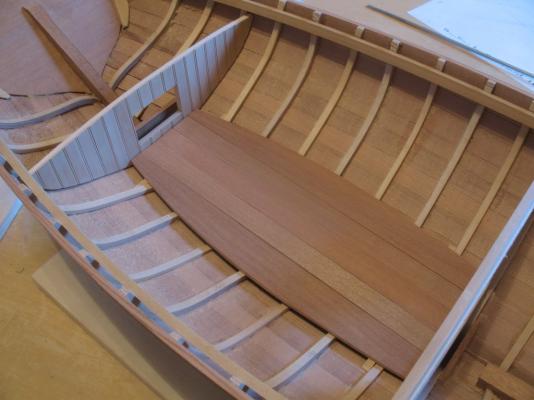
Thank you all for the kind remarks and feedback. build part 24 I am going to keep the interior as contrasting varnished woods regarding the benches floorboards and coamings and decks The forward bulkhead and the lazaret will be the Costello and the floorboard are redwood as will be the seats the coaming will be mahogany and the deck planks Costello with a mahogany toe rail. I will make the floorboards removable with some sort of brass (bronze ) fixings. Michael

-
Ed yes pewter would be a great metal to use for multiples if small parts basically being mostly comprised of tin with copper and or antimony as hardeners, it seems that blackening pewter is quite a common practice. Michael
- 3,618 replies
-
- 4
-
-
- young america
- clipper
- (and 1 more)
-
Ed if you make the waxes for the lost wax method then you could talk with a jeweler who does this sort of work they would be able to advise on the best way to assemble the tree of wax masters or models these are small enough Items that a number of items could be cast at the same time. Unless you are able to melt bronze you would need to have it done by someone with the right equipment, that said it is in the preparation of the investment that takes all the time. If all the "foundry" had to do was pour the metal, the costs would be substantially lower. You could probably cast quite a few at a time using the silicone molds to make the wax investments that you assemble into the tree. it all sound rather complicated but actually the major work is in making and developing the the initial set ups then it gets easier. the thing with the wax masters is that the wax is much easier on the silicone rubber moulds which can then last much longer. Michael
- 3,618 replies
-
- 9
-
-
- young america
- clipper
- (and 1 more)
-
Gerald, the tooling for this project has already given me a few ideas, one of the great yacht designers of the 19th century and early 20th was Francis Herreshoff, His break through yacht Gloriana built in 1891 this yacht used steel frames with a layer of double planking. your tools for making the frames of of the Falls of Clyde look like the sort of tool that would be perfect to make the Herreshoff frames. I might just have to copy this idea. Again such a pleasure to follow your project both here and on your own site. Michael
- 281 replies
-
- 3
-
-
- falls of clyde
- tanker
- (and 2 more)
-
I finished off the evening by roughing out the main beam across the bulkhead. I used the same tool to create the reveal I got the idea from the replica Gill Smith cat boat Michael
-
Definitely a light touch Ed, and a very elegant solution to a complex looking flywheel. This is the sort of item that i would want to make a rubber mould from to make waxes for a lost wax casting. Michael
- 3,618 replies
-
- 7
-
-
- young america
- clipper
- (and 1 more)