HOLIDAY DONATION DRIVE - SUPPORT MSW - DO YOUR PART TO KEEP THIS GREAT FORUM GOING! (Only 36 donations so far out of 49,000 members - C'mon guys!)
×


michael mott
-
Posts
5,198 -
Joined
-
Last visited
Content Type
Profiles
Forums
Gallery
Events
Everything posted by michael mott
-
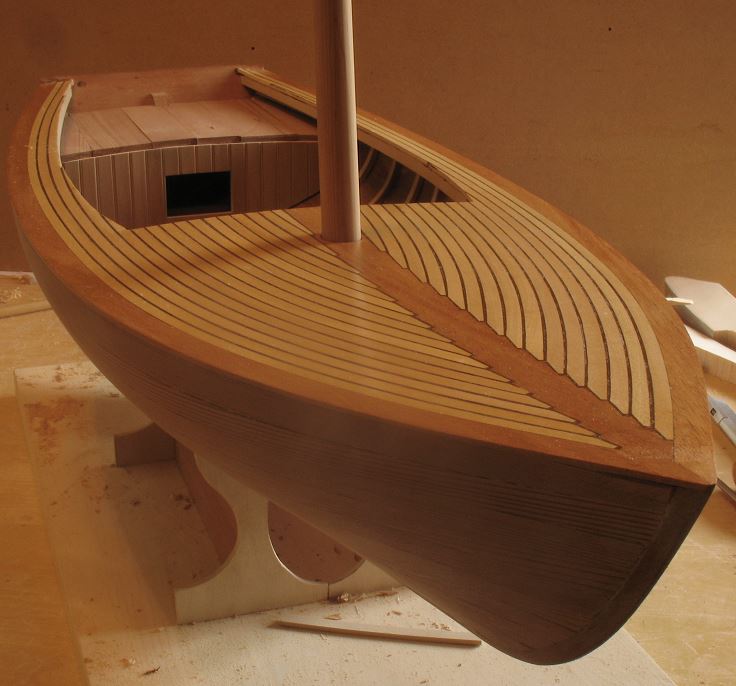
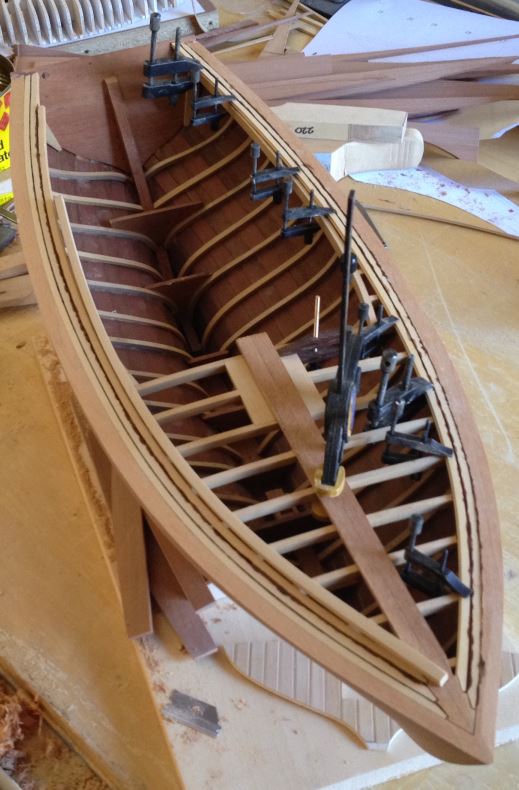
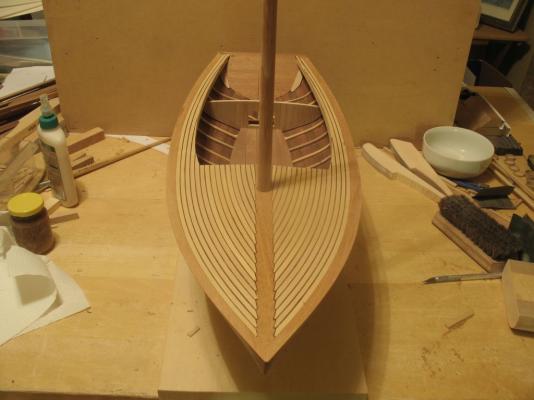
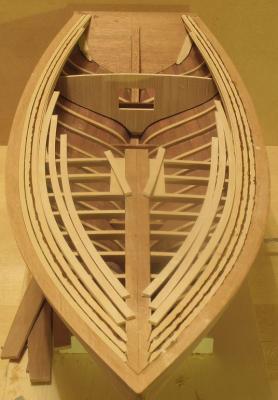
 build part 36 I have begun working on the aft deck substucture, I will build this deck as a sheet that can be finished off the boat then glued in. I have also lowered the aft end of the floorboards. I am thinking of having some gentlemanly fun with the small lazarette For now I am going to leave the deck with a couple of coats of Tung oil. Michael

-
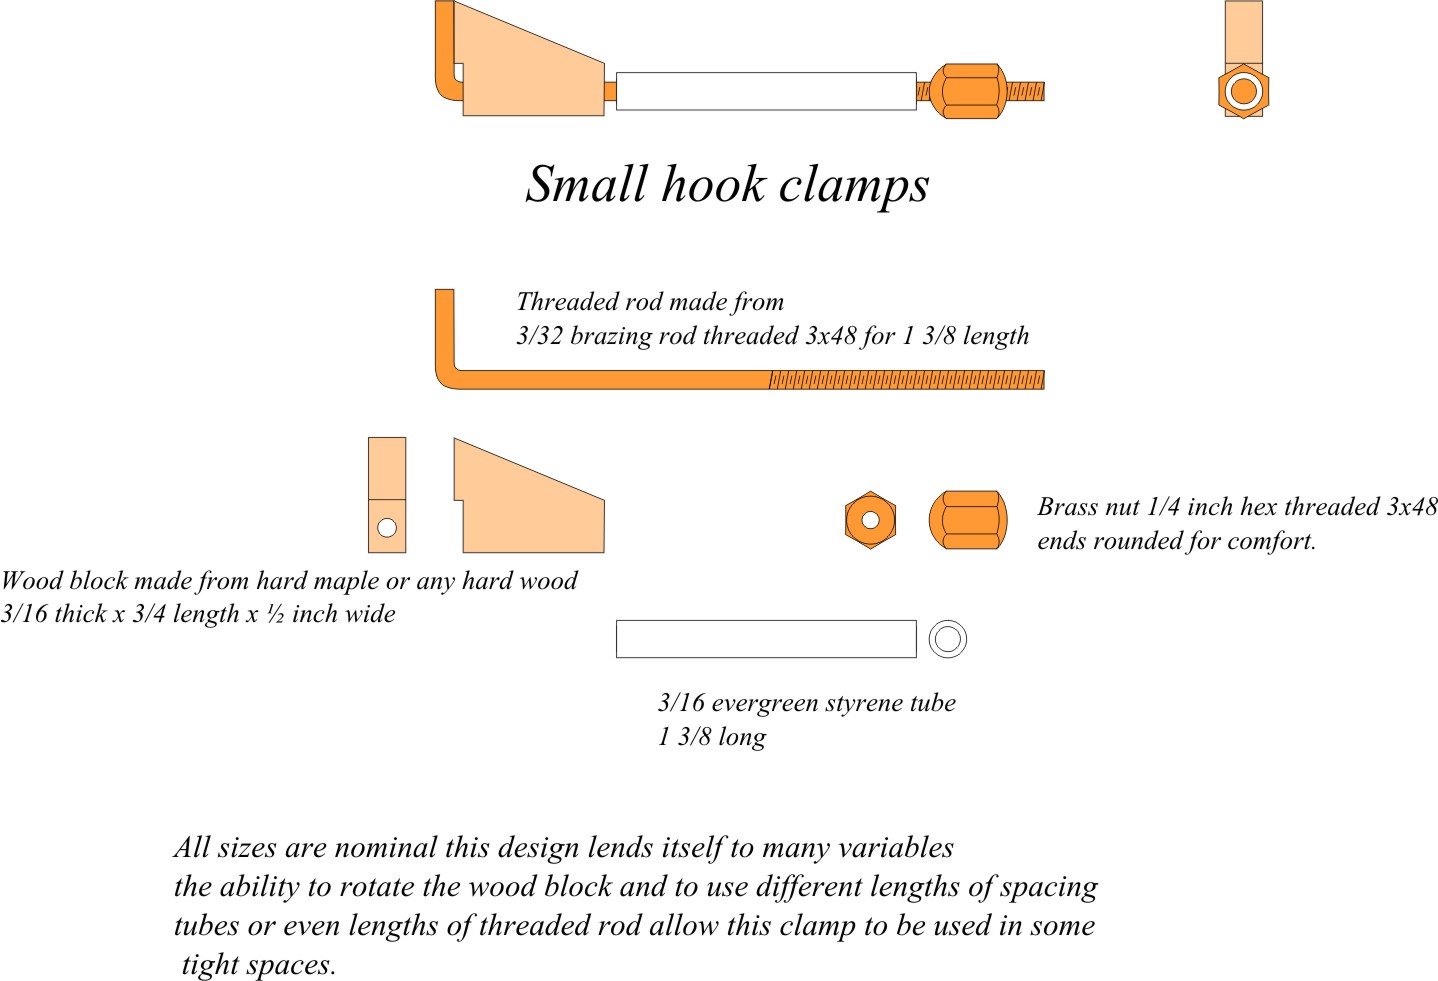
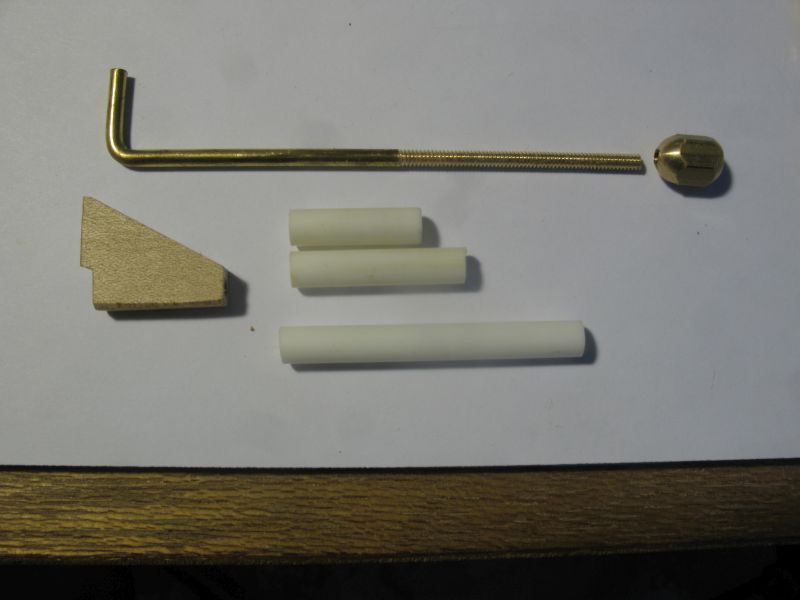
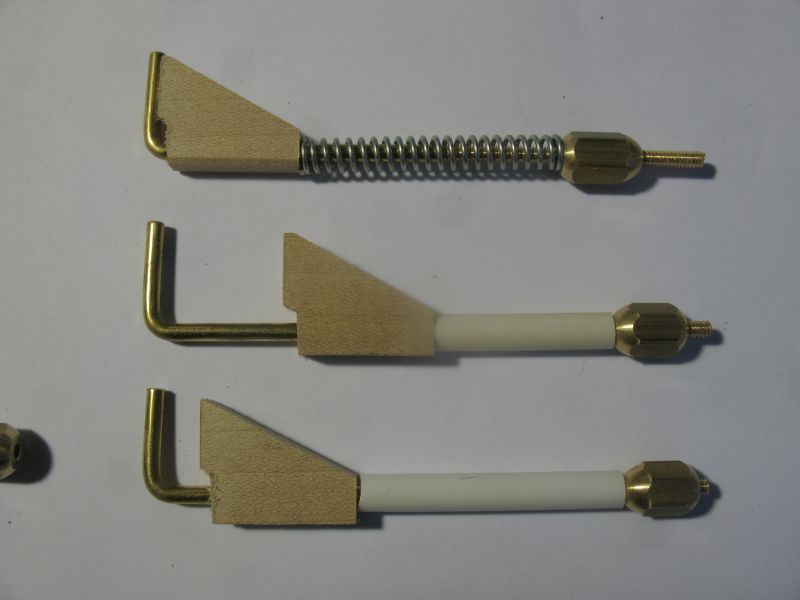
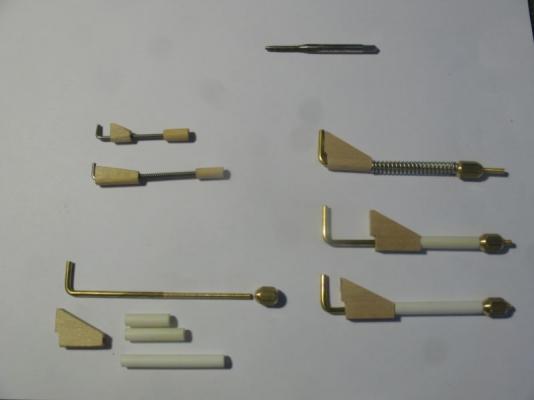
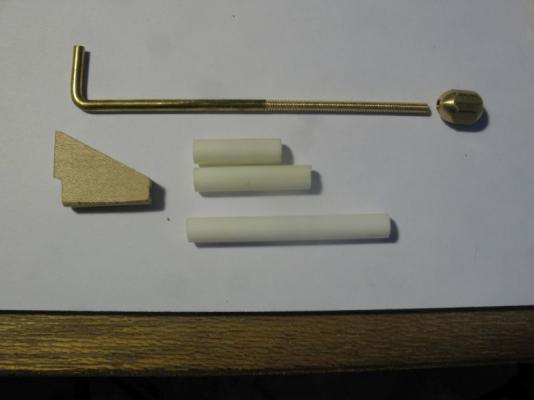
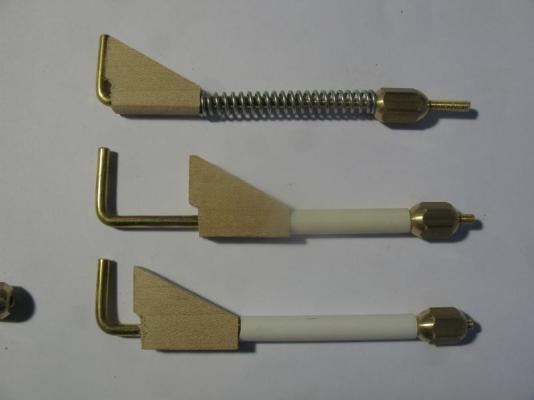
Thanks everybody for the comments and likes they are appreciated. Ed thanks for the tip regarding the shellac I shall see if I can locate some the next time I am in the city. I am pleased that you like the clamps. here is a drawing of the ones I have made they can obviously be fabricated to a lot of sizes. small hook clamps.pdf The smaller ones in the top left will be followed up with some more using 2x56 threaded steel rod or even 1x72. The spring version which I made first is not as useful, and more difficult to place I found. I am converting them all to the spacer type. I had thought about using some square rod in order to keep the rod aligned with the wood block, however in some cases it would be difficult to get them into tight spots. the ability to rotate the block adds a lot of flexibility. and with some different spacers, The hex brass stock is rounded on the ends to be easier on the fingers. Michael

-
Congratulations on your new family member Hakan. A great Idea regarding straightening up the Apple lumber as well. Michael
-
Stunning workmanship on the flywheels, I am curious about the difference with the fabrication of the boiler wall and the doors, I see that you build the doors as solid integral pieces, is this because of a definitive lack of actual evidence for their design or to just act as representative elements? Michael
-
Absolutely beautiful workmanship, I look forward to the next update. Michael
- 641 replies
-
- 6
-

-
- greenwich hospital
- barge
- (and 1 more)
-
Druxey, you are now pushing the bar very high indeed. I can see that I am going to need to sort out a small saw of some kind. Michael
- 641 replies
-
- 6
-
-
- greenwich hospital
- barge
- (and 1 more)
-
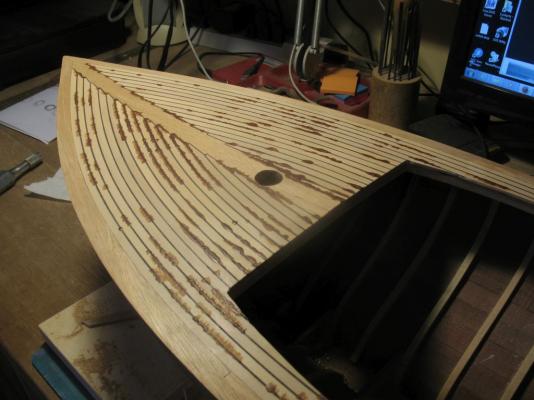
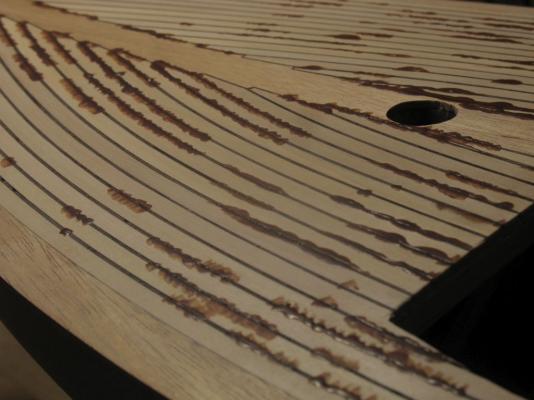
Thank you all for your votes of confidence. Mark this is what I mean I had hoped that by spreading the thickened glue I would avoid having to go back and fill the low spots and pinholes. In order for the deck to take a good final finish it needs to be "flat" and not looking like an open grain. Photographs can be brutal or deceptive in this case they were deceptive. More rounds of scraping seem to be in the cards. Michael
-
When I saw the finished vents Nils I had forgotten how they began life, you really are a master at this stuff. Michael
- 2,625 replies
-
- 5
-
-
- kaiser wilhelm der grosse
- passenger steamer
- (and 1 more)
-
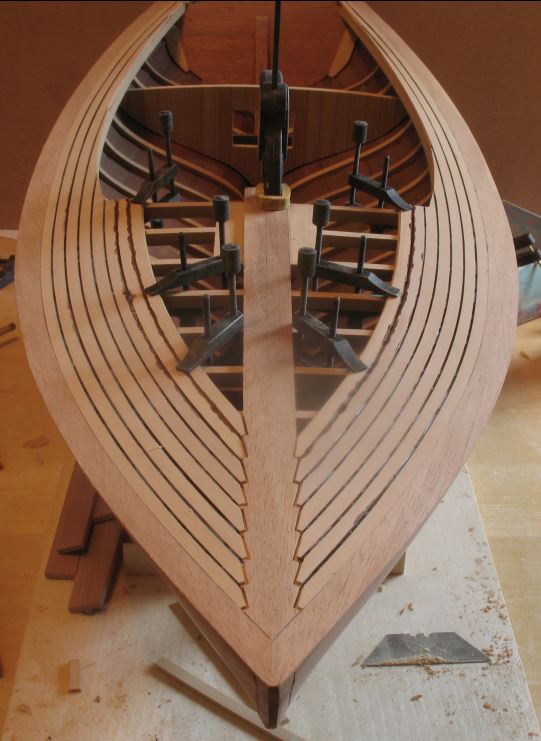
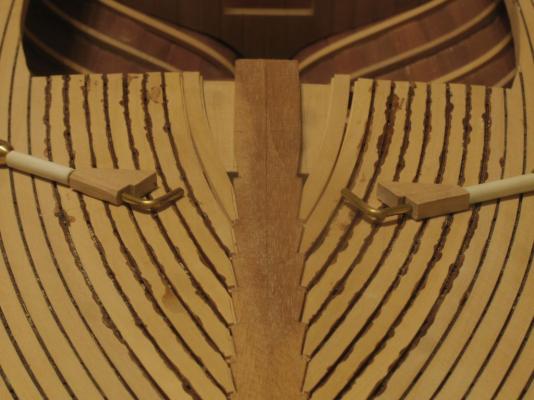
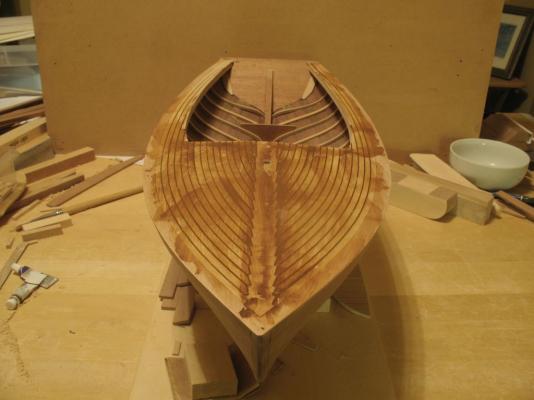
Thank you all for the likes. Build part 35 I modified some small clamps that I made a while back, I took out the spring and added a short length of styrene tube, this enabled the clamp to close with a degree of pressure not easily available with the springs. the small diameter of the bent brass part allowed me to get into a pretty tight spot. After the planks were glued I gave a leveling sand ready for the filling. next I thickened up the coloured glue and spread it over the surface as if I was grouting tiles...... I won't do that again It was really hard scraping this all off my thumb is sore from the pressure. It looks OK not quite as good as I wanted... I am thinking about the next move.... Michael

-
Good health to both you and Pam John, it is only when we are not functioning at 100% that we realize just how complex life is. Michael
- 745 replies
-
- 3
-
-
- francis pritt
- mission ship
- (and 1 more)
-
Druxey I am curious about your method of gluing such delicate planks. The inside looks as clean as the outside, are you thining the glue down and then cleaning up with q tips etc? The hull does look exquisite. Michael
- 641 replies
-
- 6
-
-
- greenwich hospital
- barge
- (and 1 more)
-
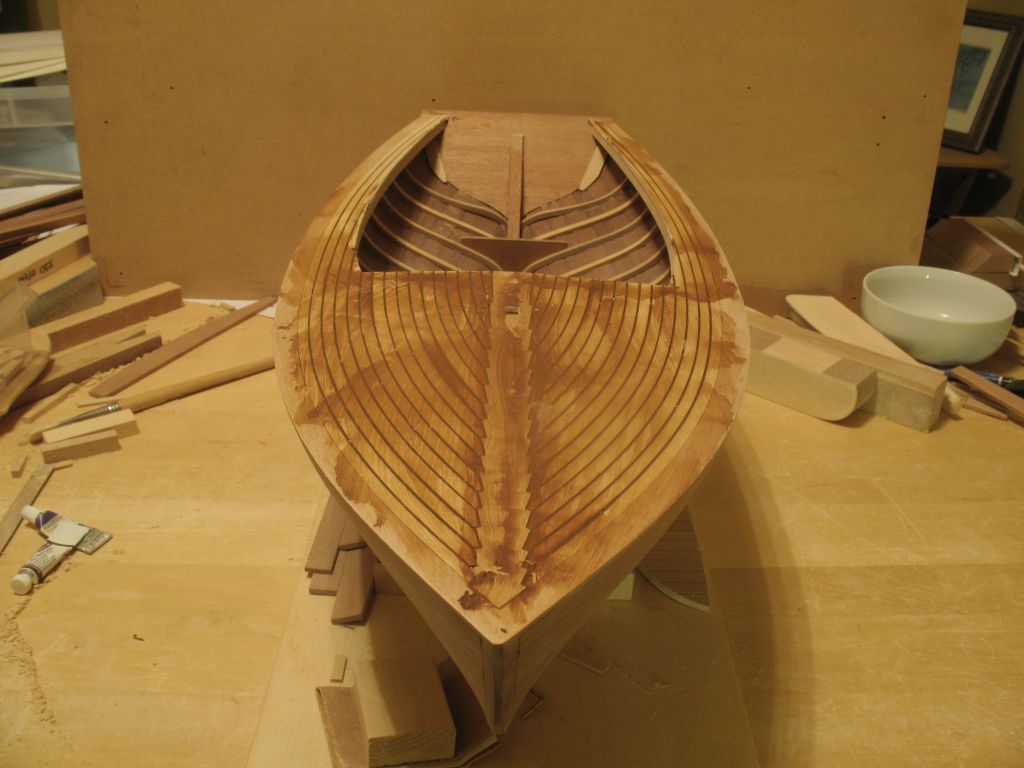
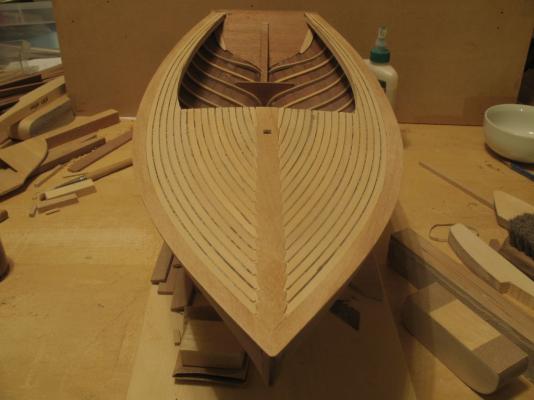
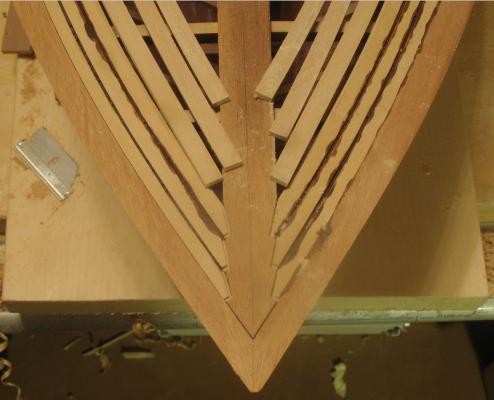
Thanks for all the fine comments and encouragements. Build part 34 The cockpit area planks have been trimmed to withing a 1/64 of the cockpit stringer and the longest planks cleaned up a bit. Now the planks are getting shorter and will go a bit faster. All of the billets have been curved ready for splitting. gluing progresses Something I have been thinking about is to finish gluing all the forward planks including the king plank then do a preparatory sanding. Next using a razor blade like a putty knife and forcing a thickened glue into the remaining space for the caulking. I was wondering if anyone has thickened up the glue with the Costello dust and how it responded. Michael

-
My personal choice would be for the flat roof. not only is it more nautical bit also gives you many more options regarding other activities like fishing or whale watching, or even watching Americas cup racing. Michael
-
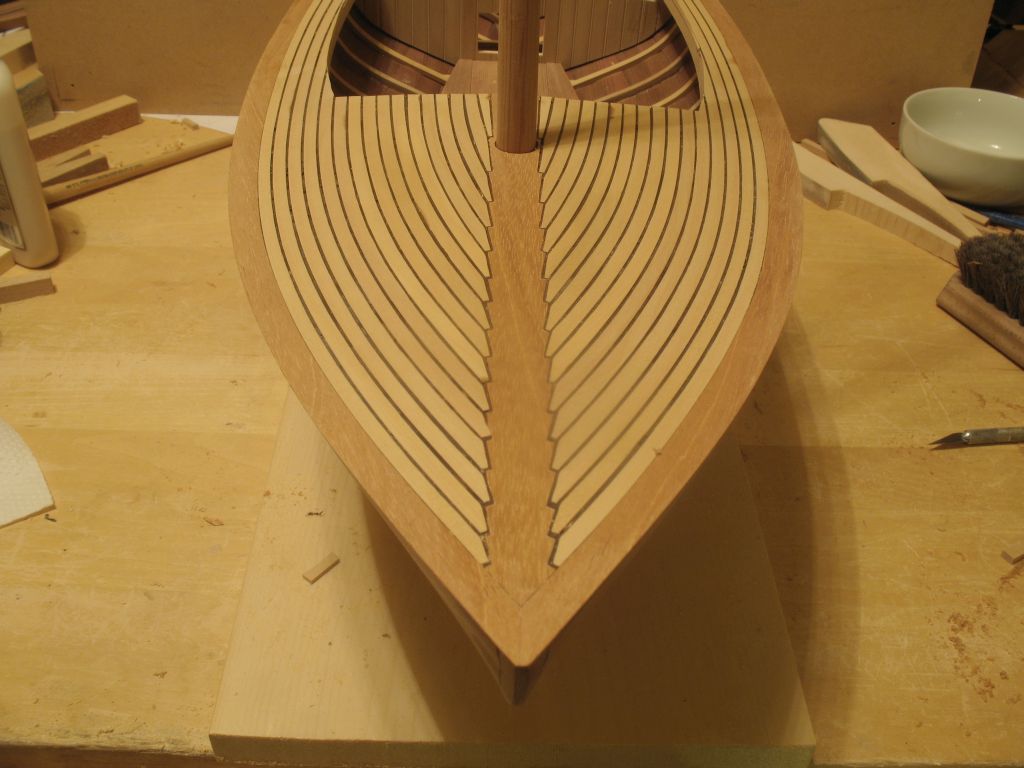
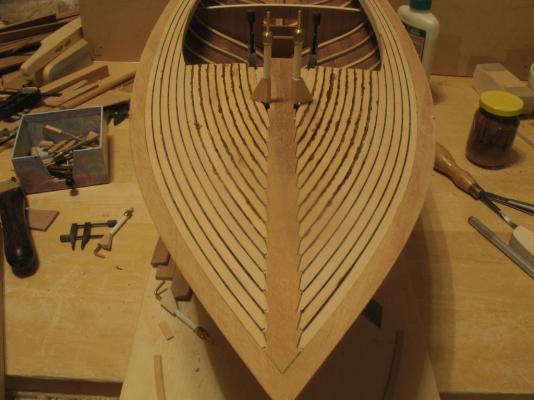
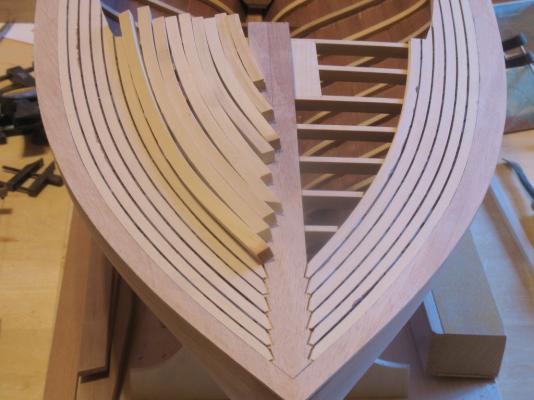
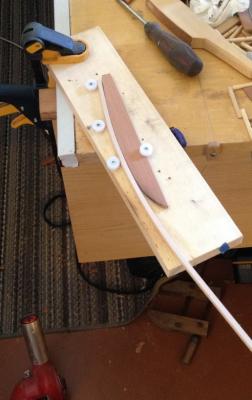
Build part 33 The deck planking continues, I am closing in on the much shorter planks so they ought to go a little more quickly. I am also getting more familiar with the bending of the square planks now, there is no substitute for practice. I set up a better method than the original almost free form method. I am now using a basic french curve type former that allows for a far more controlled bend. a scrap of redwood and some nylon buttons held on a short piece of pine. Ready to split. The three longest planks are now glued so the pace should pick up a bit now. The minor adjustments to the split planks are very easy to make now with the new bending jig. This is done after I have scraped in the rebate. I am setting the notches individually in pairs as I move toward the mast the king plank is not fixed and can be lifted off the make the notches which make life a little easier that doing it on the hull. Michael

-
Mark, thank you for the photograph, your picture confirms what I was thinking intuitively. I used my 20 foot yawl masts as a rough guide, this one being a taller one is a bit heavier proportionally. Thanks to all for the comments and likes Michael
-
Druxey, such graceful lines and workmanship, you make it look so easy. Michael
- 641 replies
-
- 12
-
-
- greenwich hospital
- barge
- (and 1 more)
-
Dion, Yes a speedy recovery to your wife from me as well. the various skill sets that the members of this forum possess is amazing. Michael
-
Jon, My own view would be to see how it sails as it is before making any changes, just don't go out in a force 10 Michael
-
Jon, sounds like a plan. I just told Judy that our next big holiday will be to the east coast. As soon as we sell our place and move to a smaller place we will also do the trip. Michael
-
Thistle, thanks for the comment and for visiting my build. I have not had a chance to visit the boat yards in the area, however back in 1986 I did visit the east coast. I purchased a small dingy kit from Laughing whale in Bath, we went us as far as Booth Bay Harbour, to visit a friend Christopher Williams who wrote "Craftsmen of Necessity" his family owned a small island and there was a single house on it that was built by a shipwright in the 20's The house was wonderful and was tight as a drum. His father or grandfather was one of the first recipients of the Pulitzer prize and the house had a writing station at one side of the great room looking out over the sea. I have visited the online Herreshoff Museum and spent a great deal of time looking at drawings and images of the Herreshoff heritage. Gill Smith who designed and built Cat boats is one of my other favourite builders and was a contemporary of Nathaniel. Michael
-
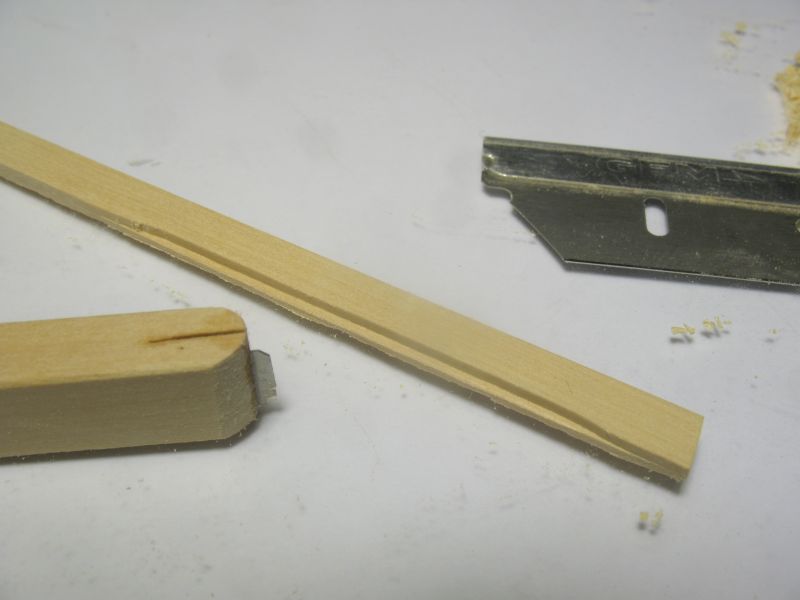
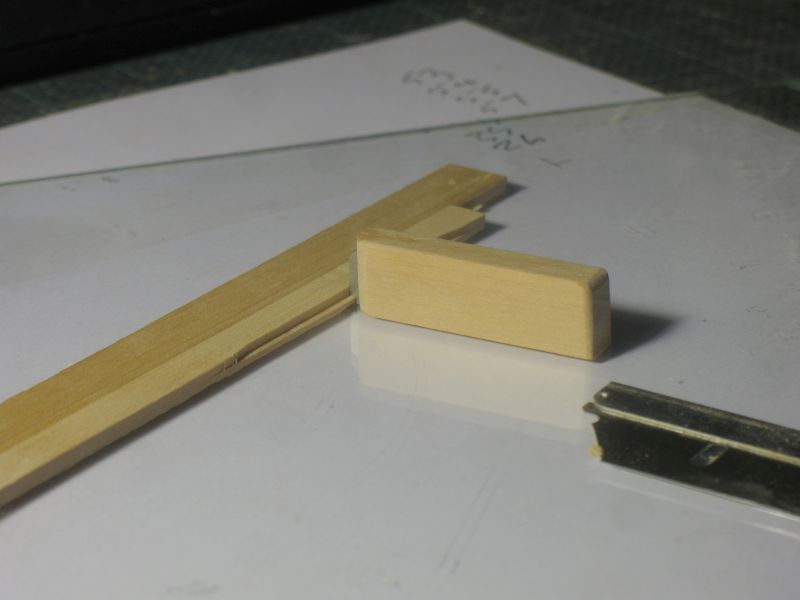
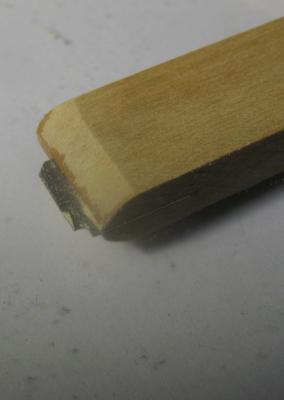
Druxey ,Pete, Thanks, also to those who added likes. Not really wanting to make another cutter because the way I made the first one would be a little tricky replicate another exactly the same. I managed a salvage operation and made a small handle for the broken piece I glued it into a small piece of Costello and have now decided that this will be a good way to make these little tools in the future. Back to the scraping. Michael


-
It just occurred to me that my own little steam box was not new at all I had seen yours Hakan and forgot about it then built mine patting myself on my own back when it was your Idea all along. Credit where credit is due. Michael