michael mott
-
Posts
5,200 -
Joined
-
Last visited
Content Type
Profiles
Forums
Gallery
Events
Everything posted by michael mott
-
 Thanks everyone for your well wishes for Judy. All is well now. I have to hunt through my scraps of thin lexan for the "glass" in the skylights, I did have some 1/16th cell-cast acrylic that was left over from some architectural models. The interesting thing about cell-cast is because of the nature of the manufacture it is not super consistently even as far as thickness goes varying about 25 thousands over the sheet in random ways. we used to call it thick or thin whatever the main denomination was. The reason I used the cell cast is because It cut much more cleanly without gumming or fracturing the way the extruded acrylic did. So I need to find a bit of thin 1/16th failing that I will buy some new 1.5mm lexan Michael
 -
Pete watching your build is very inspiring, I can see how things are supposed to look. Michael
- 258 replies
-
- 5
-

-
- buzzards bay
- herreshoff
- (and 1 more)
-
ancre Le Fleuron 1729 by rekon54 - 1:24
michael mott replied to rekon54's topic in - Build logs for subjects built 1501 - 1750
Amazing workmanship simply amazing. Michael -
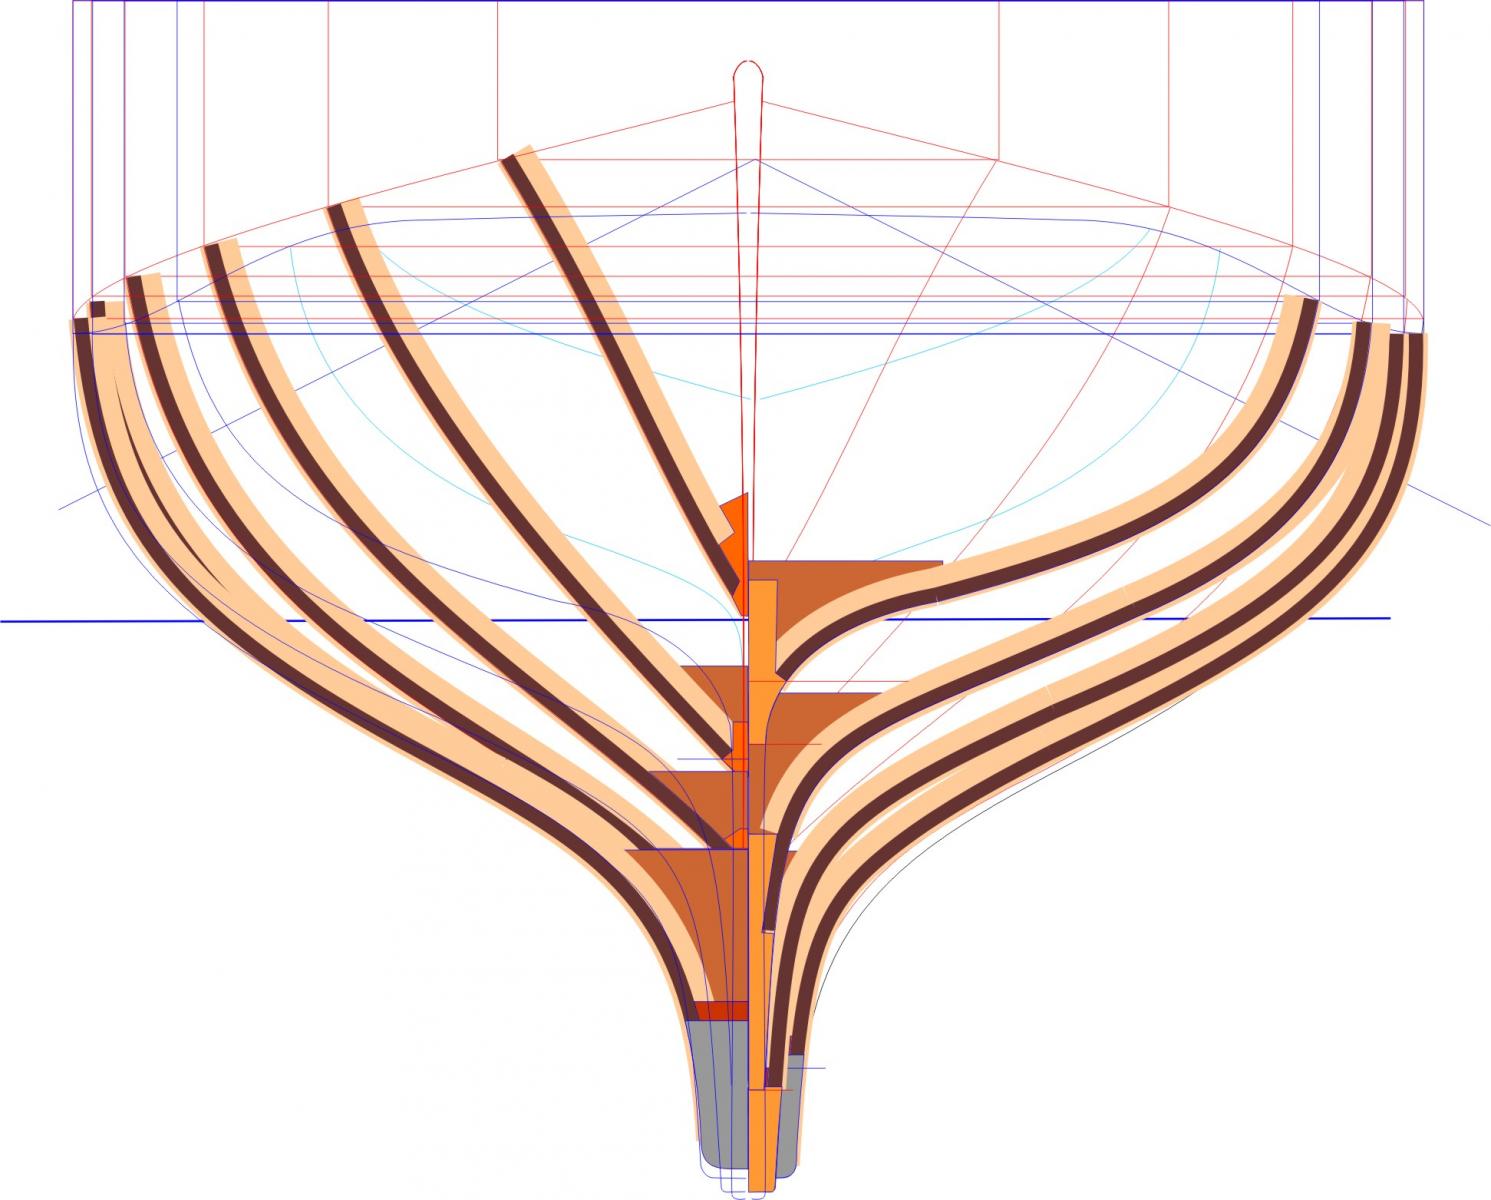
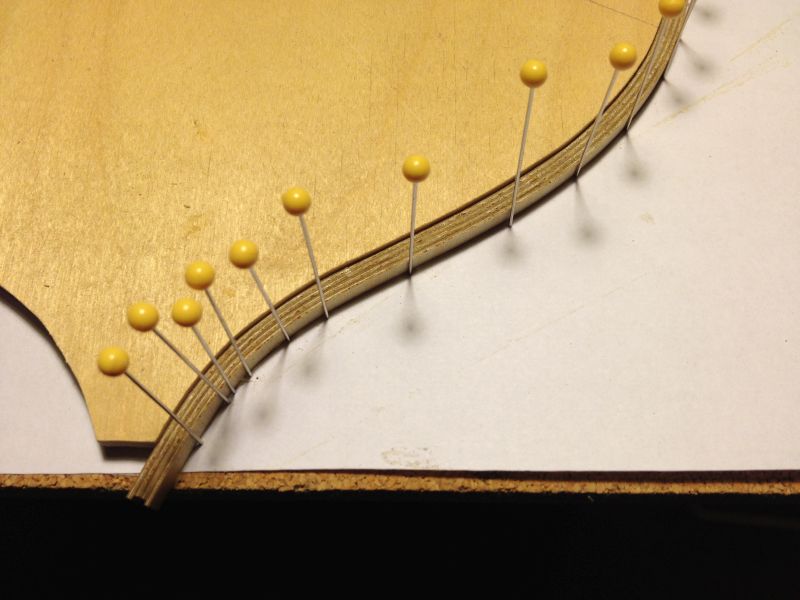
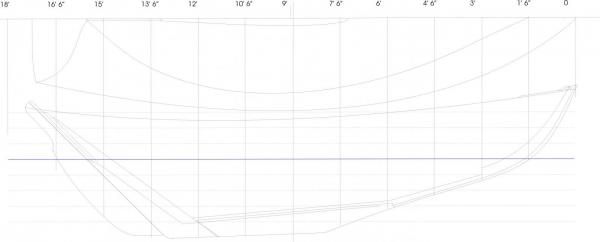
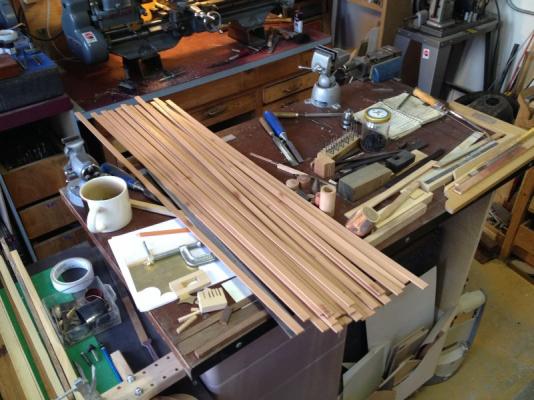
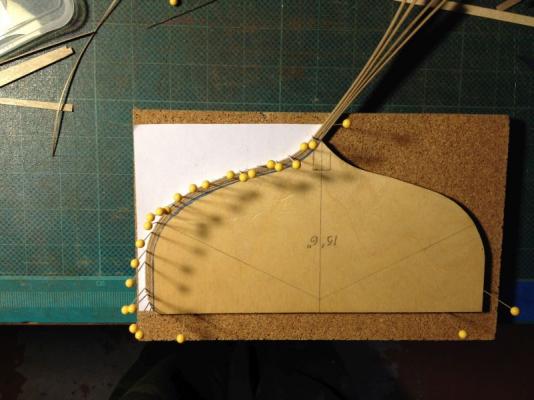
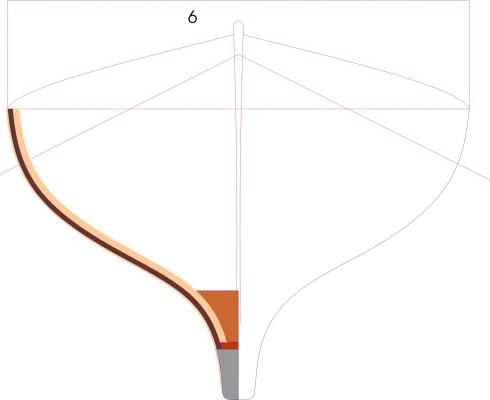
Disclaimer This is all Pete's fault. Because I already have too many builds on the go I thought why not another one. I know there are a few others here who merrily go about building a few boats/ships at the same time one of them shall remain nameless but we all know who it is. Pete has already done enough waxing eloquently about the merits of the Herreshoff lineage of boat designs so there is no need for me to go into any great details here except to say that I completely agree with him on the elegance of the Herreshoff lines no matter what size he designed. Build Part 1 Pete sent me a printed copy of the drawing he is using for his new boat it was already printed at 1 1/2 inch to the foot. (thanks Pete) I scanned it in order to trace it for developing some detailed model plans the lines plan is 50% and the body plans are 100% I spent a lot of time studying the various images of the 14 on the net and was particularly drawn to the Port Hadlock WA Boat school photo stream There are a lot of pictures of the 14 under construction and it is this version of the hull that I intend to model as far as the main structure of the hull. I have chosen this one because of the clarity of the construction methodology visible in the pictures. Unfortunately there are no pictures that I have yet found of the beginning of the Port Hadlock boat which would have confirmed a few things about how they prepared the frames and if they used a set of mold forms with ribands to prepare the bent frames, but I suspect that is the method that was used. I used corel draw this time instead of Autocad because I am more familiar with all the curve functions in corel. I used the line width function to shape the frames instead of drawing the outlines of them and this seems to be working well. This hull will be a test of my skill at doing a proper planking job, I have learned so much since the first post on the Pilot Cutter (still planning on sailing her next summer) where I basically did not have a clue about what I was getting into and built that hull as if it were a strip built canoe. I have chosen 3/4 inch thick planks for the hull (3/32 inch) and wondered a while about what wood to use. I want to have the planks varnished and not painted (visions of Chucks planking job on his cutter for the clarity and elegant execution) as a goal but with a more reddish colour. I remembered the redwood panels from the salvaged garage door and did a little re-sawing to get enough planks for the task. stripped up to 3/32 x 9/16 (3/4 x 4 1/2) Next I tried to bend some 5/32 square stock by all the different methods that I have read about on this forum and snapped most of them (what am I doing wrong?) I remembered that I had a 5 foot by 5 foot sheet of 1mm birch aircraft ply so I cut some 3/16 strips up on the paper cutter, it worked very well surprisingly. I also printed and traced out one of the more challenging mould forms to add the frames to. Next I used the wide throat jewelers saw to fret out the mould to use as a form for laminating the rib/frame the material is 1/4 inch Baltic birch ply. The mold form was pinned to some cork covered homasote (at least that is what I think it is) and the 4 layers were laminated together. In order to cancel out any discrepancy from side to side I laminated two of the same side, I will cut out the middle of the mold to help with the clamping of the planks. This will now continue for the rest of the frames that will fit over the molds Michael


-
Hi Nils, Congratulations on the fine workmanship in completion of this ship,The pictures showing the cramped spaces below decks highlight the difficulty that serving on these ships must have caused the sailors in those days. Merry Christmas to you as well while I am here. Michael
-
The steam engines power output being dependent on the volume of steam, would also be dependent on the size of the firebox area to generate the steam which is hottest at the fire and the crown sheet, or in the case of a marine boiler like this one the ability of the hot flue gasses to transfer the heat as efficiently as possible without all the heat going up the stack. More boilers would also create more steam. A larger capacity of steam would allow for the engine to run faster. A fast fire is not necessarily the hottest so some dampening on the vents and stack to slow the flue gasses would also allow more steam to be generated. a constant trade off would also depend on the wood being burned, Drier the hotter it would burn. Seems counter intuitive but but I heat with wood and a fast fire does not put out as much heat it seems as a slow one does. Michael
- 701 replies
-
- 10
-
-
My own understanding of this was not to reduce heat but to clear the ash and clinker formed so as not the reduce the efficiency of the fire. Michael
-
Glenn really interesting following this build, I am enjoying seeing the way you are approaching the building of the engine. michael
-
Cutting Boxwood
michael mott replied to mikiek's topic in Building, Framing, Planking and plating a ships hull and deck
Mike if you do use a power tool make sure that the blade has very fine teeth or you might find that the wood will splinter. 1/16x 3/32 is pretty small, so also make sure that you have zero clearance on the support surfaces. Michael -
Denis the window glass looks great! Michael
-
Oh and this is a great way to make tiny "fiberglass" model hulls over a wooden form. mini production runs of things like lifeboats as well Michael
-
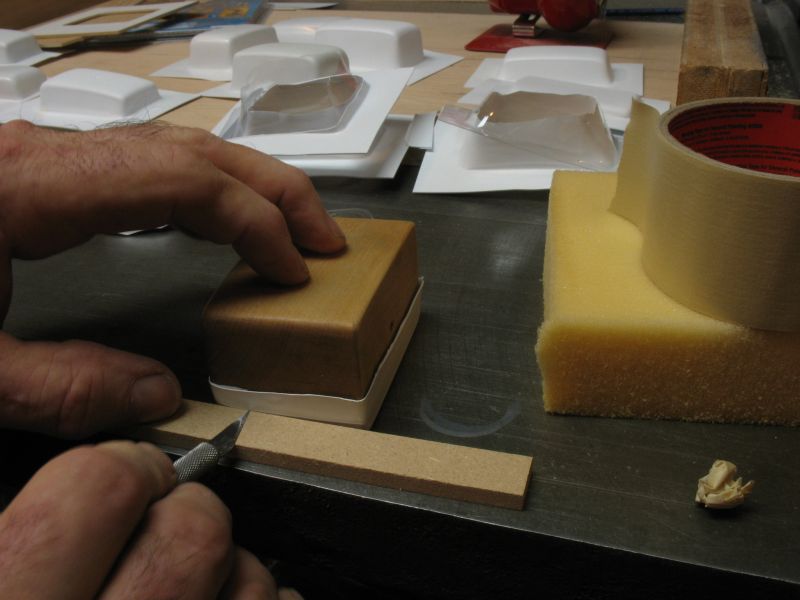
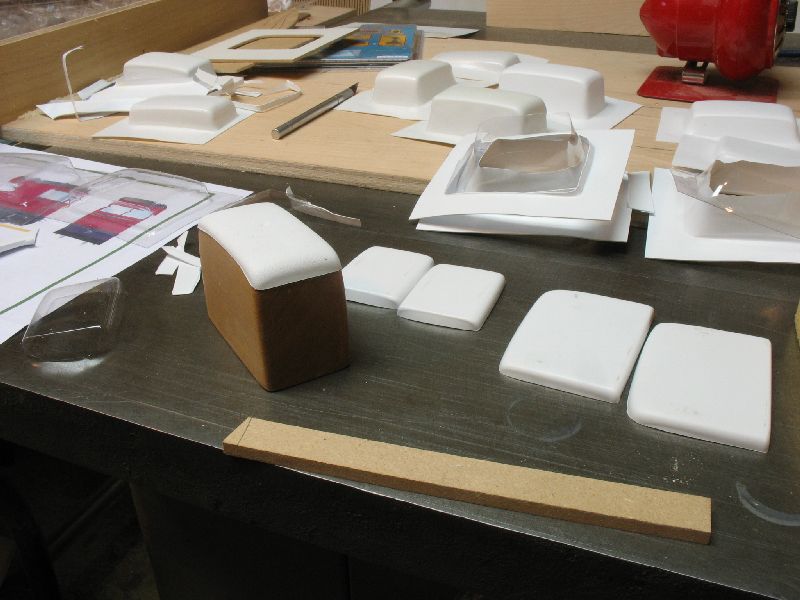
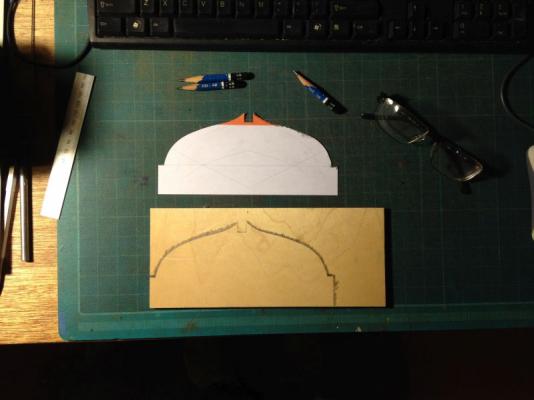
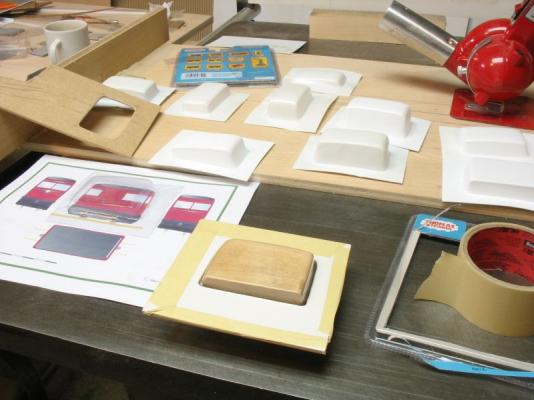
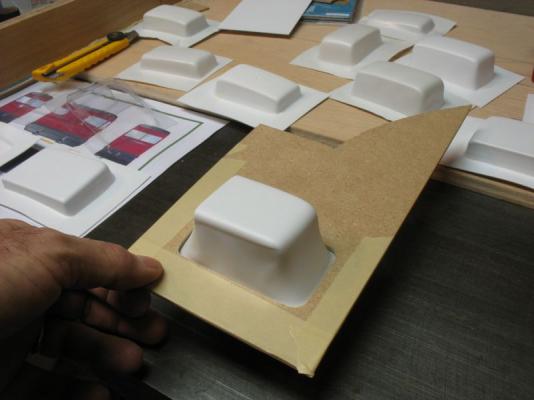
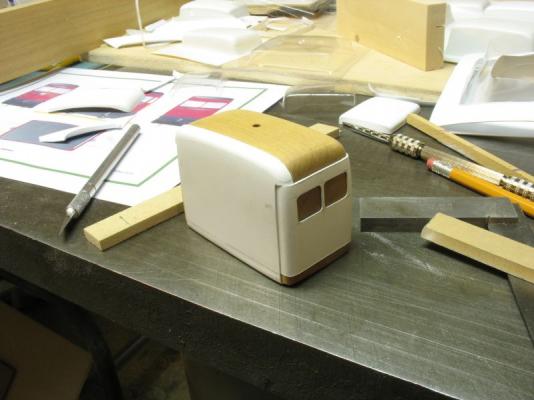
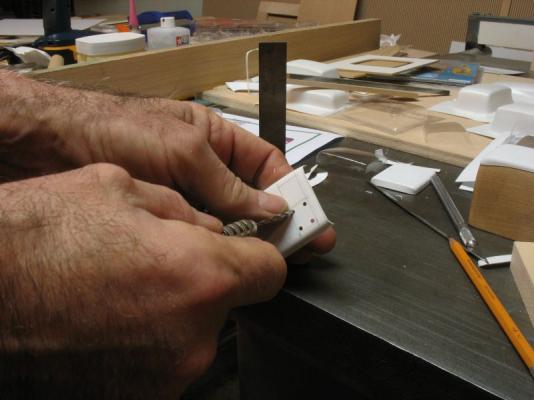
Hi Patrick here are a few pics that shows the process, you can use some old blister pack material which is clear or use some clear sheet styrene. These pics show a fairly deep draw or drape so your would be quite easy because you would not have to draw so deep. just enough for enabling a clean cut around the bottom as in the fourth pic first a former is made of the basic shape and a window of a thin material 1/8th inch ply or MDF is cut to hold the plastic which is attached with some masking tape. the frame or window with the plastic is then heated up so that the plastic is soft, this is easiest with a hot air gun but an oven will suffice if you don't have a hot air gun sometimes the plastic pulls away like this just stick a new scrap and do another like this with .015" styrene sheet or like ]this with some scrap blister pack sheet then you can cut off the section you need like this which gives you sections like these if you use the white you can fret out the windows like this and assemble the parts to form the whole I hope this helps. Michael


-
Cutting Boxwood
michael mott replied to mikiek's topic in Building, Framing, Planking and plating a ships hull and deck
Mike, a small jewelers saw is more than adequate for such small pieces. Michael -
Hi Pete Come to the dark side......... You know you want to michael
- 258 replies
-
- 11
-
-
- buzzards bay
- herreshoff
- (and 1 more)
-
Patrick the 3d mock up is certainly the way to sort out the different sections, I am sure that it will be amazing when you begin getting the shells done and get on with the interiors. Have you considered making a drape mould of each level then it becomes a reasonable task to mask out the windows paint it white peel the masking and then the interiors are free standing on the floors with the shells fitting over them. Michael
-
Ed you continue to raise the bar... or in this case lower it through the deck. Exquisite work on the whole windlass. My only thought about the method of manufacture is seeing the drill chuck used for milling. I know that safety has been mentioned in the past and that you are careful in this regard, if the chuck holding the mill is mechanically locked to the spindle I would have no concern, however if it is held with a taper as many are then milling puts sideways pressure on the chuck and I have seen one come off. Ask me how I know this. Michael
- 3,618 replies
-
- 6
-
-
- young america
- clipper
- (and 1 more)
-
Late as well, happy birthday Remco. Your ships wheel is one of the reasons that I think this forum is one of the best forums on the net. Not only is your work exemplary, but you took the time to show us how you did it. I would agree that your wheel is one of the cleanest crispest wheels that I have seen congratulations on both events. Michael
- 1,215 replies
-
- 6
-
-
- sloop
- kingfisher
- (and 1 more)
-
Pete I guess we all have a different concept of going slowly, to me you seem to moving at break neck speed... just kidding Very nice work on the insides, it took me a moment to realize that you had carved down the building forms next to the bent frames. I wonder how much of these same methods would work on a 1 1/2 inch scale model that you speak of doing. Michael
- 258 replies
-
- 4
-
-
- buzzards bay
- herreshoff
- (and 1 more)
-
Nice work on the mast Pete. I am always surprised by your skills with the x-acto knives, I would have used a block plane. A trick I learned recently is to have a sub sheet covered with some 120 grit paper then place my wood to be planed on it so that I can plane fine strips and tapers. the grit holds the piece without any fuss and doesn't seem to create any issues with the side facing the sandpaper. Also the set on the plane needs to be very fine. Michael
-
Mark congratulations on completion of this step only ....... more to go, you must be pleased! your step to start over seems like it was years ago now and was well worth the decision. Michael
-
Pete Very nice work on the ribs, How long are you soaking them in the Alcohol, and what type are you using, is it single malt or the other type It could add a nice patina to them. Michael
- 258 replies
-
- 7
-
-
- buzzards bay
- herreshoff
- (and 1 more)
-
Cutty Sark by NenadM
michael mott replied to NenadM's topic in - Build logs for subjects built 1851 - 1900
Hi Nenad, I do not have any other pictures except a couple inside where the figureheads were displayed. Michael- 4,152 replies
-
- 3
-
-
- cutty sark
- tehnodidakta
- (and 1 more)
-
Cutty Sark by NenadM
michael mott replied to NenadM's topic in - Build logs for subjects built 1851 - 1900
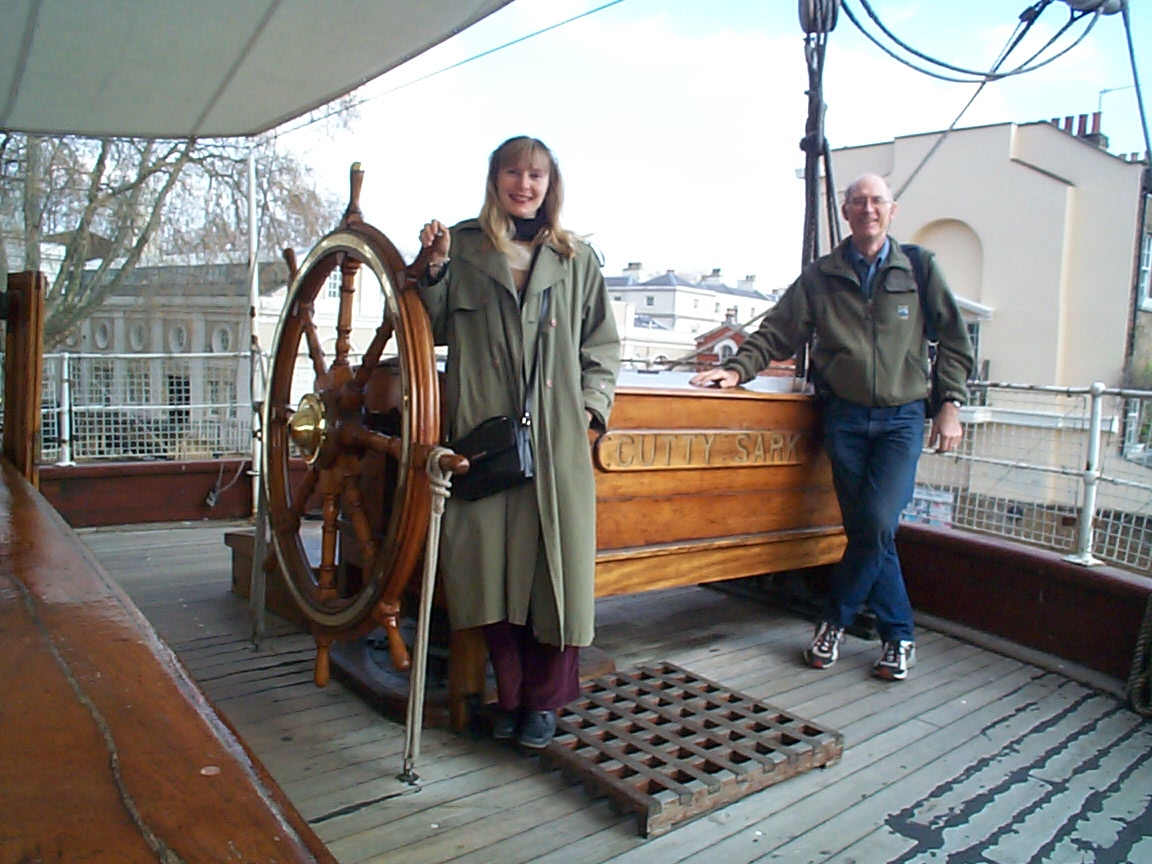
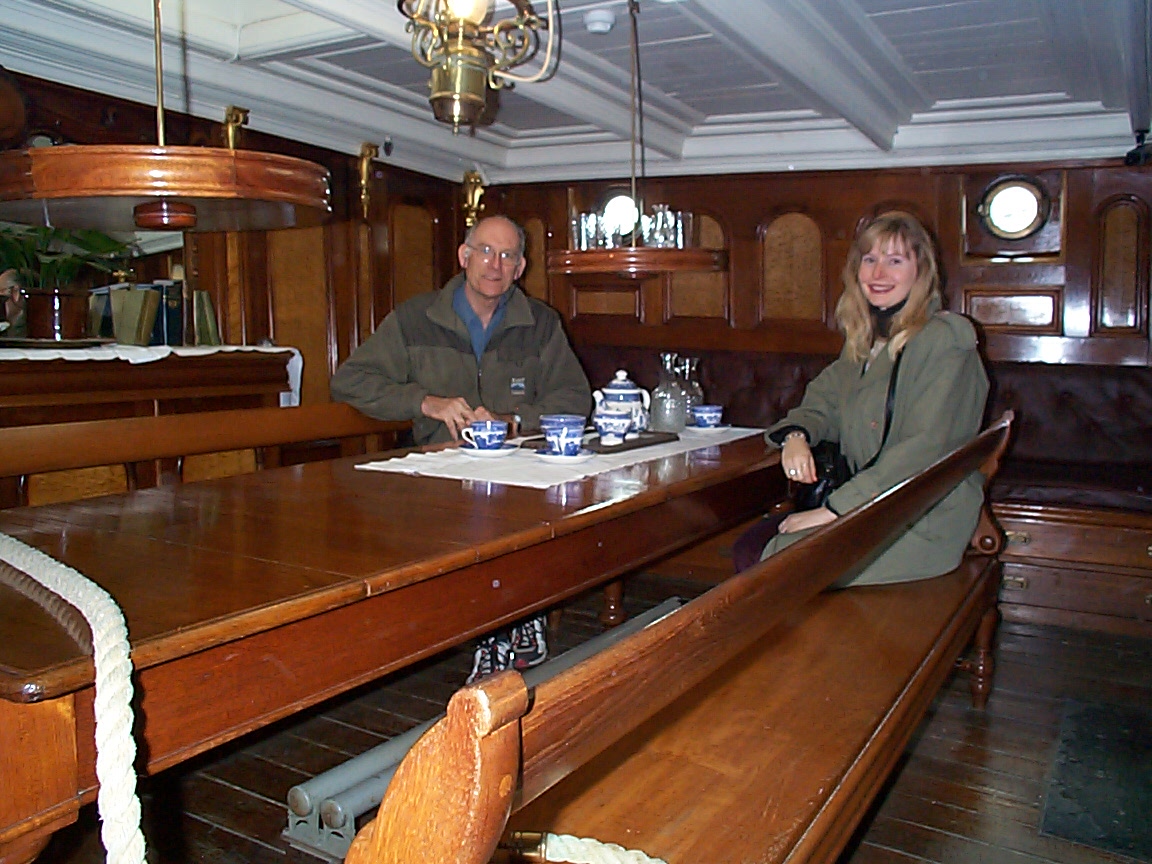
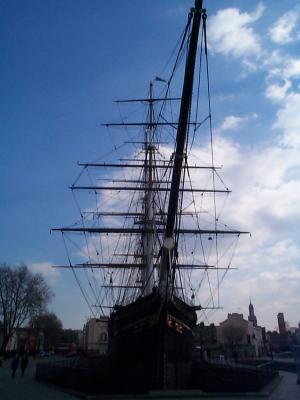
Hi Nenad I was looking for some pictures for family and came across these they were taken in 2003 before the fire A cover over the skylight Tea in the main cabin Judy steering us nowhere Michael


- 4,152 replies
-
- 12
-
-
- cutty sark
- tehnodidakta
- (and 1 more)
-
Cutty Sark by NenadM
michael mott replied to NenadM's topic in - Build logs for subjects built 1851 - 1900
Good to see that you resolved the skylights Nenad, Yes life's anniversaries do take us by surprise some days don't they. Michael- 4,152 replies
-
- 3
-
-
- cutty sark
- tehnodidakta
- (and 1 more)
-
Interesting idea for the window glass Denis. you could also tint it a little with some watercolour. Michael