michael mott
-
Posts
5,200 -
Joined
-
Last visited
Content Type
Profiles
Forums
Gallery
Events
Everything posted by michael mott
-
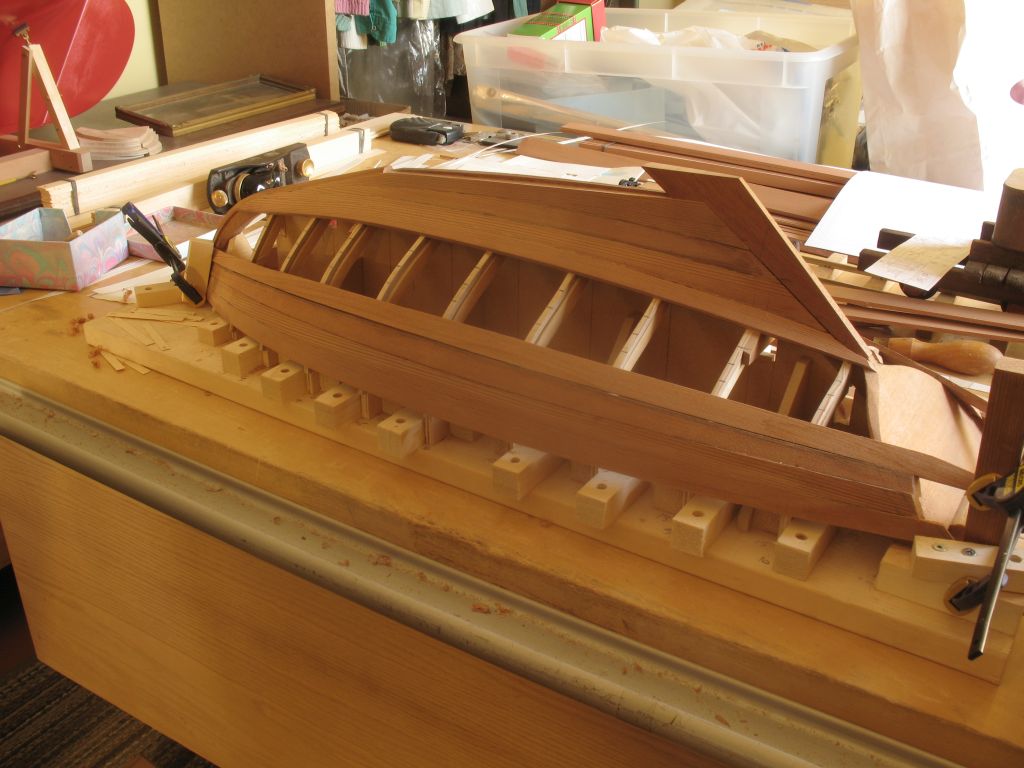
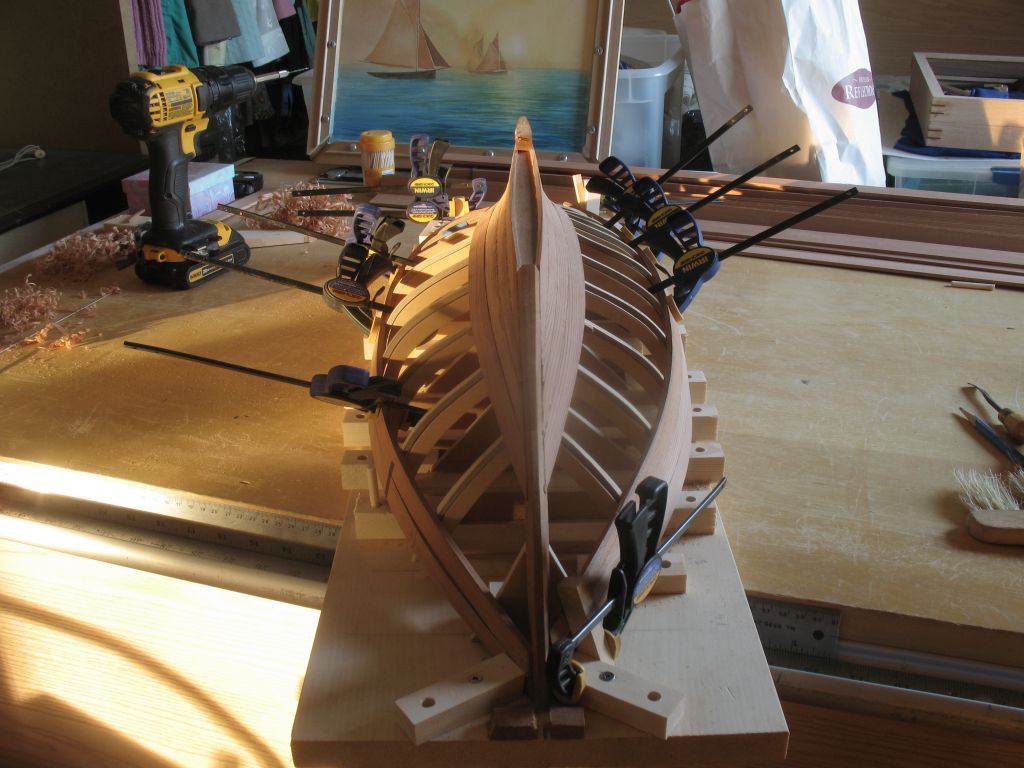
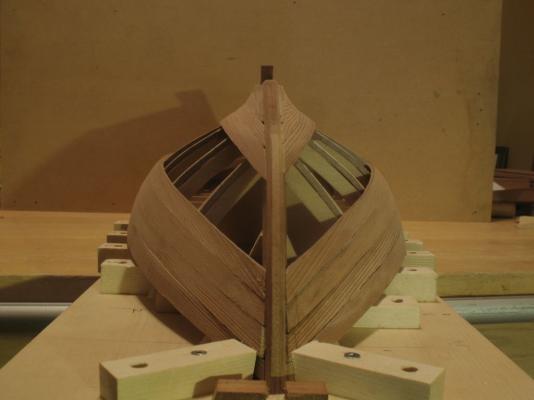
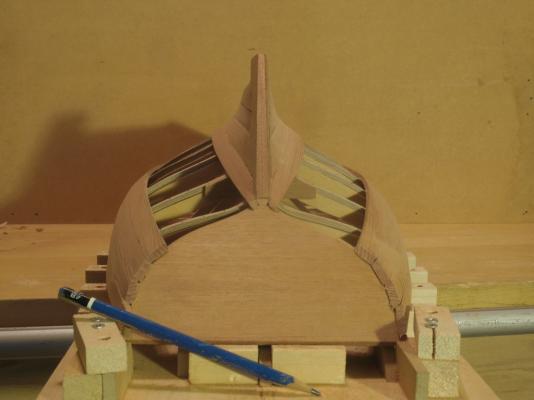
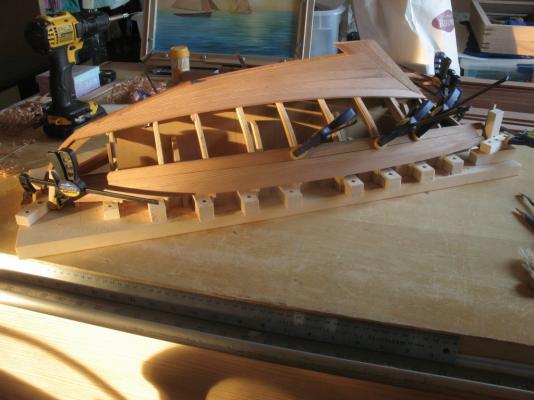
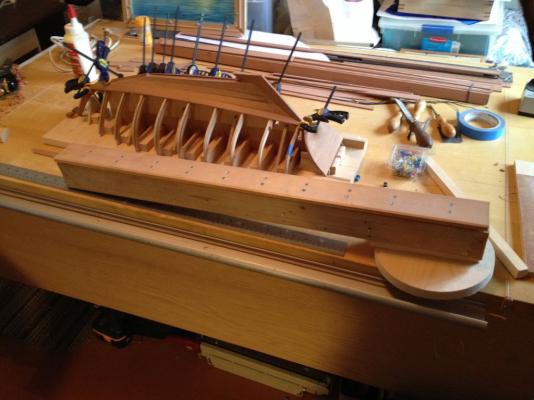
 Jon, Pete and Patrick, thanks for your kind comments. and thanks to all who added a visit and pushed the like button. Build part 18 Evened up the gluing to get a better idea of her shape. This planking is quite the learning curve. When I first started the planking on the pilot cutter I had no Idea it would lead to this. I am beginning to feel confident enough now that I will be able to tackle the planking on skipjack with her canoe stern in the spring when I can spend more time in the shop. Four more planks to go on each side now. I am staring to think about the lead ballast for the keel, I will shape a block of wood then make a plaster mould. I will need to use the tiger torch to melt enough lead to do it in one pour. Michael
-
I will follow along as well. Michael
-
Jon, I like the way you are approaching the fittings and matching the ones on the full size. Revisiting the strip planking on your hulls reminded me of the planking on my Pilot cutter, working with the larger planks is a lot more finicky but I am liking the process better. Michael
-
I have just been dealing with this issue and the planks that I am using 5/32 thick by 5/8th at the widest cannot be edge bent successfully I have to spile them. after steaming for 25 minutes they lay on the frames like a cloth....Thanks Chuck and Druxey for the tutorials Michael

-
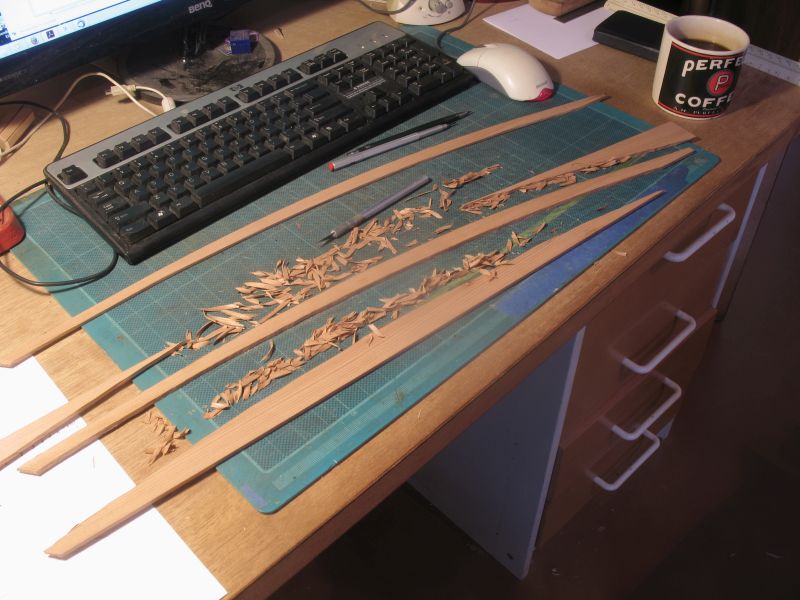
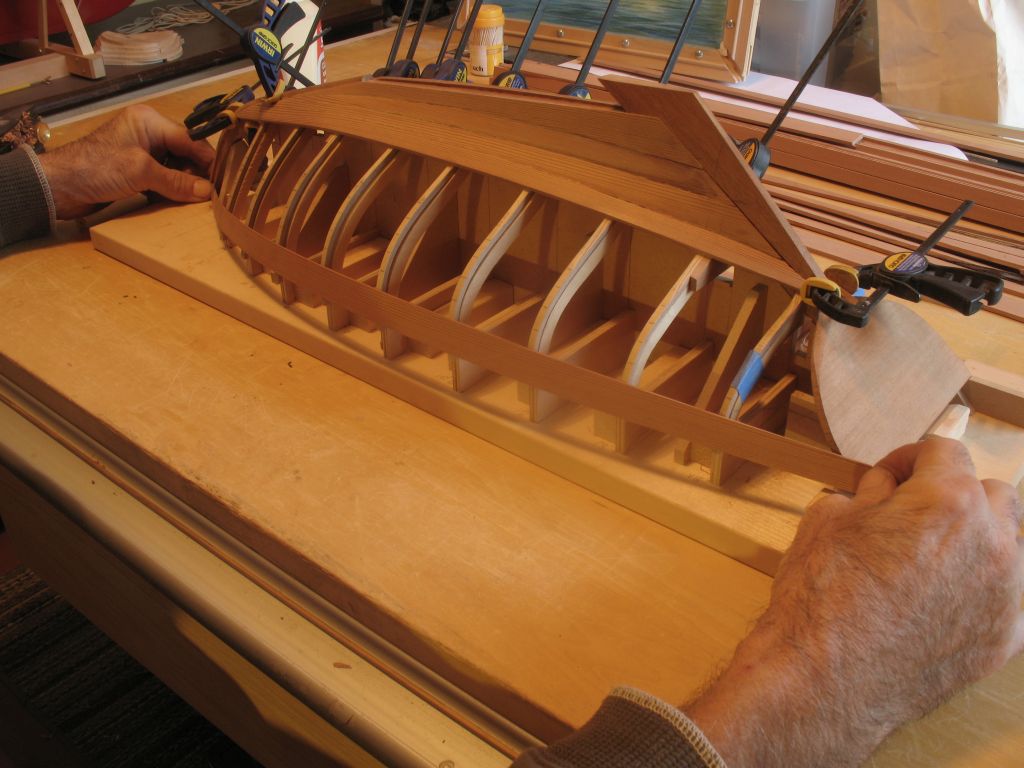
Thanks for all the kind comments and likes. build part 17 The planks are getting rather curved now near the mid point of the bilges, and I keep wishing I had made them just a little thinner. I did cut a bunch that were thinner to begin with but picked up the thicker pile when I originally brought them into the house. I did not realize it until I had glued a couple on. Proceeding on after shaping the next plank I made a copy for the opposite side and I am cutting them out with the trusty #11 taking little scallop type cuts to the line, the grain differential hardness means that it is not easy to cut cleanly in one long cut, so after rough cutting the large waste off leaving some for fine cutting. I use the block plane to finish the convex edge which mates to the previous plank and a sanding stick for the concave edge which winds up being the top new edge. After matching them I popped one in the steam box. and then after 25 minutes it laid on the frames nicely. It is looking more like a hull now. Michael


-
Dave, it is great to see another small boat in the larger scale. I will certainly be following along. Looks like you have made a good start, I look forward to the coming pictures. Michael
-
Ian what a great job you have done on the planking, I particularly like the use of the cut up erasers to act as non crushing blocks. I am looking forward to meeting you on Sunday when I come down to Calgary. Michael
- 191 replies
-
- 3
-

-
- victory
- caldercraft
- (and 1 more)
-
Very nice Pete, clever solution to the rabbet line. Michael
-
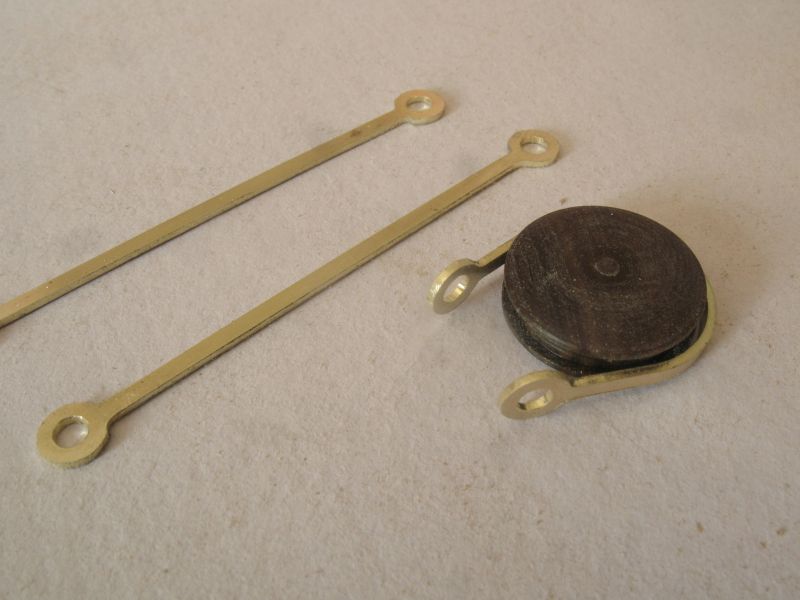
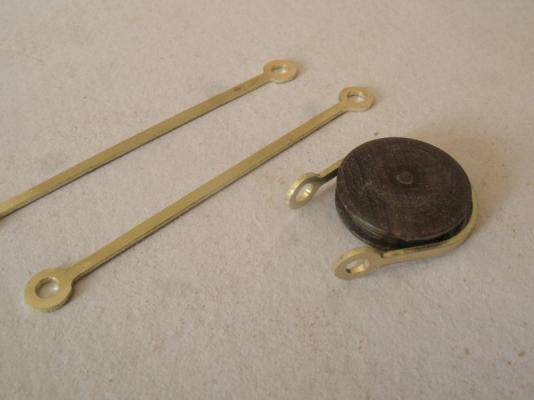
looks great Jack, Might I suggest that you rotate the loops down to be in line sort of like an eye-bolt with the loop at both ends, that way the tension on it will be in line, and there is no tendency for the loop to want to pull down. Michael
- 203 replies
-
- 7
-
-
- artesania latina
- marie jeanne
- (and 1 more)
-
Thanks for the clarification Pete. I must say that I have spent a long time this past few weeks looking at pictures of all three boats. I am also a big fan of one of Herreshoff's other gems Gloriana...... And just to stir it up a bit Gill Smith's Pauline a cat boat Michael
-
Hi Daniel it is great to see you posting a new project. many years ago I picked up a small publication from Kalmback books called "how to build plastic ship models, (ducks to avoid the thrown fruit) there is a section in it on the rigging and it is very basic and might be a useful read. there are a few drawings and some clear text along with reasonable photographs. I know that there are all sorts of great publications out there, I thought this might be a useful document in any case. and then there is the section at the beginning of the forum in the resources section Always a good place to start. Michael
- 11 replies
-
- 3
-
-
- jolly roger
- plastic
- (and 2 more)
-
I concur completely. Contrary to the myth "that you cannot teach old dogs new tricks" you certainly can. Nils how many ship models have you built over the years? Michael
- 2,625 replies
-
- 8
-
-
- kaiser wilhelm der grosse
- passenger steamer
- (and 1 more)
-
Yes Deon we are both working from the same Drawing, but different scales, and like most things we each have our own twist on the framing. That last photo is great. Michael
-
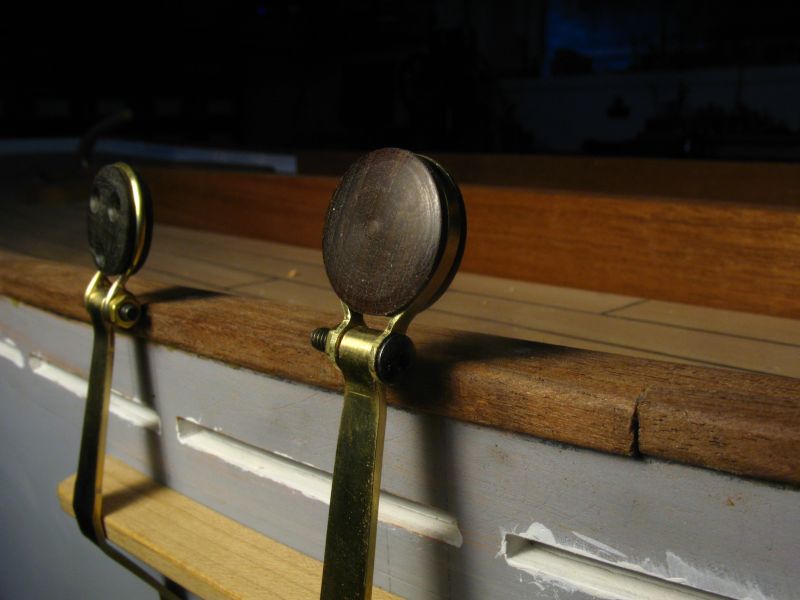
David, the first picture actually does show one of the dead eyes with the looped wire as you suggested, I went looking for a picture of that process because it was how I first began, before making the strap type. Michael
- 203 replies
-
- 5
-
-
- artesania latina
- marie jeanne
- (and 1 more)
-
Jack You could try something like this or this Michael

- 203 replies
-
- 12
-
-
- artesania latina
- marie jeanne
- (and 1 more)
-
Hmmm why does all that look familiar? really nice work on setting up the ribs. Michael
-
Exquisite work Johann. Michael
-
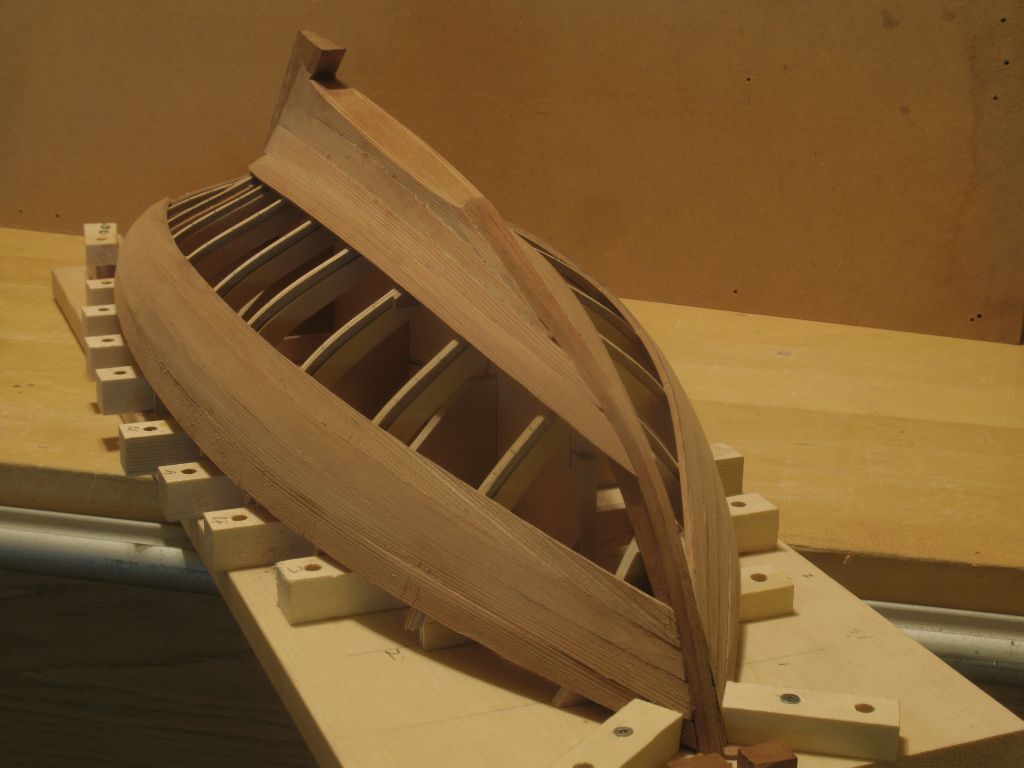
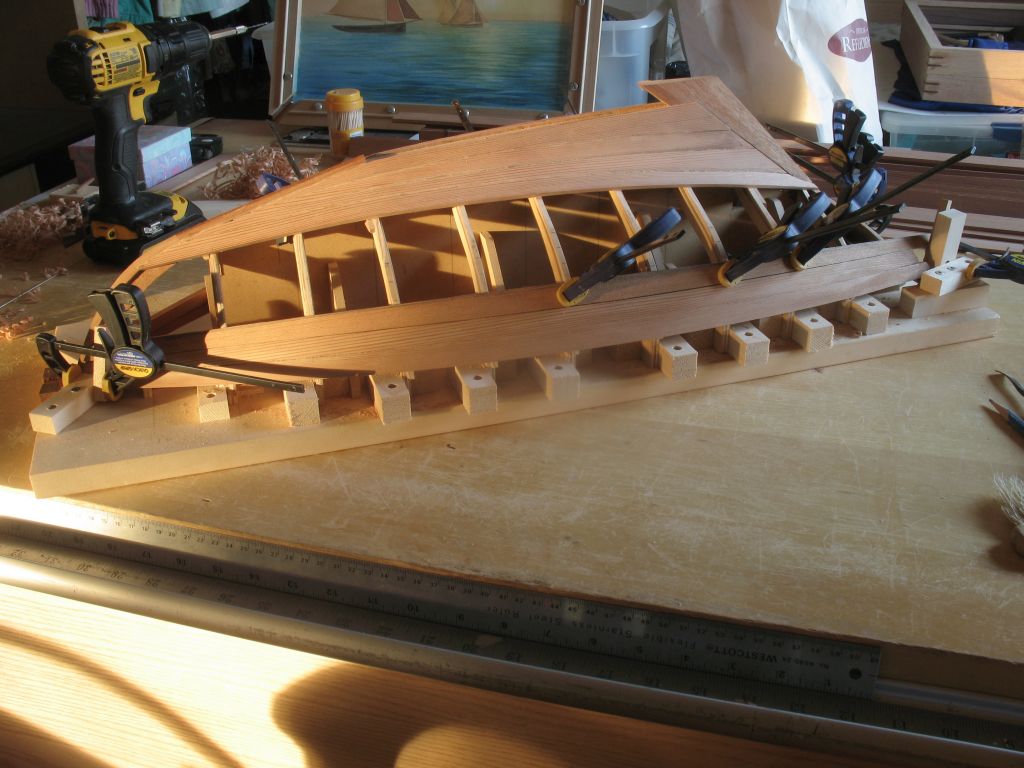
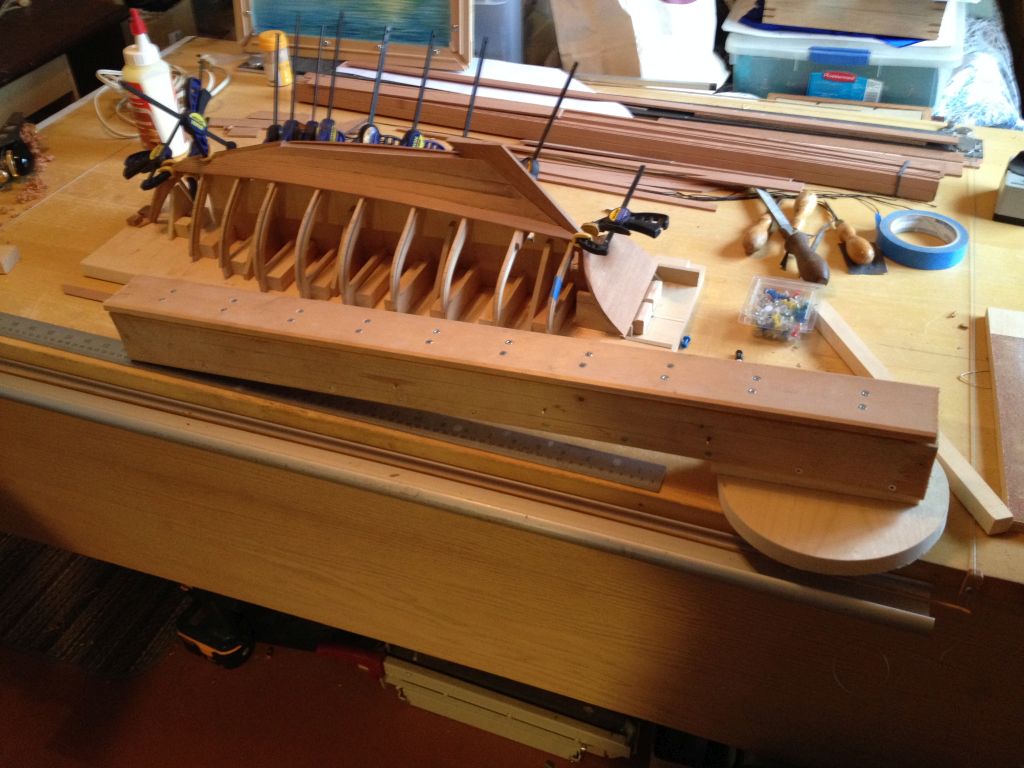
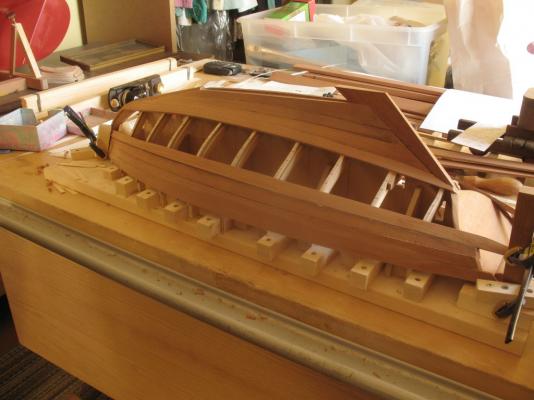
Thanks for the positive feedback. build part 16 The progress continues with the bending of the planks working up now from the sheer strake I am finding that about 20 minutes in the steamer then clamping up the plank till the following day seems to be working well, there is a little spring back when the clamps are removed for the final tweaking of the plank before gluing The picture shows the first plank glued to the sheer strake on the starboard and the opposite sister drying up prior to gluing. The next one is of the second plank on the starboard drying I just took it out of the steam box. This shot is now clearly showing the hull taking form. Michael


-
Great work Dan, thanks for sharing the construction details, some of them have been filed away for future use. Michael
- 108 replies
-
- 4
-
-
- andrea doria
- ocean liner
- (and 1 more)
-
Very nice Keith, I'm impressed with your skill using the jigsaw. A lovely yacht for sure. I will most certainly be following along. Michael
-
Amazing work Robert I can only imagine what working in bone must be like, I don't think I would have the fortitude to do it. Michael
- 241 replies
-
- 4
-
-
- royal caroline
- yacht
- (and 1 more)
-
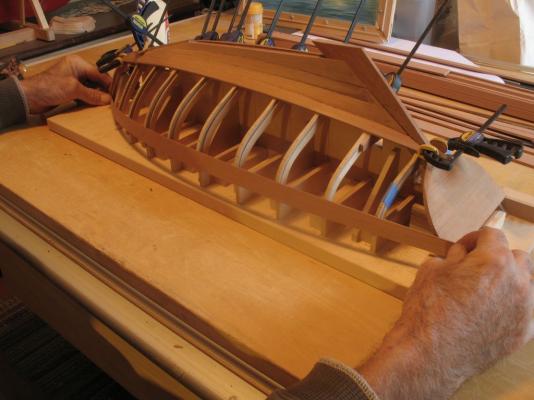
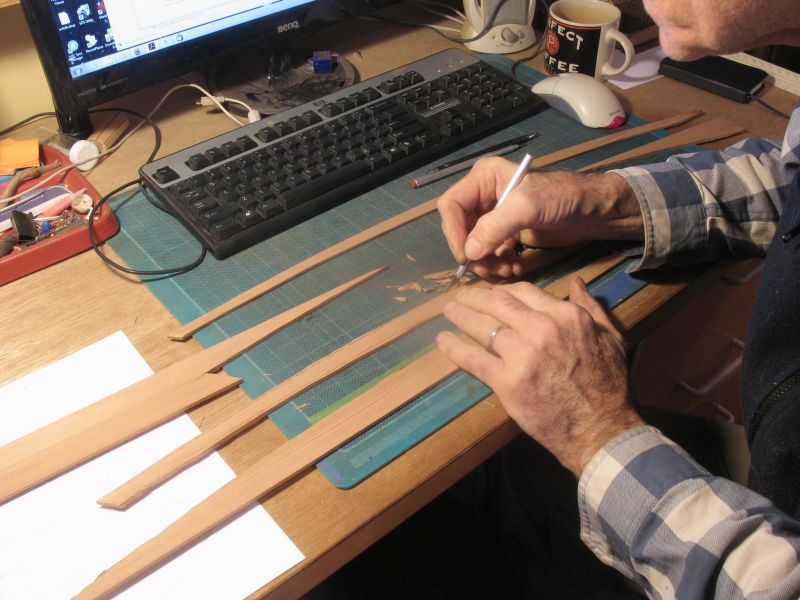
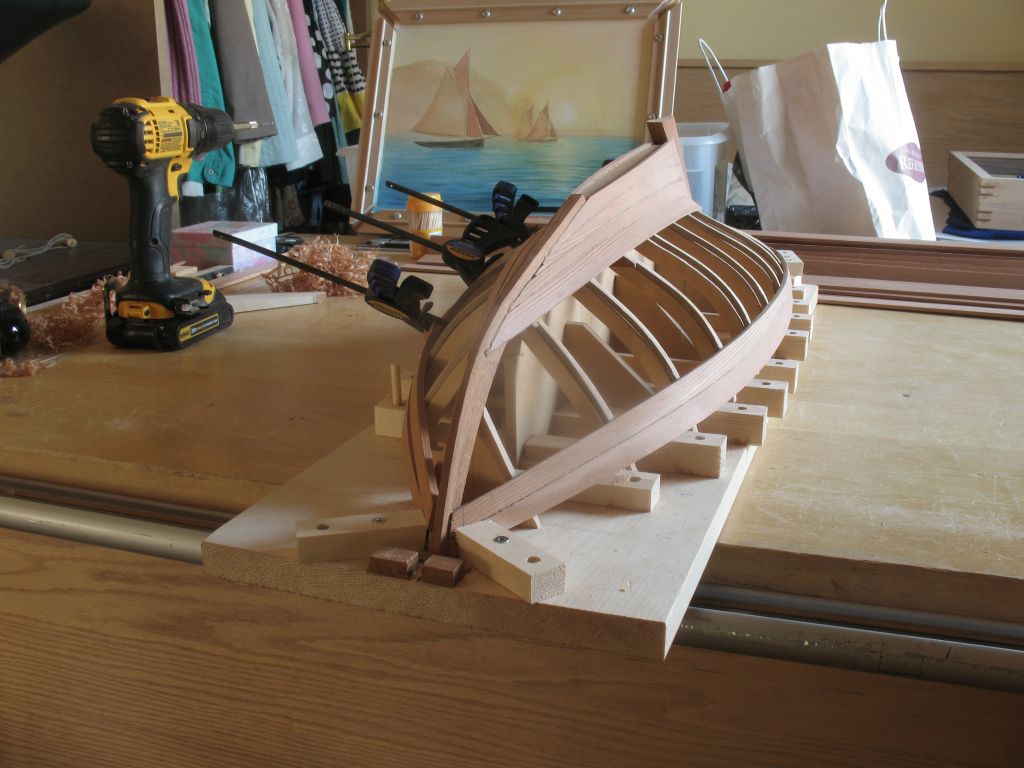
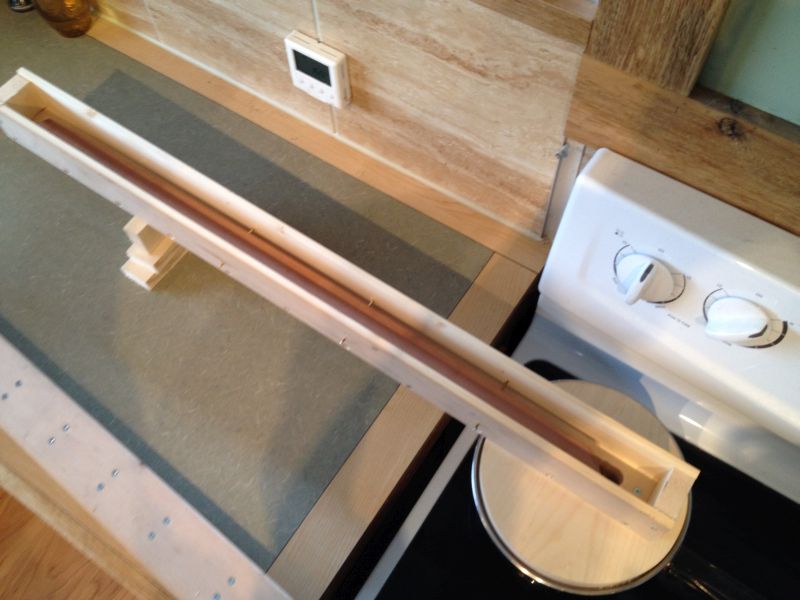
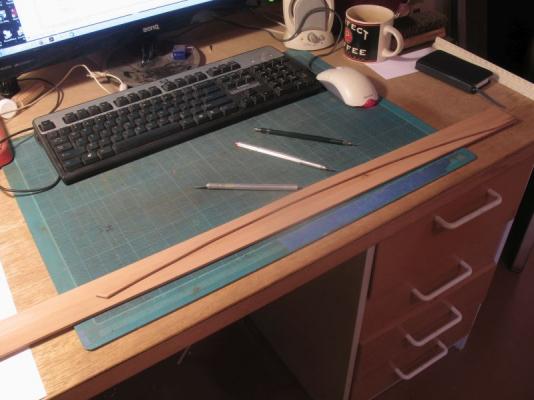
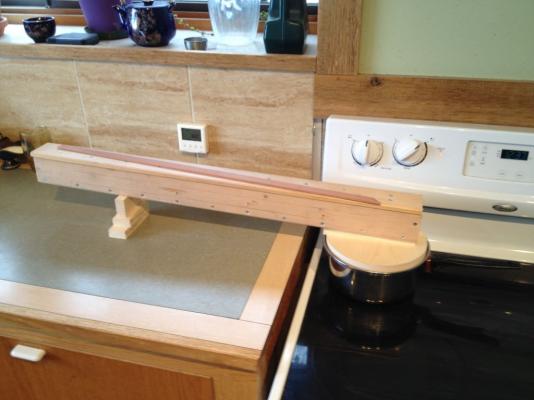
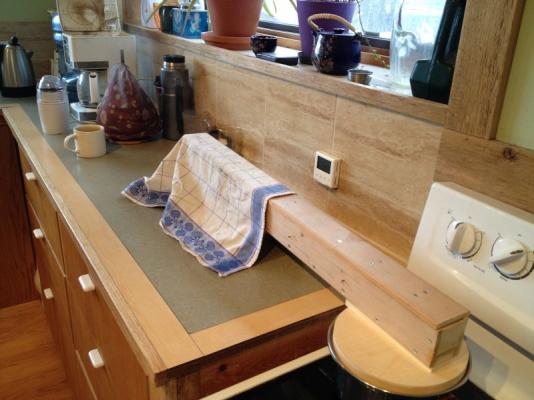
Build part 15 The sheer strake plank was too long to fit into the oven in a comfortable way so I made up a small kitchen top steam box to fit on top of a small saucepan. A 3/4 inch disc of white pine that fit loosely onto the top of the pan and a box with an inside space that is 1 3/4 inches wide by 1 inch high and 30 inches long with 3 3/32 brass pins to elevate the plank off the floor of the chamber. I also angled it to rise about an inch over the 30 inches While it was steaming I placed a tea-cloth over the slot opening at the high end and steamed for ten minutes. next and this was the part I liked best I just lifted it off the pan and carried it to the model maintaining the heat inside the box. Then opened the lit which just drops on and clamped the sheer-stake onto the model to dry. This is going to be a handy addition. Michael


-
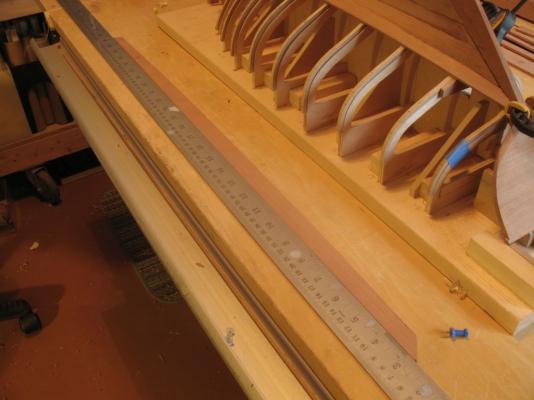
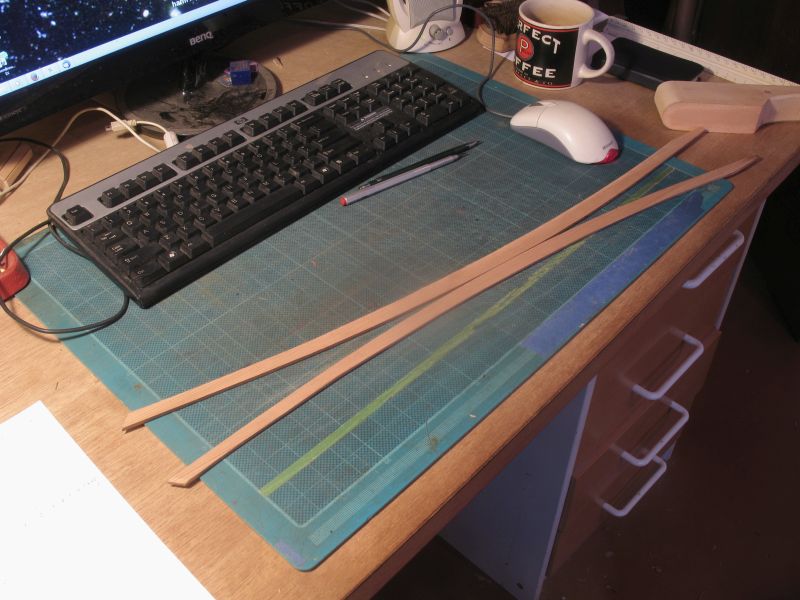
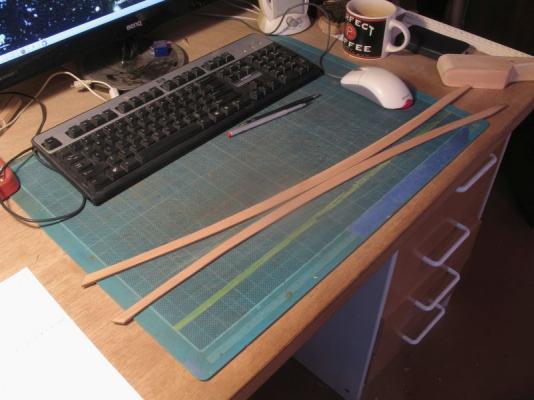
Ed Thanks for your kind words. I have ordered a Byrnes drawplate I am waiting for Jim to confirm the shipping cost to Canada. I shall get some BBQ skewers. build part 14 Herreshoff was no doubt a genius! while waiting for the 4th planks glue to dry I thought that I would make a template for the sheer stake out of the thin cut off from cutting the wide planks this way I could make the finish planks using the thin template which is much easier to shape I could have used a strip of card or paper I suppose but I had the strip so put it to good use. I basically freehand shaped the plank side curve whilst the sheer-line turns out to be a straight line. so the graceful curve of the sheer-line is caused by the natural geometry of the curve following both the plan and sheer. The redwood is a nice material to work with and looks great as well. I am thinking that i will paint below the waterline and keep the rest of the hull clear varnished with the white topsides and mahogany bright work on the coaming. Michael