DONATION DRIVE - SUPPORT MSW - DO YOUR PART TO KEEP THIS GREAT FORUM GOING! (91 donations so far out of 49,000 members - C'mon guys!)
×


clogger
-
Posts
97 -
Joined
-
Last visited
Content Type
Profiles
Forums
Gallery
Events
Everything posted by clogger
-
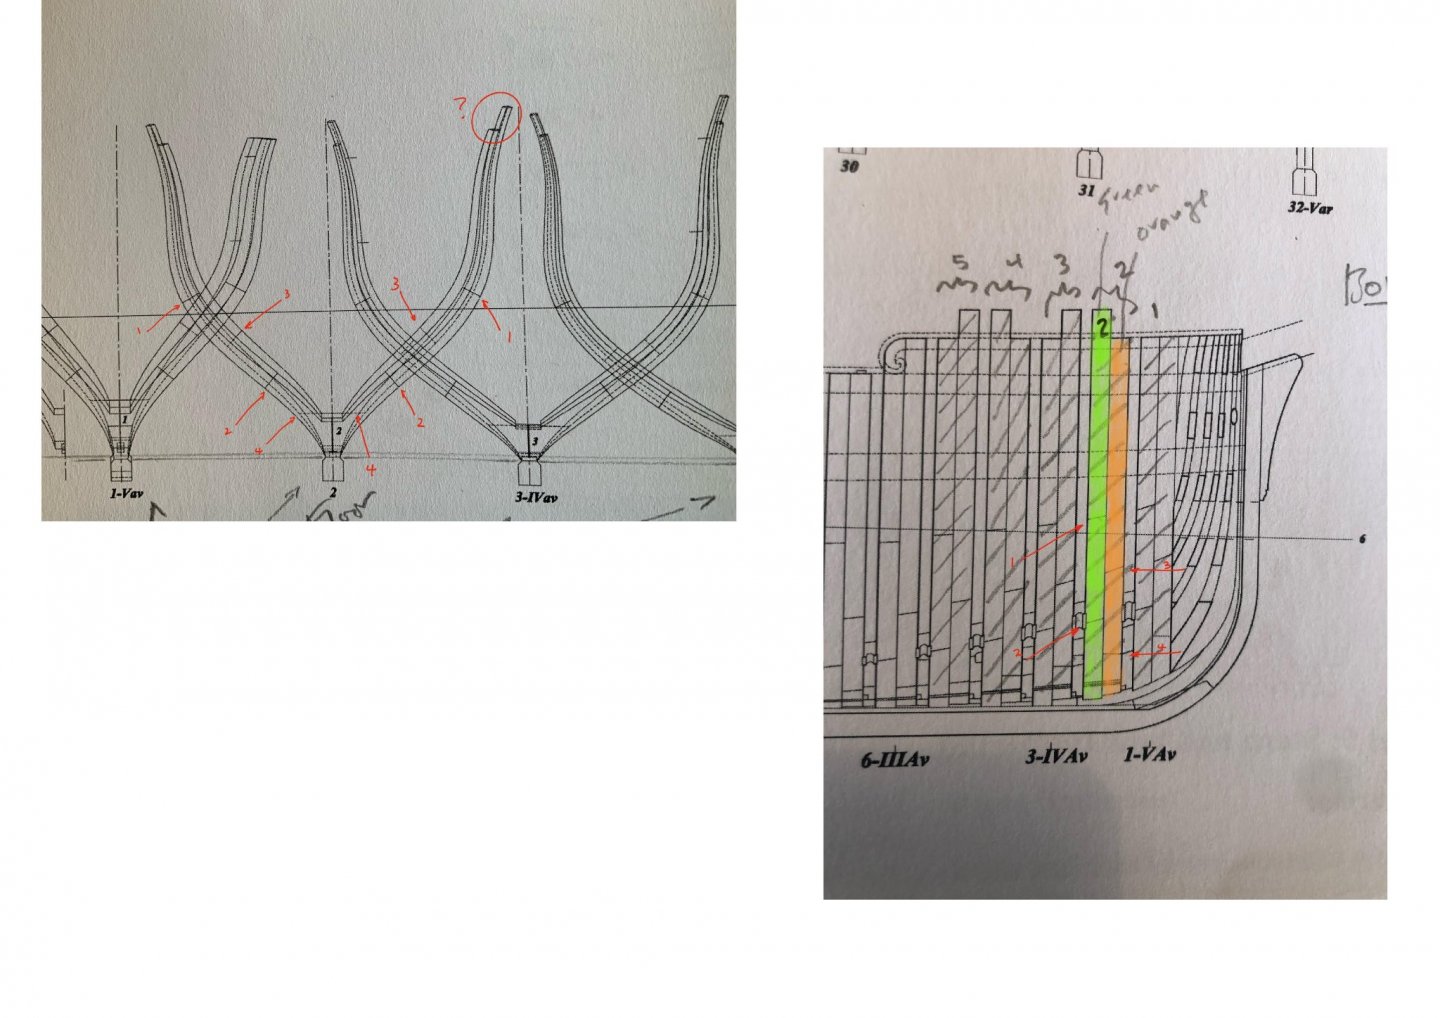
 Does that mean the frame with cuts 1 and 2 ,as marked in red, lead to the taller frame? And the dotted line cuts 3 and 4 lead to the shorter frame?
 -
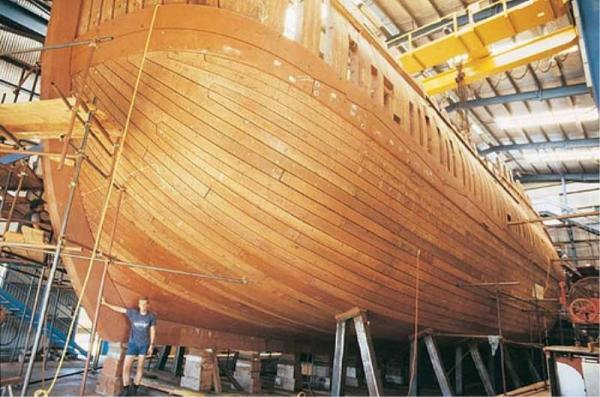
Hi No Idea For Le Rochefort I'm confused as to which lines to follow when it comes to cutting out the fore and after frames, particularly for the frames 2,3(Ivar),4,5 and 25,29(IVar) and 30 which have timbers that pass beyond the line of the framework. Which frame is taller than the other frame? The foreframe or stern frame? From the photo attached the frames 2-5 the upper timbers vary fore and aft. I know solid lines represent one half, and dotted lines represent the other half, but it still seems very confusing at the upper ends of the framexplains. Obviously the dotted lines also represent ares to be shaved back for flaring. I've attached a photo to try to illustrate my point.
-
uploading pictures
clogger replied to David56's topic in Using the MSW forum - **NO MODELING CONTENT IN THIS SUB-FORUM**
Testing Chucks method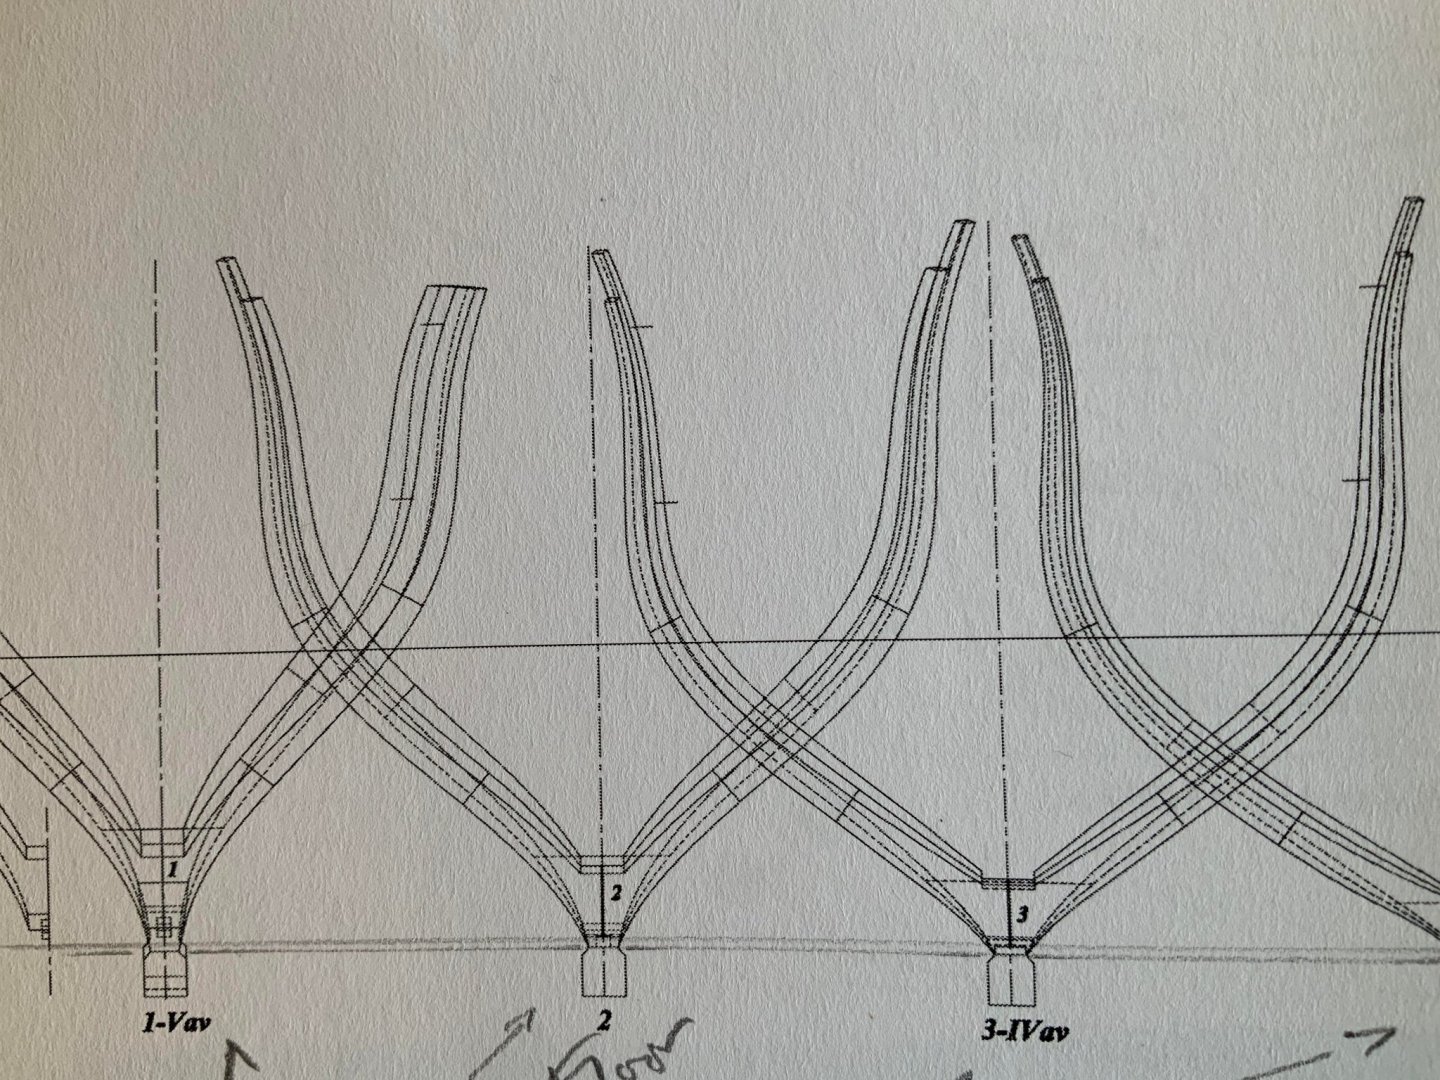
-
Very impressed with your work. Very precise neat and tidy. In fact I have the same plans but aim to build to the 1/36 scale, and using Cherry wood. Looking forward to more updates. Would love to see more of the tools and techiniques you use and as many close up pics as possible.
-
Your Cutter looks stunning!
-
I cannot recommend highly enough this vice https://www.bunnings.com.au/stanley-multi-angle-hobby-vice_p5860190?gclid=CjwKCAiAz4b_BRBbEiwA5XlVVtknHMycDWIEAYWkdZecVyfQxlkbbJsjcMu9fU3DjRzeMCQEKuCCqxoC7lcQAvD_BwE&gclsrc=aw.ds
-
Yes the plans are very good. And the scale 1:1 on the plans makes it v useful. Plus there are heaps of good build topics on the Endeavour to checkout.
-
Chipping effect on wood?
clogger replied to Keithbrad80's topic in Painting, finishing and weathering products and techniques
As far as I understand the hairspray technique just involves 1 (Primer first) Then A base coat of the colour you eventually want to show through as chips (eg rust red for a vehicle for eg) 2 Spray hairspray lightly on. Note some hairsprays perform better than others, may need to google online best versions) 3 After allowing to dry paint the final coat of the main colour of the subject. 4 Once dry, use a stiff bristle brush/toohpicks and with Water, scrub and scratch where you want chips to appear. With wood wear effects I prefer painting a seires of different paint colours and washes gradually building up to a good wood looking effect. Mostly I apply this technique on plastic/metal. For the final chipping effect I would use lighter and ligher sand colour paints such as Vallejo Iraqi sand just subtely along the edges. Sone good tutorials giving the sequence of paints to use, I have a cheat sheet somewhere which I can provide if anyone interested. -
Funnily enough I was thinking about the hull painting on my Endeavour and think will go for the natural wood look.
-
Proxxon DB250 mini wood lathe has arrived...
clogger replied to Jorge Hedges's topic in Modeling tools and Workshop Equipment
I found the tool rest too short in width, but also the tightening knob would also get in the way of the cutting tool. I've since replaced the plastic knob supplied with a wingnut arrangement which is much better. -
Love your work. The attention to detail is amazing. I'm hoping to use a lot of your great photos and information about this build with my own attempt at the Dreadnought. I have the Pontos PE, but am also sourcing other companies to complement the build. Thanks for the great contribution you have made to this great ship.
- 342 replies
-
- 3
-

-
- dreadnought
- zvezda
- (and 2 more)
-
Thanks for that Jaager.
-
Can someone let me know the recommended internal dimensions of a display case for the Caldecraft Endeavour 1/64 scale ship? I'm making a wooden glass display case but haven't yet completed the model.
-
Good to see some more progress!
-
Thanks, great idea!
-
Just a quick note to say how much I admire your build log. Excellent detail followed by excellent photos. Very inspiring, and sets a very high standard.
-
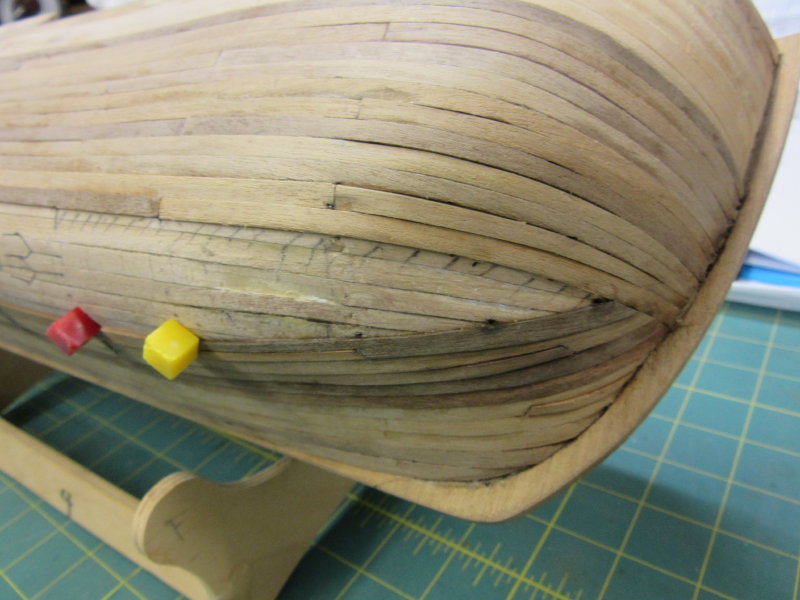
Thanks for the help guys! appreciate the feedback. I have looked at a lot of views of planked hulls on the internet and have seen the majority appear to have the planks below the wales butting the sides of the planks above. Including the Endeavour replica ship! However It does appear more aesthetic if not realistic to have the planks all meeting the stem.
-
Thanks normanh. I agree with the bulkheads. managed to finish the planking in this area finally. Need to sand and varnish later.

-
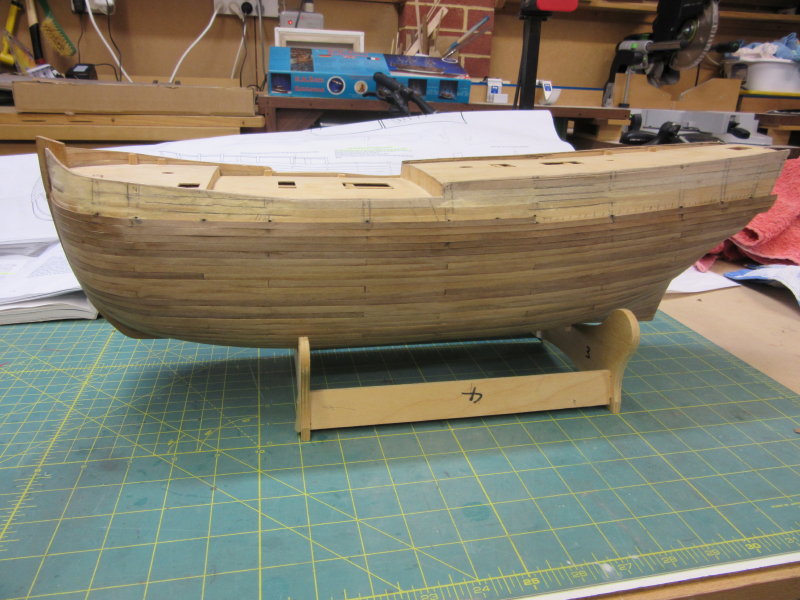
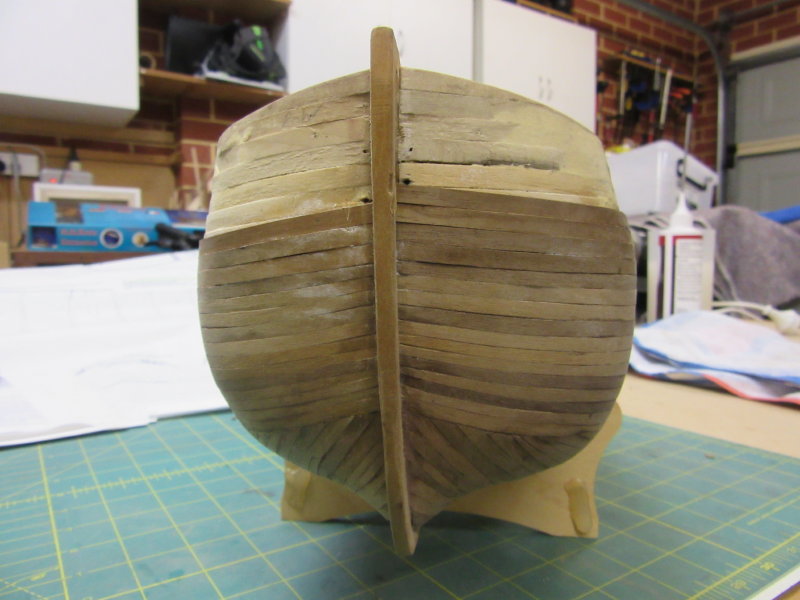
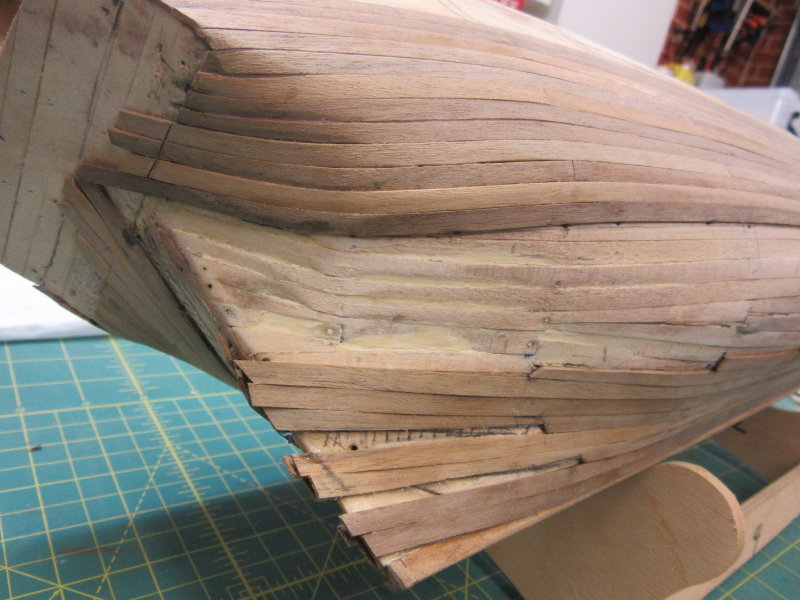
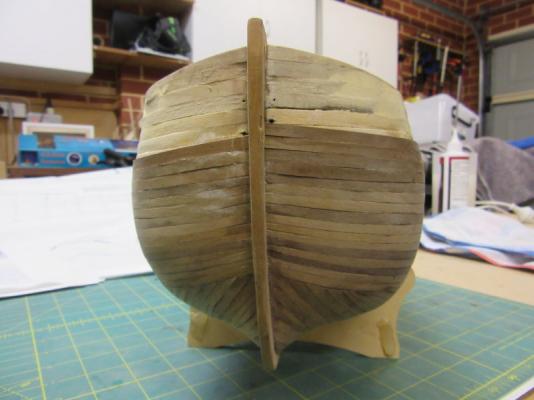
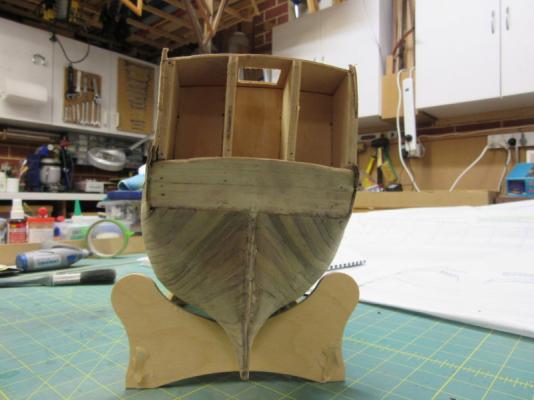
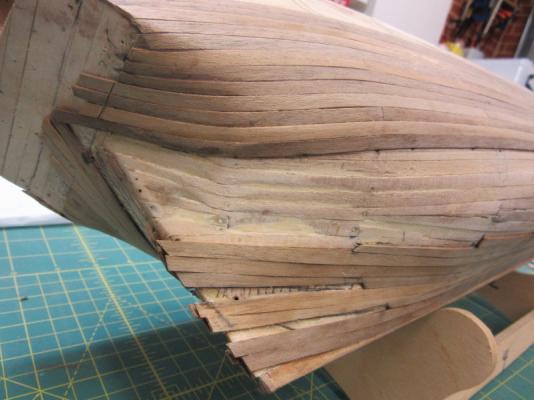
Hi I'm at the 2nd planking stage of my Caldecraft Endeavour ship. If you look at the attached photos you can see where I have got so far. I have still to complete the planking and do the final sanding. I need some advice as to the best way to lay the final planks. And how to bring the planks forward to the bow and back to the stern. I presume drop planks/steaslers are required, but I'm not sure how to do this? Any advice would be very appreciated.

-
Ha ha, thats funny as I'm using Timbermate. Just wondered if it was a good material to use or if there was something preferable.
-
I just googled spakfiller and it looks very useful. Will give it a try.
-
Love your work. I'm am also endeavouring to make the Caldecraft Endeavour. Only just completed the first planking. Sorry if you have already answered this elsewhere but what made you decide on the colour scheme? Some modellers paint the hull white, some leave the hull untouched? One more quick question, after completing the first planking what did you use as a filler?
-
Hi Sorry to see your build has temporarily stopped. I started the Caldecraft Endeavour a few years ago. Then stopped and got distracted making a 1/72 Flower Class Corvette. I'm now hoping to resurrect the Endeavour. Just came across your log and was very impressed with the qulaity build and attached notes and photos. Love to see your ship close up. I too live in Perth.