

CDW
-
Posts
7,760 -
Joined
-
Last visited
Content Type
Profiles
Forums
Gallery
Events
Everything posted by CDW
-

B-25 Mitchell "Meet Miss Runyon" by Javlin-HK-1/32
CDW replied to Javlin's topic in Non-ship/categorised builds
Silver can be a bear. Every little imperfection shows itself. Great job, looks super. -
B-25 Mitchell "Meet Miss Runyon" by Javlin-HK-1/32
CDW replied to Javlin's topic in Non-ship/categorised builds
What will you use for the silver? -
Denis Love your last photos of the plane. The faded look of the weathering looks perfect! The stand is a very effect as well.
-
B-25J Mitchell by Tom E - Revell - 1:48 Scale - PLASTIC
CDW replied to Tom E's topic in Non-ship/categorised builds
Tom Excellent choices to start. I hope all the best for your endeavor. Looking forward to following your progress. -
SBD-3 Dauntless 1:48 Hasegawa - Edwardkenway-FINISHED
CDW replied to Edwardkenway's topic in Non-ship/categorised builds
Amazon has great customer service. I'm confident they will take care of you in this matter. -
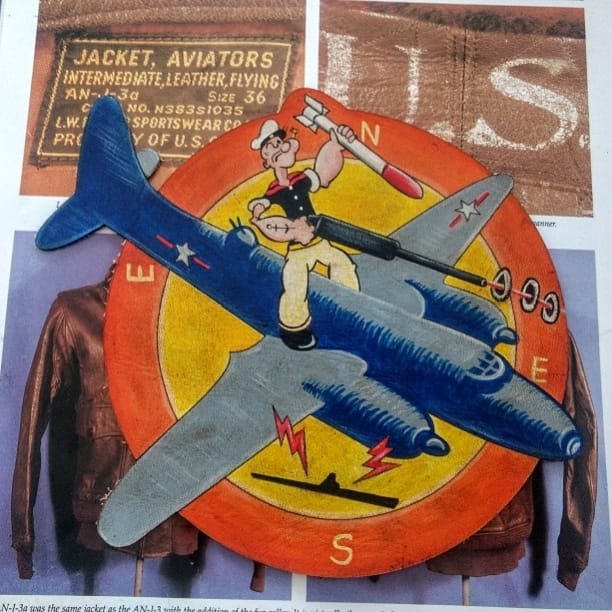
@popeye the sailor Hey Denis Here's your patch! photo courtesy of usbomberjackets dot com on facebook
-
I don't smoke either, but if I had all that stuff, I probably would burn one just for the hell of it.
-
with a $100 Cuban cigar and silk slippers
-
Roger gave me the idea to build a carrier deck to display it on, so that's what I have in mind right now.
-
Denis Is this the B-17 you're building? https://www.scalemates.com/kits/kv-models-72100-mask-1-72-boeing-b-17f-g-flying-fortress--1194449
-
Yes, the masks are specific for a particular model by manufacturer.
-
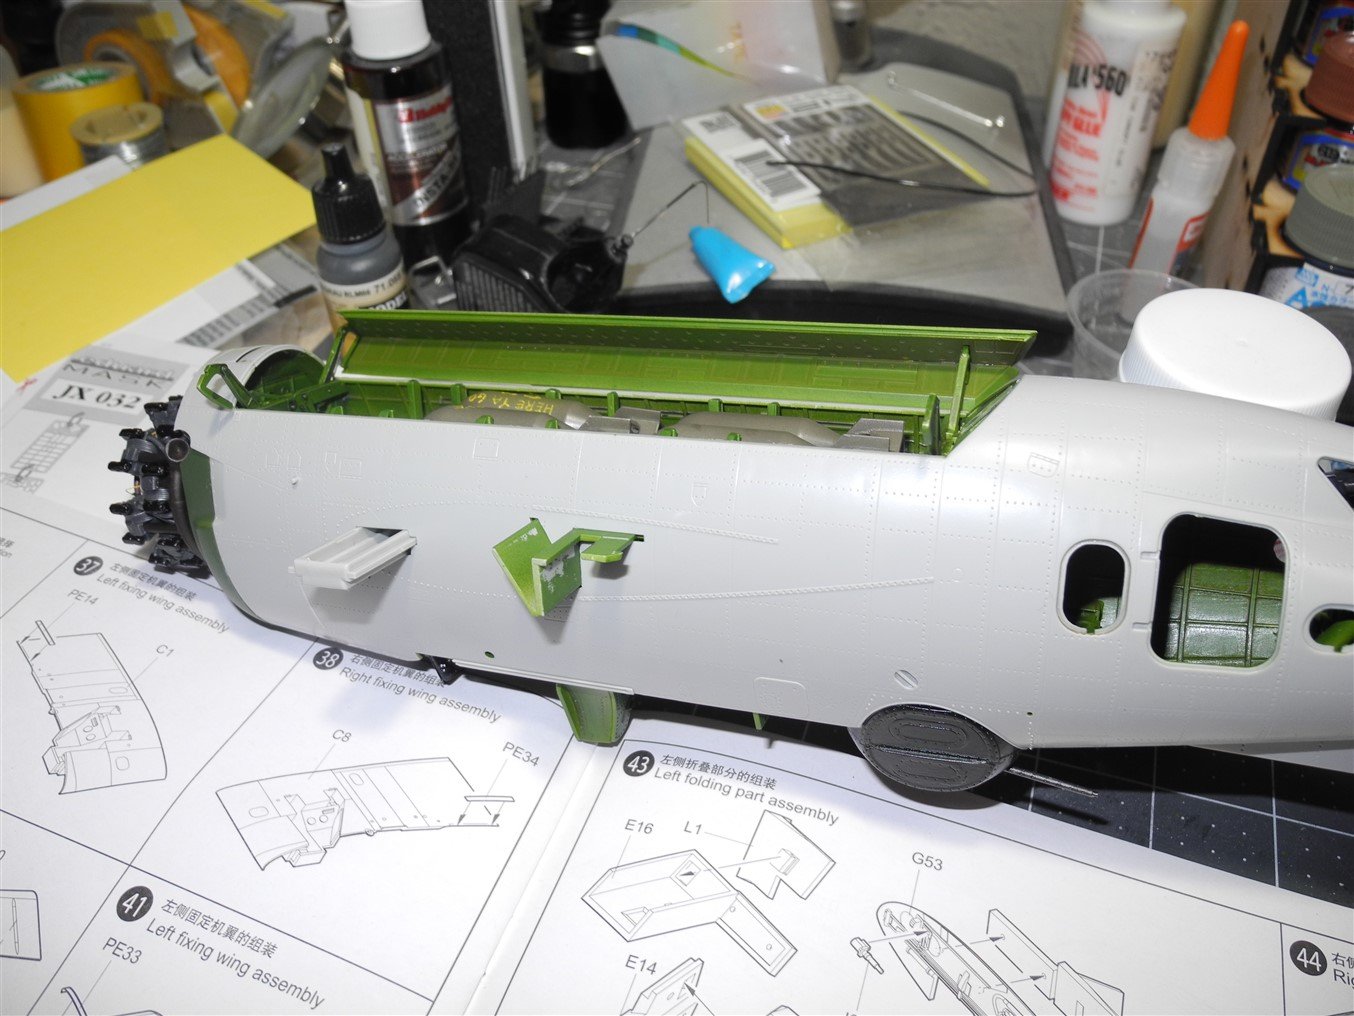
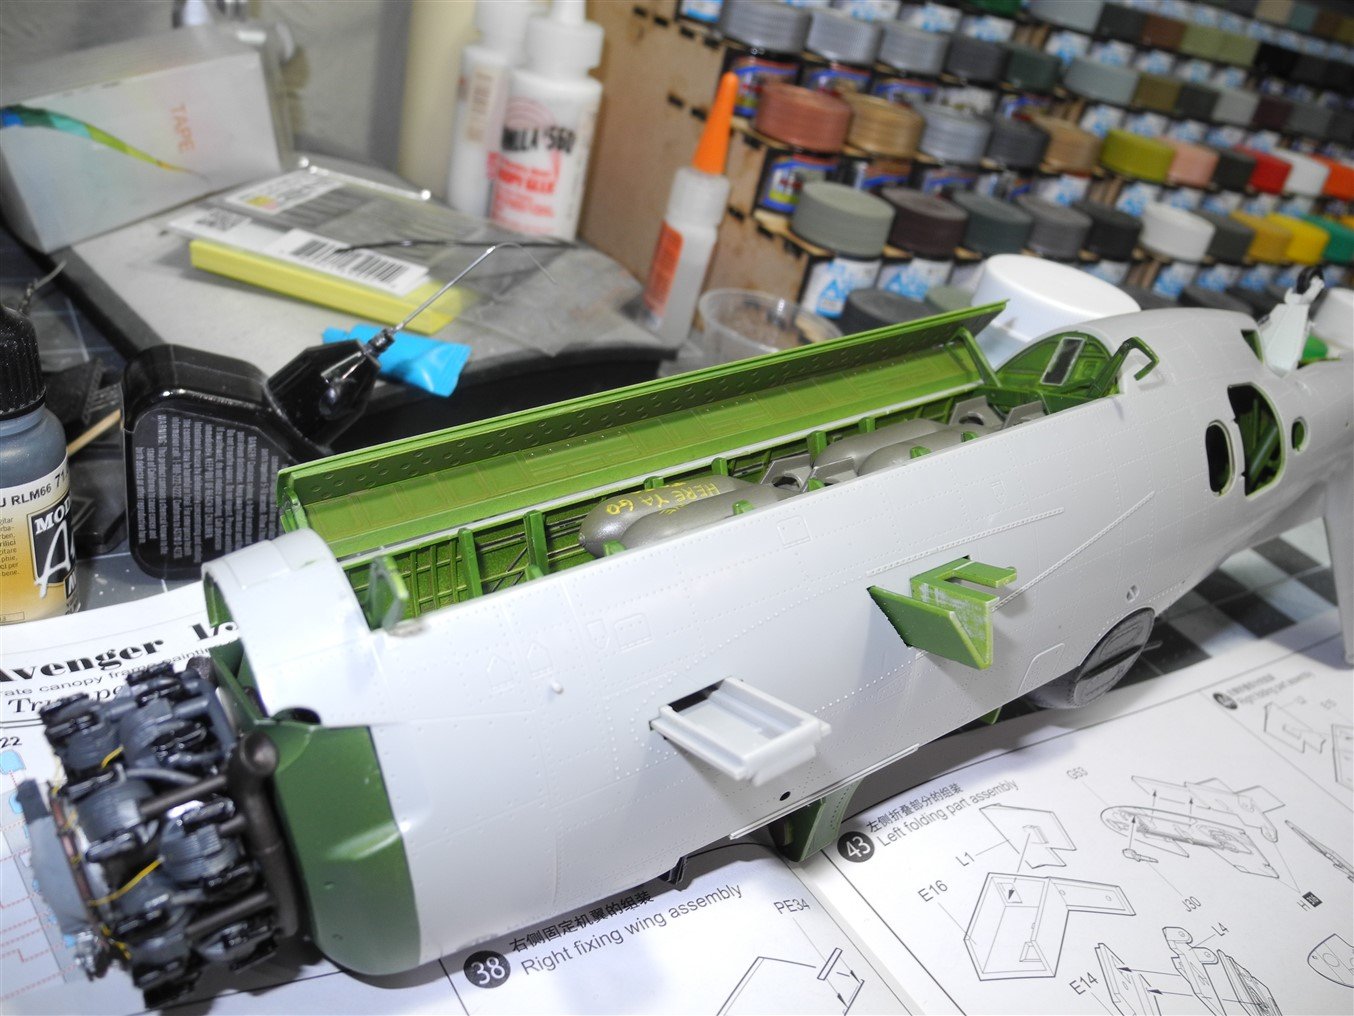
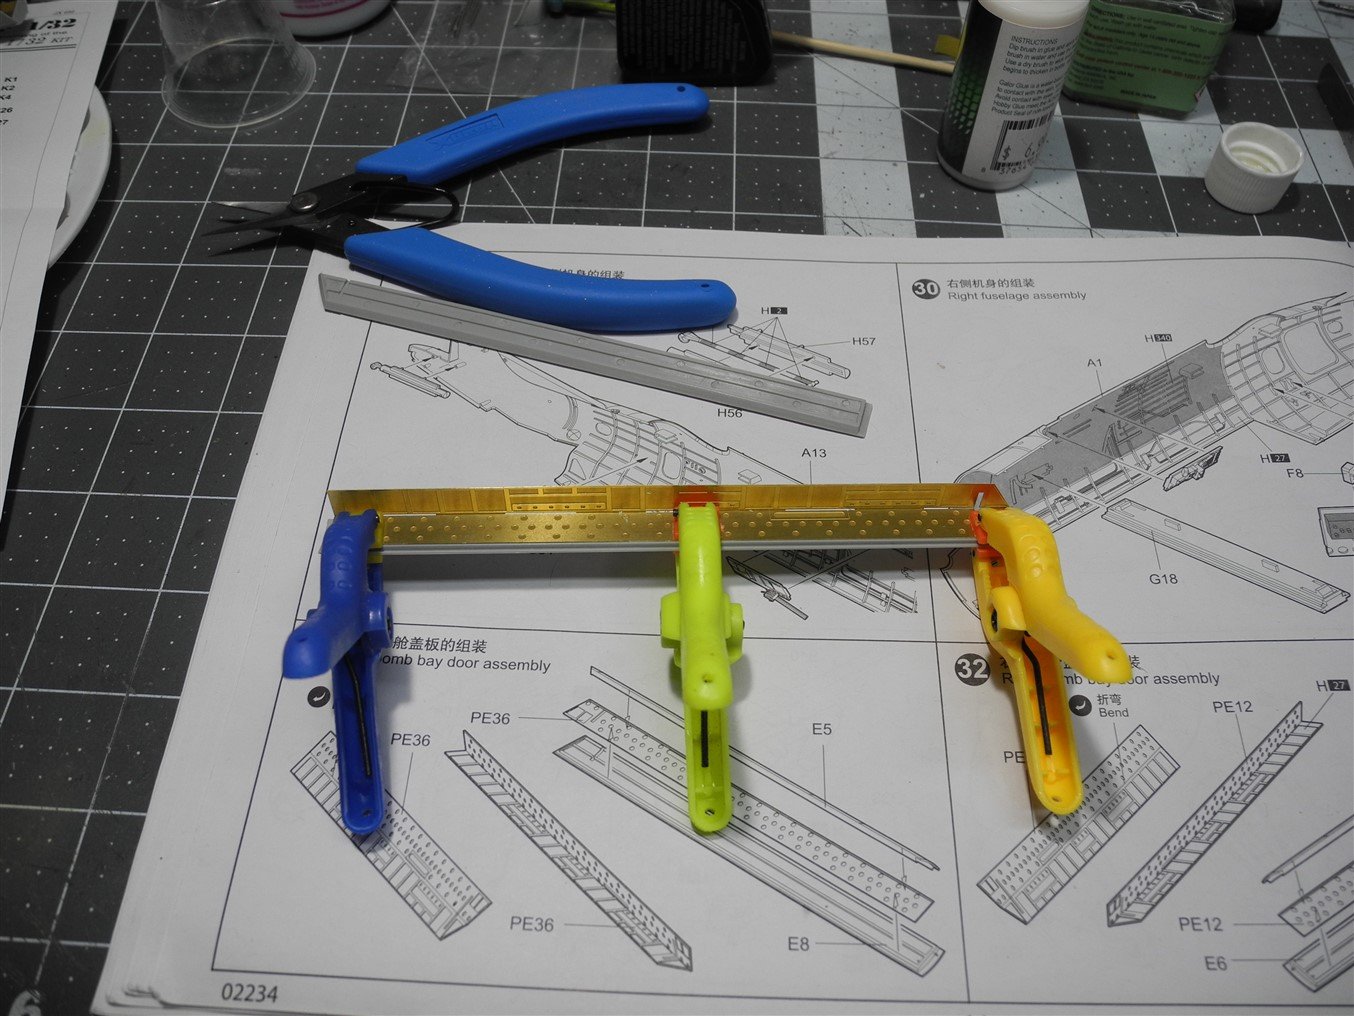
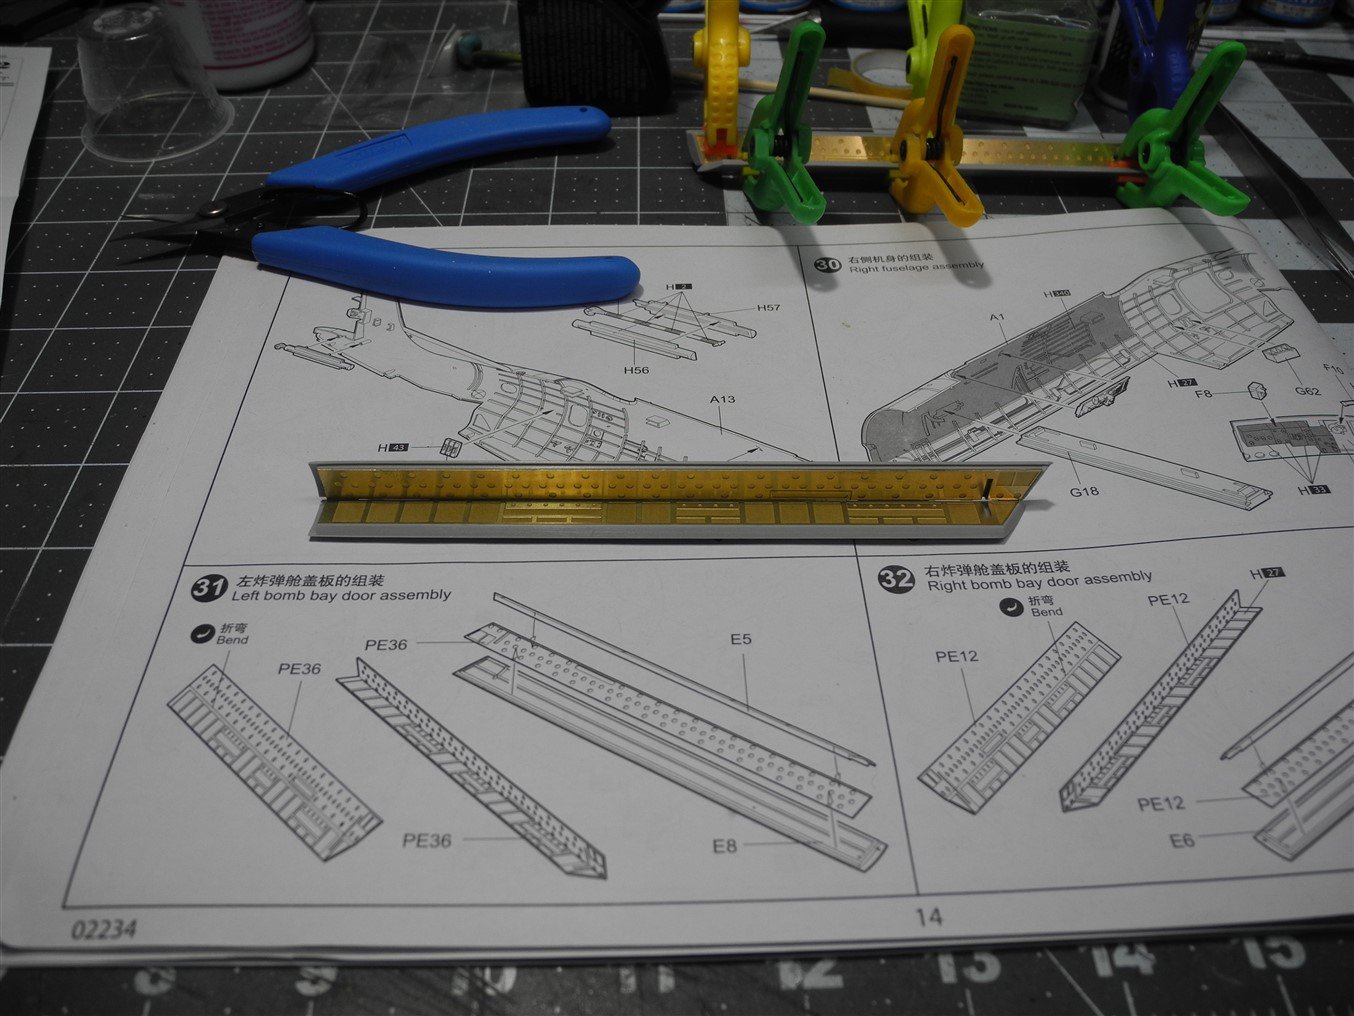
A dry fit of the bomb bay doors before moving on to another step. Will leave the doors off until the end. One less thing to work around when masking and painting the overall aircraft, and one less thing to knock off or break.
- 267 replies
-
- 13
-

-
Beautiful finished model Yves. The painting brings the model alive.
-
Mike, the applicability of acrylic glue is going to vary on particular jobs depending on the specific parts (as you referenced) as well as the experience the individual has in using acrylic glue. Like a lot of other things, we get better at it with time and practice. One thing for sure, you don't use it exactly the same as you would use CA, as with CA, you're trying to use as little of it as possible to avoid a big mess. With acrylic glue, you can use more of it and clean it all up later with a wet paint brush before the glue completely dries. I find acrylic glue is particularly well suited for ship railings. Sometimes the difficulty comes from trying to use too large of a section of railing at a time. I often cut my railings into smaller sections and find it makes working with it much easier. I cut the railing to the length I want at a vertical post, then use a smidgen of overlap of the rails on the subsequent vertical post to mate them together. When using it, don't be afraid to use a larger drop of it where the photo etch is to be attached as it will be very easy to clean up later. A good way to get practice is to use scrap pieces of railing and just glue them down on a piece of sheet styrene plastic. The little blobs of glue you put down will be enough to hold the railing in a vertical position until it starts to get tacky and once tacky use your wet paint brush to clean up the excess glue around your posts.
- 267 replies
-
- 10
-
-
Try here. You'll need to email the seller. http://www.gatorsmask.com/gatorglueorder1.html
-
SBD-3 Dauntless 1:48 Hasegawa - Edwardkenway-FINISHED
CDW replied to Edwardkenway's topic in Non-ship/categorised builds
Oh wow...didn't see this. What a disappointment. Hope Hasegawa comes through for you with flying colors. -
SBD-3 Dauntless 1:48 Hasegawa - Edwardkenway-FINISHED
CDW replied to Edwardkenway's topic in Non-ship/categorised builds
Your Hasegawa Dauntless will look great right out of the box. Can't beat Hasegawa and Tamiya models for a positive out of the box experience. Looking forward to your progress. Love the tri color scheme as well. -
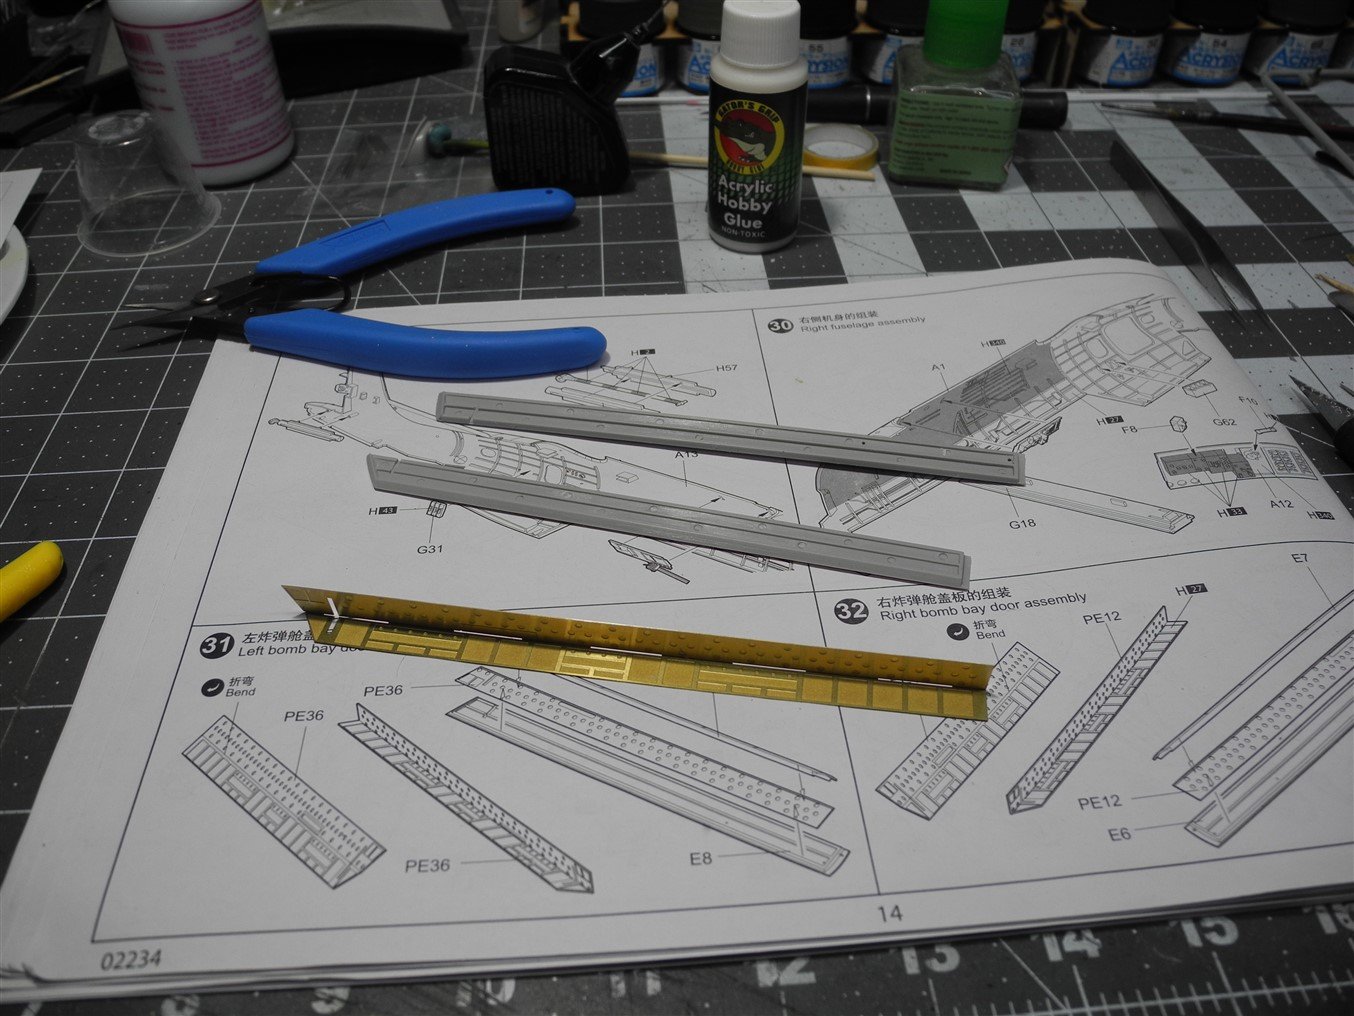
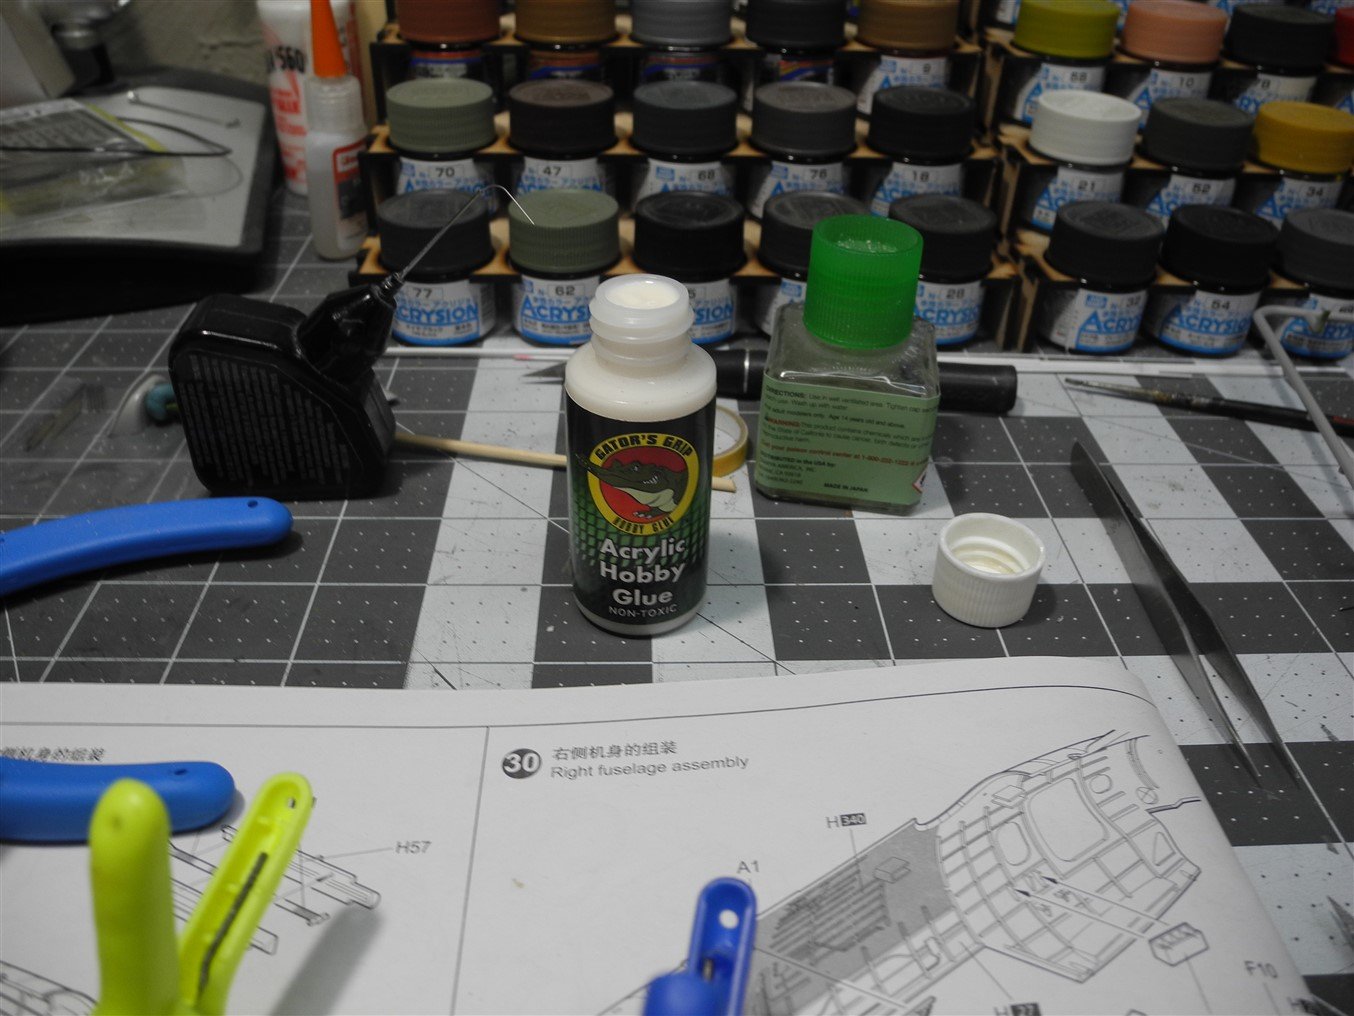
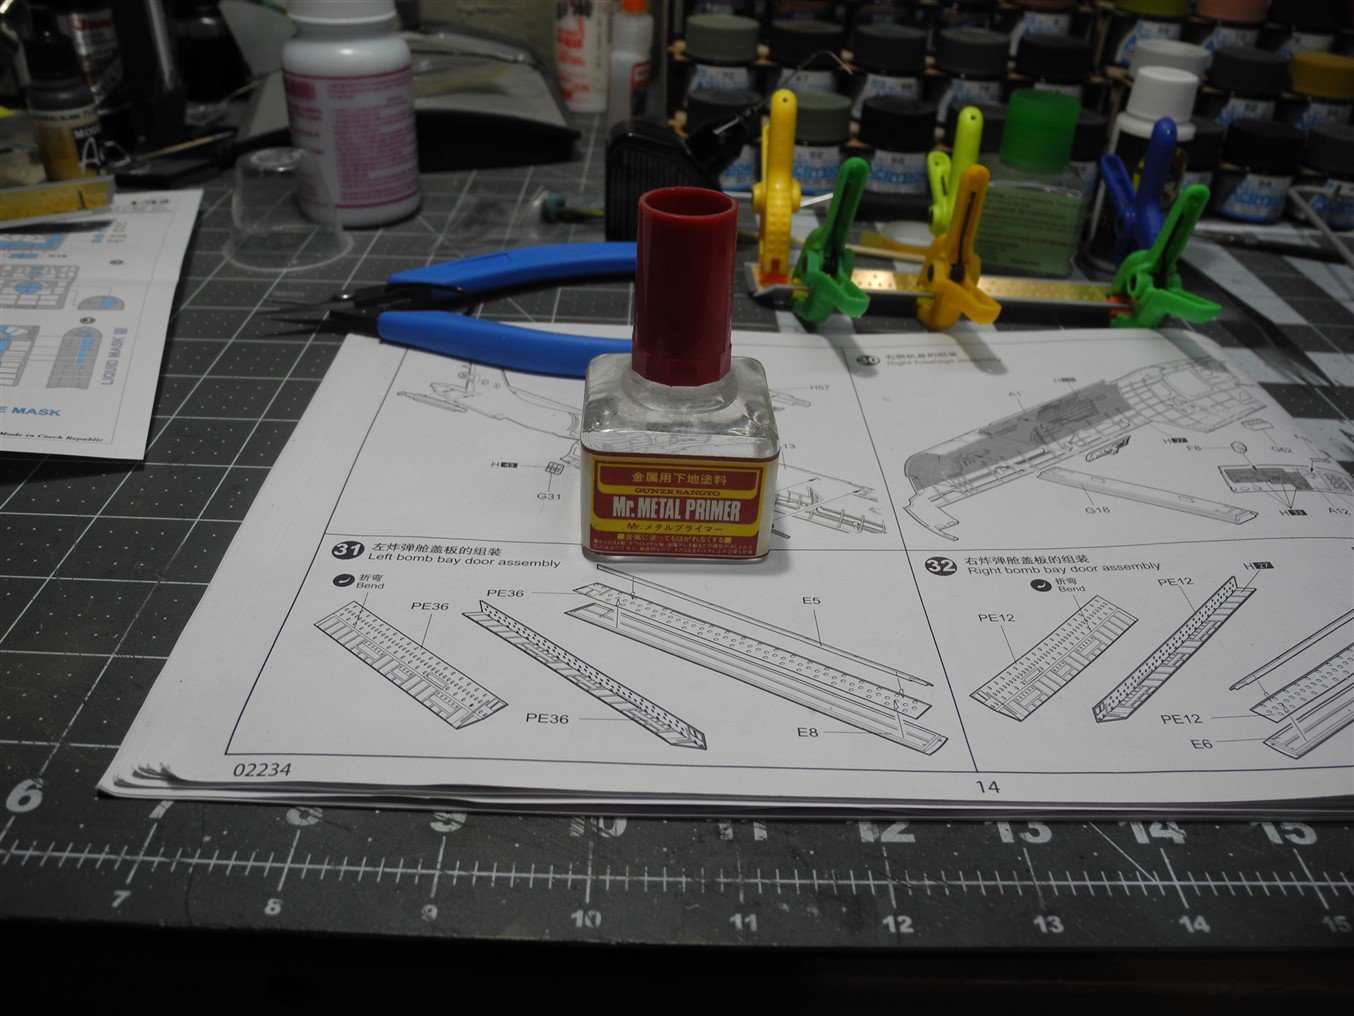
The Avenger model comes with a set of bi-fold bomb bay doors. The doors are enhanced with a fully photo etch lined inner door detail provided stock in the kit. Often, modelers ask what type of glue to use for photo etch. While CA glue has it's place in the scheme of things, my personal favorite most of the time is acrylic glue. Why? *The slower drying time gives plenty of latitude for positioning the part without it inadvertently adhering too soon. *It dries completely clear with no fogging. *It dries very thin without a buildup. *It cleans up with water. *It's a more flexible bond, not brittle like CA. I can easily clean up any excess glue with a paint brush wetted with water to eliminate any sign of the glue on the finished model. Another question modelers often ask, what is the best primer for photo etch? My choice is Mr Metal Primer. *It is a solvent based primer, and completely transparent. *It adheres very well to photo etch and mostly eliminates the chance of the finished paint color peeling away from the photo etch. *It can be brushed onto delicate photo etch parts and is self leveling. *Dries quickly. *Since it has no color pigments, it will not obliterate the fine surface details that photo etch is meant to provide. The kit provides pre shaped bomb bay hinges for the doors to attach in a bi-fold fashion.

- 267 replies
-
- 16
-
-
The Mossie is shaping up very nicely OC. The photo etch inside the cockpit is paying dividends.
-
Hi Denis Just found your build log for the Agilis. Wanted to follow along to learn a thing or three. There are more than a few wooden ship models in my stash, but it's outside the sphere of my comfort zone. I'm a neophyte wood ship modeler. Maybe following some guys who are experts such as you and JCT will give me the confidence boost I need to start one of my own.
-
Sikorsky CH-53 by mtaylor - FINISHED - Revell - 1:48 - PLASTIC
CDW replied to mtaylor's topic in Non-ship/categorised builds
As others have said, the order to follow is: gloss coat where the decal is to be placed microset under the decal microsol over top of the decal flat clear coat over decal when it's dry I've run into the same issue with model master flat clear - it dries milky. Tamiya flay clear is my go-to for that purpose. As you said, never over brush. Let the clear settle itself over the area where applied. Otherwise, you will leave brush marks. PS: if you have any Future, it works perfectly as your gloss clear coat under decals and it works perfectly when brushed on. -
It's well known in Florida, bull sharks are man eaters. Last time I checked, they account for the majority of shark attacks in Fla. They swim far upstream in rivers as well, well beyond brackish water.
-
There are a lot of critters to ruin your swimming in Fla lakes. Water Moccasins, gators, parasites, etc. As a Fla native, I don't swim in lakes but we used to do it a lot as kids. The water was cleaner back then before the massive population increase and urbanization which brought a lot of pollutants to our lakes through rainwater runoff, not the least of which is fertilizer and heavy metals (from automobiles).
-
Not enough natural light in my room. It's definitely navy blue which is a very dark blue. When you look at the photo of the gator, you'll see water lilies. Ahead of the lilies are floating roots called tussocks. The gators root up the water lilies and the roots float to the surface of the water where the gators lay out to catch sun (reptiles do that) and to lay/hatch their eggs. Often, you'll see baby gators 8" long sunning themselves on the tussock beds.