CDW
-
Posts
7,753 -
Joined
-
Last visited
Content Type
Profiles
Forums
Gallery
Events
Everything posted by CDW
-
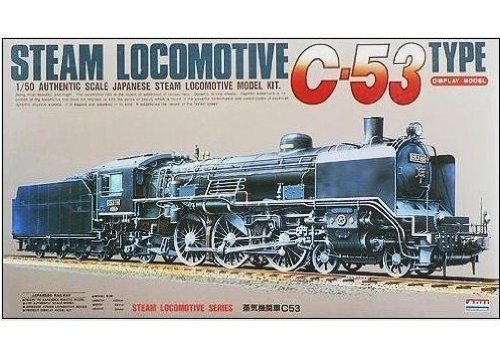
 Very sharp markings on those two locomotives.
 -
From Japan, there are a whole line of 1:50 scale steam locomotive kits. Beautiful models, I have been so tempted at times to start collecting and building these kits. So far, I have resisted the temptation, but your build here might tempt me again. Locomotives, particularly the steam powered ones, are so fascinating and cool looking.
-
Phantom Henry J Gasser by jct - FINISHED - 1/24 scale - PLASTIC
CDW replied to jct's topic in Non-ship/categorised builds
I was plenty interested, just too cautious once I thought it through. It is designed to fly indoors almost exclusively. If I remember correctly, wind speed can be no more than 5 mph outdoors or you run the risk of the wind overpowering the propulsion system, then you'll have a runaway blimp on your hands! OMG -
Phantom Henry J Gasser by jct - FINISHED - 1/24 scale - PLASTIC
CDW replied to jct's topic in Non-ship/categorised builds
A friend tried to give me his RC dirigible model...the darned thing was almost 30' long! For real. I told him I couldn't afford the helium it would take to fill it. He said, no problem, I have some tanks full of helium to give you as well. This thing was complete with all the RC equipment and everything. It was designed to fly advertisement inside of domed stadiums. I did some reading on the flying aspects of these ships and realized what a huge liability they would be to fly one. I turned down his free gift. I learned that the professionals who use these things have a helium recovery system used to remove and restore recover the helium after each use. Way too expensive for me to play with, not to mention what would happen if unexpected wind direction sailed this thing over my local international airport. I'd be sitting in a small room in Leavenworth Prison behind bars. -
Phantom Henry J Gasser by jct - FINISHED - 1/24 scale - PLASTIC
CDW replied to jct's topic in Non-ship/categorised builds
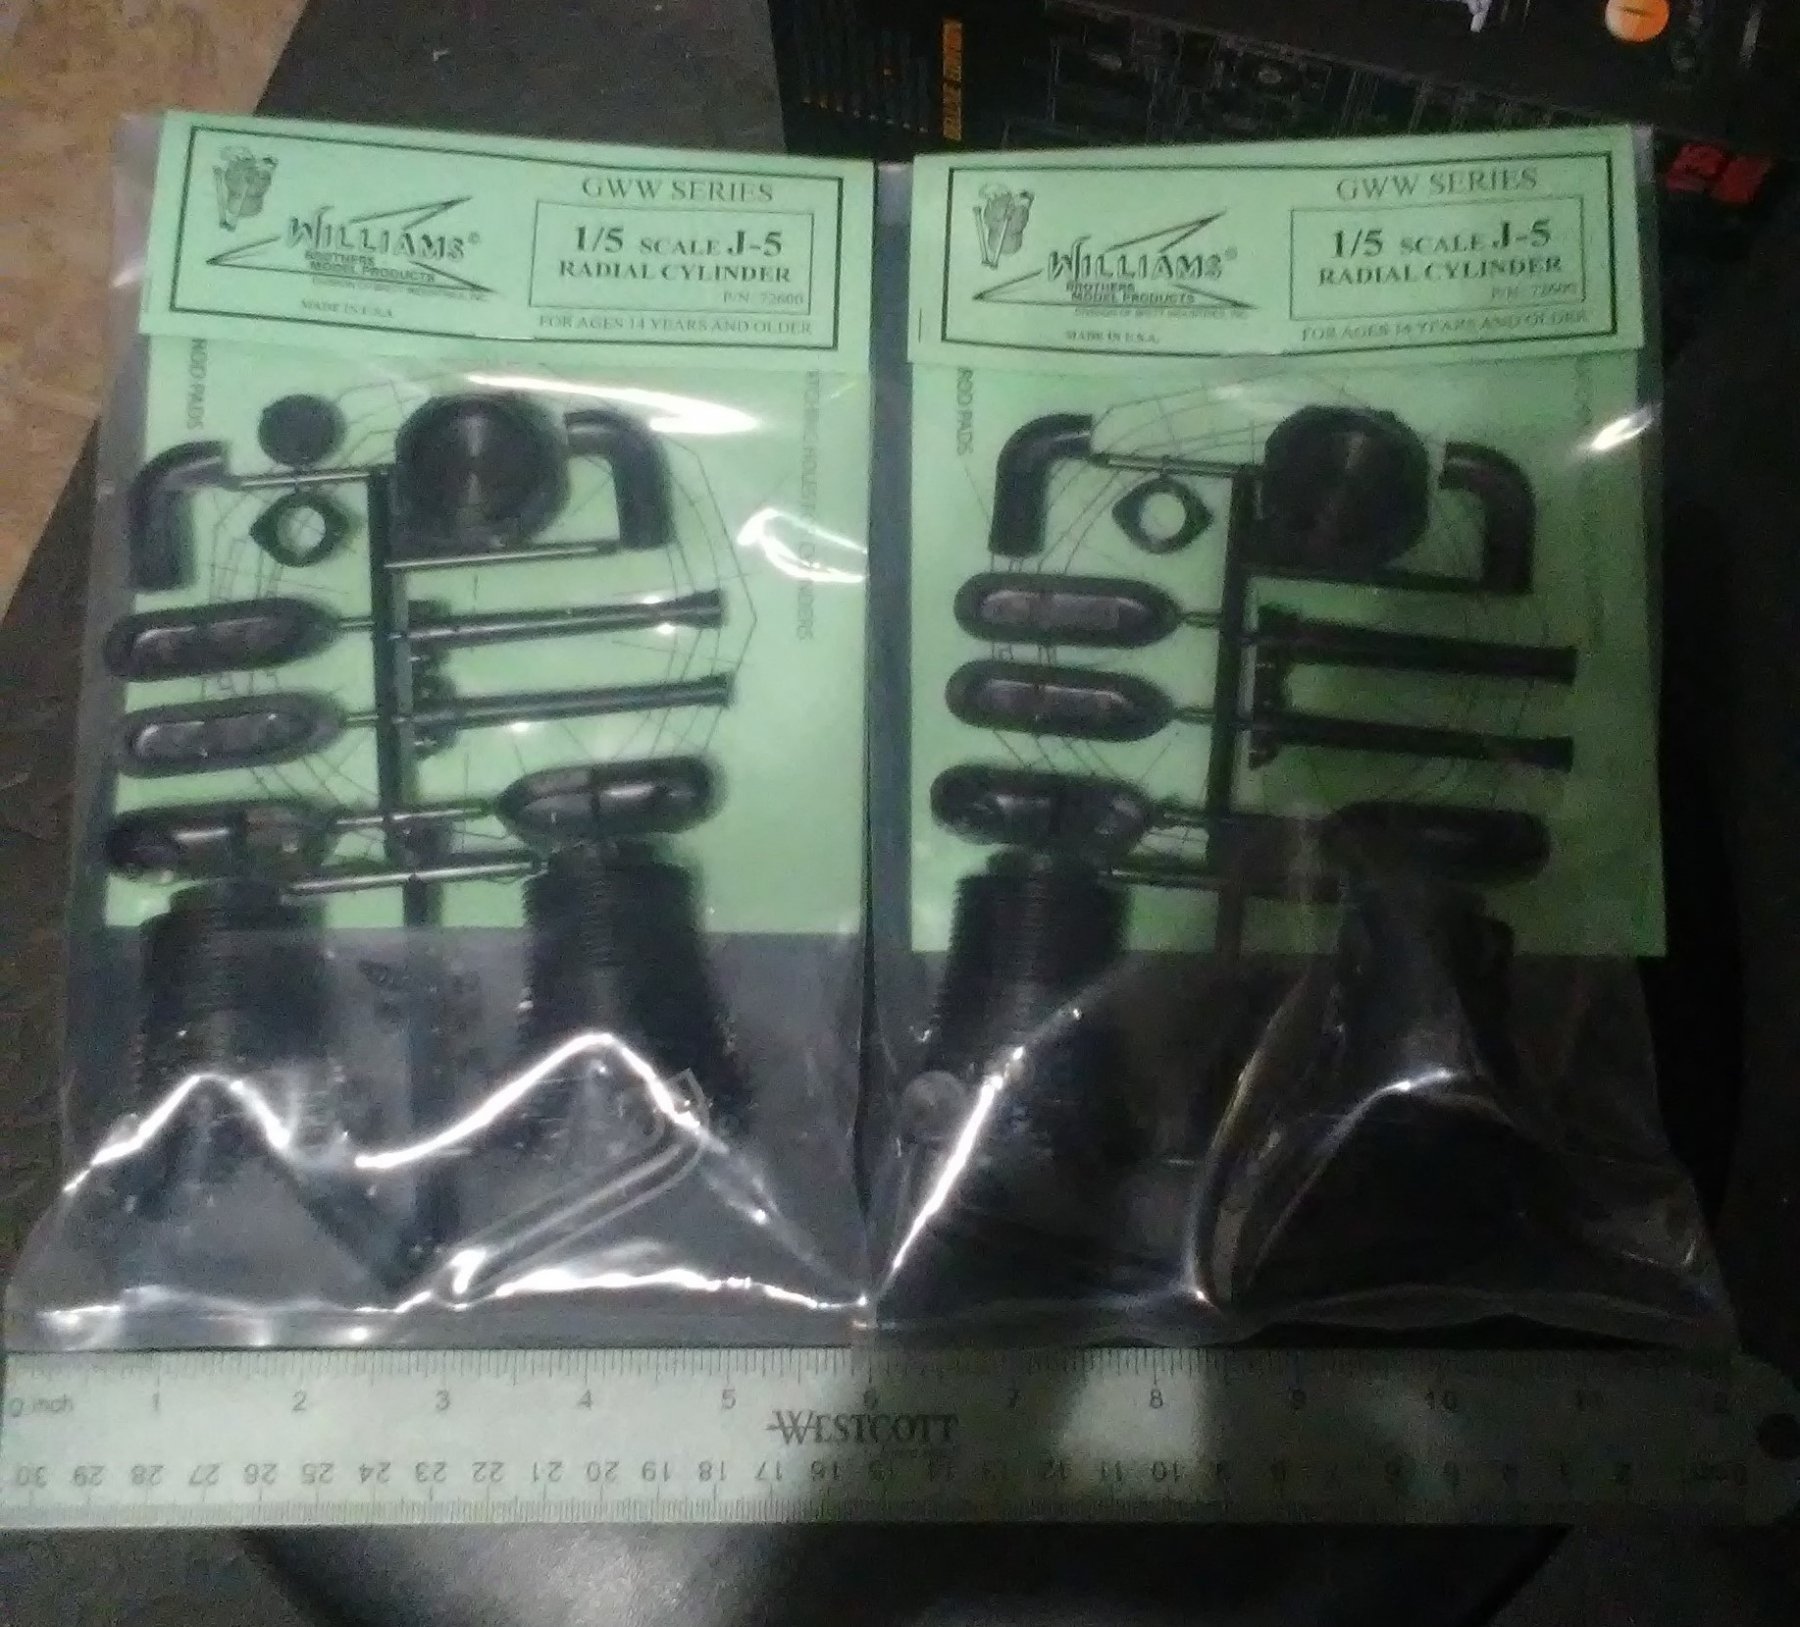
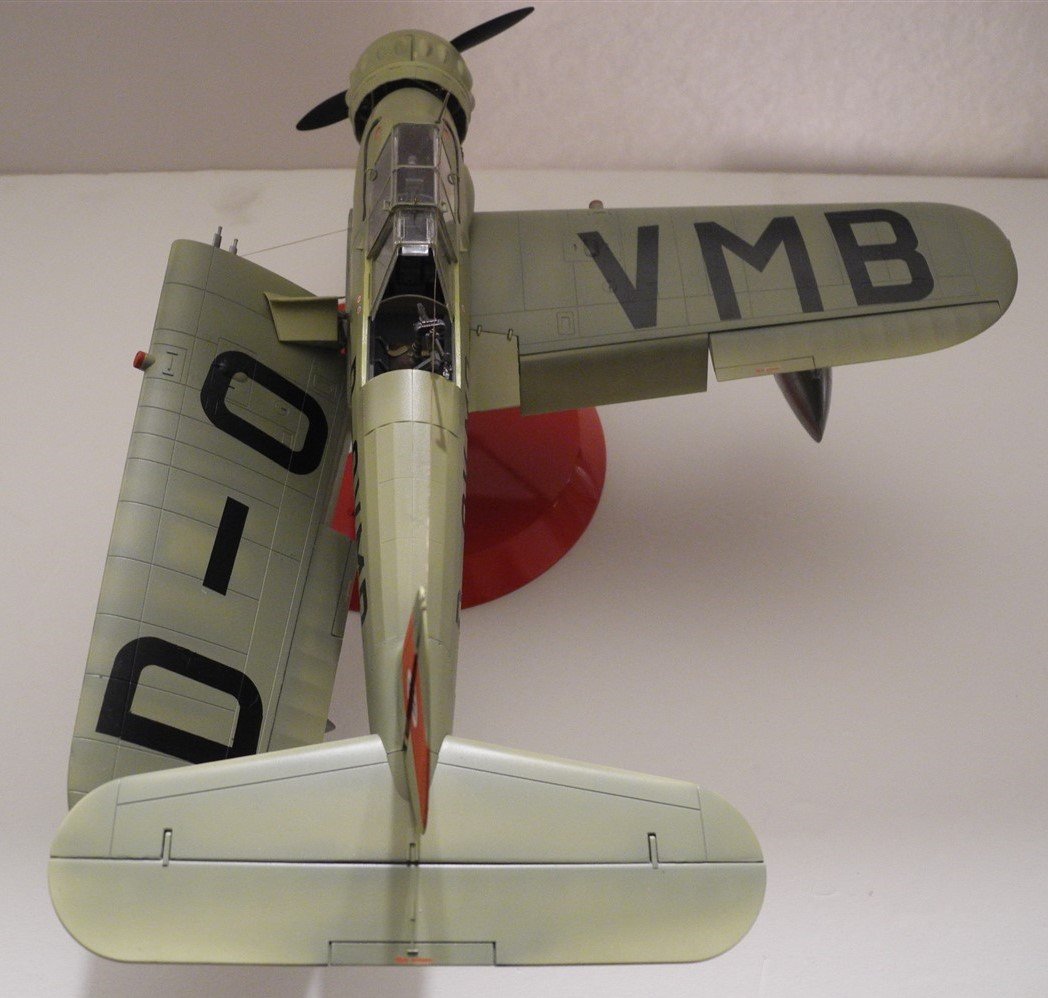
Here is an example of the kind of plastic kits Williams Brothers was famous for. I happened to have some of these handy in a storage drawer, ready for a 1:5 scale biplane model I have yet to build.
-
Phantom Henry J Gasser by jct - FINISHED - 1/24 scale - PLASTIC
CDW replied to jct's topic in Non-ship/categorised builds
Besides the line of 1:32 air racers and the Sparrow, Williams Brothers produced large scale WW1 machine gun and radial engine kits, designed primarily for scale model builders in the RC aircraft hobby. They were the only ones who produced plastic kits of this type and were a mainstay in the RC hobby. -
She's coming out bee-u-tee-full Denis. 😎
-
Phantom Henry J Gasser by jct - FINISHED - 1/24 scale - PLASTIC
CDW replied to jct's topic in Non-ship/categorised builds
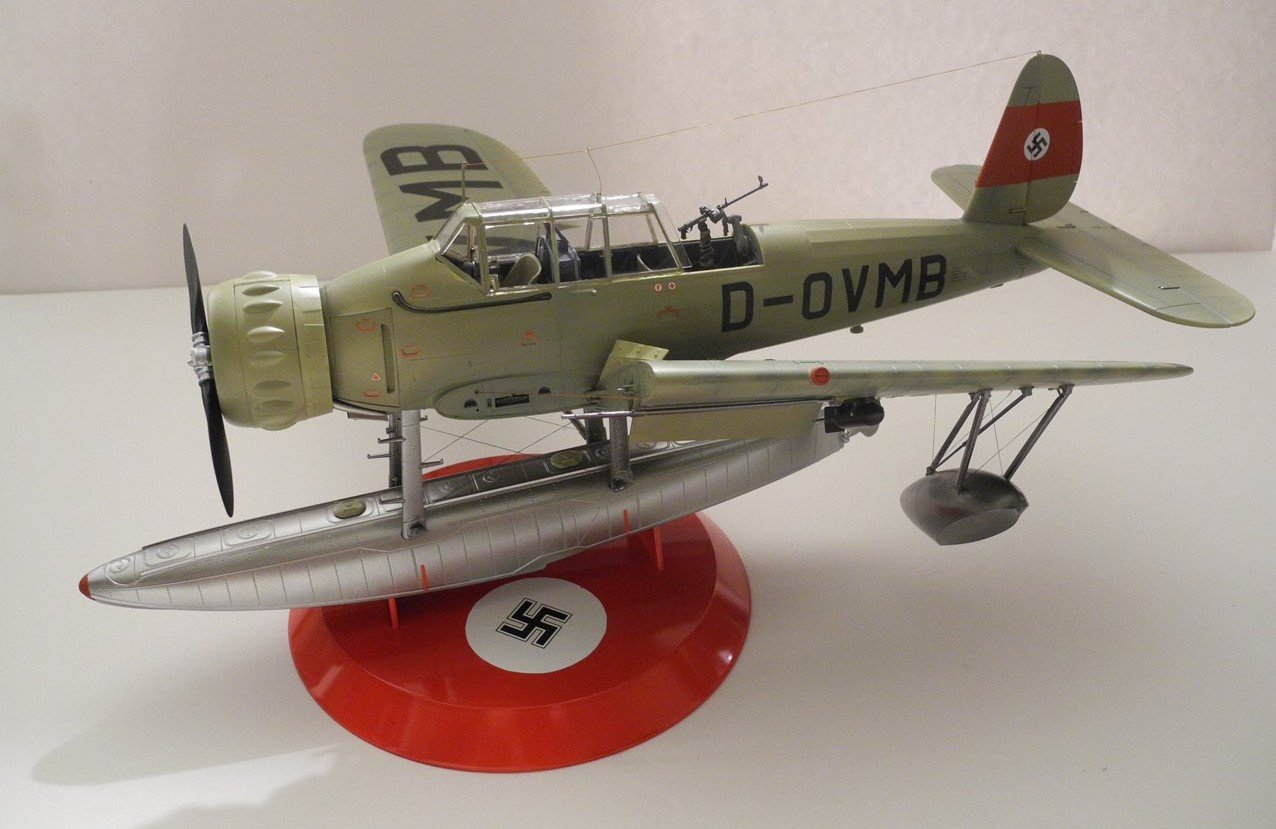
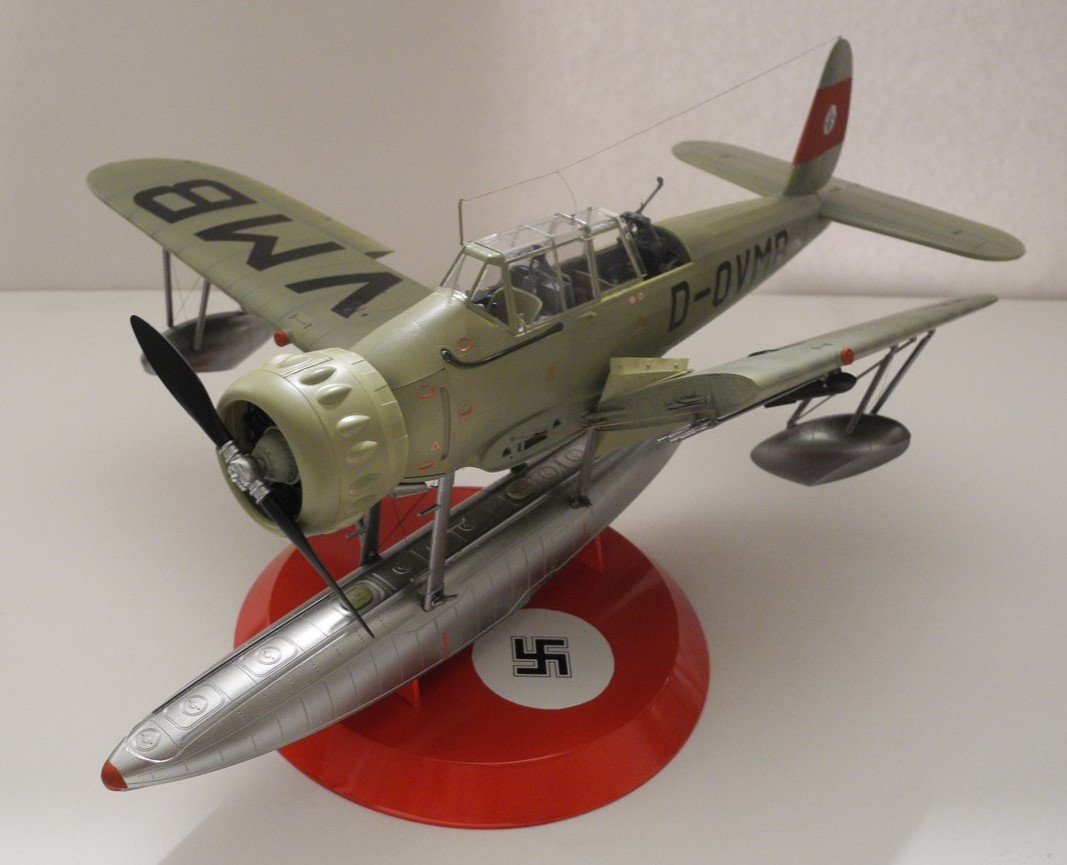
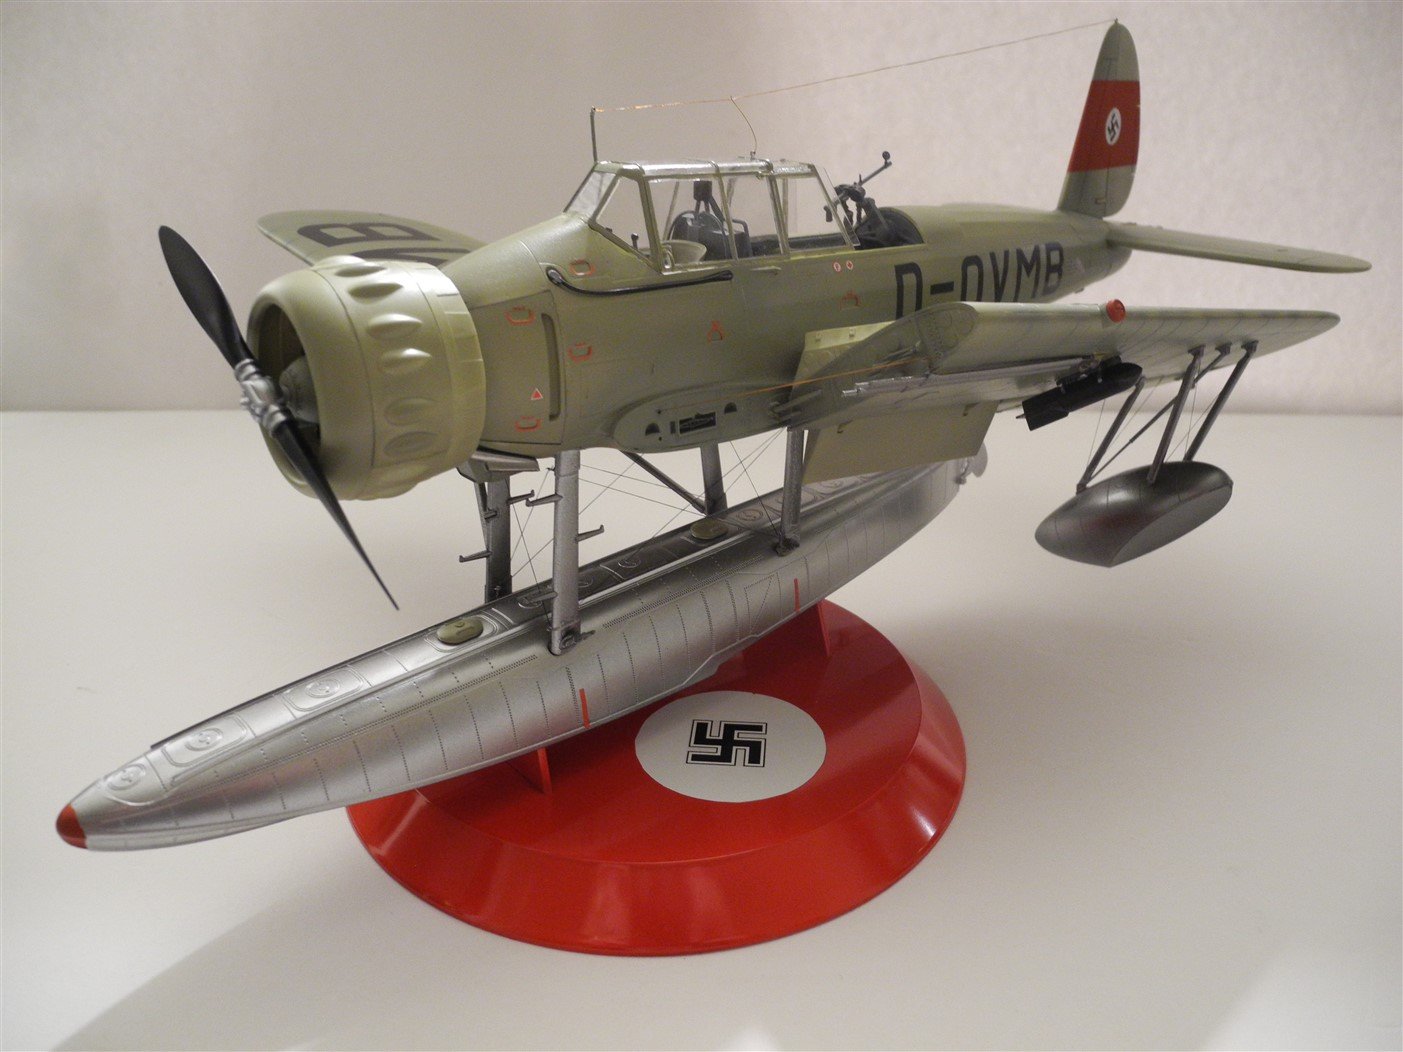
Williams Brothers had some cool 1:32 planes. I've seen them finished and they look super good. -
What you have with this engine is an example of 1960's Revell model car engineering. This is an old Revell engine used in several of their old '60's vintage kits, namely the Orange Crate altered dragster and the Mooneyes rail dragster. Both were modeled after actual race cars from that time period. Revell cornered the market for highly detailed model car and truck kits back then. Nothing else came close. Revell marketed "Part Packs", which were mini kits of engines, race chassis's, bumpers, grilles, and race car bodies such as T-Roadsters, Bantams, etc. On Ebay, you see these old part packs offered for sale though they command a premium price for the vintage items in their original packaging. More recently, others such as AMT have acquired these old Revell molds and reproduced the kits, your engine a prime example of that. All of their kit engines were highly detailed like this 283. In addition, they sold Ford, Pontiac, Oldsmobile, and several different Chevy engines including the 409. The first photo etch for model cars I ever saw came out in the 80's. Back then, it was strictly a cottage industry. Vendors produced these items in their garage or very small businesses in small, and expensive quantities. The whole car model aftermarket thing never really took off in the USA for some reason. It never grew much beyond a cottage industry, mom and pop type operation. I'm pretty sure some of these things are still available but like I said, the cost is big when compared to what you get. Obviously, these are not mass produced items. Asia seems to have done the most in photo etch and other aftermarket items, but their products center around race cars such as Porsche, Ferrari, BMW, and formula one type cars. These sets are readily available from sources in Asia, particularly Japan and China.
-
Just go on Youtube dot com and search "the great train chase". You'll find similar videos on the history of the General.
-
This model is really coming along! I just watched a history show about the Yanks stealing the General and the ensuing chase. Very interesting history about that train.
-
In the '90's, there was an edition of a 60's Chevy Nova by AMT that had an even more detailed small block chevy engine included. The kit came with an engine stand to display it outside of the car.
-
Love those old Pontiacs. My oldest brother bought a brand new Catalina in '62. My mother bought a new one in '67. She let me use hers often, and with that 389, it was a real mover. Just a big 2 bbl carb on hers, but it had plenty of kick.
-
Phantom Henry J Gasser by jct - FINISHED - 1/24 scale - PLASTIC
CDW replied to jct's topic in Non-ship/categorised builds
At the time when my forefathers settled in Florida, there were basically just two ways to get here from the north. You either came in by sea (Atlantic Ocean) through a navigable water way like the St. Johns River, or you came in by horseback or wagon around the west side of the Okefenokee Swamp in Georgia. -
These pirates look pretty cool. Correct scale, too. https://www.toysoldiersdepot.com/store.php/thedustyloft/pd8245992/mars_figures_1_72_zombie_skeleton_pirates_48_?gclid=CjwKCAjw4LfkBRBDEiwAc2DSlHICX0qaQYSJxt_cUkYN_N11iTrvDv1OL6YvIaphRvGBiepRPmcEQhoCO-cQAvD_BwE
-
Ratlines look fantastic! If I were a sculptor, would sculpt some skeleton pirates to pose as climbing the ratlines....holding daggers with their teeth. 🙂
-
Harbor Freight Hardwood Workbench Kit Bash
CDW replied to thibaultron's topic in Modeling tools and Workshop Equipment
Ahhhh...that makes sense! Mystery solved. -
Harbor Freight Hardwood Workbench Kit Bash
CDW replied to thibaultron's topic in Modeling tools and Workshop Equipment
What's the purpose of those 4 vertical pegs that are provided for the bench top? I didn't throw mine out, but never figured out why I needed them. -
Phantom Henry J Gasser by jct - FINISHED - 1/24 scale - PLASTIC
CDW replied to jct's topic in Non-ship/categorised builds
My 3rd great grandfather came to the area now known as Ocala as one of the earliest settlers in the 1840's. He built the first courthouse there for Marion County. The Ocala Star Banner conferred with one of my cousins and then published a big write up about it in their paper. I have many many cousins in that area of Florida. The couple pictured in the article are my 2nd great grandparents.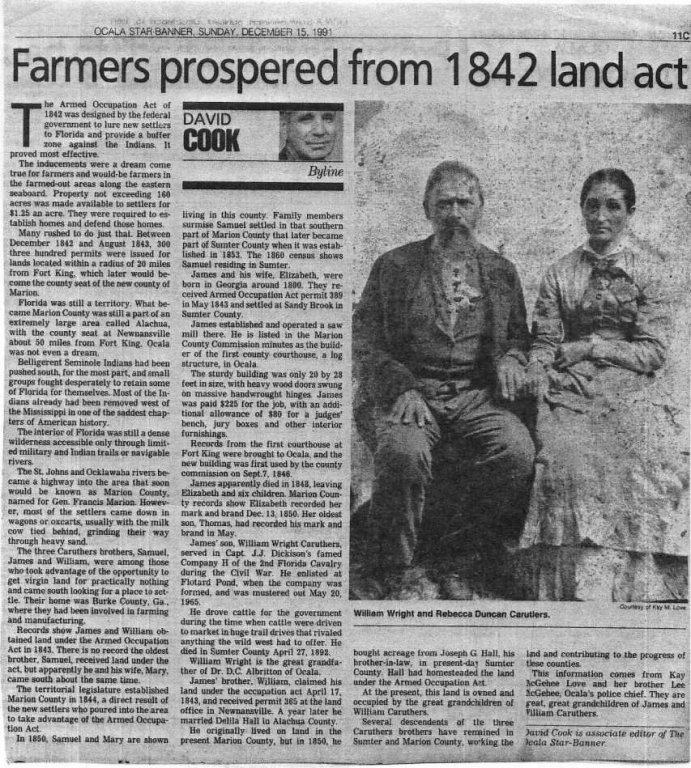
-
Thanks OC. It's always a pleasure to have you looking in and your encouragement.
-
Thank you very much for your comments, Tom. There is such a wealth of good information and how-to's out there today on the net that didn't exist some years ago, it makes the hobby more achievable than it once was. In addition, there are much better paints, glues, and putty than once existed. Scratch that itch and get a plastic kit to try out for yourself. I highly recommend a Tamiya kit of your choice as a beginning place to re enter the hobby or as a first try. The engineering and fit of Tamiya kits are superb. Some of the others require more persuasion to fit.
-
Phantom Henry J Gasser by jct - FINISHED - 1/24 scale - PLASTIC
CDW replied to jct's topic in Non-ship/categorised builds
The boardwalk was awesome. -
Thanks again for the kind words, Denis. The truss rigging takes some fiddling to do, but it's worth it in the end.
-
Thanks for the kind words, Richmond.