


Salty Sea Dog
-
Posts
666 -
Joined
-
Last visited
Content Type
Profiles
Forums
Gallery
Events
Posts posted by Salty Sea Dog
-
-
Nice painting Jesse. Happy Thanksgiving
- Piet, CaptainSteve, Canute and 4 others
-
 7
7
-
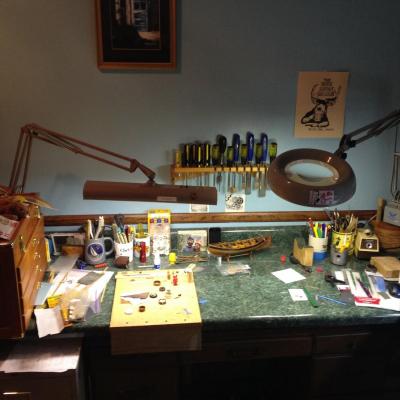
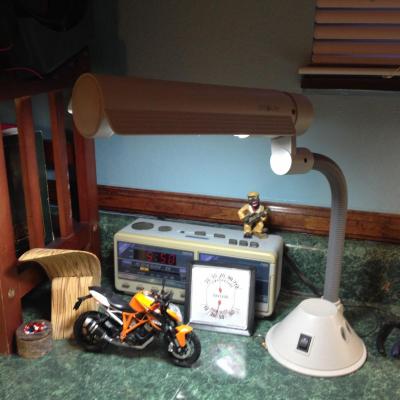
Hi Robbyn, my favorite lamp is the one on the left in the 1st pic which has twin 18" flourescent tubes in it and the base mounts out of the way. The arm articulates and the head swivels so you can direct the light to really shine where you need it. This one is made by Amplex, but I think it is a common style. The one on the right has a round flourescent tube with a big magnifying lens in the center. It doesn't give off as much light and I find a lighted Optivisor to be better when you want magnification. Although pricey, a gooseneck OttLite like in the 2nd pic from Michael's or Hobby Lobby puts out nice light too. If you get one on sale with a coupon, it's not so bad. I'm a firm believer that you can't have too much light when you are trying to do detailed work. I'm glad you are back. I was beginning to wonder if the world's largest prairie dog down the road from you got you!Buck, any recommendations on lamps?
- Piet, avsjerome2003 and mtaylor
-
3
-
-
-
Really nice work! Congrats!
- GLakie, Canute, zoly99sask and 2 others
-
5
-
-
I concur with George and Nigel!
 I'll repeat myself again and say that your details are so amazingly crisp and well executed. I've learned a lot from you - thanks!!
- md1400cs, GLakie and CaptainSteve
-
3
-
-
Hi Jessie!
You can make wood strips bend to almost any shape with water and heat. Although probably not the safest (or smartest!) thing to do, I have bent damp wood with a bare light bulb. You need to constantly move the wood slightly in the area to be bent to avoid scorching, and it will become pliable and require very little force to bend in any direction. A safer way is to put a bare bulb inside a thin wall pipe and bend the wood over the pipe. I know folks that have bent acoustic guitar sides this way. It's low tech and works well. If you do the bare bulb, definitely wear eye protection. I've never had a bulb explode, but it could happen. The wood should be damp enough to sizzle and should be re wetted with a spray bottle if it stops sizzling to prevent scorching. The walnut planking on my whaleboat was actually bent that way.
Keep up the great work!
-
Thanks for the nice comments and likes. It may not be until snow starts flying that I get much boat time. Now that it's cooler I'm hand digging some terraces in the backyard. Is it possible to ever get caught up with house projects?!!
-
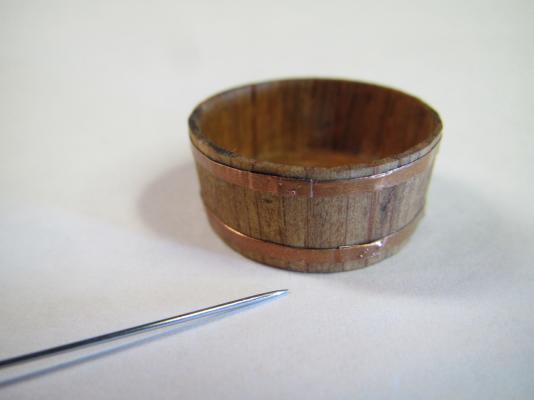
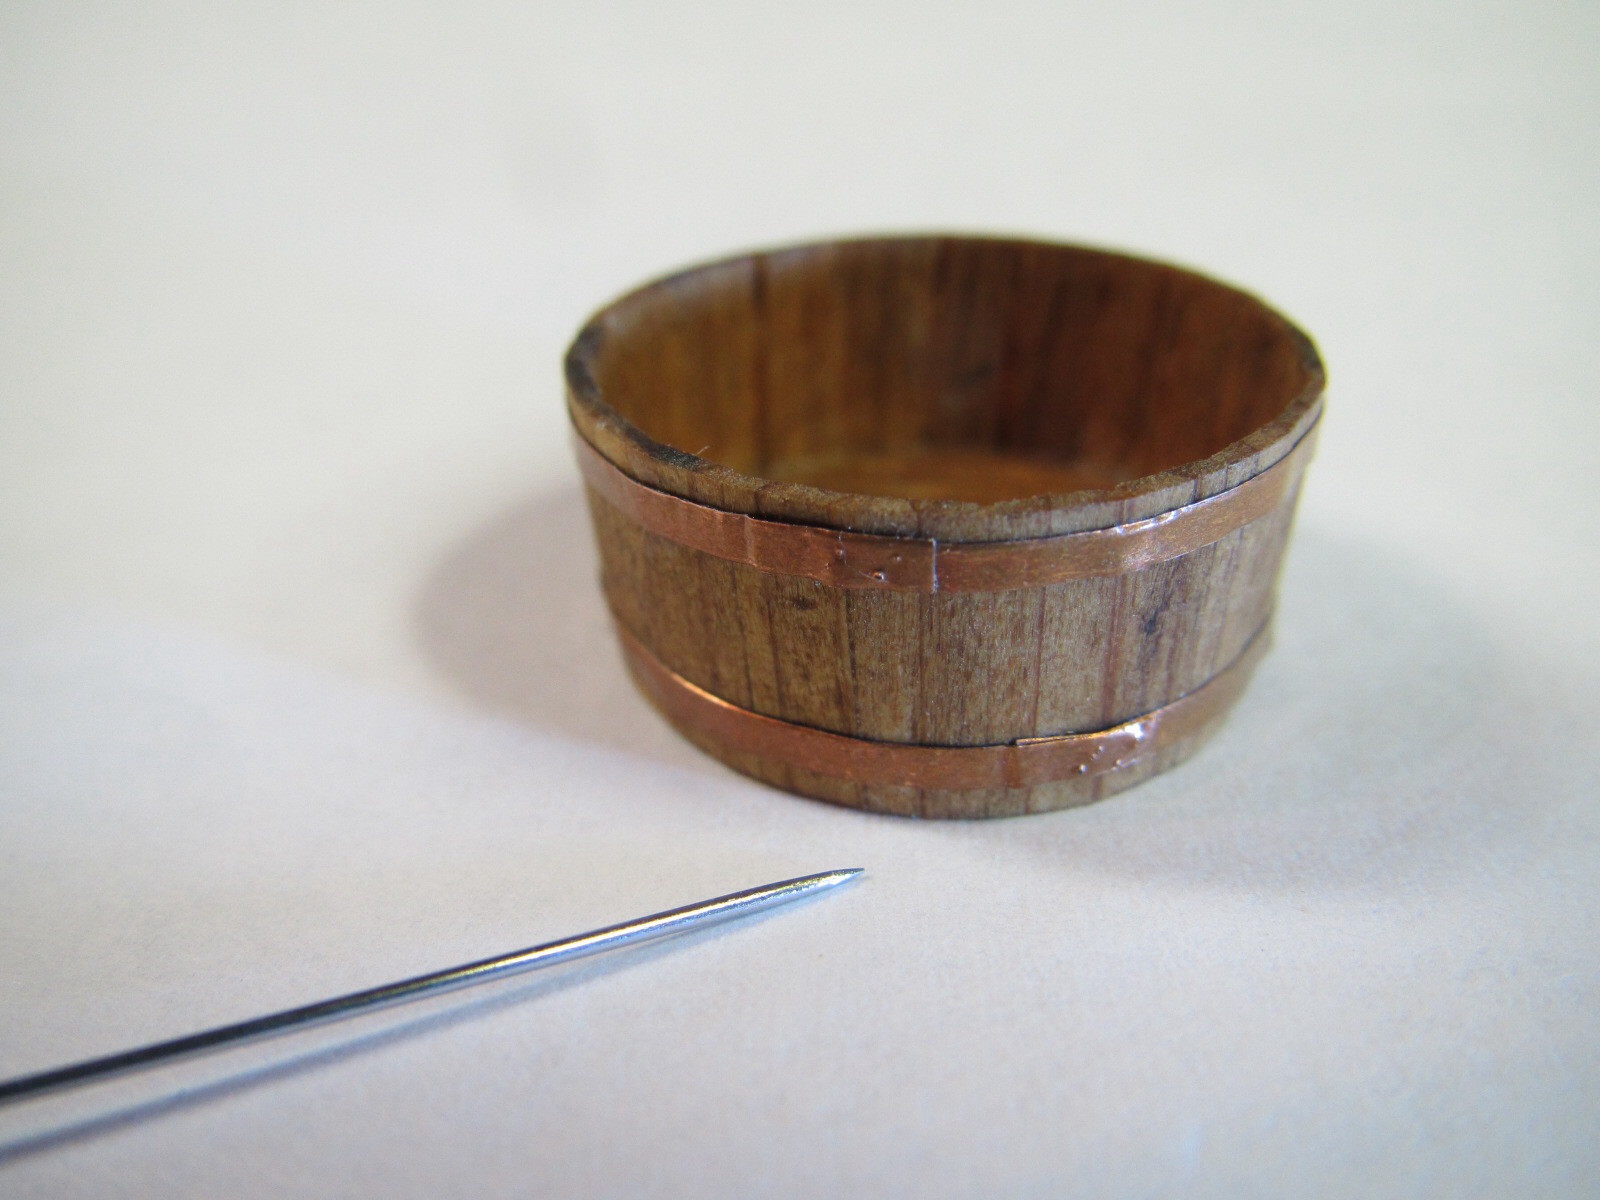
When I was moving stuff around in the garage I came across an old box of my wife's stained glass supplies. There was some thin copper foil tape that was .004" thick, which happened to be the magic thickness for the bands around the buckets. I sliced some strips that were just under 1/16" wide, and from the back side, pressed with s straight pin to make some rivet bumps. The overlaps were burnished to get a simulated blacksmith hammered band joint.
- CaptainSteve, mtaylor, Ferit and 8 others
-
11
-
WOW!! Those rope coils look absolutely real! What sort of sorcery is this!
- GLakie, zoly99sask, Dimitris71 and 2 others
-
5
-
Hi Lawrence! Thanks for checking in. I have added .004 thick copper bands to the line tubs that turned out nice. I'll post pics soon. Been tied up with lots of other projects that have kept me away from the dry dock.
Hi Lester. Thanks for the kind words. Although I did not know when I got this kit 30 years ago (dang I'm slow!) that this kit is not anything like the actual boats from the Morgan, I have learned since then. I mentioned a while back that the keel was a bit big and that the kit really seems to be based on one that Chapelle shows as a type used a half century before the Morgan. AL, short for Artesania Latina, is the kit manufacturer, and they are known for deviating from accuracy! Still, they make some fun kits. I do have the Model Shipways kit you mentioned in my ship locker. I just need to live to about 600 to build everything in there at the rate I'm going. Way too many other interests and projects....
-
-
Your work keeps getting better and better! Very cool ideas. Firing that big gun should shiver the timbers!
- mattsayers148, CaptainSteve, GLakie and 1 other
-
4
-
-
-
Thanks for the detailed build shots of the wheel Matt. That turned out really nice!
- CaptainSteve, mattsayers148, Canute and 2 others
-
5
-
-
Fantastic work as always Michael! I've been meaning to ask; What are you using for the tiny nails like in your crow's nest? I see a railroad spike on the bench, but it looks like it would be too big even with the head cut off. Are you painting them black before inserting them? Wonderful details!

-
-
Just catching up again. I really like the timber base. If you are going to make more trenails, a very cool trick I learned from JPett is to chuck a toothpick in your Dremel and run it through progressively smaller holes in a draw plate. This is really fast and you can get really long super tiny dowels. You won't have to taper each one on sandpaper.
Really nice work you've done lately!
-
-


Charles W Morgan by texxn5 - FINISHED - Model Shipways - 1:64
in - Kit build logs for subjects built from 1801 - 1850
Posted
Just catching up again. Awesome job on the whaleboats and their gear and the masts!! Have a great Thanksgiving!