HOLIDAY DONATION DRIVE - SUPPORT MSW - DO YOUR PART TO KEEP THIS GREAT FORUM GOING!
×


Salty Sea Dog
-
Posts
666 -
Joined
-
Last visited
Content Type
Profiles
Forums
Gallery
Events
Everything posted by Salty Sea Dog
-
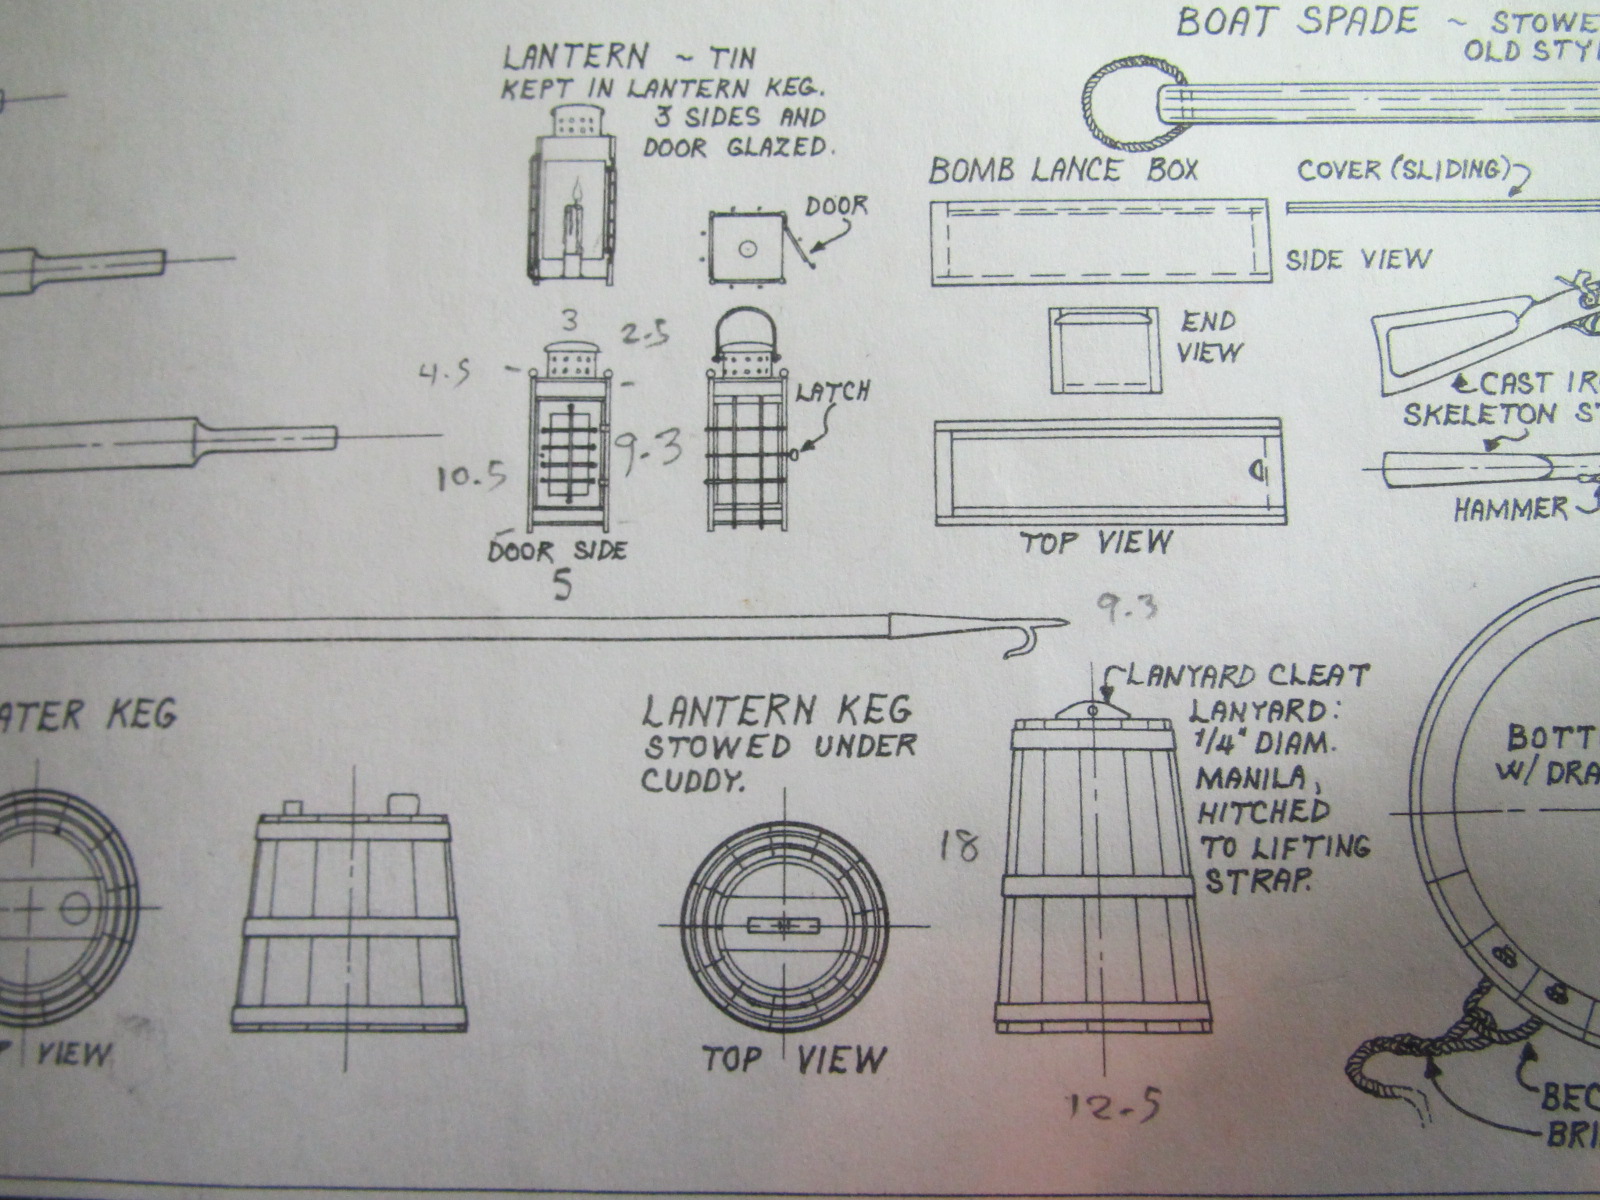
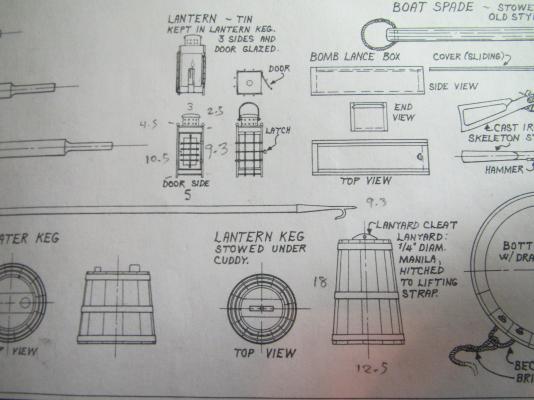
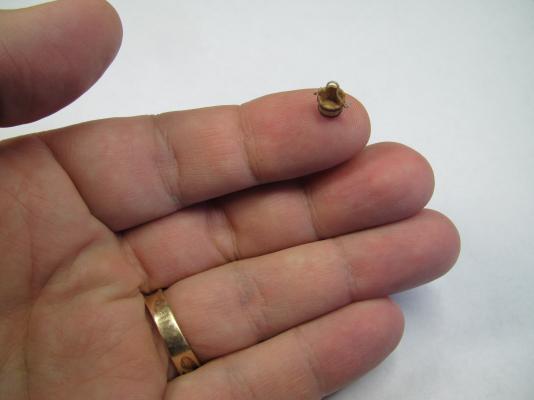
 Thanks Matt. I think that the lanyard cleat on the top of the lantern keg is wood and not the handle of the lantern. The keg would need to be waterproof. That seems odd in the story that one would pound the lantern keg to open it. I would think the lantern glass would break.
- 515 replies
-
- 1
-

-
- artesania latina
- whaleboat
- (and 1 more)
-
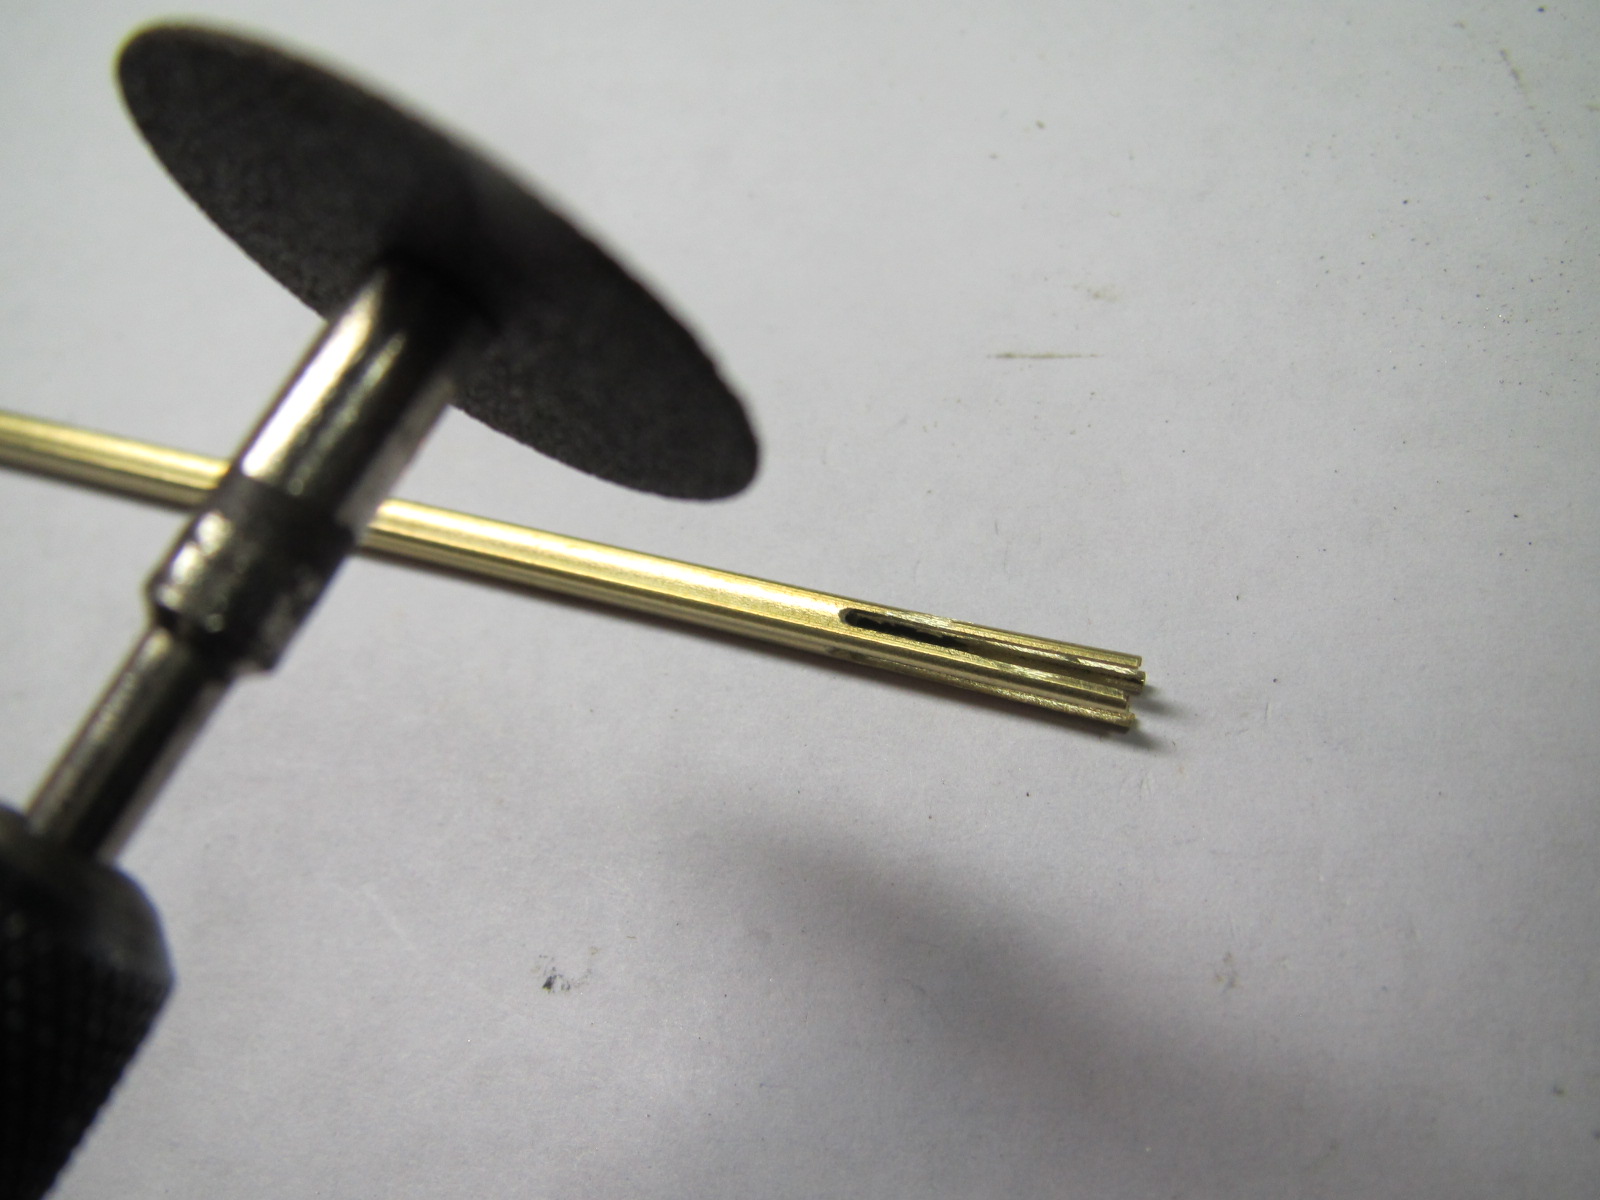
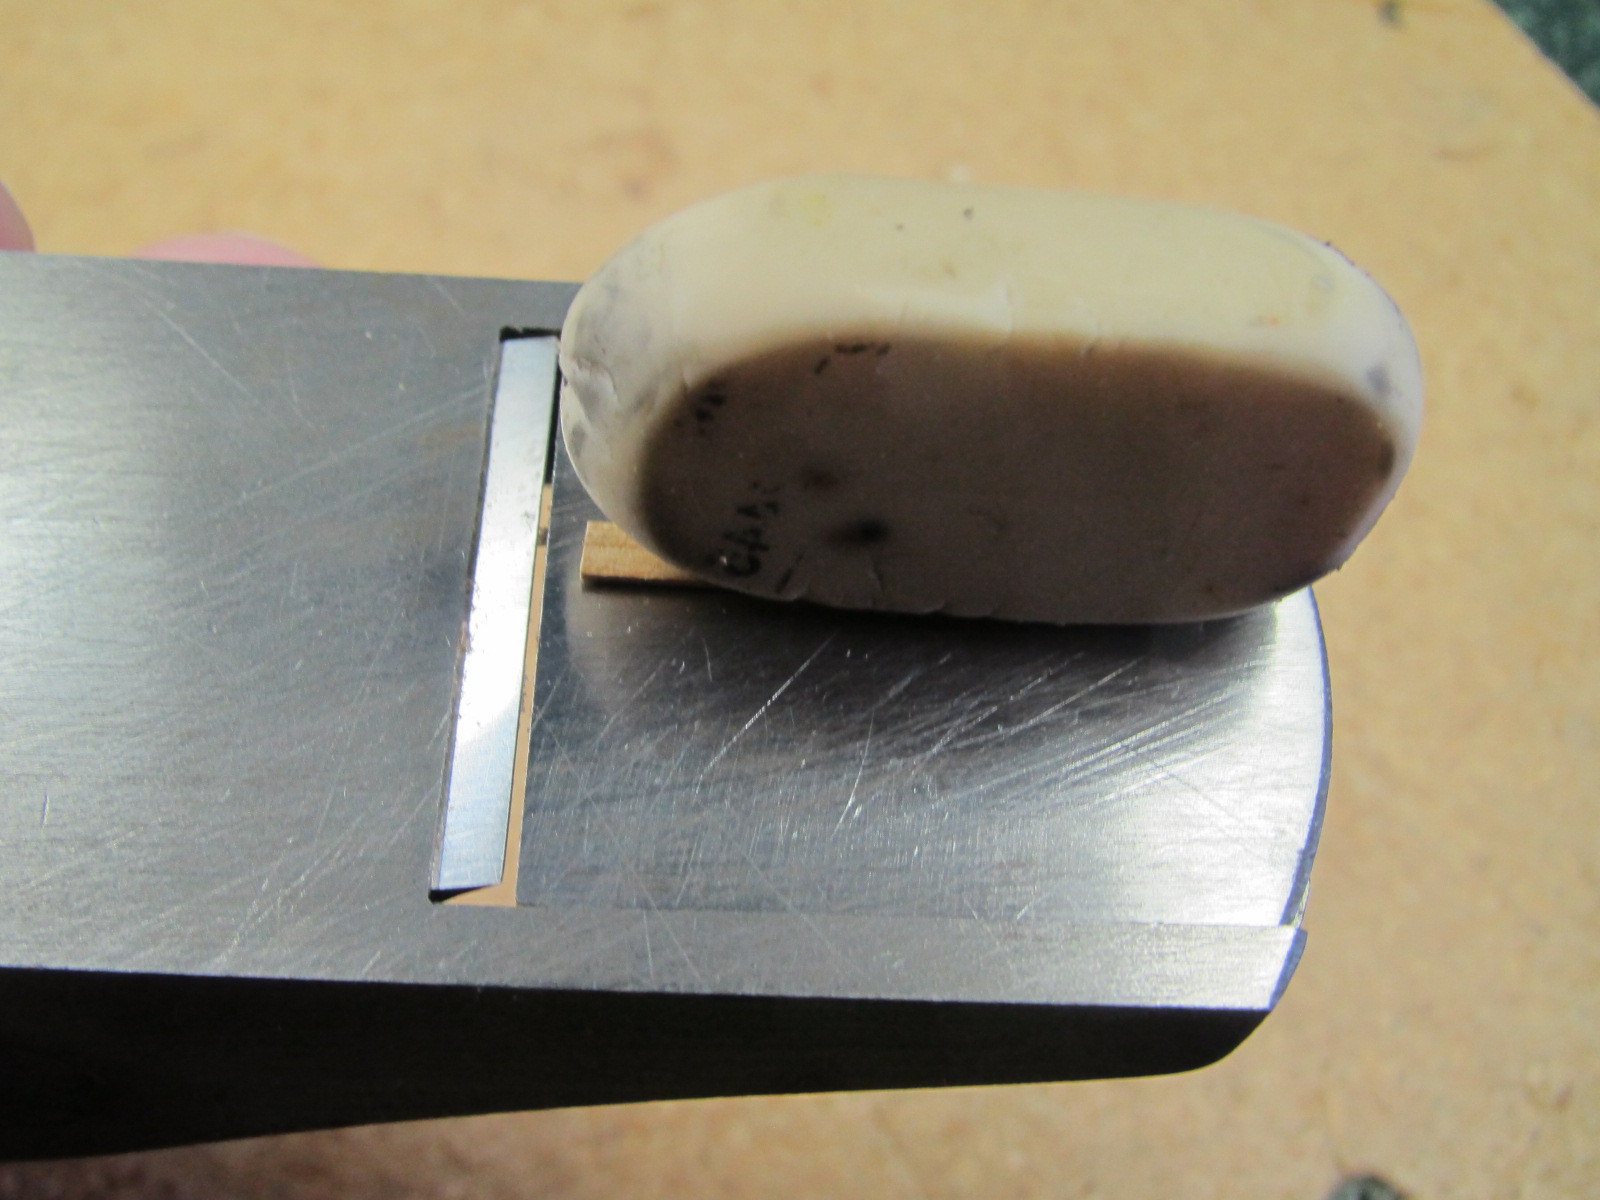
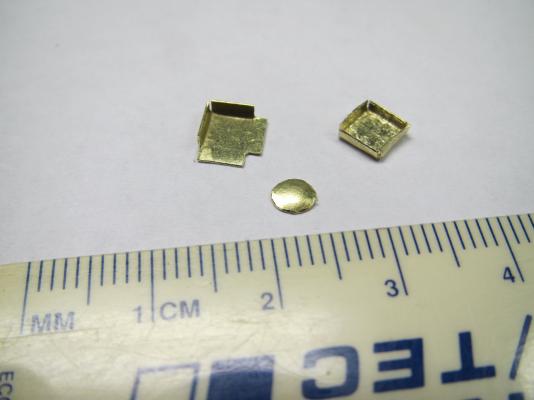
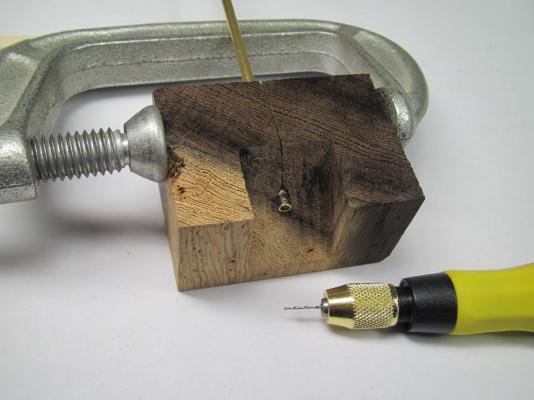
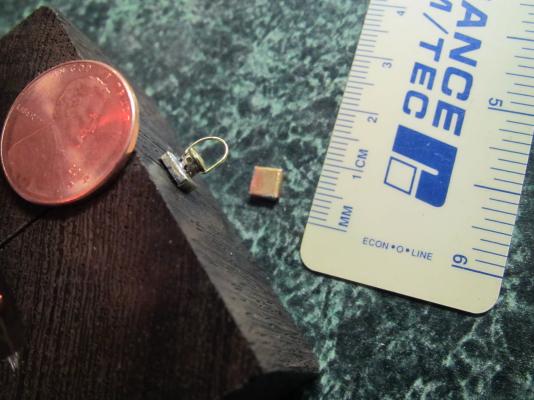
OK, I was intending to hold out until I finished this lantern to post pictures, but I ran into a snag and need to order some K&S brass 1/32" angle. Nobody stocks that size around here, as apparently, nobody else around here is stubborn enough to try using it! The angle will be used as corners to connect the top and bottom plates of the lantern. The top and bottom plates were made from .010 sheet brass. I used end cutters to trim the sheet metal and then folded the tabs while gripping them with the ground end cutters shown on page 1 (post 13) of this thread. The tabs were gripped and the plate folded over while tapping with my miniature Dremel hammer. The round cap was domed with a ball end on the little hammer while the brass was laying over a hole in a piece of wood. Since I was unable to find any tiny brass angle here, I tried a couple of things. First I tried folding the .010 sheet into some angle pieces, but it ended up a bit wavy. I then tried cutting the corners from a 1/16" piece of square tubing. I wasn't satisfied with the results because when the 4 corners were cut loose, it was really hard to hang onto one side of the angle while trying to file the edge of the opposite side. I'll wait for some actual angle to continue. The lantern has a round chimney on the top with little vent holes and a domed cap and handle. The chimney has a 1/8" outside diameter so I needed to rig a holder to drill a bunch of .028" holes in it. I sharpened the heck out of a steel brad nail and used it as a center punch. The holder is a small chunk of wood that has a 1/8" hole through it. A sloped reveal was chiseled out of the business side because it was too hard to see the tubing to drill it with it poking out of a square face. A kerf was cut down to the hole so a clamp could squeeze the tubing to keep it from rotating. The pieces were soldered together and the square end of the wood holder was used to square up the top plate with the chimmney tube, which passes through a hole drilled through the top plate. The pieces are still a bit rough since there will be more soldering before I can start filing and sanding. I now need some help figuring out the wooden lantern keg that holds the lantern. How would it open? The top has a lanyard cleat so I don't think the top would come off. Do you think that the top and sides would have been held to the base with latches? Because of the banding, I don't see that there could be a door in the side of it that would open. What do you folks think?? Any thoughts would be appreciated. I did try emiling the curator at the Mystic Seaport museum, but I think the address on the website is no longer a good one. Best wishes,

- 515 replies
-
- 11
-
-
- artesania latina
- whaleboat
- (and 1 more)
-
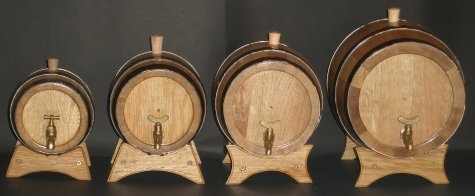
I would imagine that the barrels would be on their sides in a cradle when filled. Due to the curved barrel shape, air would be forced to the highest point and escape from the bung hole. You would be able to get the barrel completely filled if it was allowed to overflow and a bung plug would almost pressurize the contents as it was hammered in. Not saying this is the definitive answer, but it sounds good!
- 425 replies
-
- 3
-
-
- bounty launch
- model shipways
- (and 1 more)
-
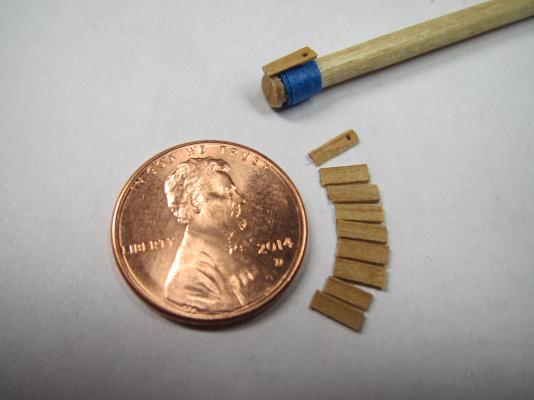
I'm not an authority, but when I was researching wooden spigots and barrels, every bung hole was located on the barrel's side at the widest point. As far as spigots go, it seemed like there were only about 3 sizes of wooden ones commonly used (these are metal in the picture because I couldn't find a series shown with wood ones). The smaller the barrel, the larger the spigot looks in relation. Also it looks like the bungs get replaced with a long plug when tapped. It's a guess, but I would think this plug would be loosened for pouring and seated when done. Kind of like taking your finger off the end of a straw to vent it. Yeah the hole for the tiny handle tenon was a trick for me too! The drill used was the smallest in the set! EDIT: Steve was replying before I finished. Wooden spigots were not threaded. They are tapered and use friction to seat them.


- 425 replies
-
- 4
-
-
- bounty launch
- model shipways
- (and 1 more)
-
Nice spigot Matt! You've started the fall down the tiny detail rabbit hole. Quick, get yourself a lighted Optivisor!
- 425 replies
-
- 3
-
-
- bounty launch
- model shipways
- (and 1 more)
-
Yeah Matt, you need to make the spigots really small!

- 425 replies
-
- 3
-
-
- bounty launch
- model shipways
- (and 1 more)
-
Hi monkeyman - I came across your hilarious post in Matt's build and had to come see what you were up to. Your lifeboat is looking really nice. I can't wait to see how it looks in paint. By the way, your English is better than most folks who speak it everyday. What is your native language.
-
Hmm. Guess that I should reconsider just tying a rag to a stick...
- 425 replies
-
- 4
-
-
- bounty launch
- model shipways
- (and 1 more)
-
Hi Lawrence- It did get mailed on Saturday. I wonder if Customs opened the package and is having fun with your bucket? Please let me know if it arrives intact. I packed it to withstand rough handling.
-
Hi Robbyn, Glad to hear you are still hanging in there. I've been worried about you since you have had a really tough row to hoe this last year. We'll wait patiently while you work through everything. We miss you!
-
Hi Lawrence- It's my pleasure. I'm glad to contribute to a build that has such a special meaning to you. I hope to get your bucket out in the mail this morning.
- 515 replies
-
- 3
-
-
- artesania latina
- whaleboat
- (and 1 more)
-
Ahoy there Matt! Nice chisels! Will you be adding some saws in your tool box?
- 425 replies
-
- 2
-
-
- bounty launch
- model shipways
- (and 1 more)
-
Great work Patrick! I fell in love with the Rainbow the first time I saw this classic photo. It just oozes speed and grace!

-
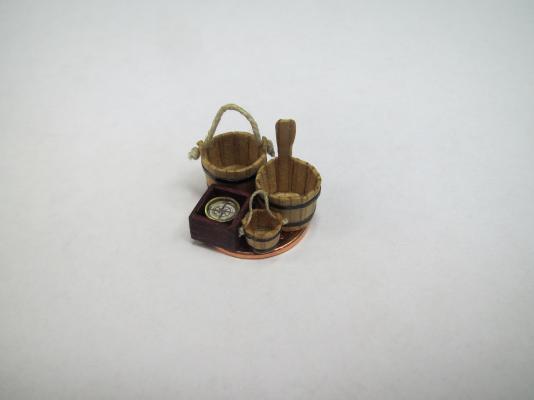
JP - "Buck's Buckets - When you have a craving for some little staving". Naw, that's kinda bad. Captain - Compass box?!! Now why did you have to go there? I would need an electron microscope to cut box joints at 1:50 scale!
- 515 replies
-
- 3
-
-
- artesania latina
- whaleboat
- (and 1 more)
-
Haha! I've been wondering that too. I either need to win the lottery and give up my day job or stop sleeping! Lawrence's 1:50 bucket is done. I'll have to look around for a box big enough to mail this to Canada in! Best wishes,
- 515 replies
-
- 16
-
-
- artesania latina
- whaleboat
- (and 1 more)
-
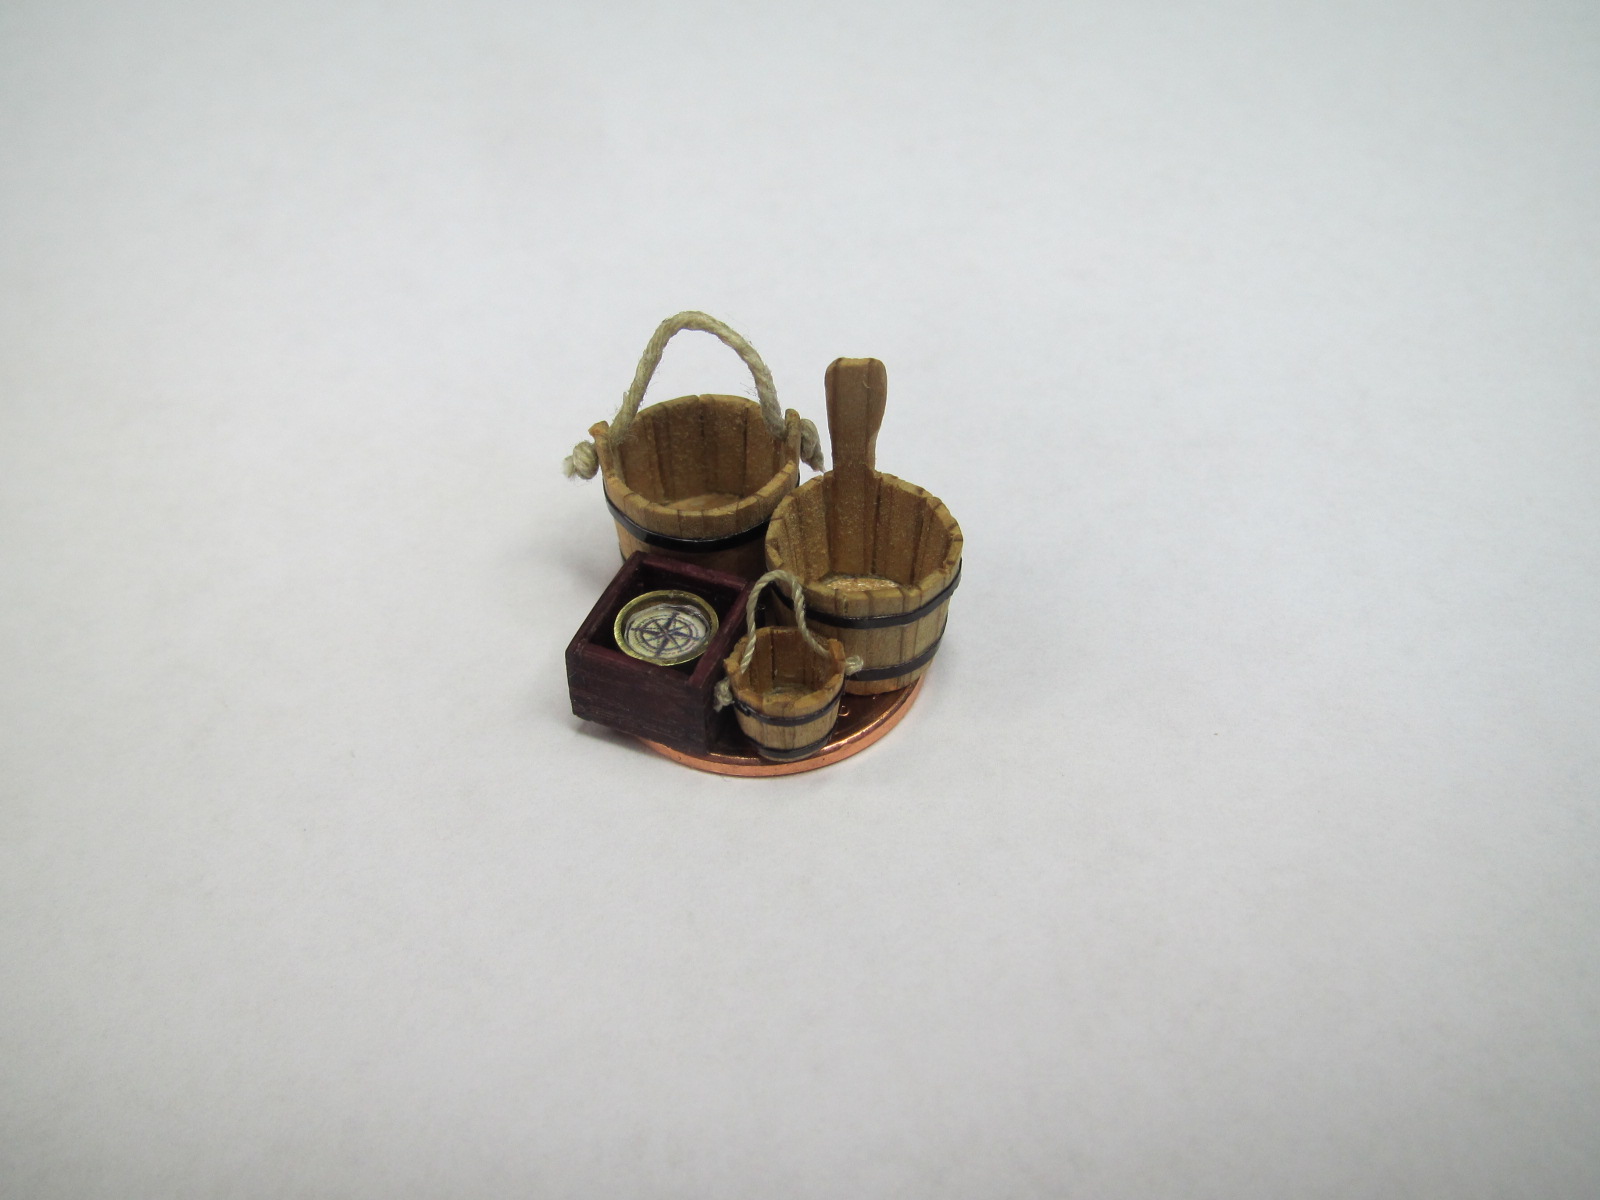
Thanks for all the great comments Brian, Matt, Michael, Ferit, Lawrence and Augie. Very much appreciated. You about made my beer come through my nose Matt! I think your imaginitive and very technical work is spurring me on to up my game - thanks!! Lawrence- It's my pleasure to be able to contribute a little bucket to your Annie M. Parker. That is such a graceful looking ship and you are doing her proud.The bucket is coming along well, but you'll have to wait a bit for more pics! Augie - There's a bit more detail to come! I'm starting on another item that's proving to be the most difficult piece so far, but that will remain a secret for now in case I mess it up! You're not getting too old to remember - I'm just so slow that some of my artifacts pre-date recorded history! Here's a group shot of some of the stuff. BTW, your ship is a joy to behold!
- 515 replies
-
- 15
-
-
- artesania latina
- whaleboat
- (and 1 more)
-
May I borrow your little hammer? I'm going to beat myself senseless with it and give up!
- 425 replies
-
- 3
-
-
- bounty launch
- model shipways
- (and 1 more)
-
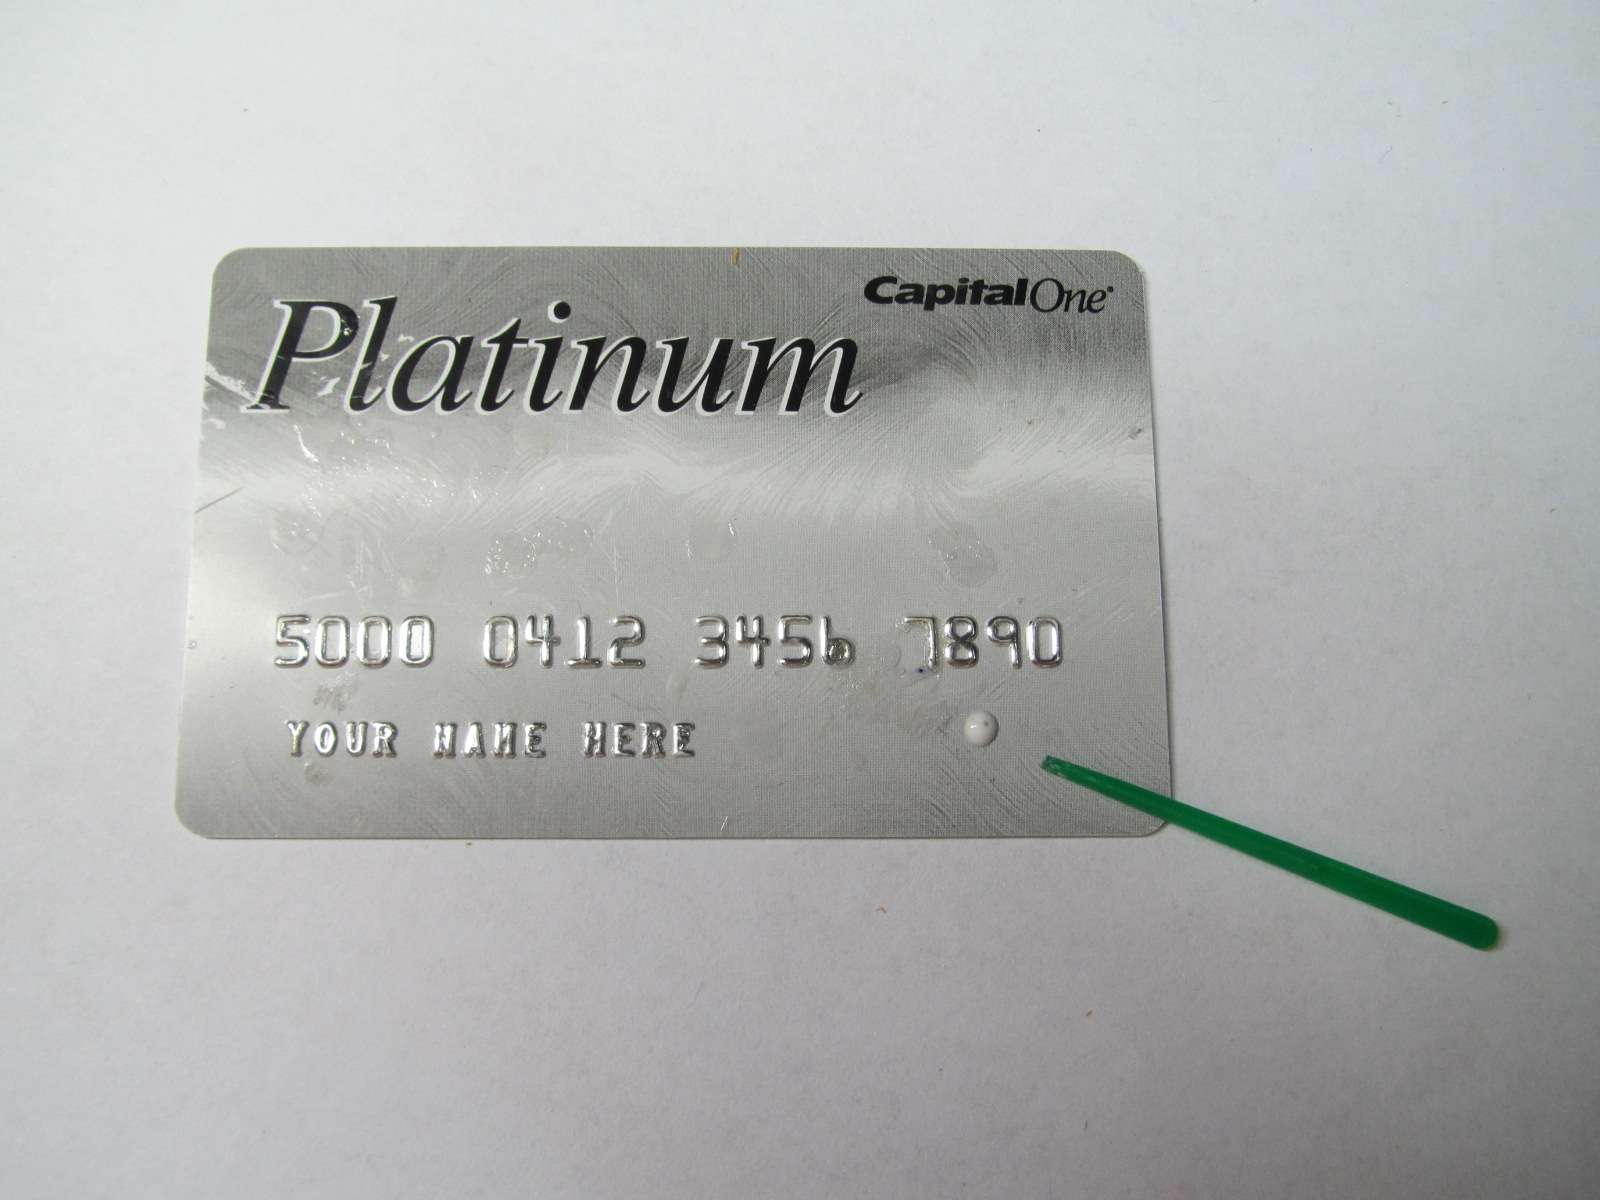
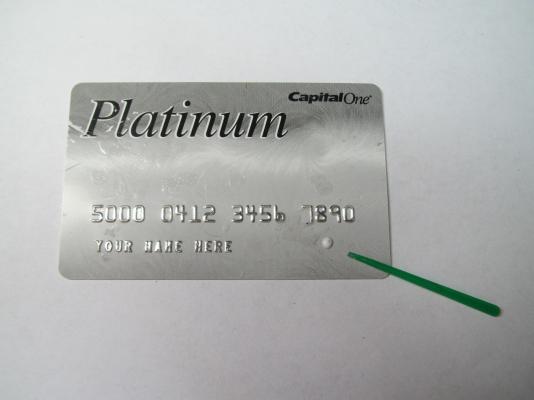
JUNK MAIL DUMMY CREDIT CARDS & VINYL MINI BLIND CUT-OFFS While not used as a part of the build, I use these all the time during the build. In the way an artists puts dabs of paint on a palette, I use the dummy credit cards that come in the mail as a glue palette for both white glue and CA. I only put a small amount of fresh glue on the card and then use a toothpick to apply just the right amount of glue to exactly the right place. This really works well for the little stuff I've been up to. At the big home centers like Home Depot, they usually have a department where they cut vinyl mini blinds to width. They end up with tons of little cut-offs and these are thick and stiff enough to mix up small batches of epoxy on and you just toss them when done.
- 396 replies
-
- 9
-
-
- Idea
- Bright Idea
- (and 1 more)
-
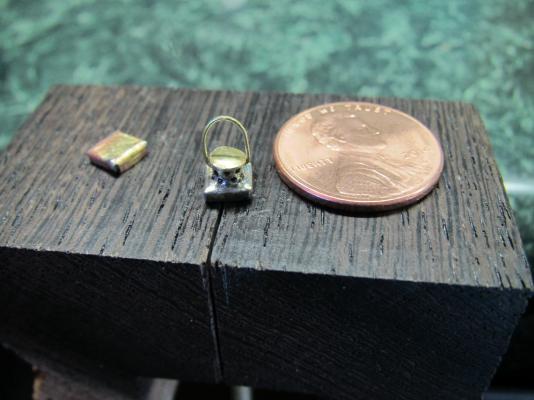
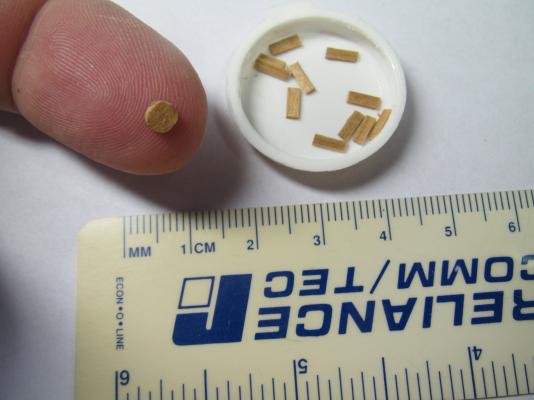
I started work on Lawrence's 1:50 bucket which will be half the size of the one with the rope handle on the penny above. This is pretty small and the hard part is hanging on to the stave pieces while shaving the tapers with the 1/8" chisel. No blood yet! I can't imagine getting much smaller than this, so that Baumann fellow must be an alien! The staves are about 1/2mm thick and the thin veneer stop fence that I had used before for planing the cedar to thickness was too thick. I adopted a different technique to plane the cedar to 1/2mm by flipping the plane upside down and using an eraser as a gripper/push block to run the cedar over the blade. Works good but a sharp blade and shallow depth of cut is needed. The stave's widths will taper from about 1.5mm to 1mm. The bottom of the bucket is 3.5mm in diameter. Part of the preperation for even starting this little bucket was obtaining the correct beverage in my dry dock. With a name like Dry Dock and a picture of HMS Victory and a quote from Nelson on the can, this seemed like the right tool for the job! I'll post more pictures when I git er done. Best wishes,


- 515 replies
-
- 10
-
-
- artesania latina
- whaleboat
- (and 1 more)
-
WOW! The sail pictures you posted these last few days are great! My thoughts are with you and I hope this latest wave leaves soon. Hang in there.
- 607 replies
-
- 1
-
-
- scottish maid
- artesania latina
- (and 1 more)
-
Lawrence - Would you be able to use a bucket on your Annie build? I reduced the bucket plan to 1:50 and I'm not sure I can pull it off, but will give it a try if you can use it. I would be honored to contribute to the build of a boat that has so much history to your family. Matt- Jim Baumann's skills seem other-worldly. Maybe he was a guest who escaped from Area 51! Best wishes,
- 515 replies
-
- 2
-
-
- artesania latina
- whaleboat
- (and 1 more)
-
Hi Marc - No I haven't built any doll houses but I had considered building a miniature timber framed birdhouse once! Never got around to it though.
- 396 replies
-
- 2
-
-
- Idea
- Bright Idea
- (and 1 more)