Salty Sea Dog
-
Posts
666 -
Joined
-
Last visited
Content Type
Profiles
Forums
Gallery
Events
Everything posted by Salty Sea Dog
-
 Boyd- Thanks for the mention of your 'bashing' thread. That was a good read. I hadn't realized that the term was an issue with some. Matt- Bash away buddy! I hope you took no offense with me mentioning drink coasters after seeing your gun swivel! I'm actually thinking of making planked drink coasters because of that!
 -
I like GuntherMT's (Brian's) easy way of breaking this down. It makes more sense to me anyway for what we do in this hobby. I don't think that there has been anyone who has gone out and bought two or more wooden ship kits at hundreds of dollars each to try to combine them into something new. That definition of "bashing" makes sense for the plastic car hobby but does not seem applicable in this hobby. In our hobby, I guess I would call what I am doing with my whaleboat kit "super detailing" and something like what rafine (Bob) is doing with his Essex as "kit bashing". In the end, I think we are both having a blast and that's what is most important.
-
That's a 1/10000 USS Nimitz, but as you can see, some of the aircraft have fallen off the deck and I never could find them! Just kidding! Can't wait until you get your new workshop set up Ferit and get back to your amazing build!
- 515 replies
-
- 3
-

-
- artesania latina
- whaleboat
- (and 1 more)
-
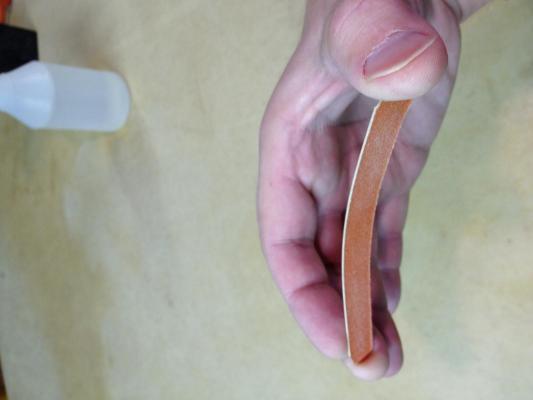
Is anyone else thinking about making treenailed decking coasters from leftover planking?
-
You wouldn't have to worry about the stand being finished before you figured out where to put it if I offered to help build it. It might end up with too many details though for anyone to be able to sit in it though.
-
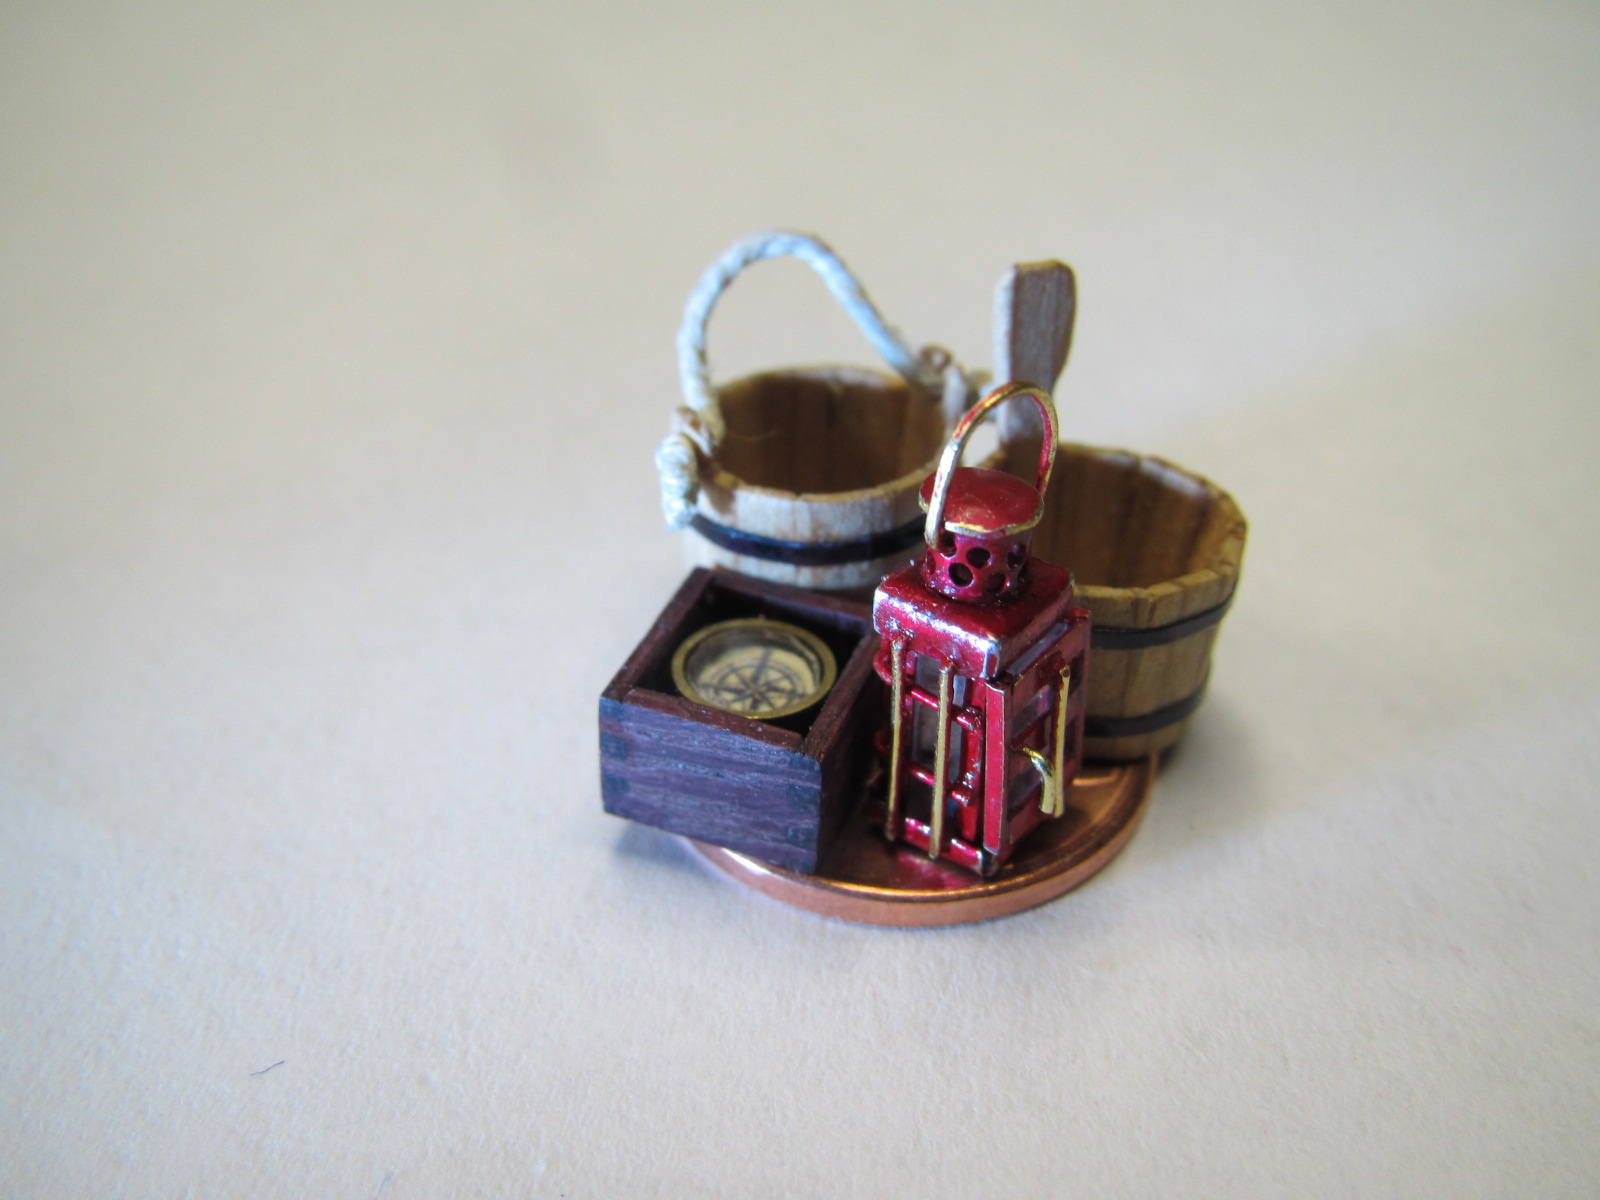
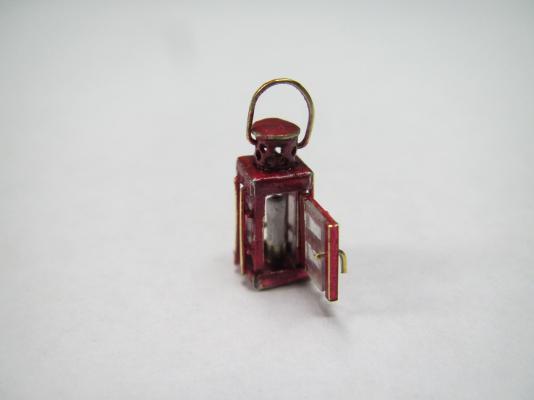
Thanks you guys! There are 4 "glass" panels inside George that were made from the thin plastic of a blueberry container. Augie- Next up will be a lantern keg even though technically it would be disassembled if the lantern was out. I will most likely scratch build new line tubs since the kit ones look pretty crude to me now. The harpoon rack, a few paddles and the sail. I guess I should get organized like Captain Steve and make a punch list.
- 515 replies
-
- 3
-
-
- artesania latina
- whaleboat
- (and 1 more)
-
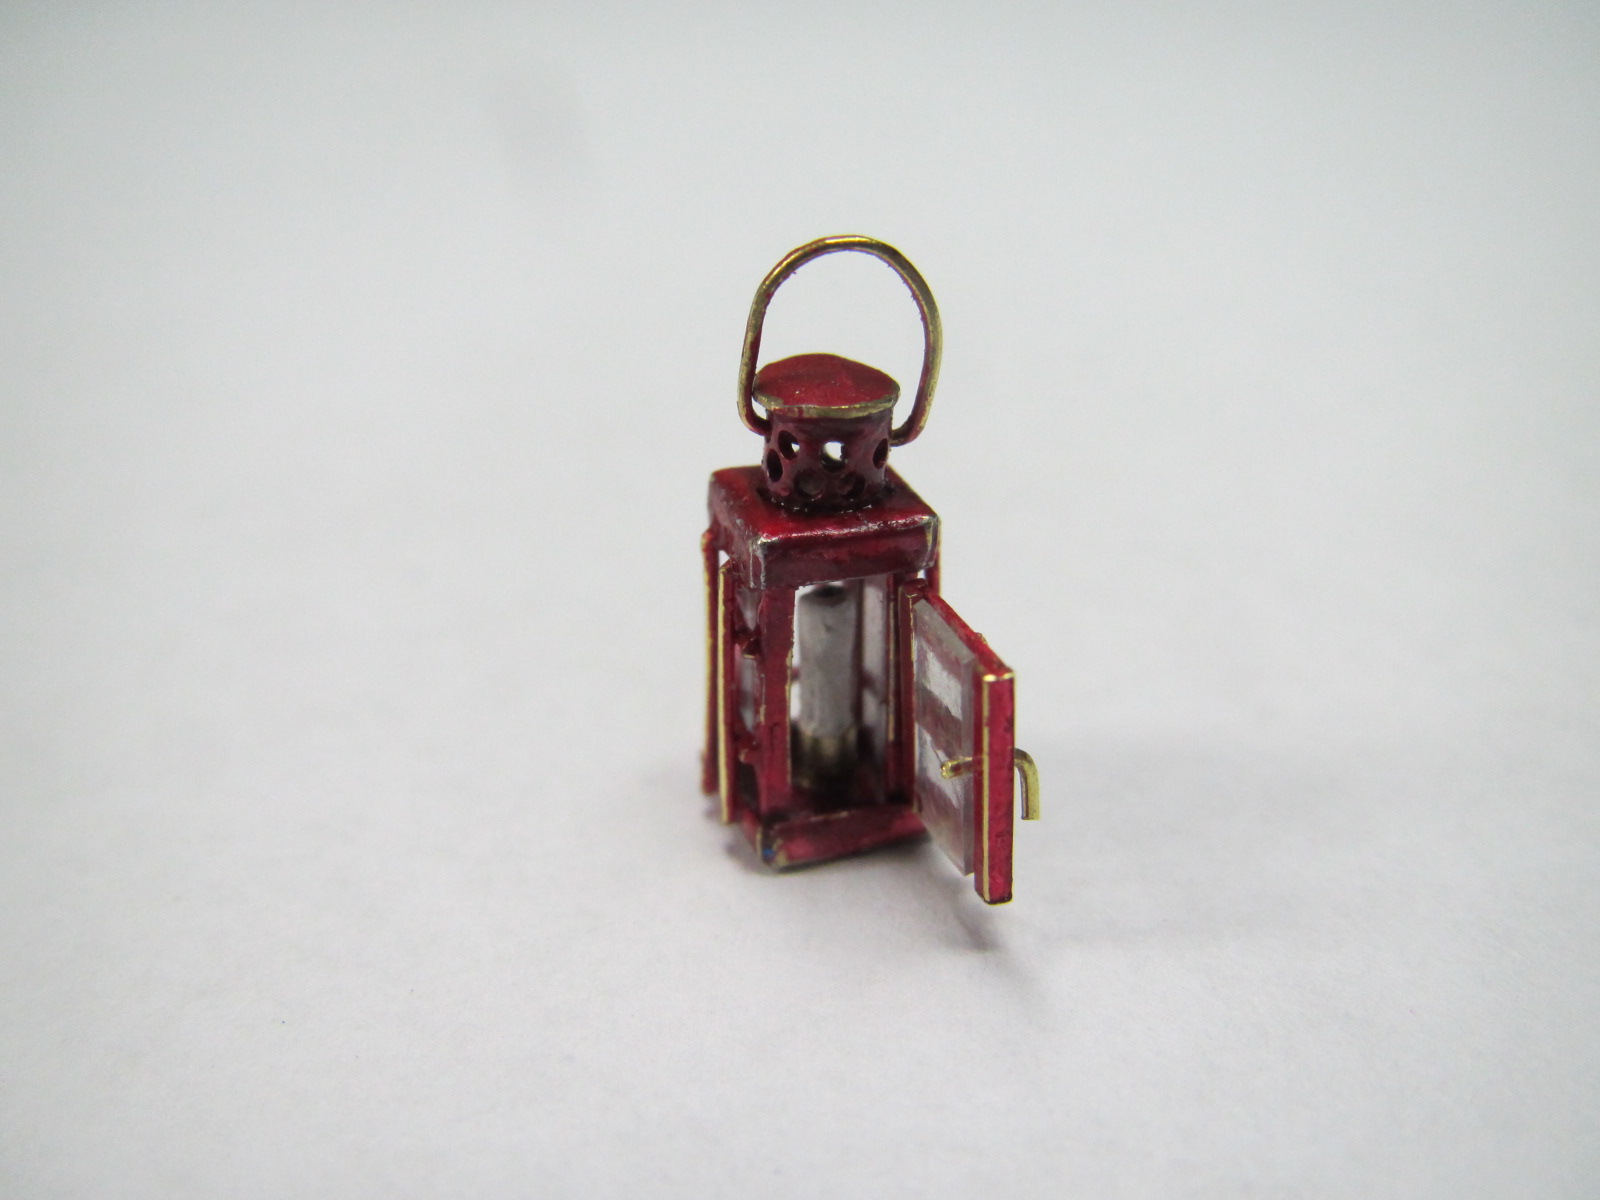
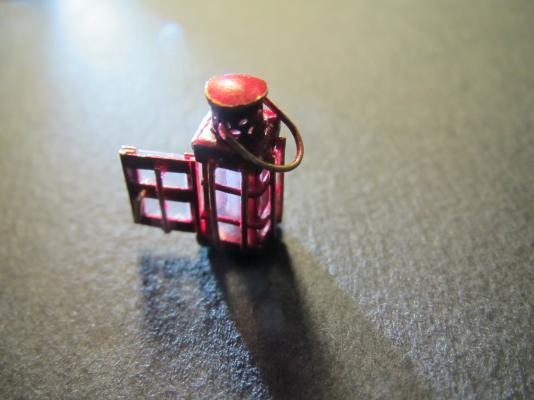
I finally got around to finishing the lantern. It's a little booger. The base is 4.5mm x 4.5mm. This thing was a challenge for me because the 30 pieces that make it up are really small and tough to hold on to. There was actually quite a bit more than 30 pieces, but who knows where the heck those other pieces went to! The door handle is less than 1.5 mm long and it swivels. The macro shots are a bit cruel, but it looks pretty good in real life. It sort of has that used and scuffed look. The candle has some fake wax drips! If I ever start something like this again, please be kind and tell me not to! Hey, now that Lawrence's bucket is in Canada, there's all kinds of room on the penny!


- 515 replies
-
- 16
-
-
- artesania latina
- whaleboat
- (and 1 more)
-
Just out of curiosity, how narrow did the gold stripe end up being? I'm guessing about 1/64"? Really nice!
-
Wow! That is some great work on the fiddly bits!
-
Gripen 1591 by NAZGÛL (Matti)
Salty Sea Dog replied to NAZGÛL's topic in - Build logs for subjects built 1501 - 1750
Good luck Matti! -
Pretty darn cool Captain! Everything including the base is so nicely executed. Bravo!
- 625 replies
-
- 4
-
-
- bounty launch
- model shipways
- (and 1 more)
-
Thanks Captain! Matt's compass box is pretty amazing though.
- 425 replies
-
- 5
-
-
- bounty launch
- model shipways
- (and 1 more)
-
Yup, you're raising the bar so high it's hard to see from down here! Nice work!
- 425 replies
-
- 5
-
-
- bounty launch
- model shipways
- (and 1 more)
-
Very nice Captain! Your coworkers should be in for some mind boggling!
- 625 replies
-
- 3
-
-
- bounty launch
- model shipways
- (and 1 more)
-
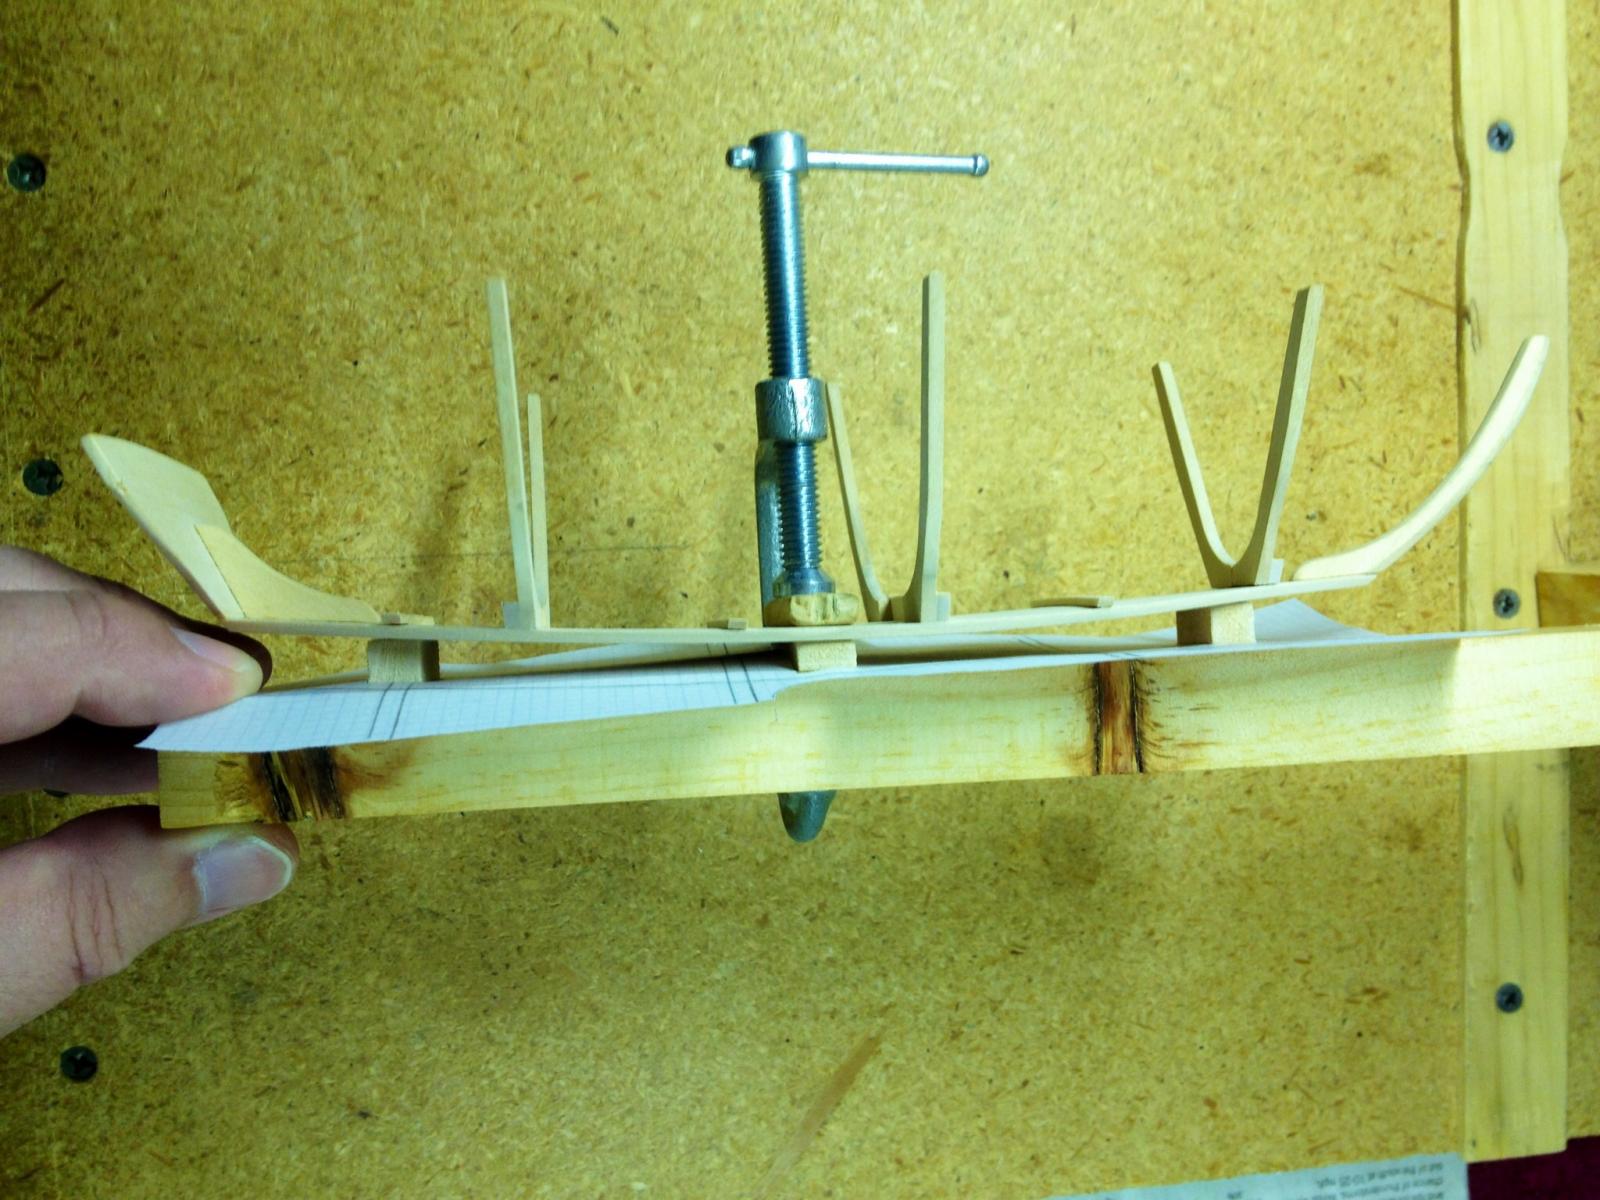
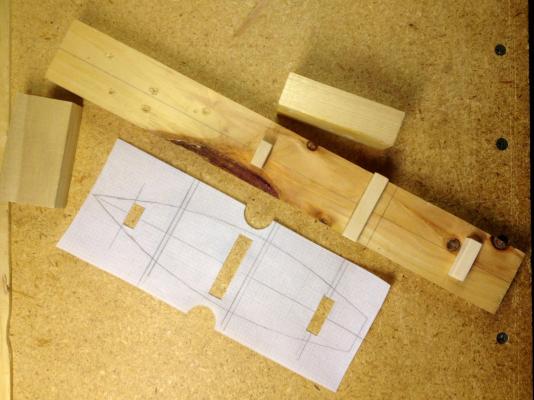
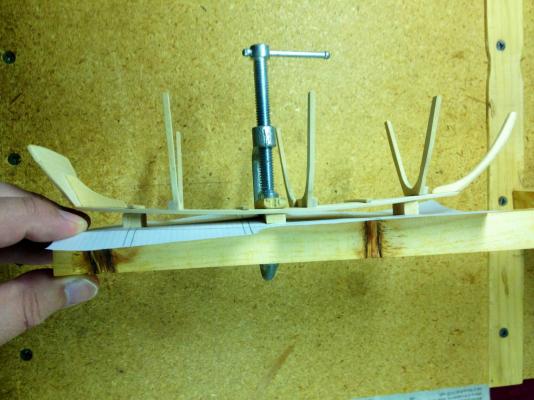
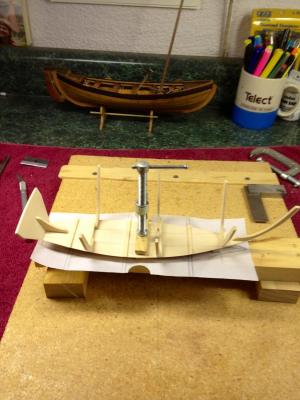
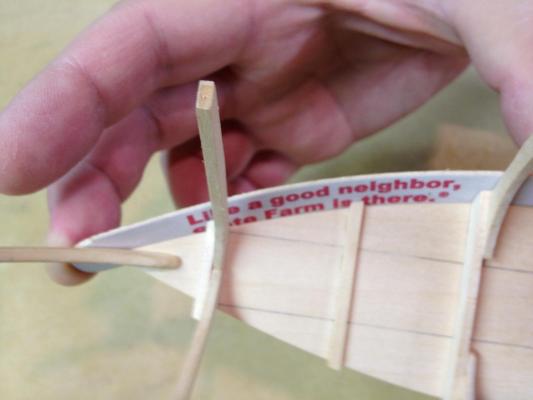
I wanted to be able to pick up the boat while working on it too! Also, I thought it was wrong to put holes in the bottom of the boat to pin it down. I mounted the spacer blocks to a small board and clamped the boat bottom to it to flex it. A scrap piece of wood protects the boat bottom from the clamp. The boat board was propped up on two short blocks to clear the clamp. After one plank was on a 2nd clamp was placed on the planked side and the 1st clamp was removed so that side could be PLANKED. Please let me know if I'm posting too much on your build - I don't want to be a hijacker! Edit to change "clamped" to "planked".
- 46 replies
-
- 4
-
-
- dinghy
- Midwest Products
- (and 2 more)
-
I started the dinghy as a side build a while back and took a few pics in case I ever decided to start a log. To get a really nice fit of the planks to the frames and the boat bottom, a flexed emory board works really well. It curves the same as the planks will. The board I used is two-sided and the fine grit side left nice surfaces. Sorry for the rotated pic- it must be an iPhone thing.
- 46 replies
-
- 5
-
-
- dinghy
- Midwest Products
- (and 2 more)
-
Yo MaryO! You are coming up on a tricky bit where you glue the stem post on. There's not a real good way to clamp it while the glue dries. To keep it from leaning side to side, tilting forward or rotating off center while the glue sets, you will want to brace/squeeze it between two perpendicular items. You could make something out of Legos or even use two heavy but compact boxes like cake mix boxes and a piece of tape to keep it from tilting forward. Hope that helps!
-
Hi Lawrence, I thought the bucket looked great hanging there. I was wondering if the little guys had removed it in the later photos to swab the decks! You have been keeping them busy. If you find another spot on the boat that you would rather place the bucket, that's ok too. It's a hoot for me to see it on your Annie! Very best wishes,
- 515 replies
-
- 4
-
-
- artesania latina
- whaleboat
- (and 1 more)
-
Is there a way for you to regulate the springs' seat pressures? How do you figure out how much you need to prevent valve floating? This is so amazing and I can hardly wait to see it running! Very, very nice!!
-
I wish I could help you with sorting out your lines, but that's a trick this old dog has still to learn. Arf! You might try sending a pm to avsjerome2003 (aka Crackers). He sails an open boat and may know everything you're wanting to figure out.
- 625 replies
-
- 4
-
-
- bounty launch
- model shipways
- (and 1 more)
-
Are you kidding me dangerdan!! I just looked at your Nave Egizia in the gallery. I'm intimidated! That's stunning! I've been wondering where you went to and am looking forward to seeing your whaleboat build. It's good to see you posting on MSW and I'm sure you will have some cool things that will make your whaleboat as stunning as your Nave. Best wishes
- 515 replies
-
- 3
-
-
- artesania latina
- whaleboat
- (and 1 more)